
Fine line paw prints are everywhere on saved boards right now, but what holds up and what falls apart is not obvious until the tattoo has healed and lived through a summer of sun and friction. Pick a design that matches the part of your life you want to honor and the clothing you actually wear. Below are 21 paw print tattoo concepts that balance visual impact, realistic aging, and wardrobe moments so you end up with a piece you still like years from now.
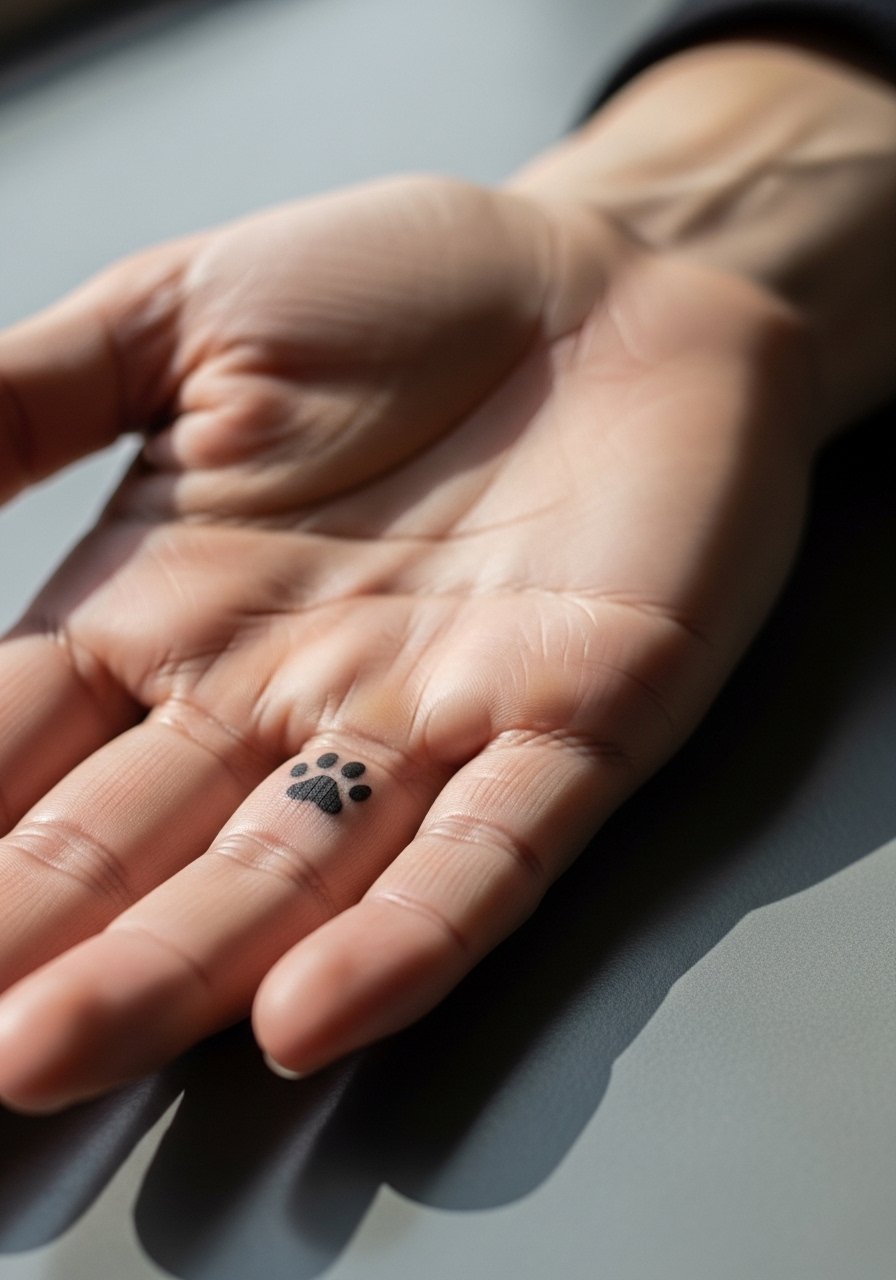
1. Tiny Single Paw on the Inner Wrist
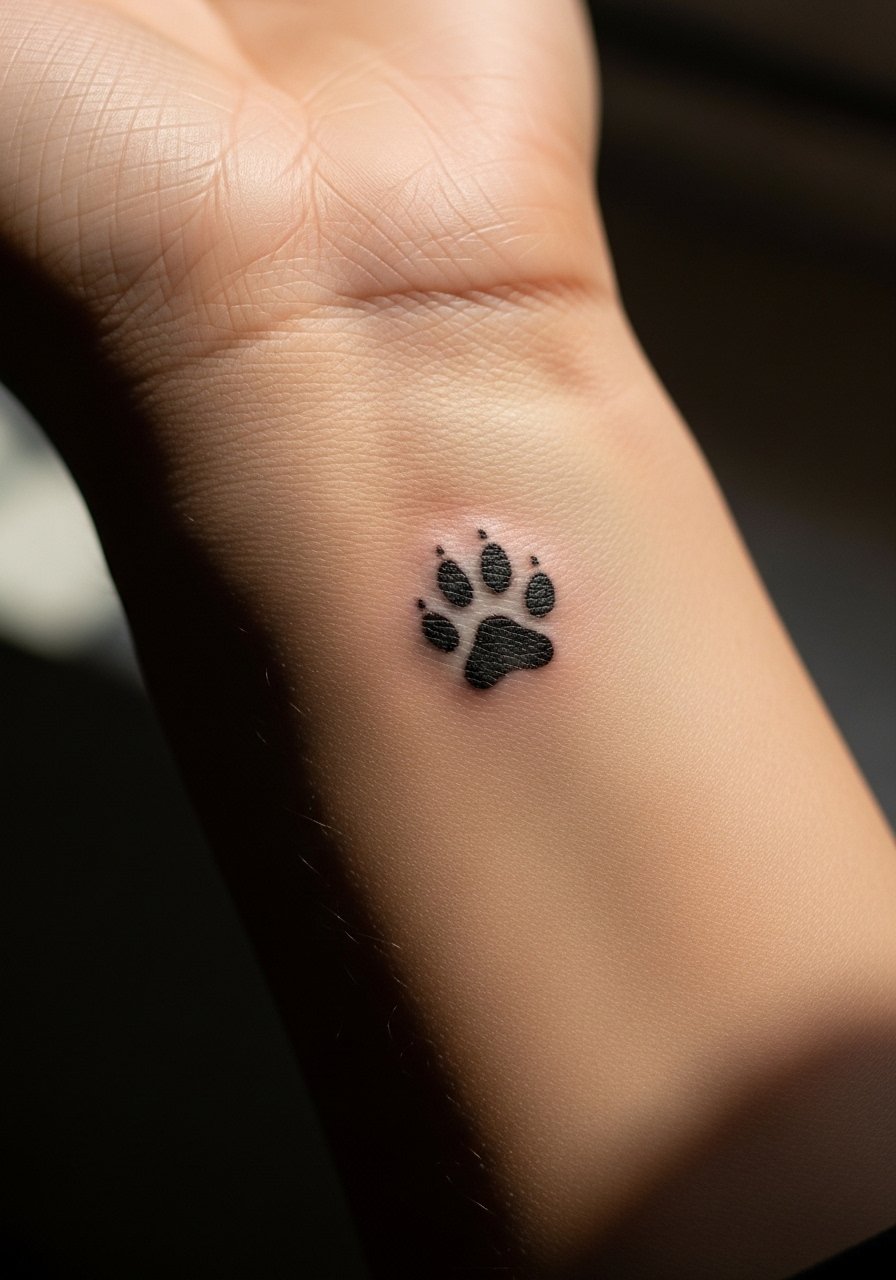
Consultation tip, bring a ruler or a coin photo so the artist knows you mean tiny and not micro blobby. I've seen wrist paw dots done too small and they blur into an indistinct smudge by year two. The inner wrist is forgiving for fine line work but gets a lot of sun and washing, so expect touch-ups around year three for most clients. Fair warning, the skin there sits close to bone so the session can feel sharp for a few minutes. For the appointment, wear a loose button-down shirt you can roll up without tugging at the stencil.
2. Paw Trail Along the Side of the Foot
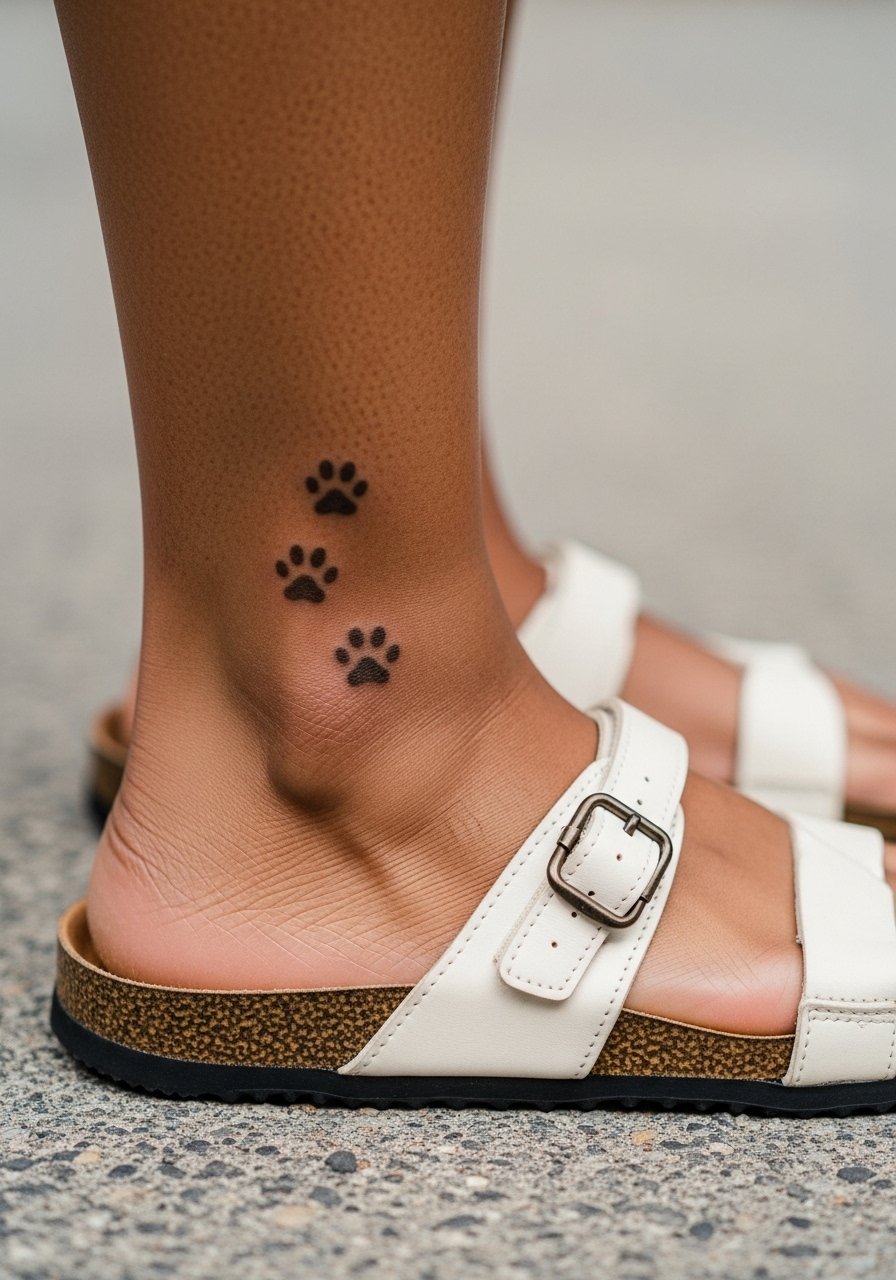
When you want movement instead of a single symbol, a trail of prints reads like a small story across the foot. Foot tattoos age differently because shoes and socks rub them a lot in the first weeks. Ask your artist to space the prints for room to breathe so the pads do not merge as they soften. Expect the session to sting near the toes and ease toward the arch. Pair the finished trail with low sandals or rolled jeans to show it off. For the session itself pick slip-on shoes so you do not need to pull anything over a fresh tattoo.
3. Watercolor Paw with Floral Wash

Most watercolor treatments that age poorly were applied with too little linework to anchor the color. This version keeps crisp paw outlines and adds a loose watercolor wash behind them. Tell your artist you want saturated anchors around the pads so the color has structure as it fades. Watercolor areas often need a touch-up at year two to restore vibrancy. This placement pairs nicely with rolled sleeves and linen tops. For evenings, a short-sleeve linen shirt frames the wash without hiding the piece.
4. Micro-Realism Pet Portrait Inside a Paw
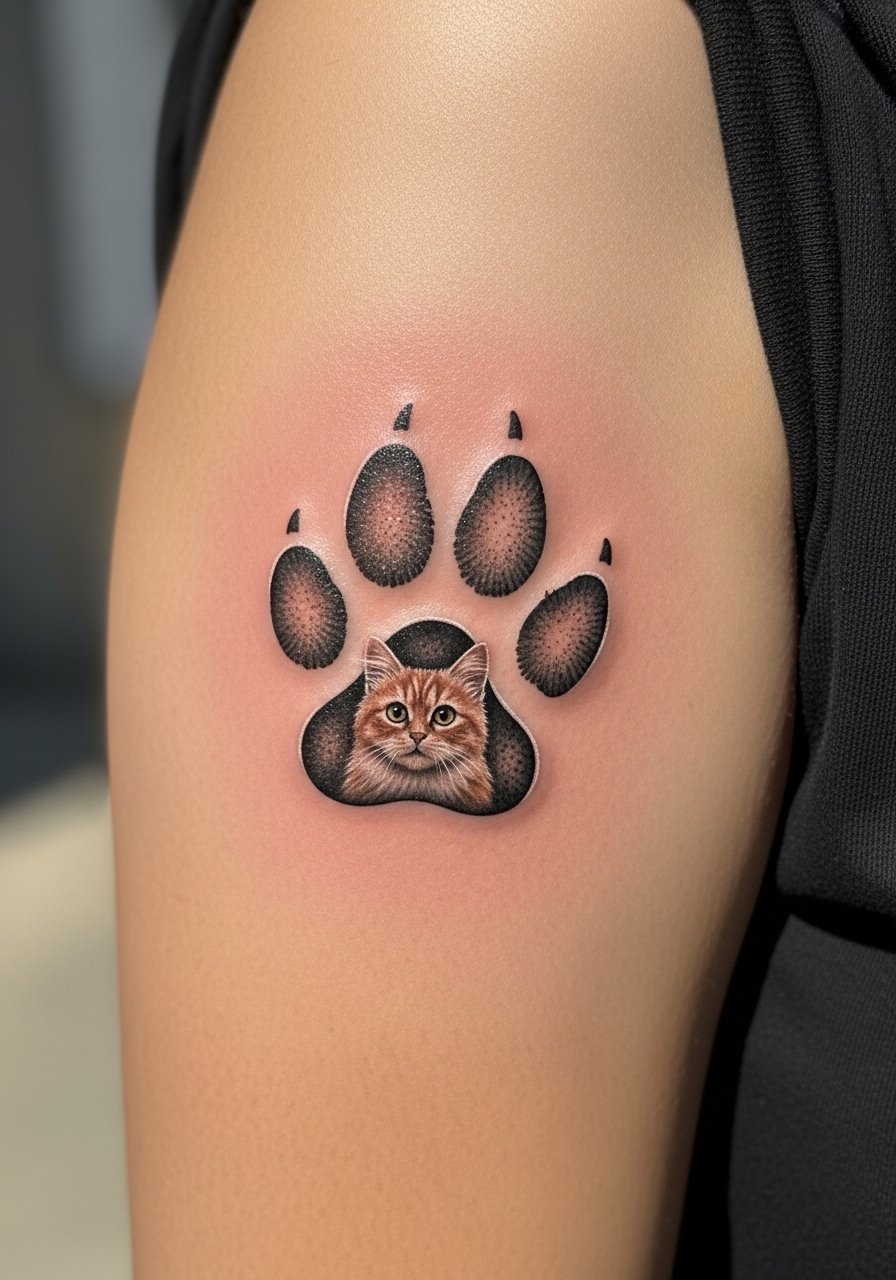
This concept packs a lot of meaning into a small canvas by placing a micro pet portrait inside the largest pad. Bring several high-contrast reference photos and point out which facial details matter most. The risk is trying to cram too much into a tiny area and ending up with muddy detail. Expect a longer session for the tight realism and plan for a touch-up at year two. Upper arm flesh holds detail better than the forearm, so choose placement based on how crisp you want the portrait to remain. For showing it off, a wide-strap tank top keeps the area visible without exposing too much skin.
5. Negative-Space Paw with Botanical Frame
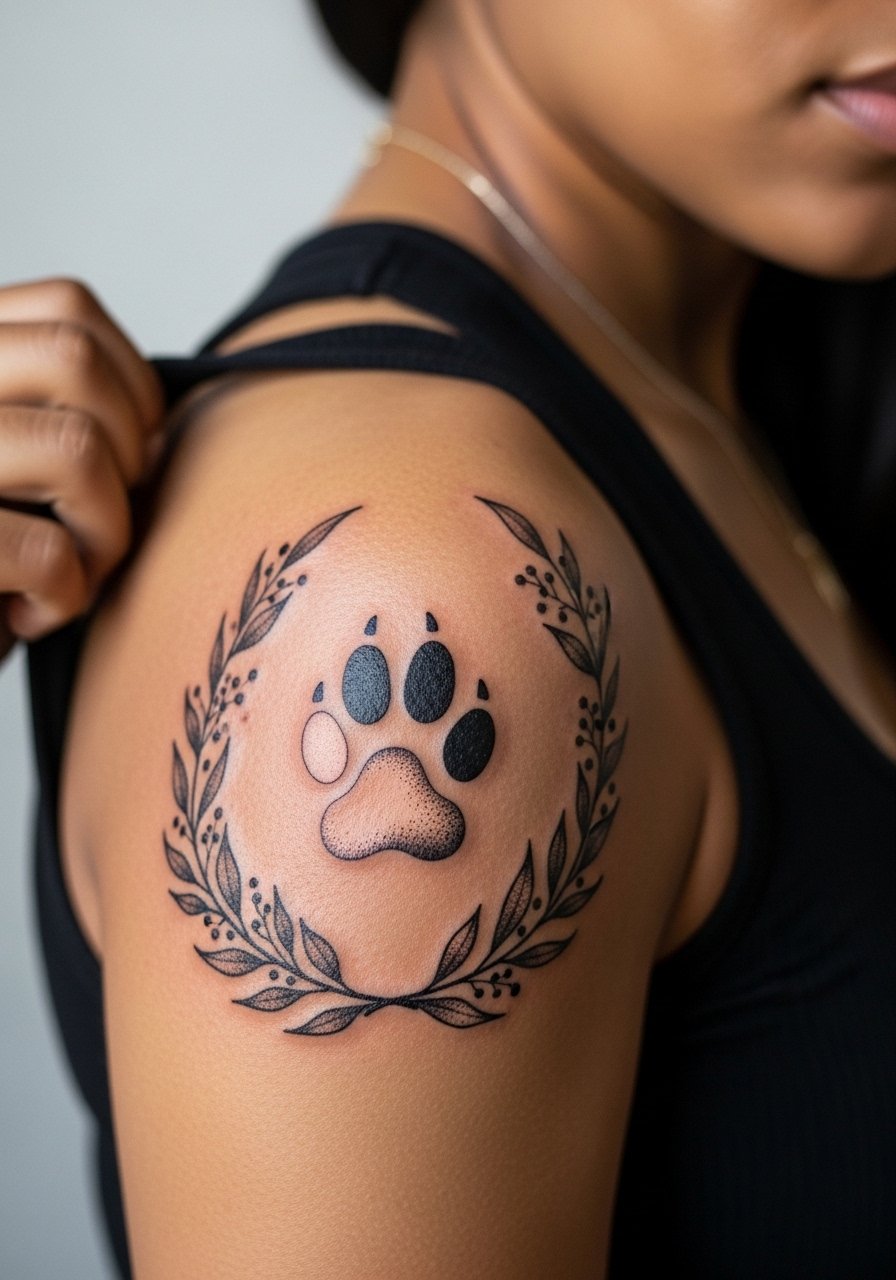
Negative-space work reads clean for longer because the artist uses surrounding shading to define the paw rather than relying on tiny lines inside small pads. Ask for stipple shading rather than solid blocks so the wreath breathes as it ages. Shoulders are moderate on pain and usually settle well, though sun exposure can weaken contrast. For the session, wear a loose tank top you can slide aside easily. Pair the finished piece with off-the-shoulder tops that show just enough of the wreath without competing for attention.
6. Geometric Paw Built from Triangles
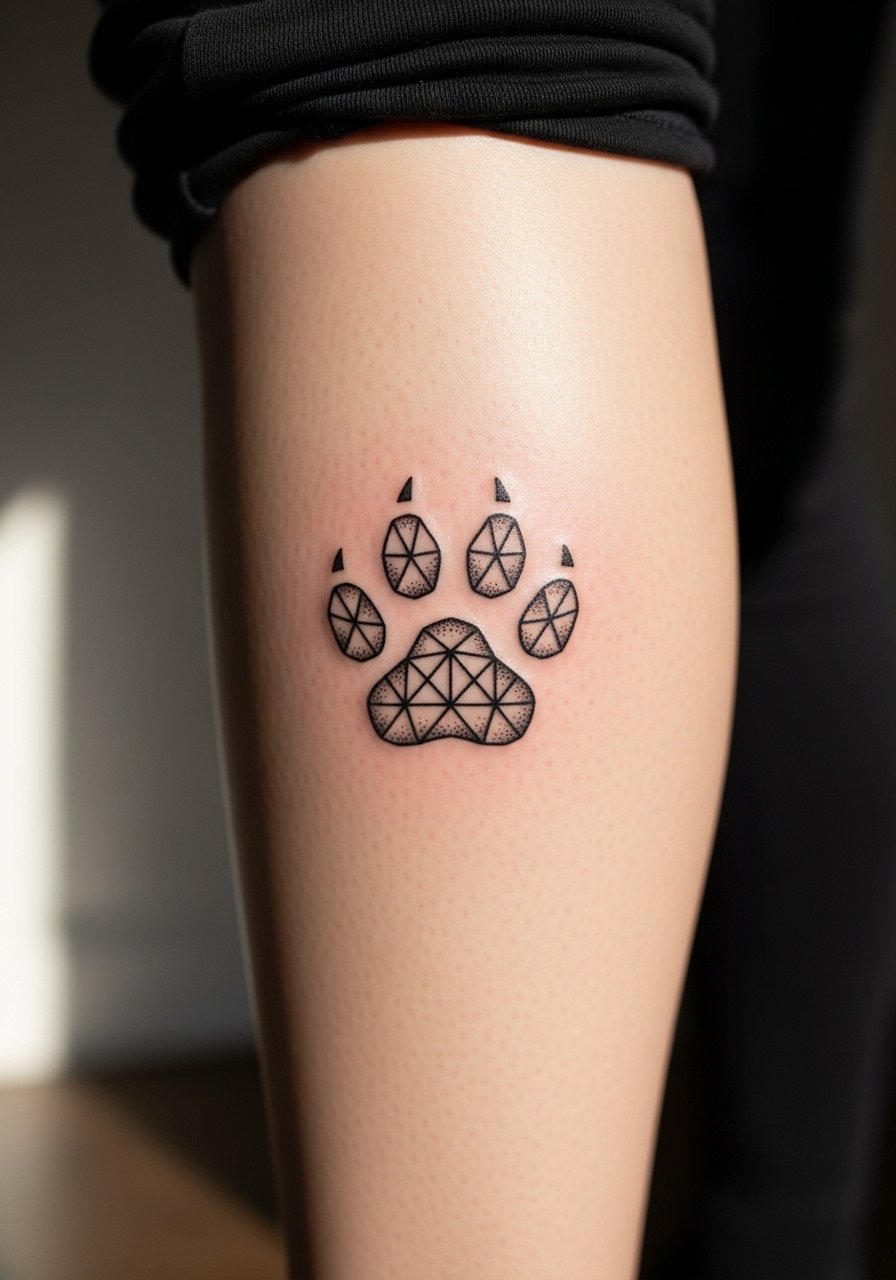
The geometric angle turns a soft symbol into a modern graphic that reads well from a distance. The main mistake is over-detailing the triangles and placing it where skin stretches a lot. Calf placement keeps the geometry stable as muscles flex. Bring clear references of the exact line weight you want and ask that the artist leave micro gaps so the triangles do not visually merge after healing. Sessions here are moderate in length and feel like steady pressure more than sharp pain. For evenings out, wear cropped trousers or a slim ankle boot to let the geometry peek through.
Pack Smart
The ankle, calf, and forearm pieces above all face different friction patterns in the first week, so a few targeted items smooth the session and early healing.
-
Stencil transfer paper kit. Helps the artist preview placement on curved areas like the calf and ankle before needle met the skin.
-
Topical numbing cream. Applied per instructions before ankle or inner wrist sessions to reduce sharp sensations without changing linework.
-
Thin protective film roll. Useful on foot and ankle tattoos that rub against sandals or socks in the first days.
-
Fragrance-free body wash. Cleans the area during showers without stripping the tender pigments that fine detail depends on.
-
Aquaphor healing ointment. A thin layer on day one helps reduce cracking for small paw pads while allowing the skin to breathe.
7. Paw Print with Scripted Name 'Milo'
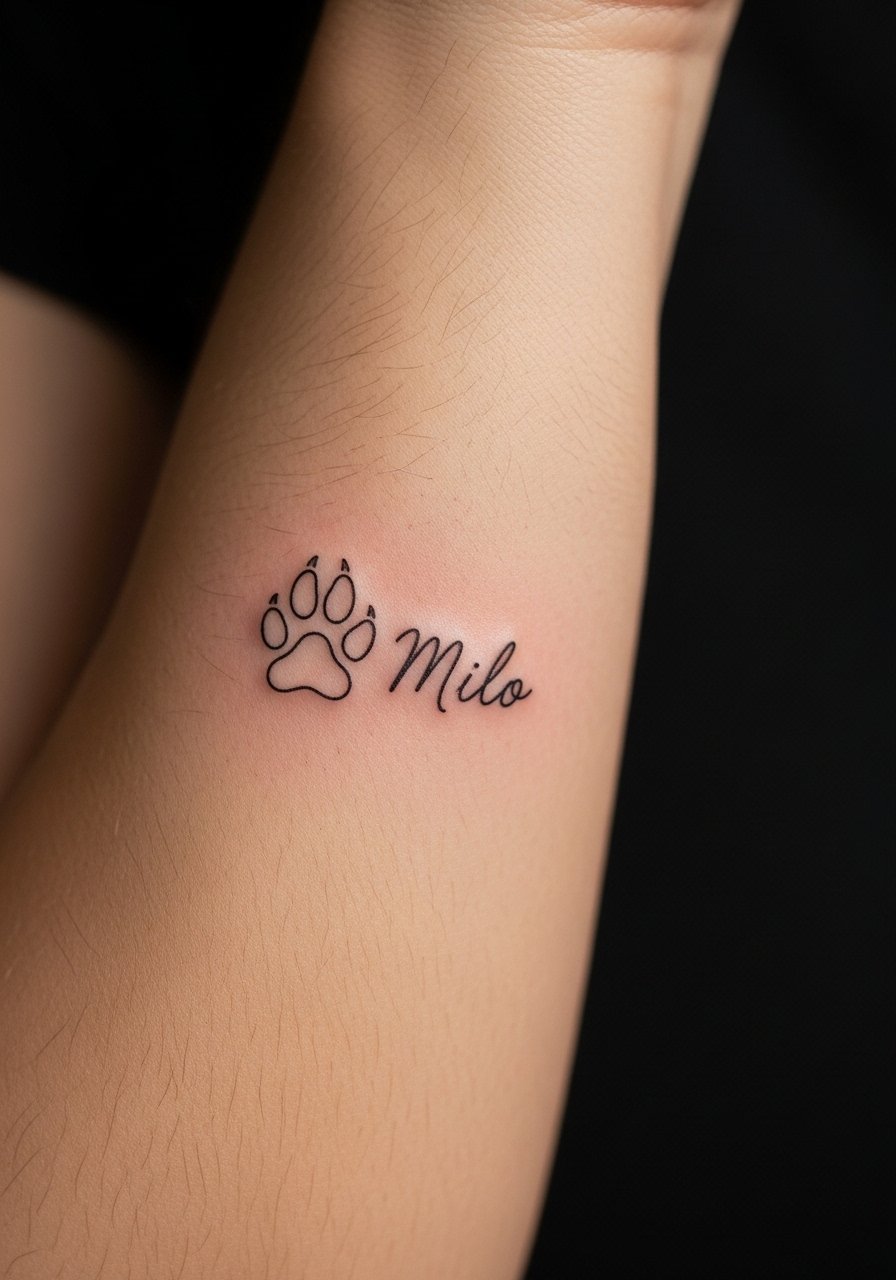
When including a name, specify exact spelling and the script style you prefer. The image prompt should use the exact text so the final stencil reads correctly. Inner forearm placement keeps the lettering readable as the skin does not shift much there. A common mistake is choosing a script that looks elegant on paper but loses the negative space between letters when reduced for a small tattoo. Expect a 45 minute to 90 minute session for clean linework and ask your artist to space the letters slightly wider than you think you need. Pair this design with a thin chain pendant necklace that sits above the script without crowding it.
8. Paw Made of Tiny Botanical Silhouettes
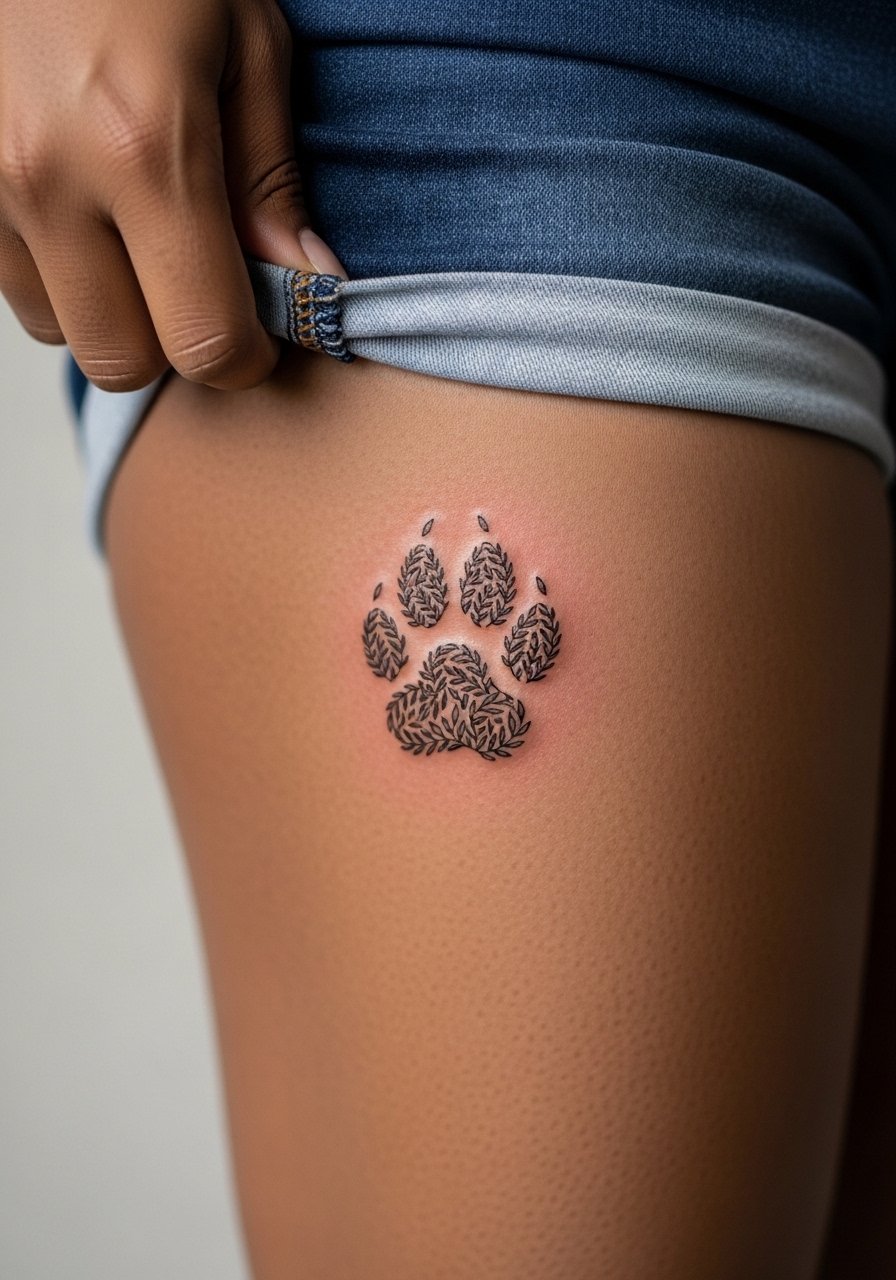
This plays on negative space and micro shapes, turning a literal paw into a pattern of plant silhouettes. Inner thigh is intimate and requires an artist comfortable with that placement. The skin there can stretch with movement so ask the artist to keep the micro elements slightly larger than the smallest possible size. Sessions can feel tender because of the nerve-rich area, and some clients prefer to schedule in the morning when pain tolerance is higher. For the session, choose high-cut shorts that you can shift without exposing more than the immediate area.
9. Paw Print Constellation with Tiny Stars
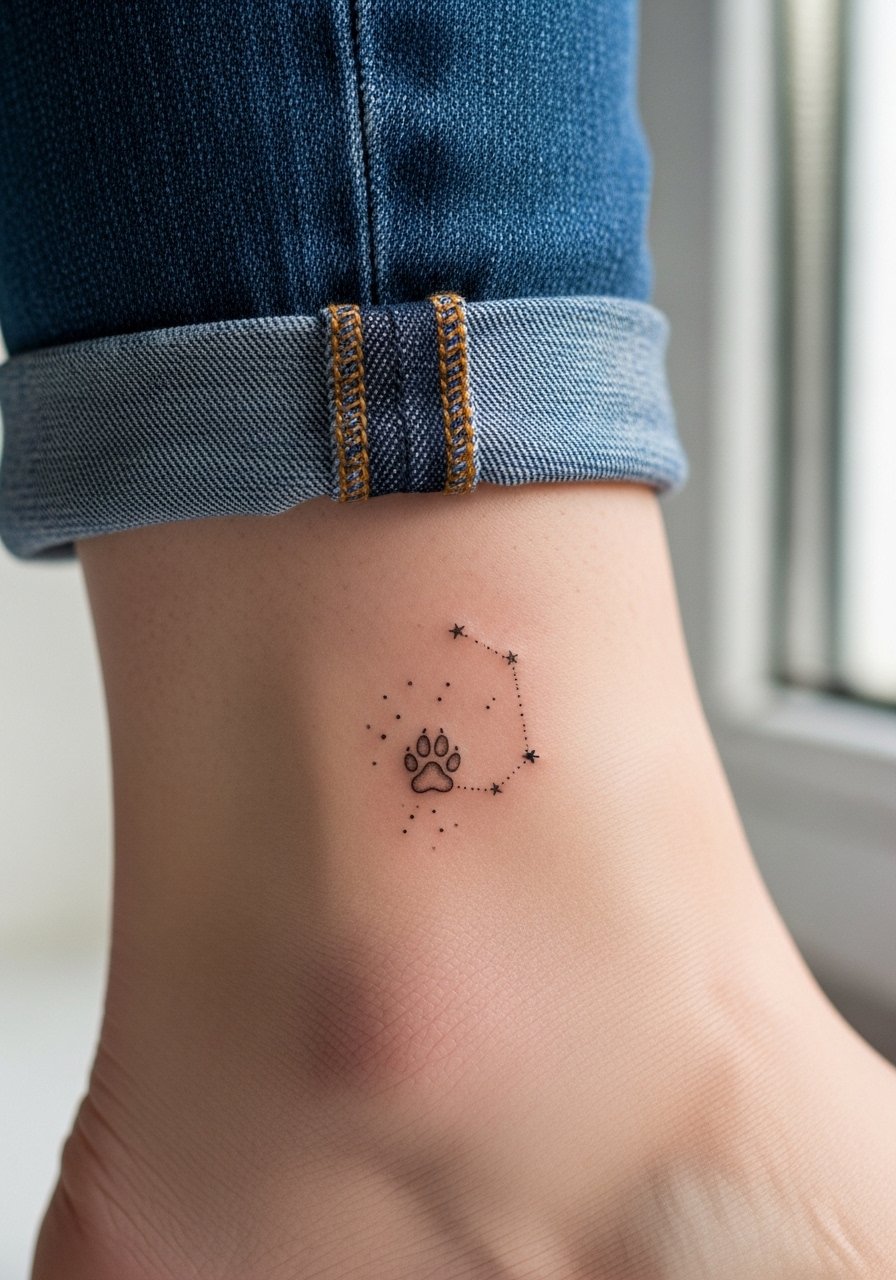
This idea merges pet memory with astrological styling by adding tiny star dots that mimic constellations. The ankle's thin skin increases blowout risk if the lines are too dense, so request minimal shading and clear pad separation. At six months the star dots should still be distinct, though expect slight softening by year three. The session is quick but sensitive, so bring an agenda item to relax your mind. For showing it off, cropped jeans and a minimalist anklet highlight the constellation without covering the tattoo.
10. Paw Print Finger Stamp
Finger tattoos are trendy but controversial when it comes to longevity. One camp says finger work falls apart quickly because of constant washing and thin skin. The other camp argues small, bold stamps can age acceptably with annual touch-ups. The truth is placement and daily wear decide the outcome. If you want a finger paw, ask for a slightly bolder pad outline than you might choose elsewhere. The session is quick but the area is sensitive. Hand pieces can affect perceptions in certain professions, so think through career questions before booking.
11. Paw Print with Tiny Date in Roman Numerals
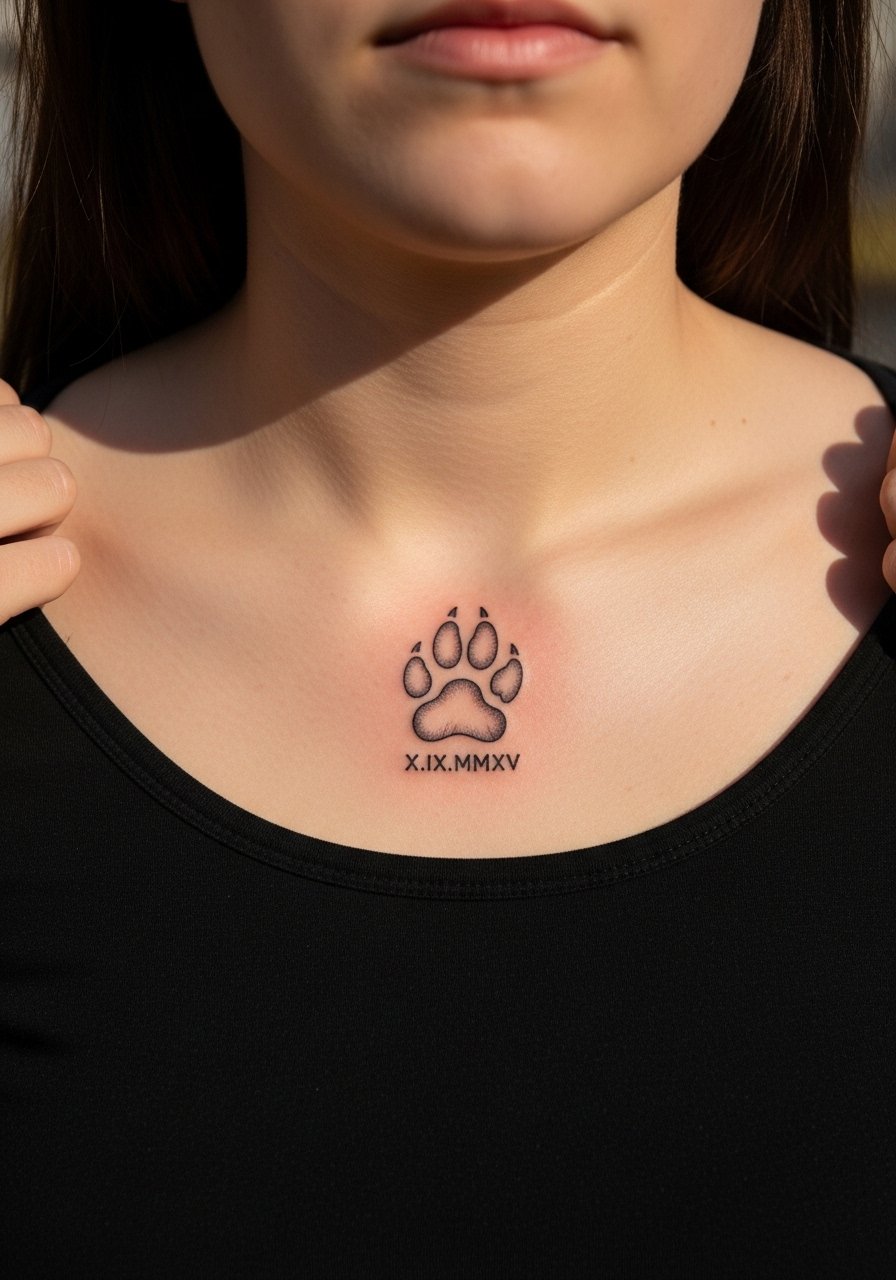
When you add a date, use Roman numerals for a compact, timeless look and specify the exact sequence to avoid mistakes. Collarbone placements photograph well and age relatively predictably though they see a fair amount of sun. The risk is placing text too close to the paw so both elements blur into one another over time. Ask the artist to keep at least a half centimeter of breathing room between the paw and the numerals. For the appointment wear a wide-neck shirt you can slide aside without exposing too much skin.
12. Matching Mini Paw for Couples or Friends
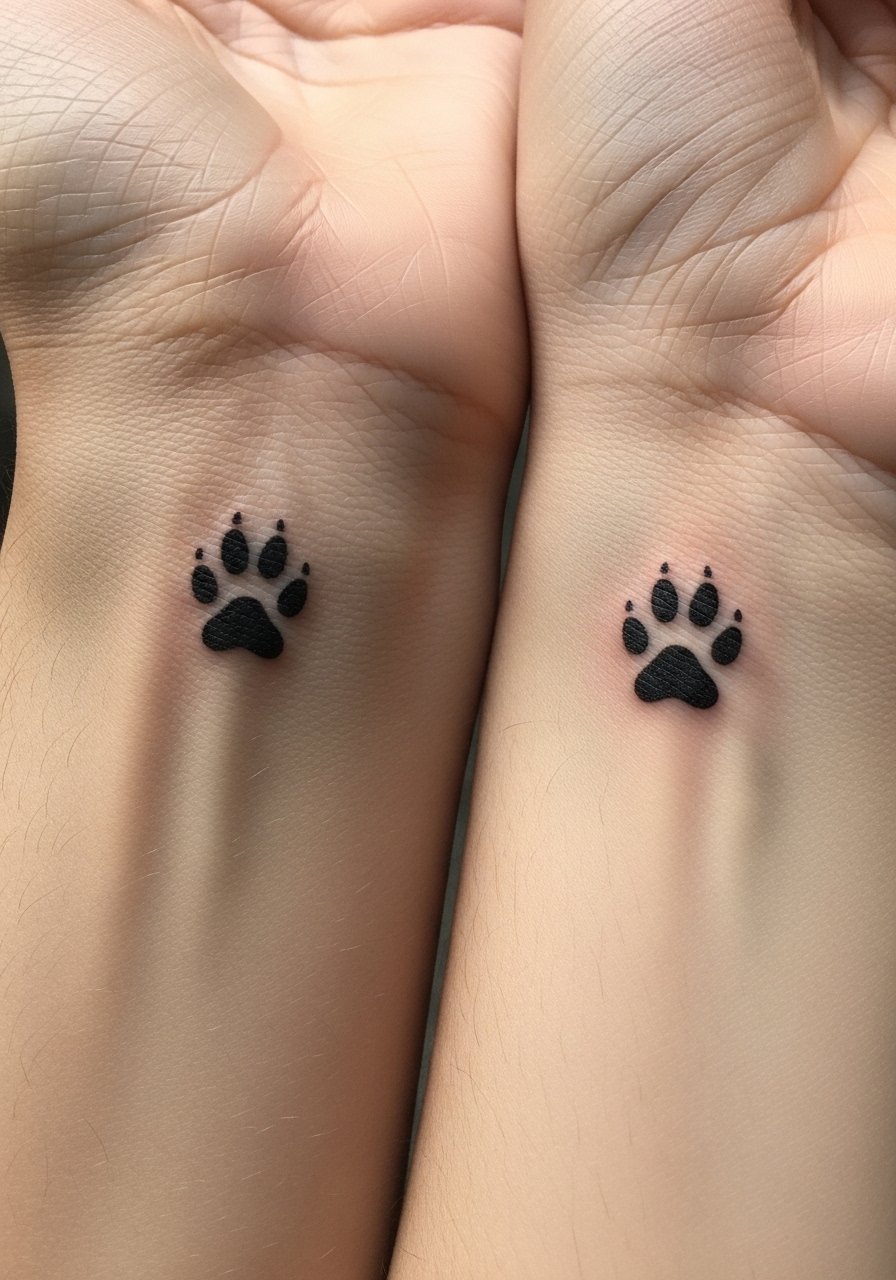
Matching pieces are about coordination more than exact duplication. Decide whether you want mirror placement or the same side on both bodies. The common mistake is not agreeing on size and line weight beforehand, which leads to one tattoo fading or reading differently. Wrist placements are visible and tend to need touch-ups sooner than upper arm work. During the consultation, have both people show their usual clothing so the artist can recommend a placement that fits both lifestyles. For the reveal, stacked dainty bracelets can complement without hiding the prints.
13. Paw Print in a Mandala Halo
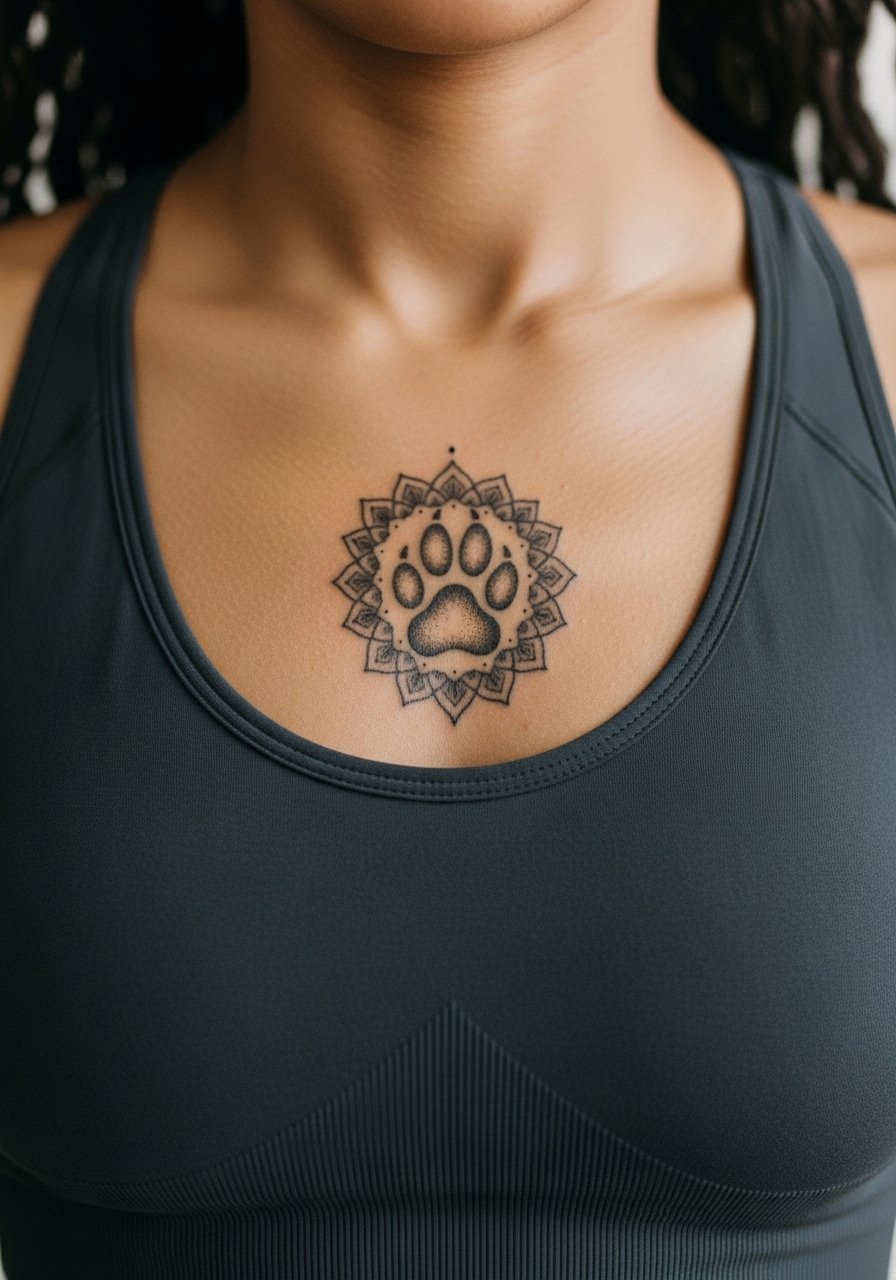
Sternum work is beautiful but sensitive. Artists split into two camps here. One group says dense mandala detail on the sternum blurs quickly because the skin flexes and contracts. The other group says if you scale the mandala back and use space strategically, the pattern will hold. Name both camps and ask your artist which approach they recommend. Sessions in this area are painful for many but the central placement keeps the artwork intimate and striking. For the appointment, wear a fitted sports bra so the artist can access the area without exposing more than needed.
14. Paw Print as a Fingerprint Texture
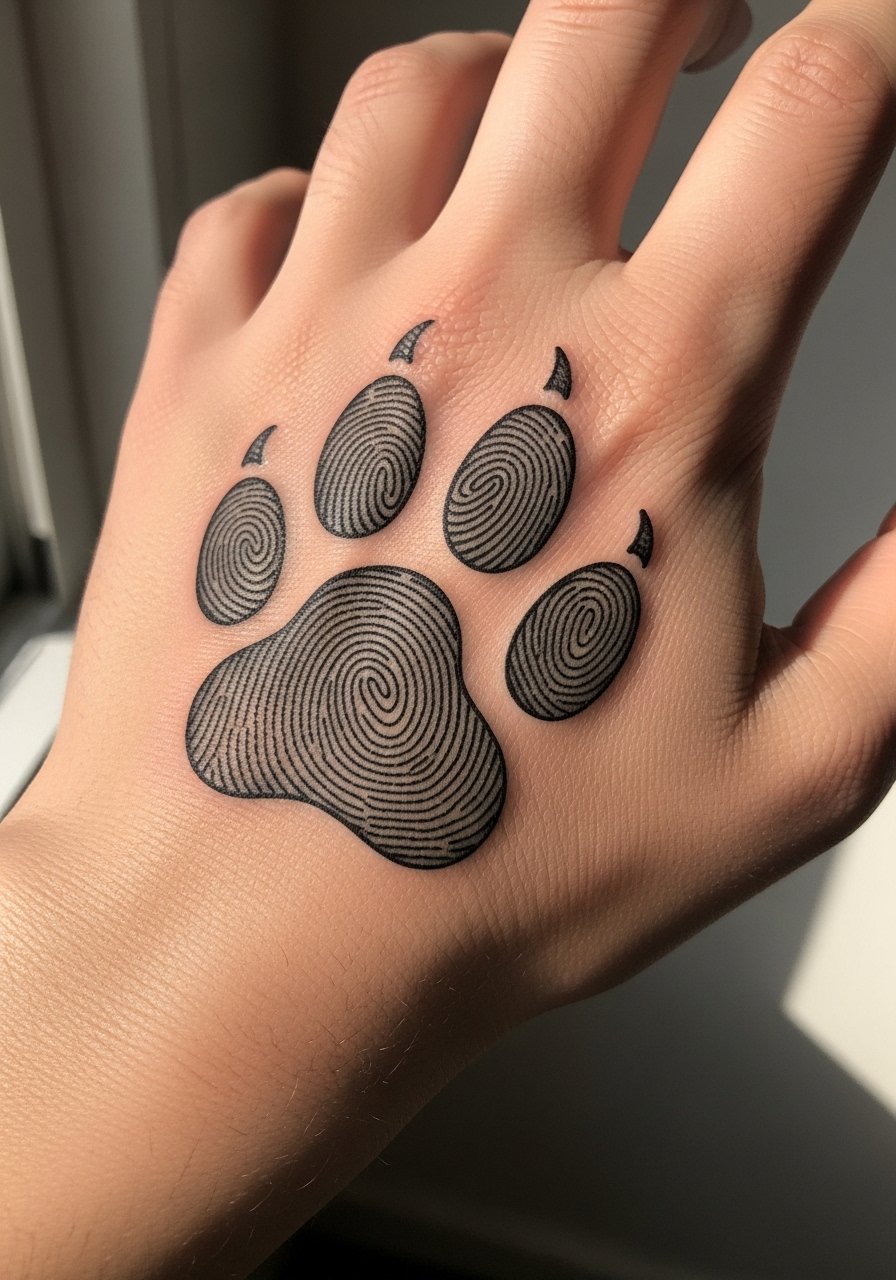
This is a fresh take that blends identity motifs with pet memory by filling the pad with a fingerprint texture. The back of the hand is high visibility and tends to fade faster because of sunlight and frequent washing. Tell your artist you want the fingerprint lines slightly exaggerated so they keep clarity as the piece softens. The session feels rough because of thin skin and proximity to bone. Think about job visibility before choosing a hand placement, and if you do go forward, plan for intermittent touch-ups to keep the fingerprint readable.
15. Tiny Paw with Subtle Gold Ink Accent
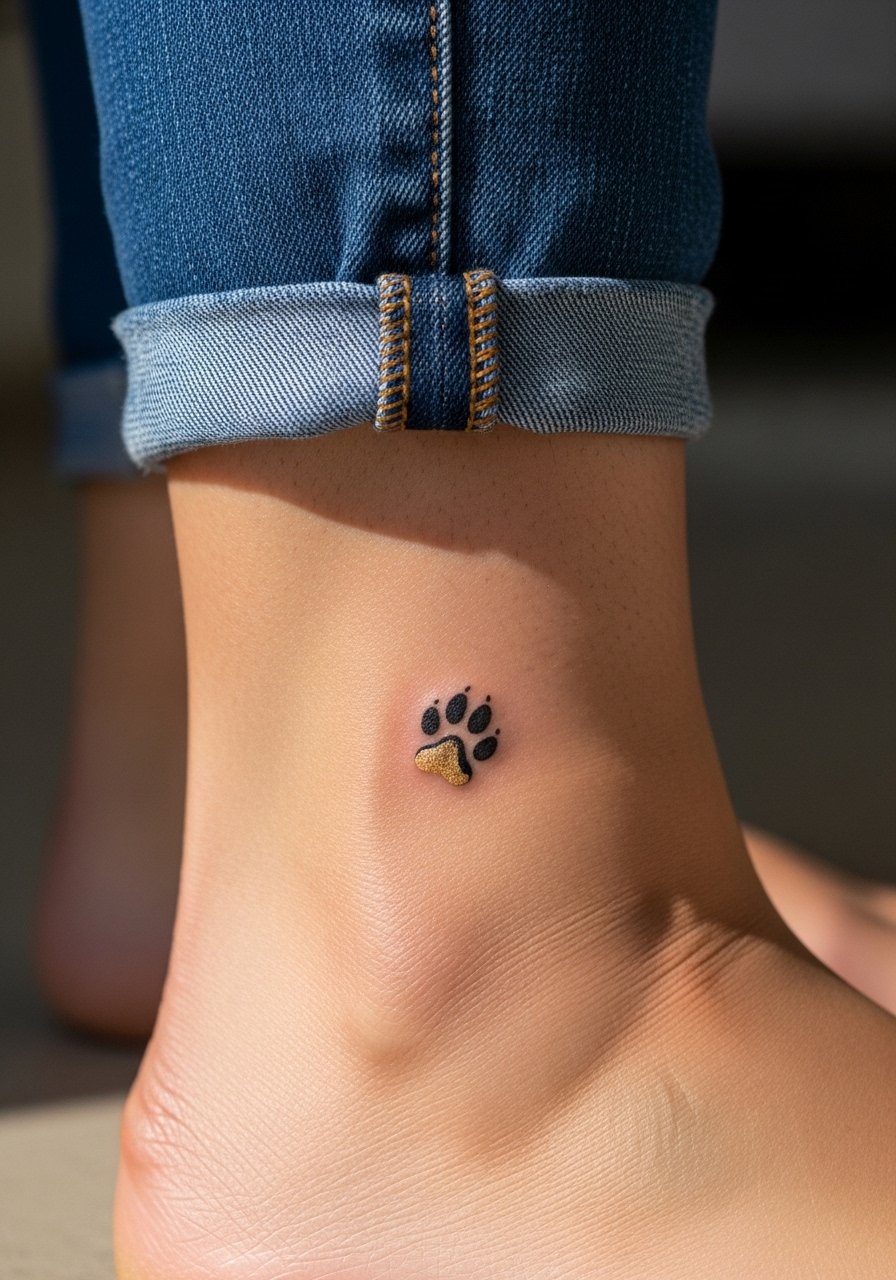
Metallic or colored accent inks can look special when used sparingly. The challenge is that specialty inks fade differently, sometimes faster, than black. Ask the artist to use gold only as a small highlight and keep black anchors around it. Ankle placement balances visibility and protection because closed shoes provide some coverage. Sessions are brief but expect the colored pinprick to need a color refresh earlier than the black lines. For the outfit, slip into rolled jeans that let the accent color catch the light.
16. Paw Print Trail Up the Spine

Spine placements create dramatic vertical lines but they also vary with posture. When the prints are close together they can compress when you bend, which is why spacing matters. Tell the artist you want regular intervals and ask for a mockup with an arching and a straight posture. Sessions are longer and can be sharp near vertebrae. For showing it off choose open-back pieces that reveal the trail without exposing more than you want. The design reads well with halter or open-back dresses.
17. Paw Print with Tiny Pet Silhouette Inside
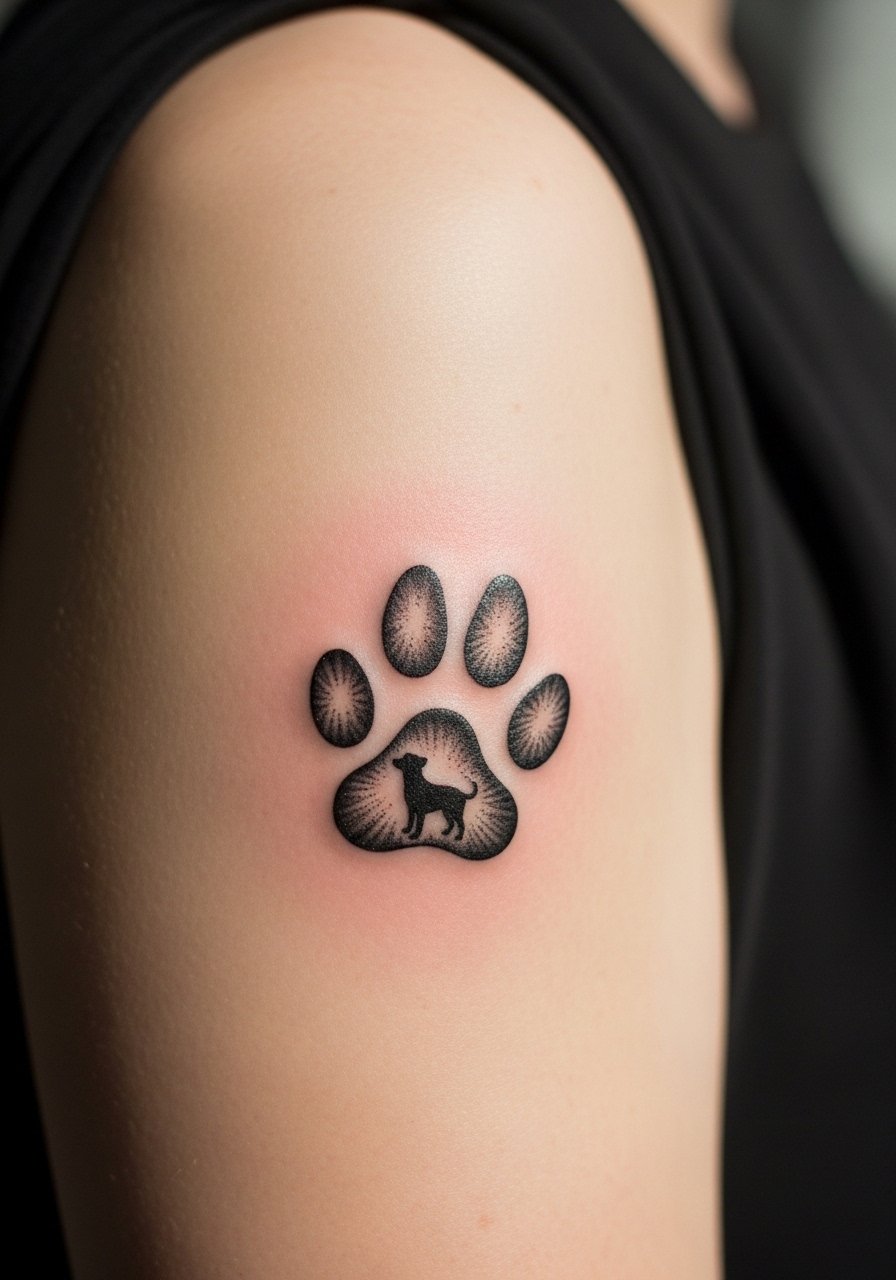
This is another compact memorial option where the silhouette is the focal detail inside the pad. Upper arm muscle gives the detail room to age well compared with hands or fingers. The common mistake is a silhouette that is too intricate for the pad size, which then loses recognition. Ask for simplified silhouettes and show which postures of the animal are most recognizable to you. Sessions are comfortable with moderate pressure. For daily wear, rolled sleeves or short-sleeve tees let the piece be seen without constant sun exposure.
18. Paw Print with Tiny Coordinates
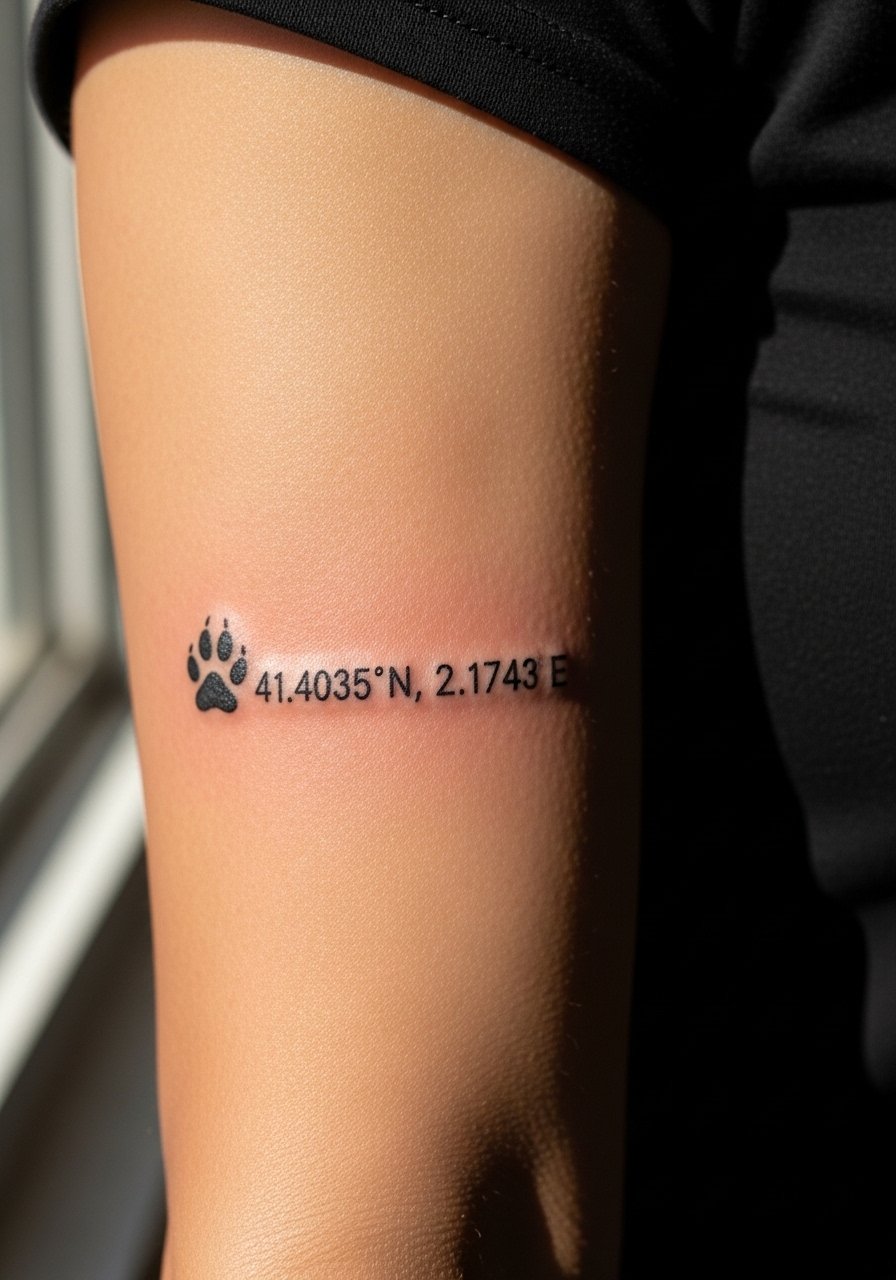
Coordinates are a clean way to mark a place tied to a pet moment. Make sure you provide the exact numeric string and the artist typeset you want so the stencil is precise. Outer bicep holds text well and resists the abrasion that hands and feet face. The mistake is placing tiny numerals too close to the paw which can make both unreadable after healing. Sessions here are moderate and usually comfortable. For showing off, short-sleeve shirts or a casual tee work well.
19. Paw Print in Stipple Shading with Halo
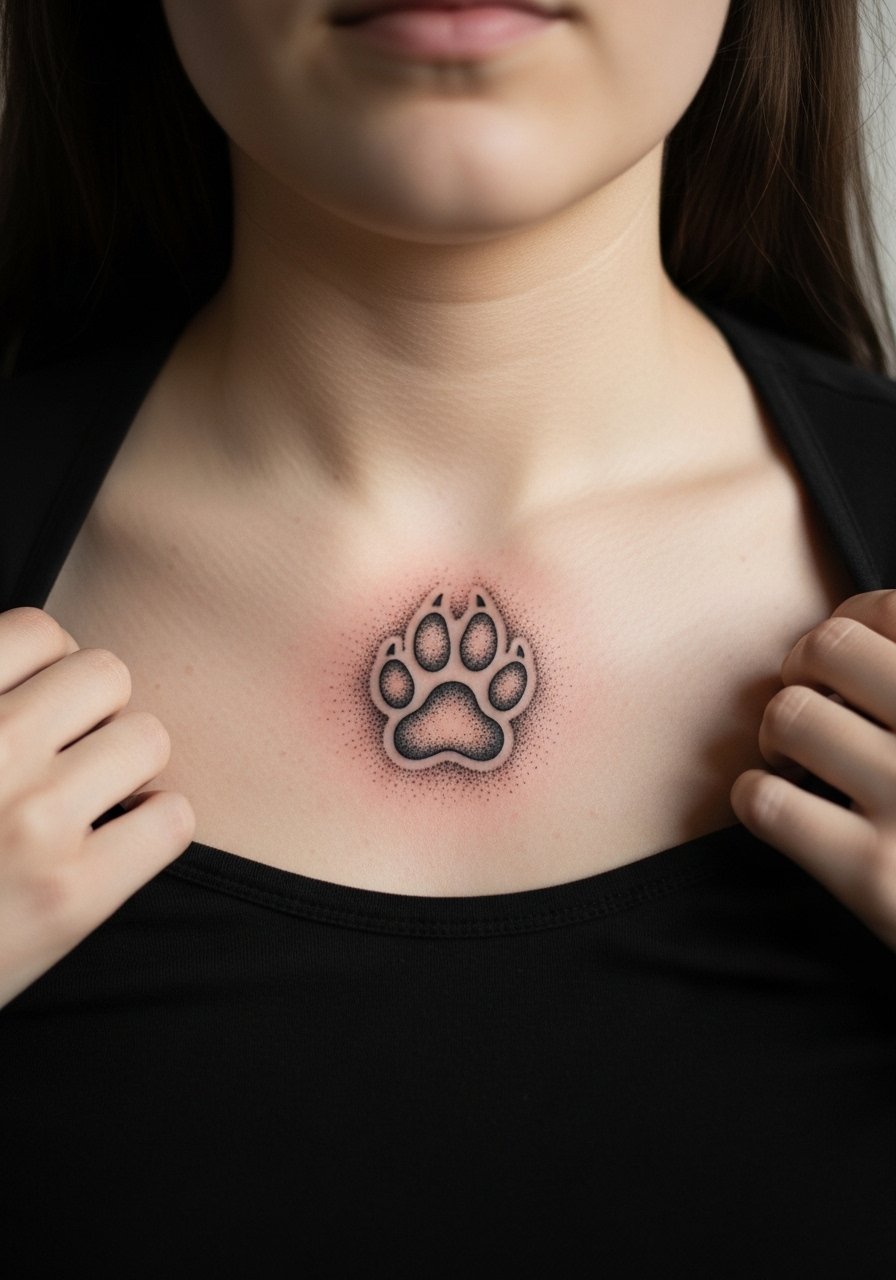
Stipple shading gives texture and a soft gradient that holds up better than heavy smooth shading in dense areas. For chest work, request stipple instead of solid fills to avoid patches that go blotchy as they fade. The chest sees a mix of sun and clothing friction so expect gradual softening of contrasts over several years. Sessions can be long if the halo is large. This piece plays nicely with wide-neck tops and layered necklaces if you want a more styled presentation.
20. Paw Print with Minimalist Geometric Frame
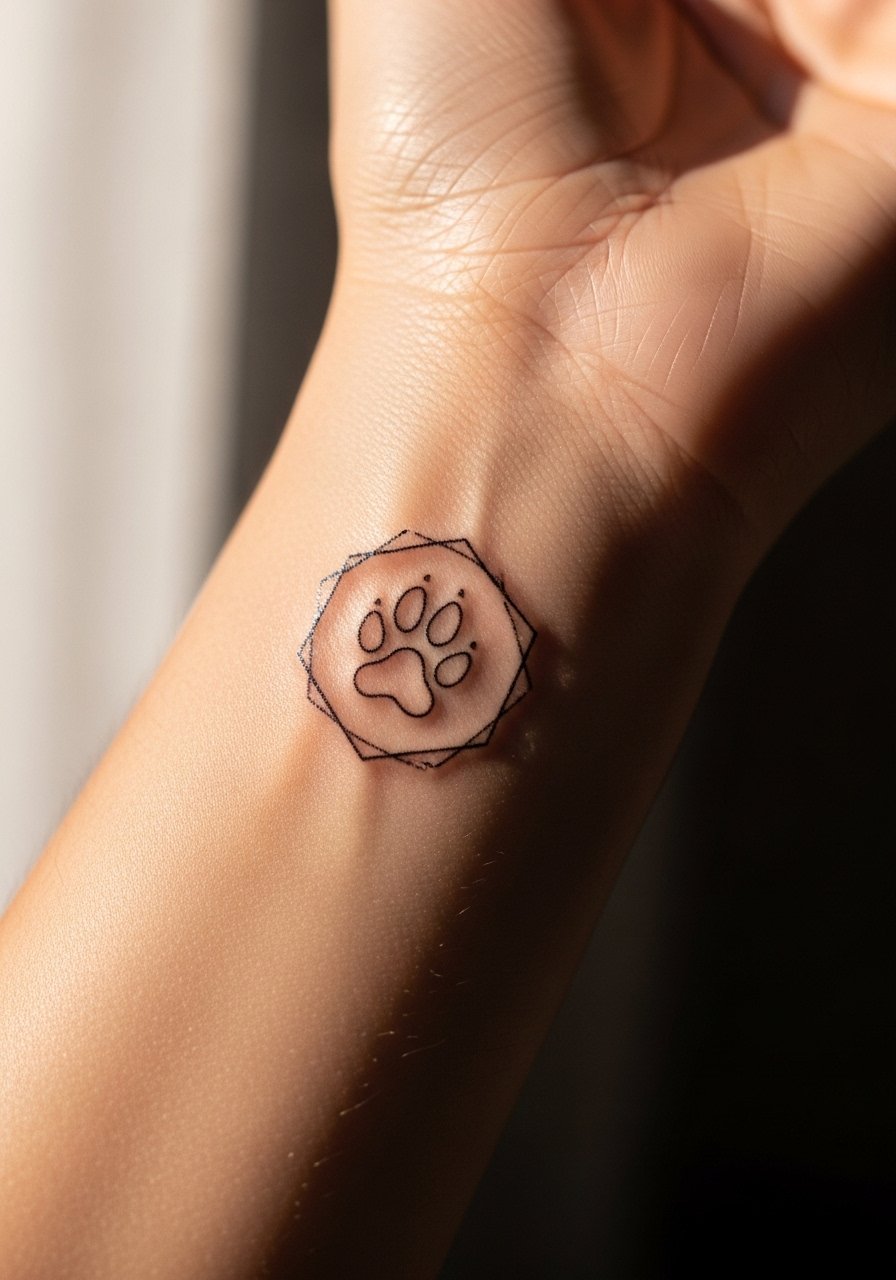
Framing can help small motifs read cleaner by giving the eye a boundary. The outer wrist is visible, so thin frames must be solid enough to remain crisp. The common mistake is a frame that is too thin, which will soften into a blur. Ask for a slightly bolder frame with a clear gap between the paw and the hexagon edge. Sessions are quick but sensitive. For daily wear, a minimalist watch sits just beside the frame without crowding the motif.
21. Paw Print on the Back of the Neck
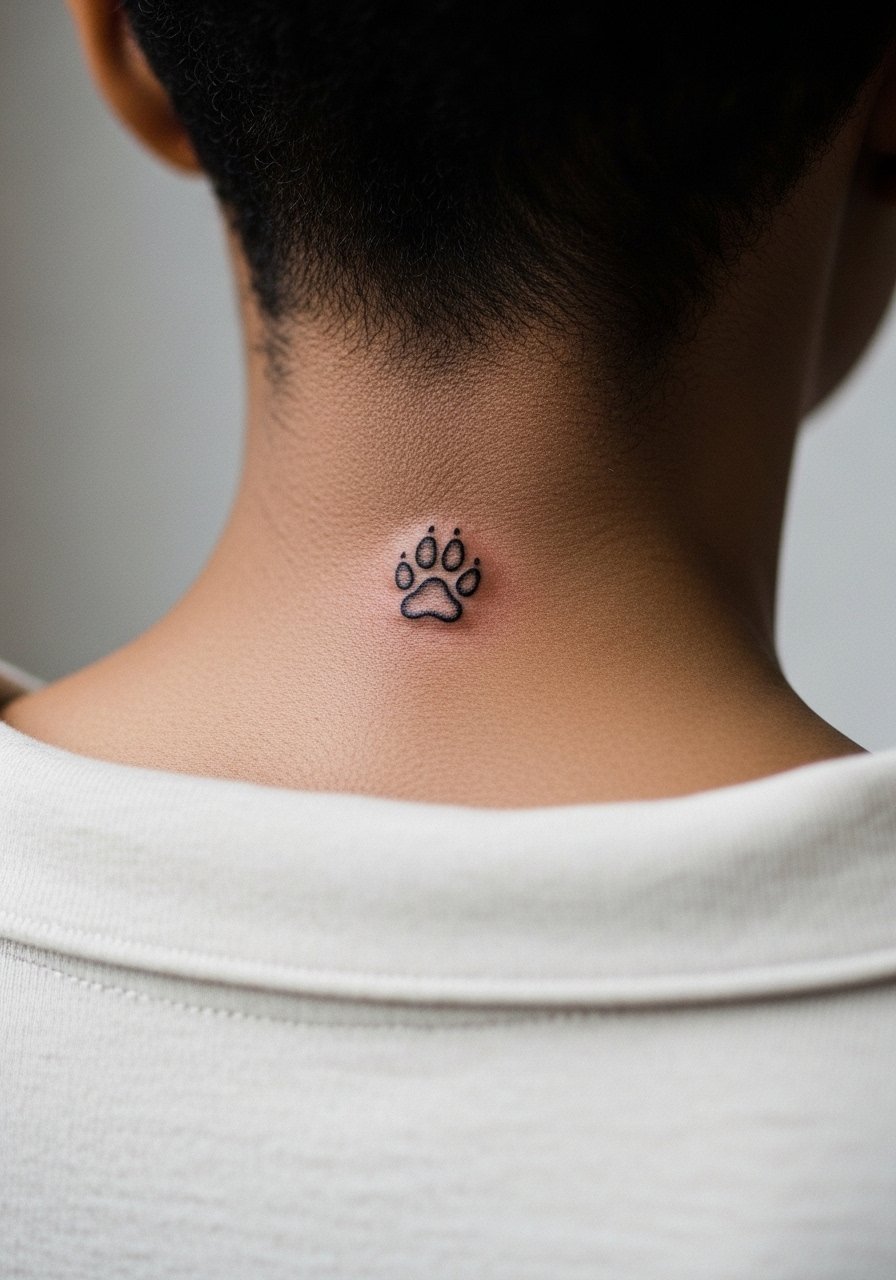
Neck placements are bold and visible. The back of the neck heals predictably if covered by hair most days but can be exposed in certain styles. The main mistake is underestimating how often it will show up in professional photos and ID shots. If you do it, ask the artist to keep the paw compact and centered so it reads even as hair moves. Sessions here are short and feel like steady pressure. If career considerations are part of your decision, map out how often this area will be visible in your daily life.
Frequently Asked Questions
Q: How much detail can you realistically fit into a tiny paw pad?
A: It depends on placement and your skin type. Pads on the upper arm or chest handle more micro detail than pads on fingers or toes. Tell your artist which elements are must-haves and which can be simplified. Expect artists to recommend scaling up slightly if you want a lasting portrait or tiny typography inside the pad.
Q: Will a watercolor paw fade faster than a black outline paw?
A: From what I've seen, watercolor pigments tend to lose vibrancy quicker than anchored black linework because they rely on saturation rather than contrast. If you love the watercolor look, ask for black anchors around the pads and plan for a color refresh at a two to three year interval.
Q: Are hand and finger paw prints worth it if they need frequent touch-ups?
A: That depends on how visible you want the piece and how much maintenance you accept. Hands and fingers show off tattoos immediately but face constant washing and sun. Some people book annual touch-ups and are fine with that. If low maintenance is your goal, opt for forearm or calf placements instead.
Q: Should I worry about career impact with a visible paw on the wrist or neck?
A: Visibility matters more in some workplaces than others. If you work in a conservative environment, a subtly placed inner forearm or upper arm option can keep the symbol personal. For sessions, consider clothing that can cover the area during meetings and events, like a loose button-down.
Q: How do I choose between a stylized paw and a realistic portrait inside a paw?
A: Think about longevity and daily wear. Stylized or geometric approaches often age cleaner because they focus on bold shapes. Micro-realism can be powerful emotionally but requires precise execution and may need touch-ups to stay legible as skin changes. Ask for healed photos of similar work in the artist's portfolio to set expectations.
