
Fine line phoenixes flood feeds right now, and they look delicate on screen. I've seen too many vanish into blurred shapes after sun exposure and a few years without touch-ups. Pain, placement surprises, and unexpected blowout are real concerns when you want a feminine phoenix that stays readable. Read on for ideas that balance prettiness with long-term healed results.
1. Fine Line Phoenix on Inner Forearm
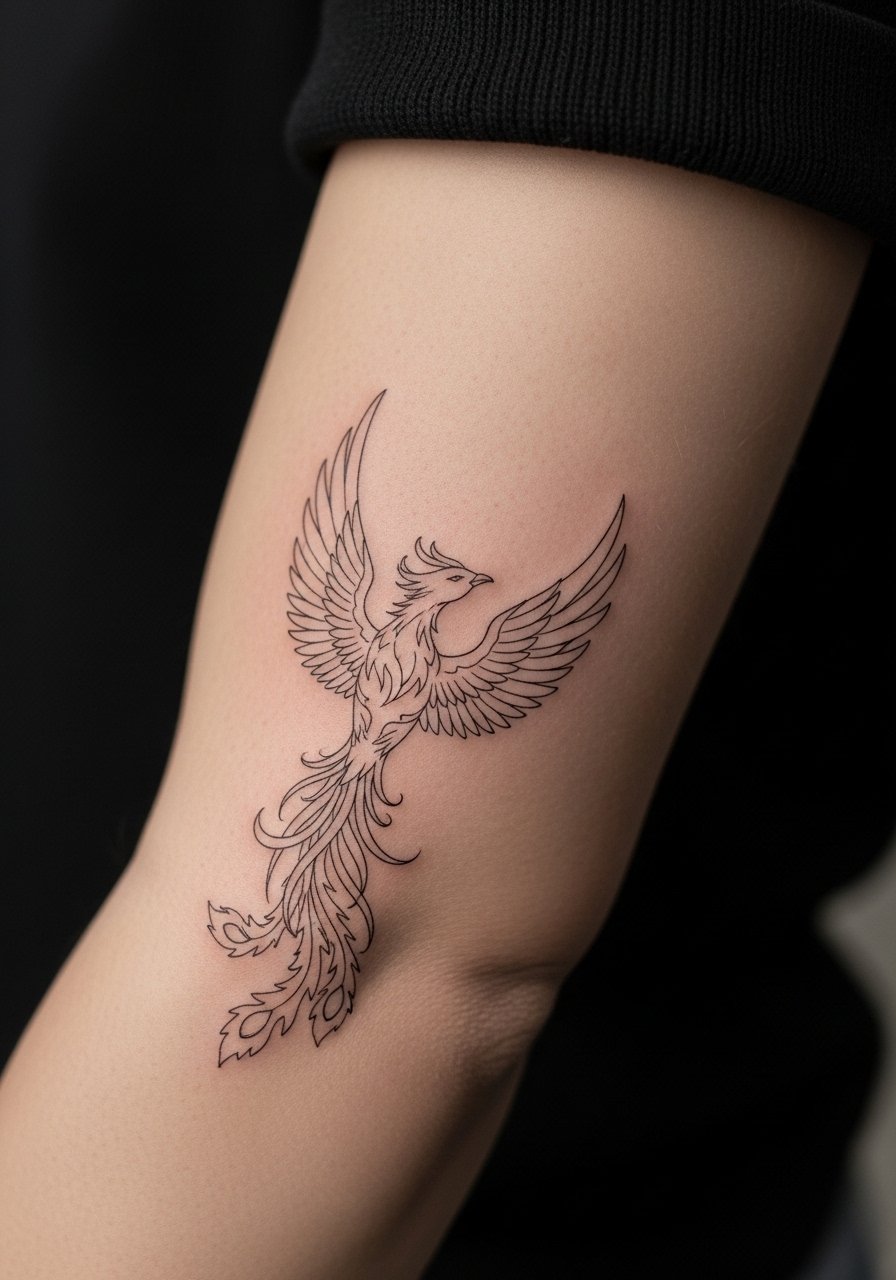
The inner forearm is where delicate detail reads well and gets shown off often. Expect moderate pain and a session that can finish in one hour for a small piece. Tell your artist you want slightly heavier primary contour lines and airy internal stipple shading so the silhouette holds as the fine internal lines soften over two to five years. Common mistake is asking for micro fills too close together, which leads to early merging. For the session wear, go with a rolled linen shirt you can push up easily so the artist has clean access and you stay comfortable afterward.
2. Tiny Phoenix Finger Tip Accent
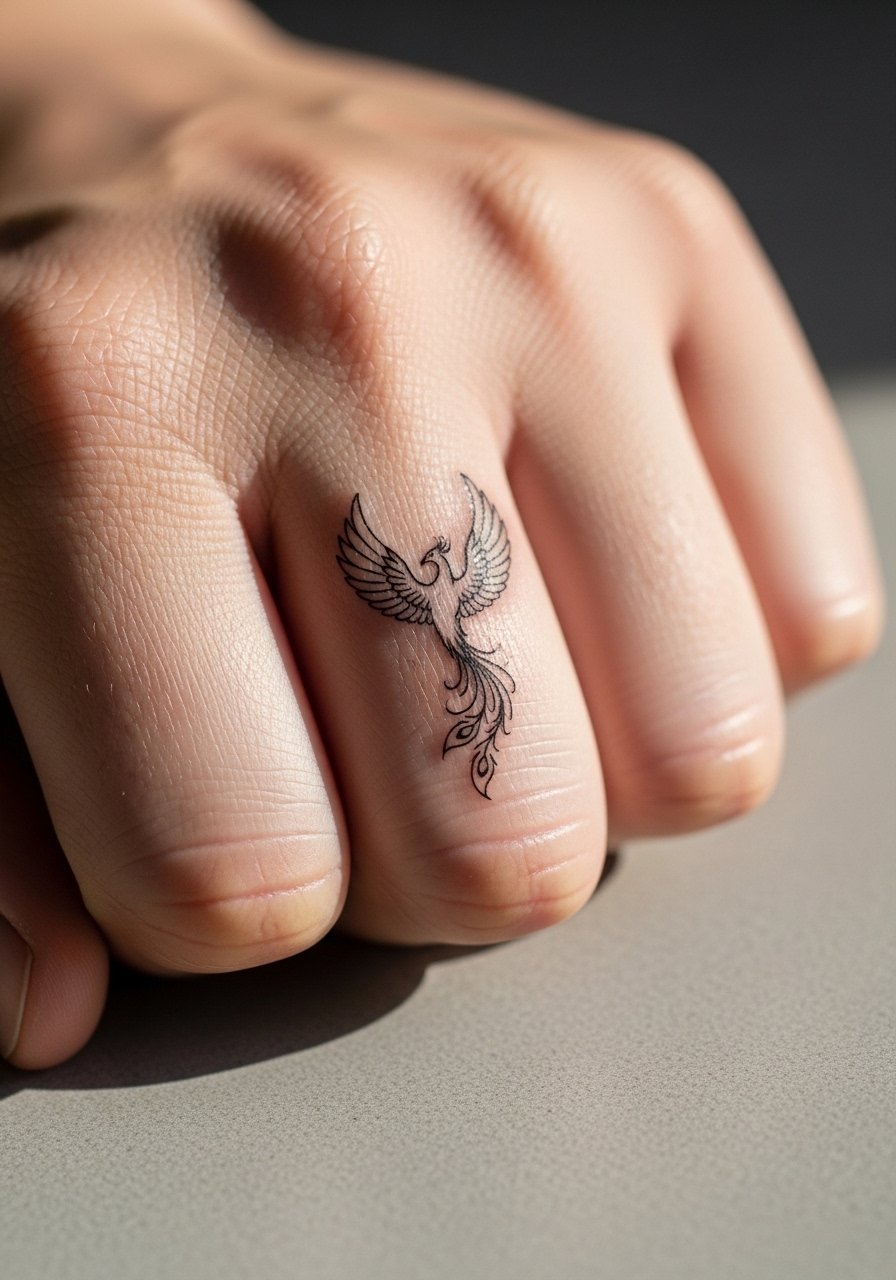
Finger tattoos read intimate but they age faster because of hand washing and friction. Expect sharpness for six months, then progressive softening and possible need for touch-up around year one or two. The session is quick and stings more than forearm work. A frequent mistake is cramming too much detail into the tiny canvas. Ask for simplified contour, higher contrast between lines, and a plan for a small touch-up. For visibility and everyday styling, a thin stacking ring frames the motif without overwhelming the linework.
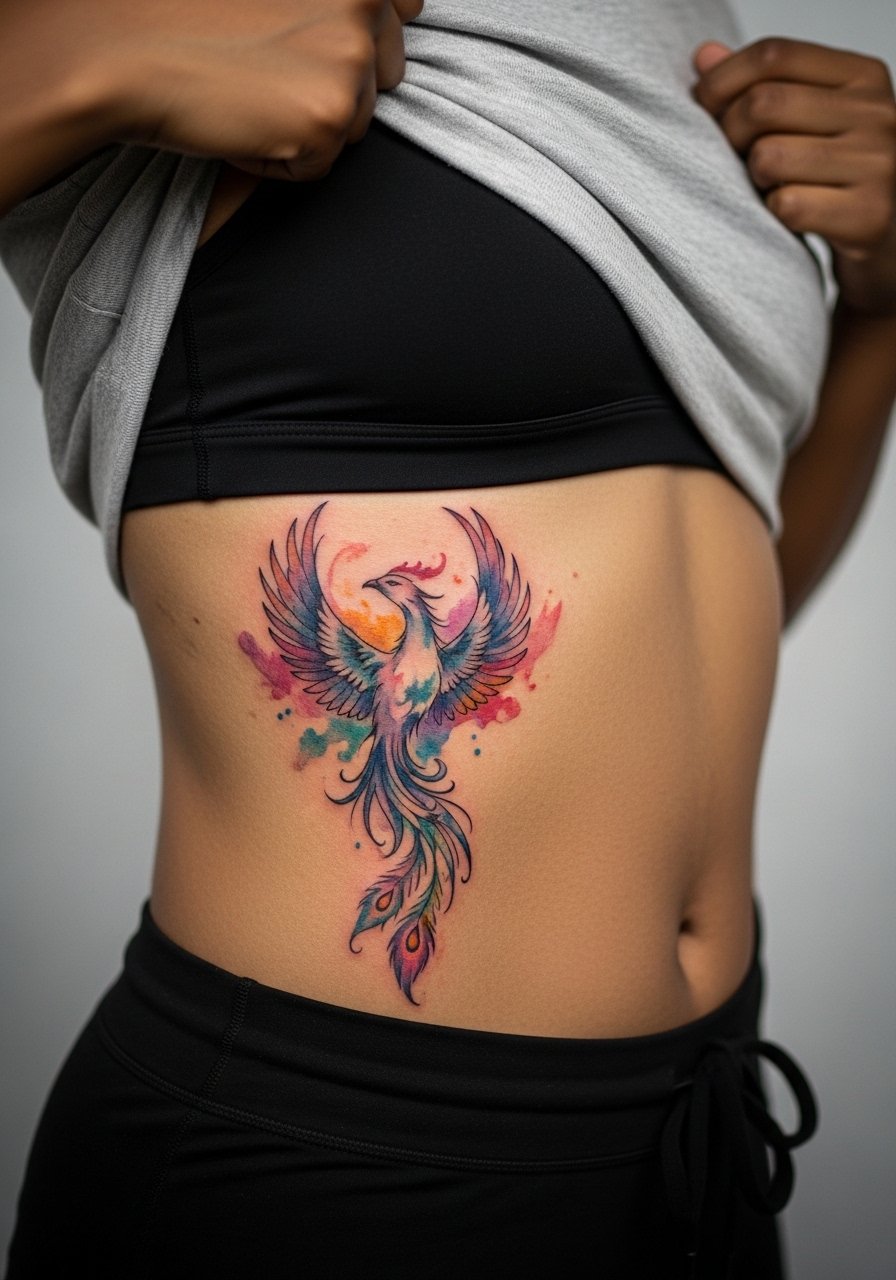
3. Watercolor Phoenix Along the Ankle
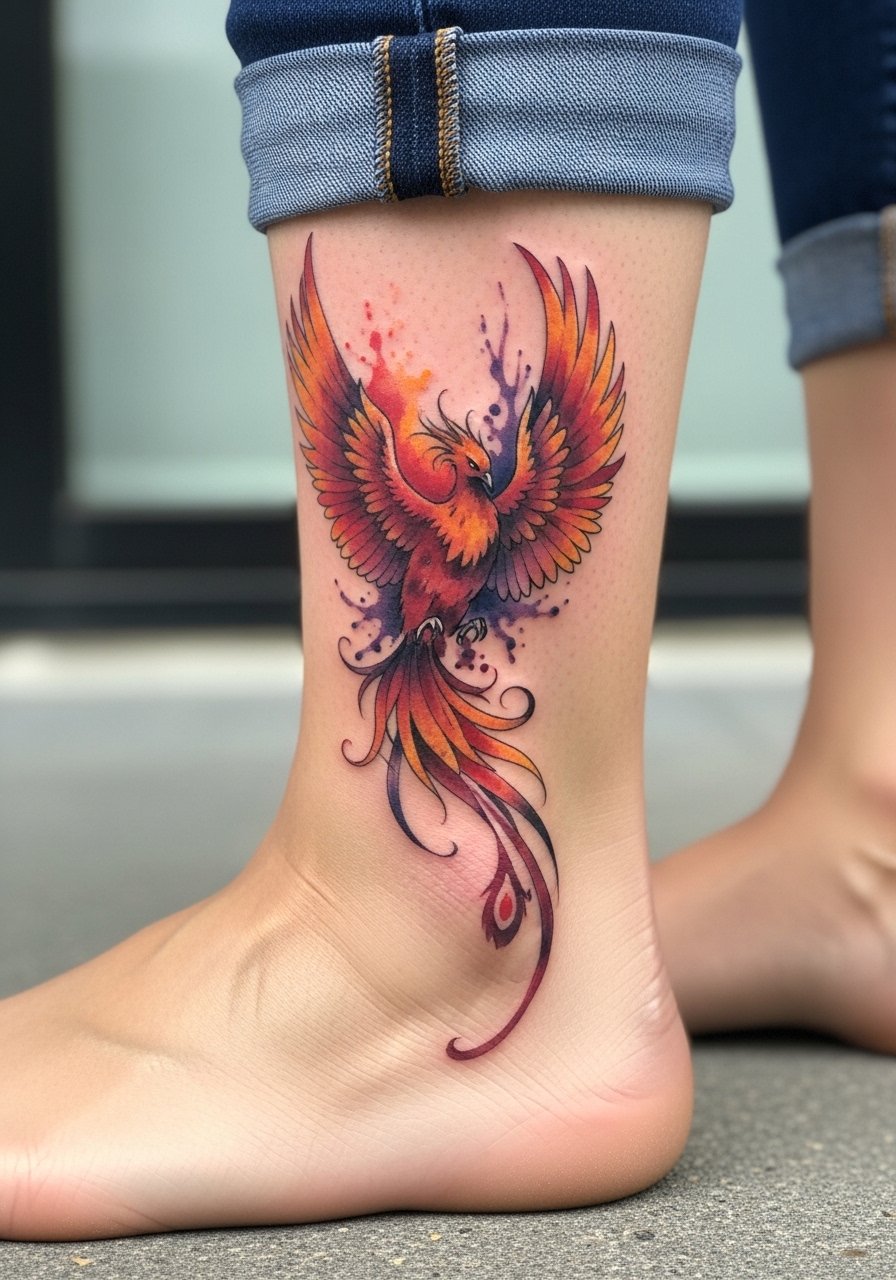
Ankle pieces can wear unevenly because of shoe rubbing and lower circulation. The watercolor wash looks soft fresh and tends to patchy fade faster than saturated work. If you want this look, request a stronger ink saturation near the outline and leave interior washes airy so touch-ups blend rather than repaint. Pain is a six out of ten for most people because of proximity to bone. For the session wear bring shoes that slip on and off easily and consider low-cut sandals to avoid rubbing the area on the way home.
4. Traditional-Inspired Phoenix on Upper Arm
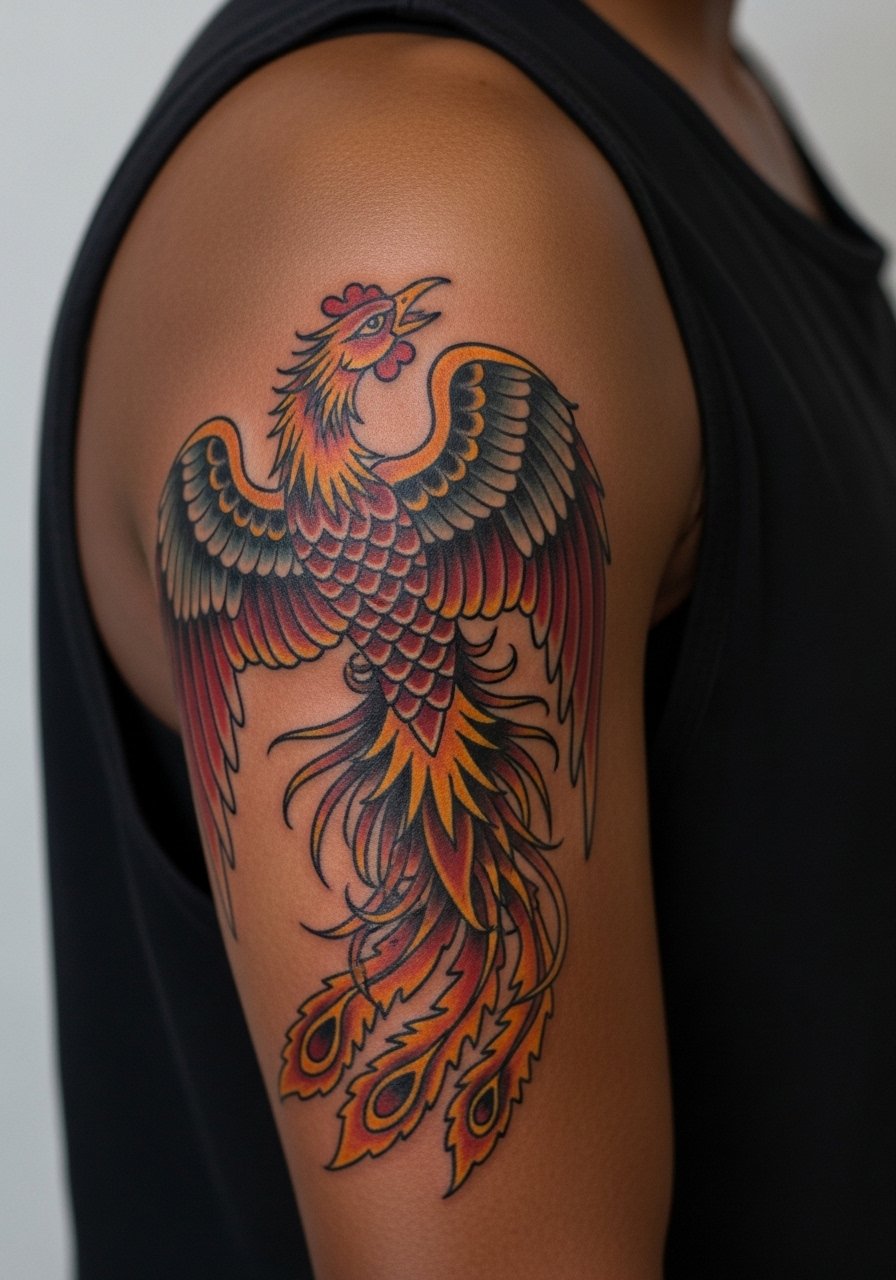
Traditional saturation and bold lines age into a readable, graphic piece. The upper arm tolerates heavier profiles and the session can run one to two hours depending on color blocks. Tell your artist you want strong black anchors and vibrant reds that will fade predictably rather than thin delicate hues that disappear. The common mistake is shrinking the motif too much for the placement, which robs it of that bold identity. This design pairs well with sleeveless knit tops and a loose tank for easy showing without overexposure.
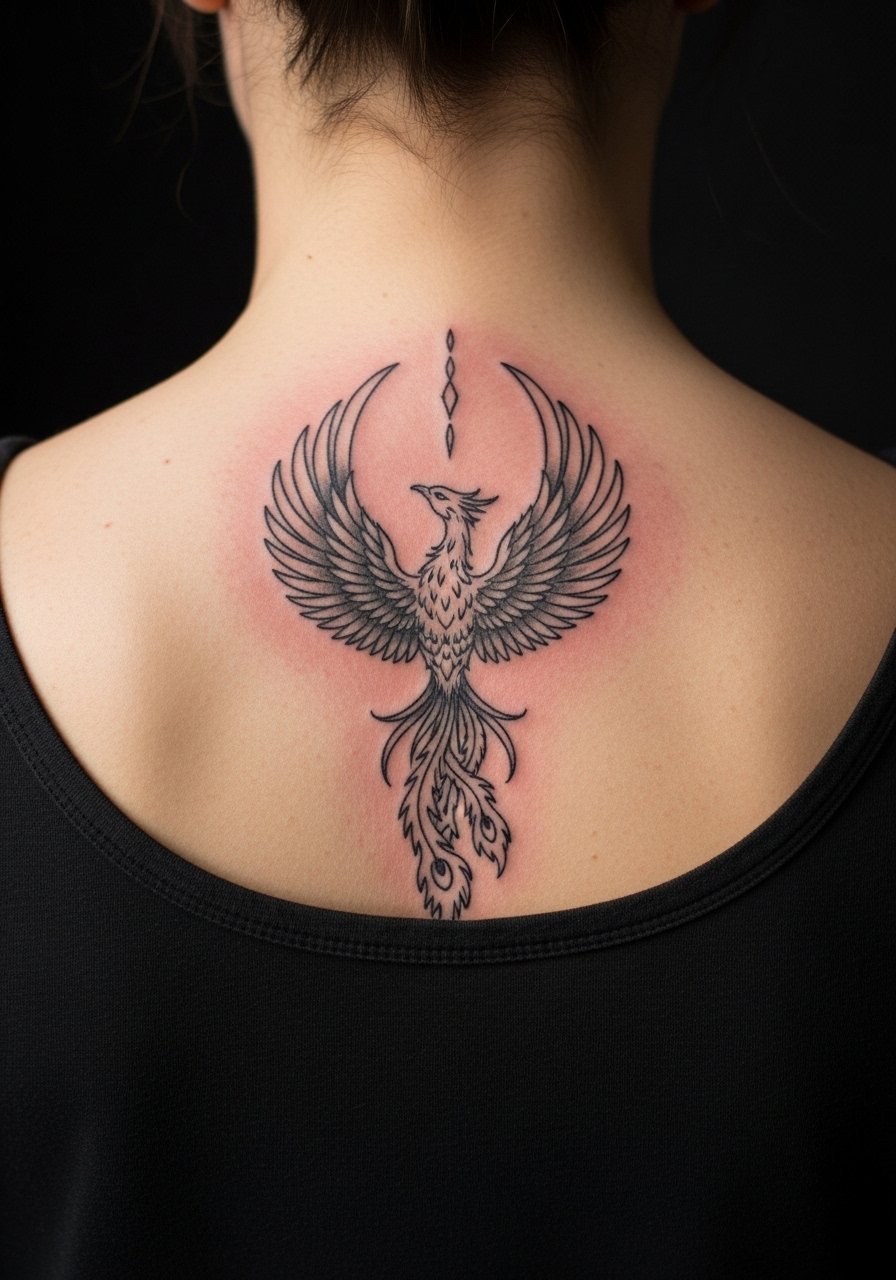
5. Micro-Realism Phoenix Near the Collarbone

Collarbone pieces read beautifully and show often when you choose the right wardrobe. Pain varies but the area can be sharp because of thin skin over bone. Micro-realism demands careful needle depth, or fine shading will lose fidelity by year three. Ask your artist for a slightly bolder outer edge and lighter inner texture, it helps the shape stay legible as the shading softens. For evenings out wear an open-neck blouse that frames rather than competes with the tiny image. If you work in a conservative office, keep in mind collarbone visibility when choosing placement size.
6. Ribcage Phoenix in Watercolor Fade
Fair warning about ribs. Pain is high for most people and sessions often split across visits. Artists split on whether fine line on ribs holds up. One camp says skin stretch and motion blur fine contours within two years. The other camp argues that with correct spacing and needle depth it settles fine. I recommend this style only if you accept the likely need for touch-up at year two or three. A common error is packing too much dense watercolor into a small rib panel, which heals patchy. For the appointment wear a cropped top you can lift easily and consider planning two shorter sessions rather than one long day.
Studio Day Picks
The first six ideas above include collarbone, ribcage, and forearm work, which bring different prep and healing needs. A few targeted items smooth the session and first week.
-
Stencil transfer paper kit. Lets you preview the placement on skin so you and the artist agree on size, especially helpful for collarbone and forearm pieces.
-
Topical numbing cream. Applied as directed before ribcage or sternum sessions this eases the peak pain and helps you complete longer color sessions.
-
Thin protective film roll. Ideal for finger and ankle tattoos to shield fresh ink from friction during the first few days.
-
Fragrance-free gentle body wash. Cleanses without irritating delicate fine line work on the forearm or collarbone.
-
Aquaphor healing ointment. Thin layers during the initial days keep small fine line areas supple without clogging them, which is useful for delicate phoenix work.
7. Small Phoenix Behind the Ear, Subtle Script
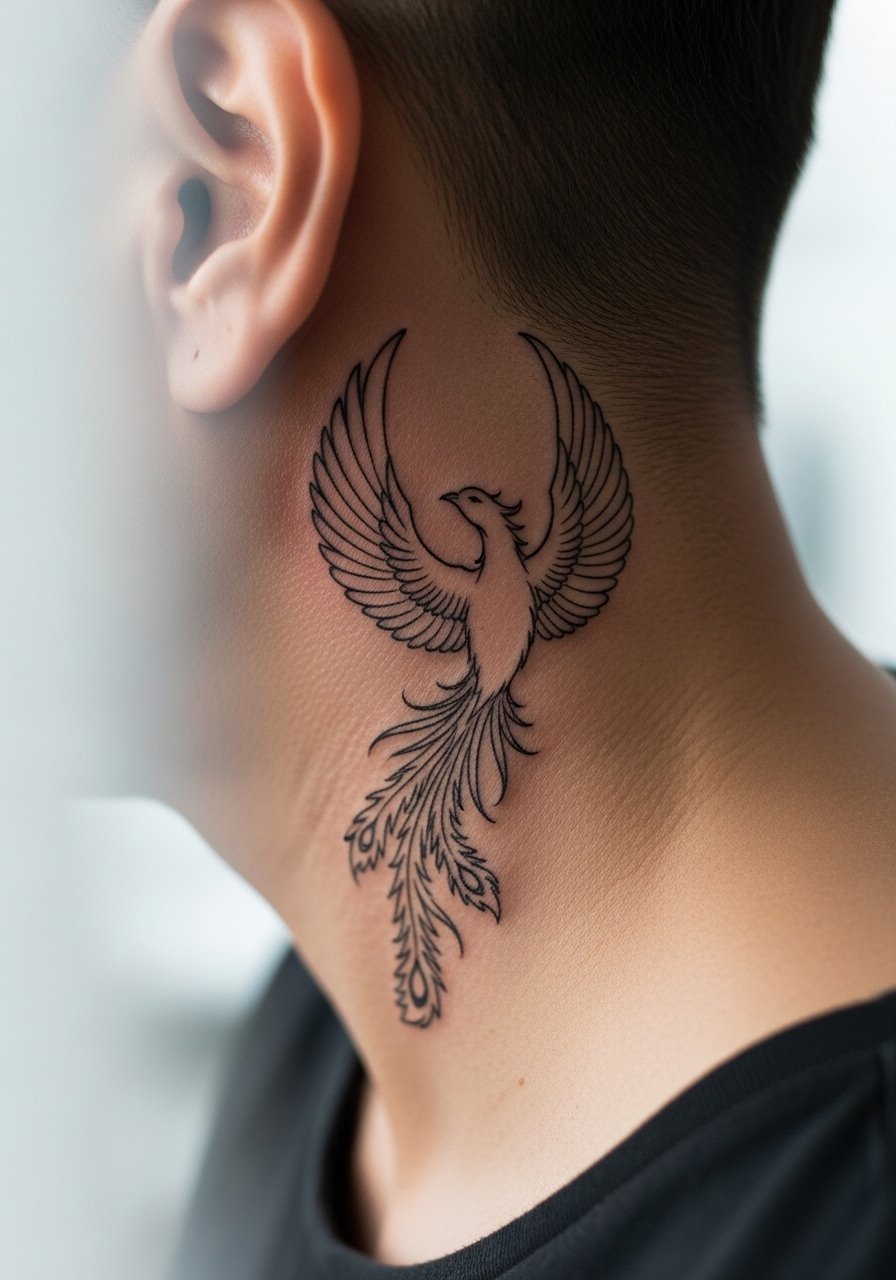
Behind-the-ear placements are small and discreet. Pain is tolerable but proximity to bone and thin skin means lines need breathing room. A tiny script or single feather alongside the phoenix helps the eye read the piece without adding dense detail that will blur. During consultation, show how you plan to wear your hair so the artist can map the visibility. A mistake is asking for micro lettering right next to the phoenix, which competes as the letters age. If you want the piece to peek through longer hair, plan for a slightly larger scale than you think.
8. Half-Sleeve Phoenix with Dot Work Shading
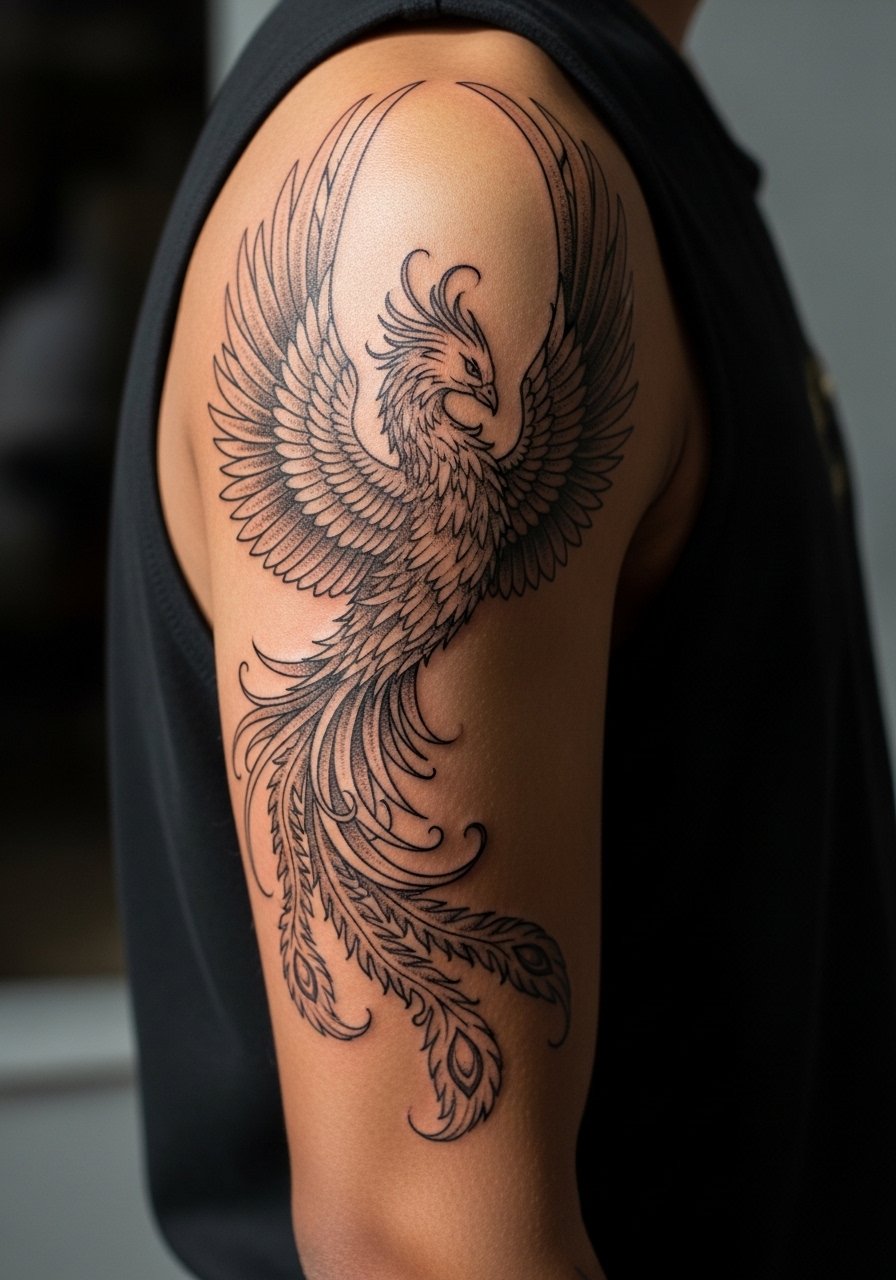
Half-sleeves let you combine contour, stipple shading, and spot color in a way that ages well because elements have room. Sessions will span multiple appointments and feel like long sittings for saturation work. Tell your artist you want heavier primary anchors and stipple shading instead of dense gradients to avoid early muddying. The usual mistake is over-detailing each feather at the cost of negative space. For show-off outfits, sleeveless knits or open-sleeve blouses let the sleeve read without appearing too busy.
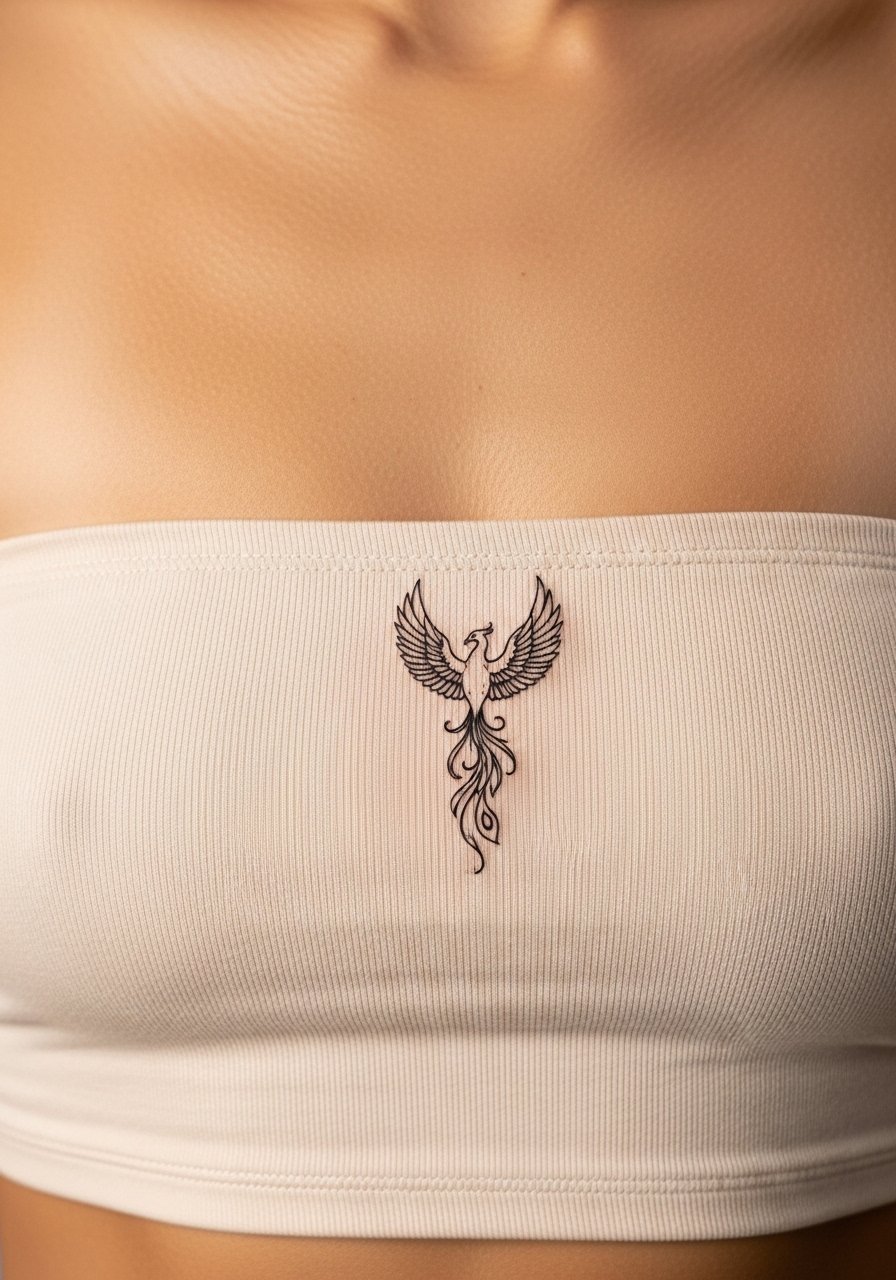
9. Minimalist Phoenix on the Sternum

Sternum placement comes with session discomfort and a longer recovery window because the area moves with breathing. Expect a multi-part session if you want symmetry and refined linework. A frequent oversight is placing the motif too low or too small, which distorts how it sits with clothing. Ask for an on-body stencil check while standing so you see the natural fall against your chest. For the appointment pick a strapless or bandeau-style sports bra you can adjust to reveal just the work while keeping the rest covered.
10. Geometric Phoenix with Negative Space Wings
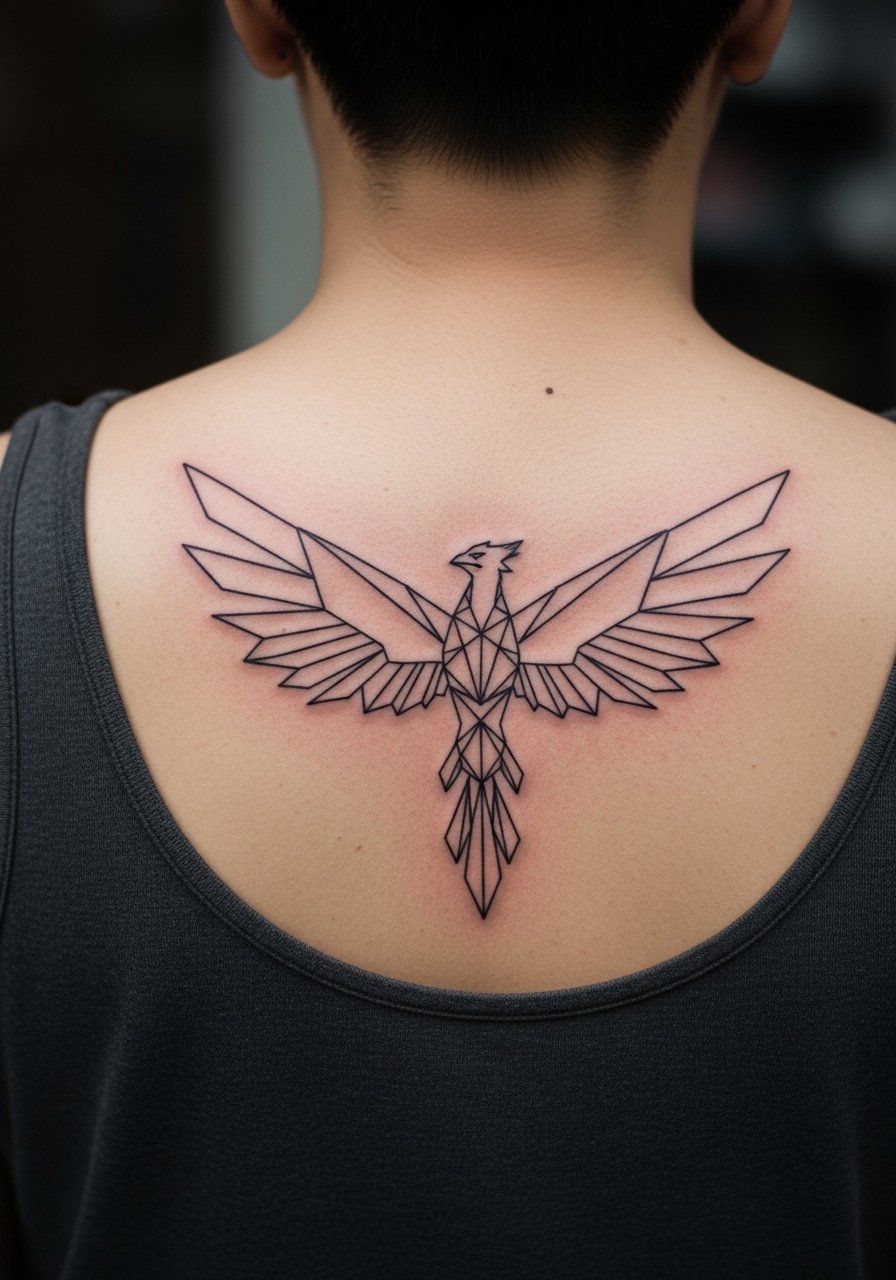
Upper back is forgiving for geometry because it gives pattern room. Negative space wings keep the design modern and reduce long-term blurring by leaving less dense ink. Sessions are moderate in pain and can usually finish in one solid block if you schedule properly. A common error is packing lines too close in mandala-adjacent areas, which leads to merge over time. For showing off, open-back tops or halter dresses work well but plan wardrobe so you can cover the area the first few nights.
11. Thigh Phoenix with Floral Accents
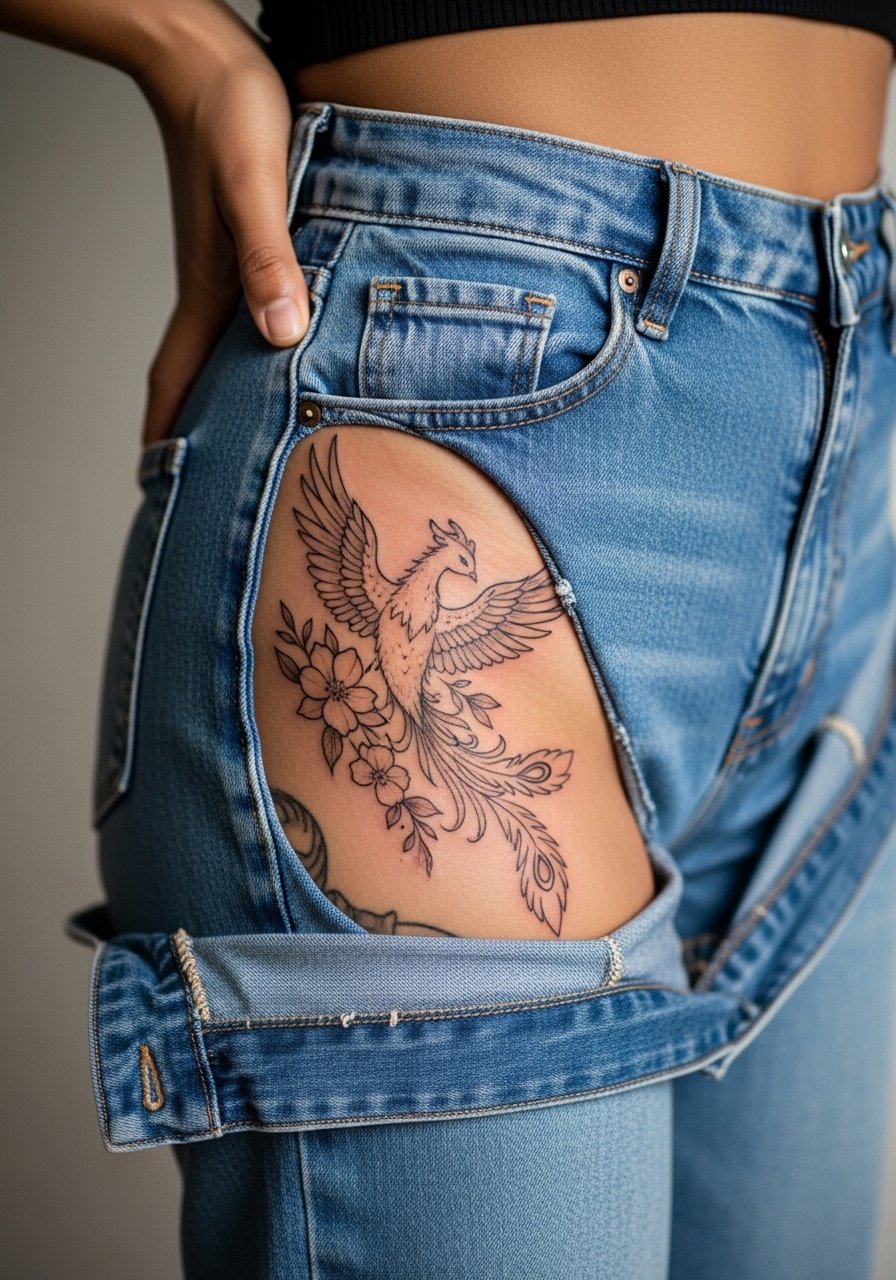
Thigh placements are popular for larger feminine pieces because they heal under clothing without constant abrasion. Pain is lower on the fleshy outer thigh and sessions can run from one to three hours. Ask your artist to keep heavier anchors on the main phoenix body and use airy dot work for the florals so the composition reads if parts become softer years out. A mistake is requesting very thin parallel lines across curved thigh panels, which can fade into indistinct bands. For the session wear high-waisted shorts or a skirt you can shift so the artist has clear access and you remain comfortable.
12. Underbust Phoenix Script and Wisps
Underbust work reads as intimate and can be hidden easily, which is why it appeals. Pain and healing vary with rib proximity. This placement also triggers the ribcage controversy again. One camp warns that fine detail under the bust loses clarity as skin stretches and moves. The other camp says with proper spacing and occasional touch-ups it can stay sharp. If you choose underbust, plan for a touch-up and ask the artist to map how movement will affect the main lines. For session wear a strapless or bandeau that you can slide so only the target area is visible.
13. Calf Phoenix with Bold Color Blocking
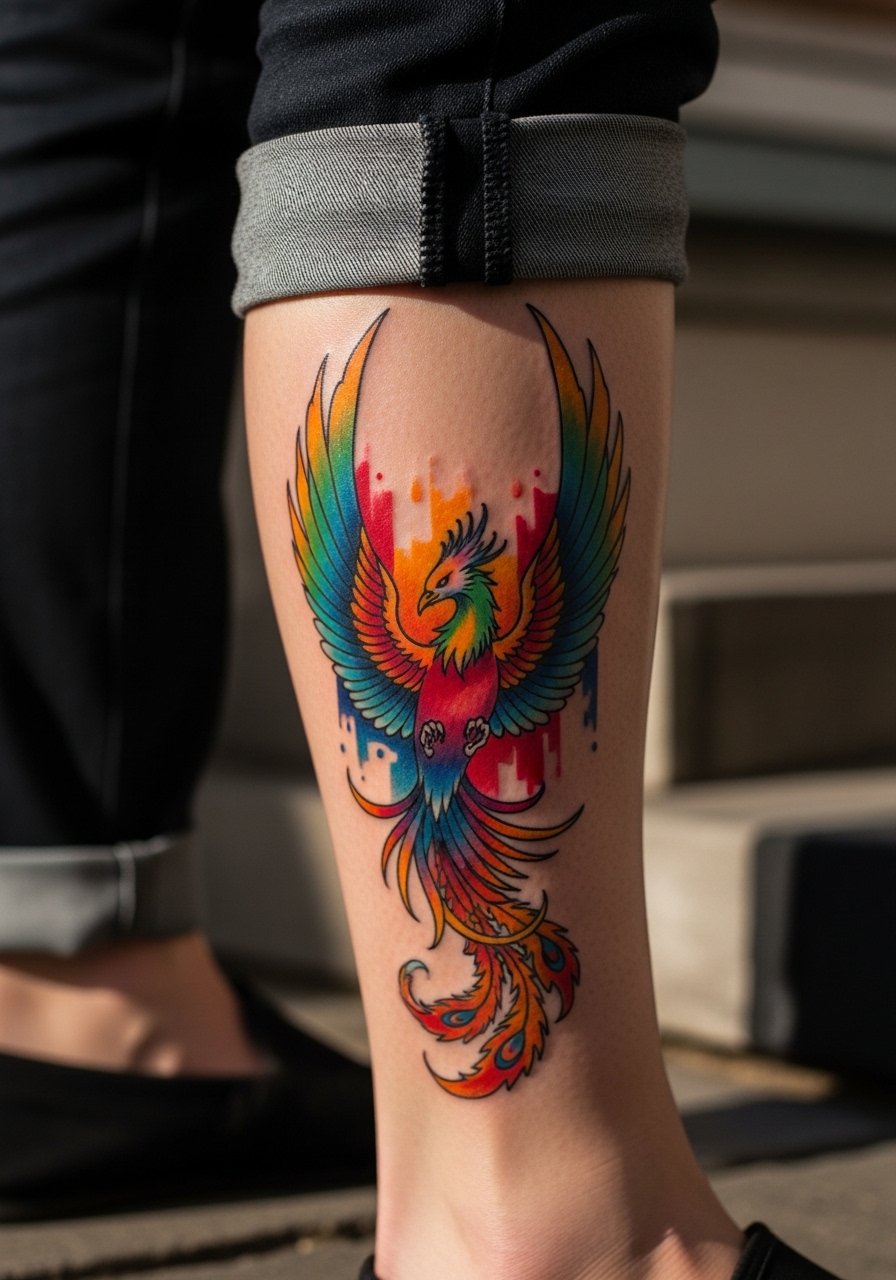
Calf tattoos take color well and are easy to protect during healing. The session soreness feels like a steady pressure rather than sharp stabs. Choose bold blocks of color rather than tiny gradients if you want durability. A common mistake is putting too much fine feather detail on the curved calf face, which can compress when sitting. For casual show-off outfits try pairing with cropped pants or a mid-calf boot that lets the art peek while avoiding constant abrasion.
14. Small Phoenix Behind the Collar of a Neckline

Back-of-neck tattoos are subtle and sit at an intersection of visibility and concealment. Pain is moderate and the area heals quickly. The big mistake is asking for ultra-fine detail that disappears under hair growth or daily friction from collars. Ask your artist for slightly bolder outer lines with light internal stippling to hold shape over time. For work settings you can hide or reveal this area by swapping collars, and a simple high-collar sweater keeps it private when needed.
15. Petite Phoenix on the Wrist
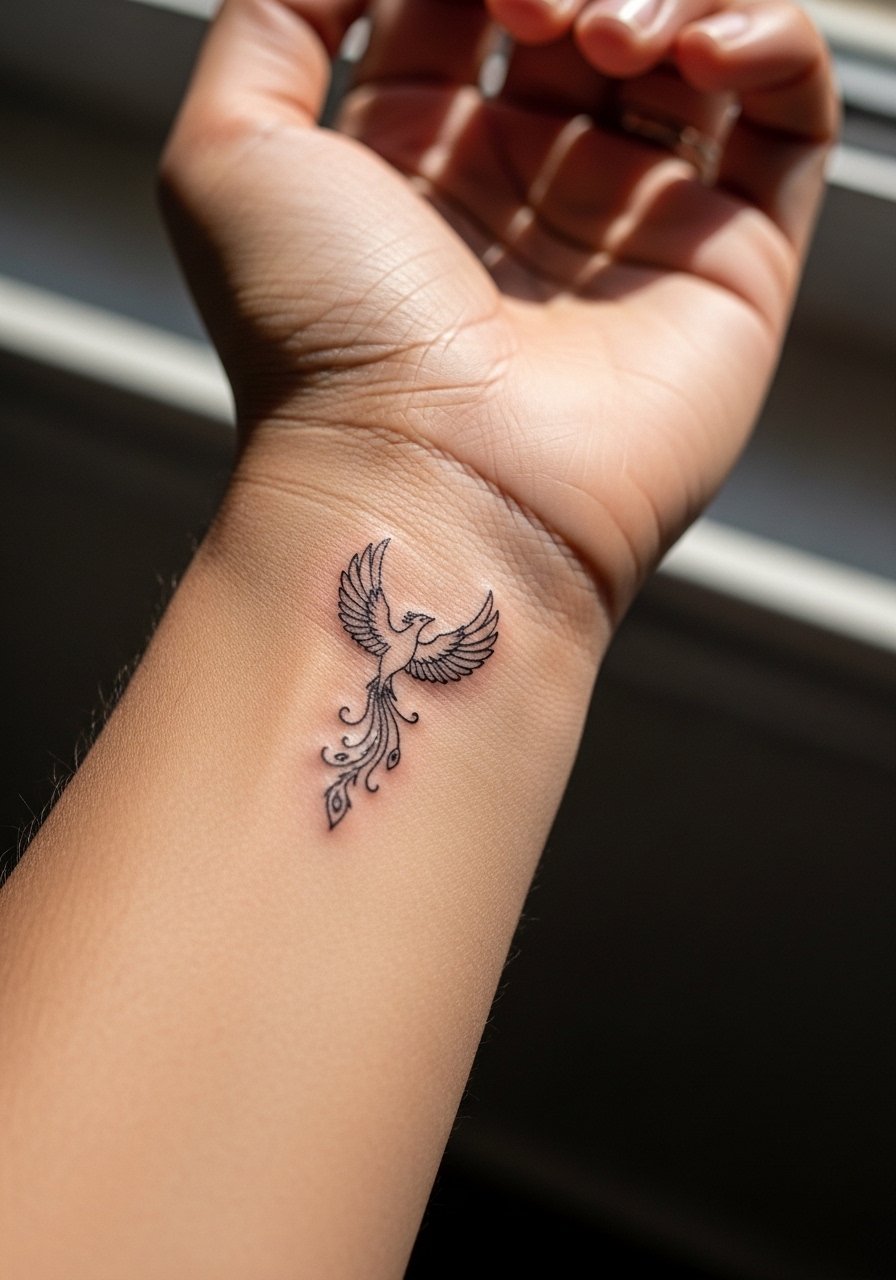
Wrist tattoos are visible and practical for small, feminine designs. Expect higher sensitivity during the session because of thin skin. Lines can blur faster here because of motion and frequent washing. Request slightly heavier primary contours and open internal spacing so the motif stays legible. The repeated mistake is packing cross-hatching into the wrist area which smudges. For showing it off, pair with a minimalist chain bracelet that highlights the placement without competing.
16. Back-Center Phoenix with Symmetry
Center-back pieces let you scale up while keeping balance. Sessions are moderate and may require a series of visits depending on size. Symmetry is the hardest part to get right because posture and stencil placement matter. A common error is not previewing the stencil while standing, which leads to a slightly off-center final. Tell your artist you want the stencil checked in multiple positions before needle touches skin. For events open-back dresses showcase the verticality well.
17. Finger-Wrap Phoenix Band
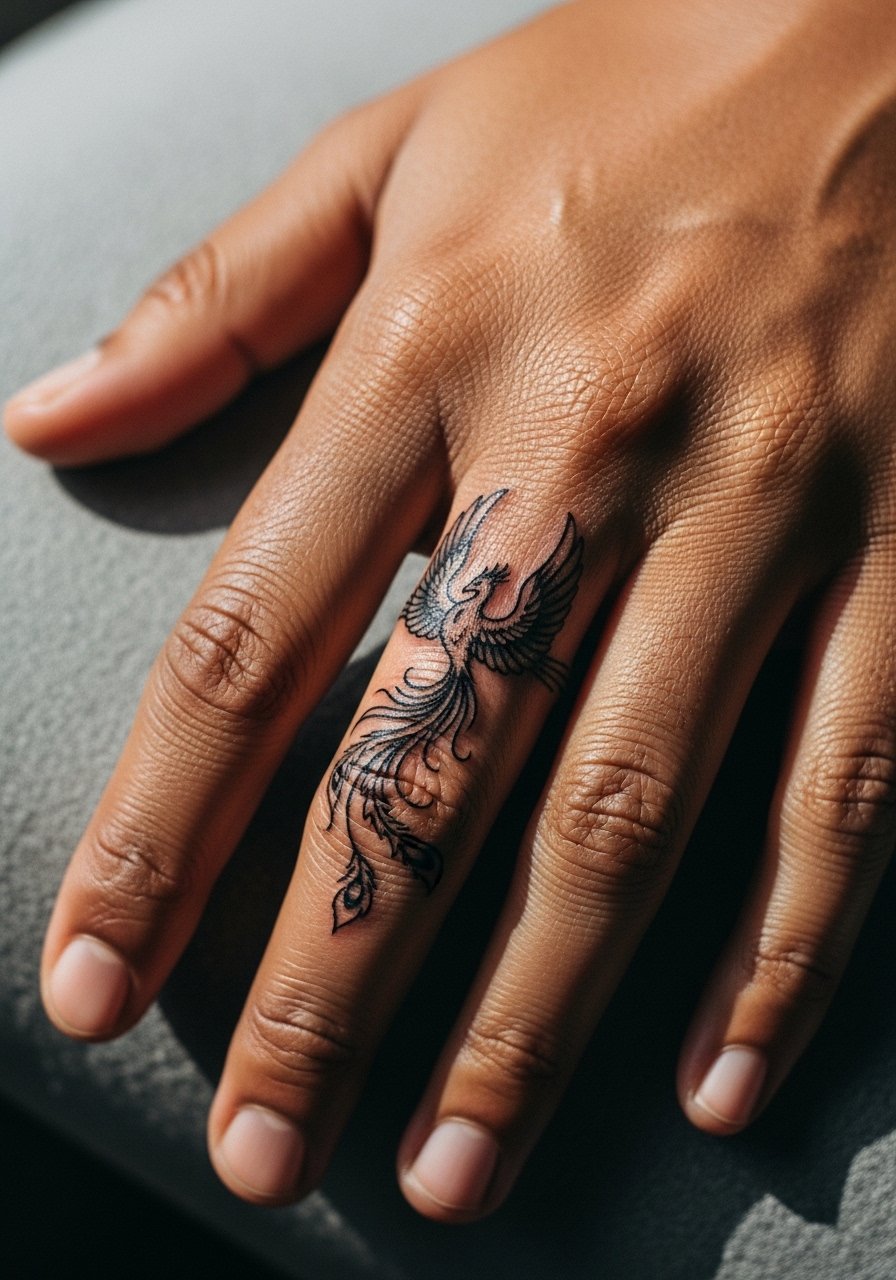
Finger-wrap pieces are charming but need frequent touch-ups because the skin there regenerates and endures constant friction. Expect a short, sharp session and plan for possible yearly or biennial touch-ups. The most common mistake is asking for continuous, tiny script and narrow lines around the whole band which break down quickly. A better approach is to keep the main phoenix motif simple and let the negative space do the work. Consider coordination with thin stacking rings rather than bulky styles so the tattoo stays visible and undisturbed.
Frequently Asked Questions
Q: Will a fine line phoenix on my ribcage need touch-ups sooner than an arm piece?
A: It depends on pain tolerance and skin movement. Ribs move with every breath and often need a touch-up sooner than forearm work. If your artist spaces lines slightly and uses stronger anchors the piece can last longer, but expect a realistic touch-up timeline around two to three years for delicate rib detail.
Q: Are watercolor phoenix tattoos harder to care for during healing than saturated traditional ones?
A: From what I've seen, watercolor fades unevenly because it relies on soft blends instead of solid blocks. That makes early protection from friction and sun more important. Keep the area shielded in the first two weeks and plan touch-ups where washes thin out.
Q: How should I choose placement if my job is conservative but I want a visible phoenix?
A: Think about easy-hide spots like the upper thigh, underbust, or back-center which are simple to cover when needed. Collarbone and wrist are visible and may not be suitable depending on your environment, so weigh visibility against workplace norms.
Q: Do tiny finger or wrist phoenixes often blow out faster than larger pieces?
A: Yes. High-motion spots and areas with thin skin are more prone to blowout and early softening. Ask for slightly bolder outer contours and leave interior detail airy to mitigate this. Expect possible touch-ups sooner than with larger, less mobile placements.
Q: Where should I look to find artists who respect cultural motifs if I want symbolic phoenix elements?
A: Start with tattoo directories, convention lineups, and hashtag searches that highlight artists' portfolios. Spending time in community forums and local shop visit lists helps you see how artists handle cultural elements and whether they adapt motifs respectfully.
