
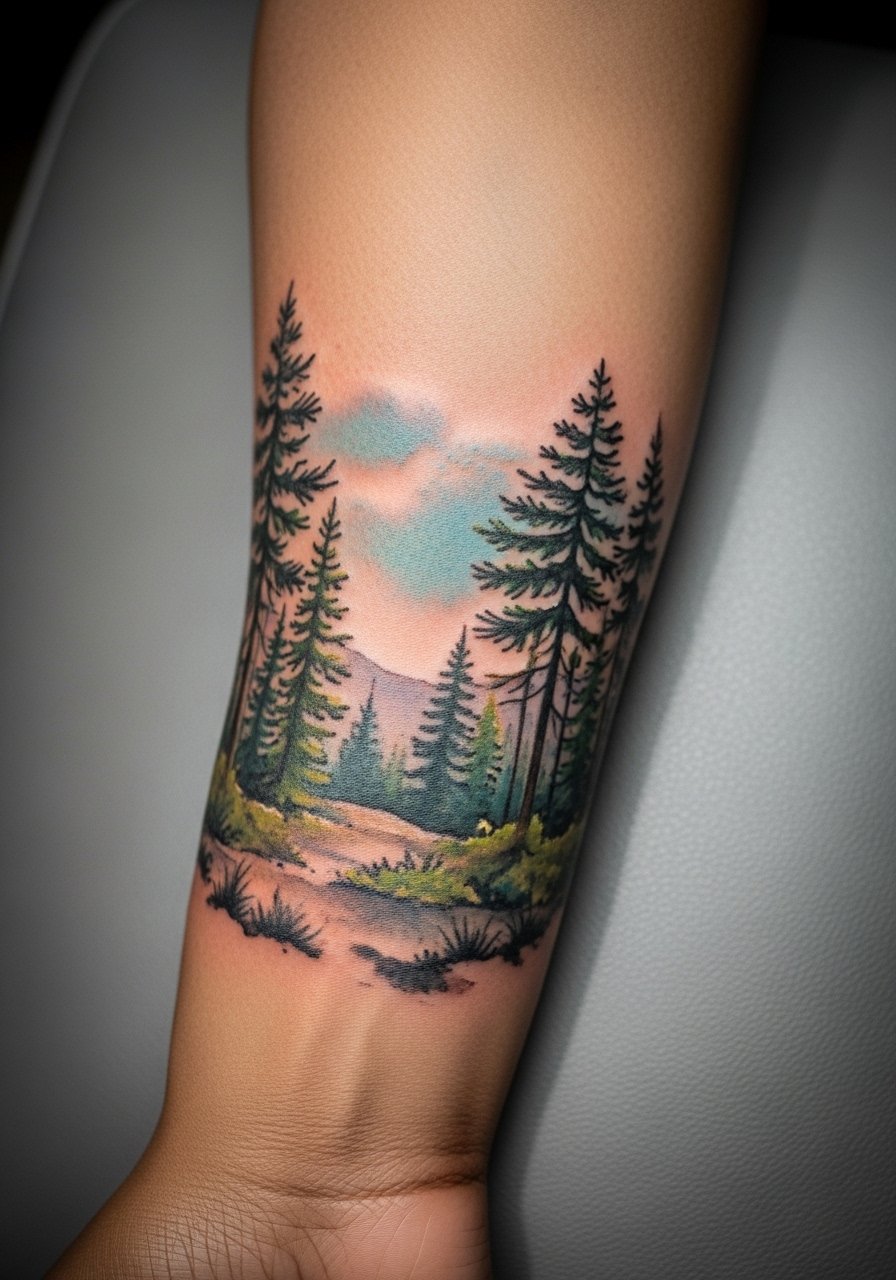
Fine line pine tree tattoos have been all over feeds for months, and the ones that still look crisp after a few years are often the ones planned with aging in mind. Watercolor techniques add softness, but they also change how a pine silhouette settles. If you want a design that keeps its character as color fades, think about placement, spacing, and how much linework you want to lock into the piece. The first idea shows a simple approach that holds up.
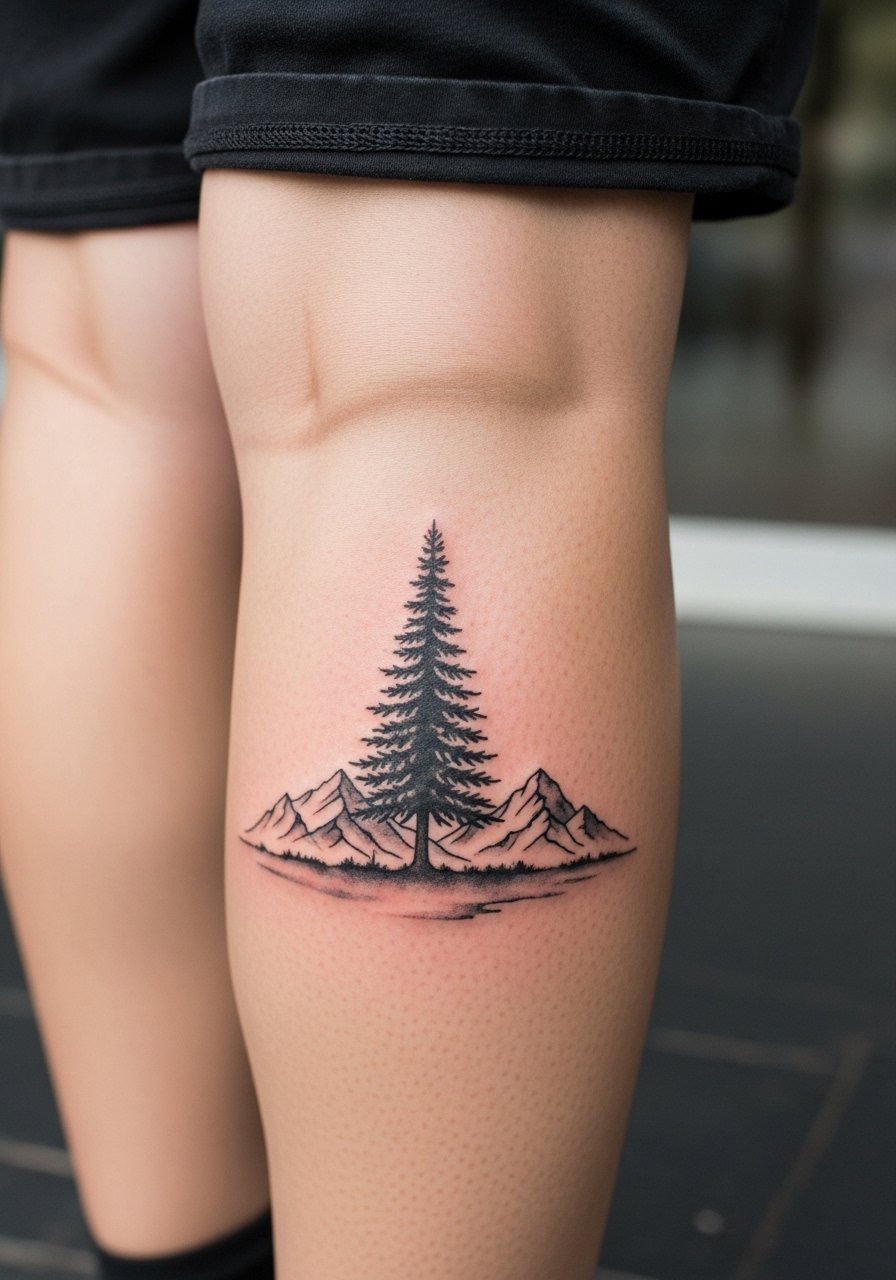
1. Single Sapling on the Inner Forearm
I've seen small pine saplings last best on the inner forearm when the linework is given breathing room. Ask your artist for slightly thicker primary stems and softer watercolor fills so the silhouette reads as it fades. Expect a mild pain level and a one- to two-hour session depending on saturation. Common mistakes include asking for too-dense color that ends up patchy as it heals. At six months the watercolor will look airy, at two years the greens soften, and at five years outlines may need a light touch-up. For showing it off, roll up sleeves and pair with a loose button-down shirt that keeps attention on the forearm while letting skin breathe.

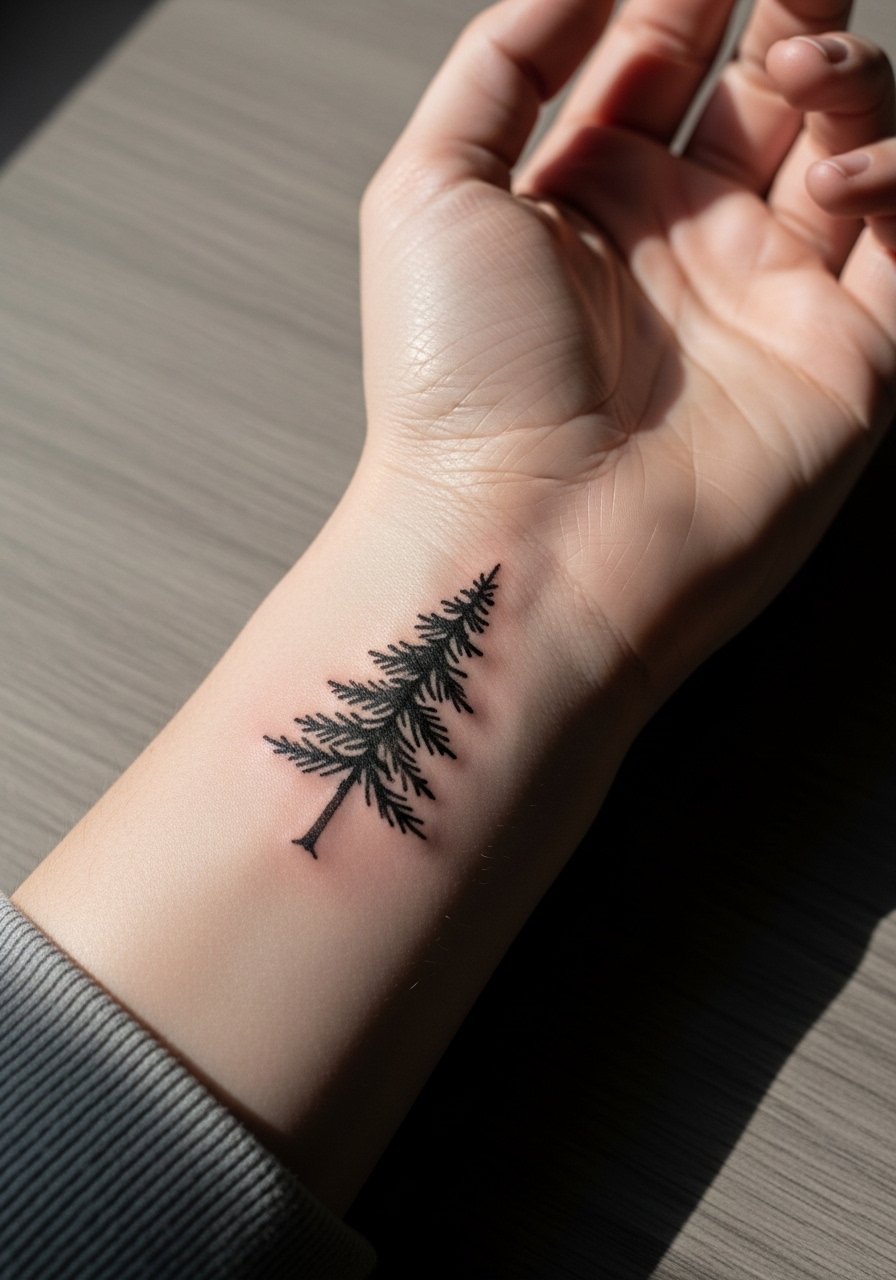
2. Tiny Wrist Accent with Soft Washes
Fair warning: the wrist is a high-friction spot and tiny watercolor washes can blur if placed too close to the hand. When I recommend this, I tell clients to keep the wash minimal and to anchor the design with a single fine line trunk. Session time is usually under an hour but expect sensitivity. The common aging issue is pigment migration from hand use and frequent washing, which leads to soft color halos. A thin protective placement slightly higher on the wrist mitigates blowout risk. For the appointment wear a racerback tank so you can move freely and not rub the area afterward.

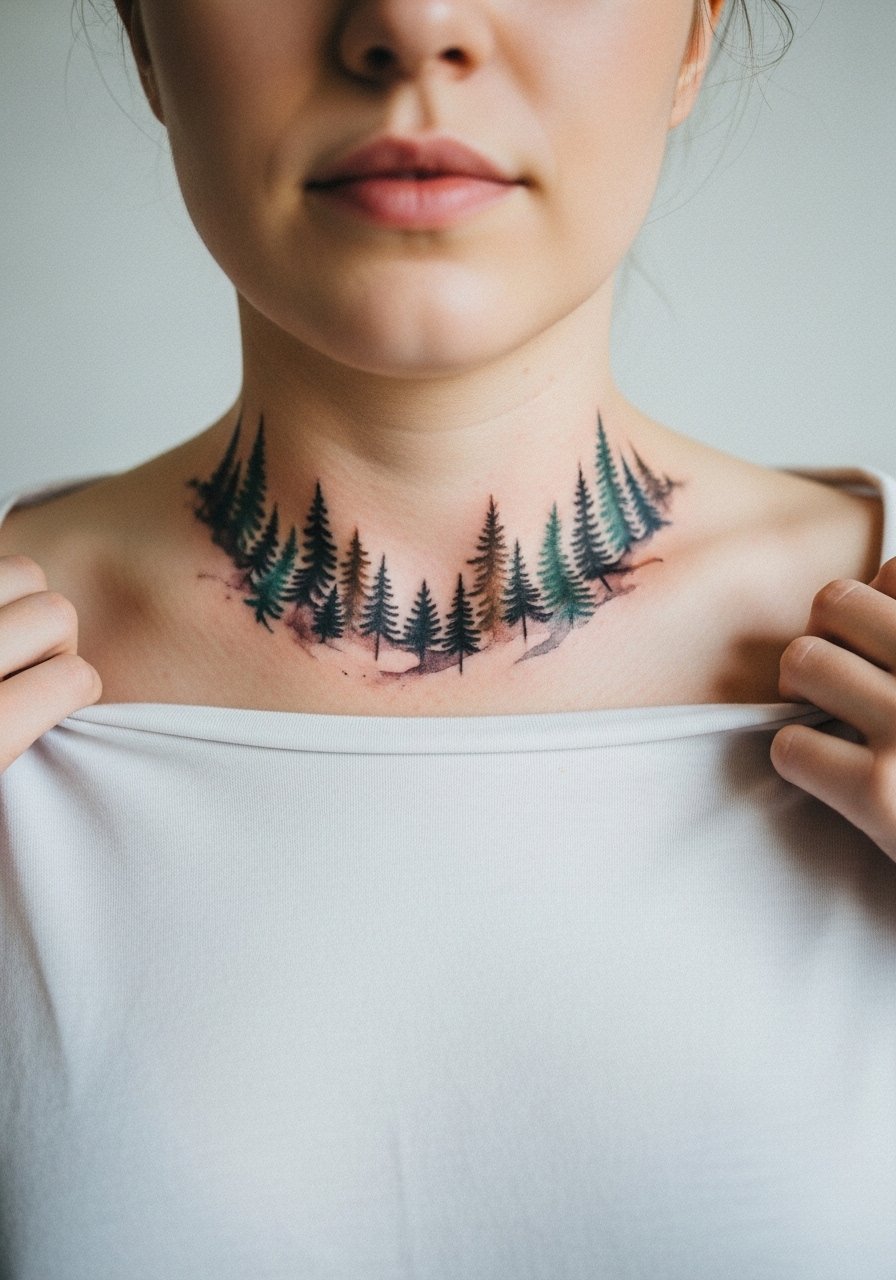
3. Pine Cluster Along the Collarbone
There's something about a horizontal cluster of small pines along the collarbone that balances delicacy with visibility. Bring reference photos showing spacing, and tell your artist to keep the watercolor lifts away from dense linework so the collarbone bones do not distort the wash. Expect a few hours for layout and color gradients. The skin here shifts with posture, so the debate is real: some artists avoid heavy watercolor near bones, while others say proper spacing keeps the washes intact. Ask which approach your artist prefers before booking. Pair the piece with an open-back midi dress for evenings when you want the collarbone to stand out.
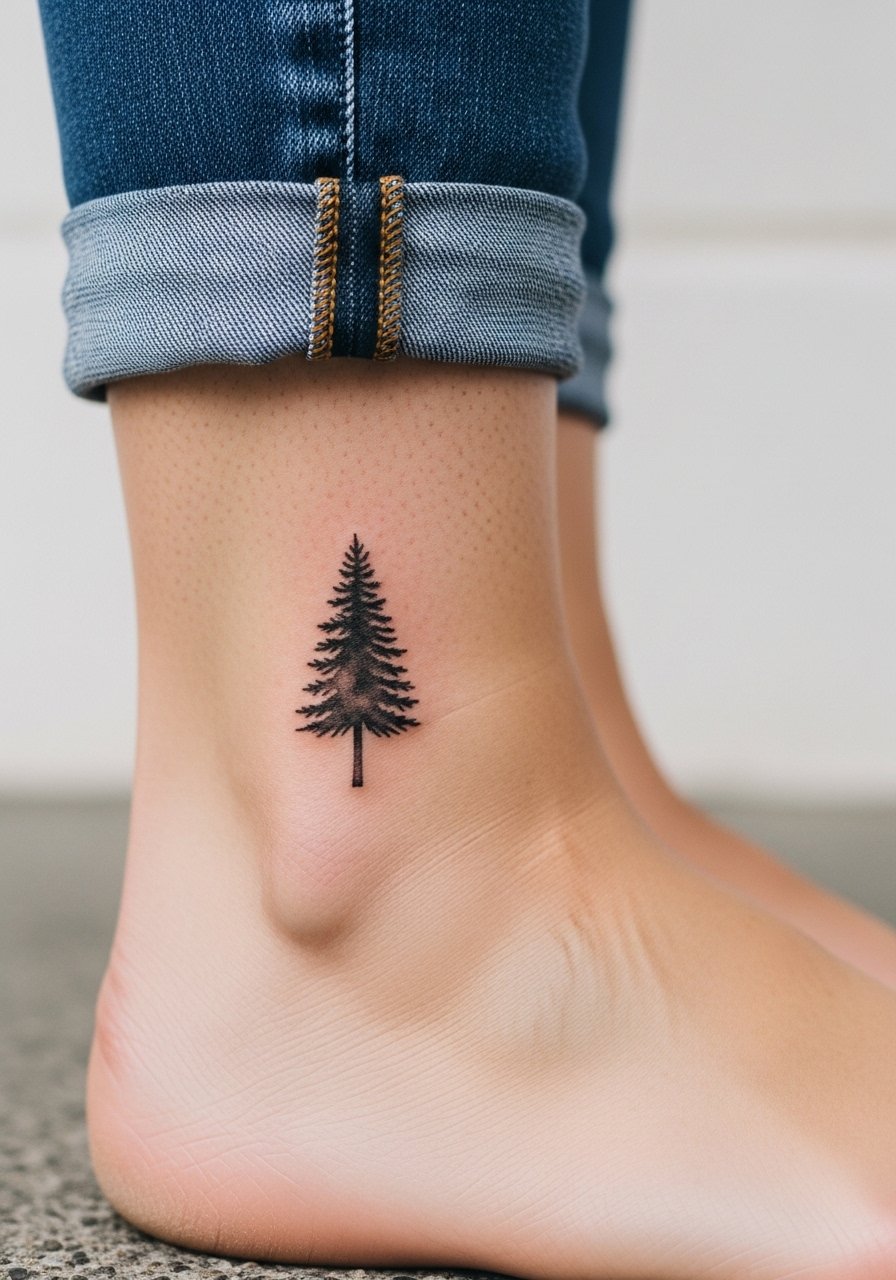
4. Tiny Pine Line on the Ankle
Most ankle tattoos feel like a two out of ten on pain scales, but the thin skin and constant shoe contact are the factors to weigh. For watercolor pines here, keep the color low and the primary silhouette in crisp linework to avoid early blurring. The session is quick, usually under an hour. The biggest mistake is asking for saturated washes that meet shoe friction and fade into a muddy patch. For showing it off, roll up your jeans or wear ankle sandals so the tattoo peeks out without rubbing against fabric.
5. Single Pine on the Side Ribcage
Fair warning: ribs are a high-pain area, but watercolor makes for a soft, sculptural piece if you want something intimate. The skin stretch and movement cause some artists to split into two camps. One camp says watercolor and fine line on ribs blur fast because the skin moves and stretches. The other camp argues that with correct needle depth and spacing the piece can settle beautifully. I advise having that conversation ahead of booking. Sessions can be longer and you should plan for one touch-up at year two. For the appointment, wear a cropped athletic top you can lift slightly so the artist has clean access.

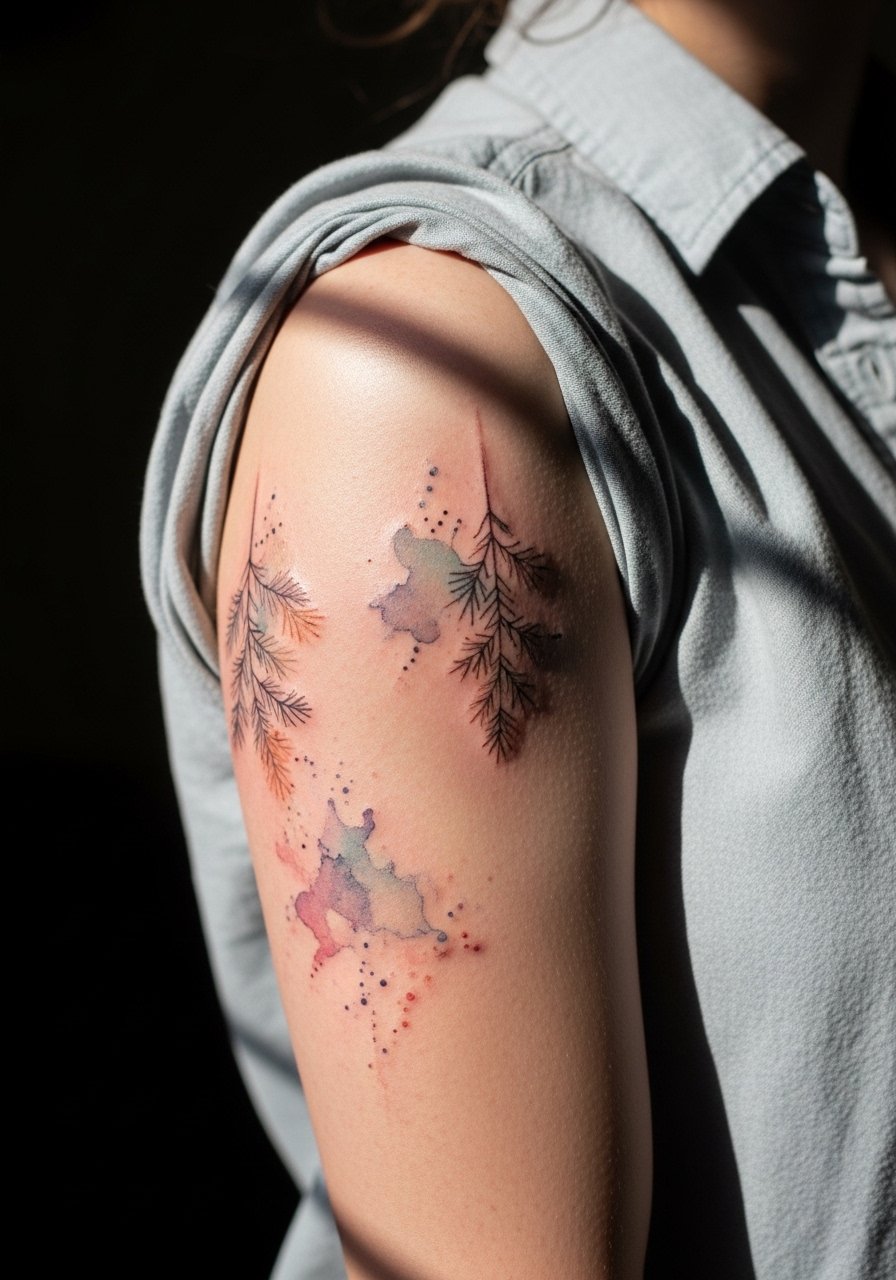
6. Watercolor Pine Sleeve Accent on the Upper Arm
When you want a sleeve that reads organic, small pines woven into watercolor washes give motion without heavy saturation. I've watched sleeves age better when artists alternate saturated trunks with airy washes that sit outside the linework. Session time varies by coverage but plan multiple appointments. The mistake is packing washes too close to dense linework, which creates muddy edges later on. For this placement, roll sleeves and wear a loose button-down shirt you can pull aside so the artist has easy access during longer sittings.
Studio Day Picks
Those forearm and ribcage ideas above require different prep, and a few practical items smooth the session and the first week after ink.
-
Stencil transfer paper kit. Lets you preview placement on skin and tweak spacing before the needle starts, which matters for linear pine silhouettes.
-
Topical numbing cream. Use 30 to 45 minutes before a rib or sternum session to reduce sensitivity without affecting the artist's ability to work.
-
Thin protective film roll. Ideal for wrist and finger pieces that face constant washing and rubbing during the first week.
-
Fragrance-free body wash. Keeps healing watercolor washes clean on areas like the collarbone and forearm without irritating fresh skin.
-
Aquaphor healing ointment. A thin layer helps lock in moisture early on for delicate linework without suffocating the tattoo.
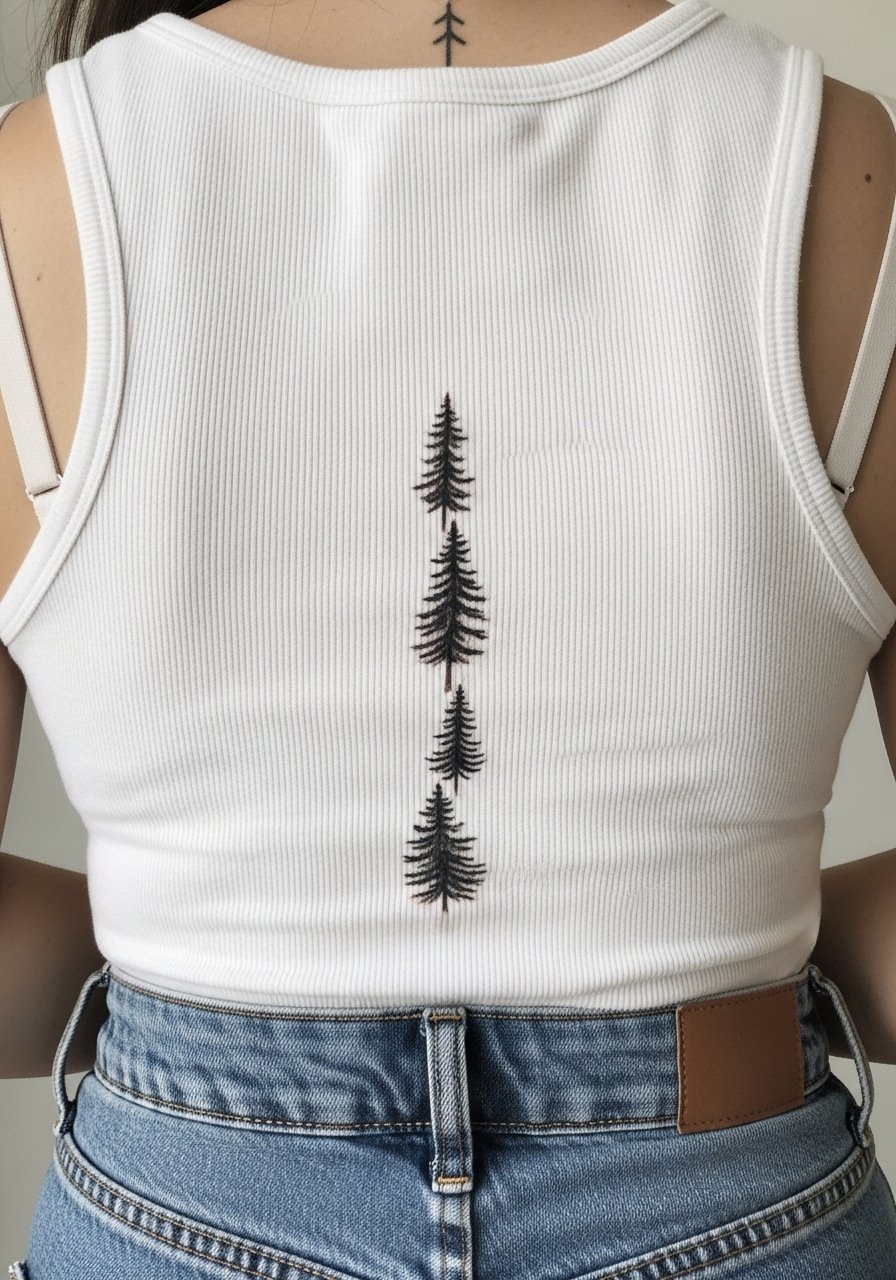
7. Mini Pine Row Along the Spine
Personal observation: spine placements read elongated and cinematic with vertical pine rows, but the skin movement there affects how watercolors pool. Tell your artist you want vertical spacing to avoid dense washes collapsing into the center line. Sessions are often split across two visits when the area is large. The downside is clothing friction from shirts, so consider higher placement if you wear backpacks often. For showing it off, open-back tops work well though choose a loose drawstring linen pant if you're pairing with lower silhouettes.
8. Pine and Mountain Micro-Scene on the Calf
Visual impact lead: a tiny pine against a watercolor mountain wash on the calf reads like a wearable postcard from across the room. The calf is forgiving for saturation and touch-ups. Expect a moderate session time and a slightly higher pain level than the outer arm. If you want longevity, anchor the scene with a crisp trunk and keep washes outside the silhouette. The common mistake is over-detailing the distant mountain, which becomes indistinct as it heals. Pair with rolled-up trousers or a cropped tee and high-waisted shorts to let the calf show.
9. Tiny Pine Between the Shoulder Blades
Mistake lead: people often ask for high-saturation watercolor between the shoulder blades and then regret it because shirts and backpacks rub the area. Keep color soft and linework steady. Sessions require you to lie face down for a while and the area can sting on deeper passes. The debate among artists is similar to ribs. One view says the shoulder blade sees enough movement to blur washes. The other says with proper spacing and healed aftercare the piece lasts well. If you commute with a bag, plan for touch-ups at year two.

10. Minimalist Pine on the Side Wrist
Pain warning lead: the side of the wrist is more sensitive than the outer wrist but gives a slender canvas for a pine silhouette. Keep pigment light and use a crisp trunk line so the shape stays legible as the color fades. Sessions are short. A frequent error is insisting on dense washes that migrate into hand lines. For showing it off, stack it with a thin chain pendant necklace worn higher on the neck so both pieces read together without crowding the wrist.
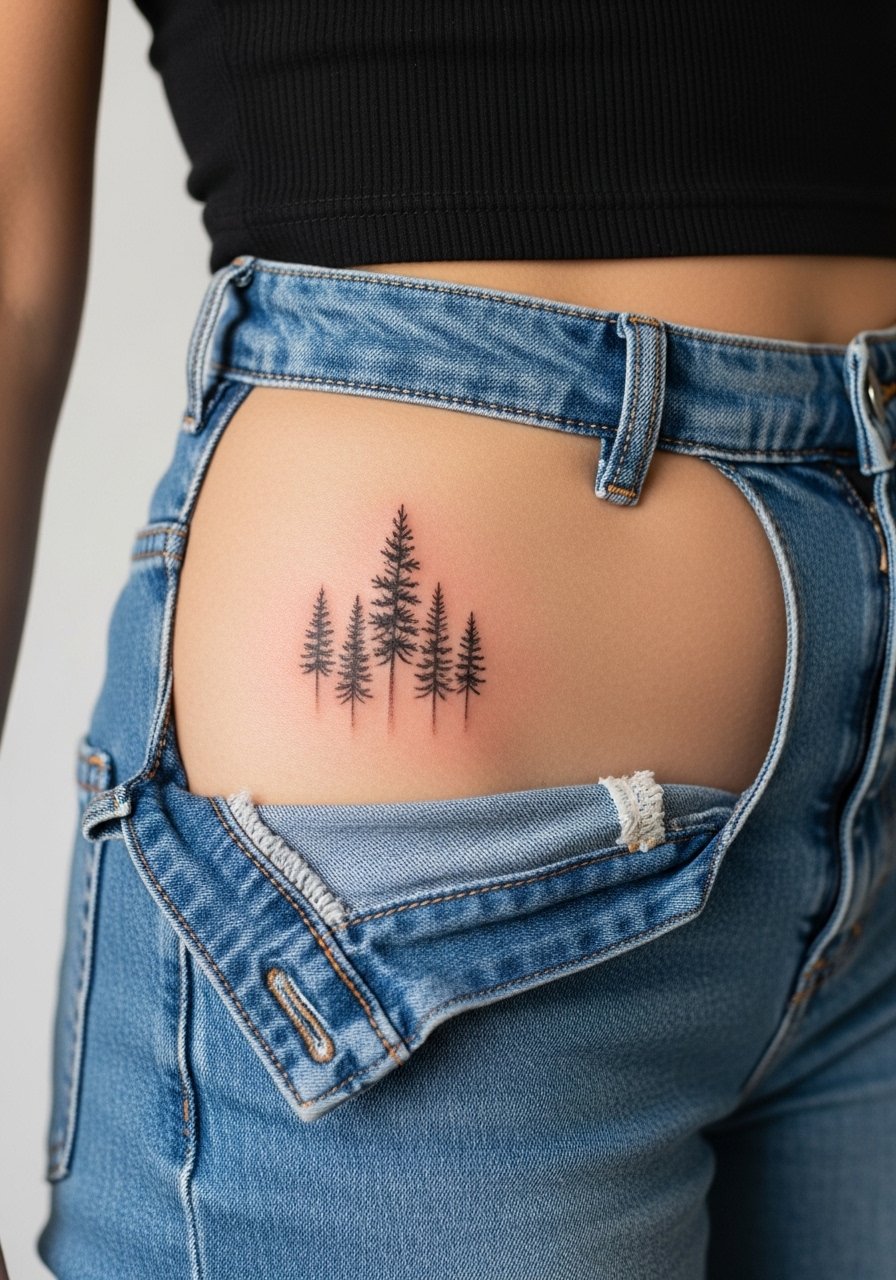
11. Tiny Forest on the Upper Thigh
Consultation lead: when booking an inner thigh or upper thigh pine cluster, ask how the artist spaces trees to account for movement and friction from clothing. The inner thigh needs a gentle touch because the skin is softer and more prone to pigment migration. Sessions can be private and longer. The benefit is privacy and reduced sun exposure, which helps color last. For the session wear high-waisted shorts that you can shift, such as high-waisted denim, so the artist can access the area cleanly while you stay comfortable.
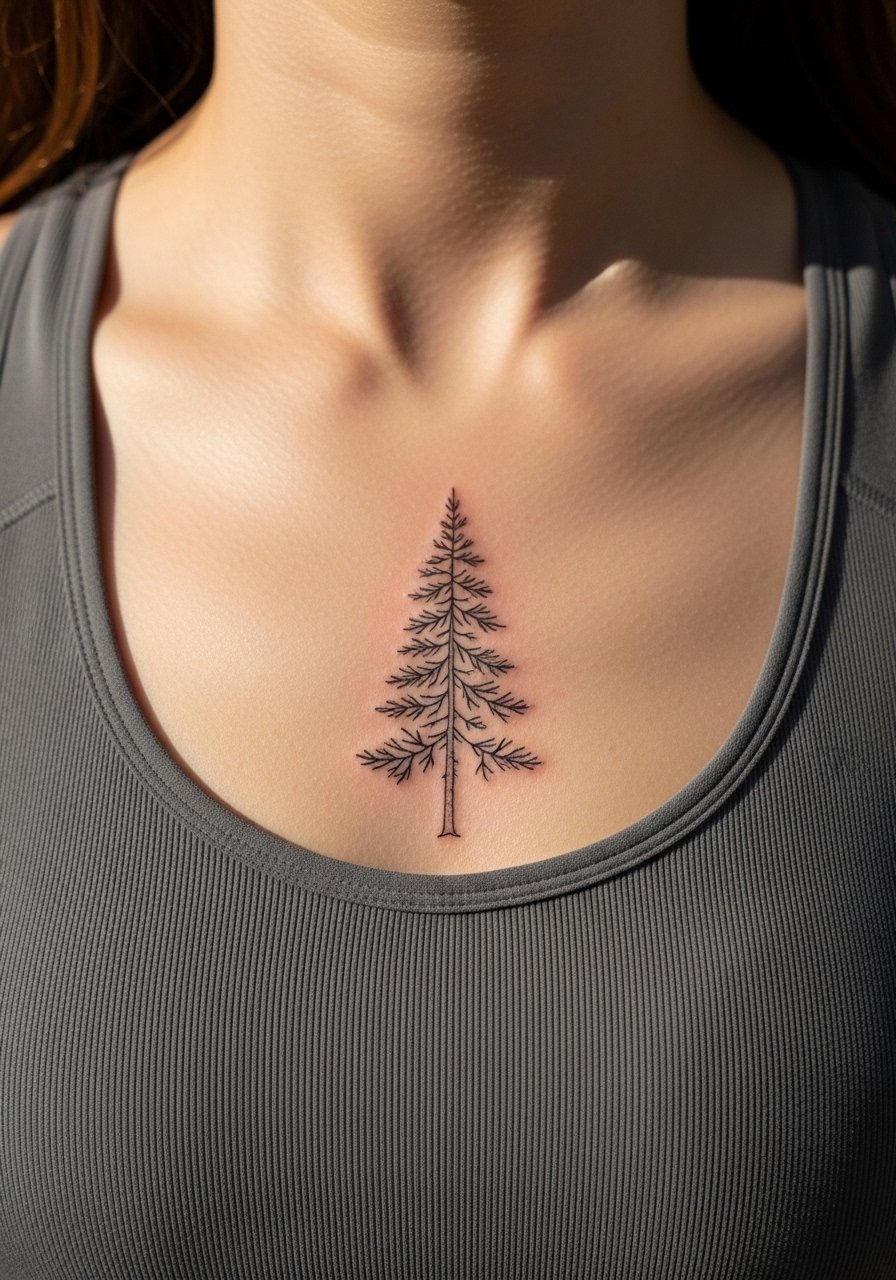
12. Pine Silhouette on the Sternum
Aging lead: sternum watercolor pieces look soft when fresh but the sternum sits near clothing lines and can rub during healing. Keep washes narrow and ask for a fitted outline to hold the silhouette. Sessions here are moderately painful and require trust in the artist's hand placement. Sensitive placement note: sternum work needs an artist experienced with chest pieces because of the skin and breathing movement. Plan for one touch-up within the first year if you wear tight tops often.
13. Watercolor Pine Wristband Around the Lower Forearm
Visual impact lead: a thin watercolor band of pines wrapping the lower forearm reads like a cuff when paired with bracelets. The skin there is reasonably stable and a light wrap is forgiving. Avoid packing color against tight lines because wrist motion causes smudge. During consultation, request staggered tree heights so the design breathes. For showing it off, layer with stacked dainty bracelets that complement the band without covering it.
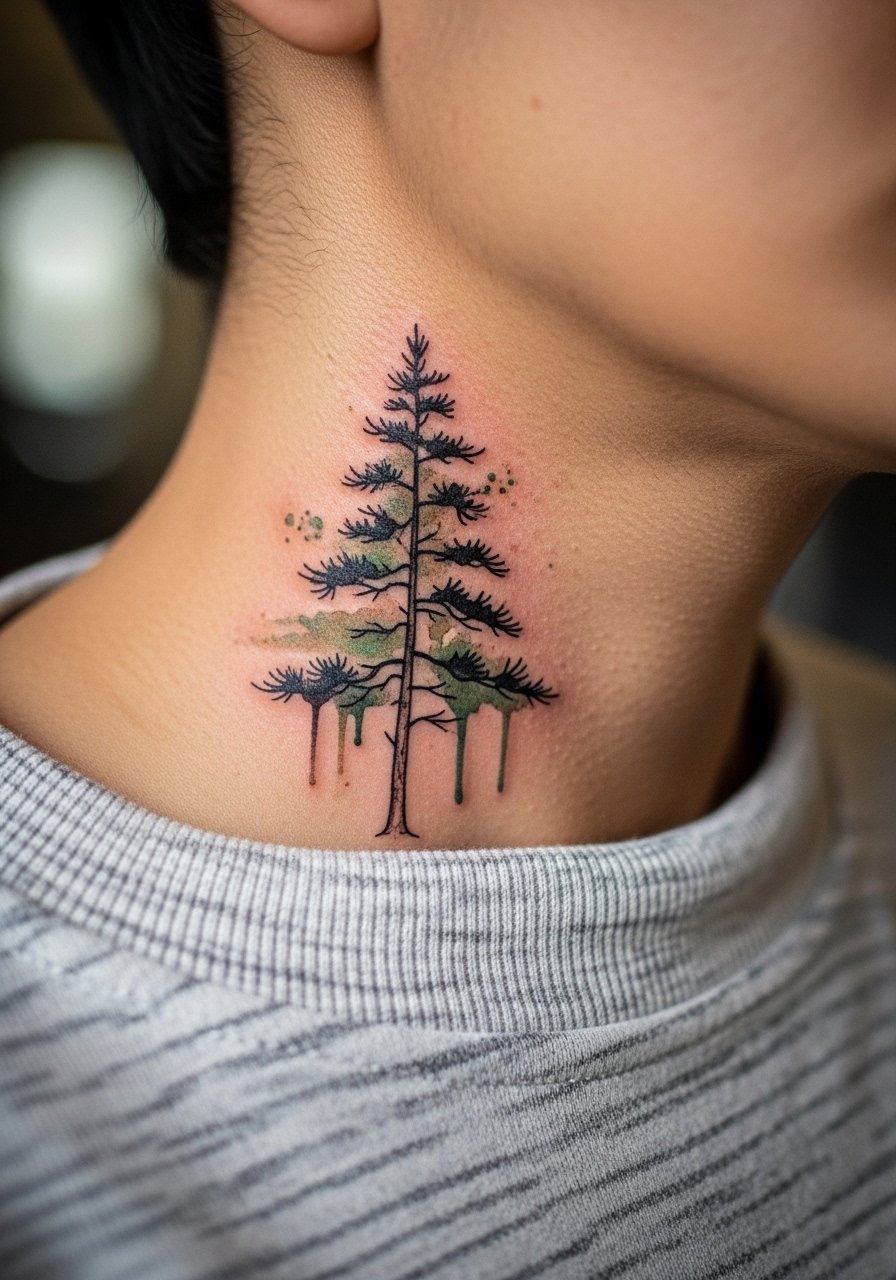
14. Tiny Pine on the Side of the Neck
Personal observation: side neck placements make a bold choice because they are visible and age differently with sun exposure. Keep the watercolor minimal and the trunk crisp to keep the silhouette readable. Sessions are short but the area is sensitive. For concealment at work consider placement slightly lower under a wide-neck shirt. Include a line for professional considerations if you might need to hide visible ink in certain settings.
15. Tiny Pine Behind the Ear, Neck Tie-In
Consultation lead: behind-the-ear placements require careful framing below the hairline on the neck. Tell your artist you want a small wash that reads only when hair is tucked. Sessions are quick but the area is delicate. Placement-safety note: describe it as on the skin behind the ear below the hairline on the neck so the artist frames it correctly. For showing off when you style your hair, choose updos that reveal the area briefly.

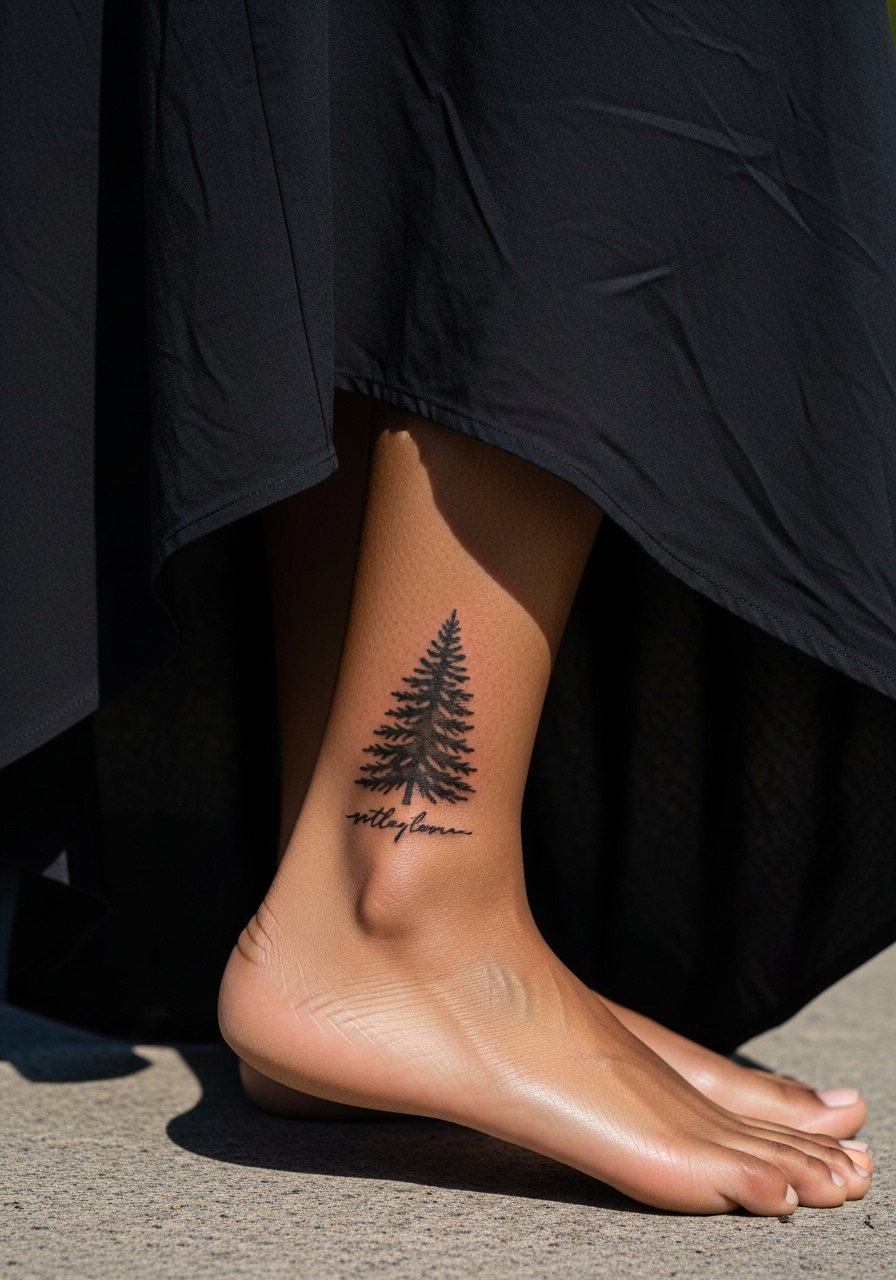
16. Pine and Script Ankle Wrap
Styling lead: pairing a thin script with a small pine around the ankle looks intentional when you choose complementary fonts and spacing. Tell your artist the exact word or date you want in the design text, because image generators and stencils need the exact letters. The ankle takes beating from shoes, so keep watercolor subtle and plan for a touch-up by year two. For outfits, a long skirt lifted slightly or sandals showcases the wrap without rubbing it.
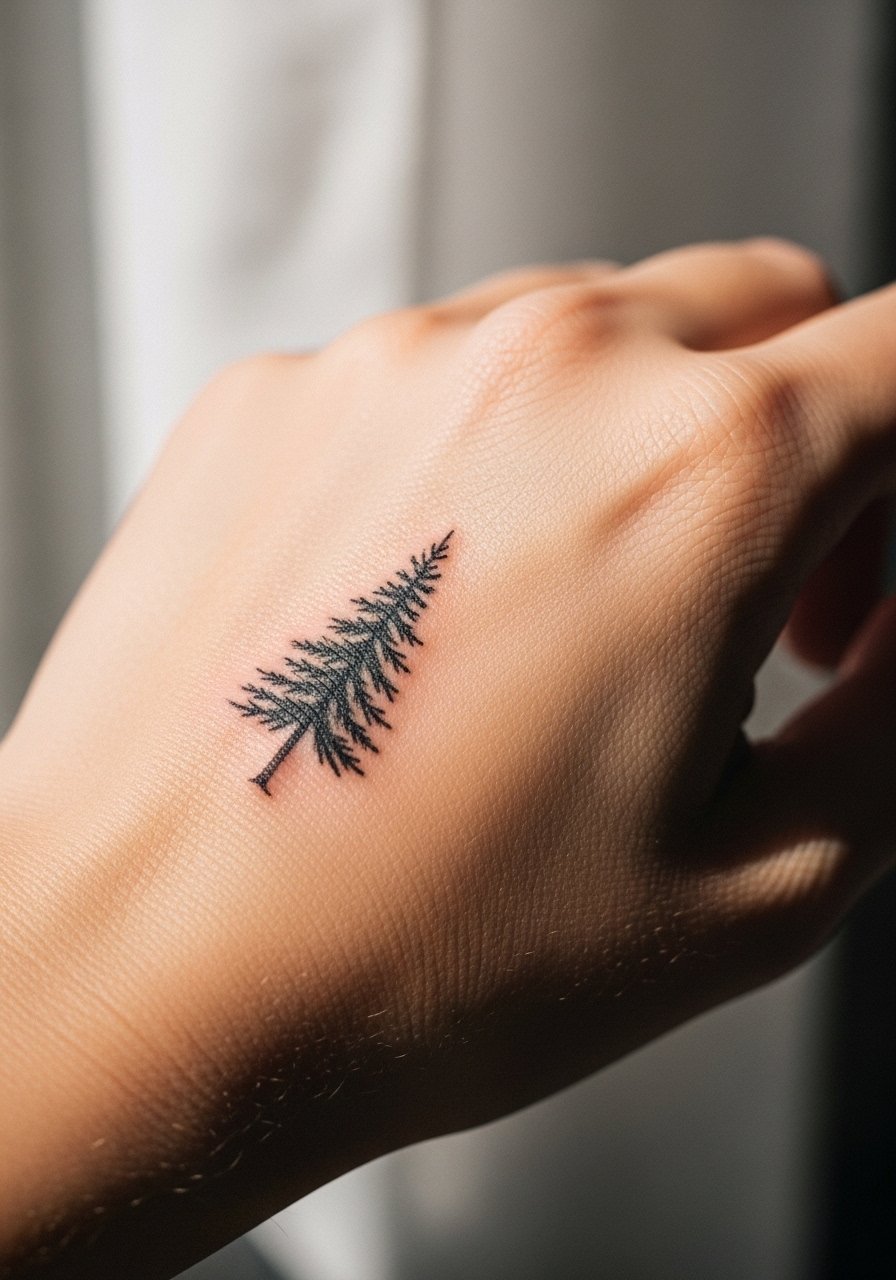
17. Pocket Pine on the Back of the Hand
Mistake lead: back-of-hand tattoos still carry professional visibility consequences for some fields, and watercolor adds another variable because hands receive constant washing and abrasion. If you want this, keep the pine compact and rely on strong linework for the trunk. Sessions are quick but healing is tricky and blowout risk is higher. Expect touch-ups sooner than on less exposed skin. If you wear rings, leave them off during the appointment and consider a thin stacking ring afterwards that does not press on the area.
Frequently Asked Questions
Q: Will watercolor pine tree tattoos fade faster than those with solid outlines?
A: Watercolor fills generally soften faster than saturated black outlines because pigment sits more loosely in the skin. A crisp trunk or subtle outline helps preserve the silhouette as the washes fade. Placement and sun exposure matter most, so plan touch-ups in spots that see heavy friction or sunlight.
Q: How much does placement affect the need for touch-ups on watercolor pines?
A: It depends on the spot. High-friction areas like hands and wrists usually need a touch-up sooner. Areas with less movement and sun exposure, like the upper arm or back of the calf, can hold color longer. Discuss realistic timelines with your artist for the exact placement you choose.
Q: Are there styling rules for showing off a collarbone or sternum pine tattoo?
A: For collarbone pieces choose wide-neck tops that reveal only the tattooed area. For sternum work pick fitted sports bras or bandeau tops for evenings and loose zip-ups for the session. A good option for collarbone reveal is an open-front blouse that frames the tattoo without overexposing it.
Q: Should I expect different pain for watercolor versus traditional pine tattoos?
A: The technique does not change pain significantly. Pain varies by placement and how many passes the artist needs for saturation. Watercolor often uses fewer dense passes than heavy blackwork, but if the artist layers washes you may feel repeated passes in sensitive spots.
Q: How do I find an artist who understands watercolor pine techniques without naming anyone?
A: Use discovery pathways like local shop directories, community forums, and convention guest lists to find artists who post healed photos. Look for healed images that show linework holding under washed color. Ask to see healed portfolios and talk through spacing, needle depth, and realistic touch-up expectations before booking.
