
The bold black strokes and red accents of trash polka tattoo art read like a visual argument. Trends push people toward tiny versions of this style, and that often leads to soft lines and lost detail after a couple of years. Bigger scale and deliberate spacing solve that, and the ideas below move from compact forearm pieces to full-canvas back work so you can pick a design that will still read clean when it heals.
1. Realistic Wolf Portrait with Brush Splatters on Upper Arm
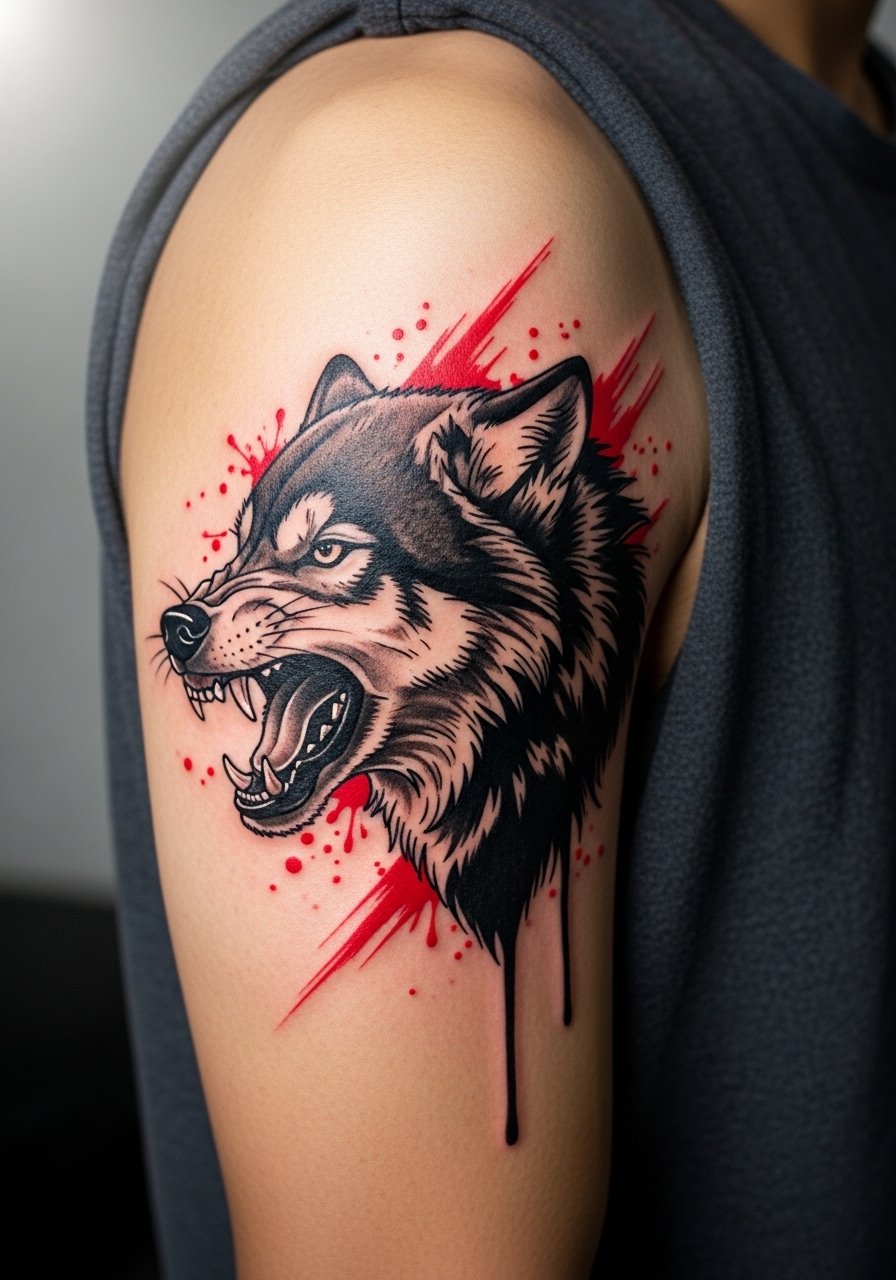
I recommend this when you want an animal portrait that still reads from a distance. Tell your artist to prioritize bold linework for the jaw and eyes, then layer splatter elements over and around it. Common mistakes include packing too much tiny fur detail into a 6-inch piece, which blurs into texture over time. Expect a 2-4 session build and a touch-up within two to four years if you want the reds refreshed. For showing it off, wear a black tank top fitted so the shoulder and upper arm stay visible without distractions.
2. Portrait Collage with Geometric Overlays for the Forearm

I've seen clients choose collage layout because it lets them pack a personal narrative into a smaller band. In consultation, bring the photos or dates you want included and say you want hard separations between portrait realism and geometric blocks. Too many small faces in a short forearm piece is a frequent error that turns into a muddled patch after a year. This placement is moderate pain. Plan for 3 sessions and expect the red highlights to need a refresh by year three. Roll sleeves and try a charcoal rolled sleeve shirt for show-off moments.
3. Bird in Flight with Brushstrokes on the Shoulder Blade
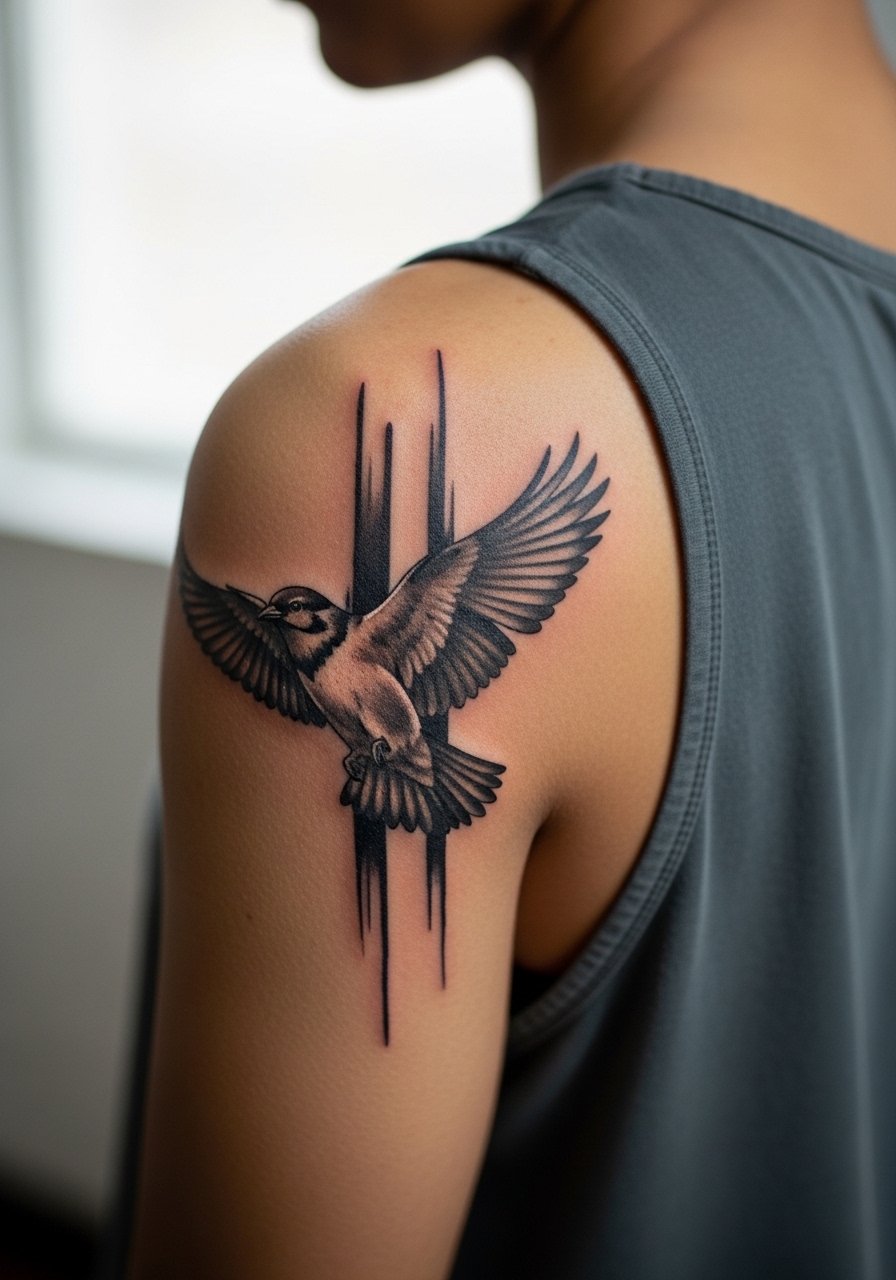
Fair warning: the shoulder blade accepts saturation well but moves with skin and muscle. Ask your artist to anchor the bird's eye and beak in denser linework while letting brushstrokes fragment outward. A common mistake is compressing the wing tips, which lose their shape when the arm swings. Sessions are two to three hours typically. Session wear that helps is a sleeveless leather vest men or loose tank so the artist can reach the area without fuss.
4. Scripted Quote Torn by Splatters Along the Ribcage
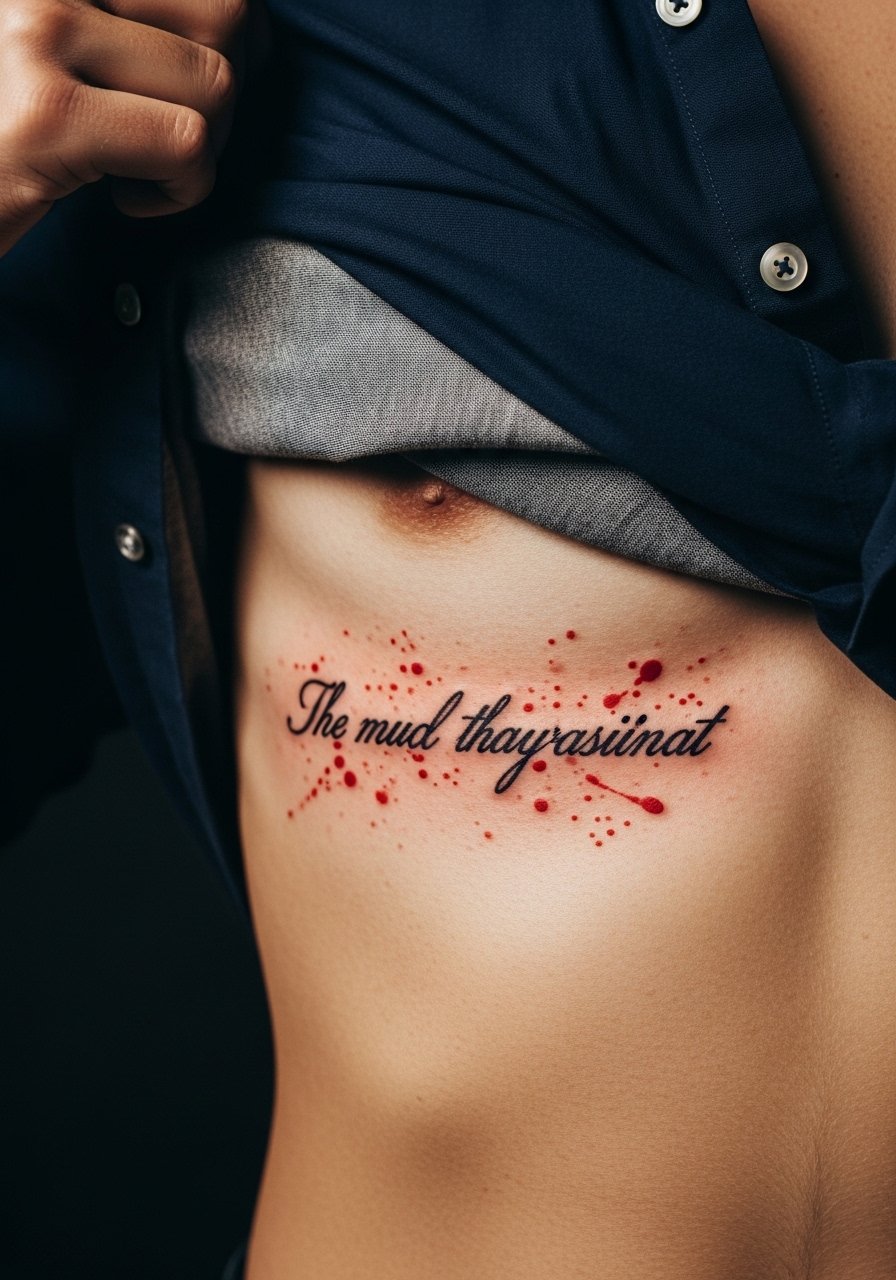
Ribcage tattoos are painful and intimate. Expect a higher pain rating for this placement and plan for one long session or two shorter ones. Tell your artist you want slightly wider letter spacing than usual so the script survives the stretching and compression that happens with breathing. A common aging problem is letters that sit too close and merge in three to five years. For the appointment, wear a loose button up shirt you can pull aside without disrobing. Note that artists split on whether very fine line on ribs holds up; one camp says the skin shifts and blurs lines, the other camp says the right depth and spacing make it last. Ask where your artist stands.
5. Surreal Skull with Cultural Runes Extending into a Sleeve
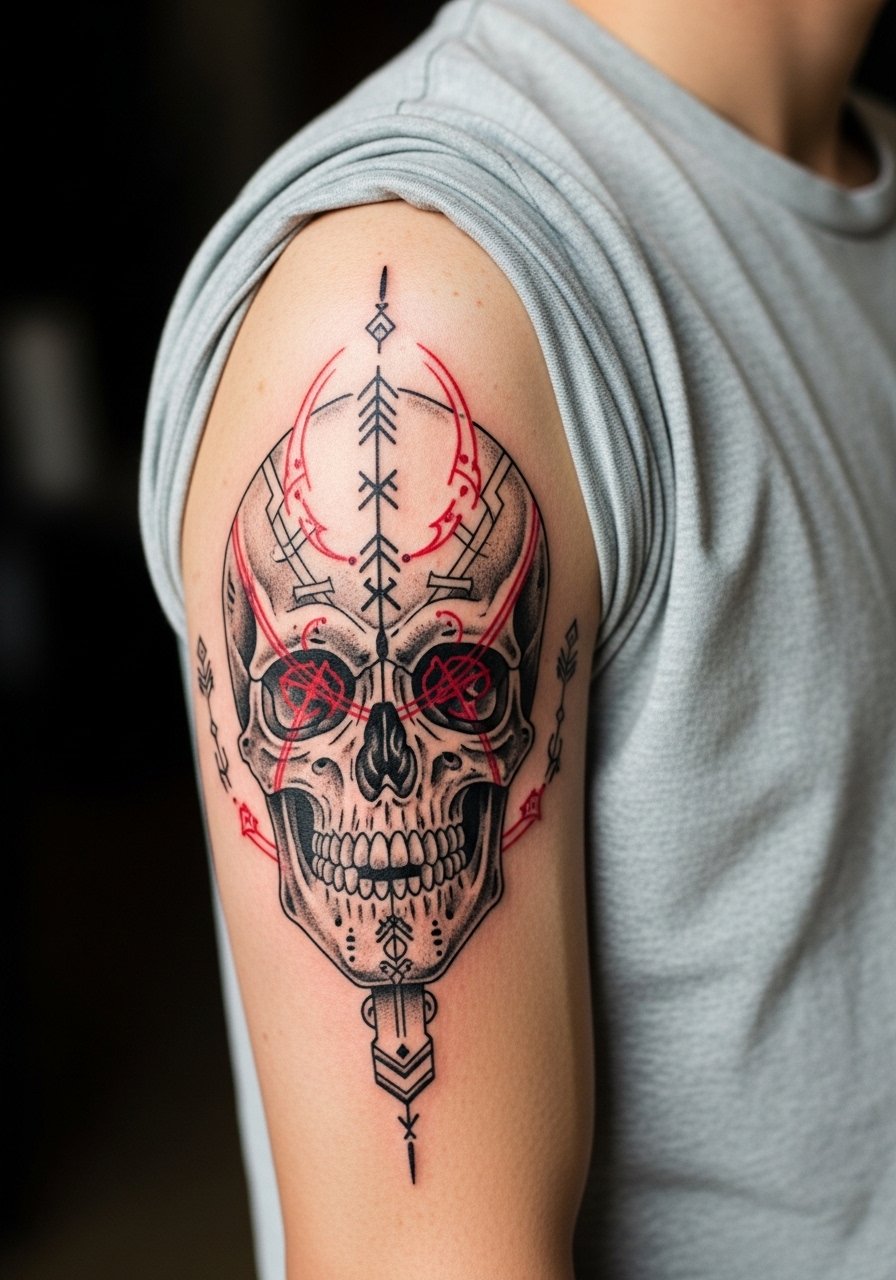
This reads like theater on skin, best suited to someone building a sleeve. The mistake I see most is squeezing detailed runes into a small area without leaving negative space, which causes visual overload as it heals. For a sleeve, stagger sessions over several months so saturation settles between passes. Expect a touch-up at year two for reds. If you want the piece to flow to the chest or back, describe the extension plan in your consultation so elements align across sessions.
6. Mandala Disrupted by Splatter on the Collarbone
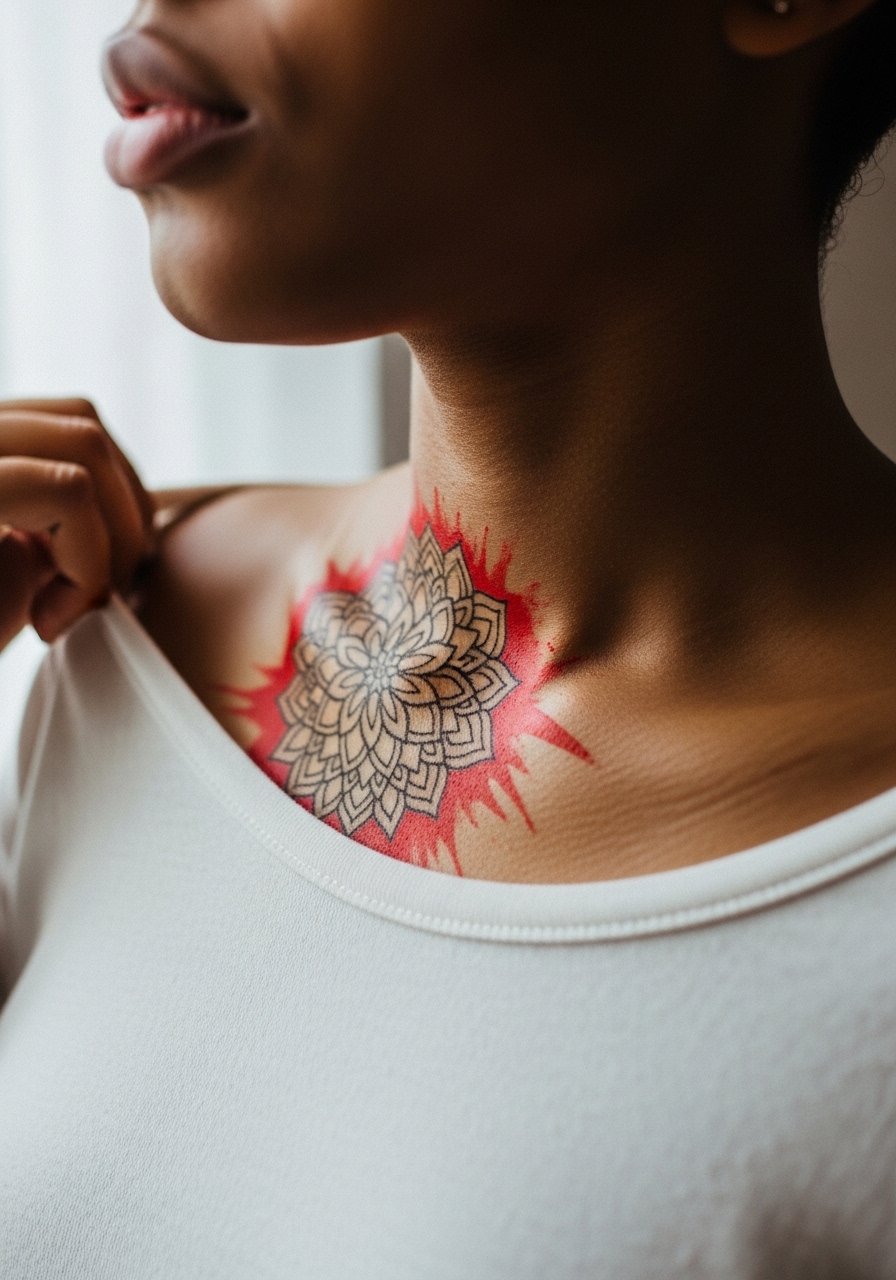
Mandala geometry needs breathing room to age well. The main error is compressing repeating dots and lines too close to the collarbone, which leads to early merging. Ask for slightly larger negative space between pattern rings. This placement is low to moderate pain and usually takes one to two sessions. For evenings out, pair with a backless black crop top to show the symmetry without fighting the neckline.
Studio Day Picks
Those first six designs include chest, rib, shoulder, forearm, collarbone, and upper-arm work. A few simple items smooth out session logistics and the first week of healing.
-
Stencil transfer paper kit. Lets you preview line placement on skin before the needle hits, which is helpful for pieces that need precise symmetry like the mandala and portrait collage.
-
Topical numbing cream. Applied under a wrap before the appointment takes the edge off rib and sternum sensitivity while still allowing the artist to work.
-
Thin protective film roll. Helps protect collarbone and shoulder pieces from clothing friction during the first few days.
-
Fragrance free gentle body wash. Cleanses healed lines without stripping the pigment or irritating fresh work.
-
Aquaphor healing ointment. A thin layer during the first 48 hours locks in moisture around fine line areas so they do not crust excessively.
7. Abstract Geometric Chaos with a Realistic Eye on the Thigh
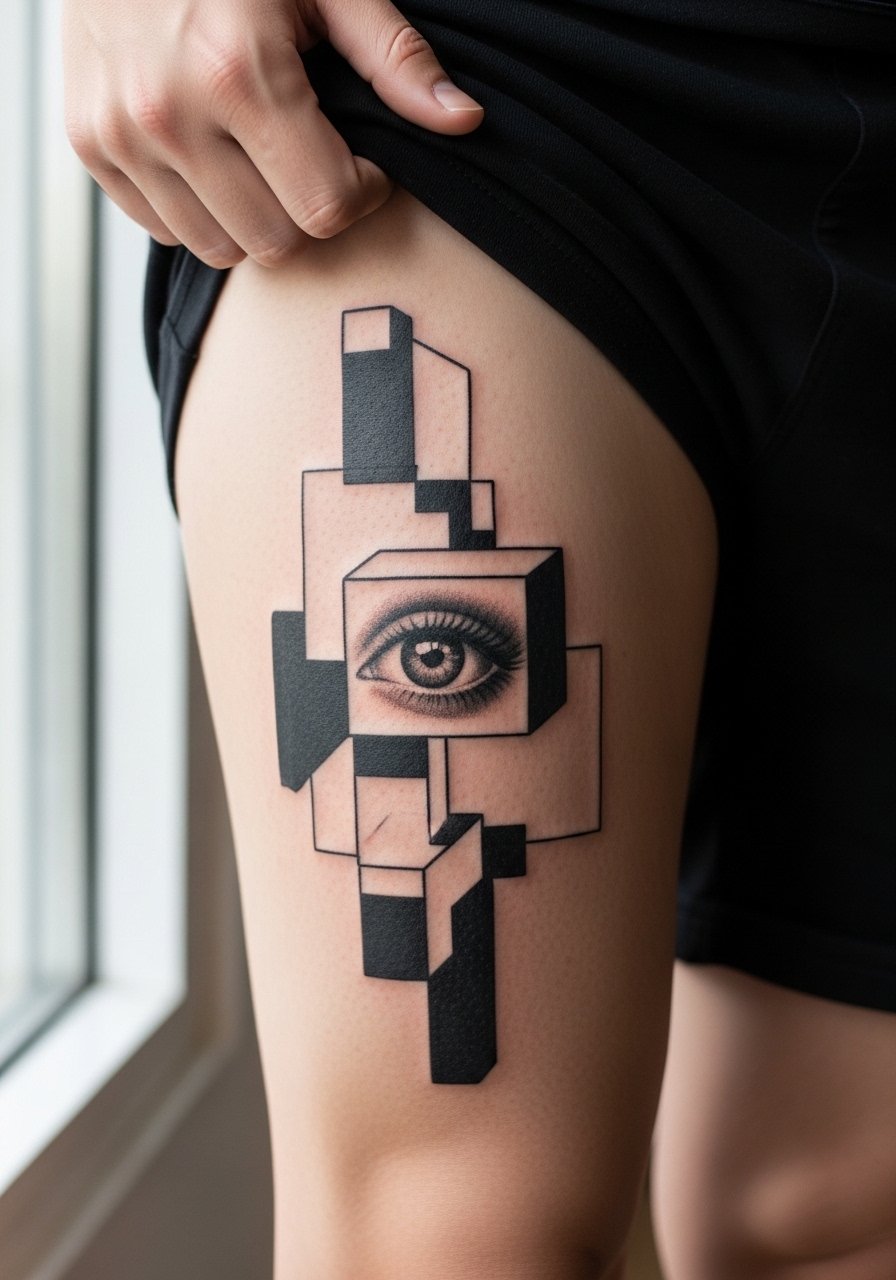
Thigh pieces give scale without constant sun exposure. The piece works when the eye is rendered with dense saturation and the surrounding geometry keeps open channels. Mistakes include shrinking the geometric fields to fit tight pants, which removes the optical tension after healing. Sessions run about three hours for a 10-inch piece. For show-off styling, try slim black shorts or black slim shorts in summer. Expect the red accents to last longer here because the area gets less sun.
8. Historical Figure Portrait with Brush Effects Across the Upper Back
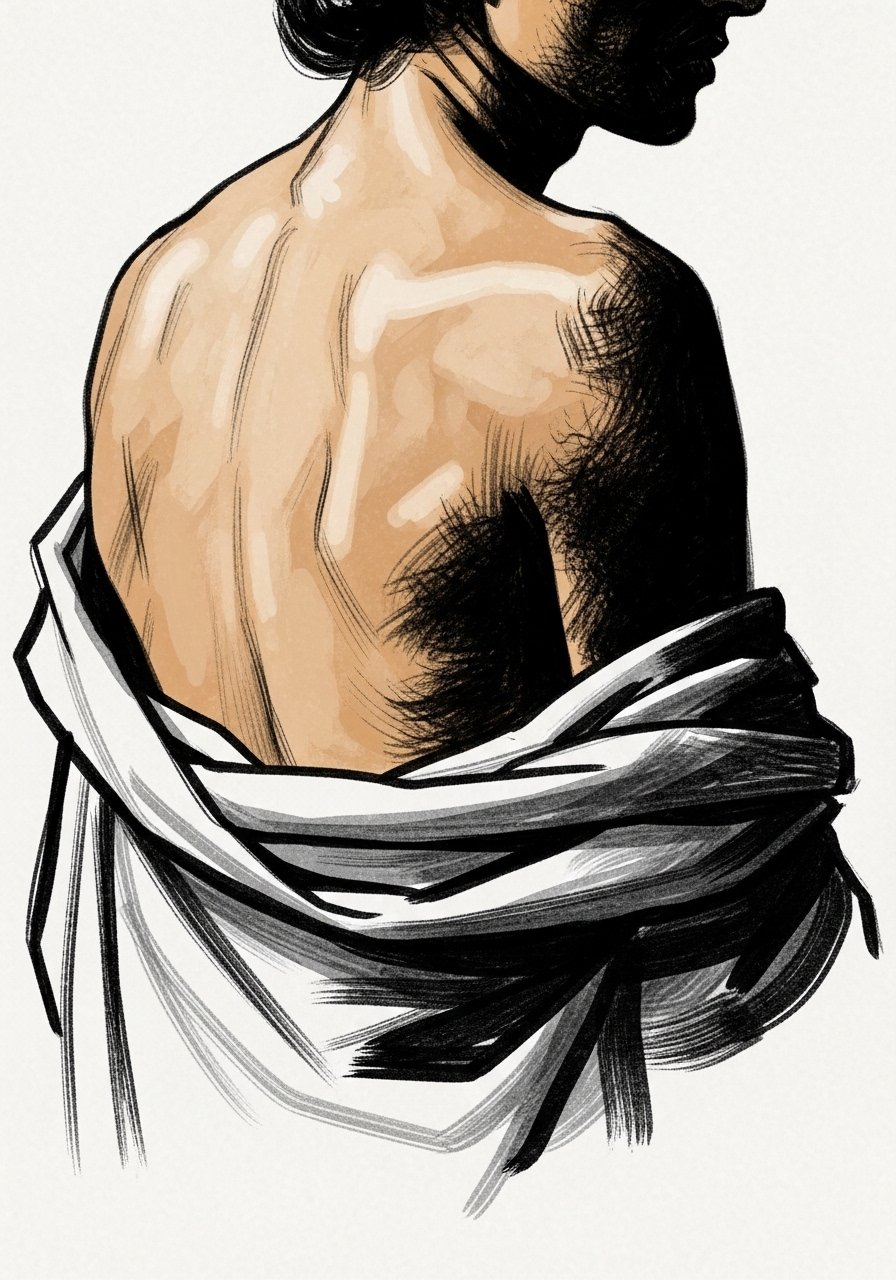
This is for people who want narrative and scale. The main consultation note is to choose a single focal feature, like eyes or profile, and let brushwork fragment around it. A common mistake is overloading the chest with additional small motifs that distract from the face. This is large work across multiple sessions. Some clients use a short convention of guest spots so the portrait reads cohesive across artists, but discuss continuity beforehand.
9. Floral Realism Torn by Brushstrokes on the Inner Forearm
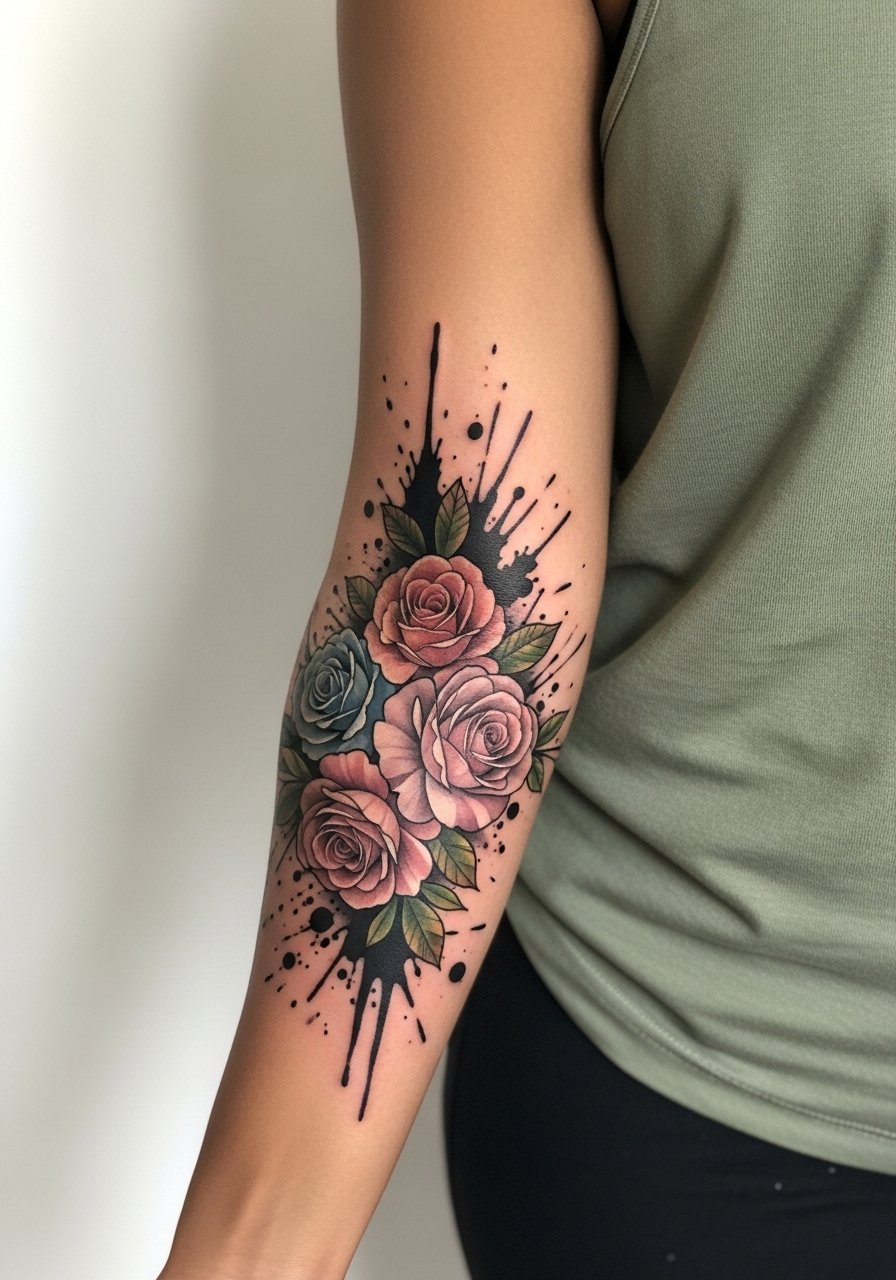
I've noticed florals translate well to trash polka when the petals maintain dense saturation and brushstrokes break the silhouette. Tell your artist to keep the central stems crisp and let splatter sit around the edges. Inner forearm pain is moderate and usually tolerable for longer sessions. For session comfort and clean access, wear a loose tank top or button-down so the artist can roll or pull fabric without pressure.
10. Tech Circuit Portrait Fusion Across the Chest
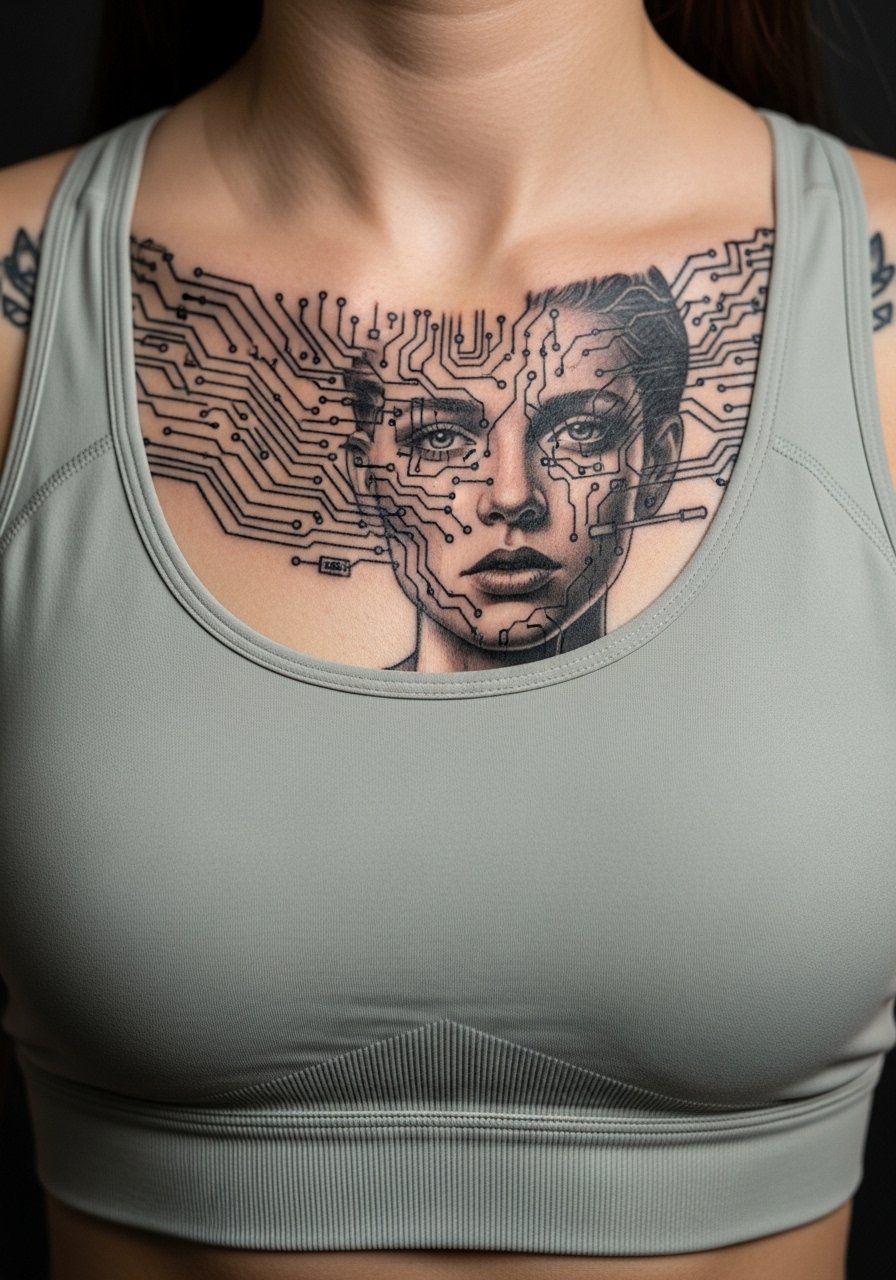
This design reads as commentary about machine and self. The trap is over-detailing circuit lines in small areas. Tell your artist you want thicker anchor lines for the portrait and thinner, more graphic circuit elements that can breathe. Chest placement sees more stretch with movement so allow extra negative space around delicate elements. Sessions are medium to long. For sensitive chest work, a fitted sports bra or front-open robe helps during the appointment.
11. Wolf Pack with Text Overlay on the Calf
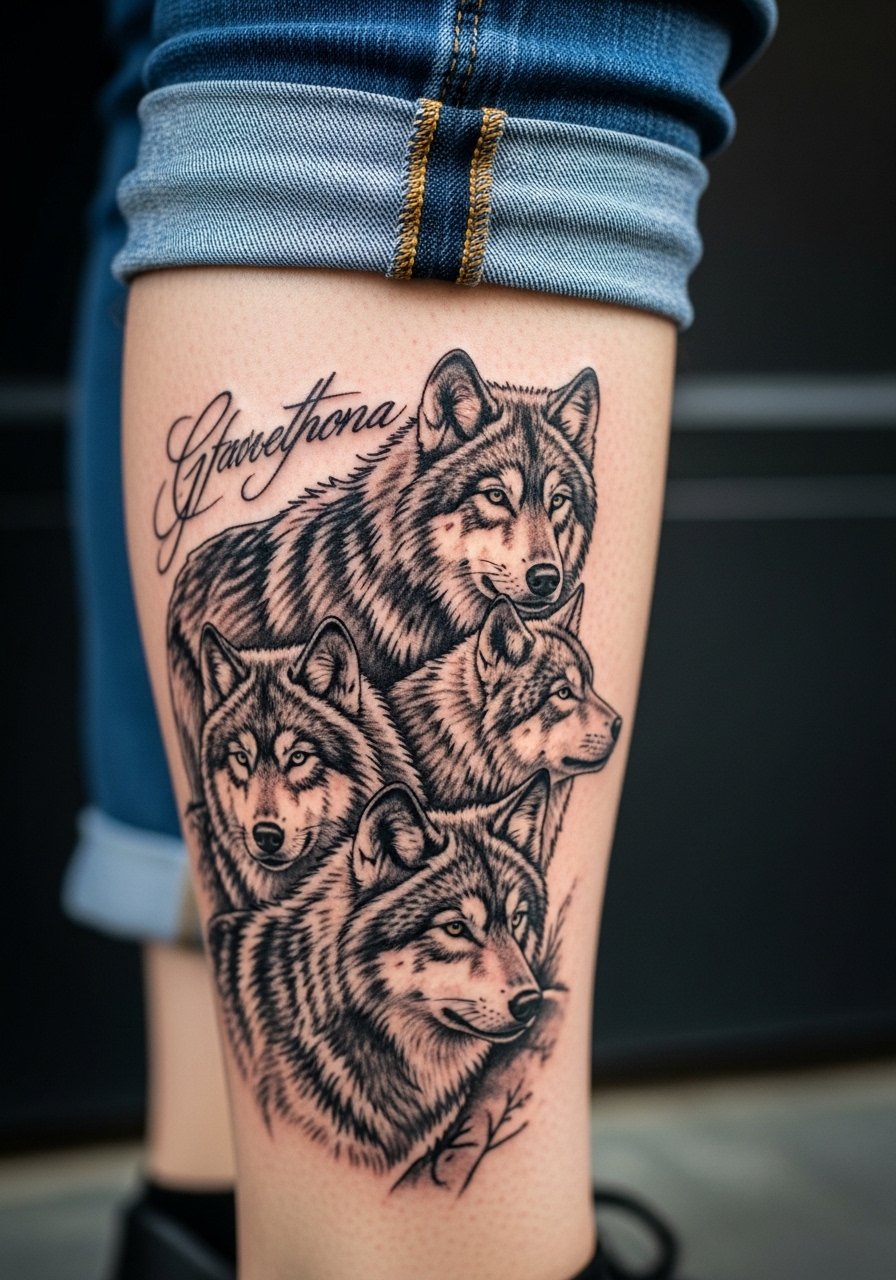
Calf work is forgiving for realism. The calf tolerates saturation well but small script layered over detailed fur can lose legibility. Ask for bolder script spacing and slightly larger letterforms. Expect three sessions if you expand to the knee or ankle. For showing the piece, cuffed pants and cuffed cargo pants or boots frame the art nicely. Touch-ups for red overlays are typically needed less often here.
12. Dali-Inspired Melting Clock Into Geometry on the Thigh
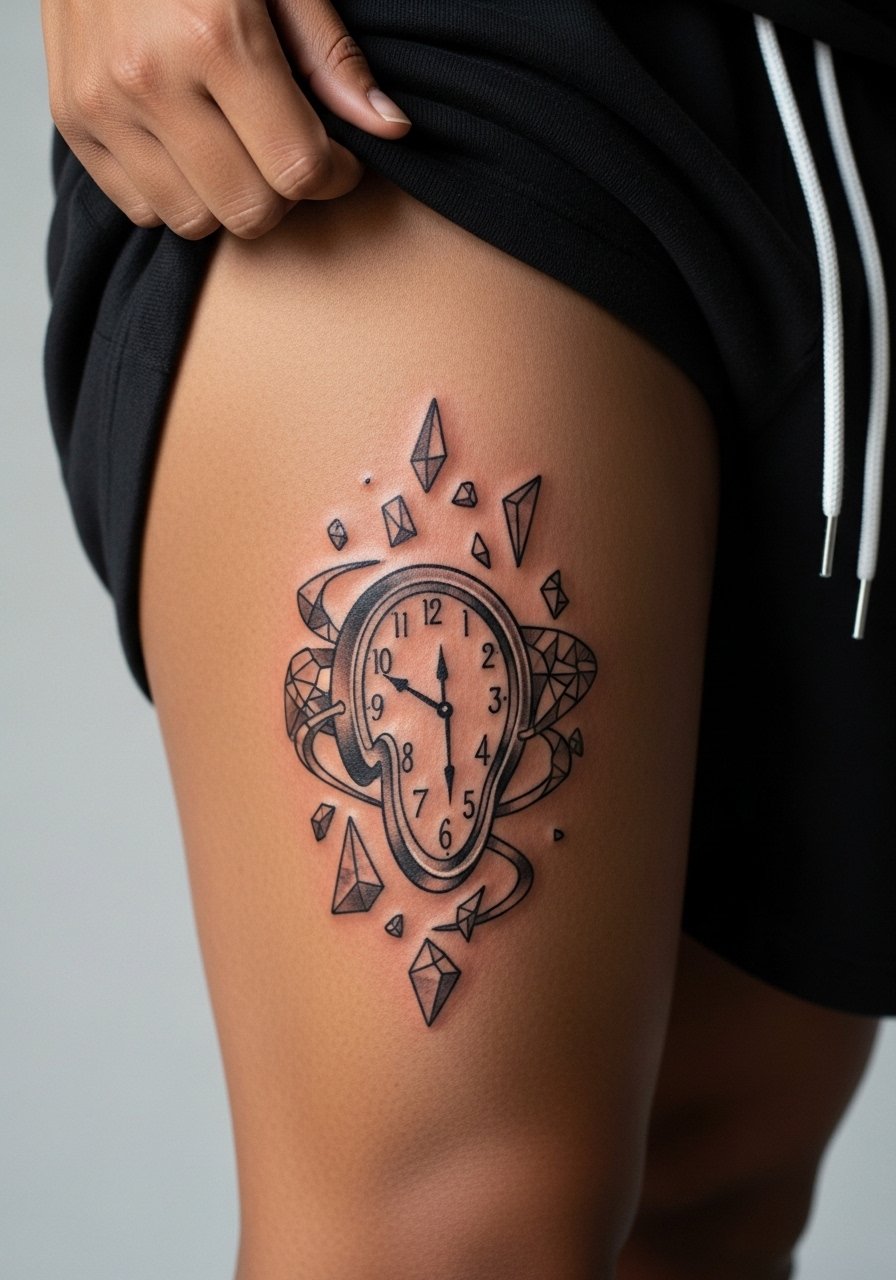
This is an art-lover's pick. The design benefits from scale so that the melt lines maintain shape after healing. The frequent error is shrinking surreal elements to small sizes where the intended paradox becomes visual noise. Sessions are multiple and include planning for flow with clothing. For session comfort, wear loose gym shorts men so the leg can be exposed without pinching.
13. Mandala Fragment on the Collarbone Edge
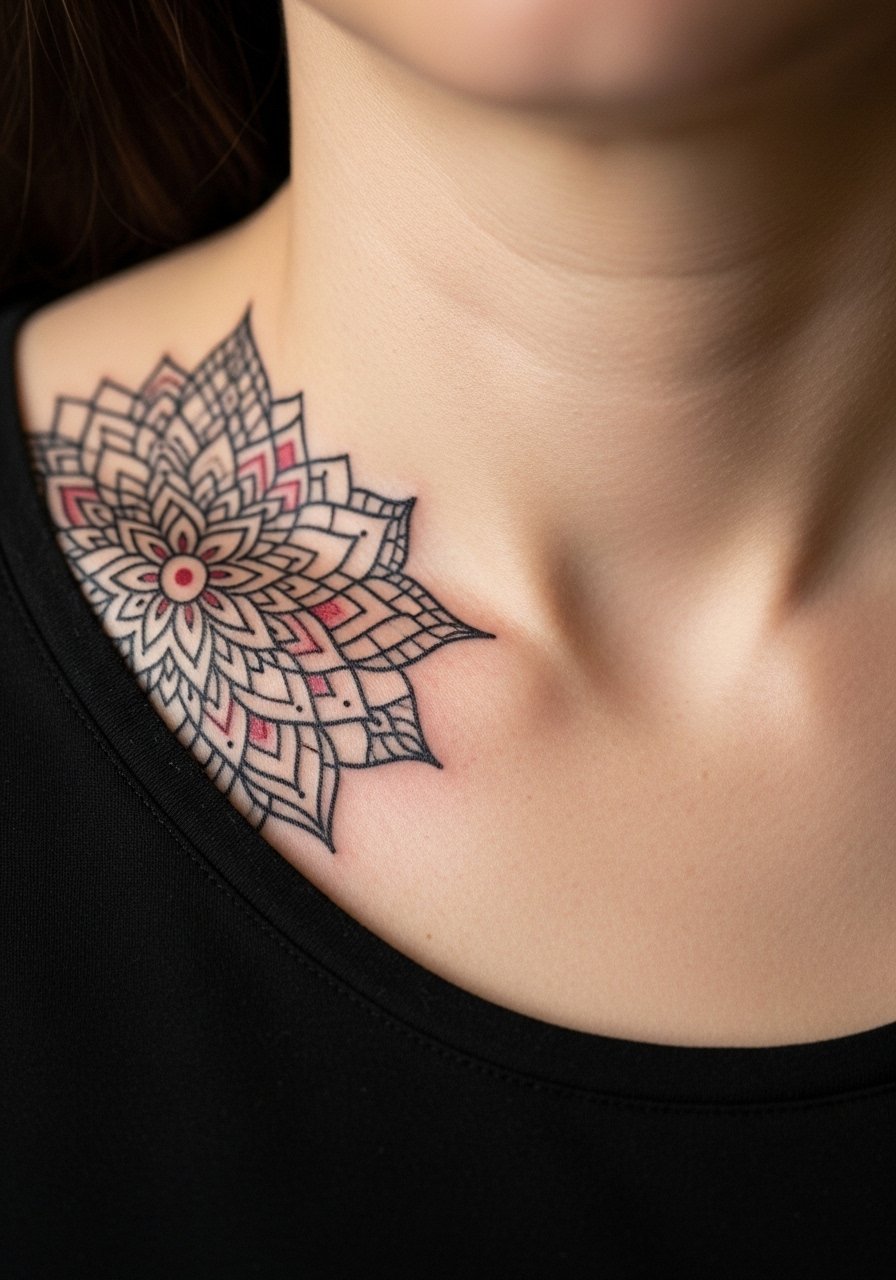
A fragment lets you get ornamental detail without committing to a full chest mandala. The aging issue comes when fine dots are packed into a tight arc near the bone. Ask for slightly bolder spacing and fewer stipple rings. This placement is visible and pairs well with open necklines. For show-off looks, a backless black crop top sets it off without competing.
14. Small Trash Polka Ankle Motif of a Single Eye
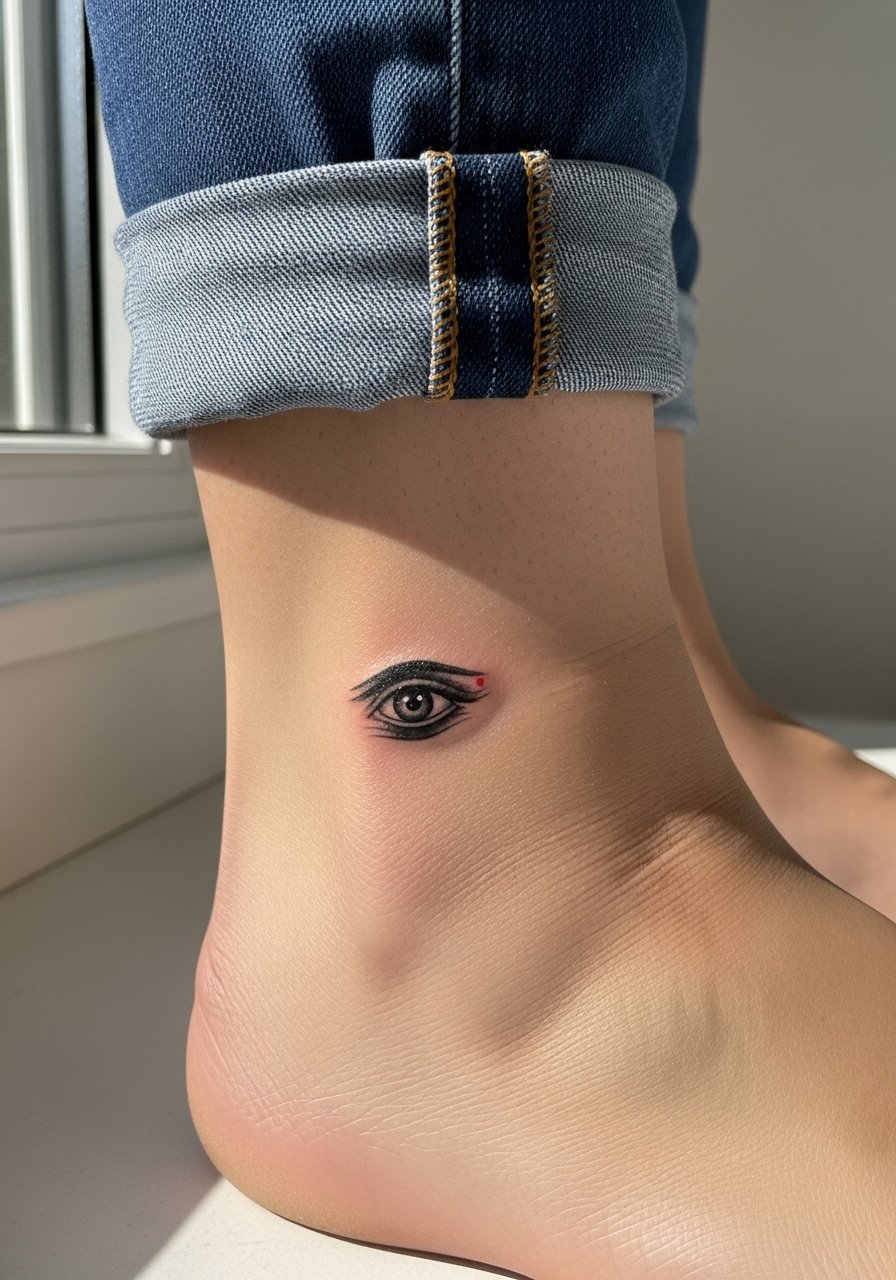
Small ankle pieces need bold anchors. Tiny photorealism without a heavy outline tends to fade into shapeless grayscale. Ask your artist for a strong pupil and a modest halo of splatter for context. Ankle sessions are short but sensitive. For the session wear, roll jeans up or choose sandals so the artist has clear access. Expect touch-up options after two to three years.
15. Optical Contrast Piece: Realistic Eye in Graphic Blocks on the Back
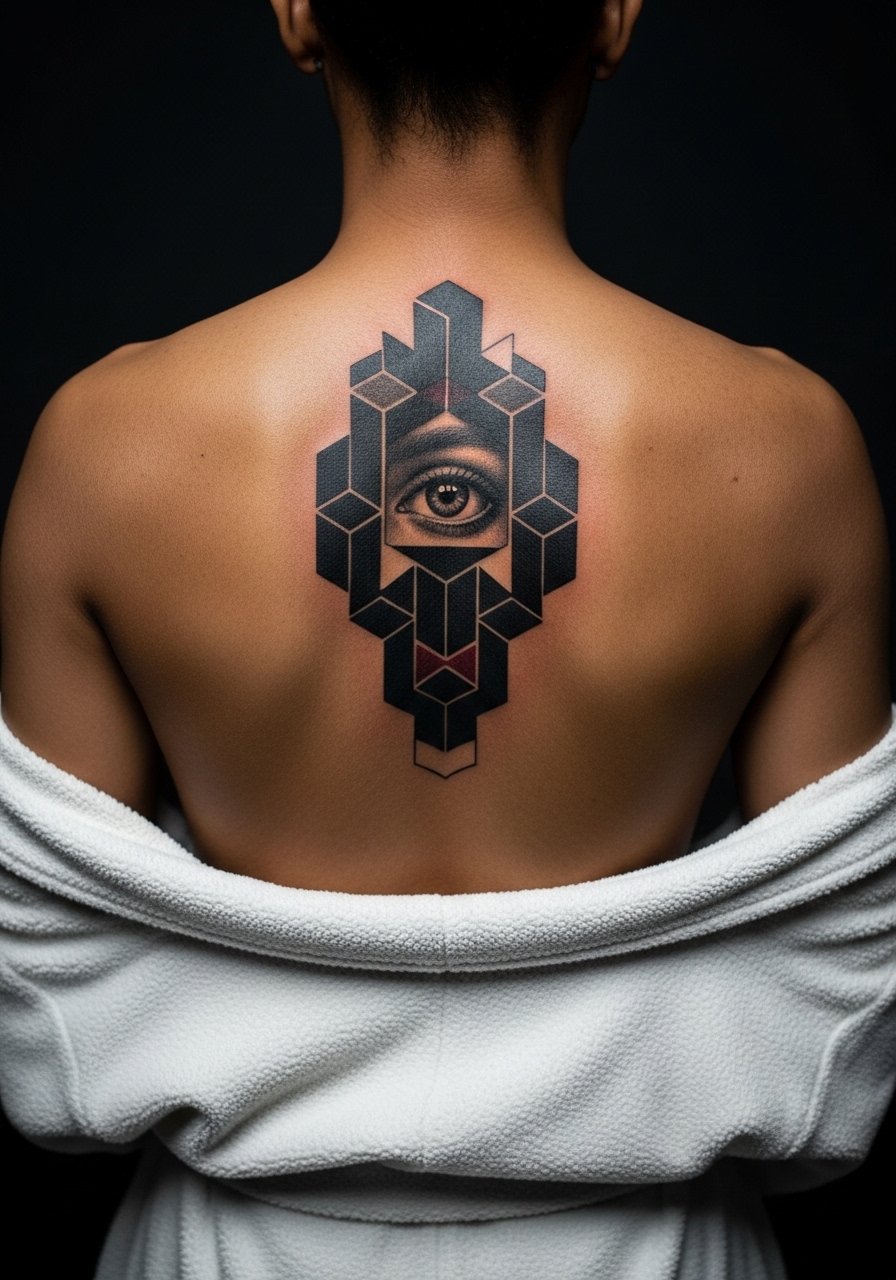
This plays with optical complementary contrast to make the eye pop against graphic fields. A common mistake is stacking too many tiny halftones next to saturation, which causes the eye to lose clarity. When you want the optical effect, specify that the eye gets dense saturation and surrounding geometry is left more open. Large back canvases allow that breathing room. Touch-ups on reds tend to need less frequency when the black field is solid.
16. Keyword-Driven Custom Collage from a Song on the Forearm
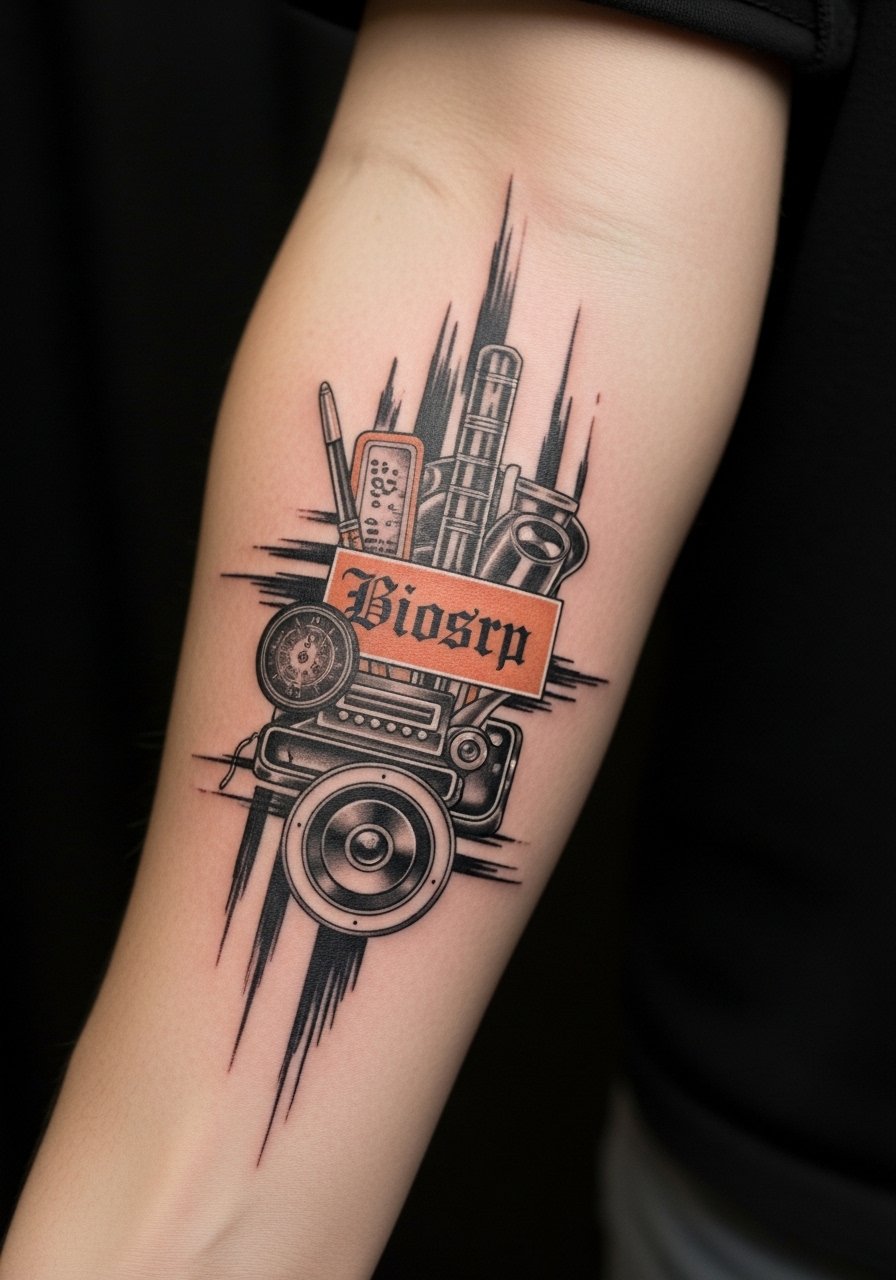
Try this if you want a bespoke piece built from lyrics or a poem. Bring the lines and highlight which words or images matter most. The consultation step I recommend is a mapped hierarchy so your artist knows the primary focal element and secondary motifs. People often hand over long texts and expect everything included. Narrow the list down to the three strongest images and let the collage read as one narrative. This forearm piece will need careful spacing to avoid blurring over time. For showing it off, a fitted black muscle tee keeps attention on the band.
17. Floral Wreath Interrupted by Industrial Brushwork on the Outer Forearm
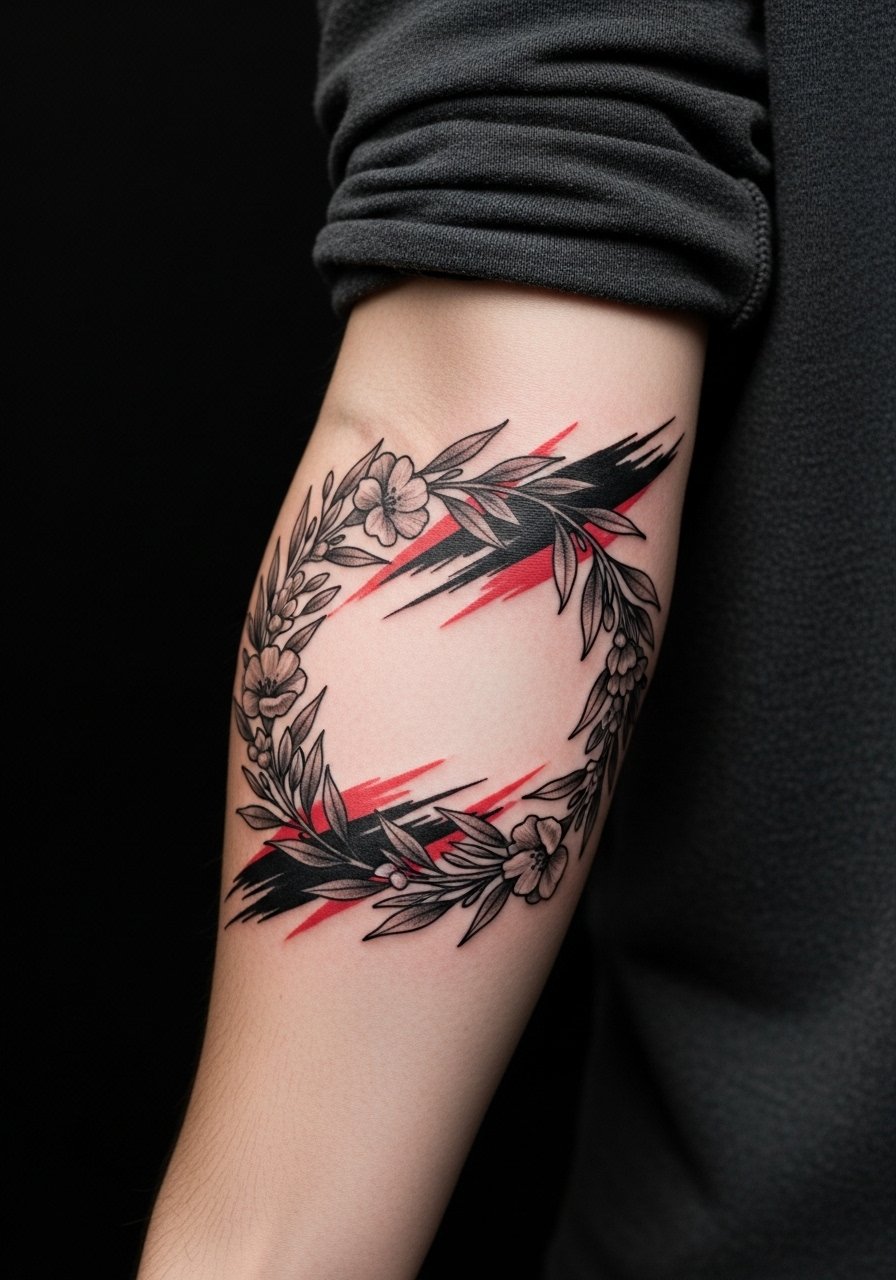
This balances soft florals and harsh graphic elements. The common error is overfilling the wreath with tiny blossoms which age into texture mush. Ask for fewer blooms with stronger negative space and bolder stems. Outer forearm sessions are straightforward and comfortable. For styling, rolled sleeves like a charcoal rolled sleeve shirt keep the art visible without competition.
18. Minimal Script with Splatters Behind the Ear and Neck Flow
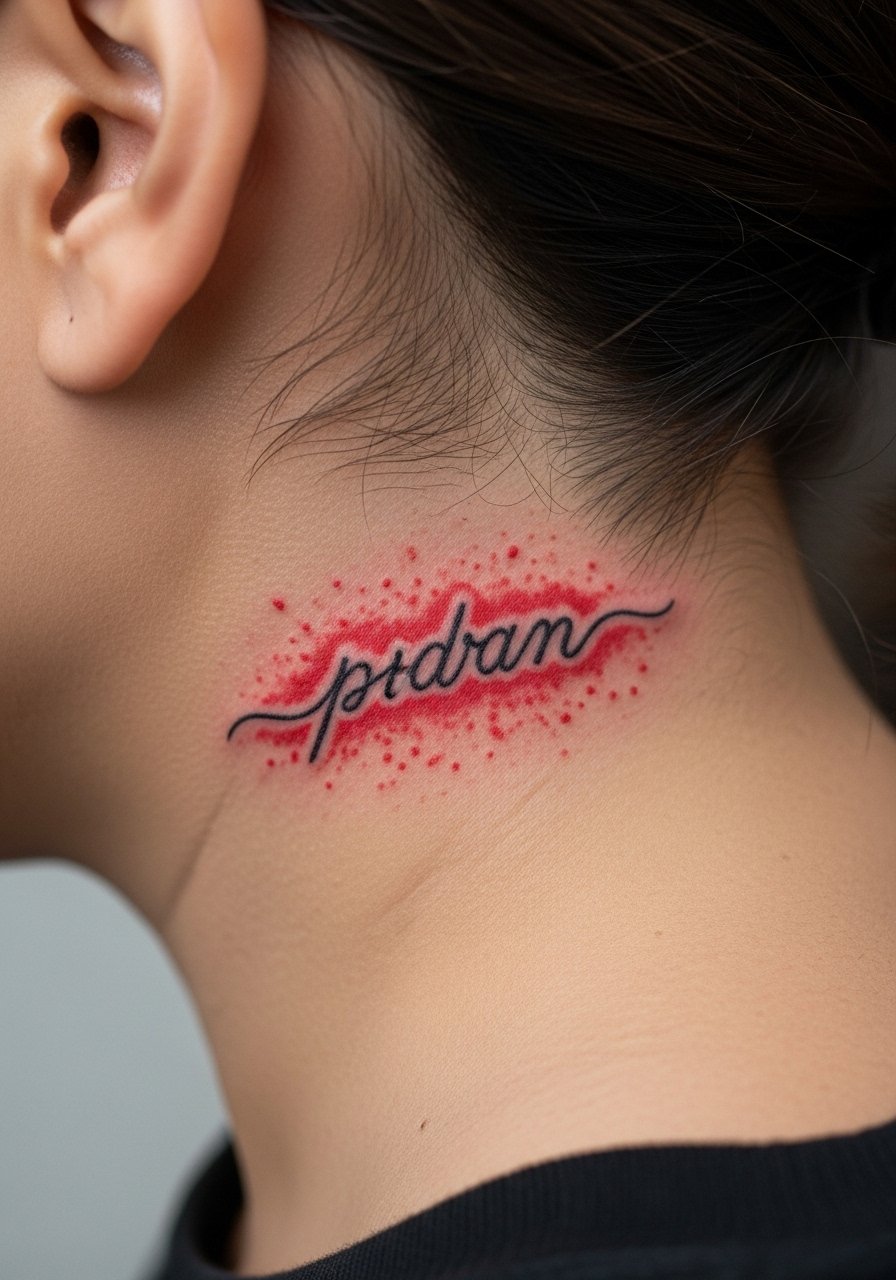
Behind-ear work is intimate and needs precise placement. This area can blur if lines are too fine. Ask for slightly thicker script and discuss future visibility since hair and collars can hide it. The session is quick but sensitive. This placement benefits from a short hair tuck and loose collar so the artist can access the area without tension. Consider how often you want this visible before committing.
19. Sleeve-Ready Surreal Animal Montage Flowing into the Chest
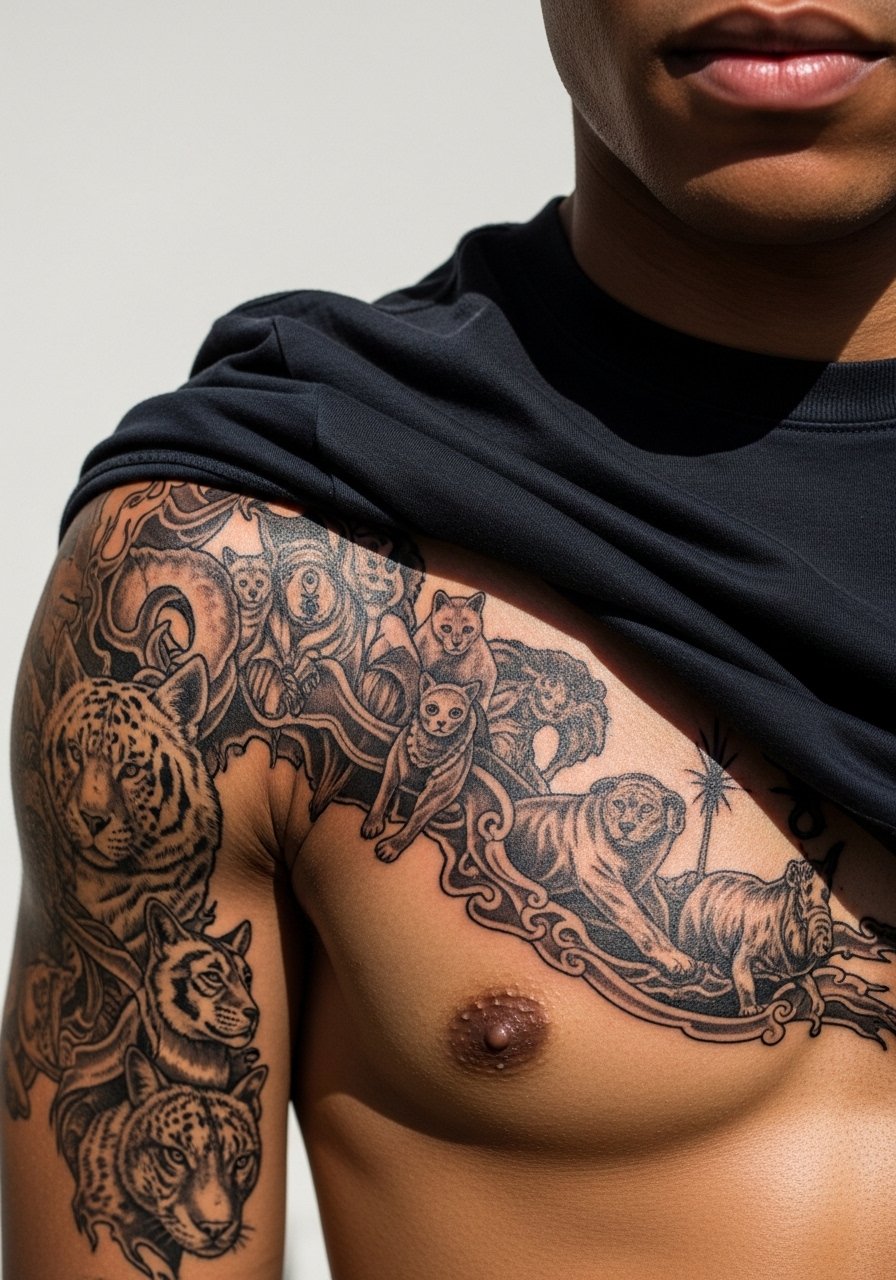
If you plan a sleeve extension, the flow to chest or ribs is what separates good sleeves from disconnected patches. The mistake people make is designing each panel as a standalone that does not share anchor points. During consultation, map which shapes will cross the joint zones so the montage reads as one piece. Expect multiple sessions and periodic design checks. This scale choice addresses the controversy about small versus large trash polka; one camp insists scale is essential, another shows small, well-spaced elements can work. Both camps have valid points. Choose scale based on where you want longevity and how much body canvas you have.
20. Neo-Surreal Floral Heart on the Inner Bicep
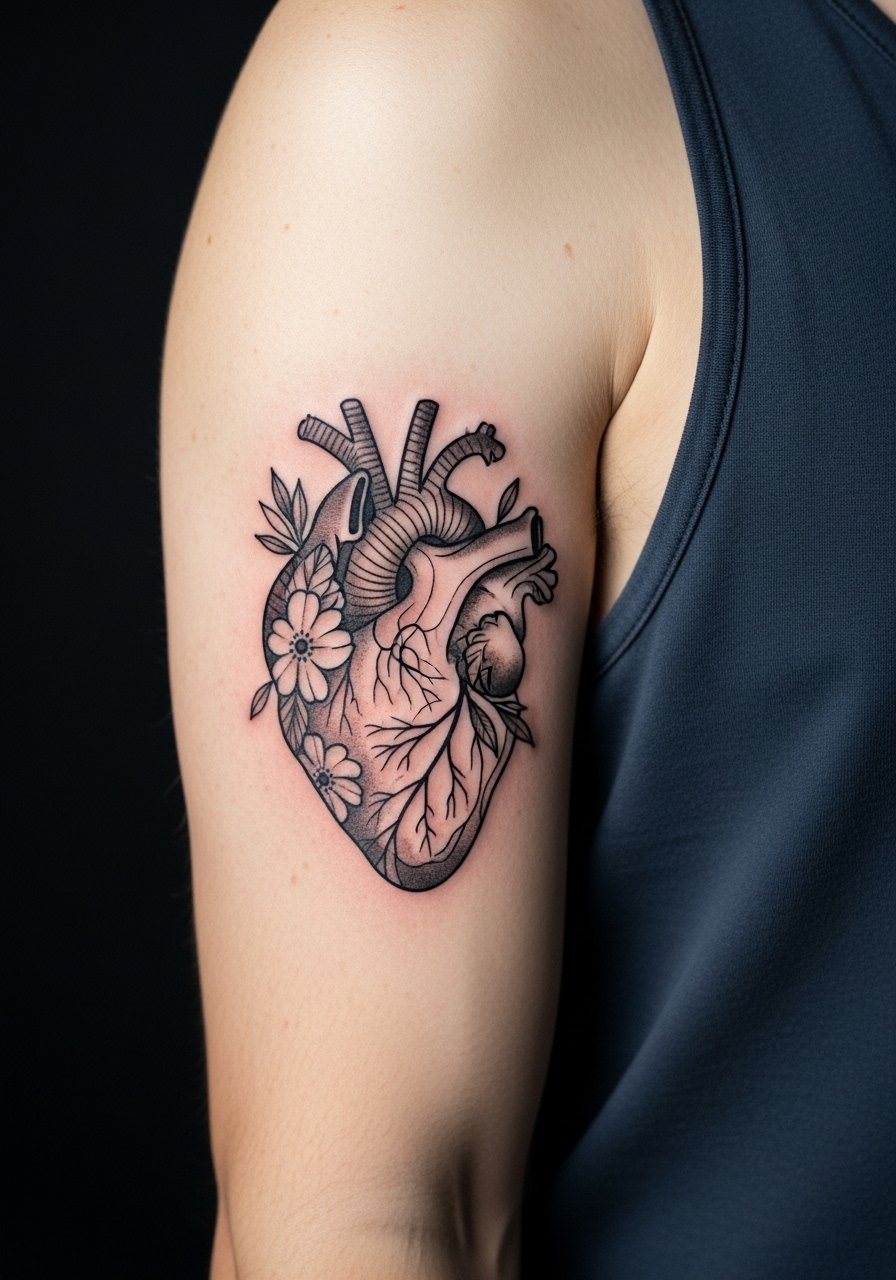
Inner bicep pieces can be protected from sun, which helps color retention. The risk is the arm's movement and friction causing early softening of fine elements. Ask for slightly bolder stems and fewer tiny stipple areas. Sessions are moderate in pain and usually short. For the appointment, a tank top makes access easier and avoids fabric rubbing during the early healing days.
21. Compact Trash Polka Chest Patch That Ages Well
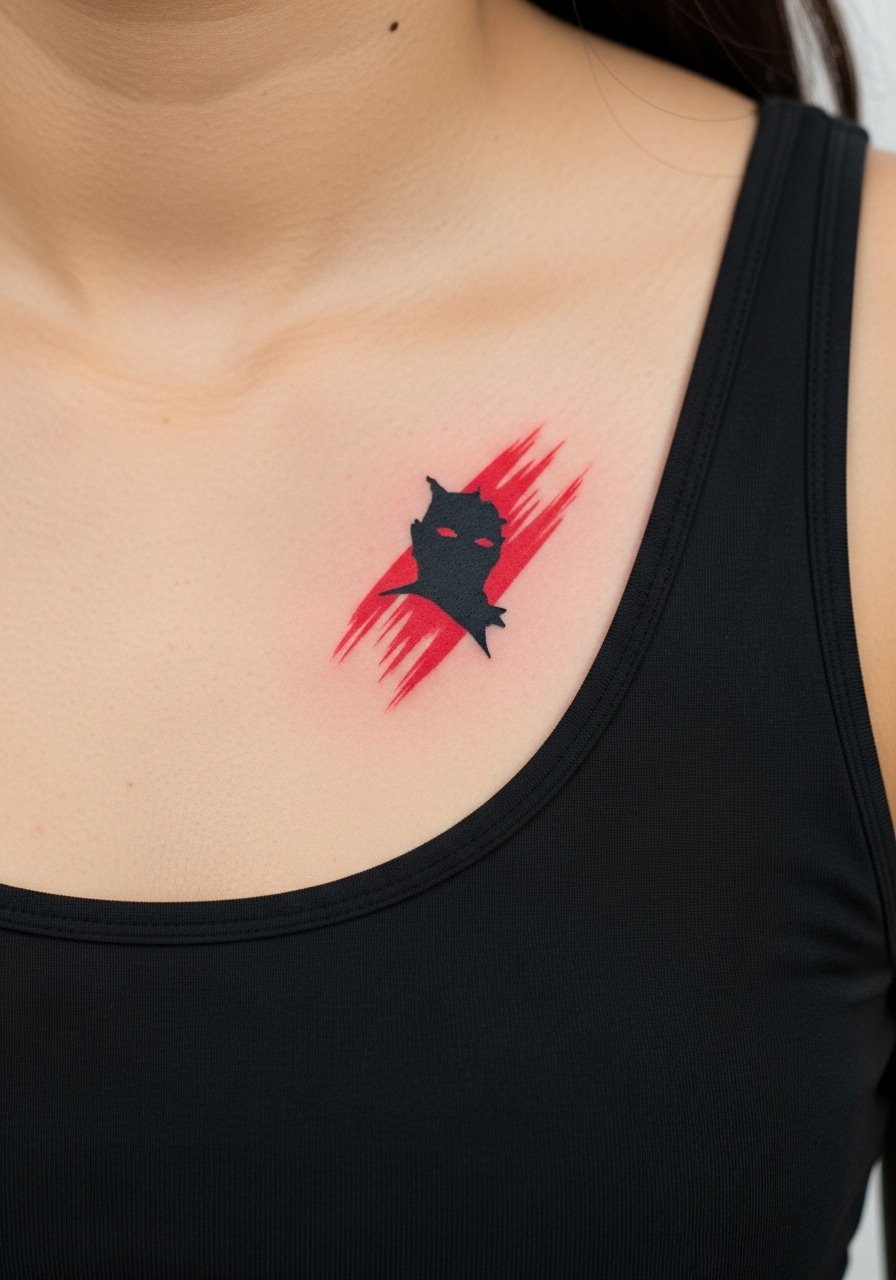
If you want trash polka but have budget or time constraints, a compact chest patch can deliver the aesthetic without a full canvas. The trick is to keep one strong anchor shape and surround it with controlled splatter. A common mistake is trying to cram multiple focal points into a small chest patch. Expect one longer session and consider a touch-up at year two for the reds if you spend a lot of time in sun. For session prep, a fitted sports bra makes access easy and keeps modesty intact.
Frequently Asked Questions
Q: How should I decide between a large trash polka sleeve and a smaller forearm piece?
A: It depends on how the design needs space to breathe. Larger sleeves let realistic elements keep their detail and let graphic splatter fragment around them. Smaller forearm pieces work if you simplify elements and increase spacing. Think about how often you wear clothing that will expose the area and whether you want frequent touch-ups for reds.
Q: Do the red inks used in trash polka fade faster than black, and how can I protect them?
A: In my experience red can fade quicker, especially on sun-exposed sites like the forearm or calf. Plan for touch-ups at year two to four depending on exposure. Use sun protection after the tattoo heals and avoid long periods of direct sunlight. During sessions wear clothing that limits immediate rubbing, for example a loose button up shirt you can move aside easily.
Q: Will fine line elements in trash polka blur on the ribs or sternum?
A: Artists split into two camps. One says ribs and sternum stretch and blur fine line quickly. The other says if you use proper spacing and needle depth, fine line can hold up. The safest route is to ask your artist to show healed examples of fine line on those exact placements and to plan slightly larger spacing than your fresh reference.
Q: Can trash polka work on darker skin tones without losing the red contrast?
A: Yes, but the approach changes. On deeper tones artists often rely on stronger black saturation and slightly larger red fields to maintain readable contrast. Bring healed examples that match your skin tone and ask the artist how they adapt saturation and spacing for longevity.
Q: If I want a custom piece based on a song or poem, how do I brief my artist?
A: Narrow the song to three strongest images or lines and note which one is the primary focal point. Provide a mood board with tonal references and say whether you want realism, graphic blocks, or both. Ask the artist to sketch composition options and mark where a potential extension could flow if you plan to add more later.
