
Fine line and saturated classic work keep showing up on saved boards, but what actually holds up on an arm years later is less about the current trend and more about placement, spacing, and honest consultation. I pay attention to how traditional palettes settle, which placements blur first, and which wardrobe choices make a piece feel like part of your daily look. Below are 17 tried-and-true traditional tattoo ideas for a female arm, with notes on aging, consultation cues, session comfort, and how to show each piece off.
1. Traditional Rose with Banner on Outer Forearm
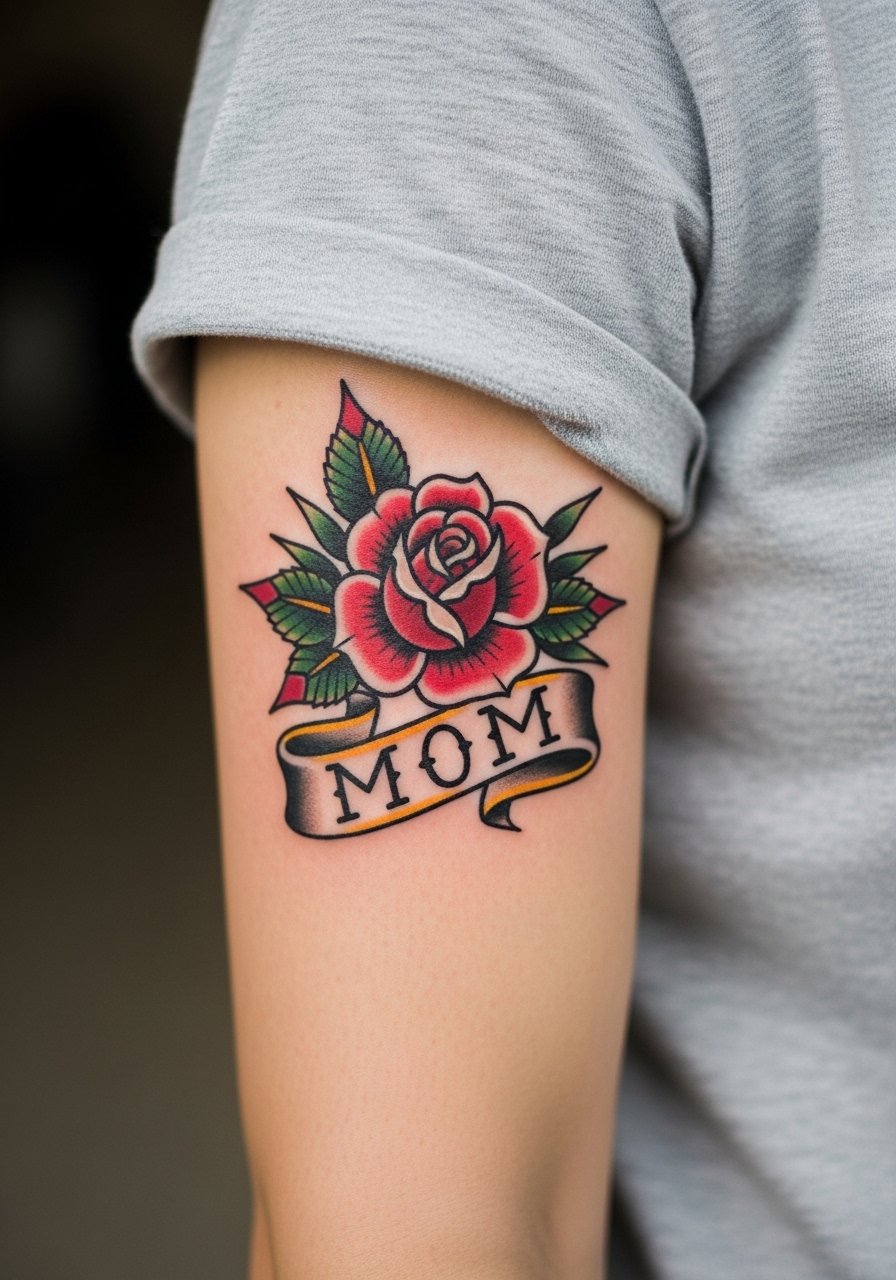
I recommend the classic rose with banner when you want a readable, age-resistant forearm piece. Tell your artist you want thicker outlines and solid saturation rather than tiny detail, so the petals hold shape at year five. A common mistake is shrinking the composition too small to fit on the wrist, which causes the banner script to fill in over time. Expect a 1-2 hour session with moderate discomfort on the outer forearm and a likely touch-up at year two to keep the reds lively. For showing it off, roll up a vintage short sleeve blouse or wear a sleeveless cotton tank so the forearm sits cleanly in photos.
2. Anchor with Rope and Heart on Inner Forearm
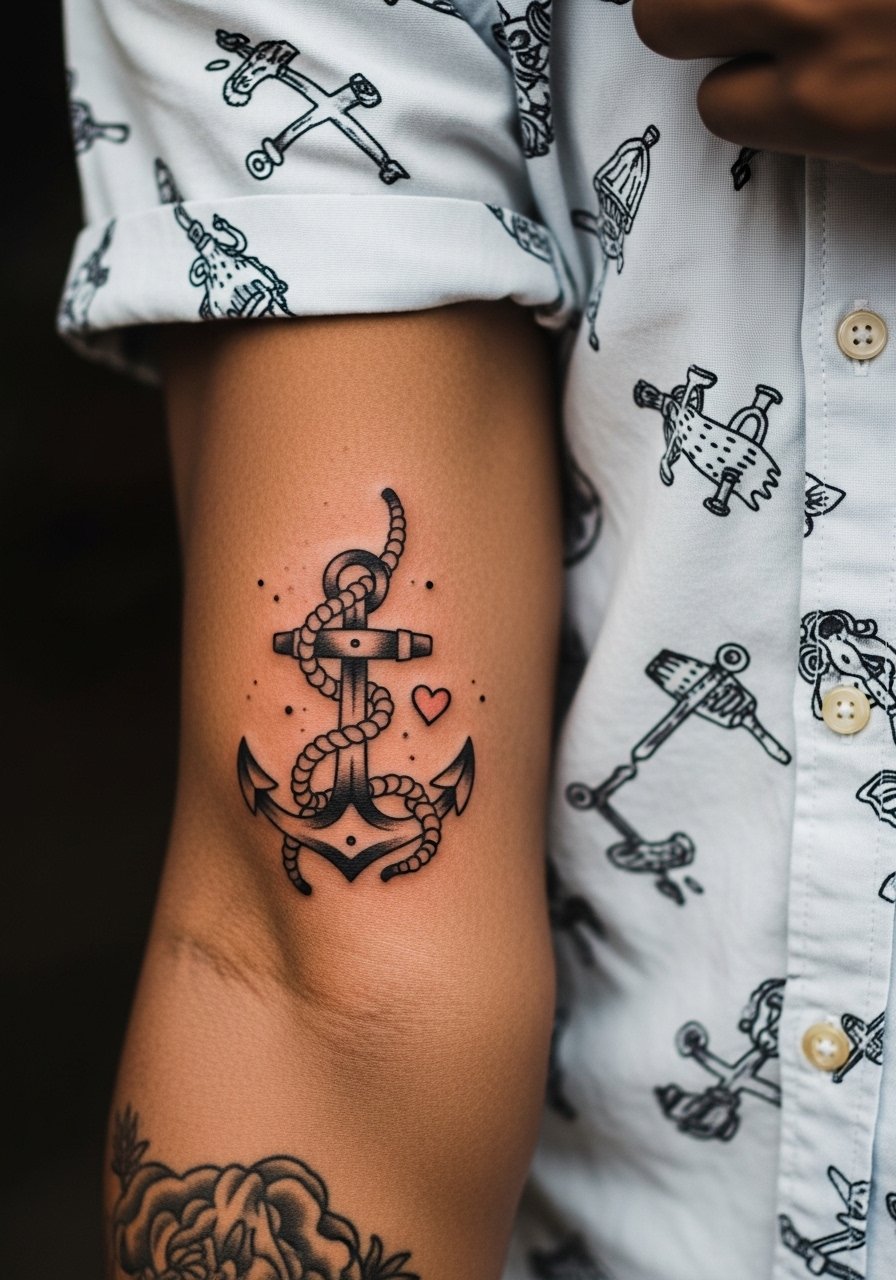
The inner forearm is ideal for an anchor that reads like a compact story. For durability, ask for bold outline weight and flattened color fills because the inner forearm changes with muscle and weight shifts. Many people choose delicate rope detail and then regret it when the rope softens over time. This placement is surprisingly sensitive, especially near the ulna, but a single session usually covers a 4-5 inch design. During the consult say you want the heart sized to sit above the wrist crease so the composition flows with your arm. For session comfort, wear a short sleeve button up women you can roll or pull aside without rubbing fresh ink.
3. Pin-Up Girl with Swallow on Upper Arm
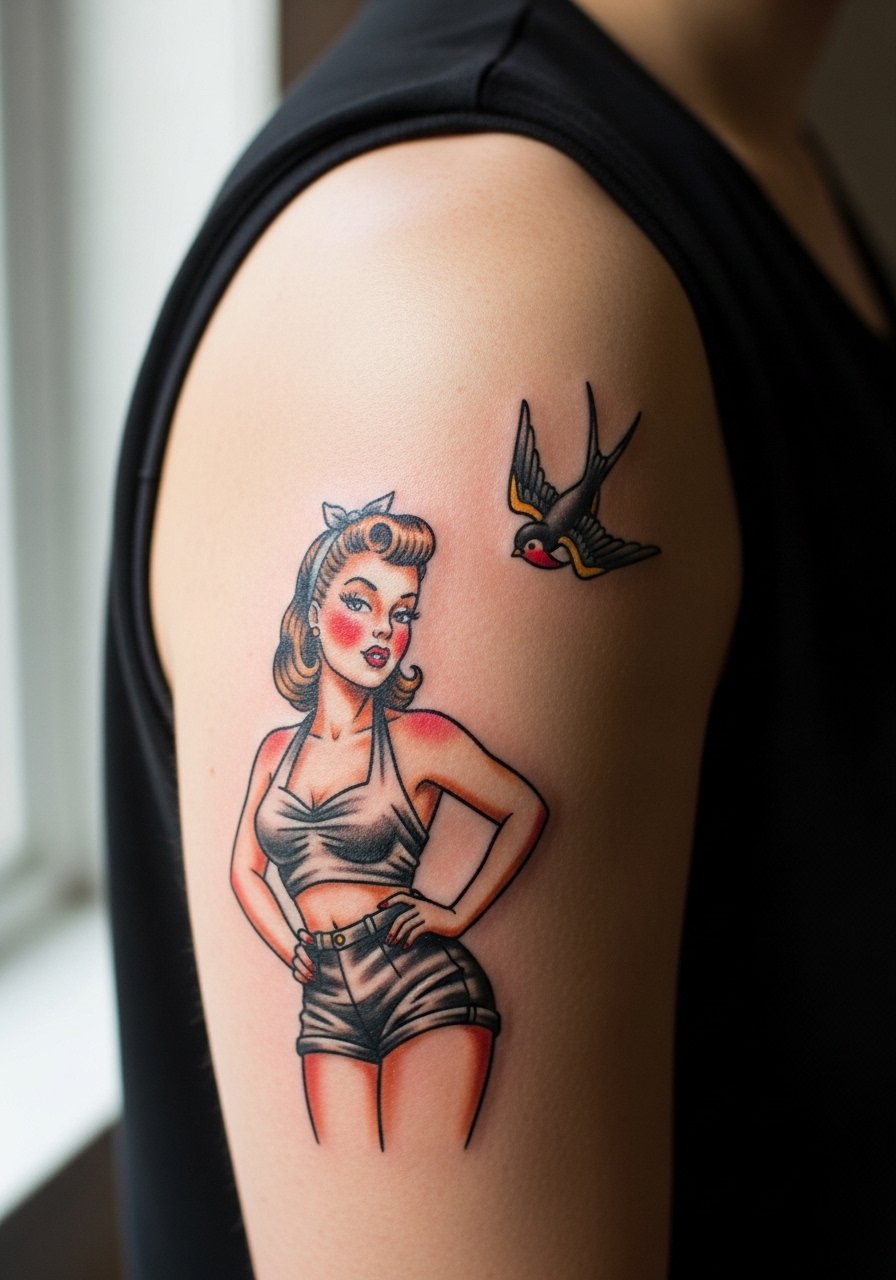
This classic reads iconic when scaled to the upper arm curve. Ask your artist for slightly larger facial features than you might think, because tiny portrait detail tends to blur. The biggest mistake is squeezing a highly detailed face into a six-inch piece without considering skin texture. Expect two sessions for vibrant color and clean saturation. Upper arm pain is usually low to moderate, and healed pieces keep their contrast well if you protect them from sun. Pair this with retro off-shoulder tops or delicate hoop earrings for a vintage silhouette when you want to show the work.
4. Swallow Bird in Flight from Wrist to Forearm
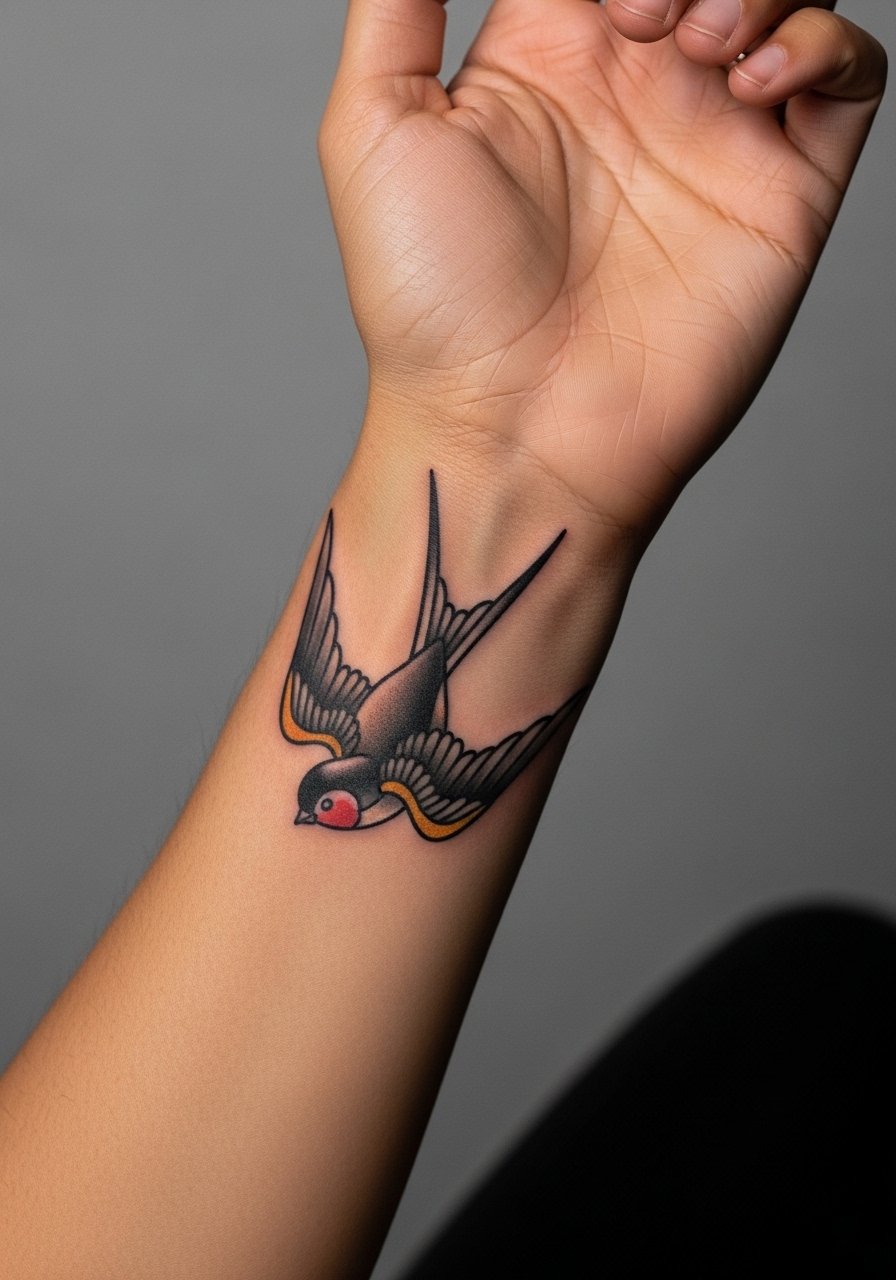
Small swallows are excellent if you want a visible, low-commitment piece that still reads classic. For longevity, keep the wings slightly separated with negative space between feathers so the shapes do not merge as the skin ages. A frequent error is compressing the bird into a tiny wrist token with dense shading. The session is quick, about 45 to 90 minutes, with the wrist feeling notably more sensitive than the forearm. Expect touch-up potential at year three if you spend a lot of time in the sun. Stack a cuff bracelet on the opposite wrist or roll a long sleeve cotton shirt once to frame the bird without covering it.
5. Heart with Arrow and Banner on the Bicep
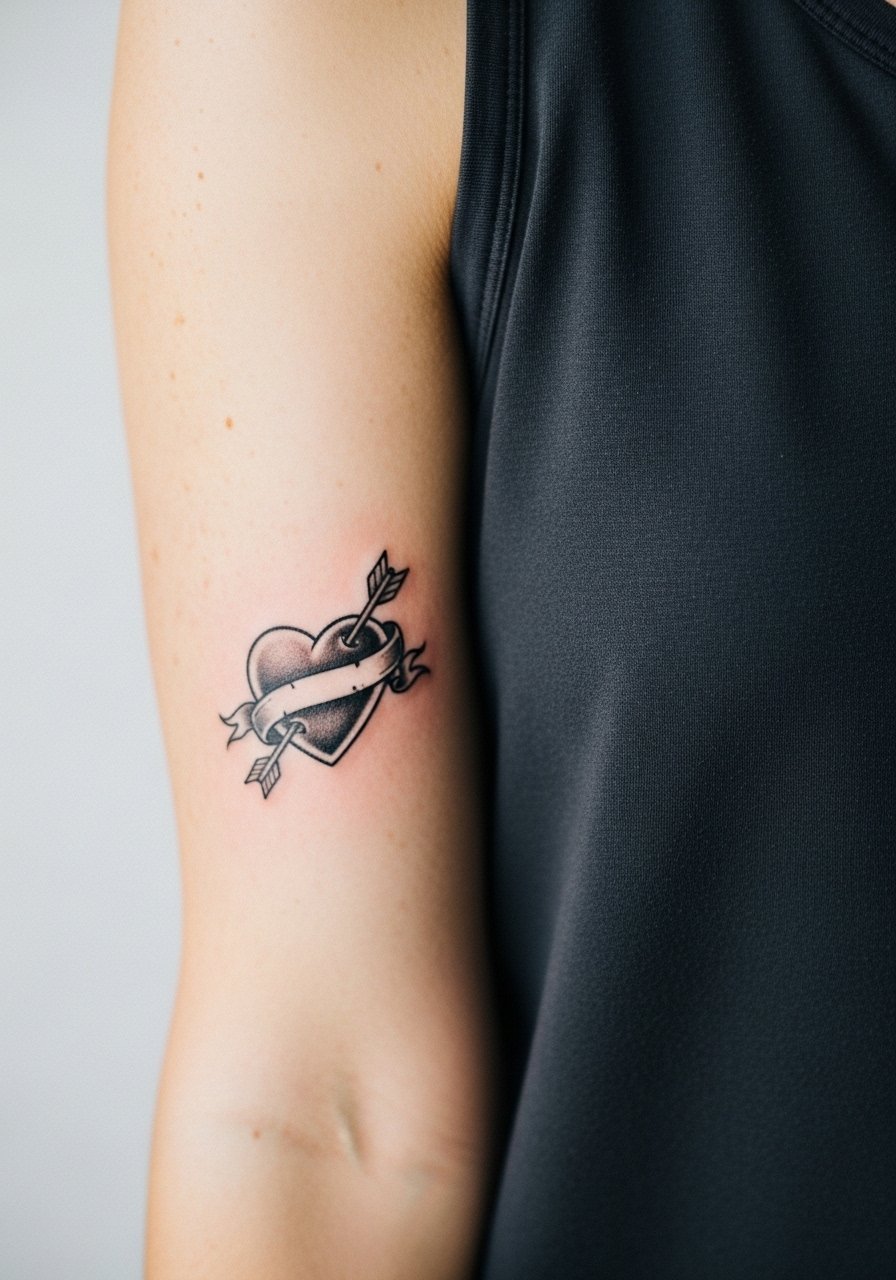
The bicep suits medium compositions that can be turned into a focal piece or built around for a sleeve. Tell your artist you want the arrow to read graphic rather than photorealistic so it keeps contrast through touch-ups. A common mistake is adding small script inside the banner that later blurs; choose larger lettering and bold letter spacing. Pain is lower on the fleshy bicep, and typical sessions run 1-2 hours. This placement pairs well with off-shoulder tops, so consider wearing an off shoulder top women when you want to showcase the silhouette.
6. Mermaid with Waves as a Forearm Sleeve Start
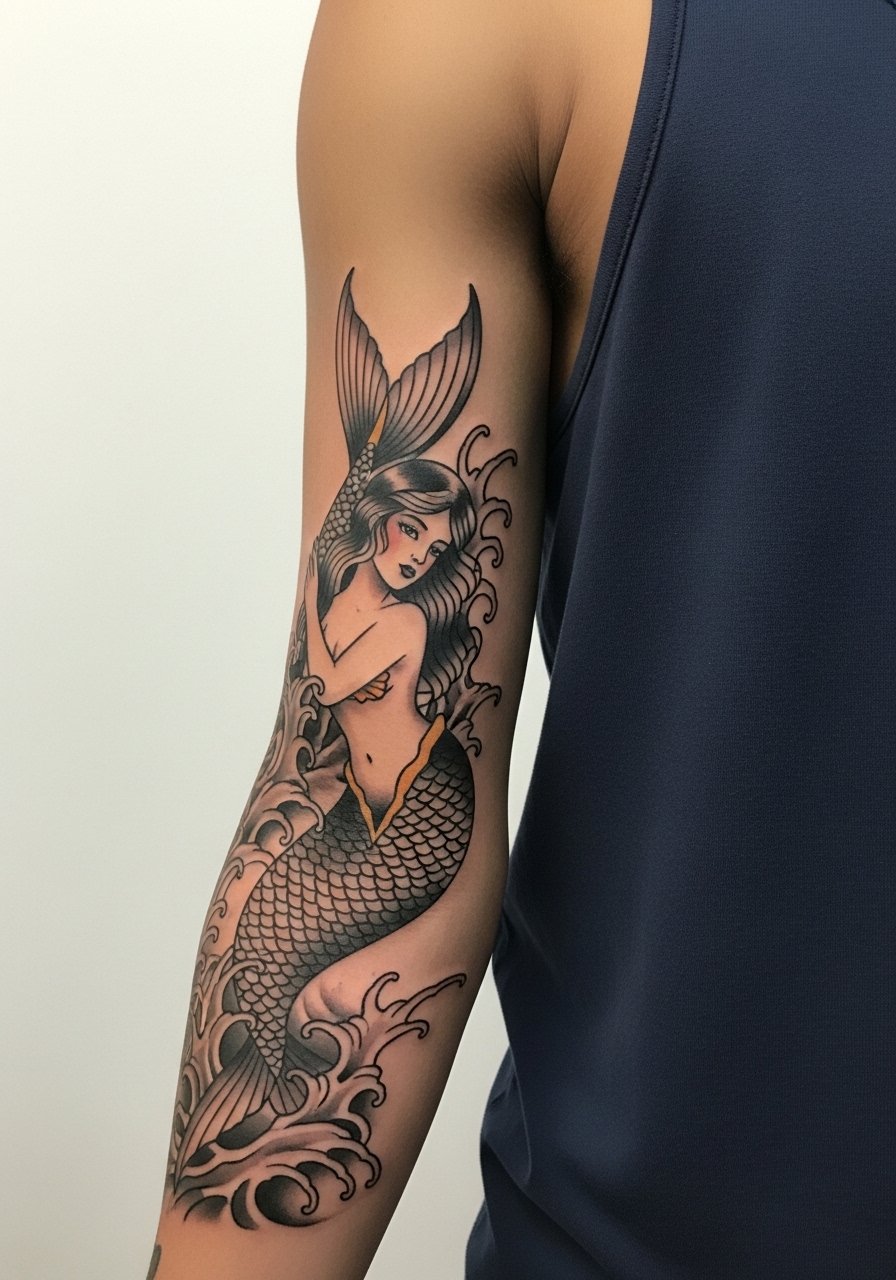
A mermaid anchors a sleeve idea and scales well along the forearm line. During consultation mention where you want the wave movement to end so it can connect to future pieces. Many people make the mermaid too detailed in tight areas and then find the scales and hair lose definition after a few years. This design typically takes 2-3 sessions for depth and saturated blues. Forearm sleeve starts feel like long sittings but the outer forearm is forgiving on pain. For showing progress between sessions, vintage-style short sleeve blouses photograph the colors well, and a open knit cardigan layers without rubbing fresh ink.
Studio Day Picks
The forearm and bicep pieces above benefit from a few practical items that smooth the session and the first week of healing.
-
Stencil transfer paper kit. Lets you preview placement and read the linework on the skin before the needle touches down, which is handy for banners and scripts.
-
Topical numbing cream. Applied as directed before the appointment it eases wrist and inner forearm sensitivity without altering the artist's work.
-
Thin protective film roll. Useful for keeping small wrist and hand pieces clean during the first few days of high friction.
-
Fragrance-free gentle body wash. Cleanses healing tattoos without irritants that can dull color or sting fresh skin.
-
Aquaphor healing ointment. A thin layer in the initial days helps keep fine line pieces from drying into tight flakes that pull at the ink.
7. Gypsy Woman Portrait on the Shoulder
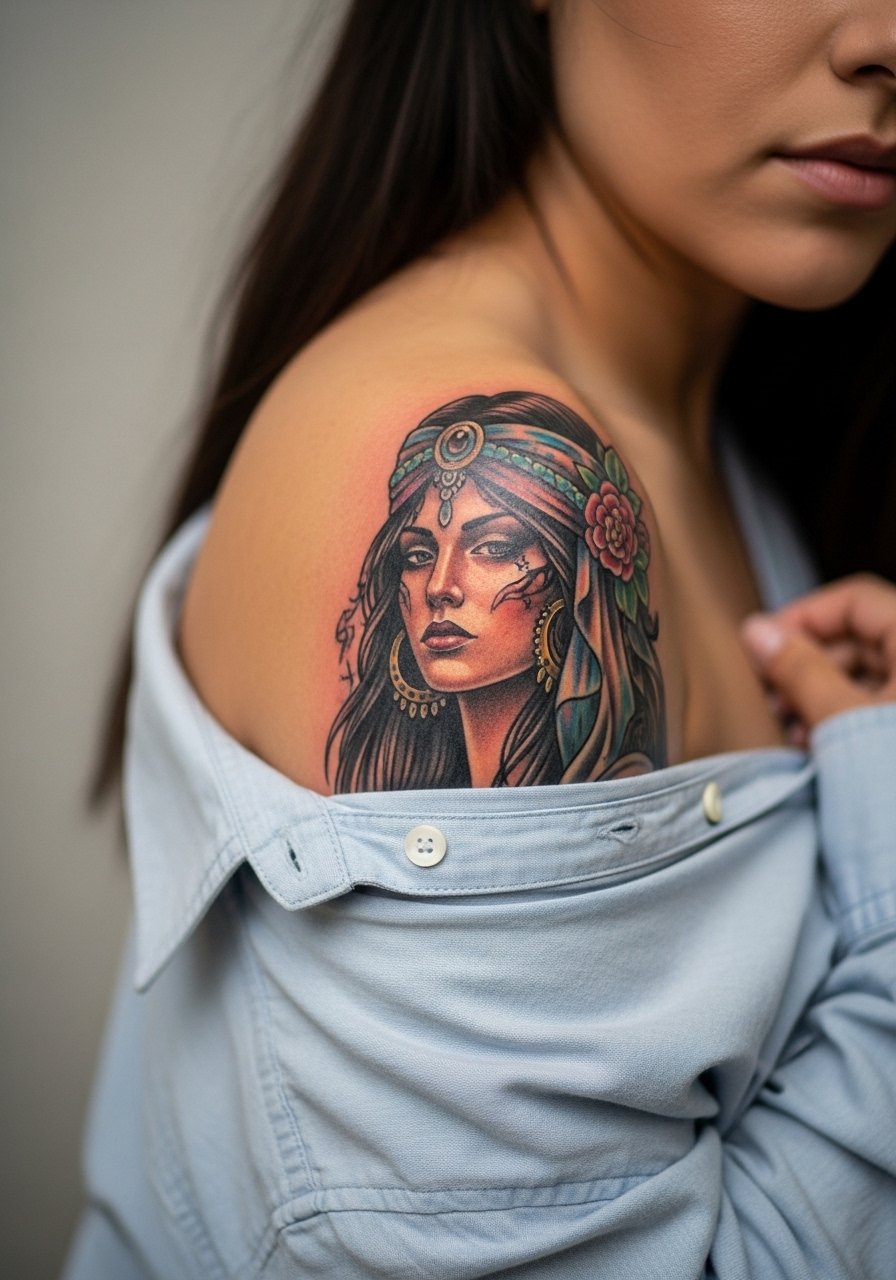
A shoulder portrait reads bold and wearable when scaled to 4-5 inches. Be explicit in consultation about the level of realism you want because the more painterly a portrait gets, the more likely small facial details will soften with time. There is a controversy about these motifs. One camp treats the gypsy portrait as a classic flash subject and uses it freely. The other camp urges caution because of cultural sensitivity and prefers stylized alternatives. Mention you want a respectful, stylized take if you are avoiding direct cultural appropriation. Shoulder sessions are comfortable with low pain and usually two sittings for saturation. Wear a loose button-down shirt you can pull aside so the artist has clear access.
8. Owl with Banner on Inner Bicep
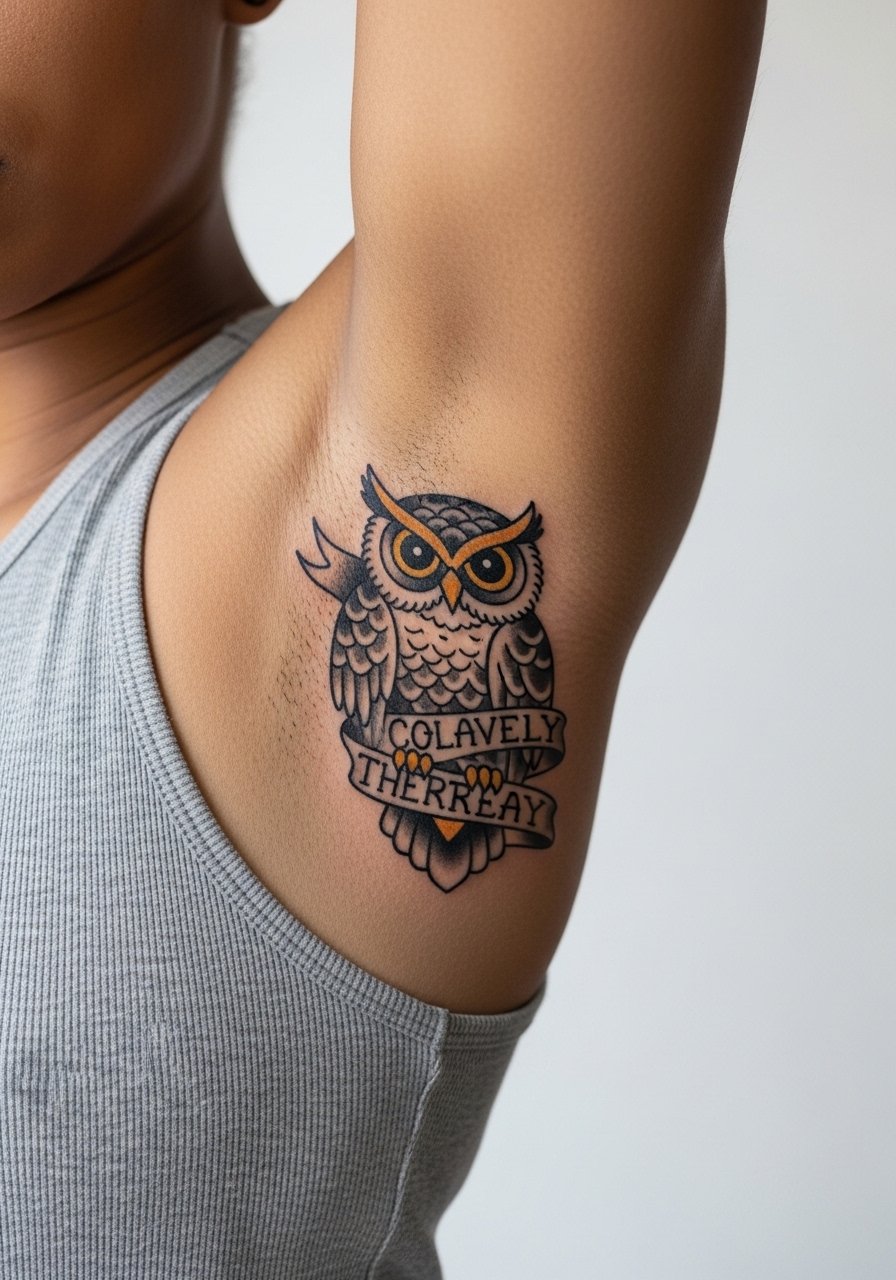
Inner bicep work looks tucked and private but reads bold when the owl's eyes are slightly oversized and the banner is roomy. The inner bicep shifts with muscle tone, so I advise thicker linework and simpler shading to avoid loss of detail. A mistake is asking for tight stipple shading in a tiny space because stipple can fade into a gray patch. The inner bicep can be tender, expect moderate to high discomfort and a single session of about 1.5 hours. Because this area is sensitive to friction, pick session clothing like a loose fit tank top that you can keep unbothered during healing.
9. Dagger Through Rose on Forearm
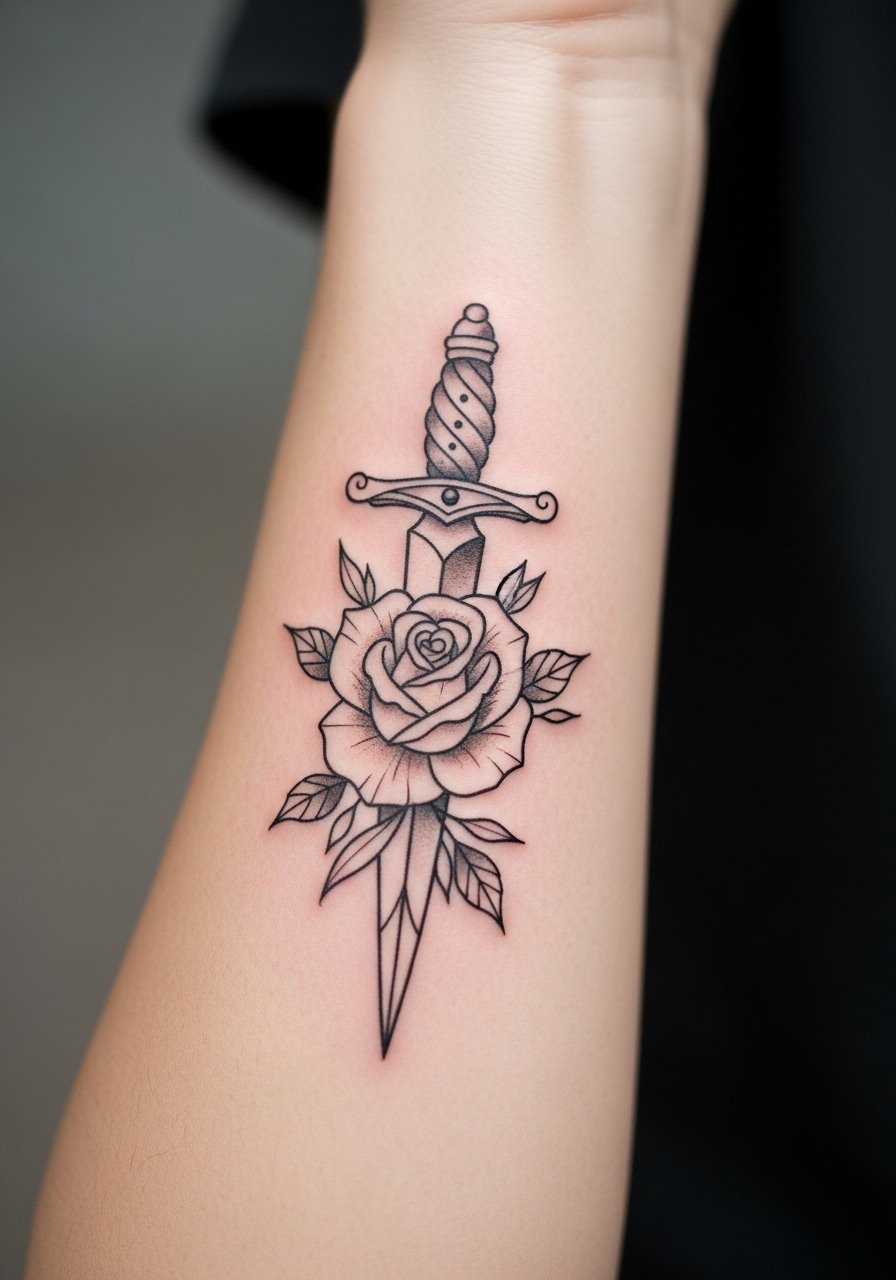
This pairing balances edge and tradition while keeping strong graphic contrast that ages well. Ask for the dagger to maintain a single directional flow so the piece reads along the arm rather than across it. The common aging problem is over-detailing the blade with tiny gradients that merge after a few years. Expect a one-session piece around 90 minutes and low to moderate pain on the forearm. For wearability, rolled-up linen shirts in cream or olive complement the palette and keep attention on the silhouette.
10. Patchwork Sleeve Elements: Hearts, Stars, Anchors
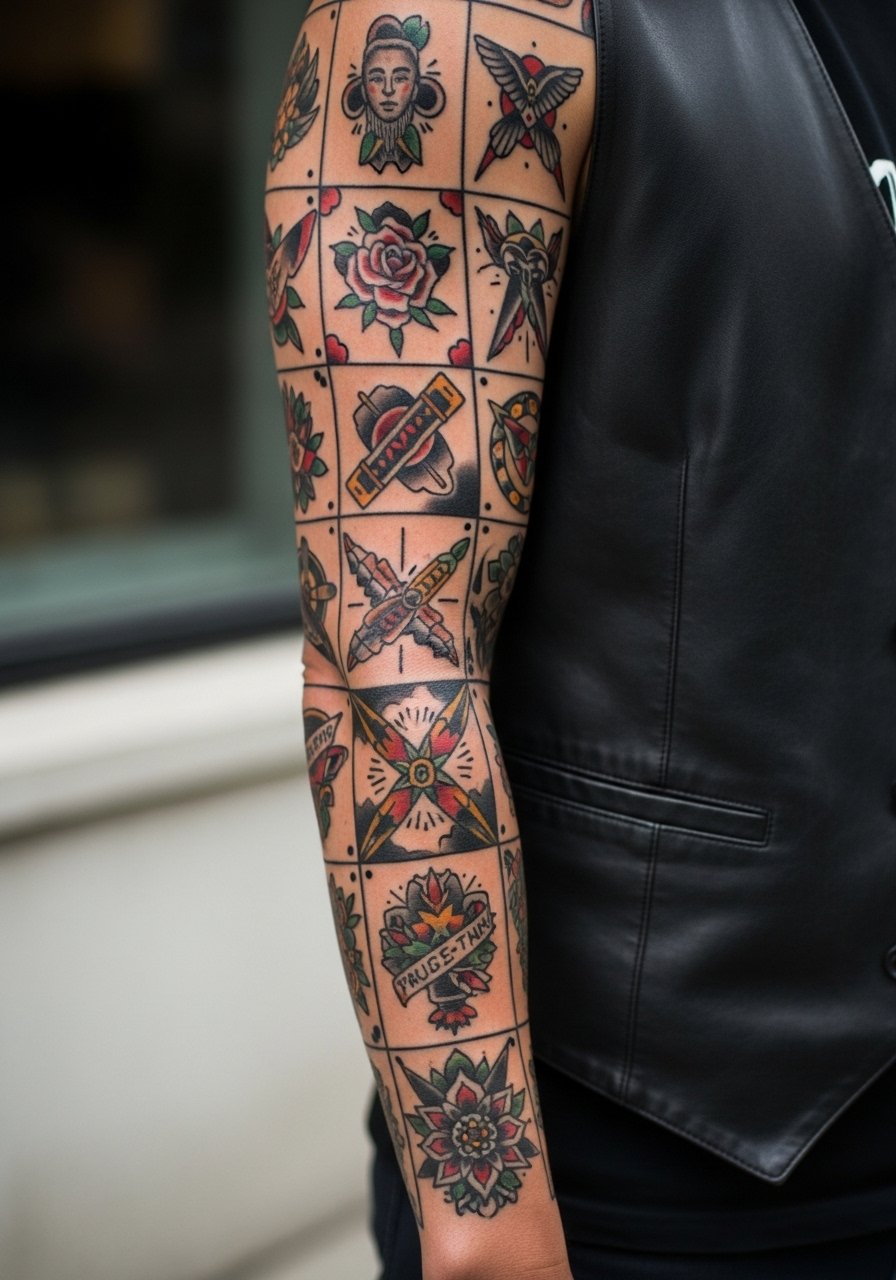
Patchwork sleeves suit people who want to build a story over time. The strategic gap is intentional, so plan placement and negative space with your artist instead of filling everything from the start. A frequent mistake is booking rush walk-ins and then having pieces clash in scale or line weight. Patchwork takes multiple sessions across months or years. Expect varied pain depending on zone and a patchwork of touch-ups as individual pieces age unevenly. For showing gaps tastefully choose sleeveless dresses or a sleeveless vest women so panels can breathe without visual noise.
11. Neo-Traditional Floral with Butterfly on Upper Arm
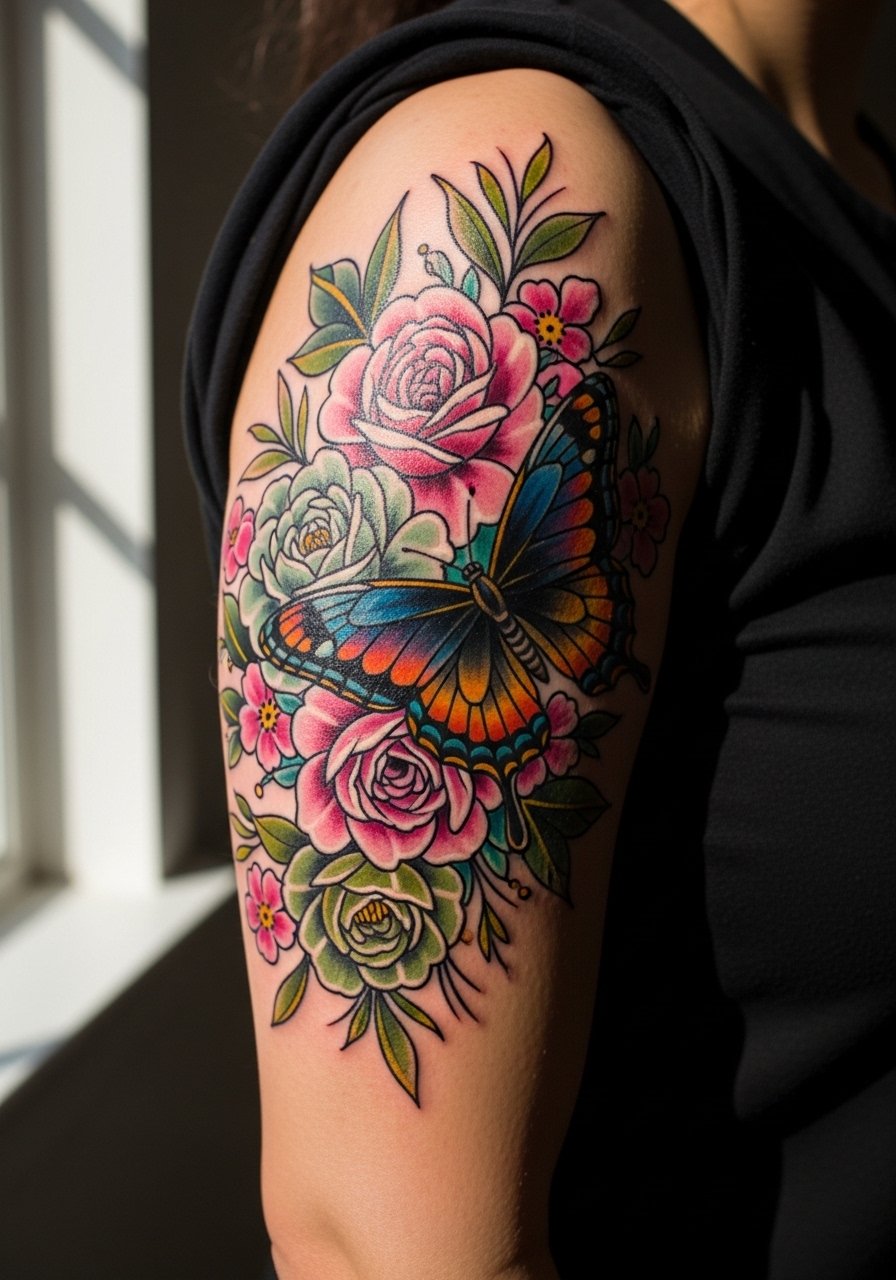
Neo-traditional lets you push color beyond the classic palette while keeping strong outlines. There is a debate between purists and neo fans. Purists argue that the limited palette and thick outlines define authenticity. The neo camp says richer palettes and ornate shading keep pieces from feeling dated. Both views matter. If you lean neo, ask your artist for a balance of bold outlines and controlled painterly fills so the piece does not lose definition. Upper arm sessions usually take two sittings for layered color and moderate pain. Pair this with off-shoulder tops for framed display.
12. Traditional Banner Script with Heart on the Wrist
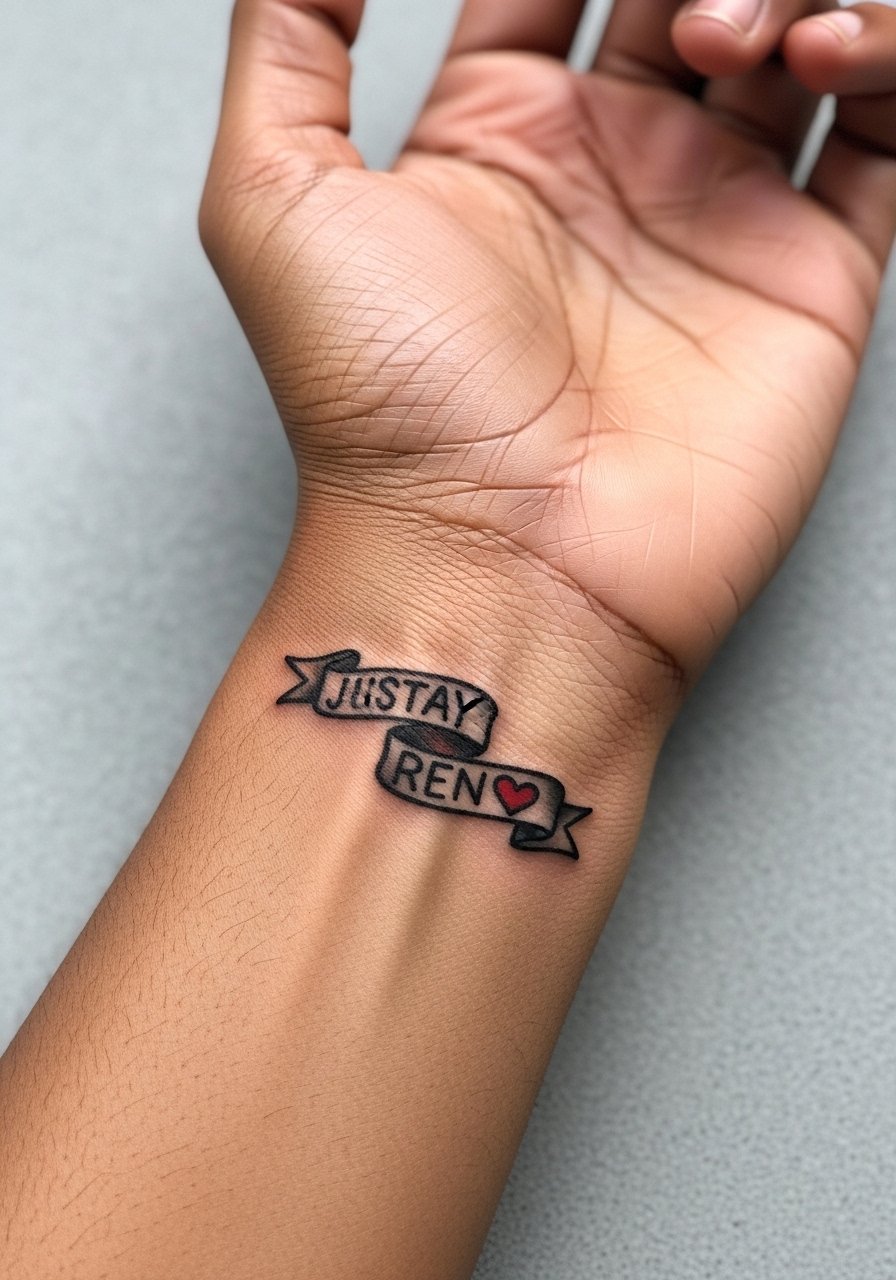
A wrist banner is a strong choice for readable, small traditional script. Keep the lettering simple and at least 6 mm tall so the strokes do not close in as the skin ages. The biggest mistake is tiny, ornate cursive in a cramped banner that becomes illegible. The wrist is one of the more sensitive areas, so expect a quick but sharp session under an hour. Because this area endures daily washing and friction, balance aesthetic with durable spacing. When showing it off, a cuff bracelet on the opposite wrist or a cuff bracelet silver works without crowding the tattoo.
13. Micro Traditional Compass on Inner Wrist
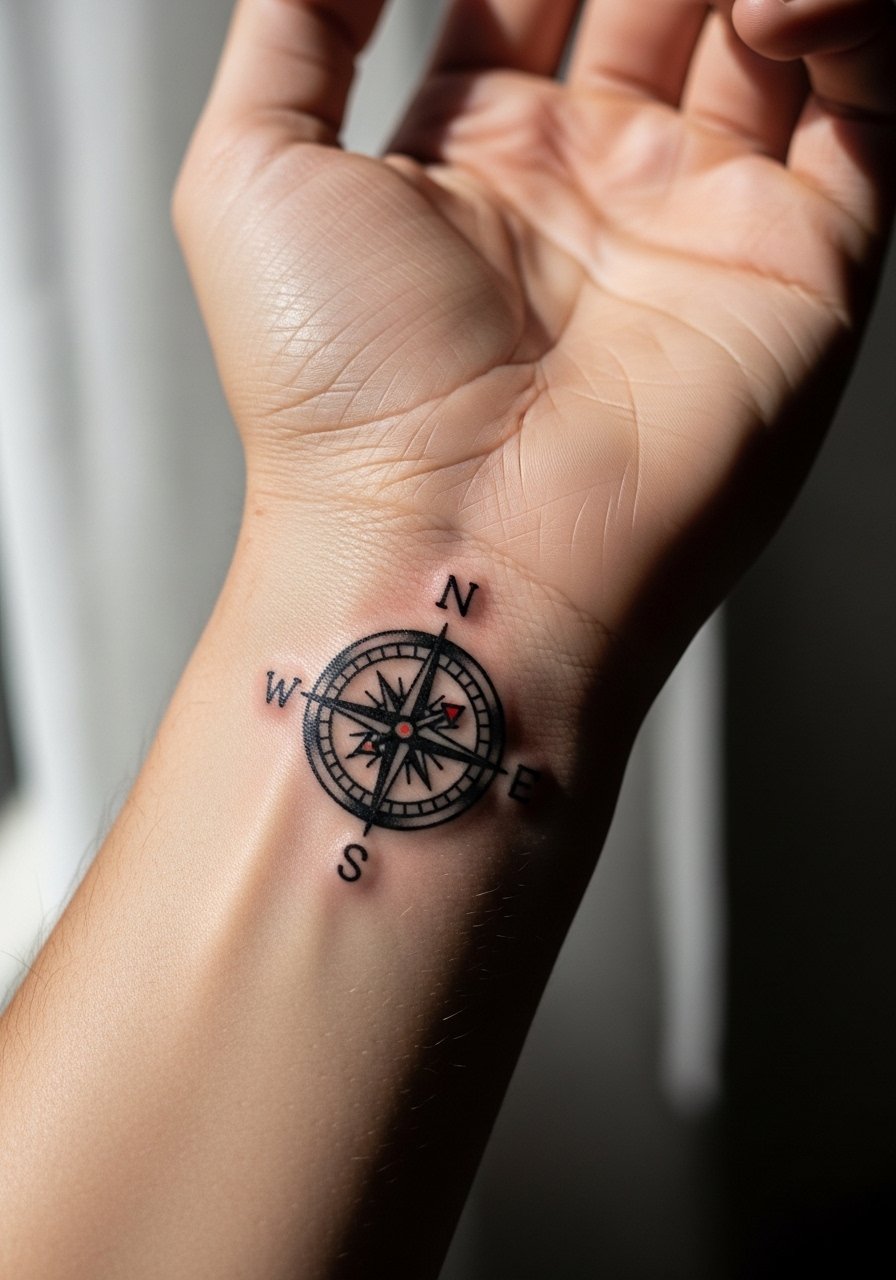
A tiny compass works for someone who wants a small nod to nautical or direction themes while keeping a traditional edge. Tell your artist you want clear quadrant markers and open negative space; dense compass faces tend to blur into a central gray blob. The inner wrist is sensitive, expect a quick sharp sting and a session under an hour. Touch-ups are common at year two because constant motion and washing affect tiny elements. For session wear choose short sleeves or nothing on the arm to avoid fabric snagging.
14. Small Traditional Star Cluster on Outer Forearm
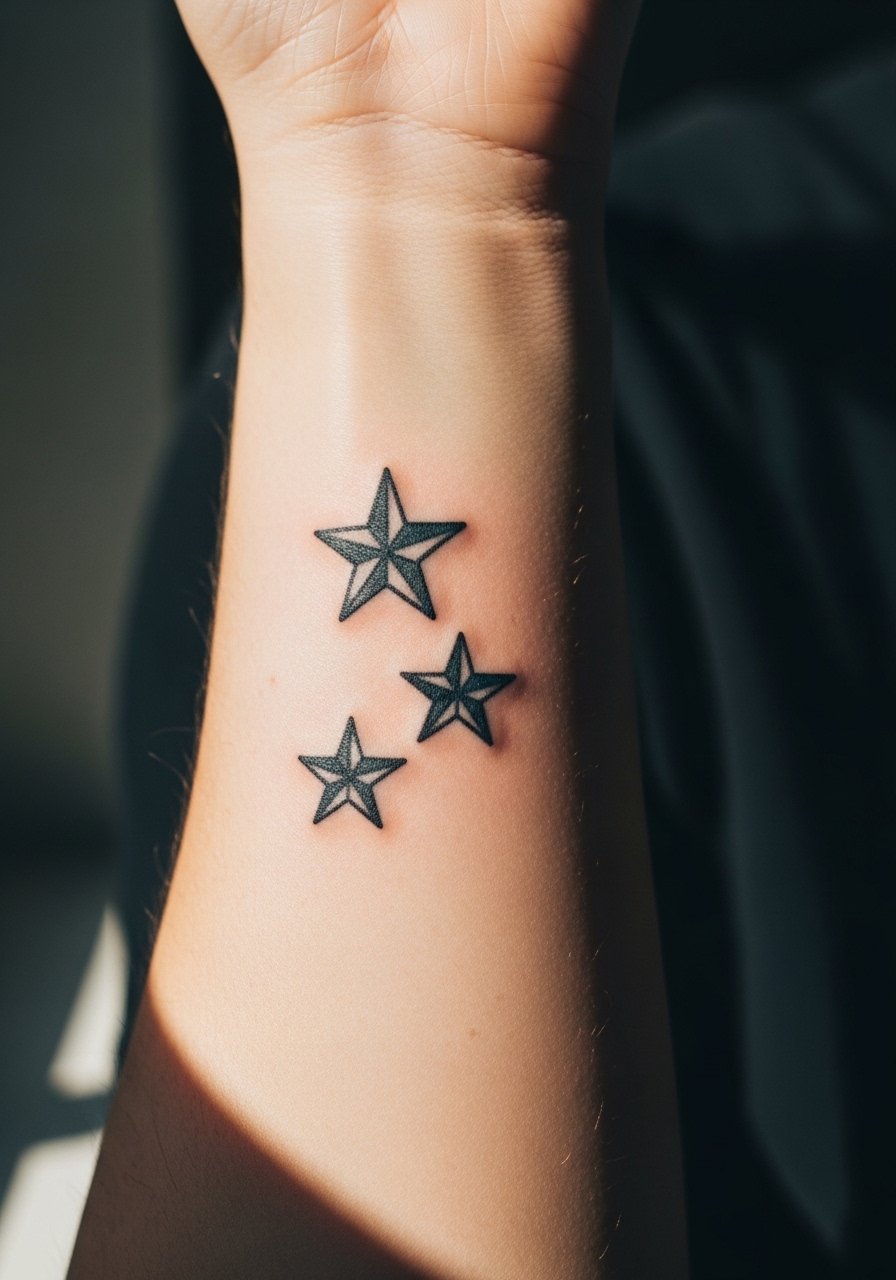
Star clusters make flexible fillers that scale from tiny accents to repeating patterns. Ask for slightly varying sizes and spacing rather than identical stars so they age into a natural rhythm. A mistake is packing identical small stars too close together which causes central blurring between points. Sessions are brief and easy on the outer forearm with low pain. For easy showing, wear rolled sleeve cotton tees in solid navy or red to echo nautical accents and keep the stars visible.
15. Traditional Ship Wheel with Rope on Upper Forearm
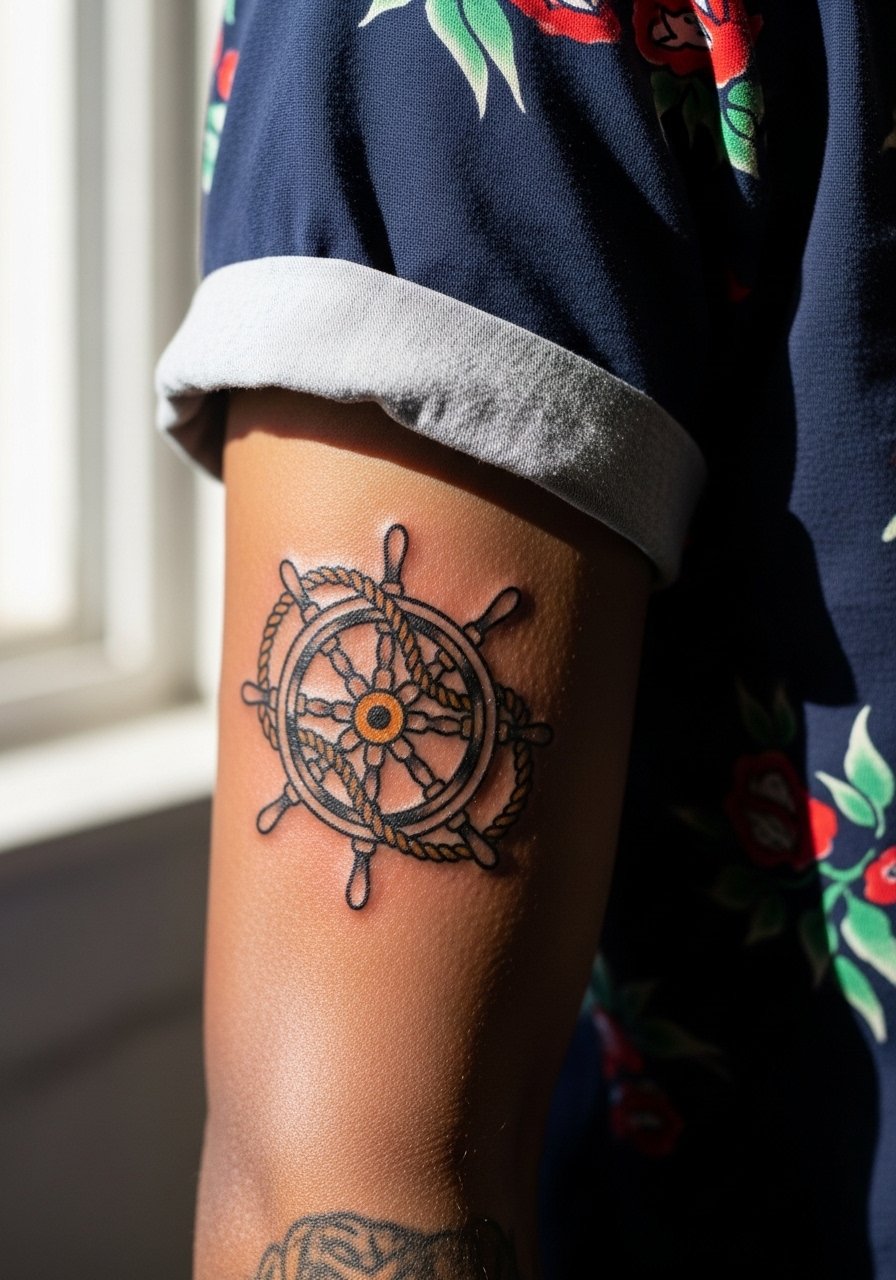
A ship wheel reads strongly when centered on the upper forearm and sized to leave breathing room for the rope detail. Tell the artist you want the spokes thicker and the rope simplified so the negative space remains clear as the years pass. People sometimes over-detail the rope knots which then merge into dark patches. Expect moderate pain near the elbow crease and one session for a 4-6 inch composition. For session day wear a rolled sleeve cotton tee that gives the artist easy access without chafing the area.
16. Tiny Traditional Key on Side of Wrist
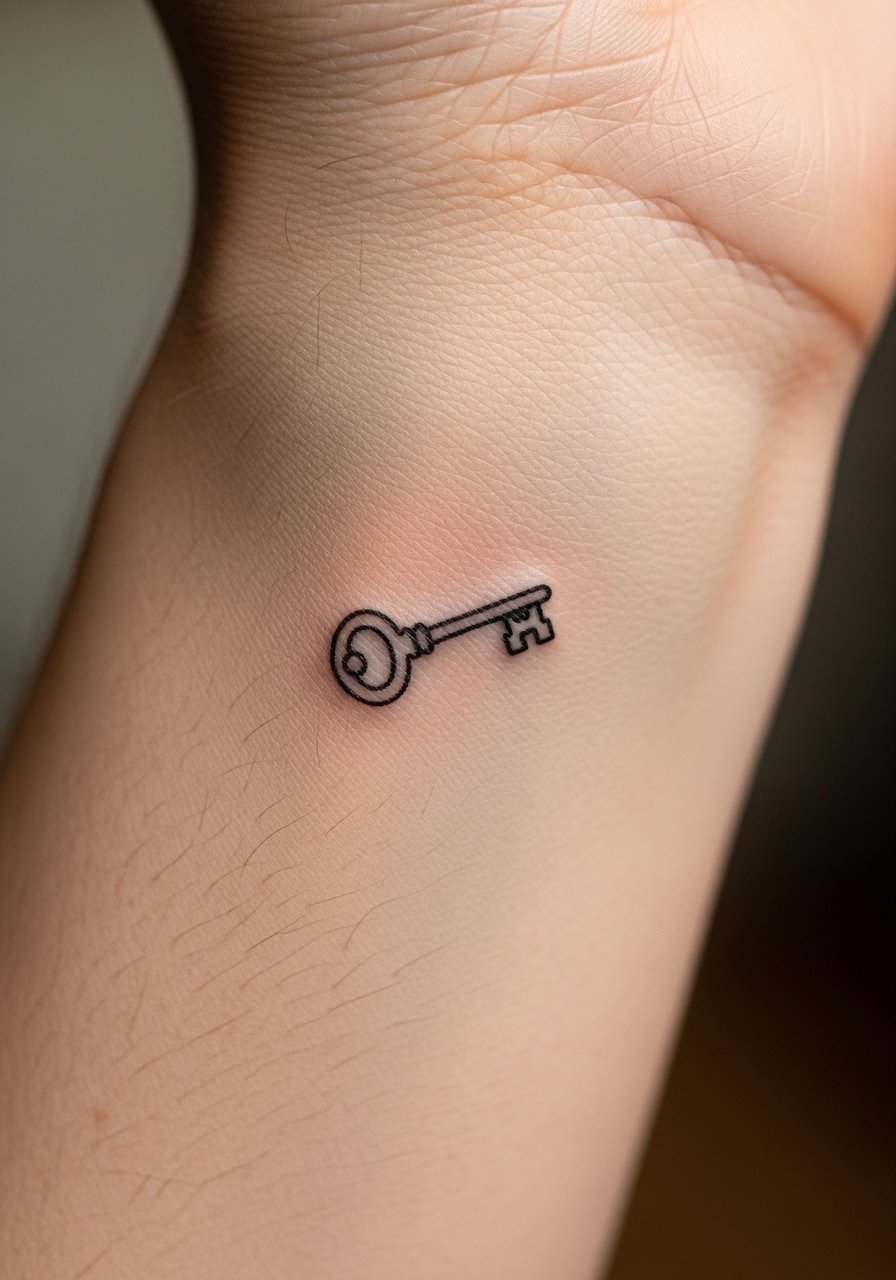
Small keys are excellent minimal pieces that still keep a traditional aesthetic when executed with clear silhouette and open space. Ask for the teeth of the key to be bold rather than intricately lined because small teeth blur first. The side of the wrist is sensitive and sees a lot of movement, so expect a quick session and a likely touch-up at year two. A practical session tip is to wear short sleeves with no bracelets to let the artist work without obstruction.
17. Traditional Lion Head on Upper Arm Near Shoulder
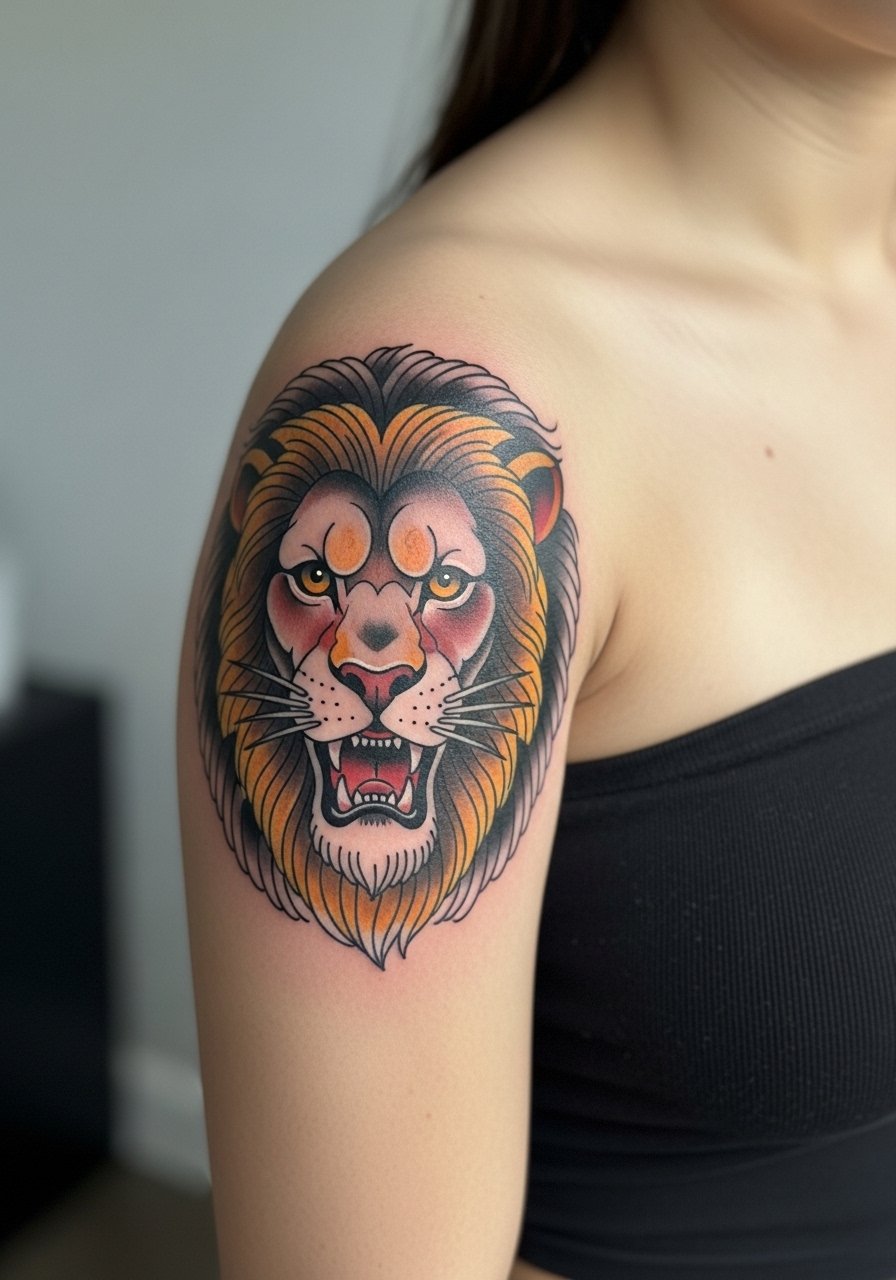
A lion head suits the shoulder cap where musculature adds natural framing. Request simplified mane shapes and solid eye contrast because over-texturing the mane in tight areas can fade into muddiness. Shoulder work feels easier on pain and usually requires one to two sessions depending on size. If you are mindful of cultural symbols, keep the design classic rather than borrowing sacred iconography. Wear a strapless tube top for session ease and to show the piece cleanly once healed.
Frequently Asked Questions
Q: Will traditional bold outlines age better on my forearm than fine line work?
A: From what I have seen, thicker outlines and solid saturation tend to hold cleaner over five years on forearm skin. Fine line pieces can look gorgeous fresh but often need a touch-up sooner, especially in high-motion areas like the inner forearm.
Q: If I want a patchwork sleeve, how should I schedule sessions so pieces look cohesive?
A: Talk to your artist about a loose plan for scale and line weight before booking individual sessions. Spread sessions so adjacent pieces can be adjusted in contrast and size to match earlier work, and expect touch-ups after most sections settle.
Q: Are there traditional motifs I should avoid because of cultural sensitivity?
A: Yes. Some portrait motifs and religious or indigenous imagery raise valid concerns. Two approaches exist. One group adapts the visual language respectfully with clear attribution and stylization. The other avoids direct replication out of caution. If a motif traces to a specific culture, discuss respectful variation with your artist.
Q: How much does placement affect session pain and healing for the arm?
A: Placement changes everything. Outer forearm and bicep are generally low pain and heal predictably. Inner forearm, wrist sides, and near the elbow are more sensitive and can need shorter sessions. Plan clothing that gives the artist easy access for that specific zone.
Q: Where can I find artists who do feminine traditional without neon or over-decoration?
A: Search style-specific tags and local studio listings using phrases like "classic American traditional women" or check tattoo directories filtered by style and city. Also browse community forums for portfolio links and ask for healed photos rather than fresh work to judge longevity.
