
Fine line stamp-style tattoos look incredible on feeds right now, but what holds up over years is not always what trends fastest. Postage stamp pieces that read clean long term lean on smart spacing, bold border choices, and placement that avoids constant friction. Below are 21 postage stamp tattoo ideas with notes on how to ask for them, what usually goes wrong, and how to style or prepare so the design looks like a stamp, not a smudge.
1. Mini Stamped Rose on Inner Forearm

I’ve seen small roses framed like tiny stamps that still read crisp after five years. Ask your artist for a slightly thicker outer border and simplified petal shapes so the silhouette stays legible as saturation softens. Common mistakes are packing too much interior detail and using hairline borders that merge over time. Expect a mild ache for the session and a three to four hour slot depending on color. For showing it off, rolled sleeves work best, so wear a loose button-down shirt to your appointment so the artist has clean access.
2. Tiny Ankle Postage Stamp Bird
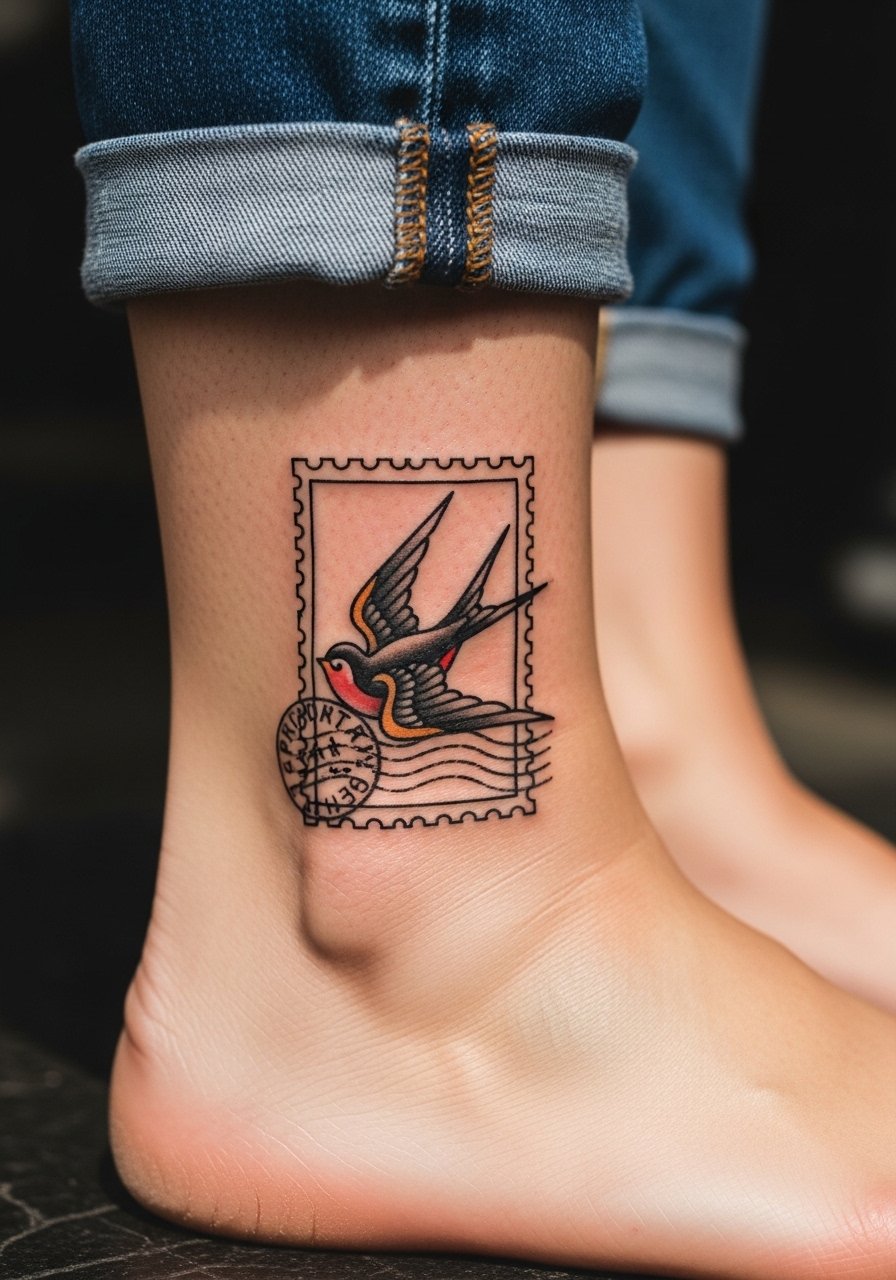
Fair warning: the ankle is a bumpier canvas and can feel sharper than the forearm. This small bird works best with solid black border lines and selective color fills rather than full gradients. Tell the artist to prioritize a clean border and to avoid tiny feather detail near the border. A common error is asking for tiny text with the bird, which often blurs. Session time is usually under two hours. For after the session photos, cropped jeans or sandals frame the piece, so plan an outfit like rolled denim you can step into easily.
3. Wrist Constellation Stamp
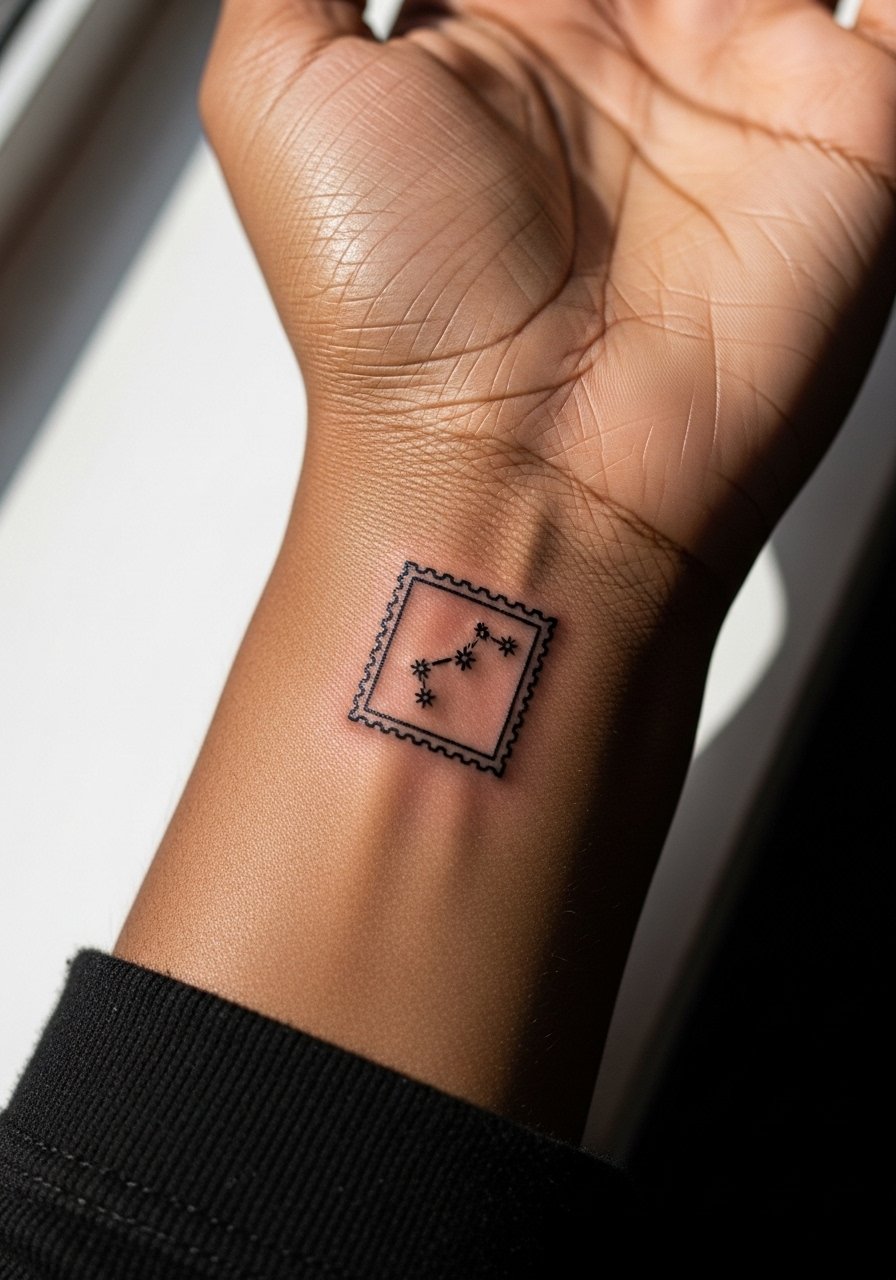
Most wrist tattoos live or die by friction and washing. The constellation stamp fares best with a bold outer frame and modest dot work inside rather than dense stippling. In six months the dots will soften, by two years the border defines the piece more than the interior. A real mistake is asking for ultra-fine stars and packed nebula shading. Wrist work needs touch-ups sooner than an upper arm. Pair this with stacked dainty bracelets or a minimalist watch when you want to highlight it without distracting from the tiny linework.
4. Collarbone Vintage Stamp Script

There is something about a script set inside a stamp that reads like a secret note. For collarbone placements, ask for slightly bolder script spacing so the letters retain shape as skin moves. A frequent error is requesting very tight cursive that turns into a blur across the clavicle. The area can be sensitive but the session is usually short. For photos and evenings out, a wide-neck top that can be pulled aside gently frames the piece. Wear a wide-neck shirt to your appointment so the artist can access the collarbone cleanly.
5. Finger Daisy Stamp

The finger is a high-wear spot and the biggest mistake is expecting fine detail to last untouched. For a postage stamp vibe, keep the border solid and the flower simple with one or two petals emphasized. Tell your artist you want a bold border and minimal interior detail, and expect a faster fade and likely touch-up at year one or two. The session is quick but the healing period calls for mindful use of your hands. Rings can frame the piece well for photos, so bring jewelry that sits above or below the tattoo rather than directly over it.
6. Ribcage Landscape Stamp
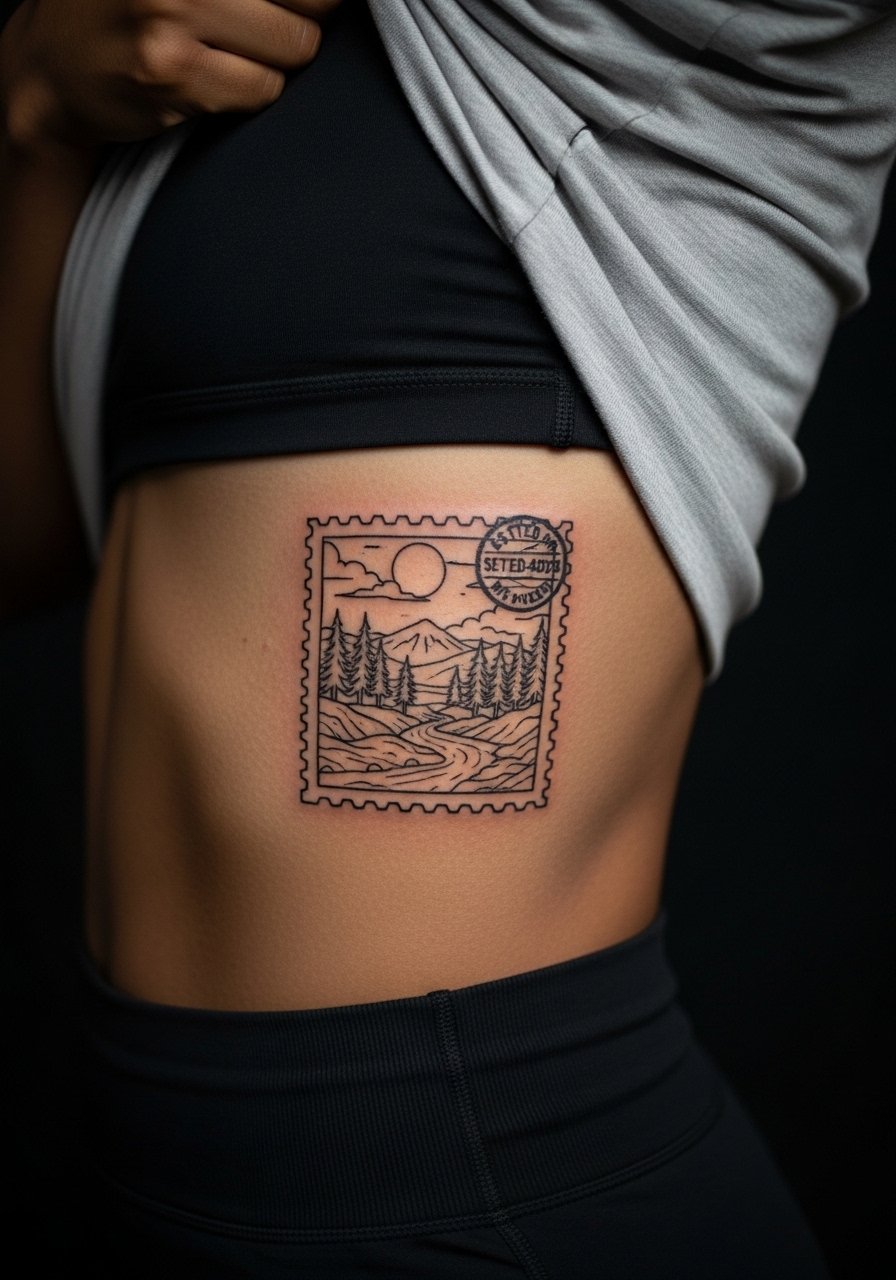
Artists split on whether fine line on ribs holds up. One group argues the skin there stretches and blurs lines within two years. The other group says with proper needle depth and spacing it can settle well. My recommendation is to ask the artist where they stand and to consider a bolder border and simpler interior if they are cautious. Rib sessions are painful for most, so plan a longer appointment and wear a top you can lift easily. This placement benefits from a slower approach and a clear conversation about touch-up expectations.
Studio Day Picks
The forearm, wrist, and finger ideas above all face different healing challenges than the rib and chest pieces, so a few targeted items make those sessions and the first week easier.
- Stencil transfer paper kit. Lets you preview line placement on skin and adjust the stamp border before any needle touches the area.
- Topical numbing cream. Applied per directions before a sensitive rib or ankle session it can take the edge off without altering linework.
- Thin protective film roll. Useful for finger and wrist tattoos that face constant washing and friction in the first week.
- Fragrance-free gentle body wash. Cleanses healing areas without stripping the fresh ink, especially helpful for wrist and forearm pieces.
- Aquaphor healing ointment. A thin layer early on keeps tiny linework moist without clogging delicate channels.
7. Calf Anchor Stamp

I’ve seen calf stamps age very well when the border is given space and the anchor shape is simplified. The outer calf tolerates saturation and color, so this design can have richer fills than a finger or wrist piece. Sessions are usually comfortable and may run an hour or two depending on color work. The common mistake is cramming tiny shading into the negative space. For summer looks, pair this with sandals and cropped shorts to show the piece. Wear loose drawstring linen pants to your appointment so the artist can roll the leg up without pinching the area.
8. Back-of-Neck Vintage Sun Stamp
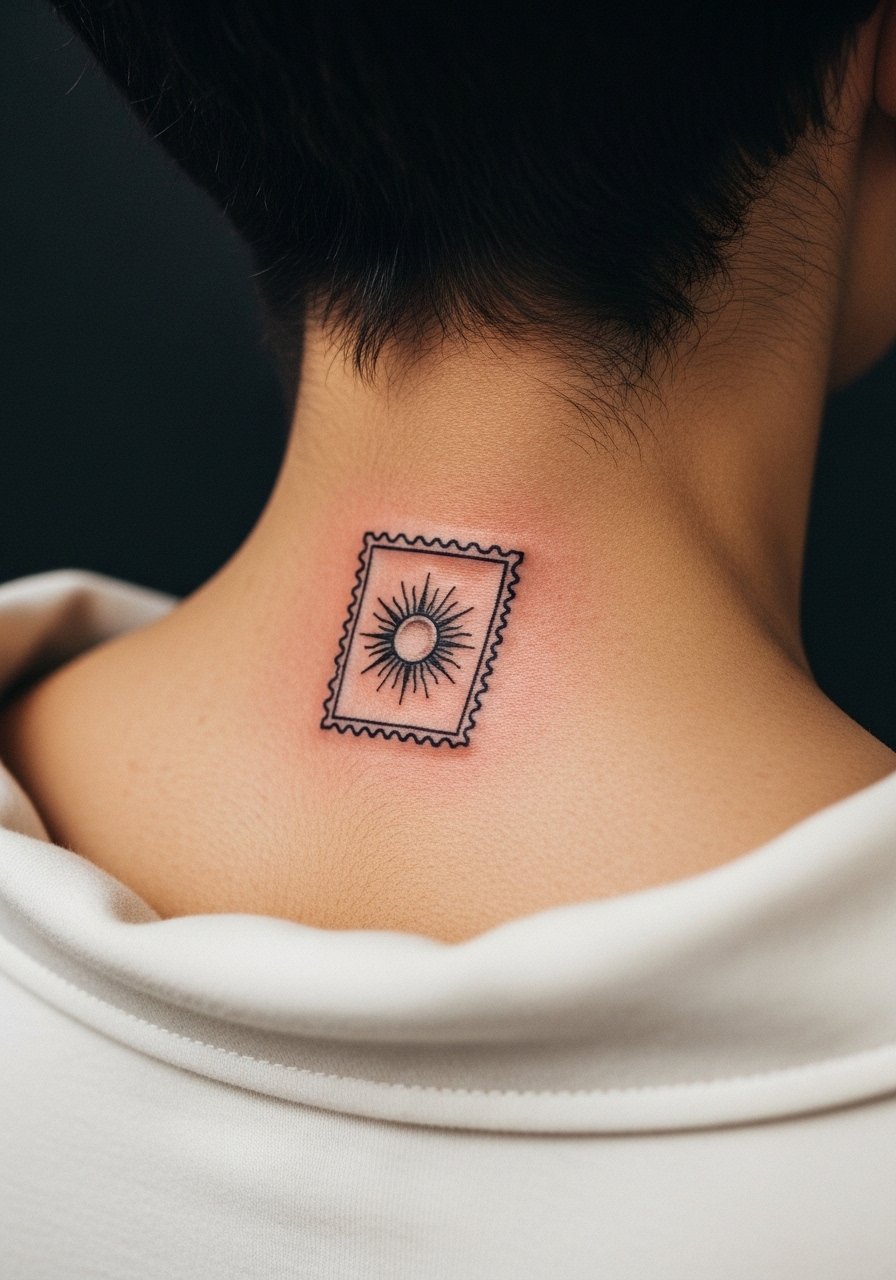
The back of the neck is a spot people underestimate for visibility and sensitivity. The session is brief but the area sees friction from collars and hair, so ask for a slightly thicker border and less interior dot work. One mistake is requesting ultra-fine rays that merge when hair rubs the area. If you want to show it off, consider short hair or updos for a hair-up reveal. For the appointment, wearing a wide-neck top helps the artist access the nape cleanly.
9. Shoulder Blade Sailor Stamp
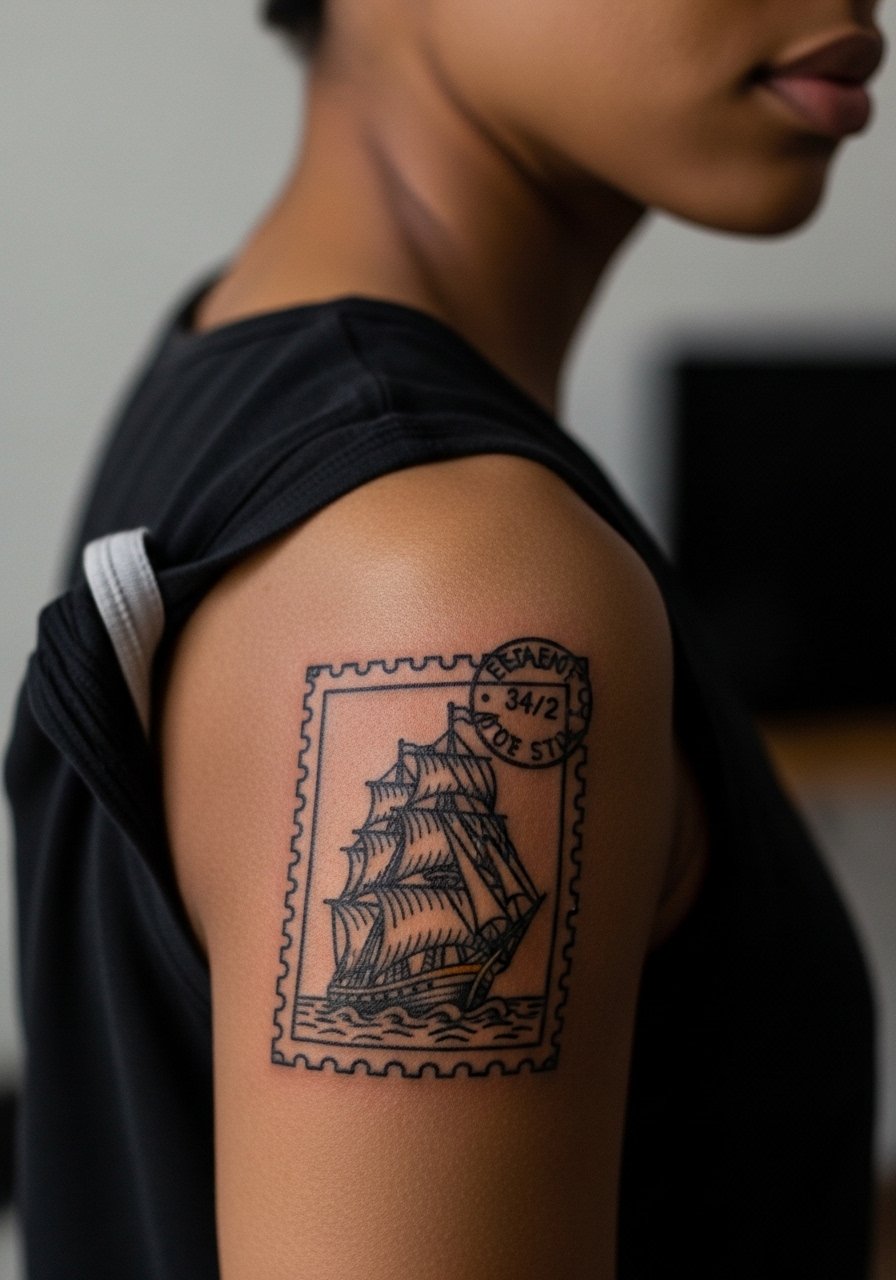
There is visual impact when a small ship sits in a stamp on the shoulder blade. The area takes color and saturation well and the skin is forgiving, so borders hold for longer. A common problem is asking for micro detail in the sails that will soften too quickly. Bring references that show the exact border thickness you want. Sessions are moderate in pain and can be done in a single sitting. An open-back dress or a tank top showcases the placement, so plan a few outfits like an open-back midi dress if you want photos.
10. Outer Thigh Floral Wreath Stamp

The outer thigh is generous canvas and tolerates larger stamp designs. If you want a detailed wreath, keep the stamp frame proportionally larger so petals do not crowd the border. The session is comfortable and can be split across two sittings if you add color. A common oversight is placing very fine interior shading without widening the border first. For modesty and access, wear shorts you can step into and pull down slightly. Expect the piece to age well with minimal touch-ups if spacing is respected.
11. Inner Wrist Portrait Stamp
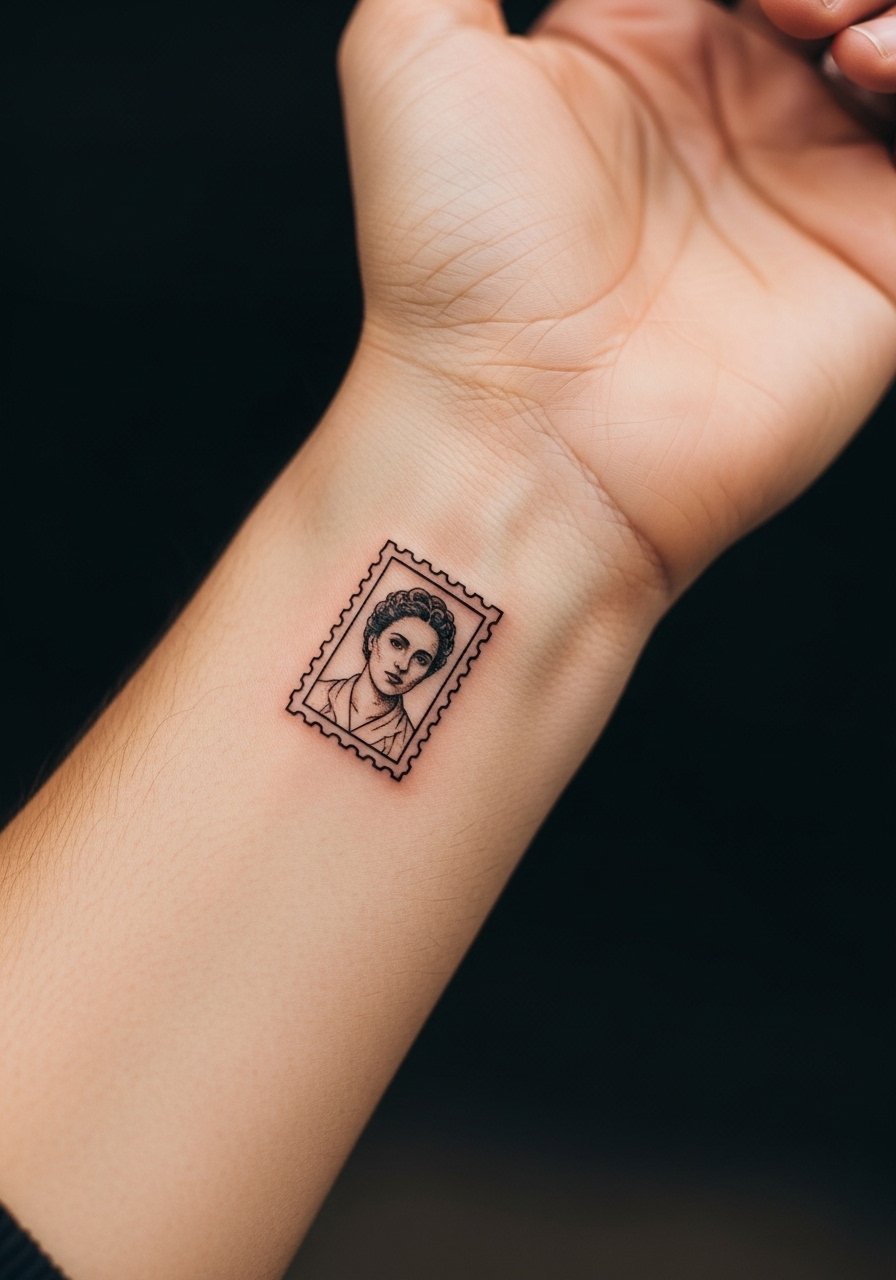
When portraiture goes micro inside a stamp, simplicity wins. Tell the artist you want blocky shadow shapes rather than tiny facial lines. The inner wrist sees a lot of washing so the most common mistake is asking for hairline detail that disappears. Sessions can take longer for portraits, so plan a two to three hour appointment. For everyday styling, a thin chain bracelet or a minimalist watch keeps attention on the portrait. Bring a bracelet you like to wear afterward so you can see how it frames the tattoo.
12. Upper Arm Traditional Skull Stamp
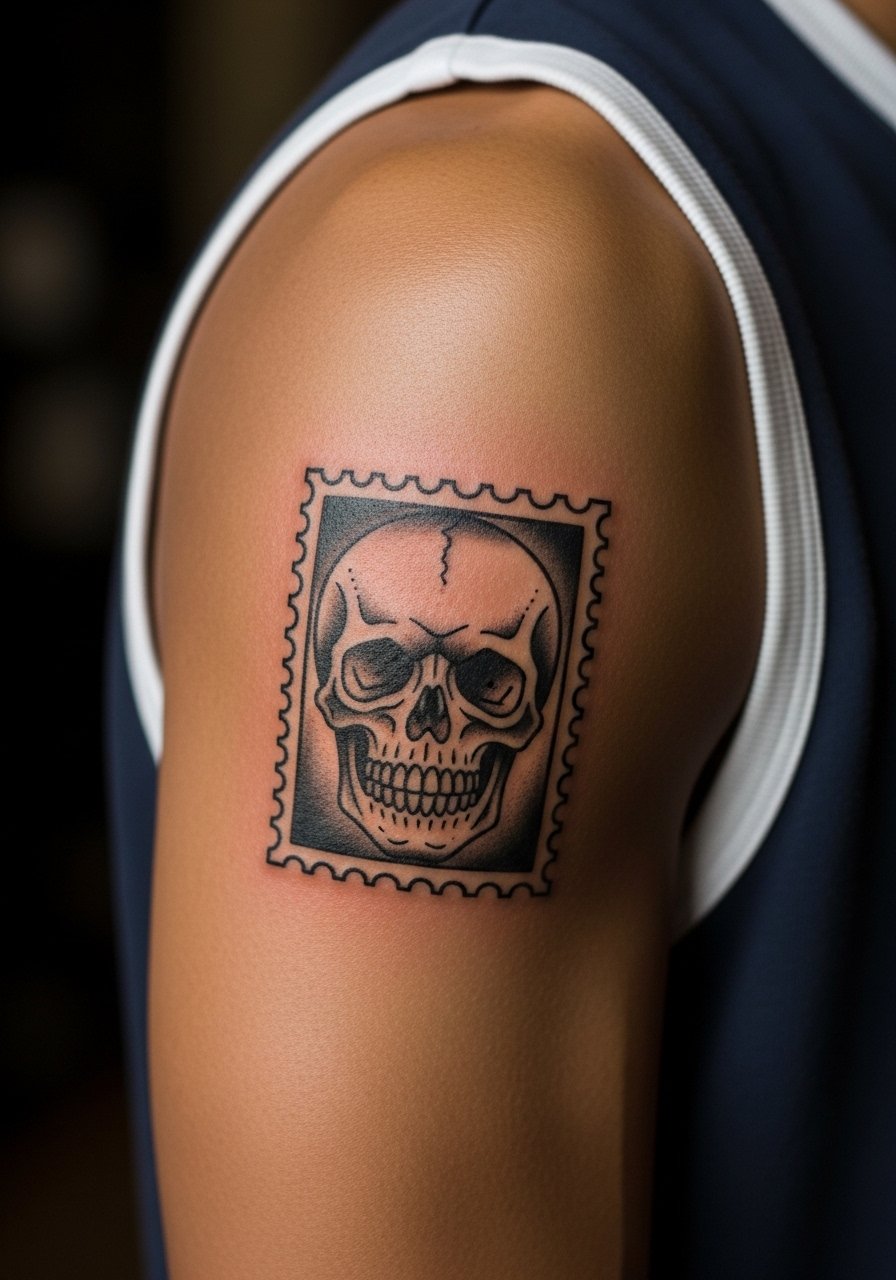
When a skull sits in a stamp on the upper arm it has room to breathe, which helps the border and interior age sturdily. The biggest mistake is shrinking the stamp too small and crowding the skull detail. Ask for balanced negative space and modest color saturation to avoid patchy fades. Sessions are tolerable and often finished in a single two-hour slot. Sleeveless shirts showcase this placement well, so wear something like a loose tank top to your appointment for easy access.
13. Lower Back Decorative Stamp
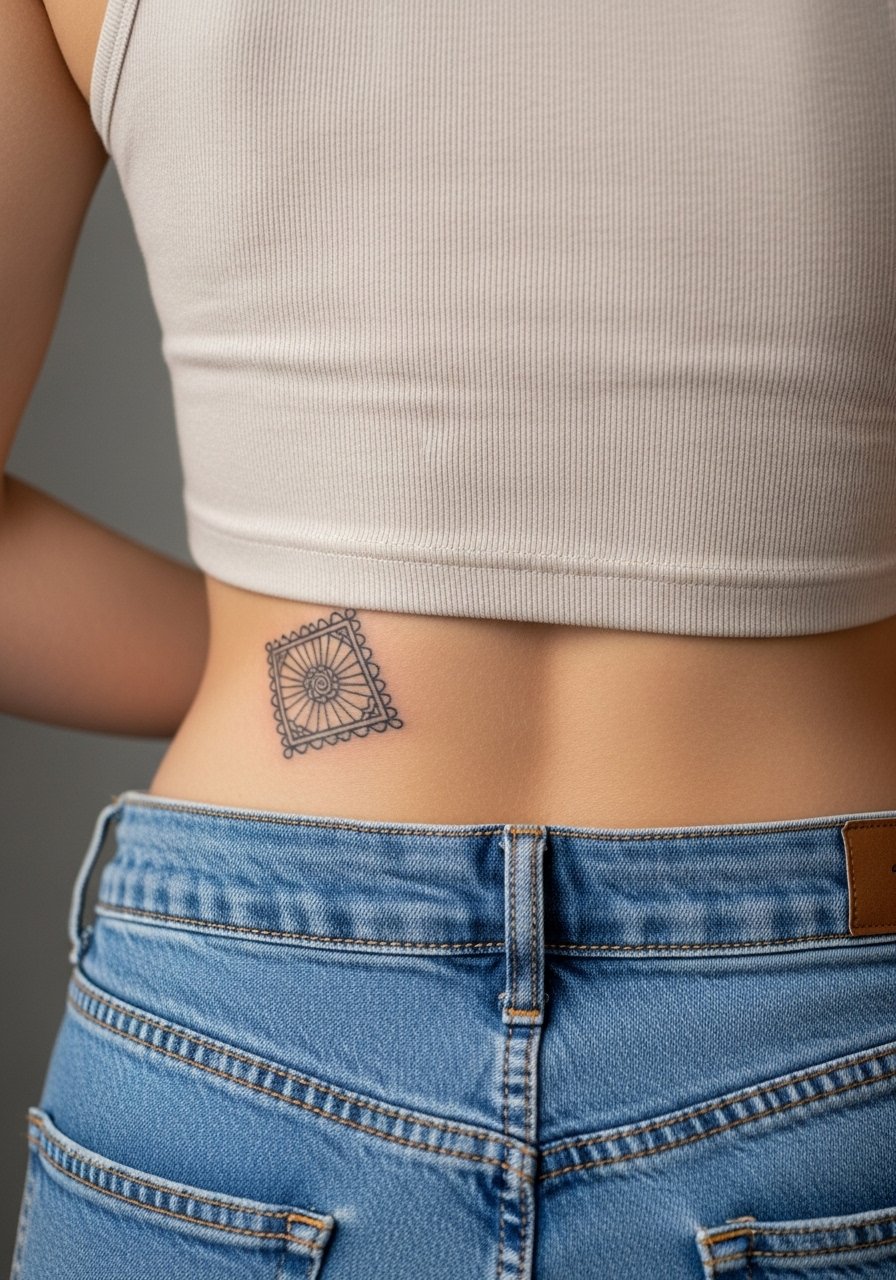
Lower back stamps can be ornate because the canvas is wide, but they also live in a higher friction zone from waistbands. A common error is concentrating dense shading right under the border where clothing rubs. For longevity, ask for a slightly elevated border and minimal color at the waistband line. Consider your career and how visible lower back tattoos might be in certain settings if that matters to you. Sessions here are moderate in pain and can be scheduled in a single sitting depending on size.
14. Sternum Tiny Heart Stamp

Sternum pieces are intimate and often more painful than they look. The skin there moves with breathing, so the main mistake is requesting ultra-fine interior detail. If you want a tiny heart in a stamp, keep the lines confident and the interior simple. Sessions require gentle positioning and a top you can pull down marginally to expose only the sternum. Some artists prefer to break this work into shorter passes, so expect communication about pacing and comfort during the appointment.
15. Top of Foot Map Stamp
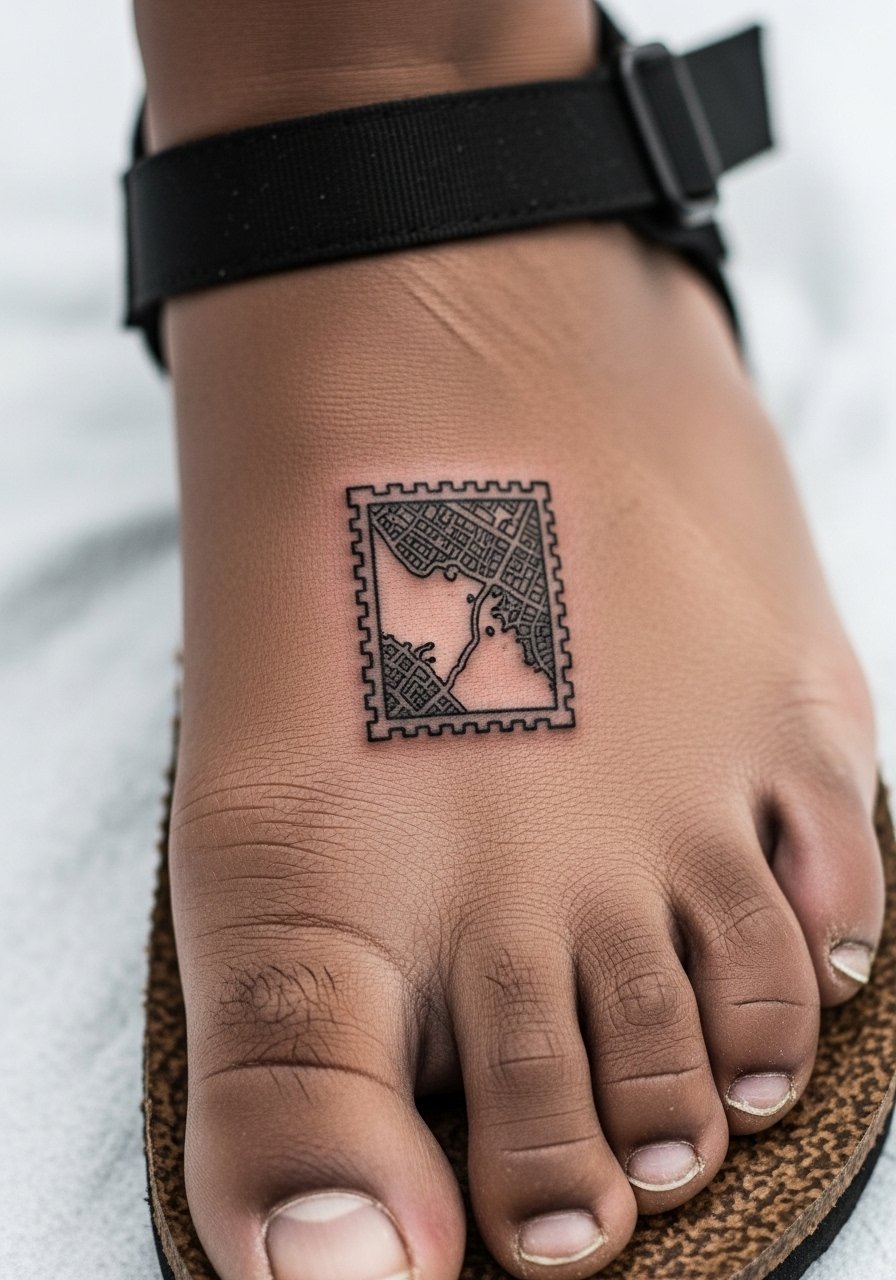
Foot tattoos deal with friction from shoes and repeated walking. A map inside a stamp works best with bold borders and simplified land shapes so the silhouette reads even as interior detail softens. The session can be sharp because the foot is bony, and healing is slower due to shoe contact. A common mistake is packing tiny coastline detail that blurs. For show-off outfits, sandals highlight the top of foot pieces. Bring footwear like flat sandals you can wear without rubbing the new tattoo when you leave.
16. Behind-the-Ear Micro Star Stamp
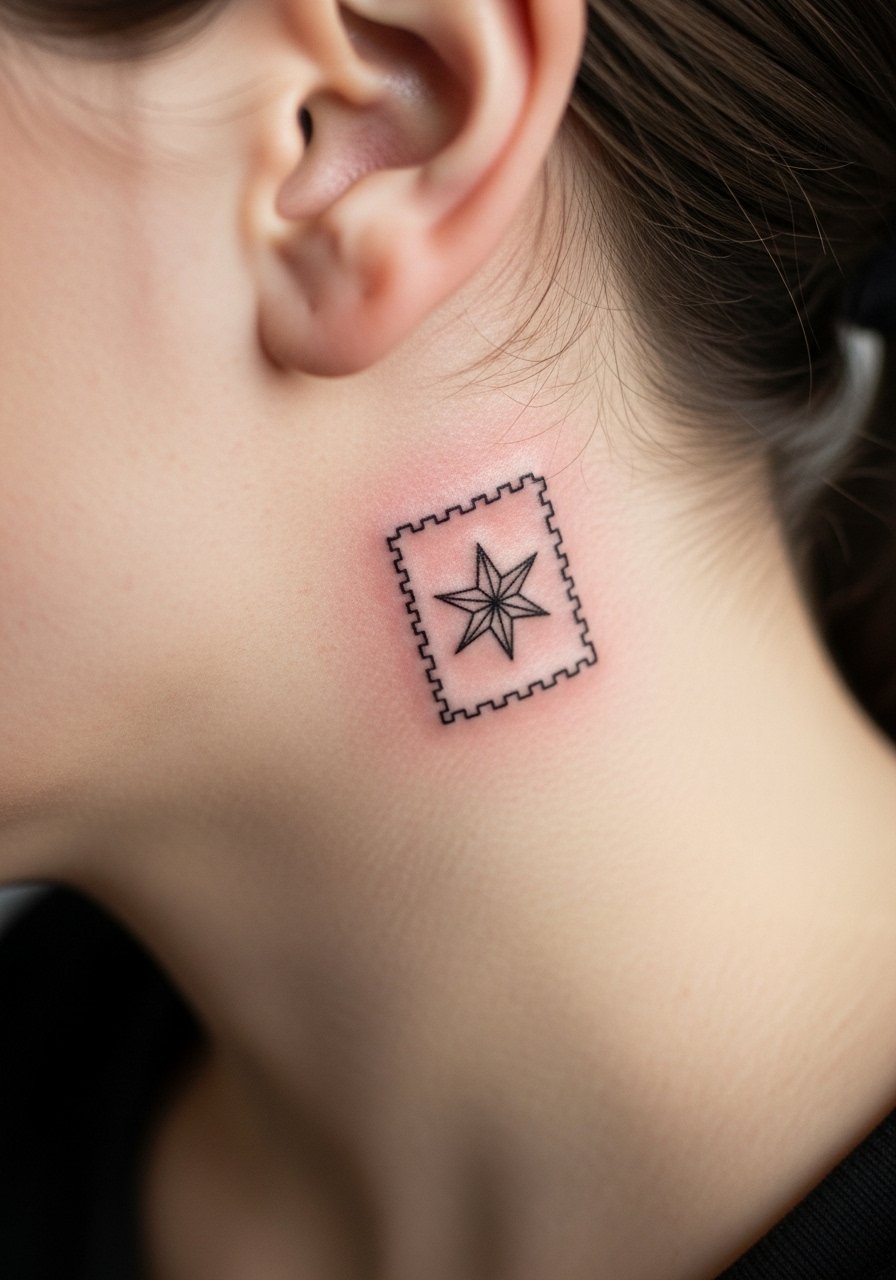
Behind-the-ear stamps are subtle and flirt with visibility as hair moves. The area needs thicker outer lines than you might ask for, because hair and collars cause friction. The typical mistake is insisting on very fine interior rays that vanish. Sessions are short but require careful placement because the curve of the skull affects stencil lay. If you plan to show it off often, consider hair-up styles that reveal the area for a clean look.
17. Full Sleeve Stamp Collage
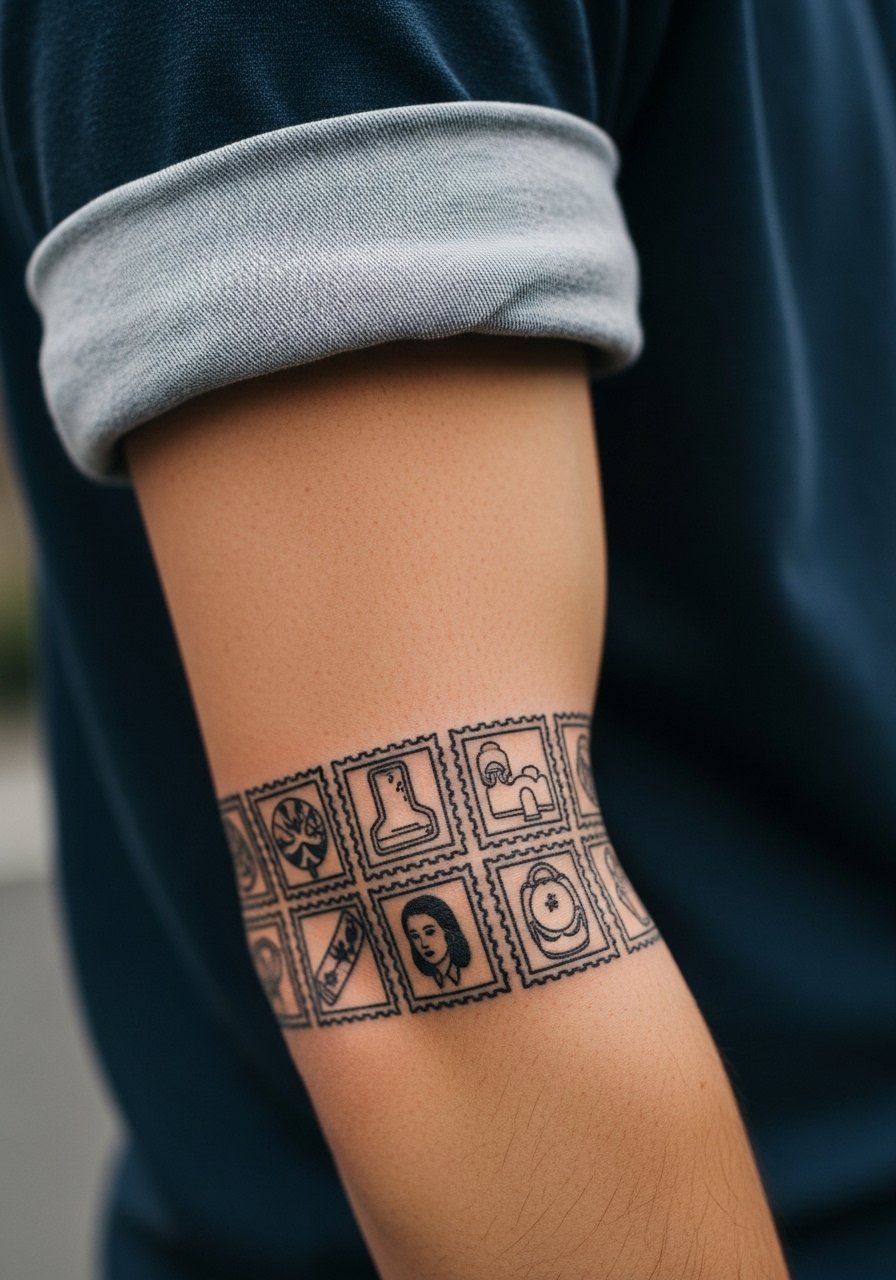
A sleeve made from many stamp motifs thrives when each stamp has consistent border weight and negative space. The key mistake is varying border thickness across stamps, which creates visual chaos as pieces age. During consultation, discuss a unifying border size and a palette that repeats across stamps to make the sleeve read cohesive. Building a sleeve takes multiple sessions and touch-ups. For showing off progress between sessions, rolled sleeves and short-sleeve shirts frame the work nicely, so plan wardrobe choices like a casual rolled sleeve button-down when you want to reveal the arm.
18. Back of Hand Postage Seal
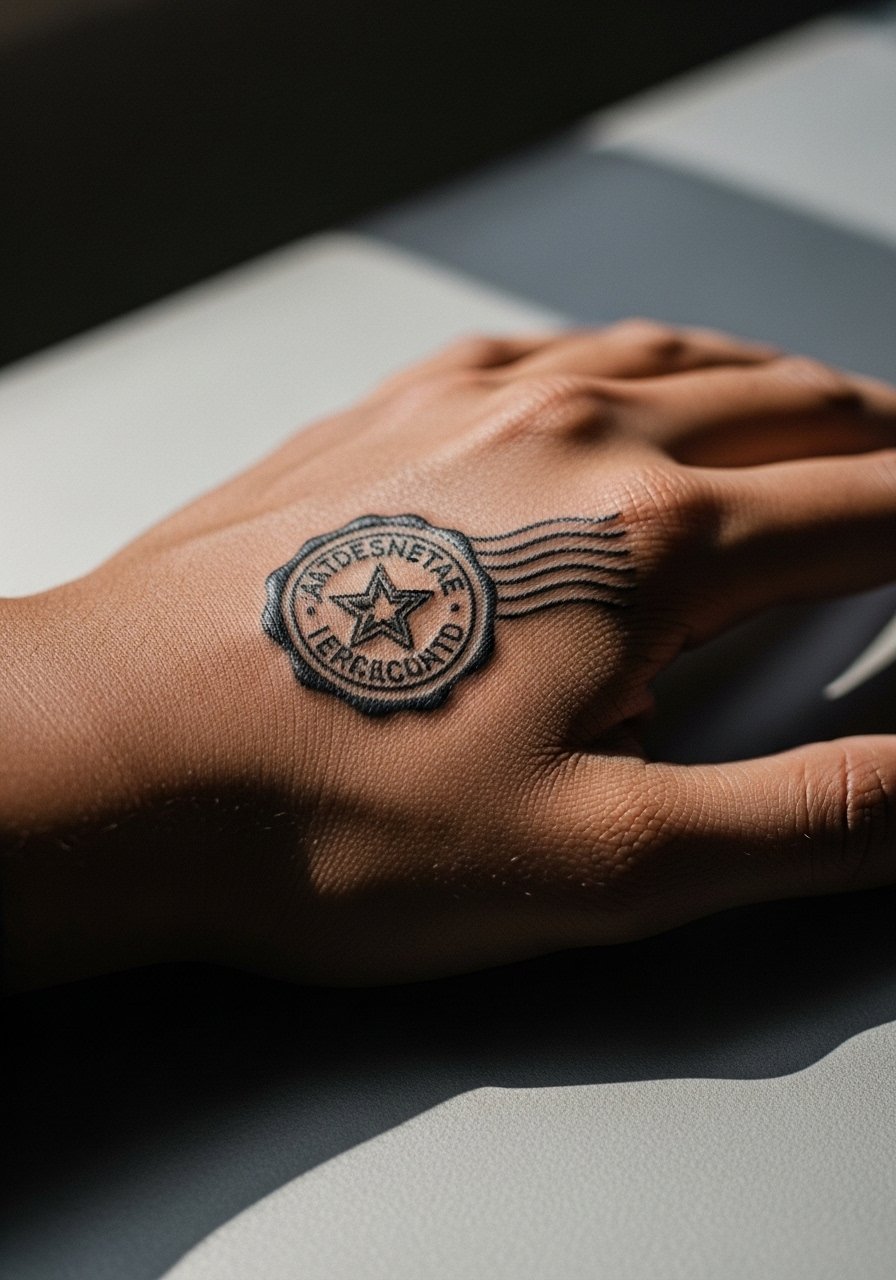
Hand tattoos still affect hiring in some industries, so think about how visible pieces may factor into job expectations. The back of the hand sees constant sun and washing, which makes border thickness essential. The common error is asking for extremely fine interior shading that disappears under daily wear. Sessions hurt more than a forearm and healing can be patchy. For accessorizing, choose rings and bracelets that sit clear of the tattoo to avoid rubbing, and expect touch-ups sooner than you would on covered skin.
19. Outer Calf Crescent Moon Stamp
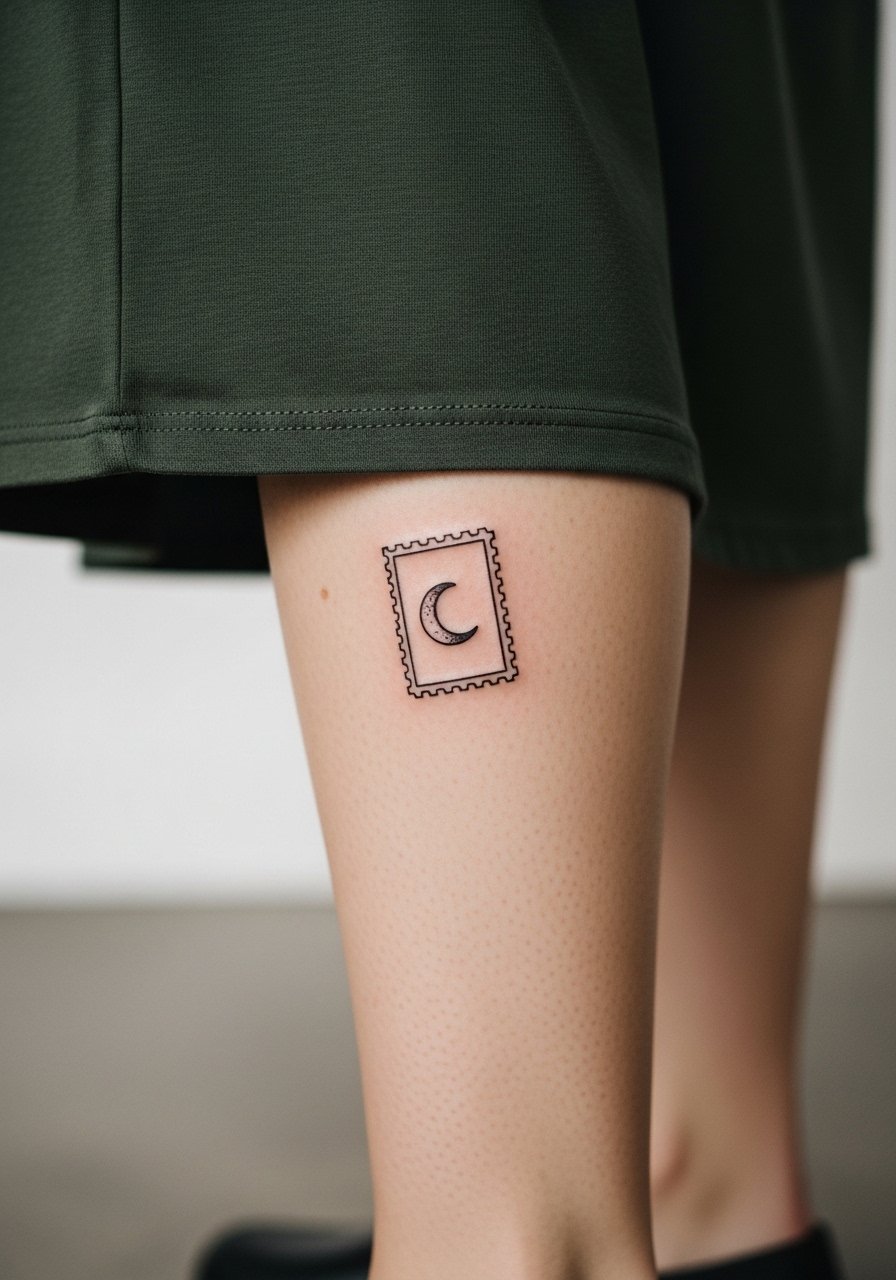
The outer calf is a forgiving placement and holds borders well, so a moon stamp can have a little more interior detail than a wrist piece. A frequent mistake is shrinking the stamp and crowding the moon with tiny dots that merge over time. Sessions are comfortable and usually short. For gallery shots, a midi skirt or cropped pants works well, so plan outfits like a flowy midi skirt to highlight the placement.
20. Nape Banner Stamp
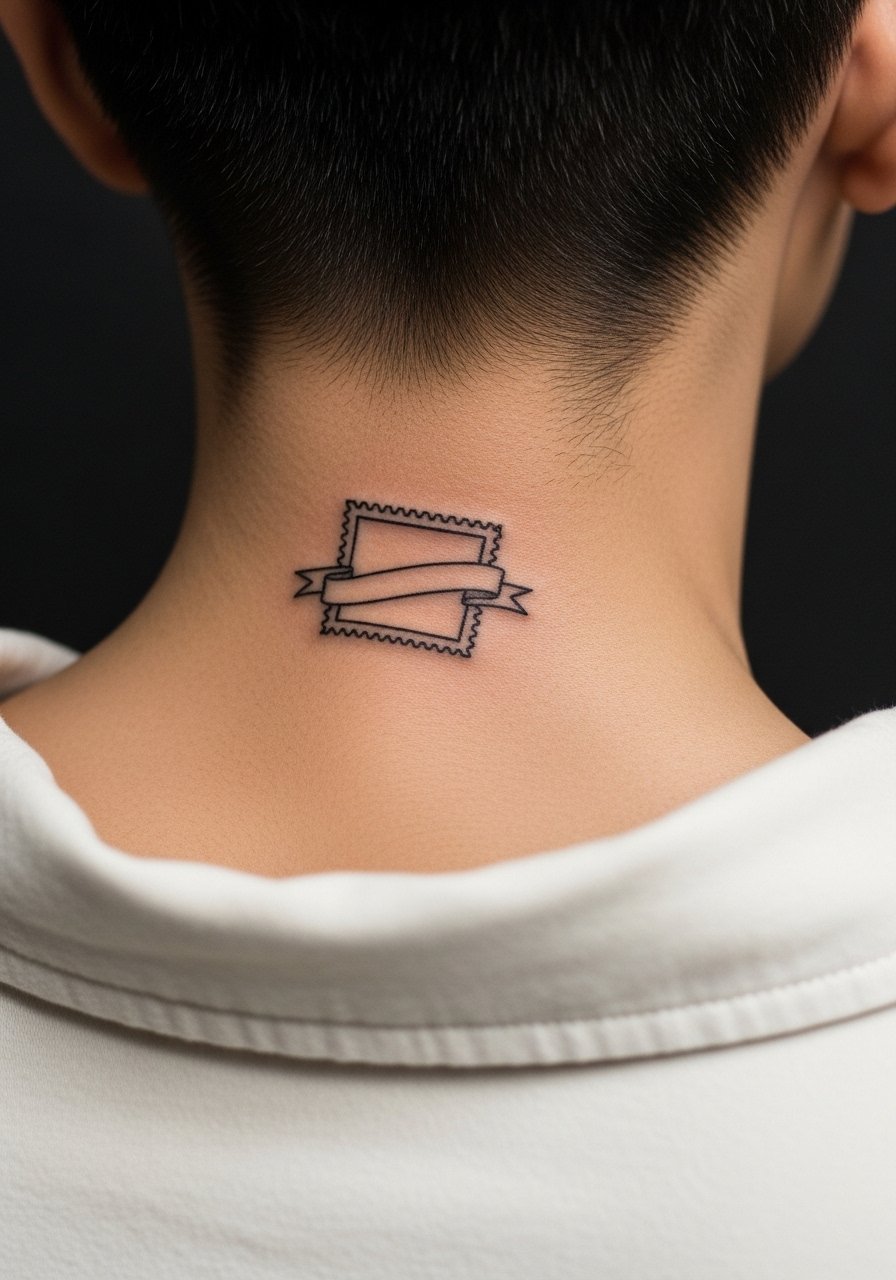
I’ve noticed nape pieces age like back-of-neck work, with friction from collars and hair playing a big role. For a banner that looks like a stamp, request a sturdy outer border and minimal interior script. A common failure is asking for tiny script across the banner that becomes illegible. The session is quick but requires a top you can shift so the tattoo area is exposed without full shoulder exposure. A wide-neck shirt helps the artist maintain a clean field.
21. Upper Thigh Book Page Stamp

Upper thigh stamps work well with finer interior motifs because the skin is thicker and less exposed to daily abrasion. The mistake people make is cramming too many tiny letters into a small book page. For longevity, widen the frame and use blockier lettering that will hold. Sessions are comfortable and the area heals discreetly. If you want to show the piece occasionally, high-waisted shorts or swimwear are natural pairings, but for the session wear something you can step into and pull down slightly for access.
Frequently Asked Questions
Q: Will a postage stamp border help tiny tattoos age better on high-friction spots like fingers and wrists?
A: Yes. A solid, slightly thicker border acts like a visual anchor as interior elements soften. For fingers and wrists, request a bold border and limited interior detail. Expect touch-ups earlier than on less exposed skin.
Q: How much should I simplify the interior detail to keep a stamp design readable at year three?
A: Aim to reduce interior complexity by about half compared with the reference you like. Blocky shadows and fewer dots hold up better than tight stipple or micro lines. Ask for examples of healed work from the artist showing similar scales.
Q: Are there specific wardrobe items I should wear to sessions for ribcage or sternum stamp pieces?
A: Wear a fitted sports bra or a cropped top for chest or sternum work so the artist can access the area without full exposure. For ribcage sessions, a cropped athletic top that can be lifted slightly is practical. Choose items that feel comfortable for you during longer sessions.
Q: Do white ink highlights help postage stamp tattoos read better over time?
A: White highlights can add contrast when fresh but they fade faster than black or color. For small stamp pieces, rely on clean black borders and saturated mid-tones rather than expecting white highlights to remain prominent.
Q: If I want a stamp motif sleeve, how do I keep it cohesive across multiple sessions?
A: Pick a consistent border weight and a limited palette you repeat across stamps. Ask your artist to space stamps with consistent negative space. Bringing a mood board helps the artist plan spacing and pacing across sessions.
Q: How often do postage stamp tattoos need touch-ups compared with traditional larger pieces?
A: It depends on placement. High-friction areas like hands, fingers, and feet need touch-ups sooner, often around year one or two. Upper arm, calf, and thigh stamps typically last longer before any refresh is needed.
