
Fine line flash is everywhere on feeds right now, and what catches your eye on a screen will not always last on skin. I've seen tiny anchors and crescent moons that looked perfect at two weeks but needed touch-ups by year two. This list brings 21 tiny tattoo flash art ideas that balance the fresh look with how they age, where to place them, what to tell your artist, and what to wear the day you book the chair.
1. Tiny Fine Line Anchor on Inner Forearm
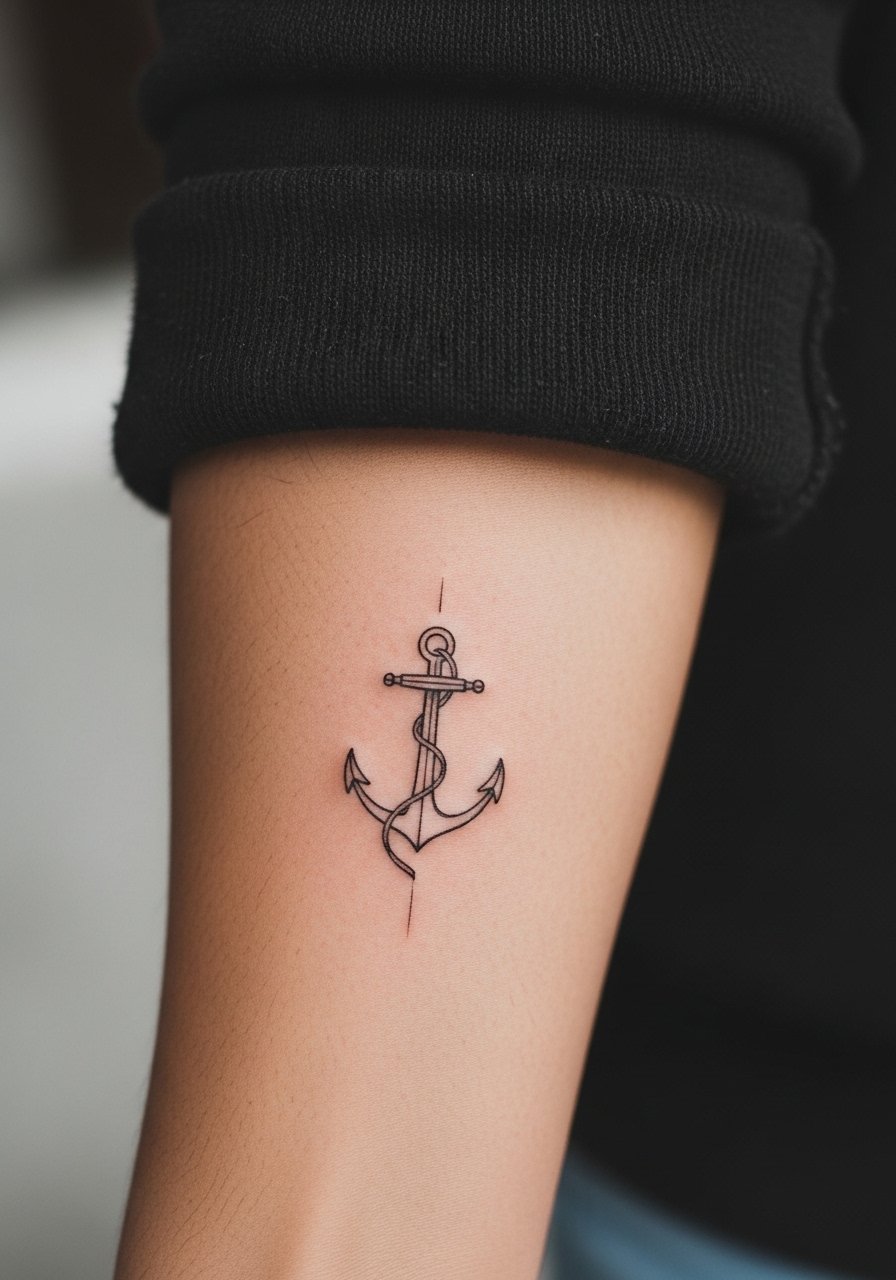
I've seen anchors age well when the linework is given a touch more weight at junctions. For a one-inch anchor on the inner forearm expect low to medium pain and a single short session. Tell your artist you want crisp single-needle detail but ask them to thicken anchor junctions slightly so the tiny bars do not blur after a couple years. Common mistake is going too tiny with uniform single-needle lines. For the session wear a linen short sleeve shirt that you can roll up easily and a thin silver ring stack to complement the wrist area when healed.
2. Minimalist Dainty Heart Behind the Ear
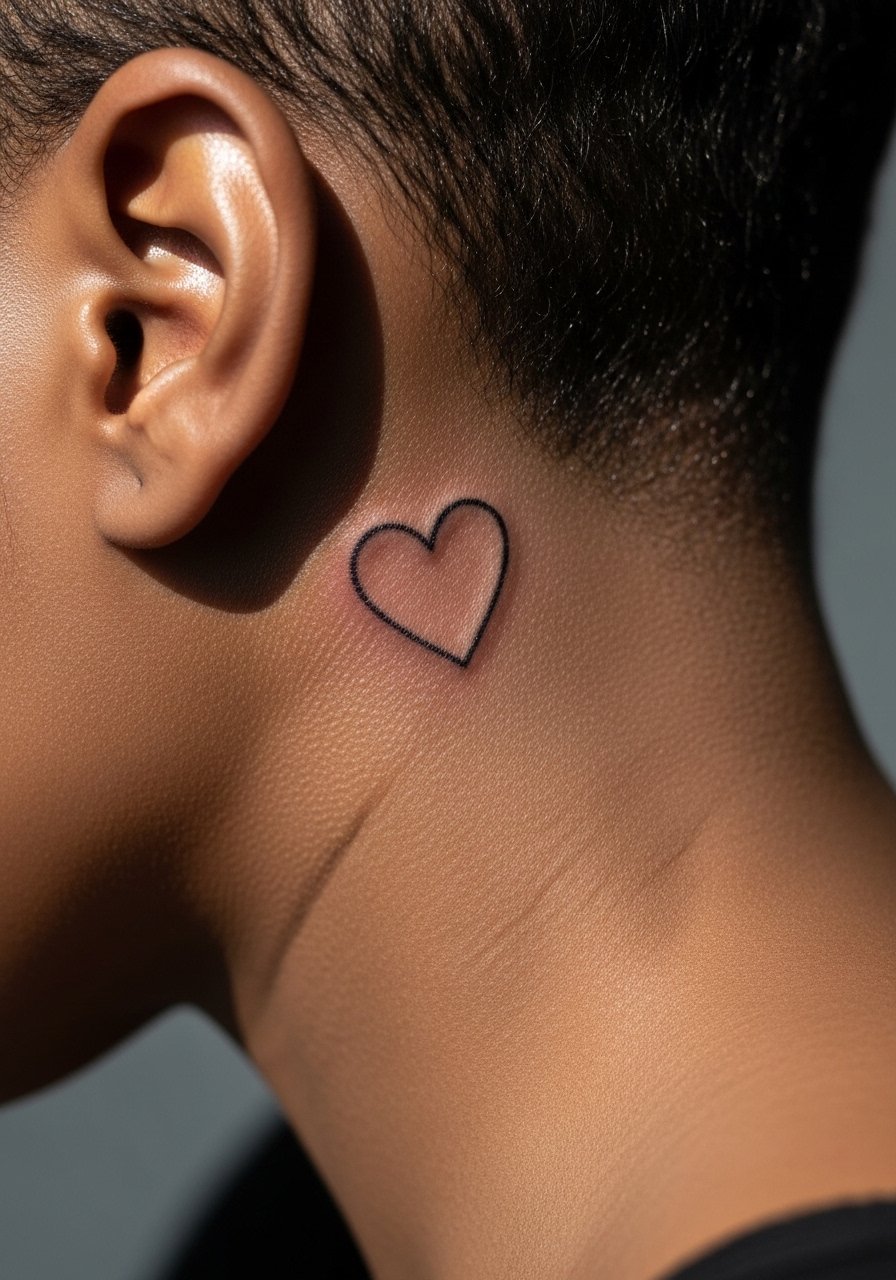
Behind-ear pieces read tiny in photos and stay private in daily life. Pain is low but expect a tickly feeling because the area is close to bone. During consultation ask for slightly bolder outline instead of whisper-thin strokes so the heart remains visible in two years. The biggest mistake is insisting on under-0.5-inch size for a single needle outline. For showing it off later, keep hair up with a silk hair scarf and wear small stud earrings like a pack of small stud earrings to frame the area.
3. Small Traditional Rose on the Shoulder Blade
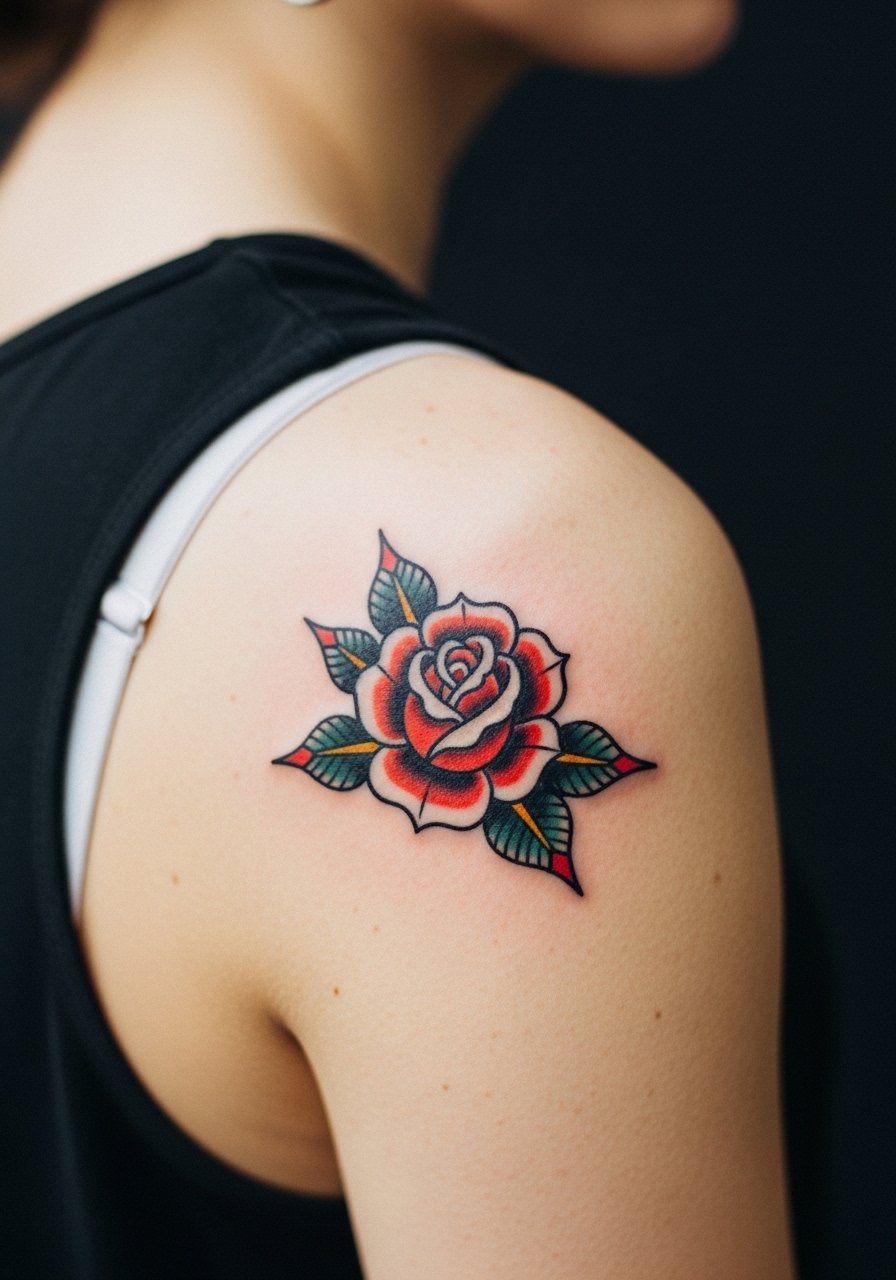
Traditional roses use bolder outlines that tend to hold up better than extremely fine line florals. Expect a medium pain level and a single session that runs a bit longer if color saturation is desired. Mention to your artist that you want solid black outlines with compact red saturation in the petals so it resists early fading. A common aging error is asking for feathered outlines that blur in tight spaces. For the session, throw on a sleeveless muscle tank so the artist has full access without tugging at clothing.
4. Fine Line Botanical Leaf on the Inner Wrist
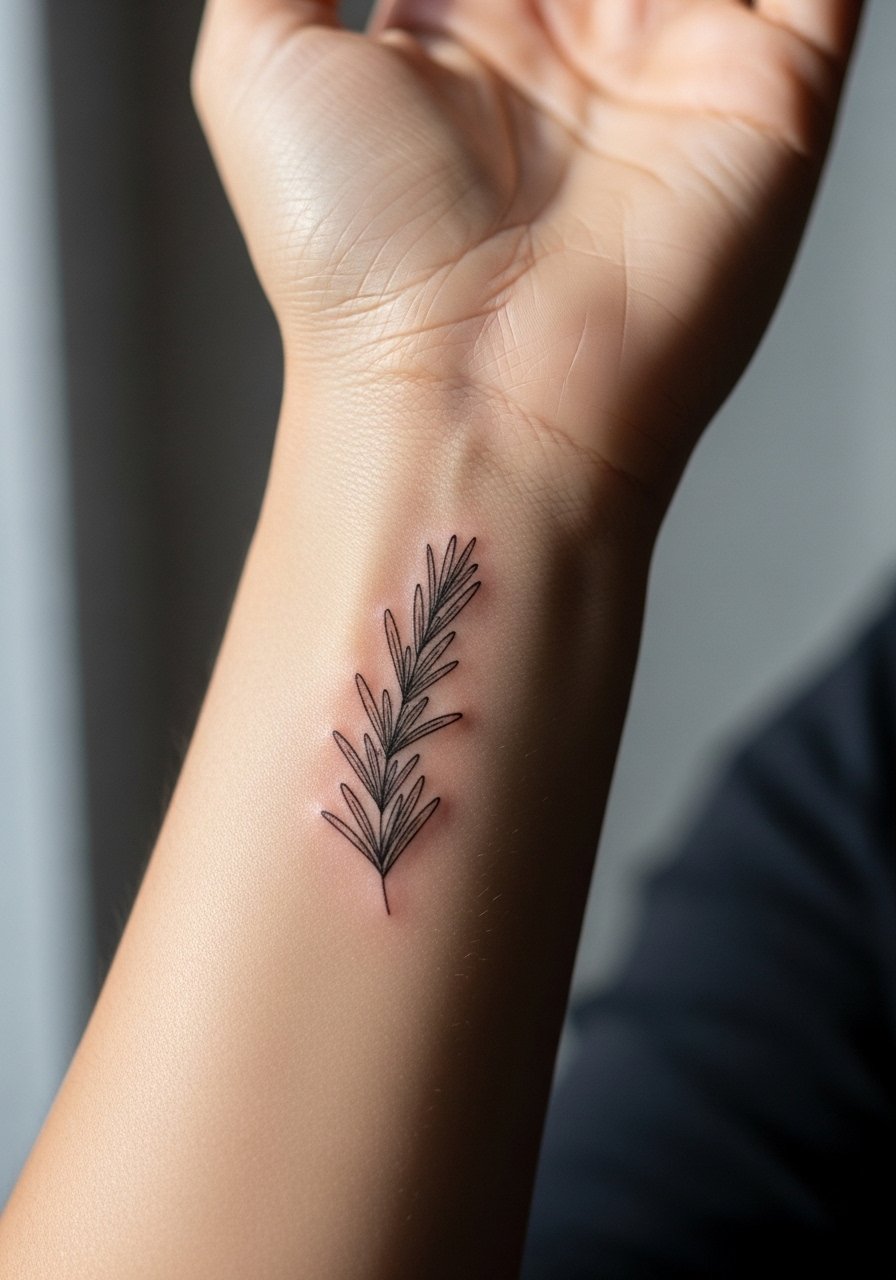
I've noticed botanical wrist pieces look especially elegant when the leaf stem tapers into the wrist line. Expect mild pain and a brief session. You should ask for a slightly thicker stem where the leaf meets the wrist so the leaf does not feather from daily washing. A frequent mistake is placing a too-complex vine in a one-inch space. When showing it off, stack a dainty chain bracelet on the opposite wrist rather than bulky jewelry so the plant linework stays the focal point.
5. Micro Swallow Silhouette on the Collarbone
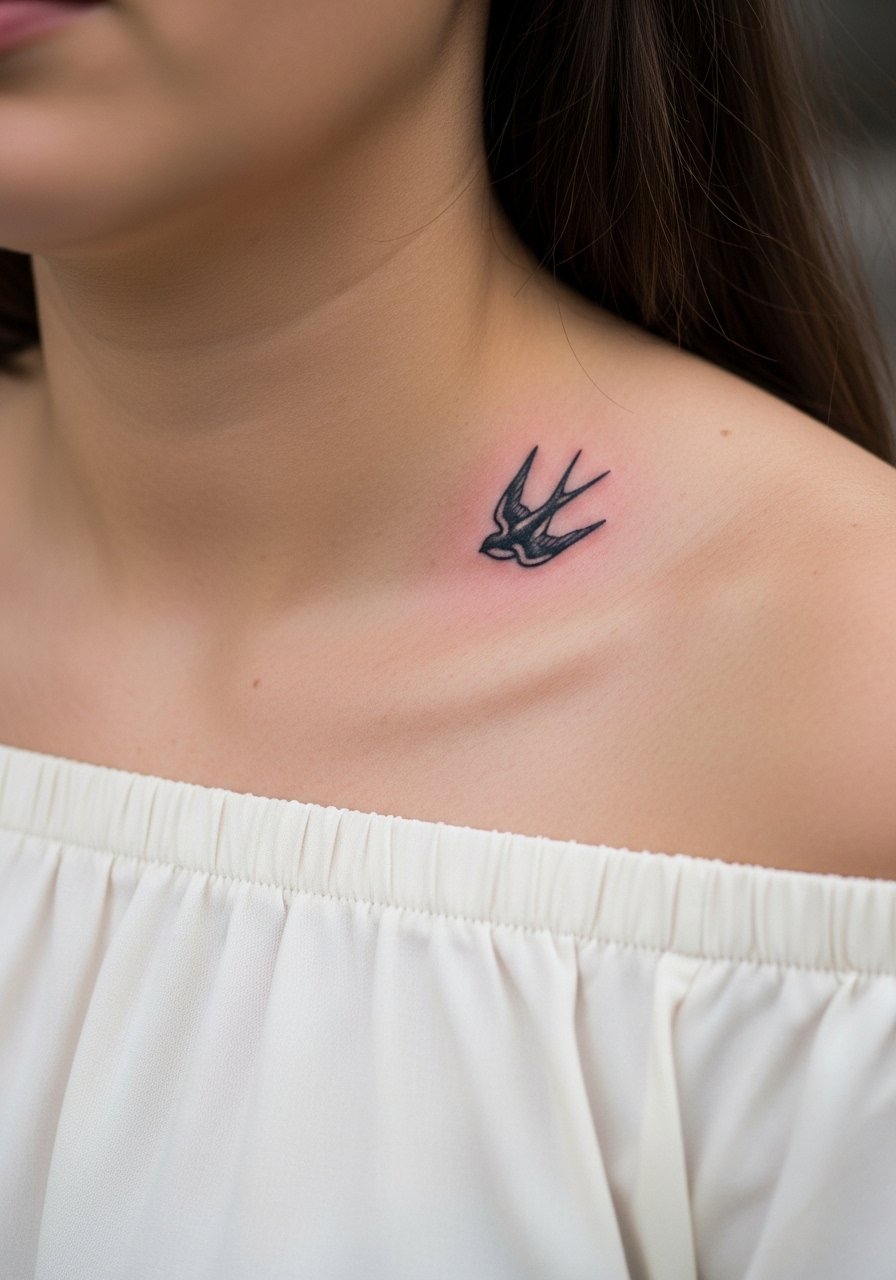
Collarbone swallows photograph beautifully and age reliably when placed with enough spacing from the bone edge. Pain can spike near the clavicle so plan a calm chair time and expect a short session. Tell your artist you want the silhouette clean and bold rather than hairline details that soften. The mistake people make is crowding multiple tiny birds into less space. For evening outfits pair the piece with an off shoulder blouse and drape a layered chain necklace below to frame the area.
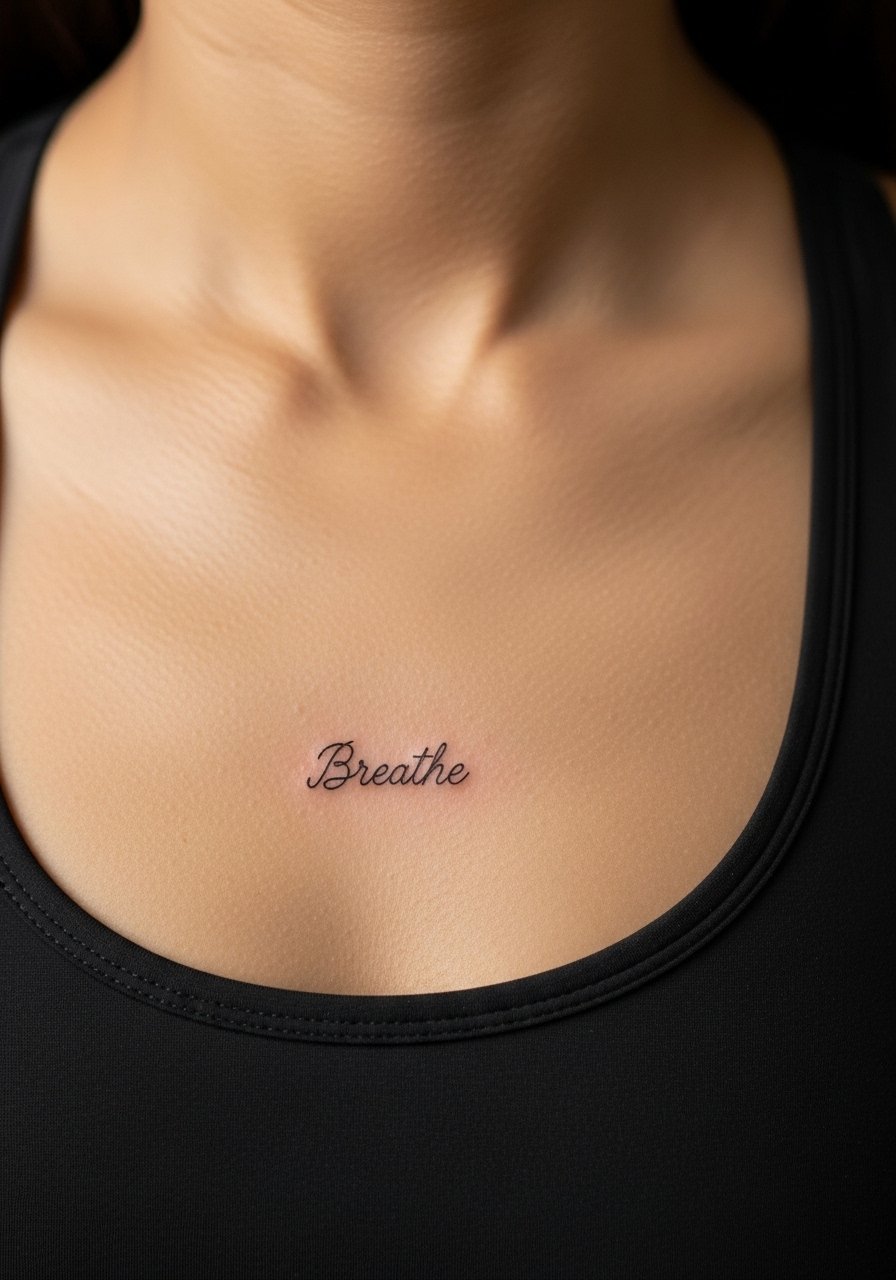
6. Dainty Script "Breathe" on the Side Rib
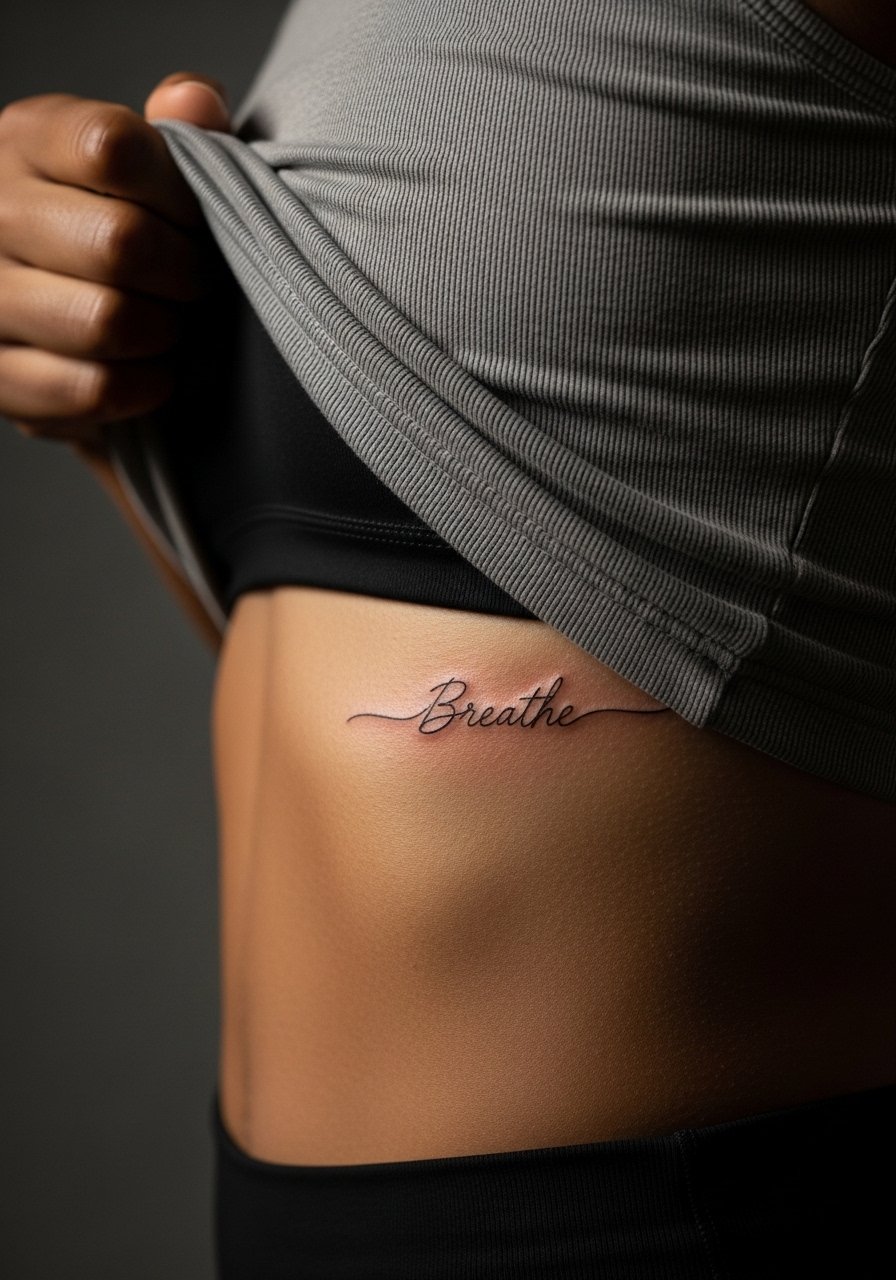
Fair warning, ribs are high on most pain charts but they make certain scripts feel intimate. The script "Breathe" works well at 1 to 1.5 inches with slightly heavier downstrokes to keep letters legible after a year or two. Artists split on fine line ribs. One camp says too-fine scripts blur quickly because the skin stretches. The other camp says with correct depth and spacing it settles fine. Ask the artist which approach they use and show healed photos of their rib scripts. For the session wear a fitted sports bra or a wide-neck shirt you can pull aside so the artist has clean access.
Studio Day Picks
The collarbone, wrist, and rib pieces above ask for different prep, so these items make the chair time smoother and help protect fine line work during the first week.
-
Stencil transfer paper kit. Lets you preview placement on skin before the needle hits, which is handy for collarbone and wrist pieces in ideas above.
-
Topical numbing cream. Useful for rib sessions to lower surprise pain without altering the artist's precision.
-
Thin protective film roll. Helps guard wrist and finger pieces from constant washing and friction during the early healing window.
-
Fragrance-free body wash. Gentle cleansing keeps fine line ink from irritation as scabs form on sensitive areas like ribs and inner wrist.
-
Aquaphor healing ointment. A thin layer in the first few days helps retain moisture for fine line work while you monitor for any excess buildup.
7. Tiny Geometric Arrow on the Ankle
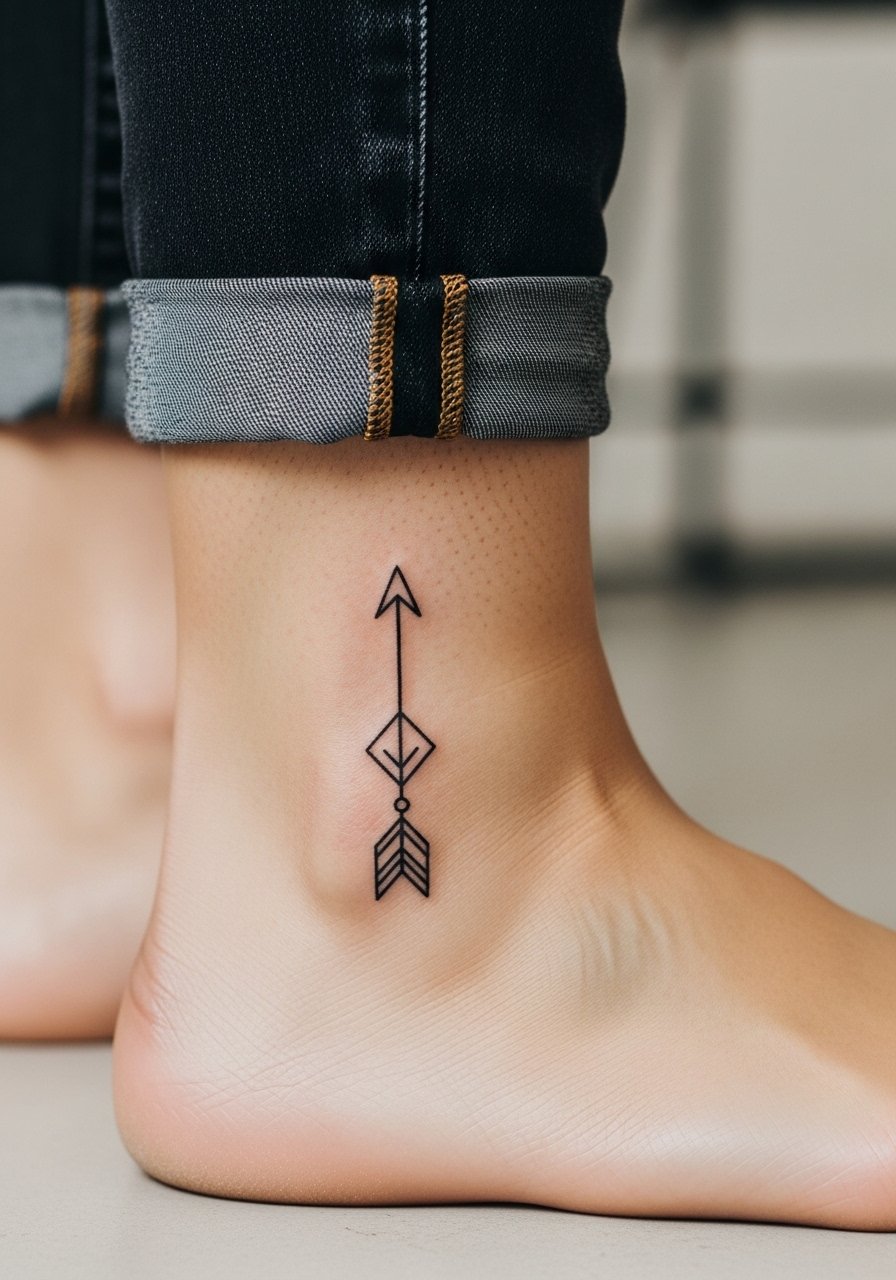
Ankle pieces are popular for minimal geometric work and they are visible in sandals. Pain on the ankle is moderate because of proximity to bone. A one-inch arrow benefits from slightly wider outer lines so the tip does not round out after a year. People often pick an arrow too small which causes the shaft to blur. For summer styling cuff straight-leg jeans or wear strappy flat sandals to show the ankle without crowding the visual field.
8. Small Watercolor Starburst on the Upper Arm
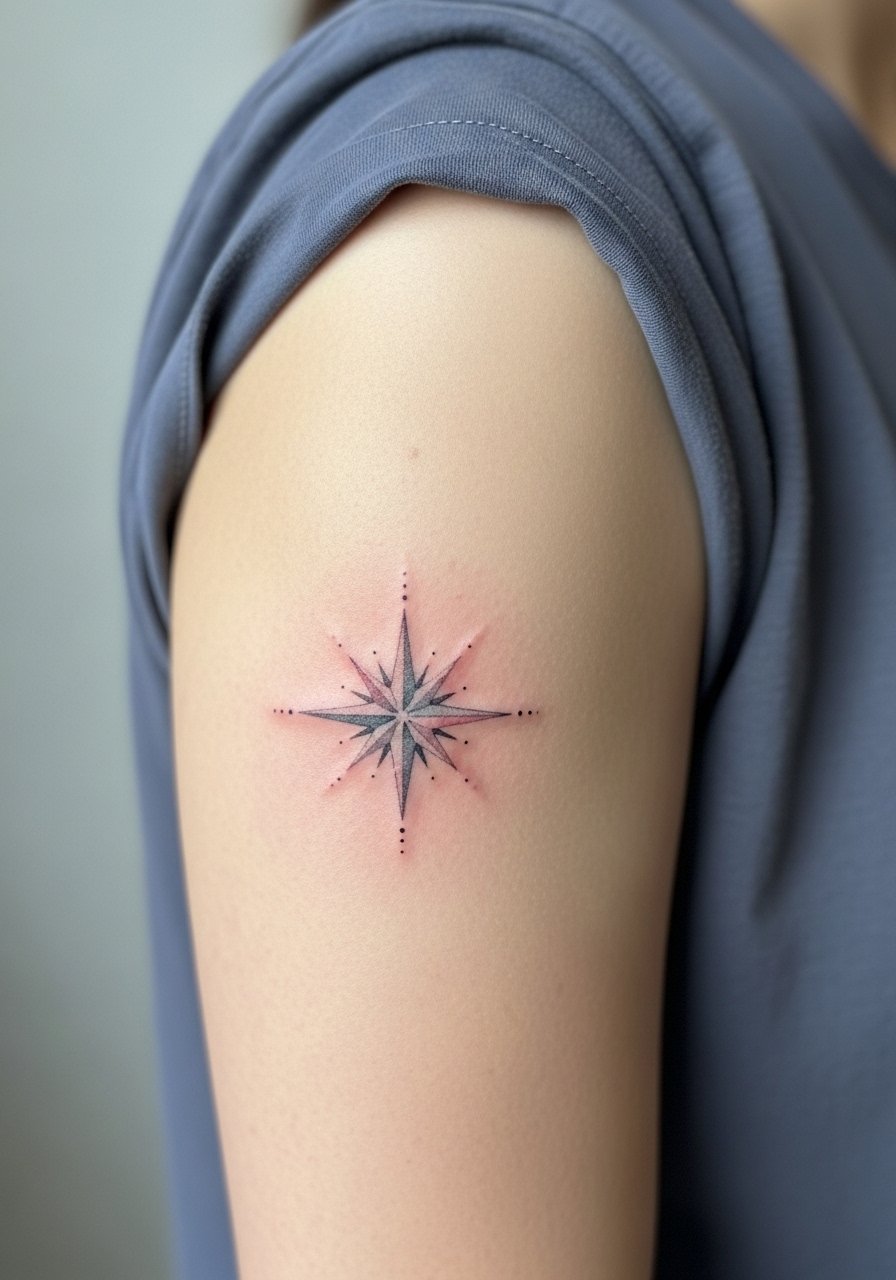
Watercolor accents can make tiny flash pop but they tend to fade faster than saturated black. Expect medium pain on the upper arm and a slightly longer session if multiple colors are used. Ask the artist to keep the pigment concentrated near the center and to avoid feathered splashes that can bleed into soft skin over time. The aging reality is colors like blue and yellow will need refreshes before black linework does. During casual wear pair the piece with rolled short sleeves so the color reads against plain fabric.
9. Fine Line Crescent Moon on the Inner Bicep
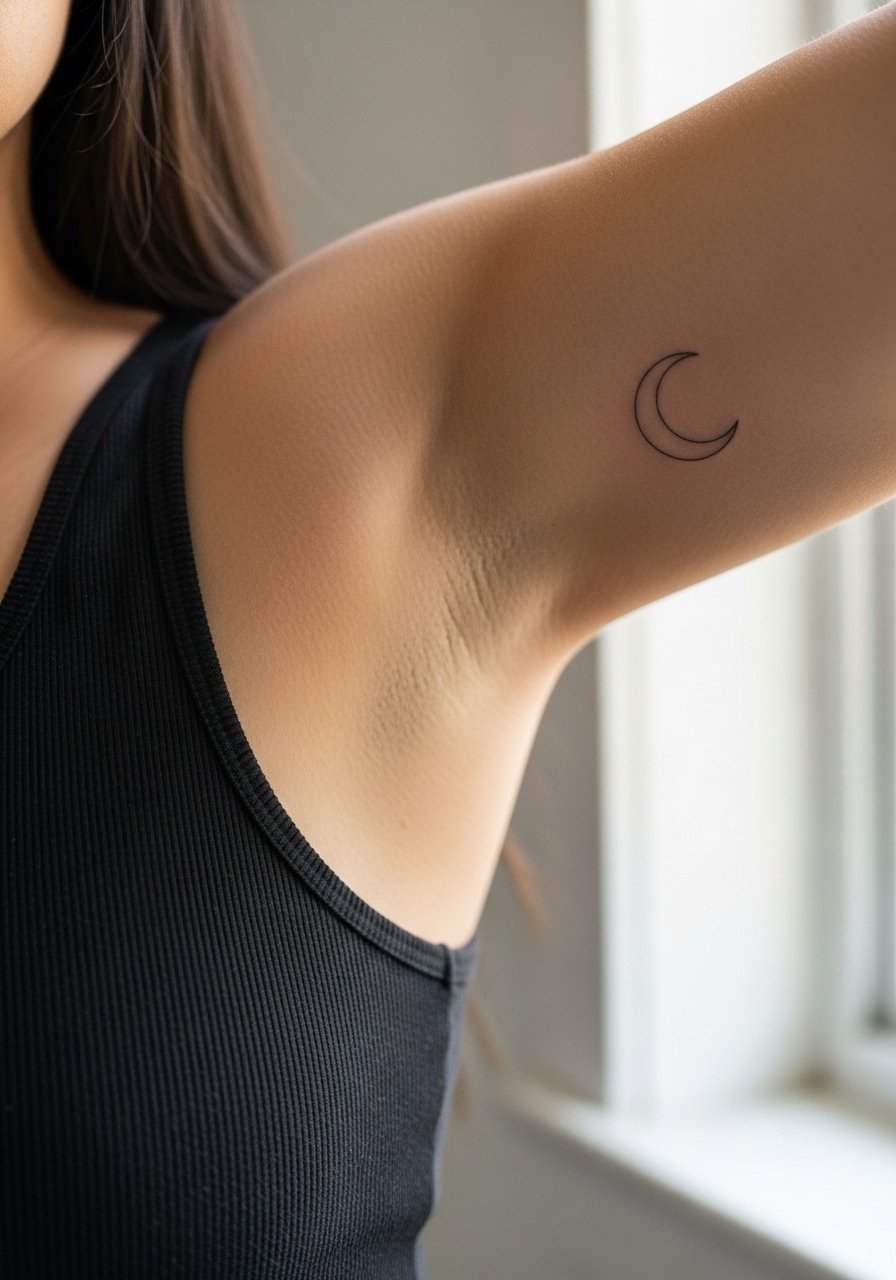
Inner bicep pieces hide well and show clean on medium to fleshy arms. Pain is lower than ribs but higher than forearm because of thinner skin. For a one-inch crescent ask for slight spacing in the interior curve to prevent dense ink pooling. A common mistake is over-detailing that looks cramped when healed. For the session pick a loose tank top so the artist can work without fabric pulling.
10. Micro Dagger Outline on the Forearm
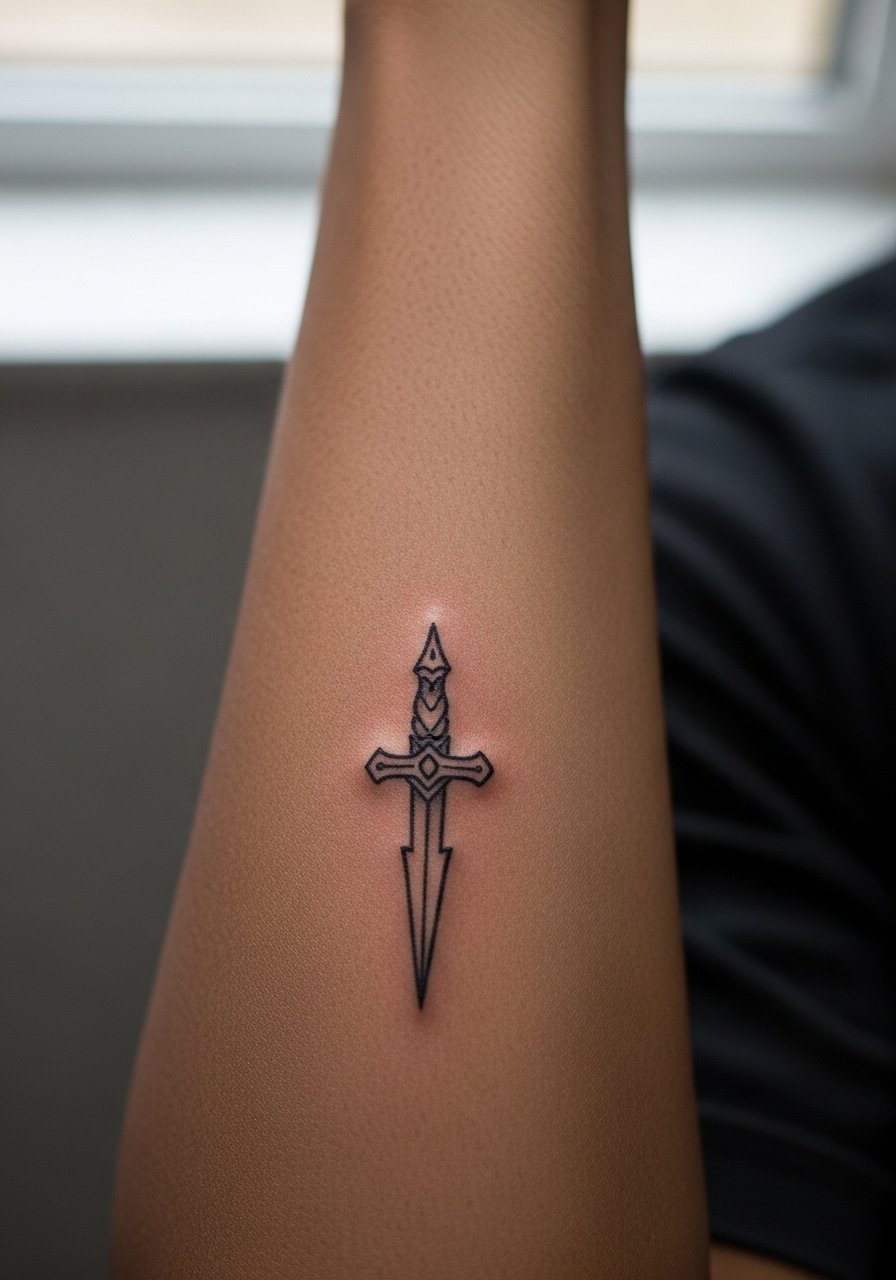
Daggers read crisp when they have a clean spine line and a thicker base. Forearm pain is mild and sessions are short. Tell your artist to keep negative space around the blade so the silhouette remains clear over time. The mistake is filling tiny negative areas that blur into the blade on lighter skin tones. In daily wear this piece pairs well with a minimalist slim watch worn on the opposite wrist to balance visual weight.
11. Dainty Floral Vine Sprig on the Collarbone
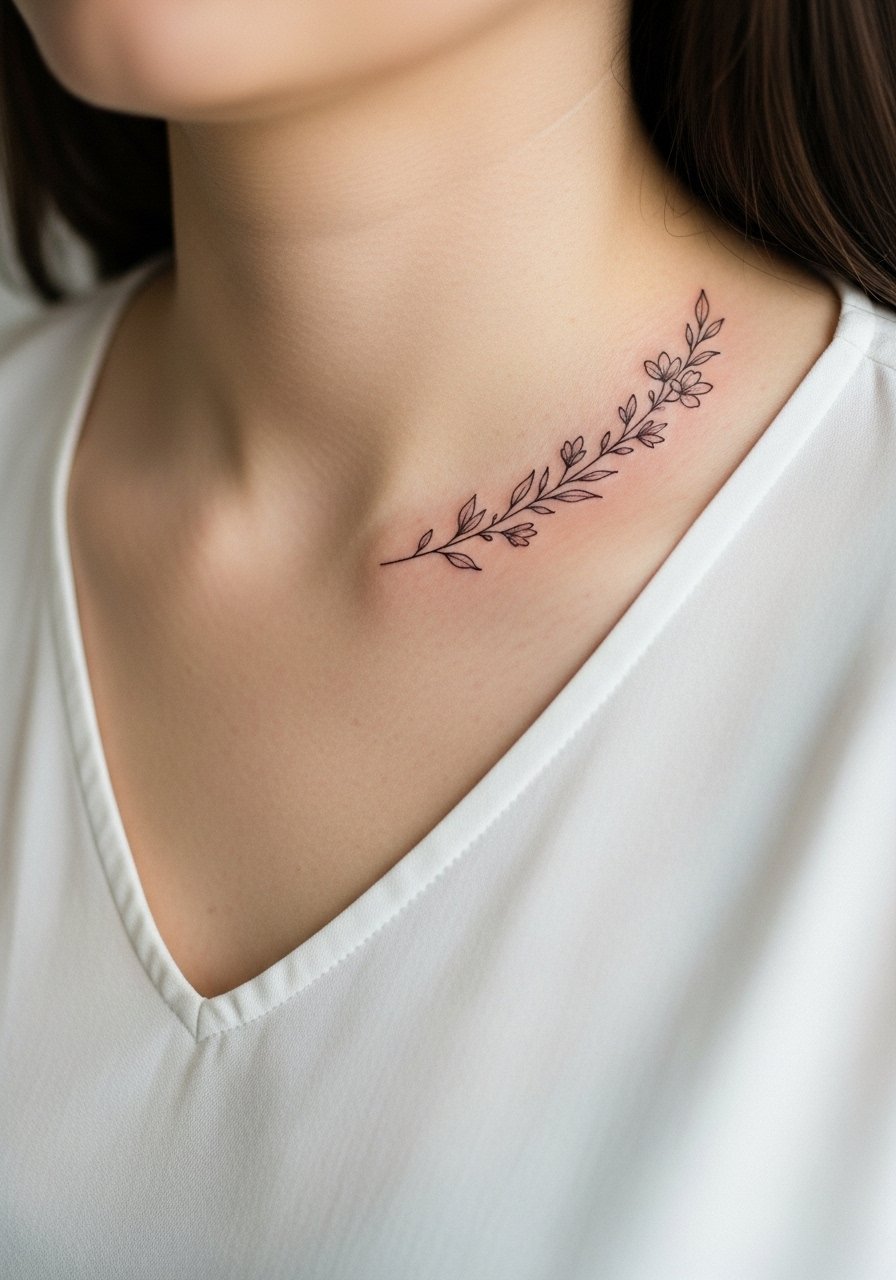
Vine sprigs photograph nicely when they follow the bone line and stop before the sternum. Pain near the collarbone can spike but a short session handles a 1.5-inch vine easily. Ask for open spacing between leaves because tight clusters tend to merge after a couple of years. A frequent request error is asking for tiny stipple shading that becomes muddy at small scale. For show-off outfits try a v neck loose top and keep layered necklaces lower than the vine so they do not compete.
12. Tiny Wave Line Art on the Calf
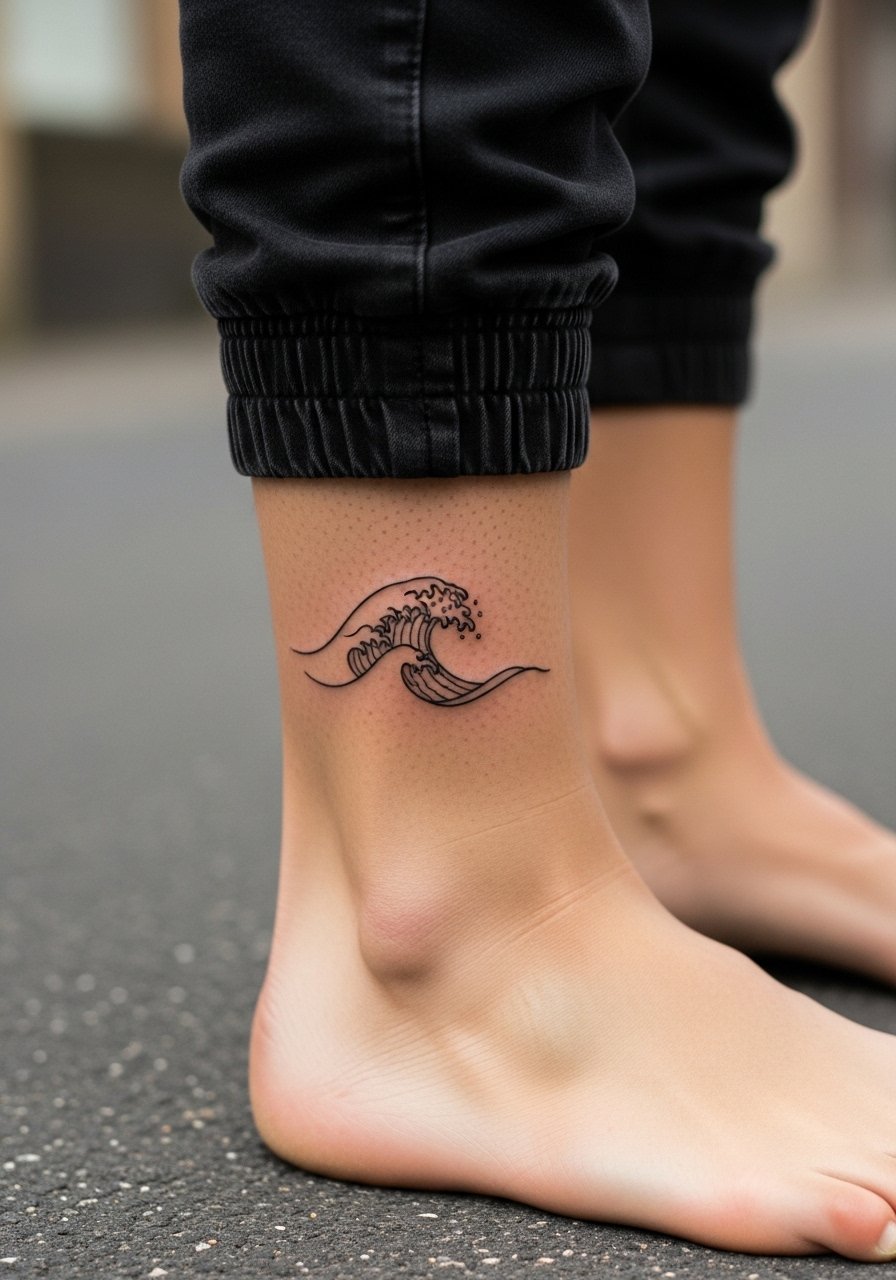
Calf placements handle slightly larger tiny designs because the skin stretches less with time than ankle areas. Pain is low to moderate and session time is brief. Ask your artist to keep the wave's crest lines slightly bolder so the curve keeps definition after activity like running. Mistakes to avoid include squeezing too many lines into a small band. For casual looks roll joggers or wear ankle leather sneakers to frame the wave without distracting.
13. Minimalist Eye Symbol Behind the Ear or Finger
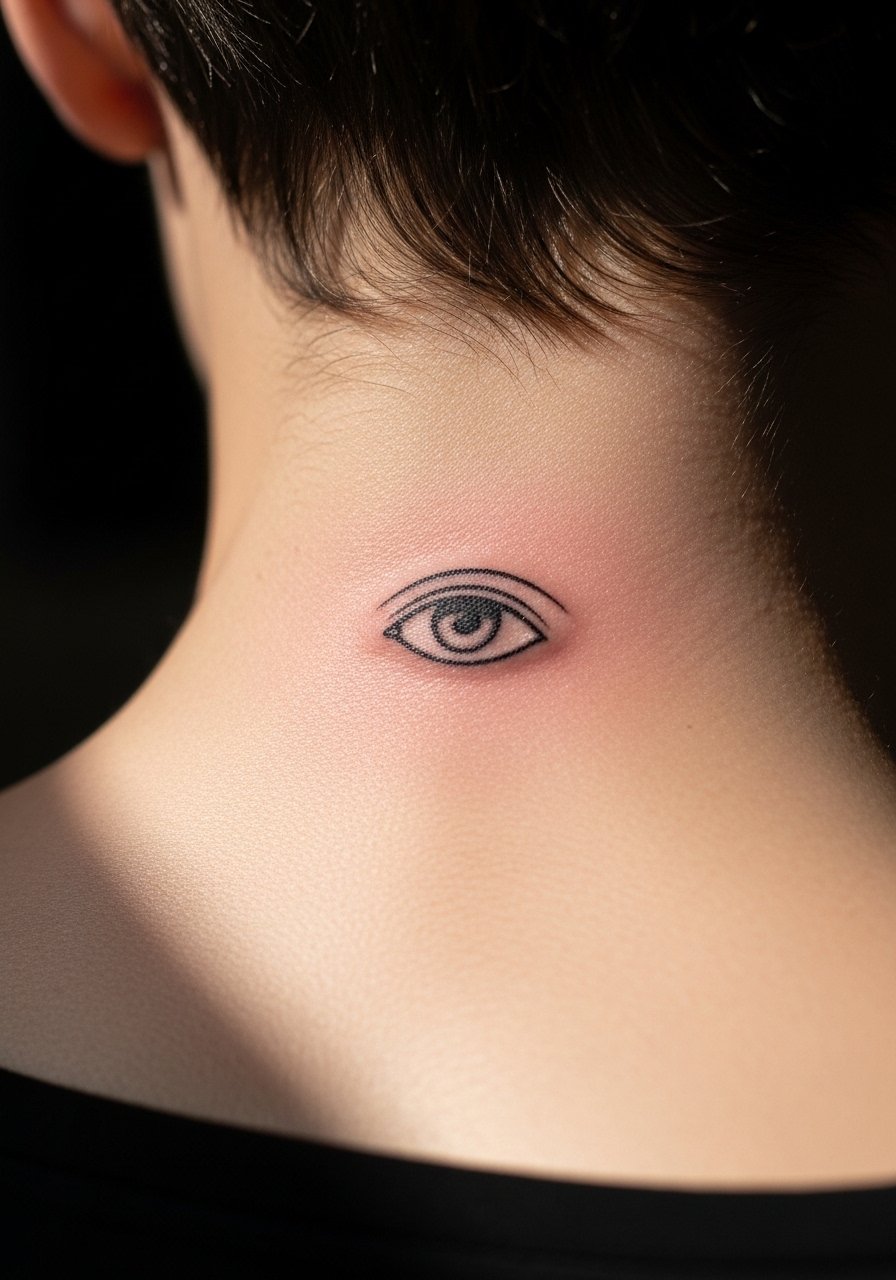
Eye symbols work tiny and carry protective vibes for some people. Behind ear placement is most subtle while finger placement is more visible and subject to heavy washing. If you choose the finger, ask for slightly bolder outer lines and avoid micro-detail inside the iris that will blur with hand use. Fingers are higher blowout risk because of constant movement. For behind-ear show-off styling keep hair high and consider a small stud earring to draw attention upward.
14. Micro Compass on the Back of Neck
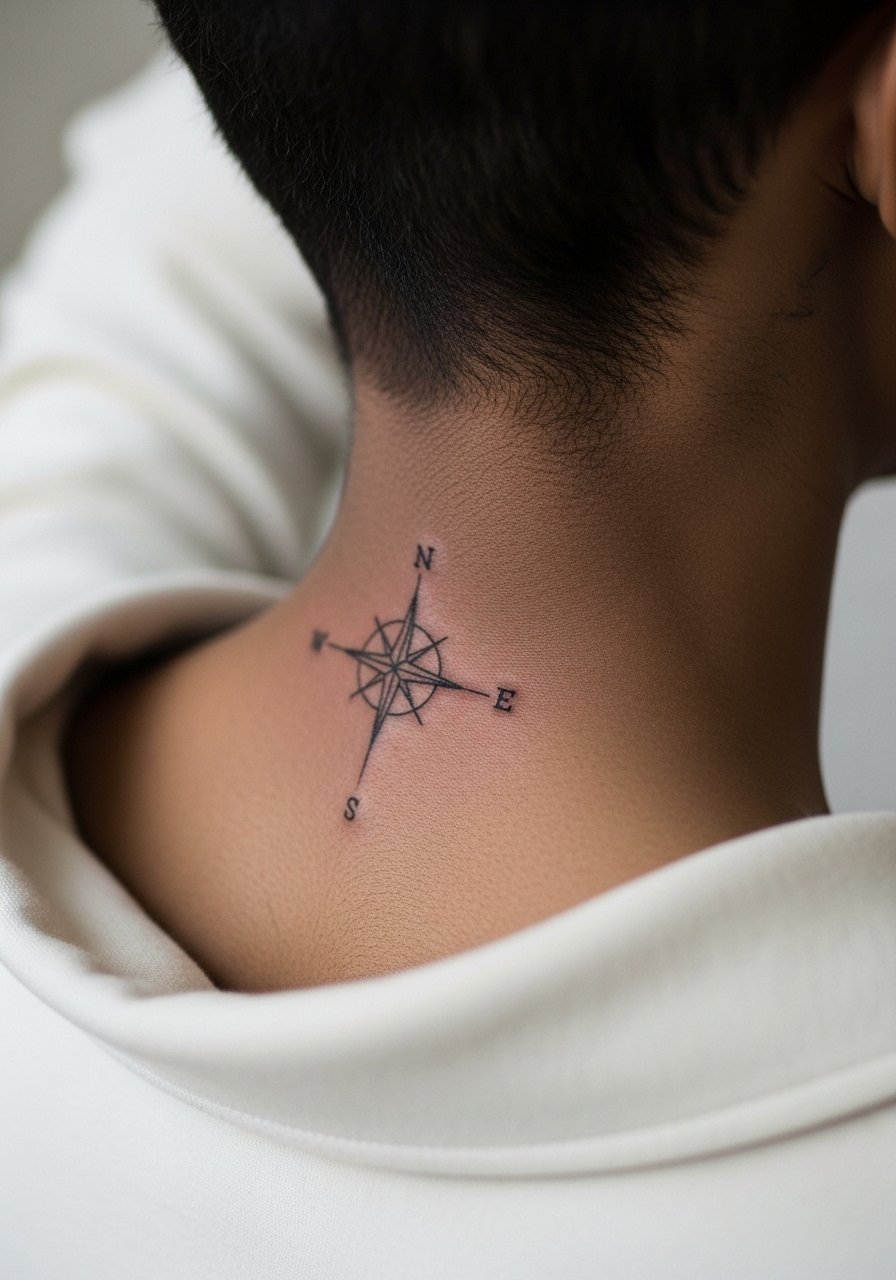
The back of neck reads small and central when the compass is compact. Pain is low to medium. Ask the artist to keep cardinal points implied rather than lettered to avoid tiny text that becomes illegible. A common mistake is placing a compass too close to the hairline where fading accelerates. For session wear a wide-neck shirt you can slide to expose only the spot and avoid tugging.
15. Tiny Mountain Range on the Forearm
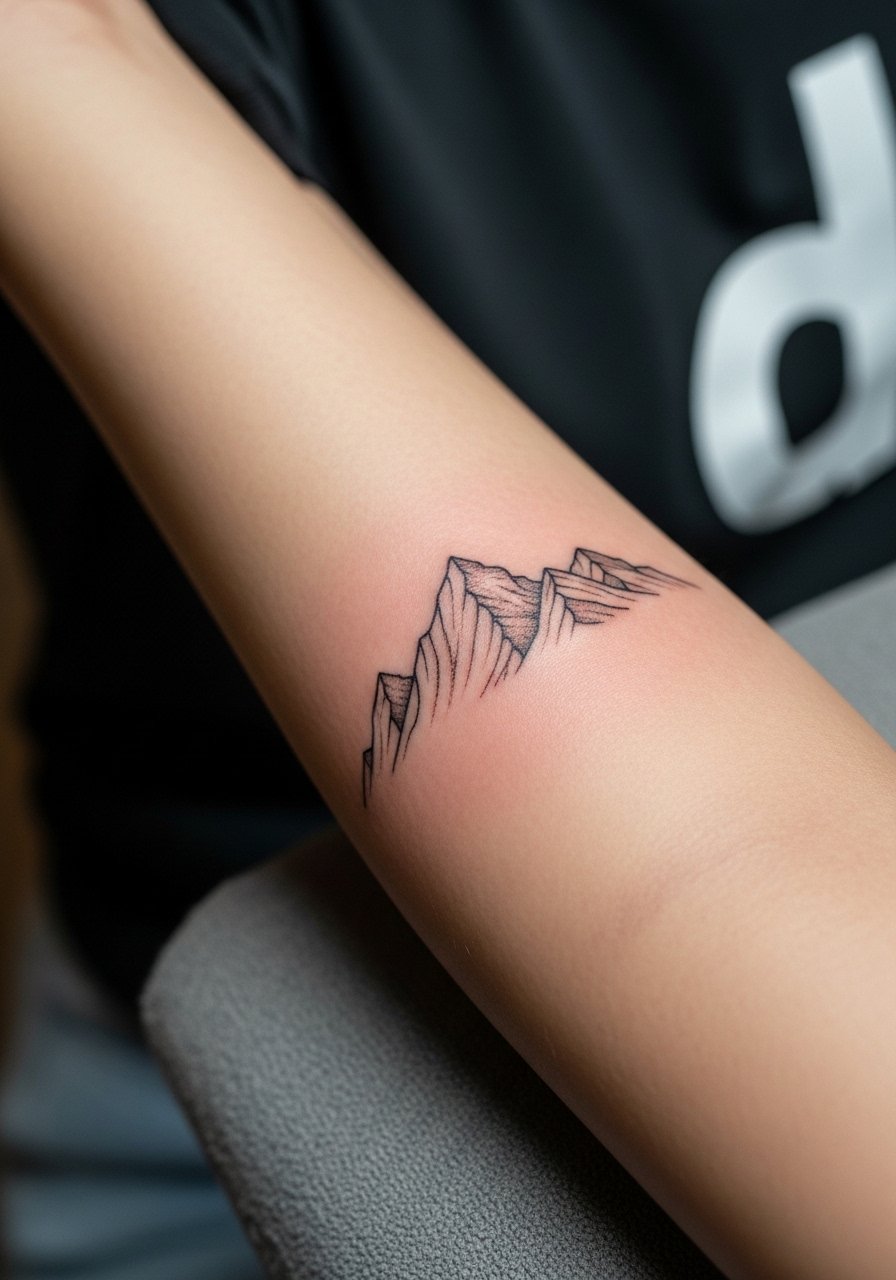
Mountain linework looks great as a thin band across the forearm, and it lasts if the peaks have room rather than dense hatch shading. Forearm placement is forgiving and pain is mild. Tell your artist you want negative space between peaks to prevent merging as lines age. People sometimes add too many micro-shades that soften into blobs. For day-to-day styling pair with a rolled cuff blouse so the artwork shows without clutter.
16. Tiny Constellation on the Ankle or Foot
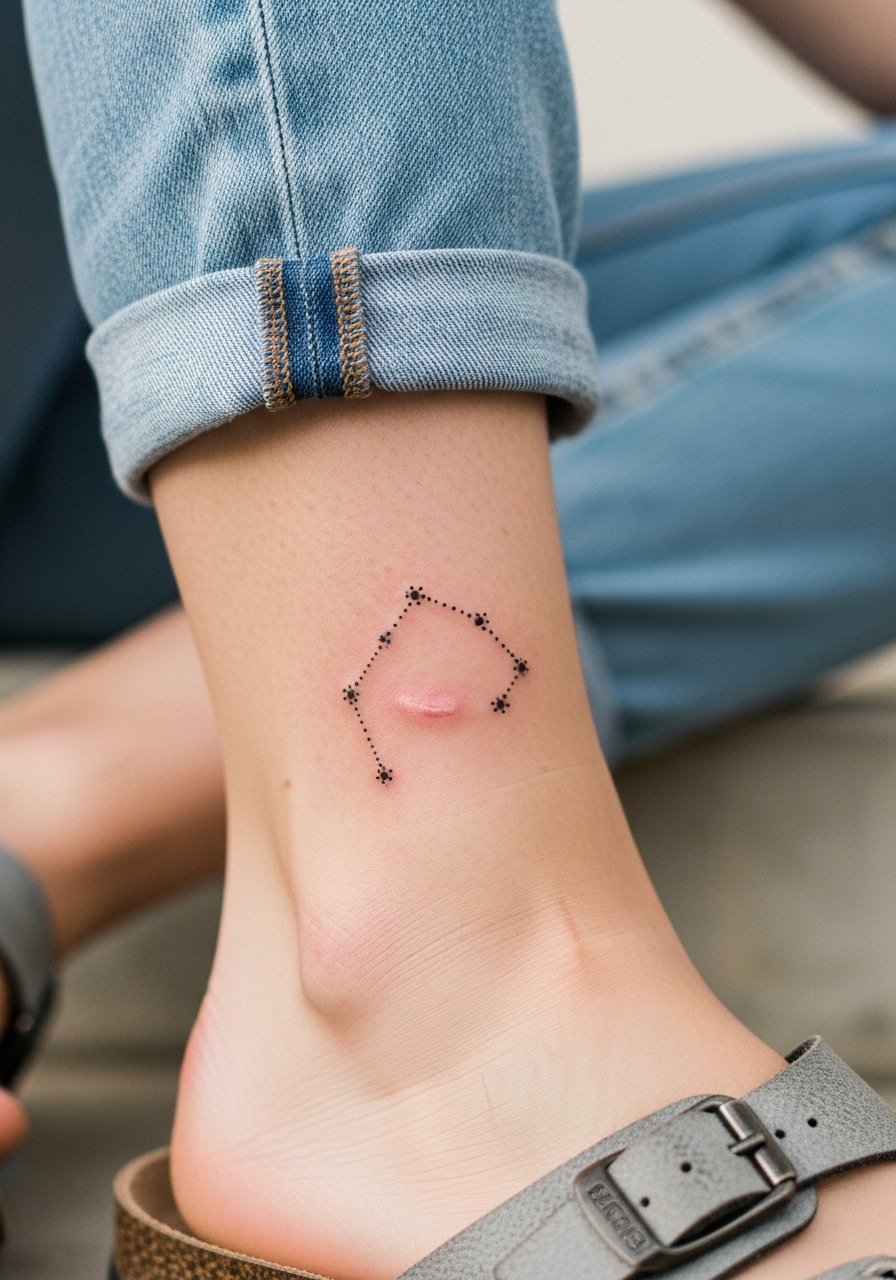
Constellations can be tiny dot work patterns that read well if dots are spaced and not packed. The ankle is a bit sensitive and sessions are brief. Ask your artist to use slightly larger dots for longevity and to keep connecting lines minimal. A common mistake is insisting on micro-dots that disappear with daily wear. For summer display consider strappy flat sandals and cuffed jeans so the pattern has breathing room.
17. Tiny Botanical Ankle Sprig
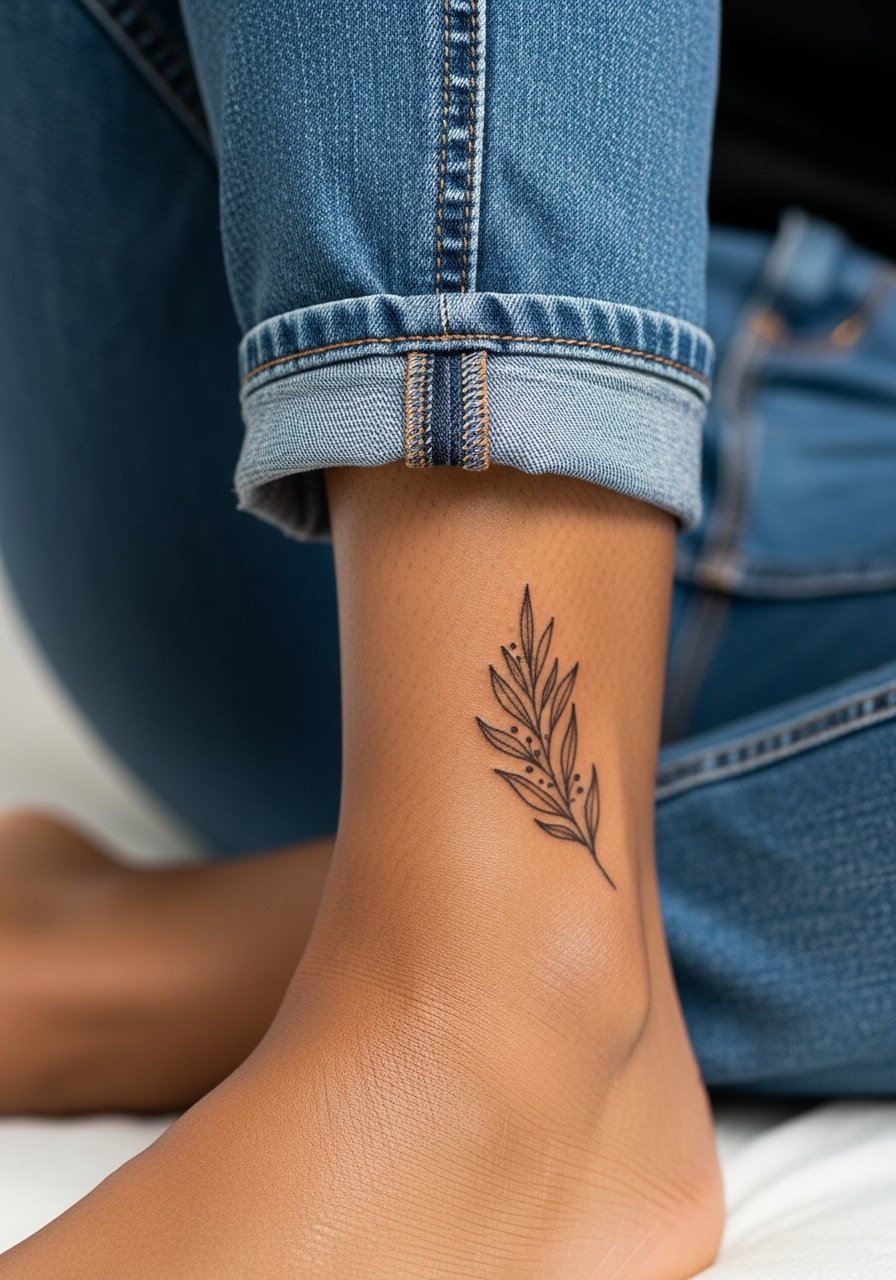
Ankle sprouts are feminine and photograph well when they run along the ankle bone. Pain is moderate on the ankle and sessions are short. Recommend that leaves have slight space and the stem be a touch thicker where it meets the bone to avoid early feathering. Many people pick elongated vines that do not age neatly on such a mobile spot. For footwear try a delicate strappy flat sandals or tuck the design under boots in colder months.
18. Minimalist Arrow Behind the Collar on the Upper Back
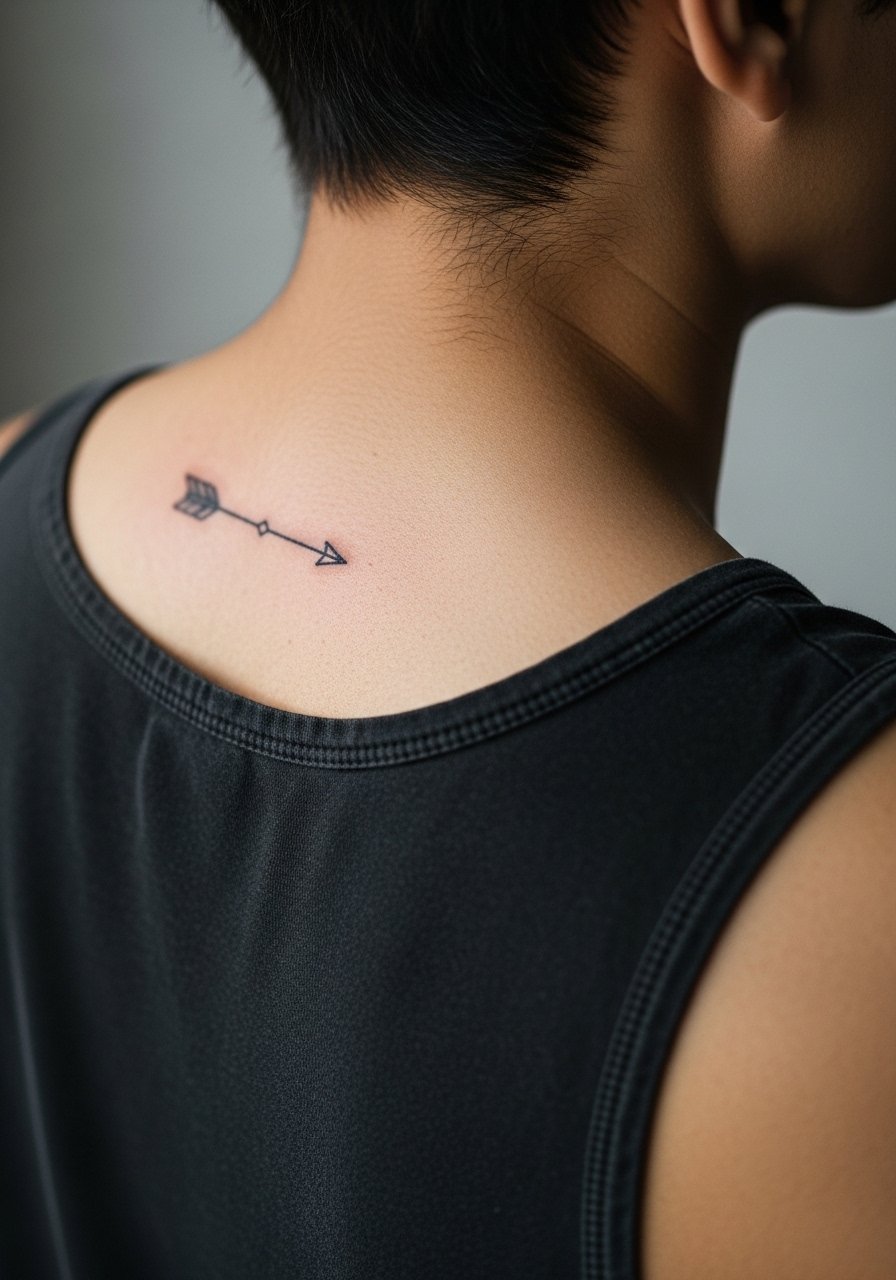
An upper back arrow sits well under open collars and heals predictably because the skin is less mobile. Pain is low to medium. Ask for a clear spine line and slightly bolder fin at the tail so the shape keeps its silhouette after a couple of years. Mistakes include requesting too many thin end lines that vanish with aging. For show-off outfits a tank top with an open back works to reveal the piece without overexposure.
19. Tiny Key Outline on the Side of the Finger
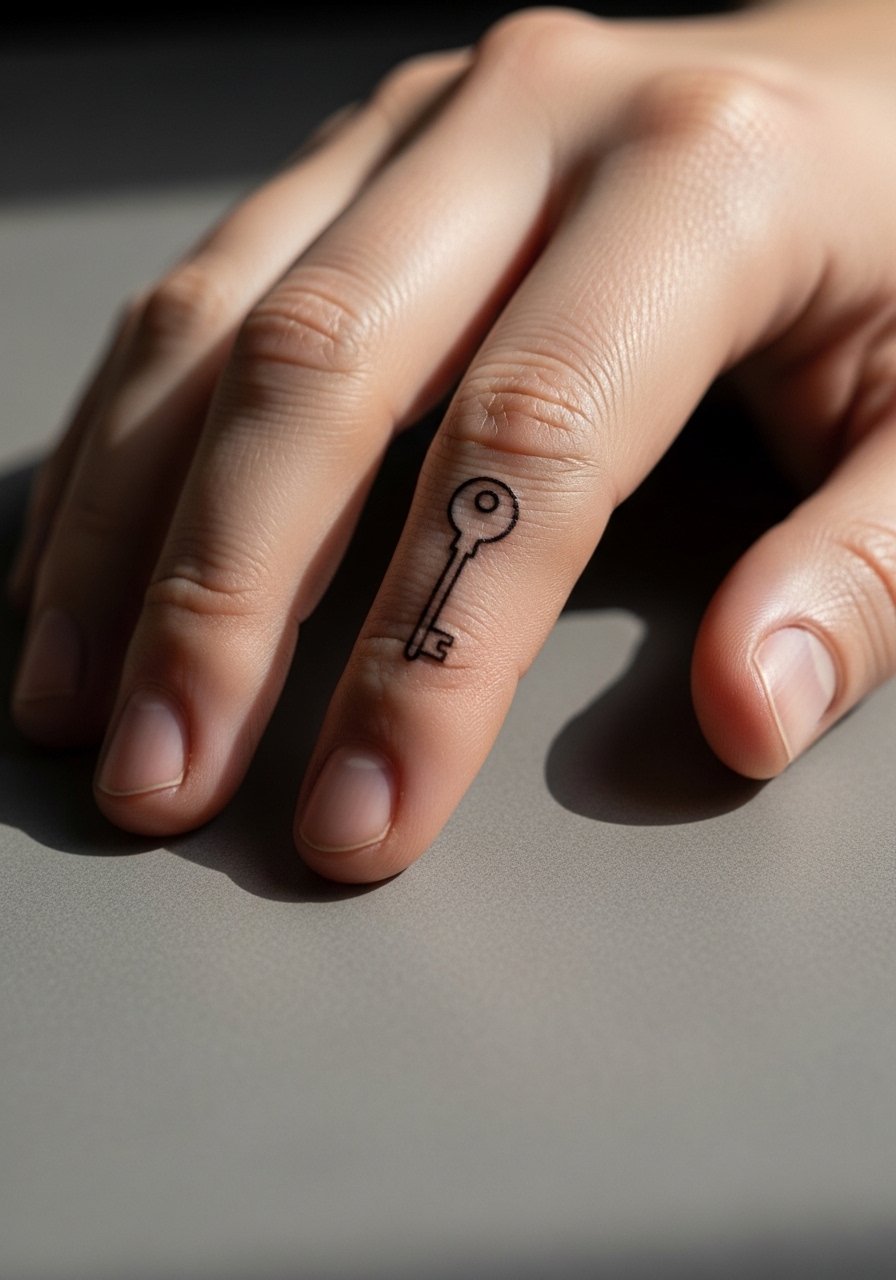
Finger side tattoos are high touch and high fade risk. Expect higher touch-up needs. If you choose this spot ask for bolder outer lines and fewer interior details so the key keeps form. A common mistake is picking intricate teeth patterns that blur into a block of ink. Fingers need regular check-ins for touch-up scheduling, so plan with your artist for a follow-up timeline rather than assuming one session will last.
20. Petite Sunburst on the Calf or Outer Thigh
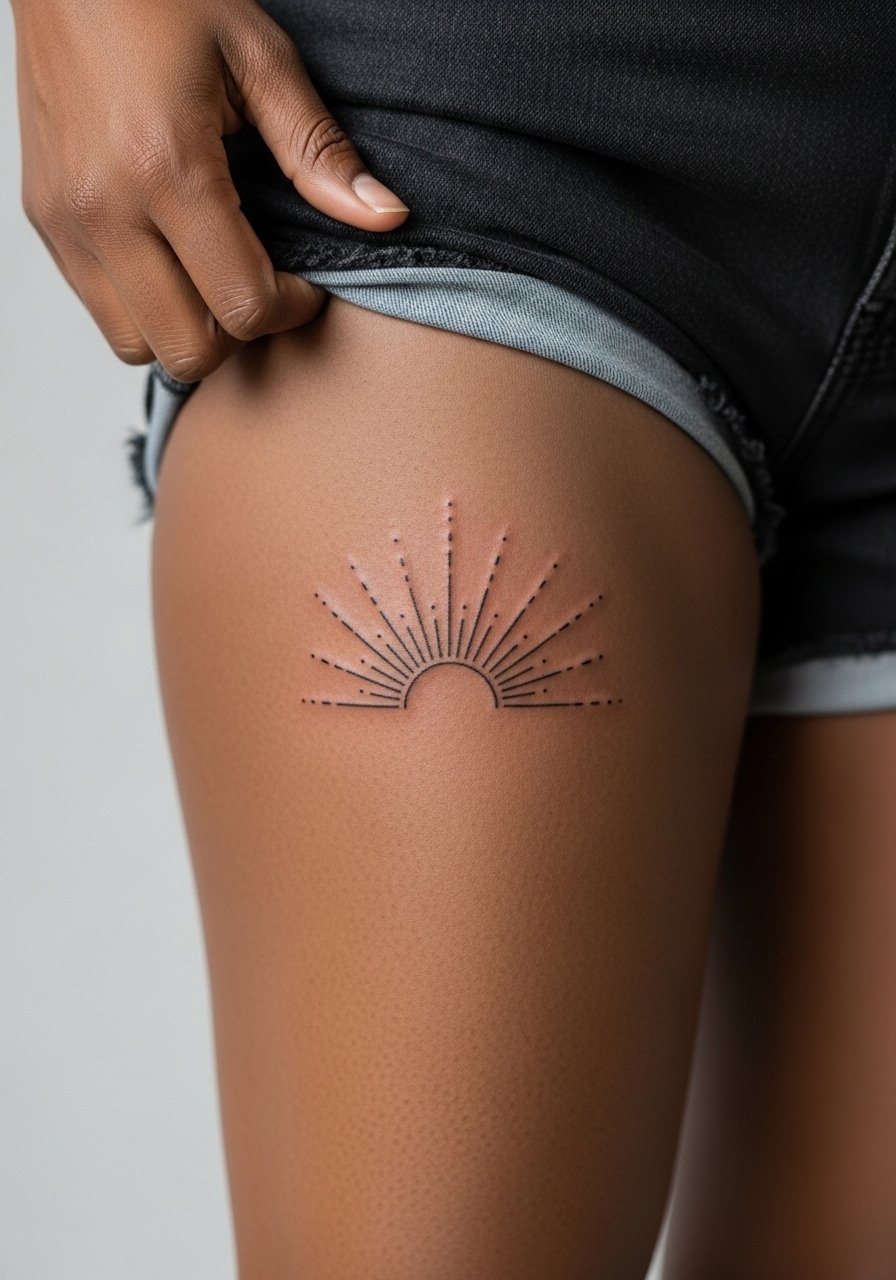
Outer thigh allows slightly larger tiny flashes and the skin there holds saturation well. Pain is low to medium depending on proximity to bone. Ask for spaced rays rather than dense hatch shading so the burst reads clearly at six months and at two years. The mistake is crowding rays into a coin-sized dot which then blurs. For session wear high-waisted shorts or a skirt so the artist can access the area without discomfort.
21. Micro Script or Date on the Side Rib Lower
Small scripts on the lower rib look intimate and linear but they are vulnerable to stretch and friction. Ribs are painful for many so expect a tougher session than a forearm piece. Ask for slightly heavier main strokes and relaxed letter spacing so the line holds for longer. Artists disagree about fine line ribs. One group warns that thin scripts blur with skin movement. The other group says if the depth and spacing are right they settle fine. Decide based on the artist's healed portfolios and ask about their touch-up approach.
Frequently Asked Questions
Q: Do fine line tiny flashes need touch-ups more often than bold traditional pieces?
A: From what I've seen, fine line work typically shows softening sooner than bold saturated pieces. Expect a touch-up window around two to three years for many fine line wrist or finger tattoos. If longevity matters, ask your artist to slightly thicken junctions and to show you healed photos of similar work.
Q: How should I dress for a rib or collarbone session to make the process easier?
A: For ribs wear a fitted sports bra or a cropped top you can lift slightly without exposing more than the area needed. For collarbone book a tank or an off shoulder blouse you can slide aside. Comfortable, loose clothing that gives the artist clear access will shorten chair time and reduce tugging.
Q: Are there placements I should avoid if I want a low-maintenance tiny flash tattoo?
A: High-movement zones like fingers, side ribs, and areas with constant friction like the ankle can demand touch-ups earlier. Inner forearm, upper arm, and collarbone tend to be lower maintenance for tiny flashes.
Q: What do I ask my artist to reduce blowout risk on small tattoos?
A: Ask how they adjust line weight for micro work and whether they recommend slightly thicker anchor points. Request to see healed shots of similar tiny flash on the same placement and skin tone. That gives you realistic expectations about blowout risk.
Q: How does skin tone affect fine line visibility in photos and real life?
A: Different pigments read differently across tones. On darker skin slightly bolder outlines help retain definition in photos. Ask to see healed portfolio examples on a range of skin tones so you can judge visibility rather than guessing from a fresh photo.
Q: Should I tip differently for a quick flash walk-in?
A: Tip customs vary by region. In many places a 15 to 20 percent tip is common even for flash work. If you feel the session required extra care or the artist adjusted a design to your body, factor that into your tip decision.
