
Fine line temple tattoos look effortless on saved boards, but what holds up is rarely the prettiest fresh photo. Tiny Japanese temple work asks for restraint in scale, needle depth, and placement. Over the next pages I run through compact pagodas, torii gates, and lantern shrines that actually age with grace. Read these options and you will know what to ask for in that first consultation.
1. Tiny Pagoda Outline with Torii Gate on the Wrist

I see this tiny pagoda on wrists more than any other small temple design, because the silhouette reads clearly on a narrow canvas. Pain is low to moderate and a single 20 to 40 minute session usually covers it. Tell your artist you want slightly heavier linework at the base so the pagoda does not vanish as it softens with time. A common mistake is requesting hair-thin lines across the whole design, which often needs a touch-up by year three. For showing it off, wear a thin silver chain bracelet on the opposite wrist to frame the piece without cluttering the area.
2. Fine Line Temple Silhouette Under a Moon on the Inner Forearm
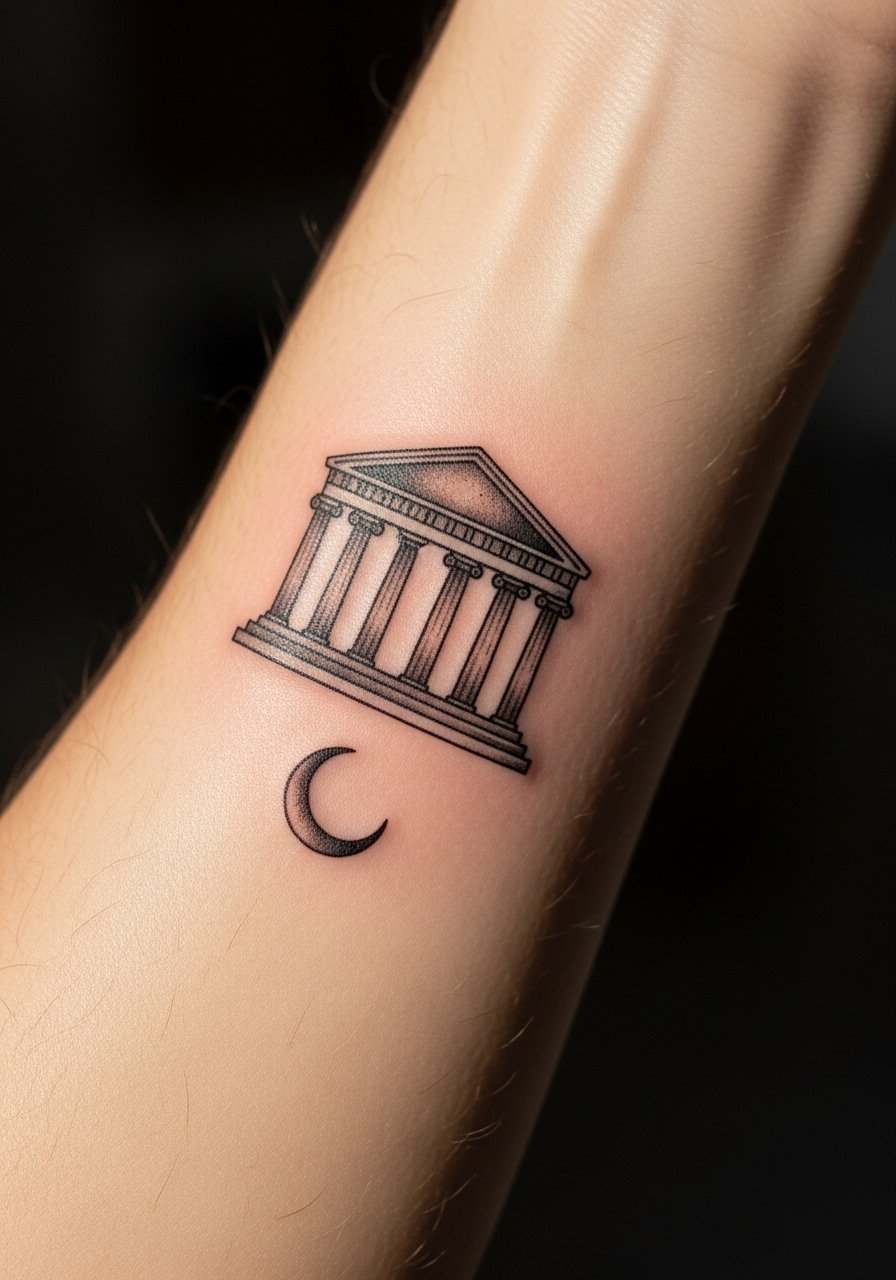
When the silhouette includes a moon, it frames the temple and gives the piece depth without adding size. Expect a two-session talk if you want subtle gray washes around the moon, though a single careful pass can work for pure line. In consultation say you prefer mid-weight linework and stipple shading around the moon so the nightsky reads without heavy saturation. Forearm skin holds fine line better than ribs, but avoid cramming extra ornamentation into the same inch. For wearing afterward, I recommend a linen button up shirt you can roll at the cuff to keep the forearm visible and unobstructed.
3. Micro Shinto Shrine with Lantern on the Collarbone

The collarbone gives a flattering diagonal for a lantern-lit shrine, but it is a sensitive stretch zone. Sessions are short, usually under 45 minutes, and the pain can be a 5 to 7 depending on proximity to bone. Tell the artist you want the lantern slightly offset so it sits above the collarbone curve; otherwise the lines can skew as skin settles. A frequent error is asking for dense gray fill near the bone, which looks blotchy after healing. For the appointment wear an off shoulder blouse or a wide-neck shirt you can tug aside without going topless.
4. Neo-Traditional Pagoda with Cherry Blossoms on the Upper Arm

Upper arm space lets a tiny neo-traditional pagoda breathe without looking crowded. Expect one to two sessions if you add blossoms and color accents. In the consultation specify bold outlines around the structure and lighter saturation in the petals so the blooms age like accents rather than solid blocks. Common mistakes include oversaturating small petals, which become muddled after a couple of years. This placement tolerates a touch-up at year three more easily than collarbone work. Pair it with a sleeveless tank women or a kimono sleeve to show the piece in bold contrast.
5. Watercolor Temple at Dusk on the Shoulder Blade
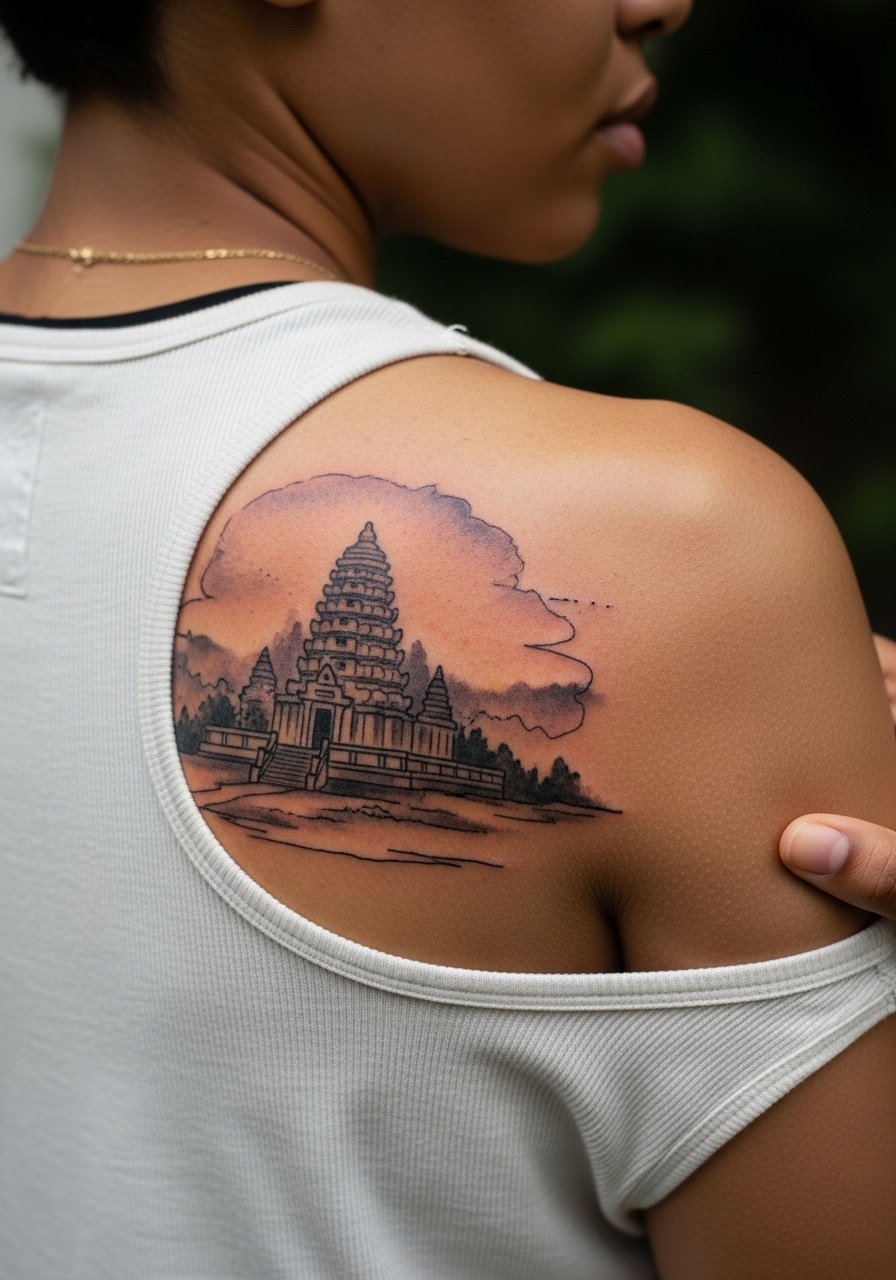
Watercolor needs space to fade into skin naturally, which makes the shoulder blade ideal. Sessions are typically longer and you should expect at least two sittings for layered color. Ask for colors that are applied sparingly around the structure so the pagoda lines remain the anchor. The aging reality is that watercolor fades faster than black line, so plan touch-ups at year three to five depending on sun exposure. For showing it off use a racerback tank top that frames the upper back without rubbing the area.
6. Blackwork Tiny Torii and Pagoda Stack on the Calf
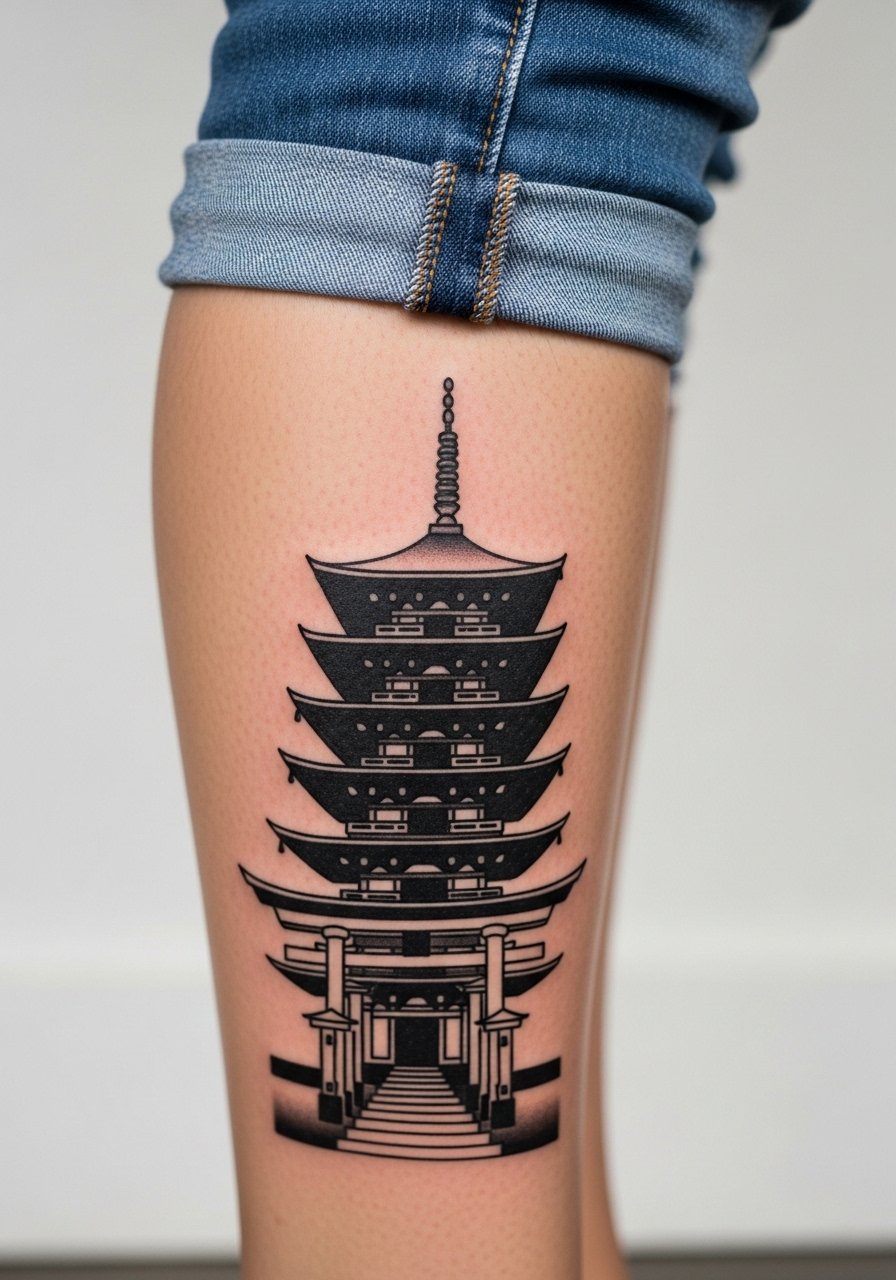
Calf placement accepts solid blackwork better than many small sites, and that high contrast helps pieces remain readable on darker skin tones. Session time is short, usually a single session for a 1.5 to 2 inch piece. Tell your artist you want heavy fills but clean edgework so the shapes do not bleed into the surround over time. A mistake is using thin outline for blackwork fill, which increases blowout risk on the lower leg. When you leave the chair pull on rolled cuff joggers or shorts so the calf gets air and avoids friction from tight pants during the first week.
Studio Day Picks
The wrist, collarbone, and calf pieces above each ask for different session prep, so pack a few things that make the chair time and the first week easier.
-
Stencil transfer paper kit. Lets you preview exact placement on small zones like the wrist or collarbone before the needle hits skin.
-
Topical numbing cream. Useful for collarbone or inner arm sensitivity when a short session would otherwise be uncomfortable.
-
Thin protective film roll. Helps ankle and calf pieces through the first few days of friction from socks and pants.
-
Fragrance-free body wash. Gentle cleansing prevents irritation around fine line work during showers.
-
Aquaphor healing ointment. A thin layer in the first 48 hours can protect delicate lines without clogging the area.
7. Minimalist Temple Roofline with Dots on the Ankle

The ankle is a high-visibility spot for small geometry and dotwork. Expect a short, sharp session and a pain score around 4 to 6 because of thin skin and bone proximity. In consult ask for spaced dots and a slightly bolder roofline so the dotwork texture survives wash cycles and shoe friction. A frequent error is putting too many dots in a compact area, which turns to gray speckle as it heals. To show the piece off, pair it with cropped wide leg pants or strappy sandals that expose just enough skin.
8. Fine Line Pagoda with Fuji Backdrop on the Inner Bicep

Inner bicep skin moves with motion, so the Fuji backdrop needs negative space to read over time. Sessions are moderate in length and friction during daily movement can soften the lines sooner than forearm work. Tell the artist you want the mountain sketched behind the pagoda and not filled, which preserves the scene as the lines age. A mistake is packing in tiny landscape details that blur into a gray patch after two years. Expect touch-up discussion at the consultation because the inner bicep often needs a tidy at year two.
9. Ornamental Temple Gate Frame on the Back of the Neck

The back of the neck is discreet and frames other small tattoos well, but it sees sun and friction from collars. Session time is usually under an hour for a compact frame. In your consultation ask for a slightly wider spacing between ornamental lines so the frame does not close up as the skin moves. One common misstep is requesting highly detailed micro-ornamentation that turns to blur in two years. For careers where neck visibility matters, consider a placement lower on the shoulder blade instead.
10. Micro-Realism Lantern-Lit Shrine on the Ribcage

Ribcage work has higher pain and a reputation for fine line not settling well. Artists are split on fine line on ribs. One camp says the stretch of the torso blurs tiny lines within two years. The other camp insists that correct needle depth and spacing allow fine line to settle well on ribs. Ask your artist which side they fall on and request a slightly bolder anchor line if they favor long-term stability. Sessions are typically short but intense and a touch-up at year two is not uncommon.
11. Neo-Traditional Tiny Temple Path on the Outer Thigh

The thigh is forgiving for small scenes that need a little horizontal runway, such as a path leading to a pagoda. Pain is low and sessions can run longer to layer color. When you brief the artist ask for the path to be simple and uninterrupted by excess foliage so it reads at a glance. A mistake is over-detailing the trail, which can become indistinct after a couple of seasons of sun exposure. If you hike frequently, discuss how clothing and packs will rub the area during the first month.
12. Blackwork Pagoda Peak Only on the Wrist

This is a compact option when you want a bold icon without size. Wrist pain is low with a quick session under 30 minutes. Tell your artist you want a thick anchor outline and minimal internal detail so the peak reads at small sizes. The usual error is asking for interior hatch shading that fills in and muddies the silhouette. For daily wear, a minimalist wrist stack on the opposite hand complements the solid black shape without crowding the area.
13. Watercolor Mini Torii in Mist on the Collarbone

Pastel watercolor keeps a torii dreamy while staying small, but the collarbone means watch for color pooling near bone. Sessions are usually single but take time to blend pigments softly. Tell the artist you prefer the mist to fade outward rather than sit saturated against the torii, which helps the gate lines read longer. The common mistake is insisting on heavy color next to bone, which can look patchy after healing. For show-off outfits, a pastel strapless top keeps attention on the mist without exposing more than you want.
14. Moonlit Nighttime Temple Scene on the Outer Forearm

A compact moonlit scene reads well on the outer forearm and translates to a clear photograph. Expect a single session with careful stipple for depth, and a touch-up at year three if you work outdoors a lot. In the consultation ask for spacing around the moon so dot work does not merge into a gray patch as it heals. A common error is compressing too many stars or ornaments into a small sky, which reduces legibility over time. The session feels like steady buzzing with the occasional sharper sensation near wrist bones.
15. Dotwork Accented Minimal Roofline on the Ankle

Dotwork brings texture to tiny roofs without adding line weight. The ankle is a high-friction area so ask for dots placed with breathing room and a slightly heavier roofline. Sessions are short but the skin there is unforgiving, so the pain can feel sharp. People often request denser dot clusters to mimic shading, which tends to merge and read as a gray patch later. Plan for touch-ups at year two to maintain definition if you wear boots or tight collars frequently.
16. Tiny Temple Path Wrapped Around the Ankle
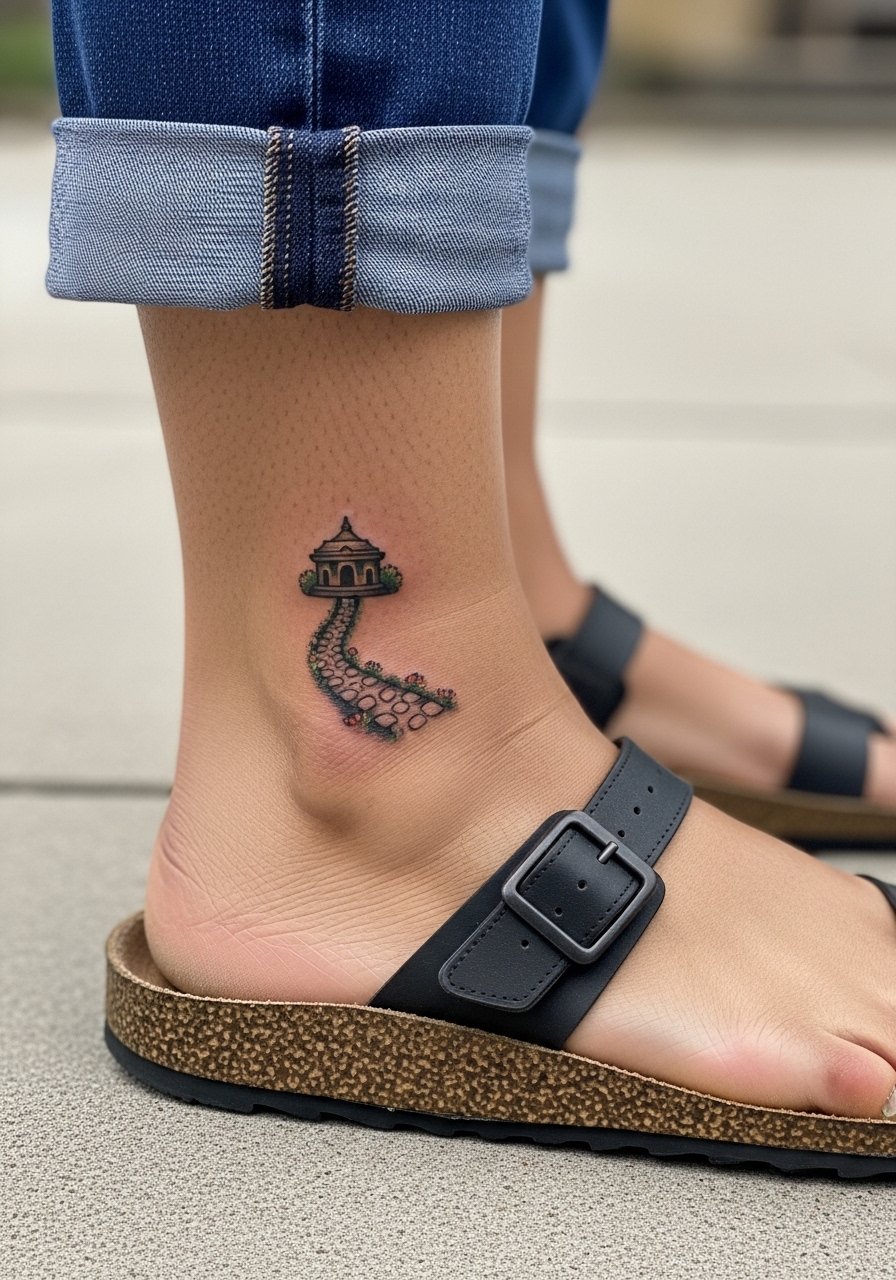
Wrapping a path around the ankle gives motion to a tiny narrative without demanding size. Session time is moderate since the design curves with the bone. Tell your artist you want negative space between the path markers to avoid it blending into a single band as skin moves. A typical mistake is asking for continuous thin lines around the ankle, which wear unevenly and may require frequent touch-ups. For the session, bring loose pants that you can pull up without compressing the area.
17. Mini Torii on the Finger

Finger tattoos are high-contact and they fade faster than other small sites. Expect short sessions but a higher likelihood of needing touch-ups within a year. In the consult, ask for a slightly bolder outline and simplified composition so the torii reads despite frequent washing and wear. A mistake is choosing ultra-fine detail that becomes indistinct once the skin's natural exfoliation kicks in. Hands are visible and sometimes restricted in certain workplaces, so factor that into placement decisions.
Frequently Asked Questions
Q: How much will a tiny Japanese temple tattoo cost and what affects the price?
A: Prices vary by shop and region, but tiny pieces are often charged as minimum session fees or hourly proportions. Complexity, color work, and whether the design needs a custom sketch affect the total. Expect a short consultation to pin down time, then book with that estimate in mind.
Q: Do fine line temple tattoos need different touch-up timelines than blackwork?
A: Yes. Fine line work usually asks for touch-ups sooner because slender lines tend to blur as collagen shifts. Blackwork with heavier outlines often looks stable for longer. Plan a touch-up conversation at your initial booking so the artist can advise on maintenance.
Q: Is it appropriate to combine cherry blossoms or Fuji with a tiny pagoda, or does that crowd the design?
A: You can combine elements if you keep scale in mind. Cherry blossom accents work as color pops if petals are spaced, while a subtle Fuji silhouette behind the pagoda works if it is kept minimal. Mention desired hierarchy to your artist so the pagoda remains the focal point.
Q: Will a ribcage temple always need touch-ups sooner than a wrist or forearm placement?
A: Ribcage skin moves and stretches, which can make tiny lines settle unevenly. Some artists avoid ultra-fine work on ribs, and others proceed with adjusted depth. It depends on artist technique and your body. Ask a shop which approach they use.
Q: What should I wear to the session for a collarbone or shoulder blade piece?
A: Wear a wide-neck shirt, racerback, or strapless top so the artist can expose only the area needed. Loose, layered clothing that you can pull aside without going fully undressed saves time and keeps the appointment comfortable.
Q: Where can I look for additional tiny Japanese temple references without following specific artists?
A: Search curated marketplaces and video platforms for flash sets and healed examples, and check tattoo directories and hashtag collections to find a range of styles and healed photos that match the scale you want.
