
Fine line trends look gorgeous on screen, but they come with common headaches: ultra-thin wrist moons that fade fast, booked-out artists who ghost deposits, and colorful thigh pieces that blur after a body change. I wrote this set of 17 sun and moon ideas to show options that read subtle at first glance and include the practical notes that keep them holding up years down the line.
1. Fine line sun and crescent moon on inner forearm
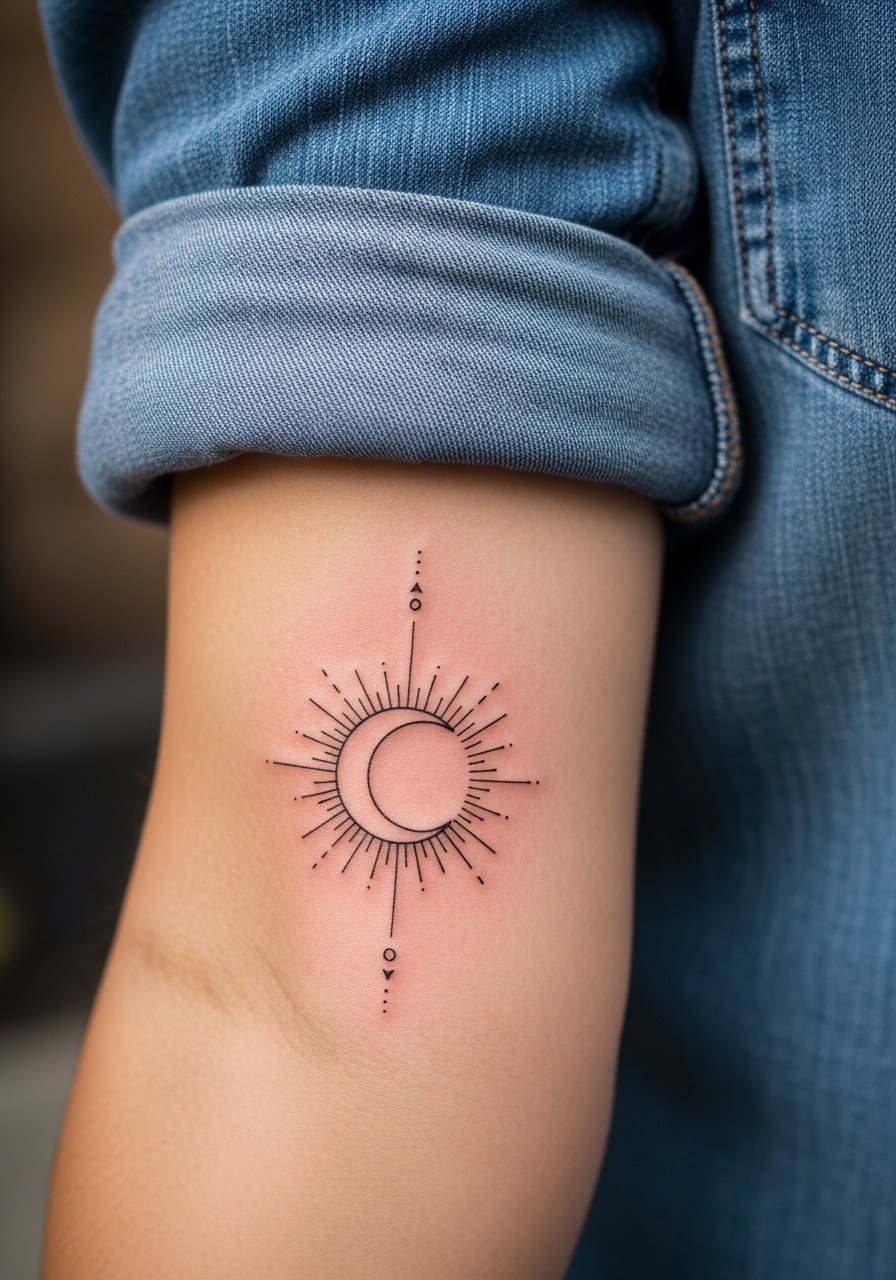
I recommend this if you want a visible, small piece that still reads refined. Say to your artist you want slightly heavier linework than a single-needle stitch so the rays keep shape after a year. The most common mistake is requesting ultra-tiny rays that merge into a gray smudge after six to twelve months. Expect one short session and a possible touch-up at the six-week check if the outer rays thin out. For showing it off, roll cuffs and layer thin silver bangles so the forearm ink sits between textures. Wear a rolled cuff chambray shirt to session day for easy access and cleaner photos.
2. Watercolor sun with moon phases on upper arm
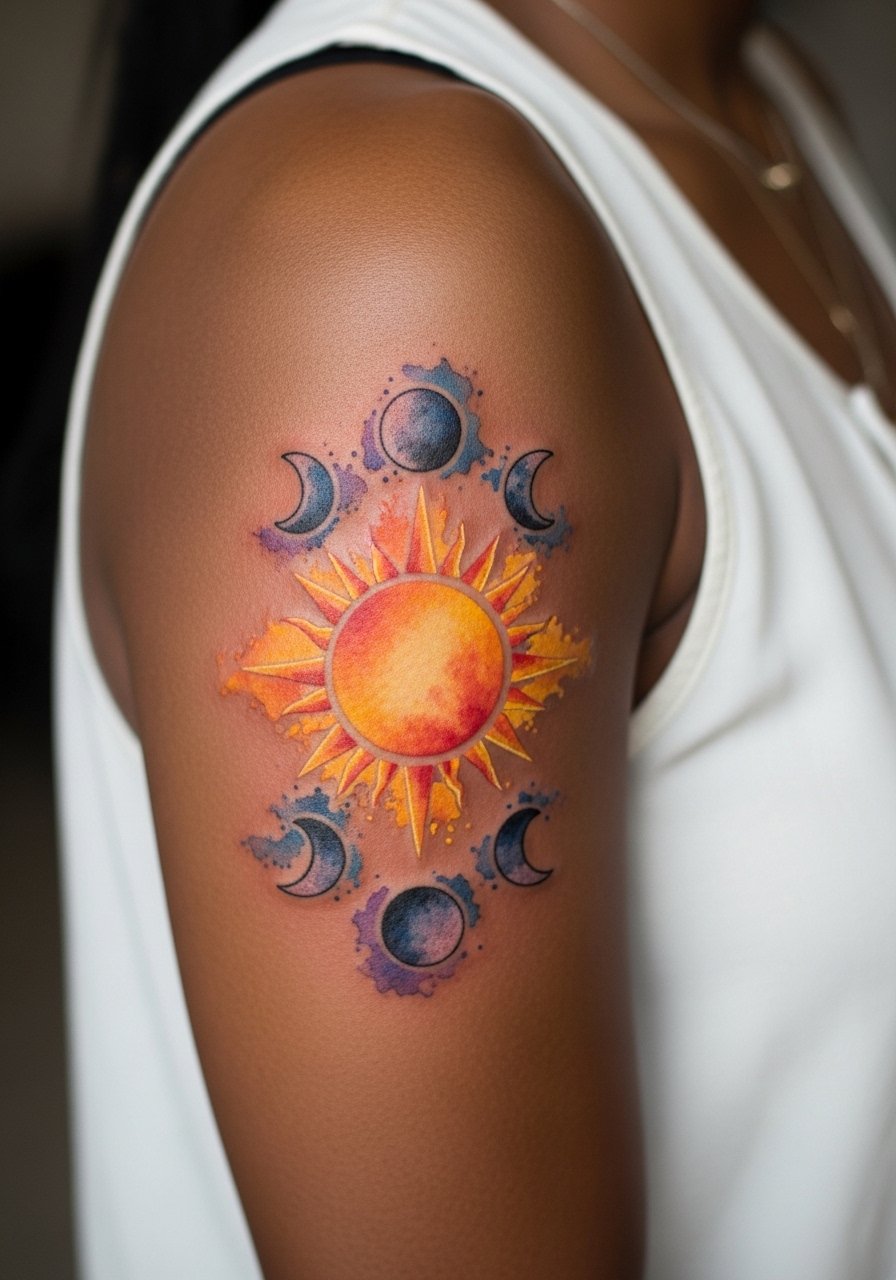
This dreamy take reads painterly without shouting. It works best on the upper arm where the artist can lay broad washes with room to blend warm and cool tones. A frequent trap is asking for saturated watercolor in a sweat-prone season, which risks ink migration while healing. If color is the priority, plan sessions in cooler months and request slightly denser saturation near the edges so color holds. Session feel is moderate, with the shoulder mobile enough to shift positions. Expect one to two sessions depending on complexity. The piece ages into a soft painterly patch that keeps its personality when placed on the upper arm rather than on a high-friction zone.
3. Minimalist geometric sun-moon mandala on the wrist
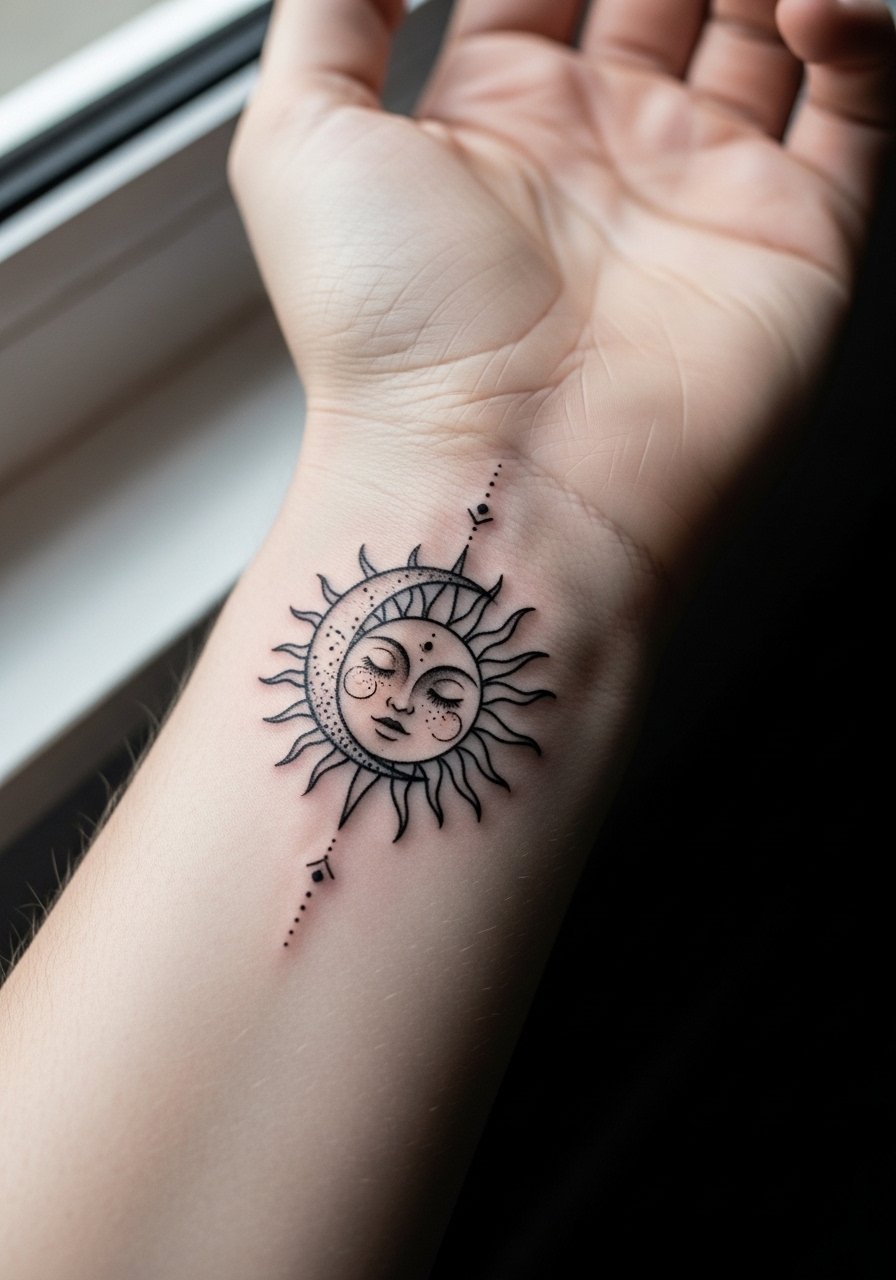
Wrist geometry is a popular first tattoo because it sits where you see it every day. Fair warning, the wrist endures a lot of washing and friction which can thin ultra-fine work quickly. Ask for slightly more spacing between concentric elements and a modest line weight so the mandala keeps definition at two years. A sensible touch-up plan is normal for this placement, especially for dense dot work. For showing the piece, keep the opposite wrist bare or add a thin leather cord bracelet to frame the tattoo without crowding it. Session time is short, but healing needs gentle care to avoid loss of crisp dot work.
4. Neo-traditional sun rays entwined with a full moon on the shoulder
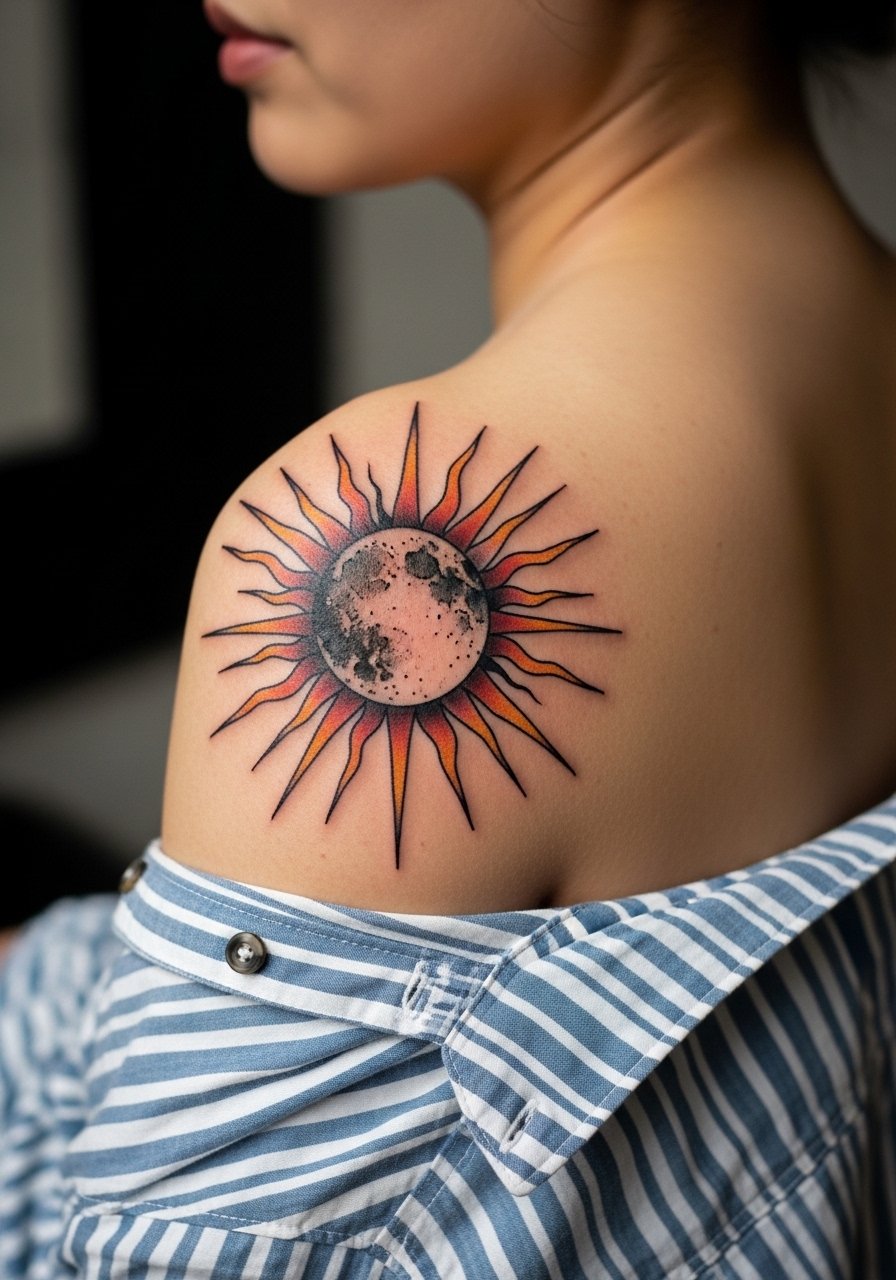
This design loves the shoulder because the curve lets rays breathe and color pop. Bold outlines and solid saturation age much better than tiny internal detail on this canvas. The common mistake is packing too many tiny highlights into each ray, which soften into a muddied patch over time. Tell your artist you want strong black outlines with color accents and ask how the piece will look in photos on medium to dark skin. Pain is manageable and sessions are comfortable with brief breaks. Play with off-shoulder tops when you want to reveal the piece, and bring a button-front shirt on session day so the artist can access the area without tugging.
5. Blackwork sun eclipsing moon on the upper back
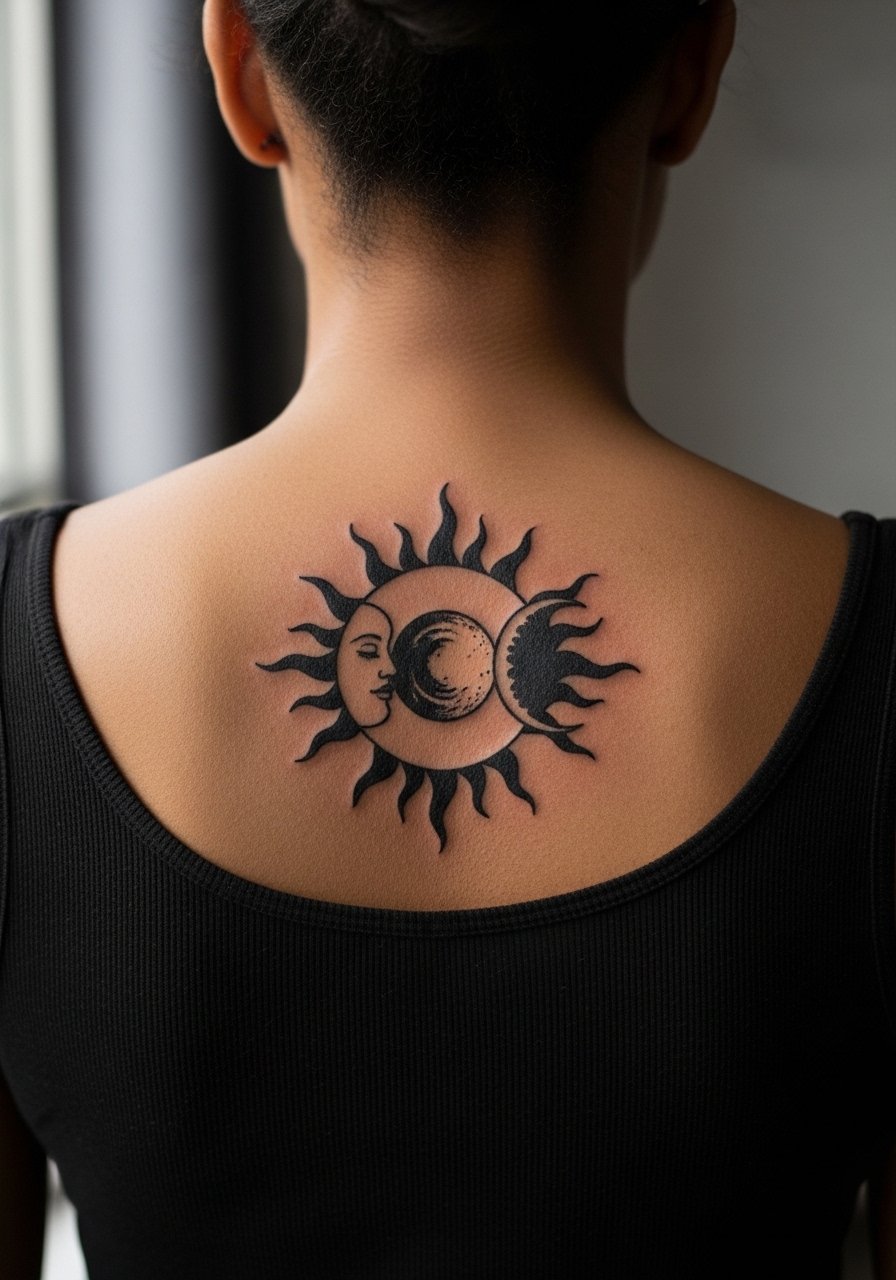
If you want drama that still reads restrained when dressed, a negative-space eclipse in blackwork does that. The upper back gives a large canvas for crisp negative shapes and keeps heavy saturation away from high-friction zones. Expect multi-session work if you want a full solid fill, and plan for aftercare that respects large-area healing. A mistake is choosing too detailed a fill pattern that ends up looking like texture from a distance. For evenings out pick backless or low-back styles so the piece is framed cleanly. This style tends to age into a bold silhouette that keeps its graphic intention.
6. Micro-realism sun and starry moon on the collarbone
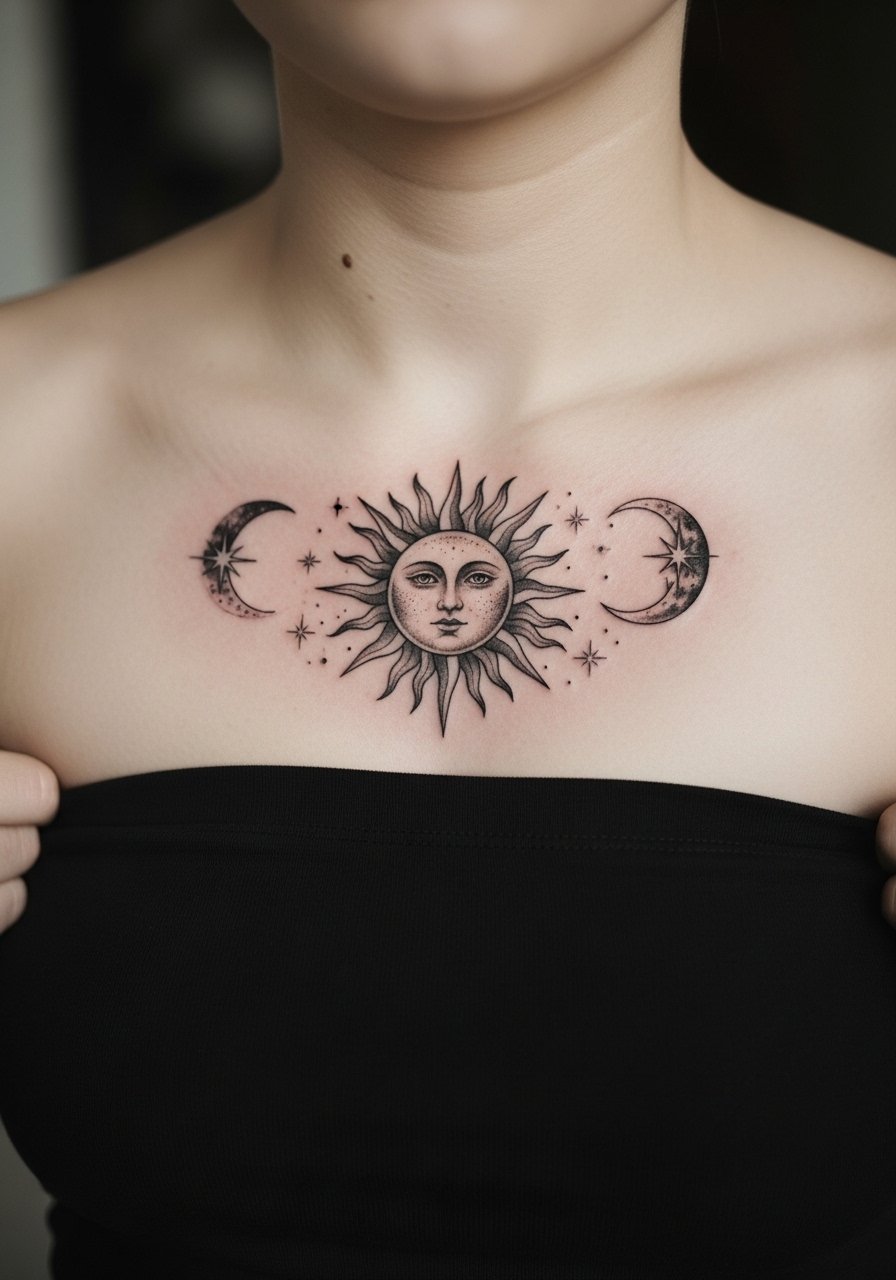
Tiny photoreal work at the collarbone can look elegant and discreet. Micro-realism is unforgiving if done too small. Ask your artist for 2-3 inch scale and refer to healed examples on similar skin tones so you see realistic contrast. The main mistakes are undersized values and skipping a follow-up touch-up for subtle shading. Pain is low to moderate but the bone is close to the surface so expect sharp moments. For session day bring a strapless top or sports bra so the chest is accessible without rubbing. At six months the detail stays legible if the initial saturation and contrast were planned for healing.
Studio Day Picks
The forearm, wrist, upper-arm, shoulder, back, and collarbone pieces above all have different prep needs. A few session-day and healing items smooth the appointment and the first week.
-
UK tea tree balm. Lightweight anti-itch properties that many people prefer over greasy ointments while healing sensitive rib or chest areas.
-
Australian dry powder healer. Absorbs sweat better than lotions for larger thigh or back pieces done in summer.
-
Japanese rice bran ointment. Used by some for fine-line wrists because it sits thin and reduces early fading.
-
Small-batch eucalyptus gel. A less shiny option some people pick for blackwork so photos show depth rather than gloss.
-
Hustle Butter. A common go-to for color pieces on the upper arm where breathability matters during the first days of healing.
7. Ornamental sun-moon with floral accents on the thigh
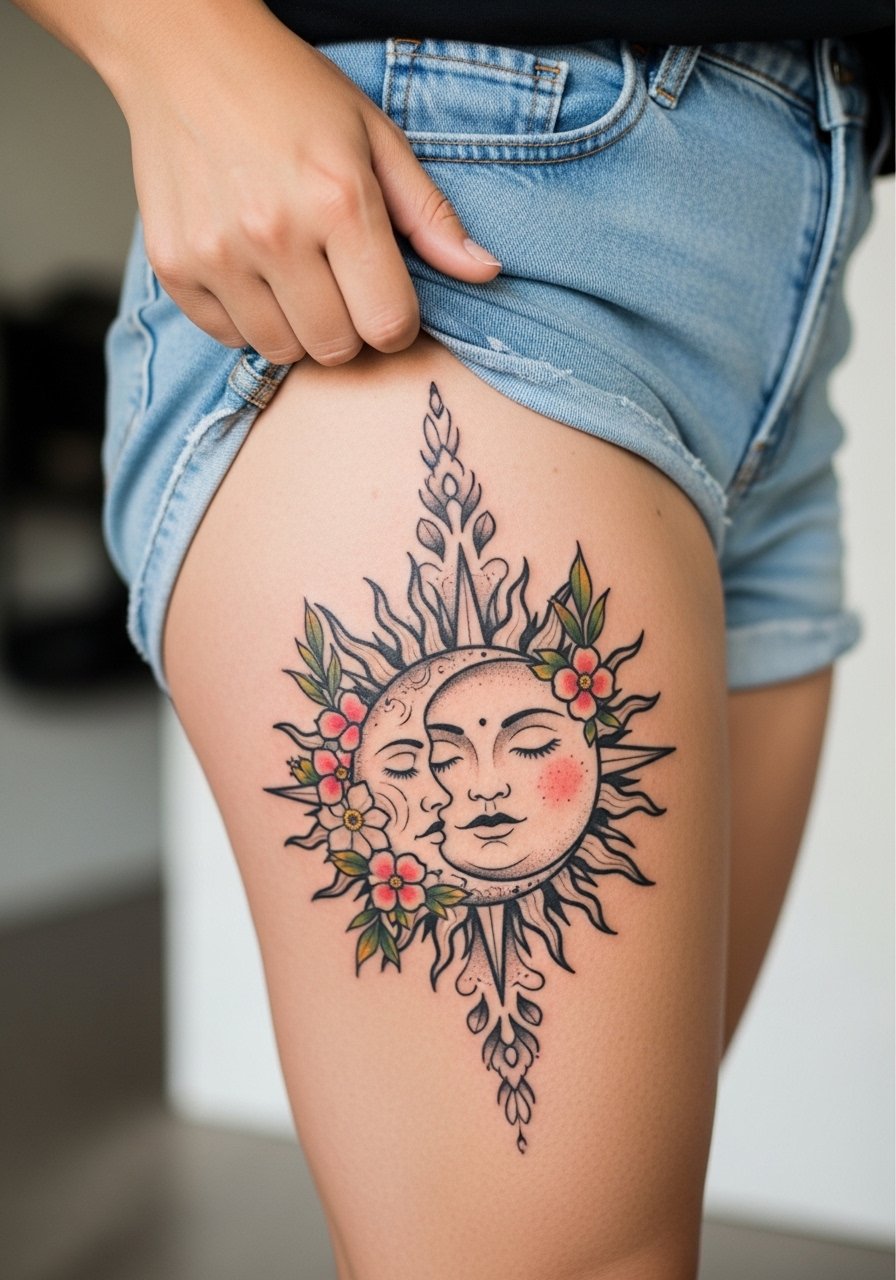
Thigh pieces are forgiving for size and curvature, so ornamental wraps feel organic with walking motion. A frequent error is packing too much tiny detail into one wrap so the pattern blurs after flesh shifts. If you plan body changes, ask the artist to place larger motifs over muscle rather than the softest belly-facing zones. Sessions are comfortable because the area is easy to access and you can shift positions. For summer reveals pick high-waist linen shorts to frame the curve and let the design show. On session day wear loose joggers you can roll down without pressure on the area.
8. Ignorant style jagged sun over smooth moon on the calf
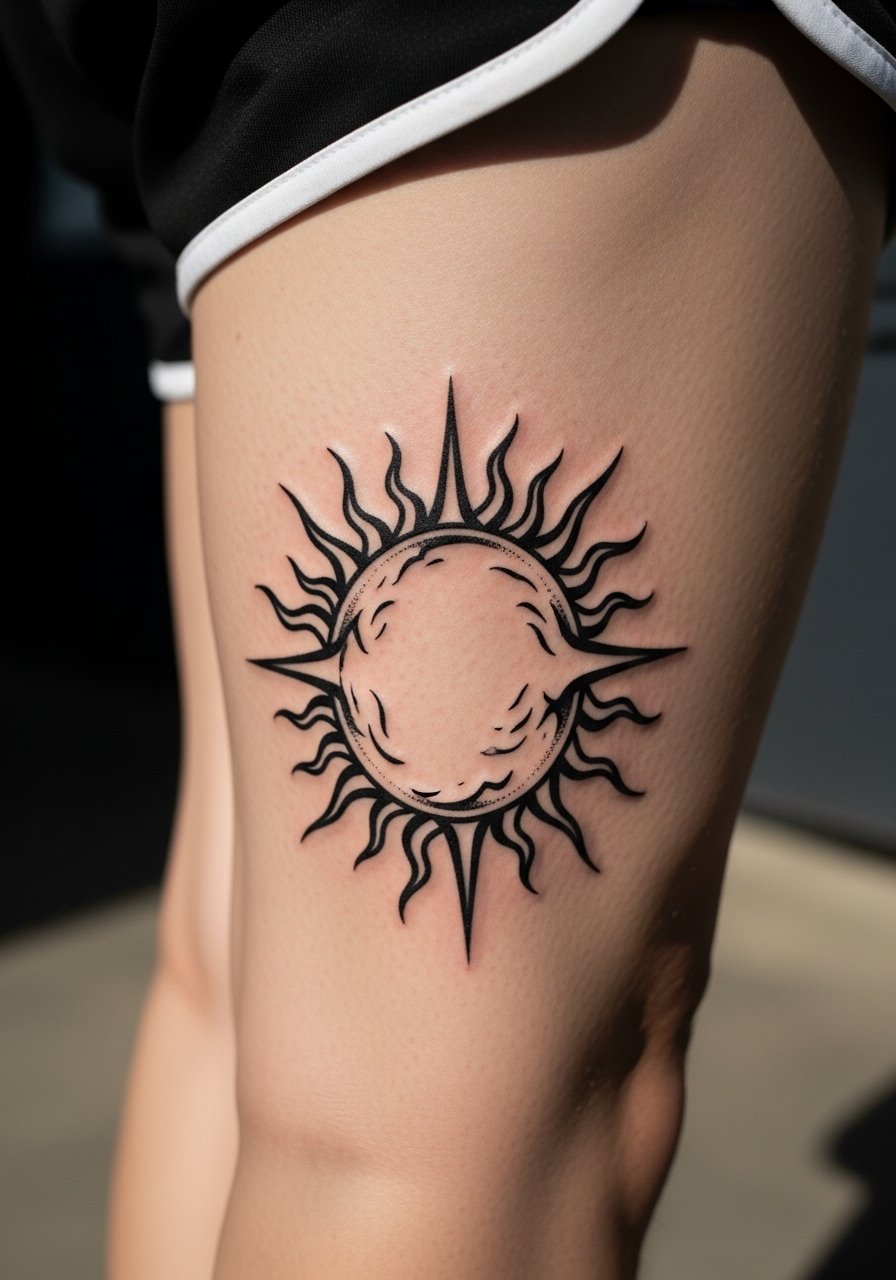
The calf is an athlete-friendly canvas that handles bold black lines and aggressive textures well. Ignorant style thrives on raw contrast, and that contrast ages into a graphic look rather than a faded smudge. The common mistake is placing intricate dot shading in a zone that sees a lot of rubbing from pants, which removes crispness early. Sessions are quick and usually single-visit for medium-sized pieces. Consider calf placement if you want visibility during active months. Expect consistent longevity because the skin there is thick and holds saturated lines well.
9. Traditional bold sun and moon faces on the chest
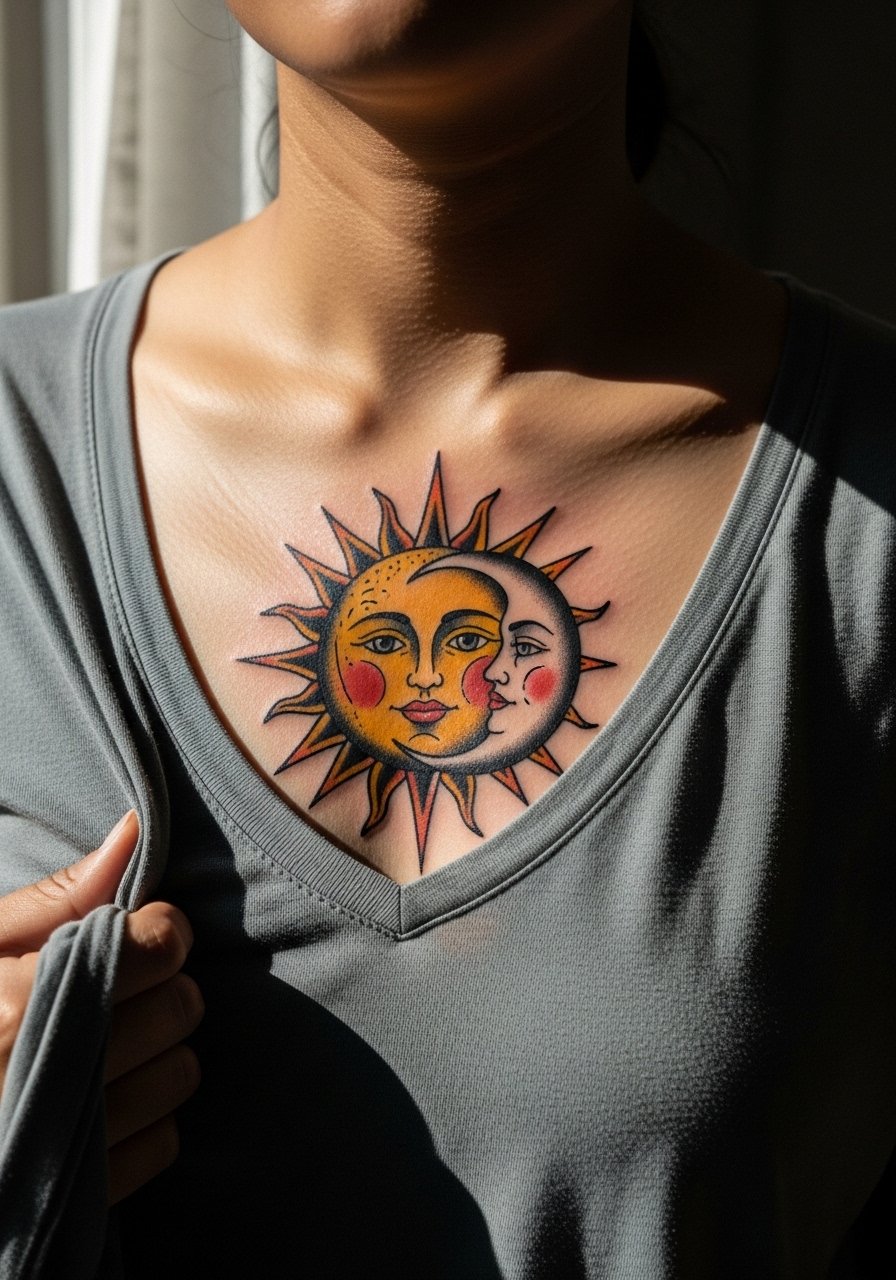
Classic faces bring a sailor-flash mood that reads instantly across larger clothing gaps. Center-chest pieces are intimate and visible in swim or open-collar looks. The main mistake is shrinking a traditional motif too small so facial features lose their expression as it heals. Chest skin responds well to saturated color but watch for pressure from bras or tight tops in the first two weeks. Expect one to two sessions depending on color. Think about revealing pieces with open collar shirts rather than constant exposure, because sun will darken and soften color over time.
10. Patchwork sun phases linking to moon on the ribcage
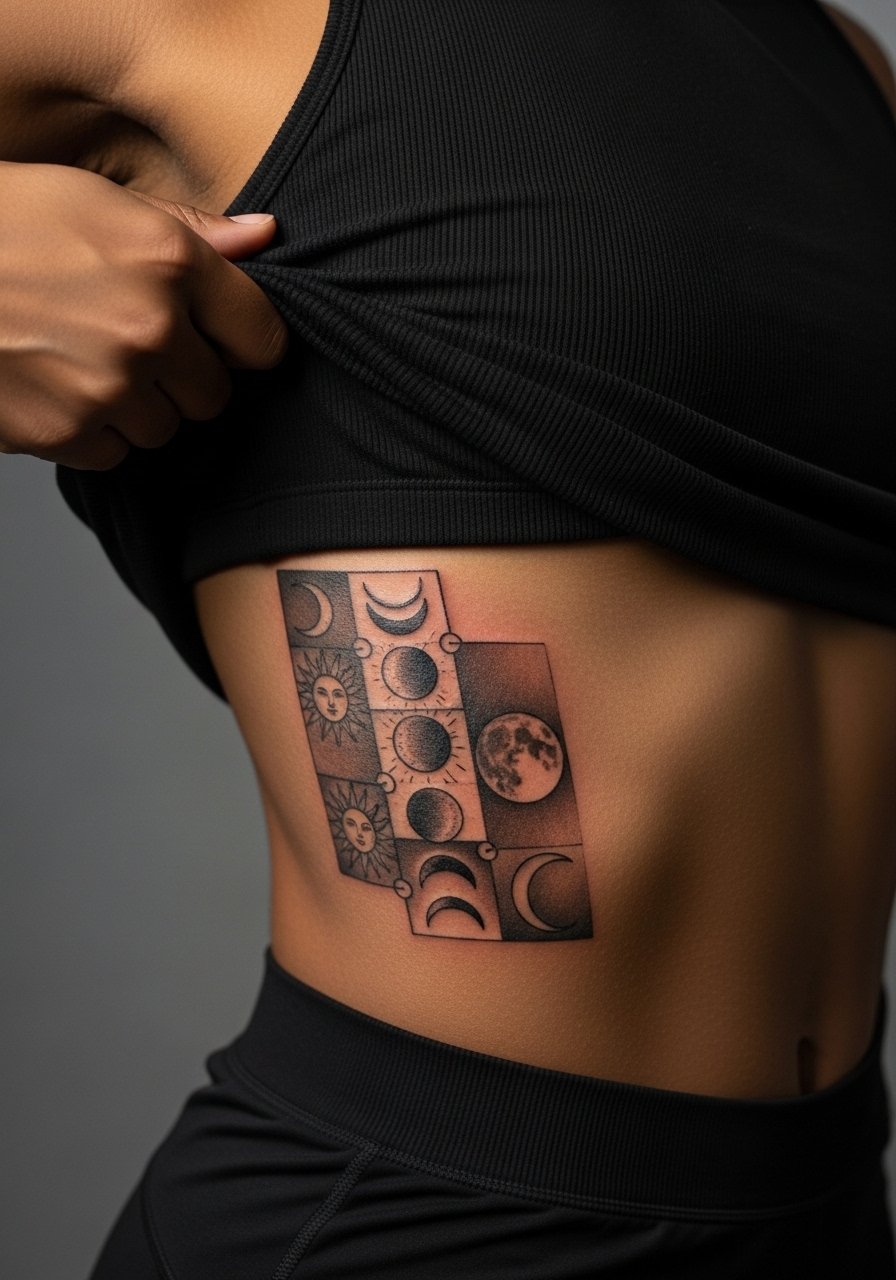
Ribcage work is a buildable option for sleeve-minded people because each panel can be added over time. The trade-off is that ribs are a high-pain, high-distortion area during weight fluctuation. Artists split on fine line here. One camp warns that too-fine lines can blur quickly because of skin stretch. The other camp says careful spacing and proper depth mean fine lines can settle well. If you favor fine line, book a test area or a slightly bolder line weight. Plan for multiple sessions and accept that touch-ups are more common on the ribs than on the forearm.
11. Custom sun-moon phases keyed to lifecycle dates on the inner bicep
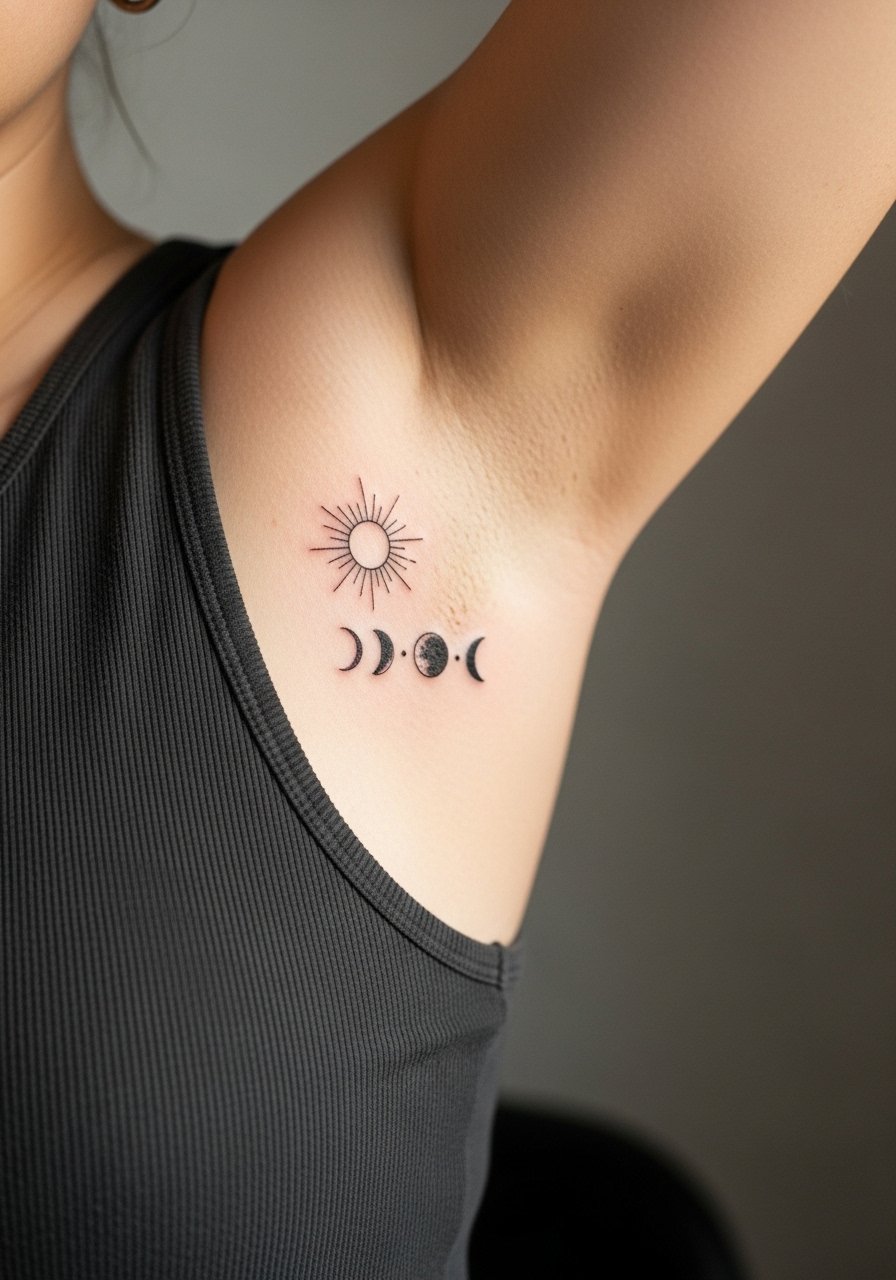
Personalized phase dates are a neat way to tie celestial art to birthdays or important cycles without heavy lettering. For this placement ask your artist for mockups that place date markers along the curve rather than on dense shading so numbers remain legible as skin shifts. The inner bicep heals differently because sweat accumulates there; keep sessions to shorter blocks and expect moderate pain. Bring a sleeveless tank on session day so the artist can access the area without rubbing fabric. This approach keeps the piece subtle but specific to a moment you can reference later.
12. Reverse contrast, moon warm golds and sun cool silvers for dark skin
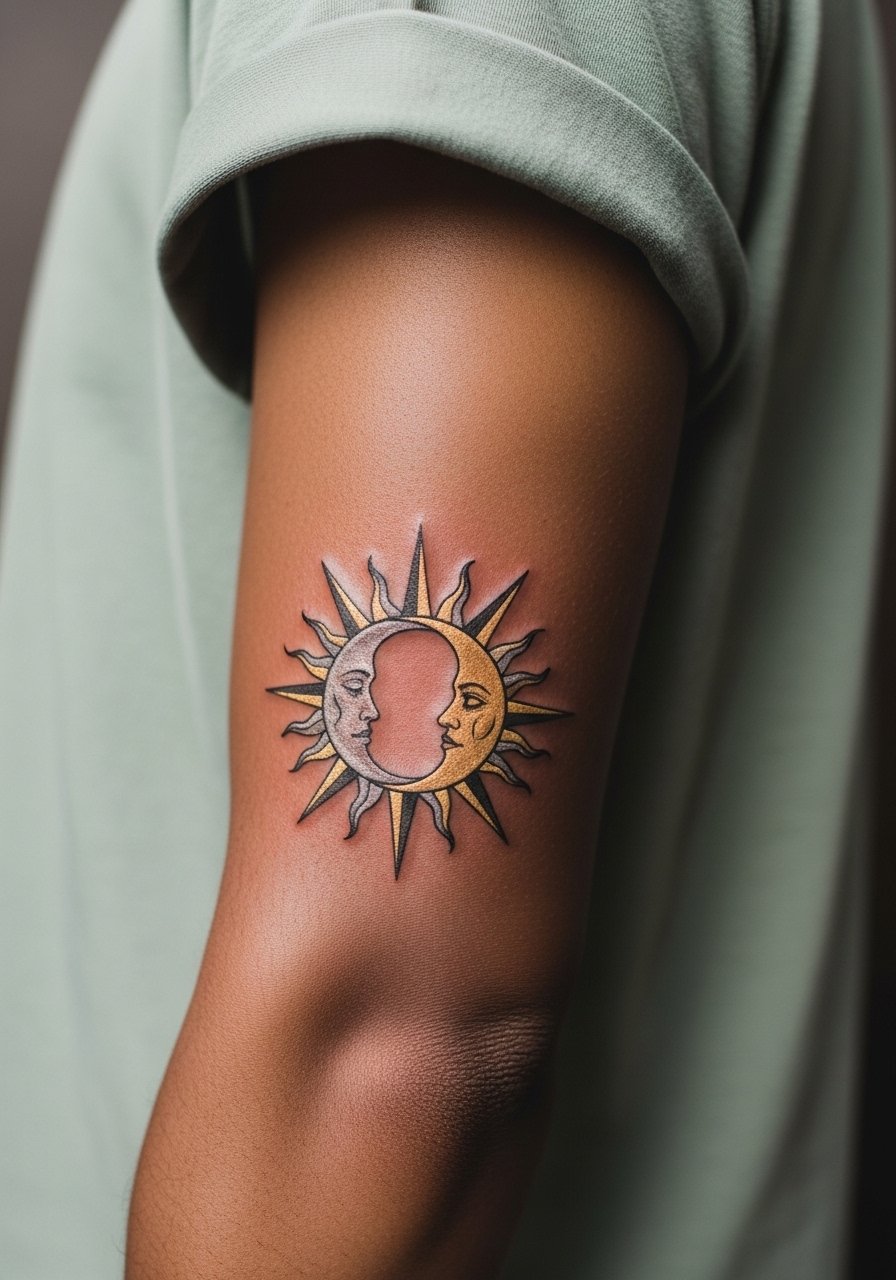
Designers sometimes flip the expected palette to make elements pop on darker skin tones. Having the moon rendered in warm golds and the sun in cooler silvers creates a readable separation without oversaturating. The key is asking for mockups on similar skin tones so contrast and saturation are tested before inking. A common error is copying reference photos shot on pale skin without adjusting palette. For session day, a loose fit short sleeve tee is practical and protects the area while still allowing easy access. Expect gentle fading in metallic mixes, and plan a color check at six weeks.
13. Thigh wraparound sun chasing moon for motion
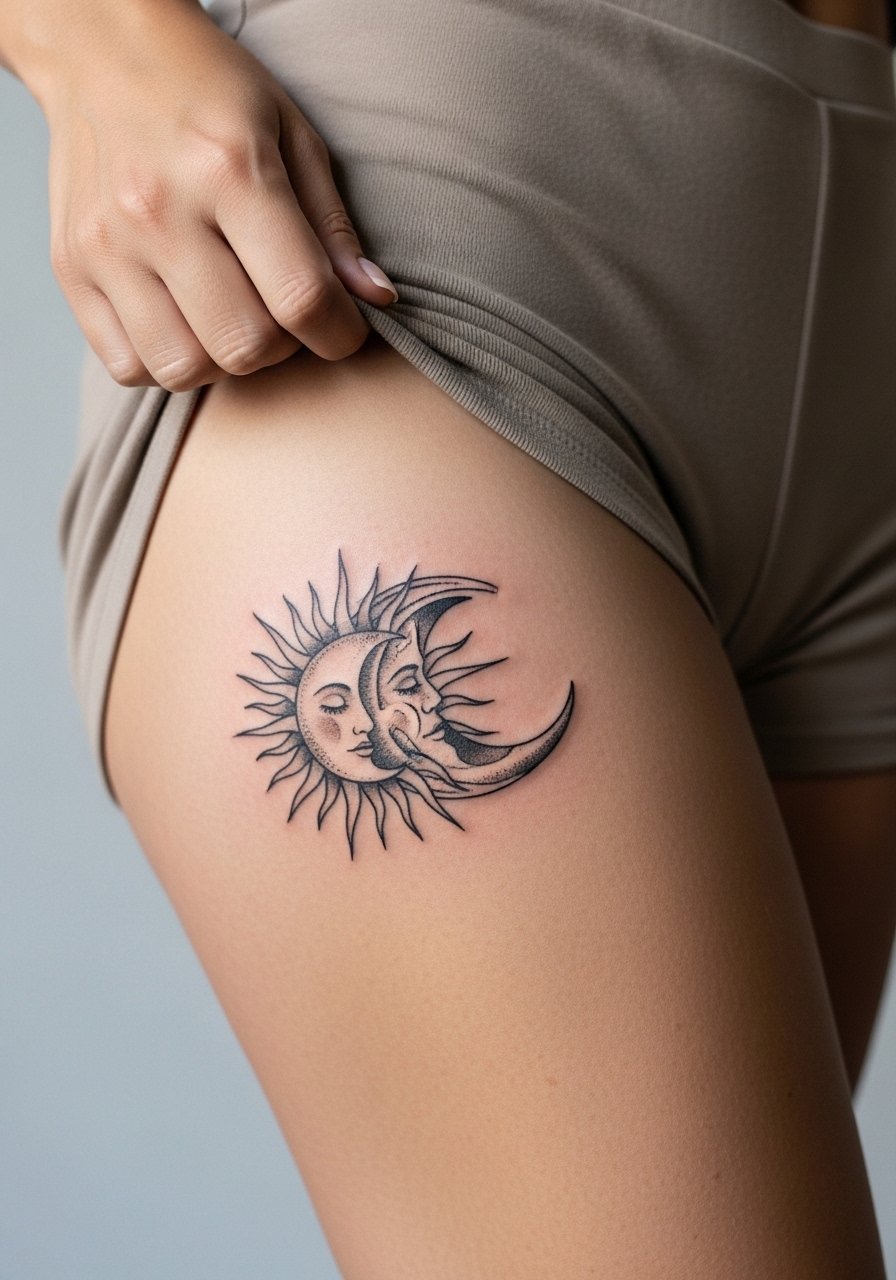
A wrap that moves with your stride is one of those design choices that feels alive. The thigh is forgiving of scale, which makes it ideal for ornamental elements that need breathing room. The mistake is trying to compress too many motifs into a narrow band so the design loses rhythm while walking. If body change is a concern, place primary motifs on areas that shift less with weight gain. Sessions are comfortable because the thigh handles longer sittings. For summer show-off, pair with high-waisted shorts that let the wrap reveal itself. Healed results keep motion in the composition without crowding.
14. Black and gray micro-real moon with sun bursts on the ankle
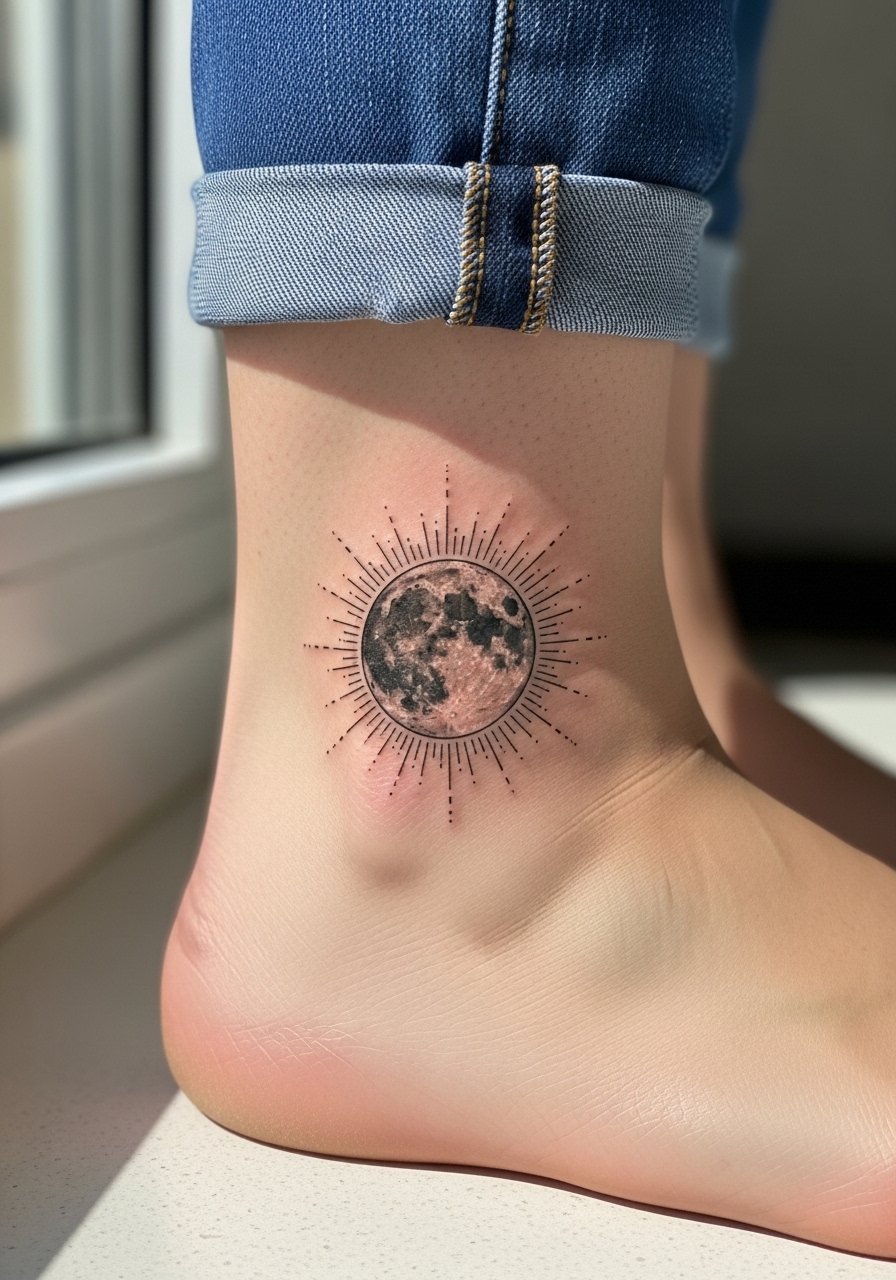
Ankle micro-realism reads very subtle when executed at the right scale. The ankle sees frequent rubbing from footwear and socks, which can impact early healing. Ask your artist for slightly denser shading near outlines so the tiny highlights hold up after a year. The usual mistake is placing ultra-fine shading that the ankle skin cannot retain, causing detail loss. Plan for a quick touch-up if any areas soften. Session times are short, but post-session care matters because the area is close to shoes and moisture. Showing this piece with cropped jeans keeps attention on the fine detail.
15. Memorial sun-moon with discreet birth numerals on the upper arm
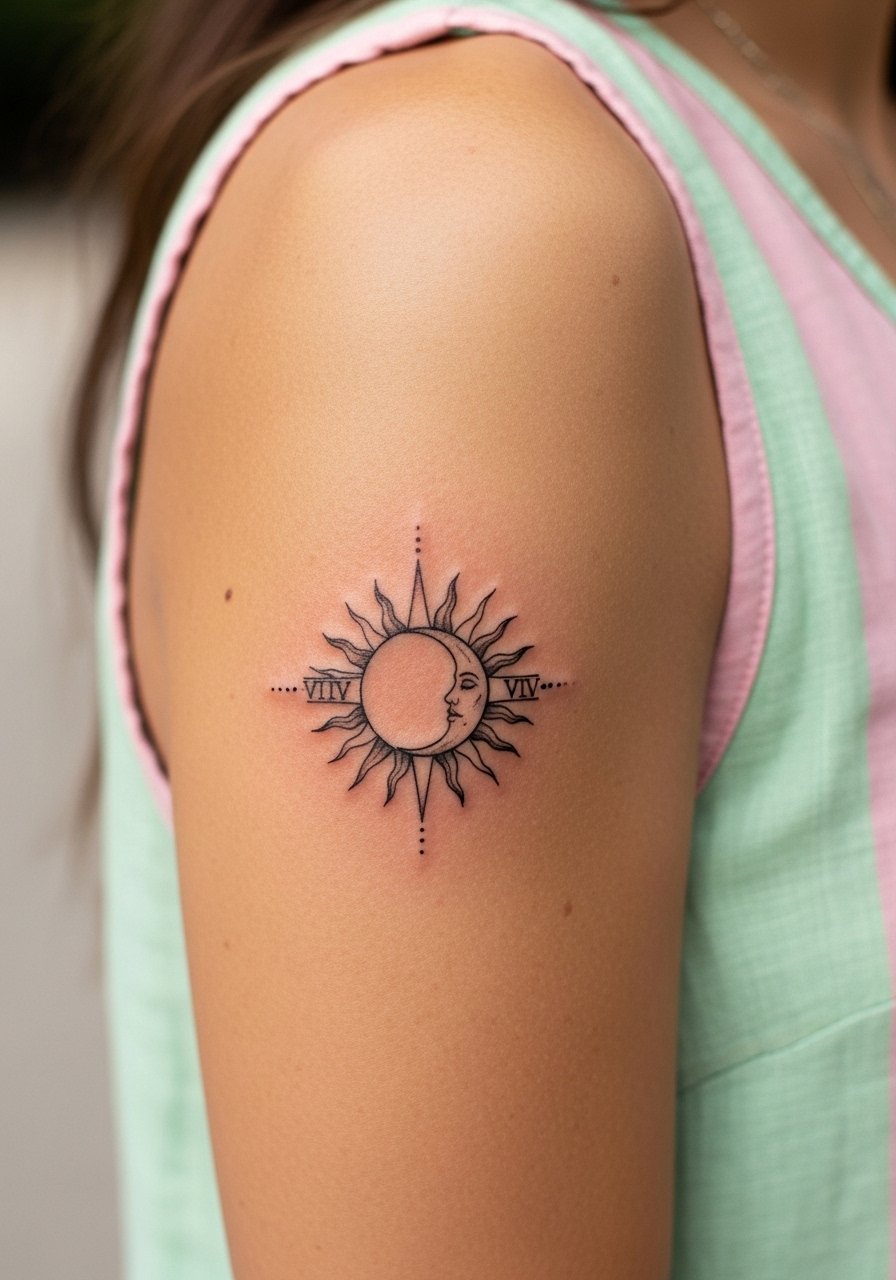
Memorial tweaks work well when integrated as subtle numeric markers rather than obvious text. Place numerals where they follow natural rays so they read as part of the design. A common error is fussing the numerals into a tiny font that blurs within months. Keep numerals bold enough to read and ask your artist to show how they age in mockup. Sessions for modest upper-arm pieces are comfortable and usually single-visit. For reveals pick a pastel linen tank that flatters color work and keeps the focus on the arm during informal looks.
16. Forearm sun chasing moon in a linear patchwork for sleeve planning
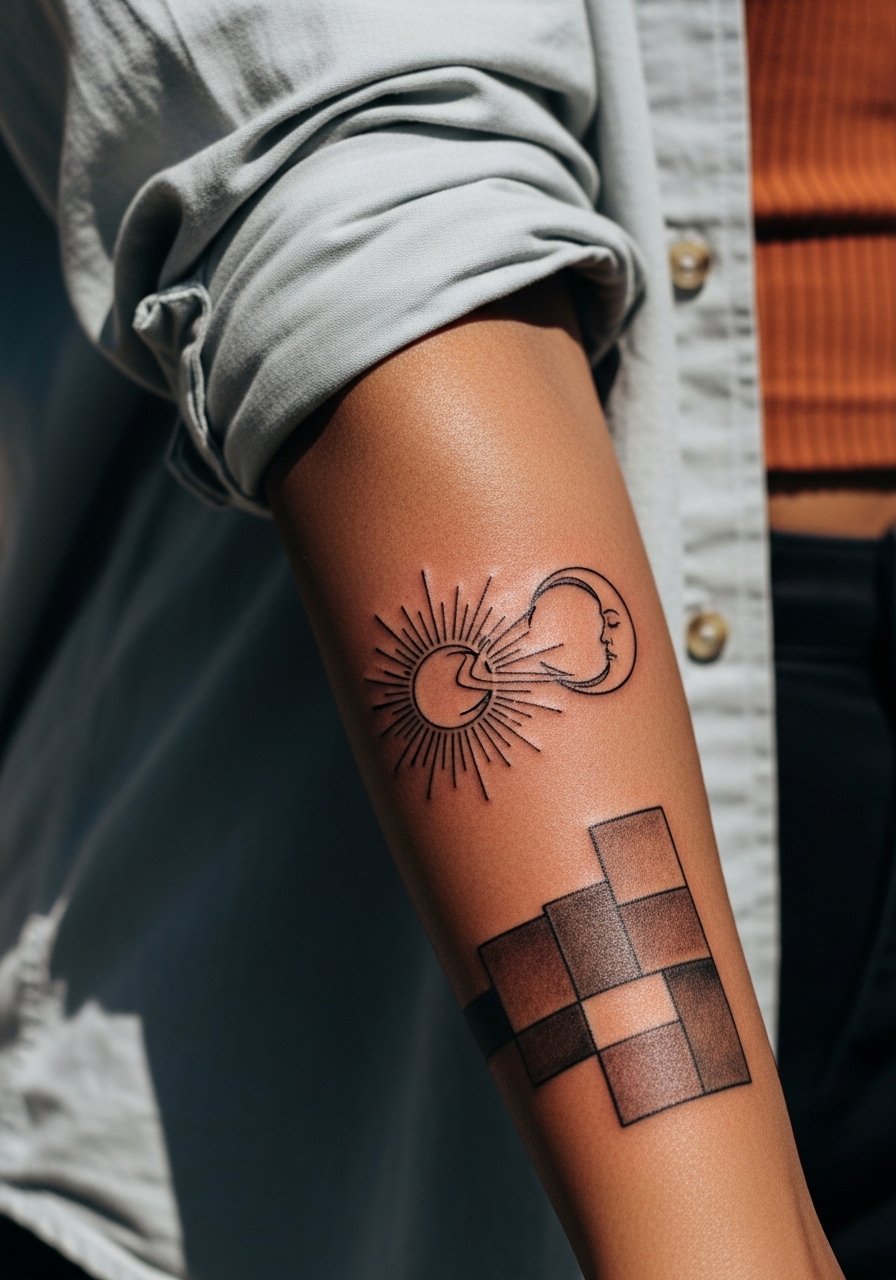
Patchwork forearm pieces are smart for collectors who plan sleeves because each module reads as a complete unit and stacks cleanly. The biggest mistake is making panels too small, which complicates future linking. Ask your artist to prototype a single module at scale that you can copy along the forearm. Expect one to two short sessions for each added panel. For session day wear a loose button-down shirt so your artist can access the forearm without fabric catching. Over time the modular approach makes touch-ups and extensions easier.
17. Tiny sun and crescent tucked behind the ear for the subtle reveal
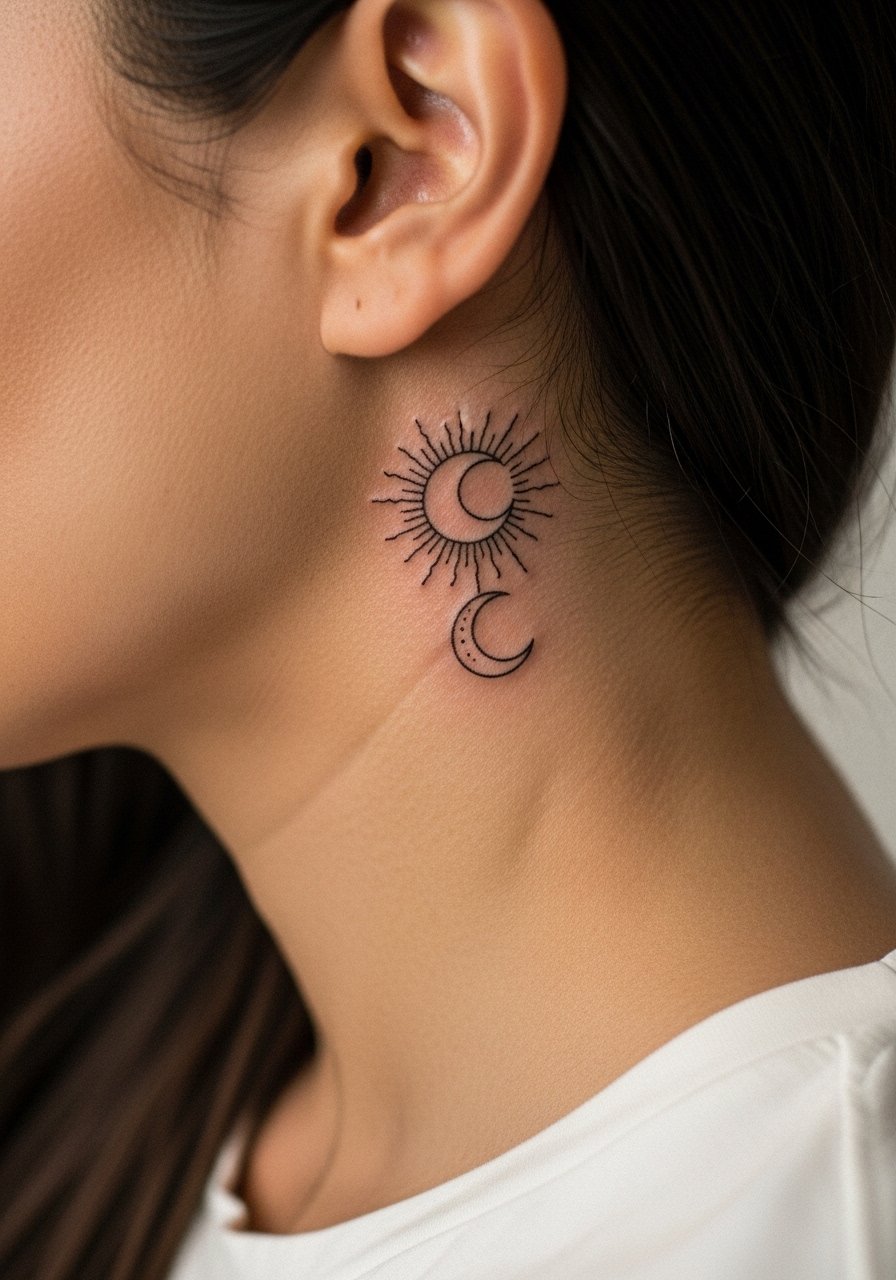
Behind-the-ear placements are ultra-discreet and read like a whisper when revealed. The challenge is scale and mobility of hair and clothing during healing. Ask for simple outlines with minimal filler so the pieces remain legible. The mistake is picking too much interior detail for such a tiny zone. Pain is low but positioning can be awkward for the artist which increases session time. Consider hair style and collarlines before booking. This spot rewards restraint with a quiet reveal that still carries intent.
Frequently Asked Questions
Q: Why did my fine line wrist moon fade so much in six months and what can I do next?
A: Fine line work on the wrist often fades faster because of constant hand washing and friction. For a better long-term result, get slightly thicker linework than single-needle fine lines, ask your artist about touch-up policies at six weeks, and protect the area from heavy sun exposure while it heals. A planned touch-up at six to twelve weeks is common for wrists.
Q: Artists keep canceling my consults. How do I book reliably for these sun-moon pieces?
A: Studios vary on deposit rules and guest spots. Use booking platforms that handle deposits and confirmations, and ask about cancellation policy before you pay. If timing is tight, search local hashtags and online community threads for guest spots and confirmed availability rather than relying on open DMs.
Q: Will a thigh sun tattoo stretch badly if I gain or lose weight?
A: Thighs hold ink well but the outer thigh is more stable than inner-front zones that stretch with weight fluctuation. Ask the artist to place key focal elements over less mobile tissue and avoid ultra-fine detail that needs perfect alignment to read. If you expect body changes, increase motif scale to preserve visual intent.
Q: Does watercolor need a different aftercare routine than black and gray pieces?
A: Watercolor color retention depends more on saturation and sun avoidance than on radically different products. Keep color work out of direct sun for four weeks and avoid tight fabrics rubbing the tattoo while it seals. The specifics vary by studio preference, so ask what they recommend for color saturation and sun protection during the first month.
Q: Should I get Saniderm, dry healing, or a thin balm for a summer thigh sun?
A: There are two camps. Some artists prefer protective film for color pieces in low-friction spots, and some healers say dry methods work better in humid areas because films can trap moisture. For summer thigh work consider a lightweight, absorbent approach and follow the artist's recommendation based on how much you sweat. If you know you perspire heavily, ask the studio what has worked for clients with similar skin and activity levels.
Q: How do I find artists who actually do clean fine line sun-moon pieces without ghosting me after a deposit?
A: Search location tags with style filters, check recent healed photos on portfolio pages, and use booking platforms with clear deposit rules. Look for shops with confirmed touch-up policies and a steady stream of completed healed examples in similar placements. Community threads and app-based guest-spot listings help surface reliable spots faster than scattered DMs.
