
Fine line is trending hard on hip bones right now, and the gap between what looks perfect on a screen and what lasts on skin is getting louder. Many people pick ultra-delicate linework without realizing the hip bone vibrates under the needle or that clothing rub will erase crispness during healing. Read on for 21 soft hip bone tattoo ideas that balance fresh aesthetics with real-world wear, wardrobe pairings, and the exact consultation notes to bring to your artist.
1. Delicate floral outline along the hip bone

I recommend this when you want something that follows your natural curve without heavy shading. In consultation ask for single-needle linework with slightly increased spacing so the petals do not merge after a year. Pain sits higher when the stencil rides directly on the bone, but a 1-2 inch outline usually finishes in a single session. A common mistake is asking for ultra-tiny petal detail that needs denser stipple shading; that invites faster blur on hips. At six months the lines read crisp if you avoided dense shading. By year three expect some softening and plan for a light touch-up if you want the crisp outline restored. For showing it off, pair this with high waisted bikini bottoms in neutral tones and a cropped tank.
2. Minimalist snake coiled on the side hip
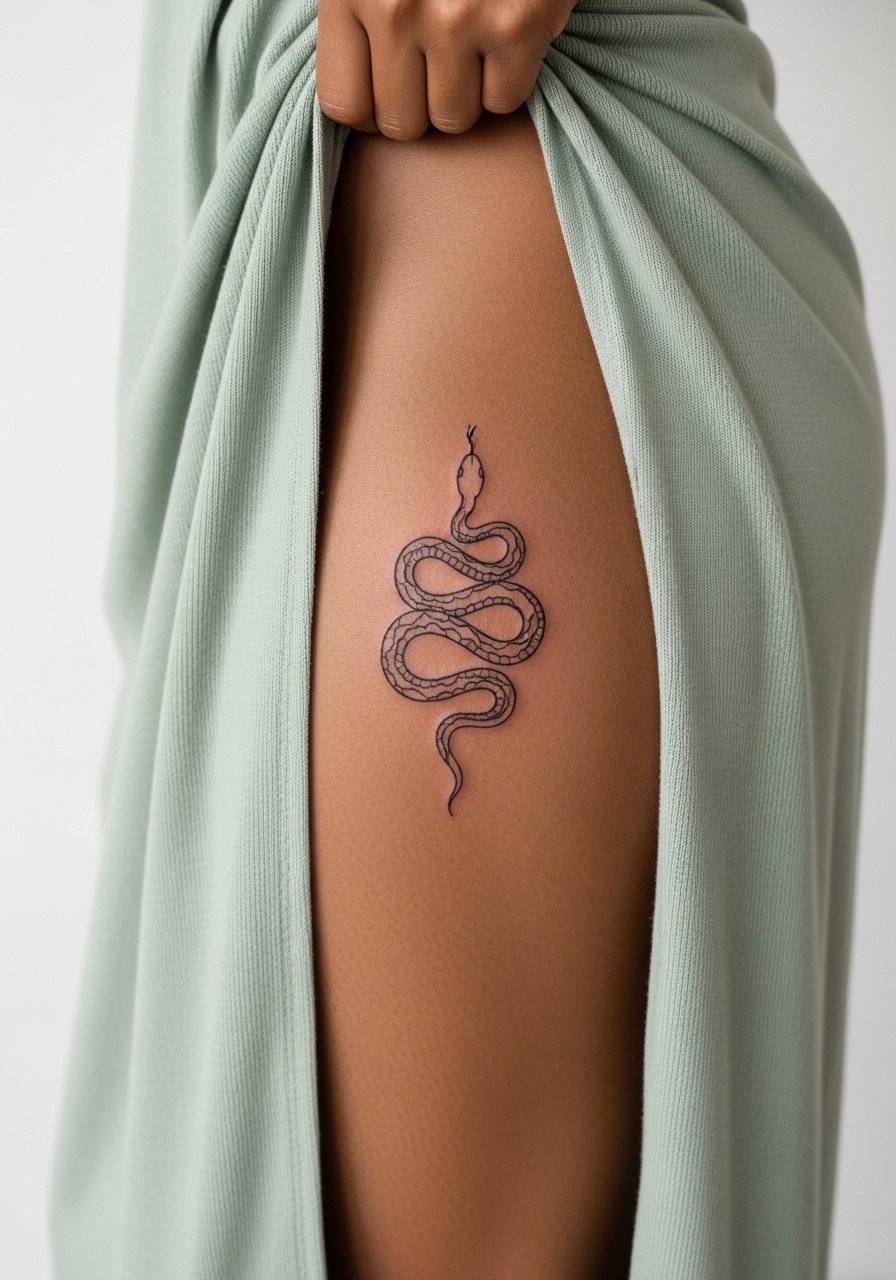
This is an option if you want edge without overdoing it. Tell your artist you want confident negative space inside the coil so the shape reads when your body moves. Expect a quick single-session sting when the needle brushes the bone. The biggest error is asking for hairline thickness across the whole coil, which tends to fade unevenly on hips. For longevity ask for slightly bolder anchor strokes on the head and tail while keeping the mid coil light. Pair it with a side slit maxi dress for a subtle reveal during evenings out. Some artists use numbing creams for hip bone placements and others advise against them because of blowout risk. Name both camps during booking and ask how your chosen artist balances comfort with line clarity.
3. Tiny butterfly on the upper thigh, snug to the hip
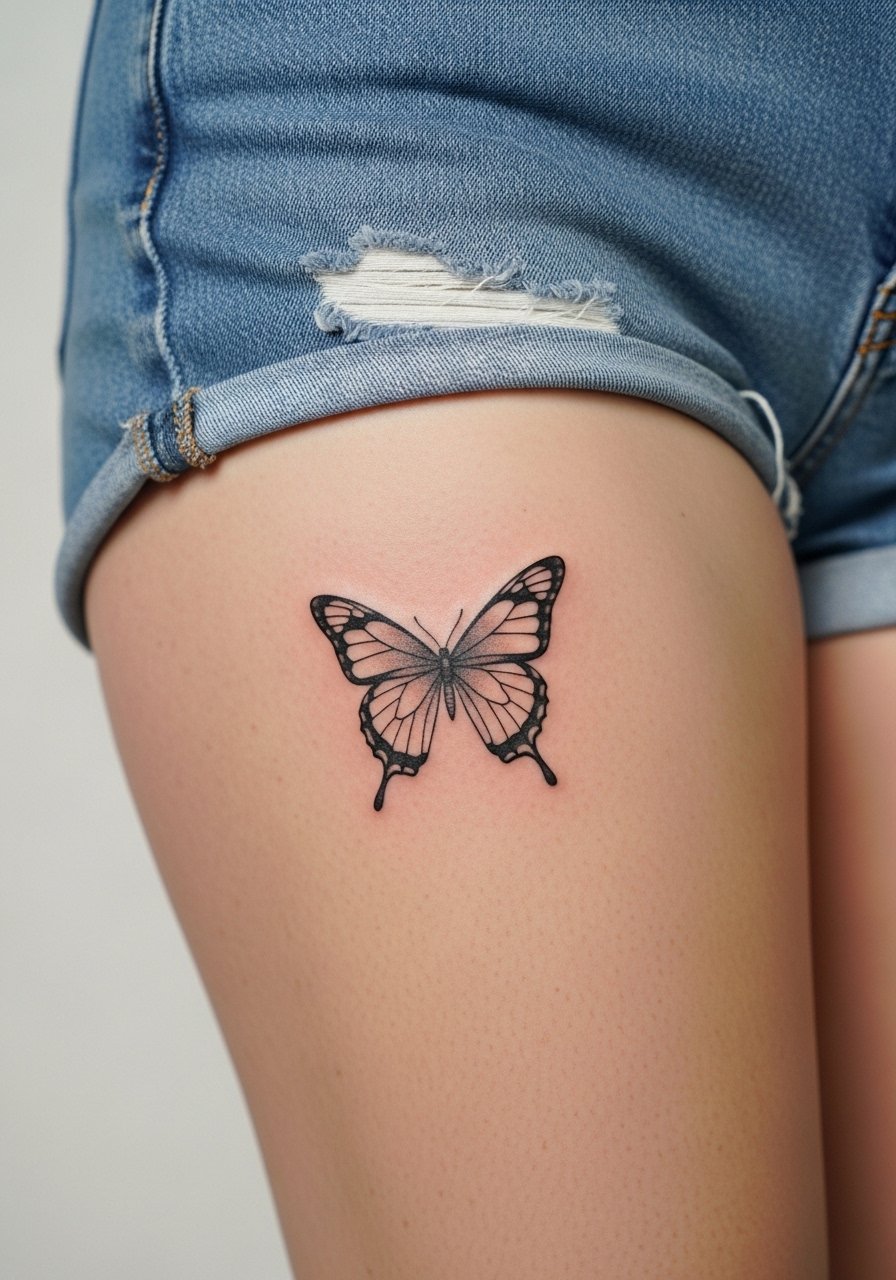
This placement takes some of the worst bone pain out of a hip tattoo while keeping visual flow. Ask for micro wing veins rather than heavy color packing if you want subtlety that photographs well. A common faux pas is requesting watercolor blends in a single session on this spot; color bleeds during healing are more likely in summer months. At six months micro-realism wings still read crisp with minimal touch-up if color packing was conservative. If you plan to show this off in warm months, pair it with denim cutoff shorts. During the session wear loose thigh-length shorts so the artist can access the area without tight waistbands.
4. Single-line crescent moon that follows the hip curve

There is an economy to this design. In consultation ask for a continuous single-stroke feel while avoiding hairline thickness across the whole arc. The session time is short and pain is sharp but manageable where the needle crosses bone. A common mistake is shrinking the crescent to decorative micro size, which leaves no breathing room and speeds up blur. Expect bright clarity at three months with gradual softening by year two. For wardrobe, this looks balanced with a cropped tank top and low-rise bottoms that let the curve show.
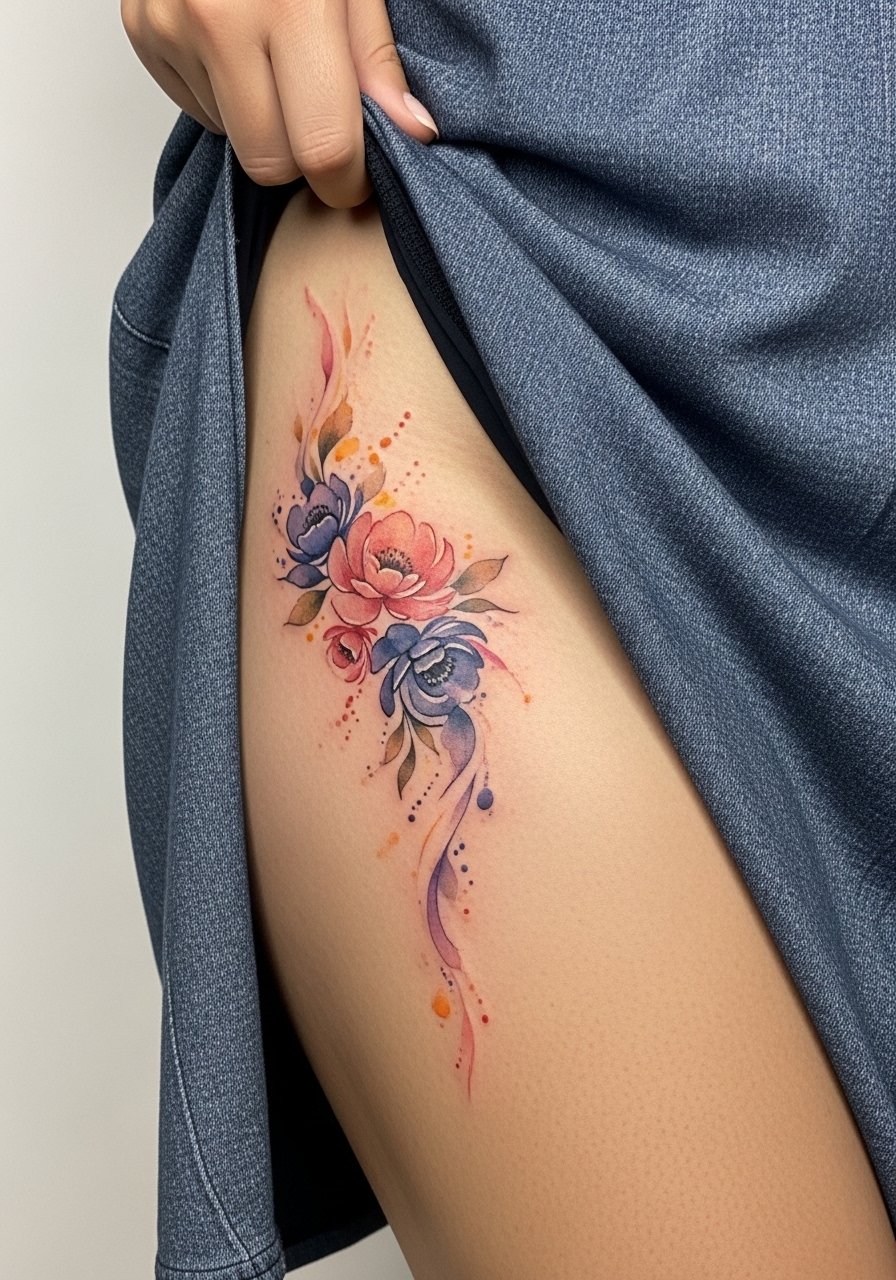
5. Botanical mandala wrapping the hip
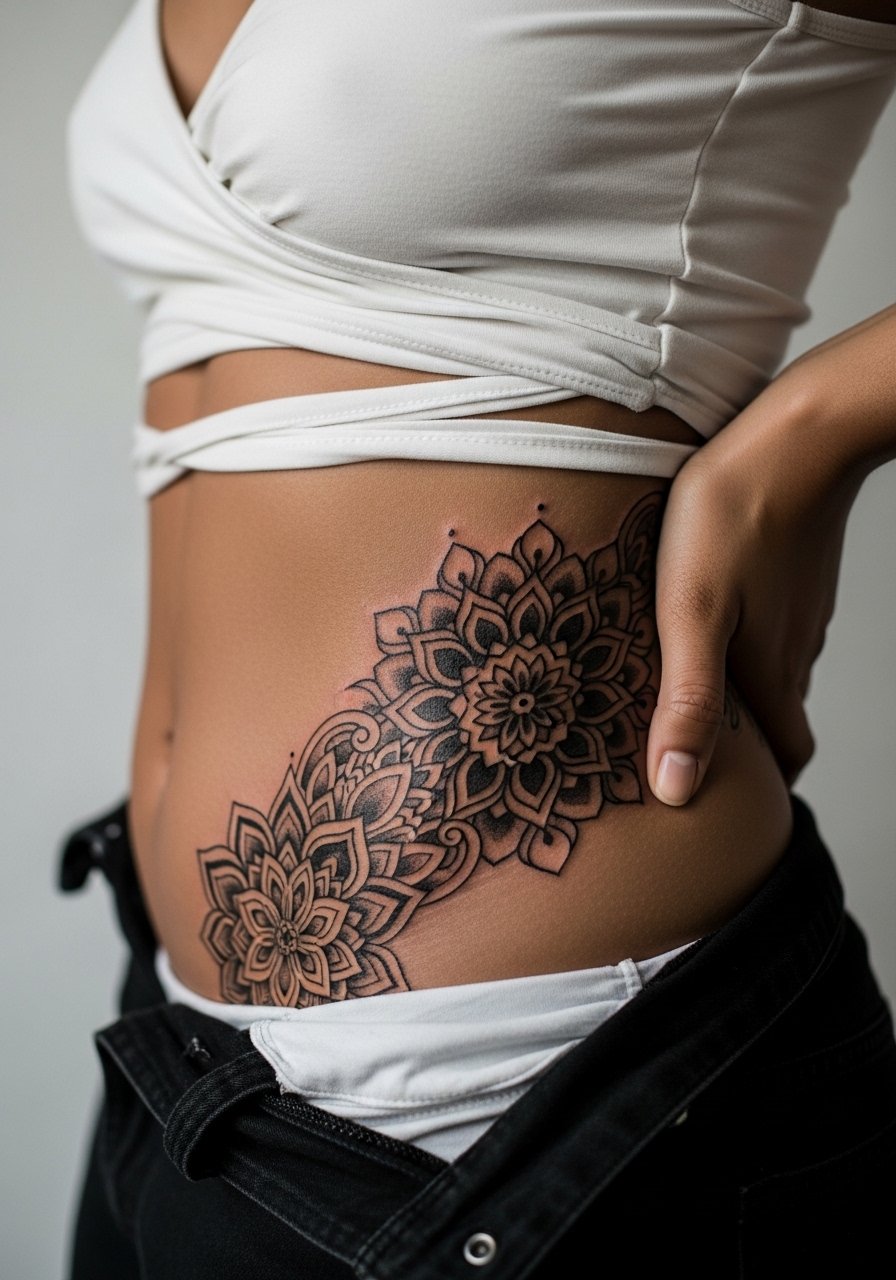
This requires more planning because symmetry and spacing dictate how the design ages. Say you want radial gaps between dense dot work so the mandala does not merge after a few years. Expect 2-3 sessions for the full wrap and sharper discomfort on bone-adjacent passes. The mistake I see is packing ornate detail into a 2-inch circle. Give the design 4-6 inches for negative space to preserve stipple shading. Artists split on whether dense fine work holds on hips, and you should hear both sides before booking. For evenings try a wrap crop top that frames the symmetry without crowding the pattern.
6. Small heart with feather detail tucked into the inner hip
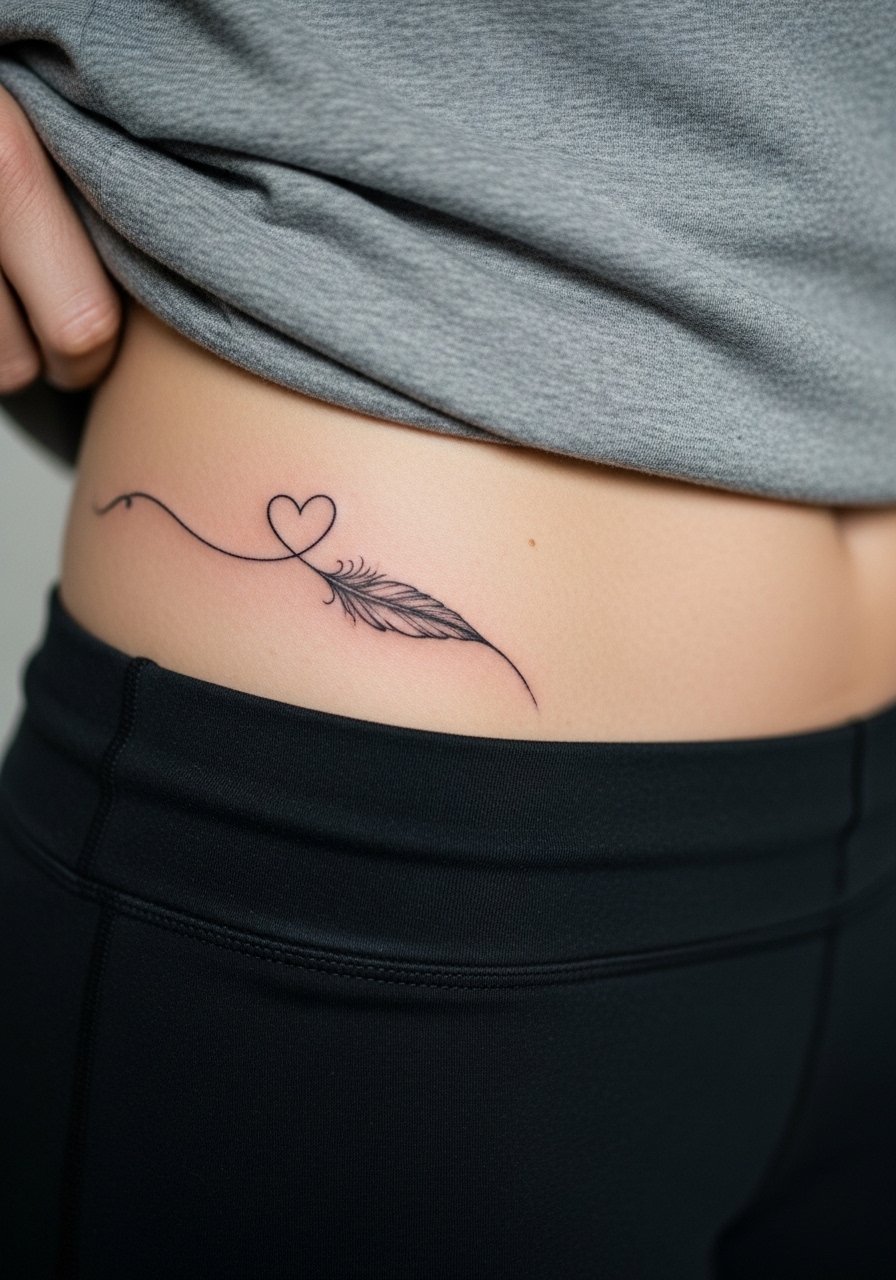
This is intimate and compact. Tell your artist you want one clean outline for the heart and feather made with light whip shading rather than heavy fill. The inner hip has softer tissue which reduces bone buzz, but friction from waistbands is a real threat during healing. A common regret is placing this where weight fluctuation stretched the area. If you expect body changes, ask to sit the design on a firmer bone edge. Session time is short and touch-ups are usually needed at year two for crispness. For the appointment, wear low rise yoga pants you can roll down without pressure.
Studio Day Picks
The first six soft hip designs above include both bone-adjacent outlines and softer thigh extensions, so bring products that reduce friction and support lighter balms during the initial heal.
-
Thayer's witch hazel toner. Gentle astringent many people use after the first two days to remove excess balm without clogging pores, helpful for hips that sweat under bands.
-
Dragon Blood tattoo balm. Thinner texture that artists mention for bony placements, so it sits lightly on fine line work without sealing off needle channels.
-
Greenfoot natural tattoo salve. A natural option that some prefer when the hip area chafes from clothing, it soothes without heavy petroleum.
-
Japanese rice bran oil. Used by a few healers for quick absorption on warm days when thicker lotions sting or feel greasy on the hip curve.
-
Saniderm tattoo bandages. A protective film option favored by many artists for hips that rub, it reduces scab picking and keeps friction to a minimum.
7. Watercolor abstract flowers flowing from hip to thigh
Pick this if you like painterly gradients that move with the body. The caveat is color bleeds during healing on warm, sweaty skin. Tell your artist to plan color packing over two sessions rather than forcing everything at once. The mistake is asking for dense saturation in a single pass, which risks uneven settling. At six months watercolor can look soft and intentional. By two years pigments tend to mute and may need a color refresh if you want vibrancy. For wearing it in summer, short cutoffs or thigh slit dresses show off flow without tight waistbands digging into the design.
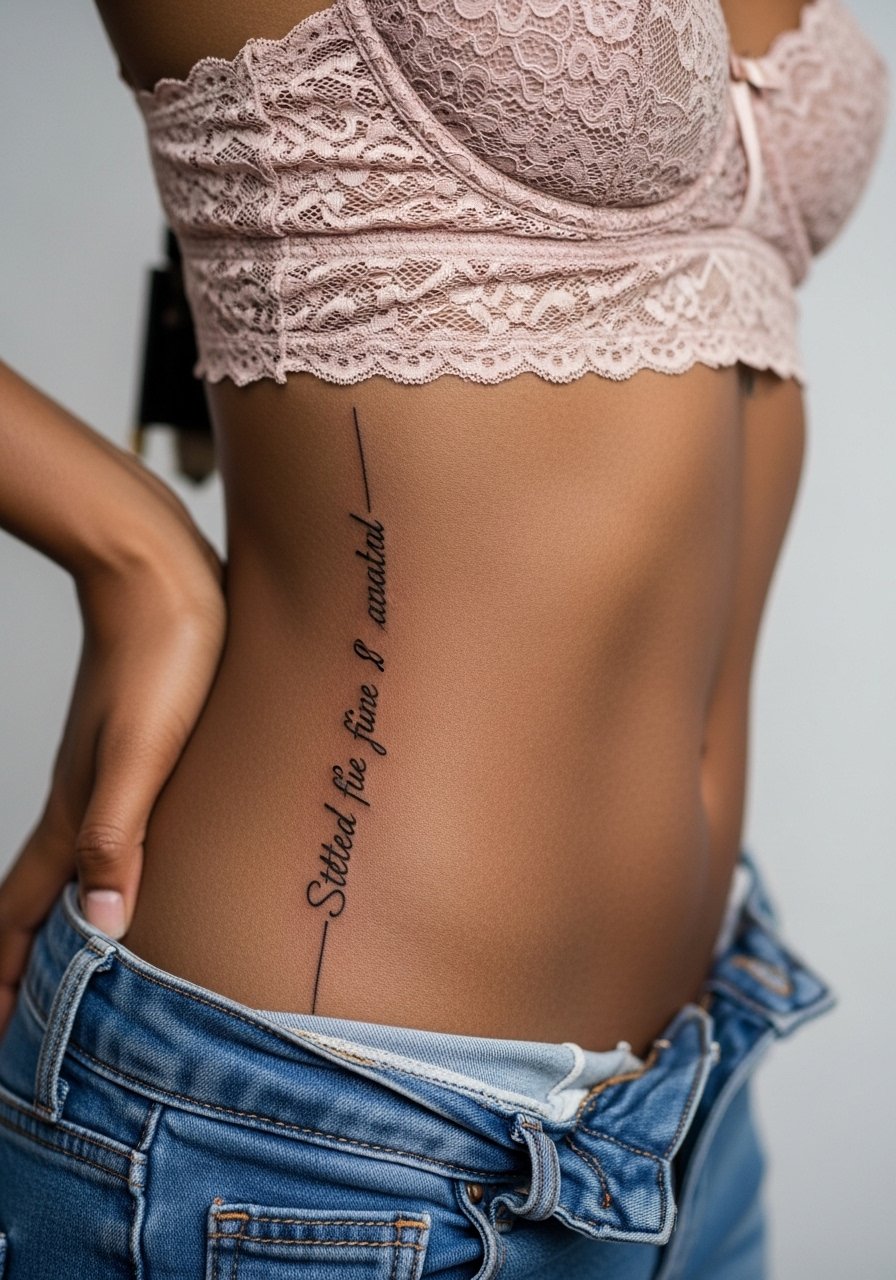
8. Geometric script that hugs the hip line

If you want a personal mantra made to flatter the waistline, choose a single, clean font and ask the artist to mock the spacing directly on your skin. Small lettering squeezed into the curve often blurs into an indistinct bar. Pain is brief for single-line script but feels sharp on bone crossings. Expect touch-up opportunities at year two to restore crispness. One under-covered idea is vertical script that elongates the hip rather than running horizontally. For intimate reveals, low-rise bottoms rolled down a touch pair well with this placement.
9. Micro-realism dragonfly on the outer hip

Choose micro-realism if you value detail that rewards close viewing. Tell the artist you want crisp wing veining and denser body saturation for contrast. The outer hip gives slightly more flesh under the needle, which helps color packing hold. Common mistakes are asking for an ultra-detailed insect under 1.5 inches, which compresses detail and invites blur. Session time can stretch into multiple short sittings. For outfits, asymmetrical hem dresses or wide leg pants keep attention on the detailed placement without competing textures.
10. Single-line bird silhouette riding the hip curve
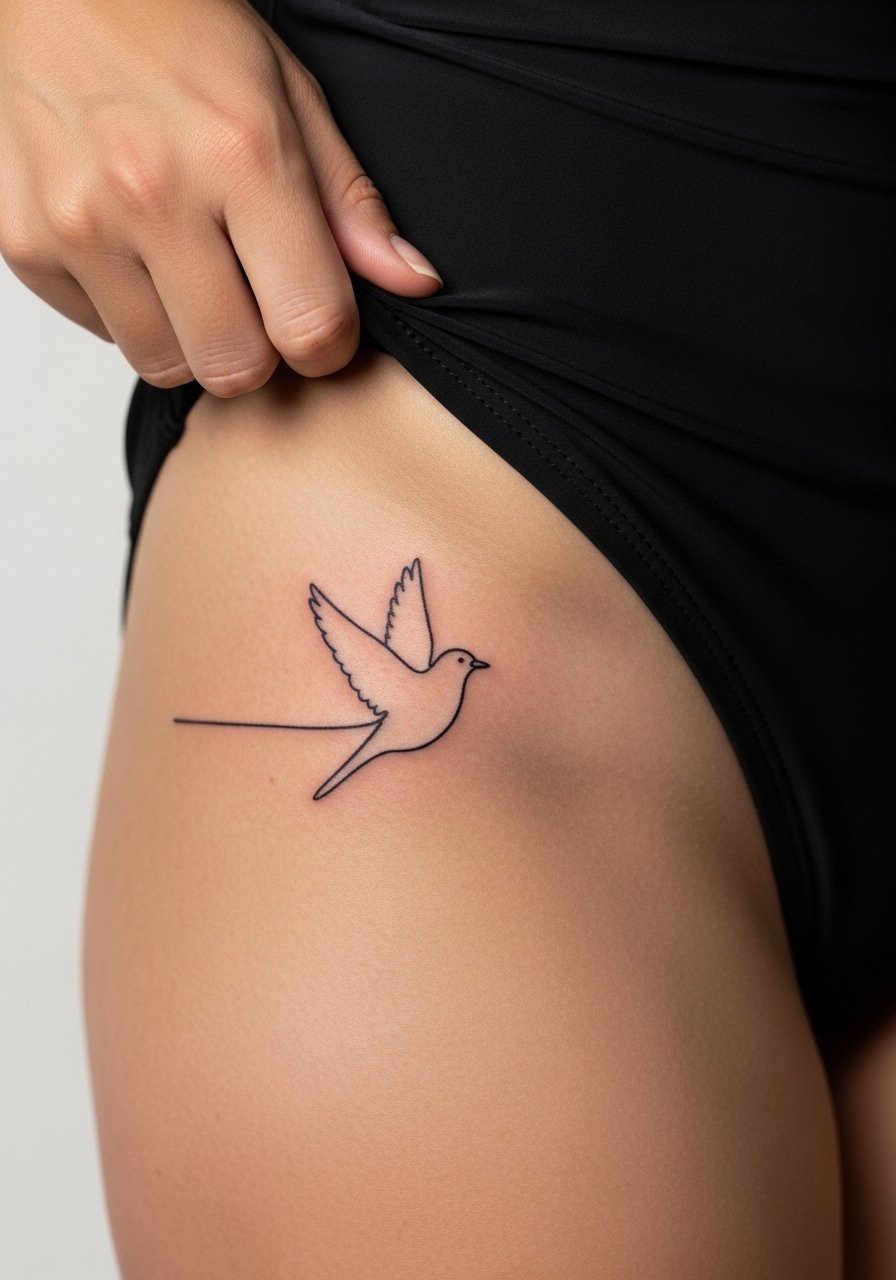
This reads like movement whenever you walk. In the consult ask for a subtle taper in the line to suggest wing motion instead of static symmetry. Time under the needle is short and pain is punctual where the bone meets skin. The common error is compressing multiple birds into a tiny space which ages into a cluttered smudge. Expect clean appearance at three months and softer edges by year two. A swimsuit bottom reveal shows this off best.
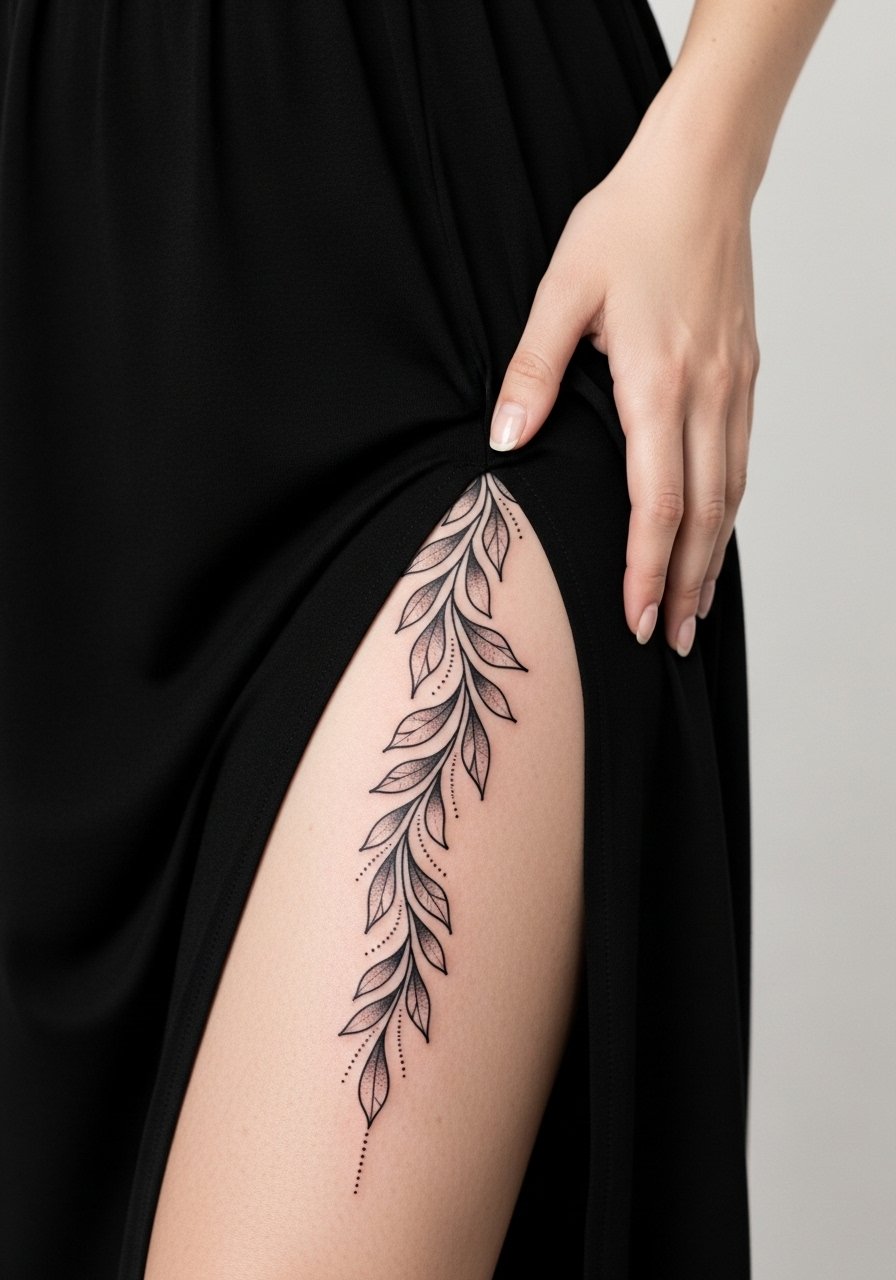
11. Ornamental leaves draping down the hip
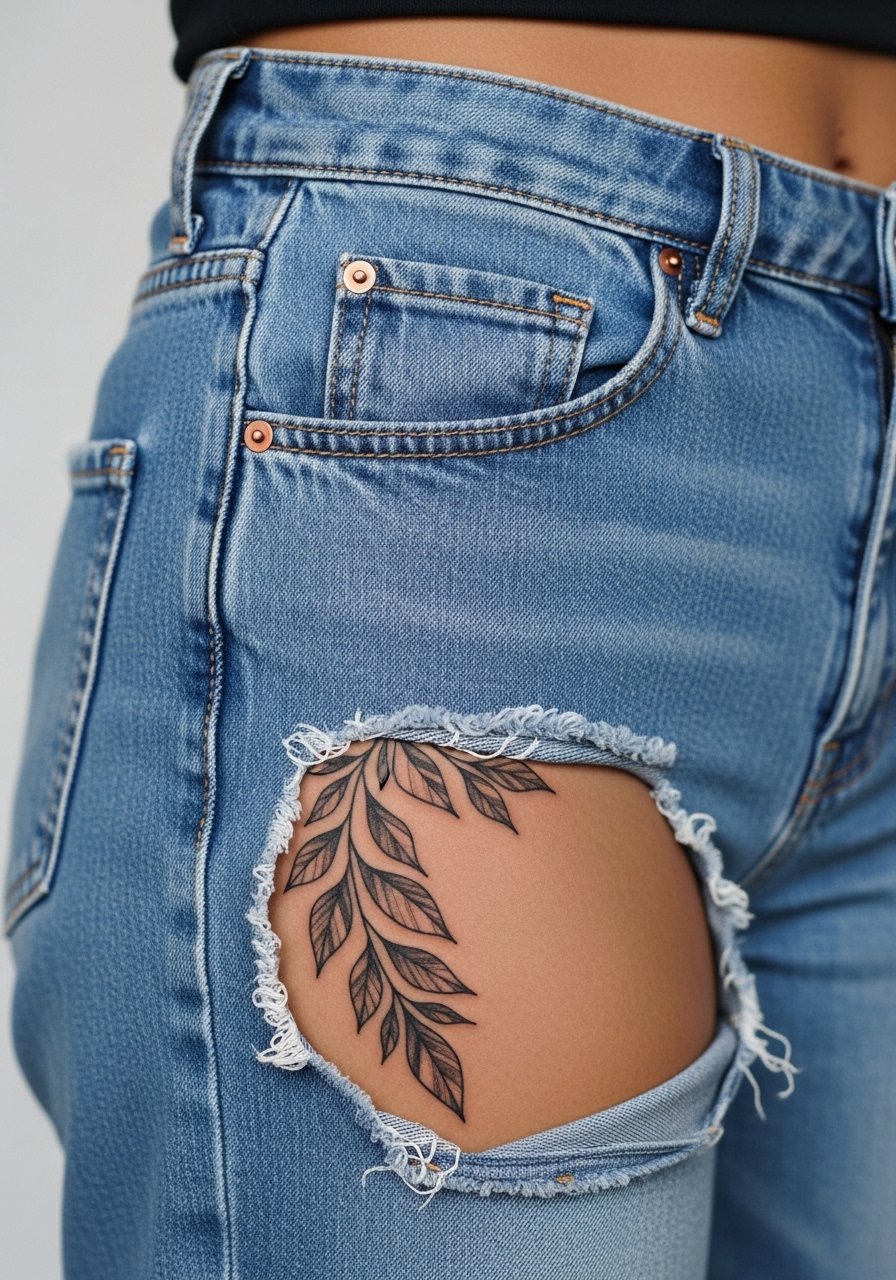
Choose vertical leaf draping when you want a nature motif that moves with body shape. Ask for varied leaf sizes and a mix of dot work for depth so the composition breathes. The inner edges near the bone feel sharper during the session. A frequent mistake is uniform leaf size which flattens in photos. For showing it off try an asymmetrical hem dress that keeps the line visible without waistbands cutting across the leaves. Plan on a touch-up in two to four years if you want edge restoration.
12. Fine line stars clustered just above the hip
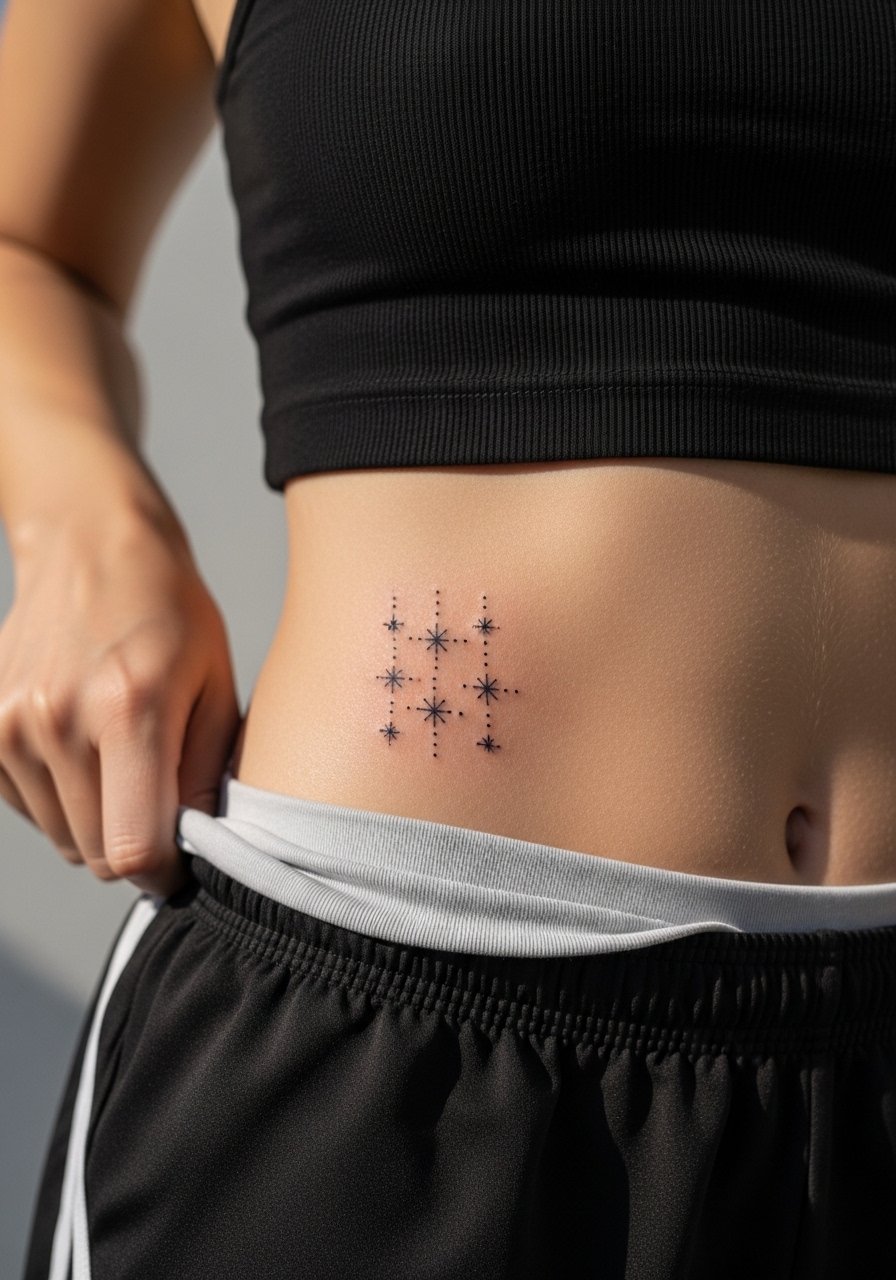
This is minimal and low commitment. Tell the artist you want spacing even between stars to avoid future merging. Pain is minor for individual stars but can feel like a repeated buzz if many are tattooed in one sitting. The mistake is ordering tight clusters in a very small area which resolves into a single blurred spot over time. These read clean at three months and keep a subtle sparkle for a couple of years with minimal touch-up needs.
13. Watercolor butterfly blend centered on the hip
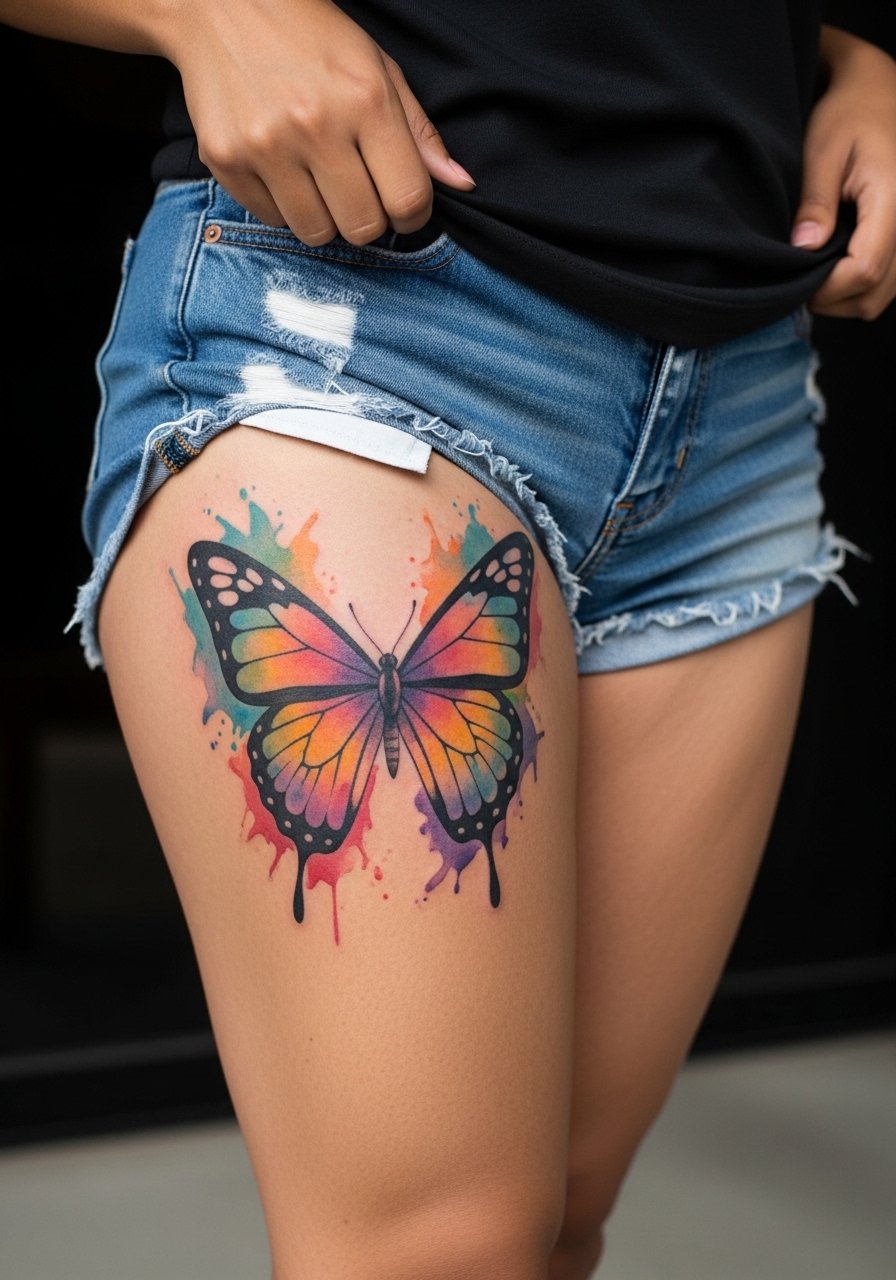
This larger butterfly is for someone who likes color flow tied to body movement. Ask for soft color overlays and avoid heavy black outlines that contradict watercolor intent. The main risk is pigment migration while scabs form, especially in hotter months. A staging across two sessions reduces bleed. For showings pair with denim cutoff shorts or thigh-revealing summer pieces. Expect muted tones by year two and plan a touch-up if you want bright saturation later.
14. Geometric script quote that elongates the waist
This idea plays optical tricks, elongating the waist when placed along the curve. Bring the exact font sample and ask the artist to stencil it on so you can check how the letters sit. Tiny condensed fonts tend to blur; a slightly wider geometric typeface holds better. Pain is focused when the needle crosses the crest of the bone. For framing try a wrap crop top with high-rise bottoms.
15. Ornamental vertical leaves that mimic body contours
This version emphasizes vertical flow to visually lengthen the torso. During consultation request varied leaf spacing and negative space between clusters. The hip bone will make certain leaf tips sharper during the session. Avoid crowding leaves too close to the heat map of waistbands because chafing is the biggest risk to crisp edges while healing. For nights out, a thigh slit dress or skirt keeps the artwork visible and untucked.
16. Micro butterfly realism tucked near the hip crease

Micro realism rewards careful artist selection. Ask for a portfolio mockup on similar skin tone so you can see how color reads. The outer hip gives some cushioning compared to the bone line which helps with smoother color application. The most common error is squeezing too much detail into an area under two inches. Expect a touch-up window at one to two years to maintain wing edge definition. This pairs with high-waisted swimwear for discreet summer reveals.
17. Vertical script quote for an elongating effect
Vertical script is one of the under-covered options worth considering. Tell your artist you want letter spacing increased slightly to counter skin stretch. The inner hip area has softer tissue and a different sensation during the session, usually less bone buzz but more movement sensitivity. Small, compressed text fails faster because letters blur into one another. This placement looks elegant with low-rise jeans or lingerie-style tops.
18. Single-line abstract face for modern subtlety
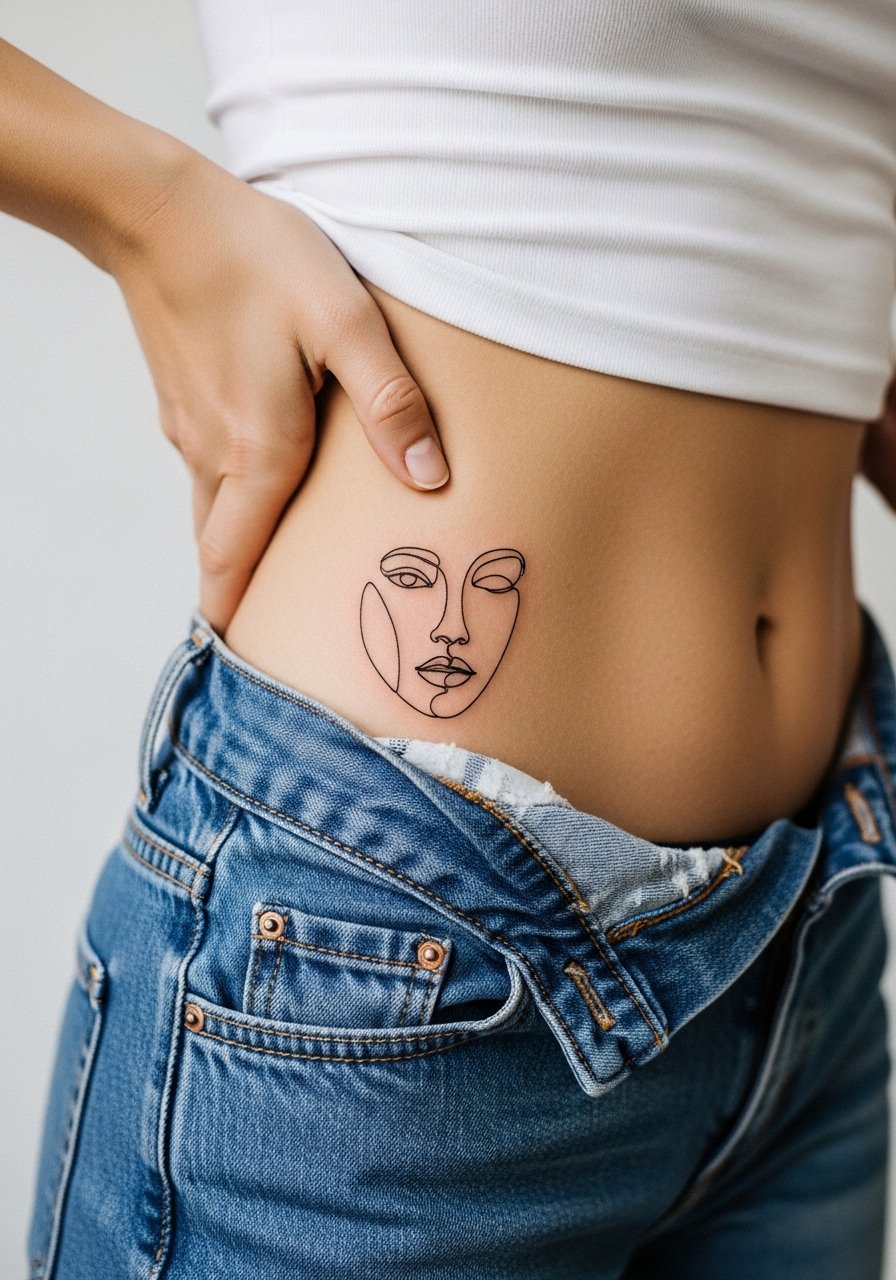
An abstract face gives an artsy, quiet presence. In the consult ask for a continuous line approach that avoids micro-stops which become weak spots as the skin moves. Pain is similar to other hip bone outlines and there is a higher blowout risk if the artist goes too deep in soft tissue. A common mistake is insisting on ultra-fine single-needle continuity when a slightly varied line weight preserves expression longer. For low-key styling this pairs with a simple cropped tank or high-waisted bottoms.
19. Nature leaf garland that hugs the hip edge
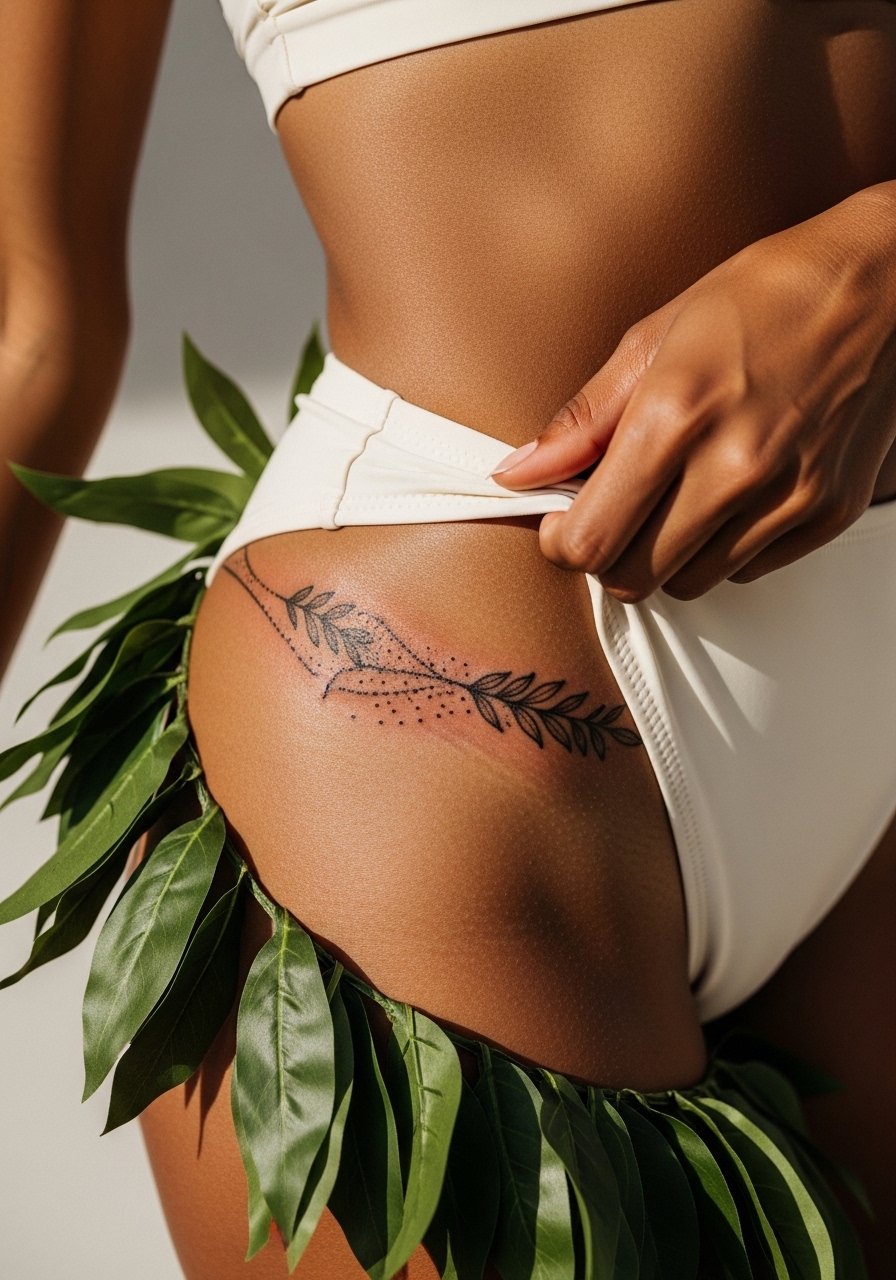
A garland reads organic and moves with your body. Ask the artist to mix dot work and slight stipple shading for depth so the garland keeps separation between leaves. The key session consideration is avoiding tight waistbands immediately after the appointment. Many people underestimate how a small shift in clothing can rub and distort fresh lines. For show-off moments, pair with high waisted bikini bottoms that frame the curve.
20. Fine line star trail that curves under the hip
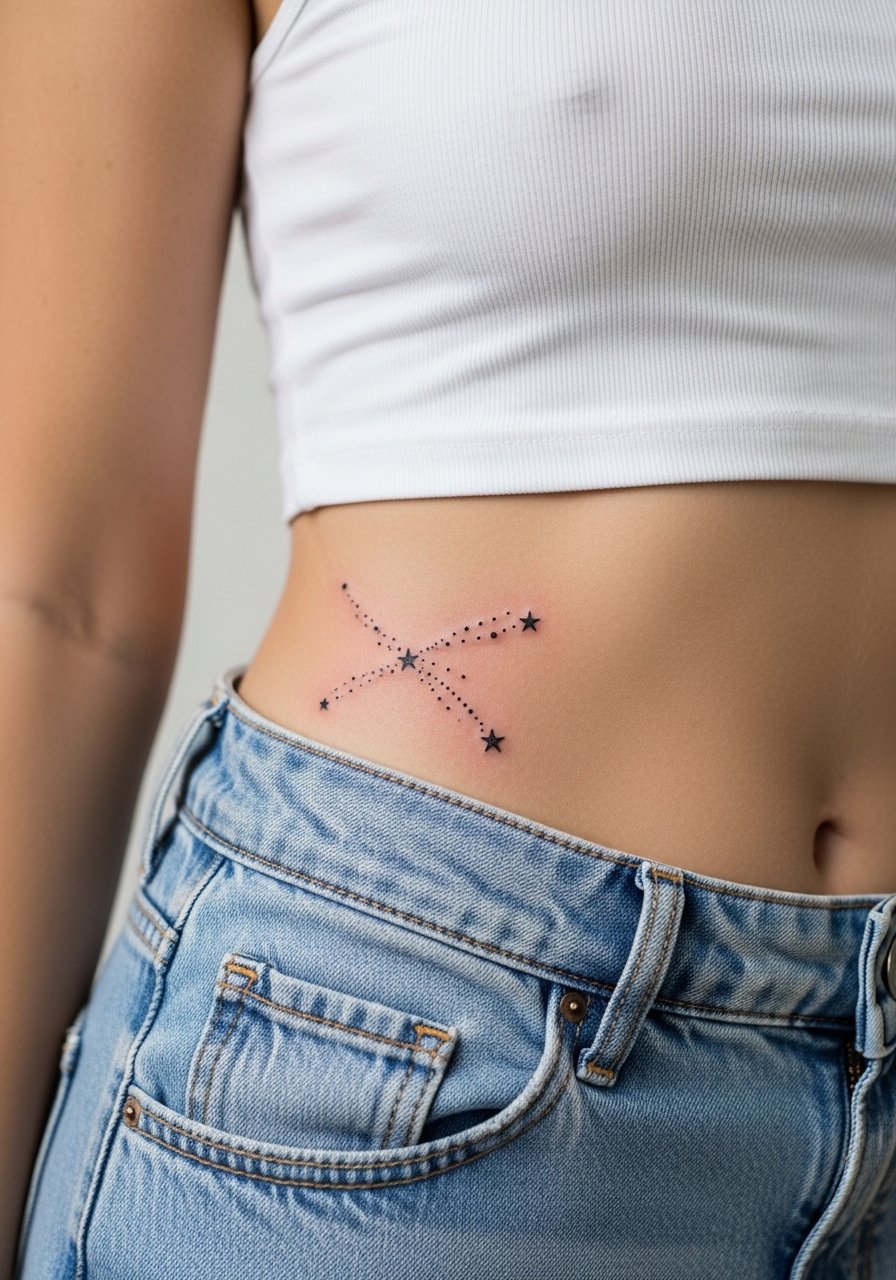
Star trails are low-maintenance and read well when spaced deliberately. Tell your artist to set minimal dot clusters and maintain separation between stars so the pattern ages into a soft trail rather than a single smudge. Pain is punctate on bone crossings but short lived. This keeps a subtle sparkle for a couple of years with rare touch-ups.
21. Upper thigh extension butterfly for less bone pain
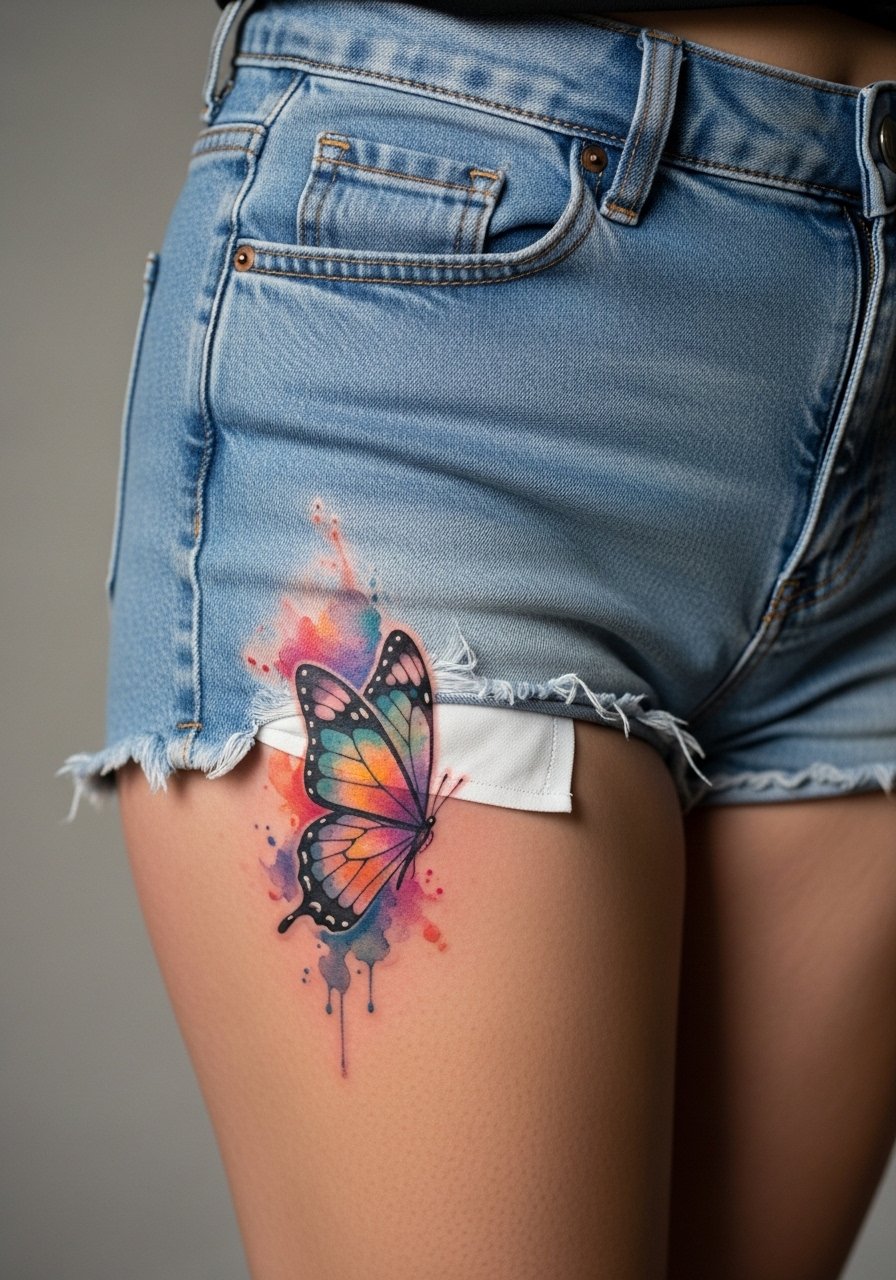
This version is specifically for people who like hip placement but want to avoid the worst of bone pain. Move the main saturation onto the upper thigh and keep the hip portion as a connecting line. The session is more comfortable and healing is easier because thigh tissue tolerates some pressure. A mistake is forcing dense color across the entire bridge from hip to thigh in one go. Plan two sessions for smoother gradation. For summer wear pick denim cutoff shorts and loose skirts so the area can breathe during the first week.
Frequently Asked Questions
Q: How much does a small hip bone tattoo usually cost and what affects the price?
A: Prices vary by city and artist day rate, but what matters most is session time, complexity of linework, and color. A simple fine line outline done in a single short session tends to be less expensive than a multi-session watercolor or mandala wrap. Get three quotes and ask whether the artist charges a minimum for custom stencils.
Q: Will a fine line hip tattoo fade faster than bolder work on my skin tone?
A: From what I have seen, very thin fine line work can blur faster on areas that experience stretch or friction. On darker skin tones, slight line thickening up front helps lines read longer. Ask your artist to test the exact line weight with a small healed mockup or a digital mock on a reference photo of your skin tone.
Q: Should I use Saniderm or dry healing for a hip tattoo that sits near waistbands?
A: Artists are split. One group prefers a protective film like Saniderm to reduce rubbing and scab picking. The other group favors dry healing for better scab formation and less trapped moisture. For hips that rub from clothing many people opt for a short Saniderm window then switch to light, non-petroleum balms.
Q: What should I wear to my appointment for a hip bone or upper thigh tattoo?
A: Wear loose, pull-down bottoms or high-cut swimwear so the artist can access the area without tight lines. Options I recommend include drawstring joggers or shorts that you can slide down slightly during the session. A loose tank or button-down on top also helps keep you comfortable.
Q: How painful is the hip bone during shading work compared with the upper thigh extension?
A: The hip bone area typically feels sharp and buzzy, especially during shading passes. The upper thigh extension is usually less intense because of softer tissue. If you worry about pain, plan shorter sessions focused on outlines first and shading later, and discuss practitioner approaches to numbing and depth with your artist.
