
Fine line wing tattoos are everywhere on feeds, but the versions that still read clearly after five years are not always the ones getting the most likes today. Sketch style wings sit in that tension between on-trend detail and long-term legibility. This list runs through 21 sketch wing ideas for men, with placement, aging warnings, and what to say in the chair to make the design live for years.
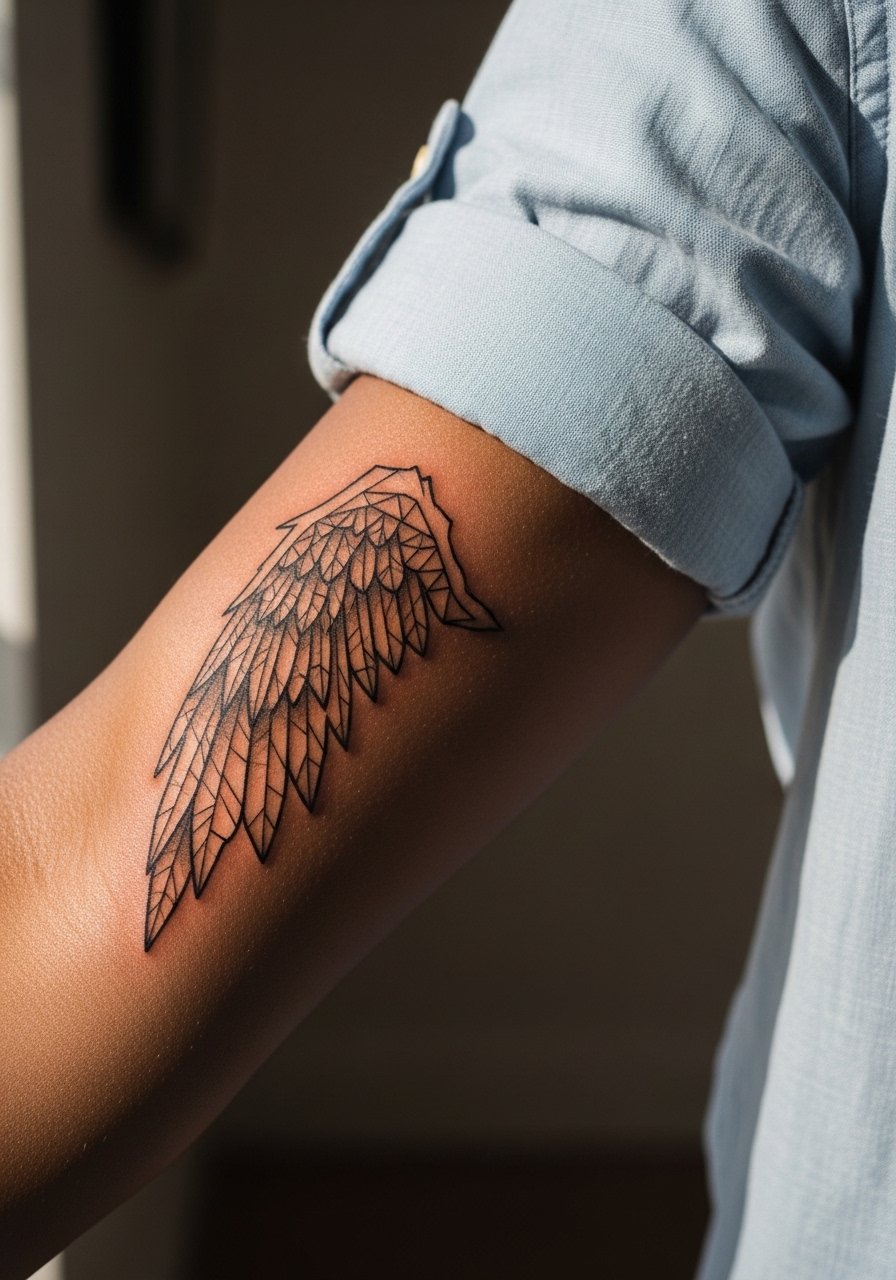
1. Inner Forearm Single Wing in Sketch Ink
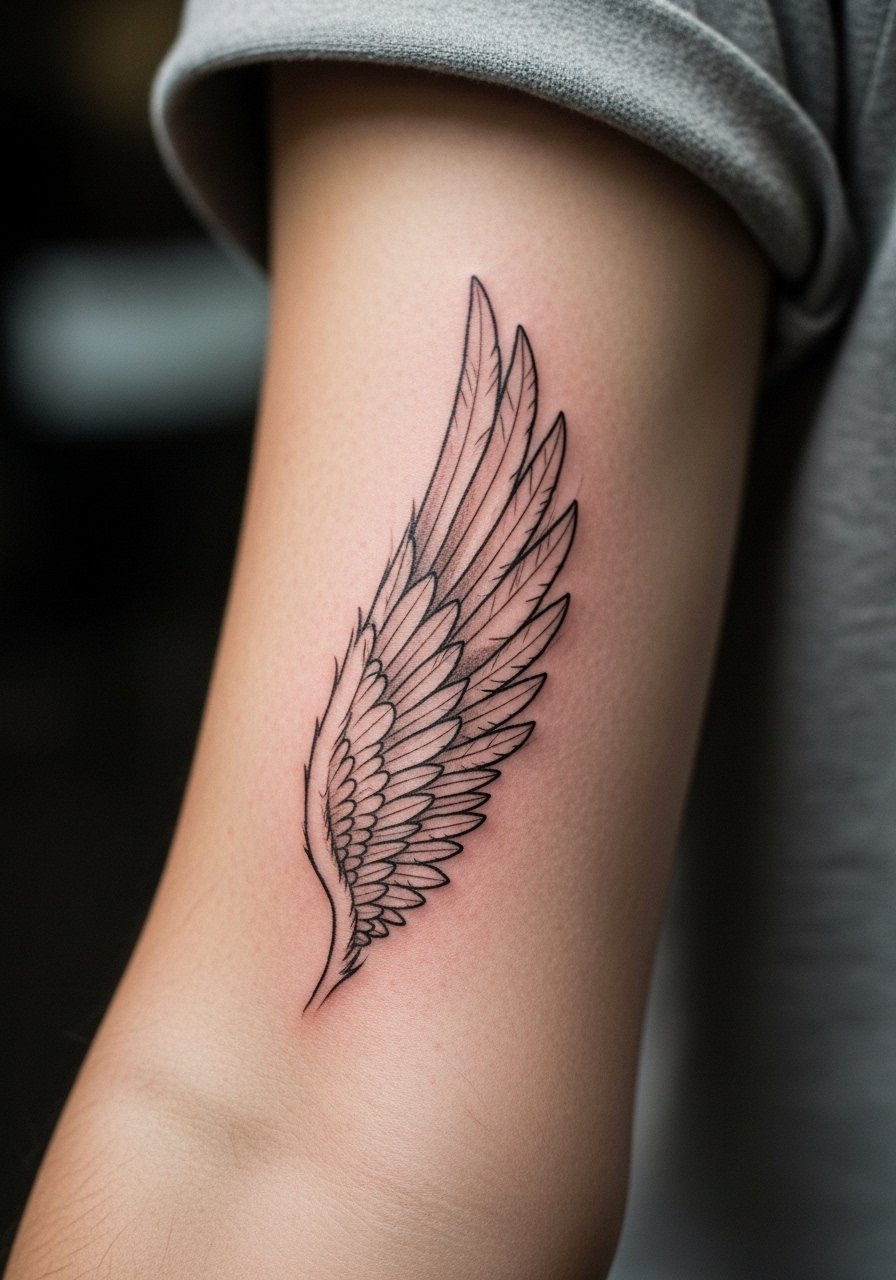
I recommend this for someone who wants a daily-visible piece that reads like an illustration in motion. Tell your artist you want varied lineweight, stipple shading for depth, and a clear negative-space edge so the wing keeps shape as it fades. Pain is mild for most people and a single session of 60 to 90 minutes usually does it. Common mistake is going too fine with compact feathers, which blur into a single gray block after a few years. For the session, wear a loose button-down shirt you can roll up without rubbing the fresh ink.
2. Sketch Wing Half-Sleeve Along the Outer Bicep
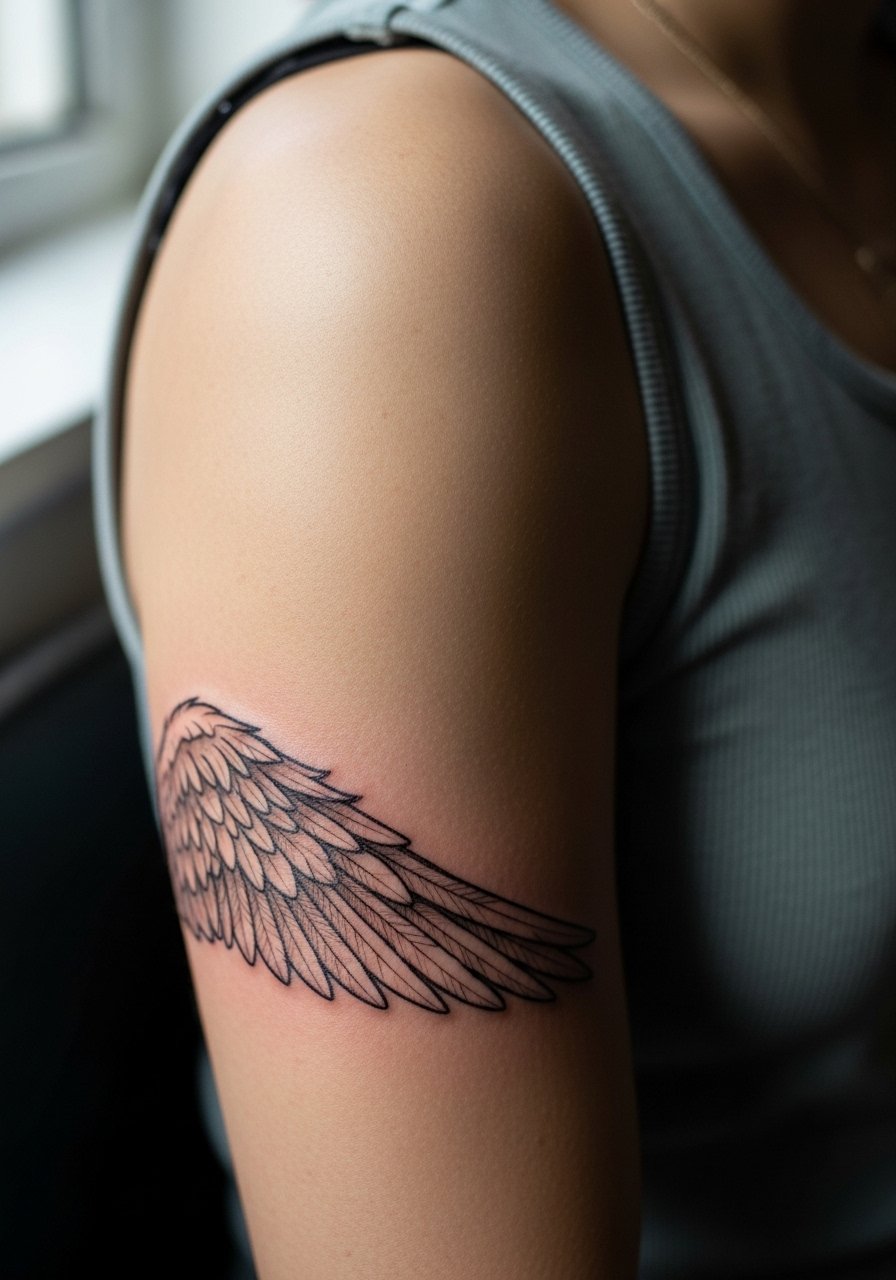
This placement lets you scale detail without threatening blowout because there is more canvas. Expect medium pain in spots near the deltoid and longer sessions, often two to three hours. Ask for slightly bolder anchor lines along the feather shafts and lighter cross-hatching inside the vanes. The typical error is packing shadowing too densely near the elbow crease, which softens into a gray patch over time. Pair the finished piece with short sleeves or a muscle-fit tank to show the sweep of the wing when you want it visible.
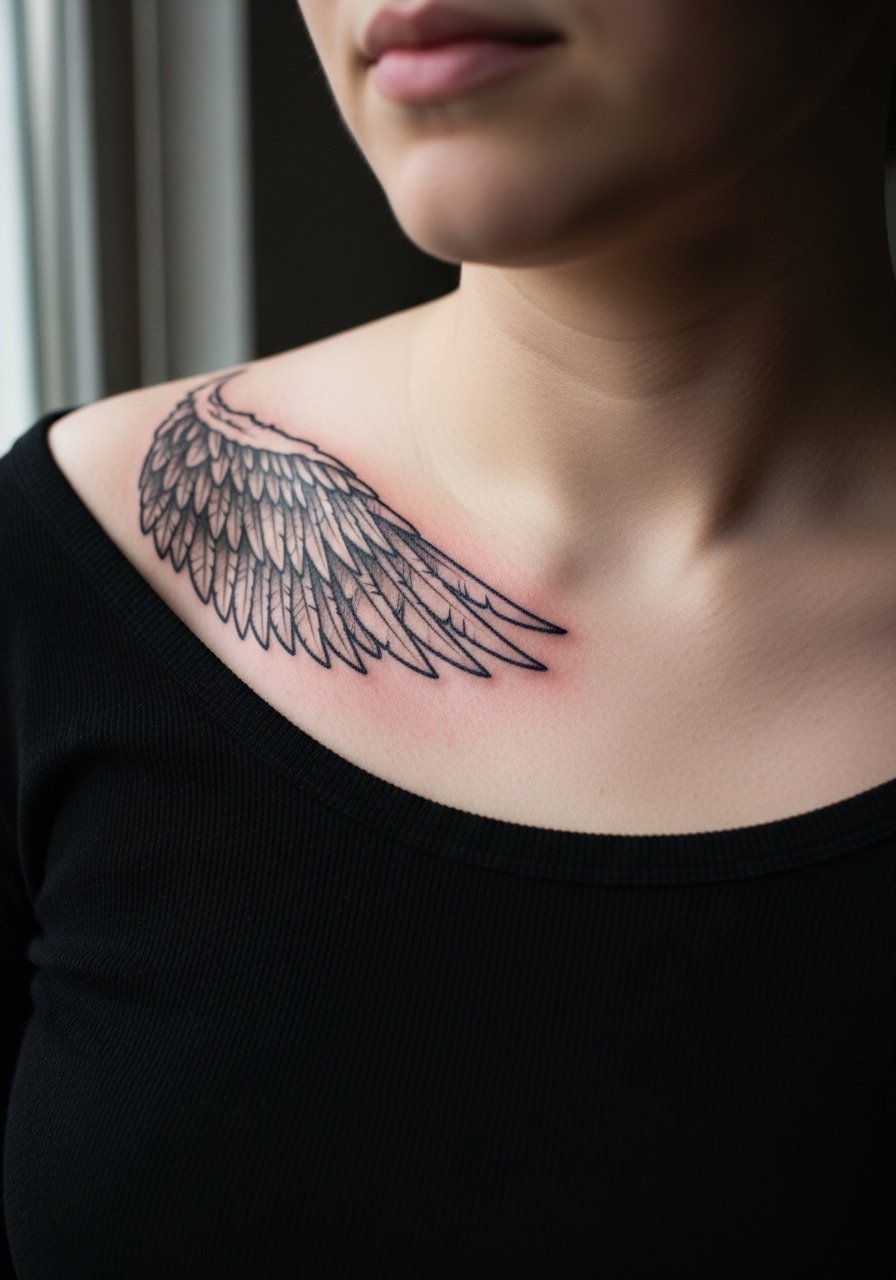
3. Feathered Sketch Wing Over the Collarbone
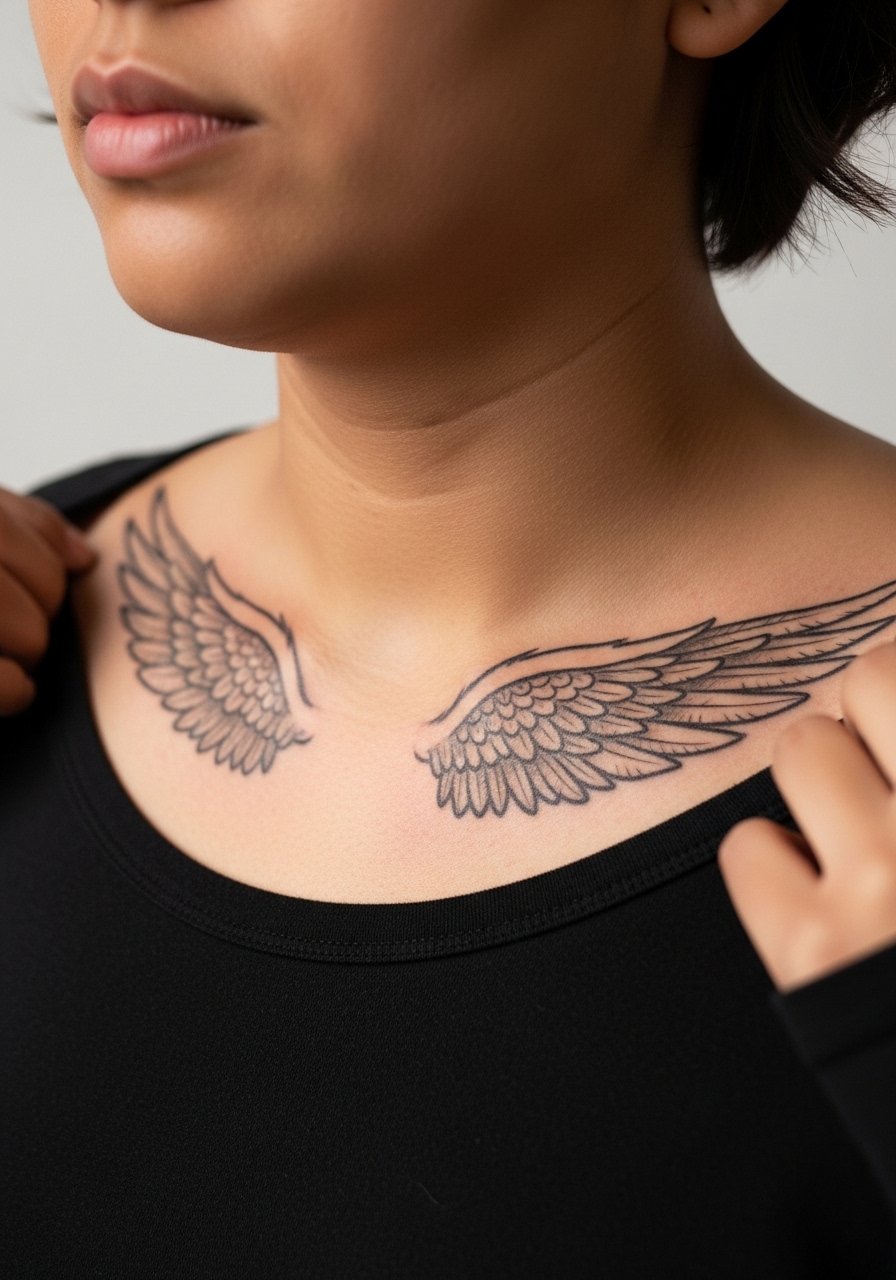
The collarbone placement is visible and vulnerable to sun. Pain ranges from moderate to high near the bone. Tell your artist to keep the feather tips a touch larger than you prefer so the negative space holds over time. A common aging issue is loss of contrast from constant sun exposure. During the session, wear a wide-neck shirt you can move aside without rubbing the area. If you work outdoors, plan for yearly touch-ups to maintain crispness.
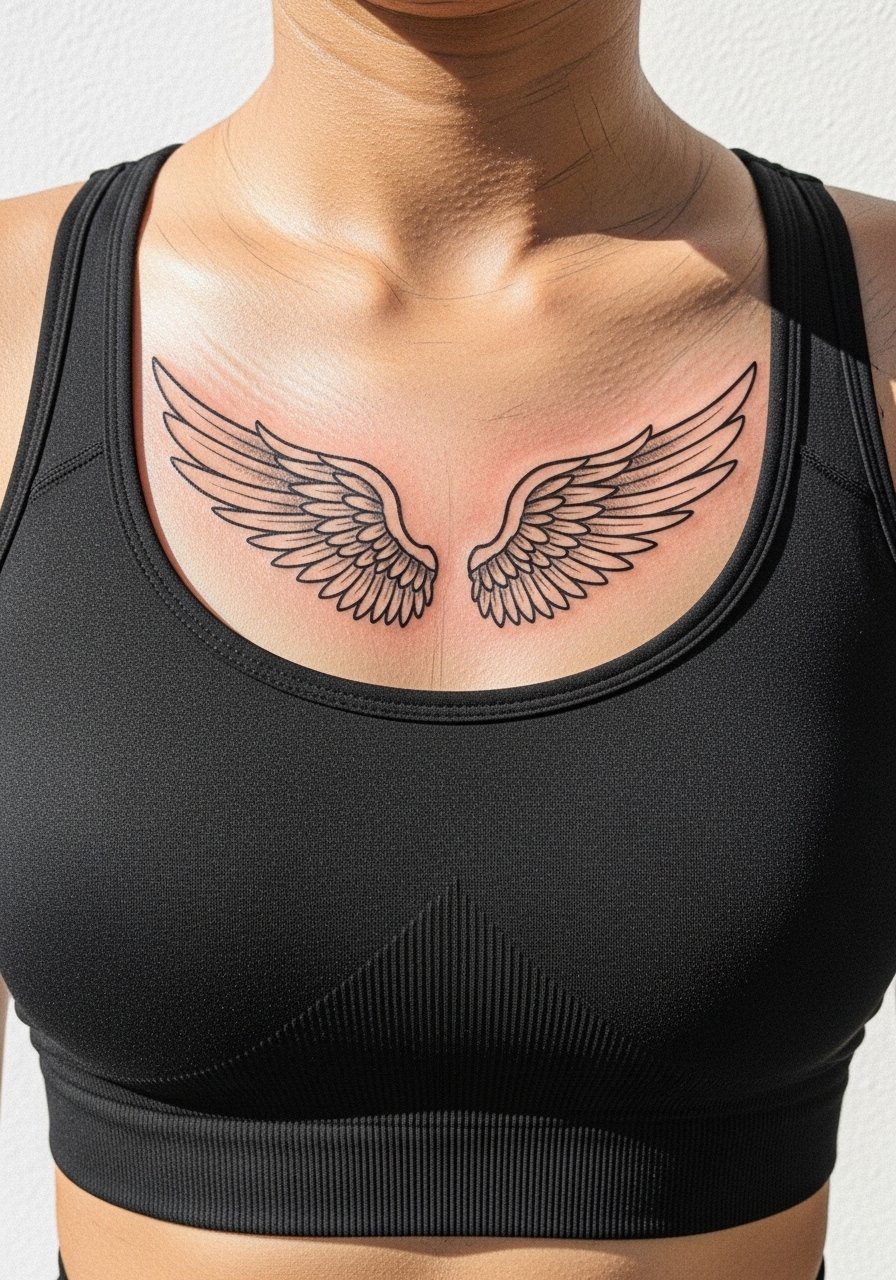
4. Symmetrical Sketch Wings Across the Chest
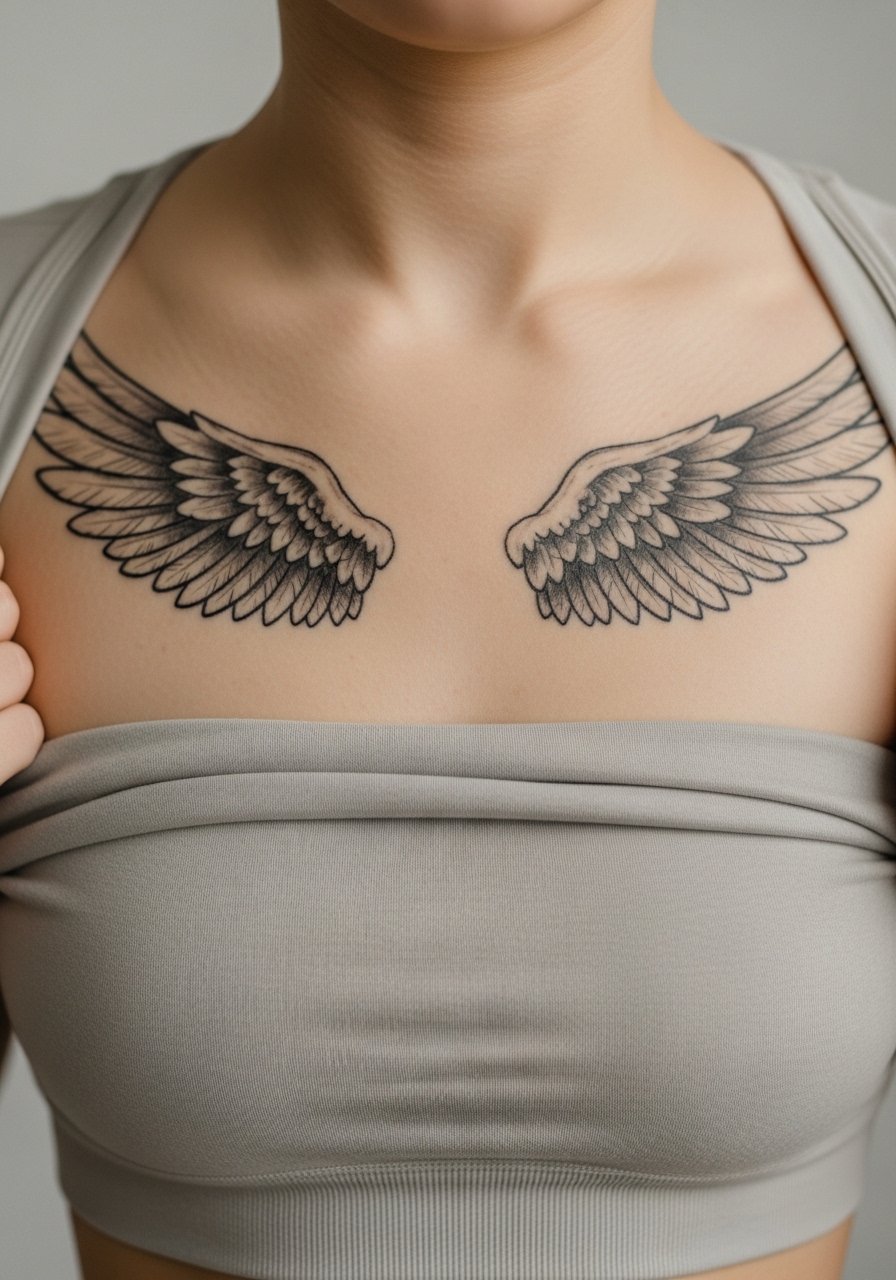
Chest wings read dramatically when large and slightly looser in the feather detailing because skin shifts with breathing. Rib-adjacent areas are more painful and need careful positioning. A mistake I see is insisting on micro-detail across that full span, which disappears into texture after a couple of years. Ask the artist to treat each feather with spacing and to darken only the anchor lines. For showing it off, open-collar shirts or a thin chain pendant necklace sit above the center point without competing.
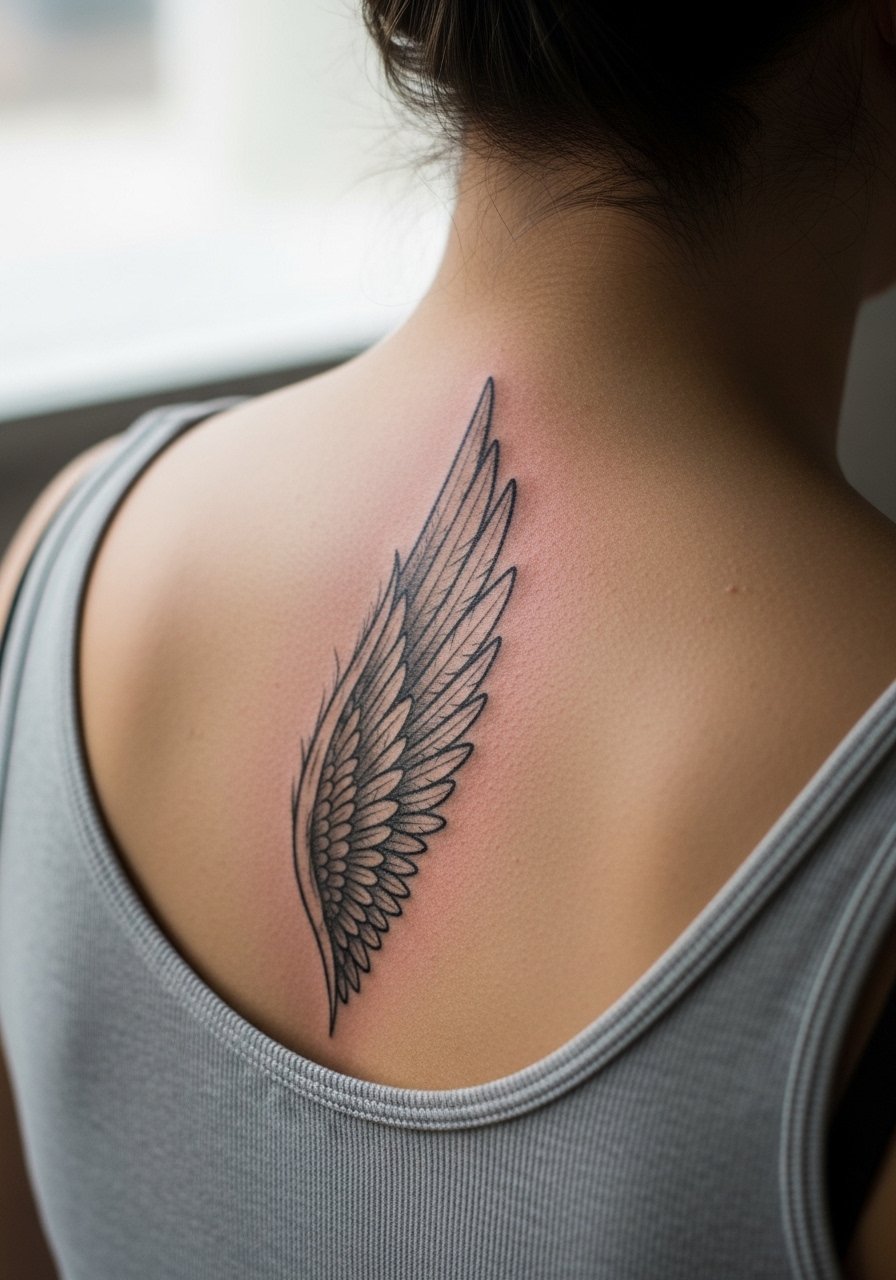
5. Sketch Wing Spanning the Shoulder Blade
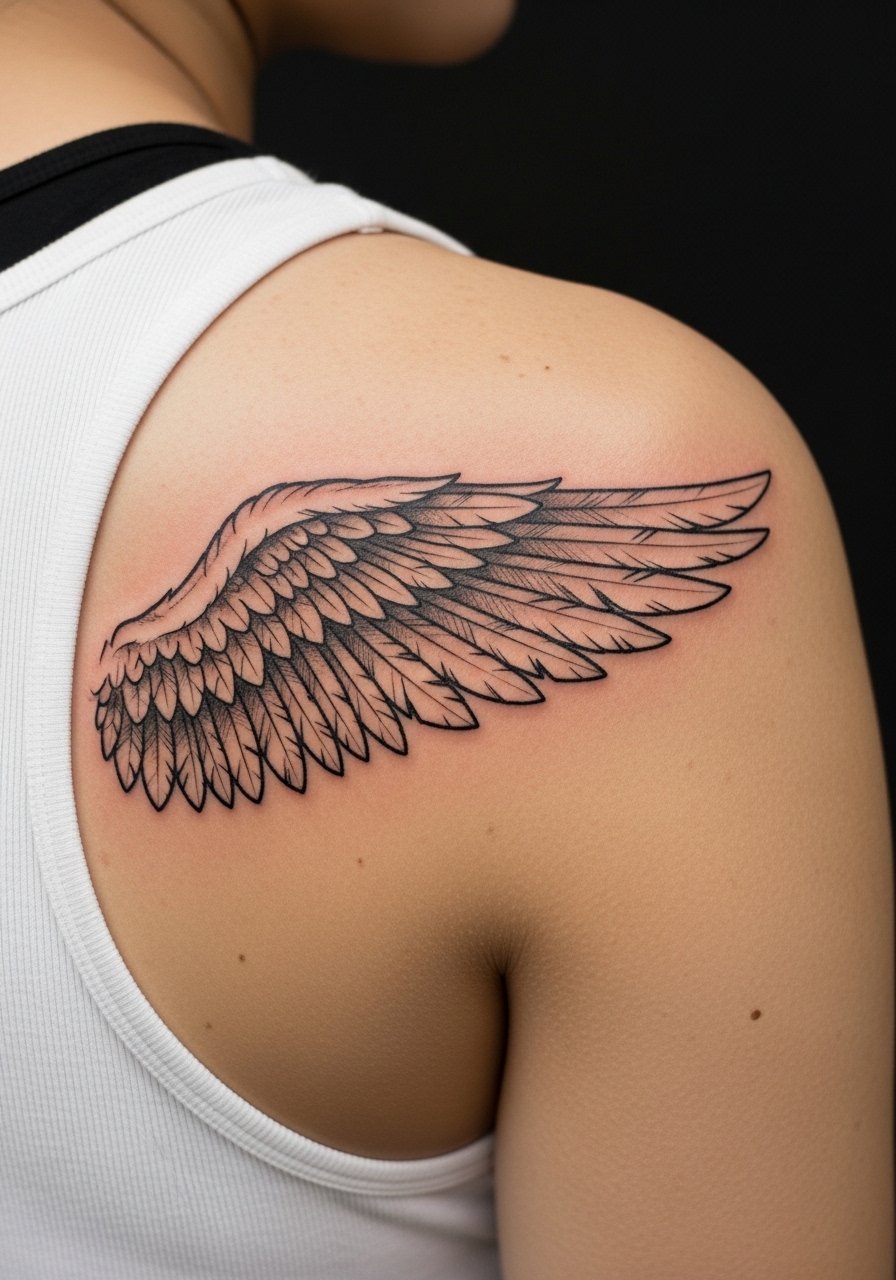
Shoulder blade wings look like they move with the body. The area allows for lots of stipple shading and whip shading to suggest motion. Sessions run one to two and a half hours depending on size. A frequent error is oversaturating darks that later sit as heavy gray fields. Ask for layered shading and ask the artist about touch-up timing. For the session wear a loose tank top you can slide off without dragging fabric over fresh ink.
6. Minimal Sketch Wing on the Wrist
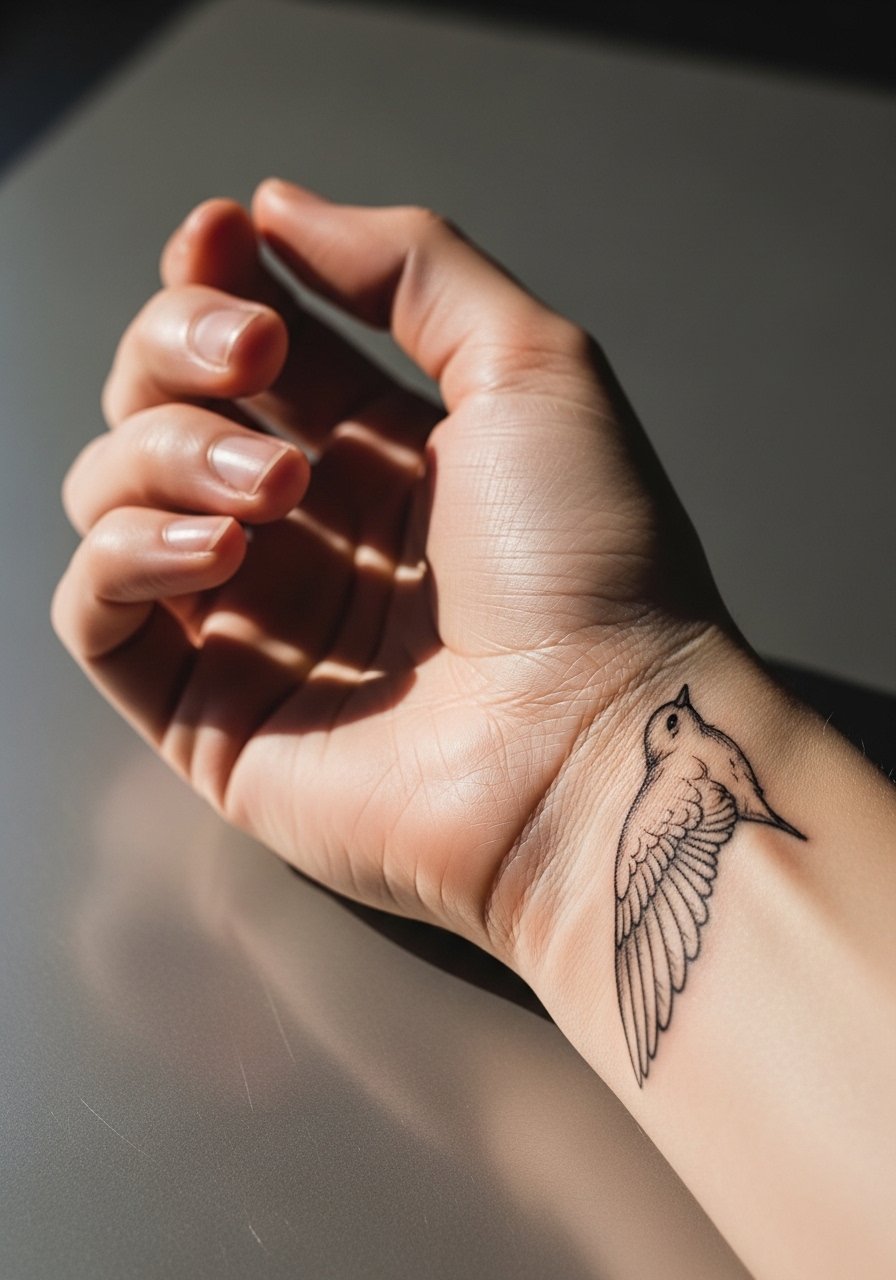
Wrist wings are great for subtlety but they sit in a high-friction zone. Expect a ten to fifteen minute design with modest pain. The usual mistake is placing too many thin feather strokes into a tiny space, which blurs from washing and movement. Ask for cleaner anchor lines and slightly more spacing between feathers. For showing the piece off, stack with a minimalist bracelet that frames the wrist without covering the linework.
Studio Day Picks
The wrist, forearm, and shoulder pieces above heal differently, and a few targeted items make the session and first week smoother.
-
Stencil transfer paper kit. Lets you preview the line placement on skin so you can confirm the wing angle before needle touches skin.
-
Topical numbing cream. Applied as directed before the session takes the edge off high-sensitivity areas like ribs and inner bicep.
-
Thin protective film roll. Useful for small, friction-prone sites such as wrists and hands during the first days of healing.
-
Fragrance-free gentle body wash. Cleans the area without irritating delicate linework while the skin re-epithelializes.
-
Aquaphor healing ointment. A thin layer helps keep fine line work hydrated in the earliest phase without clogging the needle channels.
7. Split Wing Design Over the Sternum
Sternum placements are intimate and painful, but they make for a central anchor piece. The controversy here centers on fine line there. One camp says the skin stretch and movement blur lines quickly. The other camp believes with correct depth and spacing fine line can hold up on the sternum. Both positions have merit. If you choose this spot, ask for slightly larger feather tips and let the artist show healed examples on similar skin. Wear a strapless or zip-top garment you can remove easily for the session.
8. Ankle Wing in Sketch Linework
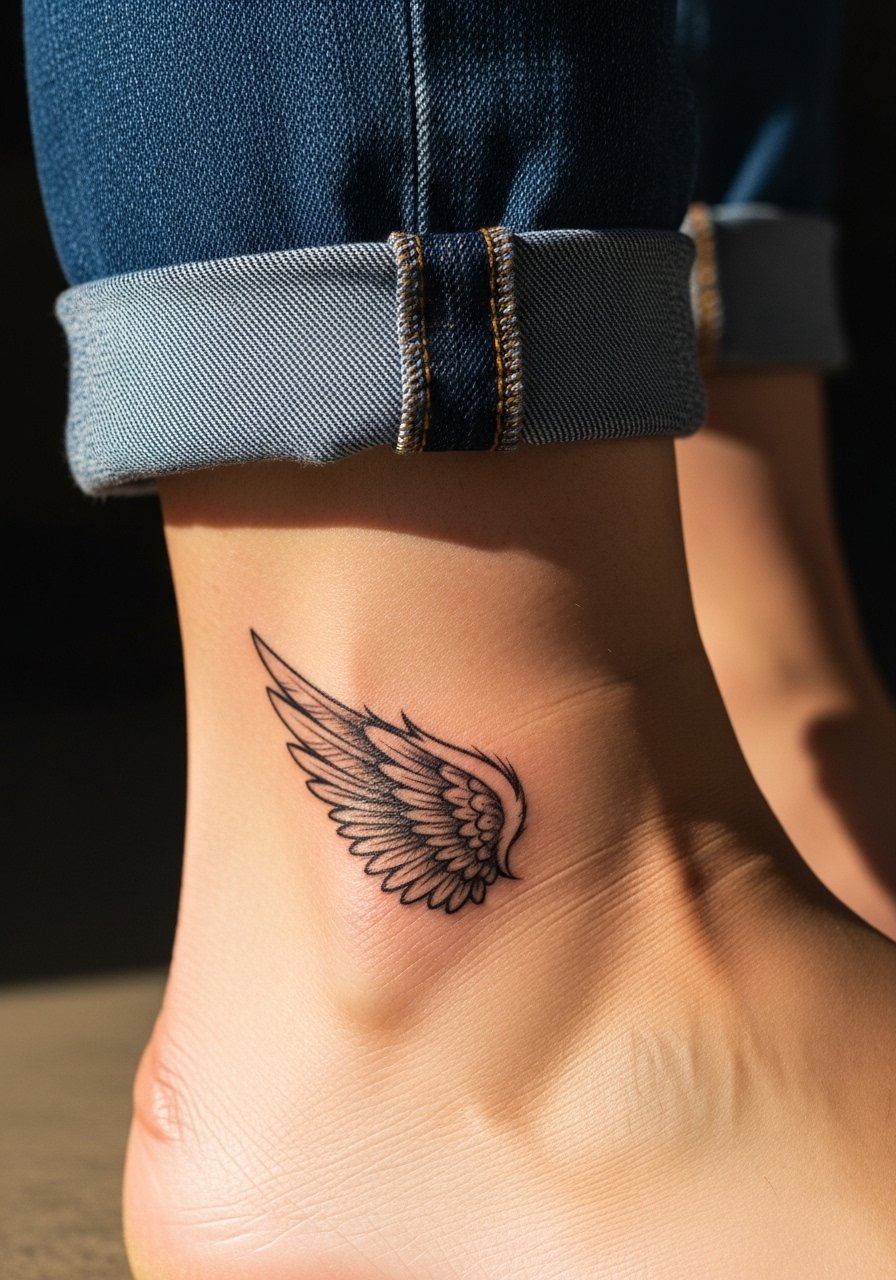
Ankle pieces are small and versatile but sit near shoes and socks that cause friction. Pain is moderate and sessions are brief. Common error is cramming too much interior shading into a tiny outline. Instead, use negative space and a few stipple shadows. For the appointment wear jeans you can roll up or loose pants so the artist has clear access and your ankle avoids pressure afterwards.
9. Winged Collar-Tattoo Blending into Deltoid
This design acts like a transition piece between chest and arm work. Expect variable pain near the collarbone. A common mistake is asking for mirror-image symmetry across the chest and shoulder, which can look rigid on the moving deltoid. Ask the artist to design for motion and to emphasize directional strokes. For wardrobe, a loose button-down shirt or open-collar tee frames the lines while keeping the area comfortable during healing.
10. Small Sketch Wing Behind the Ear
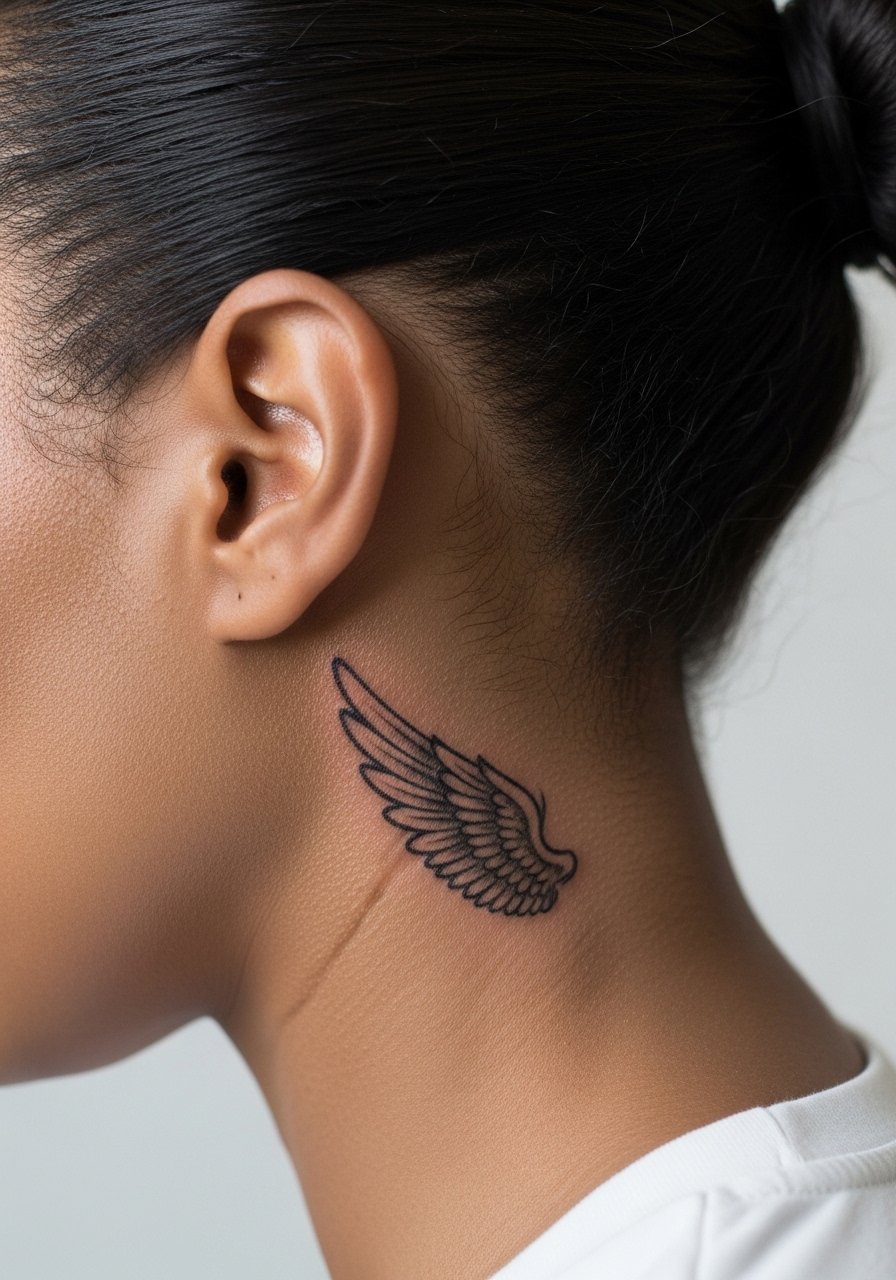
Behind-the-ear pieces are discreet and intimate. The area is sensitive and needs an artist experienced with shallow placement. Keep the design minimal so it ages without smudging. The main mistake is asking for dense shading which looks heavy in that tiny zone. Mention in consultation that you expect minimal touch-ups and ask to see healed photos on similar skin. Because of the location, cutting hair or tucking it up on session day helps.
11. Single Wing Down the Side Ribcage
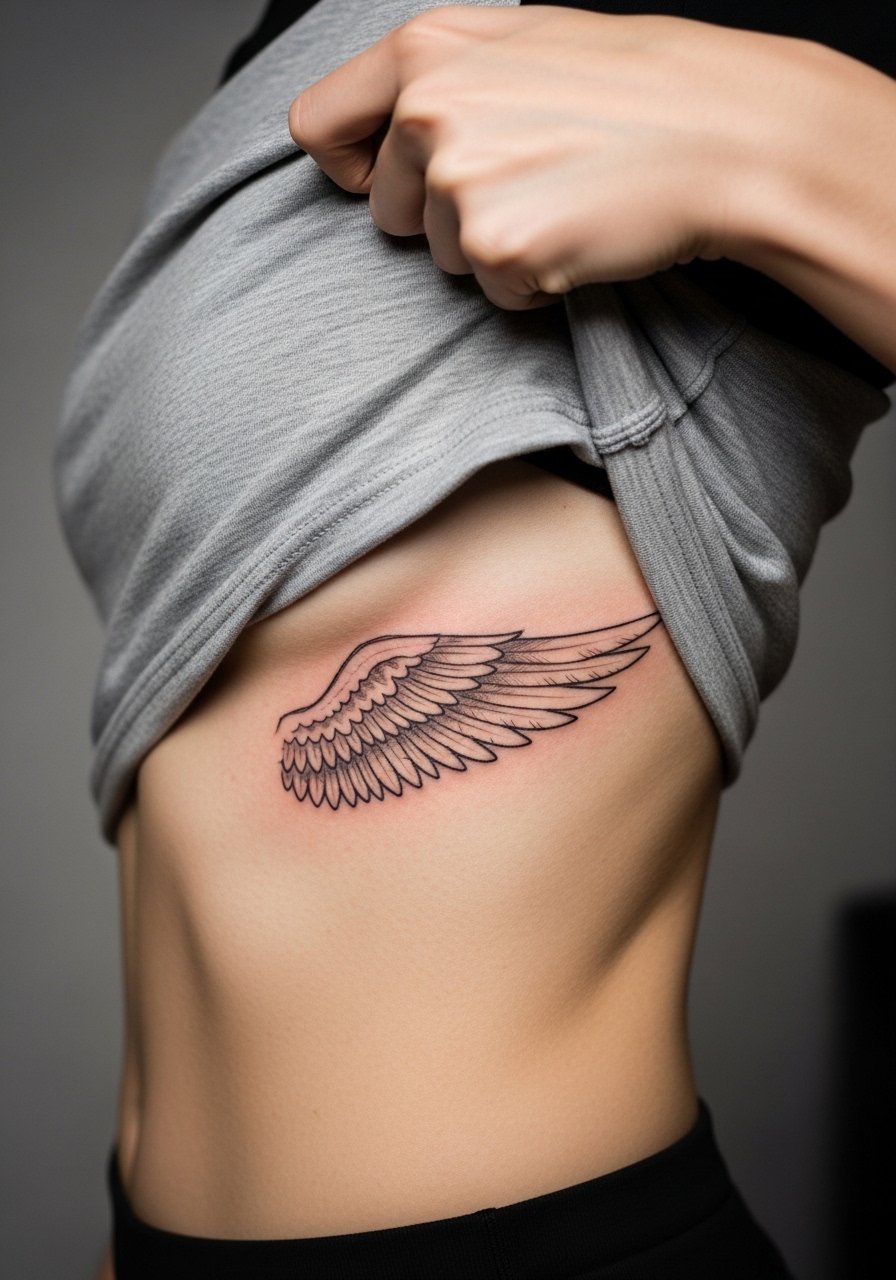
Ribcage work has a reputation for pain and long healing. Fine line wings here can be gorgeous but they risk blurring from skin flex. That fuels a common debate. One group says the constant expansion of the ribcage undermines fine detail. The other group designs with breathing in mind and spaces lines to survive. If you pick ribs, plan for the session to be split and discuss spacing carefully. For the appointment wear a cropped athletic top that gives access without needing to be fully undressed.
12. Low-Contrast Sketch Wing on the Calf
Calf wings let you scale texture and stipple work without risking blowout. Pain is low to moderate. The usual mistake is relying on very light lines throughout, which fade unevenly with sun exposure. Ask for slightly darker anchor strokes and a plan for a touch-up at year two. For post-session comfort, wear loose shorts or drawstring linen pants that do not rub the area.
13. Tiny Wing on the Side of a Finger
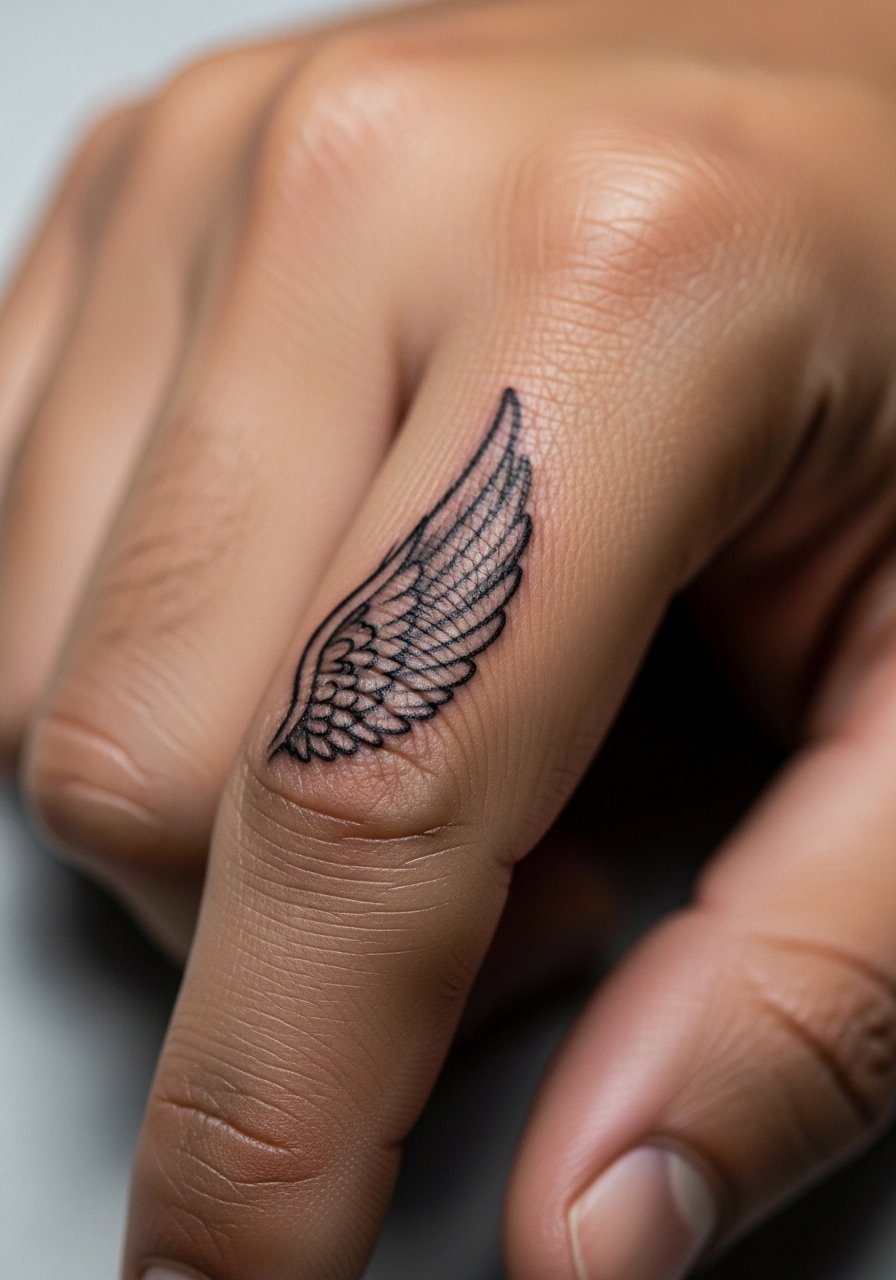
Finger tattoos are notorious for fading and early touch-ups. The skin there sheds quickly and sees constant washing, so expect multiple micro touch-ups. Avoid dense shading and ask for clean, slightly bolder outlines rather than filigree. A real mistake is expecting permanence comparable to forearm pieces. If you want a low-commitment look that still reads, plan on yearly touch-ups and avoid placing the wing across a joint.
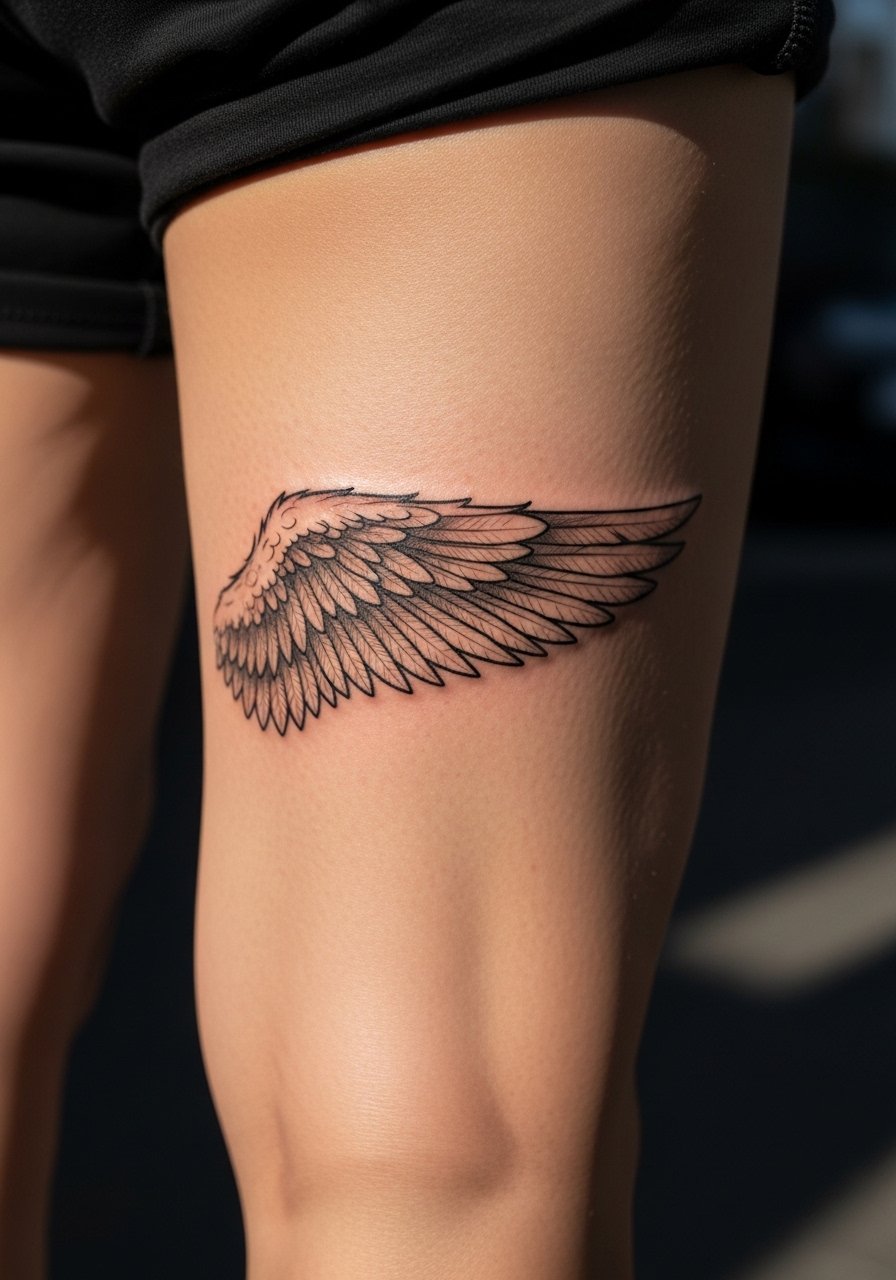
14. Sketch Wing That Wraps the Thigh
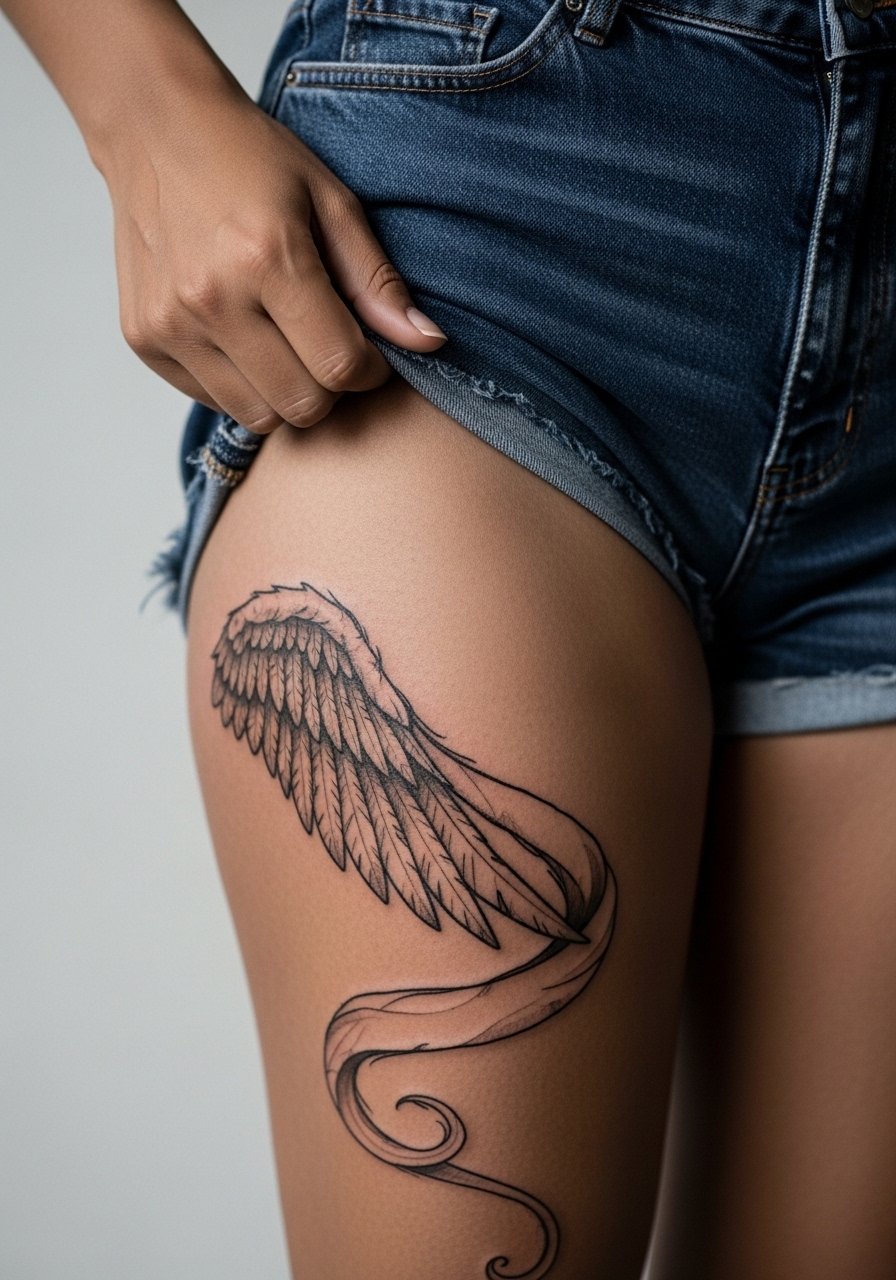
Thigh wings allow for larger, painterly brushstrokes and dense stippling without blowout. Pain is moderate. A mistake is doing excessively fine detail that gets lost when the leg sits against fabric. Tell your artist you want readable negative space and medium-weight lines through the feather shafts. For the session wear loose shorts or a pair of gym shorts so you can move comfortably and not disturb the area after.
15. Micro-Realism Sketch Wing on the Back of the Hand
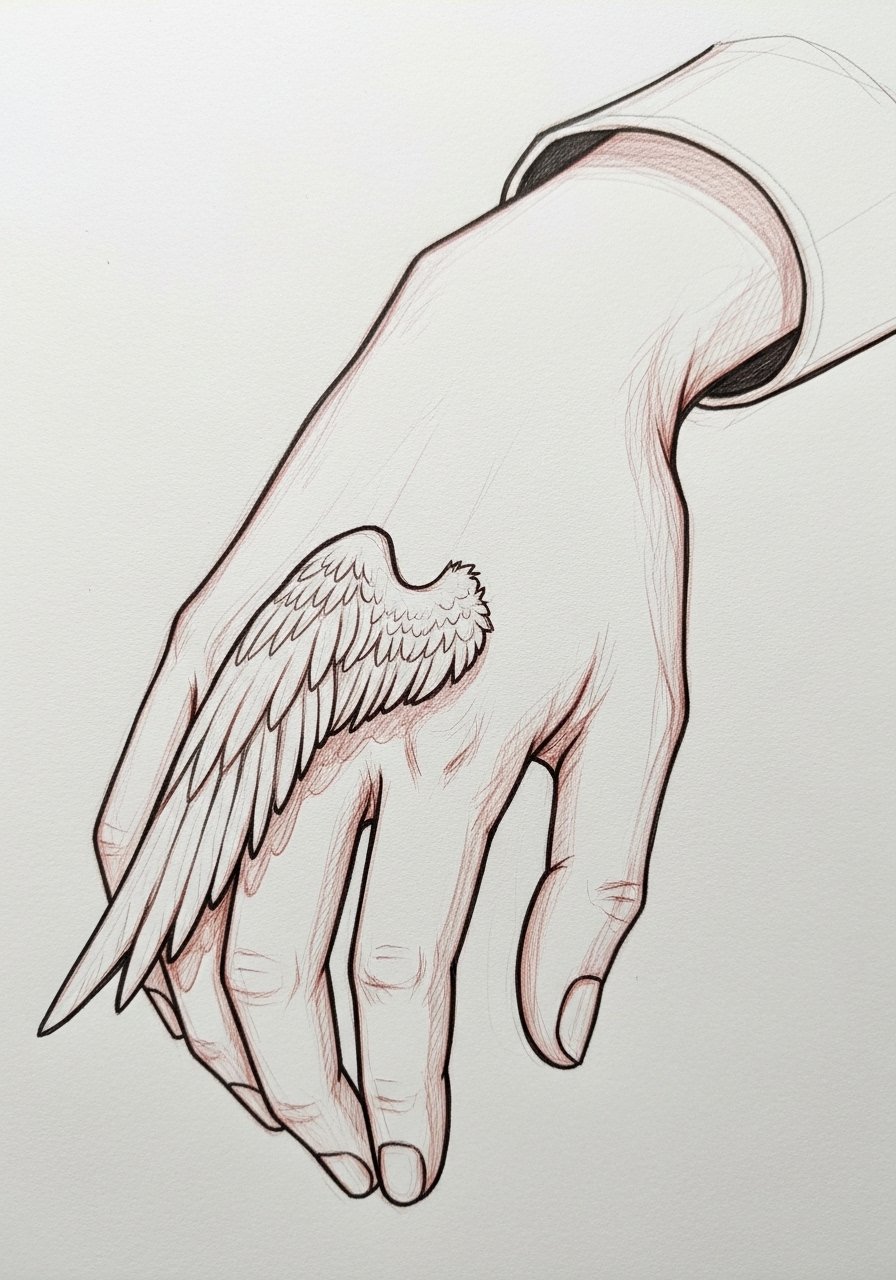
Hand tattoos age faster and can affect hiring in some fields. Artists split on whether micro realism holds here. One camp says constant hand use and sun exposure mean early fading. The other camp adapts placement to the meatier parts of the hand and uses bolder anchors to extend life. If you go forward, pick slightly larger feathers and accept a short touch-up timeline. For showing off, a simple ring or cuff can frame the piece without covering it.
16. Asymmetrical Wing Along the Spine
Spine-adjacent wings are dramatic and require an artist comfortable with vertical flow. Pain is higher near the vertebrae. A common error is too much cross-hatching which tightens into a murky column. Request open negative space between feather groups and ask the artist how movement will affect each section. Pair this design with open-back shirts or a halter top for evenings when you want the lines visible.
17. Stylized Geometric Wing on the Forearm
Mixing sketch strokes with geometric structures creates a modern contrast. This looks best with strong linework for the geometry and looser strokes inside the feather forms. Pain is mild. The usual mistake is over-detailing the geometry which can read as noise when small. Tell the artist you want clean linework for the geometric borders and softer stipple shading within. Show-off pairing includes a classic leather cuff bracelet to echo the graphic edges.
18. Overlapping Sketch Wings as a Back Piece
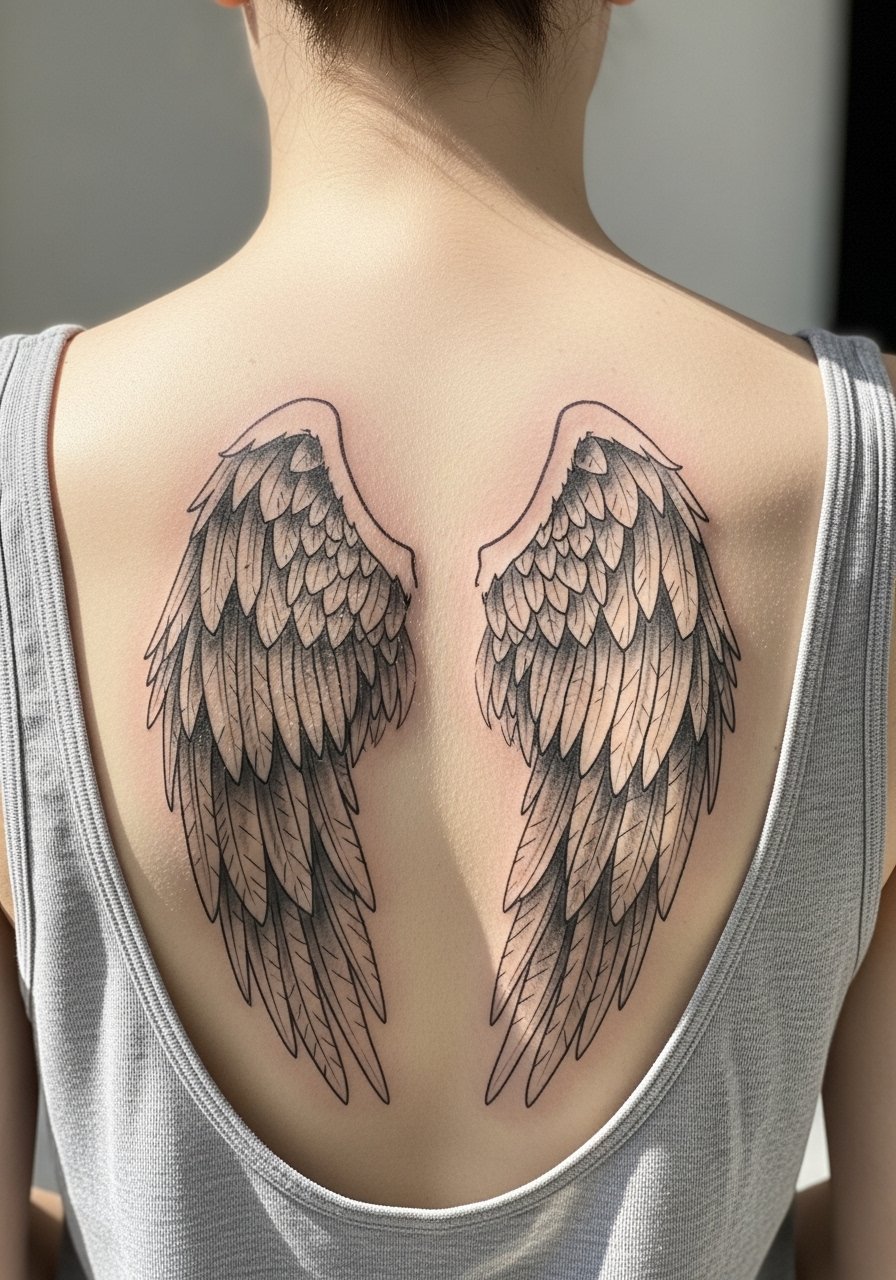
A full back arrangement lets the artist play with scale and depth. Sessions are long and usually split over days. A common error is demanding micro-detail across the entire back, which becomes visually dense at distance. Ask for layered tonal values and to preserve open spaces so the composition breathes when healed. For chair comfort and access, wear a button-down shirt you can take off easily.
19. Single Wing Curving Around the Hip
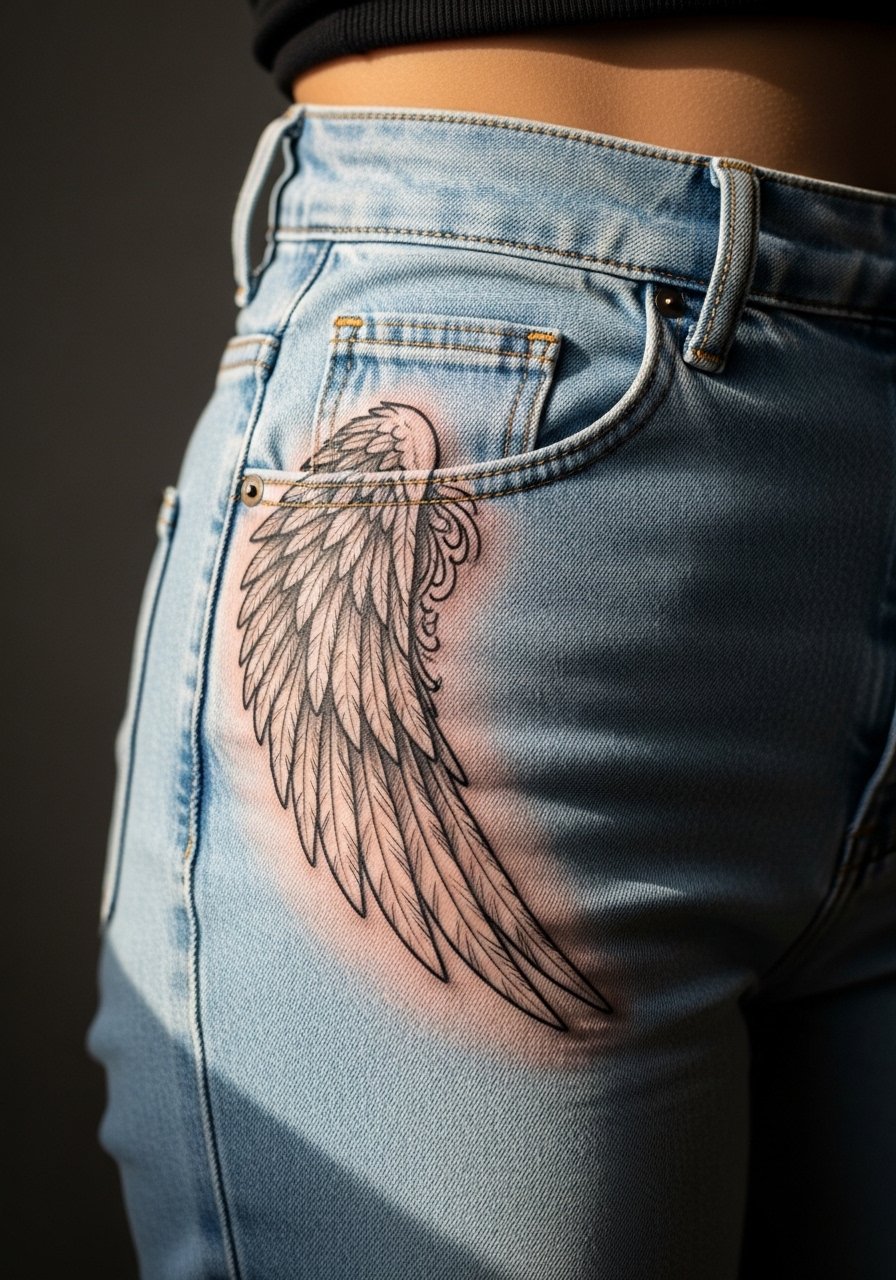
Hip pieces are sensual and often hidden, so they can be more experimental. The main risk is friction from clothing, which can mute fine strokes. Avoid dense fill near the pant line. Tell the artist to keep the lower feathers simple and to plan the piece so sewn edges do not sit directly over delicate linework. For the session wear high-cut shorts or jeans you can lower slightly without full exposure.
20. Abstract Sketch Wing with Dot Work on the Chest Side
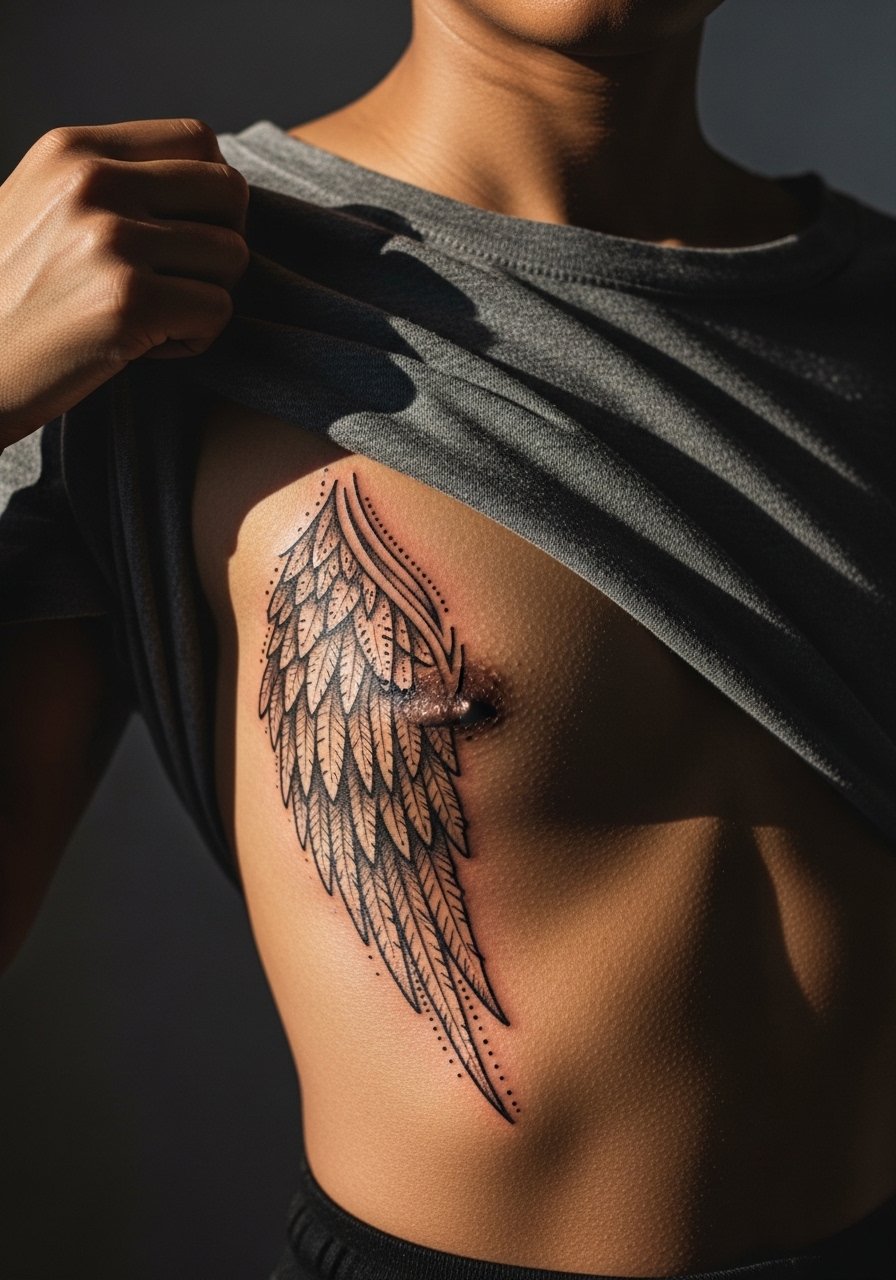
Abstract wings that lean into dot work age differently across skin tones. Dot work can hold nicely on medium to dark skin with proper contrast, but it needs deliberate spacing to avoid muddying. A mistake is packing dots too tightly, which reads as gray at six months. Ask for reference photos showing healed dot work on similar skin. For showing the piece, a wide-neck tee keeps the focus on the line silhouette without clutter.
21. Tiny Wing Near the Hairline at the Nape
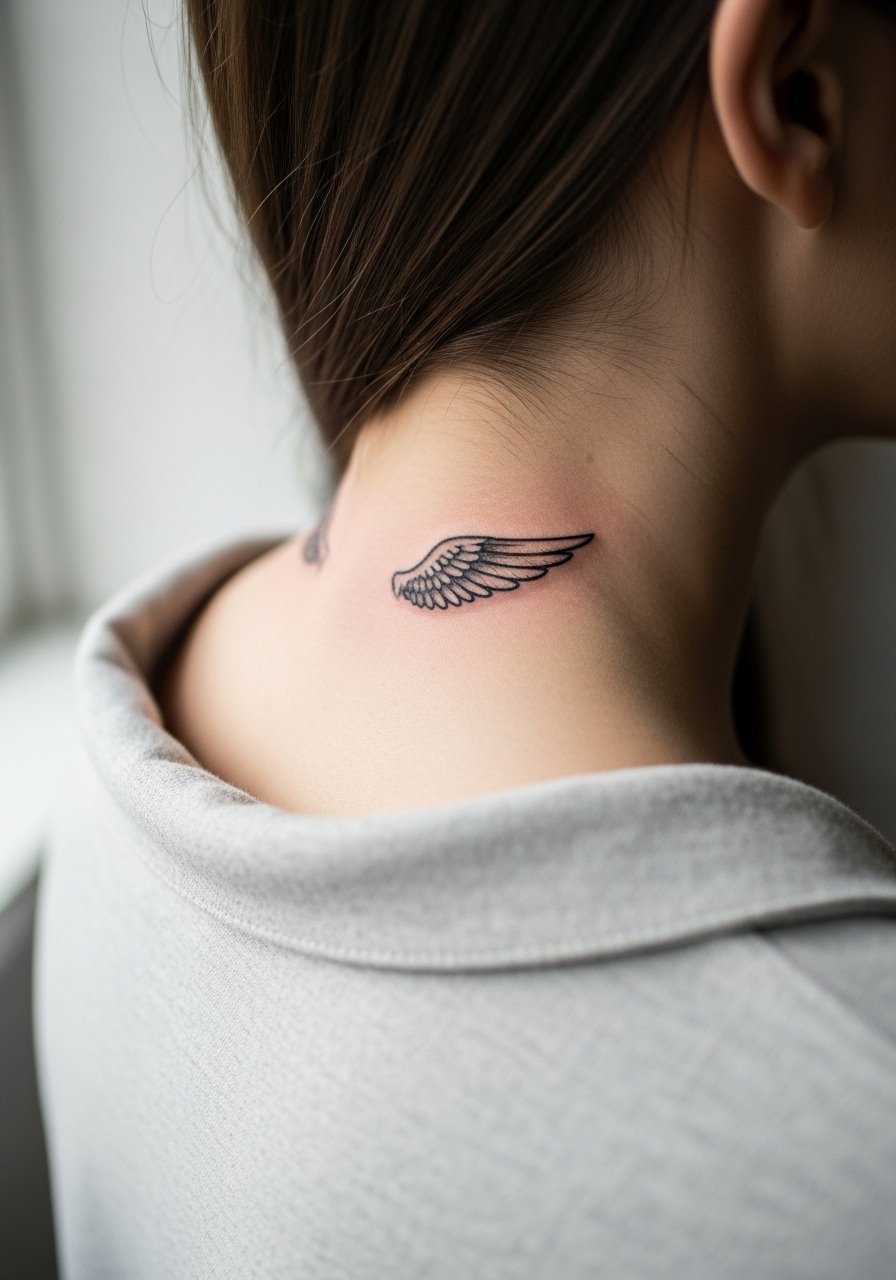
Nape pieces are subtle and often hidden by hair. The spot needs shallow needlework for comfort and to avoid blowout. A typical mistake is asking for dense shading right at the hairline, which can look blurred as hair rubs during sleep. Ask the artist for a small, airy design and to position feathers where hair will not constantly sweep across the area. On session day tie your hair up or bring a slip-on button-down shirt so the artist can access the area without tugging.
Frequently Asked Questions
Q: How long do sketch style wings typically hold detail on forearms versus ribs?
A: Forearms tend to keep linework longer because the skin is thicker and less prone to aggressive stretch. Ribs move with breathing so micro-detail requires more spacing to survive. In my experience forearm wings often need touch-ups later than rib pieces, but maintenance comes down to placement, sun exposure, and how bold the original anchors are.
Q: Can I get a sketch wing as a full-sleeve element without losing the sketch feel?
A: Yes, but scale is key. For a sleeve integrate pockets of negative space and use bolder anchor lines in high-wear areas. Tell your artist you want the sketch texture preserved in panels rather than across a continuous fine network. That approach keeps the feeling without risking an overall gray blur.
Q: Do darker skin tones change how dot work and stipple shading should be designed for wings?
A: They do. Dot work can read beautifully on darker skin if the contrast is planned and dots are spaced to avoid merging. Ask for healed photos on similar skin tones during consultation and agree on slightly larger dot spacing if needed.
Q: How should I dress for a long back or shoulder blade session to stay comfortable?
A: Bring a loose button-down or a tank top you can slide off and back on without pulling over your head. A loose tank top is practical and keeps the area accessible without excess rubbing when you change.
Q: Are hand and finger wings worth it if I want low maintenance?
A: Probably not if low maintenance is the priority. Hands and fingers need frequent touch-ups. They are great for a short-term aesthetic or if you accept yearly maintenance as part of the plan.
