
Fine line collarbone work is everywhere online, but the reality is not as simple as picking a pretty stencil. Fine lines can look angelically delicate when fresh, then soften faster than expected. The bone is a sharper surface so sessions can be stingier than a forearm piece. There are ways to plan for longevity and still get a dainty look, and the first idea below shows the safest way to do that.
1. Fine line butterfly trio centered on the collarbone
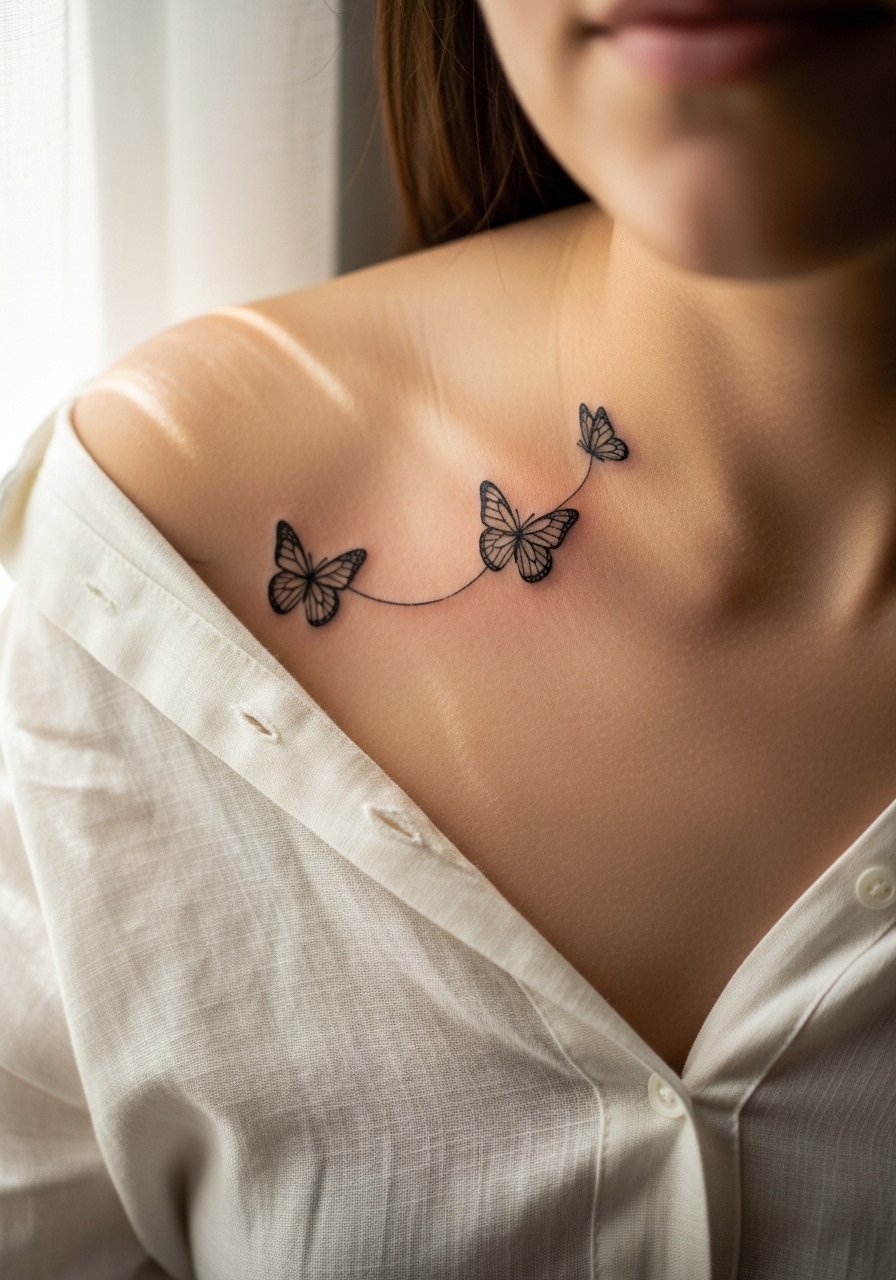
I've seen this trio become the go-to for people who want movement without a big commitment. Tell your artist you want slightly varied wing spans and upward trajectory so the set elongates the neck. Common mistakes include making each butterfly identical and too small, which leads to blurred shapes by year two. Pain is sharper right on the bone but sessions are short, usually under an hour. Expect a touch-up around year one to keep the wing tips crisp. For showing it off, pair with an off shoulder blouse in a neutral linen for a soft frame.
2. Muted peony sweep along the clavicle
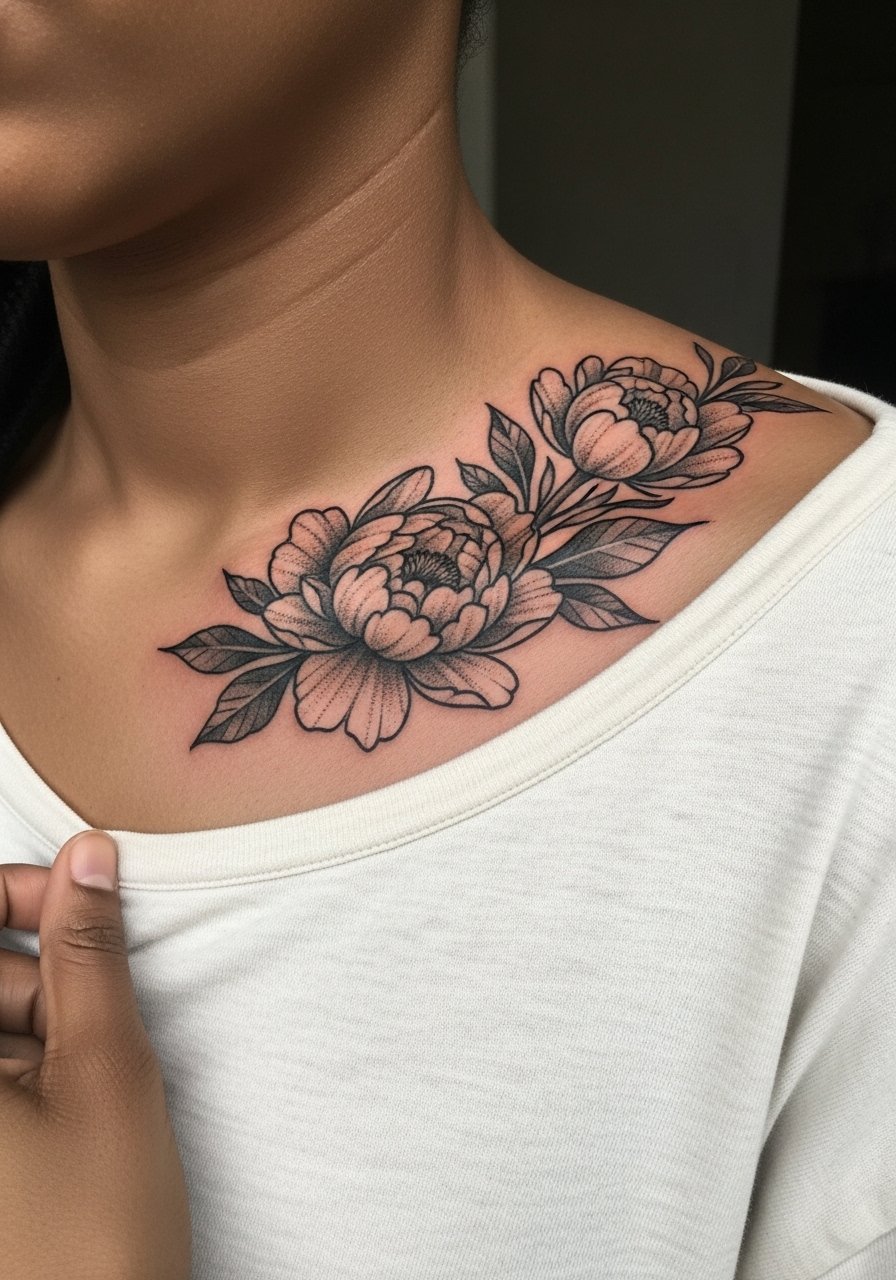
Most people choose a peony for softness, but the trick is to keep the bloom compact and follow the bone contour. In consultation, ask for stipple shading rather than heavy wash so the petals age into texture rather than a muddy patch. The common error is overfilling with watercolor blends that fade into a gray haze. Session time is usually 1 to 1.5 hours and pain is variable depending on how much sits over the bone. Wear a v neck linen tank to the appointment so the artist has clear access and you can preview neckline pairing.
3. Hummingbird in duo-tone near the clavicle end
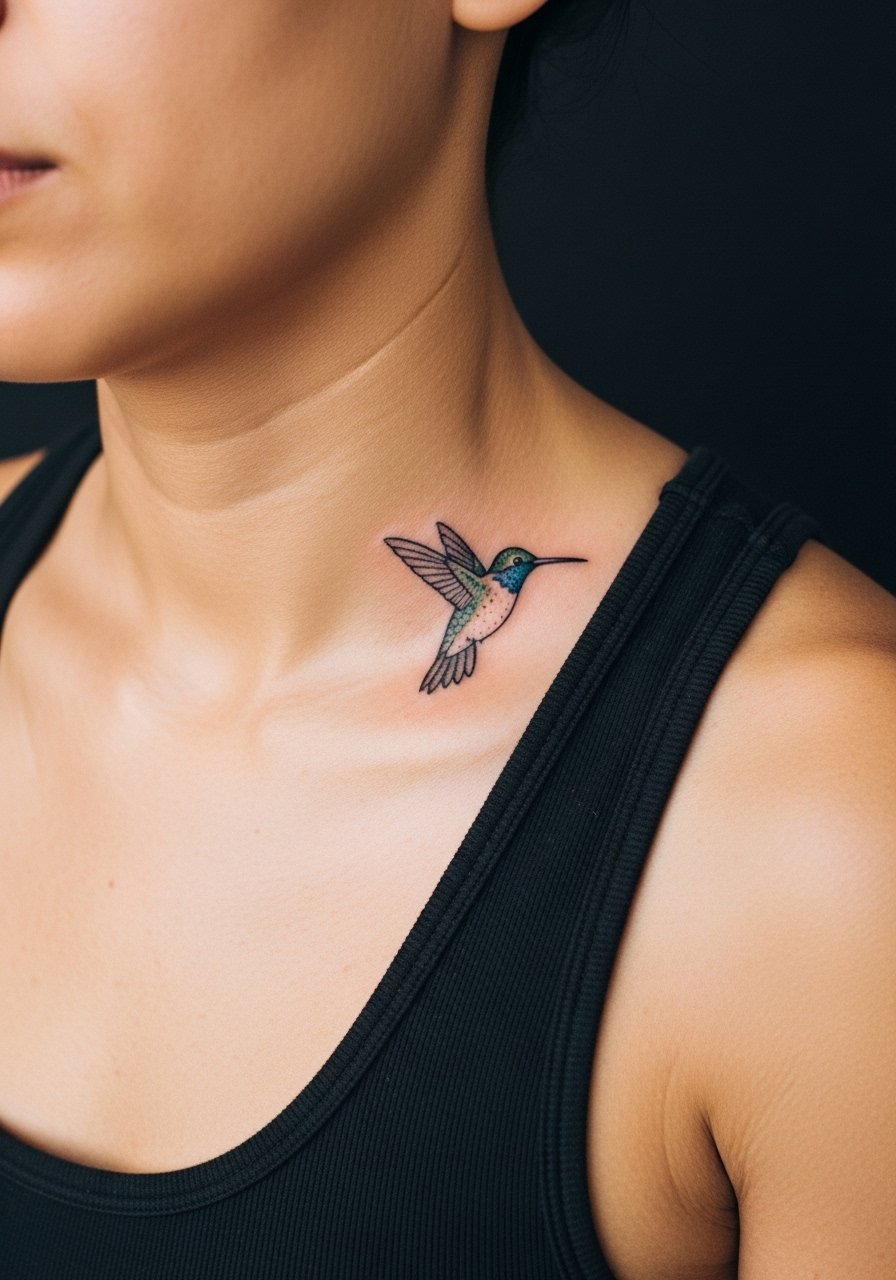
This tiny illustrative bird reads vibrant without taking up space. When you bring references, show exact color swatches and ask for limited saturation to avoid heavy fading. A typical mistake is asking for full watercolor fills at that scale, which often puddle over time. Expect one short session and a possible color refresh at year two if you want the pigment lively. Session comfort is manageable but the wing area over the bone can sting. For evenings out, a racerback tank keeps the shoulder free while showing off the silhouette.
4. Grayscale outline flower and leaves spanning both collarbones
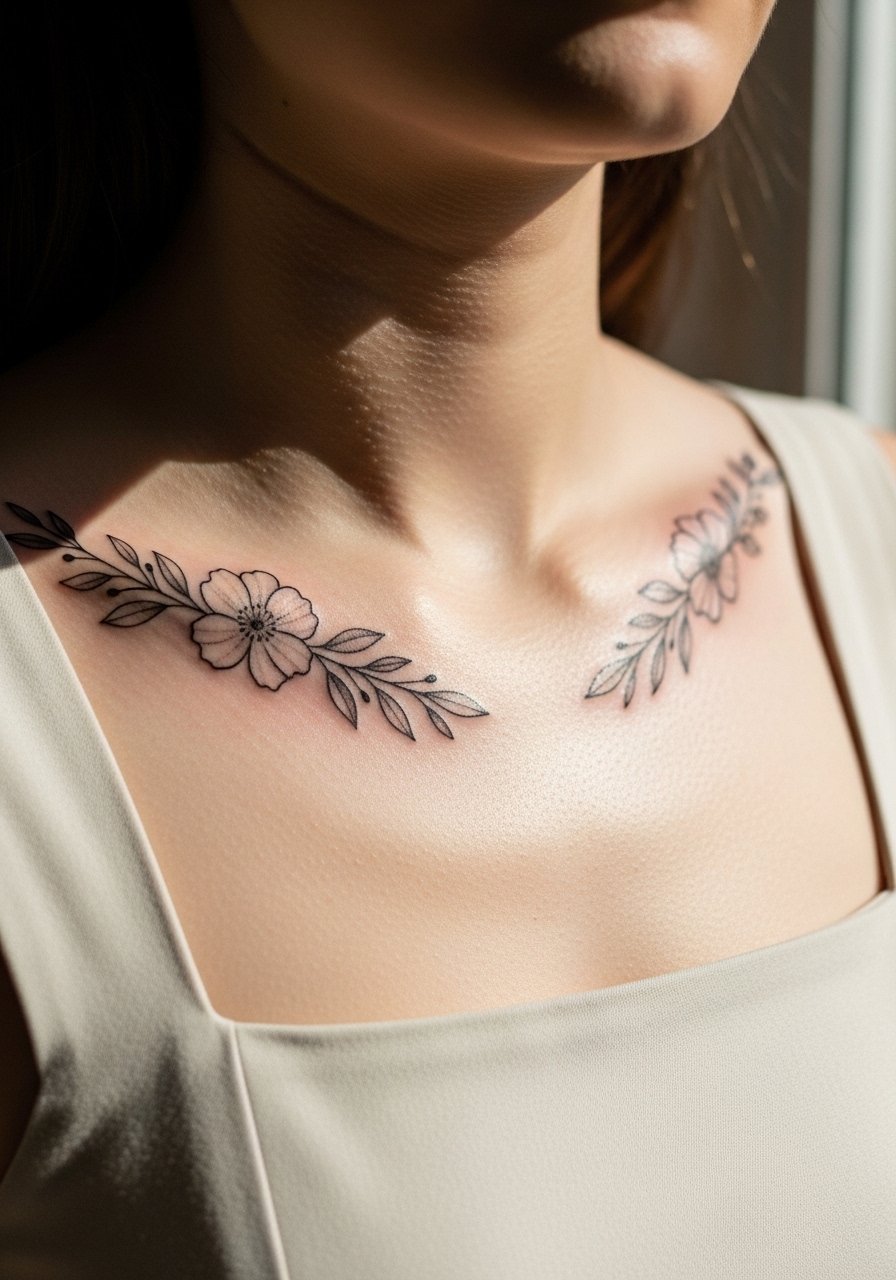
If you want symmetry, this mirrored piece balances uneven bones naturally when the stems follow each curve. In consultation, request slightly bolder outlines than a typical fineline flash so the mirrored tips stay distinct long term. A frequent mistake is asking for identical micro-details on both sides, which can read lopsided once healed. Expect a single session around 45 minutes and touch-ups at year one if lines soften. Pair these with a square neck dress for clean framing that keeps attention on the symmetry.
5. Minimalist wing outline on the upper collarbone
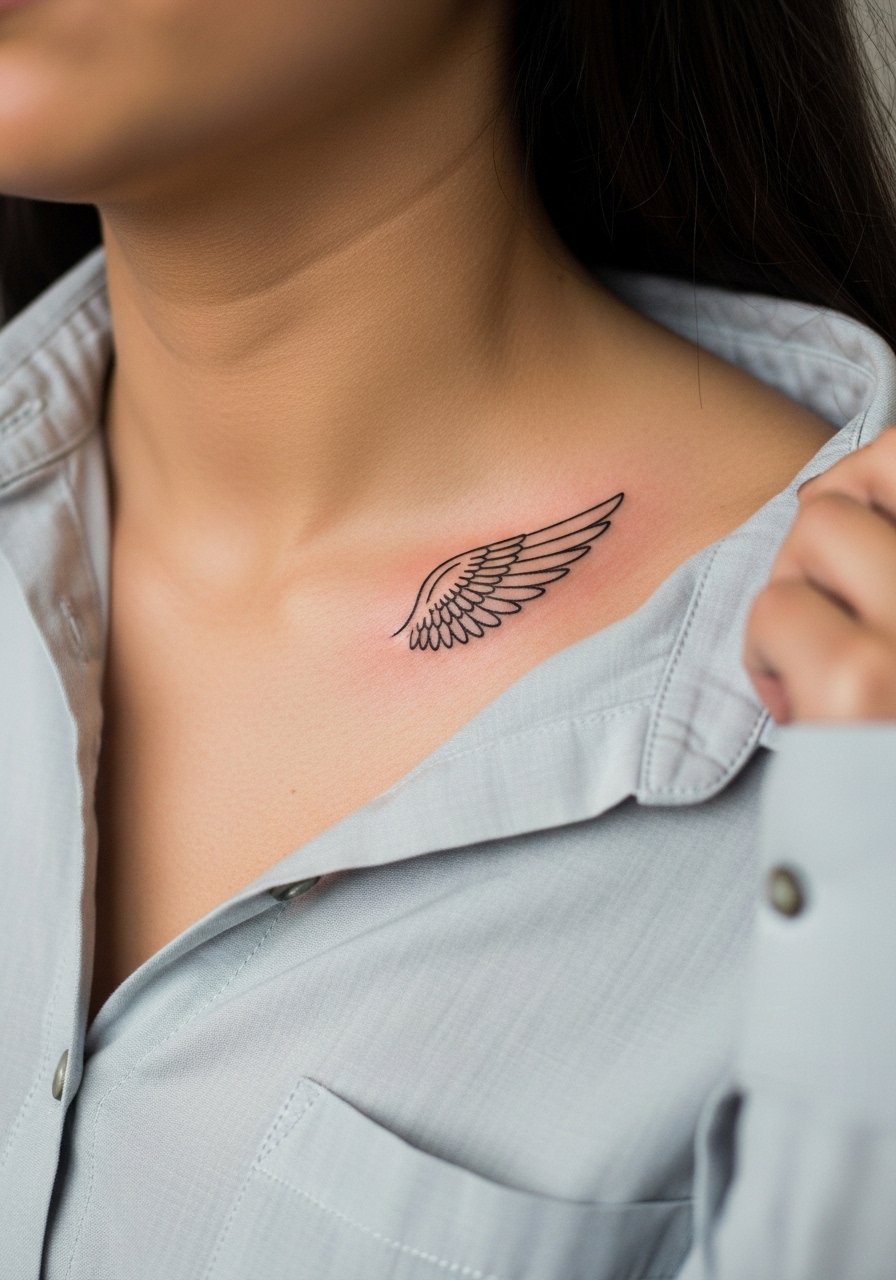
Fair warning, the upper collarbone rides the sharpest ridge so fine work translates to quick stings. The biggest mistake is making the wing too thin and too short. Ask for a modest scale increase and clean negative space between feathers for longevity. This usually takes under 30 minutes. Blowout risk is low if the artist spaces lines and keeps depth consistent. For a simple show-off, a thin chain pendant necklace sits above the wing without crowding the linework.
6. Dainty vine script wrapping the collarbone curve
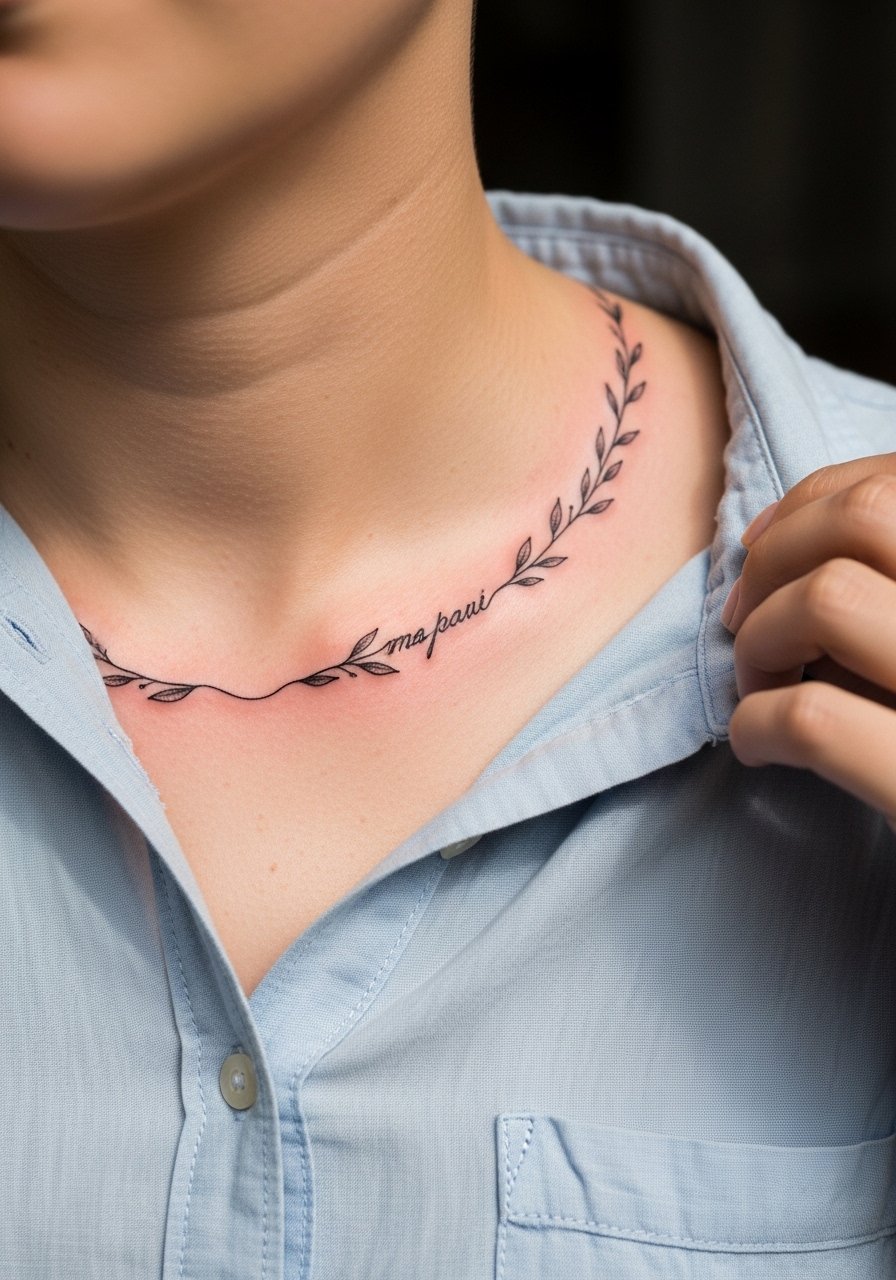
When people want a line of text that feels organic, a vine script blends script and botanical flow. Tell your artist to sketch the layout directly on skin so the words follow the bone. A common error is asking for ultra-thin lettering that fades into a whisper; request slightly heavier primary strokes for photos and longevity. Expect a single session, and plan a touch-up at year two if you wear sun-exposing necklines often. For the appointment, bring a loose button-down shirt you can pull aside to keep the area accessible.
Pre-Session Essentials
The upper chest and collarbone pieces above ask for unobstructed access and tools that protect fine line work during the first week.
-
Stencil transfer paper kit. Lets you preview placement and scale on the skin before the needle meets the curve, which is helpful for the butterfly trio and vine script.
-
Topical numbing cream. Applied as directed before the session it eases the sharper bone sensation without changing the linework when used properly.
-
Thin protective film roll. Useful for the first night to shield delicate collarbone lines from friction against clothing.
-
Fragrance-free gentle body wash. Cleans the healing area without irritating fine lines that depend on crisp edges.
-
Aquaphor healing ointment. A thin initial layer helps lock in moisture on fragile linework for the first few days while skin begins to close.
7. Single line geometric triangle in the clavicle dip
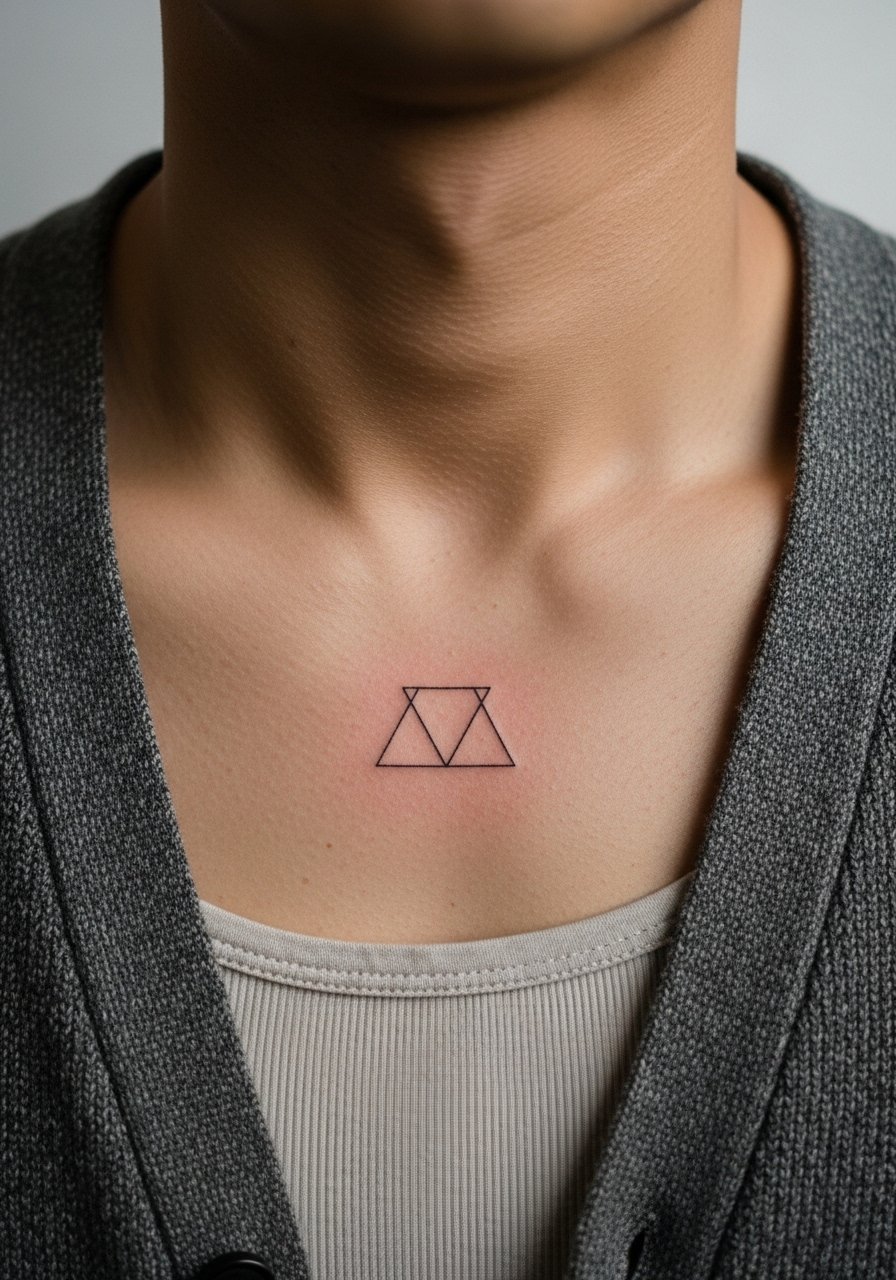
The clavicle dip is an optical sweet spot for tiny geometry. The consultation note should be exact measurements so the triangle sits perfectly centered. A frequent mistake is scaling the triangle too small which causes the internal angles to blur. This design often takes under 20 minutes. Expect minimal blowout if the lines are spaced and not packed. For a low-key reveal, try a strapless bralette under a sheer layer so the shape peeks through without competing with necklaces.
8. Dotwork mandala fragment over the upper collarbone
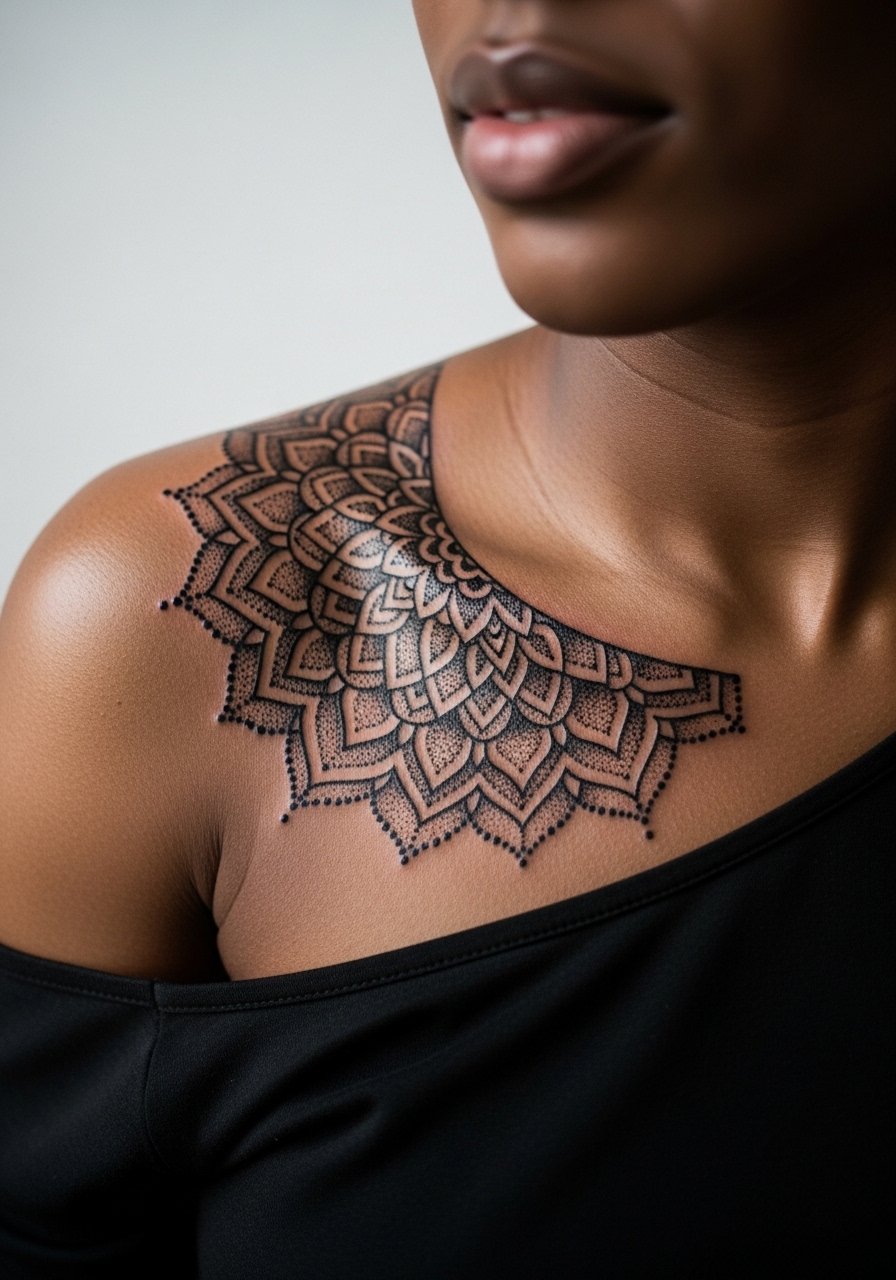
Dotwork needs breathing room to avoid merging dots over time. Tell your artist you want a fragment rather than a densely packed full mandala so the dots remain distinct at year five. A common version that ages poorly is a dense center with tiny outer dots. Sessions can run 1 to 2 hours depending on coverage and require steady hand technique. For summer visibility, pair this with a one shoulder dress that frames the arc without covering it.
9. Fine line constellation mapped along the collarbone
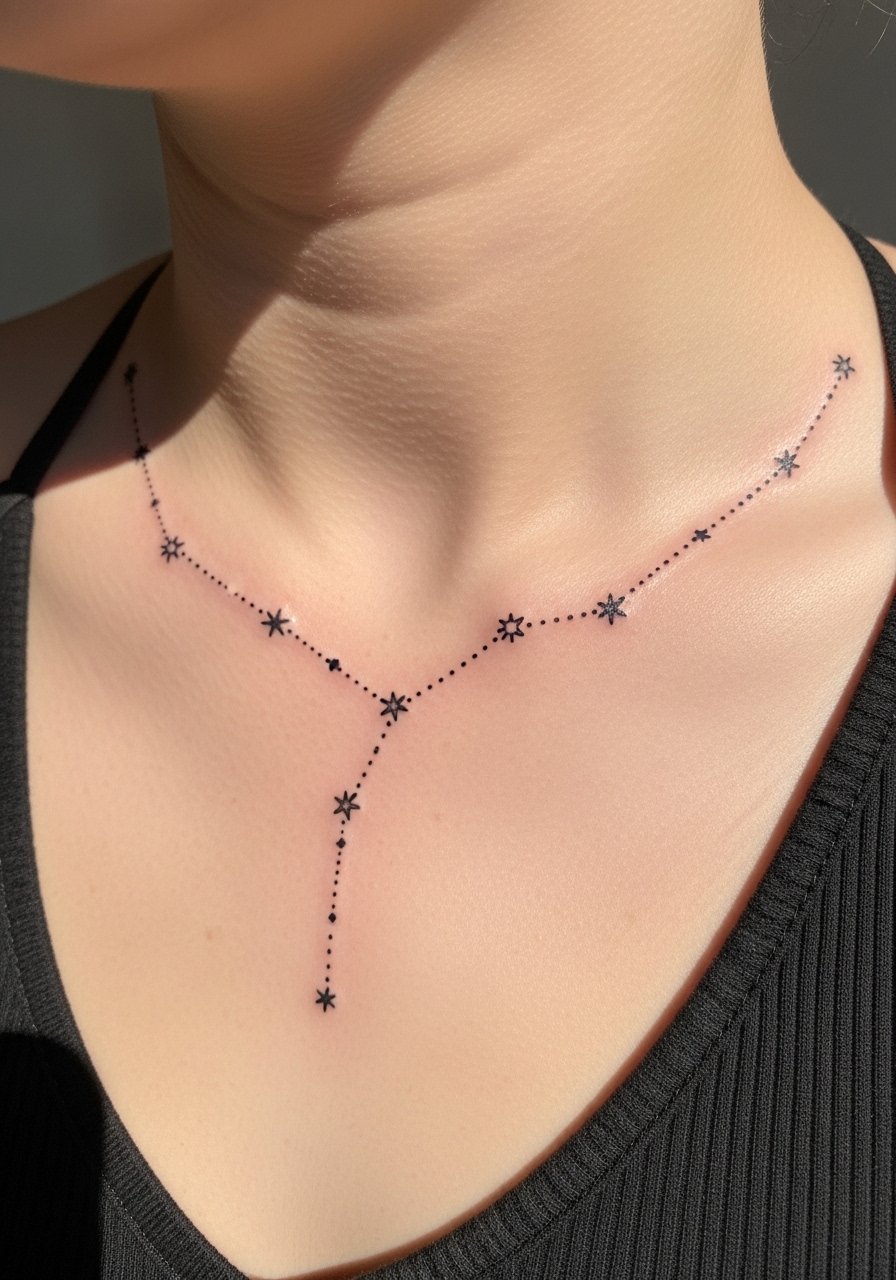
Constellation pieces are popular because they can read personal without heavy detail. Ask your artist to use small but distinct star dots and connecting lines with breathing space so they do not bleed together over time. The mistake is cramming too many tiny stars in a short span, which looks messy after settling. Sessions are quick and often under an hour. For stage-right styling, layer a dainty constellation necklace that sits above the ink to create a subtle celestial stack.
10. Minimal heart pierced by an arrow at the clavicle
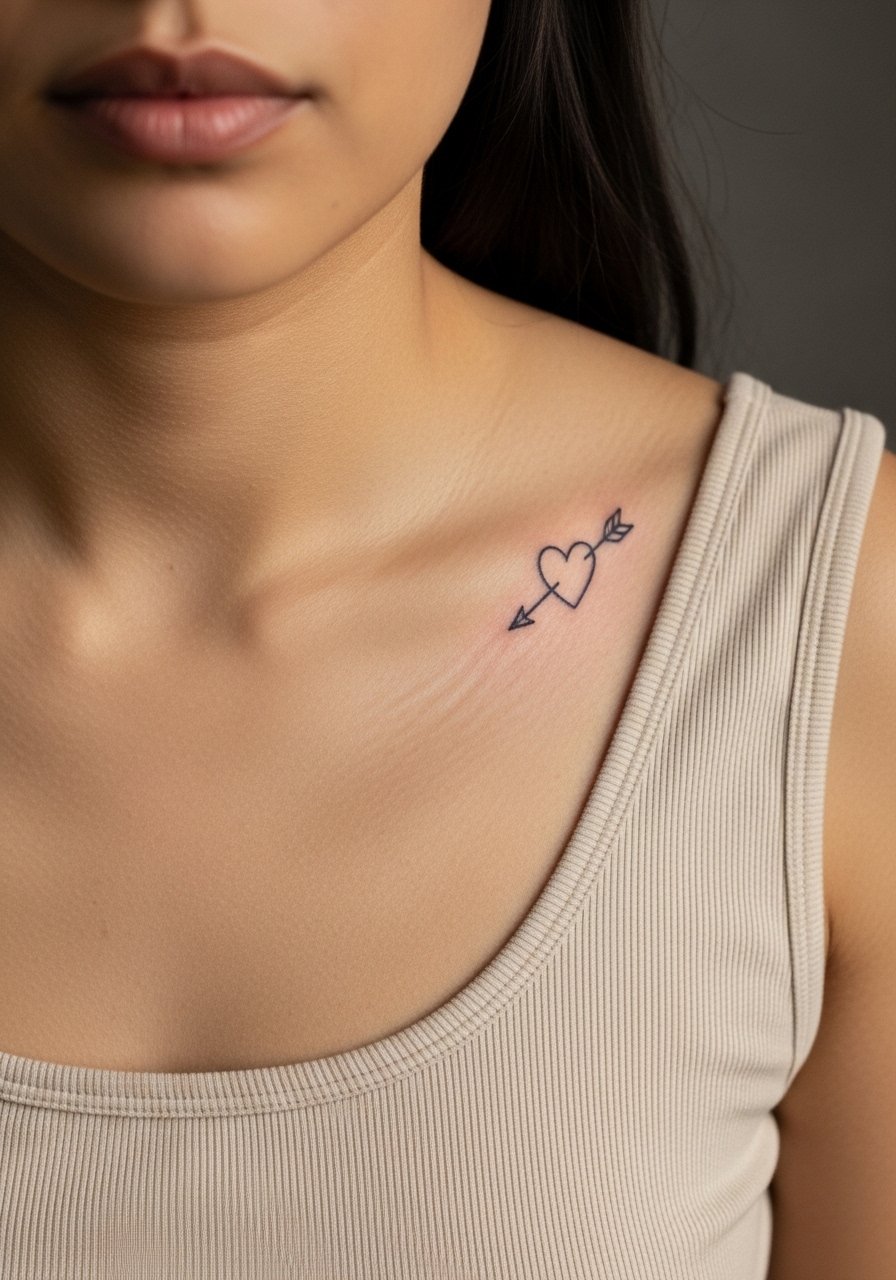
Playful and compact, this design can peek from low necklines. Be explicit with your artist about the arrow angle so it does not read like a smudge once healed. A mistake is having the heart too close to the bone edge which can flatten under pressure. This is a short needle time and usually low session cost. For everyday wear, a scoop neck cami reveals the symbol without bulky accessories.
11. Blackwork feather drifting from the collarbone toward the shoulder
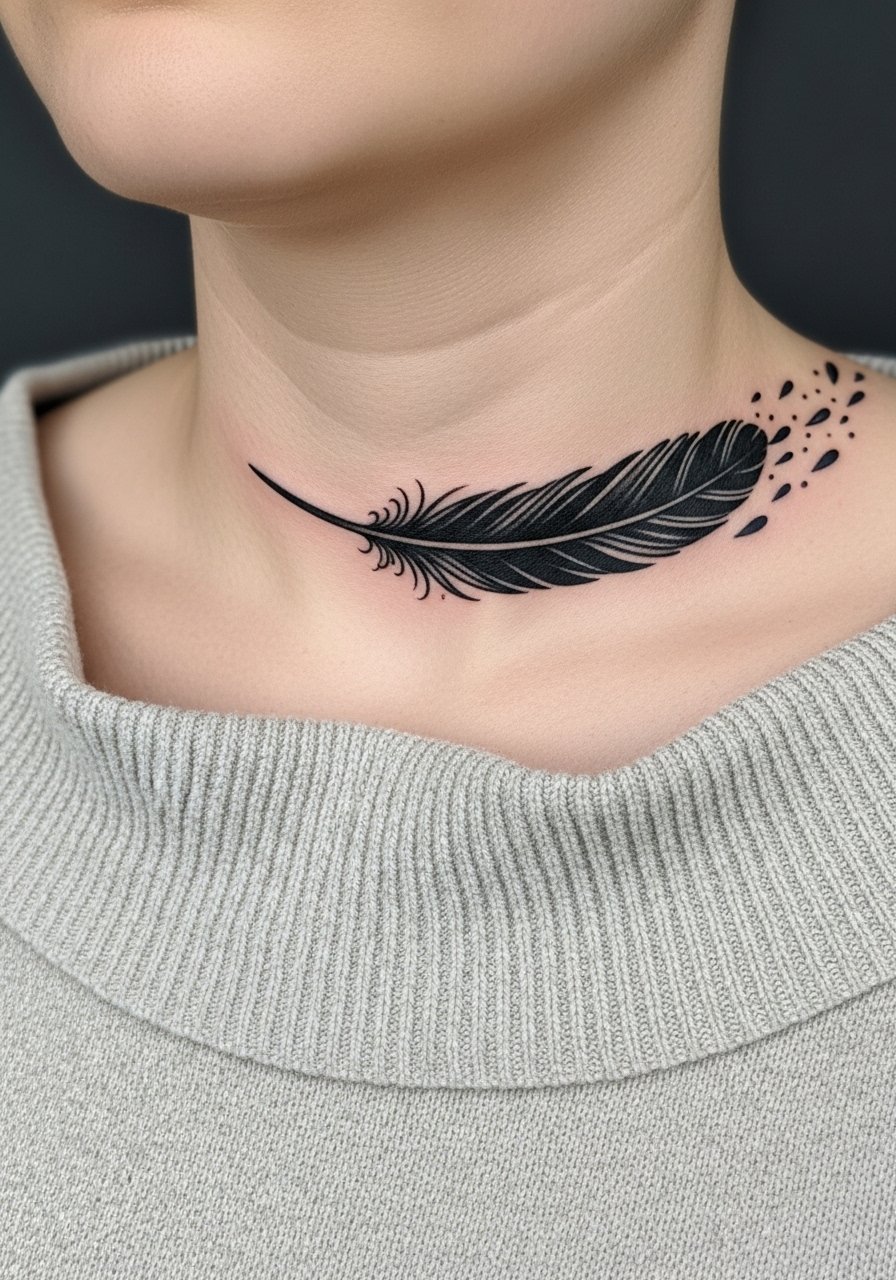
Blackwork at this scale is bold and ages into a graphic silhouette. In consultation, ask for crisp edges and a tapered quill so the feather maintains form as skin softens. A common mistake is adding heavy texture that fills in and loses flow. This piece takes around an hour depending on length. For contrast, pair the feather with a boat neck sweater rolled low to keep attention on the bold sweep.
12. Ornamental wave pattern hugging the bone like a necklace
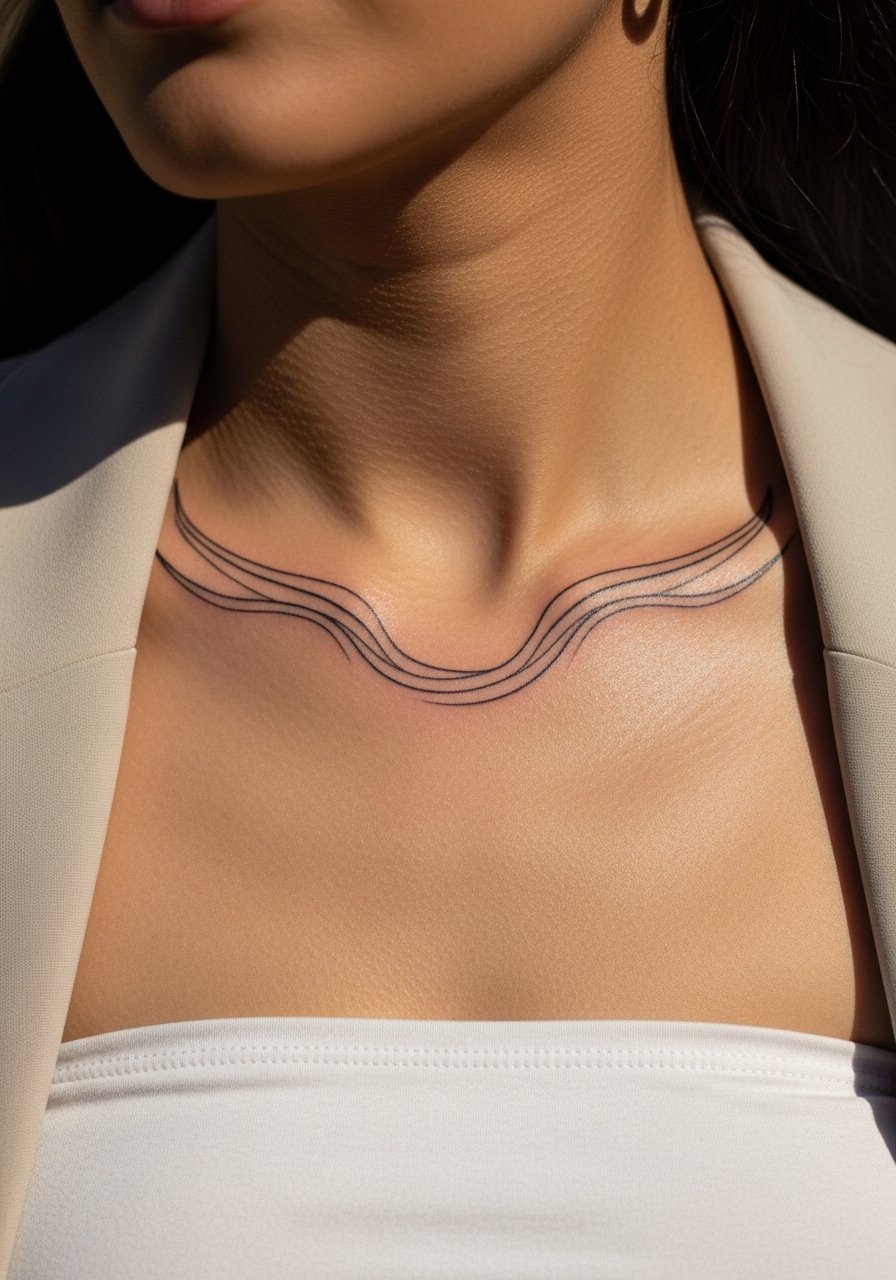
Wave patterns mimic a necklace when drawn to match the bone contour. Tell your artist you want rhythm in the arcs and consistent spacing so the pattern reads like a draped band. A common wrong move is adding tiny filigree that compresses with healing. This usually runs under an hour for a two-inch band. Show-off pairing works well with a bandeau top under structured outerwear.
13. Micro-realism bird silhouette on the clavicle end
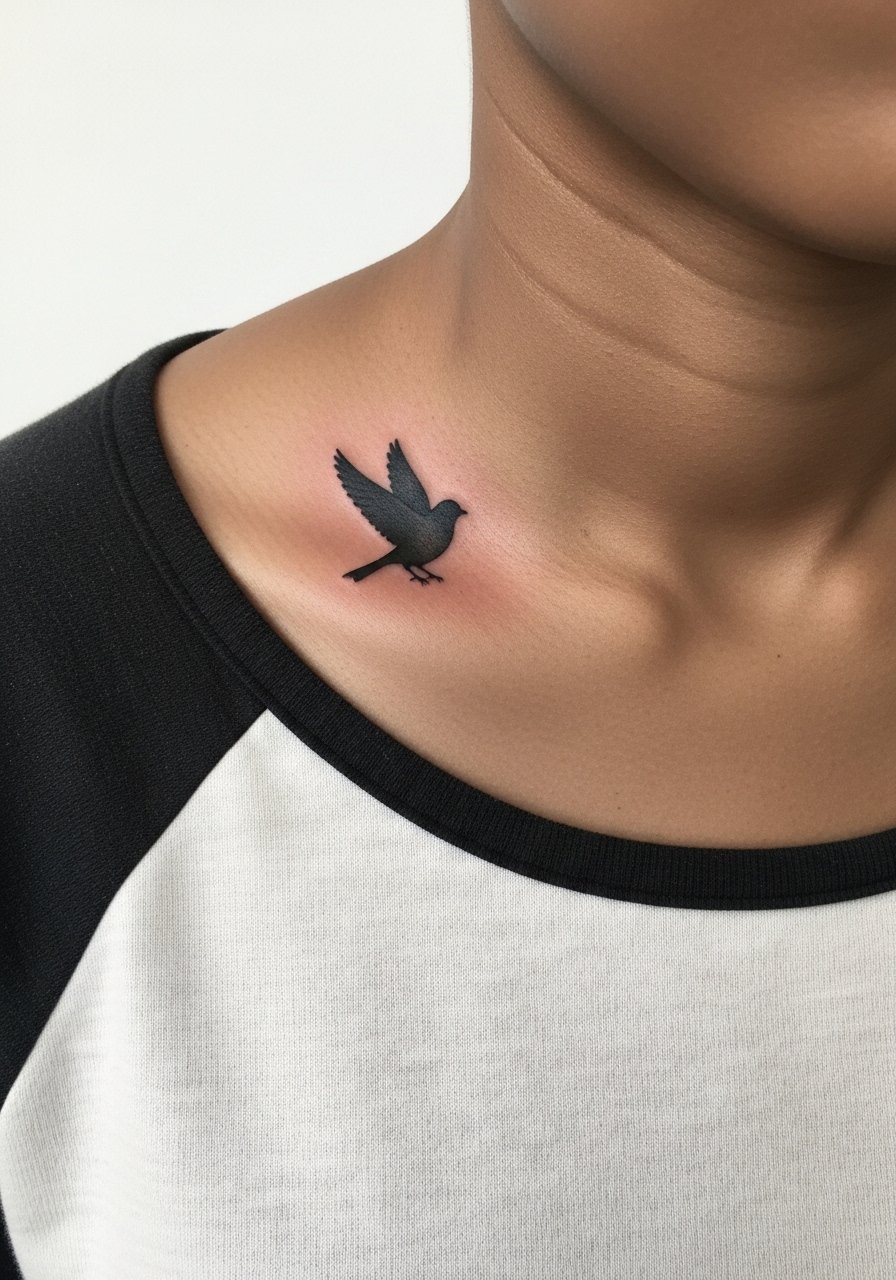
Micro-realism relies on careful contrast and clean negative space at small scales. Ask for a test patch of shading density so the tiny eye and wing shadow do not dot into a blob later. The main mistake is pushing too much tonal gradation into a one-inch piece. Sessions often need a steady hand and may take an hour. For casual framing, a raglan off shoulder tee shows just the shoulder edge where the bird sits.
14. Tiny sunrise linework skimming the collarbone
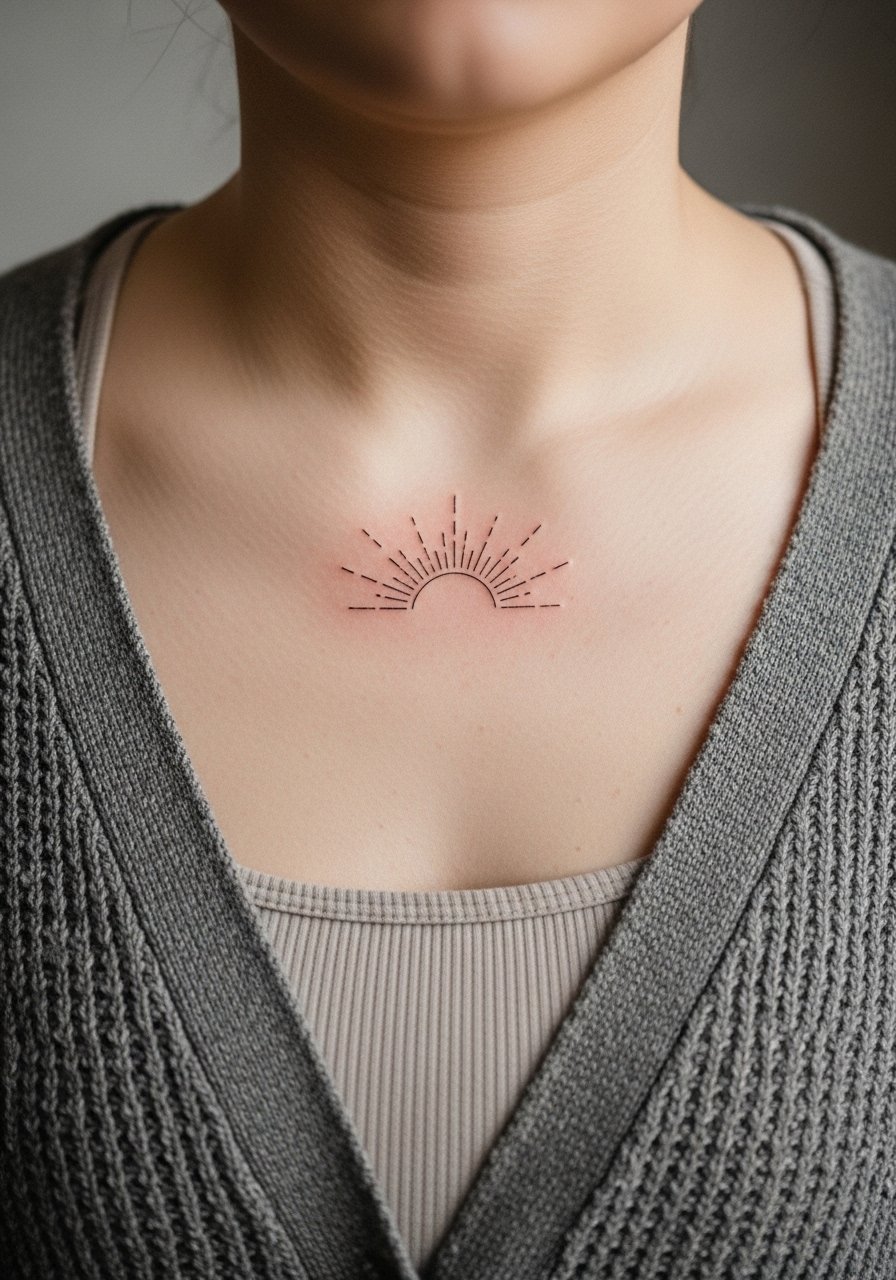
A horizon line with a few rays reads like a micro-sigil above the bone. During the consultation, show exact ray thickness and spacing so the sun does not blur into a single mark. The common aging problem is over-relying on micro rays that merge after a year. This is a fast piece, about 20 minutes, and pain is mild to moderate. For layered looks, the design pairs with an open cardigan loose fit draped off one shoulder.
15. Asymmetrical wing balancing an uneven collarbone
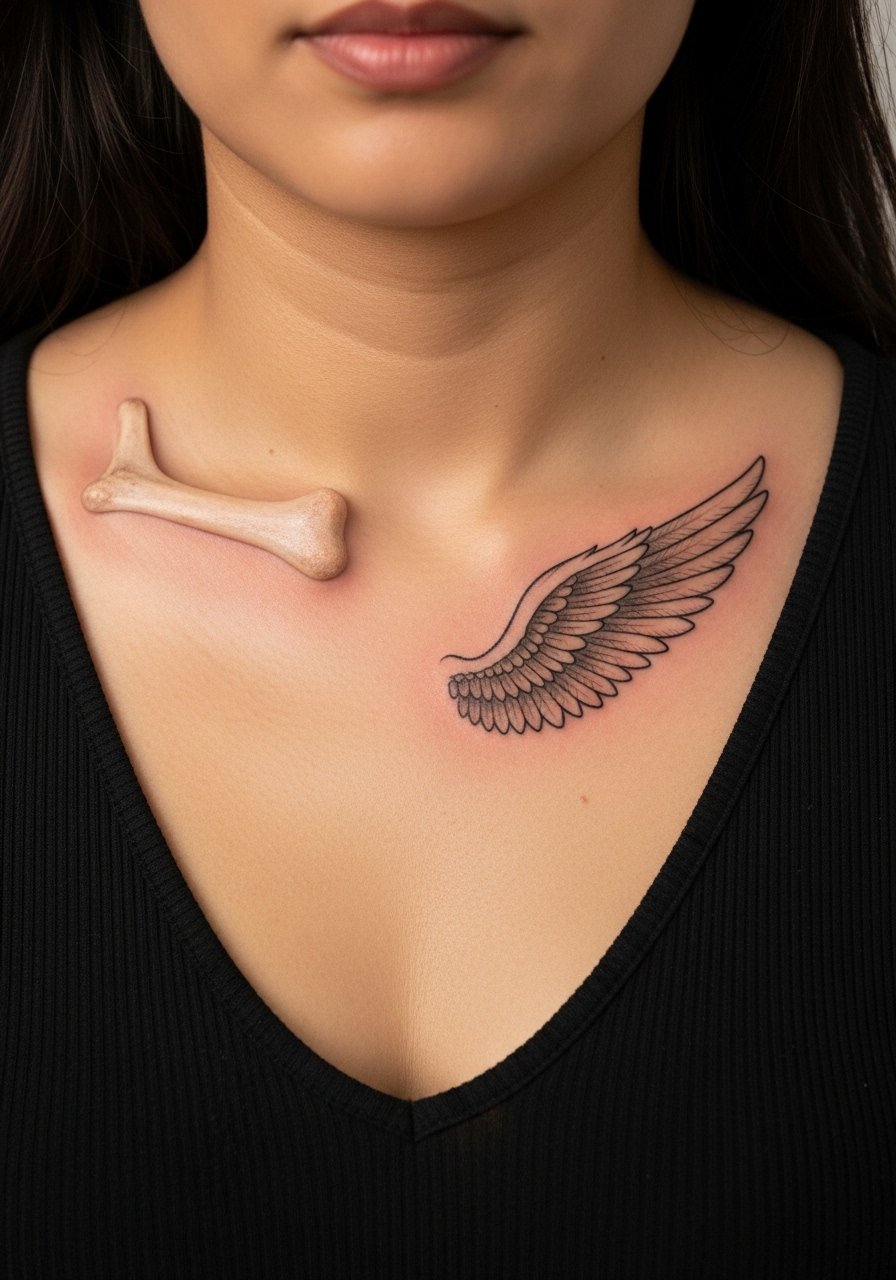
When bones are uneven, an asymmetrical placement can look deliberate instead of lopsided. Tell the artist to blot the stencil across both sides to visualize balance before inking. The mistake people make is insisting on perfect symmetry, which can highlight natural asymmetry. Sessions are brief and focused. The wing can sting more near the tip over bone, so plan short breaks. Pair with a v neck linen tank that reveals one shoulder more than the other.
16. Coordinate numbers in fine script along the collarbone
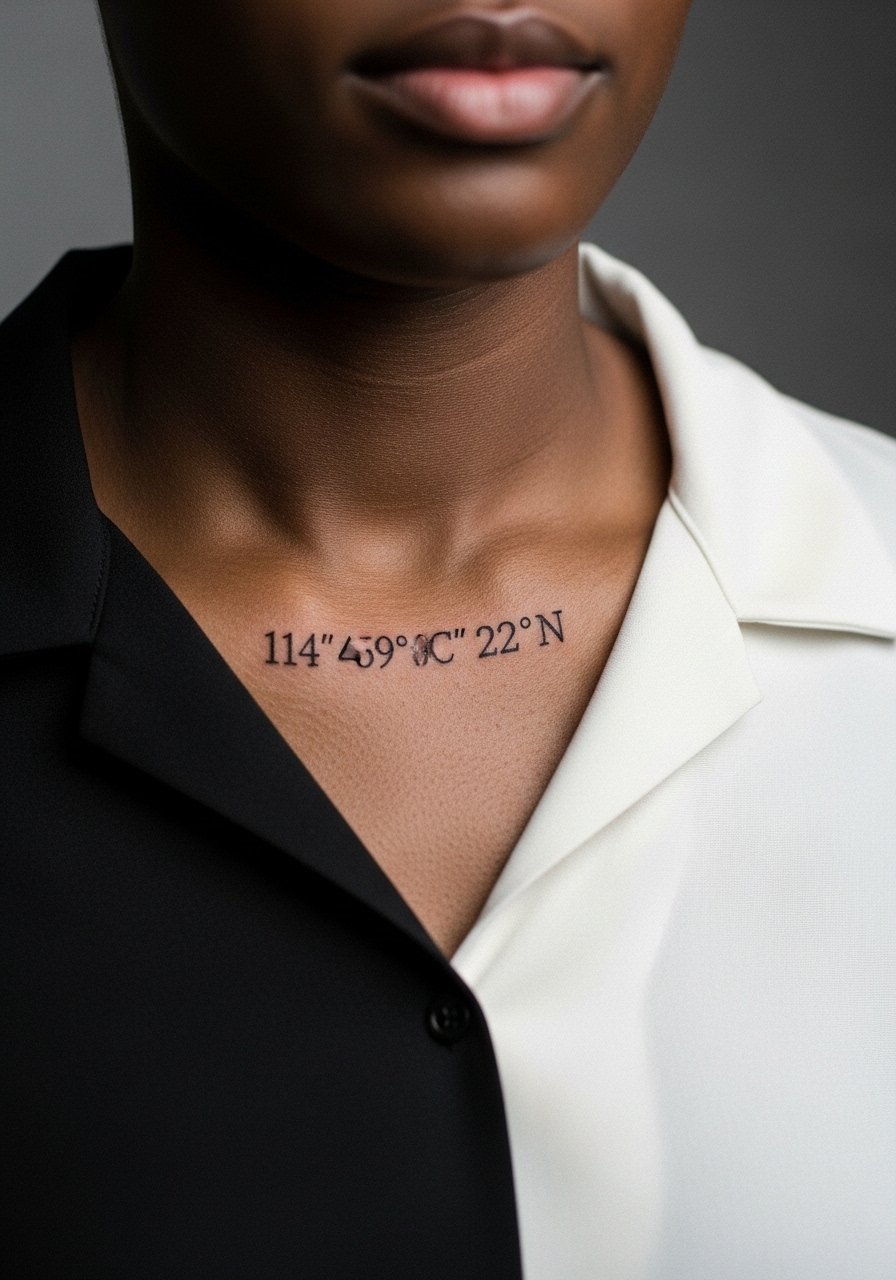
Coordinates feel personal and compact, but the letters need room to stay legible. Ask your artist to space numerals deliberately and choose a font with open counters rather than tight cursive. A frequent error is choosing script that blurs into a line. Expect short session time and a possible touch-up at year two for clarity. A thin pendant keeps attention above the numerals without crowding the skin.
17. Tiny moon phases arcing over one collarbone
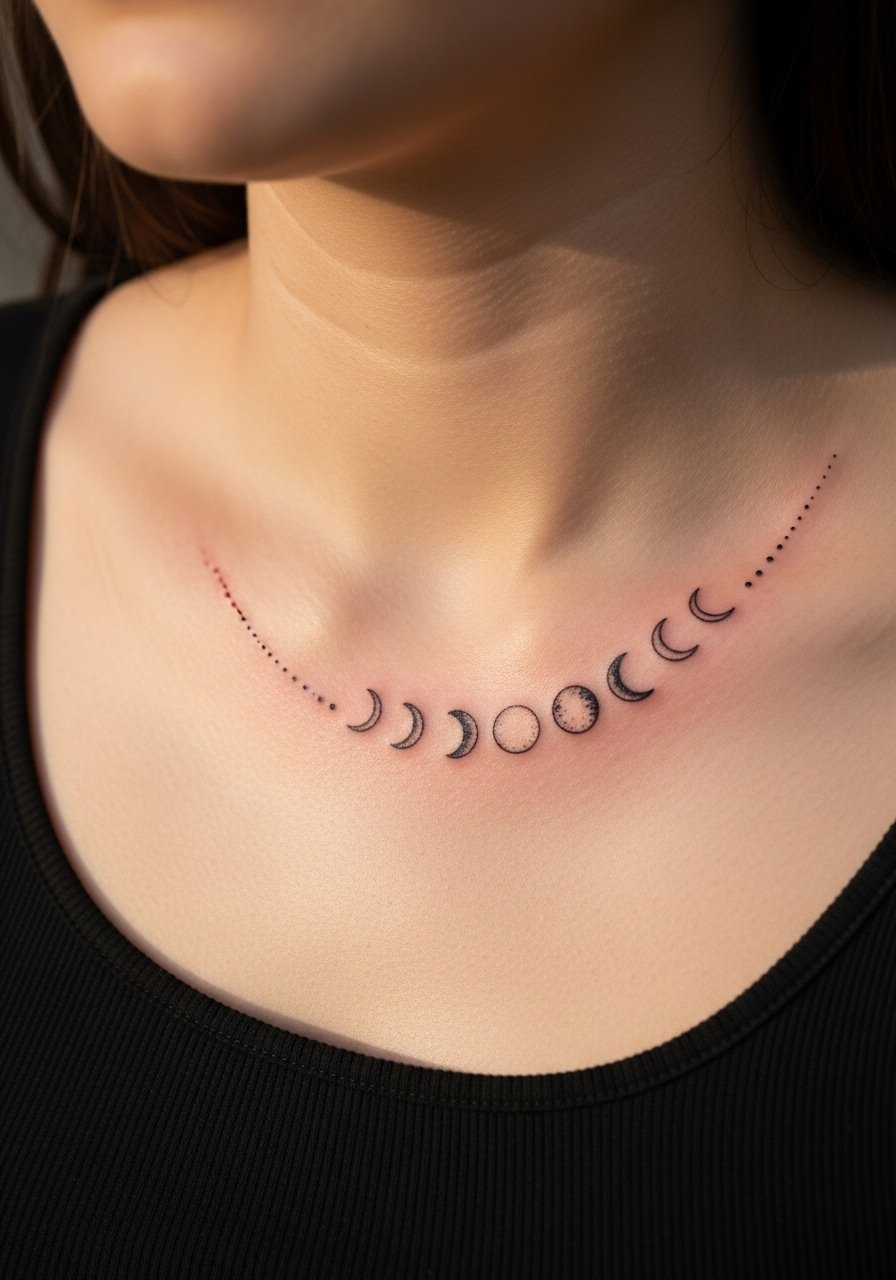
Moon phases are great for spacing and narrative without big ink. Tell your artist you want even spacing and consistent dot sizes so each phase remains distinct. The mistake to avoid is compressing too many phases into a tiny span. Sessions are brief and typically under 45 minutes. For a cohesive look, pair with a halter top crop that leaves the arc exposed.
18. Small botanical sprig tucked above the collarbone
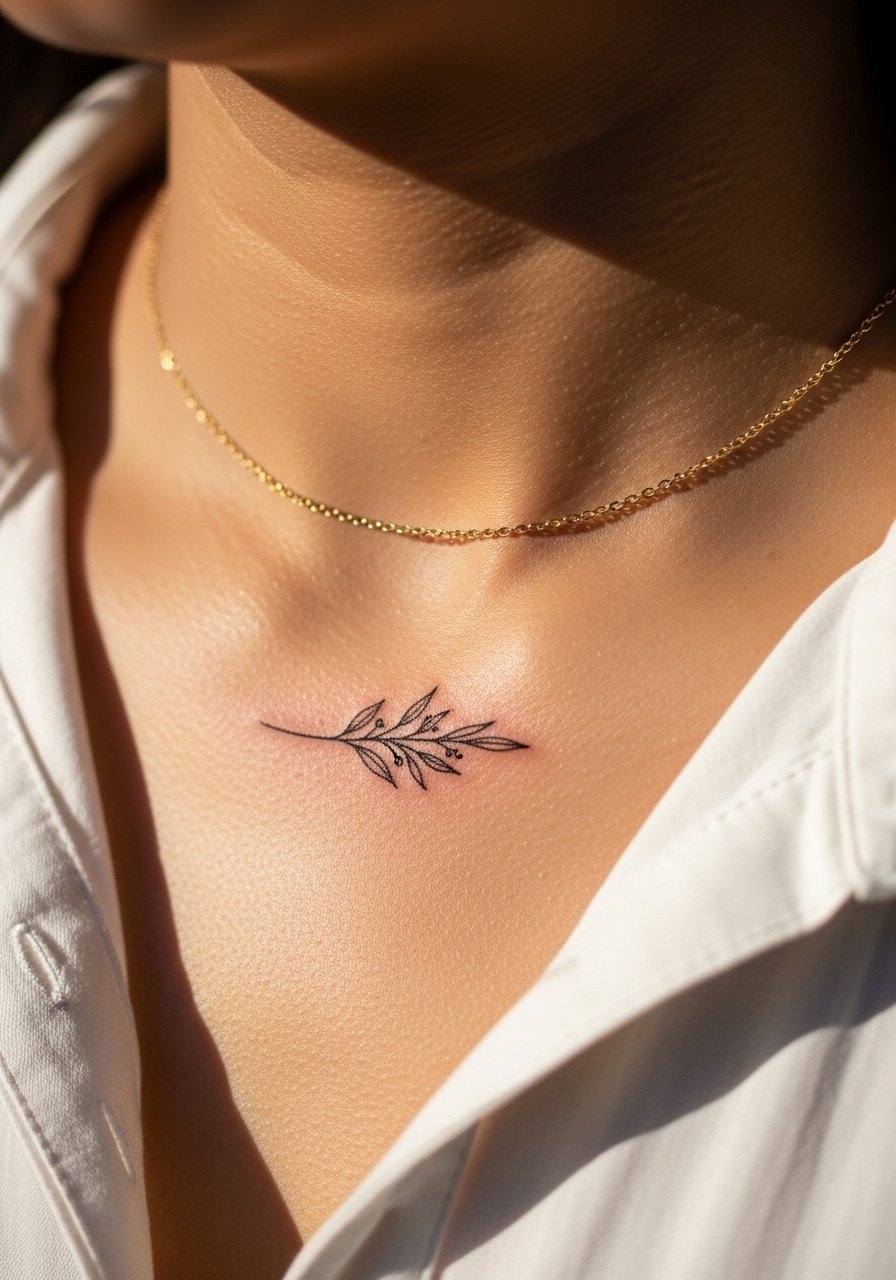
Botanical sprigs are forgiving because they can be lengthened or shortened to follow the bone. During consults I advise asking for slightly stronger main stems so the piece reads in photos. The common mistake is over-detailing leaves which blur into texture. Expect a single quick session and a touch-up if you sunbathe the area often. For jewelry pairing, a thin gold chain necklace sits just above without covering the sprig.
19. Single-dot anchor on the clavicle edge
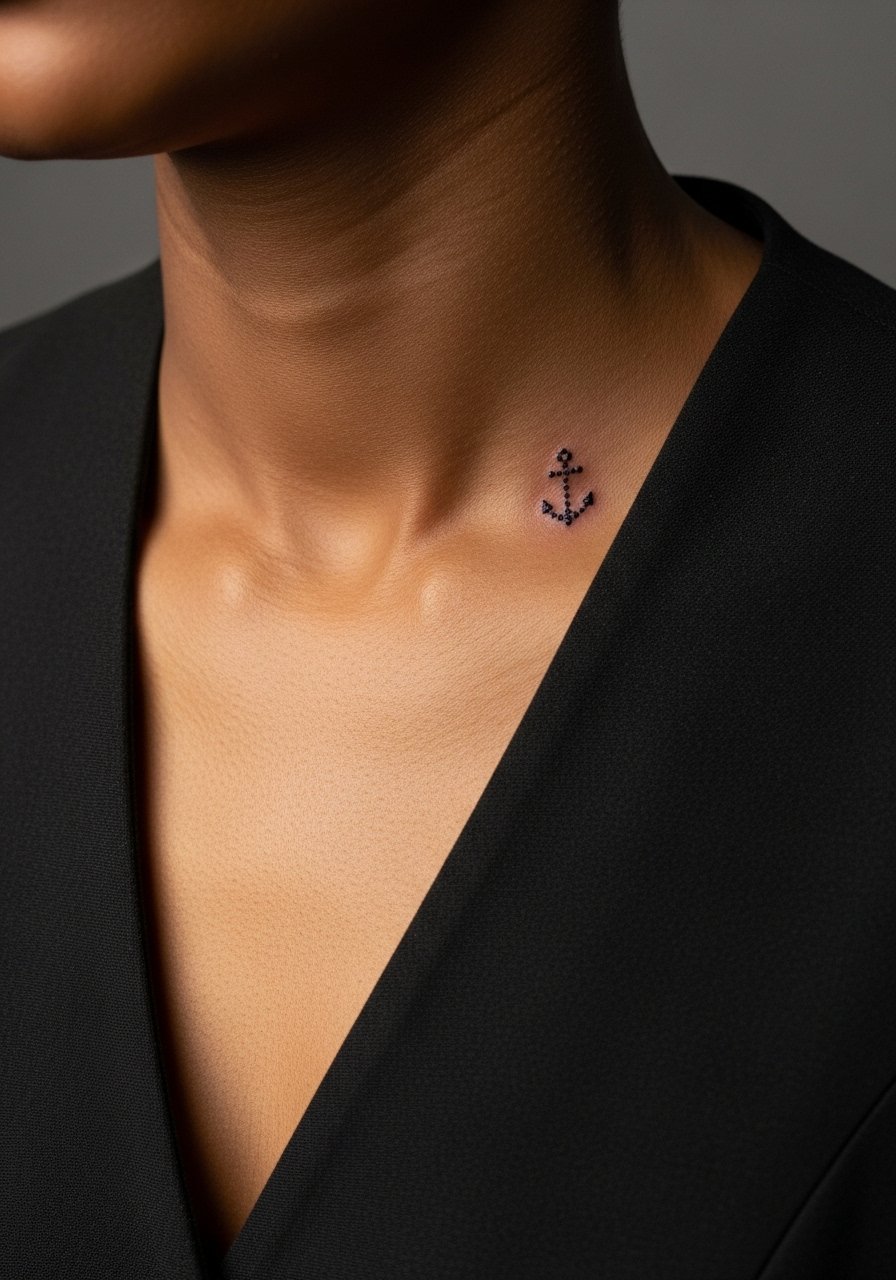
Micro-anchor symbols read graphic and discreet. Be clear that you want one solid dot and a clean outline so the anchor keeps shape as the skin ages. A misstep is pairing the dot with tiny cross-hatching that fills in. The session is very short and pain is low. For casual shows, a front open vest frames the spot without bulk.
20. Minimalist compass point at the clavicle dip
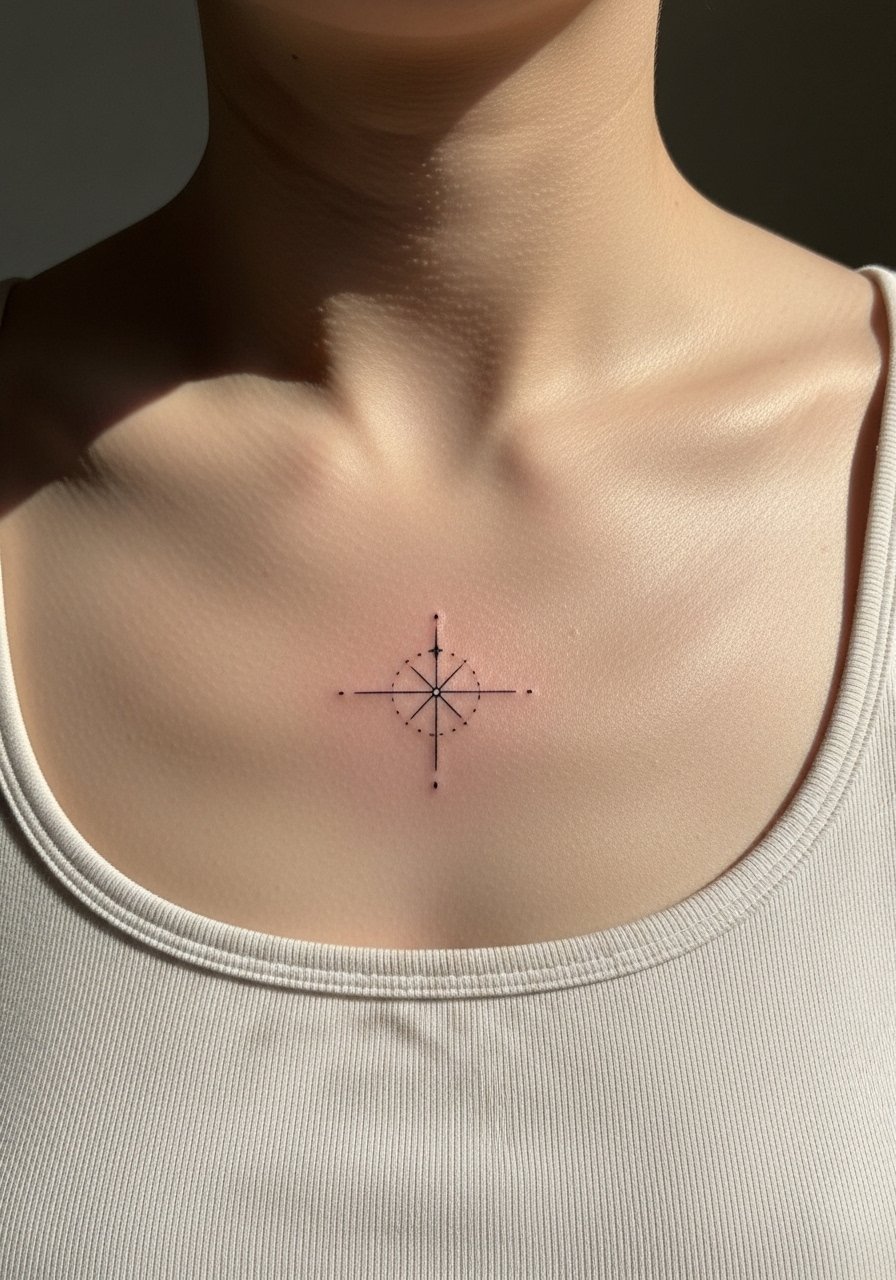
Compass points are great small anchors for travel-minded clients. Ask for clean negative space between the north point and secondary marks so nothing smudges together later. The usual error is overloading with tiny markings which become indistinct. This quick piece takes under 30 minutes. For styling, a scoop neck cami shows the tiny symbol without distraction.
21. Wave-line necklace that doubles as a collarbone tattoo
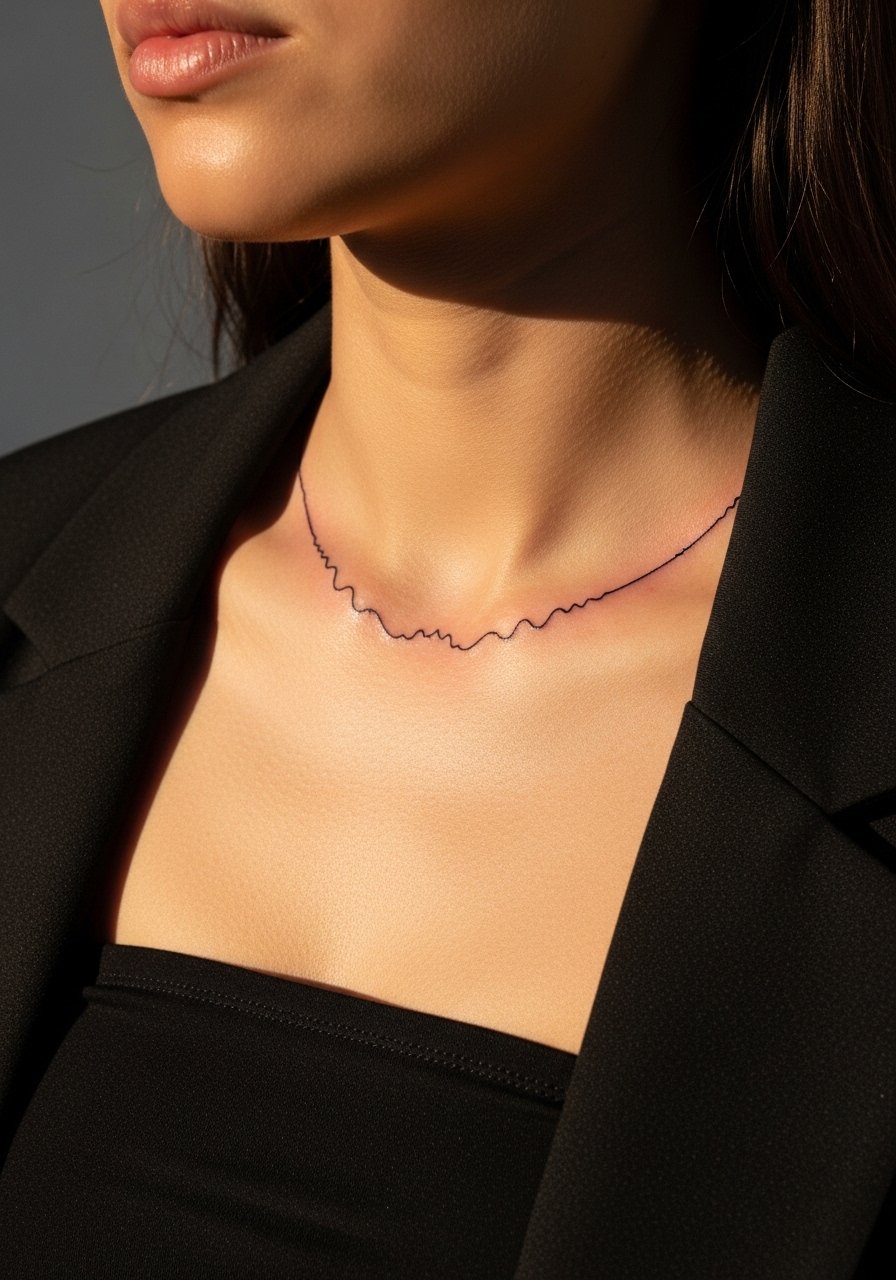
Designing a tattoo to act like jewelry is one of the collarbone's strengths. When you consult, have photos of how different tops sit on your collarbone so the artist can place the line where it will show most often. A common mistake is placing the line too low where shirts cut it off. Sessions are fast and the piece ages well if the line has consistent spacing. For a polished look, wear a bandeau top under tailored outerwear so the tattoo feels intentional like a necklace.
Frequently Asked Questions
Q: Do fine line collarbone tattoos fade faster than bolder work and what are the camps in that debate
A: Fine line pieces often soften sooner than saturated blackwork. One camp argues that fine line is worth the delicate look and that regular touch-ups keep it crisp. The other camp prefers bolder lines for longevity and less maintenance. What matters most is spacing, needle depth, and how much sun exposure the site gets. Ask your artist where they stand on line weight and touch-up timelines.
Q: Will a collarbone tattoo stretch or shift noticeably if I gain weight
A: Collarbone tattoos sit over bone and nearby soft tissue. Small weight changes usually alter surrounding skin but rarely warp a well-placed collarbone design. Larger shifts can change how the skin sits and blur edges. If you expect significant body changes, mention that in your consultation so the artist can advise on scale and placement.
Q: How painful is getting inked on the collarbone and what helps during the session
A: The collarbone is on the sharper side of most pain scales because the needle brushes close to bone. Short sessions, breaks, and topical numbing when approved by the artist help a lot. Bring loose, accessible clothing like a loose button-down shirt so you can shift easily without irritating the area.
Q: How soon might I need a touch-up for a delicate collarbone piece
A: Expect to check linework at around one year. Many fine line collarbone pieces need a light touch-up by year one to two to restore crispness. Heavy blackwork may go longer before requiring refresh. Your artist can recommend a realistic schedule based on their hand and your skin type.
Q: Are there special healing considerations for collarbone tattoos compared with forearm work
A: Collarbone areas experience more friction from straps and collars which can irritate fresh ink. Use protective clothing choices in the first week to limit rubbing and keep sun off the area while it heals. The product suggestions earlier are geared toward minimizing friction and contamination for these small visible placements.
