
Fine line trends and social media hype make a lot of Resident Evil designs look irresistible on screens. The surprising part is what holds up after the hype fades. Small, well-spaced blackwork and minimalist silhouettes often age cleaner than tiny micro-realism that sits in high-movement zones. Below are 21 subtle Resident Evil tattoo ideas with placement, aging notes, and real wardrobe tips so you can pick something that still looks sharp years from now.
1. Umbrella Wheel on the Inner Forearm
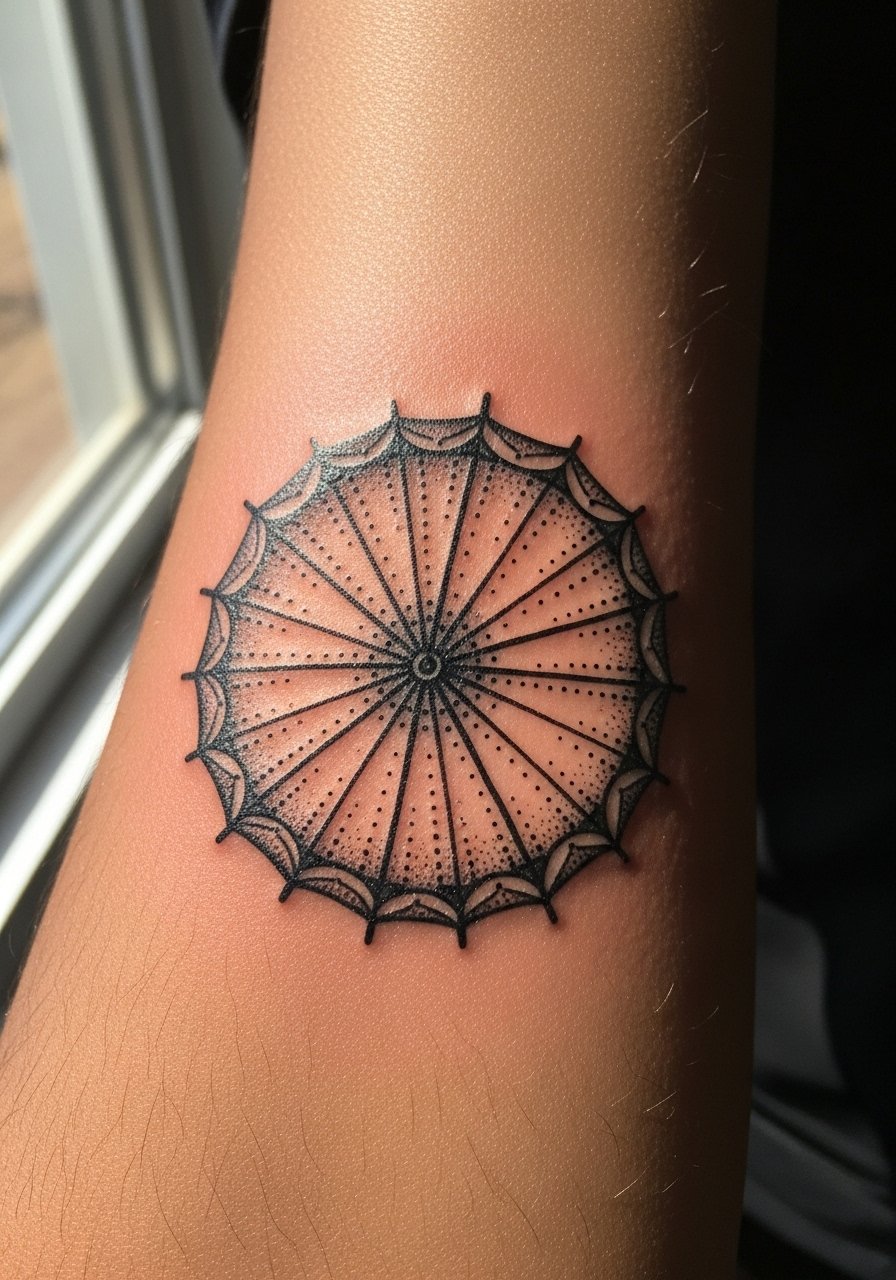
Personal observation lead: I see this logo on forearms a lot because it reads clearly and can stay small without losing detail. Tell your artist you want heavier linework around the wheel and thinner spokes inside, so the outer lines take the wearing. Common mistake is making the spokes too thin for forearm movement, which causes softening at year two. Pain is low to moderate and a single session usually does it. For showing it off, roll sleeves up and pair with a rolled sleeve black t-shirt or a leather jacket on cooler days.
2. Herbivore Virus Vial on the Inner Wrist
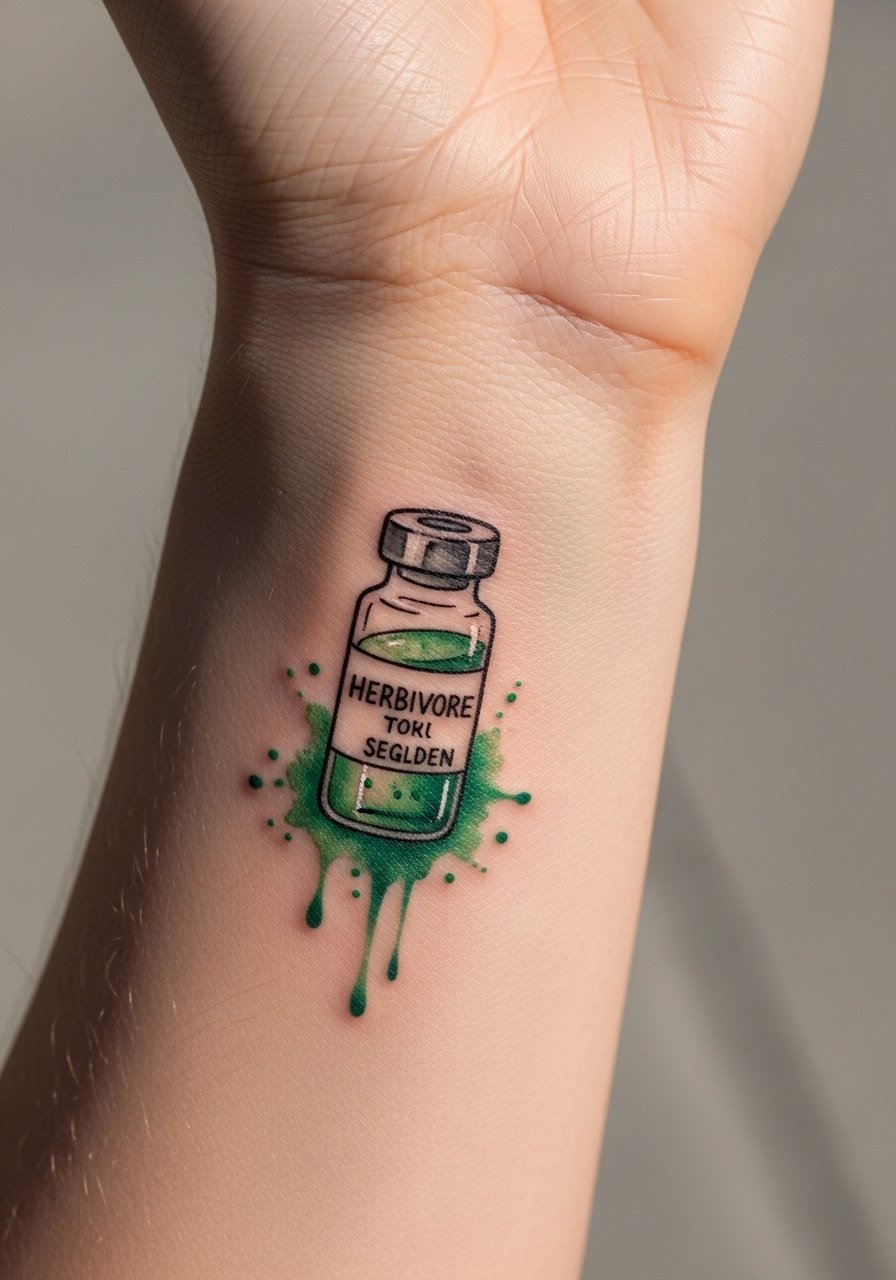
Pain warning lead: the wrist stings more than the forearm but the vial shape gives a discreet canvas. Ask for slightly thicker contour lines and a light color wash for the green glow so the linework anchors the watercolor. Fine line versions here often need touch-ups by year one if they sit too shallow. Expect one short session and a touch-up option. Wear a thin leather cuff opposite the tattoo when you want the wrist to read intentionally styled.
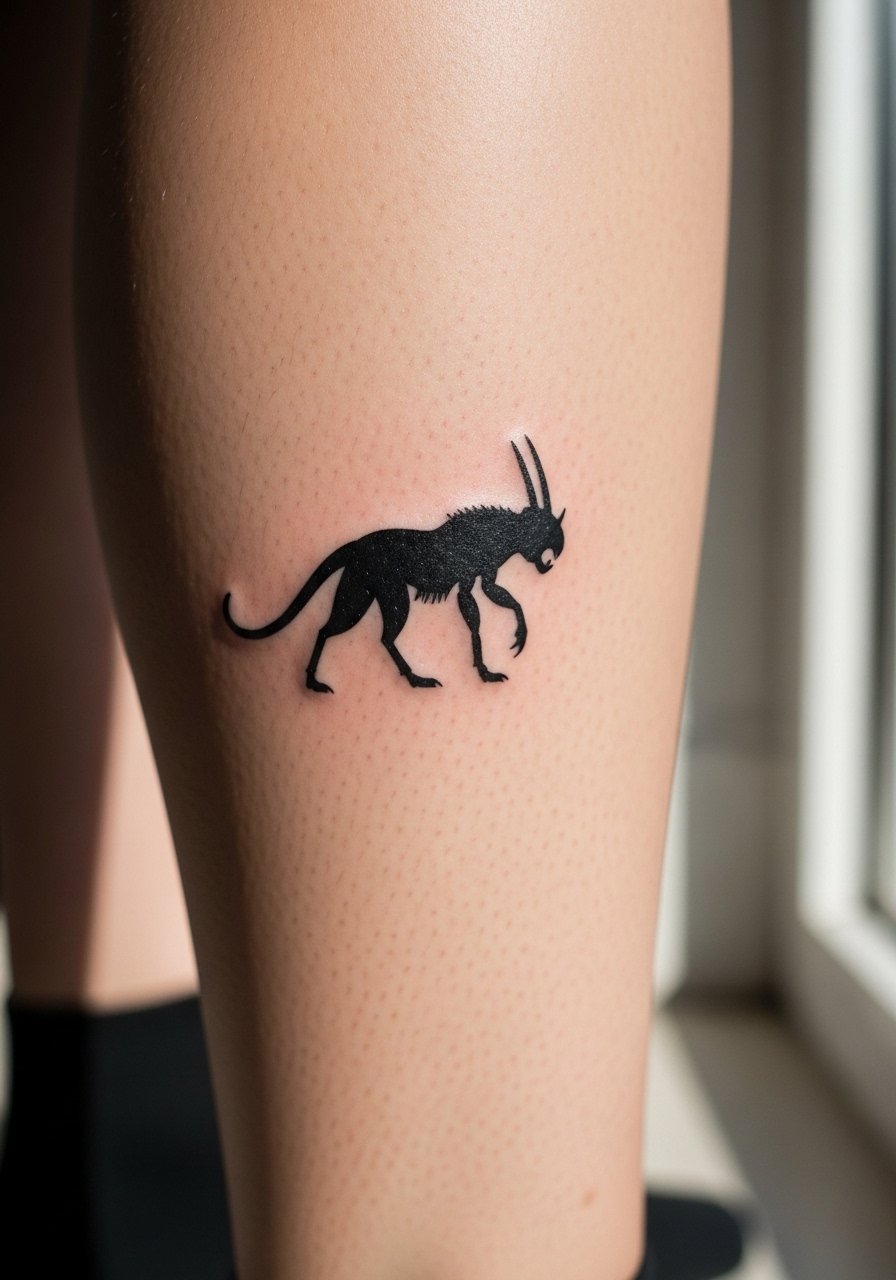
3. Tiny Tyrant Silhouette on the Calf
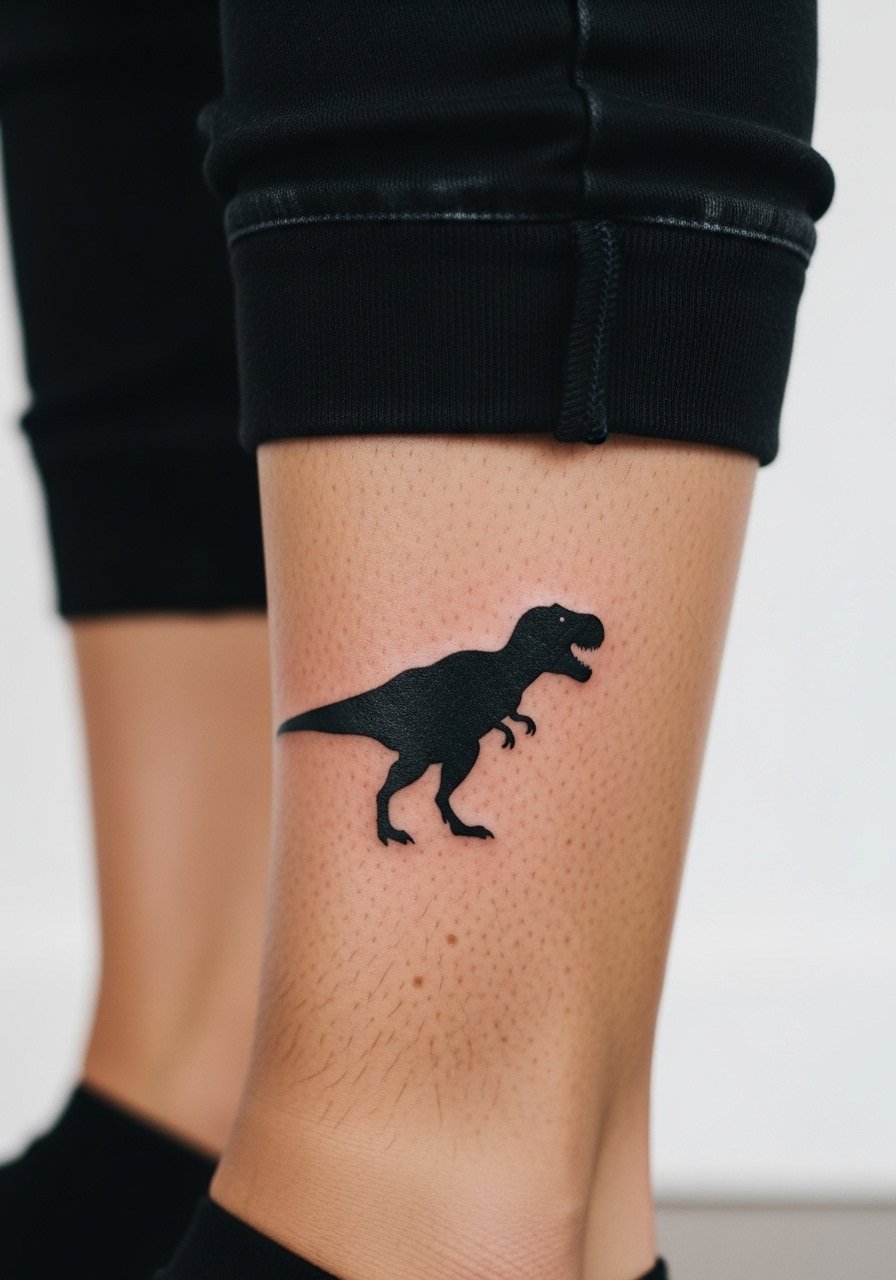
Visual impact lead: a small, single-color silhouette on the calf reads from distance and rarely needs color saturation. Tell your artist to keep the silhouette solid with no tiny interior details, which can look like noise as the skin moves. The calf is forgiving, so blowout risk is low and touch-ups are uncommon. For sessions, wear loose sweatpants pulled up so the leg can rest without rubbing. For showing it off, slim joggers rolled up or shorts with combat boots frame the placement well.
4. Licker Ribs with Muscle-Following Layout
Aging and healing lead: ribs are painful and the skin moves a lot, but the payoff is dramatic when the design follows the muscle curve. Artists split on whether fine detail on ribs settles cleanly. One camp says the constant breathing and stretching blurs tiny textures within two years. The other camp says proper depth and spacing keeps stipple shading intact. My advice is to choose bold black fills and stipple shading rather than micro-detail on the ribs. Session time is long, expect at least two sittings. Sensitive clothing during the session includes a lifted cropped top or sports bra.
5. Mr. X Stomping Shoulder Patch
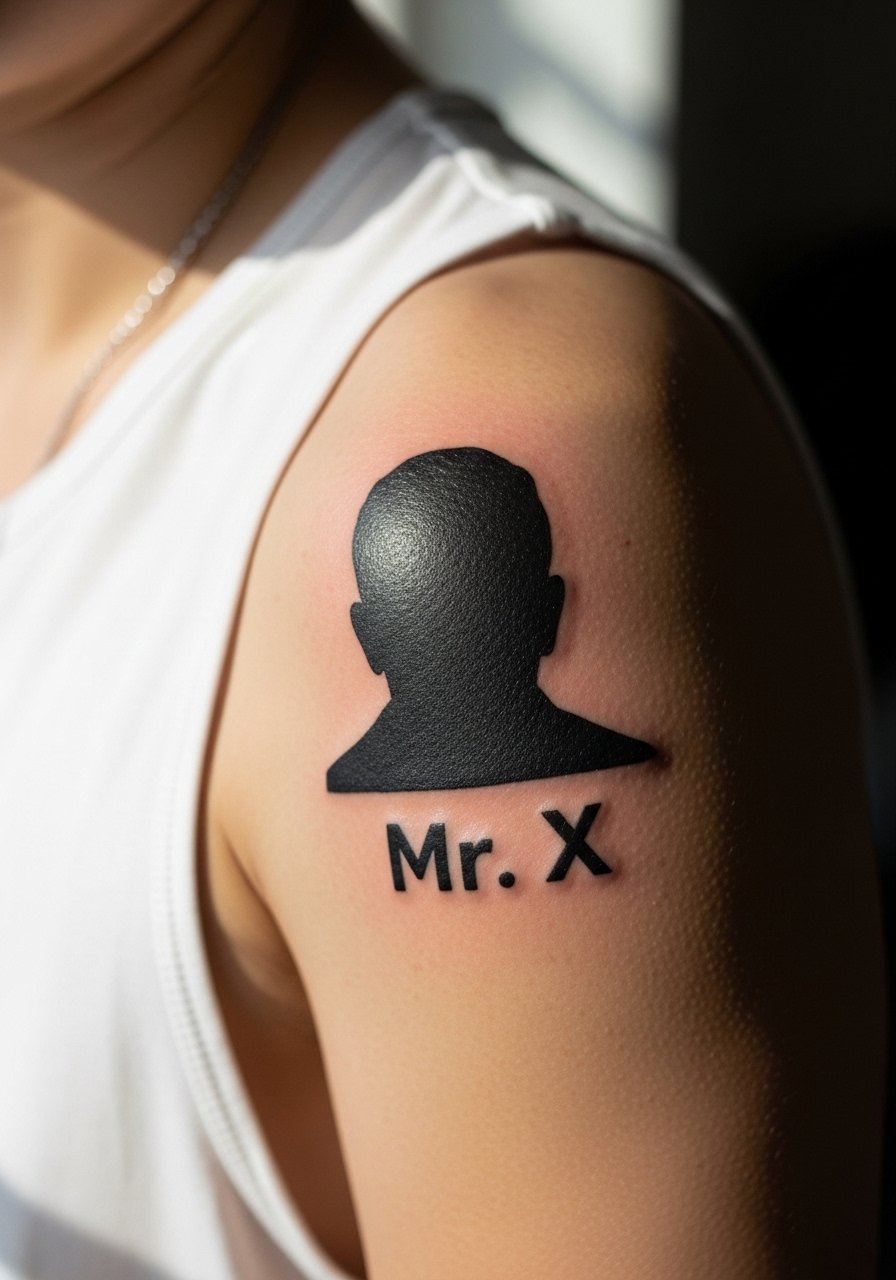
Mistake lead: people often ask for a tiny Mr. X and lose the imposing posture that makes it readable. Ask your artist for a six-inch patch with heavy black fills and clear negative space for the coat lines. The shoulder is forgiving for saturation so color or blackwork will last. Session feels moderate and a single long block usually covers it. For showing it off, an off shoulder tank top or sleeveless button-down frames the piece.
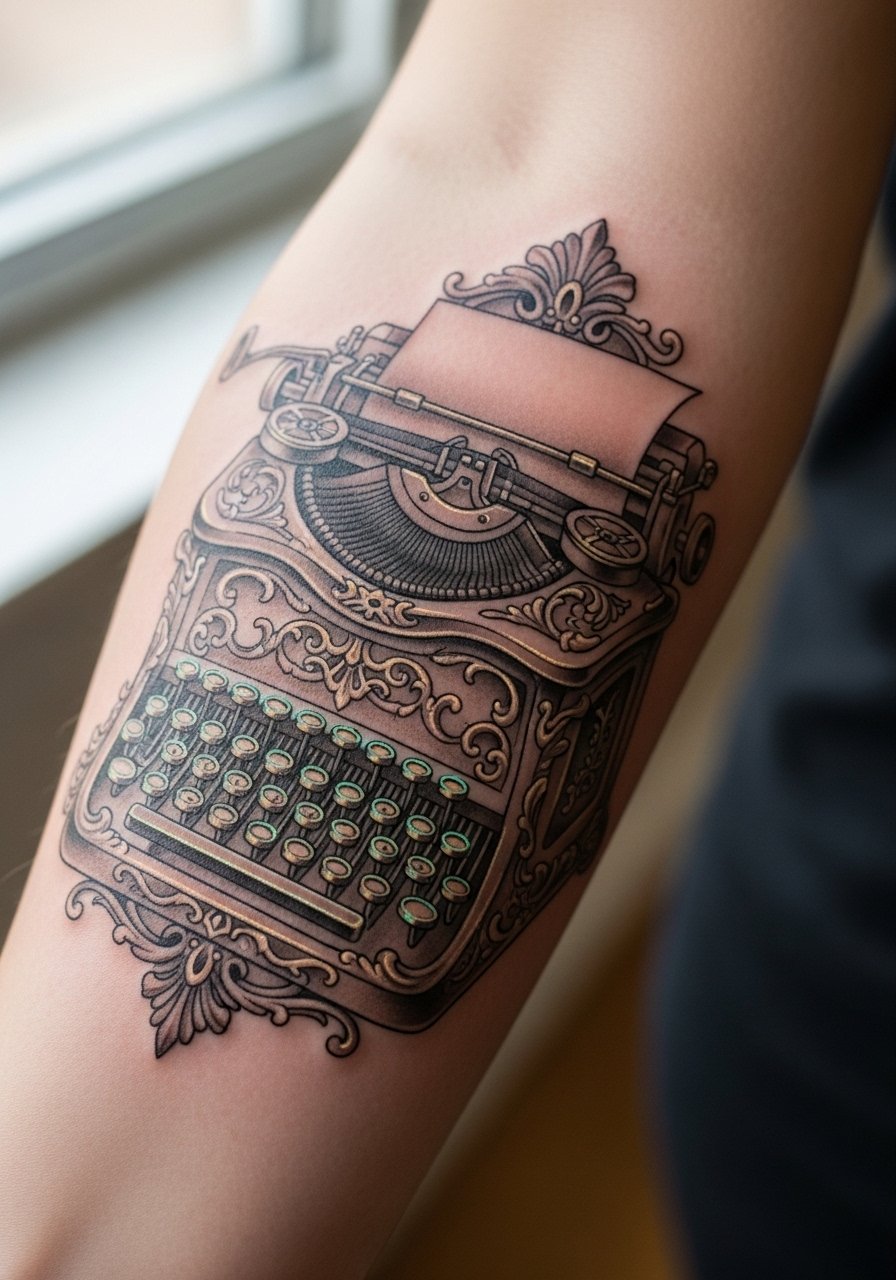
6. Mansion Typewriter Save Point on the Outer Forearm
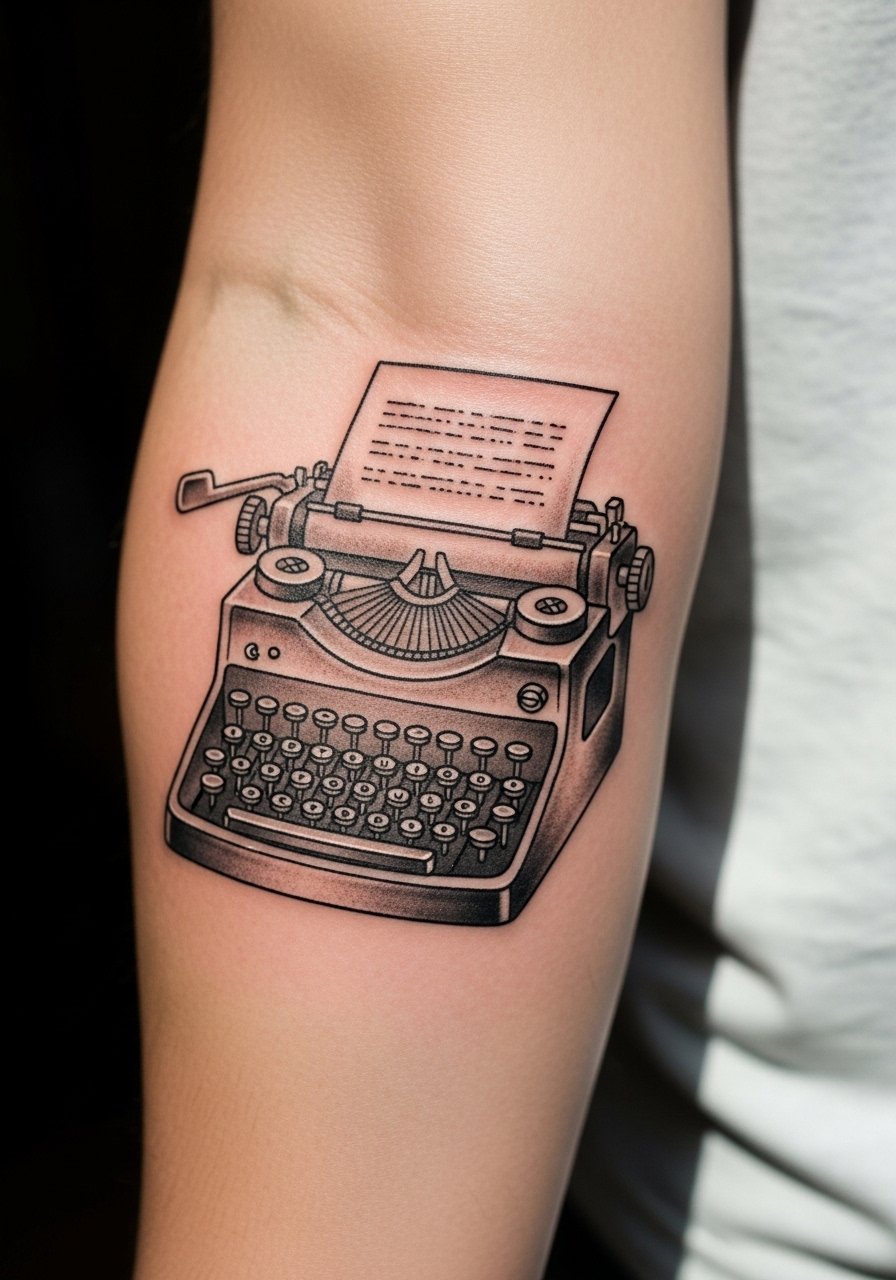
Consultation lead: when you sit down for this, bring references that show the key elements of the typewriter and the font you want for "SAVE". A common version that ages poorly uses micro-shading inside tiny keys. Instead, request simplified key outlines with medium spacing so the type remains legible at five years. Forearm movement is moderate so touch-ups might be needed around year three. Wear a loose short-sleeve athletic shirt for the session so the artist has unimpeded access.
Studio Day Picks
The shoulder, ribs, and forearm pieces above ask for different session prep, so a few targeted items make the chair easier and the first week less annoying.
- Tea tree healing balm. Lightweight balm some people switch to after ointment irritation, useful for textured realism pieces that need moisture without greasiness.
- Japanese rice bran salve. Good for dry winter healing on bold blackwork logos, it helps avoid excessive scabbing on larger black fills.
- Manuka honey adhesive patches. Useful on curved calves and ribs where adhesion matters more than flat areas.
- H2Ocean piercing aftercare spray. Thinner than heavy ointments, handy for portrait or realism work where excess grease can dull saturation.
- Aquaphor healing ointment. A thin layer in the first 48 hours can help fine line pieces avoid scab over-drying while the stencil settles.
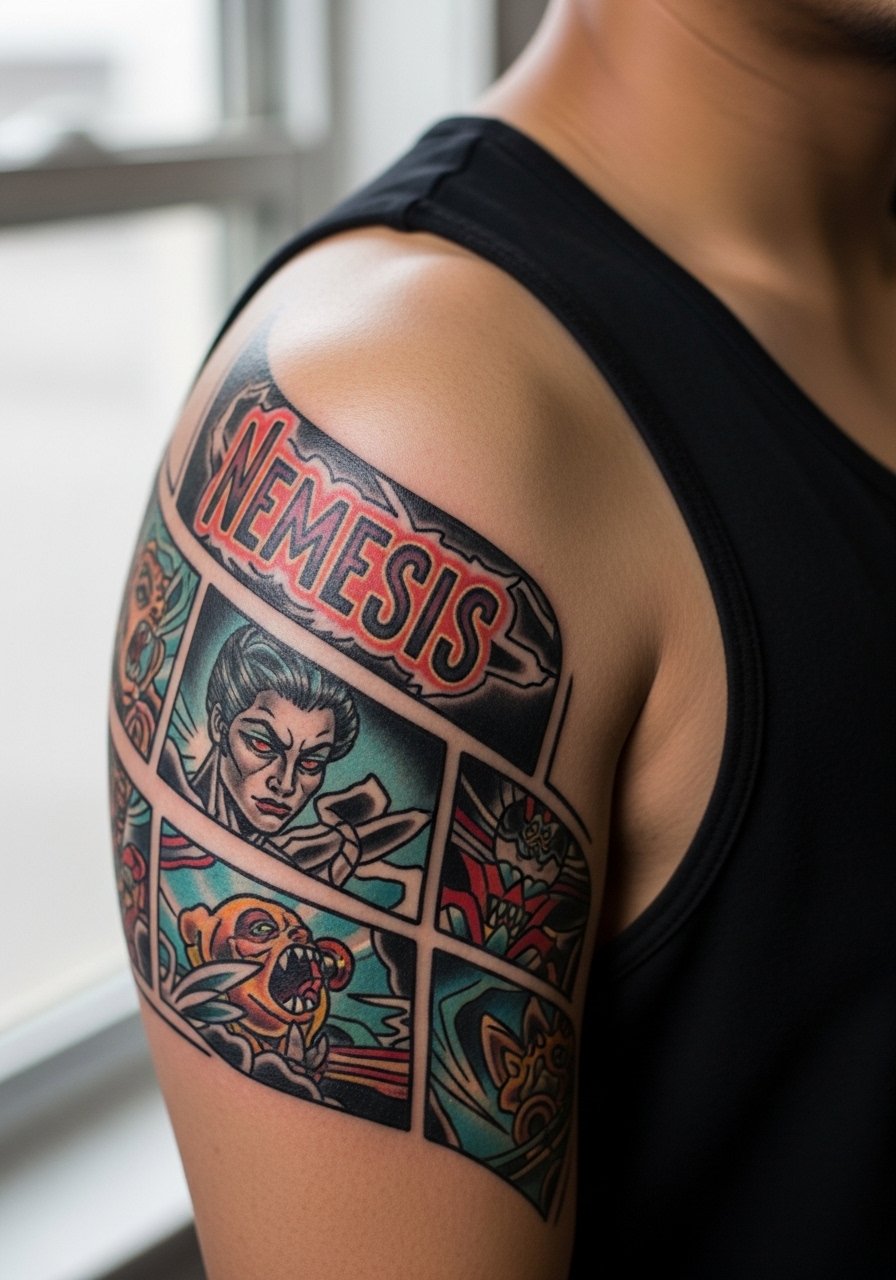
7. Neo-Traditional Nemesis on the Upper Back
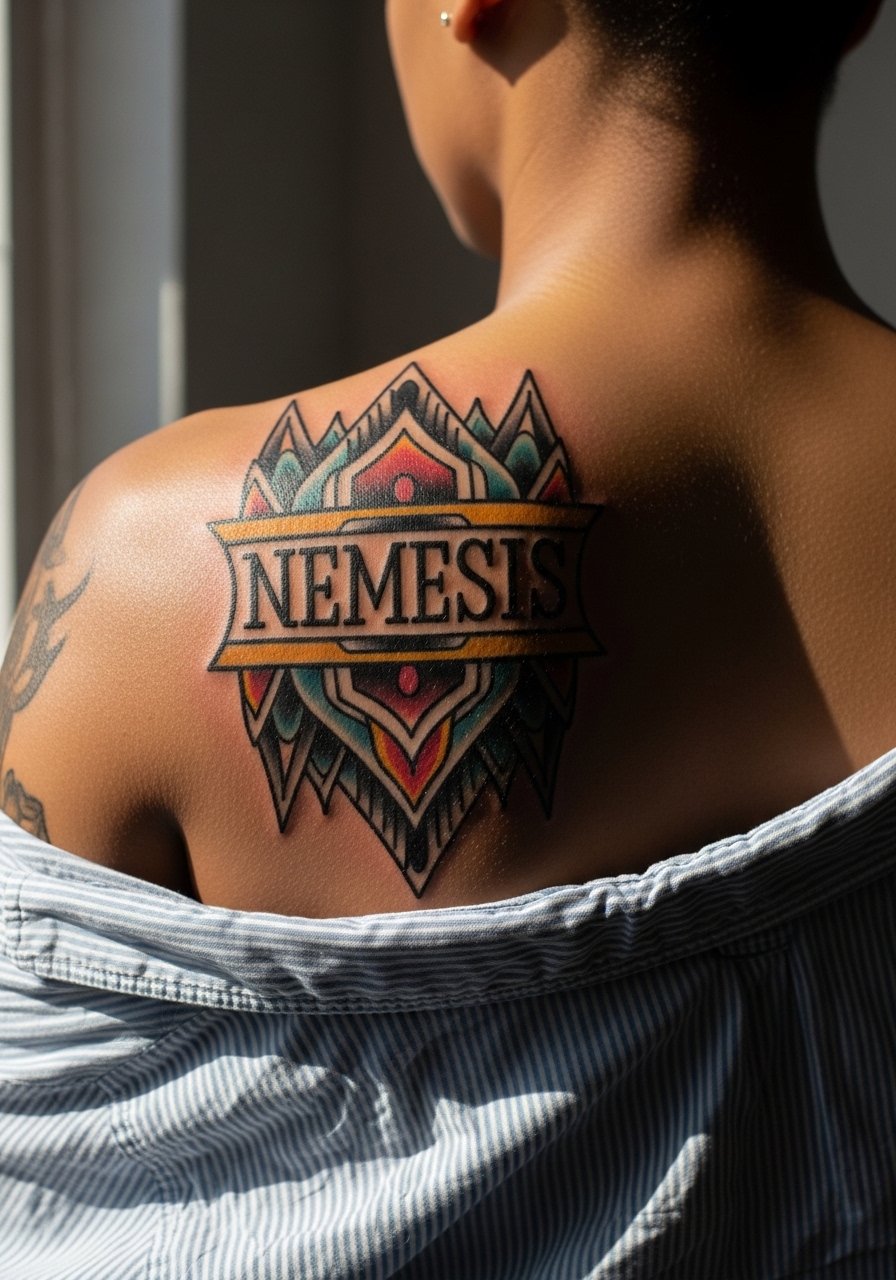
Personal observation lead: back pieces let artists breathe with scale and color, which suits Nemesis well. Ask for bold outlines, simplified shadow shapes, and skin-tone-friendly saturation so the coat and face retain contrast as it heals. Mistakes involve over-detailing the face at small sizes, which softens into mud after a couple of years. Sessions usually split into multiple days. For the appointment, wear a loose button-down you can pull aside for access.
8. Claire Redfield on the Outer Thigh
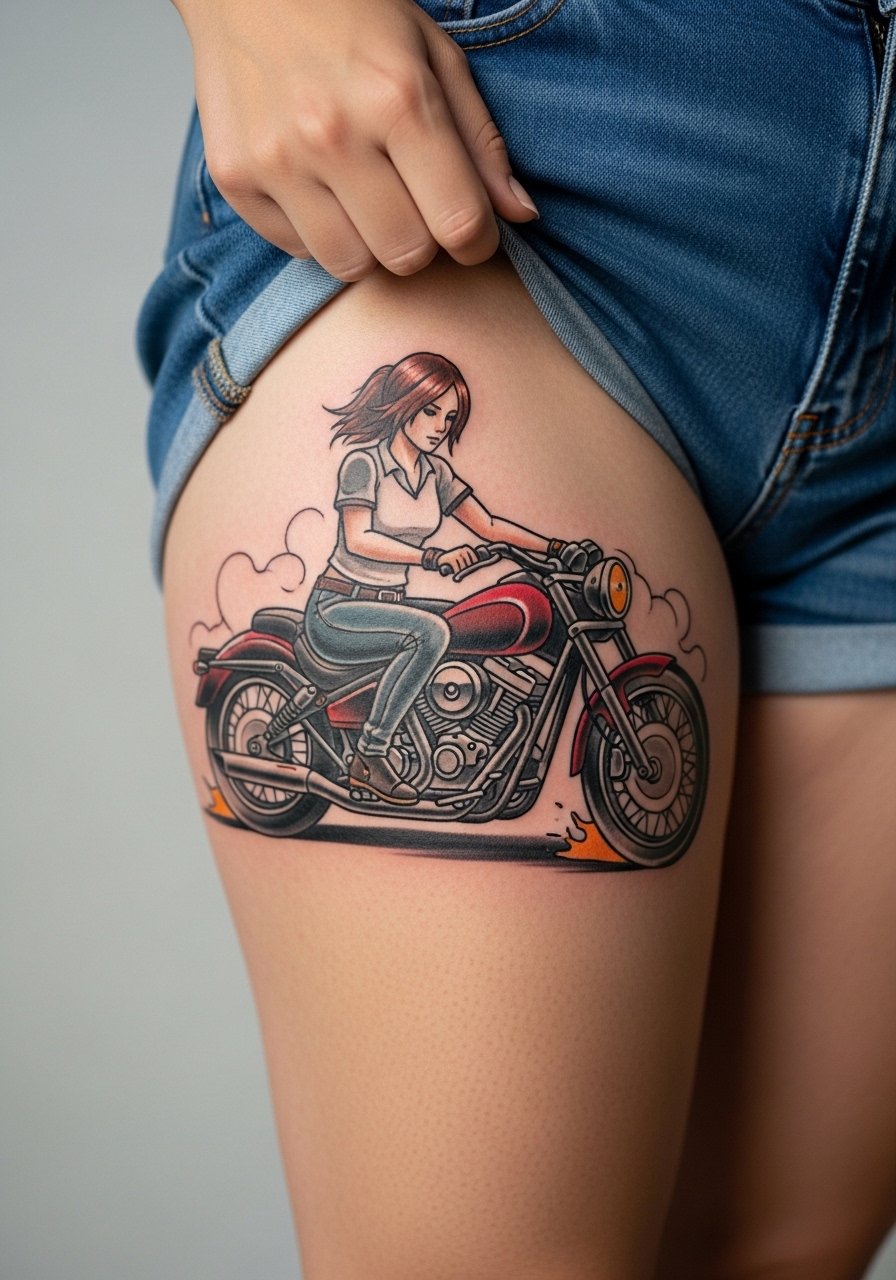
Mistake lead: the thigh is forgiving, but sitting on tight seams after the session can irritate healing ink. When you describe the concept, tell the artist how much negative space you want around the figure so the motorcycle and character read separately as it ages. Full-color neo-traditional here needs two to three sessions for clean saturation. For the session, pull on loose athletic shorts so the area can rest without tight seams.
9. Leon S. Kennedy Micro Portrait on the Inner Bicep

Consultation lead: micro-realism on the inner bicep calls for exact reference photos and a designated touch-up in the quote. The inner bicep moves and stretches, so shallow fine lines often blur. Ask for deeper contrast and stipple shading rather than only hair-fine contours. Expect moderate pain and one to two sessions. For showing it off, a fitted tank top in neutral gray complements delicate linework, try a fitted tank top men style during flexed photos.
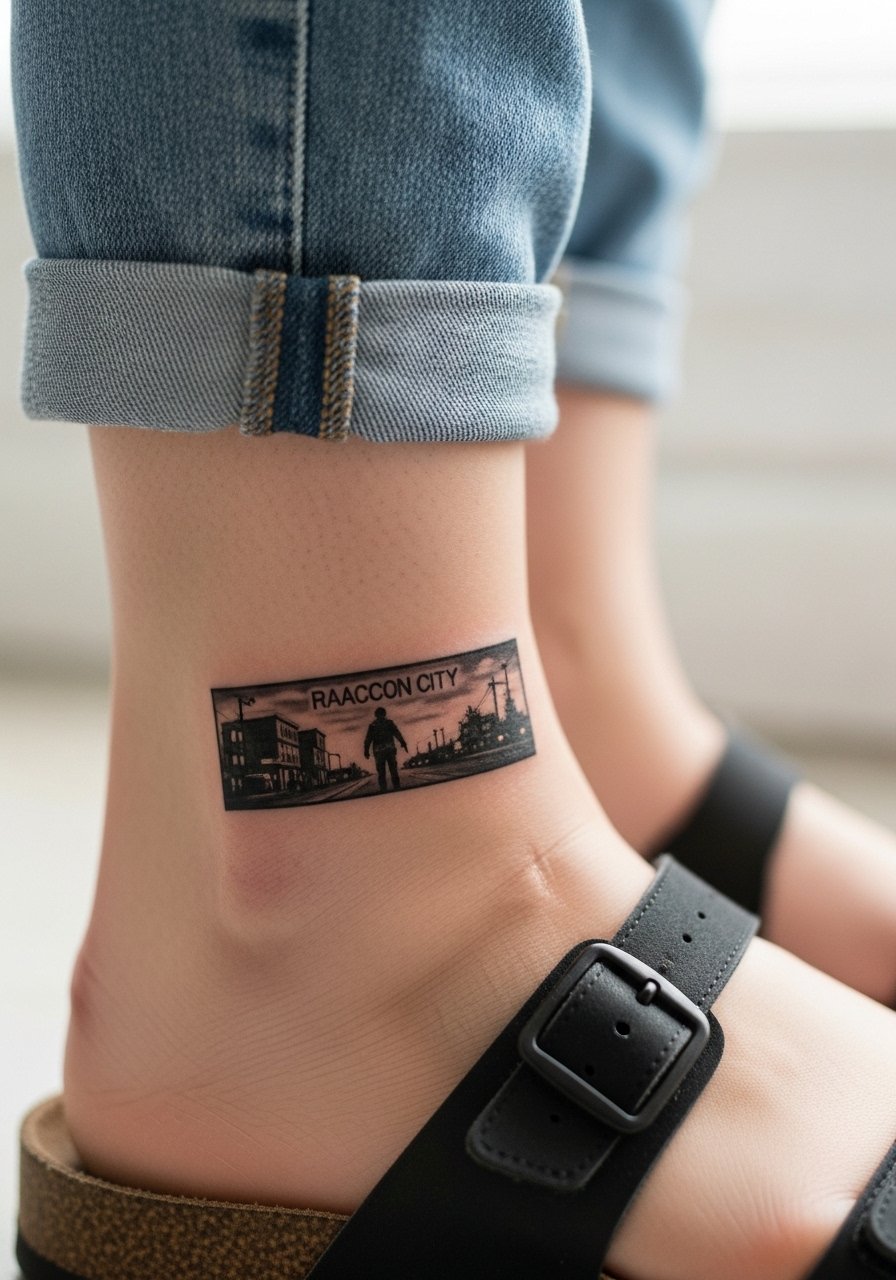
10. Raccoon City Street Sign on the Wrist
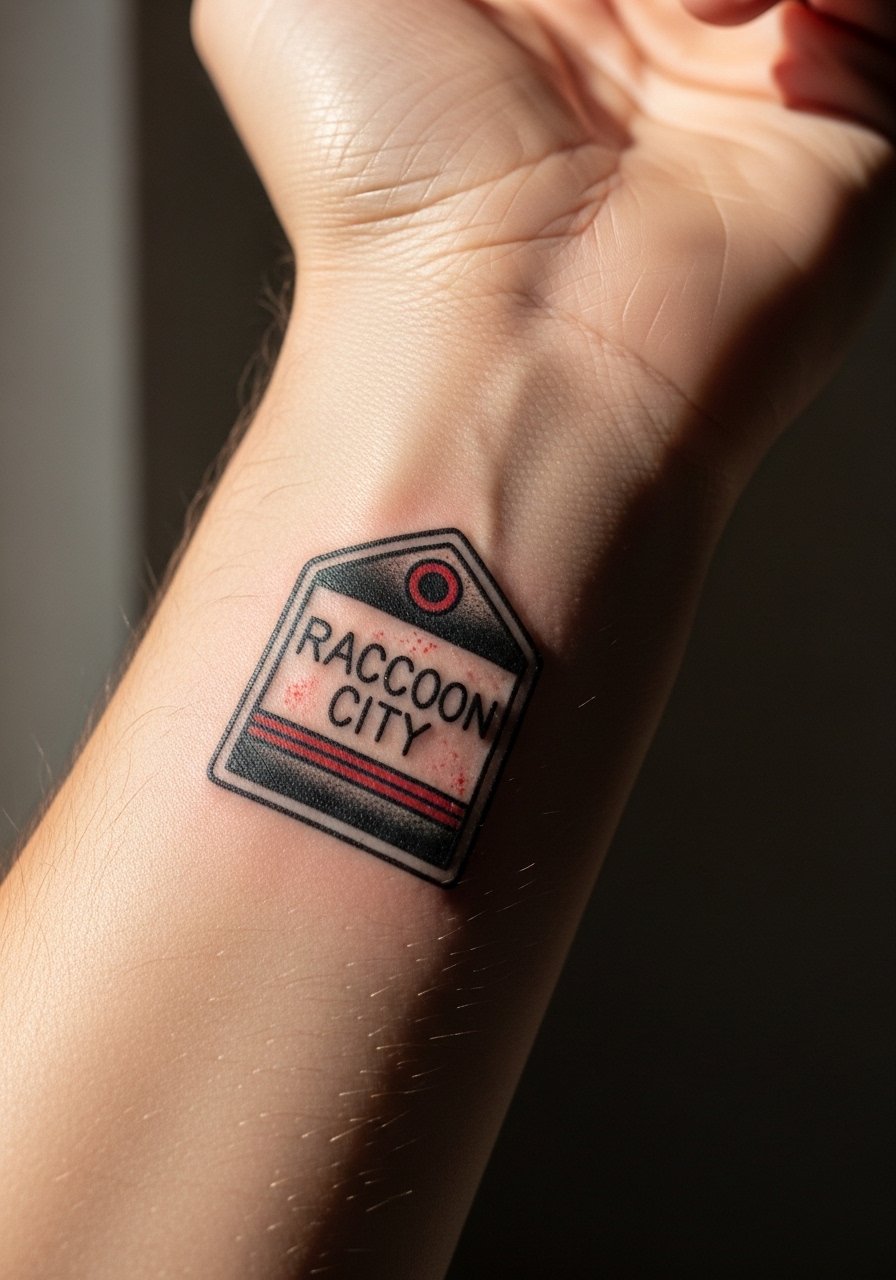
Mistake lead: tiny script or logos on the wrist that use narrow type often blur within two years from washing and sun exposure. Request bolder letterforms, slightly larger kerning, and a thin black outline to protect the red fill. Wrist tattoos need a strategic touch-up policy in the quote. Pain is moderate. Style the piece with a minimalist watch or stacked thin bracelets for evening looks.
11. Licker Tongue Wrapping the Thigh
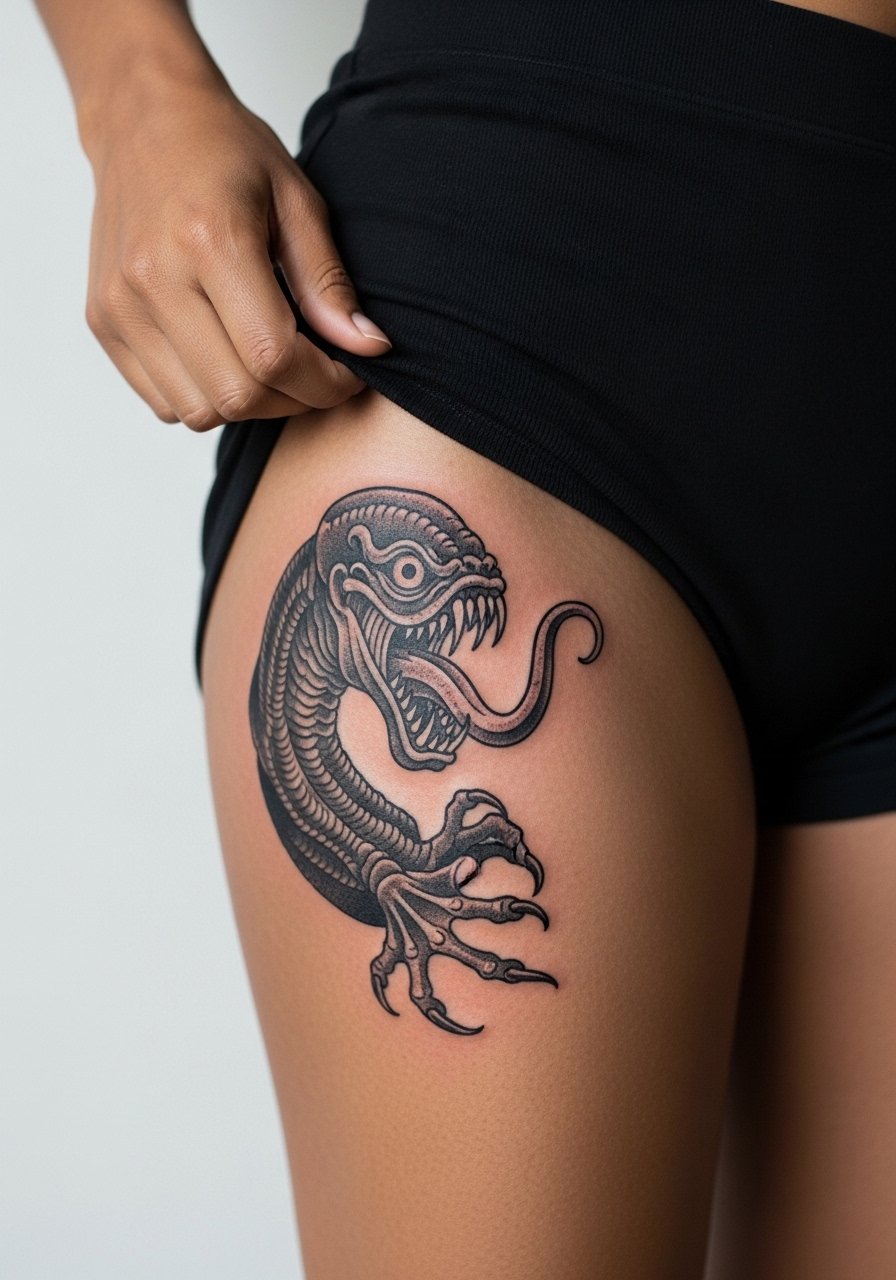
Visual impact lead: the thigh offers the space for a Licker to curve and look dynamic without shrinking the details into noise. Tell the artist you want clear contrast between tongue and background so the textured lines do not merge after sitting. Mistakes include putting too much fine stipple in shaded areas, which flattens with movement. Sessions are usually two sittings. For session wear, high-waisted shorts that you can shift are ideal.
12. Typewriter with UV "Save" Accent on a Forearm Sleeve Start
Consultation lead: if you want UV ink for a save point detail, discuss visibility and artist experience with UV work. UV holds differently than pigment under sunlight, so plan the UV as an accent not the main line. Forearm placement means the blackwork anchors the piece and the UV accents age mainly by visual contrast loss, not blowout. The session feels like a standard forearm block. For showing it off during day-to-day, rolled sleeves and neutral tees work best.
13. Nemesis Chase Scene as a Shoulder-to-Upper-Arm Panel
Mistake lead: sleeves start and stop points are often poorly planned, making future sleeve build-out awkward. For a chase scene, ask the artist to leave consistent negative space along the outer arm if you plan to expand. The shoulder handles saturation well, and outlines should be slightly thicker for longevity. Expect a multi-session block. Wear a sleeveless muscle tank to the appointment for clean access.
14. Zombie Face Peering from the Thigh Crease
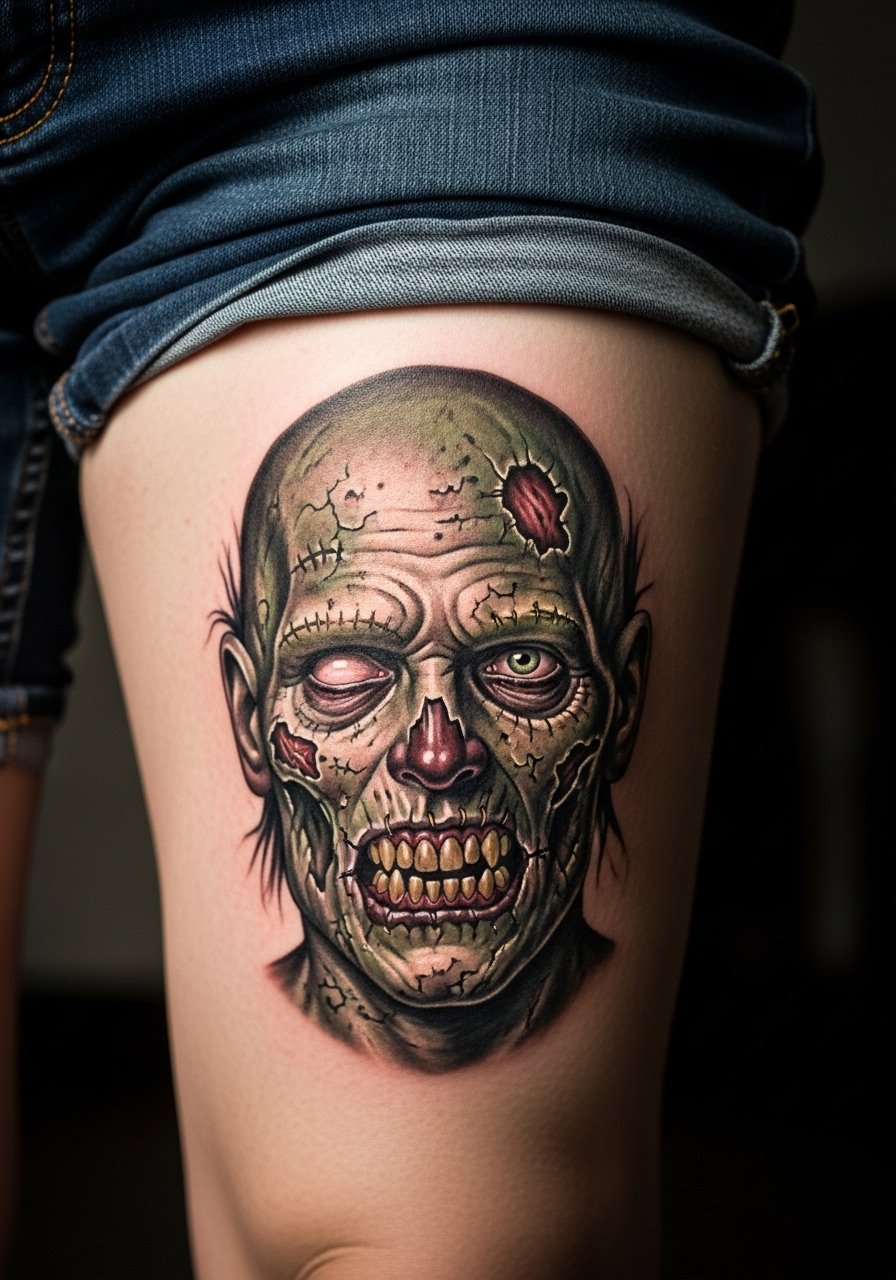
Mistake lead: realism relies on fine transitions and color saturation, both of which can be affected by friction from clothing on the thigh. Ask your artist to place the face where clothing sits looser and to plan for two color sessions. The thigh is forgiving for pain. For avoiding early abrasion, choose high-waisted bottoms in daily wear and avoid tight seams for the first month.
15. Minimalist Umbrella Outline Behind the Ear

Consultation lead: behind-the-ear placements are discreet but require precise scale because the area is small. The biggest mistake is cramming logos too small. For longevity, ask for slightly thicker linework than typical face micro-line. Note that visibility is hair-dependent. The session is quick and the pain is lower than ribs. This placement needs a careful artist who photographs portfolios for behind-the-ear work.
16. Mr. X Neck Silhouette on the Side Neck
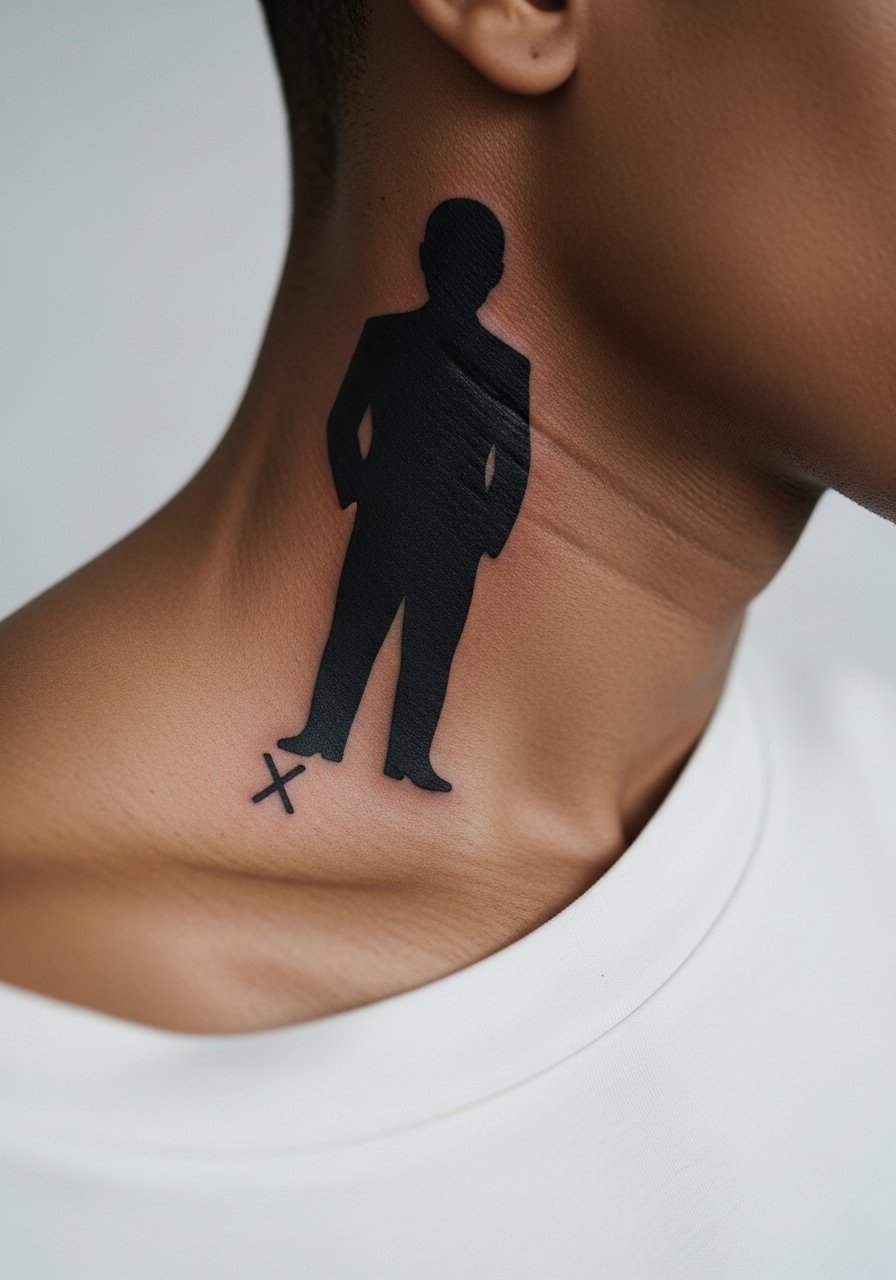
Aging lead: neck skin can shift and sun exposure eats contrast, so a silhouette with strong black fill ages best here. Artists disagree about neck placement because of workplace visibility. One camp argues neck pieces hurt future opportunities. The other camp says a small, covered silhouette is unobtrusive if you can hide it under collars. Be blunt in consultation about your career needs. Expect a short session.
17. Mansion Interior Typewriter as a Narrow Forearm Scene

Mistake lead: packing too many tiny props into a narrow forearm scene makes the piece unreadable by year three. Choose the typewriter as the focal point and rely on negative space for the rest. Forearm movement makes micro shading soften, so ask for clear contrast and mid-tone washes. One session may cover a compact scene. For session wear, bring a loose short-sleeve top to keep the arm free.
18. Tiny Herb Vial on the Ankle
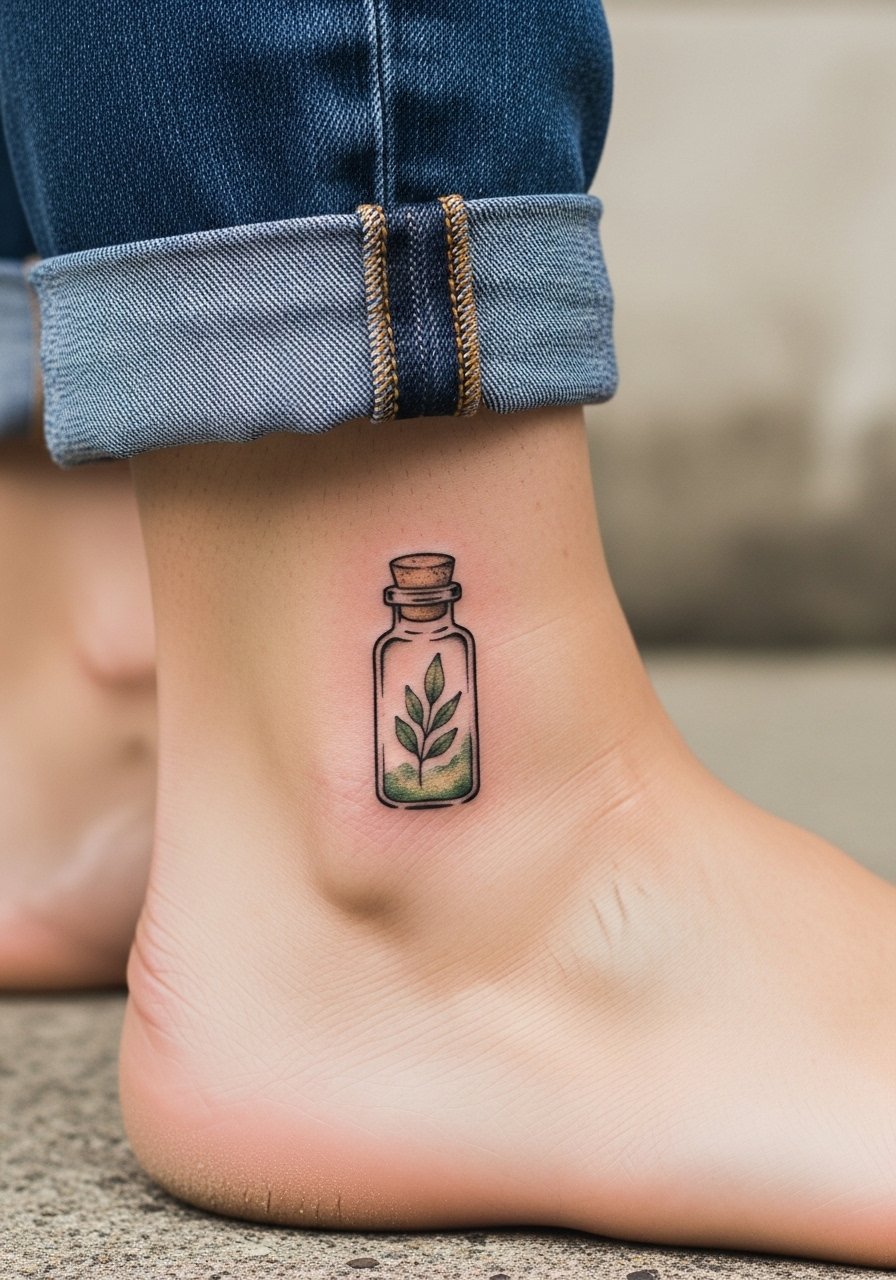
Mistake lead: the ankle faces a lot of rubbing from socks and shoes, which can dull watercolor effects early. Request a guarded outline and a slightly more opaque green wash so the vial reads after normal wear. Touch-ups are common for ankle color after the first year. Wear sandals or rolled jeans in the week after your session to cut down on friction.
19. Tyrant Full-Body Silhouette on the Calf
Personal observation lead: a taller silhouette on the calf benefits from muscle contouring, which makes the figure feel more imposing. Tell the artist to center the silhouette on the muscle belly and avoid too many interior shapes. The calf is low-risk for blowout so touch-ups are rarely needed. For showing off, slim joggers or shorts rolled up are ideal and highlight the vertical silhouette.
20. Jill Valentine Micro-Realism on the Collarbone
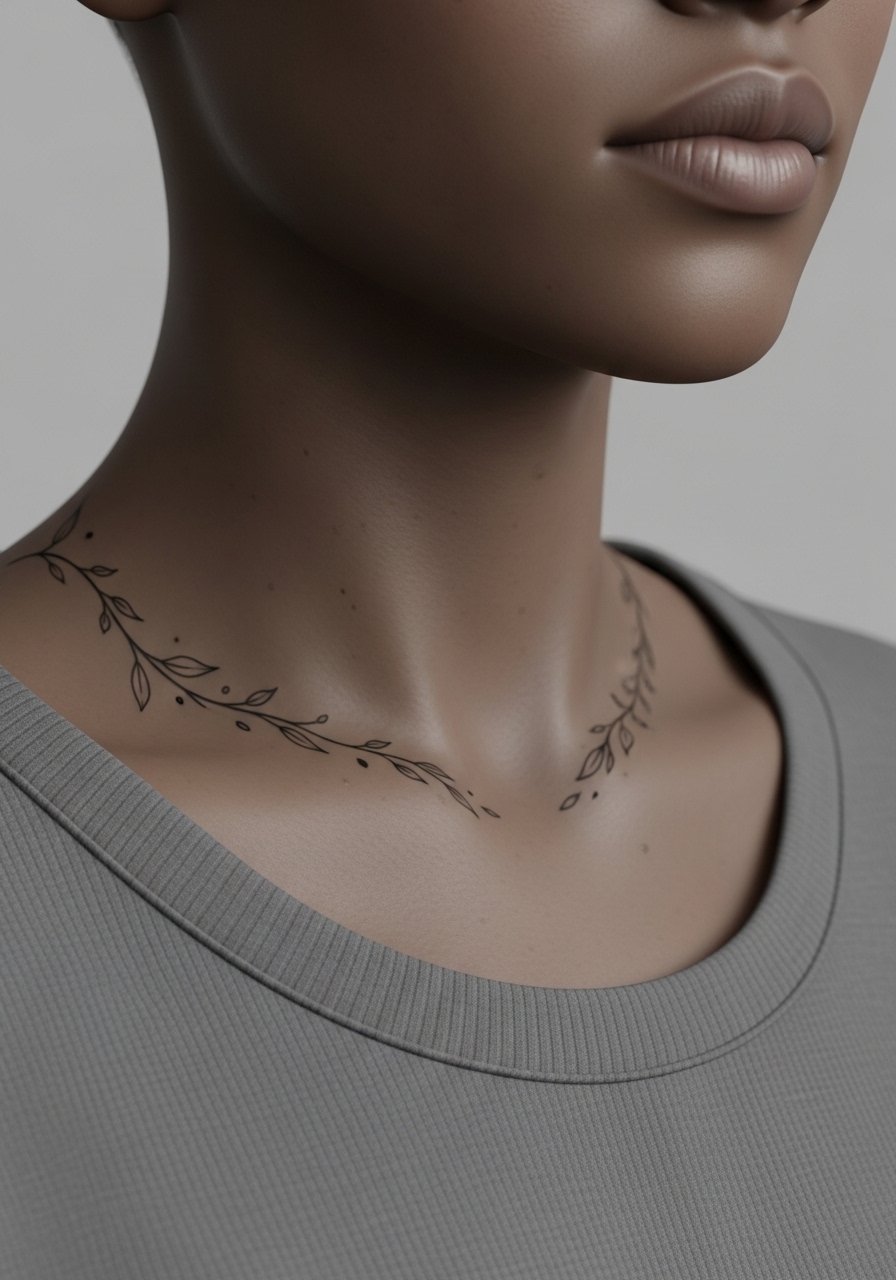
Mistake lead: collarbone placement looks delicate but the skin there can mute contrast with shallow shading. One camp believes micro-realism here is fine with touch-ups. The other camp warns it will soften faster than a bold black outline. My recommendation is to keep the portrait small but with clear contrast points, and plan a touch-up at year two. Session time is moderate and session wear should be a strapless or wide-neck top.
21. Raccoon City Outbreak Scene as a Narrow Ankle Strip
Consultation lead: compressing a scene into a narrow ankle strip needs a focus on silhouette and negative space rather than micro detail. The ankle rubs and sees water more often, which affects fine shading, so plan for bolder contrasts and a follow-up color session if you want full saturation. For the session, wear sandals or rolled jeans so the artist can work without obstruction.
Frequently Asked Questions
Q: Will fine line Resident Evil portraits on collarbones and inner biceps fade faster than blackwork logos?
A: Yes, fine line portraits often lose crisp edges earlier than heavier blackwork because the skin in those areas moves and the lines sit shallower. Expect touch-ups around year two to three for micro-realism. If longevity is a priority, ask for slightly thicker contour lines and stronger mid-tone contrast during the consultation.
Q: Is Saniderm better than dry healing for the detailed realism pieces in this list?
A: Artists and collectors split into two camps. One camp prefers Saniderm for less mess and controlled peeling. The other camp favors dry healing for more natural scab formation and final ink settling. The best route is to ask your studio which method they have consistent success with for the specific style you choose.
Q: How should I dress for sessions based on placements discussed here?
A: Match session wear to the placement. For shoulder or back pieces, bring a loose button-down shirt you can pull aside. For thigh work, wear loose shorts. For collarbone or sternum areas, a wide-neck top or sports bra works best. Comfortable, easily removable clothing makes your session smoother.
Q: Do ankle and wrist watercolors need different care than blackwork?
A: Yes, watercolor and light washes rely on saturation and can be affected by friction and washing. Ankle and wrist are high-friction zones, so expect more frequent touch-ups for watercolor than for solid blackwork. Planning for a follow-up session in the initial quote helps manage expectations.
Q: How do I find artists who show healed Resident Evil work across skin tones?
A: Use hashtags like #ResidentEvilTattoo and #RETattoos on Instagram to build a shortlist. Search TikTok for "resident evil tattoo healing" to see short-term and healed clips. Reddit r/TattooDesigns threads are useful for peer feedback. Look specifically for healed photos on portfolios, and ask the studio if they have examples on medium and dark skin tones before booking.
