
Fine line red florals are everywhere online, but the feed and the chair are two different things. Fine line pieces photograph featherlight, yet they often need touch-ups, red can shift on olive and darker tones, and small pieces can cost more than expected once a shop sets minimums. Read on for 21 red flower directions that balance how they look fresh with how they heal, and what to ask your artist first.
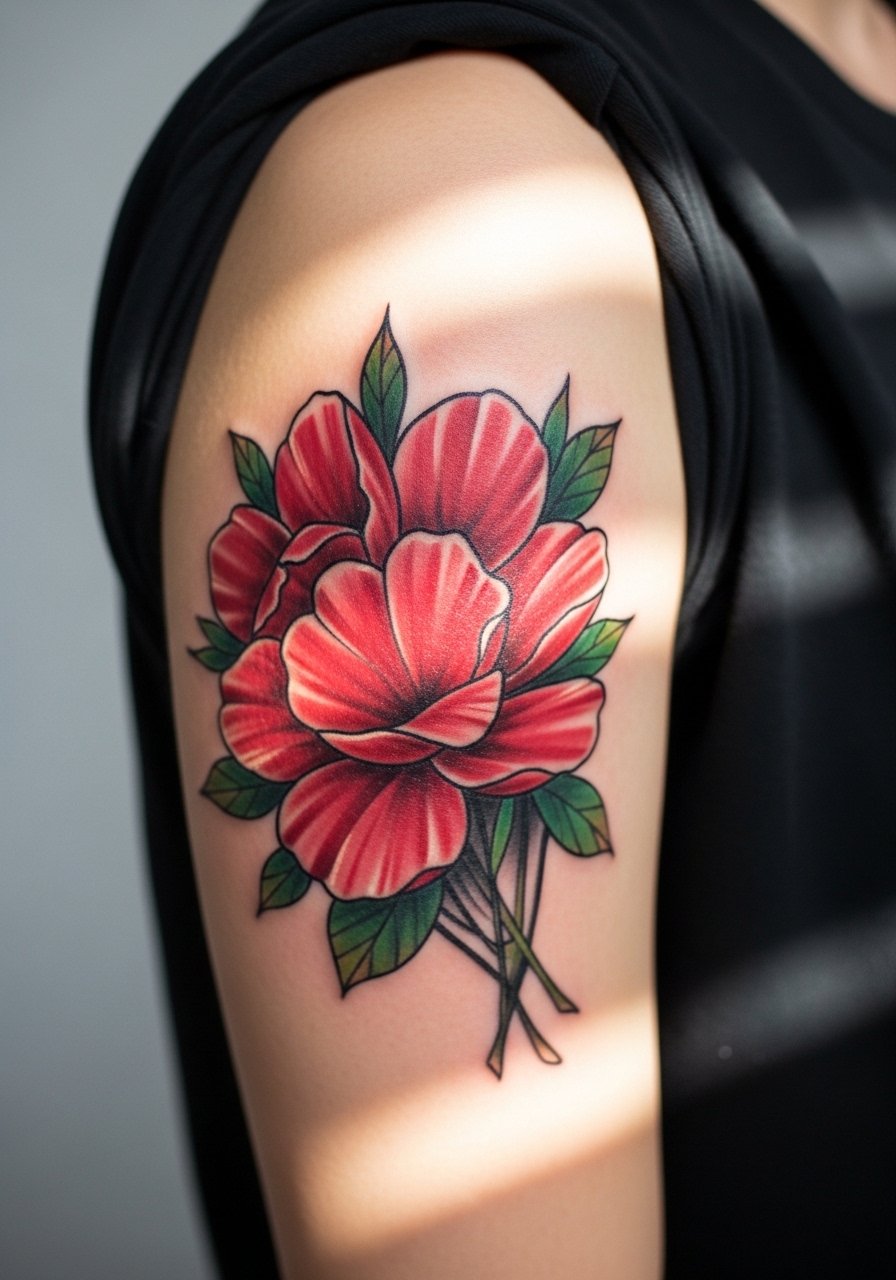
1. Neo-Traditional Red Rose Sleeve With Skull Accents
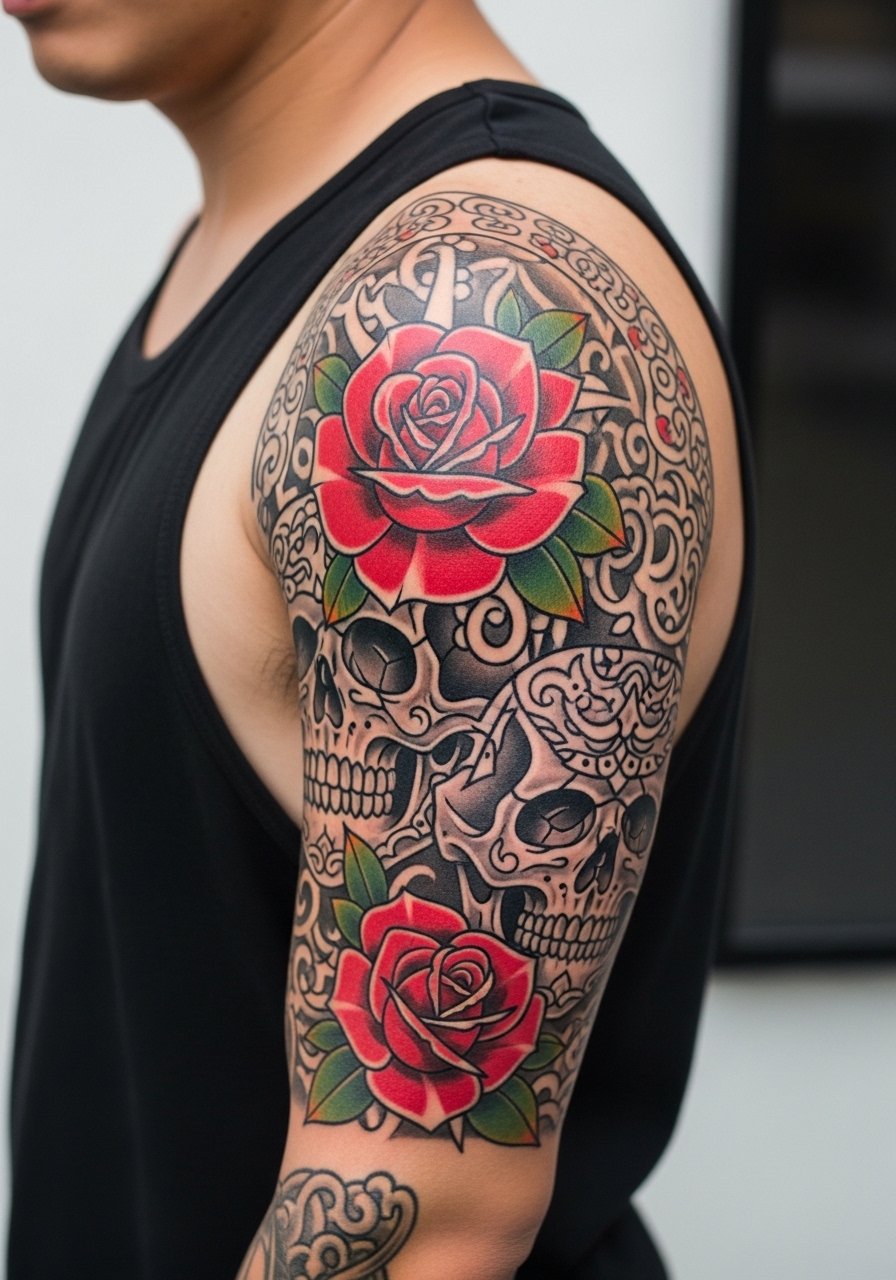
This is the kind of sleeve collectors pick when they want saturated reds that read from across a room. Expect multiple sessions and a heavier hand for saturation, which helps red hold against sun and friction. Tell your artist you want bold outlines and layered saturation rather than single-needle fills so petals keep depth at year three. Common mistake is compressing too many tiny elements into the upper arm, which ages into visual noise. Pain sits at a comfortable medium for the outer arm and sessions run long. For showing it off, try a fitted tank top black on warm days so the shoulder and upper arm are visible without competing details.
2. Fine Line Single Peony on Inner Forearm
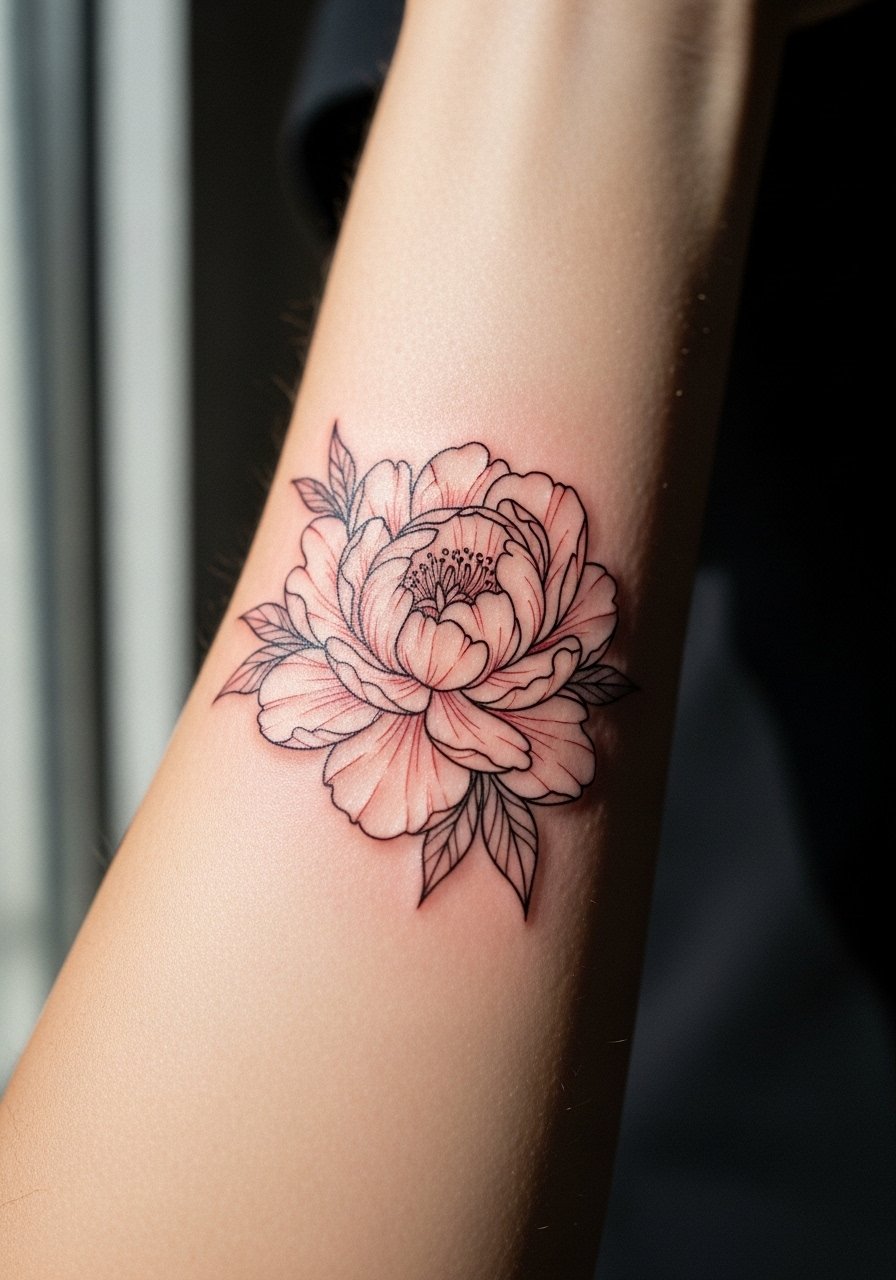
Fine line peonies are a top pick for first-timers who want something elegant but low-profile. I tell people to expect touch-ups at the six-week mark and again around year two if the lines are very thin. The main debate here is whether single-needle holds up on forearms. One camp says single-needle with perfect depth ages well, the other argues bold linework outlasts it. Ask your artist where they land and whether they recommend a slightly heavier line so the bloom still reads in two years. Session time is short and pain is mild. For a casual daytime look, roll your sleeves and wear a rolled cuff chambray shirt to frame the forearm.
3. Watercolor Red Poppy Bouquet on Collarbone
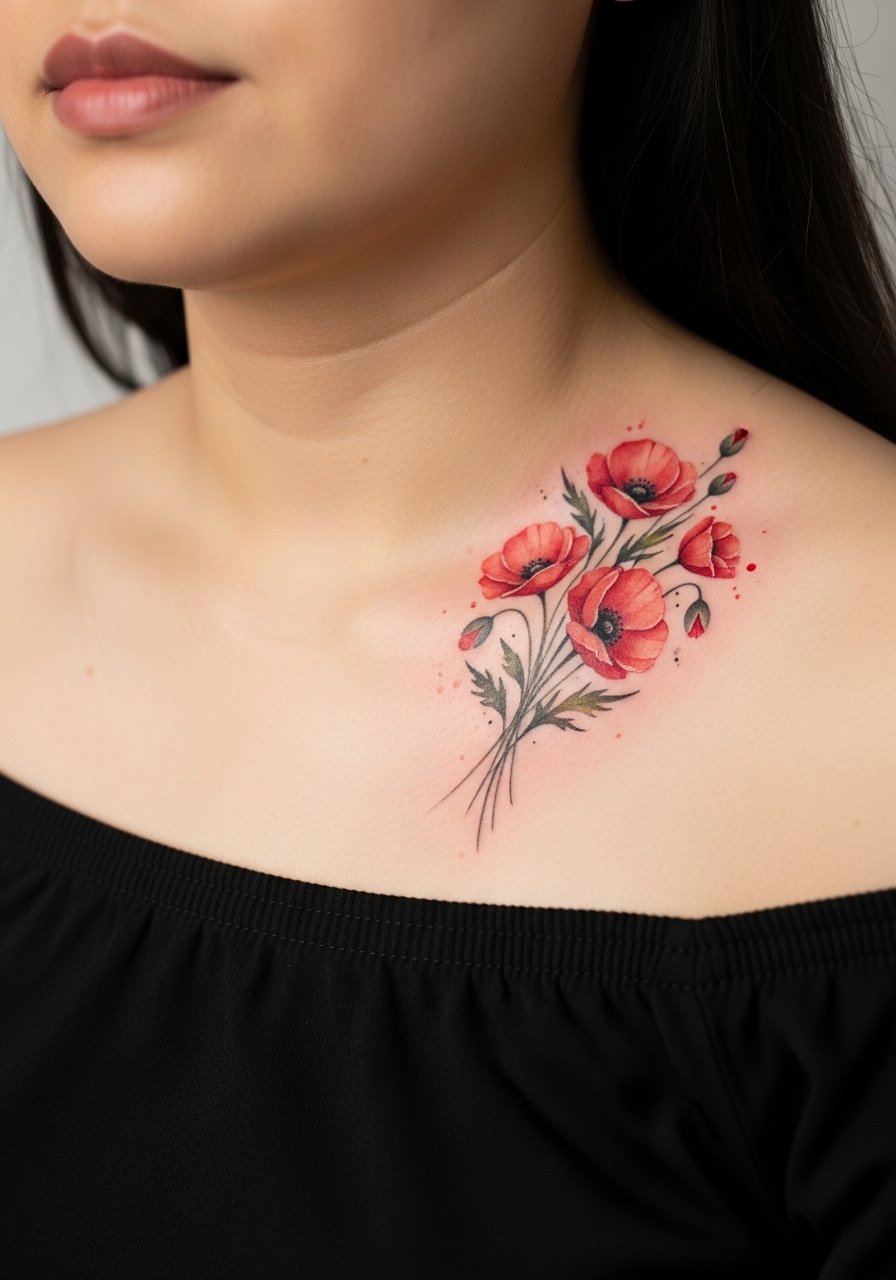
Watercolor poppies feel painterly and fresh. The trade-off is that soft washes can fade unevenly, especially with sun exposure right across the collarbone. Ask for strategically placed micro outlines to hold petal edges and plan on annual top-ups if you spend summers outdoors. The session can sting near bone, so expect sharp spots and intermittent breaks. For showing the work, an off shoulder blouse or a layered pearl strand keeps attention on the pops of red without competing with neckline jewelry.
4. Traditional American Red Rose with Banner on Forearm

This classic keeps its look because of thick linework and full saturation. It heals predictably and ages into a readable shape, which is why many people choose it for forearm placement. A common error is shrinking the rose too small; compact traditional pieces blur if the petals are under-scaled. Expect one to two sessions and medium pain. During consultation, specify banner text size if you want lettering to still be legible at five years. Pair the forearm with rolled-up linen shirts in cream or olive for a low-key way to show the art.
5. Blackwork Red Flower Mandala on Upper Thigh
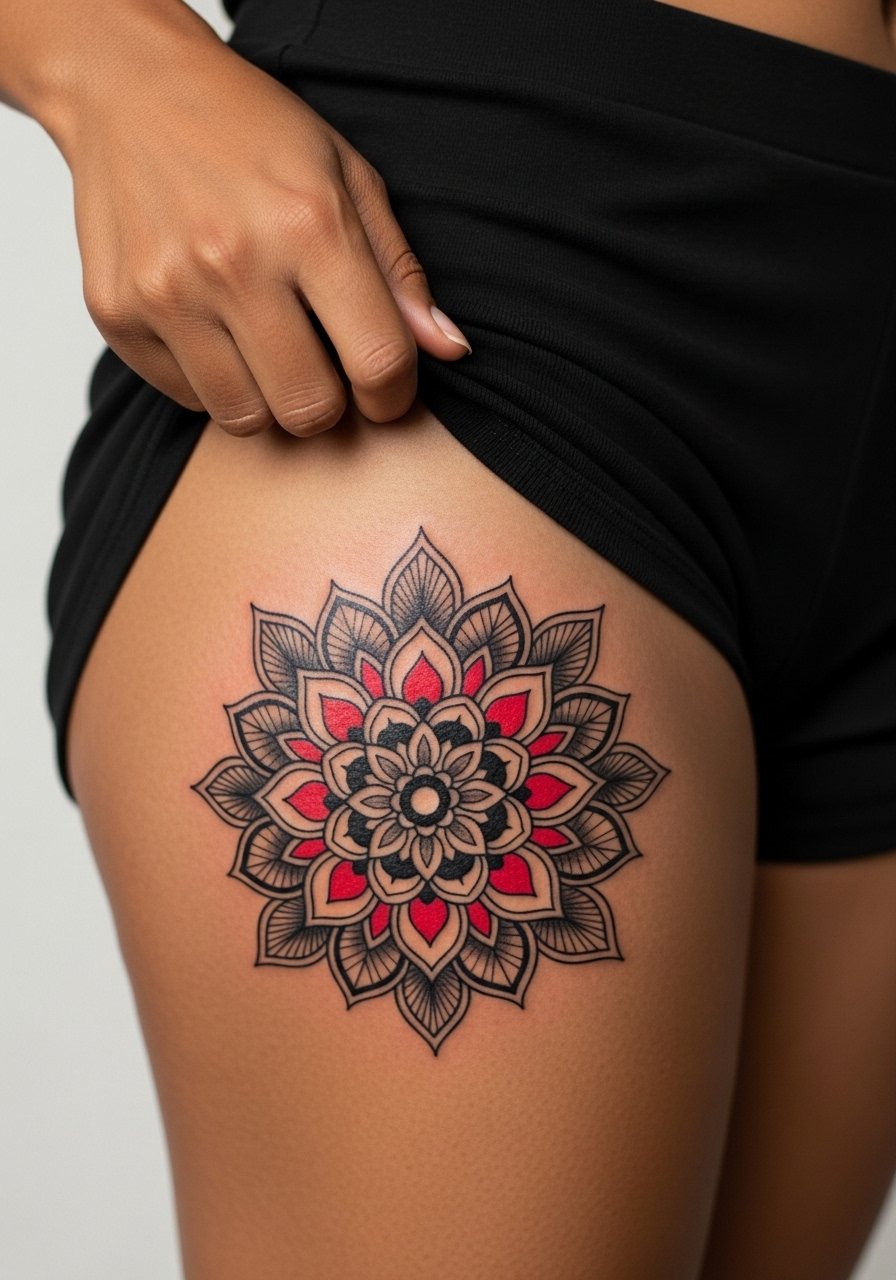
A mandala that uses red sparingly inside bold black geometry reads crisply on thicker skin. Upper-thigh placement reduces sun exposure, which helps saturation last. One real mistake is going too tight with dot work in the center; give the design breathing room so stipple shading does not merge over time. Sessions are moderate and usually split into two. This placement pairs well with high waist denim shorts and skirts with side slits for a clean reveal when you want it.
6. Micro-Realism Cherry Blossom Branch on Ribcage
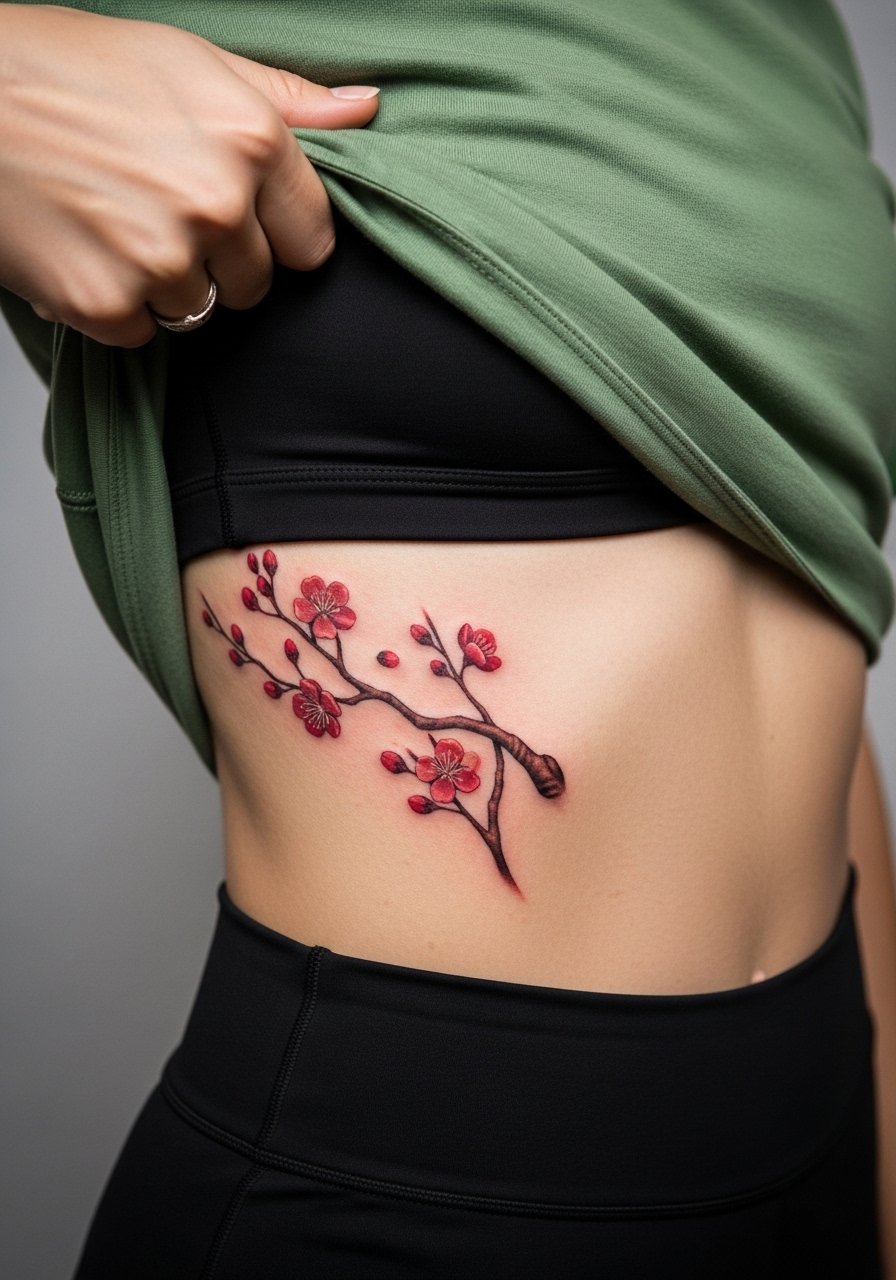
Ribcage micro-realism shows off tiny gradations and lifelike petals, but the area is notorious for movement and pain. Expect a high pain score and sessions broken into short sittings. Artists split on whether micro-realism survives rib stretch long term. One camp says the skin there stretches too much and delicate details blur, the other says careful needle depth and spacing keep realism intact. If you want this, ask the artist about depth, spacing, and a realistic touch-up schedule. For the session, wear a strapless bra or cropped top so the area can be exposed without discomfort.
Studio Day Picks
The ribcage and thigh pieces above need different prep than small wrist flowers, so these items smooth the session and early healing.
- Badass Balm tattoo salve. A non-petroleum option that users favor for sensitive skin and for keeping bright reds from reacting to heavy ointments during humid months.
- Ink Safe wipes. Gentle pre-session wipes remove lotions without smearing stencils, which helps when artists are working tiny cherry blossom branches.
- Tattoo Goo color protectant. A lightweight balm people use sparingly on healed color to reduce UVA fade where red is at risk.
- Recovery Ink protective patches. Breathable second-skin for small wrist or finger work that needs edge protection during early activity.
- Hustle Butter. A thinner, non-greasy option many choose for summer healing to avoid clogging pores while keeping color hydrated.
7. Ornamental Red Lotus with Geometric Frame on Spine
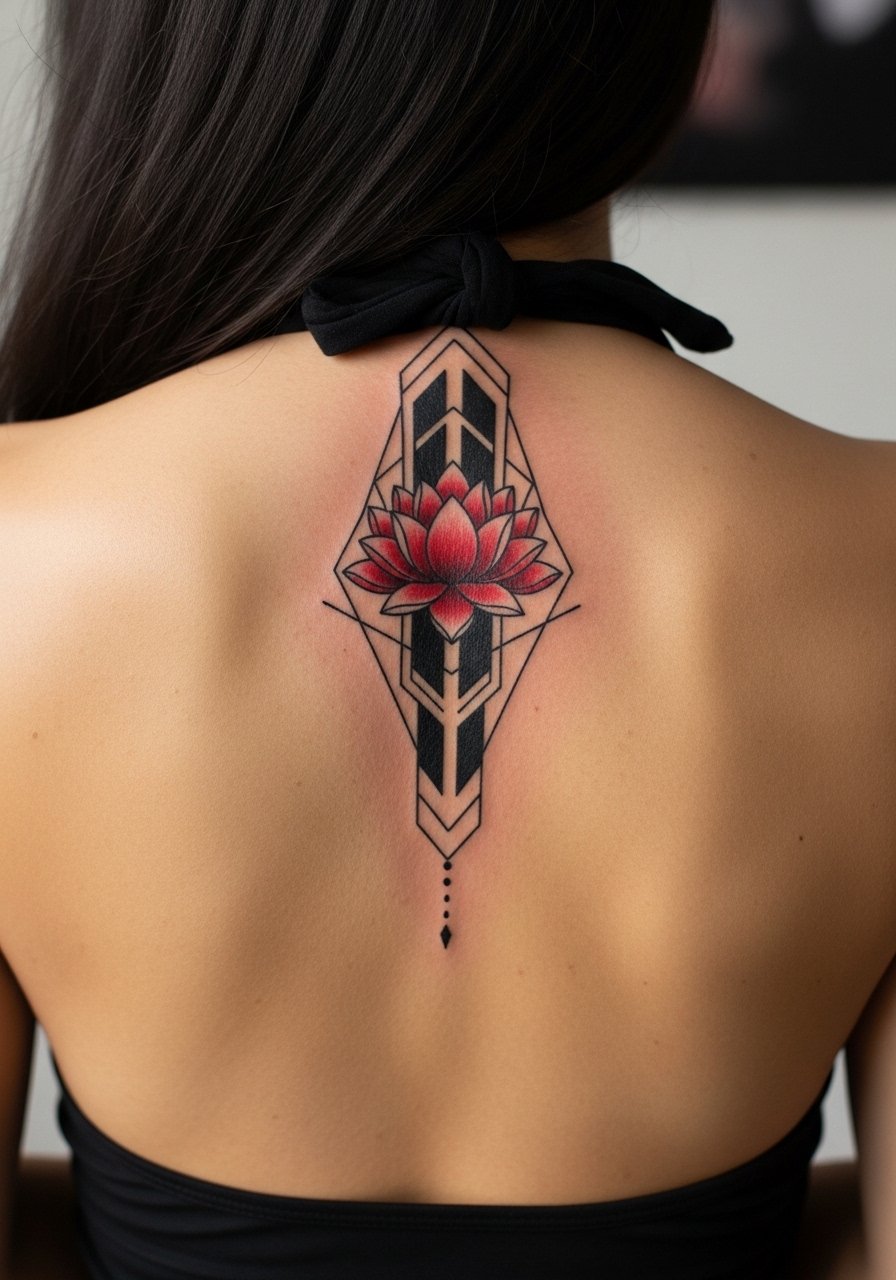
A curved lotus that follows spinal lines looks intentional when the frame echoes posture. The sternum and spine see movement but the vertical composition helps the piece age with posture rather than against it. Tell your artist you want the frame to follow vertebra spacing so the geometrics do not merge when you bend. Sessions are moderately long and can involve stencil repositioning. For nights out, a backless halter top shows the vertical flow without revealing too much skin. Respect is due if the motifs draw on specific spiritual patterns, so consider slight variations rather than direct replicas.
8. Ignorant Style Chunky Red Daisy on Calf
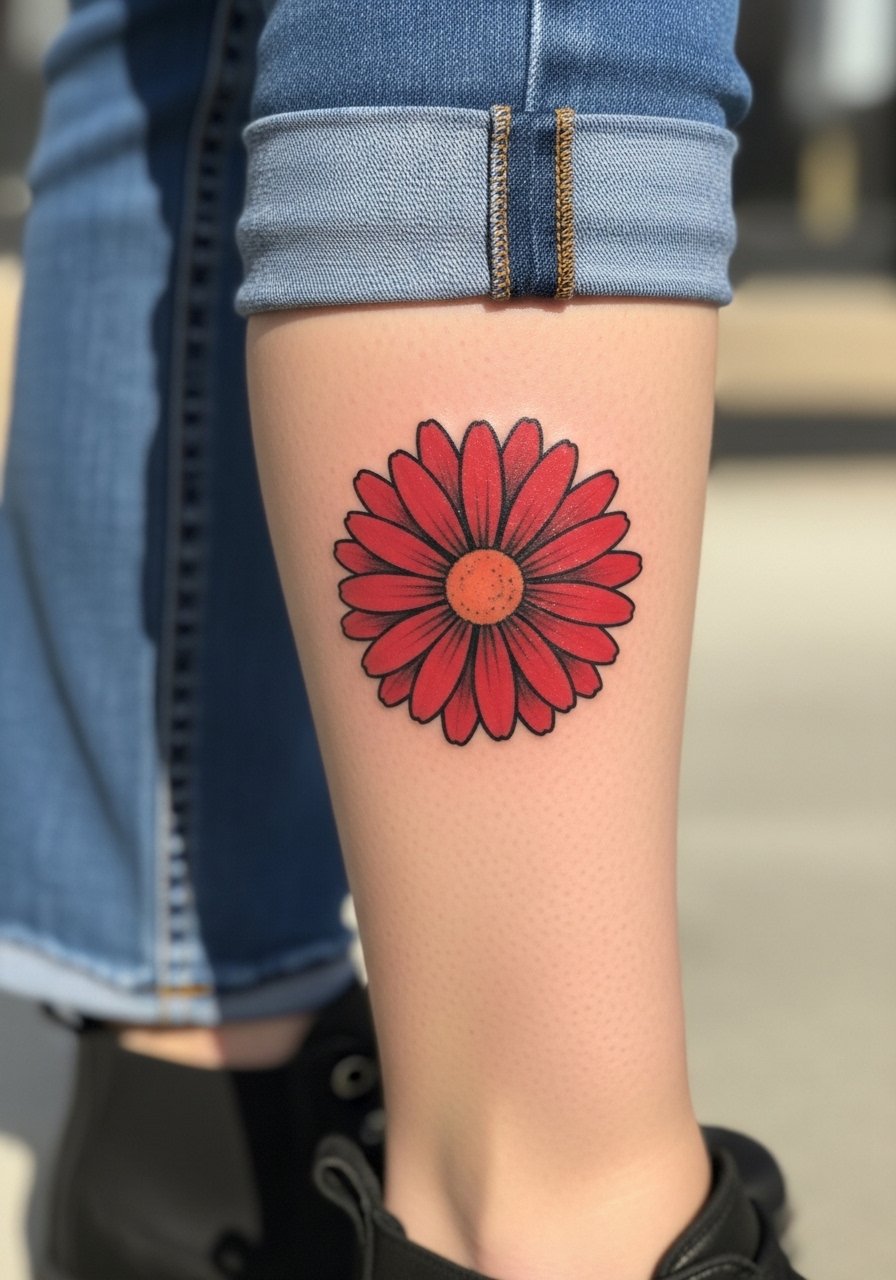
This playful, chunky daisy reads as intentional imperfection. It is cheap to run and often finished in a single session, which makes it great for low-commitment fun. Blowout risk on the calf is low, but keep lines bold so the shape does not lose character as it ages. The main reward is instant personality without long-term fuss. For a casual outfit, roll bootcut jeans and pair with canvas low top sneakers. Session wear is simple sweatpants pulled up so the artist can access the lower leg.
9. Minimalist Red Tulip Stem Behind the Ear
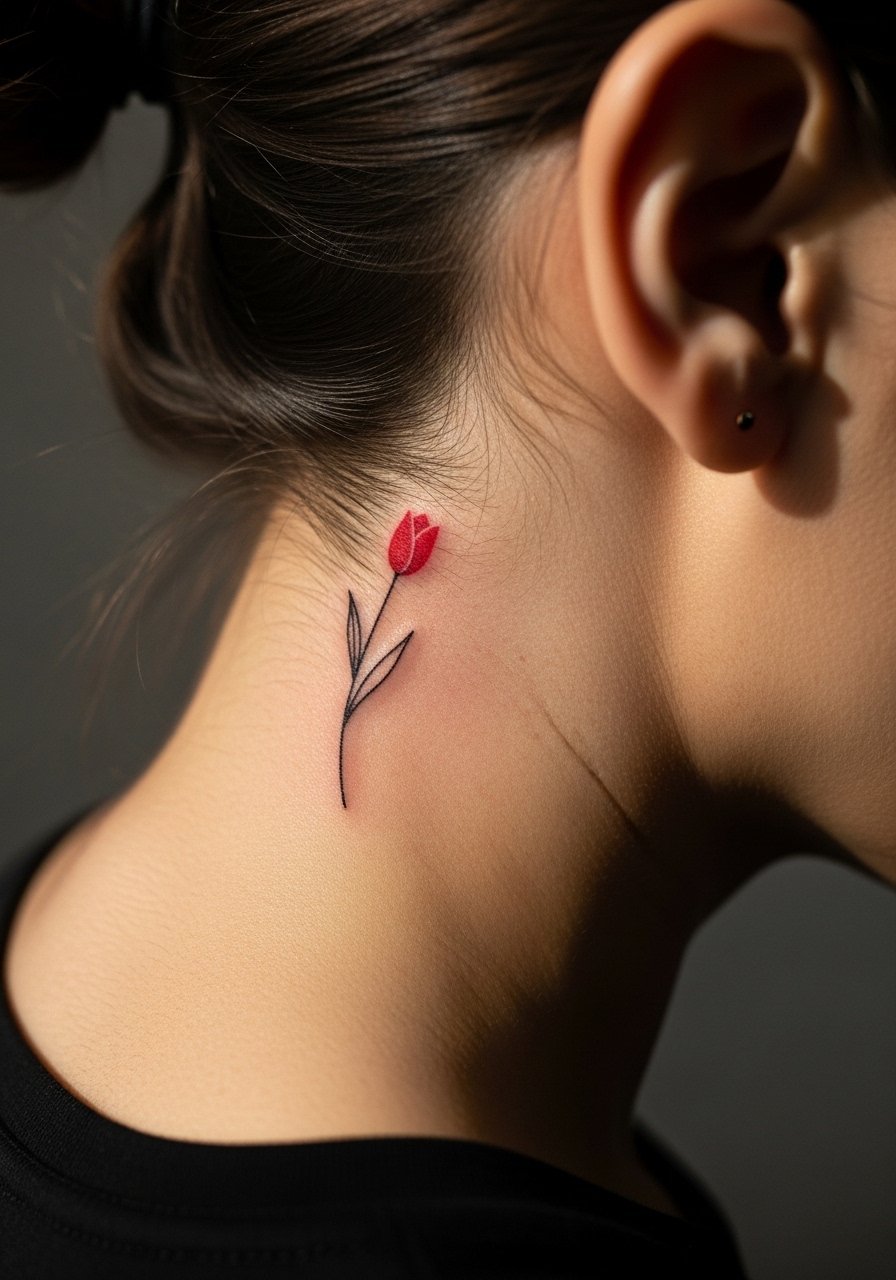
A tiny tulip behind the ear is discreet and quick, but it requires placement care for visibility and for healing. Behind-the-ear skin is thin and sensitive, so touch-up timing matters. The fine line debate applies here too. One side recommends single-needle for a barely-there look, the other suggests a slightly thicker stem to survive friction from hair and scarves. If you want it discreet, ask for a small test patch or a temporary decal first. Wear your hair up for a few days while the area scabs and heals. This spot is especially easy to hide or reveal.
10. Neo-Traditional Red Hibiscus with Hummingbird on Shoulder

Hibiscus pairs with movement, and a hummingbird brings dynamic composition. Shoulder caps tolerate saturation well and let colors stay vibrant longer due to lower friction. Tell your artist you want heavy saturation and a bold outline so reds do not wash out after tanning seasons. Sessions are medium length and comfort is high. For session access, a button-front camp shirt is a practical choice you can open to expose just the shoulder. This style reads tropical without being literal because the bird adds motion.
11. Fine Line Red Anemone Cluster on Inner Forearm
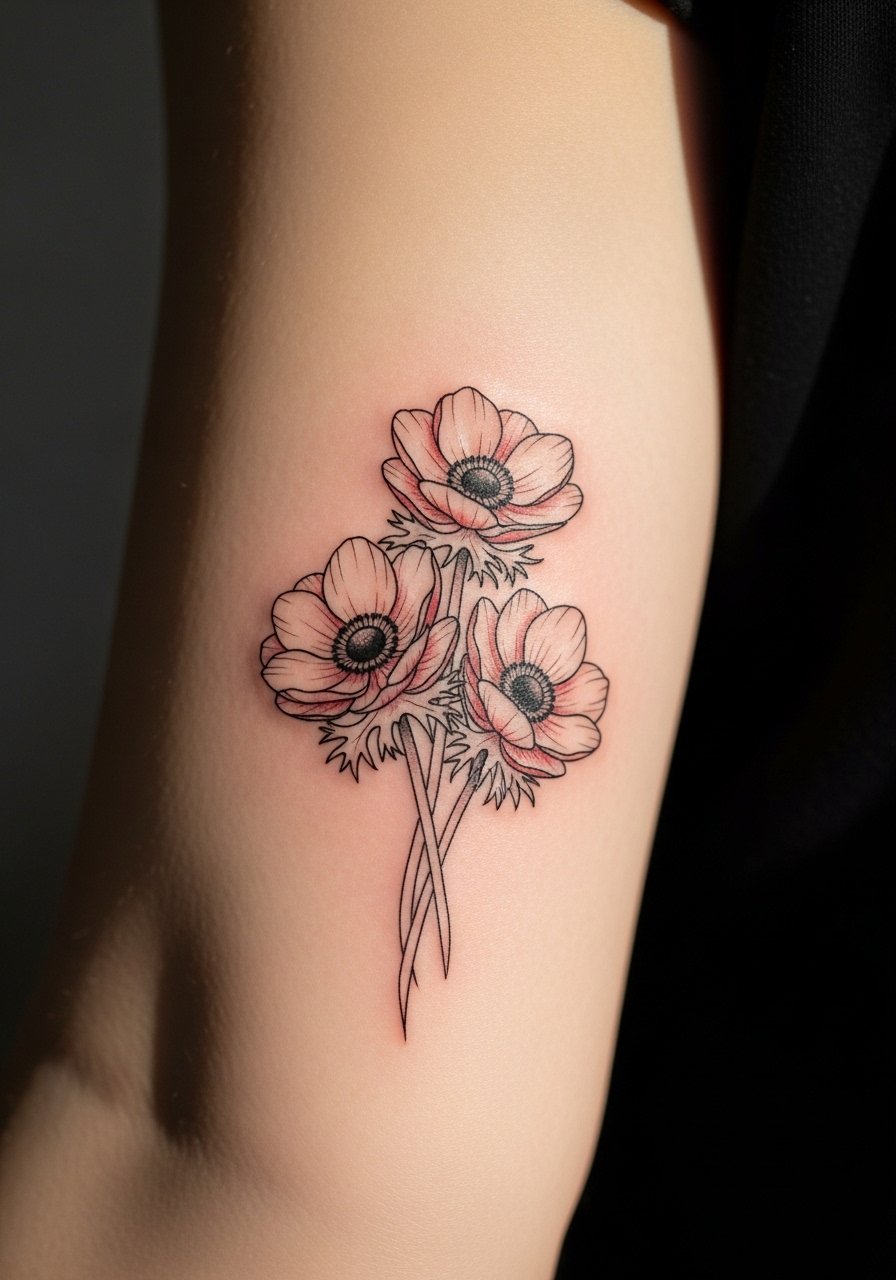
Anemone clusters are excellent for layering with other pieces later, but fine line clusters need spacing to avoid merging as they heal. Expect touch-ups at six weeks and possibly again at year two for thin contour lines. The mistake people make is asking for too many tiny petals close together. Tell the artist you want negative space between blooms so stipple shading can age cleanly. This placement is comfortable in sessions and looks great when paired with rolled cuffs. For a refined daytime look, stack thin silver rings on the opposite hand while keeping the forearm visible.
12. Black and Gray Realism Red Carnation Portrait on Upper Back
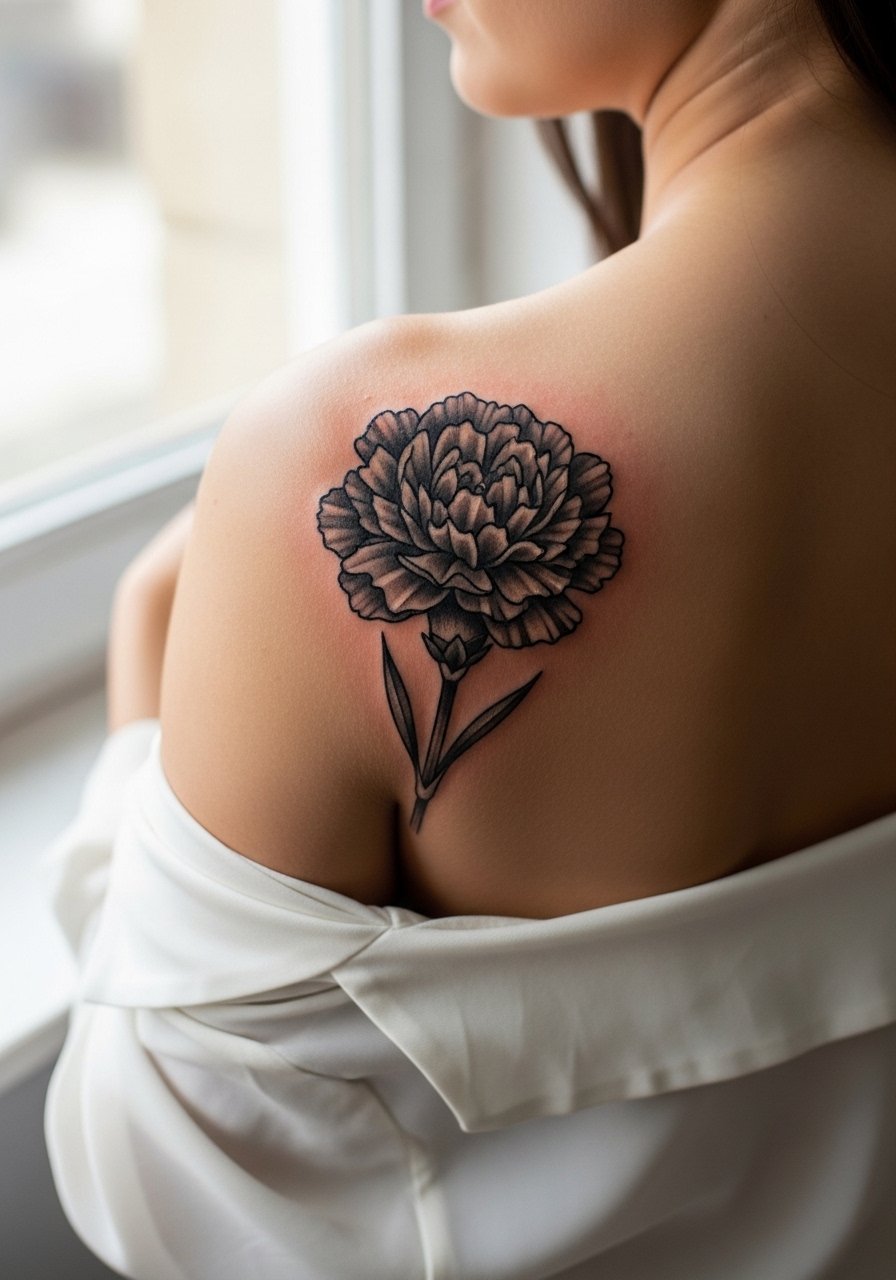
Some memorial pieces opt for black and gray realism with tonal work that suggests red petals without using red ink. This avoids red-specific fading issues and gives a soft-focus emotion. Expect multiple long sessions, especially for an 8-inch portrait, and plan for touch-ups over years. One common mistake is compressing too much detail into a single flower; give the artist room to render depth with smooth gradients. For reveals, a sheer blouse or backless style highlights the realism without overexposing the area.
13. Watercolor Red Sunflower Half-Sleeve on Outer Forearm
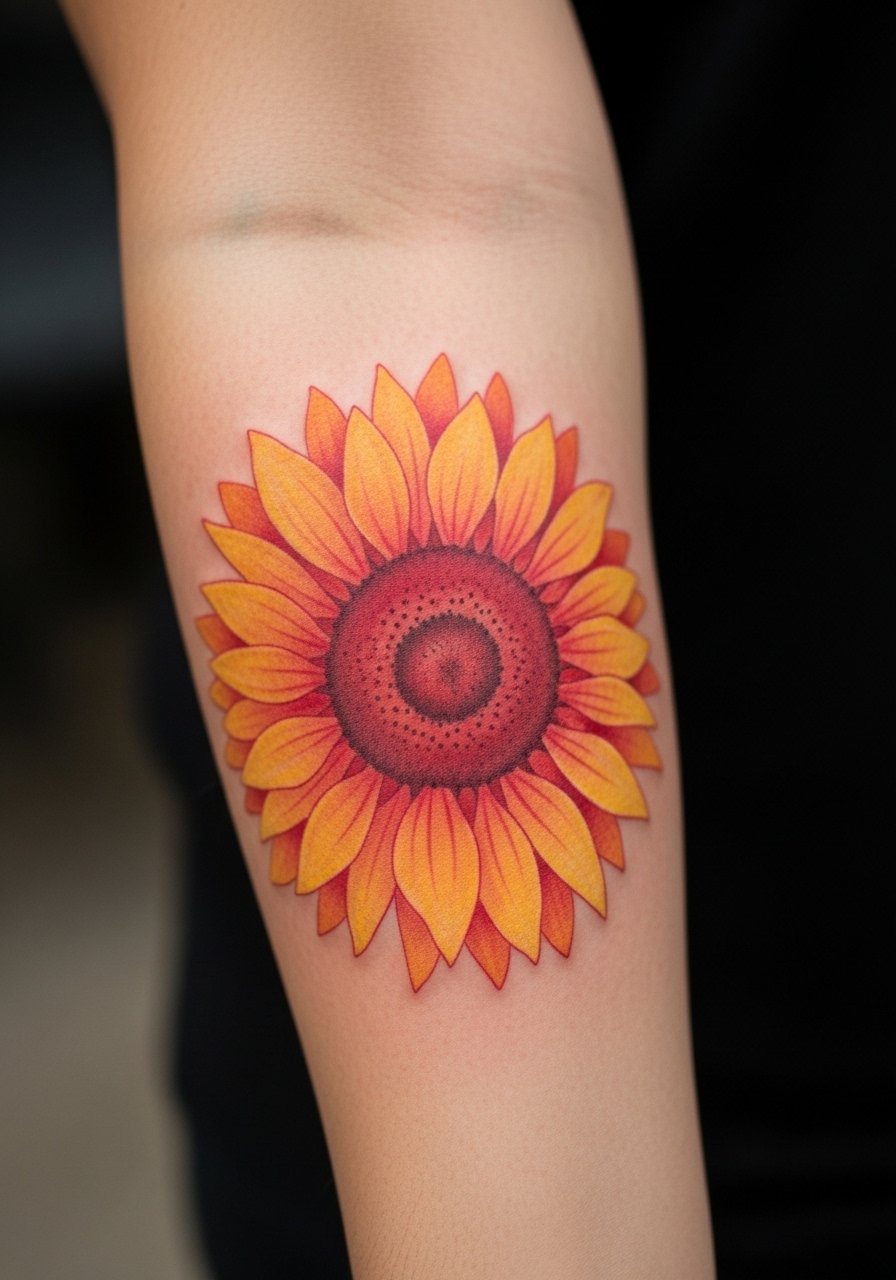
Sunflower half-sleeves with watercolor wash bring optimism into color, but watercolor can drift toward a faded look if left unprotected. For reds in this style, ask for subtle edge-line reinforcement so the petals keep definition at two years. This placement sees more sun, so plan sunscreen into your maintenance routine after healed. Sessions are long and may be split; pain is tolerable on the outer forearm. Pair with rolled-up short sleeves or a sleeveless linen tank to keep the artwork visible during warm months.
14. Memorial Red Poppy Cluster on Upper Arm
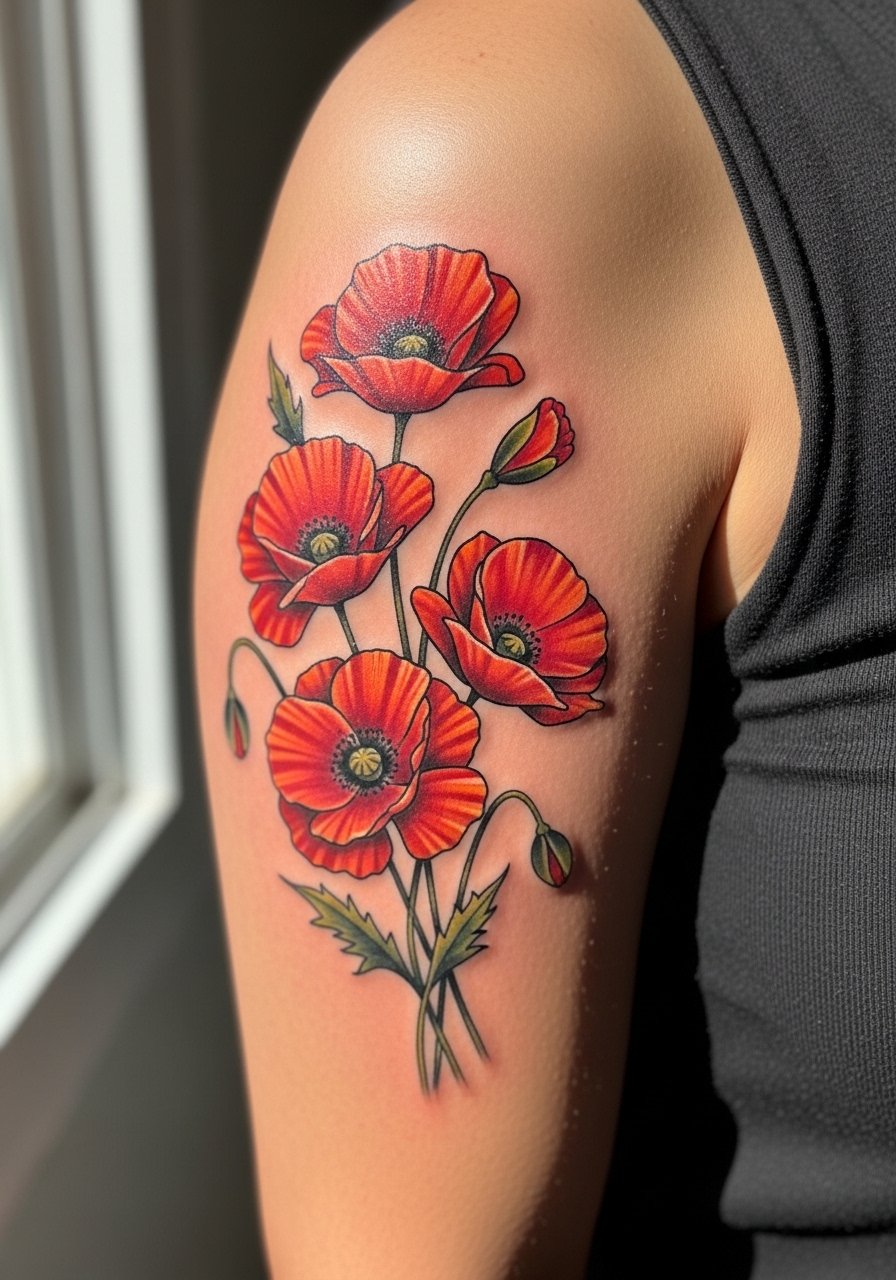
Poppies used for memorials focus on clear silhouette and saturated red centers. The upper arm offers sun protection and low friction so poppies often keep color longer than wrist pieces. A frequent misstep is making petals too wispy for memorial clarity. Ask for solid cores and slightly heavier petal edges. Sessions are medium and pain is low. This piece pairs with casual tanks and bracelets when you want to show it without making it the only focal point.
15. Curved Red Lotus for Spine Flow

A curved lotus that matches the natural sway of your back ages with posture rather than fighting it. The unique idea here is intentional curvature so the piece moves with you when you bend. The sternum and spine area can be sensitive, so sessions may be split and require extra breaks. Ask for the stencil to be tested in multiple standing and seated positions so it sits where you want it during daily movement. For showing off, an open-back dress or backless halter works well without overexposing.
16. Red Bouquet Cover-Up on Upper Arm
Cover-ups using layered red petals can mask older ink while giving you a fresh composition. The trick is to work with darker reds and strong black outlines where old ink shows through. Tell the artist which areas of the flash or old tattoo you want hidden and be realistic about how much of the old color needs to be incorporated. Sessions depend on the complexity of underlying work and several touch-ups are common. For the appointment, wear a loose button-down shirt you can pull aside without tugging the skin.
17. Geometric Red Flower Frame on Thigh
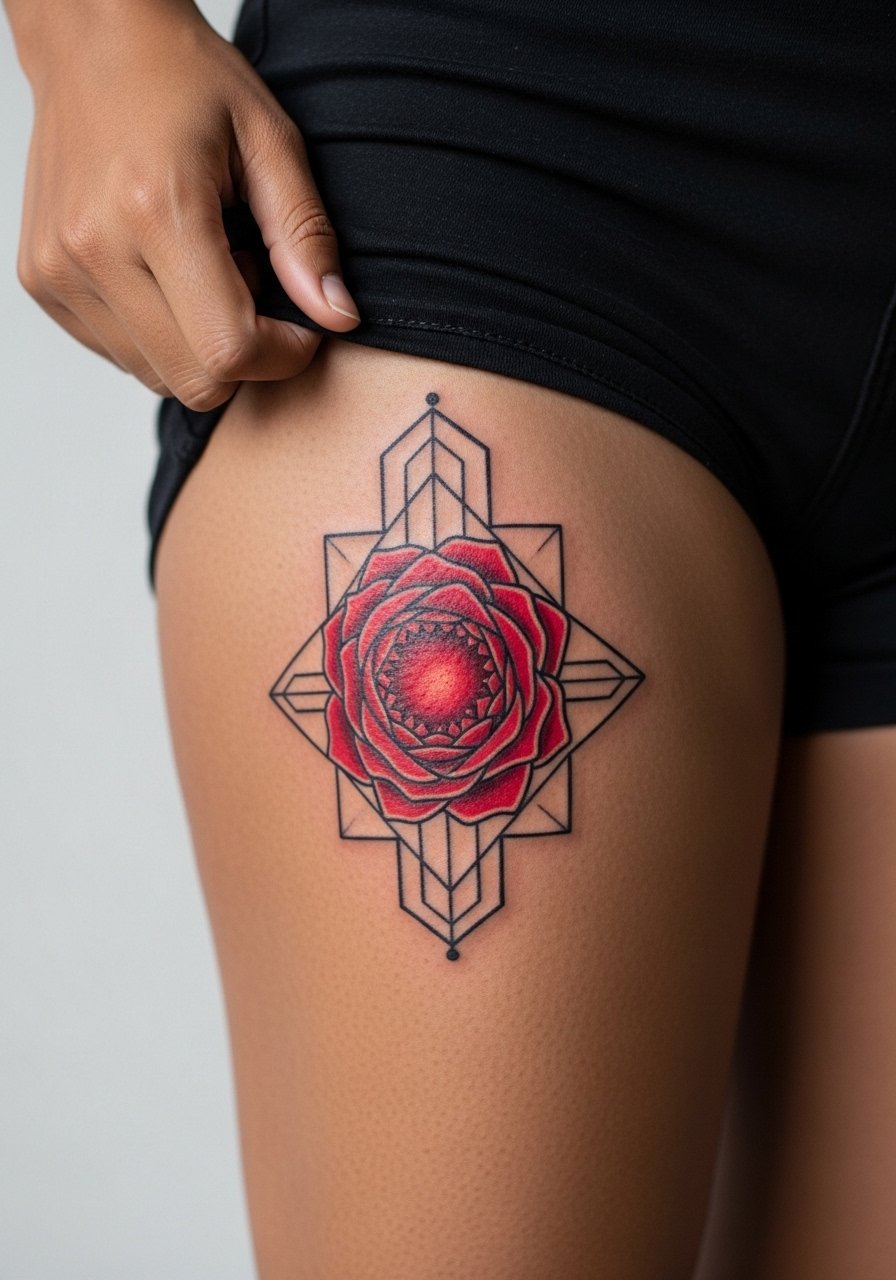
Thigh placements give artists room to breathe with spacing and geometric framing that ages predictably. The biggest mistake is squeezing detailed geometry into too-small scales. Ask for a mockup that shows the negative space on muscle and skin, so the dot work and whip shading stay crisp. Sessions are comfortable when lying prone and you can usually tolerate longer sittings. For summer reveals, high-waisted shorts or skirts with side slits make the frame feel intentional while keeping the rest of your outfit grounded.
18. Red Gerbera Micro-Realism on Inner Bicep
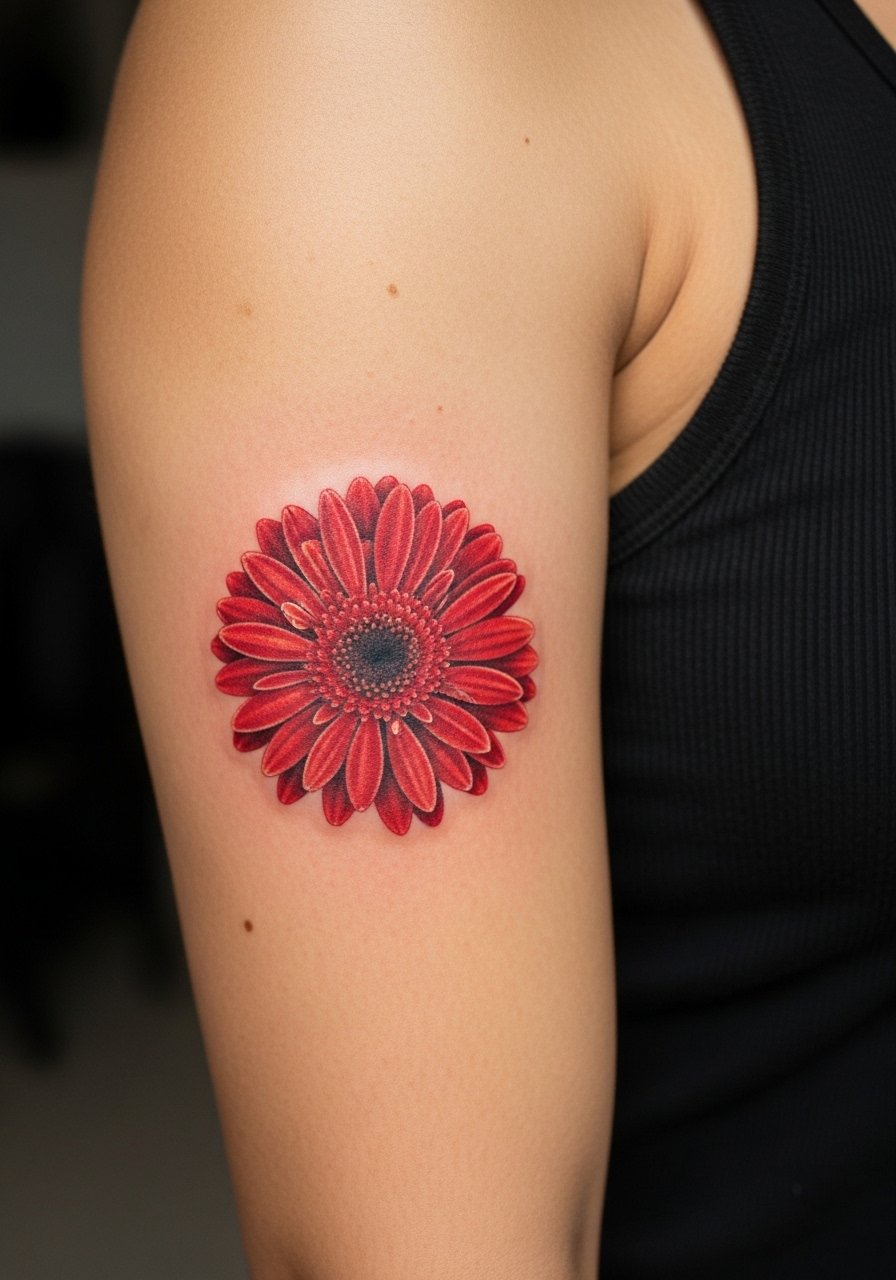
Inner bicep micro-realism looks intimate and photographs well, but the area moves and stretches with arm motion. Expect moderate pain and a higher chance of touch-up. Ask the artist about needle depth and the timing for a six-week revisit. One mistake is underestimating how the skin will shift with muscle changes. For the session, wear a sleeveless tank to allow easy access while staying comfortable.
19. Tiny Red Daisy on Ankle
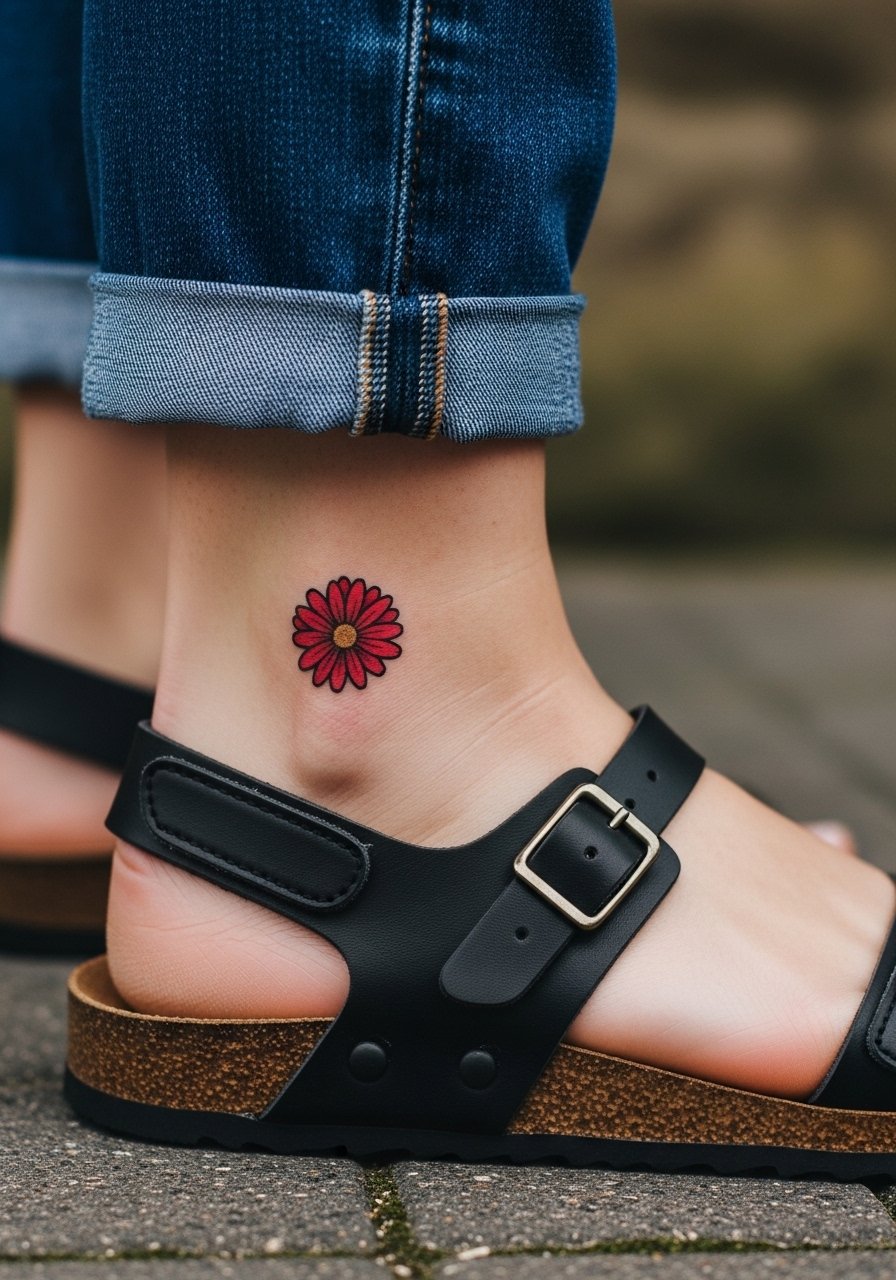
Ankle tattoos are cute and low-commitment but face friction from socks and shoes. Keep linework bold and simple so the daisy maintains shape. A common oversight is placing very fine details where shoes will rub. Sessions are short and pain is tolerable, though the ankle bone can sting. For summer wear, pair this with strappy ankle sandals and cropped jeans to display the work without abrasion during healing.
20. Red Camellia Wrist Accent
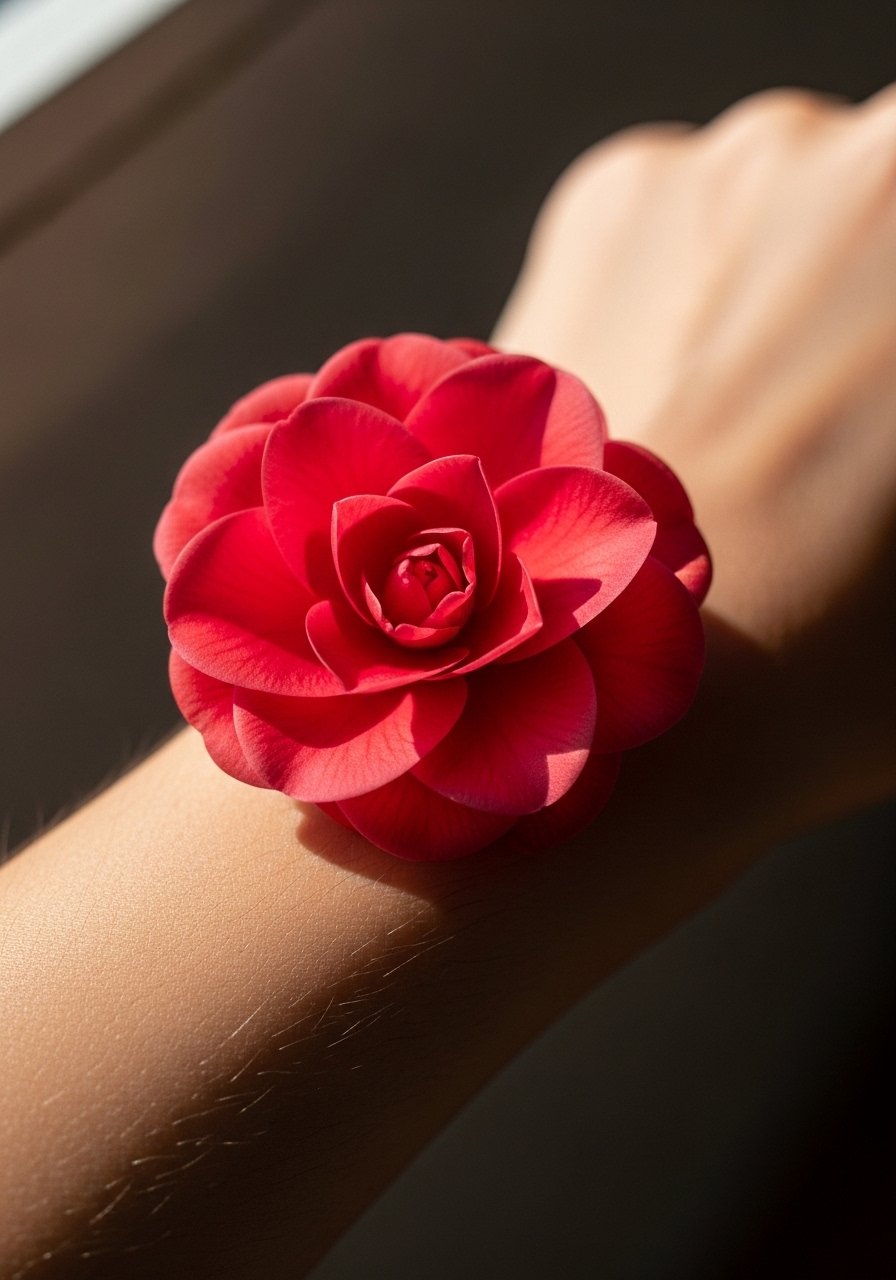
Wrist camellias look refined but are a higher maintenance spot because of constant washing and sun. Expect touch-ups more often than for thigh or upper arm work. The fine line versus bold outline debate applies here as well. One camp prefers thin lines for an airy look, the other recommends a reinforced outline to prevent early fading. If you work with your hands, ask for a slightly thicker contour and plan a six-week touch-up. For showing it off, a cuff bracelet on the opposite wrist complements without crowding the camellia.
21. Red Pop of Color as Finger Dotwork Accent
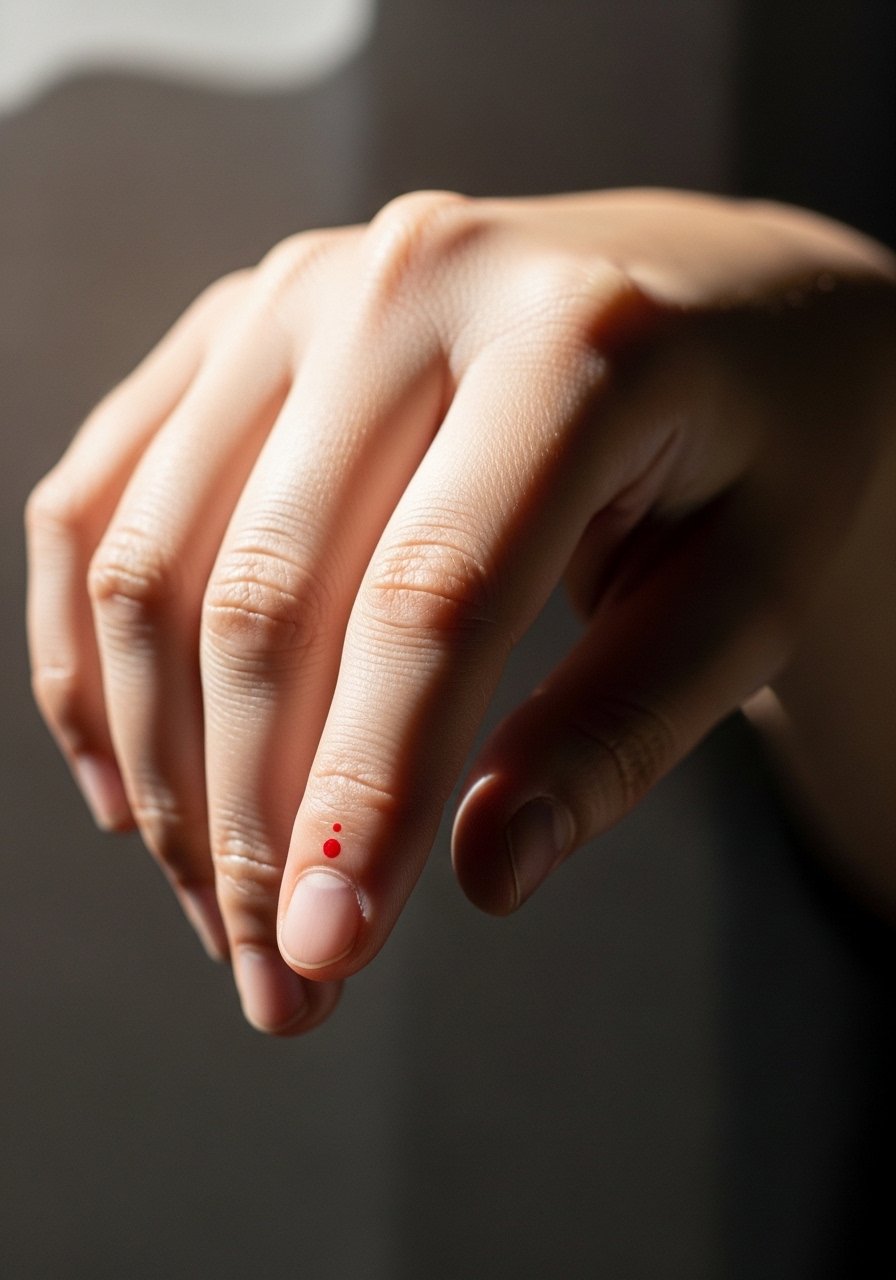
Finger work is fast and visible but notoriously high-maintenance due to frequent washing and thin skin. Dotwork can be a clever approach because the negative space helps the color read longer. That said, finger pieces often need touch-ups within a year. Be honest with your artist about lifestyle and be prepared for a higher refresh rate. For session prep, remove rings and clean hands thoroughly. Keep expectations realistic and treat finger placements like a seasonal accessory rather than a forever guarantee.
Frequently Asked Questions
Q: Will fine line red florals fade faster on darker skin tones?
A: From what I have seen, very thin single-needle red lines can lose contrast faster on melanin-rich tones. Many people on darker skin find slightly bolder outlines or a black anchor around petals helps red stay visible longer. Ask for a color test patch if you are concerned.
Q: How often should I plan touch-ups for a wrist red rose versus a thigh red rose?
A: Wrist pieces endure more friction and sun exposure, so plan for touch-ups sooner, often within one to three years. Thigh pieces sit under clothing more frequently and can hold saturation for longer, with touch-ups typically needed less often. Exact timing depends on lifestyle and sun protection.
Q: Do artists prefer Saniderm or dry healing for red ink, and what are the camps debating?
A: Artists and clients split into two camps here. One camp prefers Saniderm because it reduces mess and protects fresh color, especially on small, exposed pieces. The other camp warns it can trap moisture and cause reactions for some skin types. The best approach is to ask your artist how they handle red ink specifically and whether they have a preferred aftercare routine for your skin type.
Q: Is a watercolor red piece worth it if I want low maintenance?
A: Watercolor reds look amazing fresh but usually need more maintenance than fully saturated traditional work. If low maintenance is the priority, ask for subtle outlines or a neo-traditional hybrid so petals keep shape as color softens.
Q: Where are the best places to find artists who handle red flower work well?
A: Search style tags on social platforms like #RedFlowerTattoo, #FineLineFloral, or filter portfolios on apps such as Tattoodo and Booksy. Local convention guest spots are also useful for finding color specialists. Read healed photos and ask about healed timelines before booking.
