
The tattoos that actually read as "be brave" are rarely loud slogans. They are small scenes, tactile symbols, or a single line of script that settles into the skin and keeps its message for years. Choosing a realistic approach means thinking about placement, spacing, and how the ink will age. Below are 27 realistic takes on "be brave," with what to ask your artist and how to wear them so the message keeps working.
1. Micro-Realism "Be Brave" Script on Inner Forearm
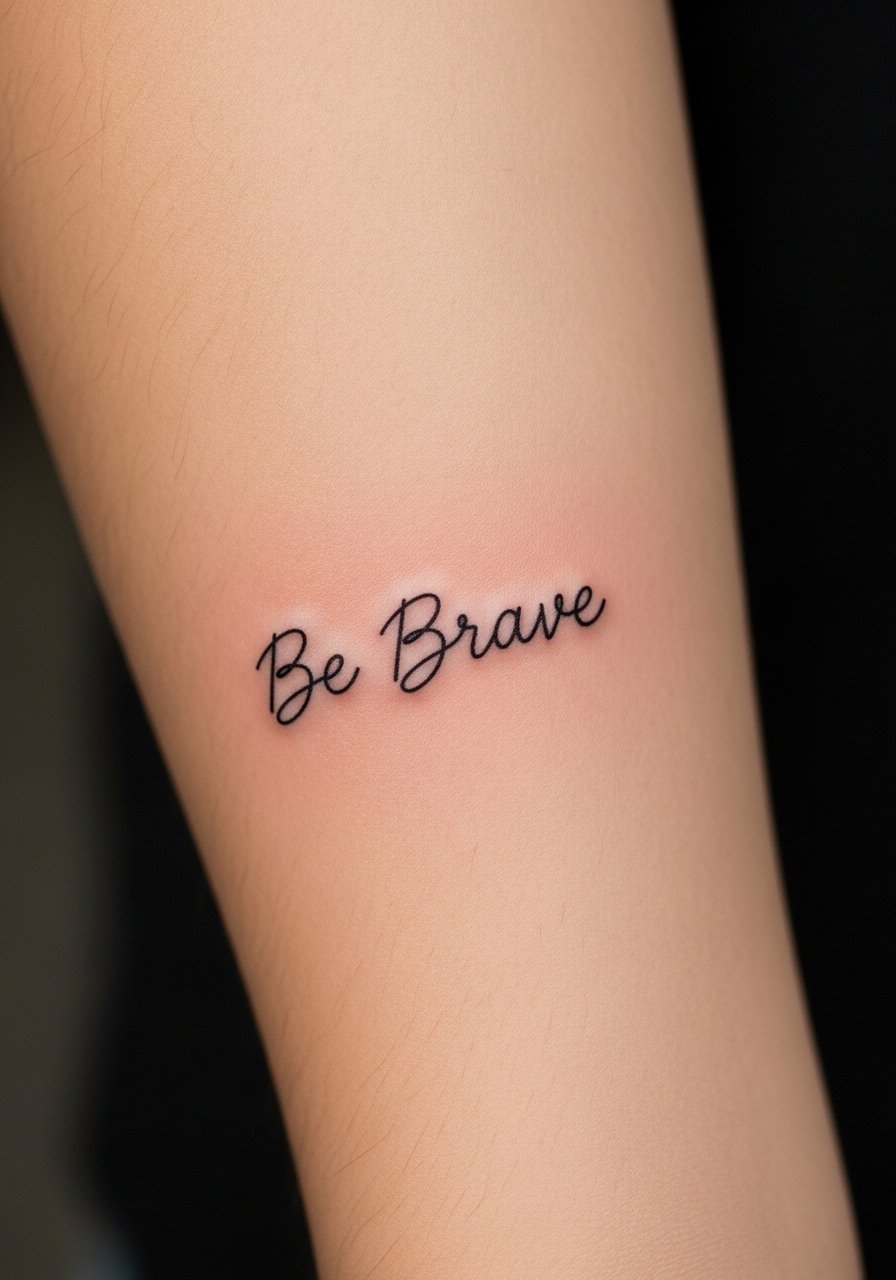
A tiny scripted "Be Brave" in micro-realism style reads like a private note to yourself. I recommend asking the artist for slightly open counters in the letters so the strokes do not fill in over time. Expect a low pain score, under an hour in most sessions, and a possible touch-up at year two for fine line tightening. Common mistake is asking for hairline lettering without spacing. If you want to show it off pair it with a thin chain pendant necklace that sits just above the script, keeping attention on the forearm without competing.
2. Realistic Small Lion Head on Shoulder Blade
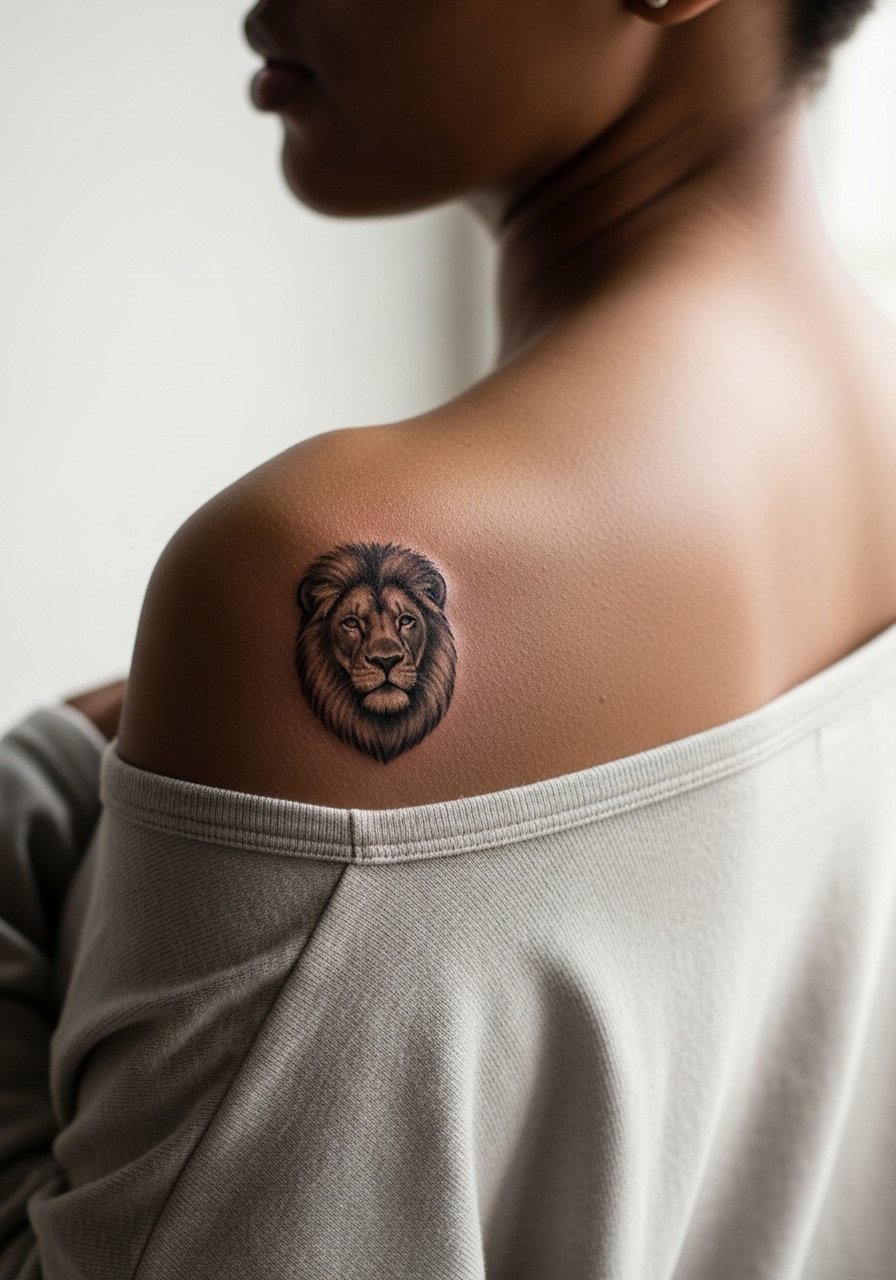
A compact, realistic lion head symbolizes courage without words. This placement feels discreet and shows well in open-back tops. Tell your artist you want soft stipple shading for fur texture and deeper contrast around the eyes so the face retains presence after a few years. The session is usually moderate in length and comfort, with the shoulder blade tolerating shading well. Avoid asking for overly dense mid-tones that will look muddy as they settle. Pair with open-back midi dresses to let the piece peek out on warm days.
3. Photorealistic Rose with Tiny Script on Collarbone

A photoreal rose plus a small script above the bloom reads as both delicate and deliberate. Collarbone skin moves a lot, so ask for slightly bolder linework around the script to avoid early softening. Sessions often split into outline and shading rounds if color saturation is desired. The main aging issue is sun exposure, so plan for sunscreen when exposed. A common mistake is packing too many tiny highlights that disappear with time. This shows beautifully with thin strap camisoles for evenings and layered wide-neck tops for casual wear.
4. Realistic Mountain Range with Small "Be Brave" Script on Ribcage
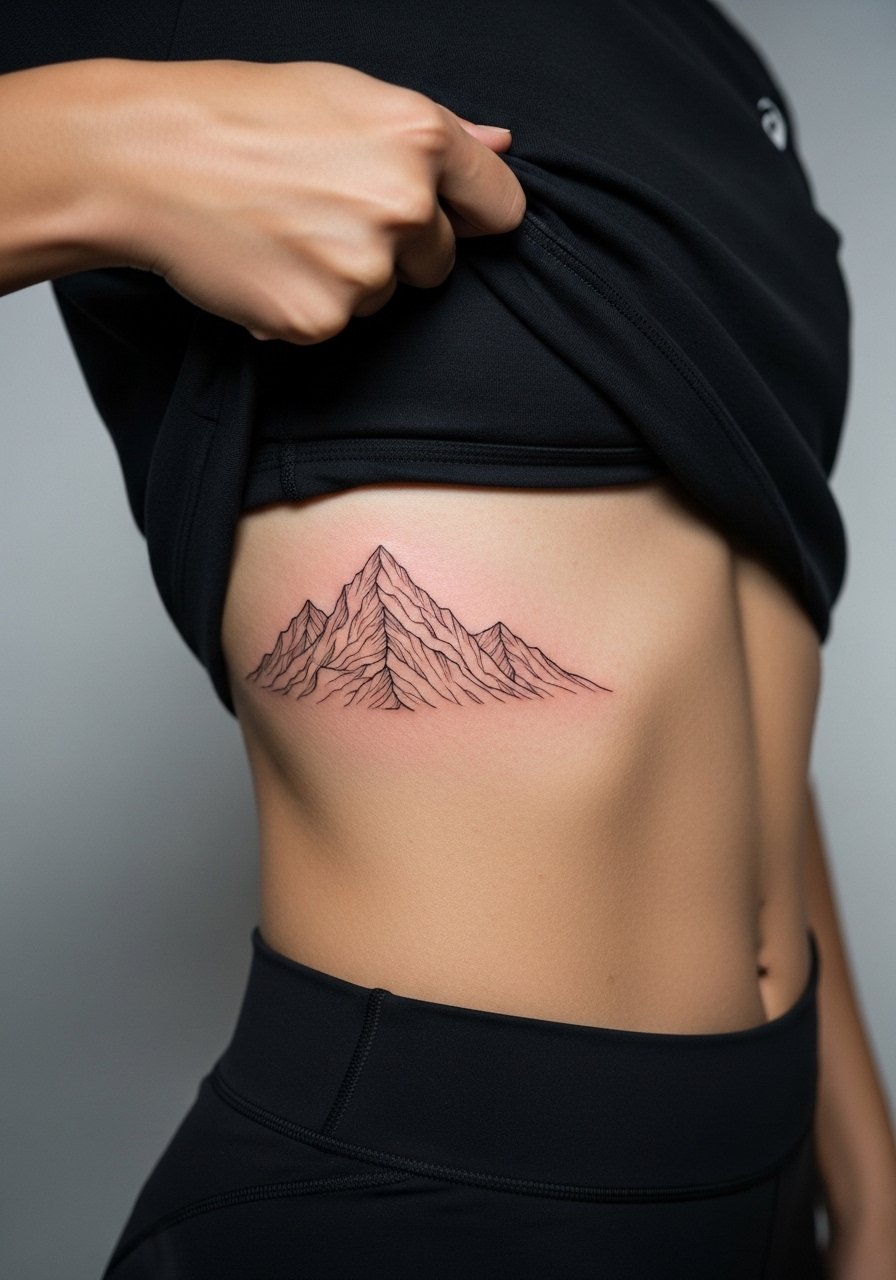
Ribcage pieces read as private declarations. Fair warning: ribs are a higher pain area. Artists split on fine line there. One camp says the skin stretch blurs lines fast. The other says with proper depth and spacing it settles fine. Ask the artist which approach they prefer and expect a touch-up conversation. The common mistake is making the range too small. For appointment day wear a zip-up hoodie you can lift easily so access is simple and comfortable.
5. Micro-Realism Phoenix Feather on Upper Arm
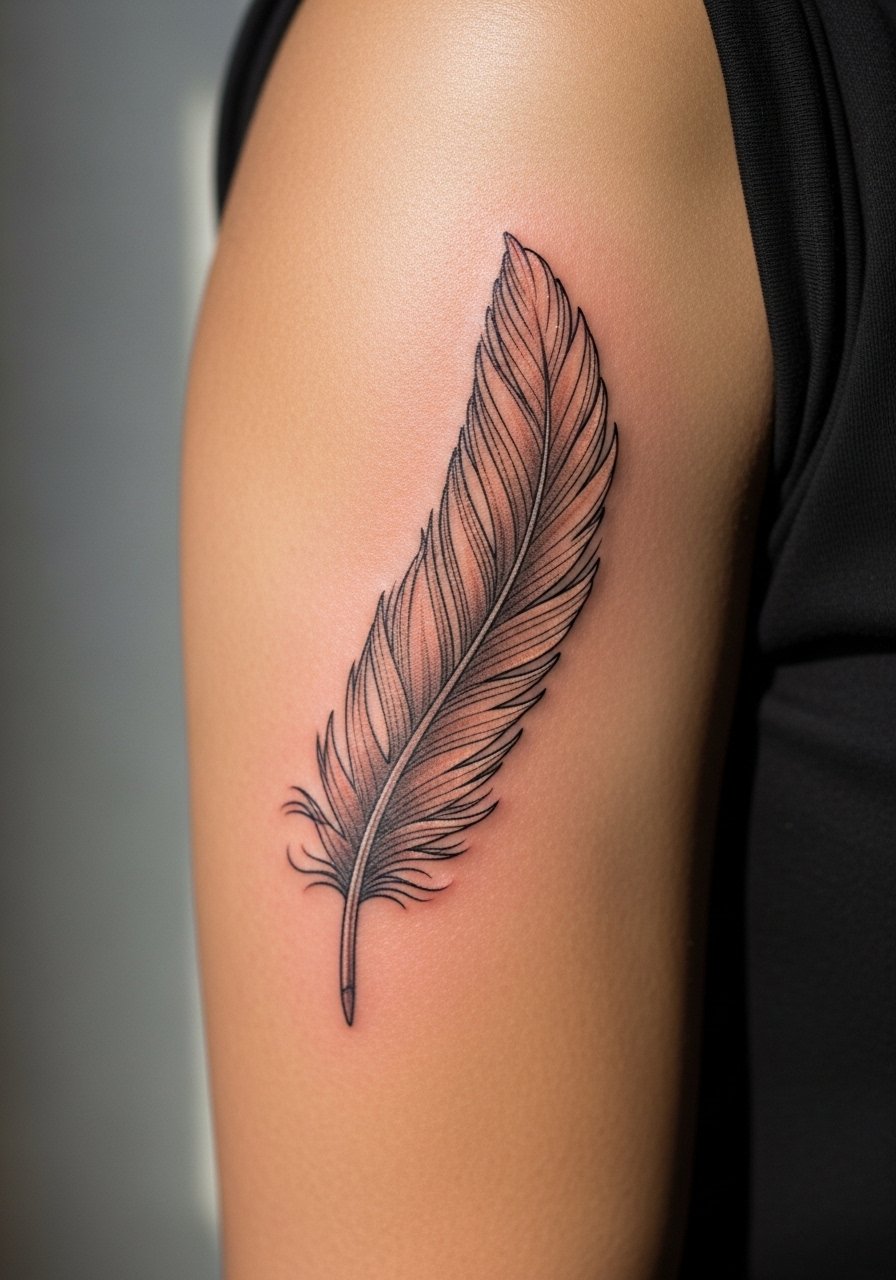
A single feather can carry the phoenix story with realism that keeps it readable. Upper arm skin handles saturation well and sessions are usually short. Tell your artist to use stipple shading for texture so the feather does not flatten into a gray block as it heals. A common mistake is asking for too many tiny filaments that merge over time. For showing it off, roll sleeves up or wear loose button-down shirts with the cuff pushed so the feather sits in the open.
6. Hyper-Realistic Heartbeat Line Ending in a Tiny Anchor on Wrist
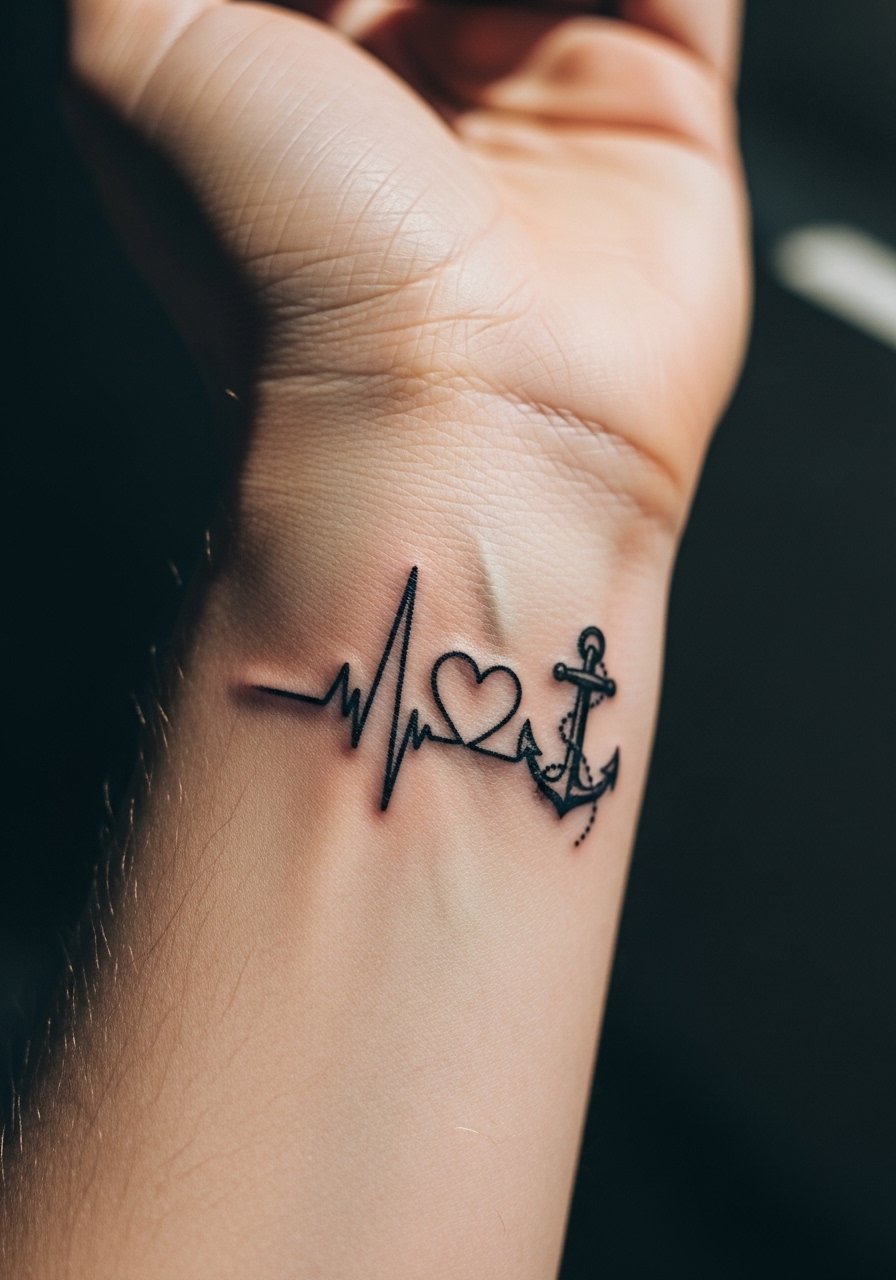
Wrist pieces are very visible and face frequent washing, which affects fine work. The heartbeat line that resolves into an anchor reads like resilience made literal. Ask for bold terminal points and a slightly thicker anchor so the design survives constant friction. Expect a short session but plan for a touch-up if you type a lot or wash hands frequently. Avoid ultra-thin connecting lines that blur. Pair with a minimalist watch or stacked delicate bracelets so the wrist reads styled without hiding the line.
Studio Day Picks
Those inner forearm, shoulder, and wrist pieces above need small prep differences. The shoulder and ribcage benefit from loose layers, and wrist work needs protection from daily friction in the first week.
- Stencil transfer paper kit. Lets you preview line placement on skin for the micro-script and heartbeat ideas before the needle touches.
- Topical numbing gel. Applied per instructions it can ease ribcage sensitivity without affecting shading on larger pieces.
- Thin protective film roll. Useful for wrist and inner-forearm pieces to limit early friction from clothing and handwashing.
- Fragrance-free gentle body wash. Cleans the healing area without stripping the delicate linework of fine pieces.
- Aquaphor healing ointment. Thin layers in the first days keep fine line tattoos moisturized while they form stable scabs.
7. Realistic Wolf Portrait on Calf
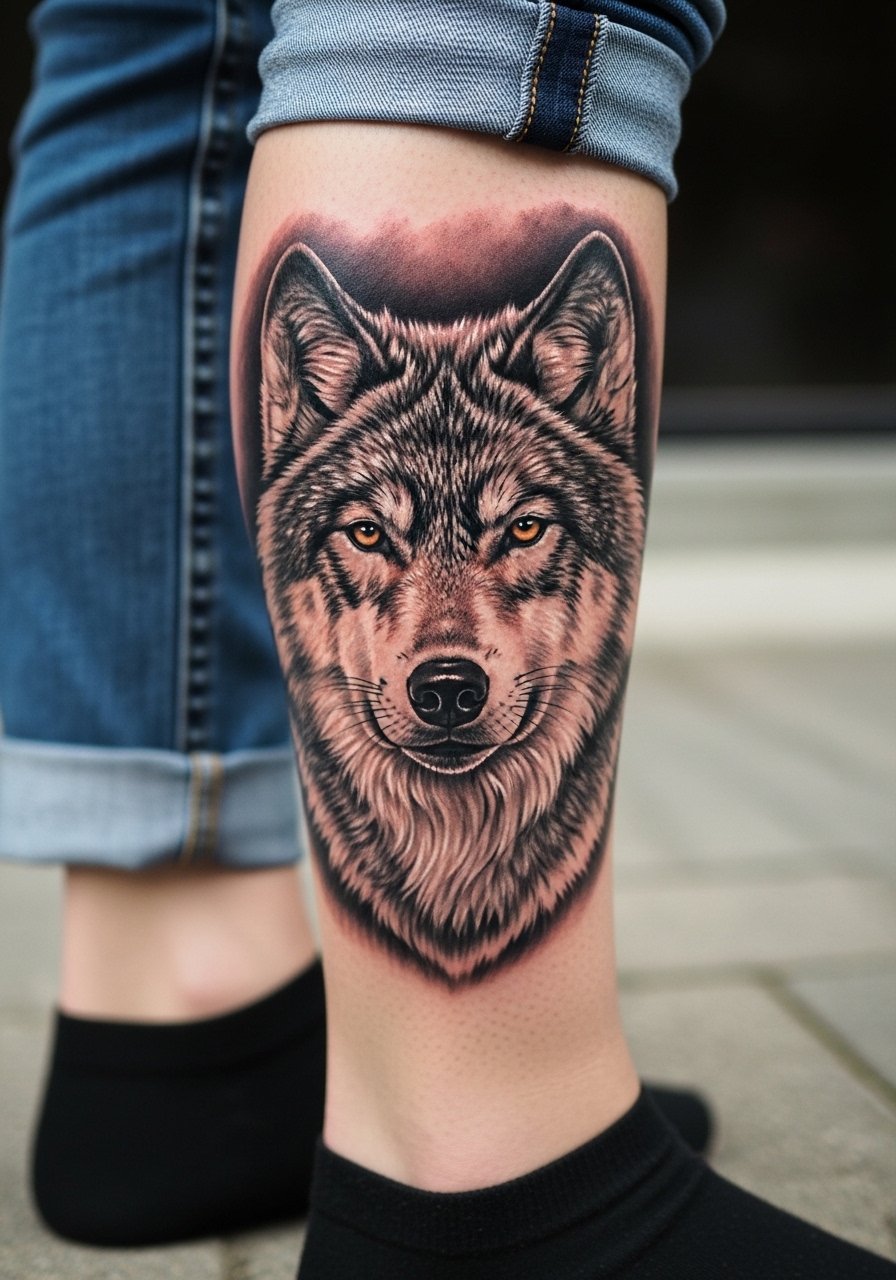
A wolf portrait channels bravery through gaze and texture. Calf skin takes shading well and sessions can be longer. Tell your artist to prioritize contrast around the eyes and nose so the face remains defined after a few years. The mistake is over-softening early with low contrast. Expect moderate pain and a potential touch-up at year two if you favor lighter grays. For show-off outfits roll jeans or wear high-waisted shorts so the calf reads as intentional styling.
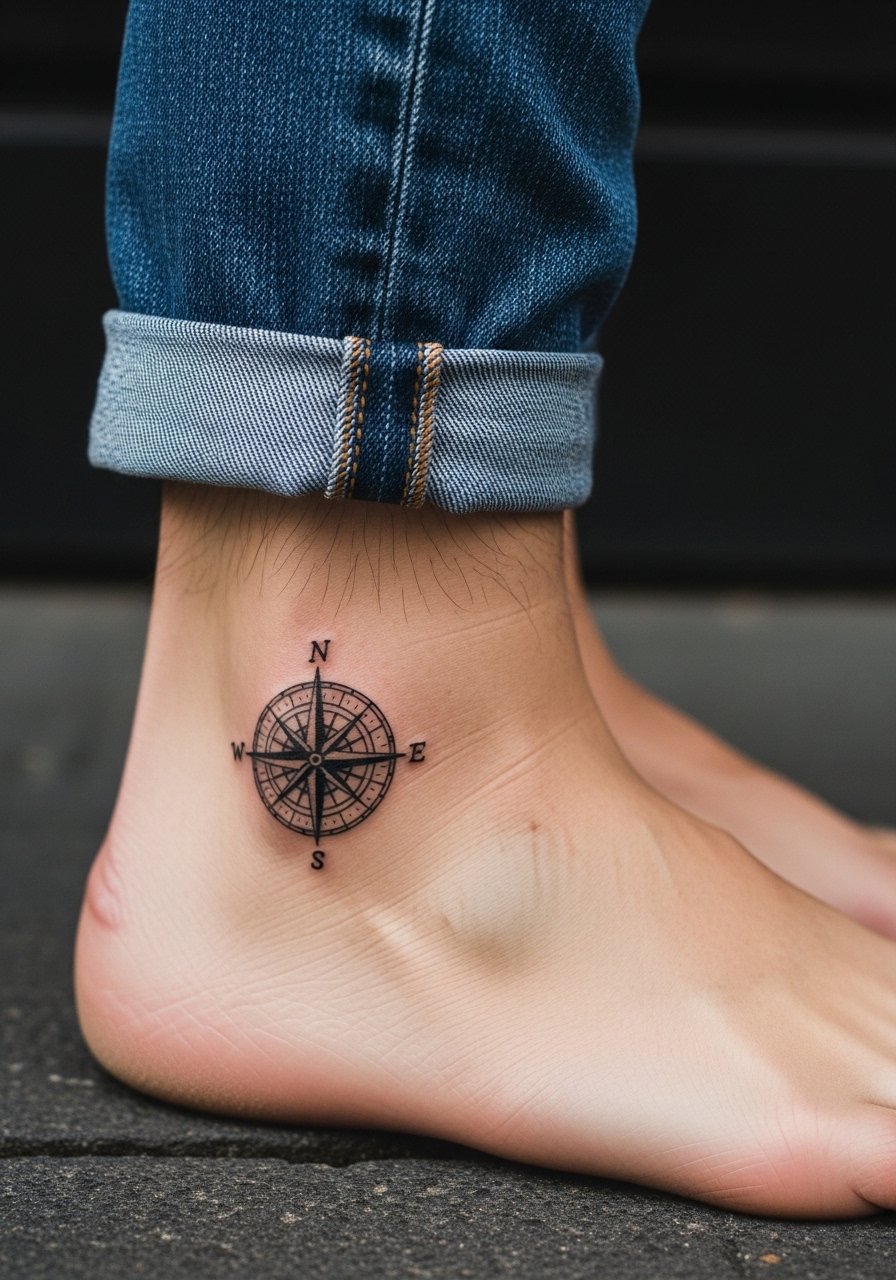
8. Tiny Realistic Compass with "Be Brave" on Ankle

Ankle pieces face lots of rubbing from socks and shoes. The compass needs clean negative space between points to avoid filling in. Tell your artist you want solid outer points and light interior shading. Session time is short, but the first week needs protection. A common mistake is placing too much tiny lettering near the compass; keep the script offset slightly. Show it off with sandals or cropped trousers so the ankle reads intentional.
9. Realistic Stacked Pebbles on Inside Wrist
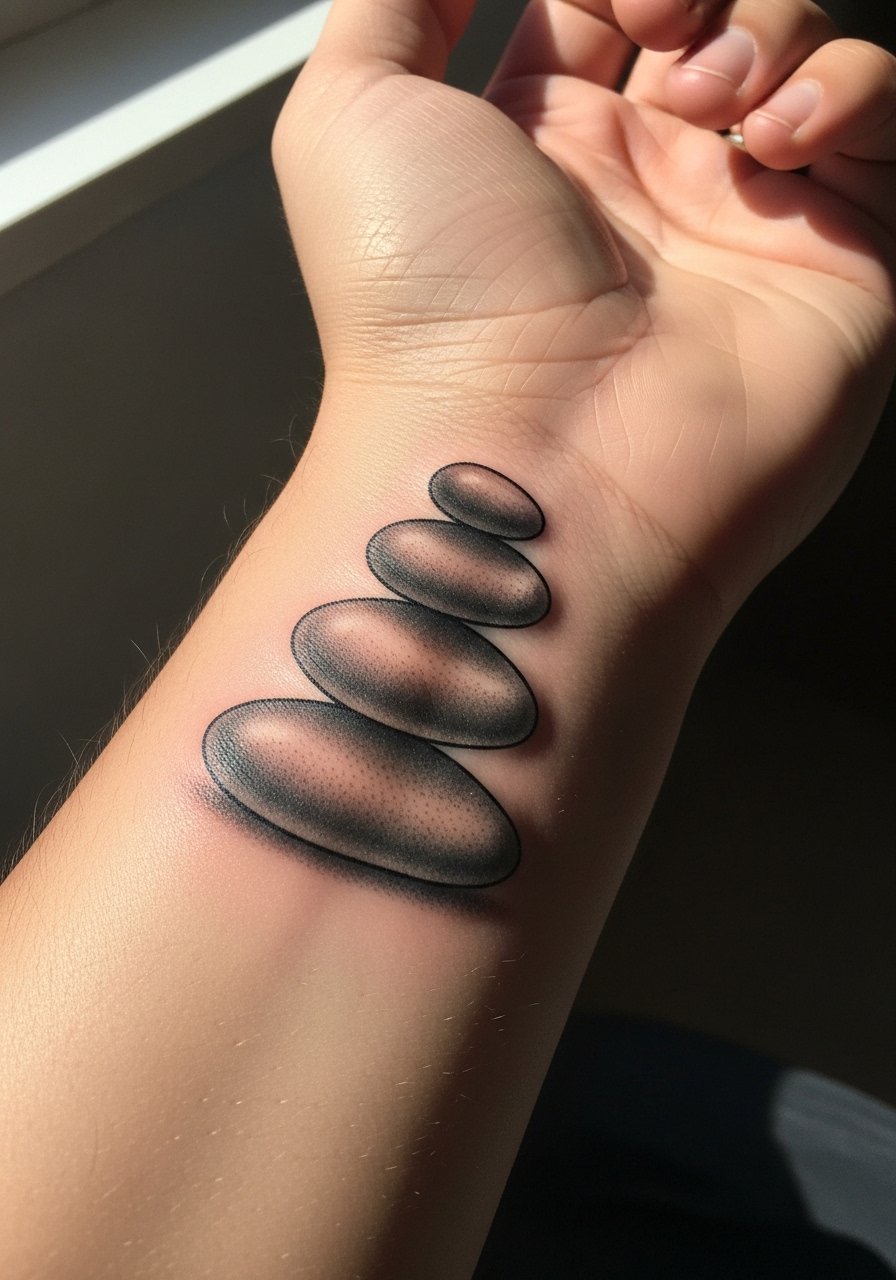
Stacked pebbles symbolize steady courage. The inner wrist is a high-movement zone which risks early softening. Ask for varying dot work densities so each pebble keeps separate texture. Sessions are brief but consider touch-ups by year two. Mistake to avoid is too much exact symmetry which loses character as the skin ages. Pair with a thin leather cuff bracelet or a simple watch to frame the stack without covering it.
10. Realistic Portrait Silhouette with "Be Brave" Script Behind Ear
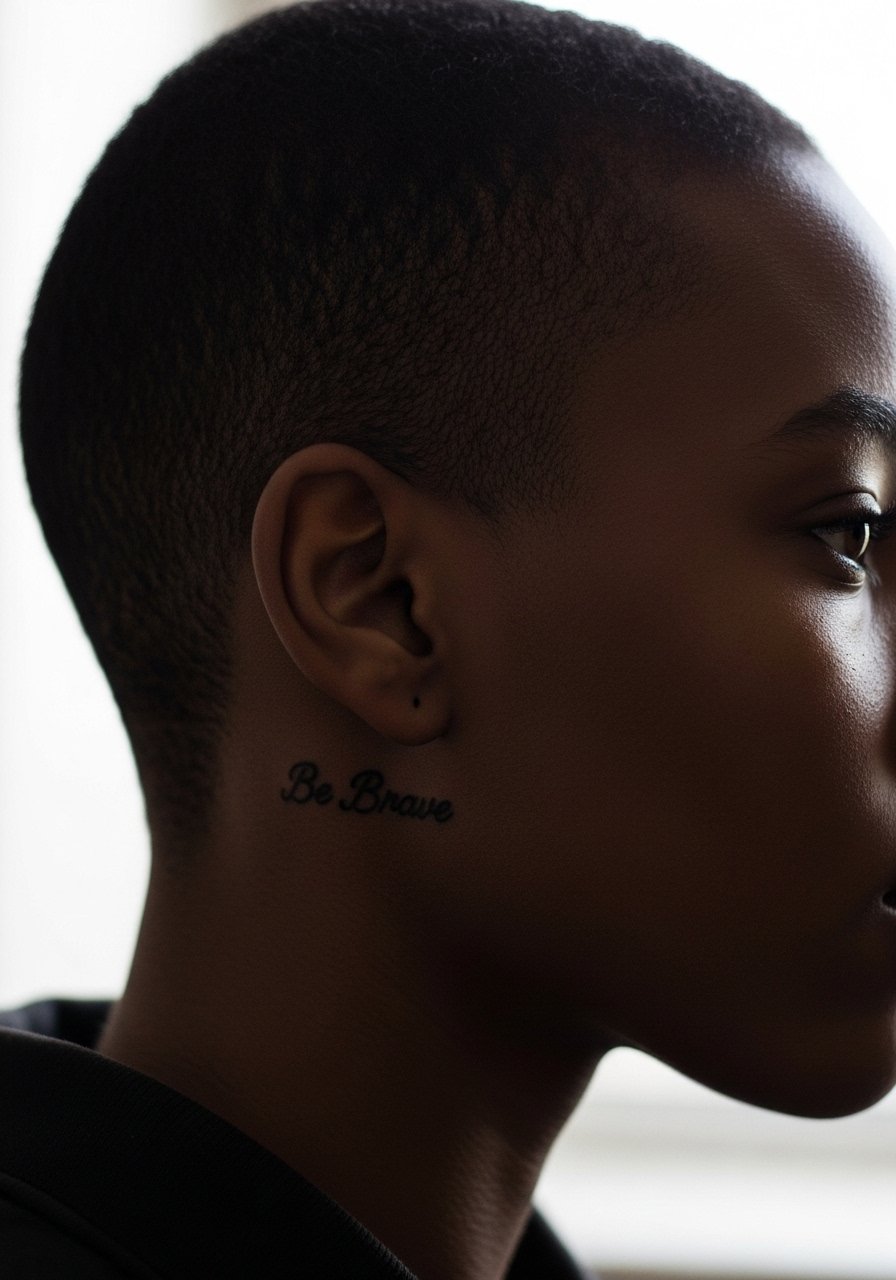
Behind-ear placements are intimate and require hair management during the session. The silhouette works best as a shallow-filled shape that does not rely on micro-detail. Tell your artist you want clean edges and avoid tiny interior strokes that disappear. Note that some workplaces still react to visible neck-area tattoos. For session day have easy-to-shift hair and a wide-neck shirt so access is quick and comfortable.
11. Micro-Realism Sparrow Mid-Chest, near Sternum
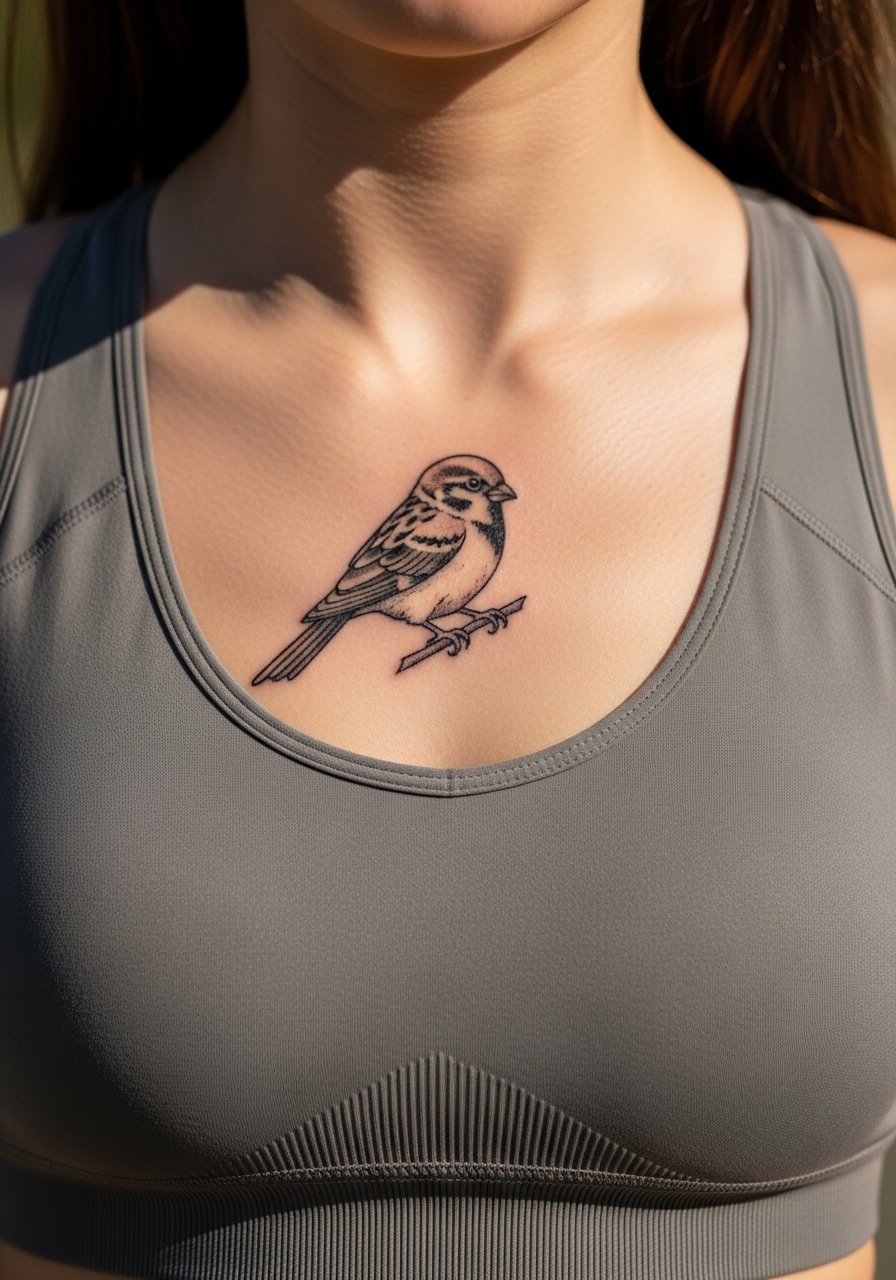
Sternum pieces sit close to the center of gravity of your chest, and the skin there can be sensitive. A sparrow in micro-realism reads like a quiet bravery emblem. Ask for slightly bolder contrast in the central feathers and lighter wing tips. This placement needs a calm, spaced session and might require a touch-up to restore fine feather tips. People sometimes ask for tiny dots that vanish into pores. For the session wear a fitted sports bra so the artist can work without constant wardrobe fuss.
12. Realistic Dagger Piercing a Small Rose on the Side Thigh
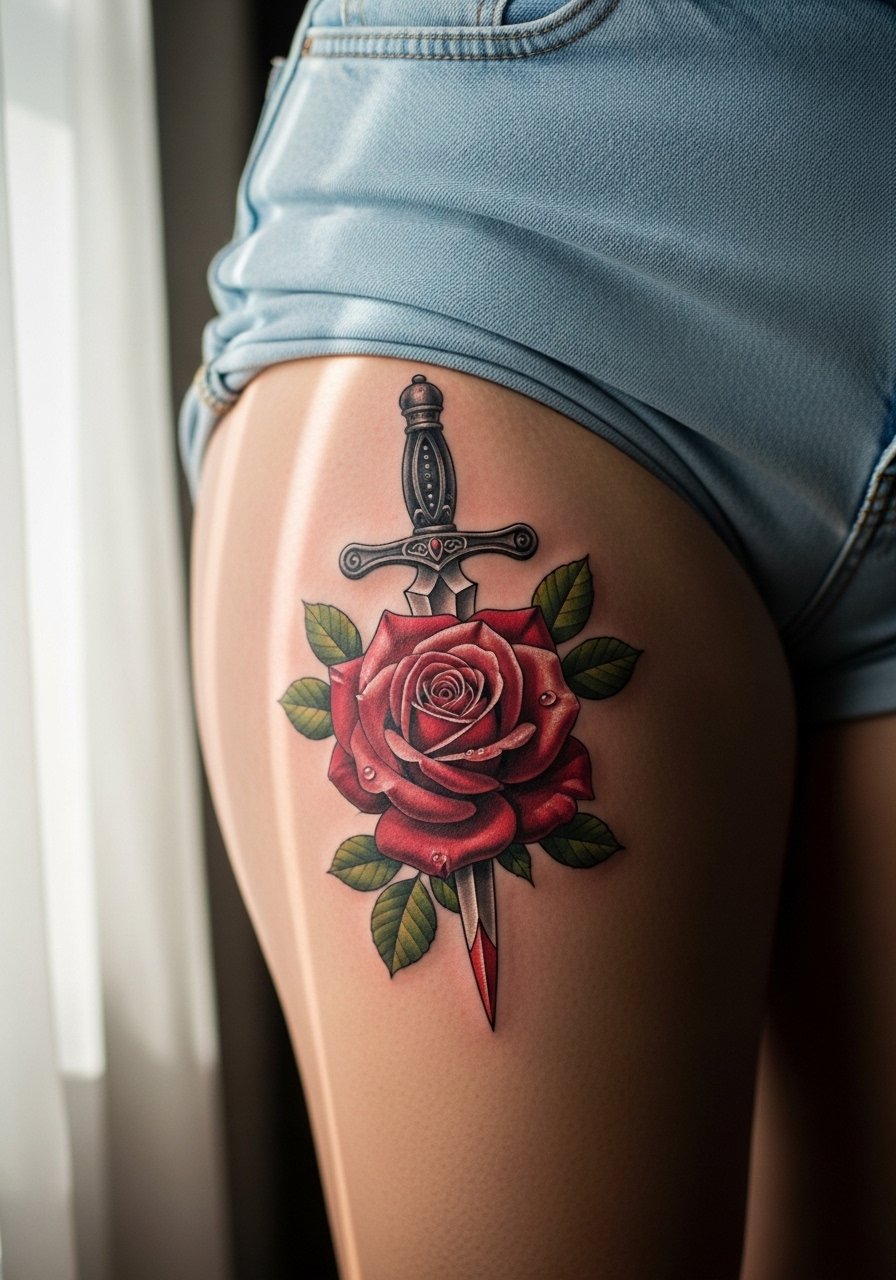
Thigh tattoos let realism breathe with enough space. A realistic dagger and rose pairing balances sharpness and softness. Ask for defined negative space at the dagger edge so it reads crisp through healing. The session is moderate in length. Common mistake is packing too many tiny highlights in the rose center that vanish after scabbing. Wear high-waisted shorts or a skirt so the piece slides into your regular wardrobe without rubbing.
13. Realistic Single Eye with Tiny Script on the Back of the Hand

Hand tattoos are visible and still impact some professional settings. A realistic eye needs bold edges and strong pupil contrast to keep its gaze after the top layers of skin shed. Expect faster fading and more frequent touch-ups than forearm work. Many people forget how much sun and washing the hands get. A common mistake is asking for ultra-fine lashes which blur first. If you plan to show it off, balance with minimal rings rather than bulky jewelry so the eye remains the focal point.
14. Realistic Seahorse Along the Side of the Foot
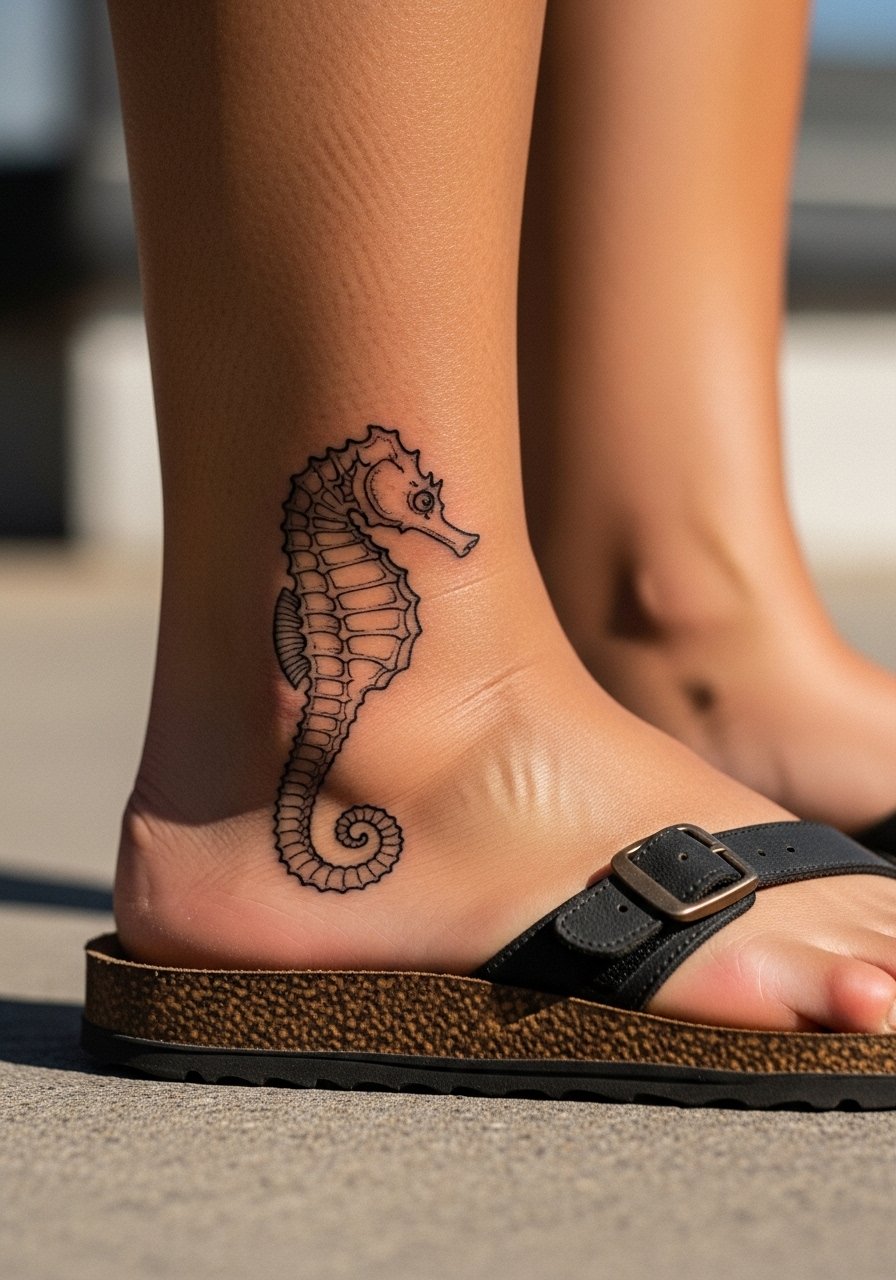
Foot tattoos handle fine detail poorly because the skin is thin and moves with shoes. A seahorse works if scaled with clear solid areas and a sturdy outline on its spine. The session is quick but expect touch-ups due to friction from footwear. Common mistake is placing too many micro lines that disappear. For the appointment wear slip-on sandals or flat sandals to avoid sock friction afterward.
15. Photorealistic Hummingbird Near Collarbone
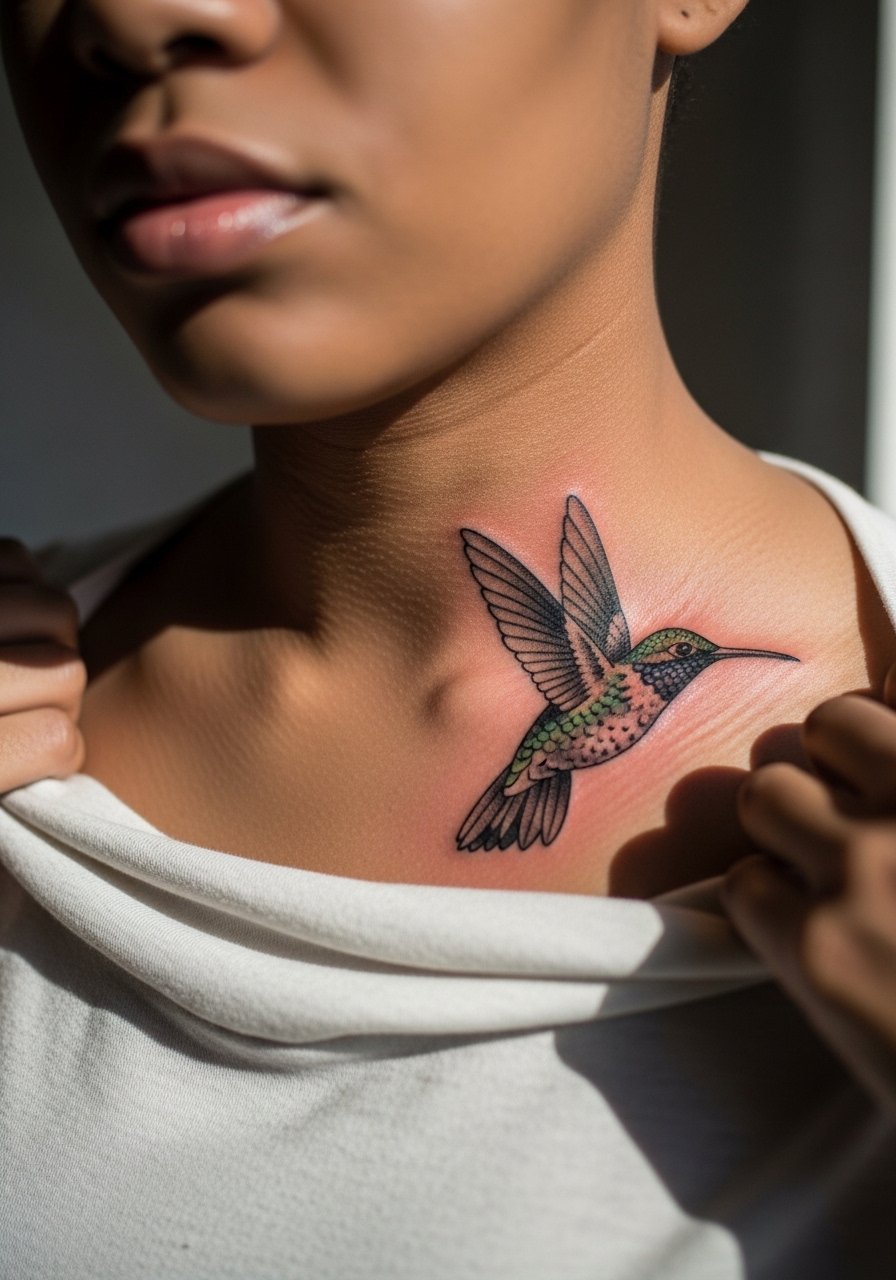
A hummingbird in photorealism captures motion and bravery in small scale. Collarbone placement moves with breathing, so request slightly thicker strokes for wing tips. The session can be split into outline and shading to minimize trauma. People often ask for extremely thin wing lines that disappear after a year. Dress the area with thin strap camisoles to show the bird without stressing the skin.
16. Realistic Lion Paw Print on Upper Thigh

Thigh skin tolerates saturation so a paw print can be textured and bold. Ask the artist to emphasize pads with subtle stipple to avoid muddying. The session is comfortable and often quick. Avoid asking for micro-cracks and fissures inside the pads that the body will blend with time. This piece pairs well with high-slit skirts or wrap skirts for moments you want to reveal it deliberately.
17. Micro-Realism Compass Rose Behind the Ankle Bone
Behind-ankle placements are small and encounter shoe friction. For a compass rose ask for distinct outer points and slightly simplified interior decoration to retain clarity. Sessions are short but expect early protection from socks. A frequent mistake is adding too many tiny veins or dots that disappear. Style with cropped trousers or ankle boots that show just the right amount of skin.
18. Realistic Oak Leaf on Inner Bicep
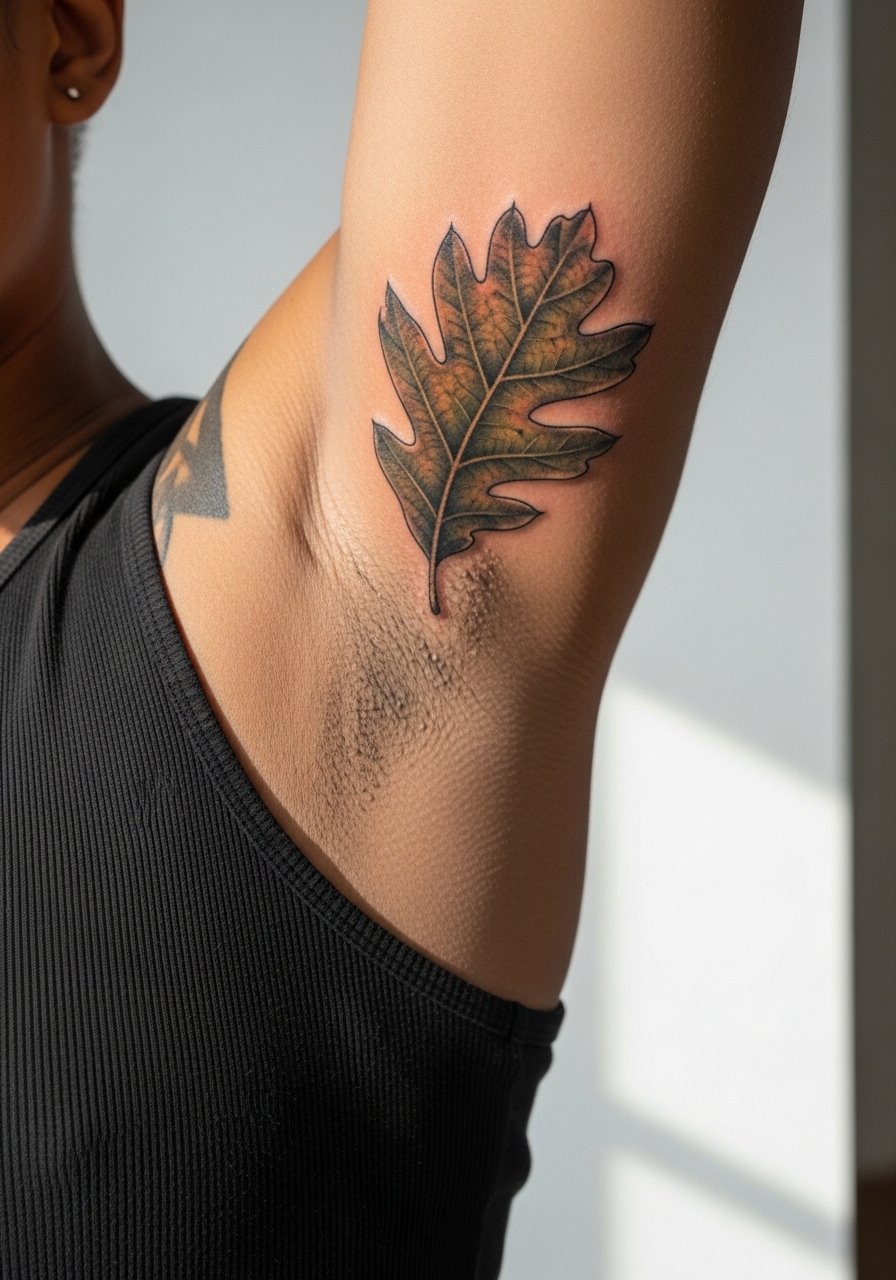
Inner bicep skin is soft and can hold crisp shading if the artist is comfortable working there. An oak leaf with clear midrib and stipple shading ages predictably. Tell your artist you want a stronger midrib so the shape keeps structure as the pigment settles. Sessions might require position changes to access the inner arm. A common mistake is making veins too detailed. For comfort wear a loose tank top you can raise without stretching the fabric over the new ink.
19. Photorealistic Small Sparrow on the Back of the Neck
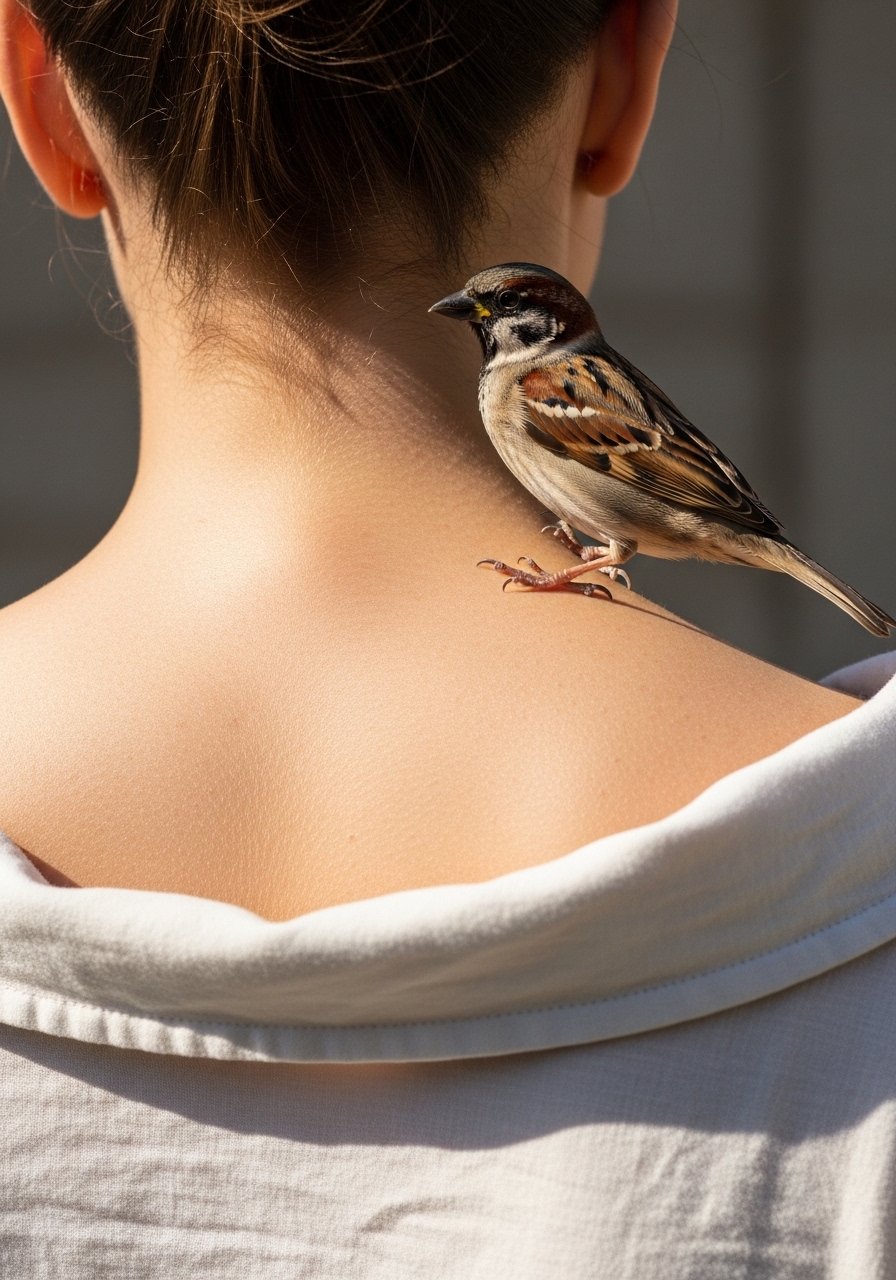
Neck pieces are visible and require a skilled hand. A small sparrow is readable if the beak and eye are given extra contrast. The session can be uncomfortable and some workplaces react to visible neck tattoos. Mistake to avoid is dense micro-shading that turns to a gray patch. For session logistics wear a wide-neck shirt so the artist has access without causing friction on the fresh work.
20. Realistic Candle Flame with Tiny "Be Brave" Script on Rib Side
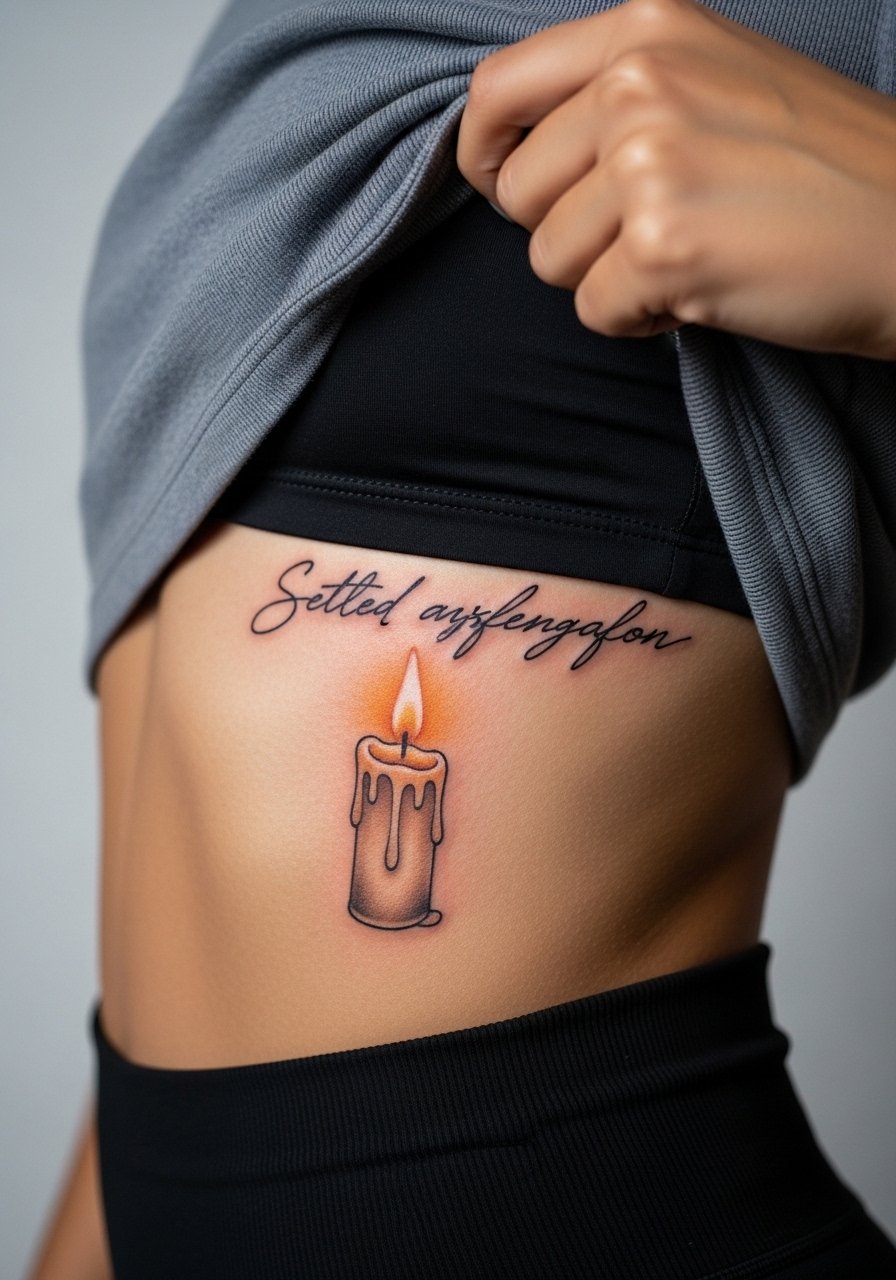
A candle flame symbolizes enduring courage. The rib side is a sensitive placement and the flame should use bold contrast at the wick and subtle gradient outward. Artists are split on fine line in this area. One camp warns of quick blur from skin movement. The other says correct depth and spacing keep lines intact. Ask your artist which approach they favor and plan for longer sessions. For comfort wear a crop top or zip front hoodie that allows easy access and warmth control.
21. Realistic Oak Tree Seedling on Inner Wrist
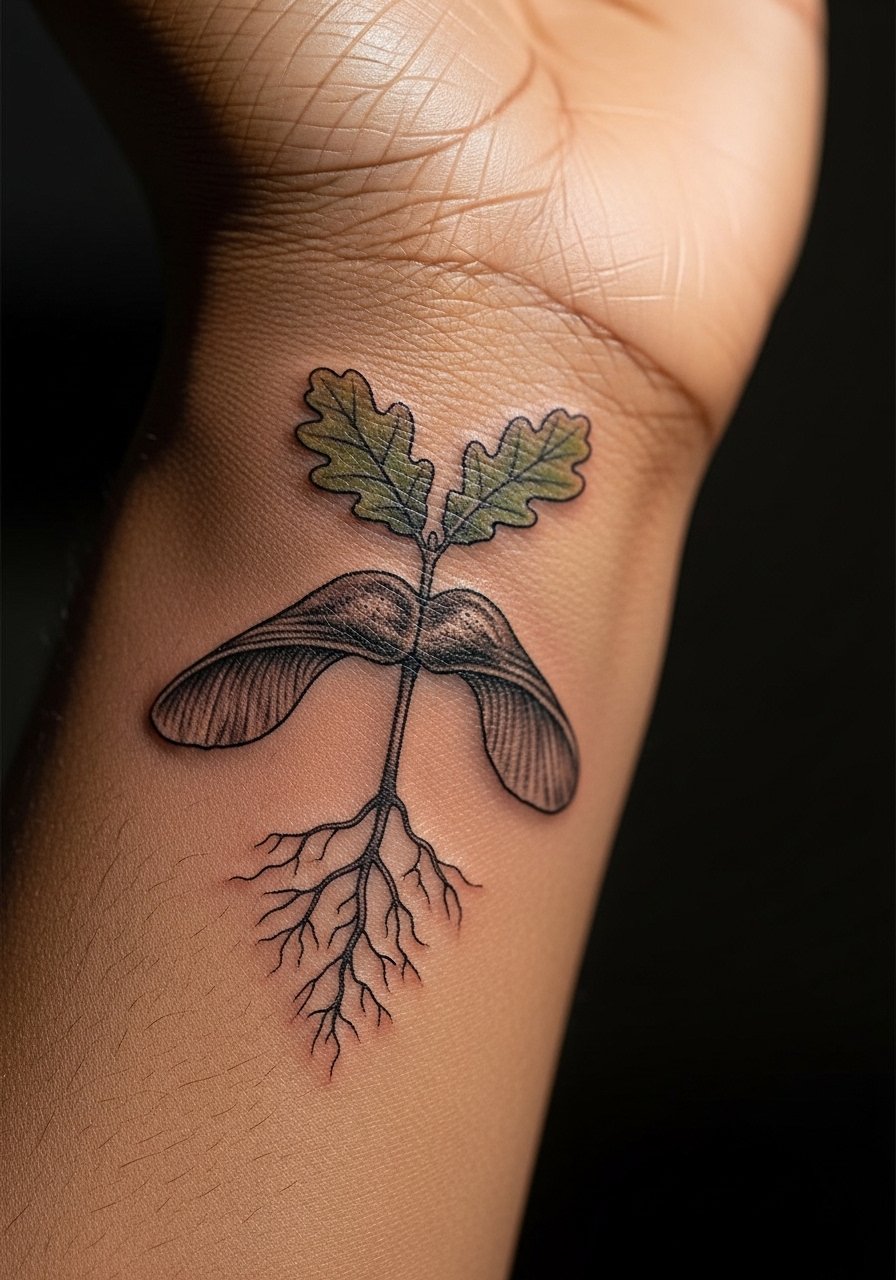
An inner wrist seedling reads as quiet bravery. Since the wrist endures movement and washing, ask for simplified root lines and slightly stronger stem contrast. Sessions are short but expect early protection and possible touch-up at year two. The common mistake is crowding seeds or leaves too close. Show it off with a minimalist bracelet rather than wide cuffs so the piece remains visible.
22. Realistic Sparrow Pair over Heart on Left Chest
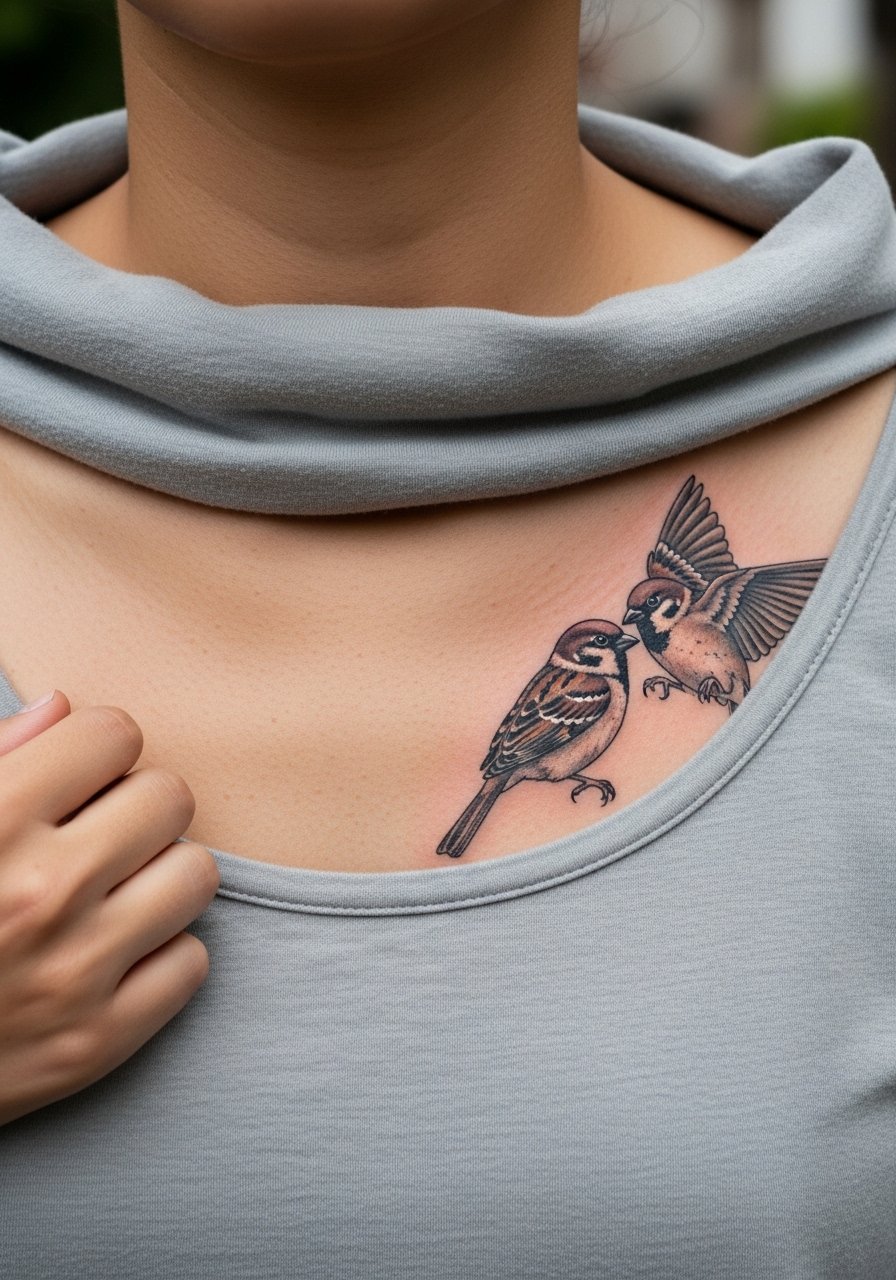
Chest pieces age with sun exposure and movement. Two sparrows over the heart can represent shared courage. Ask for spacing between birds so their wings do not merge as the skin settles. Sessions can be moderate to long. A mistake is over-detailing feathers in overlapping areas that become indistinct. For the session choose a wide-neck shirt you can shift without rubbing the site.
23. Realistic Anchor Wrapped with Rope on Inner Wrist
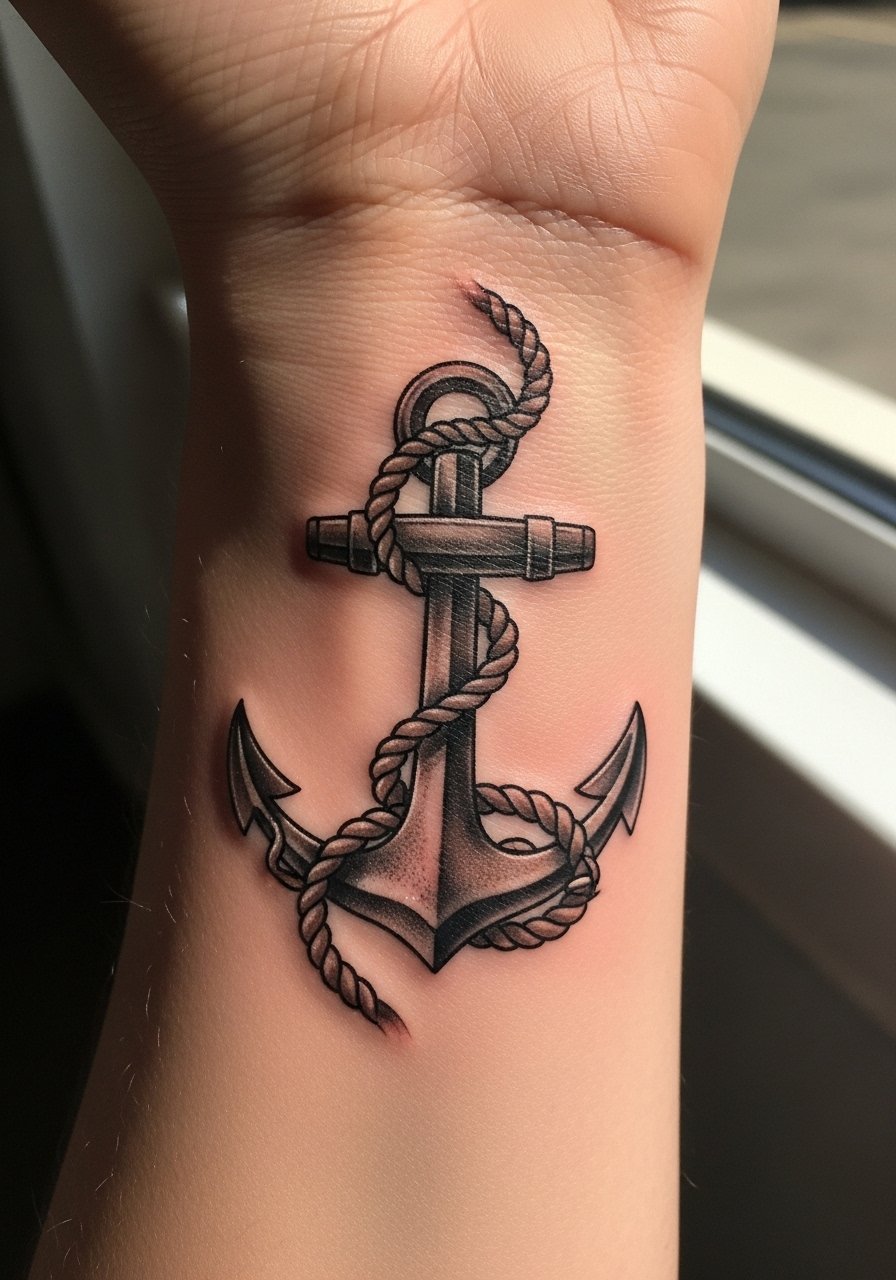
Anchors are classic bravery symbols. For wrist anchors keep the rope loops broad instead of hairline twists so texture holds. Session time is short. Frequent washing is the enemy of fine rope detail, so expect touch-ups. People often request too many tiny knot details that vanish. Pair with a delicate rope-style bracelet to echo the motif without crowding the skin.
24. Realistic Bear Paw on Upper Back, near Shoulder
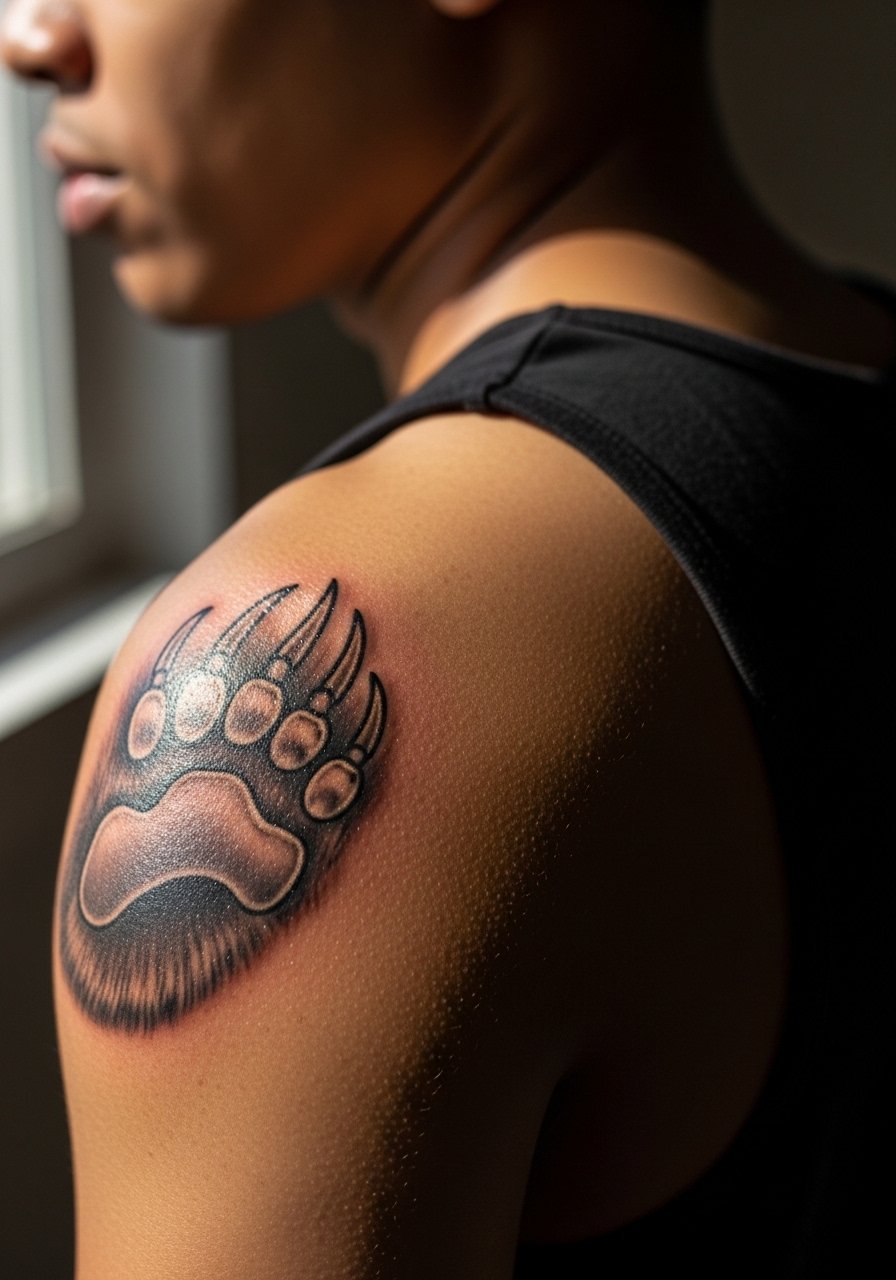
Upper back pieces age well and handle saturation. A bear paw can be rendered realistically with textured pads and shallow claw marks that remain readable. Sessions are moderate and comfortable. A common mistake is making claw lines too thin. For the session wear a loose tank top you can easily pull aside so the artist has clear access.
25. Realistic Sparrow Wing on Side of Hand near Thumb
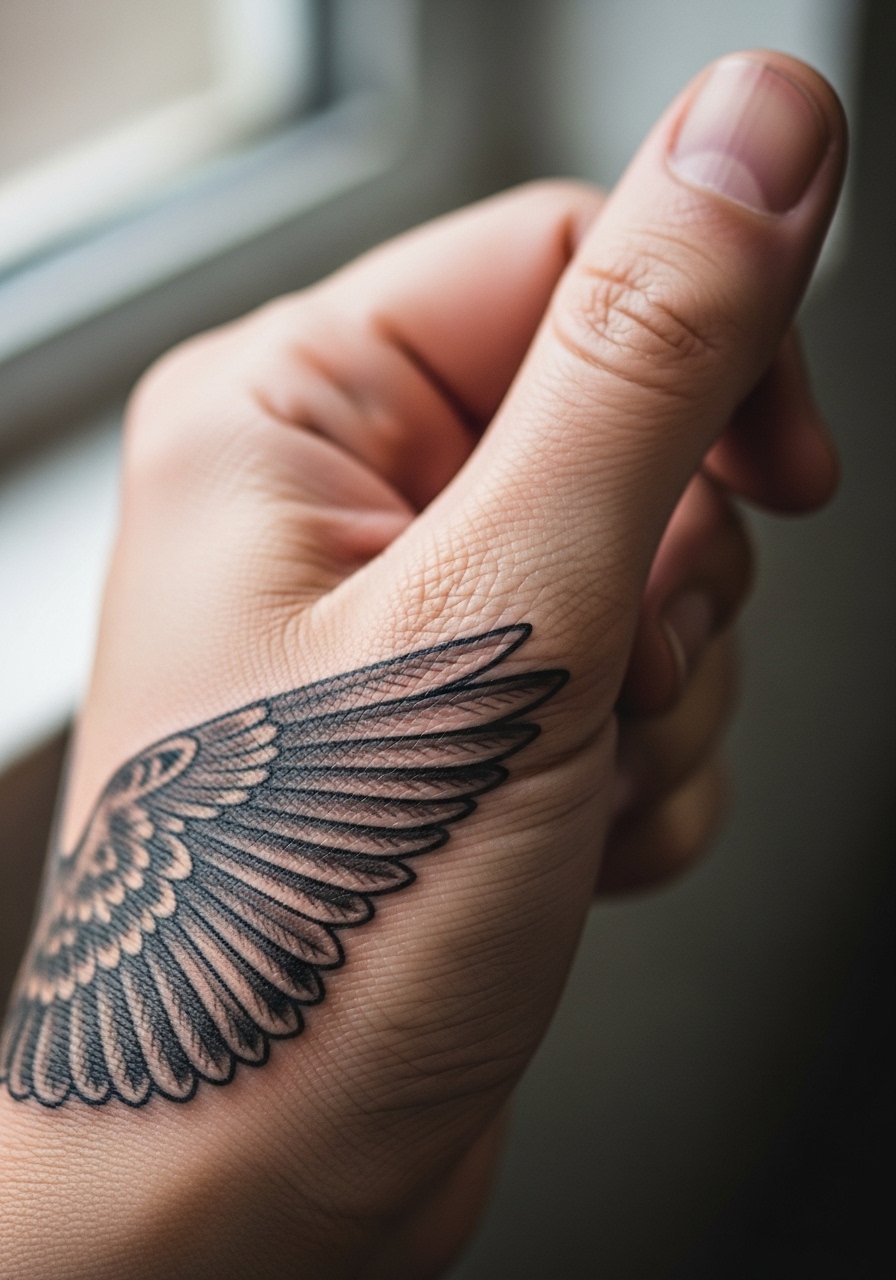
Side-of-hand tattoos rub a lot, so the wing should use simplified barbs and a stronger marginal line. Expect faster fading and plan for touch-ups. Many ask for feather micro-etching that blurs within a year. If you need the look to last, scale up slightly and prioritize bold strokes. Style with minimal rings and consider a thin leather cuff when you want to frame the area without covering the art.
26. Realistic Compass with Mountain Overlay on Upper Arm
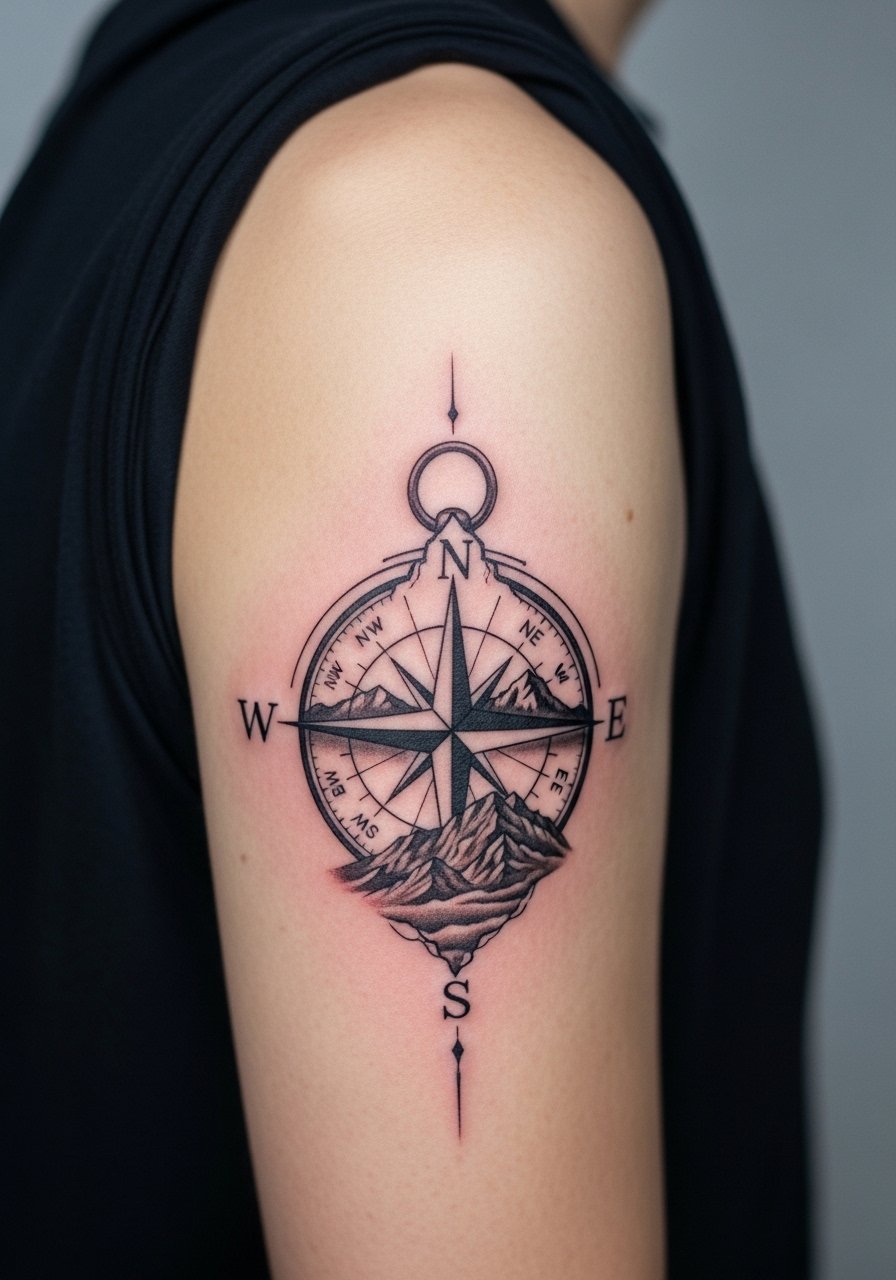
Upper arm placements support layered realism. A compass overlaid with a mountain scene reads like a visual task to remain brave while navigating life. Ask for clear separation between the compass rim and the mountain silhouette so the piece keeps its reading over time. Sessions are moderate and comfortable. Avoid tiny stipple in both elements that might merge. Pair with rolled sleeves or a loose button-down to let the composition show without competing textures.
27. Realistic Phoenix Rising from a Small Flame on the Sternum Edge

The sternum edge requires careful depth control because the skin is sensitive. A phoenix rising from flame works if the bird's main feathers are given bold contrast and the flame uses soft gradients. Expect a tender session and ask about pacing breaks. Some artists warn against dense micro-detail here due to movement. For the appointment a fitted sports bra makes access straightforward and keeps you comfortable.
Frequently Asked Questions
Q: Will fine line "Be Brave" scripts on wrists blur quickly?
A: Fine line wrist scripts face constant washing and friction, so they often need a touch-up sooner than forearm pieces. Ask your artist for slightly open counters and a touch-up plan. If you want to protect the first week try a thin protective film suggested in the Studio Day Picks.
Q: Is ribcage placement worth the pain for a realistic mountain or candle design?
A: Ribcage pieces are higher on the pain scale but they make the design private and dramatic. Decide based on tolerance and how often you want the piece visible. Ask the artist whether their technique favors fine line on ribs or thicker spacing, because artists divide on this.
Q: How do I pick realistic typography for a "Be Brave" script so it ages well?
A: Choose scripts with slightly wider stroke contrast and ask the artist to avoid micro flourishes. During consultation show examples of healed work from the artist so you can see how their lettering settles. A small test stencil on your skin helps visualize scale.
Q: What should I wear to a sternum or upper chest session to be comfortable and allow easy access?
A: Wear a fitted sports bra or a wide-neck shirt you can shift without exposing more skin than necessary. These layers let the artist work while you stay covered and warm between passes. A recommended item is a fitted sports bra for easy access.
Q: Are hand and neck tattoos still risky for job prospects, and does realism change that?
A: Visible placements like hands and neck can still affect some professions. Realism makes the art more striking, which can increase visibility. If career flexibility matters, think about placement that can be covered when needed or choose a smaller motif that reads more discreetly.
Q: How often should I expect touch-ups for realistic black-and-gray pieces on high-friction areas like feet or hands?
A: High-friction zones such as hands and feet usually need touch-ups every 1 to 3 years depending on exposure and care. Realistic detail fades faster there, so plan touch-ups as part of the design decision rather than a surprise.
