
Fine line plague doctor trends look gorgeous online, but longevity is where the decisions happen. I have seen bold blackwork settle into a decade of readable contrast while delicate needlework that looked flawless fresh needed touch-ups far sooner. If you are picking a beaked mask, think about placement, spacing, and how you want it to look after one, three, and five years. The sections below jump straight into references, placements, and what to ask for at the consultation.
1. Traditional portrait plague doctor on upper arm
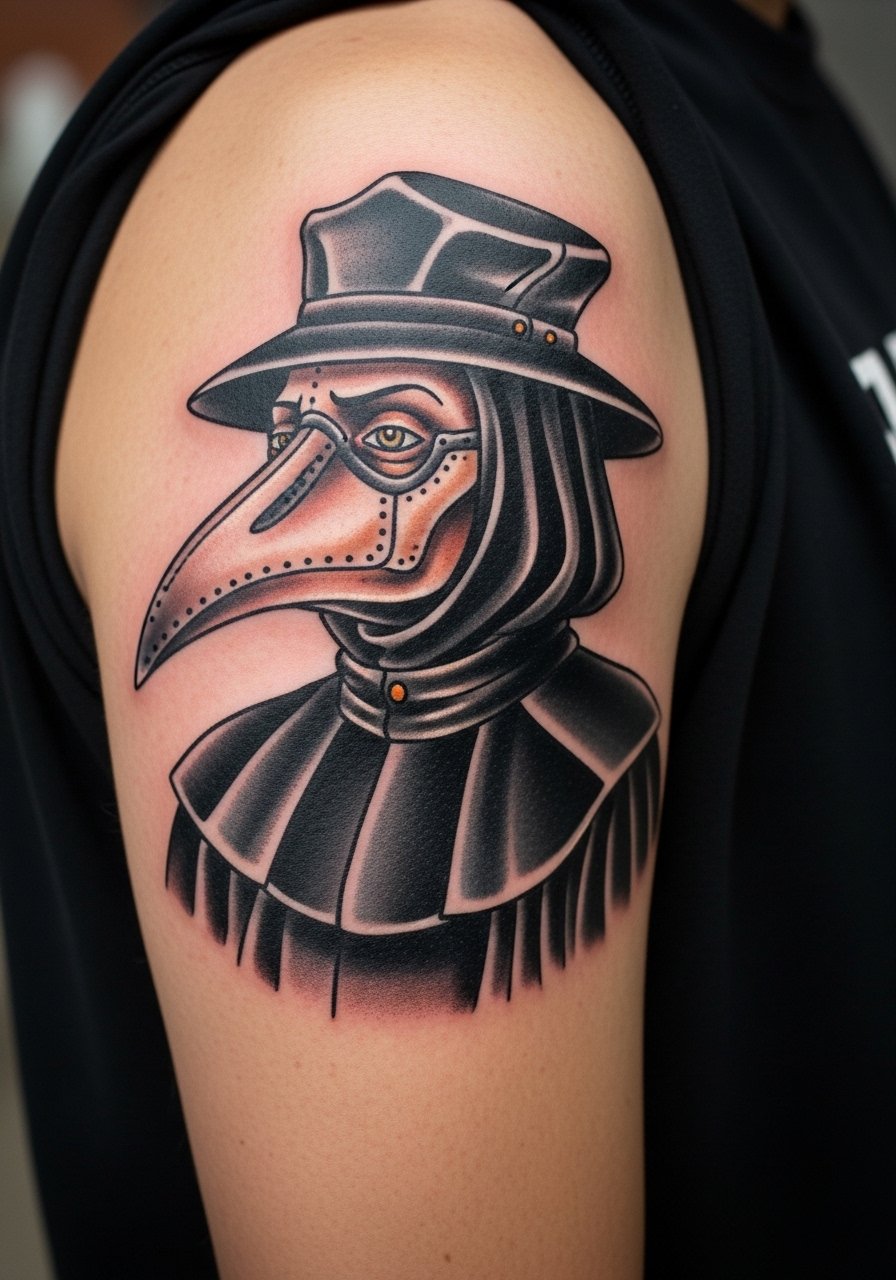
I recommend this when you want historical detail that reads from across a room. I tell people to pick a six to eight inch scale so the beak and hat get room and the linework does not crowd. Fair warning, the outer upper arm is forgiving on blowout but still needs solid lineweight for long-term saturation. Session time is usually two to three hours and the pain is moderate. For the appointment wear a black fitted t-shirt you can roll or pull for access. A common mistake is asking for tiny facial detail in a small portrait and then expecting it to remain crisp at year five.
2. Blackwork silhouette plague doctor on back
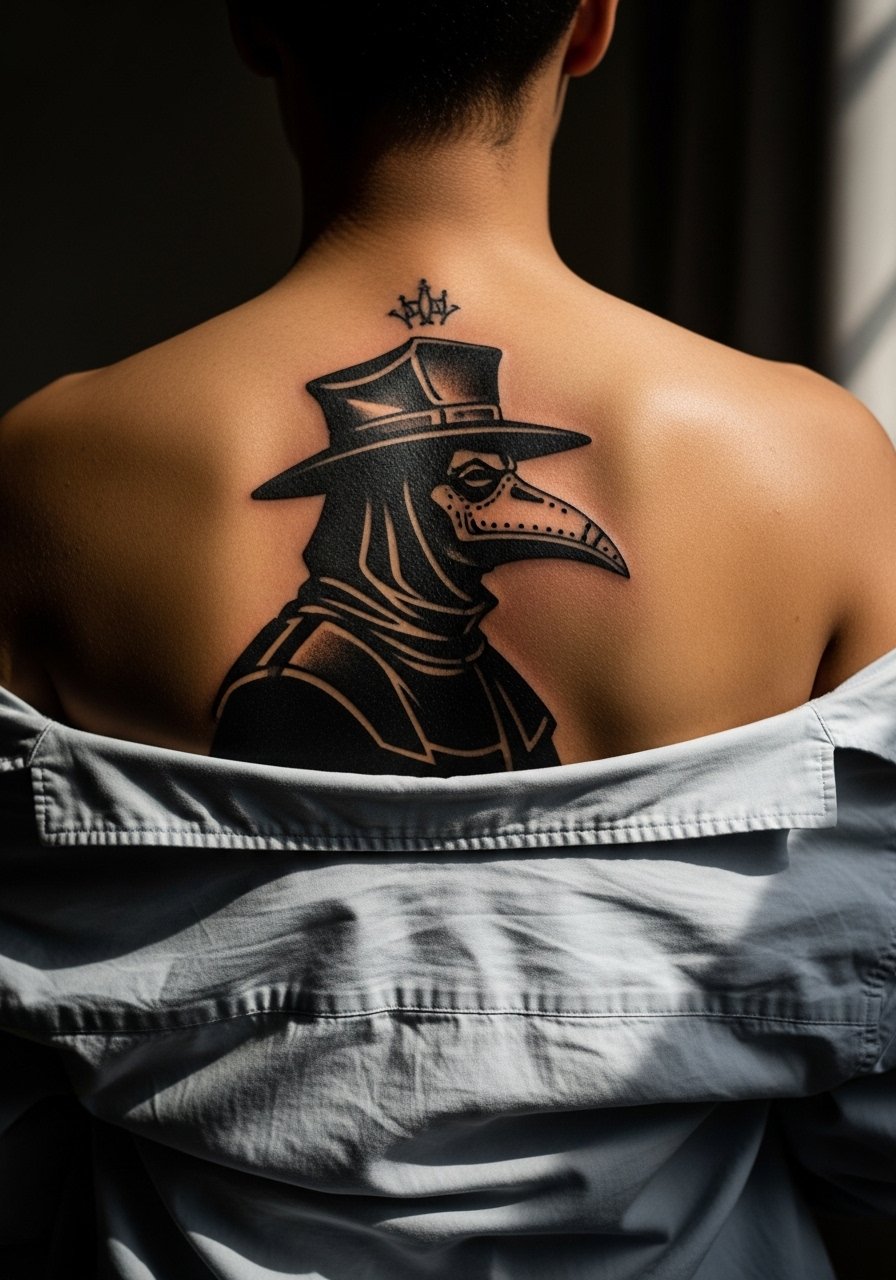
Visual impact leads here. Blackwork silhouettes really work on a broad canvas like the back because the negative space reads starkly. Expect three to four sessions for a full back piece and plan for heavy saturation sessions that can be intense but short per pass. This placement is low risk for blowout when the artist spaces the fill properly. For showing it off pair the healed look with a backless crop top or an open-back dress. The main mistake is shrinking a silhouette into a patch that becomes muddy over time.
3. Detailed beaked mask on forearm
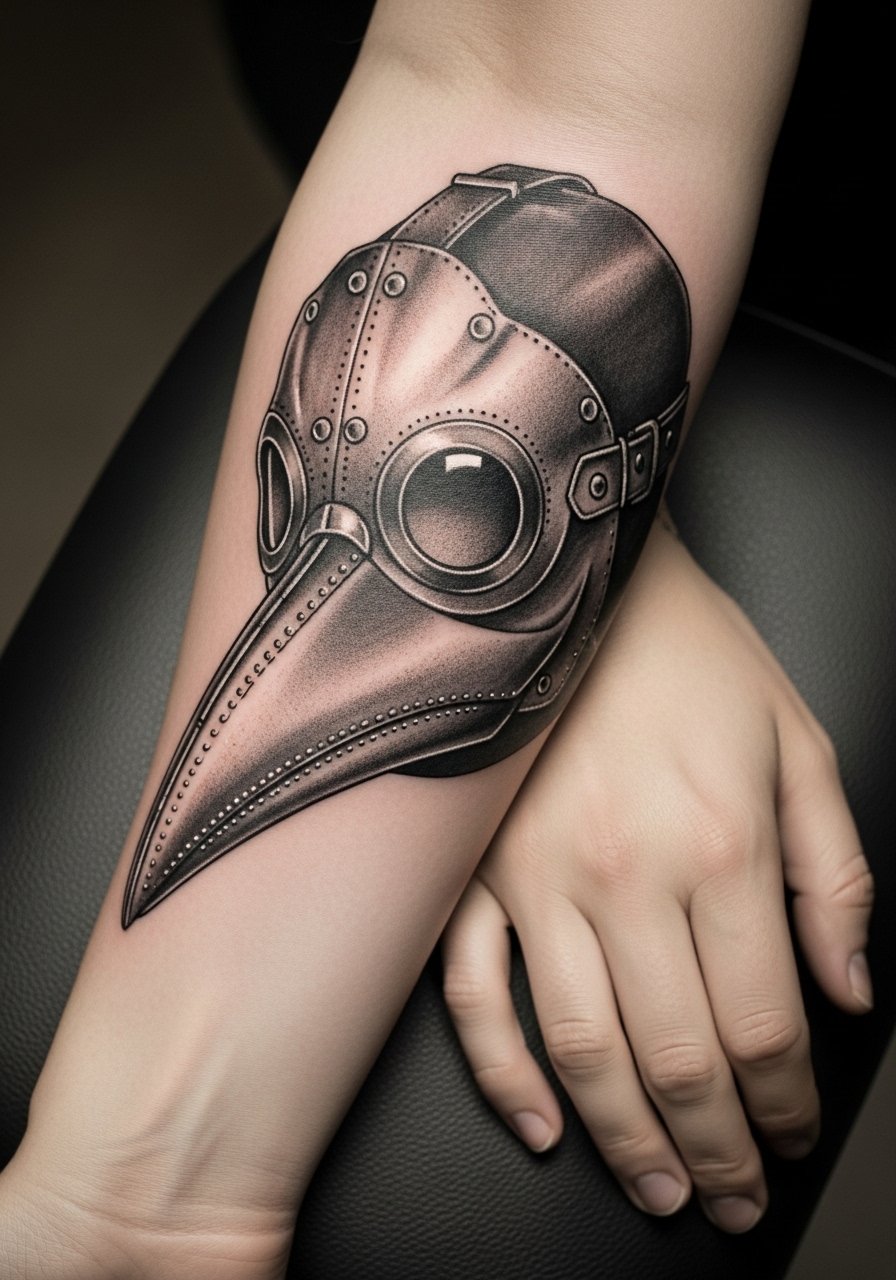
Personal observation: forearm masks get the most daily scrutiny so the detail needs to be proportionate to the canvas. I tell clients to go four to six inches and to ask the artist for stipple shading rather than ultra-fine lines in dense areas. Expect one to two sessions and moderate pain. Styling wise, rolled-cuff henleys frame the design and keep attention on the forearm, try a henley shirt rolled cuff on reveal days. A frequent error is packing too many tiny cross-hatches which soften into gray patches after a couple of years.
4. Full-body plague doctor with hat and coat on chest
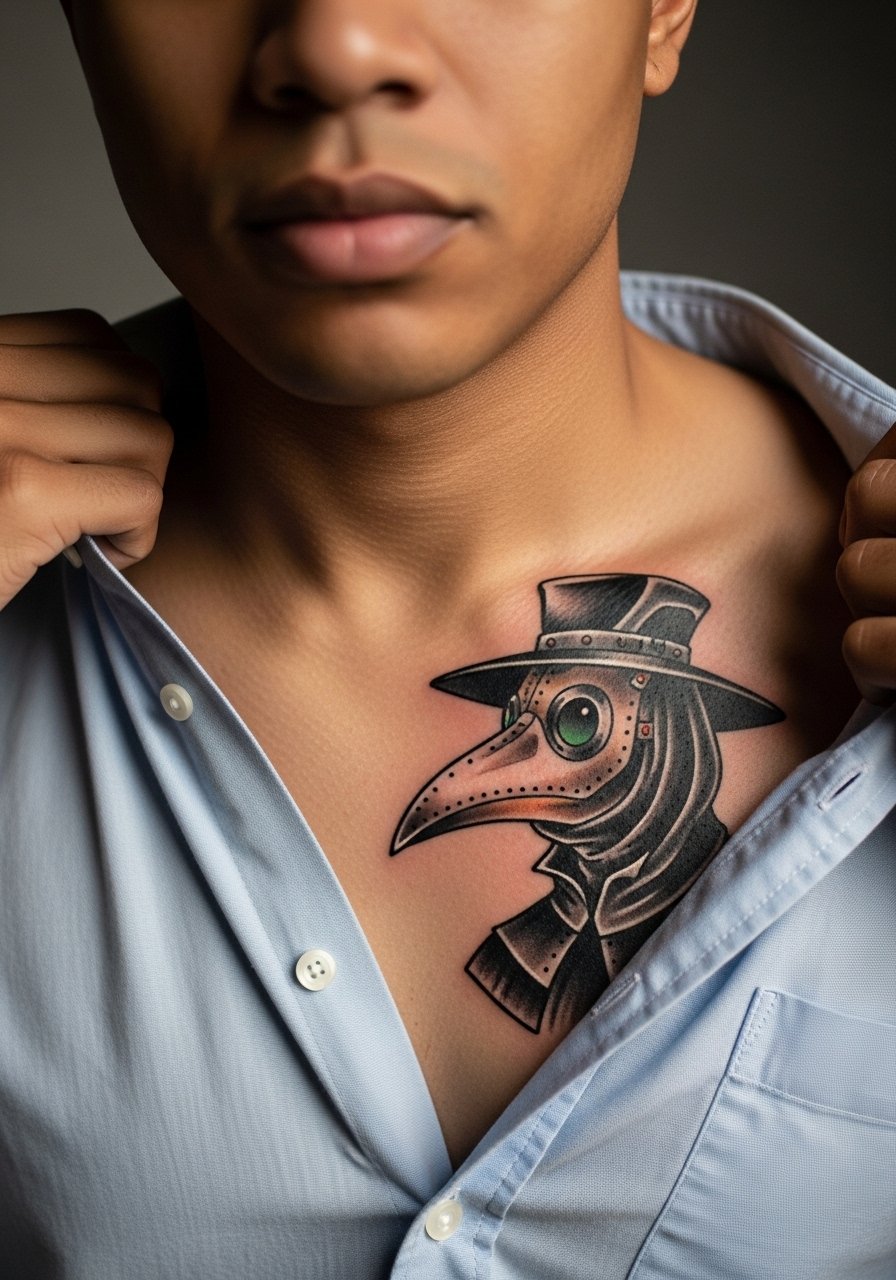
Visual impact lead again. Chest pieces read as personal statements and suit neo-traditional saturation. This one works best at five to seven inches tall so hat, coat, and stance get space. Sessions are commonly two sittings and the sternum area is more sensitive, expect higher pain near the bone. For showing it off try a deep v neck tee or an unbuttoned linen shirt. Many people ask for tiny facial texture that ends up lost on the chest because movement and stretch soften delicate detail.
5. Minimalist beaked mask outline on wrist
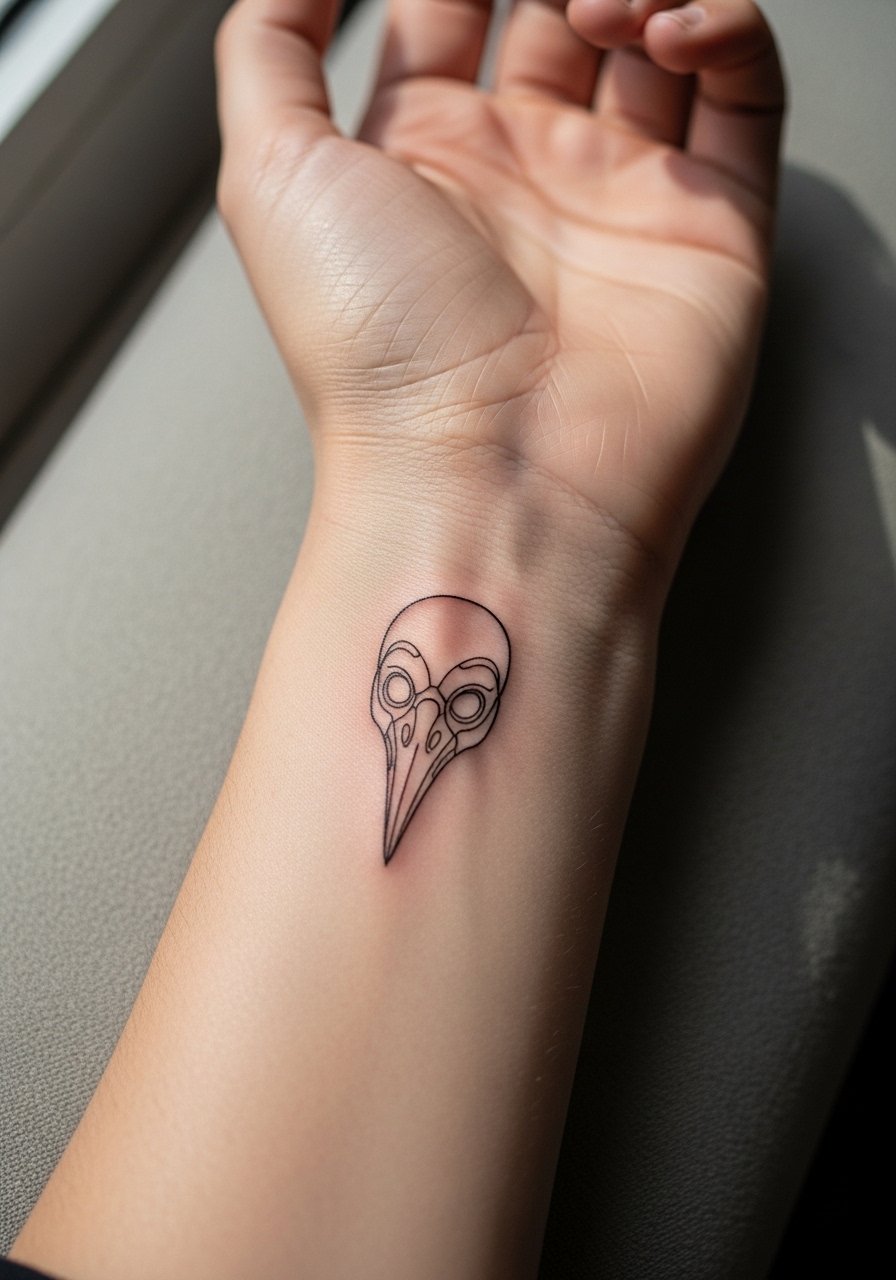
Mistake lead. The wrist is small and the biggest error is making the mask too intricate. For a wrist piece keep it two to three inches and insist on slightly bolder linework than your reference to allow for future fading. Expect a single short session and a sharp sting while the needle crosses tendons. Pair the healed tattoo with a thin silver chain bracelet on the opposite wrist to balance attention. Anticipate a touch-up at year two or three for fine outlines on this spot.
6. Watercolor plague doctor with plague motifs on thigh
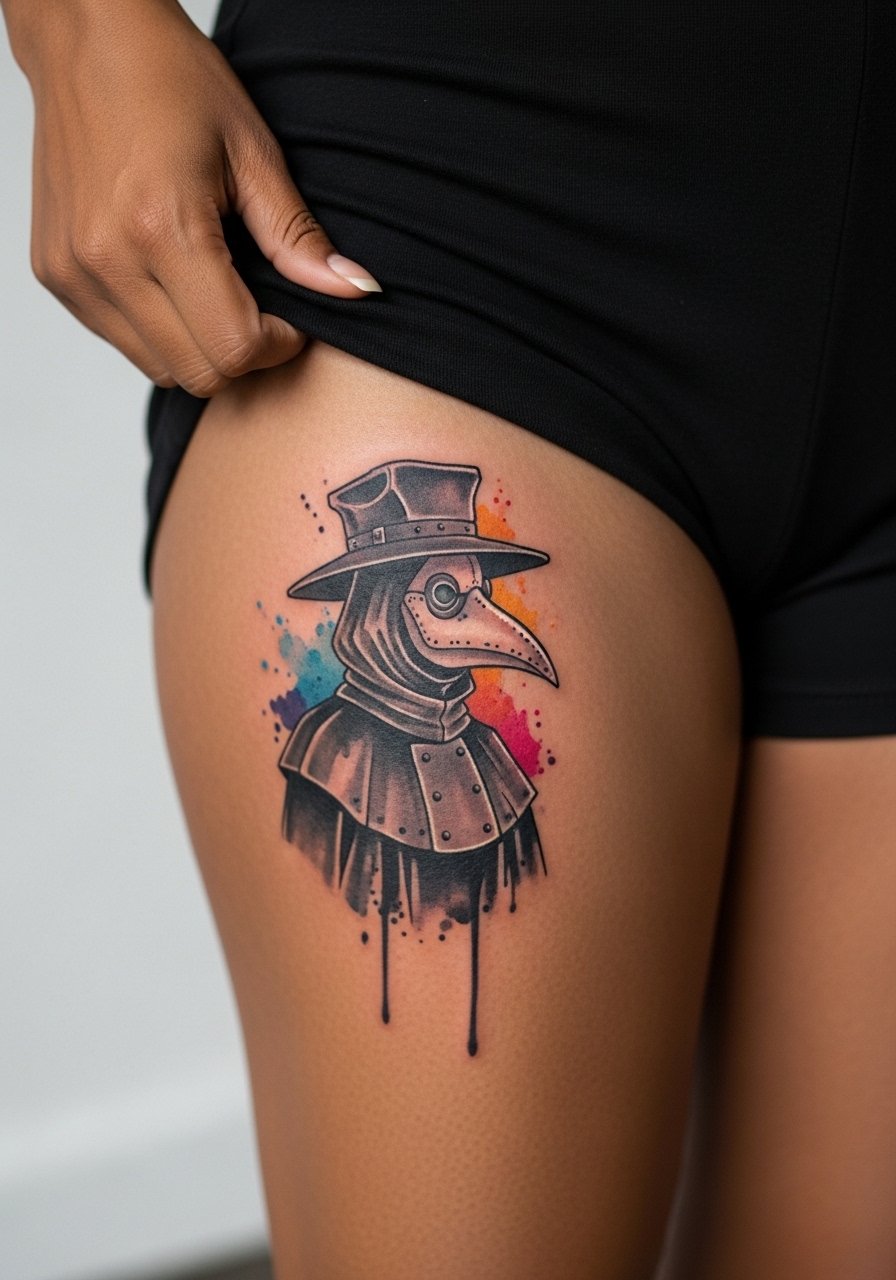
Aging and controversy lead. Watercolor looks painterly fresh but camp debate is real on color bleed. One group warns that bright washes fade unevenly and can look muddy with time. The other group argues controlled saturation and layered glazing hold better than expected. For thigh placement you get size and time: three sessions often. Wear loose shorts or a high slit skirt when showing it off. The common mistake is asking for watercolor with no outlines and then expecting crisp shapes as the piece heals.
Studio Day Picks
The upper-arm portraits, wrist outlines, and thigh washes above all ask for slightly different prep and first-week care, so a compact kit makes the appointment smoother.
-
Stencil transfer paper kit. Lets you preview line placement on your skin before the needle hits, which matters a lot for the upper arm portrait in idea one.
-
Topical numbing cream. Applied before a sensitive chest or thigh session eases the first pass without changing how the needle reads depth.
-
Thin protective film roll. Keeps wrist and forearm pieces clean during the first week of showers and typing.
-
Fragrance-free body wash. Gentle cleansing helps avoid irritation, especially for areas that rub against clothing like the thigh.
-
Aquaphor healing ointment. A thin layer for the first few days protects fine line and watercolor work without clogging the skin.
7. Micro-realism plague doctor mask on collarbone
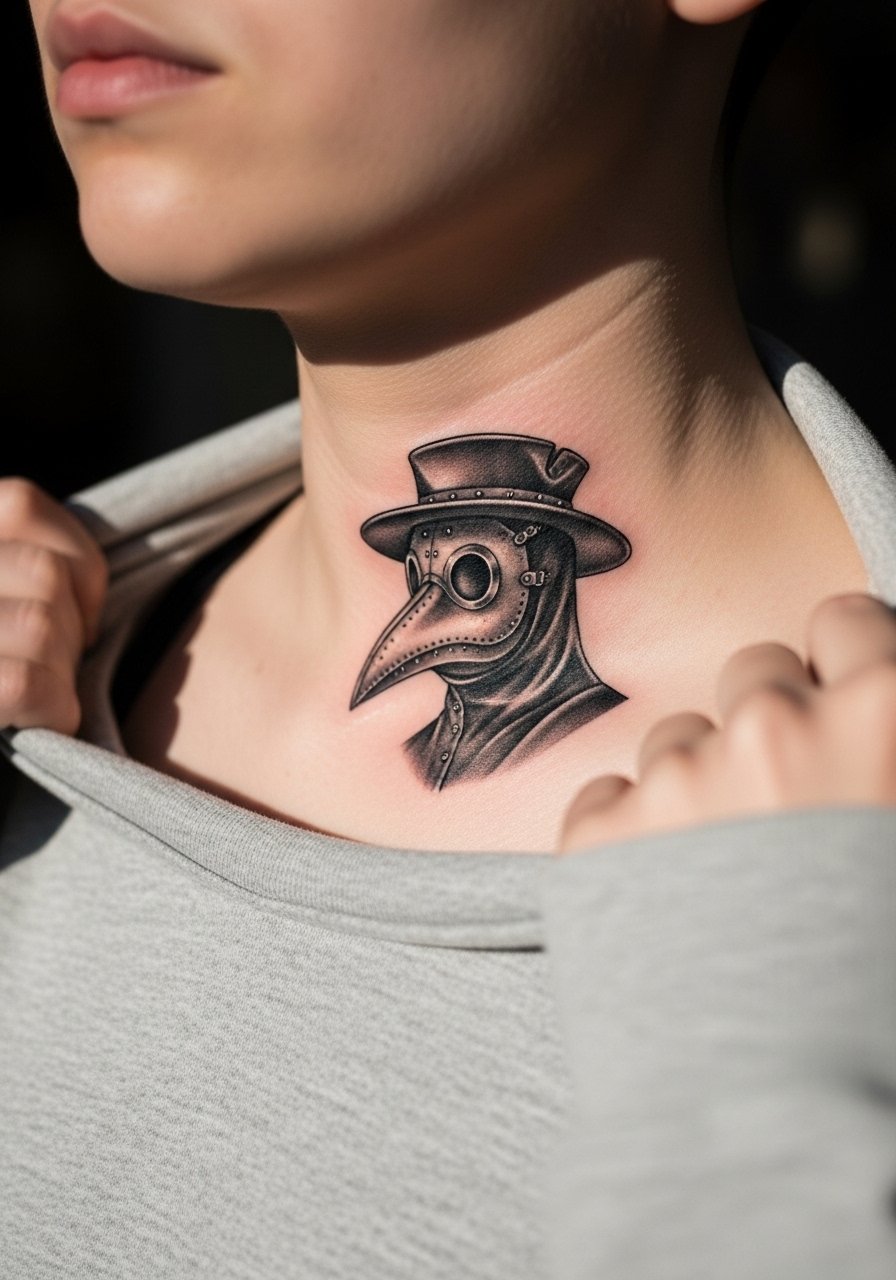
Consultation lead. Micro-realism on the collarbone demands a clear talk about scale and contrast. I tell clients to show macro photos of the detail they want and then ask the artist where density should be reduced. Sessions are short but the collarbone sits over bone so pain spikes are normal. This piece ages faster if the lines are drawn too thin, so request slightly more saturation than you think you need. A one to two year touch-up timeline is realistic. Hand this off to artists who list micro-realism in portfolios and check healed photos when possible.
8. Ornamental plague doctor with ravens on shoulder
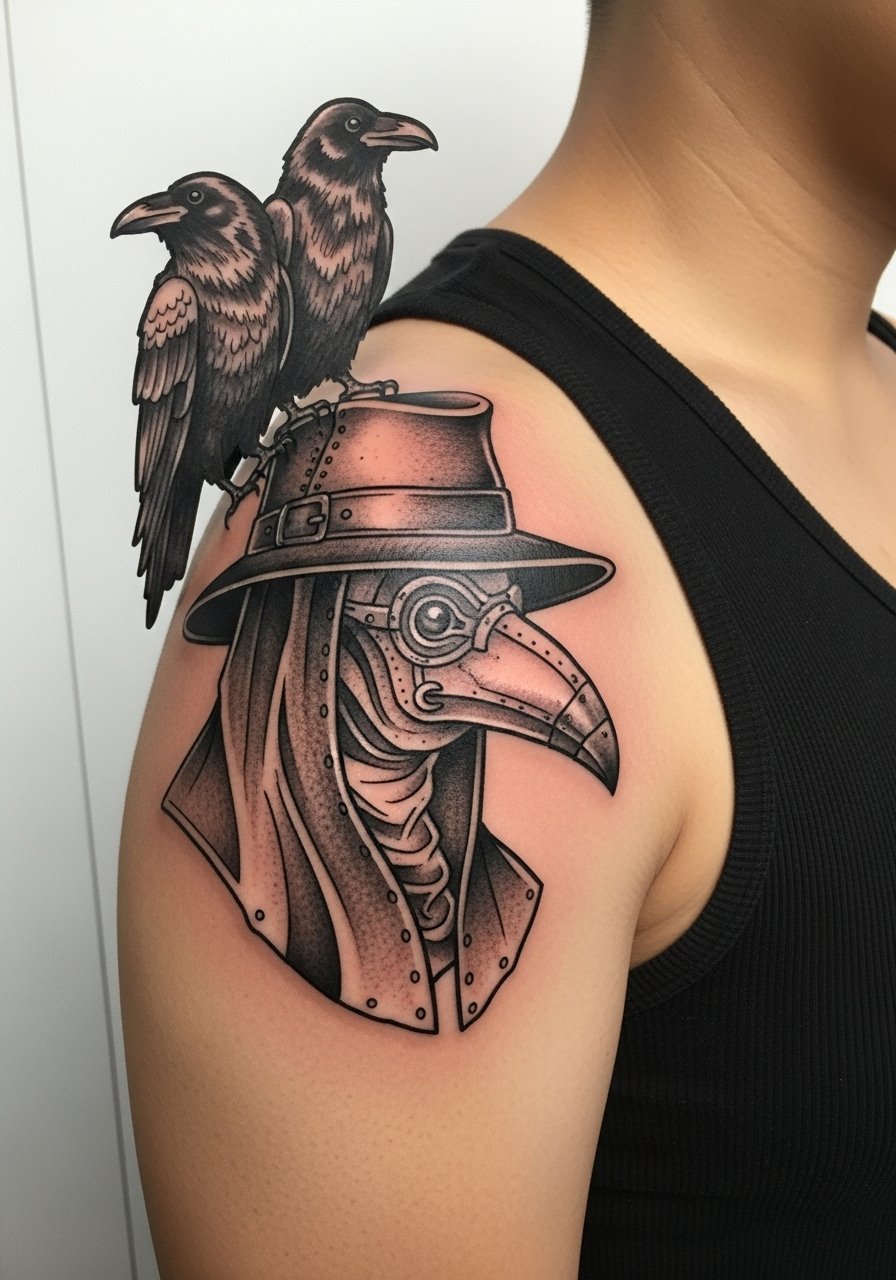
Styling lead. Shoulders take ornament well because the curve lets motifs breathe. Ask for a shoulder-cap layout sized around five inches so ravens and ornament do not crowd. Session wear is a tank top or loose sleeve so the artist has clear access. For evenings out pair the healed design with a loose button-down shirt you can pull aside. A common mistake is trying to pack sleeve-level detail into a small shoulder piece which flattens with time.
9. Black and gray full figure on calf
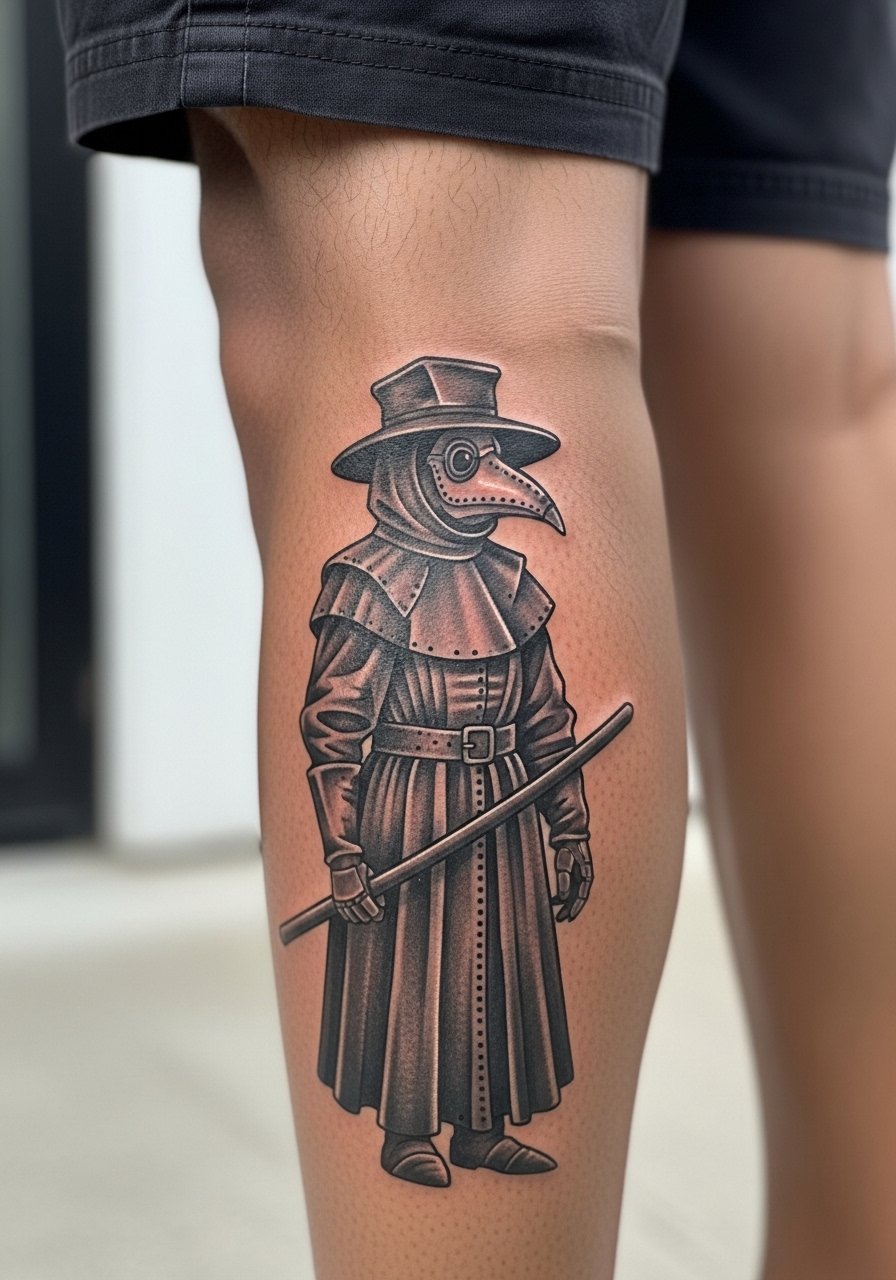
Pain warning lead. Calf work is generally less painful and heals predictably, so it suits narrative full figures. Typical height is six to eight inches and expect two to four sessions depending on shading. The calf tolerates deeper saturation which helps long-term contrast for black and gray realism. For showing it off try cuffed jeans or athletic shorts. A mistake I see is under-sizing the figure for the leg which leads to lost mid-tone detail after a year.
10. Ignorant style plague doctor mask on ribcage
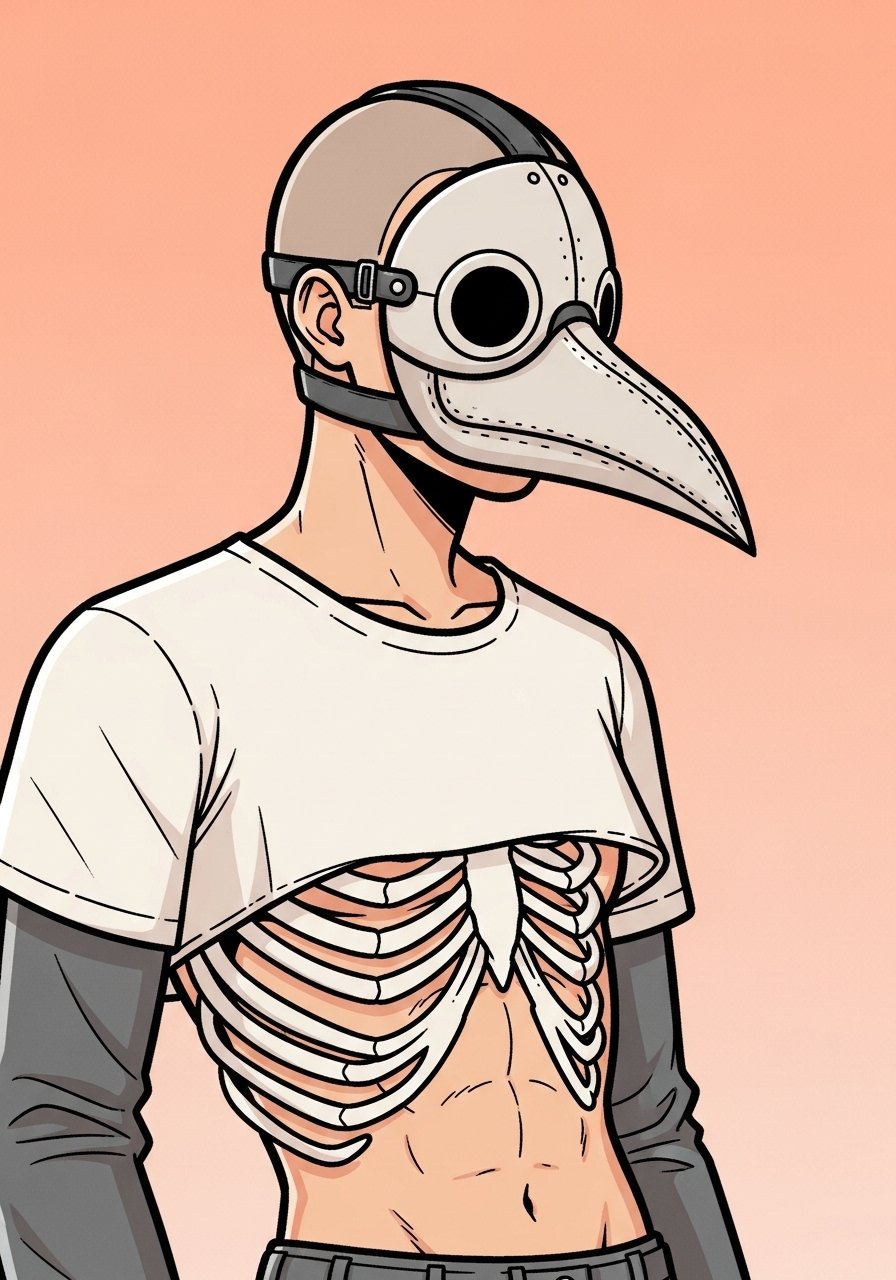
Pain warning lead. The ribs are a high-pain zone, so expect a two-session plan and honest talk about breaks. Ignorant style benefits from thick black outlines that age into a bold silhouette, and that robustness helps in a stretch-prone area. Artists disagree on fine line rib work with two camps on durability. One camp says ribs blur faster due to stretch and thin lines. The other camp says correct depth and spacing settle well. Ask the artist which camp they practice with and request a draft stencil to preview spacing.
11. Fine line plague doctor profile on neck
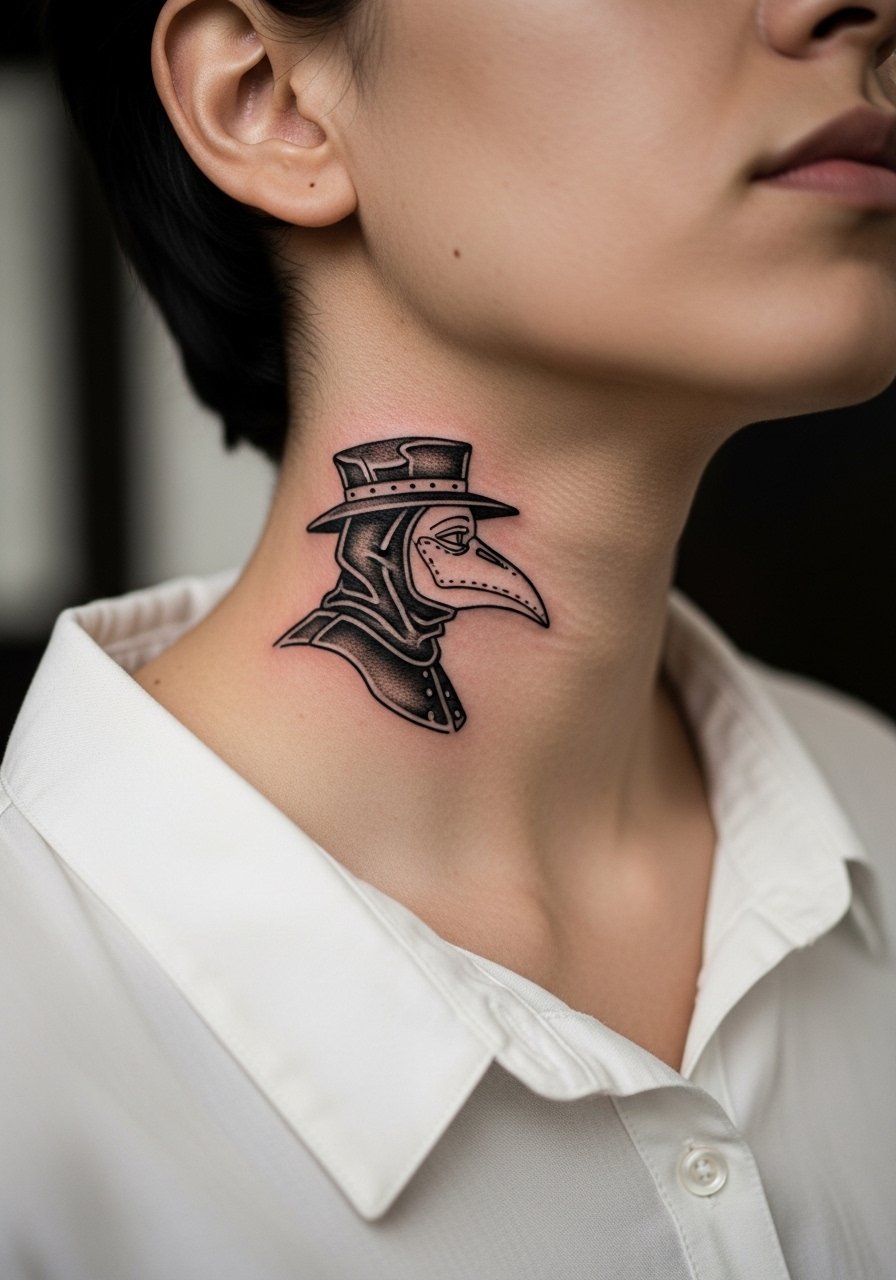
Mistake lead. Side-neck placements demand that you accept potential workplace scrutiny and faster fading. Fine line here looks elegant at first but loses crispness quicker because of movement and sun exposure. Expect a single short session and a touch-up in two to three years. During consultation request single-needle work with slightly wider spacing than you'd request for inner forearm. A small career check and a conversation with your artist about fade rates will save regret.
12. Patchwork plague doctor sleeve elements
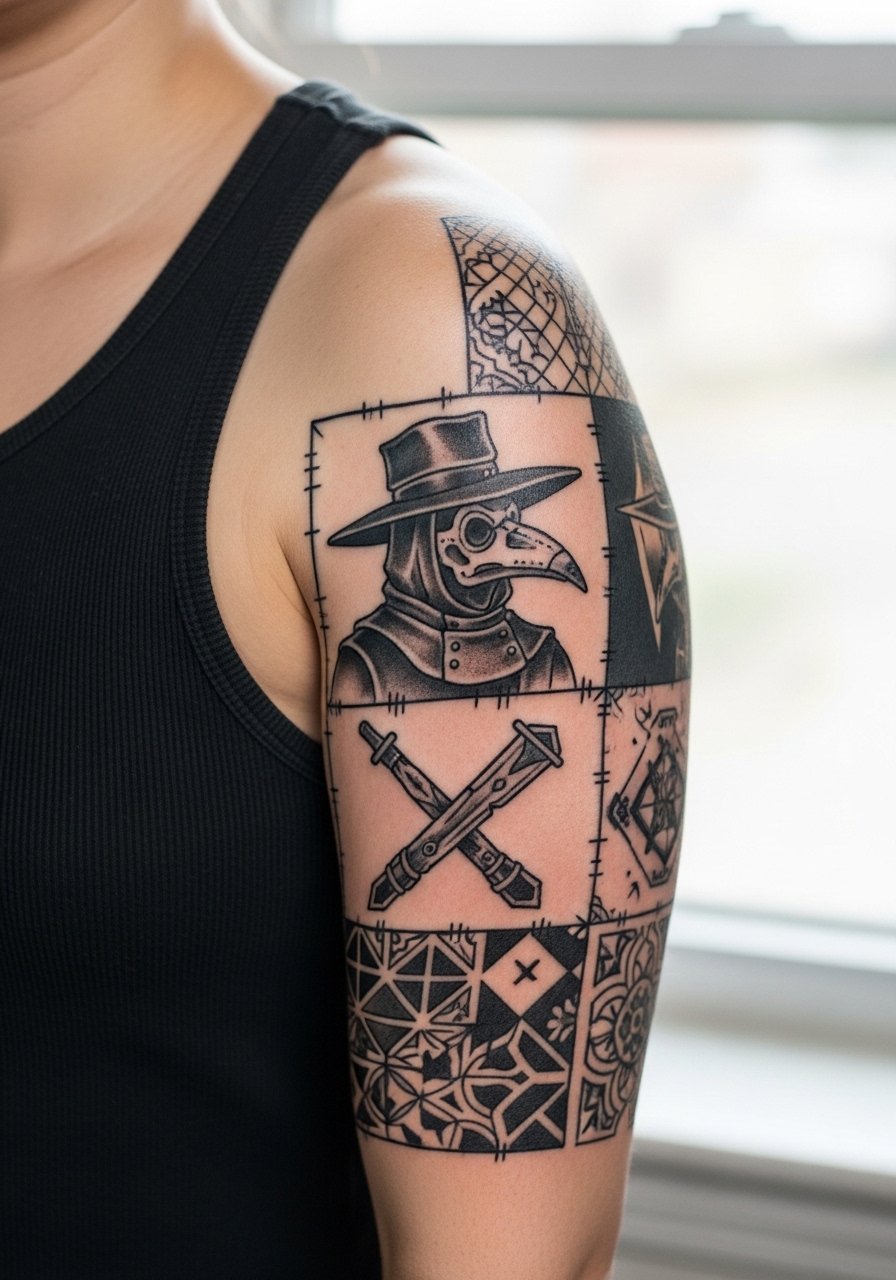
Consultation lead. Sleeves built as patchwork need a mapped plan so themes connect without crowding. Expect five plus sessions over months. Tell your artist the elements you want grouped and which motifs should be dominant so the sleeve does not read like a collage of equal parts. A common error is letting walk-in flash get layered in without a cohesive spacing plan. For the session wear a sleeveless tank so the artist can work without tugging at fabric. Touch-ups are normal on sleeves as pieces settle differently.
13. Micro-realism mask on the inner bicep
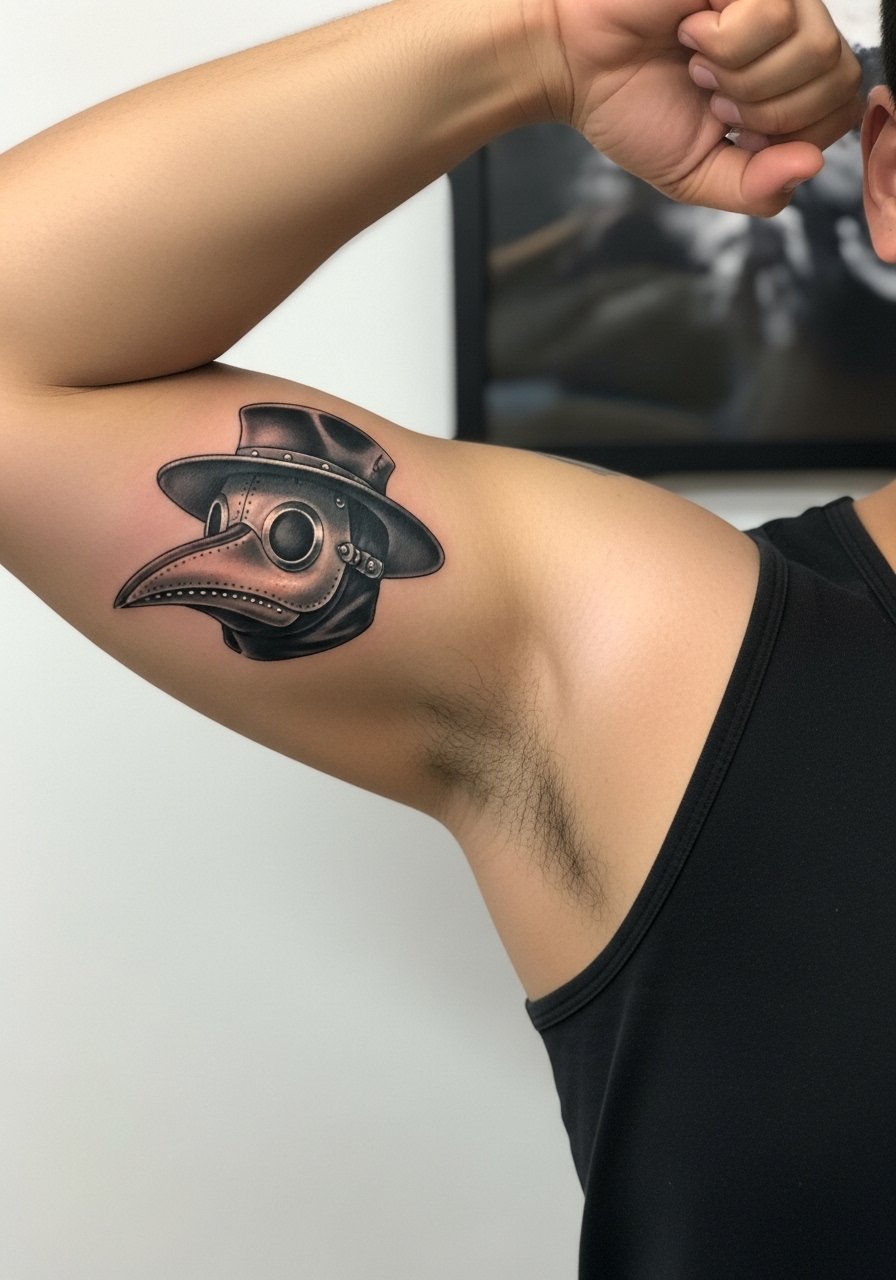
Aging lead. Inner bicep skin is softer and often keeps detail better than the wrist. Still, movement from arm flexing can slightly blur fine shading over the years. I advise one to two sessions and a touch-up plan at year two if you want long-term micro detail. A common mistake is underestimating how your arm shape changes with weight and muscle which affects composition. Ask for a slightly elongated beak in your stencil to compensate for curvature.
14. Collarbone micro-realism mask with tiny symbols
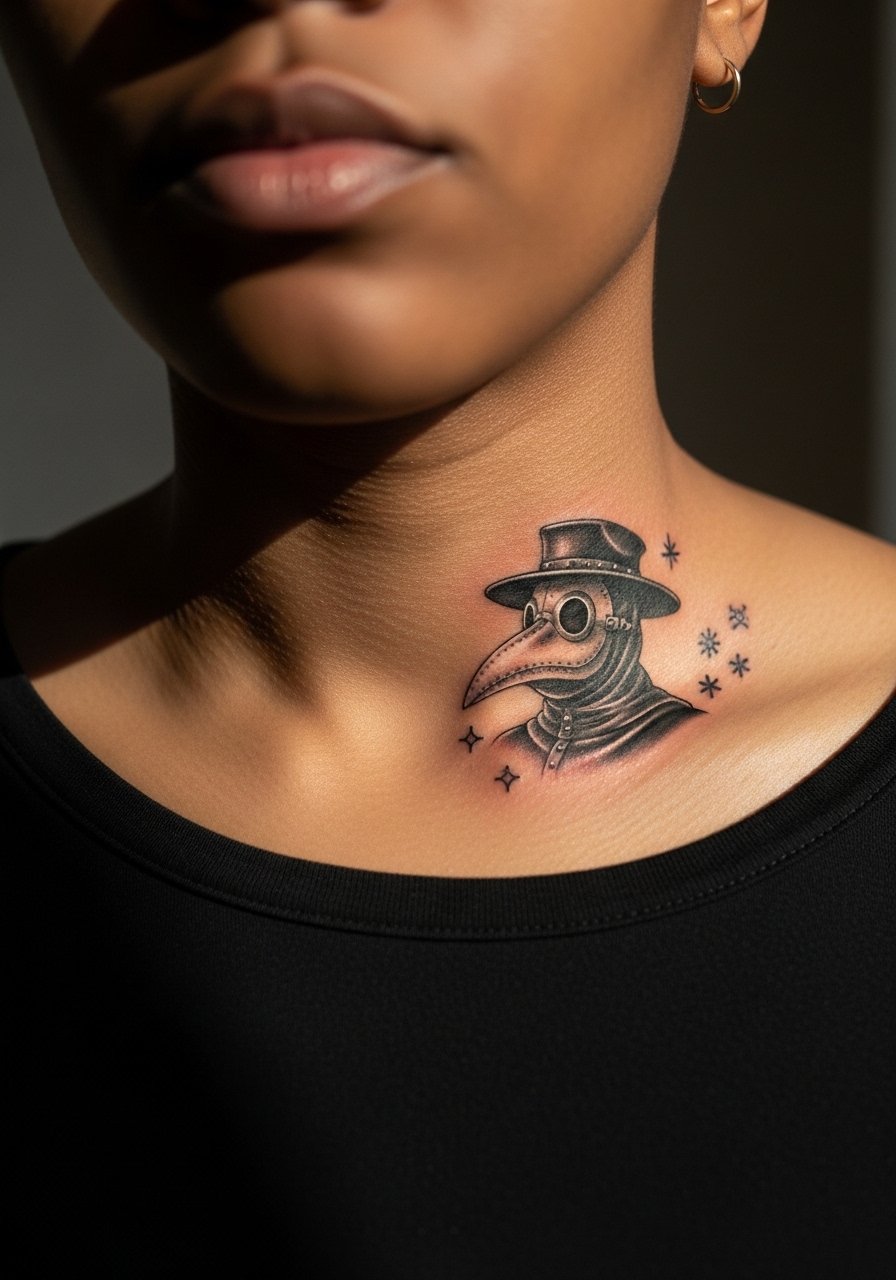
Consultation lead. Tiny symbols near the collarbone balance the mask but need exact placement so they do not vanish into jewelry lines. Tell the artist the necklace heights you usually wear so the symbols sit visible. Expect a one to two hour session and a higher sensitivity near bone. The typical mistake is locating symbols right at the necklace line which then get obscured. A delicate chain sits well above this work but avoid heavy pendants.
15. Minimal silhouette mask on ankle
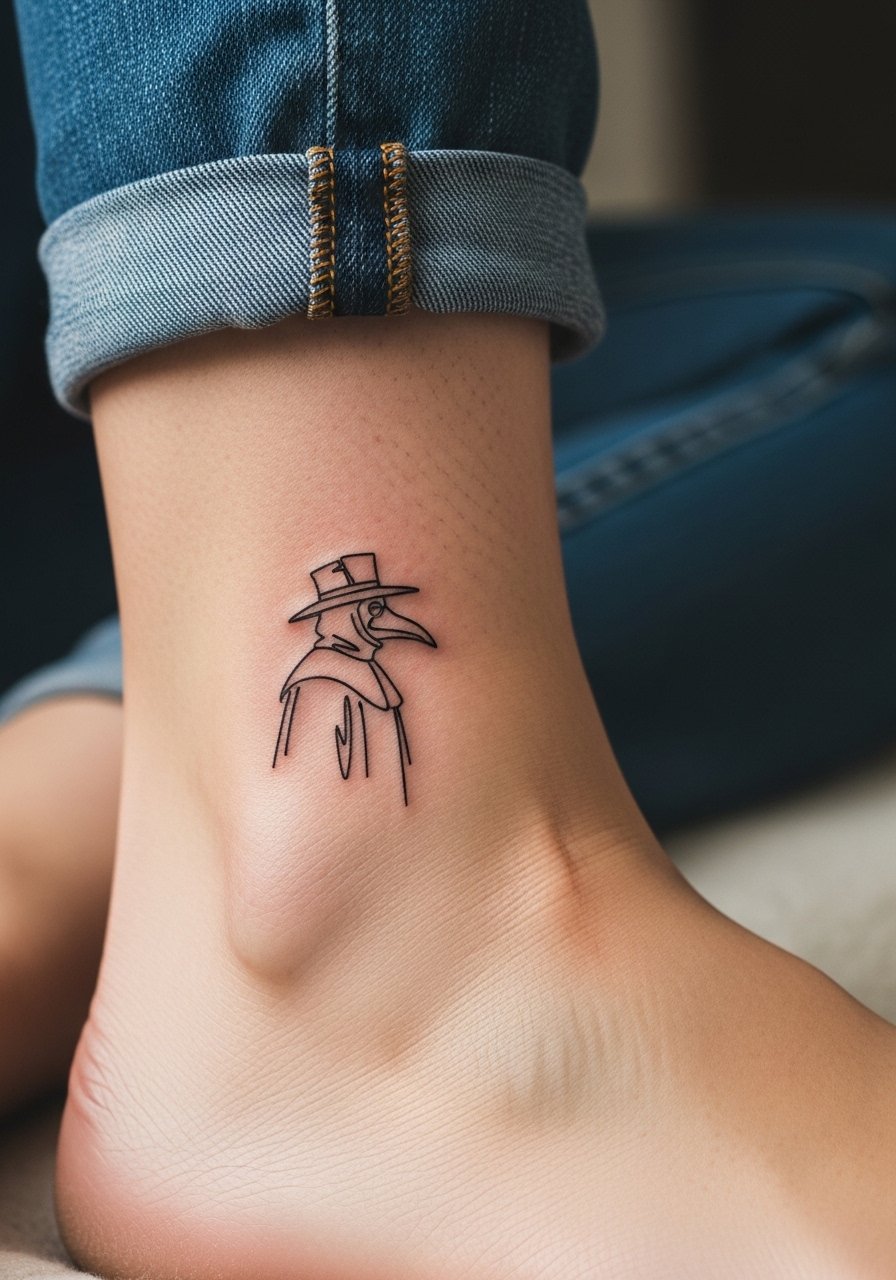
Visual impact lead. Ankle pieces are seasonal show-offs and need bold, simple outlines to avoid blurring from frequent friction and shoe rubbing. One short session is normal and the pain is brief but sharp near bone. For showing it off wear jeans cuffed or sandals. A mistake is requesting extremely fine profiles on the ankle which become fuzzy under repeated washing and rubbing.
16. Neo-traditional plague doctor bust on sternum
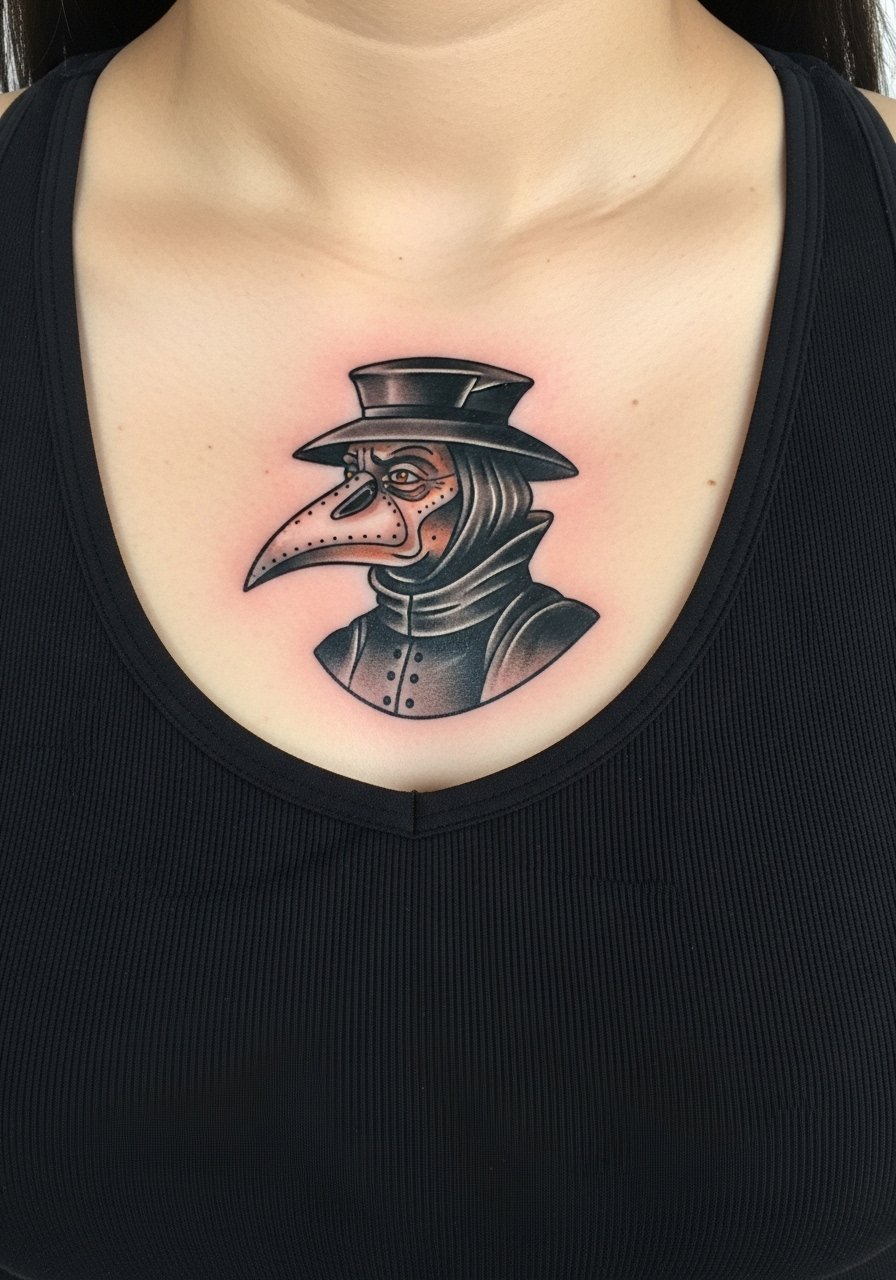
Pain warning lead. Sternum tattoos are sensitive and sit near bone so be prepared for higher pain and possibly two sessions. Neo-traditional color accents help the bust stand out, but watercolor fans should heed the color versus black and gray debate. One camp prefers black and gray for long-term legibility. The other camp uses careful color layering to keep vibrancy. For the session wear a fitted sports bra for modest exposure. A common error is asking for tiny facial detail directly over the sternum where movement and breath make it hard to preserve.
17. Plague doctor cameo on upper thigh
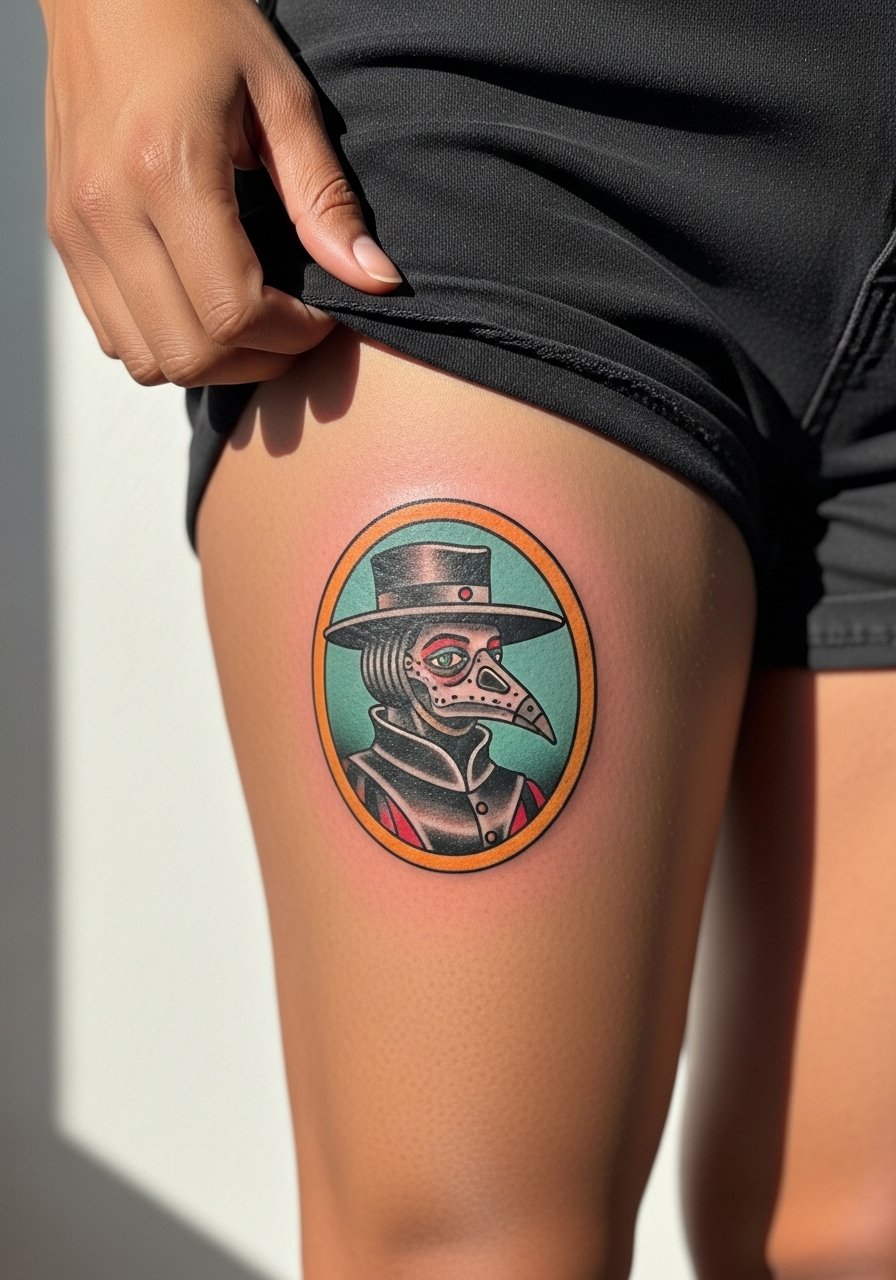
Personal observation lead. Thigh canvases let you include decorative frames and motifs and still heal with minimal friction if you avoid tight waistbands. I recommend eight to ten inch scale for cameo frames so inner details stay legible. Wear loose shorts or a loose athletic short to the appointment so fabric does not press on the fresh ink. Expect three sessions for layered color and a touch-up at year two for color resaturation.
18. Small micro-mask behind the ear
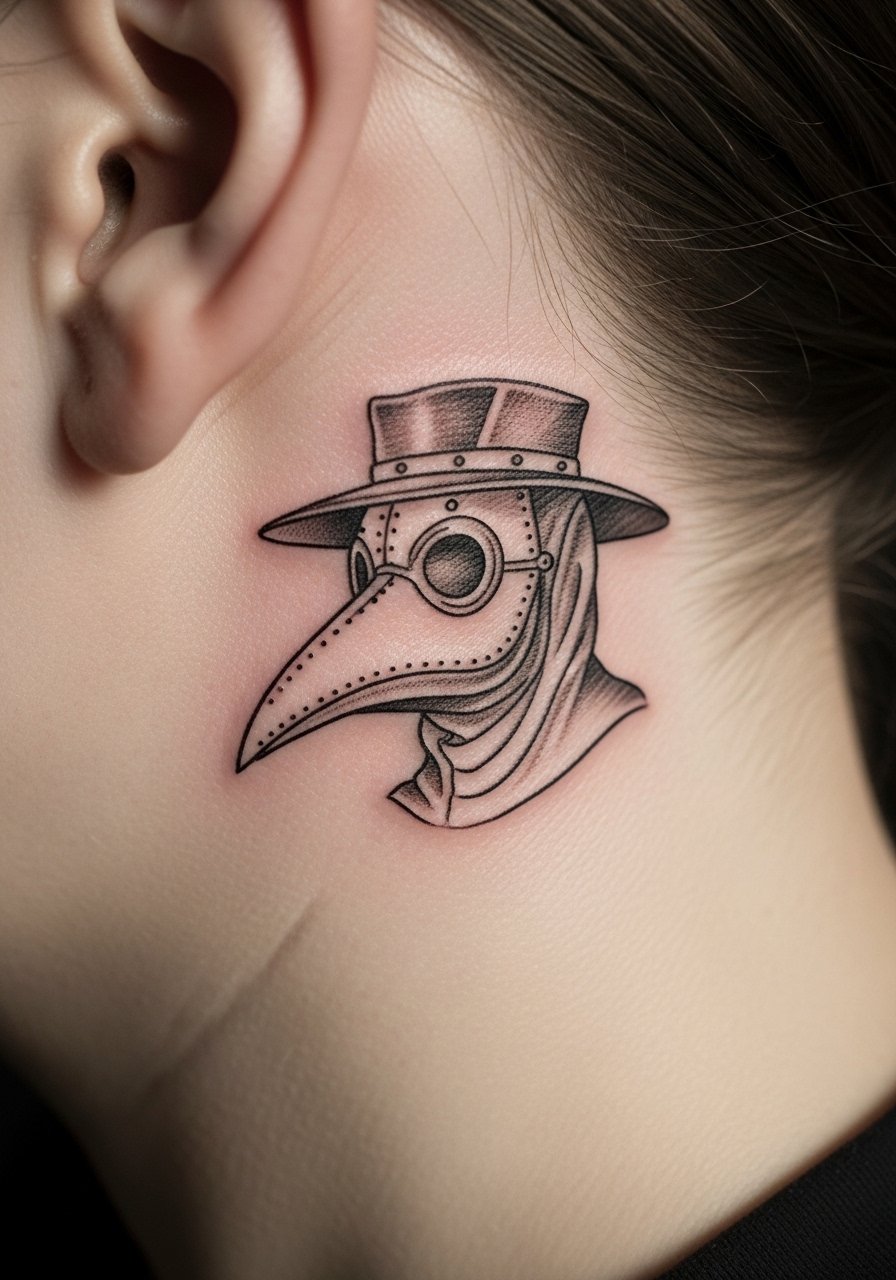
Mistake lead. Behind-the-ear pieces read as discreet statements but tiny lines can blur if placed too close to the hairline where fringe hides them and movement rubs them. This is a low-session, high-sensitivity spot with quick healing. The mistake is copying a complex reference and shrinking it into a dot. If you want longevity keep shapes simple and ask for a slightly bolder contour.
19. Ornamental hand piece with beak motif
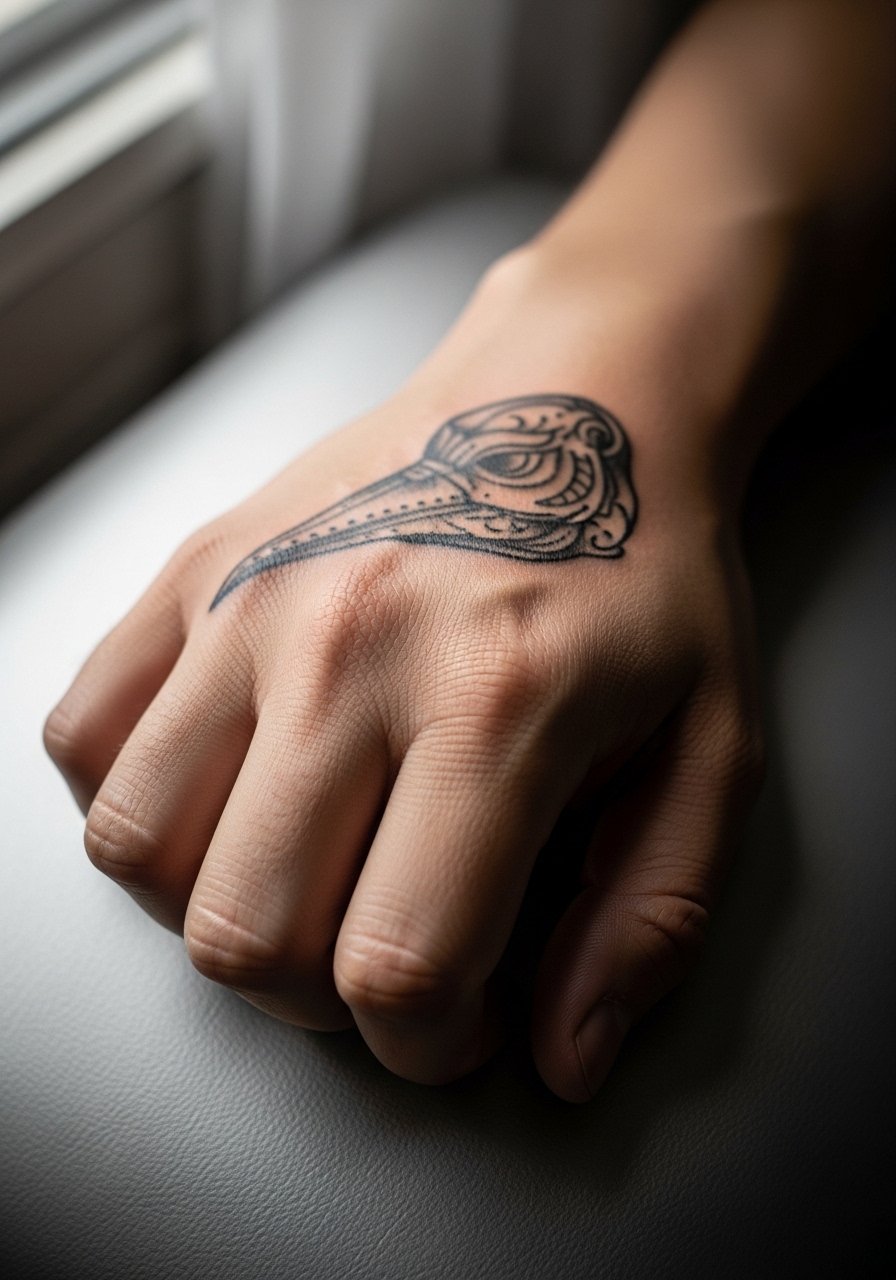
Pain and practicality lead. Hand tattoos remain exposed and fade faster due to washing and sun. Expect a short but sharp session and plan for touch-ups frequently. If you want a hand piece keep contrast heavy and lines slightly bold. Discuss career implications because some workplaces still react to visible hands. The common mistake is porting a chest-level detail down to the hand which becomes muddied quickly.
20. Geometric plague doctor mask on the forearm
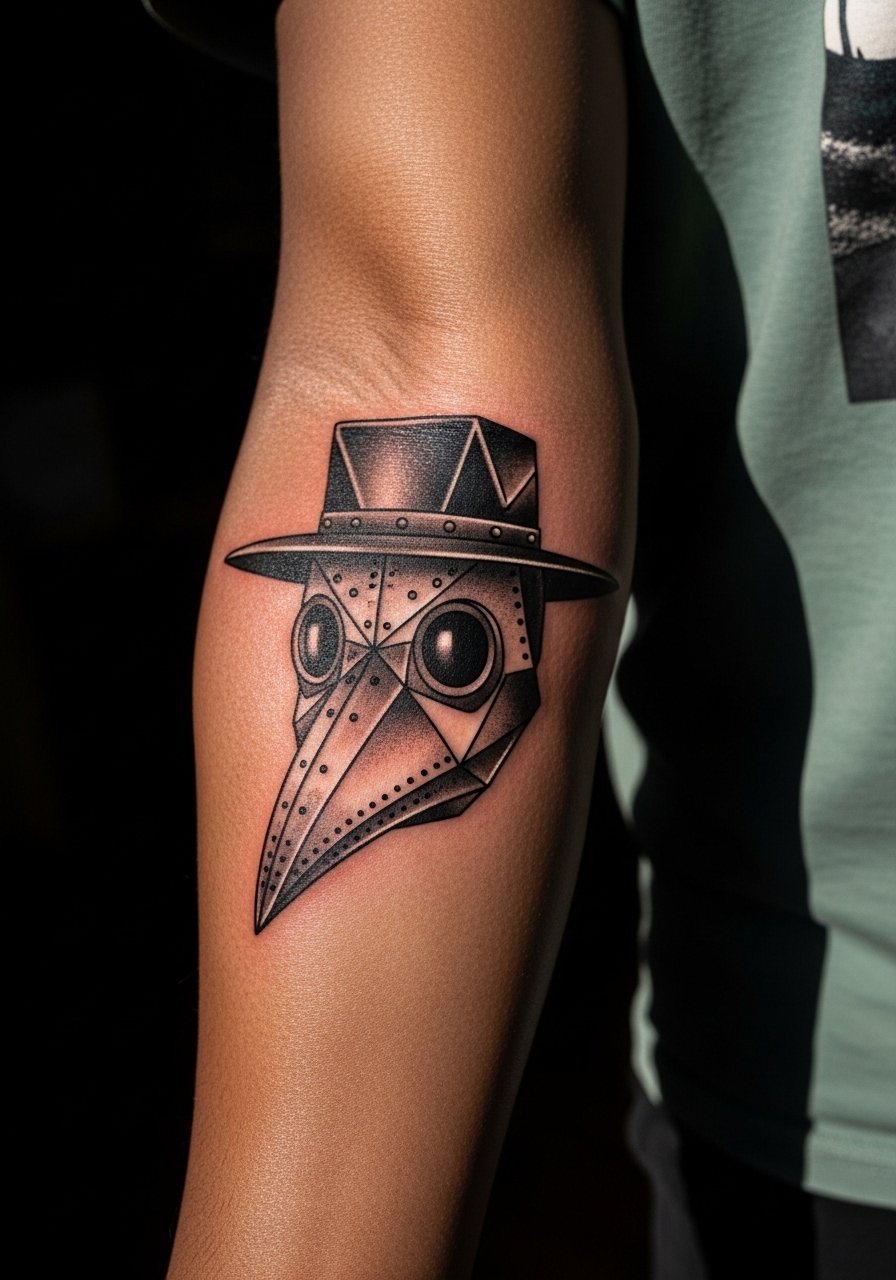
Mistake lead. Geometric work needs breathing room. The biggest error is making shapes too small or tightly packed which leads to line merging over time. For the forearm keep scale at four to six inches and use slightly heavier lineweight for intersecting geometry. Sessions are moderate in length and the piece ages predictably if you avoid too-fine spacing. For showing it off, rolled sleeves in linen work well.
21. Calf full figure with cloak details
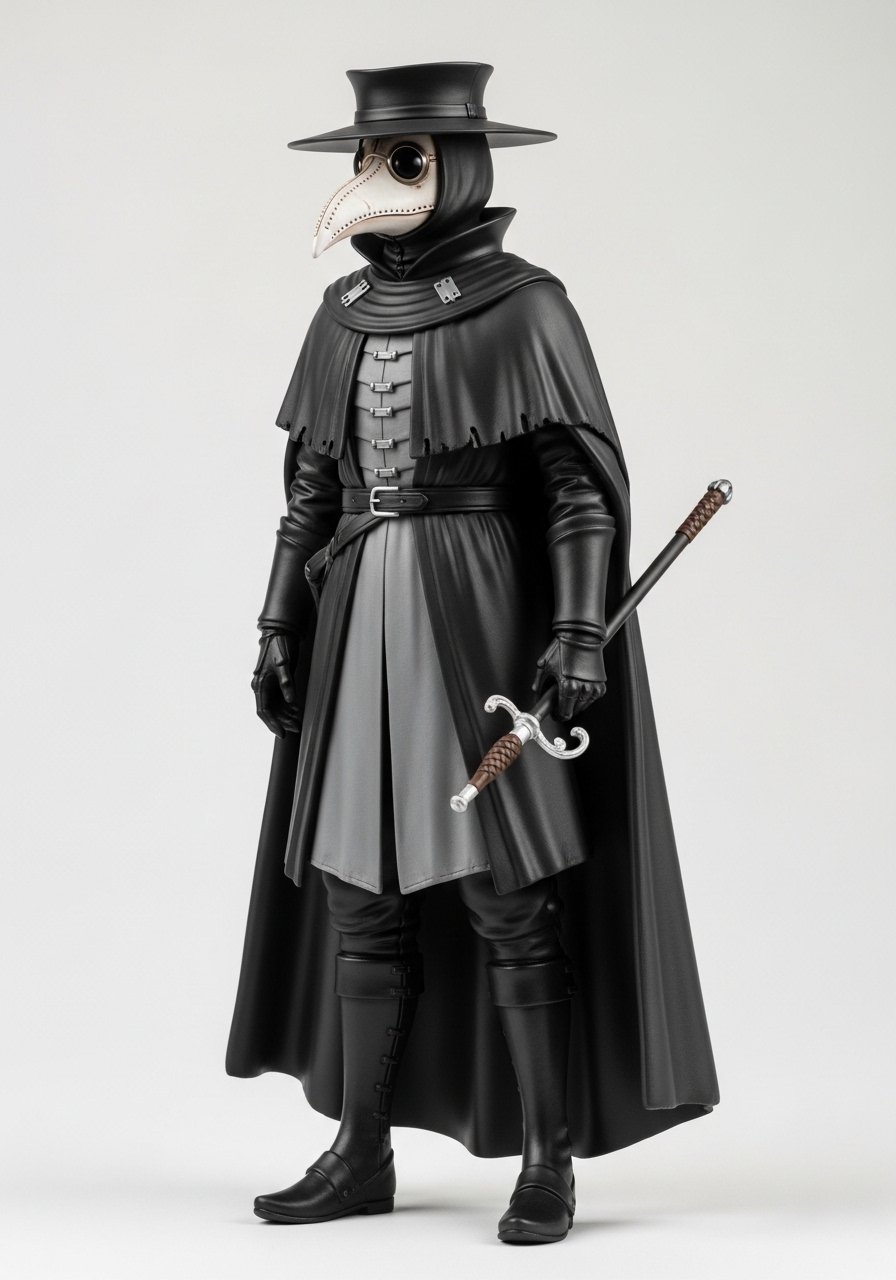
Visual impact lead. The calf allows long vertical compositions that keep narrative elements readable. Plan for two to three sessions and ask for medium-to-heavy saturation in shadow areas to preserve opacity. A common mistake is compressing cloak folds too tightly which then blur with calf movement. For showing it off cuffed jeans or shorts that reveal the full figure work best. Touch-up timing depends on footwear rubbing and exposure.
22. Ribcage ornamental with negative space
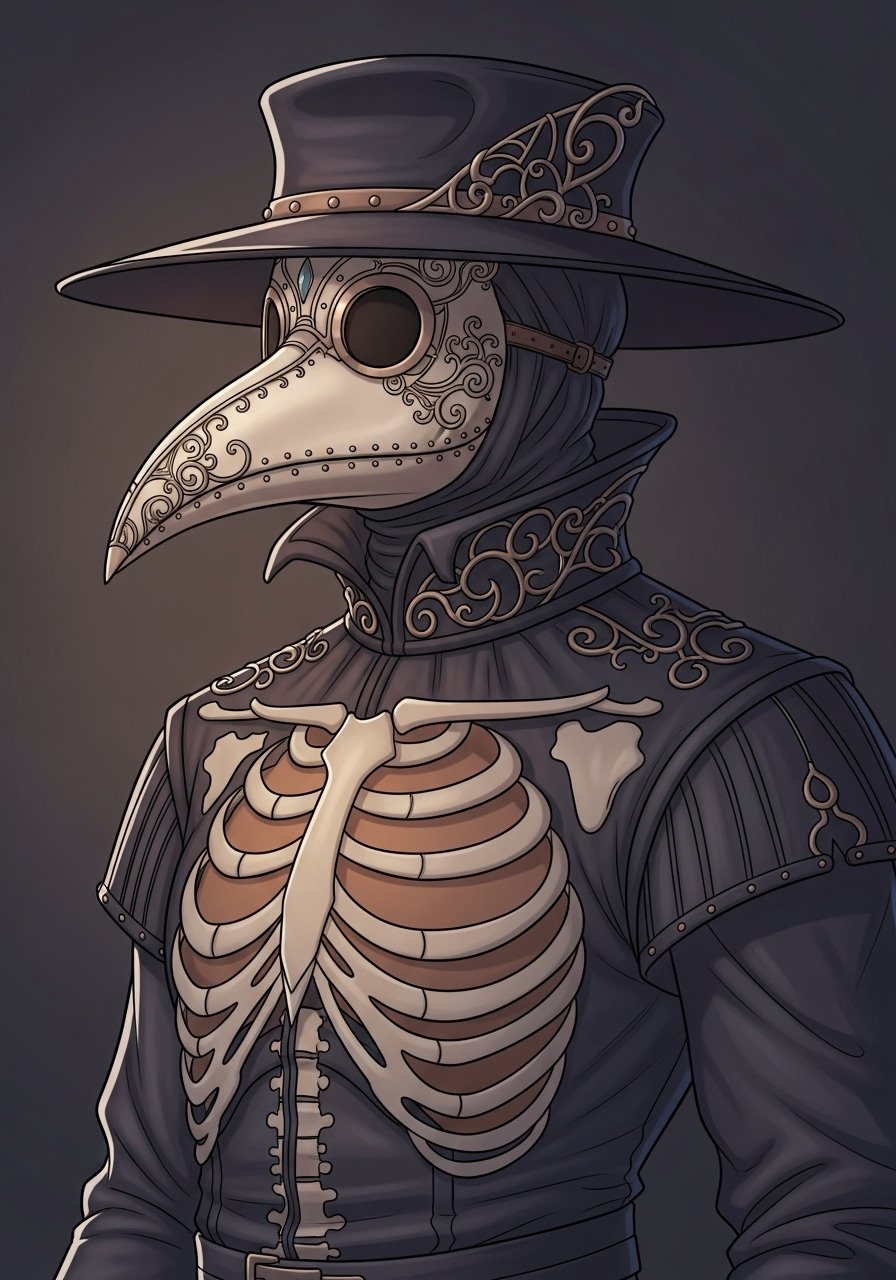
Controversy lead. Ribcage ornamentals look delicate but the debate over fine line durability on ribs is loud. One camp warns that thin lines on ribs blur within a couple of years because of skin stretch. The other camp claims careful depth and spacing avoid that outcome. My advice is to ask the artist which camp they follow and to choose slightly stronger outlines if you want longevity. Expect two sessions and plan for a touch-up timeline accordingly.
23. Thigh sleeve patch with mixed motifs
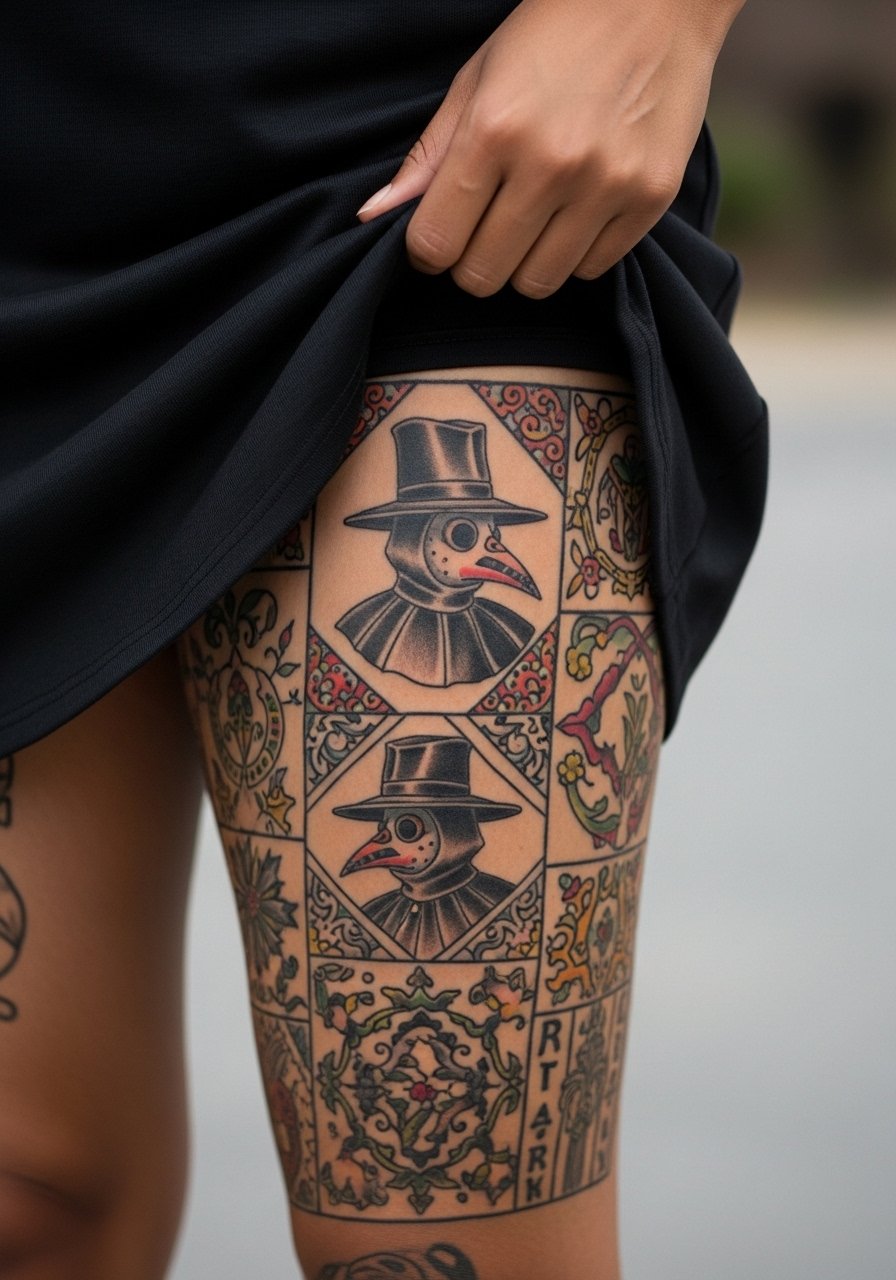
Consultation lead. Thigh sleeves let you mix realism, ornament, and watercolor while keeping everything private if you choose. Build a plan across multiple sessions and map how motifs flow with muscle contours. Wear loose shorts or a loose drawstring linen pant for the session. The mistake is adding too many small elements without a breathing plan which makes the patchwork feel like visual clutter when healed.
24. Collarbone micro-mask with script accents
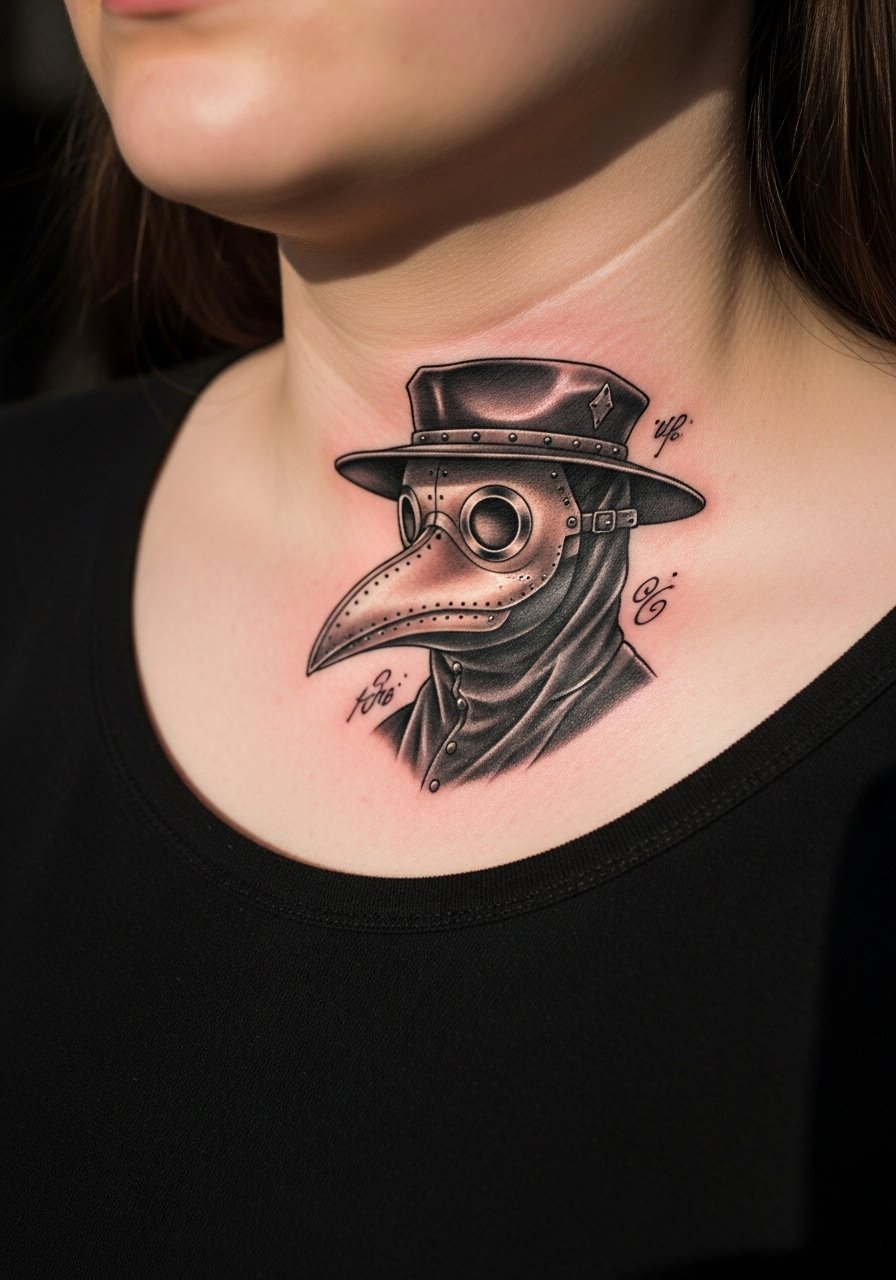
Consultation lead. Script near collarbone competes with necklaces and fabric, so bring the font and the typical jewelry heights you wear. Expect a short session and higher sensitivity near bone. The common error is asking for dense script directly over moving skin which can blur. For showing it off a thin chain pendant necklace can complement rather than crowd.
25. Back-of-neck silhouette with hooded cloak
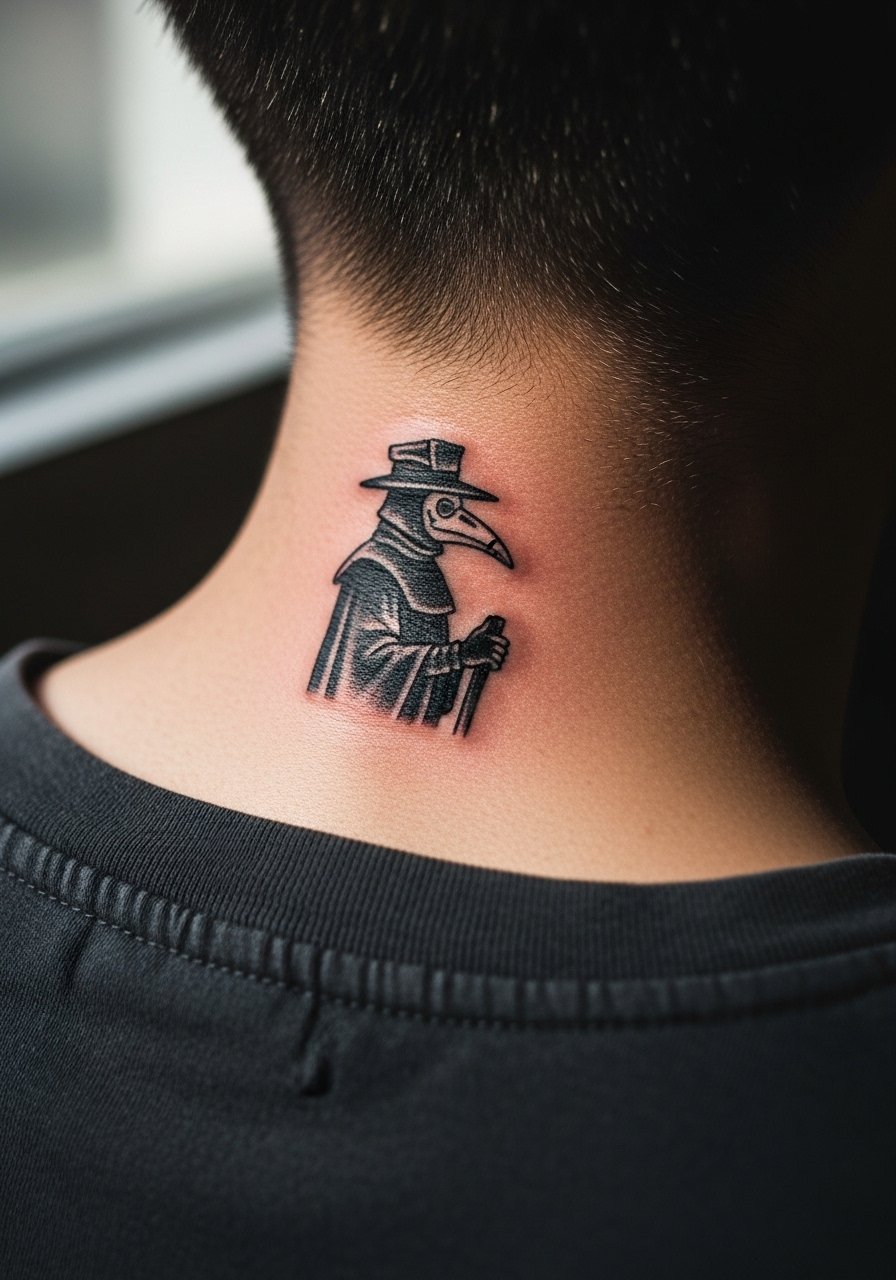
Personal observation lead. The back of the neck is discreet and reads well with solid shapes. Expect quick sessions and faster fade if you expose the area to sun or frequent haircuts. Let your artist know your typical hair length so they place the piece to be visible when you want it to be. A common mistake is selecting a highly detailed portrait for this tiny zone which then loses definition quickly.
26. Ankle band plague doctor motif
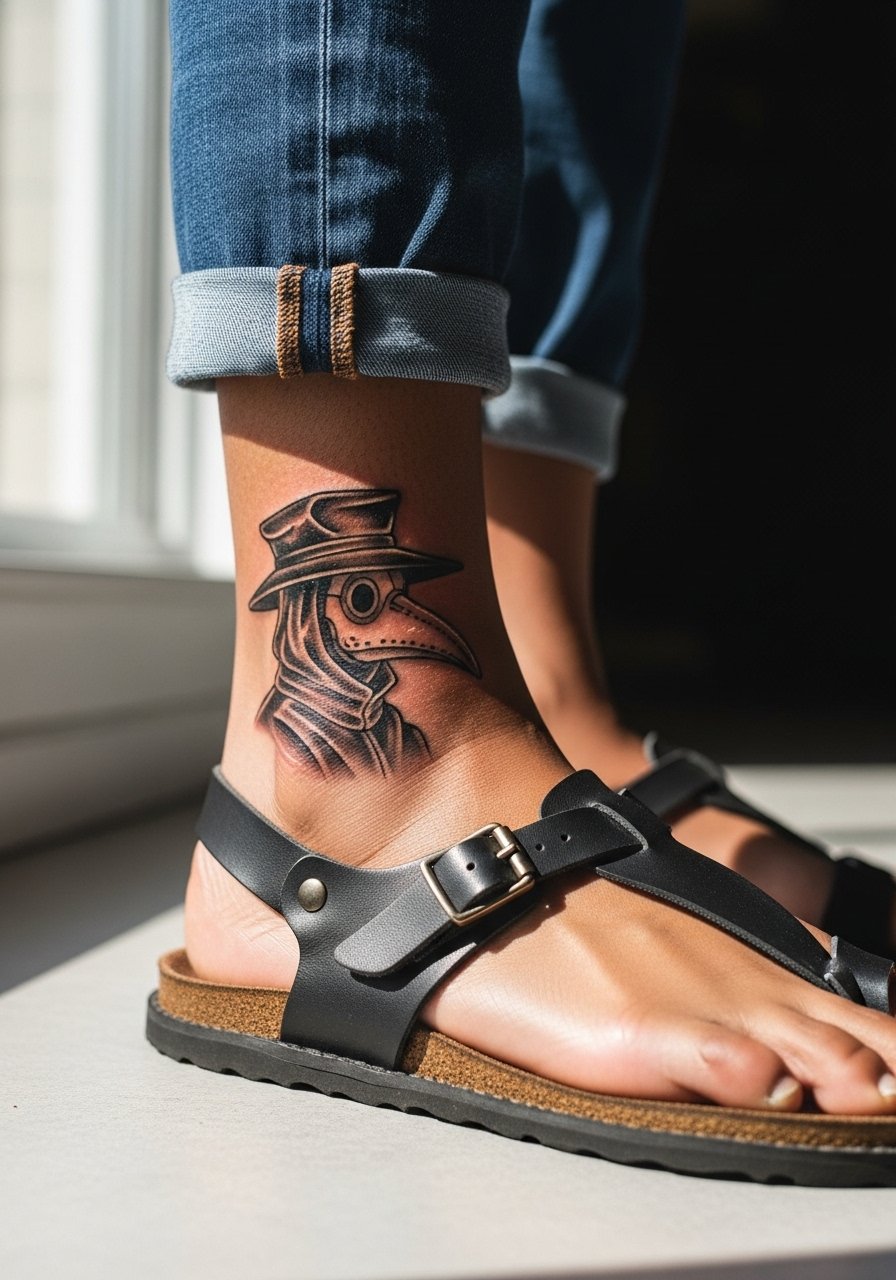
Visual impact lead. Ankle bands work well as repeat motifs and suit minimal silhouettes for longevity. One short session is common and friction from footwear is the main aging factor. Ask the artist to avoid super-fine fills on the underside where shoe straps hit. For showing it off roll jeans or wear sandals. The frequent mistake is wrapping too tightly which causes lines to blur where skin flexes.
27. Sternum micro-mask with floral framing
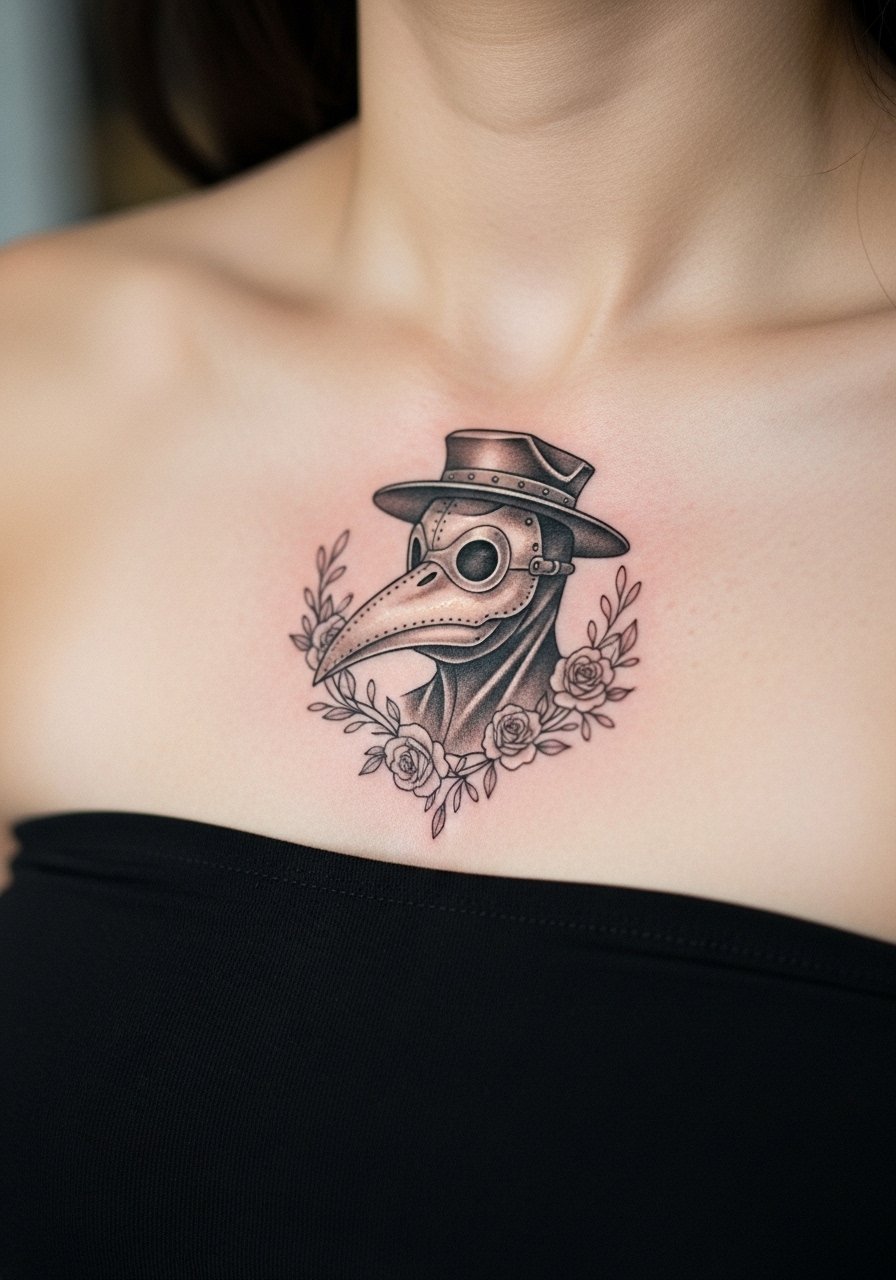
Decision-pressure lead. Sternum micro pieces demand a strong discussion about size and pain because the area is sensitive and moves with breathing. I advise a modest scale so floral frames do not overwhelm the mask. One to two sessions are typical and expect a sharp sensitivity. The common mistake is over-detailing the face portion which then blurs or looks patchy as the skin heals. If you plan to show this area, a strapless top reveals it best but consider session comfort for longer sittings.
Frequently Asked Questions
Q: Will fine line plague doctor tattoos on the ribs blur faster than blackwork versions?
A: It depends on the technique and your skin. Fine line tattoos can lose crispness faster on the ribs because thin lines sit in stretch-prone skin. Blackwork or slightly heavier lineweight holds contrast longer. Ask your artist which approach they use and view healed photos from their ribcage portfolio.
Q: How should I dress to a chest or sternum session with a full-figure plague doctor design?
A: Wear a fitted sports bra or a zip-up hoodie you can open so the artist has clean access without you being uncomfortable. A loose zip hoodie helps for longer chest sessions and keeps modesty intact. Pack a loose top to change into after the session.
Q: Are watercolor plague doctor tattoos a bad idea on darker skin tones?
A: Watercolor can work on darker tones but it requires careful color selection and saturation. Rich, deeper pigments and defined outlines where needed help the piece hold. Talk to artists experienced with color on your skin tone and ask to see healed examples.
Q: How often should I expect touch-ups for wrist or hand plague doctor pieces?
A: Hands and wrists face a lot of washing and sun exposure so plan on touch-ups every one to three years for fine outlines. Bold blackwork stretches that window out a bit. Keep the area moisturized and use sun protection once fully healed.
Q: Where do I look for custom portfolios of plague doctor designs if I do not want common templates?
A: Search hashtags like #PlagueDoctorTattoo and #BlackworkTattoo on Instagram and check tattoo directories for your city. TikTok reels and Reddit r/tattoos are useful for healed photos. Also consider digital reference packs that offer mask variation when you want a custom starting point.
