
Sitting in the chair with the stencil on your skin is when the design really chooses you. Trends push watercolor and fine line phoenix sketches into saved folders, but what holds up is a mix of placement, scale, and consistent saturation. These 17 phoenix ideas pick placements and techniques that flatter feminine contours and live through years of movement and sun. Read the first idea to see a fine line forearm sketch that balances delicacy with long-term clarity.
1. Fine Line Phoenix on Inner Forearm
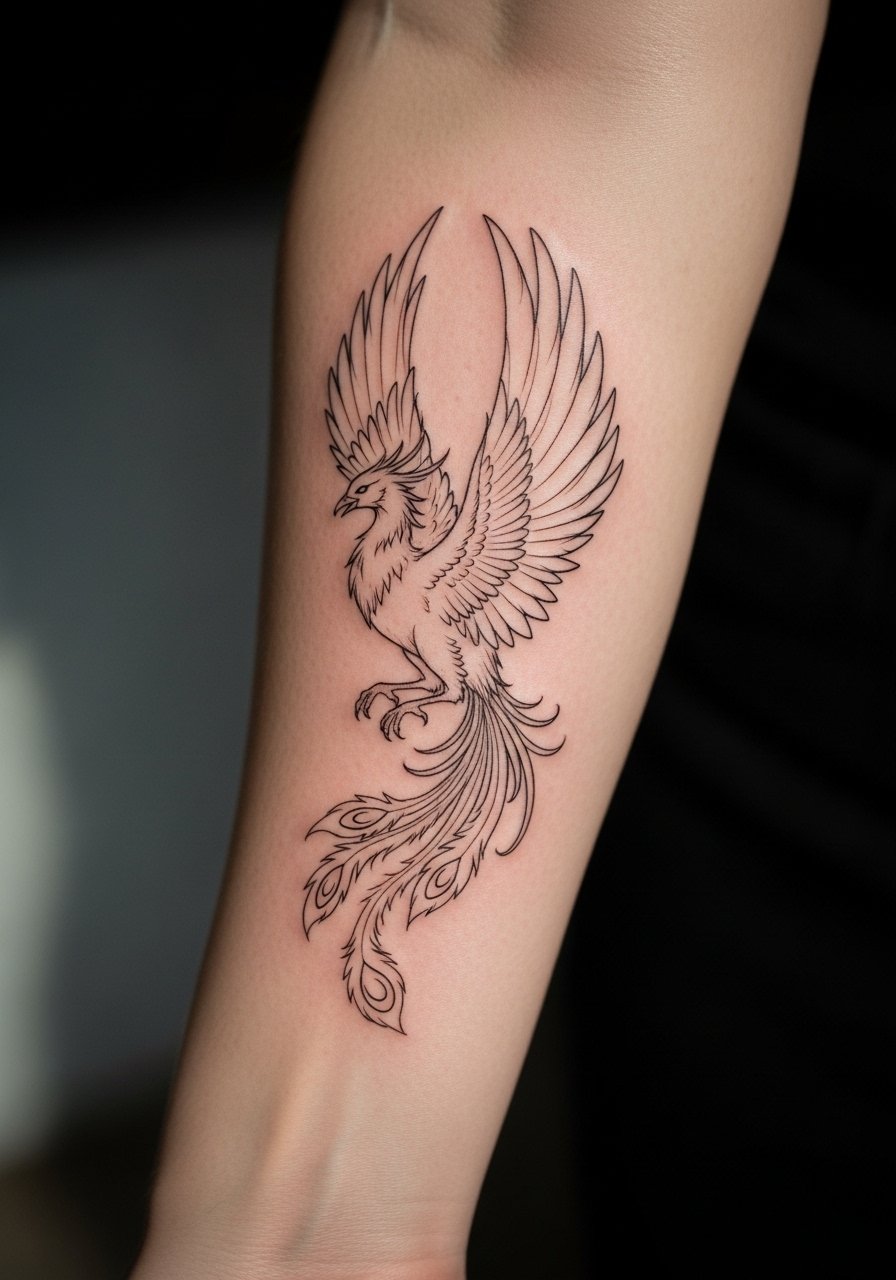
I recommend this for someone who wants delicate detail without heavy color. Tell your artist you want single-needle linework with slightly increased spacing between feather lines so the small strokes do not merge over time. Fair warning, the inner forearm gets daily sun exposure which can soften fine lines, so expect a touch-up at year three if you want crisp edges. The session feels moderate for most people, about one to two hours depending on size. For showing it off, rolled-up sleeves pair well with a racerback tank that keeps attention on the forearm without covering the art.
2. Watercolor Phoenix on Shoulder Blade

This piece suits someone who wants painterly color but not a lot of saturation. Ask for a watercolor approach with defined linework around the silhouette so the shape reads as it heals. A common mistake is asking for soft washes only, which can blur into a bruise-like patch on aging skin. Placement on the shoulder blade helps color settle with movement rather than stretch. Session time usually runs two to three hours. For the appointment, wear a loose button-down shirt you can pull aside so the artist has clean access.
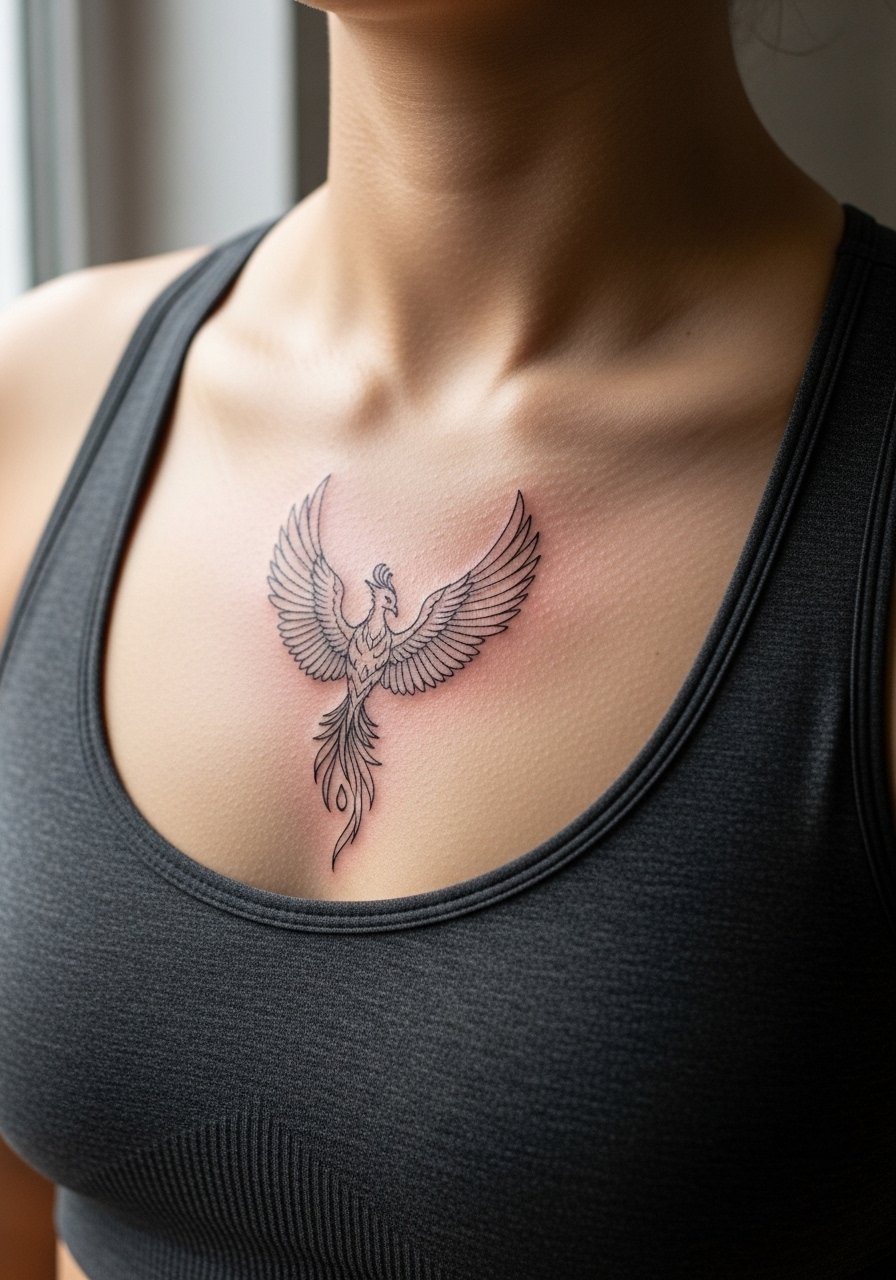
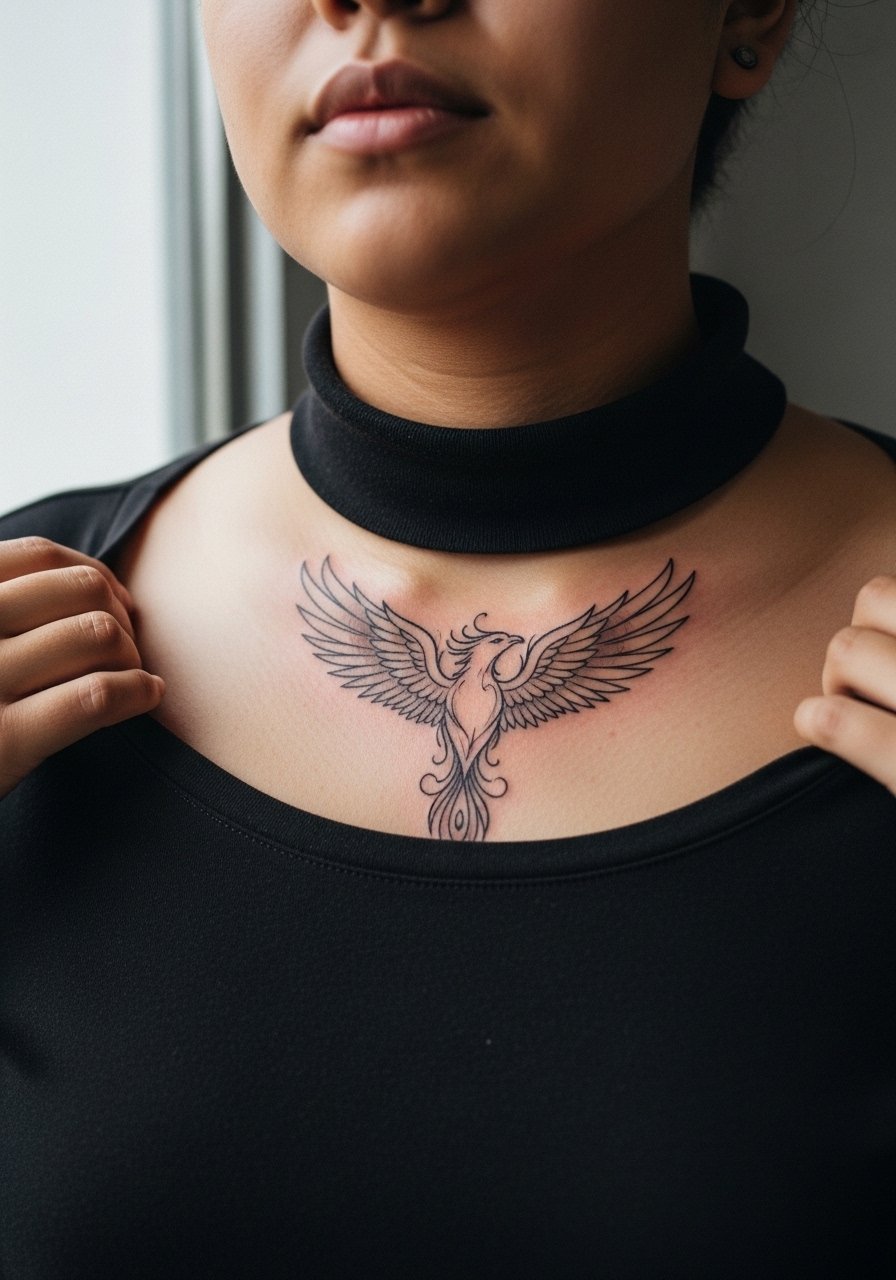
3. Micro-Realism Phoenix over the Collarbone

This small, high-visibility placement reads intimate and stylish. Ask for micro-realism with slightly bolder anchor lines so the tiny details retain shape after a year. The collarbone moves with breathing and can make micro strokes soften sooner if the artist goes too shallow. Expect a one to two hour session and moderate pain. Pairing it with a thin chain pendant necklace frames the design without crowding the collarbone. Note that some artists debate micro-realism on collarbone because of thin skin versus longer-lasting silhouette lines. Ask where your artist stands.
4. Bold Neo-Traditional Phoenix on Upper Arm

This is for someone who wants color and resilience. Neo-traditional saturation ages well because the pigments are concentrated. Tell your artist you want clean bold outlines and heavy saturation in feathers, not tiny weak fills. A frequent mistake is shrinking line weight to fit a tiny canvas. Scaling up keeps the piece readable at five years. Sessions can run three to four hours or be split into two visits. For showing it off, a loose linen shirt with rolled sleeves makes the outer arm read like a framed panel.
5. Geometric Phoenix on the Calf
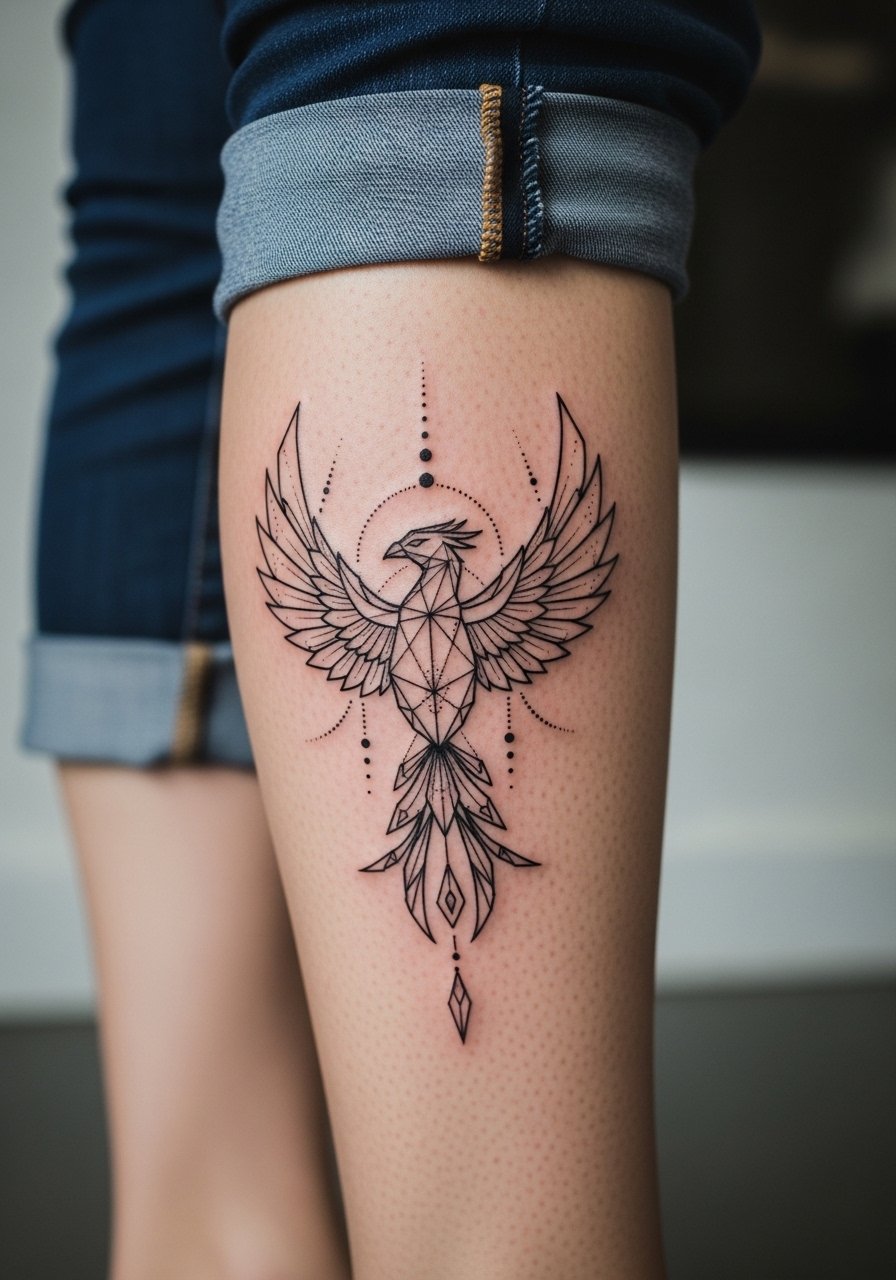
Choose this if you want symmetry and structure with organic motion. Ask for negative space between geometric elements so the design breathes and does not fuse as skin ages. A common mistake is crowding tight shapes into a small area which leads to blurring at year two. Calf sessions are usually low to moderate pain and take one to two hours. For the studio day wear a pair of loose drawstring linen pants so you can roll the leg up without pressure on the area.
6. Flowing Phoenix Sleeve Start on Outer Forearm
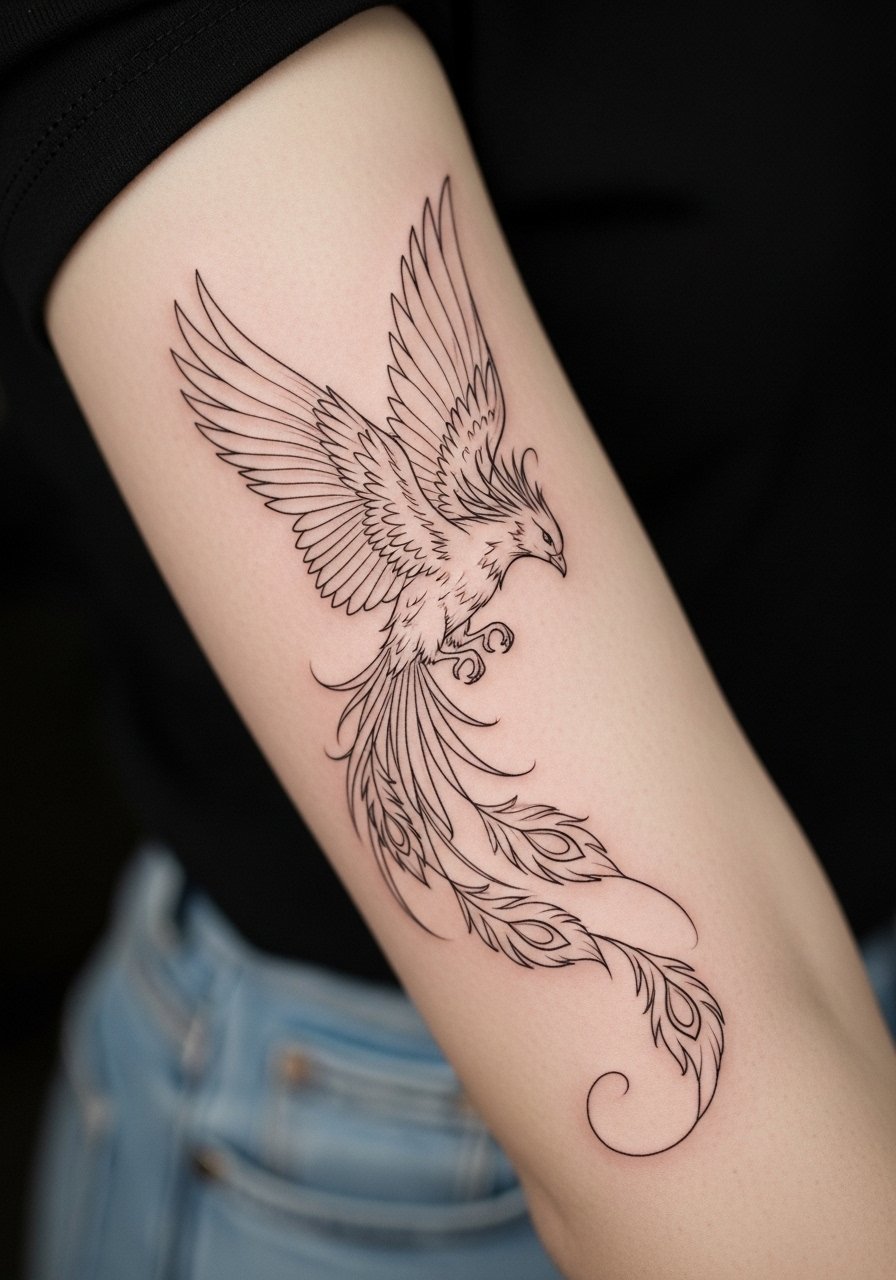
This is a sleeve-first-session approach that lets you add elements later. During consultation, bring references for feather flow and ask the artist to map negative space for later pieces. The mistake people make is expecting a complete sleeve after one visit. Plan multiple sessions and expect touch-ups by year four for fine areas. Outer forearm pain is lower than inner forearm. Pair this opening piece with a minimalist watch when you want to keep attention on the sleeve start.
Studio Day Picks
The upper arm, cuff, and calf pieces above ask for different prep than delicate collarbone work, so a small kit smooths session day and the first week of healing.
-
Stencil transfer paper kit. Lets you preview placement on skin and confirm flow for the sleeve and collarbone pieces before the needle touches skin.
-
Topical numbing cream. Applied under film about 45 minutes before reduces edge pain during rib or sternum work without affecting the artist's line.
-
Thin protective film roll. Useful for protecting ankle and hand tattoos during the first days when friction and washing are frequent.
-
Fragrance-free gentle body wash. Cleans healing skin without stripping color, which helps fine line forearm pieces keep clearer lines.
-
Aquaphor healing ointment. A thin layer in the first 48 hours helps retain moisture for small, detailed phoenix feathers without suffocating the skin.
7. Minimalist Phoenix on the Ankle
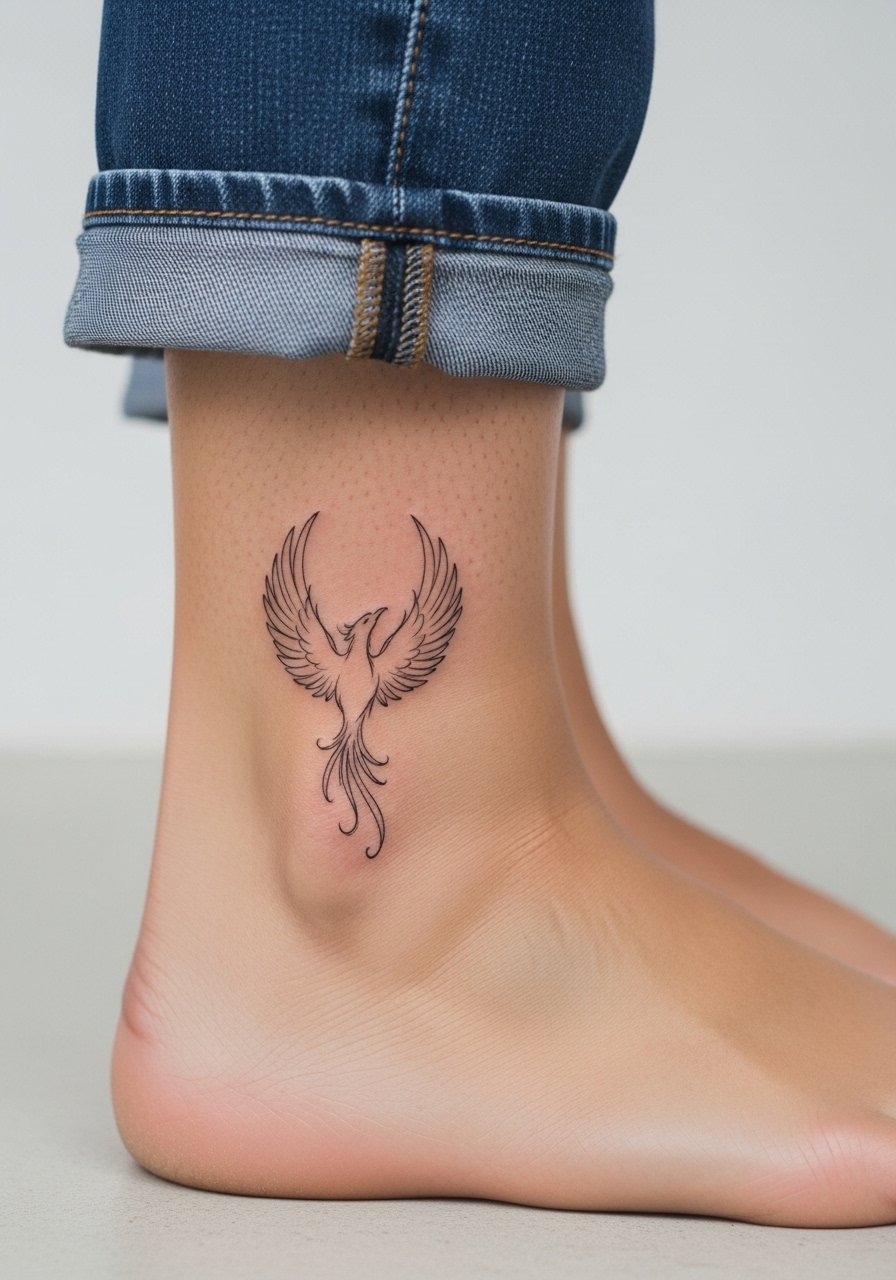
Tiny ankle pieces are visibility-first choices. Ask your artist for slightly thicker single lines than you might expect so the outline lasts through frequent shoe and sock friction. The mistake is making lines too delicate on a high-friction spot. Healing on the ankle can take longer because of movement and footwear, and touch-ups at year two are common with fine detail. Session time is short, under an hour for a small sketch. For showing it off, sandals or cropped jeans work best and a pair of sandals keeps the ankle visible without rubbing.
8. Phoenix Sternum Accent
Sternum placements are intimate and can be sensitive. Be explicit in consultation about depth and symmetry because the chest moves with breathing and can distort tiny strokes. Some artists argue sternum fine line always needs bolder contouring, while others say careful shallow work can look delicate and last. Name both camps when you ask about technique. Pain is higher on the chest and sessions are typically one to two hours. For the appointment wear a strapless or fitted sports bra you can remove or pull down easily.
9. Phoenix Ribcage Ribbon
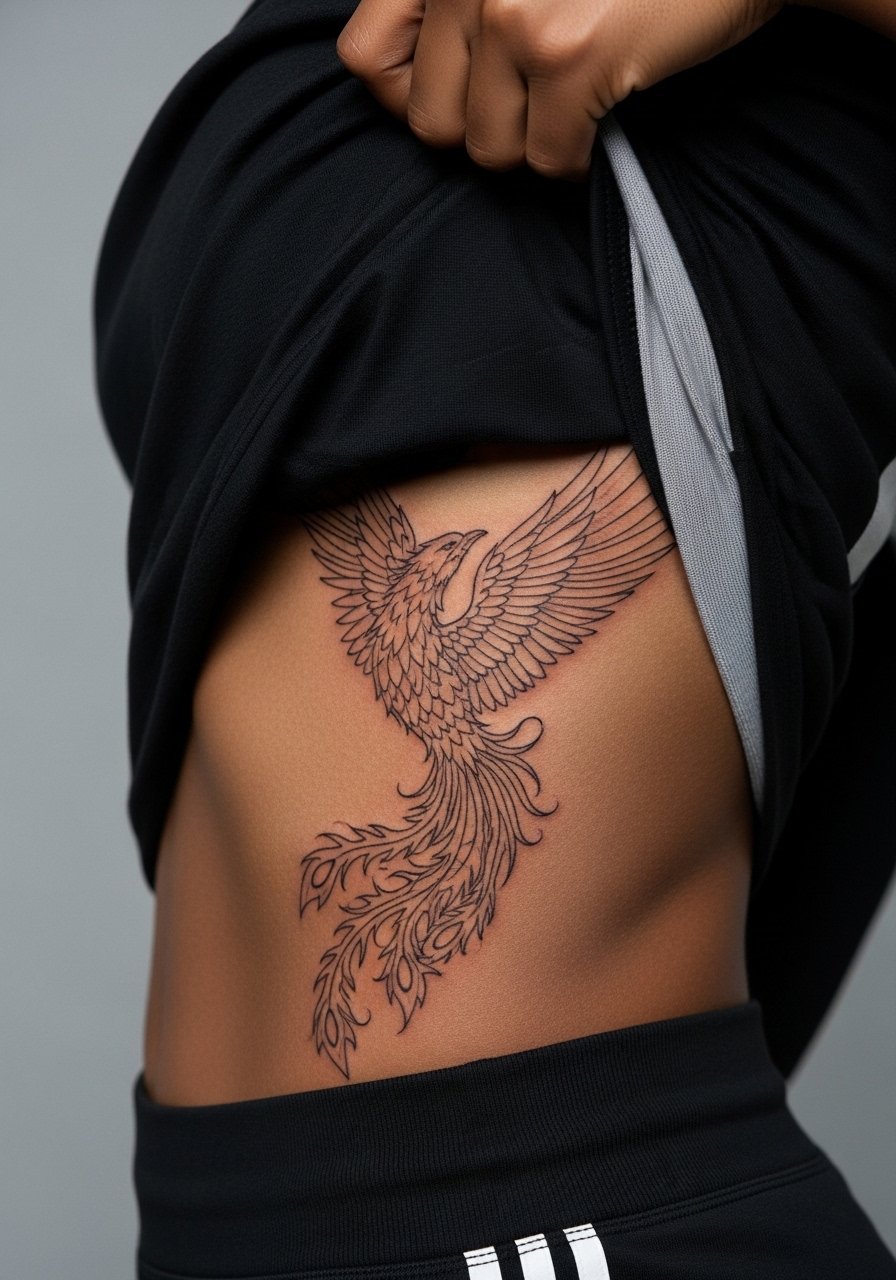
Ribcage phoenix pieces look dramatic but are controversial among artists. One camp says the constant stretch with breathing blurs fine lines quickly. The other camp argues that with proper spacing and slightly bolder anchors, lines hold. Name both and ask which one aligns with the artist's portfolio. Expect higher pain and a longer session, often two to three hours. A common error is going too small here. For session comfort, wear a loose zip-up hoodie or a cropped athletic top so you can adjust coverage between passes.
10. Phoenix Tail Down the Spine

Spine work creates vertical drama and pairs with open-back dresses when healed. The trick is to balance line weight so the central spine line does not dominate. Consult on feather tapering and negative space so the tail ages without merging. Spine sessions feel sharp in short bursts but most people tolerate a focused two-hour visit. For showing the healed work, an open-back midi dress highlights the tail without competing with the rest of your wardrobe.
11. Phoenix Wrap on Thigh Hip
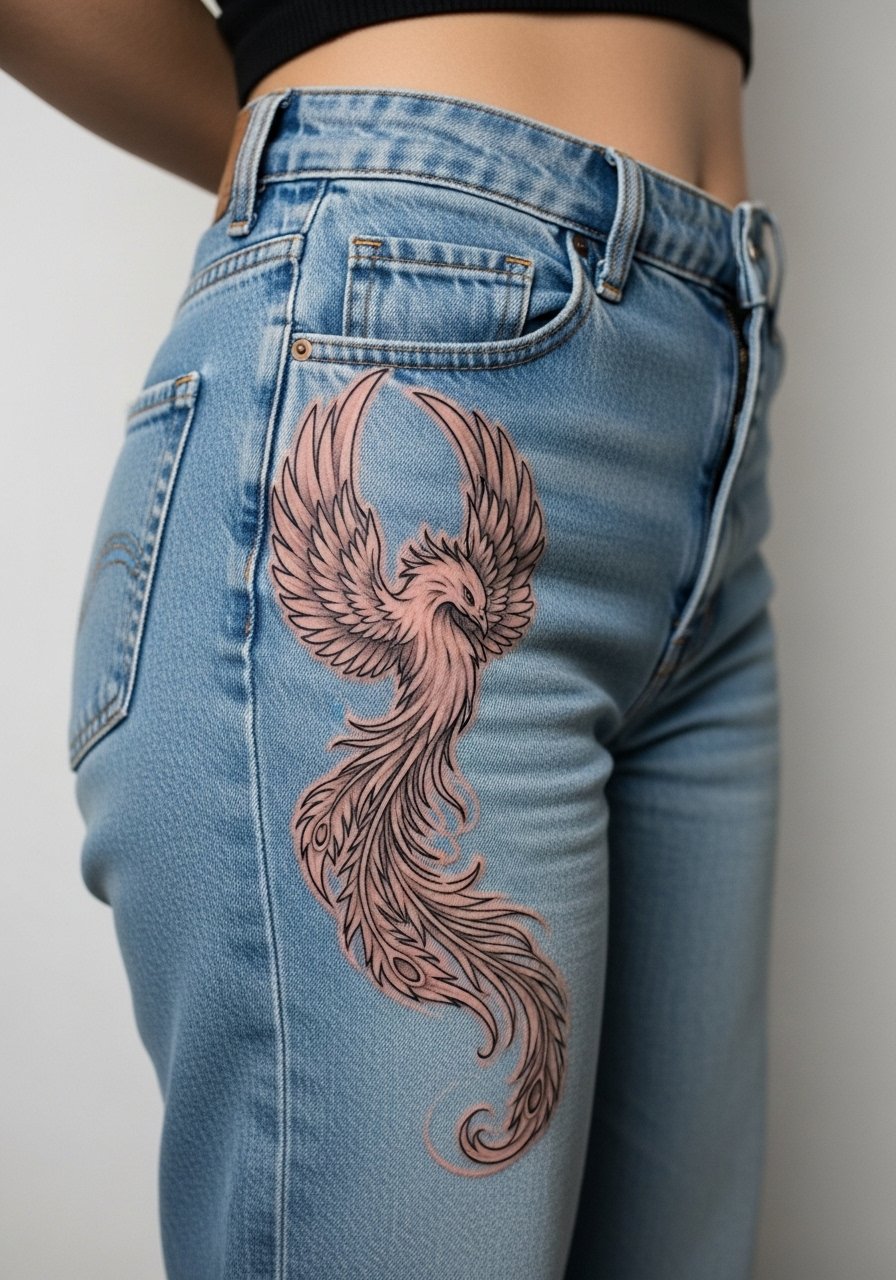
This placement benefits from scale and movement. Ask your artist to map the feather flow around clothing lines so the design is visible with high-waisted pieces. A common mistake is placing tight symmetry where clothes will always cut through the composition. Thighs tolerate larger work and sessions can be long, three to four hours, so plan accordingly. For the session wear comfortable high-waisted shorts or a skirt that allows access without exposing more than the tattoo zone.
12. Mini Phoenix on Finger Side
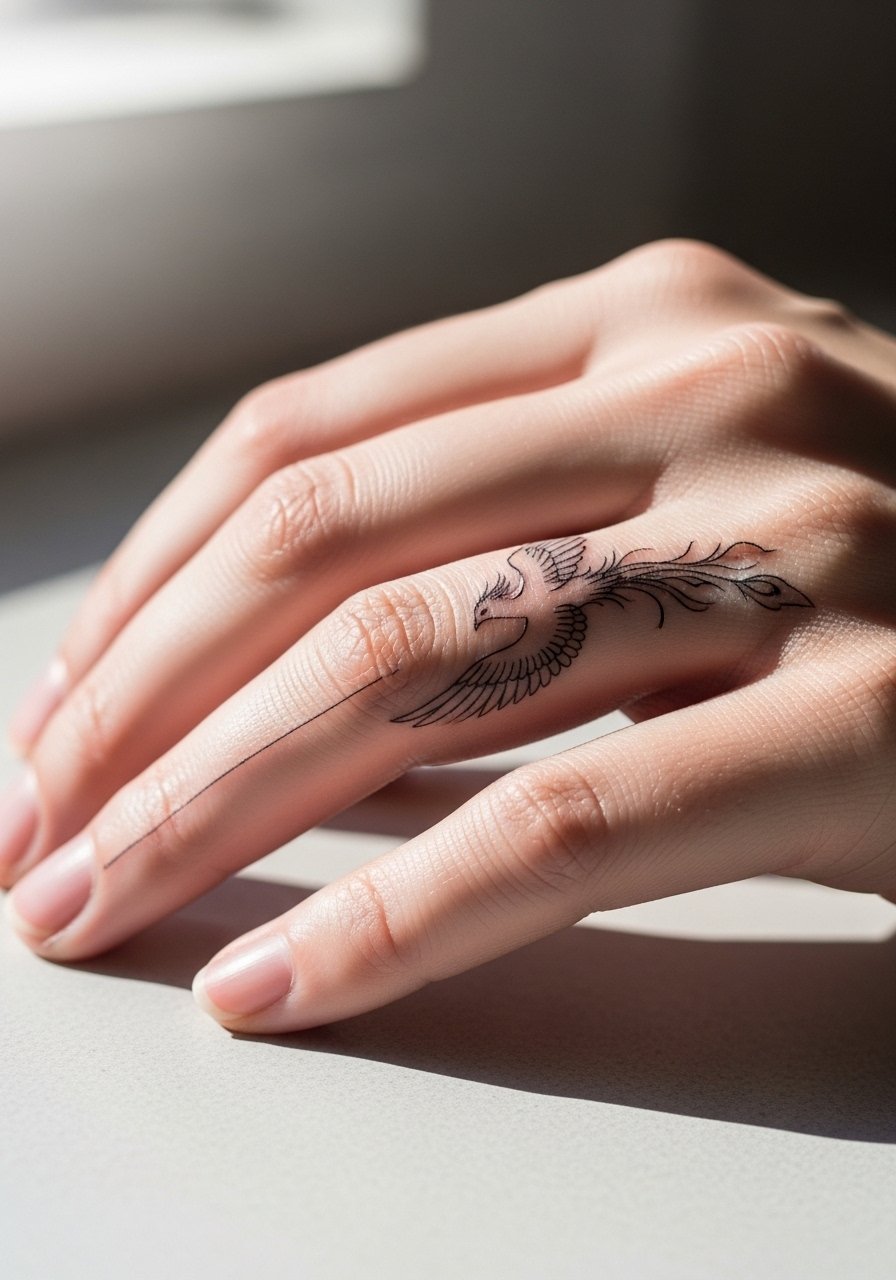
Finger tattoos are high-maintenance. The skin there regenerates quickly and ink can fade or migrate. To get a long-lasting tiny phoenix, ask for bolder edge lines and accept that frequent touch-ups are likely. A common mistake is expecting single-session longevity like an arm piece. Sessions are short but healing is fussy. This placement is good if you like something discreet. Wear minimal rings during healing and consider a delicate stackable ring set to complement the finger art once healed.
13. Phoenix Accent Behind the Ear

Behind-the-ear placements read like a whisper. They need a tiny canvas and precise placement below the hairline. Tell your artist the feather tip must not sit on the ear cartilage. Pain is low but expect limited detail. A frequent error is requesting script or tiny faces in this zone. This area is great for subtle statements and works well with short hair or updos in the summer. Consider an appointment-day hairstyle that keeps hair up so the artist has clear access.
14. Phoenix Over the Heart with Floral Motif
A chest-over-heart piece reads symbolic and intimate. Ask for a floral merge that frames the phoenix so the bird does not get lost in movement. The common mistake is adding too many tiny flowers that age into texture. Sessions on the chest feel sensitive and usually run two to three hours. If you want to show it off, a wide-neck blouse that can be pulled aside for photos keeps the look elegant without full exposure.
15. Phoenix Cuff Around the Wrist
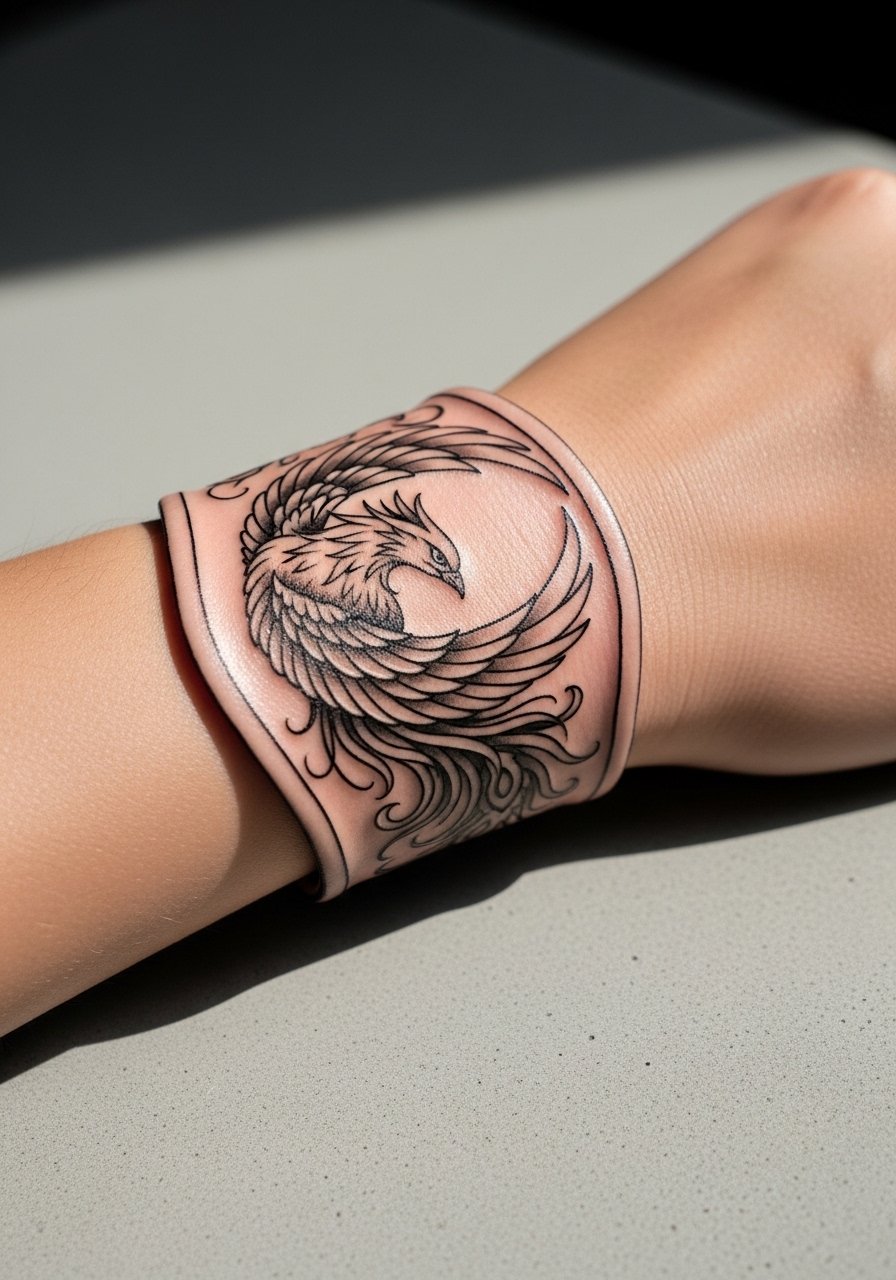
Wrist cuffs need careful spacing to avoid distortion from wrist movement. Ask for gaps at natural creases so the design reads when you bend your hand. A mistake is cramming detailed feathers into the crease where skin folds cause rapid wear. Healing here is exposed to constant washing and friction. Sessions are short but touch-ups are common. Pair the cuff with a thin bracelet that sits just above the design so it frames without rubbing.
16. Phoenix on the Lower Back
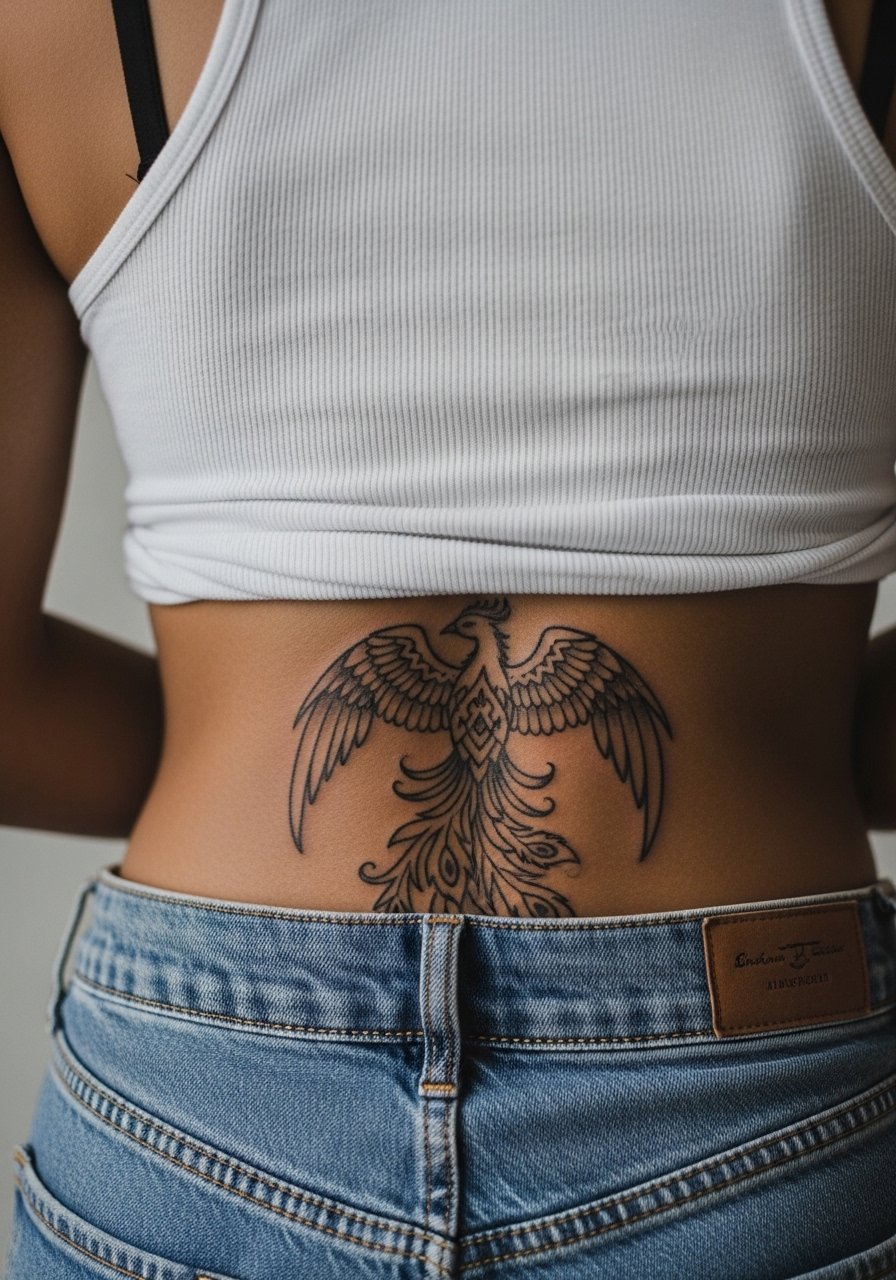
Lower back phoenix designs can be broad and ornamental. Ask your artist to anchor the tail with negative space so clothing waistlines do not chop the composition. The mistake is centering too low where waistbands sit, which hides the focal point. Sessions can be two to three hours for a medium piece. For the studio day, wear pants that can be lowered slightly without exposing more than the lower back zone.
17. Full Sleeve Phoenix Composition

A full sleeve is a long-term project and works best when you plan chapters. In your consultation, ask for a roadmap drawing showing how feathers, flames, and fillers will join over sessions. A common regret is starting with a highly detailed center piece without considering how fillers will balance it. Expect multiple sessions spread over months and touch-ups after the last healing window. For showing sections during the process, a short-sleeve tee or rolled sleeve keeps the arm visible without constraining the artist.
Frequently Asked Questions
Q: How do I choose between fine line and neo-traditional phoenix styles for longevity?
A: Think about scale and placement first. Fine line looks delicate but needs protected placements and occasional touch-ups. Neo-traditional saturation fares better in sun-exposed areas and when you want fewer touch-ups. Ask your artist to show healed photos of both styles on the body part you are considering.
Q: Will a watercolor phoenix fade faster than a saturated color piece?
A: Watercolor approaches use lighter washes and can fade faster, especially where skin stretches. If you love the watercolor look, ask for defined outlines or occasional saturated anchors so the silhouette survives even if washes soften. Expect touch-ups sooner than with dense color work.
Q: Are ribcage phoenix tattoos a bad idea because of movement and breathing?
A: Artists are split. One camp says ribs blur fine lines quickly from breathing and stretch. The other camp says careful spacing and slightly stronger anchors make it viable. The right choice depends on your pain tolerance and the artist's portfolio for ribs. Ask to see healed rib examples.
Q: What should I wear to the studio for a sternum or upper chest phoenix?
A: Wear a fitted sports bra or a wide-neck shirt you can pull aside so only the tattoo zone is exposed. This keeps the rest of your torso covered while giving clear access to the artist.
Q: How often should I plan touch-ups for small placements like finger or ankle phoenix tattoos?
A: Small, high-friction spots often need touch-ups every one to three years depending on your lifestyle. Factors like frequent hand washing, tight shoes, and sun exposure speed fading. Plan conservatively and budget time for a follow-up check.
