
Fine line owls and full-back spectacle pieces are both trending, but they demand different choices long before the needle hits skin. The real decision is practical not just aesthetic. Think about how the piece will sit when you gain muscle, how easy it will be to care for with limited visibility, and whether you want bold saturation that ages predictably or fine work that may need touch-ups. Read on for 17 vetted owl tattoo design directions for the back and what to ask at consult.
1. Realistic Owl with Tribal Elements on Upper Back
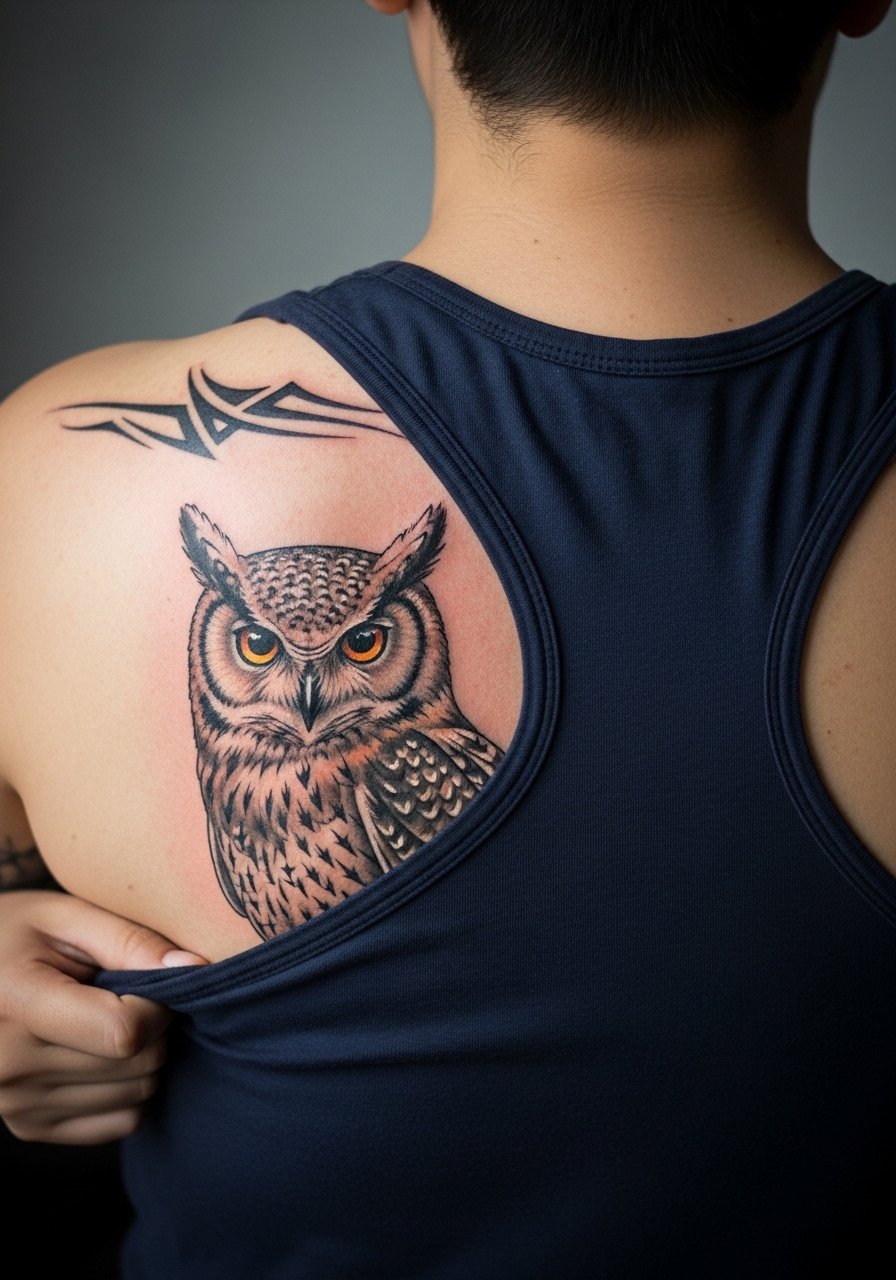
A realistic owl centered across the upper back works when you want feather texture and facial detail without crowding the spine. I recommend asking your artist for 12 to 16 inch references in the consult, and for layered reference photos that show feather direction. Common mistakes include asking for ultra-fine single-needle texture across a wide area, which often softens unevenly after two years. For aging, expect crisp contrast at six months, slight softening at two years, and the need for a saturation touch-up by year five on frequently sun-exposed shoulders. Session time usually splits over three to five shorter sittings to avoid excessive face-down time.
2. Geometric Owl Silhouette Spanning Full Back
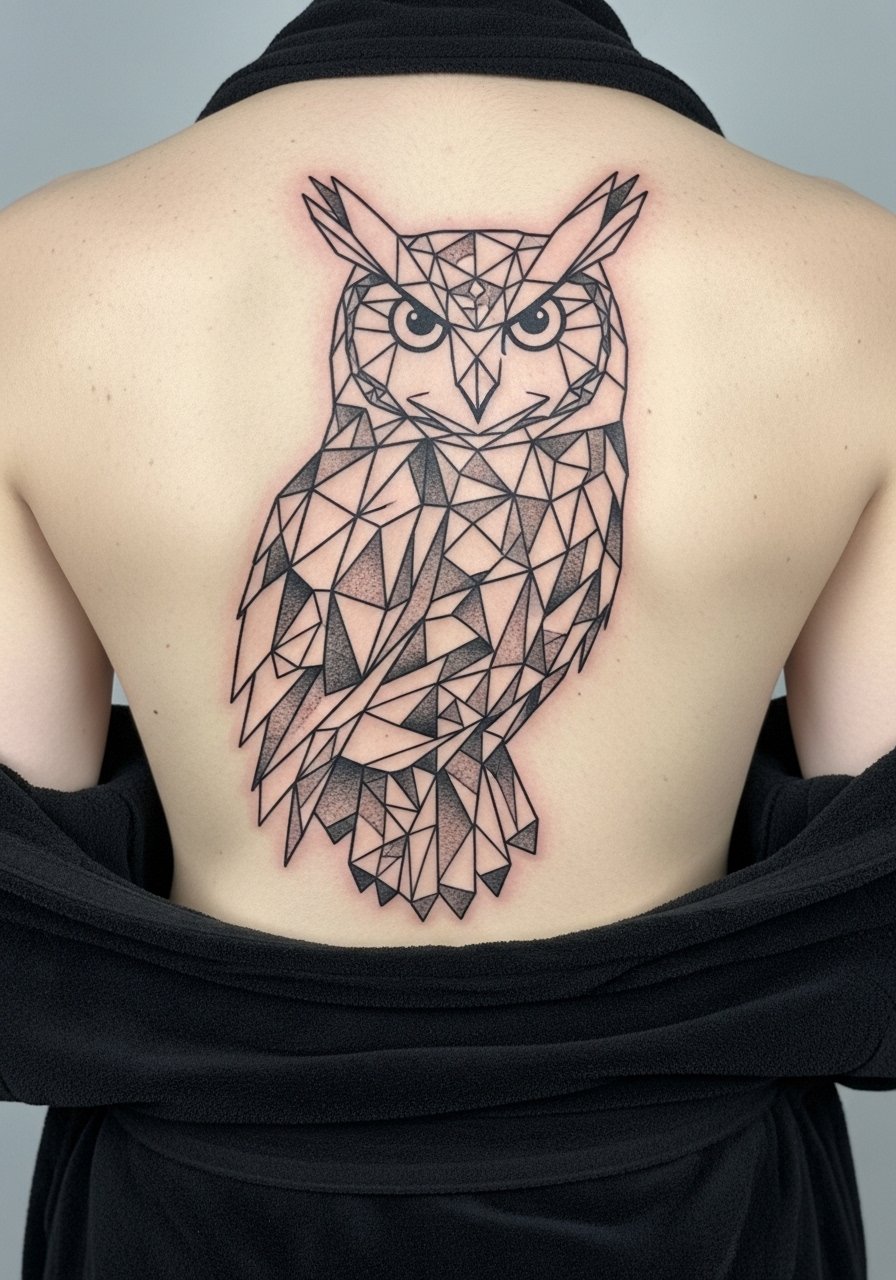
Geometric blackwork reads beautifully at scale and ages well when lines are spaced generously. The biggest mistake is shrinking a complex symmetry down too small. Tell your artist you want breathing room between lines and at least two pilot stencils to confirm alignment with the spine. Pain for full-back sessions is moderate to high because of duration, but the work moves faster than micro-realism. Expect two to four sessions depending on coverage. For showing it off, a backless halter dress highlights the central symmetry and keeps attention on the negative space rather than competing prints.
3. Traditional American Owl with Banner on Lower Back

A lower back traditional owl with a banner is classic for those who want bold outlines and color that survives years of friction. Tell your artist to keep outlines at a thicker gauge and to rough-in color saturation rather than layering delicate wash tones. Common aging problems happen when artists try to mimic delicate shading in that high-friction zone. Session time is moderate with three sittings typical for color packing. For outfits, pair the piece with high waist crop sets to frame the design without covering the banner during wear.
4. Abstract Owl Wings Arching Across Shoulder Blades
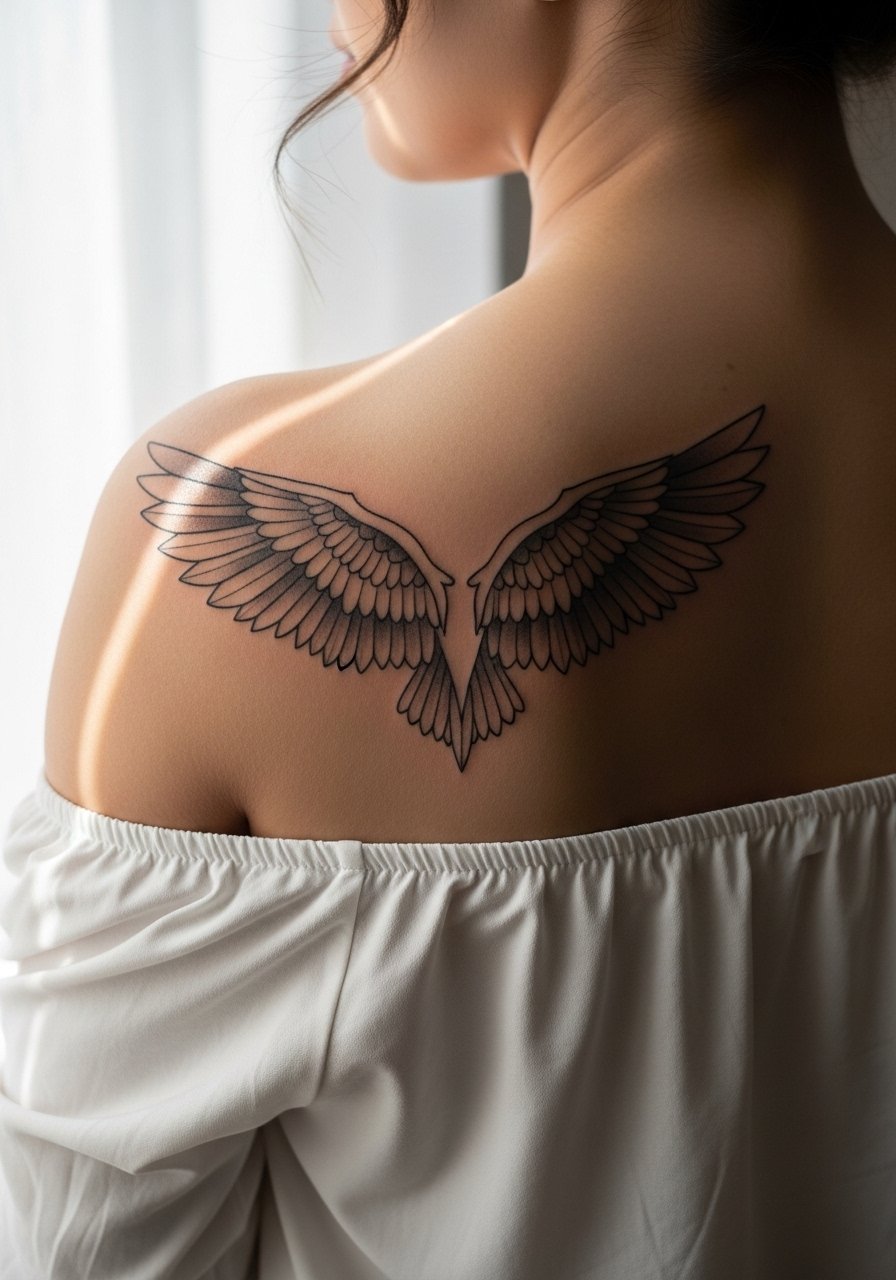
This wing arch uses negative space and flow to work with shoulder movement. The best use case is someone who wants motion rather than a head-and-body image. Tell your artist to map wing span to your shoulder blade width during the stencil stage. A mistake I see is compacting the wings too close to the spine which kills the sense of flight. Pain is low to moderate on the shoulder blades, and a single three-hour sitting often covers the initial pass. Pair the finished wings with an off shoulder blouse for a draped reveal.
5. Neo-Traditional Owl with Clockwork Gears on Upper Back
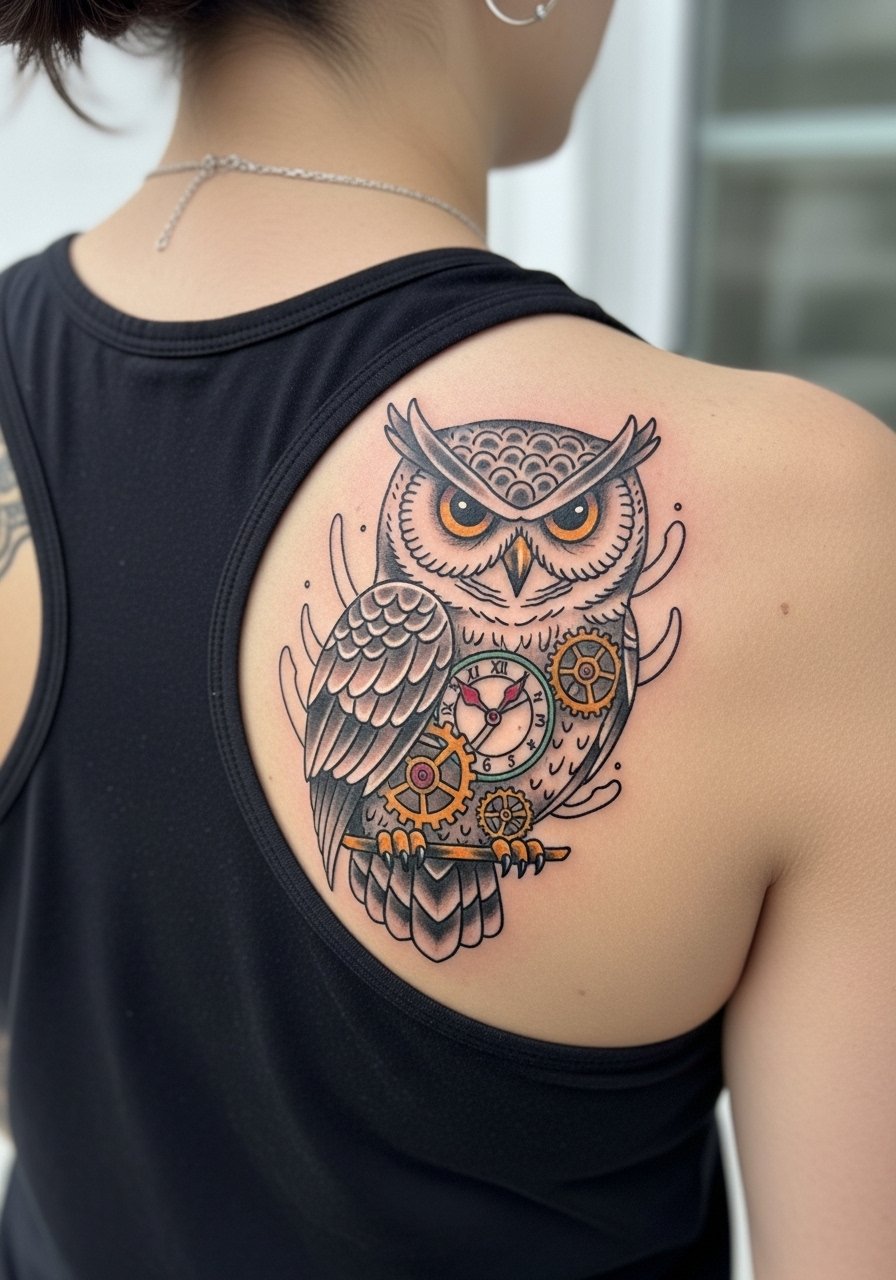
Blend neo-traditional bold outlines with steampunk gear motifs for a piece that reads like a narrative. During consultation, specify which gears should be color accents and ask for reference showing how metallic highlights sit next to feathers. A common error is overloading the composition with tiny gear teeth which become indistinct after healing. Sessions usually stagger across four to five sittings for layering color and saturation. For studio comfort, wear a loose tank top so the artist can access the upper back without straps digging in.
6. Minimalist Owl Eyes Centered on Spine
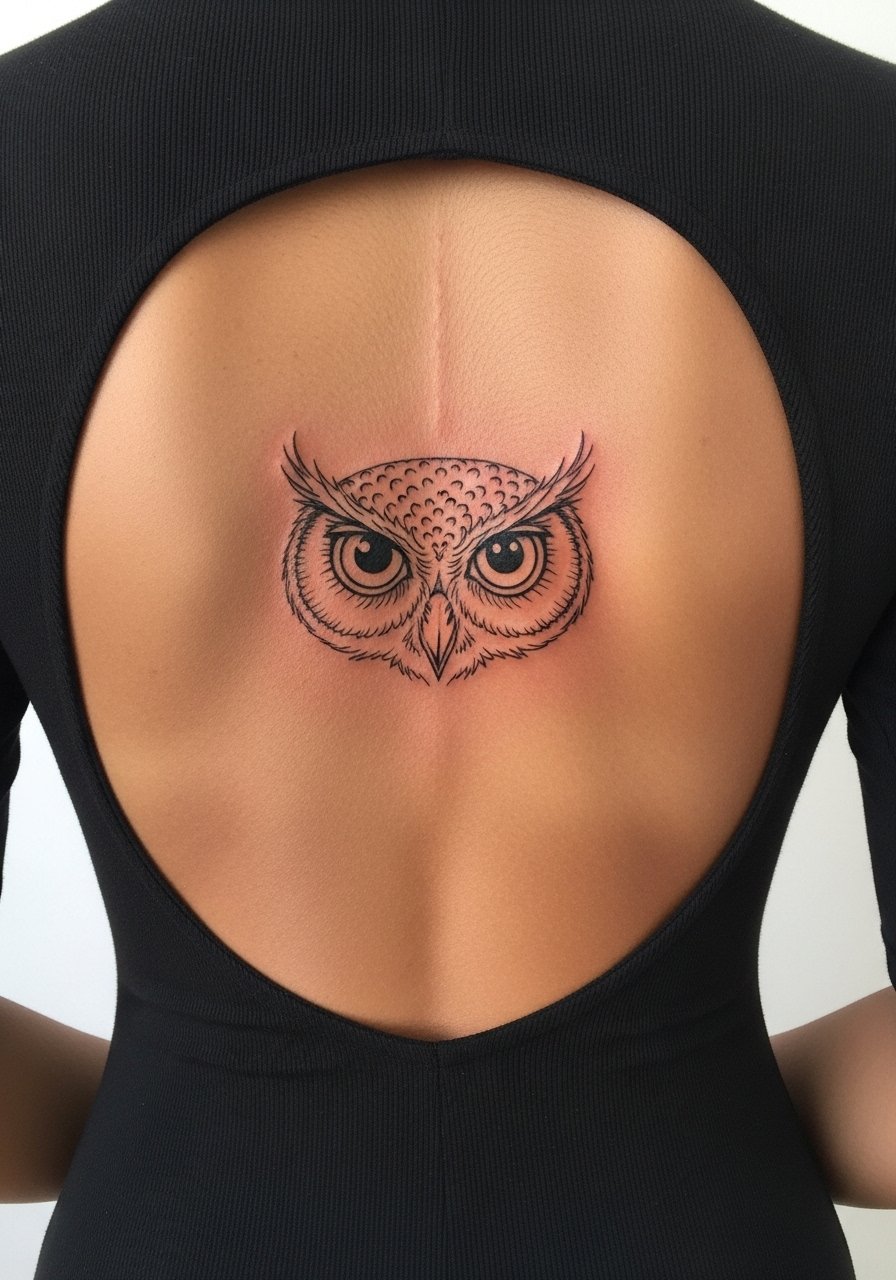
A spine-centered minimalist eyes design is subtle and deliberate. Tell your artist you want slightly bolder line weight than typical fine-line to account for movement on the spine. The fine-line camp and the bold-line camp disagree strongly on spine placement. One camp warns that single-needle work blurs on the spine within a few years. The other camp says correct needle depth and spacing preserve fine work. Ask the artist where they stand and to show healed photos on spined placements. Sessions are short and low-pain for many clients, but expect a touch-up at year two if you opted for lighter linework.
Studio Day Picks
Those first six owl concepts range from single-needle spine accents to full upper-back saturation, and a few simple items make the artist chair and the first week more comfortable.
-
Stencil transfer paper kit. Lets you preview placement directly on skin, especially helpful for center-spine compositions and symmetric wings above.
-
Topical numbing cream. Useful for longer upper-back sessions when you need a manageable first few hours without dulling the artist's ability to work.
-
Thin protective film roll. Keeps lower-back and shoulder-blade tattoos clean during the high-friction first days of movement and clothing contact.
-
Fragrance-free gentle body wash. Cleanses healing back tattoos without stripping pigment or irritating delicate linework from micro-realism pieces.
-
Aquaphor healing ointment. A thin layer during the initial closed-heal window helps with scabbing control on dense color and fine-line work alike.
7. Ornamental Owl Mandala Covering Full Back
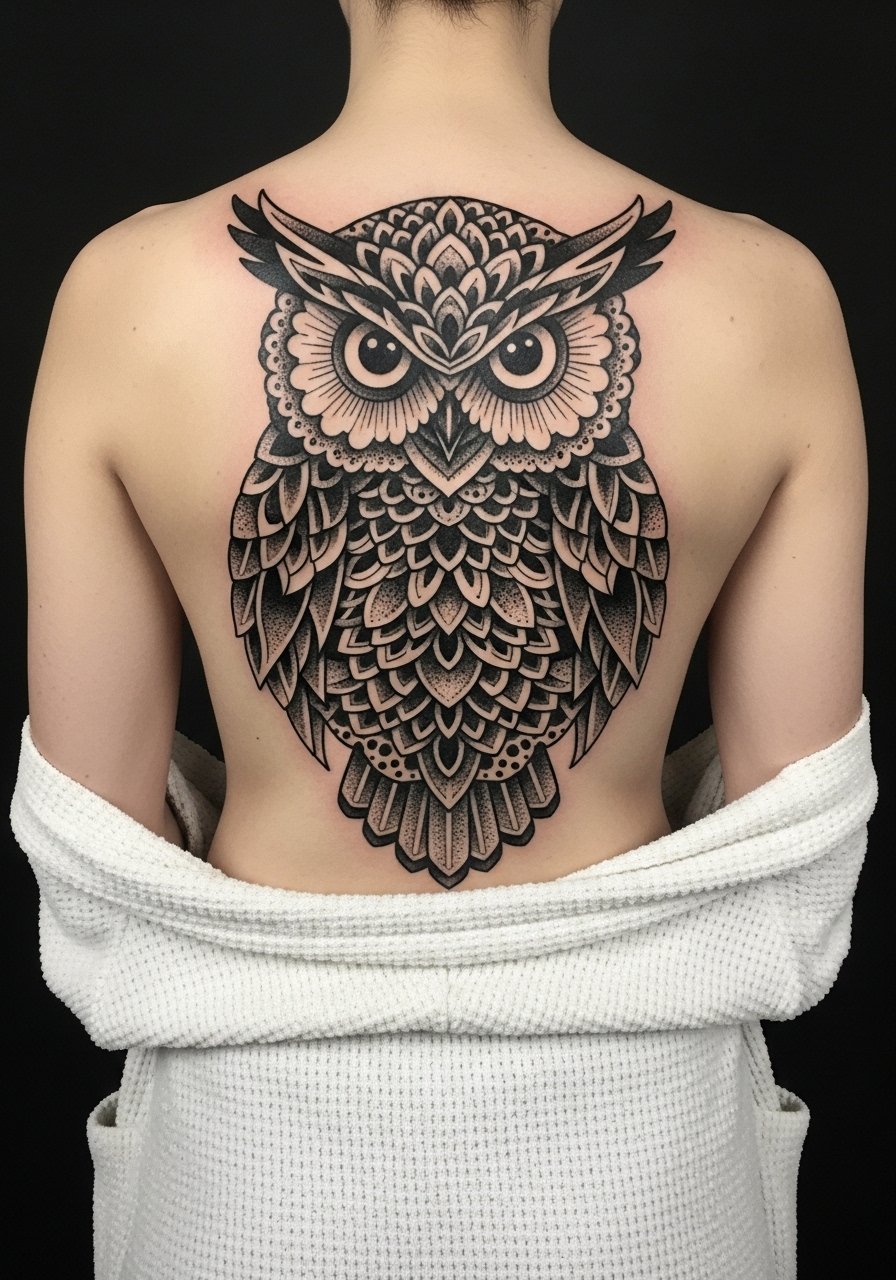
Ornamental mandalas scaled to a full back are meditative and require patience. Tell your artist you prefer more negative space between mandala rings so stipple shading holds up across years. A common error is packing too many concentric lines too tightly which merges after healing. For longevity, bold dots in the stipple areas and consistent spacing prevent muddying at year three. This piece typically takes six or more sessions. Because it's a large canvas, ask about staged touch-ups and sun-protection strategies for the whole back when you plan wardrobe choices.
8. Photorealistic Barn Owl in Flight Across Back
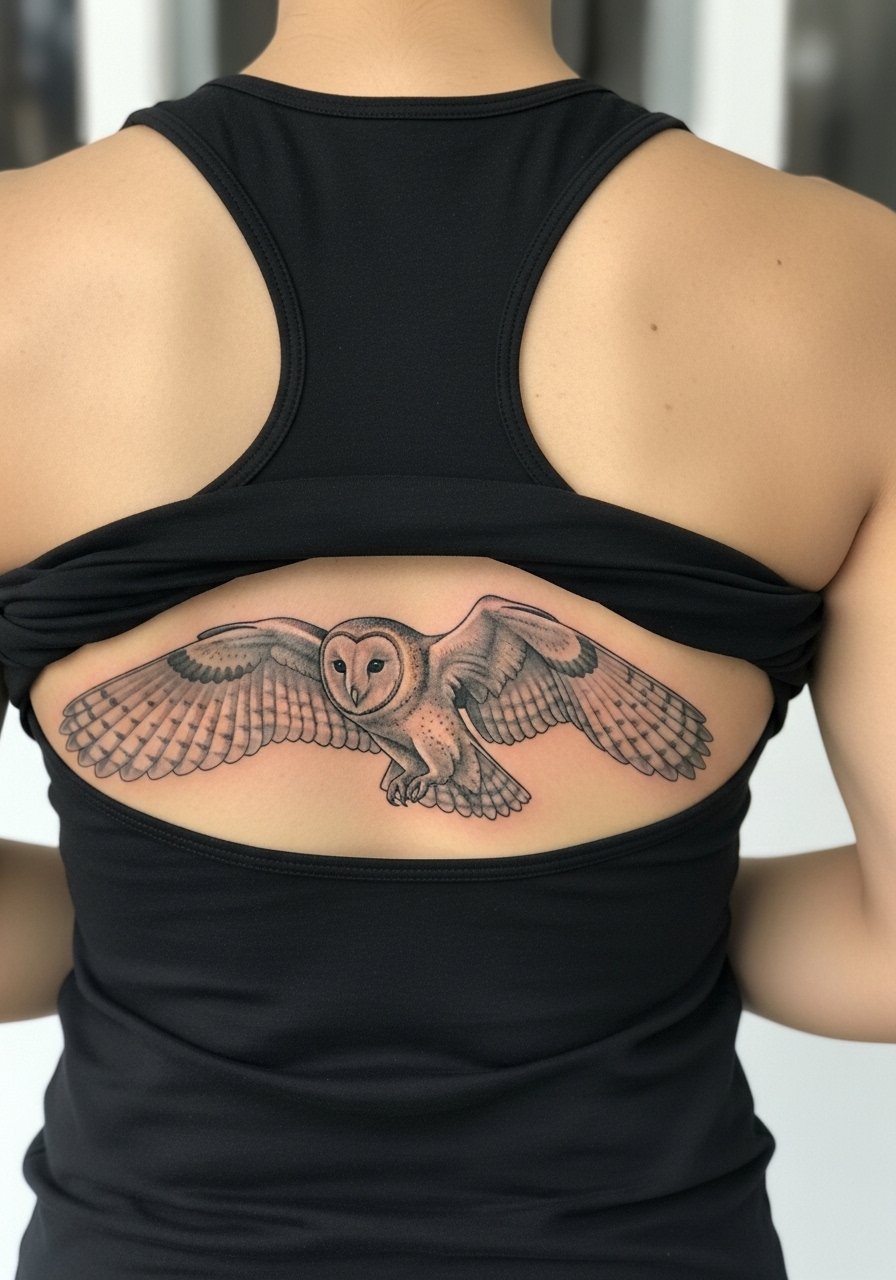
A barn owl in motion shows off an artist's micro-realism skill and reads cinematic across the shoulder blades. Bring multiple high-resolution reference photos and ask for a layout mock showing wingspan relative to your shoulders. Mistakes include asking for extreme feather micro-texture without accepting that subtle blending may soften over time. Expect five to eight sessions for true photorealism and plan rest days between sittings. For practical wear, an open knit cardigan layers well for reveal and protects the healing skin from sun.
9. Ignorant Style Owl Skull on Lower Back
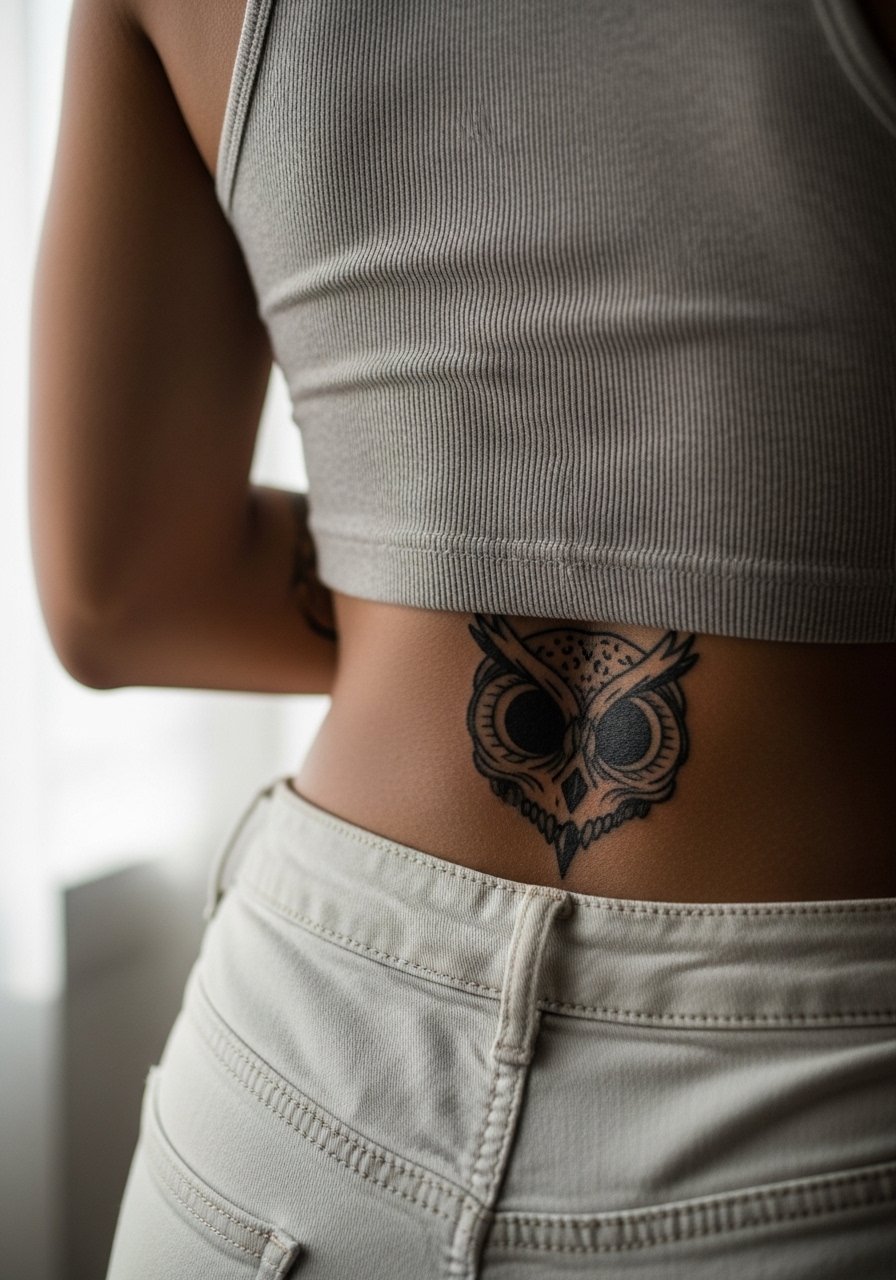
Ignorant style leans into raw, expressive lines that age into a characteristic texture if done well. Communicate to your artist that you want intentional unevenness not accidental blurring, and ask for examples of healed ignorant pieces. A regular misstep is asking for tiny, sketchy elements in a high-friction spot; keep the skull elements medium-large. Sessions are moderate length and often require a single color-pack pass plus a touch-up. For showing it off, vintage denim pairings work well and echo the design's rough edge.
10. Watercolor Owl with Galaxy Background on Shoulder to Mid-Back
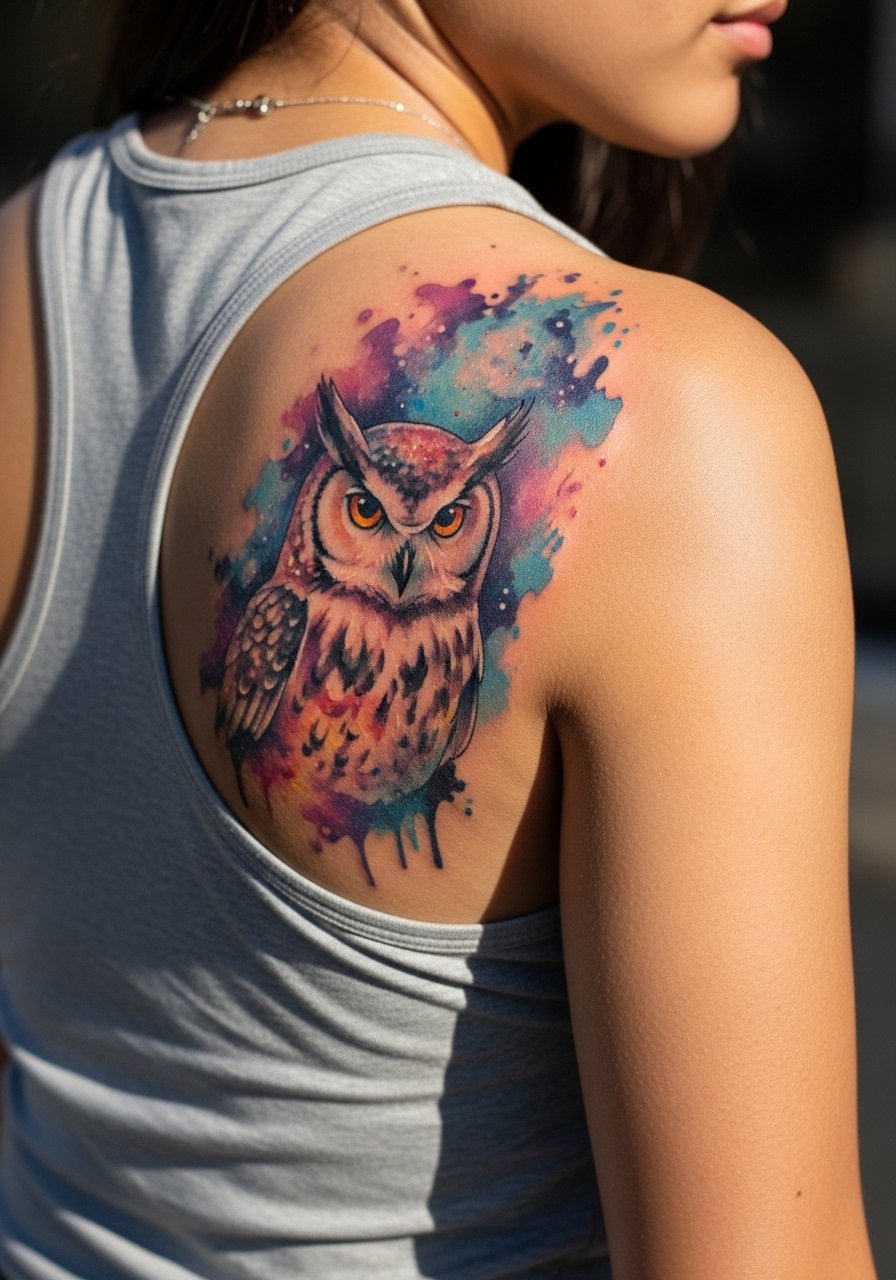
Watercolor effects look ethereal fresh but can fade faster than solid packs, which is why many artists now recommend bolder borders for longevity. There is a split in practice on aftercare for color-heavy pieces. One camp promotes protective film and trimmed occlusive windows for faster sealing. The other camp prefers a longer dry-heal period to let scabs fall naturally. Ask your artist which method they use and why. For the session, expect multiple color-saturation passes over four sittings. For evenings out, a racerback tank keeps shoulder flow visible without rubbing the pigment.
11. Split-Back Contrast: Blackwork Owl vs Color Feathers
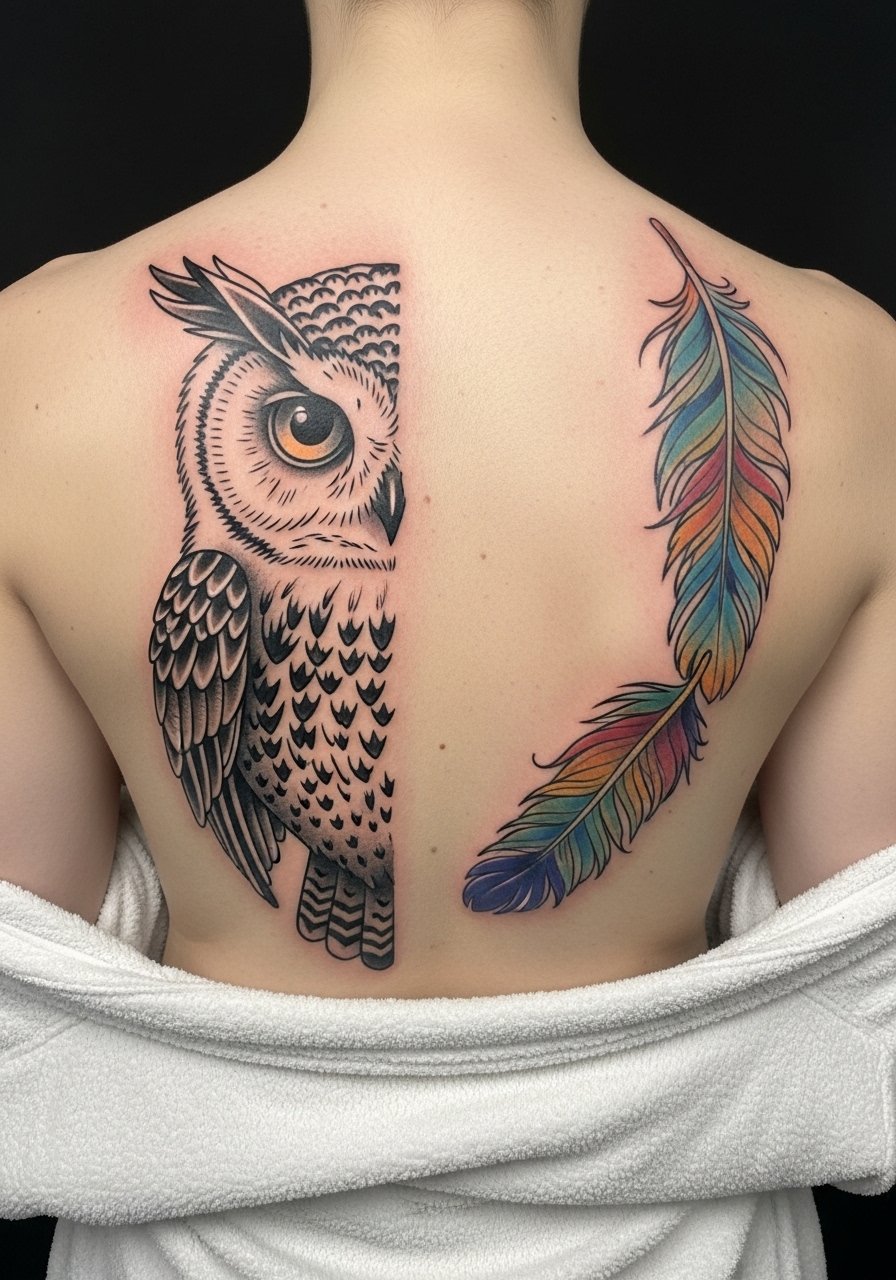
Split-contrast designs use the back's width to play with two visual languages. During consult, specify which side will age into texture and which will be color-packed, and ask the artist to mirror negative space to keep balance. The common mistake is unequal saturation that reads lopsided at one year. Sessions usually divide into discrete blackwork and color days. For wardrobe, choose tops that reveal one side at a time if you want to highlight the contrast on different days.
12. Half-Back Floral Perched Owl
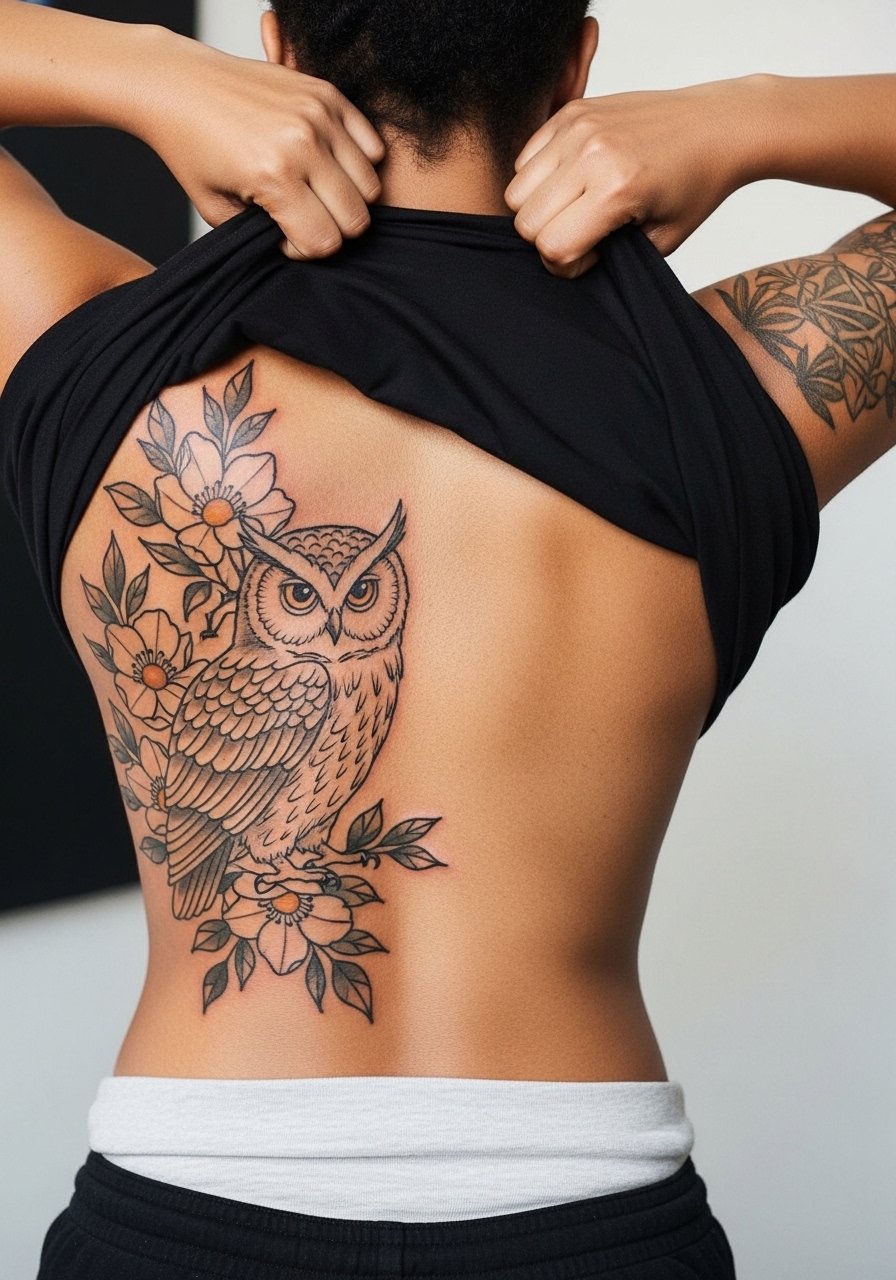
A half-back perched owl gives asymmetry and allows the other side of the torso to remain free for future work. Tell your artist you want the perch to read at a glance from three feet away, and ask them to scale floral elements so they do not crowd the bird. A common mistake is packing tiny petals near the spine which blur over time. Sessions are medium length and you should plan one touch-up to even color once healed. For session comfort, a loose tank top provides access without fabric pressure on the area.
13. Compass Owl Back Piece for Travelers
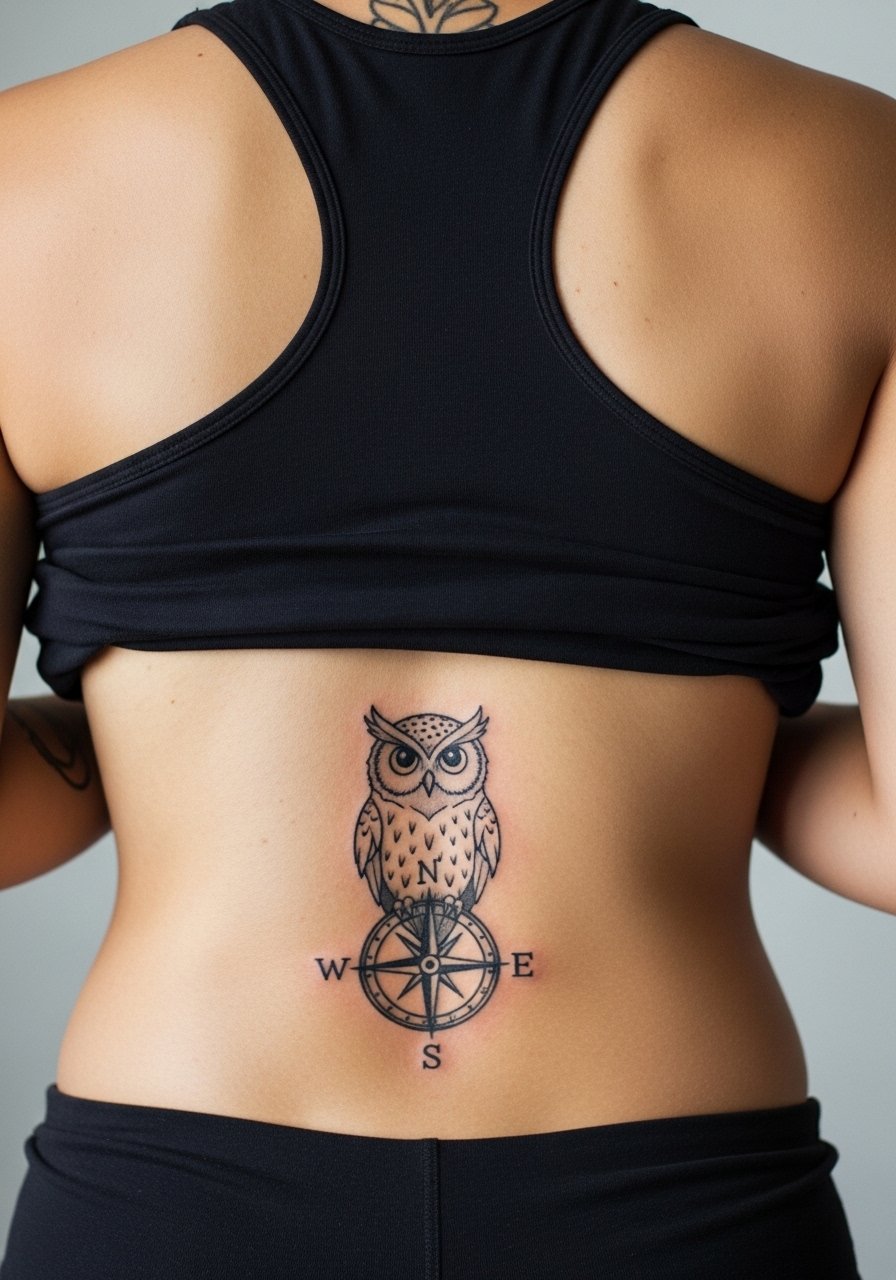
Combine an owl with compass elements for a back piece that reads like a travel talisman. In consultation, decide which compass points will be decorative and which will be readable. A mistake is tiny numeric or text details that lose legibility at an inch scale. This design benefits from balanced negative space to avoid a heavy center that ages into a visual blob. Expect three to four sessions depending on the level of shading. Wear open-back dresses to show the central compass without covering it up.
14. Memorial Owl with Banner and Dates on Upper Back
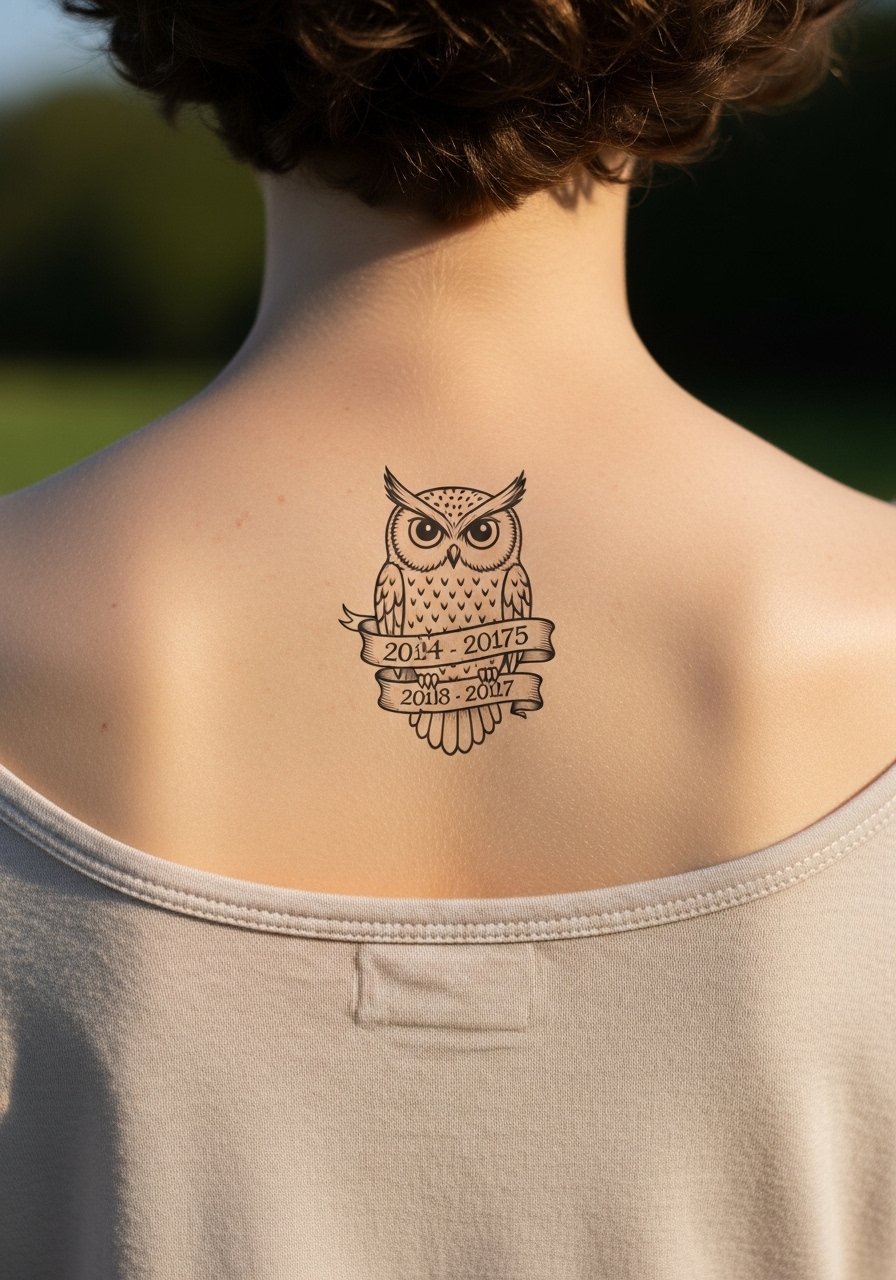
A memorial owl with a banner needs precise lettering and placement so dates remain legible for years. Ask your artist for exact typeface mockups on skin and for a healed photo library of similar scripts on upper-back placements. Many people underestimate how small lettering blurs in areas that move with shoulders. For longevity, choose slightly wider letter spacing than you think you need. Sessions are short for the banner and longer for surrounding shading. Layer with a loose button-down shirt when you want to hide or reveal the dedication.
15. Clockwork Steampunk Owl Spanning Shoulders and Mid-Back
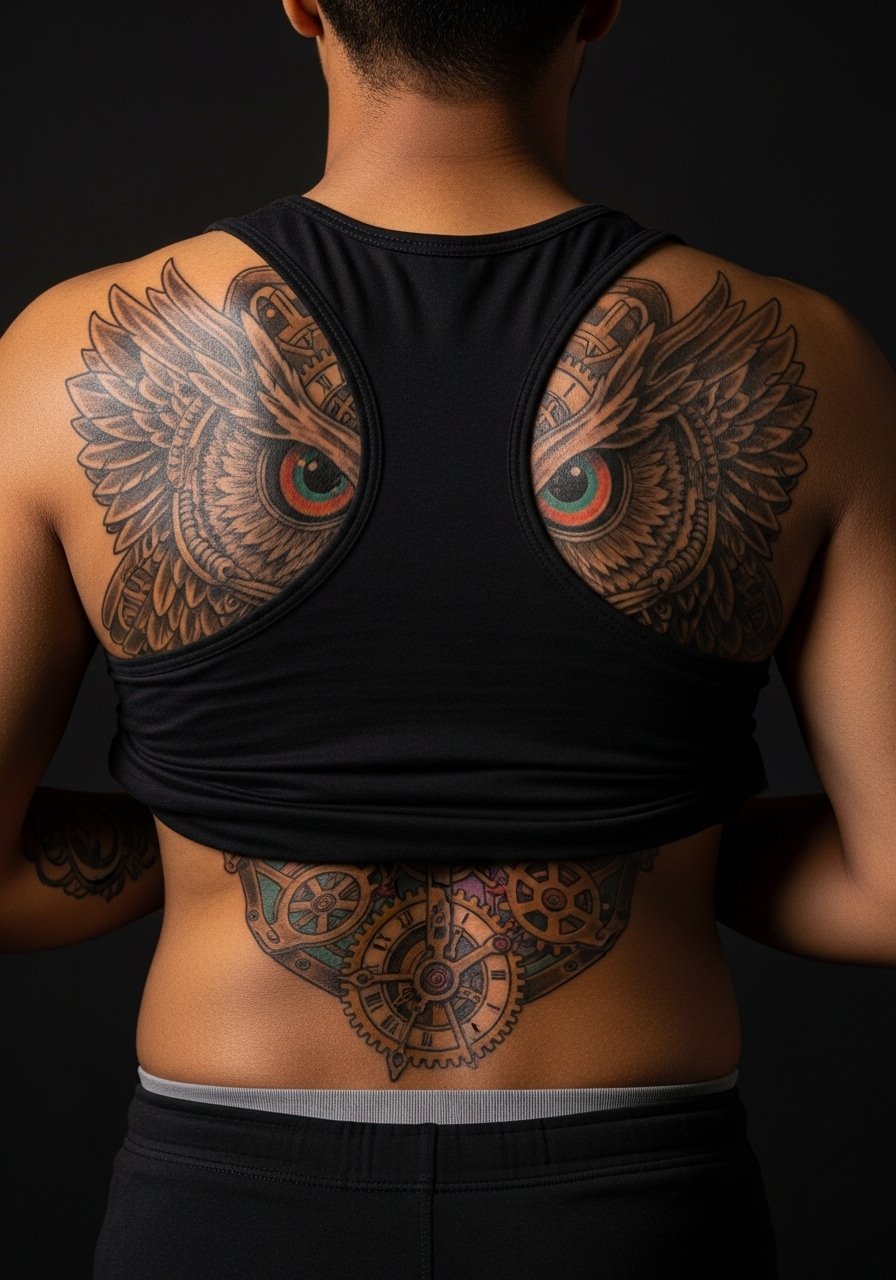
Clockwork integrations look best when the mechanical elements follow muscle lines rather than fighting them. Tell your artist you want gear arcs to sit with your clavicle and trapezius shapes so movement reads as mechanical motion. A frequent error is rigid gear placement that bends oddly with shoulder motion. This style needs multiple sessions to blend metal highlights with feather texture. For the chair, wear a racerback tank that gives the artist clear access to the shoulder-to-mid-back sweep.
16. UV-Reactive Galaxy Owl on Mid-Back
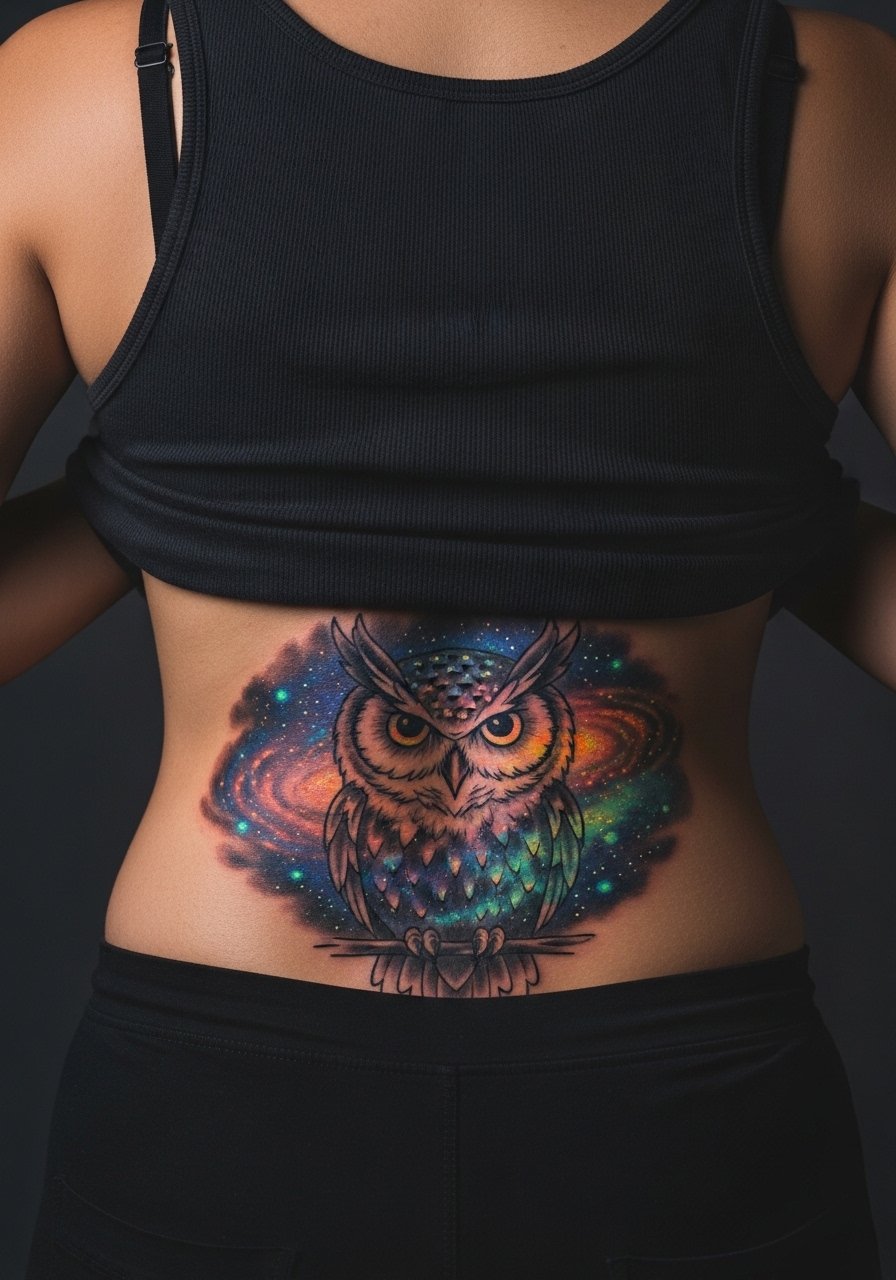
UV-reactive inks add a playful element for nightlife, but they come with trade-offs. Ask your artist about pigment longevity and compatibility with your skin tone. A common mistake is relying on UV ink for core contrast rather than as an accent, which reduces visibility over time. Sessions are similar to watercolor work with added pass for reactive pigments. For safety, confirm the ink brand and discuss sun exposure limits. UV accents pair well with open-back tops for evening reveals.
17. Minimal Spine-to-Lower-Back Eyes with Subtle Dotwork
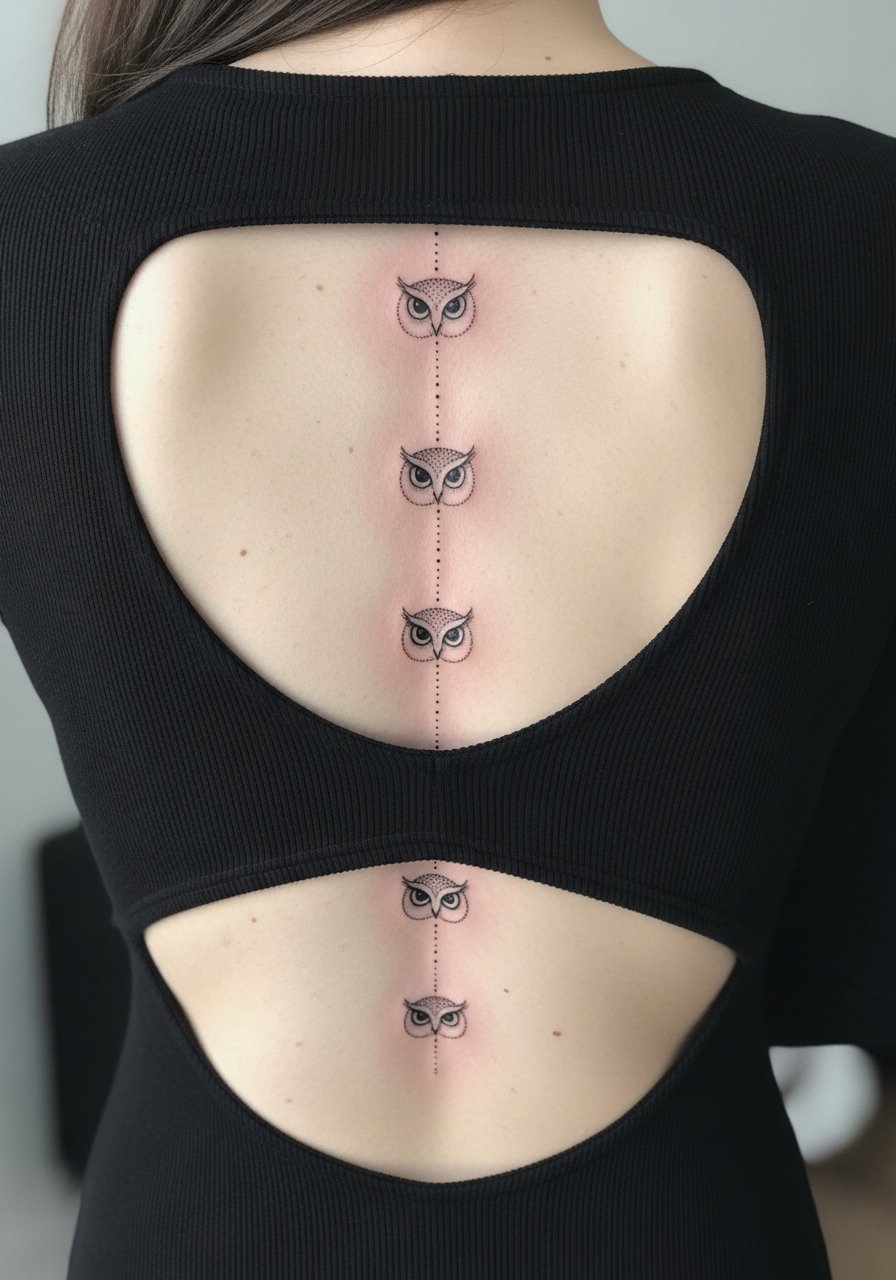
A long vertical spine composition reads elegantly under fitted clothing and in yoga wear. Tell the artist you want stipple spacing in the dotwork to be visible at arm's length, and request pilot dotted stencils to preview density. A common mistake is overdense stippling that becomes a shaded block after healing. Pain varies along the spine but sessions are short and tolerable for most. For showing the piece, a spine cutout dress or a front zip sports bra keeps the vertical line visible and flattering.
Frequently Asked Questions
Q: How should I decide between fine-line micro-realism and bold blackwork for a back owl?
A: Think longevity and lifestyle. Fine-line micro-realism offers delicate feather texture but usually needs touch-ups earlier, especially across moving skin. Bold blackwork holds contrast longer and tolerates sun and friction better. If you train heavily or expect significant body changes, a slightly bolder approach will age more predictably.
Q: Will a full-back geometric or mandala owl stretch badly if I gain muscle or weight?
A: Central, spine-focused pieces resist distortion more than off-center panels that sit on expanding muscle. For geometric work, ask your artist to plan symmetry with the spine and to avoid tight repeating patterns at the flank edges where stretch is most visible. A consult showing your activity level helps the artist adjust scale.
Q: For watercolor and UV-reactive owl backgrounds, what aftercare method should I anticipate?
A: There is debate between protective film and dry healing for color-heavy work. One camp prefers short-term film coverage to reduce contamination. The other prefers hands-off scab management to preserve color edges. Ask your artist which method they specialize in and follow their protocol so pigment settles as intended.
Q: How often do upper-back photorealistic owls need touch-ups?
A: Expect a realistic piece to look crisp at six months, soften by year two, and often benefit from a saturation or contrast touch-up around year three to five depending on sun exposure and skin type. Darker skin tones sometimes require strategic white highlights or richer mid-tones to maintain definition.
Q: What should I wear to the studio for a lower-back or full-back session?
A: Wear something you can adjust to expose only the tattoo zone. For lower back work, high-waisted pants with a loose top is practical. For full-back pieces consider a front-open robe or a loose button-down you can pull aside. Comfort and easy access reduce fidgeting and make long sessions smoother.
