
The tattoos that still read crisp after five years are often not the ones that earned the most likes on day one. New-school thrives on color and cartoon energy, but longevity comes from linework, placement, and realistic aftercare trade-offs. If you worry about price creep, how colors show on darker skin, or whether Saniderm is for you, these 27 bold new-school drawings break the choices down with smart design and wardrobe notes to help you book the right session.
1. Cartoon Character Sleeve with Oversized Features
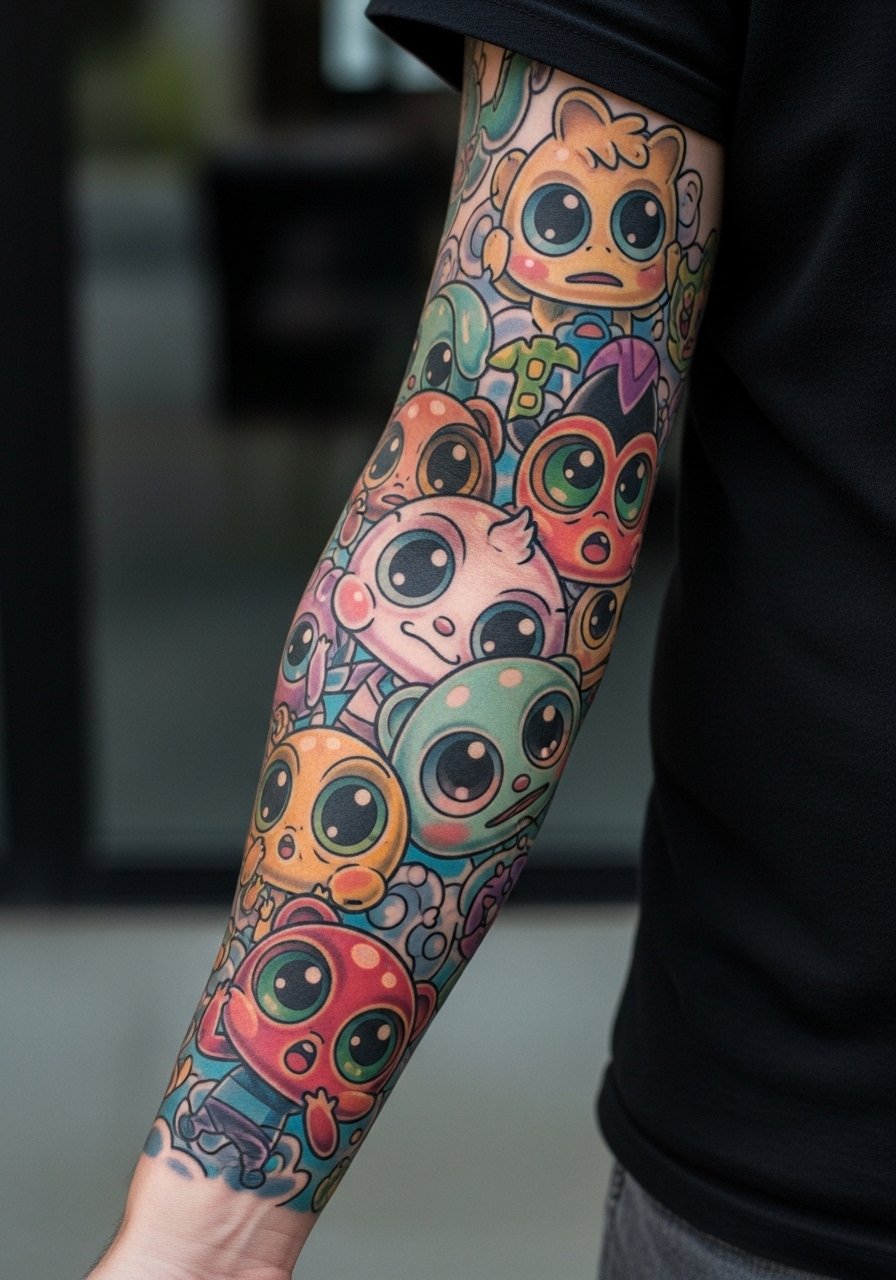
This full-arm sleeve is the classic new-school playground. Say you want a sleeve that reads like a moving comic strip, tell your artist to plan large focal characters with bold outlines and negative-space flow between them. The risk is crowding everything into the same value range so the colors fight one another. Ask for a shared accent hue to tie separate characters together and for elbow-friendly spacing so the sleeve still reads when your arm bends. For the session, wear a loose short-sleeve button-down so the artist can roll the sleeve without stretching the fabric.
2. Surreal Landscape Back Piece with Neon Highlights
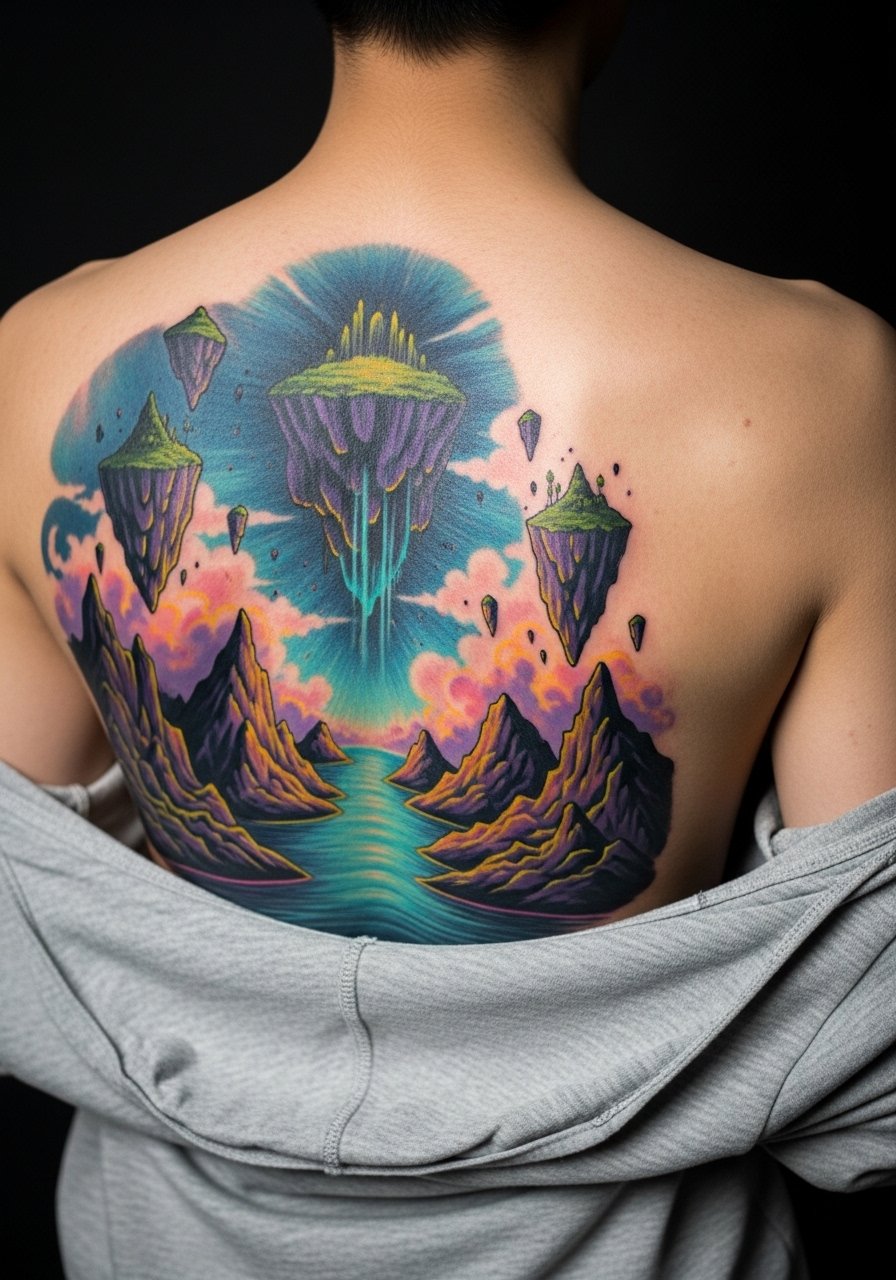
A back landscape gives an artist room for impossible perspective and neon color pops that feel cinematic. The practical bit to request in consultation is layered depth, with midtones under each character and white highlights used sparingly so photography captures the neon without washing it out. Big pieces like this usually take multiple long sessions. For showing it off, pair the piece with an open-back top for evenings and a loose button shirt when you want it covered. A healed back piece photographs differently than a fresh one, so plan shots at least six weeks after the last session.
3. Graffiti-Inspired Critter on the Outer Forearm
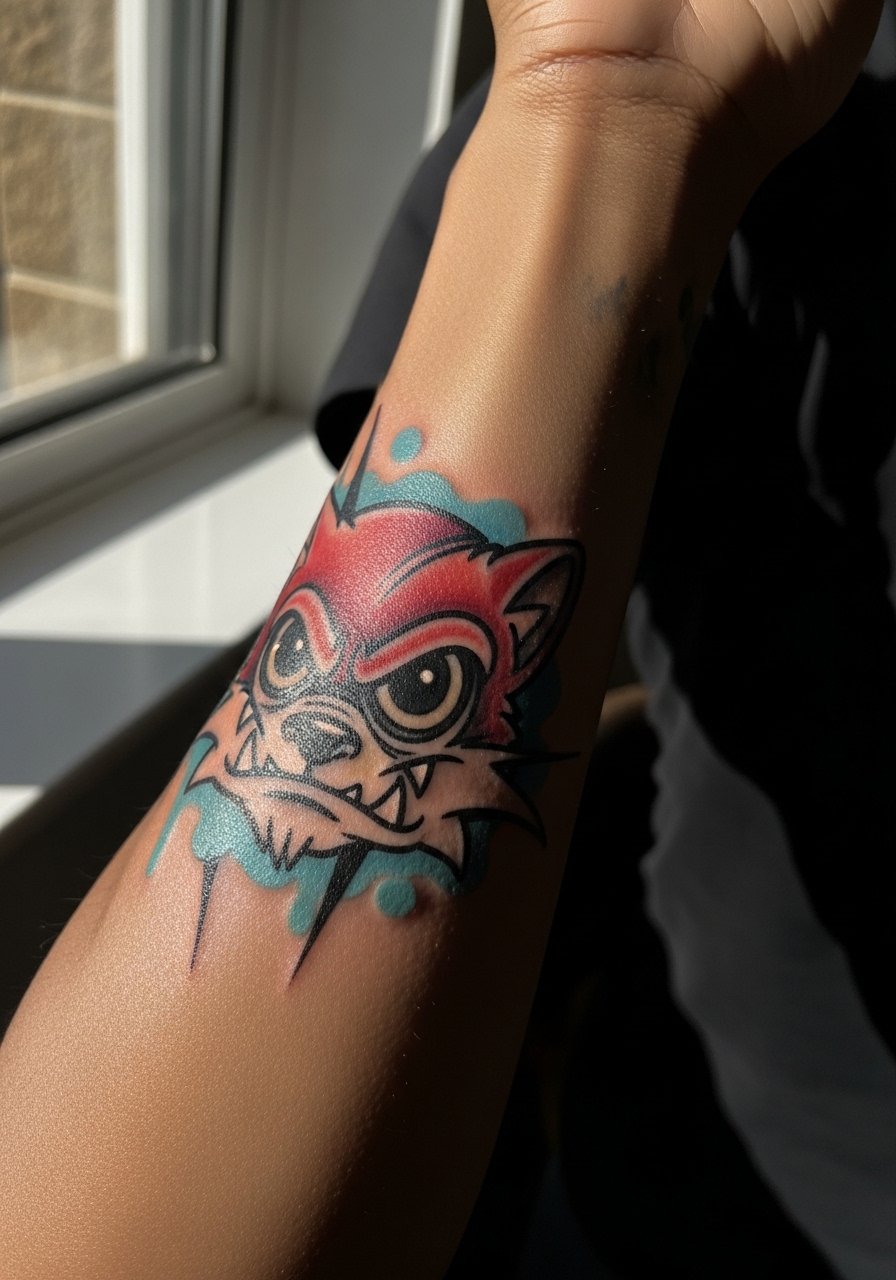
Graffiti line flow makes new-school feel alive. For a forearm critter, ask your artist to exaggerate motion lines and to keep the silhouette readable from arm’s-rest position. Common mistakes are tiny internal details that blur as the skin stretches, and color choices that disappear on darker tones. To keep the bright palette intact, prioritize neon accents and strong black outlines. Show-off styling pairs nicely with a rolled cuff short-sleeve tee so the piece is visible without competing with a loud pattern.
4. Anime Character with New-School Exaggeration on the Thigh
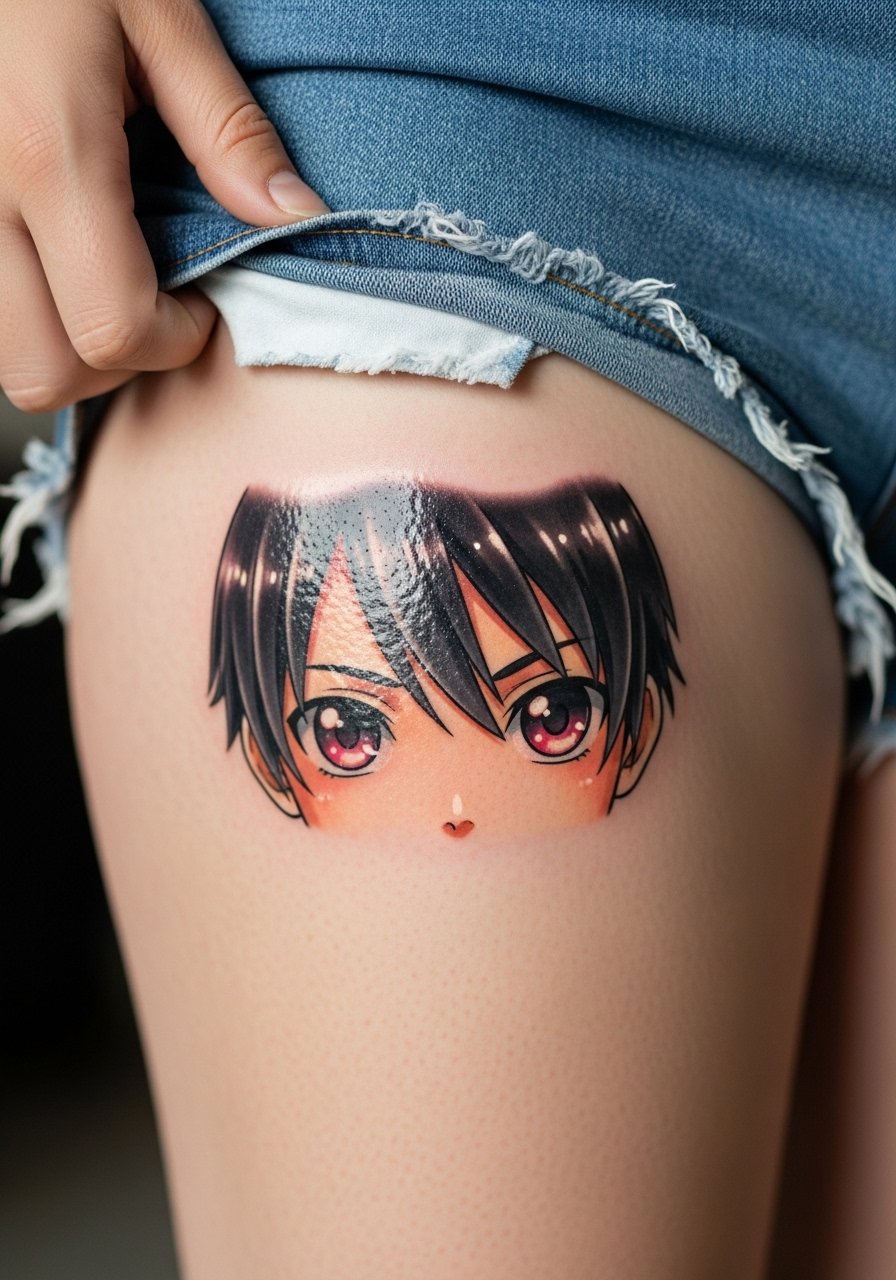
Anime faces translate into new-school beautifully because of emotive expressions and size exaggeration. For a thigh placement, request a slightly larger scale than a forearm piece so facial detail reads once healed. The thigh tolerates heavier saturation, but be aware that rapid weight changes or major body shifts distort rounded features more than flat motifs. If you plan to show it off, denim shorts or a high-waisted short work well. Session feel tends to be moderate, but longer coloring blocks can fatigue the area, so schedule breaks.
5. Pin-Up Character with New-School Cheesecake Flair on the Upper Arm
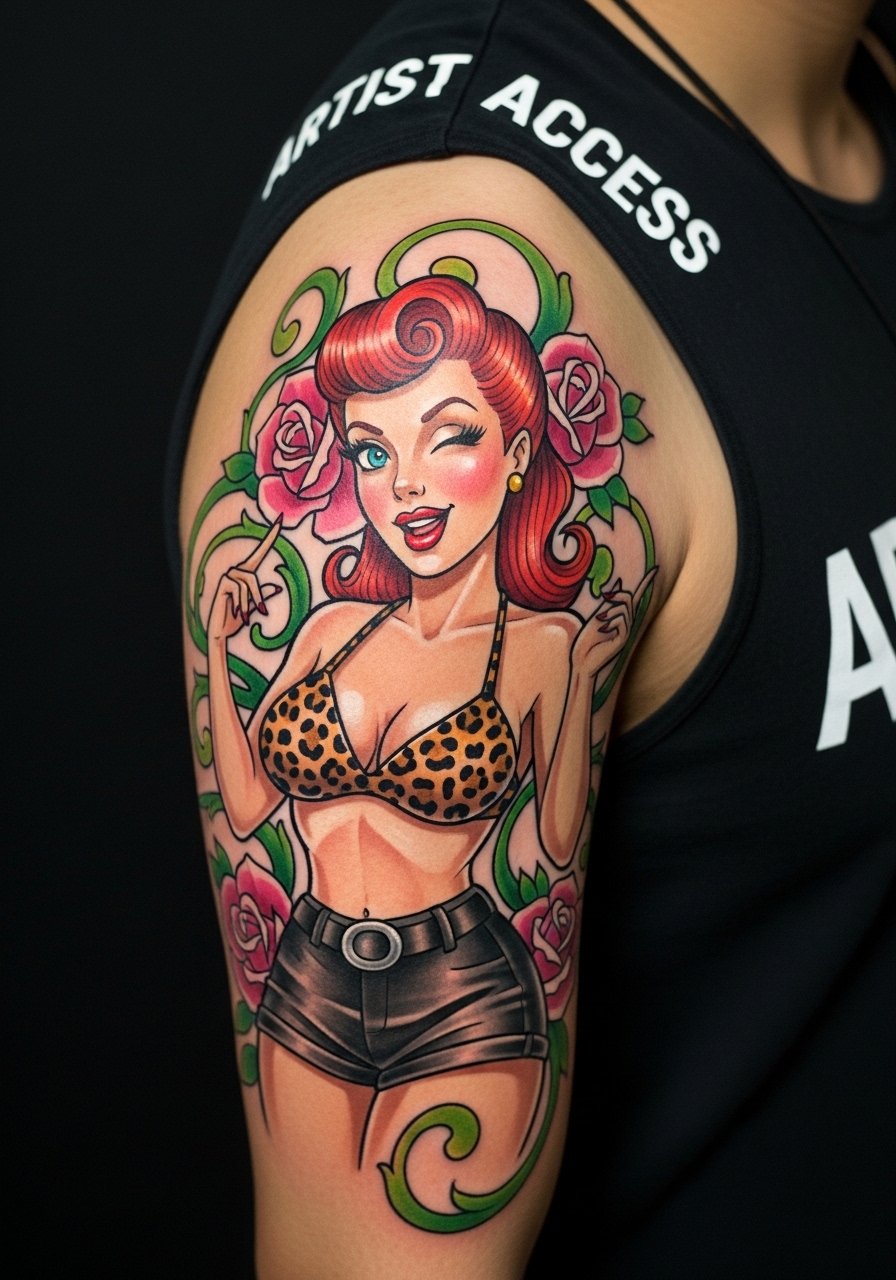
A pin-up reimagined in new-school combines vintage attitudes with cartoon distortion. Ask for solid outlines around the figure and skin-tone highlights placed thoughtfully so the character reads against colorful backgrounds. The mistake is trying to cram too much period detail into a medium panel; simplify retro clothing and push expression. Short sleeves or a sleeveless tank are sensible for showing off the upper arm, and for the session wear a loose short-sleeve top you can slide off easily.
6. Comic Book Hero Portrait in Full Color
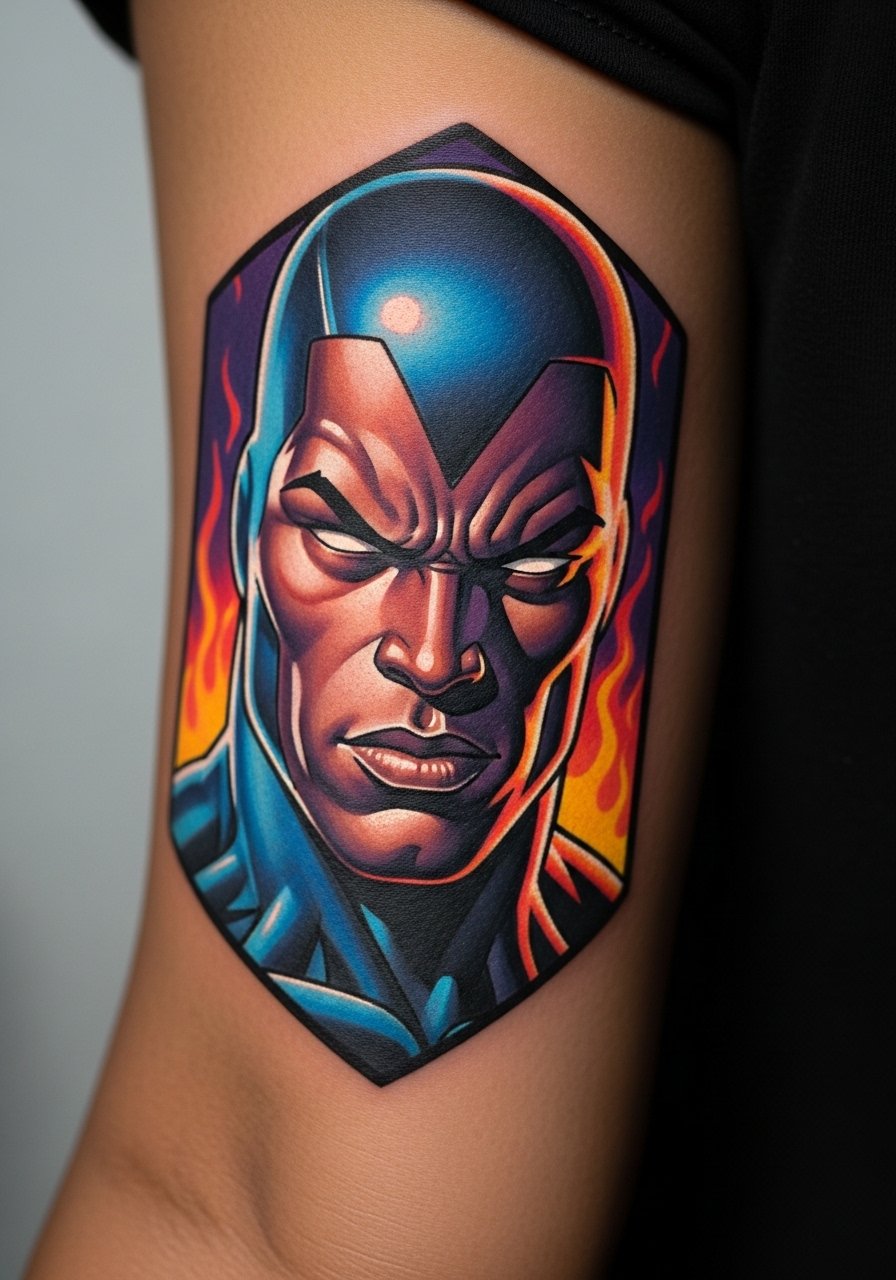
A comic-hero portrait in new-school should lean into iconography and bold contrast. For good long-term results, specify strong black outlines and a limited secondary palette so the face doesn’t compete with the background. Medium-scale portraits require at least two sessions for clean color layering. During the session wear a short-sleeve fitted tee that gives the artist arm access without stretching the fresh ink.
Studio Day Picks
The forearm, thigh, and upper arm pieces above ask for different prep than hand or chest work, so a few targeted items smooth the session and first week.
- Stencil transfer paper kit. Lets you preview the exact line placement on skin before the needle starts, which matters on sleeves and portrait panels.
- Topical numbing cream. Useful for rib and thigh sensitivity, applied per the product instructions and discussed with your artist during booking.
- Thin protective film roll. Helps small, high-friction placements like wrists and ankles survive daily activity in the first few days.
- Fragrance-free gentle body wash. Cleanses healing color without irritating the skin or stripping pigment.
- Aquaphor healing ointment. Thin application in the first 48 hours protects fresh linework on areas that move a lot, like elbows and knees.
7. Twisted Monster Character with Graffiti Flow on the Calf
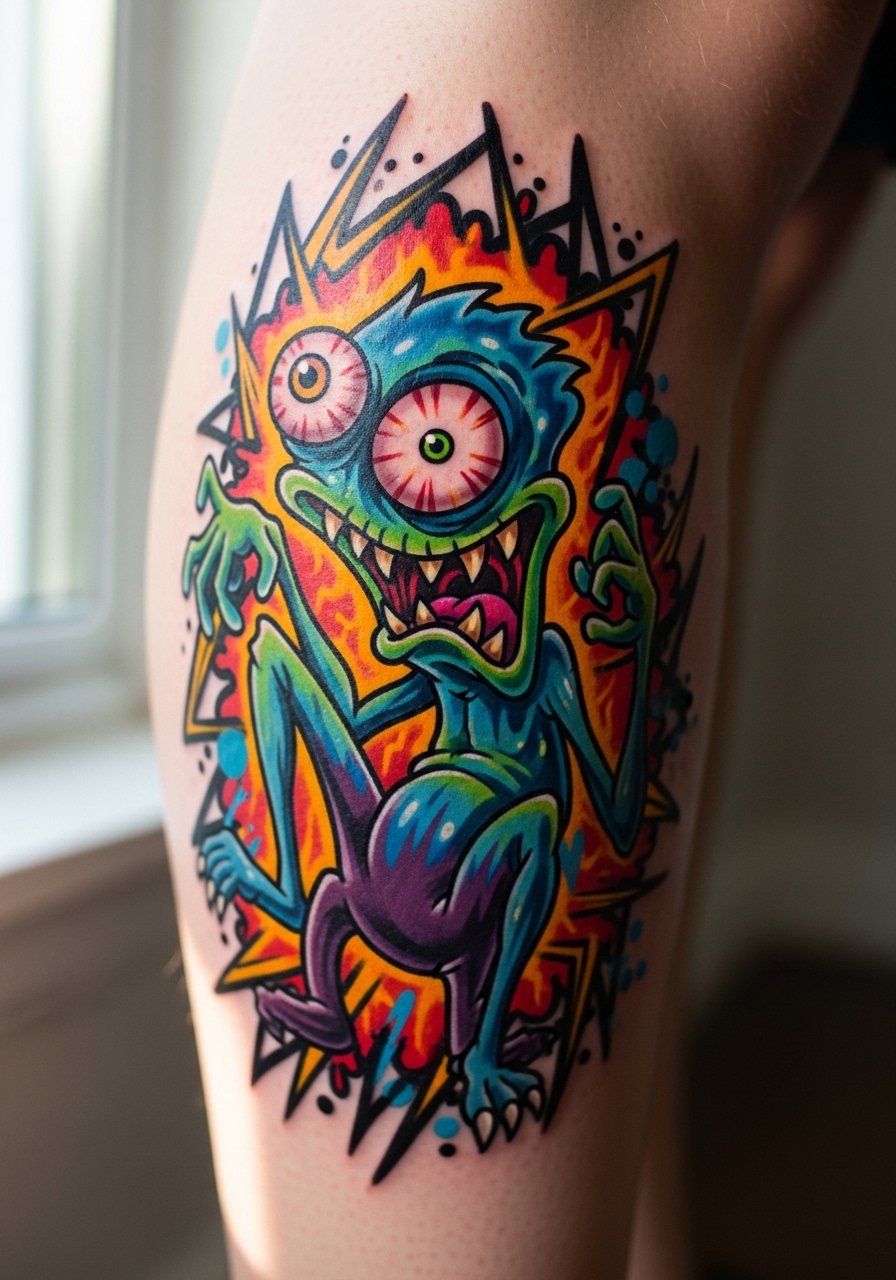
Monsters let artists push anatomy and color extremes. For a calf piece, ask for a clear upper and lower edge so the design keeps its shape when you sit. A common error is putting dense small-scale detail into a curved area, which blurs as the skin flexes. For show-off outfits, shorts with sneakers highlight the lower leg and pair well with a minimalist ankle bracelet. Calf sessions can be longer but less painful than ribs.
8. Bright Neon Abstract Shape on the Wrist
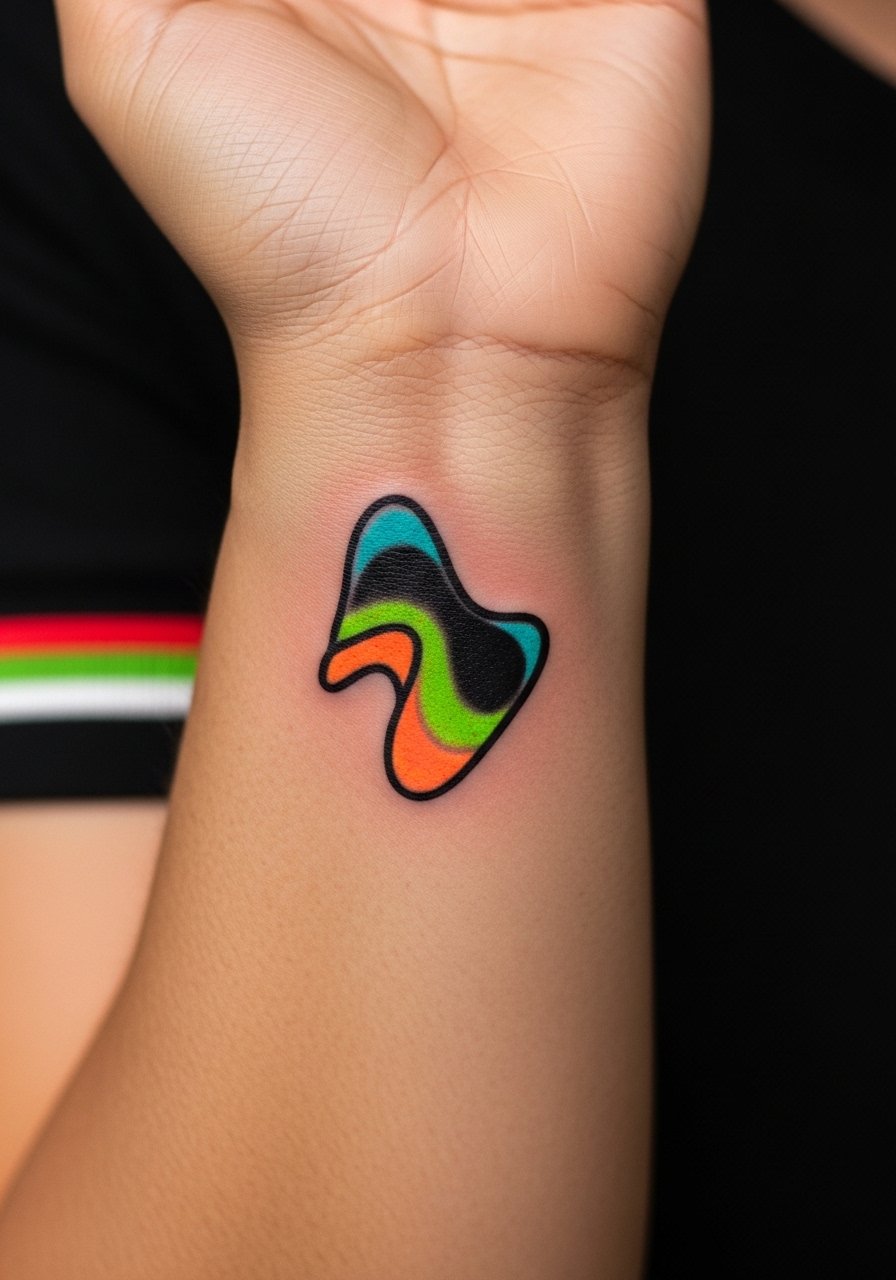
Micro new-school works only if you simplify the concept. Bold blocks of neon with a heavy outline keep tiny pieces readable. The controversy about fine line longevity applies here. One camp argues tiny lines blur faster and need touch-ups sooner. The other camp says well-executed depth and spacing let fine work last. Ask which approach your artist prefers and expect touch-ups earlier than with larger work. For showing the wrist, a thin chain bracelet on the opposite hand balances attention.
9. Cartoon Animal with Oversized Expressive Eyes on the Forearm
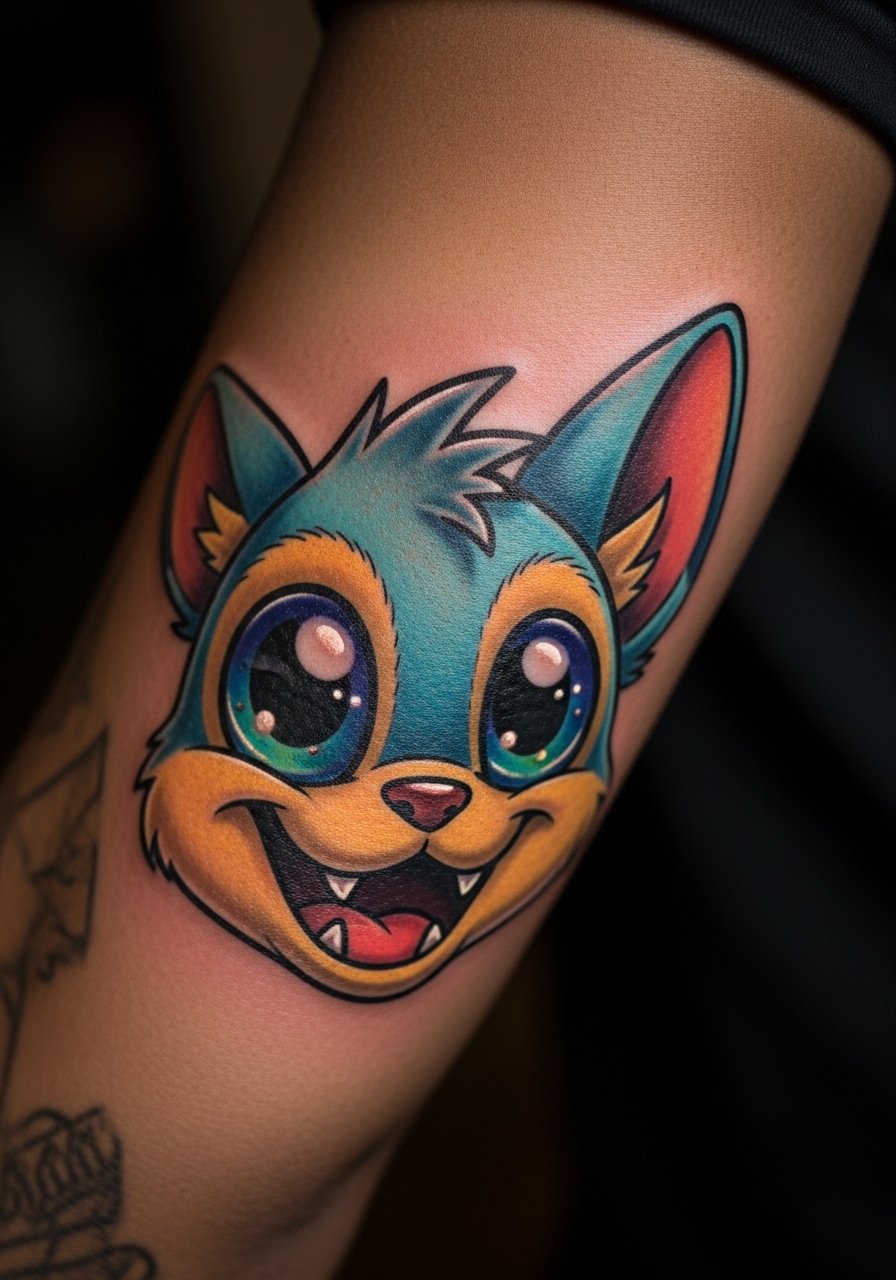
Cute animals are universal new-school currency. For forearm visibility, scale the eyes so they remain glossy after healing and ask for heavy outlines around the pupils. The typical mistake is using muted pastel fills that disappear on dark skin. Bright electric pinks and lime greens hold better than pastels in higher melanin tones. Show it off with a rolled cuff linen shirt to keep the arm in view without adding visual noise.
10. Multi-Character Patchwork Half Sleeve
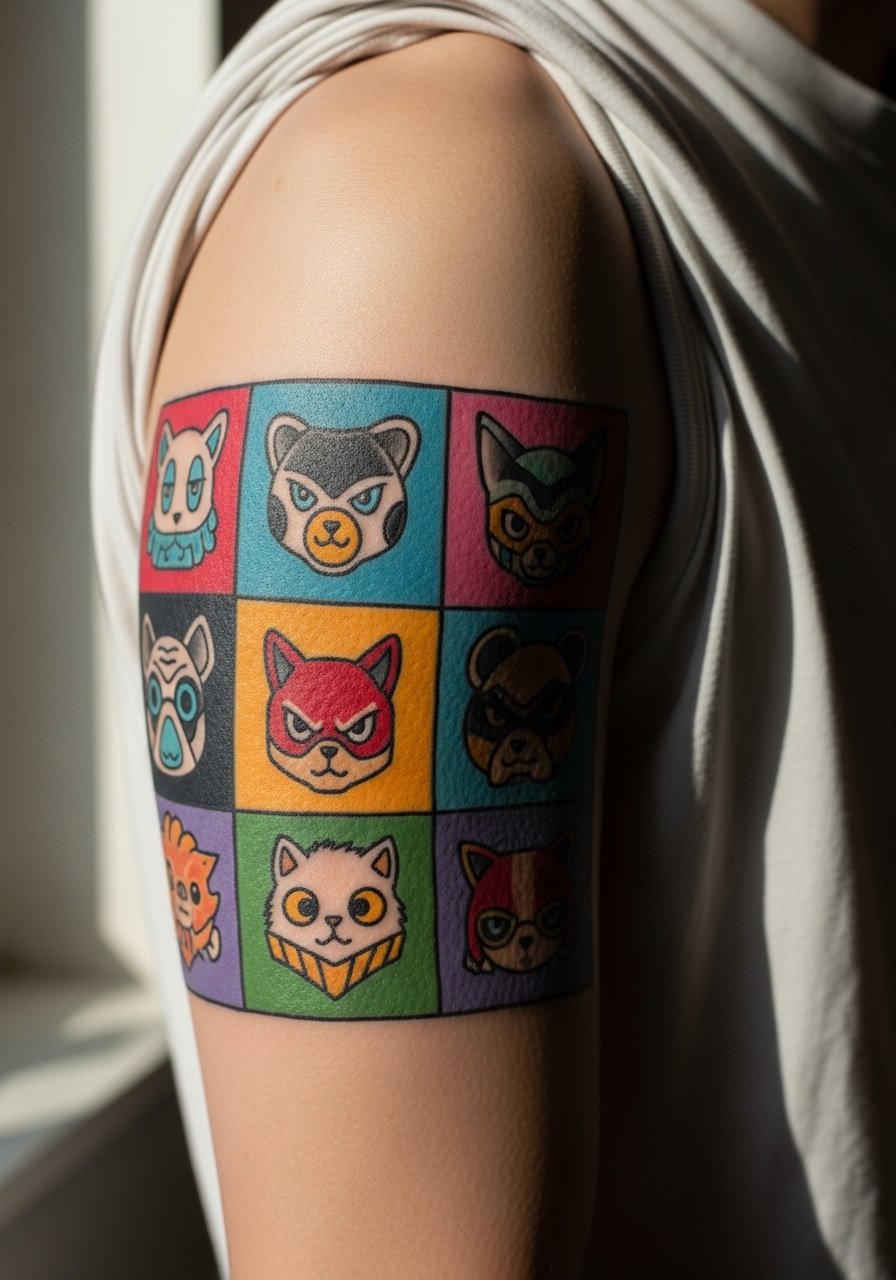
Patchwork sleeves let you build over years, but cohesion matters. Before booking new artists, decide on a spine color or recurring motif so later pieces match earlier ones. A common problem is style drift when each artist uses a drastically different line weight or palette. Document progress with consistent photos after each session so you and future artists have a reference. For session day wear bring a shirt you can slide off easily, like a loose button-down.
11. Graffiti Lettering with Character Embellishment on the Leg
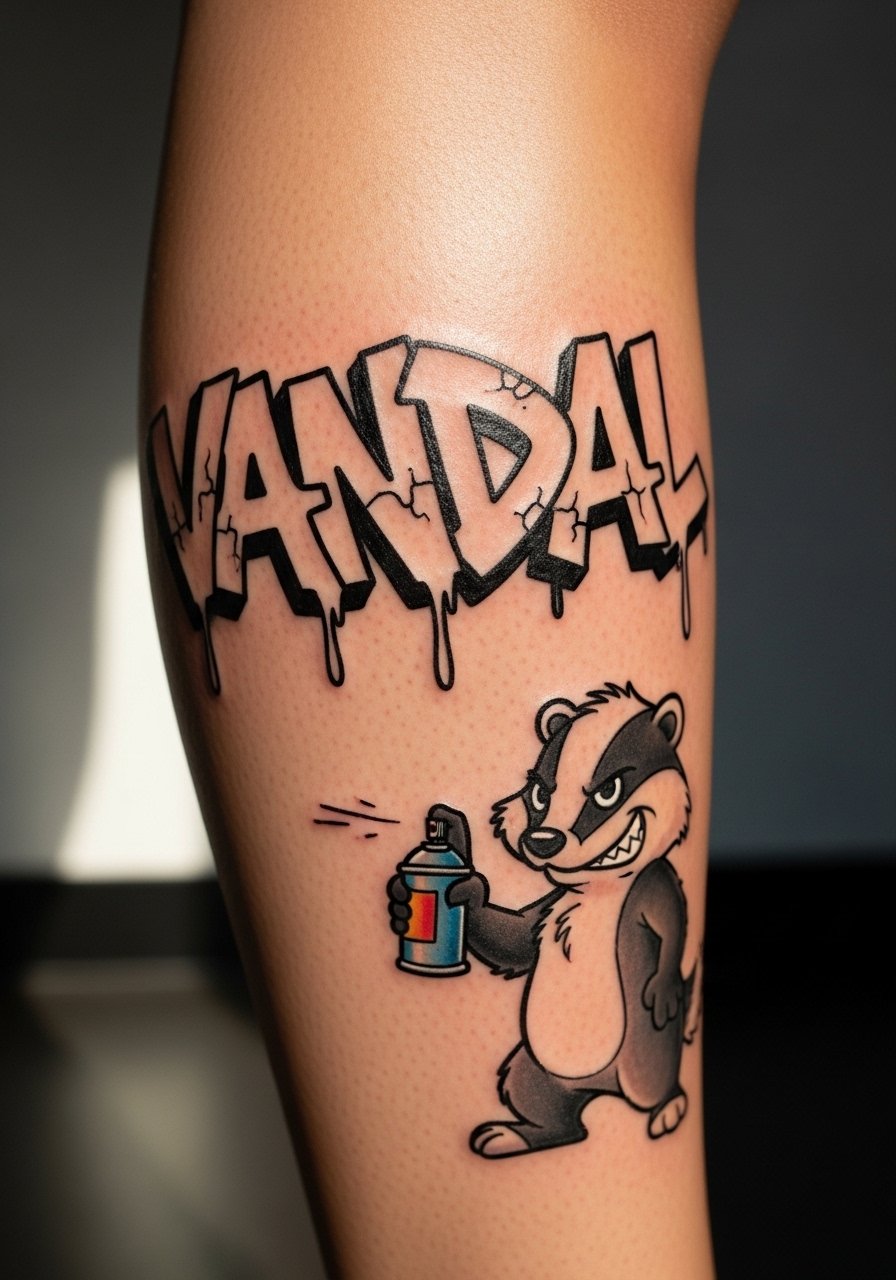
Text becomes part of the image in new-school graffiti typography. Keep letter spacing generous so color fills survive healing without merging. The mistake is tiny script with multiple color gradients, which looks muddy after a year. Pair words with a single adjacent character and request a strong outer outline to preserve legibility. Shorts or capris show off leg work and pair well with athletic shorts for casual summer wear.
12. Surreal Sleeve Filler: Floating Shapes and Twisted Plants
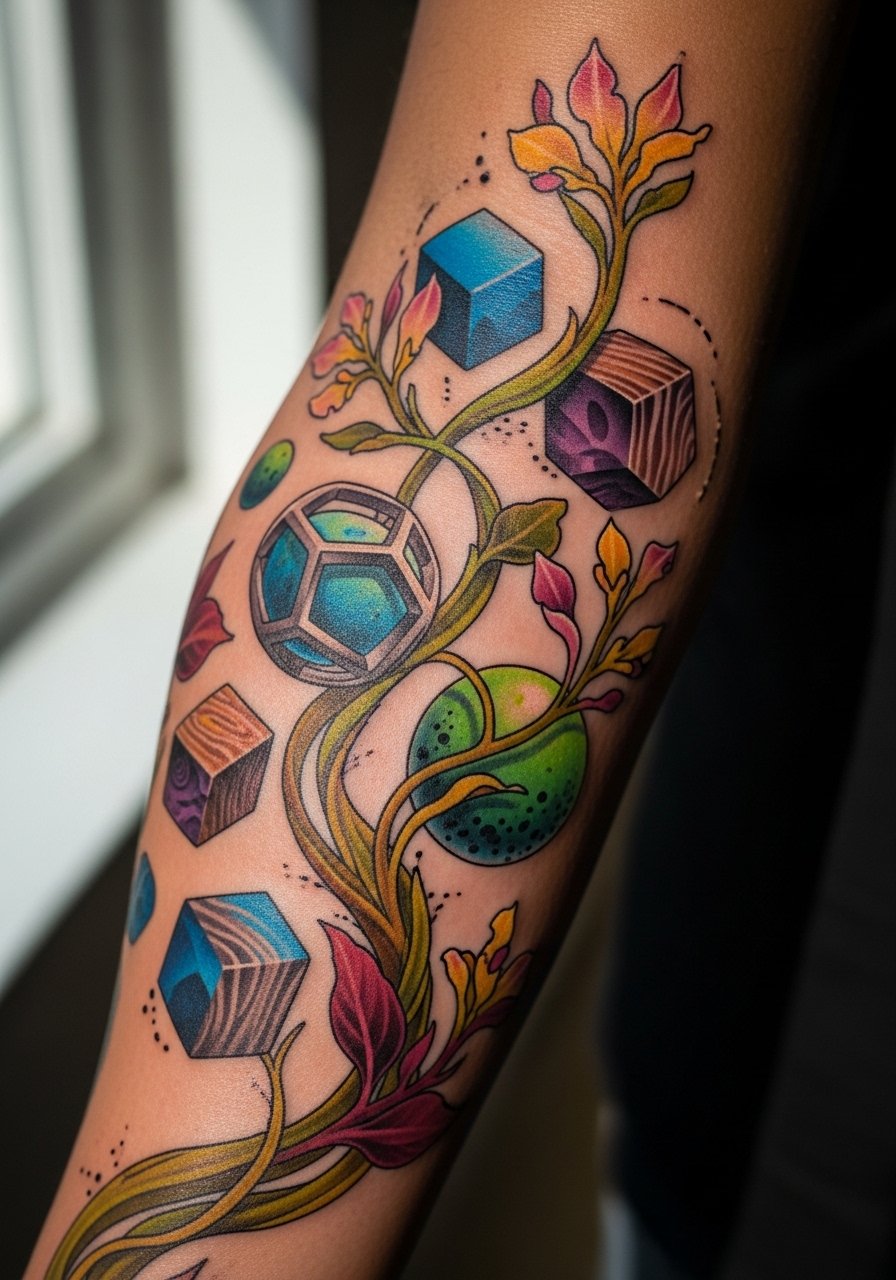
Filler elements make sleeves breathe. For seamless integration, ask your artist to use contrasting saturation and to leave negative-space corridors between characters so the filler does not overwhelm. One technical pitfall is over-detailing filler in small areas; simpler shapes with strong outlines age better. For visibility and style, rolled sleeves or a sleeveless tank let the inner forearm read clearly.
13. Retro Video Game Sprite with Neon Backdrop on the Ankle
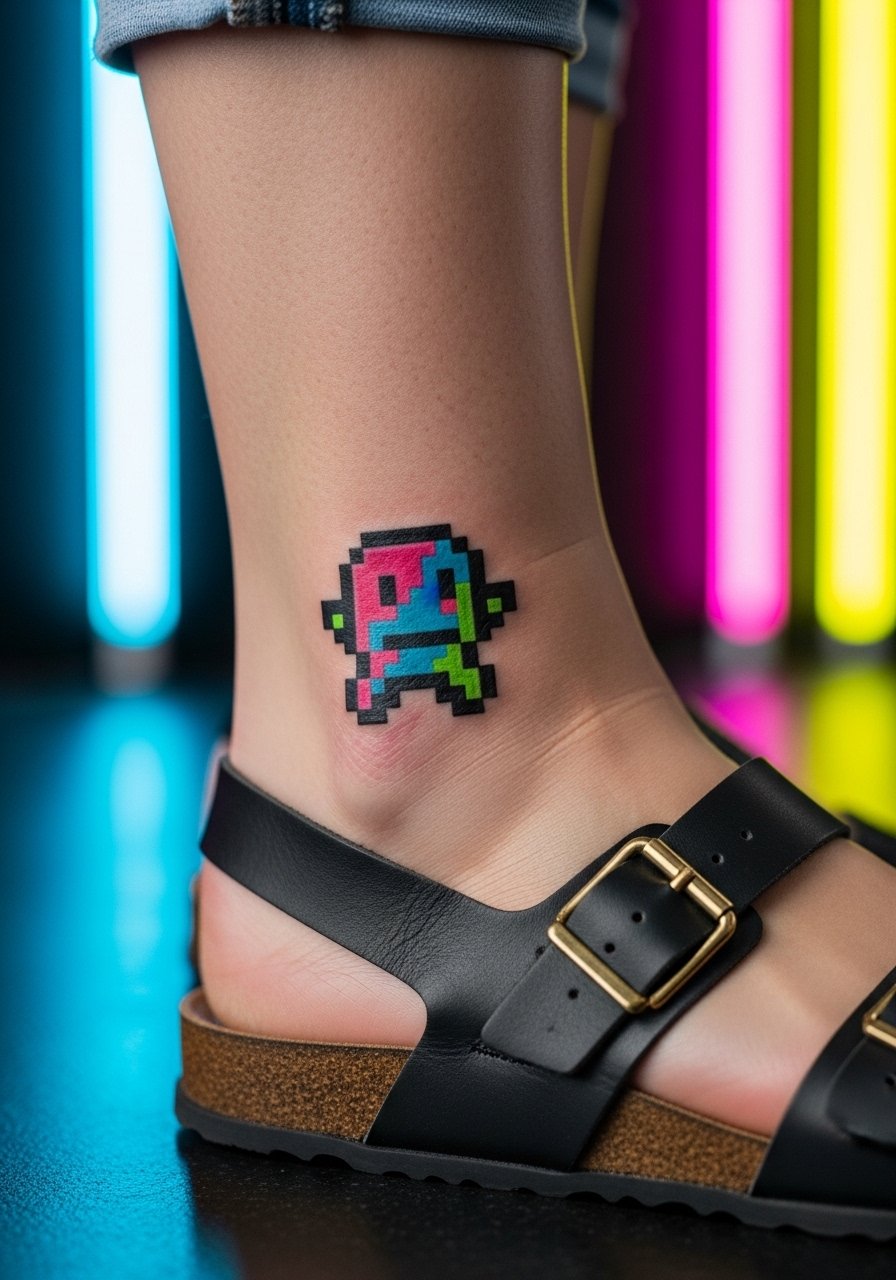
Nostalgic sprites translate into compact new-school pieces if you boost contrast and avoid tiny dithering. The ankle is a high-friction zone so request a bolder outline and avoid fragile interior lines. For showing off, sandals or cropped pants highlight the design. Pair with a minimal sandal or flip-flop to keep the ankle visible. Expect more touch-ups on ankle work because shoes and socks rub the area during healing.
14. Colorful Monster Skull with Extra Eyes on the Shoulder Blade
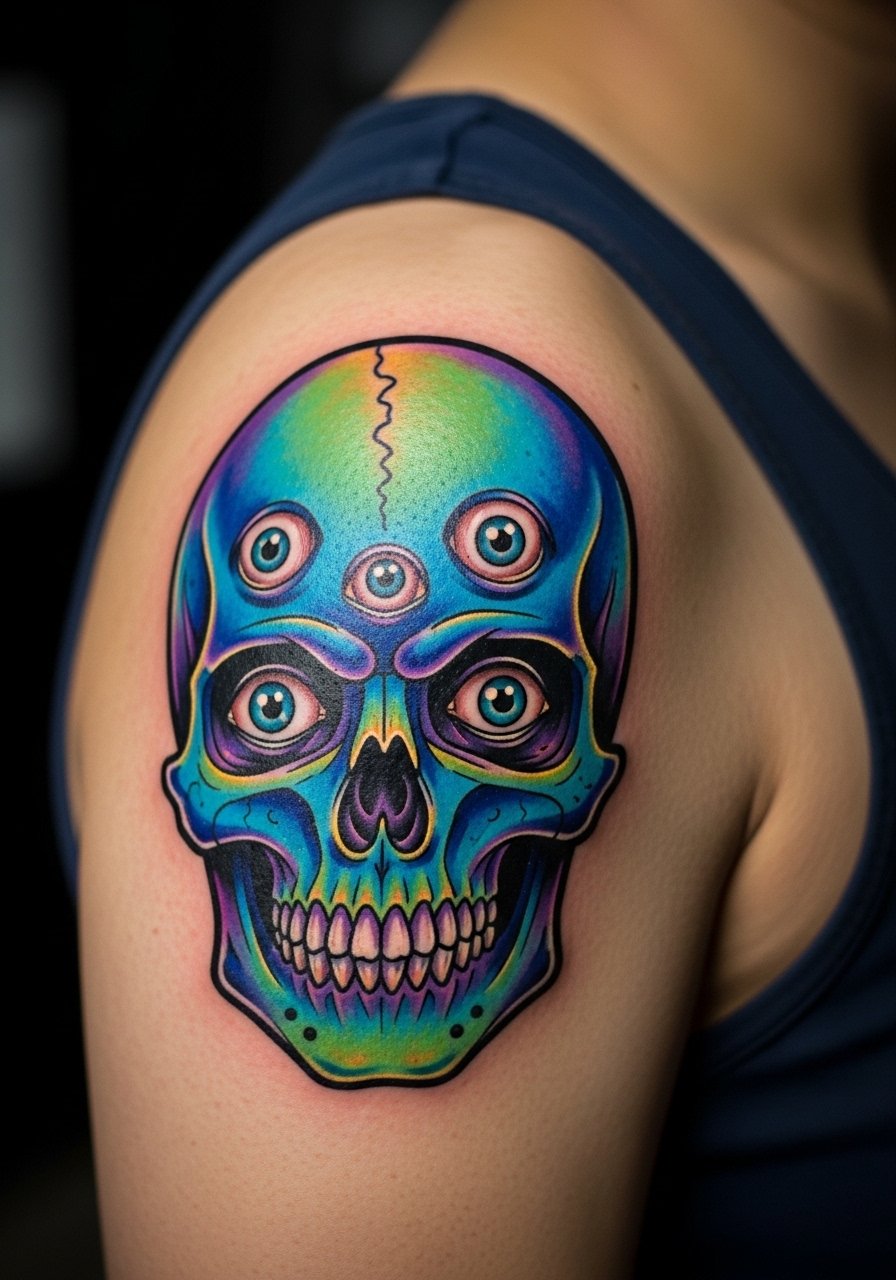
Shoulder blades provide canvas without constant sun exposure. A skull with multiple eyes thrives here because the curvature adds drama. Ask for bold black framing so the skull keeps its shape when you wear shirts that stretch slightly. For look-and-feel, tank tops and open-back pieces pair well with this placement. A session here is moderate on pain, but expect movement to change how the design sits across different postures.
15. Custom Cartoon Mascot on the Upper Arm
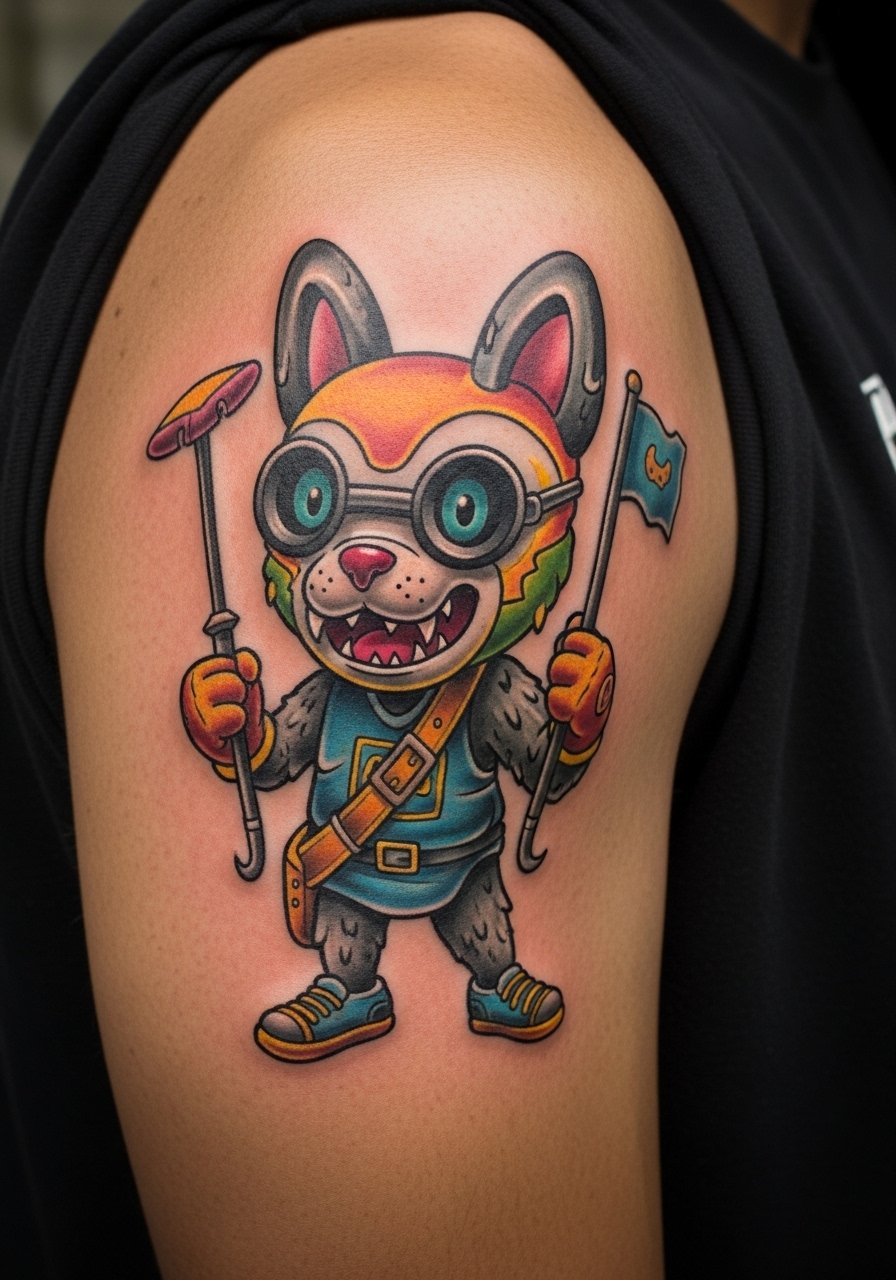
A bespoke mascot is the one design that is truly yours without naming anyone. Spend time on character traits during consultation and bring reference images for posture and expression. Expect multiple rounds of sketch revisions for a mascot you will love long-term. Upper arm placements are forgiving for future modifications, so you can add elements later. Pair with a short-sleeve fitted tee to show the mascot off casually.
16. Retro Pinball Machine Panel on the Ribcage
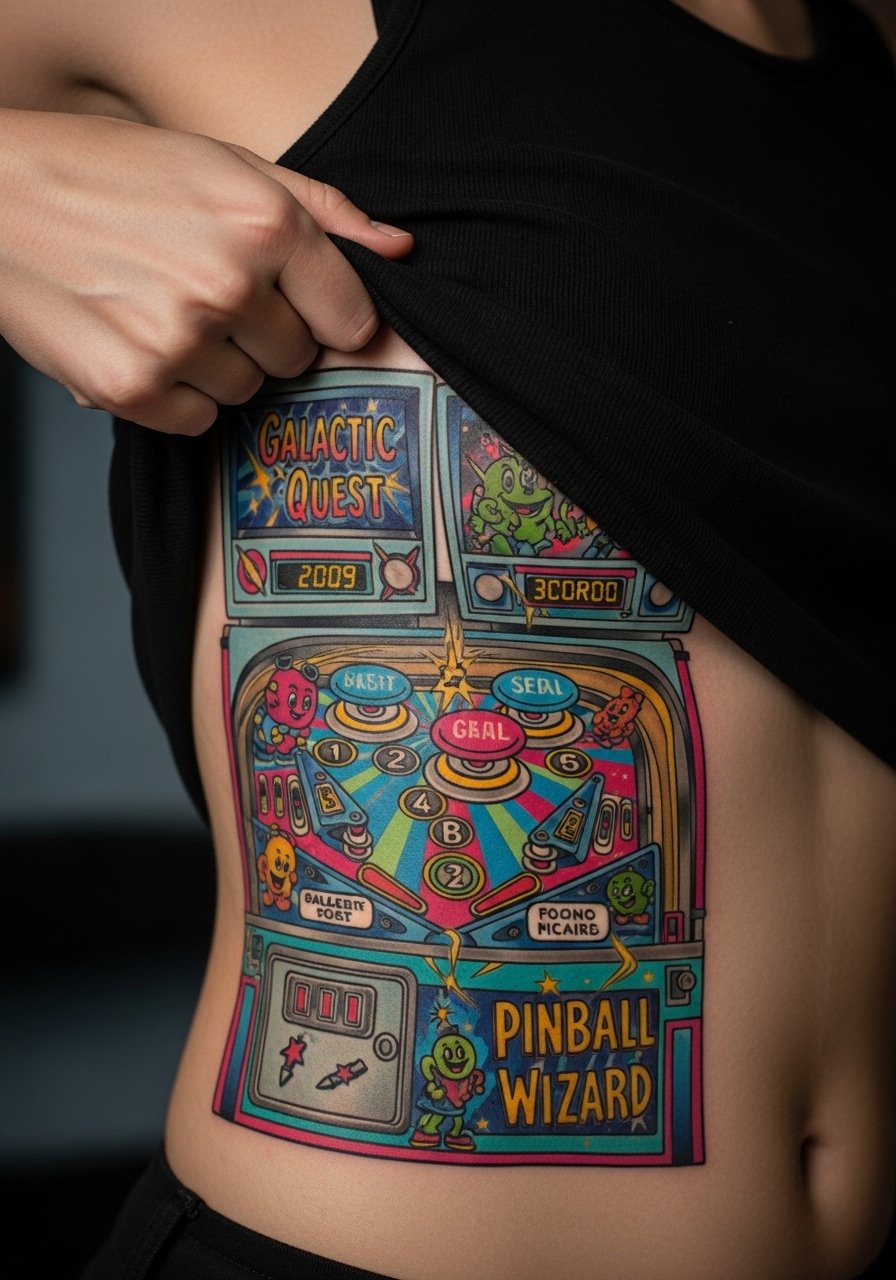
Ribcage pieces look dramatic but are a high-pain zone. The main mistake is dense linework too close together in a stretch-prone area. For better longevity pick larger shapes and avoid ultra-fine crosshatching. The numbing-cream debate surfaces here. One camp supports numbing cream to manage pain for long rib sessions. The other worries that numbing can alter how an artist gauges pressure and depth. Discuss the option with your artist and follow their guidance for session length and break frequency.
17. Neon Abstract Sleeve Accent Around the Elbow
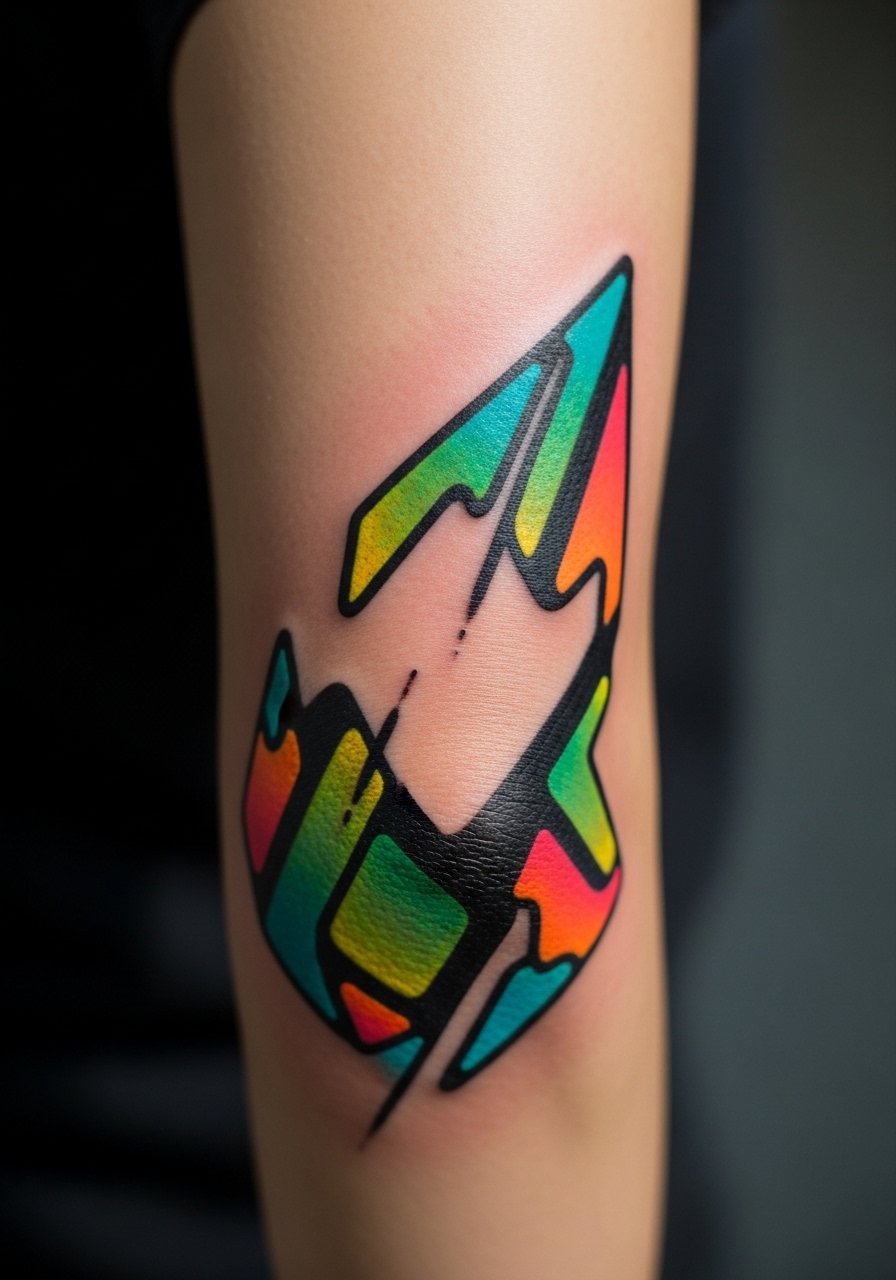
Elbows are notorious for pigment loss and texture change. For an elbow accent, request larger color blocks and a bold border that stops short of thin lines crossing the joint. The trick is to use the joint as a compositional pivot rather than a place for fine detail. Wear a loose short-sleeve top so the artist can position your arm comfortably during the session. Expect that this area may need touch-ups sooner than calmer skin zones.
18. Playful Sticker-Style Chest Piece Above the Sternum
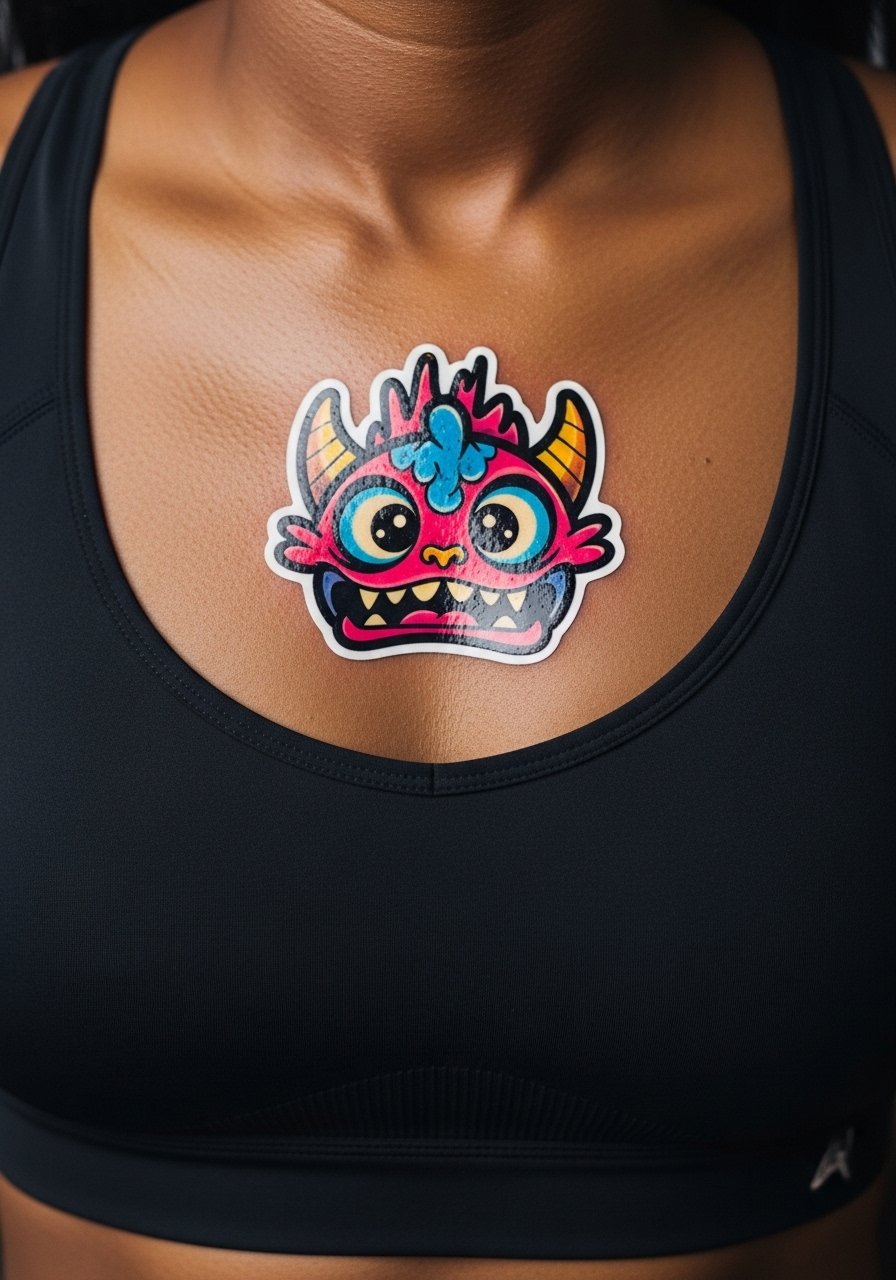
Sternum and upper chest placements are visible and intimate, so plan the design scale carefully. Sticker-like motifs with thick borders and isolated color fields hold well here. Keep in mind that underbust movement during breathing can slightly shift how the image reads at different times. If you plan to show it with low-neck tops, a wide-neck shirt works for casual displays. Healing here can be sensitive and benefits from gentle movement and loose clothing.
19. Color-Blocked Geometric Creature on the Calf
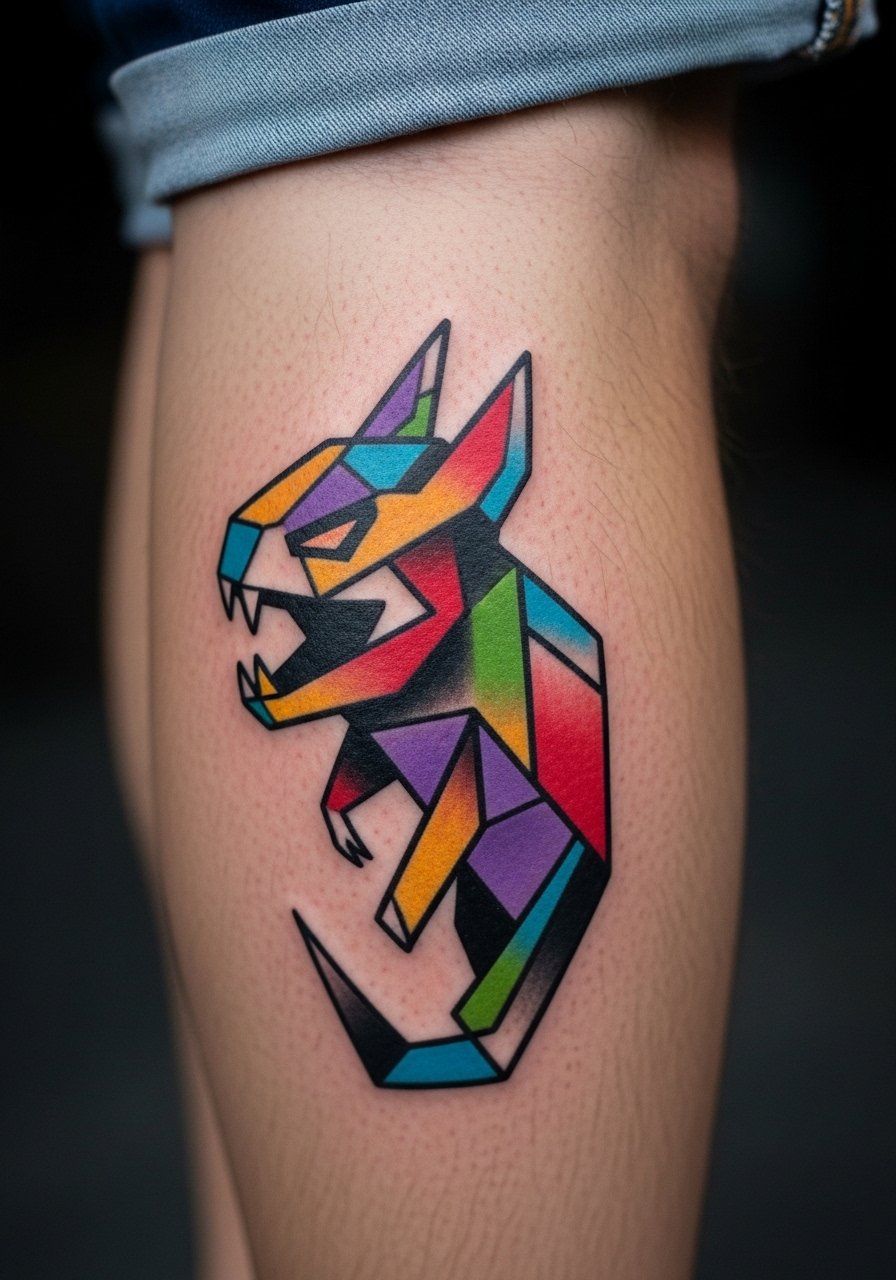
Geometric compositions need breathing room. On the calf, insist on simple color planes and avoid micro-patterns that vanish into muscle shifts. A common mistake is stacking too many small color transitions; flat planes of electric hues with a strong outline read clean for years. Pair with shorts or capri pants and a denim short for summer display.
20. Micro New-School Tattoo on the Finger
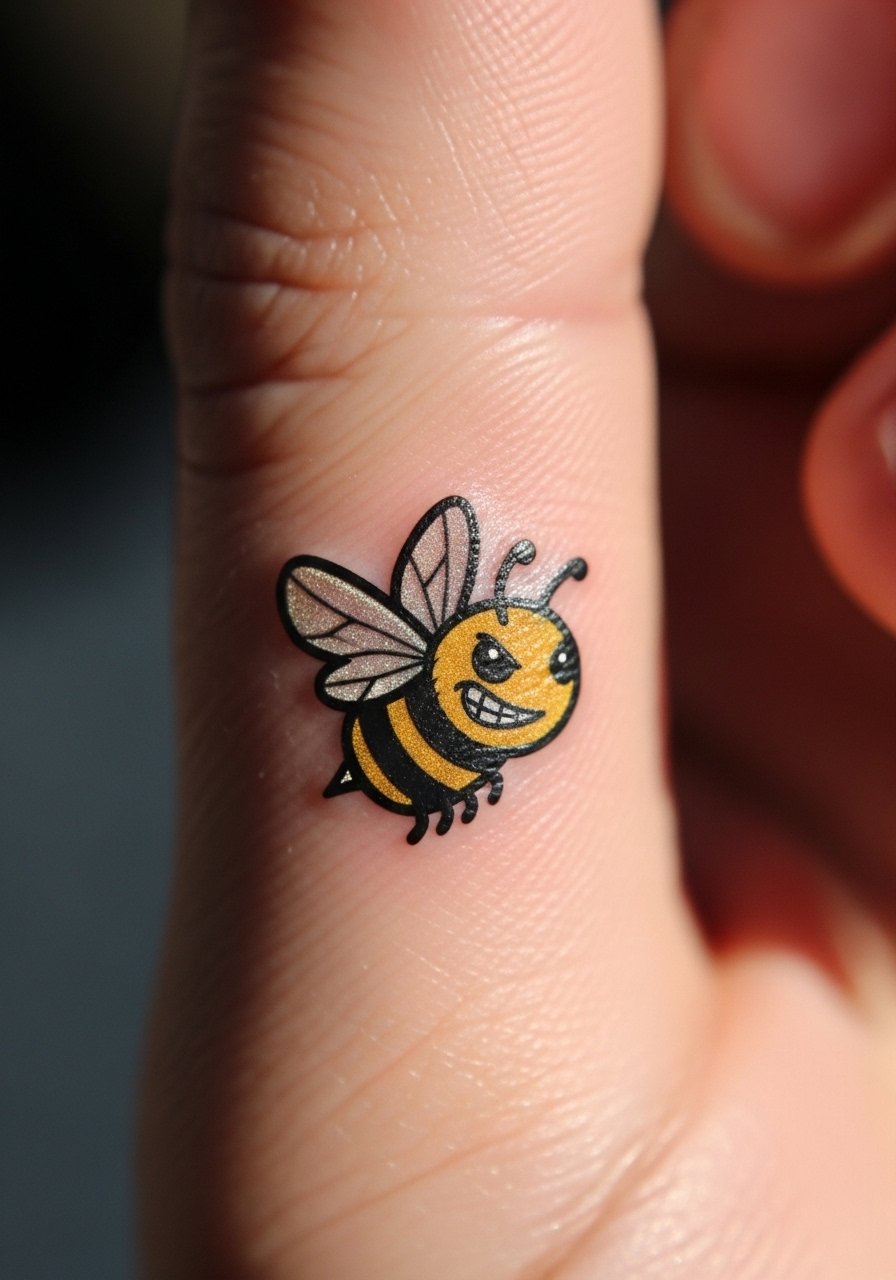
Fingers are high maintenance. Micro tattoos here can look charming but expect faster fade and potential line spreading. One camp of artists treats finger pieces as temporary, recommending small, iconic designs and frequent touch-ups. The other camp will do denser blackwork to help longevity. If you choose a micro piece, pick a simple silhouette with thick outer lines and accept that you may need a refresh sooner than for forearm work. Keep jewelry minimal during healing to avoid constant rubbing.
21. Surreal Floating Eye Landscape on the Upper Back
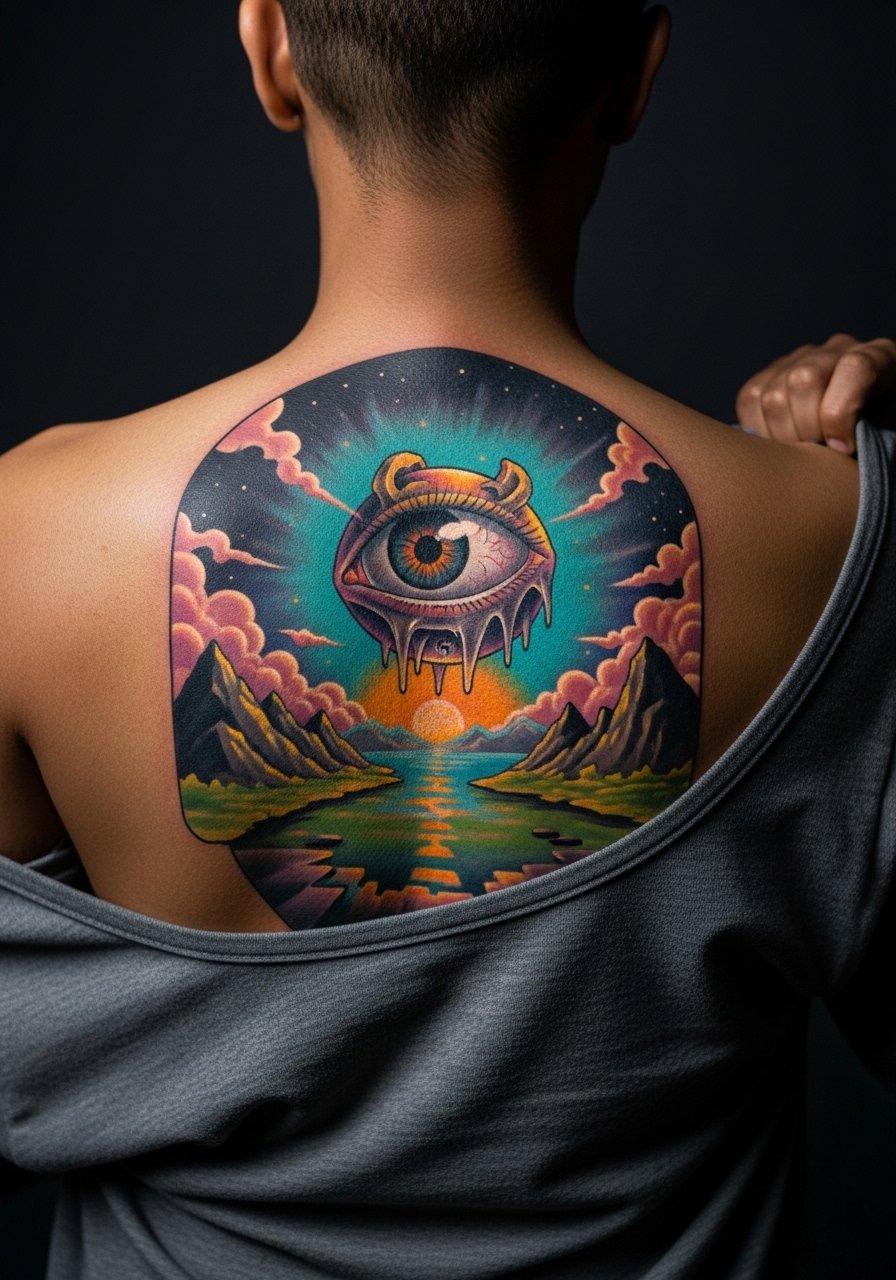
Upper-back canvases are forgiving for experimental visuals. Floating eyes and dream elements gain from varied saturation levels and scattered white highlights. Ask for a map of where each element will sit relative to your shoulder blades so clothing doesn’t cut through critical parts. For show-off styling, an open-back dress brings the piece into evening wear.
22. Electric Colored Abstract Around the Collarbone
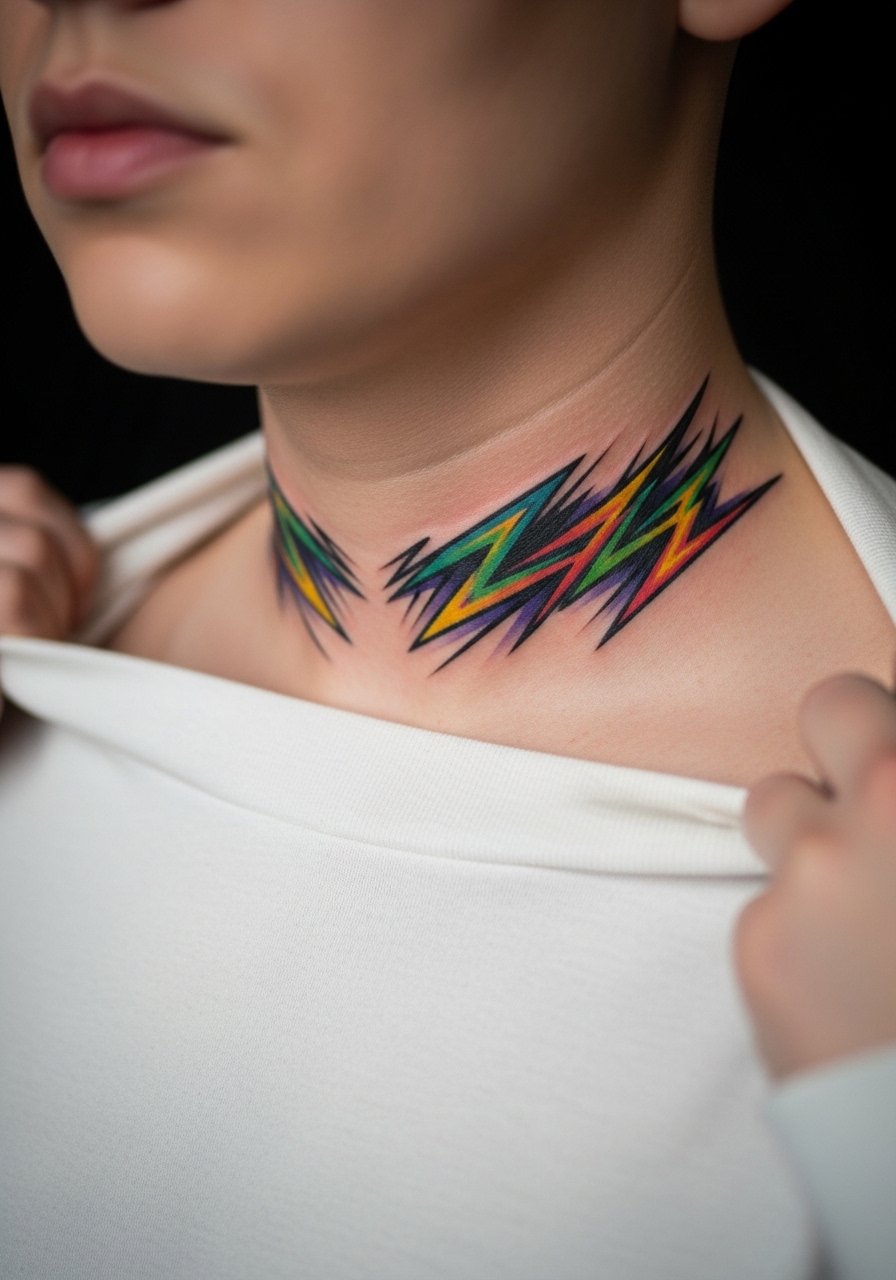
Collarbones are highly visible and photograph well. For this area pick narrow, elongated shapes that follow the bone line. The danger is dense color that competes with jewelry. Keep a small margin for chain placement and pair the tattoo with a thin chain pendant to frame the upper chest without crowding the artwork. Expect minor shifting in how the piece reads with different necklines.
23. Cartoon Horror Hybrid on the Thigh Outer
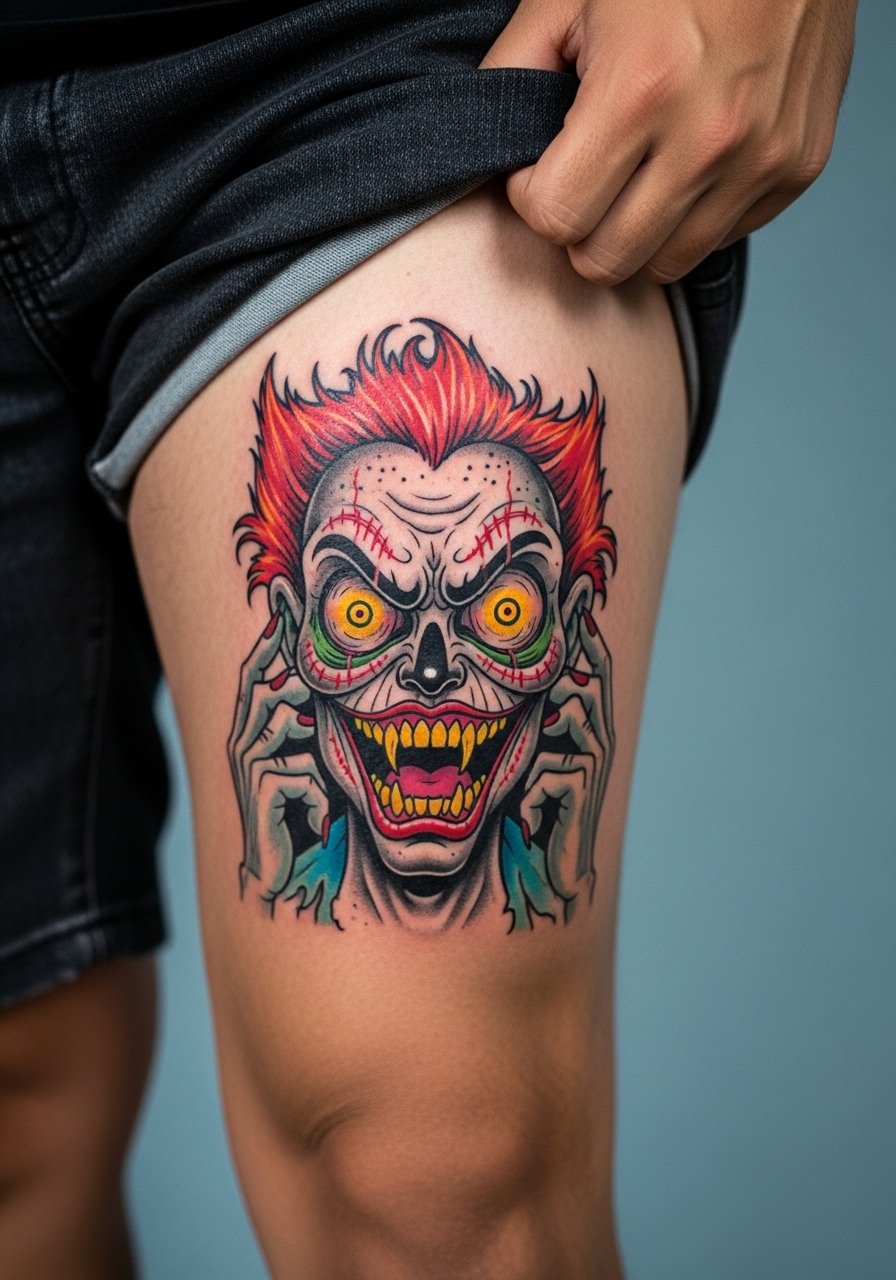
Thigh pieces let you balance edge and privacy. A horror-comedy hybrid works well when you keep the facial features big and the color palette saturated. The thigh tolerates detail more than ribs, but body shape changes can warp rounded elements, so leave breathing room around limbs. Show with shorts or swimwear when you want to display the piece.
24. Neon Badge-style Logo on the Upper Arm

Logo-style pieces need crisp geometric precision. On the upper arm this reads cleanly because the surface is relatively flat. Ask for simplified letterforms and bold negative space so the symbol remains legible in low light. For casual showing use a tank top and avoid layered sleeves that drag across the fresh art.
25. Patchwork Knee Cap Motif That Wraps Slightly
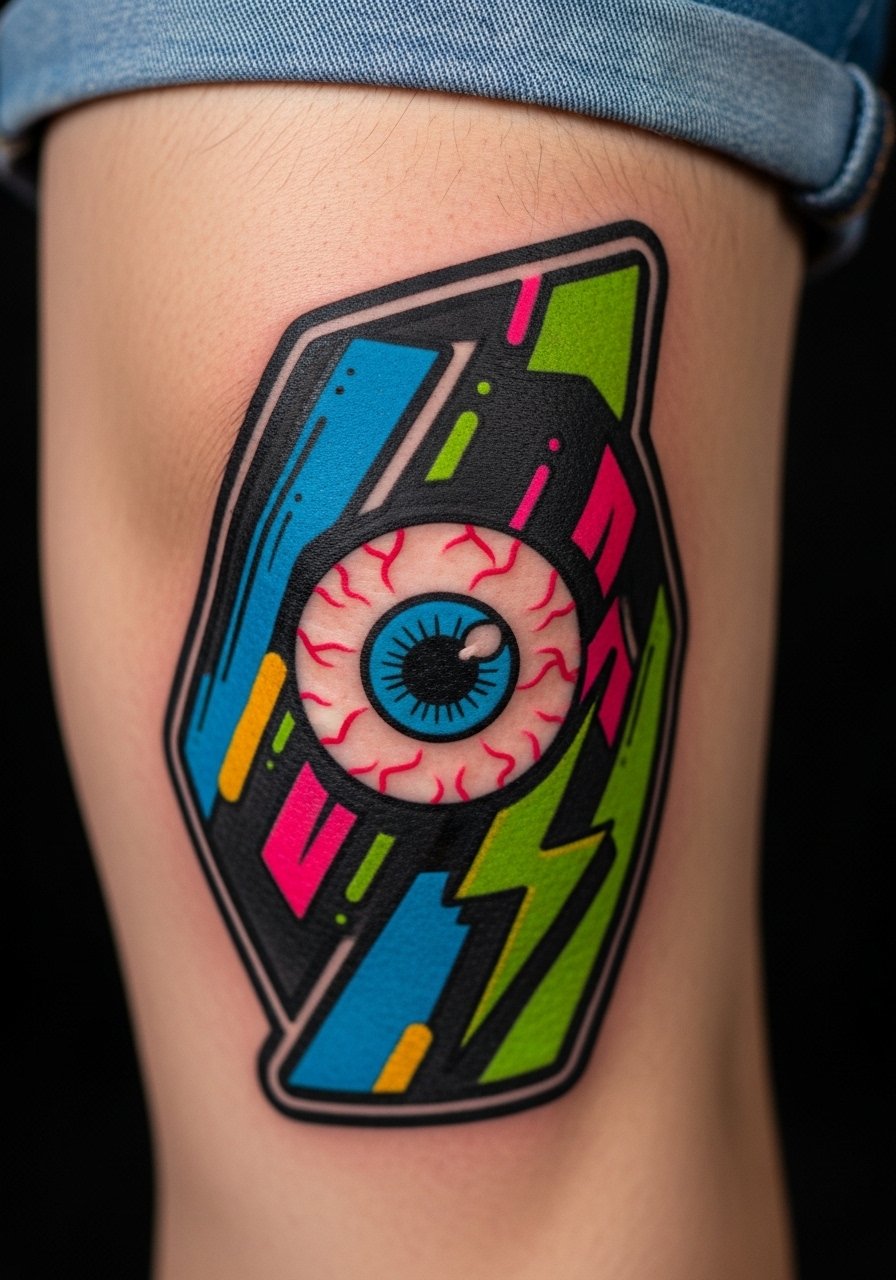
Knee work must respect joint movement. Keep primary details off the most mobile zone and use surrounding panels to anchor the composition. Expect this area to require touch-ups earlier because of motion and abrasion. When showing it off wear shorts or a loose drawstring pant you can roll up without pressure on the healed art.
26. Graffiti Splash Background Behind a Small Portrait
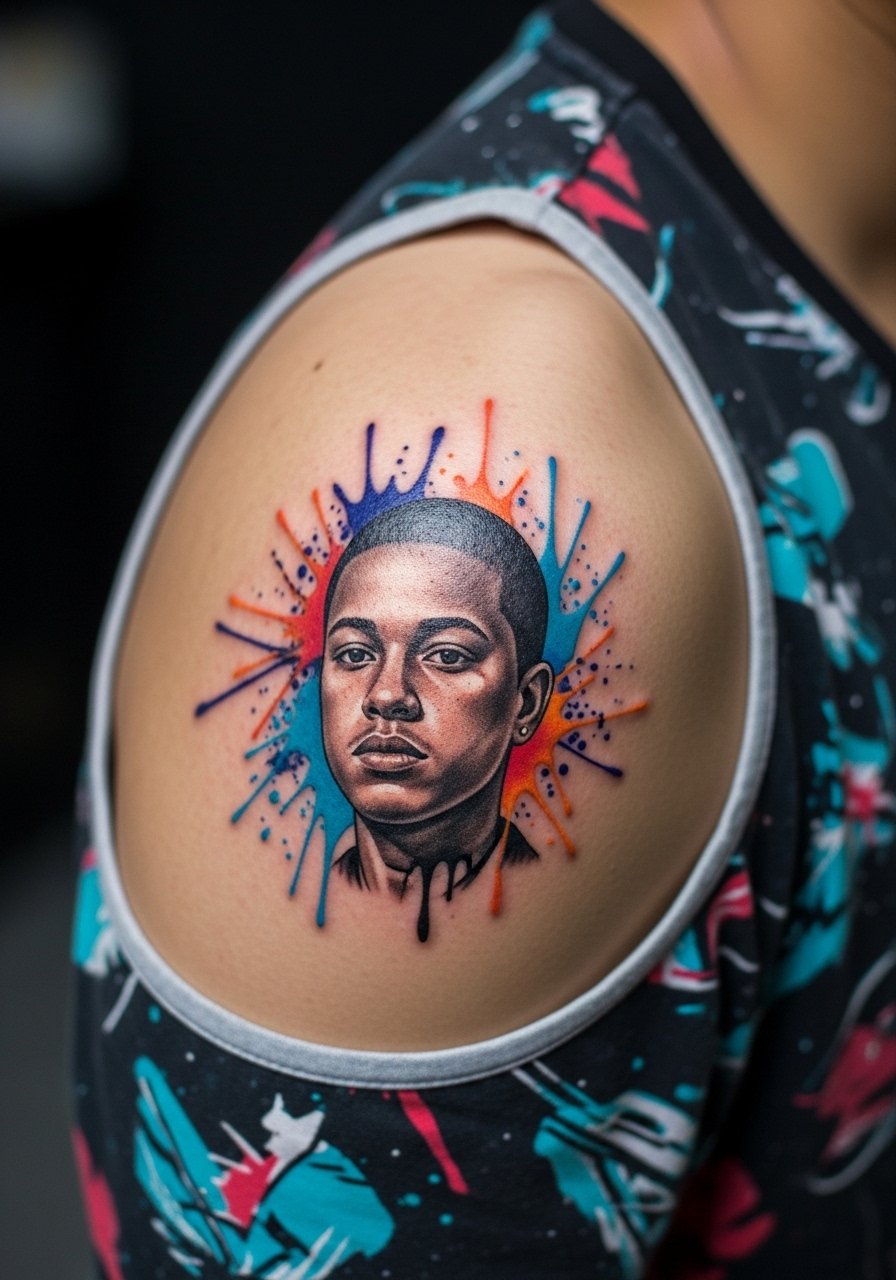
Background treatments can lift small portraits and add movement. Ask your artist to plan the splash so it frames the portrait instead of overwhelming it. The common error is matchy-matchy color that blends with the portrait tones. Choose contrasting neon accents for the splash so the portrait remains the focal point. This works with short sleeves and a rolled cuff tee.
27. Oversized Glassy-Eyed Creature on the Forearm with White Highlights
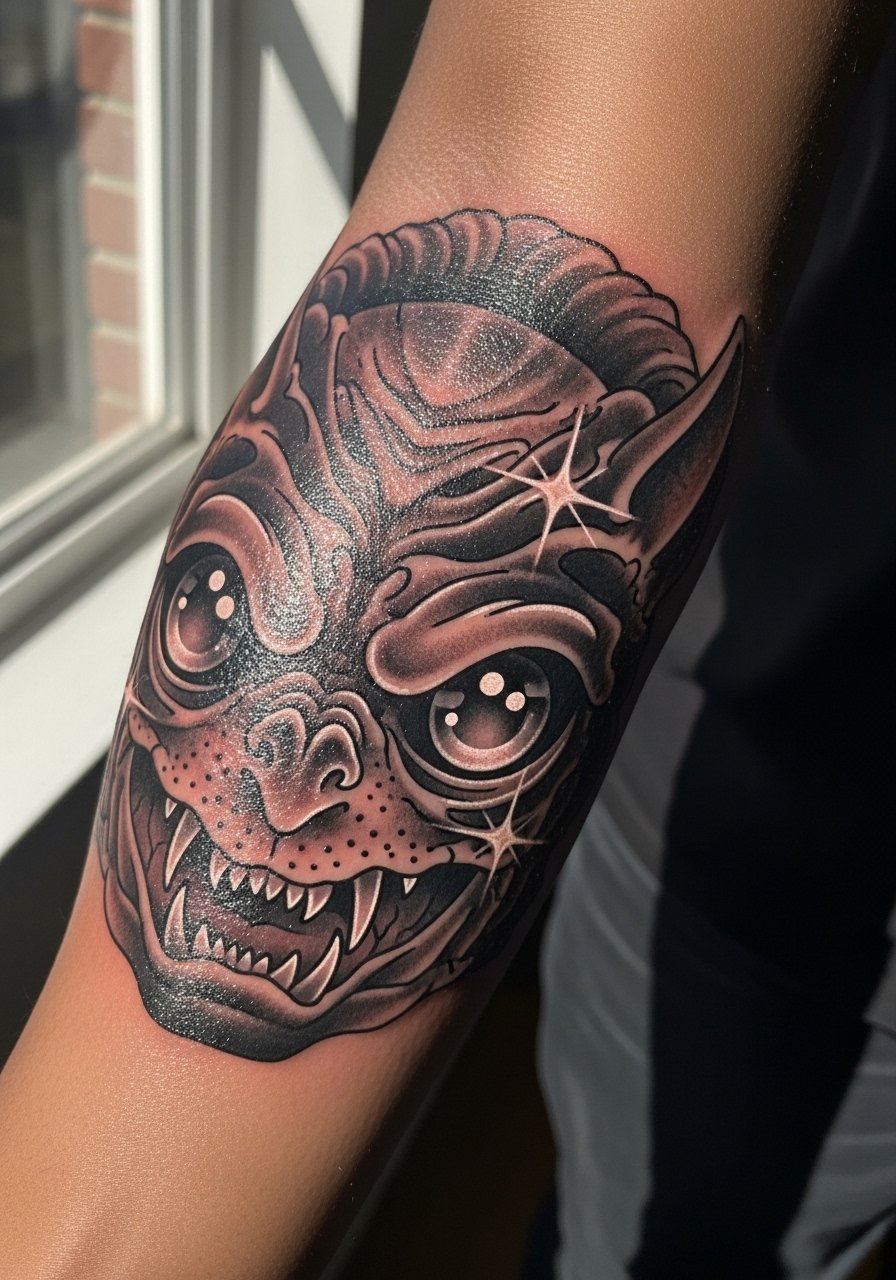
End with a forearm creature that uses white highlights sparingly to create gloss without muddying darker skin tones. For darker skin, prioritize high-value accents like neon yellow or bright pink instead of subtle pastels. The photography reality is that some colors read differently across skin tones, so bring reference images that reflect your complexion when you consult the artist. For the session, wear a short-sleeve fitted tee to let the artist work without fabric interference.
Frequently Asked Questions
Q: How should I pick colors for new-school tattoos if I have darker skin?
A: Bright, saturated hues like neon pink, electric blue, and lime green show up best on higher melanin tones. Avoid relying on pastels or deep purples as primary fields because they can become muted once healed. Bring healed healed examples on skin tones similar to yours and ask the artist which inks they use for durable saturation.
Q: Will a micro new-school wrist or finger piece need touch-ups sooner than a forearm piece?
A: Yes, expect more frequent touch-ups on fingers and wrists due to constant washing and friction. Keep designs bold with thicker outlines and accept that a maintenance plan may be part of owning micro work. If you want minimal upkeep, favor slightly larger placements like the outer forearm.
Q: What questions should I ask an artist to confirm they specialize in new-school?
A: Ask to see a focused portfolio of recent new-school pieces, not a mixed-styles grid. Request healed photos where possible and ask about the ink brands they prefer for neon ranges. Ask how they handle multi-artist sleeve cohesion if that is your plan. If the artist deflects these specifics, consider another consultation.
Q: How do I decide between Saniderm and dry healing for a bold color new-school piece?
A: Artists split into two camps. One group favors second-skin products for reduced scabbing and easier showering. The other supports dry healing to avoid trapped moisture and potential color muddiness. Follow the studio protocol they recommend and plan to check the healed result at the one-month mark so you can discuss touch-up needs.
Q: How do new-school sleeves hold up if I gain or lose significant weight?
A: New-school’s exaggerated shapes can distort with major body changes, particularly on soft-tissue areas like thighs and stomach. Forearms, calves, and upper arms tend to resist noticeable warping. If you anticipate major weight change, discuss placement and scale that will tolerate those shifts and plan for possible touch-ups later.
Q: Is tipping expected for tattoo sessions and how much is common?
A: In the US tipping is common and typically falls in the 15–25 percent range, similar to other personal services. If you are traveling or on a tight budget you can ask the shop about local norms when booking. Cash tips are often appreciated but many shops accept card or app payments too.
