
Fine line plague doctor masks are everywhere on saved boards, but trends and longevity do not always match. Fine line looks fragile and lovely fresh, while bold blackwork usually softens into dependable contrast over years. If you want a minimalist plague doctor that still reads clean after a few seasons, placement and line weight matter more than the trendiest stencil. Below are 27 compact takes, placement notes, styling tips, and what to ask your artist before the needle hits.
1. Minimalist Fine-Line Beaked Mask Outline on Inner Forearm
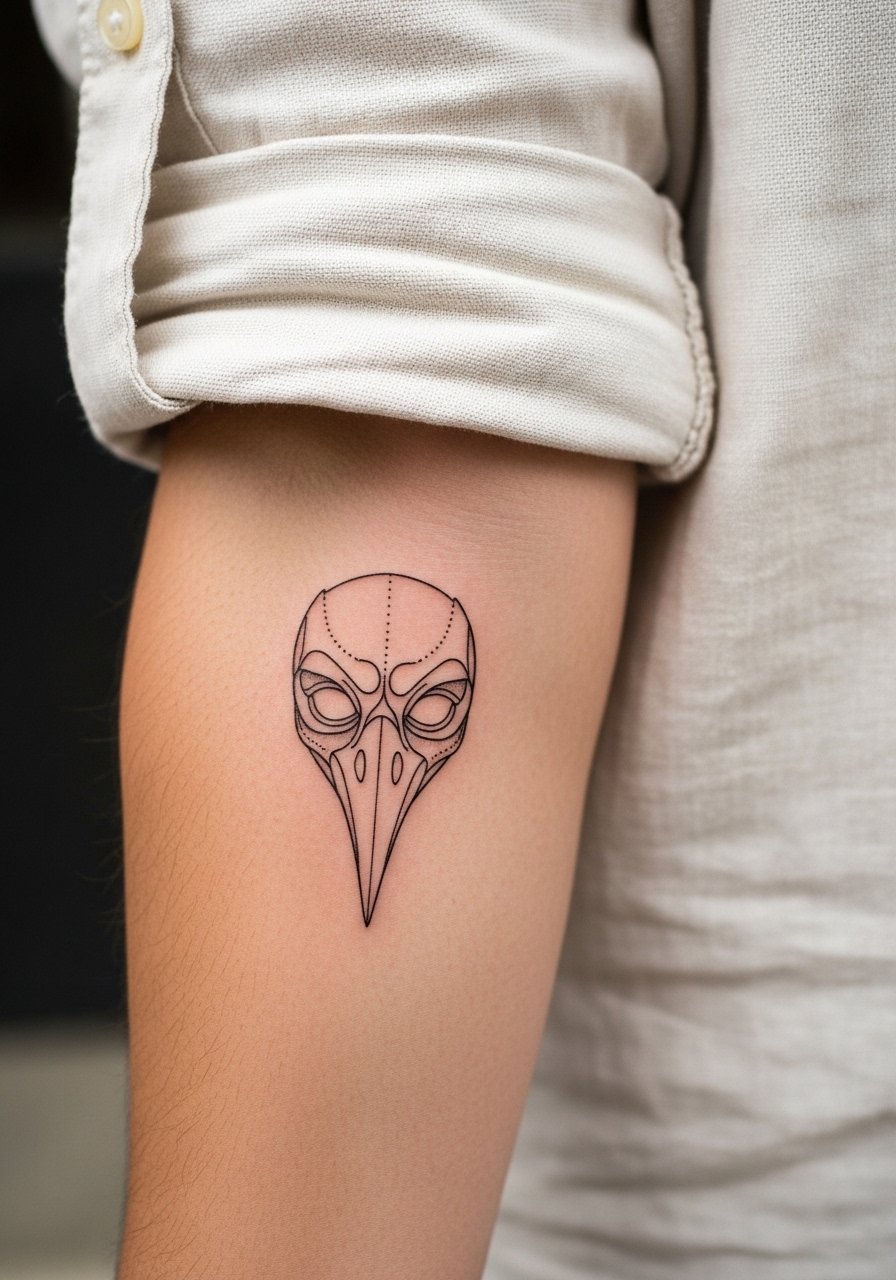
I have seen this tiny outline on inner forearms that still reads crisp at year two when the artist kept linework airy but not razor-thin. Fair warning, forearms move a lot, so blowout risk is real if the lines are drawn too close together. In consultation, ask for slightly heavier one-point-one linework and mention you want minimal shading so the beak keeps its shape. Pain sits around a 3 to 4 on most scales and the session is usually under an hour. For showing it off, pair with a cream linen button down rolled at the cuffs so the tattoo reads like an intentional accent.
2. Silhouette Plague Doctor Profile on Shoulder Blade
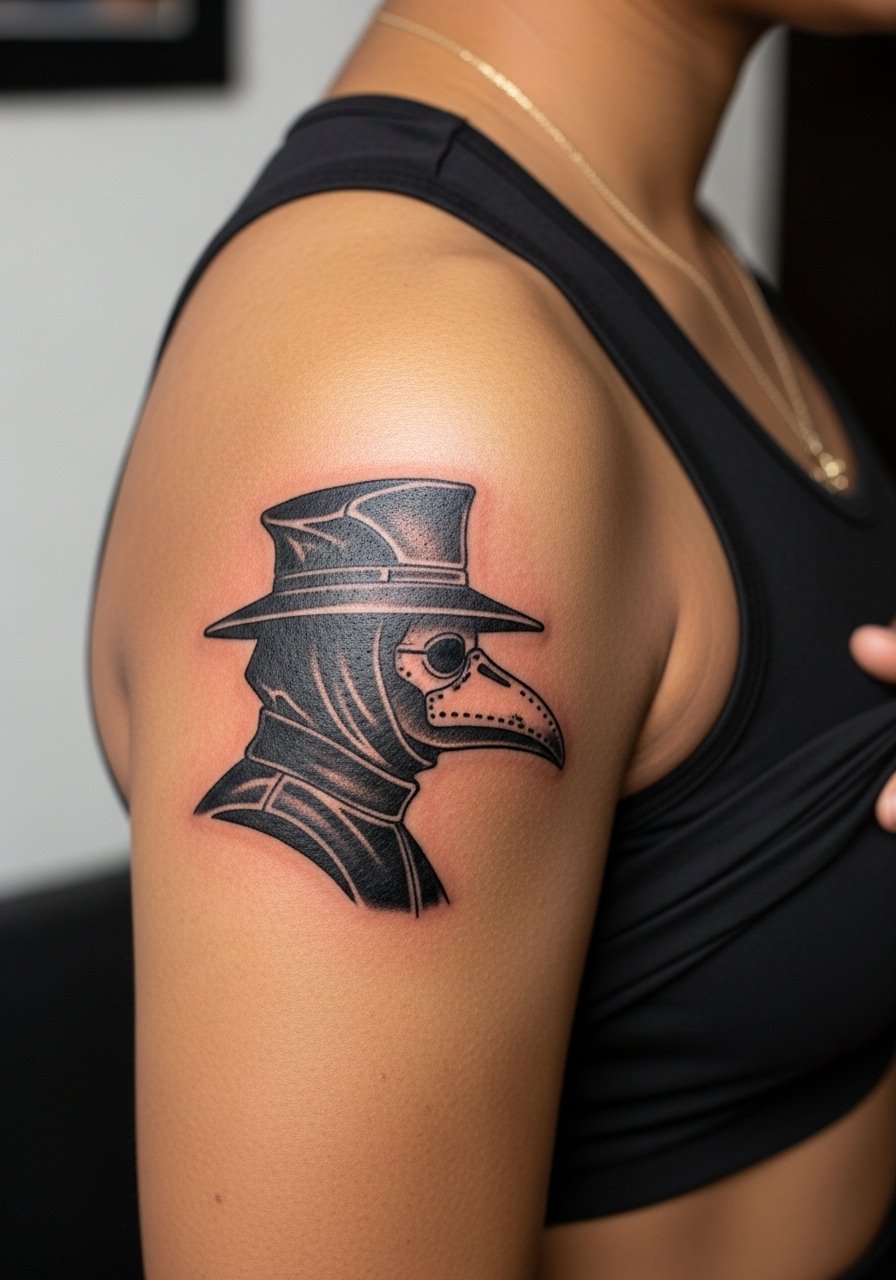
Most people choose a silhouette here for longevity. The thicker blackwork resists fading and retains saturation across heavier skin types. When you sit in the consult, say you want a clean negative-space eye and a crisp beak curve instead of tiny interior details that will mush over time. Upper back sessions run 1 to 2 hours depending on size. For evenings, this pairs well with a strappy cami top that reveals the art without competing with patterns. Expect touch-up talks at year three if you live in a sunny climate.
3. Fine-Line Plague Doctor with Hat and Coat on Outer Forearm
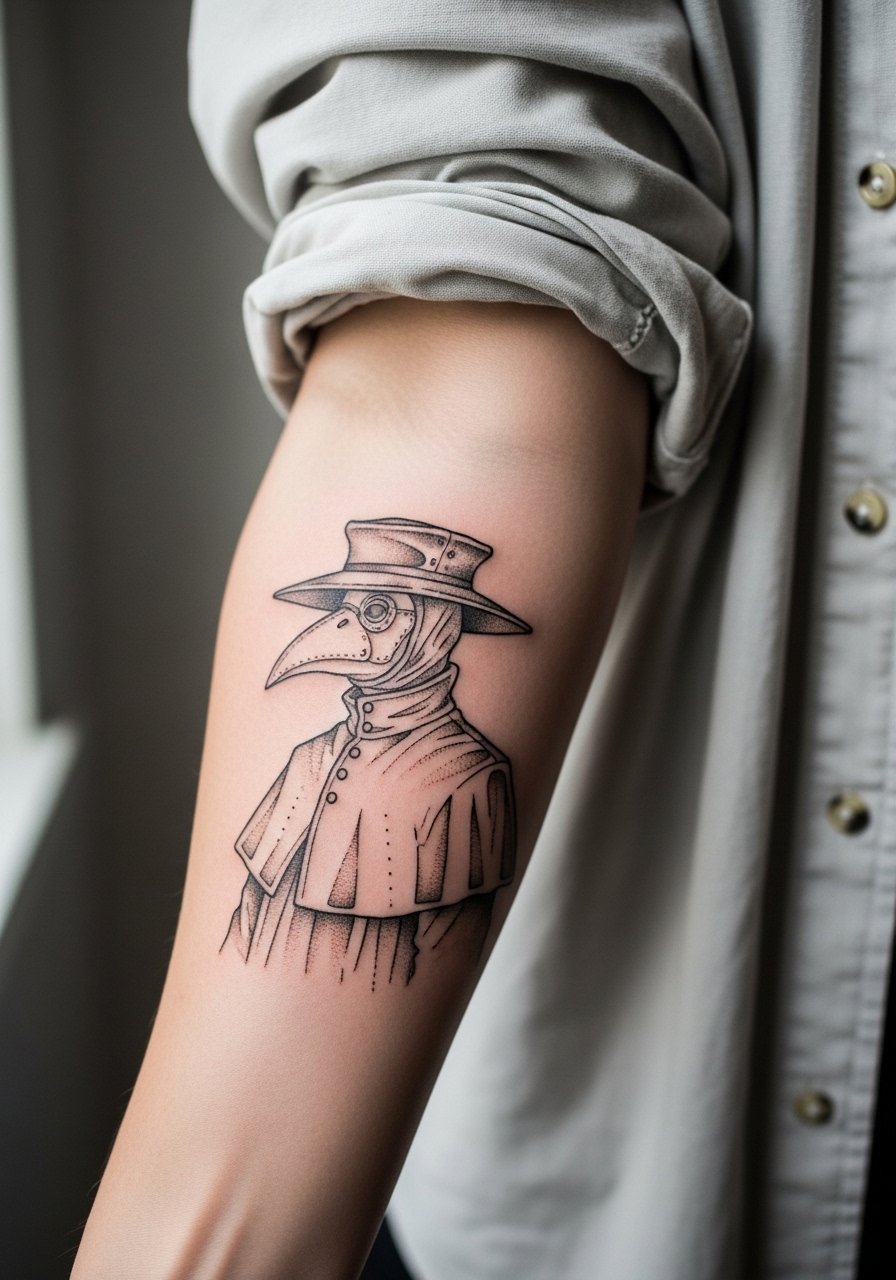
When someone asks for hat and coat details in fine line, the common mistake is asking for too many tiny cross-hatches. That level of micro texturing often blurs by year two. Ask your artist for selective stipple shading and a confident single contour for the coat edge so the silhouette reads at arm's length. The session usually takes about 1 hour. Wear a loose long-sleeve button up you can pull aside during the session. If you want it visible in daily wear, rolled sleeves or a short-sleeve knit make it pop.
4. Quarter-Sleeve Minimalist Profile with Halo on Upper Arm
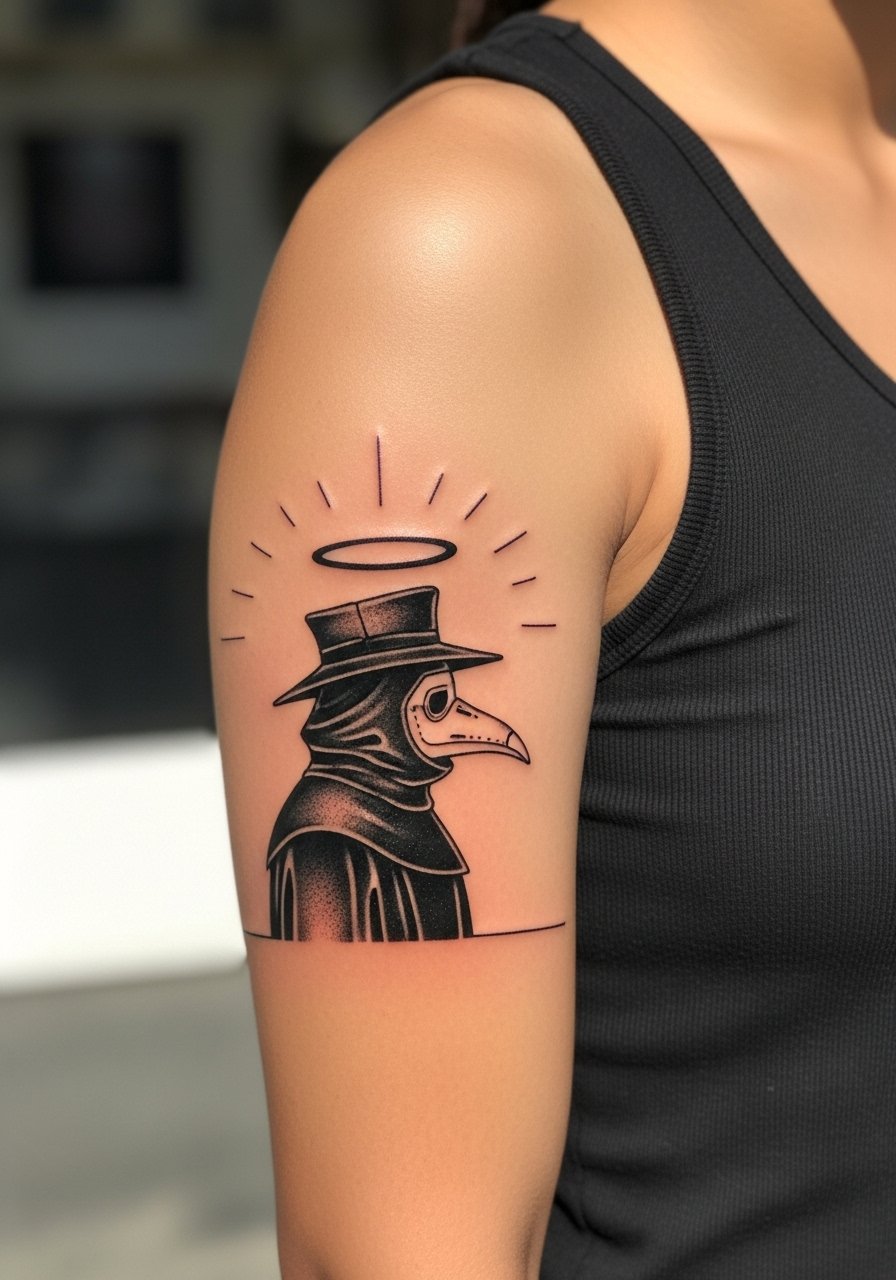
I've seen quarter-sleeves like this hold up best when the halo uses spaced dot work instead of tight washes. One camp argues fine line can carry a sleeve if spaced; the other camp prefers bold blackwork for durability. Name both views in your consult and ask where your artist stands. Expect two sessions and moderate pain during shading areas. For showing it off, an olive green tank top or a structured blazer with sleeves pushed up frames the sleeve without busy prints. Plan touch-ups at year three to restore halo contrast.
5. Beaked Mask Micro-Realism Outline on Collarbone
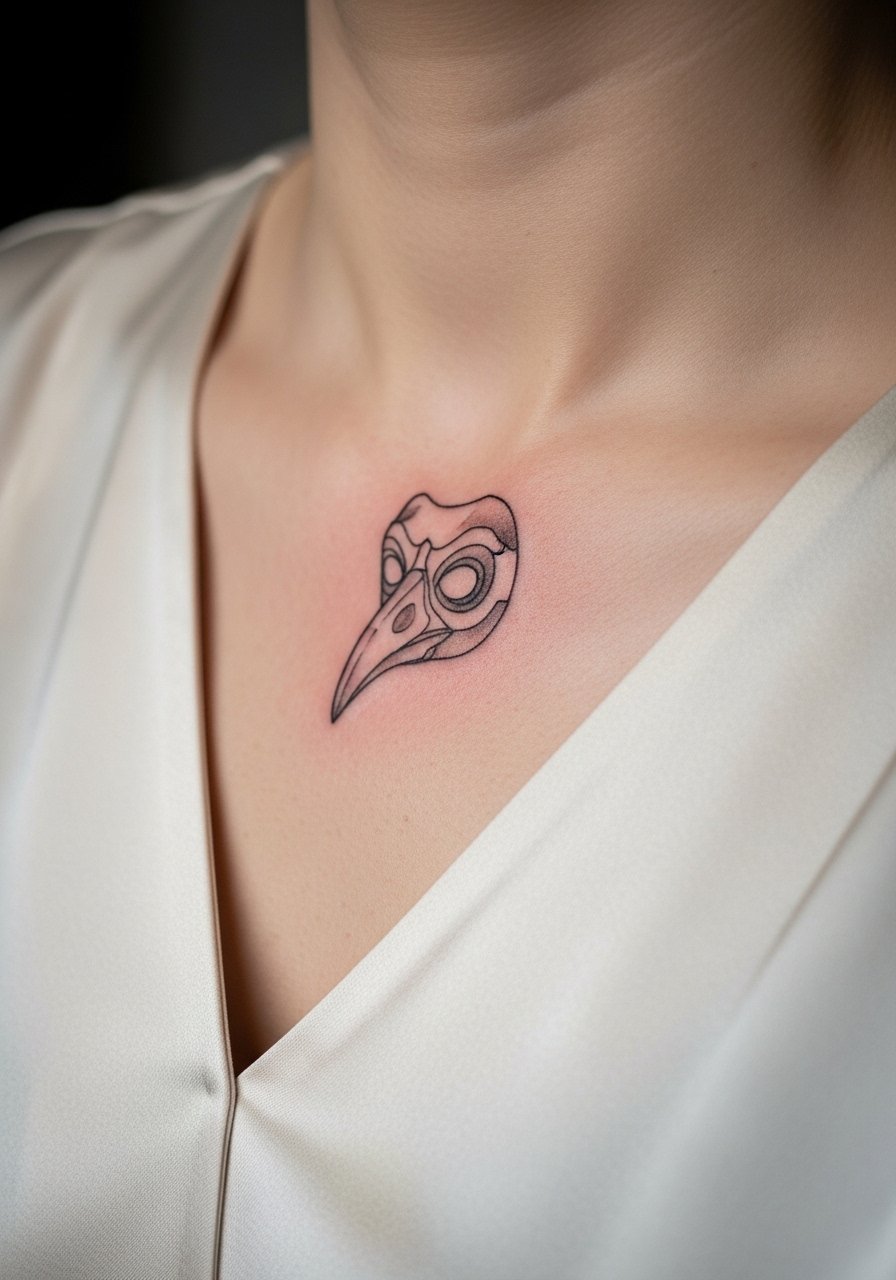
Collarbone micro-realism reads intimate and elegant when the beak is kept to about an inch. A common error is asking for tiny gray gradients that wash out on darker skin tones. Ask for crisp outline first, then one layer of soft shading. Sessions are short, often under 45 minutes. When dressing to expose it, a V-neck silk blouse layered with a thin pendant sits beautifully below the piece. Expect lighter visibility over time and plan a touch-up window at two to four years.
6. Neo-Traditional Plague Doctor with Herbs on Outer Thigh
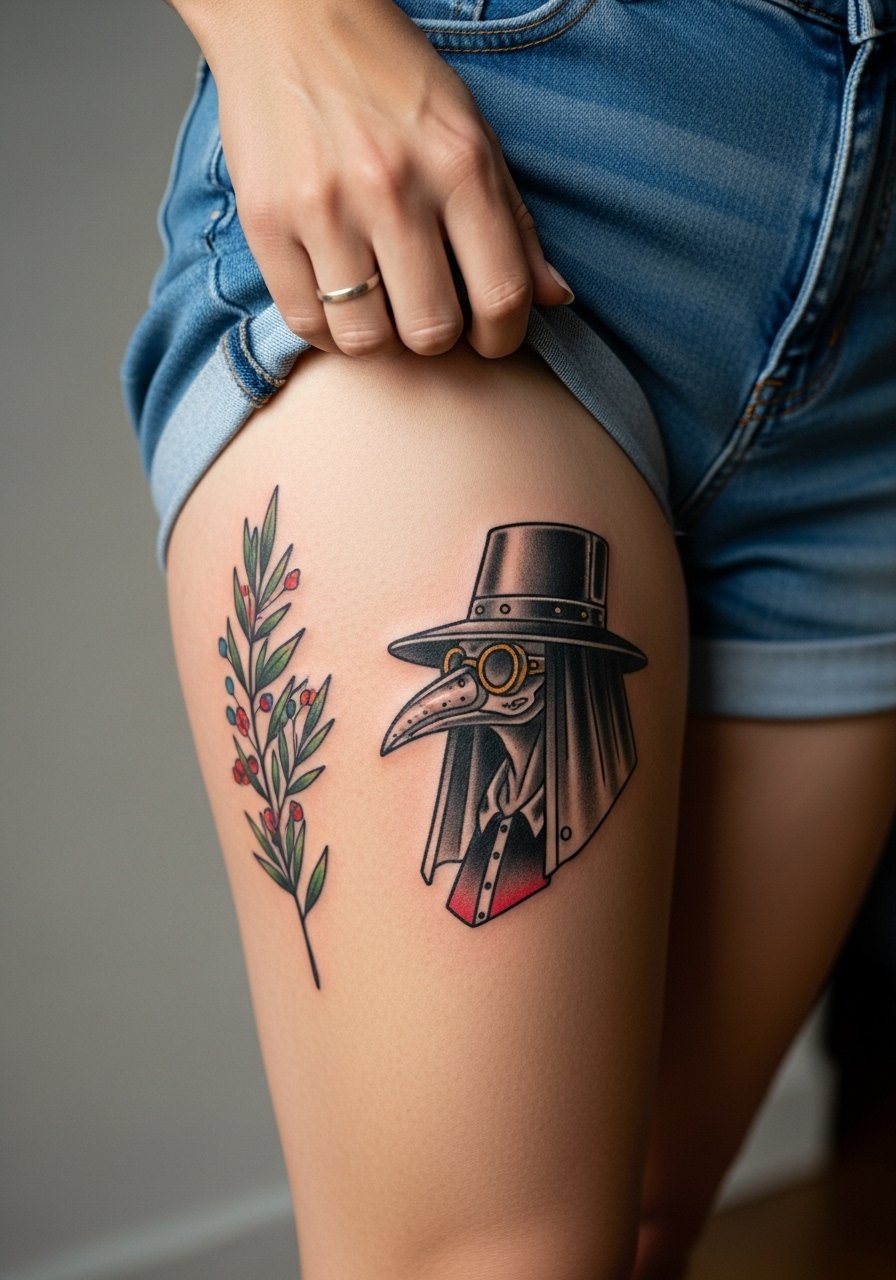
Thigh pieces tolerate color and saturation well because skin stretches less there than on limbs. This design benefits from controlled color pops on leaves to emphasize healing motifs. Tell the artist you want bold outlines around color patches so saturation holds. The session runs 1 to 2 hours. For the appointment, wear high-waisted shorts you can shift for access. Recovery is forgiving, but plan for two sessions if you want rich color saturation.
Studio Day Picks
These picks help with the wrist, forearm, and thigh pieces above. They make the session smoother and the first week easier.
-
Stencil transfer paper kit. Lets you preview exact placement on skin before committing, which is crucial for small forearm and collarbone pieces.
-
Topical numbing cream. Applied about 45 minutes before helps with sensitive wrist and inner forearm sessions without affecting linework when used correctly.
-
Thin protective film roll. Keeps wrist and hand tattoos cleaner during the first week of frequent washing and friction.
-
Fragrance-free gentle body wash. Gentle cleansing prevents irritation around delicate collarbone and thigh work.
-
Aquaphor healing ointment. Thin layers for the first few days lock in moisture around fine line pieces without sealing out air.
7. Black and Gray Atmospheric Plague Doctor on Calf
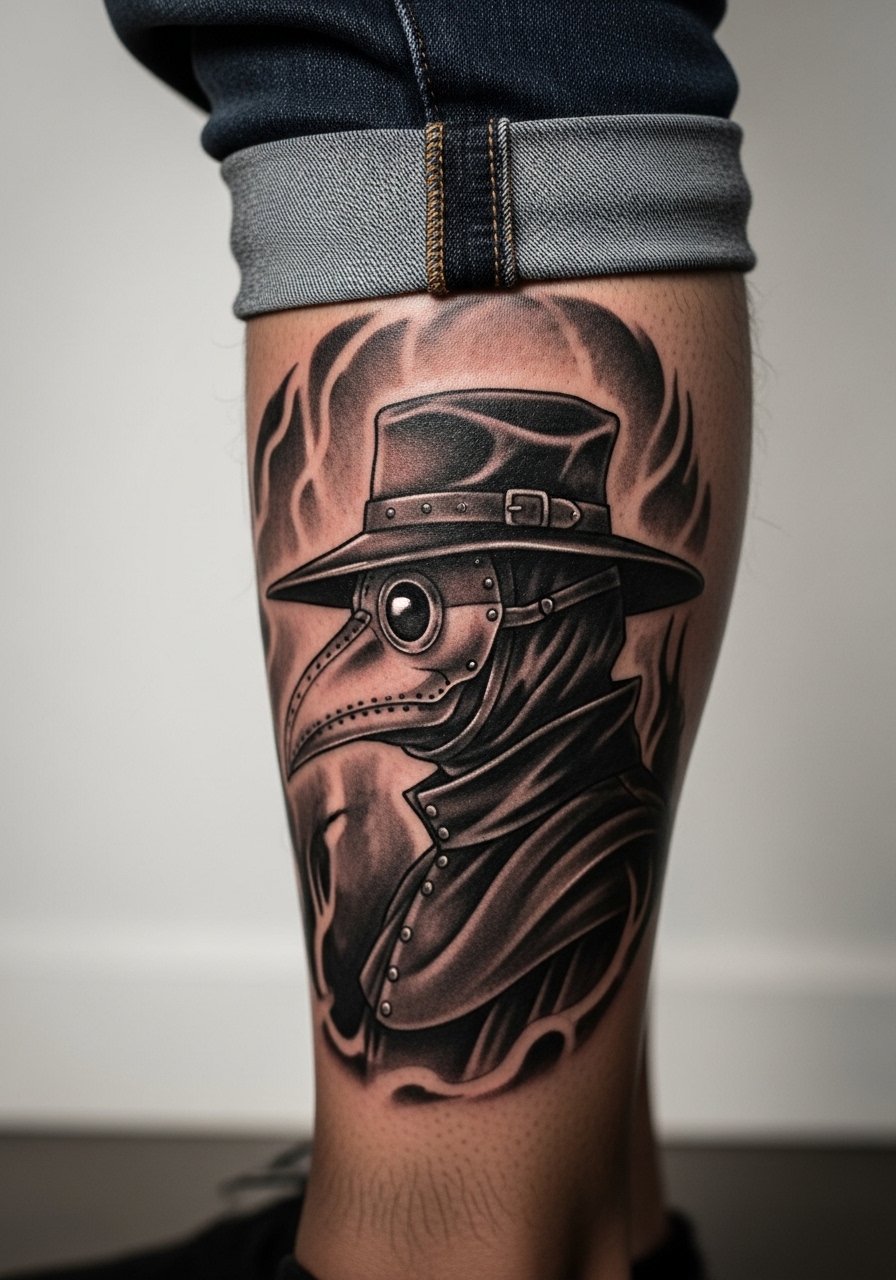
Calf placements let artists play with moodier shading and gradients. Expect a session of one to two hours for a five-inch piece. A common mistake is overdoing tiny gray gradients that become patchy over time. Ask for larger stipple blocks and controlled whip shading to keep the atmosphere without muddying. Pain is moderate, usually a 4 on a typical chart. Casual footwear and rolled jeans highlight the calf when you want to show it off, and a simple loose tank top helps keep the area accessible during touch-ups.
8. Watercolor Beaked Mask with Crows on Shoulder
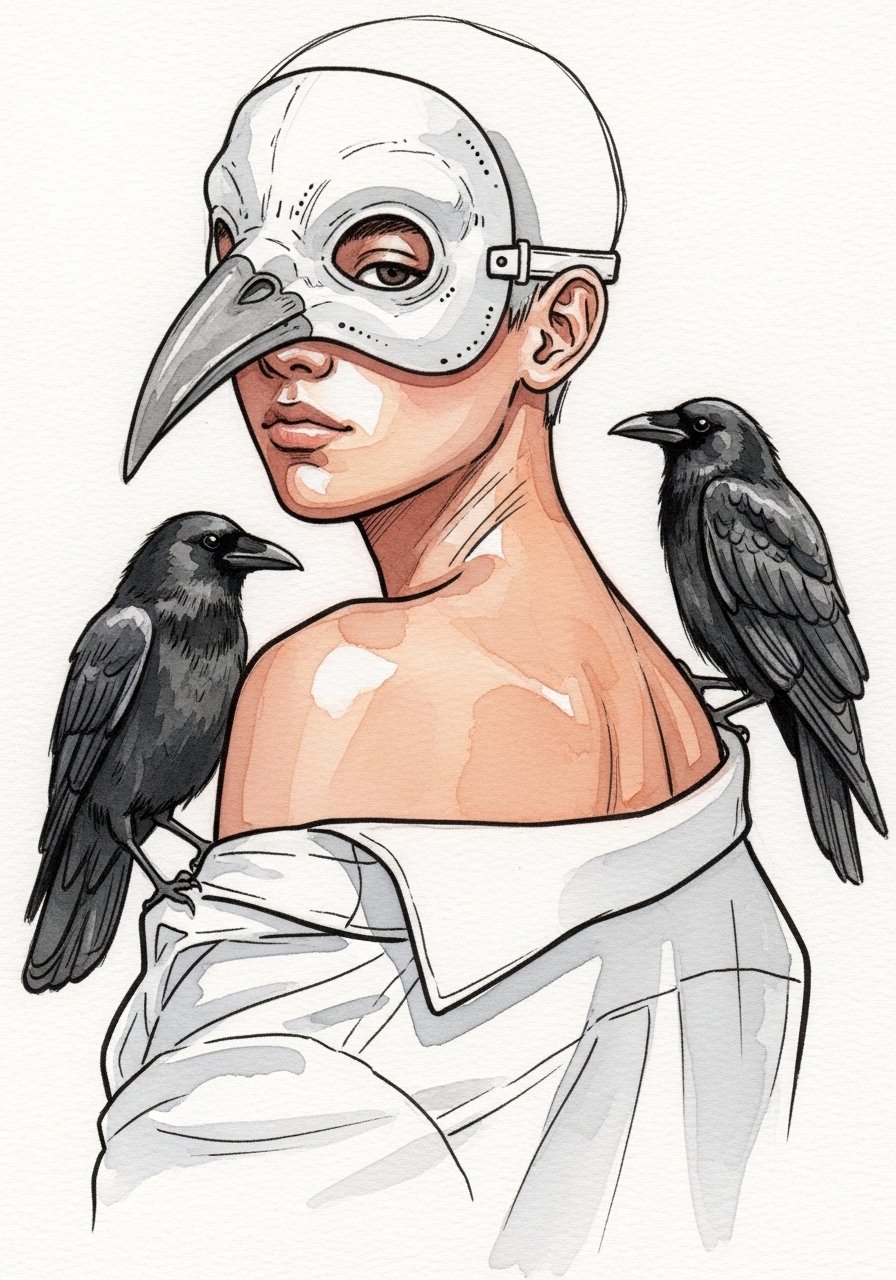
Watercolor accents read beautiful at first but can fade faster than black outlines. If you like the wash, ask for black outlines that will hold the composition as the color softens. Session time is typically under an hour for a small shoulder piece. For showing it off, a wide-neck shirt that reveals the shoulder keeps attention on the color while protecting the rest of the torso. Plan on a color refresh at year two to three depending on sun exposure.
9. Ornamental Plague Doctor Silhouette along the Spine
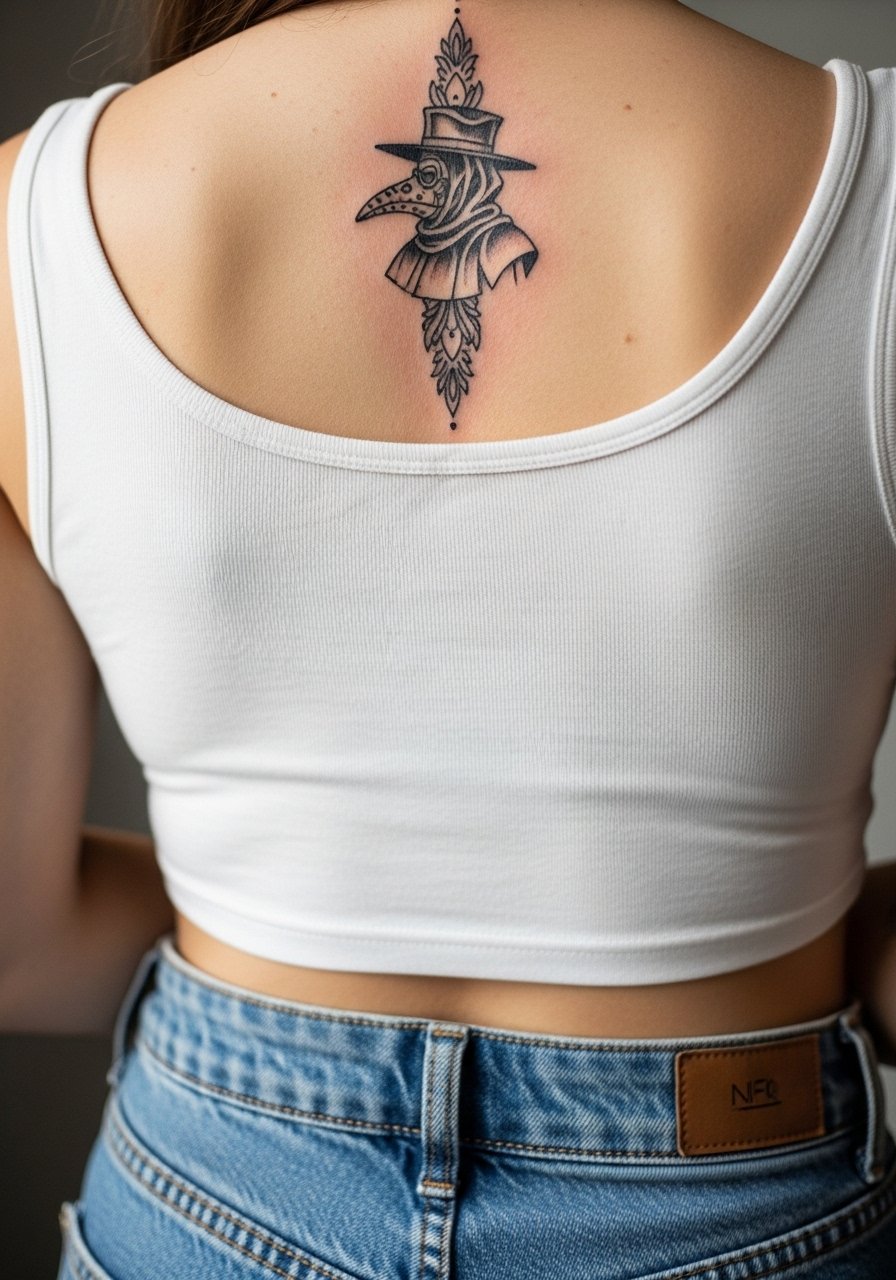
Spine pieces with ornamental patterns demand spacing so the pattern avoids future merging. The mistake I see most is packing too many small elements between vertebrae lines. Ask for rhythm in the pattern and slightly larger negative spaces. Sessions are two to three hours for six-inch work. For summer exposure, pair with an open-back dress or a strappy top to let the silhouette read. If you have concerns about back sensitivity, mention them in the consult so the session is paced.
10. Ignorant Style Beaked Mask Cartoon on Inner Bicep
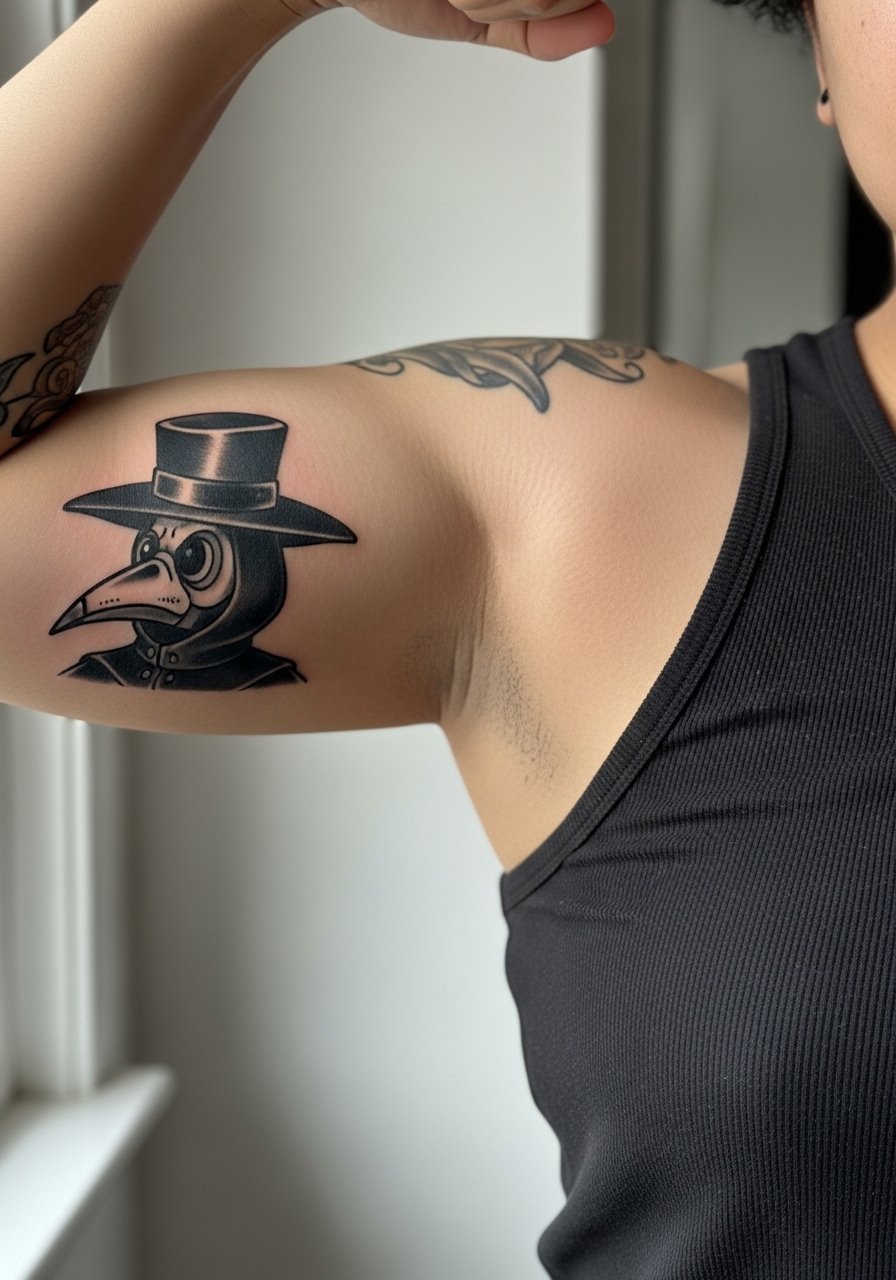
Inner biceps handle bold outlines well, but this area can blur if the artist uses too fine a needle for thick black fills. When you book, request thick linework and solid fill for the cartoon aesthetic. The inner arm can sting more than the outer bicep, so numbing strategies are reasonable to discuss. Wear a tank top with easy arm access for the session. Expect a single session for a small piece and a possible touch-up to even out saturation.
11. Halo-Framed Minimalist Profile on Upper Arm
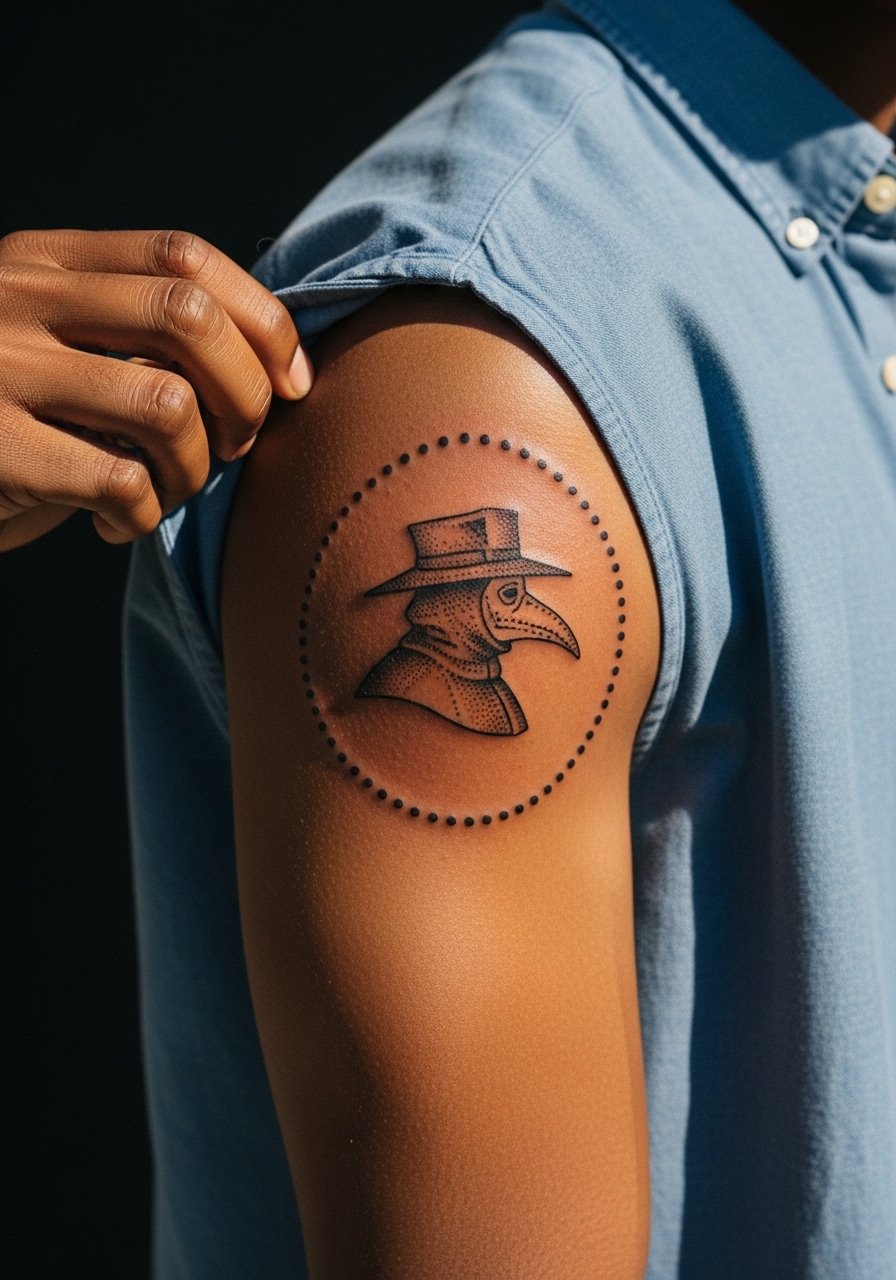
This idea leans into halo dot work to add mystery without filling the whole sleeve. The halo should use spaced dot work to avoid dense areas that merge. I've noticed artists split on how tight those dots can be. Ask your artist for a test dot density on a spare session or a small patch. Session time is moderate and pain is manageable. For a clean look, pair the piece with a sleeveless button-down to show the halo without distraction. Expect a faint softening of dots by year three.
12. Tiny Beak Micro on Ankle
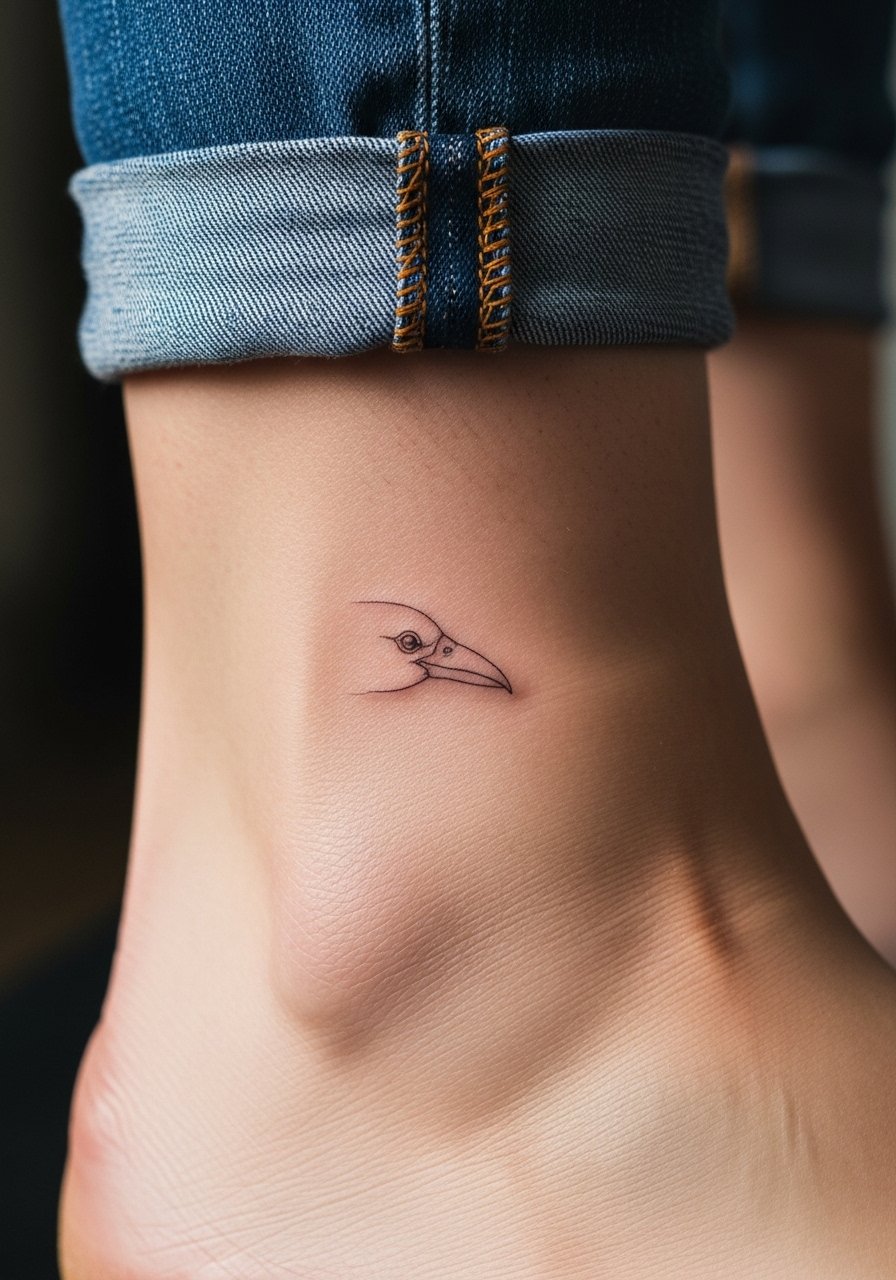
Ankle work is small and visible, but it endures constant friction from socks and shoes. The usual mistake is asking for ultra-fine single hairline strokes. Instead, ask for compact, slightly heavier contour lines to resist abrasion. The session is very short. For appointments, wear pants you can roll like jeans you can roll up so the artist has clear access. Expect more frequent touch-ups than collarbone pieces because footwear rubs the area.
13. Minimalist Plague Doctor with Dates on Sternum
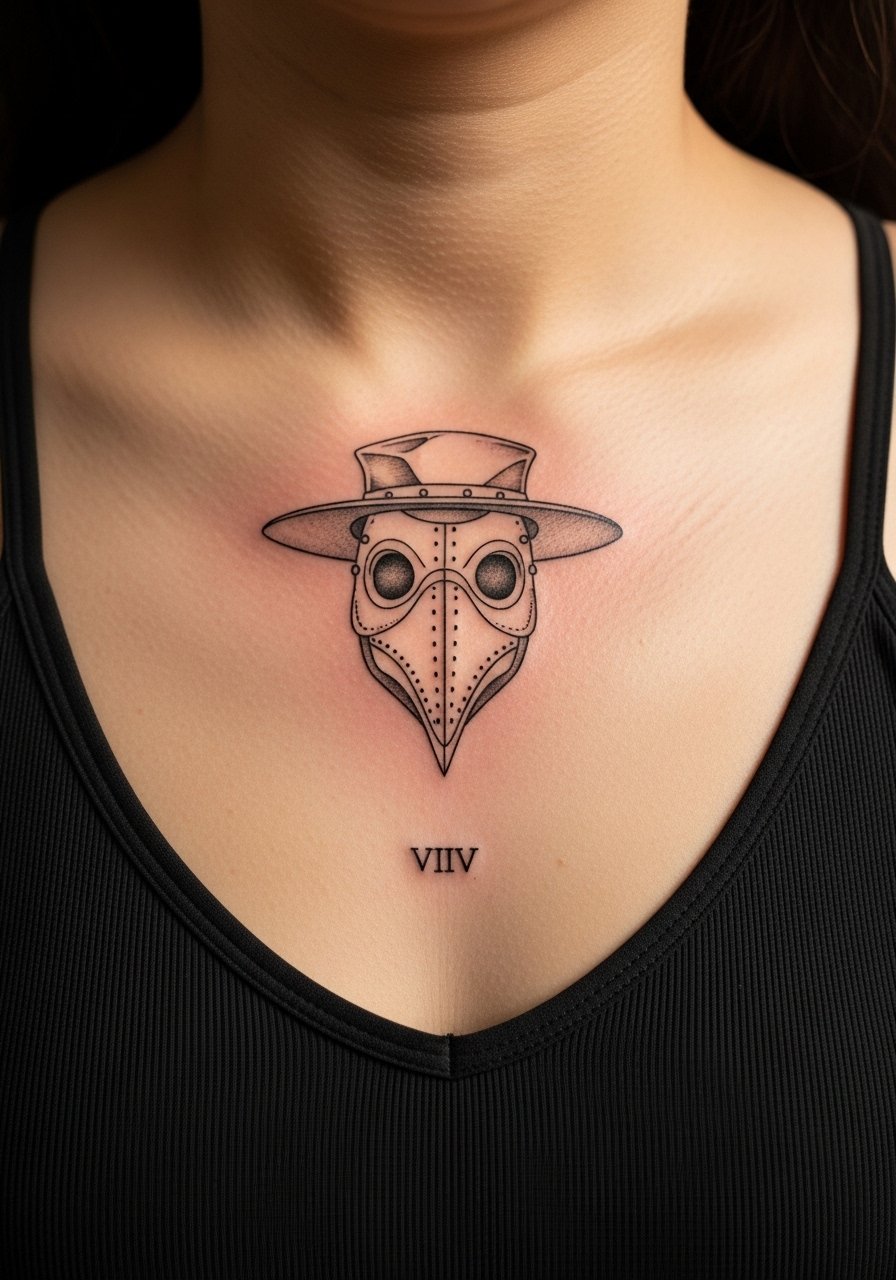
Sternum placements require sensitivity because the skin shifts and sessions can be painful. One camp says fine line blurs there quickly. The other camp argues that with correct spacing and depth fine line can settle well. State both views and ask the artist which approach they prefer. Session time is usually under an hour for a small design. Wear a fitted sports bra so the artist has access while you stay comfortable. Plan for a touch-up discussion depending on how your skin heals.
14. Verdant Floral Rebirth Around a Small Mask on Thigh
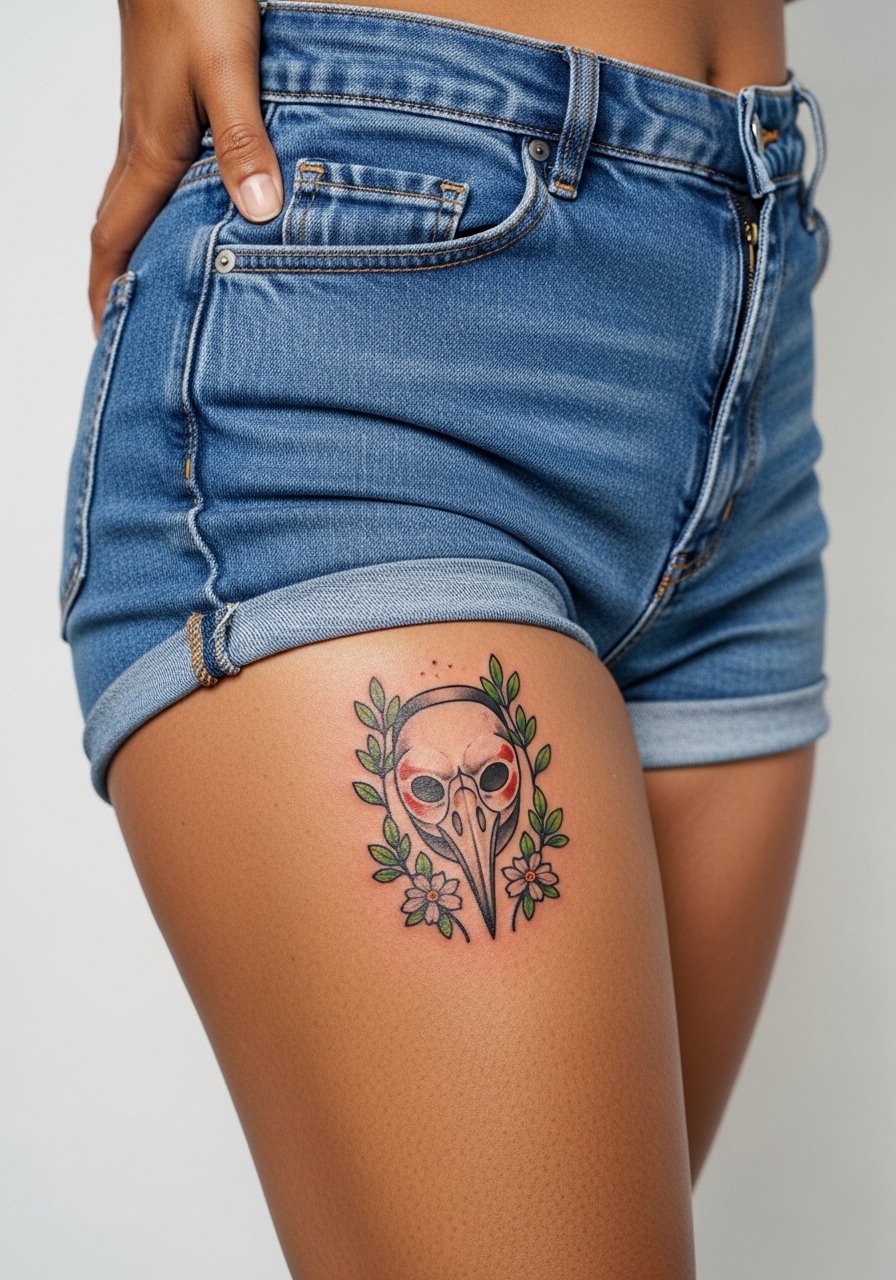
Thigh allows for personal storytelling with color and botanicals that age gracefully. A frequent error is tight micro-detail inside tiny flowers that collapse. Request larger petal shapes and color blocks with bold outlines so the design breathes. Sessions can be longer if you choose color saturation. Wear high-waisted denim shorts you can shift for access. The thigh is forgiving for touch-ups and often shows color longevity better than arms.
15. Hand Tattoo: Minimal Mask and Coat Details on Back of Hand
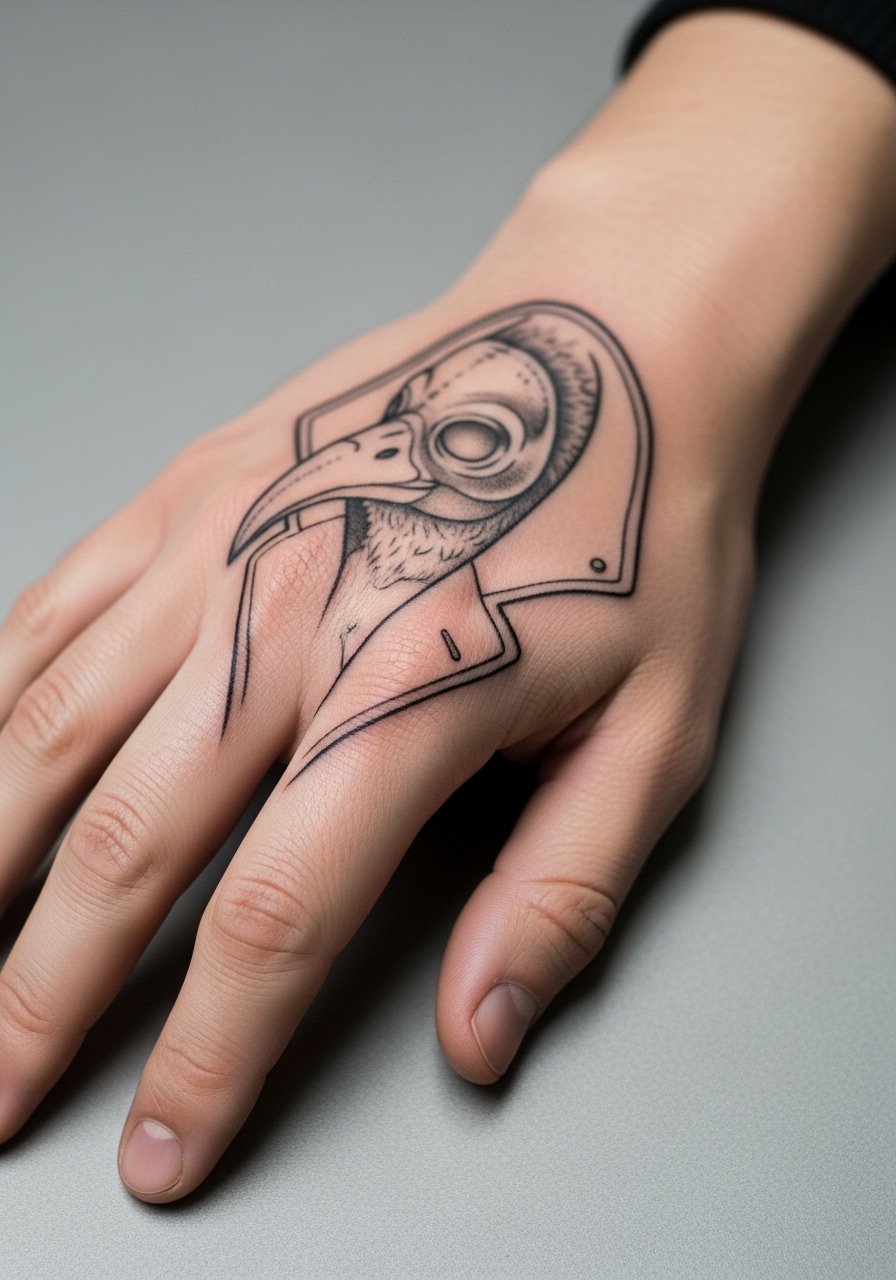
Hand tattoos are very visible and often fade faster because of constant washing and sun exposure. The fine line camp says subtlety is elegant. The blackwork camp prefers bolder lines for visibility. Name both positions during your consult and choose accordingly. Sessions can be short but the pain is high due to thin skin. For showing the piece, minimalist rings on other fingers and a slim-fit black tee keep the focus on the hand without competing. Know that touch-ups are common for hand work.
16. Micro-Realism Beaked Mask on Collarbone with Layered Necklace Gap
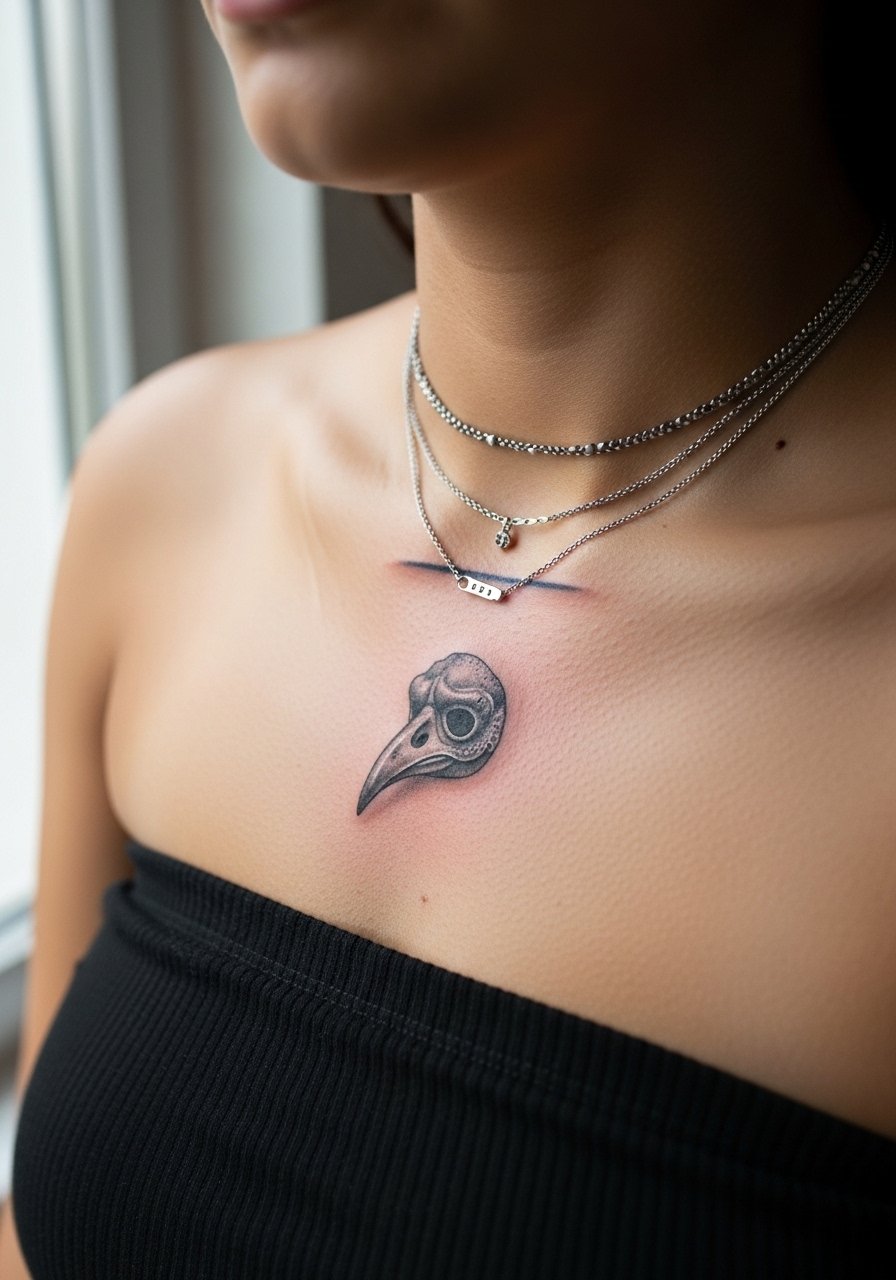
I recommend leaving a deliberate negative gap above the collarbone if you plan to wear layered chains. Artists sometimes forget to consider necklaces and the piece can feel crowded. Tell your artist you want necklace-safe spacing so the pendant area remains clear. Session time is short. For outfits, a layered necklace set sits below the tattoo without crowding. Expect subtle fading in the highest-motion areas, with touch-up possible at year two.
17. Tiny Behind-the-Ear Beaked Accent
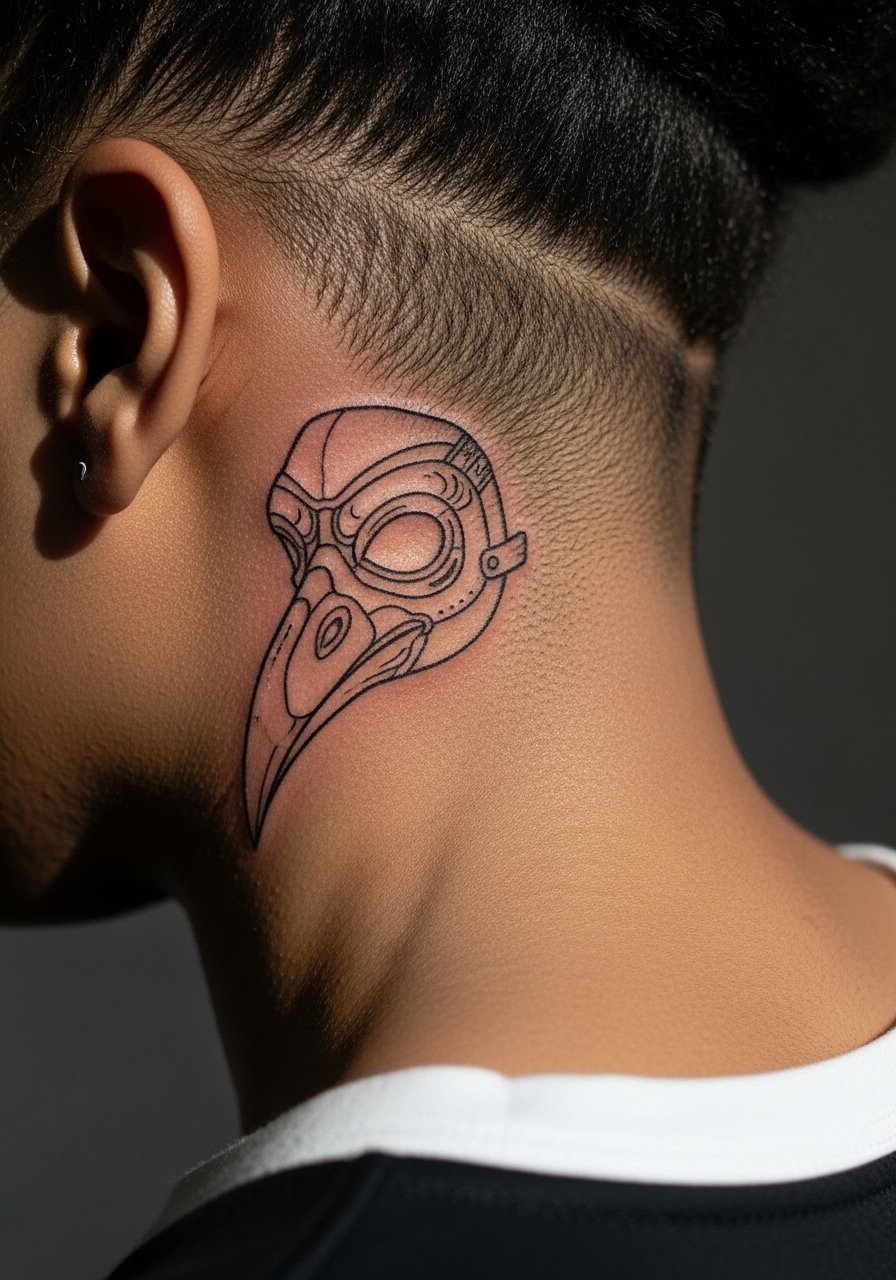
Behind-the-ear placements require careful framing because the area is small and movement is constant. Artists often avoid overly fine detail here for that reason. The session is quick but can be noisy near bone. For after the session, hairstyle choices help hide or reveal the piece. This spot pairs well with tucked-back hair or a high ponytail and a thin chain pendant for balance. Expect subtle softening over a few years and plan a touch-up if needed.
18. Negative-Space Nape Outline
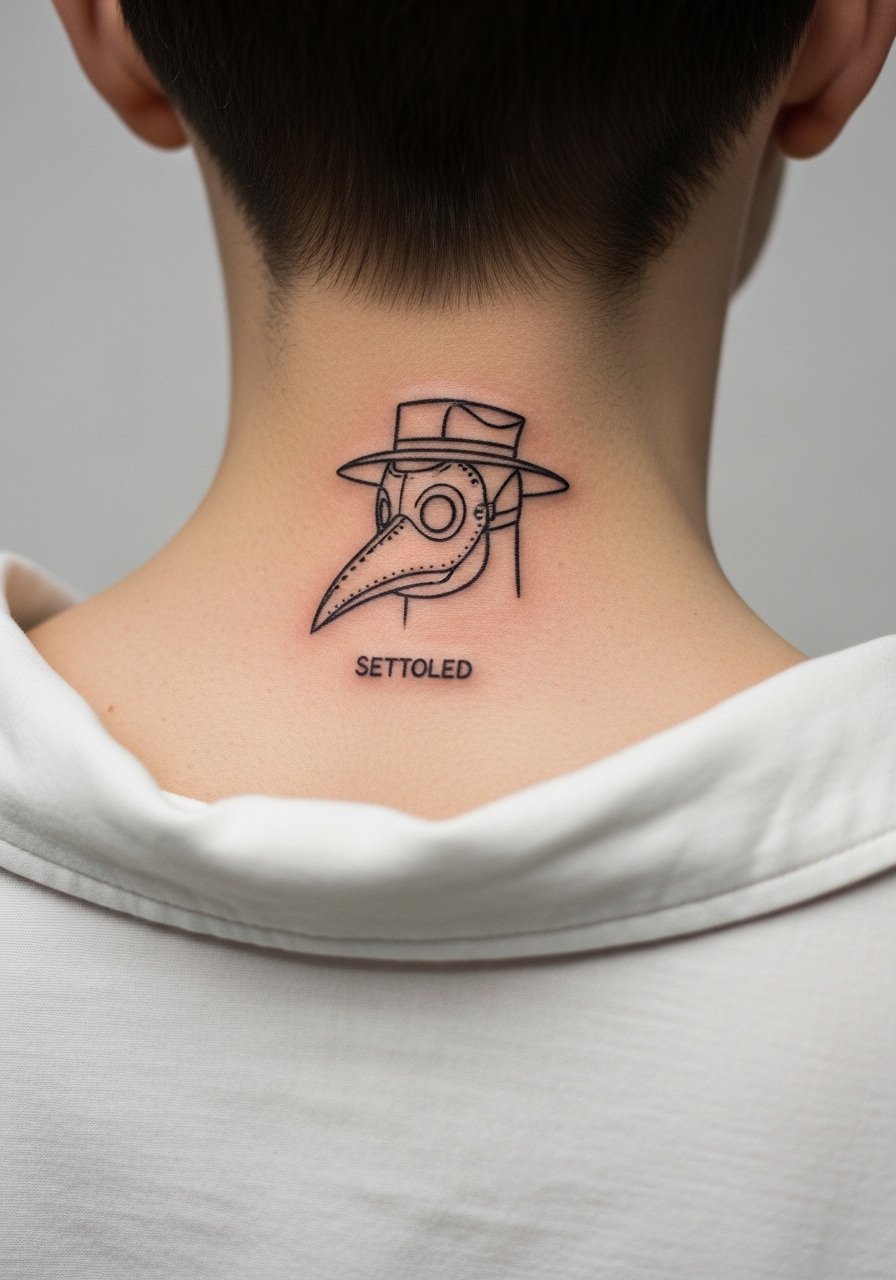
Nape tattoos need clothing considerations for both the session and daily wear. The usual error is making the design too small for neck curvature. Ask for a slightly larger scale so the negative space reads from a normal viewing distance. Sessions are short but position can be awkward. Wear a wide-neck shirt that can be pulled aside for the session. Expect natural softening at year two but little blowout if the artist spaces lines properly.
19. Geometric Halo Beak on Calf
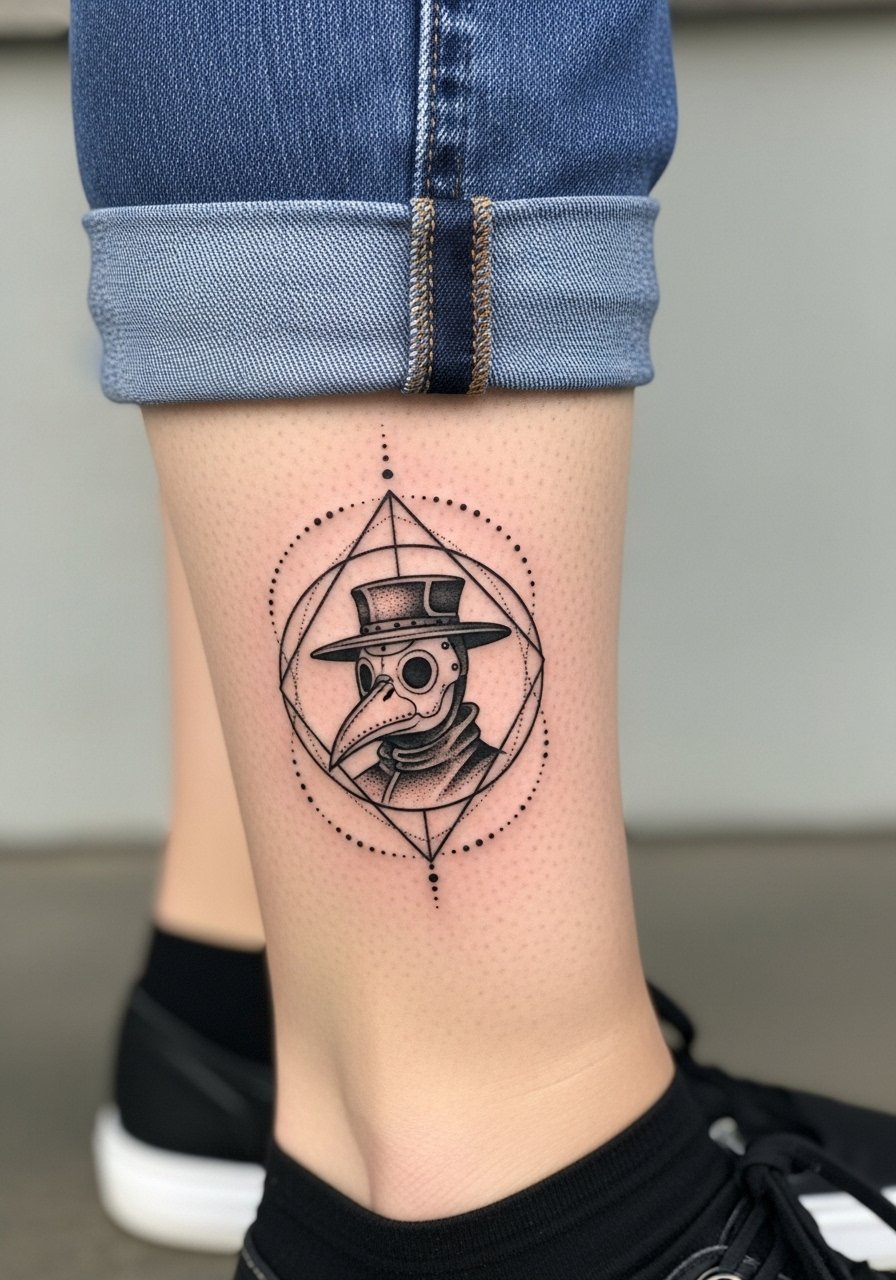
Geometric halos balance shape and negative space well on the calf. The common mistake is cramming tight geometric fills that look sharp fresh then flatten. Ask for open spacing in the halo to keep movement readable over time. Sessions are one to two hours. For reveal looks, a racerback tank or cropped pant works. Touch-ups are usually minor but ask your artist about dot density if halo contrast matters to you.
20. Dot-Work Beaked Mask on Inner Forearm
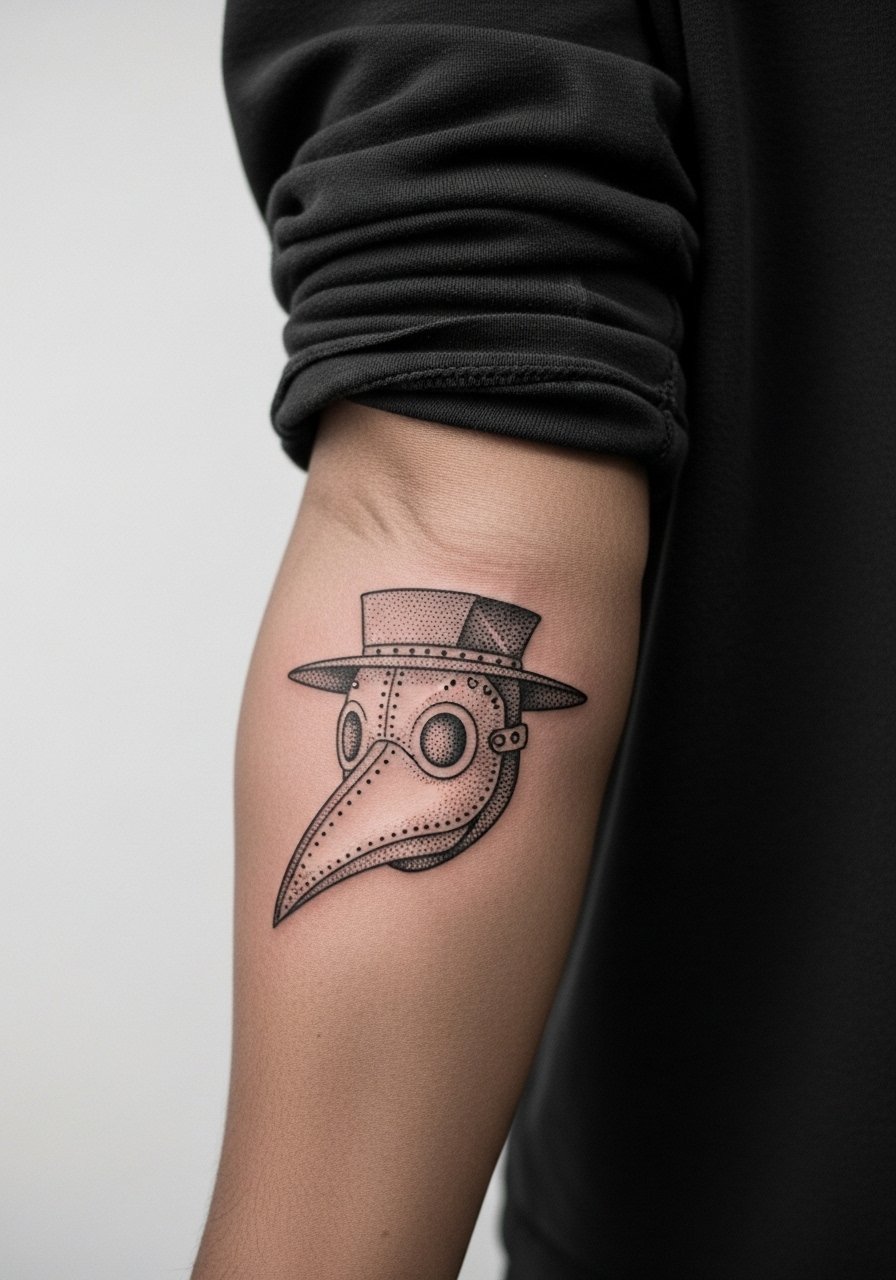
Stipple shading looks delicate and can age well if dots are spaced. The mistake is asking for too dense stippling that merges into a gray patch. Ask for deliberate spacing and test dots at the start. Pain is low to moderate and the session often fits into an hour. For appointment comfort, wear a loose long-sleeve button up you can push up without restriction. Expect dot contrast to soften and consider a light touch-up after a couple of years.
21. Shoulder Blade Silhouette with Two Crows
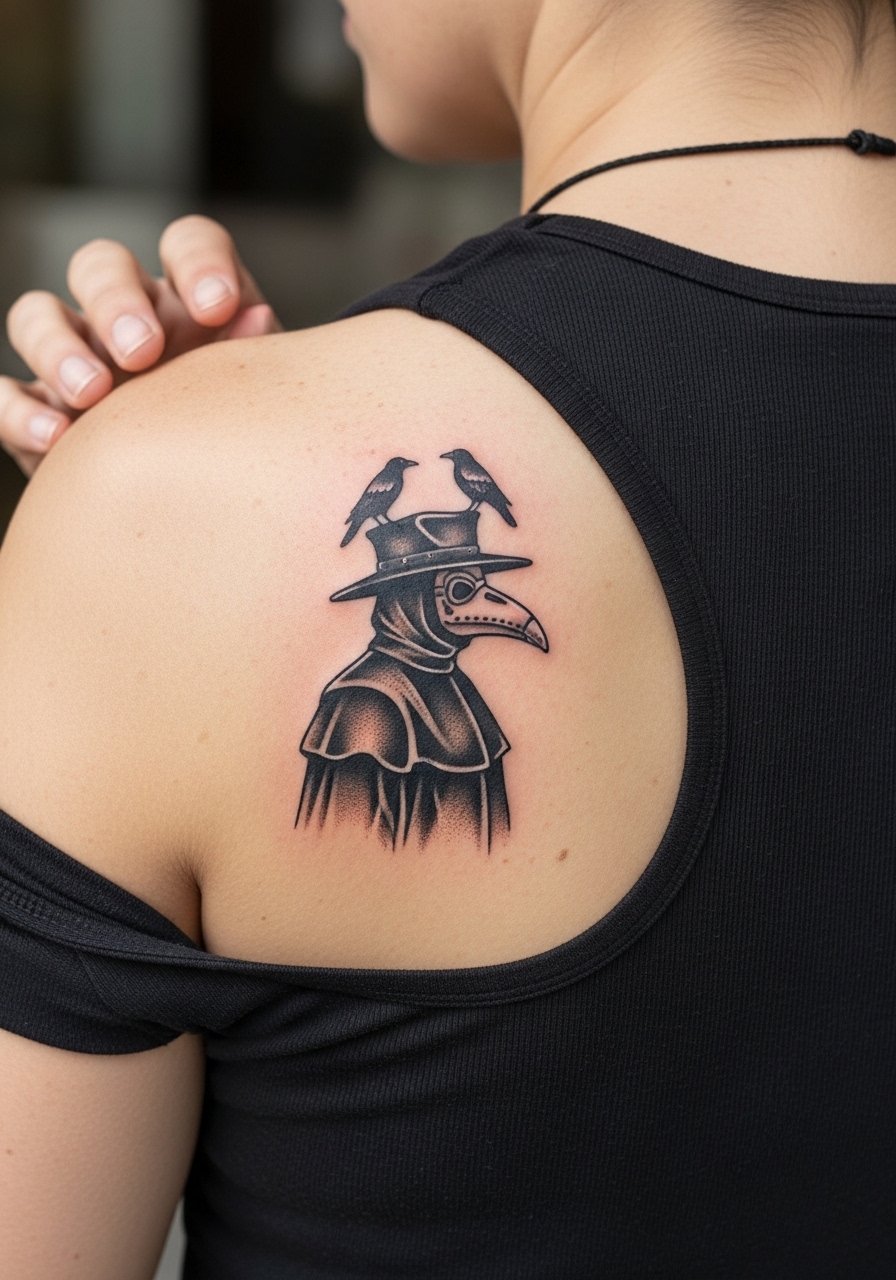
Shoulder blade is forgiving for silhouettes combined with small elements like crows. A mistake to avoid is tiny crow feathers filled with fine lines that blur into the black silhouette. Ask for solid crow shapes and crisp separation from the main figure. Sessions are comfortable and usually under two hours. For showing it off, a racerback tank reveals the composition with clean framing. Touch-ups are rarely dramatic here because saturation holds.
22. Hat and Coat Minimalist on Upper Chest
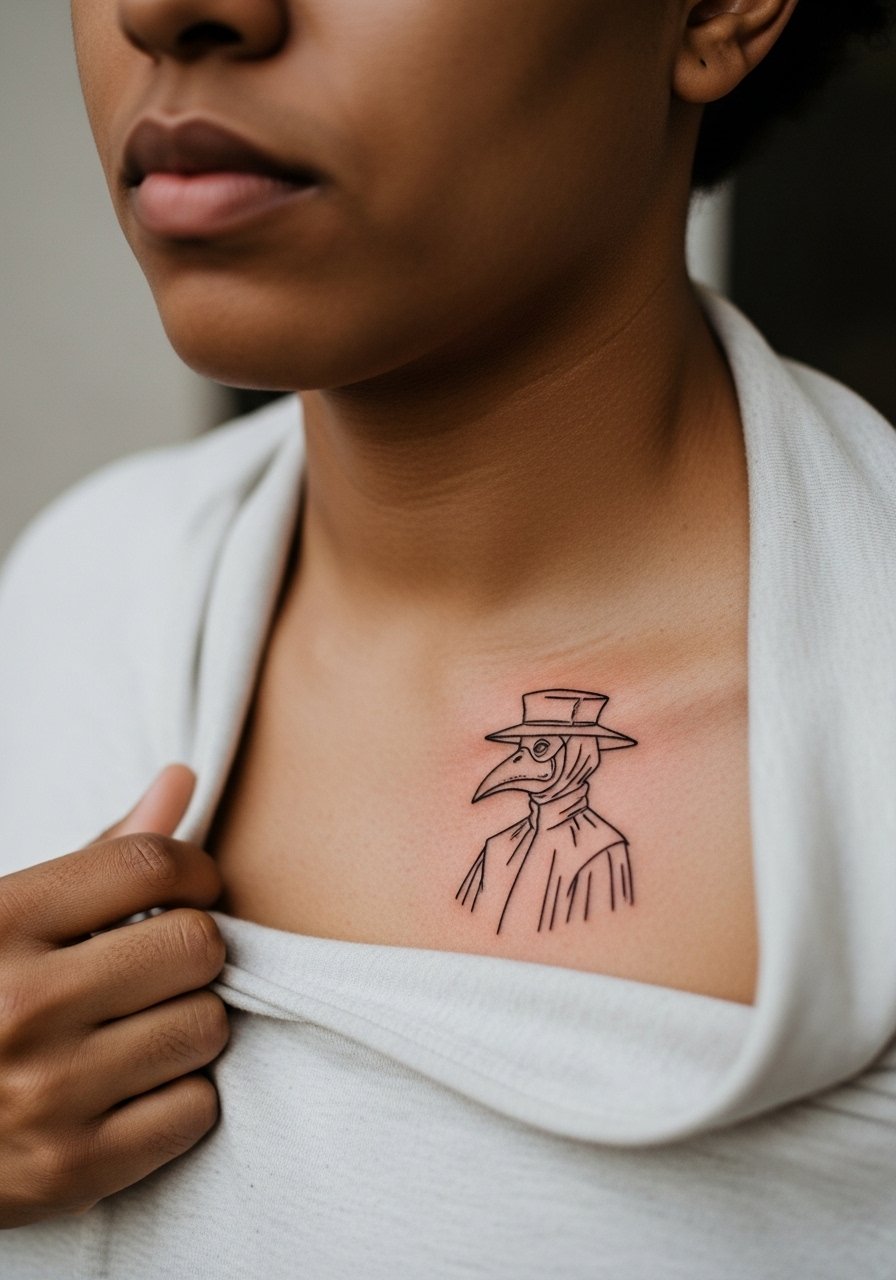
Upper chest pieces require careful sizing so the design does not get swallowed by neckline movement. Fine line here can look beautiful but may lose contrast over time. Artists differ on technique, so bring examples of line weights you like. Sessions can be uncomfortable near bone and cartilage. Wear a wide-neck shirt you can shift for the session. Expect to discuss touch-ups, especially if you sunbathe the chest.
23. Tiny Finger Beak Accent
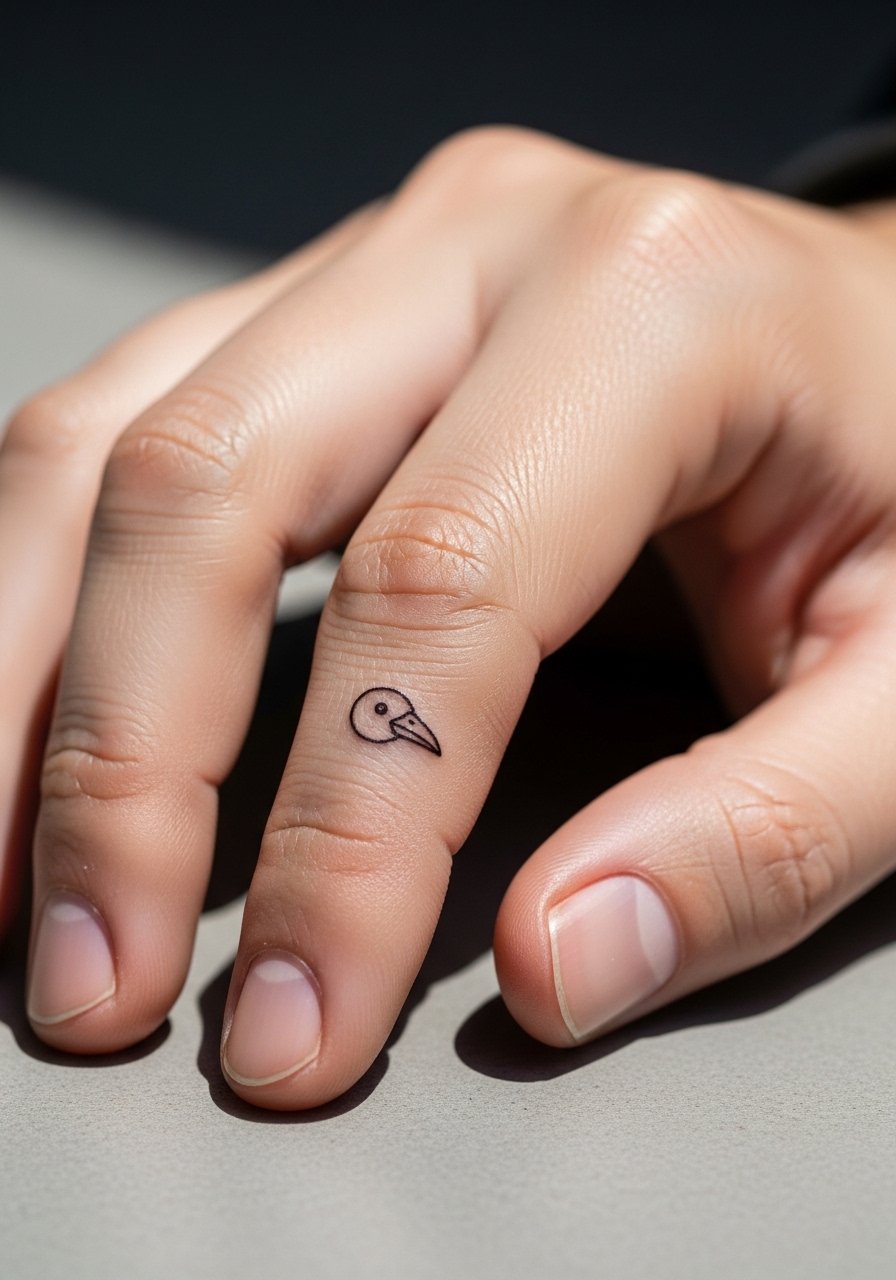
Finger tattoos are a commitment. They fade from hand washing and contact. The common error is dense interior detail. For longevity, ask for a single confident contour and acceptance that multiple touch-ups may be needed. Sessions are very quick but can sting. Pair with a minimalist ring set on adjacent fingers to balance the look. Expect yearly touch-ups for crispness if you wear the piece daily.
24. Stipple Quarter-Sleeve with Subtle Halo
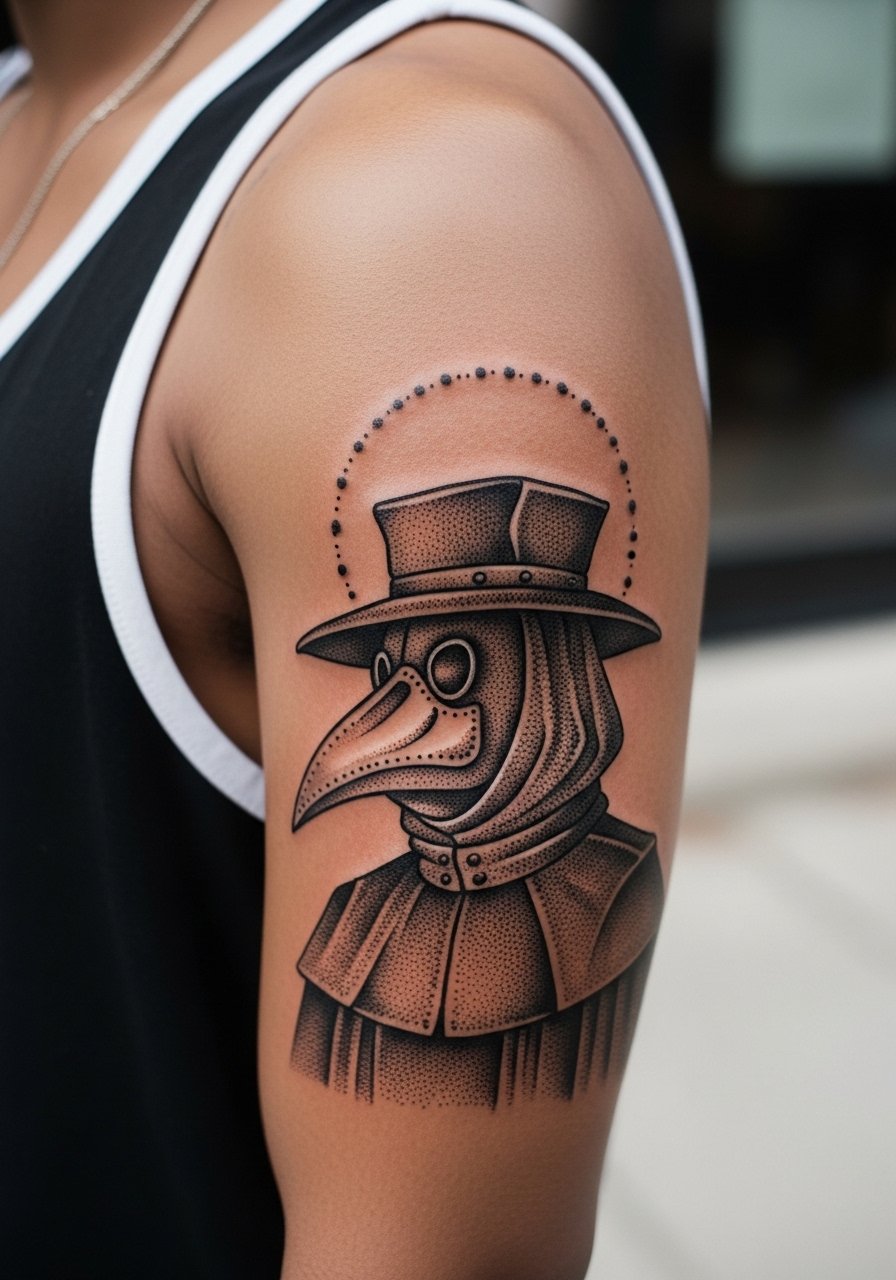
Quarter-sleeves with stipple allow for gradual tonal transitions without heavy black fills. Avoid packing stipple too tightly next to delicate linework. Tell the artist you want gradient stippling that reads at arm distance. Sessions will be multiple depending on coverage. For outfit choices, a sleeveless tank top works for both session access and showing the sleeve. Expect touch-ups to refresh contrast every three to five years.
25. Cartoon Ignorant Style Beaked Mask on Inner Wrist
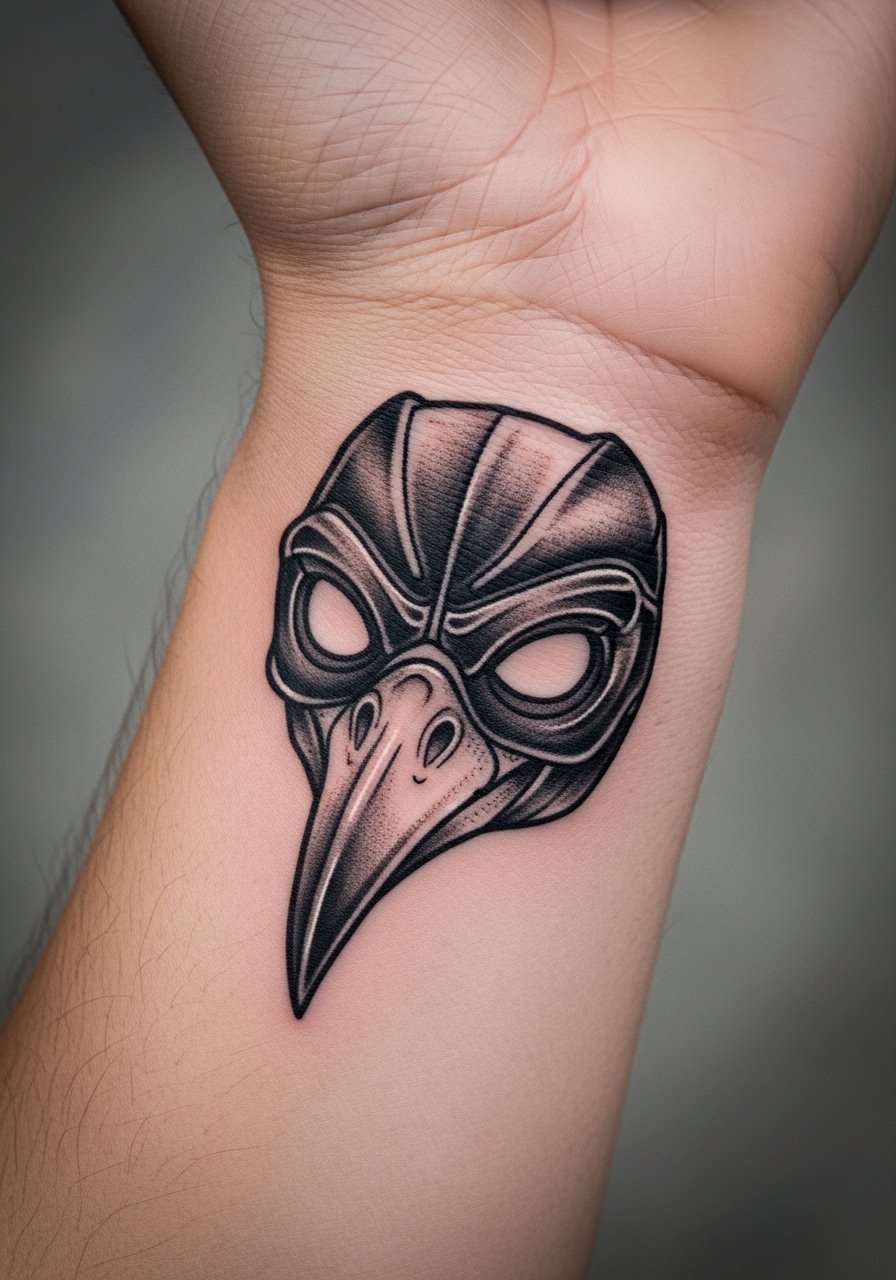
Inner wrist pieces are visible and subject to friction. A common mistake is requesting ultra-thin lines that blur from wrist motion. For this style, ask for thick outlines and deliberate spacing from veins and tendons. Sessions are short but can feel sharp. For the session wear, a sleeveless tank lets the artist work without fabric interference. Plan on a touch-up in two years depending on wear.
26. Minimalist Mask with Tiny Herbs Around the Eye on Ribcage
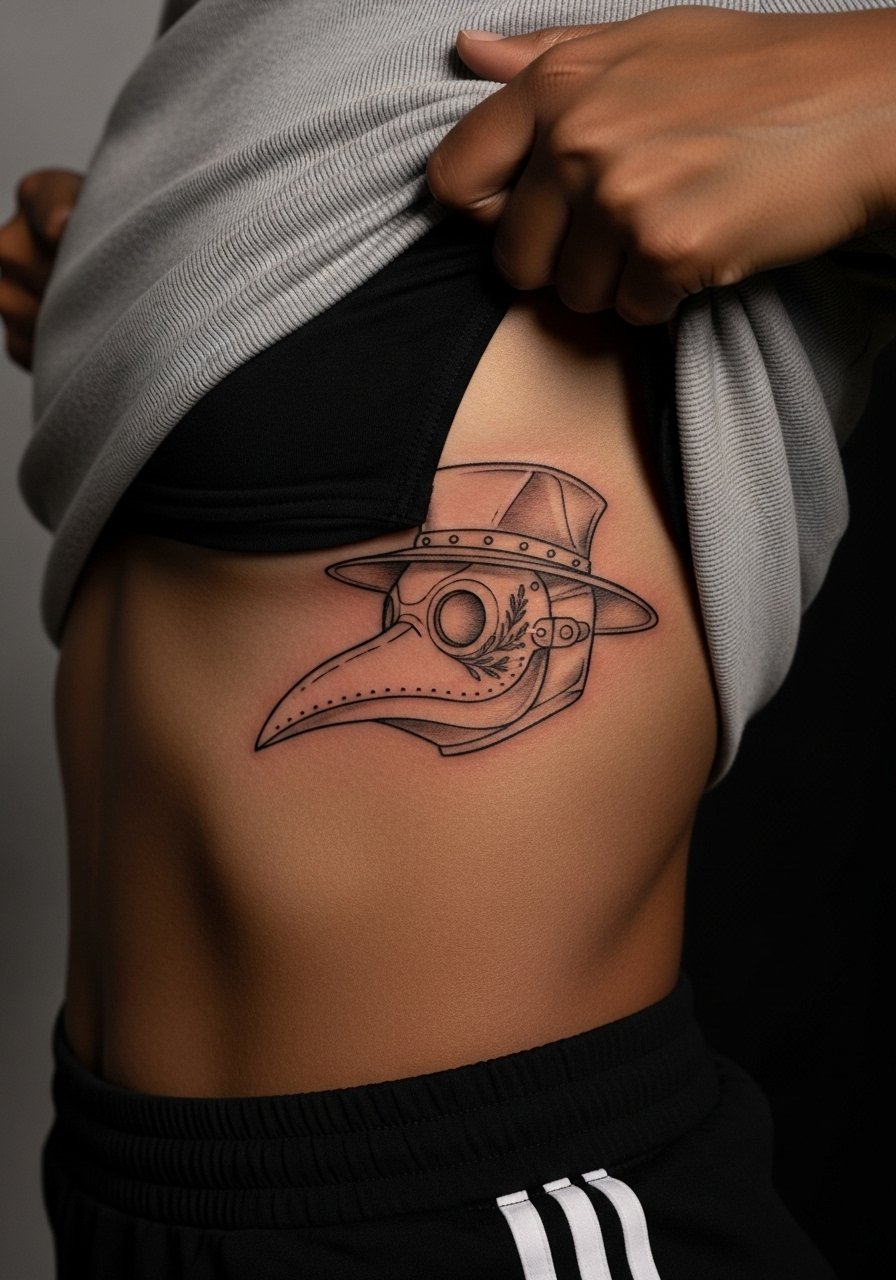
Ribcage placements hurt more and the skin stretches with breathing. Artists disagree about fine line here. One camp says stretch blurs lines within two years. The other camp insists proper depth and spacing let fine line settle. Mention both positions and ask how your chosen artist prefers to approach ribs. Sessions can be split for comfort. Wear a cropped athletic top you can lift during the session. Expect potential touch-ups if breathing motion affects density.
27. Micro-Beak with Single Crow on Shoulder Cap
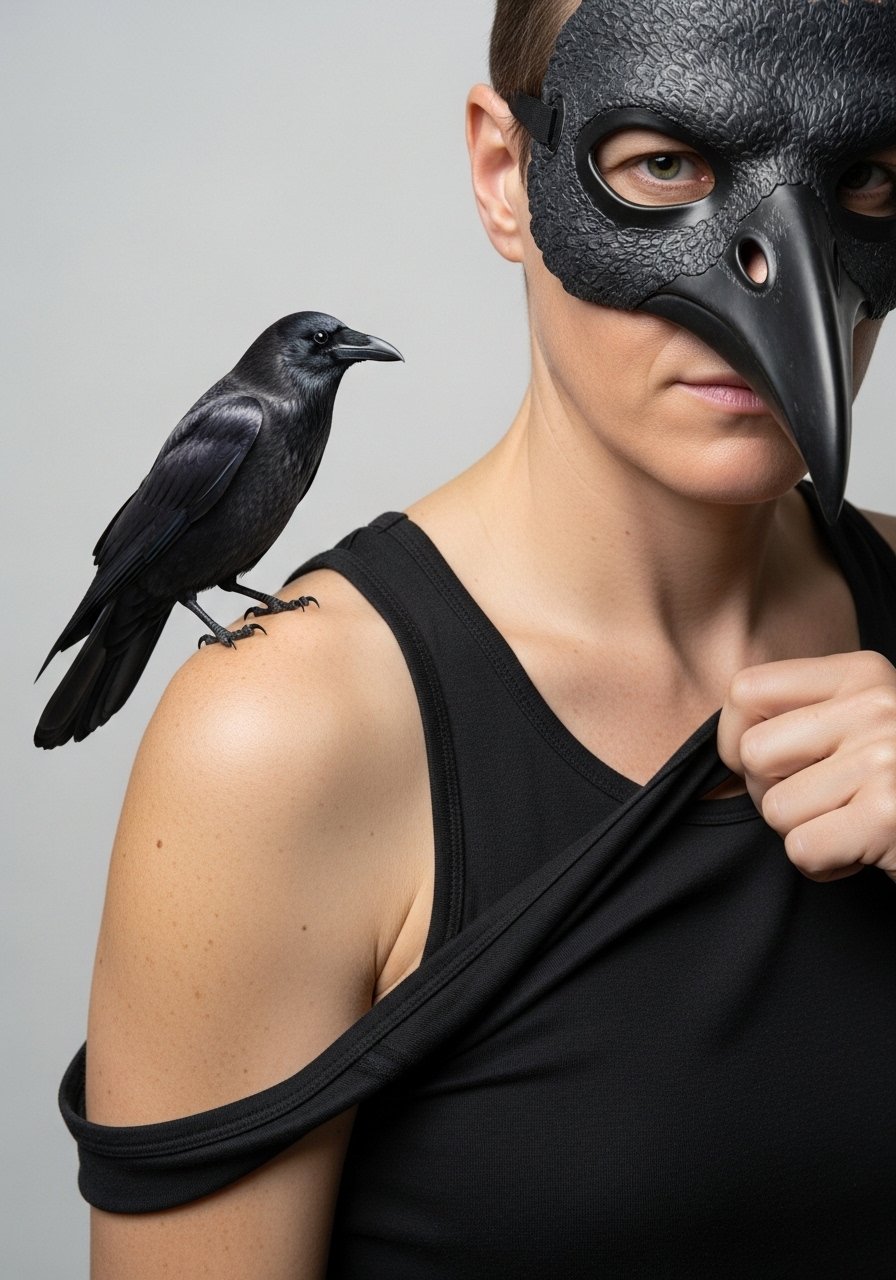
Shoulder cap micro pieces look refined when the artist balances tiny gray values and bold negative shapes. A common error is too many micro gradients that disappear on darker tones. Ask for a strong silhouette edge with micro shading accents. Sessions are short and tolerable. For showing it off, an open-back dress or a racerback works well. Touch-ups are rare but possible for the smallest gray areas.
Frequently Asked Questions
Q: Will fine line plague doctor tattoos blur faster than blackwork on the wrist?
A: In practice, fine line on the wrist tends to soften sooner because of constant movement and washing. Blackwork holds contrast longer. If you love fine line, ask for slightly heavier single lines and consider the inner forearm instead of the wrist for slower fading.
Q: How should I prep clothing-wise for a thigh or outer leg session?
A: Wear high-waisted shorts or loose bottoms that shift easily so the artist can access the upper thigh without pressure. A zip-front hoodie to remove after the session works too. The goal is to stay comfortable while keeping fabric away from the fresh ink.
Q: Are hand and finger plague doctor tattoos career risky and do they need special care?
A: Hand tattoos remain highly visible and can affect industries with strict dress codes. They also need extra care because of friction and washing. Discuss career implications before booking and expect touch-ups more frequently than for chest or back work.
Q: What should I ask about dot density for stipple halos on a quarter-sleeve?
A: Ask your artist for a test dot density and to show a healed example if possible. Good stipple uses breathing space so dots do not merge. If an artist cannot demonstrate that spacing, consider a different approach or shop.
Q: How do I decide between Saniderm-style second-skin and dry healing for a small fine-line collarbone piece?
A: Artists and clients split into two camps. Some prefer second-skin for convenience and lower scab disruption. Others prefer dry healing to let scabs form naturally. Ask your artist which method they recommend for that placement and follow their specific timeline.
Q: If I have darker skin, which minimalist plague doctor styles show best?
A: Blackwork silhouettes and slightly bolder line weights generally offer the best contrast on darker skin. Micro-realism can work if the artist adjusts contrast and spacing. Ask for a test patch or healed photos on similar skin tones before committing.