
Fine line pines are all over feeds right now, and the pieces that still look crisp after a year are not always the ones that looked best fresh. Expect tiny pines to fade faster on wrists, to cost more than they used to with guest spots and apprentices changing the market, and to sting more on bony placements than you think. Read on for 27 compact micro pine tree tattoo ideas, practical consultation notes, and wardrobe tips so the design still feels peaceful every season.
1. Fine line pine on the inner forearm
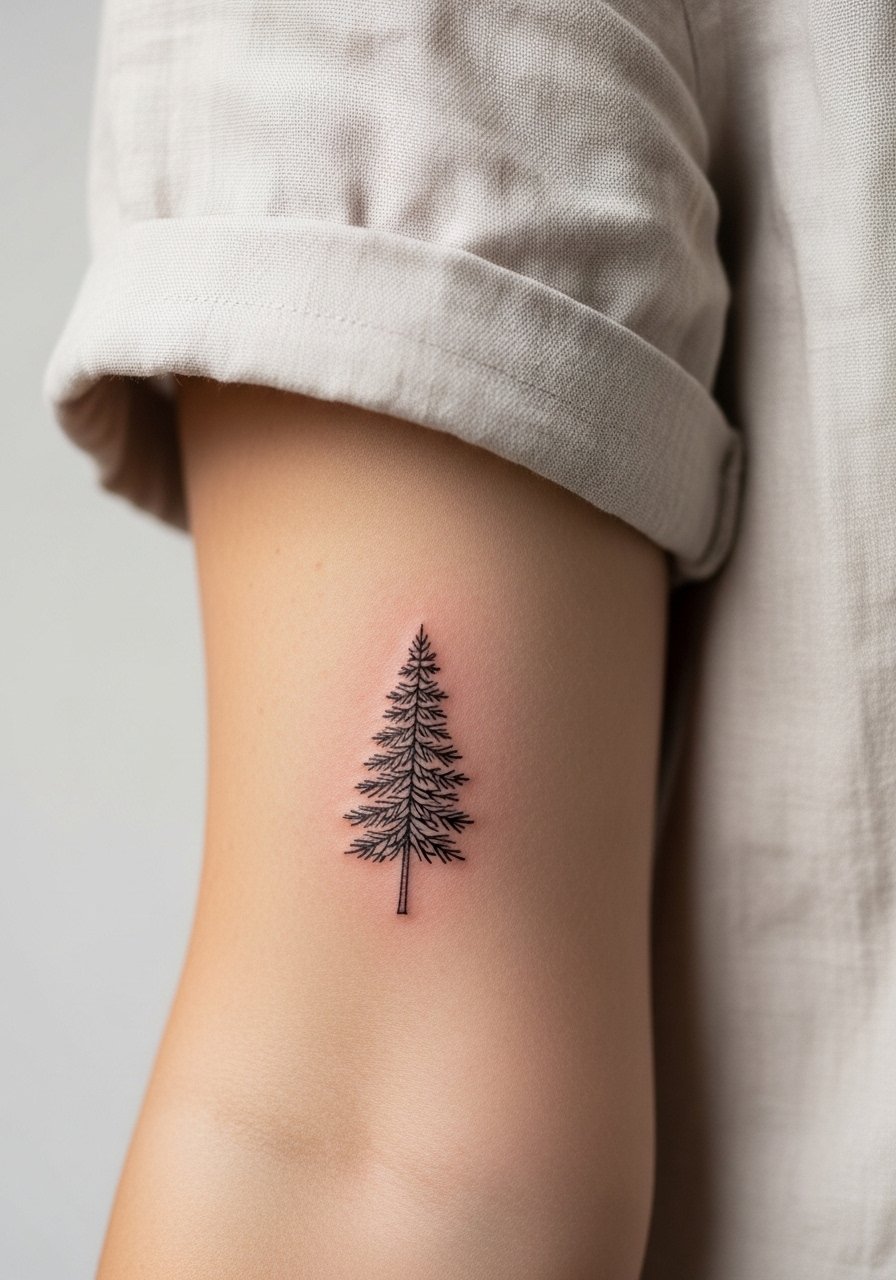
I recommend this when you want a readable micro that can be imagined with other small pieces along the arm. Tell your artist you want single-needle linework with slightly increased line weight near the trunk so the silhouette keeps contrast as it ages. The common mistake is asking for hairline lines everywhere, which often goes 50 percent lighter by year two and needs a touch-up. Session time for a one-inch forearm pine is typically 20 to 40 minutes and pain sits around a 3 out of 10. For showing it off, pair with a linen short sleeve shirt rolled at the cuff so the design reads without distraction.
2. Micro-realistic single pine silhouette on the tricep
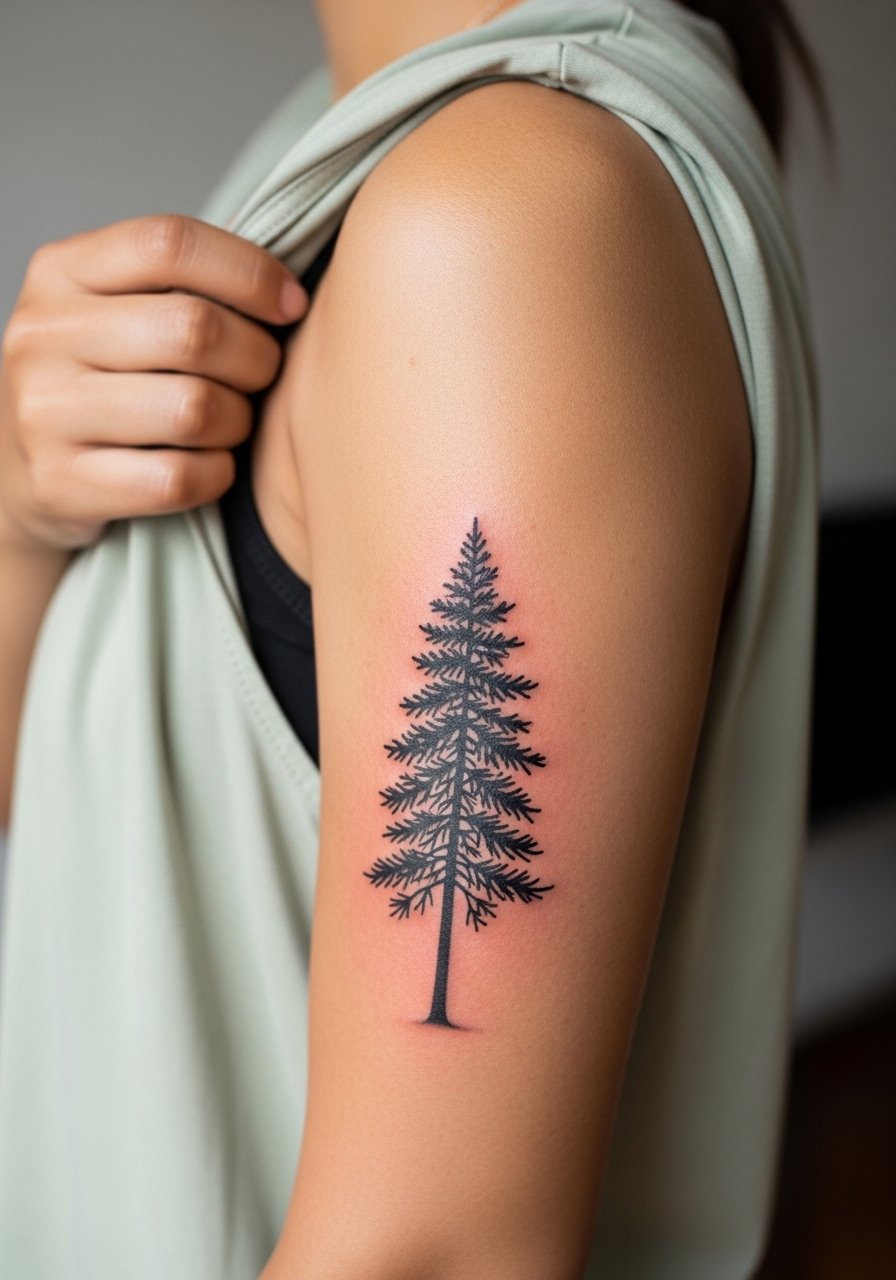
This style is where tiny bark texture and subtle needle clusters make a small image feel dimensional. Ask for black and gray shading with a touch of stipple work rather than dense black fills so the piece keeps depth without muddying on darker skin. Expect 30 to 60 minutes in the chair and a pain level around 4. A bad version packs solid black too close to the edges and blurs into a blob over time. If your wardrobe shows shoulders, a loose tank during the session works, and a thin silver cuff opposite the piece balances the look. Mention you want planned spacing for future touch-ups so the artist maps where micro detail will smooth out.
3. Minimalist dotted pine for the outer ankle
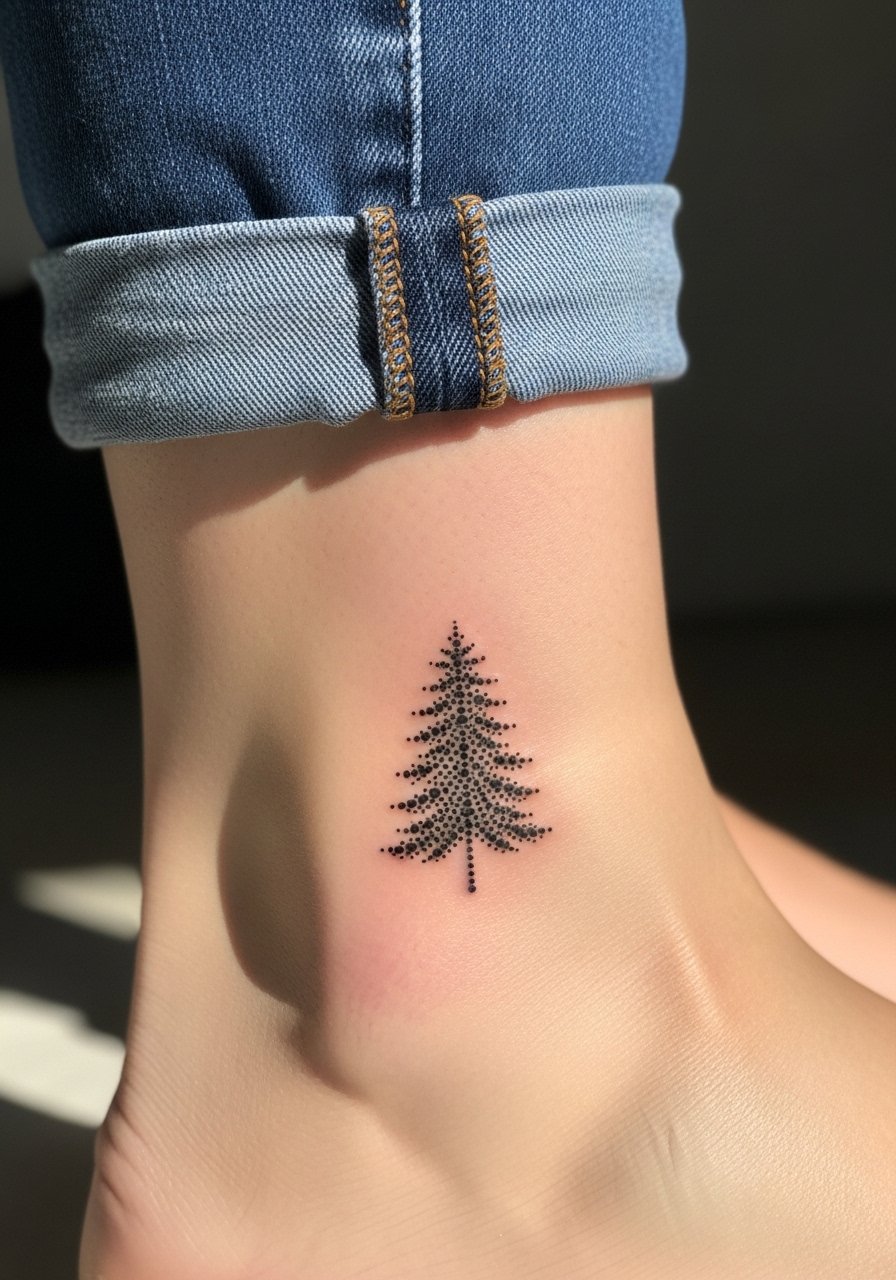
Ankle pines in dotwork heal fast if you follow friction precautions. Tell the artist to use sparse dot clusters for the silhouette rather than continuous lines. The biggest error is sizing too small under the ankle bone where constant shoe rub and socks erase tone quickly. Fresh look at six months usually shows crisp dots, and by two years some points will have faded into soft gray. Session time is often under 30 minutes and pain ranges 4 to 6 depending on bone proximity. For summer visibility pair the design with flat sandals leather and cuffed jeans to frame the area without covering it.
4. Blackwork geometric pine on the shoulder
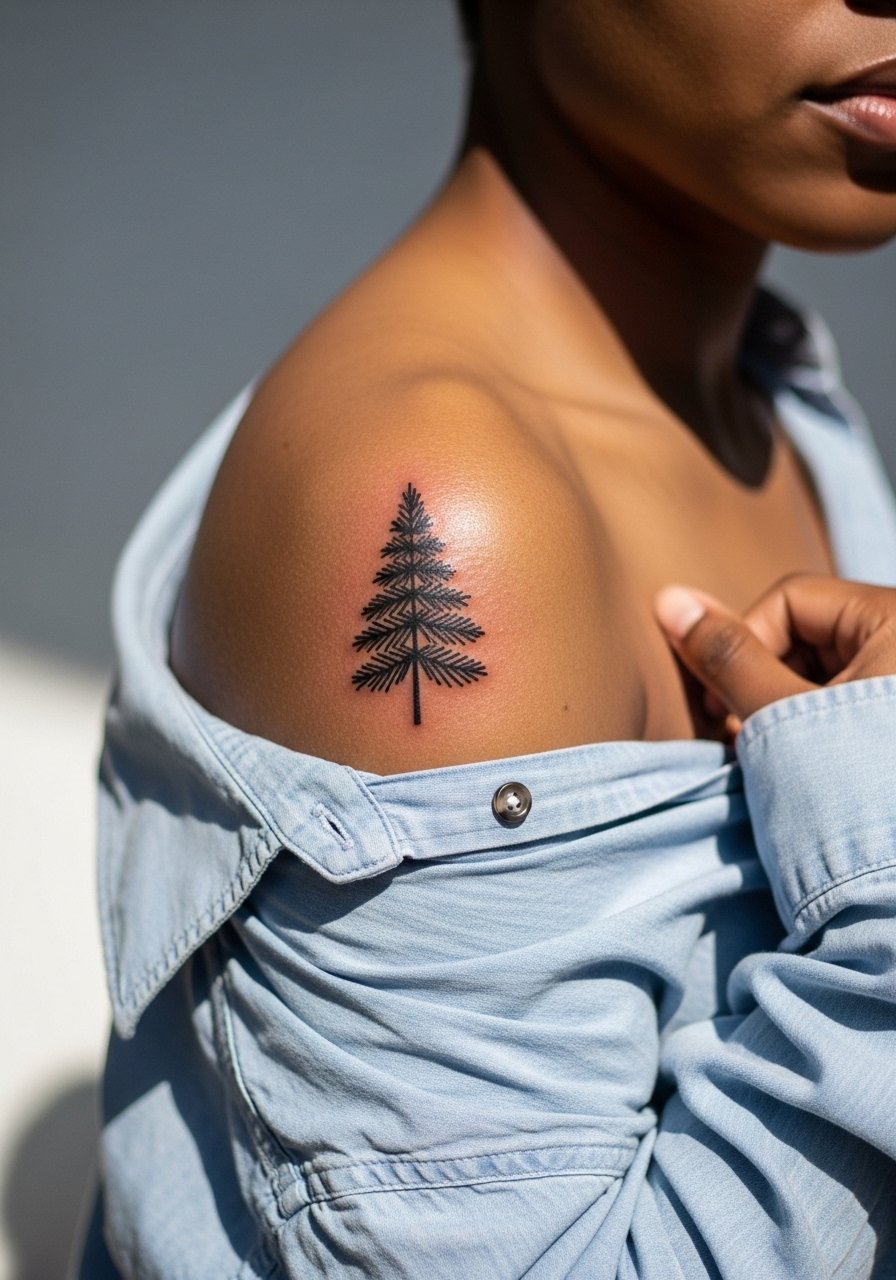
If you want high contrast that reads from a distance, pick solid black geometric shapes for the pine. In consultation say you want bold negative space and crisp edges rather than tiny hatch shading. Shoulder placement handles saturation well so this style ages into a strong silhouette rather than softening into gray. A typical mistake is cramming too many interior details into a two-inch icon. Expect 30 to 50 minutes and a pain level around 3. For evening looks try an off shoulder blouse that reveals just the cap of the shoulder so the black fills pop against fabric.
5. Micro dotwork pine on the finger
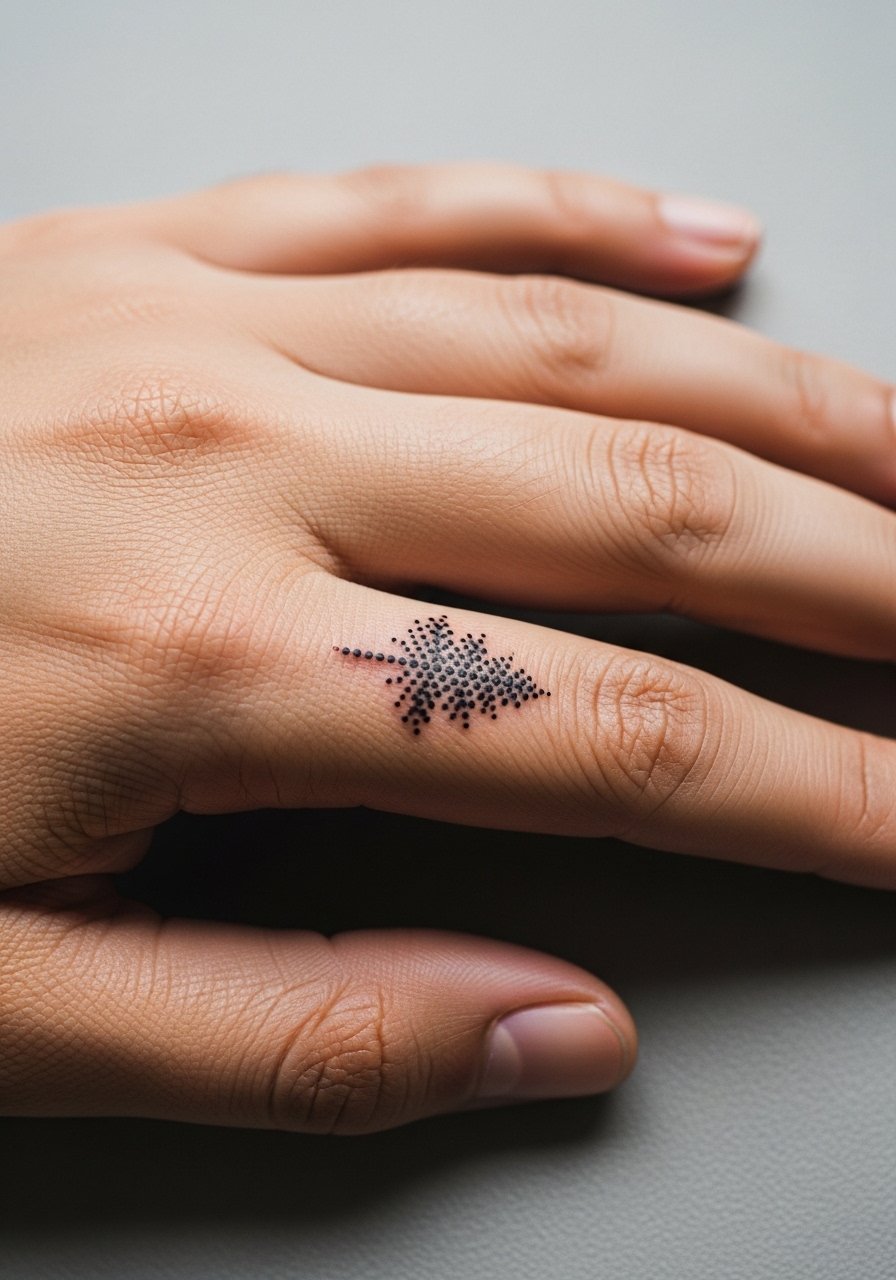
Finger micro tattoos solve the tiny meaningful itch but they require special expectations. Tell your artist you want bold dots spaced slightly wider than the sample so touch-up needs are minimized. The most common version that ages poorly uses hairline strokes and ends up needing a repaint within a year. Fingers deal with constant washing and friction, so expect touch-ups at six to twelve months more often than other placements. The session is very quick, ten to twenty minutes, but pain is sharp and localized. Show-off pairing for photos is a dainty ring stack on adjacent fingers so the tattoo sits in a composed hand shot.
6. Neo-traditional pine with a tiny mountain backdrop on the upper arm
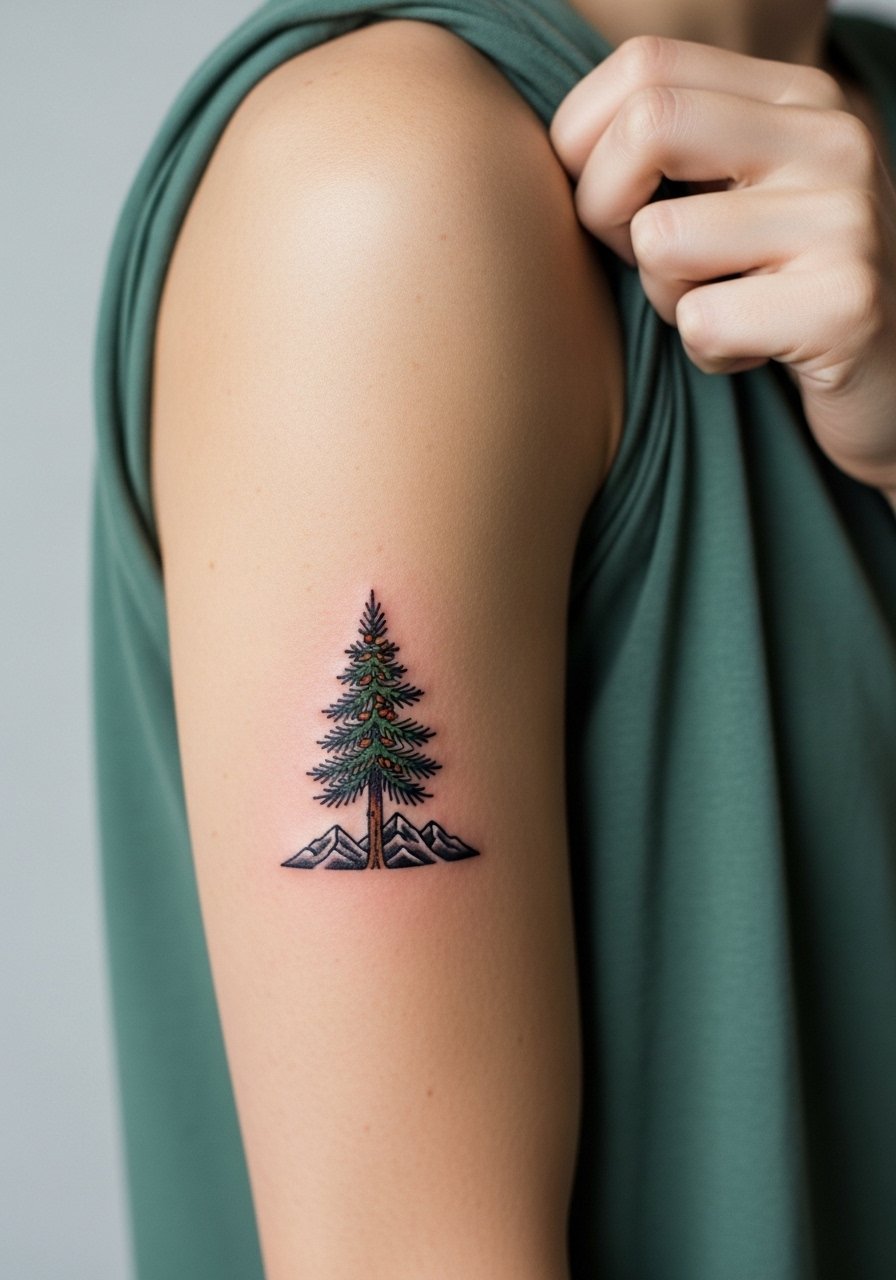
This is a compact storytelling piece that benefits from small color accents in the needles. Ask for a limited palette, with green washes kept light so saturation does not spread into the trunk. The frequent error is overloading color, which softens faster than black and starts to look washed by year three. Expect 45 to 75 minutes for a two- to three-color micro and a pain level near 4. For showing it off pick a sleeveless crop top or rolled-up sleeve so the tiny mountain reads against bare skin.
Pack Smart
The forearm, wrist, and finger designs above have different healing demands than chest or thigh pieces, so a few targeted items smooth both session day and the first week.
- Lush Tattoo Balm. A non-greasy option that forum users favor for winter months, useful for the fine line wrist pine that needs light moisture without clogging.
- Australian Gold Aftercare Spray. No-touch spray that helps fingertip and ankle pieces avoid constant rubbing when you are on the move.
- Indie Pine Tar Salve. A niche anti-inflammatory pick for irritated micro spots, handy after a detailed micro-realism tricep session.
- UK Tea Tree Gel. Lightweight antibacterial gel for small healing windows where heavy ointments make scabbing worse.
- Hustle Butter Deluxe. Thinner than heavier ointments so fine line work on forearms and collars keeps clarity without a greased look.
7. Tiny black and gray forest cluster on the inner bicep
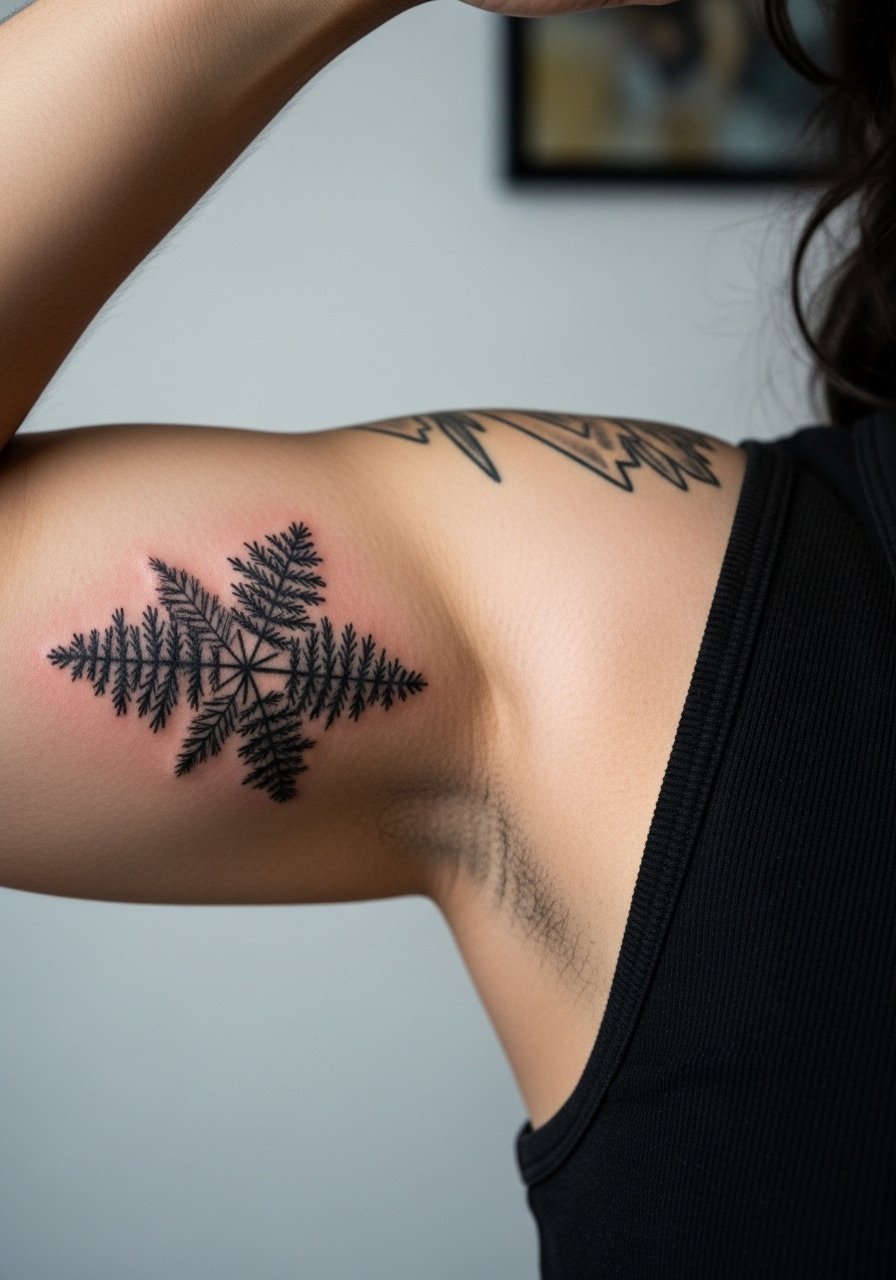
Clustered micro pines create depth without overwhelming a small area. When booking, ask for layered stipple shading instead of continuous gray wash so each tiny tree keeps separation as it ages. The inner bicep can hide stretch and still hold detail, but it is also a sensitive area for some. Session time is usually 45 minutes to an hour and pain sits around 5. A frequent mistake is insisting on excessive tiny trees in a one-inch square, which merges into a gray mass by year two. For sessions wear a loose short-sleeve button-up you can move aside easily.
8. Fine line pine with misty base on the wrist
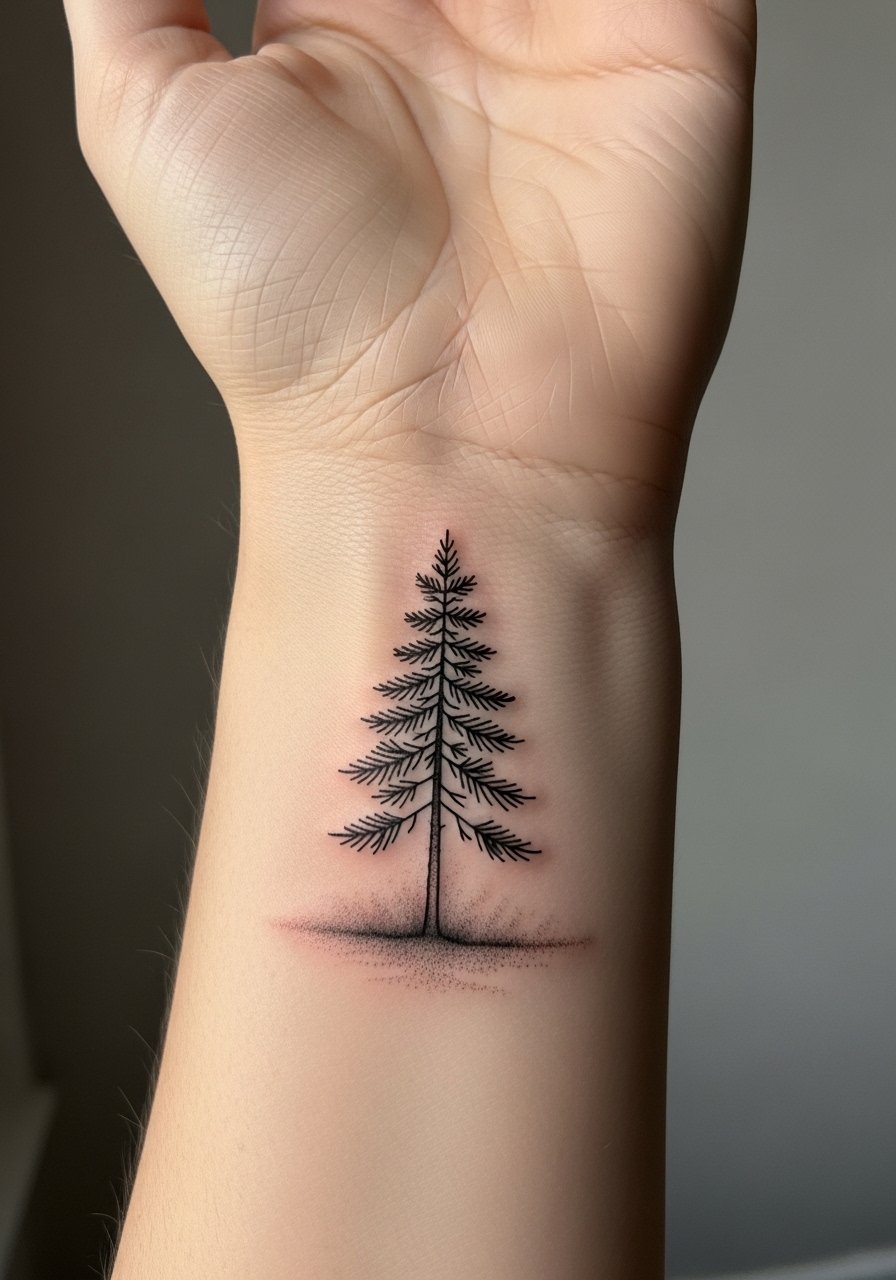
This minimal design reads delicate and modern, but wrists are a wear zone. Tell the artist you want a slightly heavier trunk and open misting dots at the base rather than continuous shading. That approach preserves line clarity at six months and reduces the risk of the mist becoming a muddy patch at year two. Expect 20 to 40 minutes in the chair and a pain level around 4. A common error is asking for ultra-thin misting that disappears with hand washing. For photos consider a minimalist leather bracelet on the opposite wrist to frame the tattoo without crowding it.
9. Watercolor pine splash near the shoulder blade
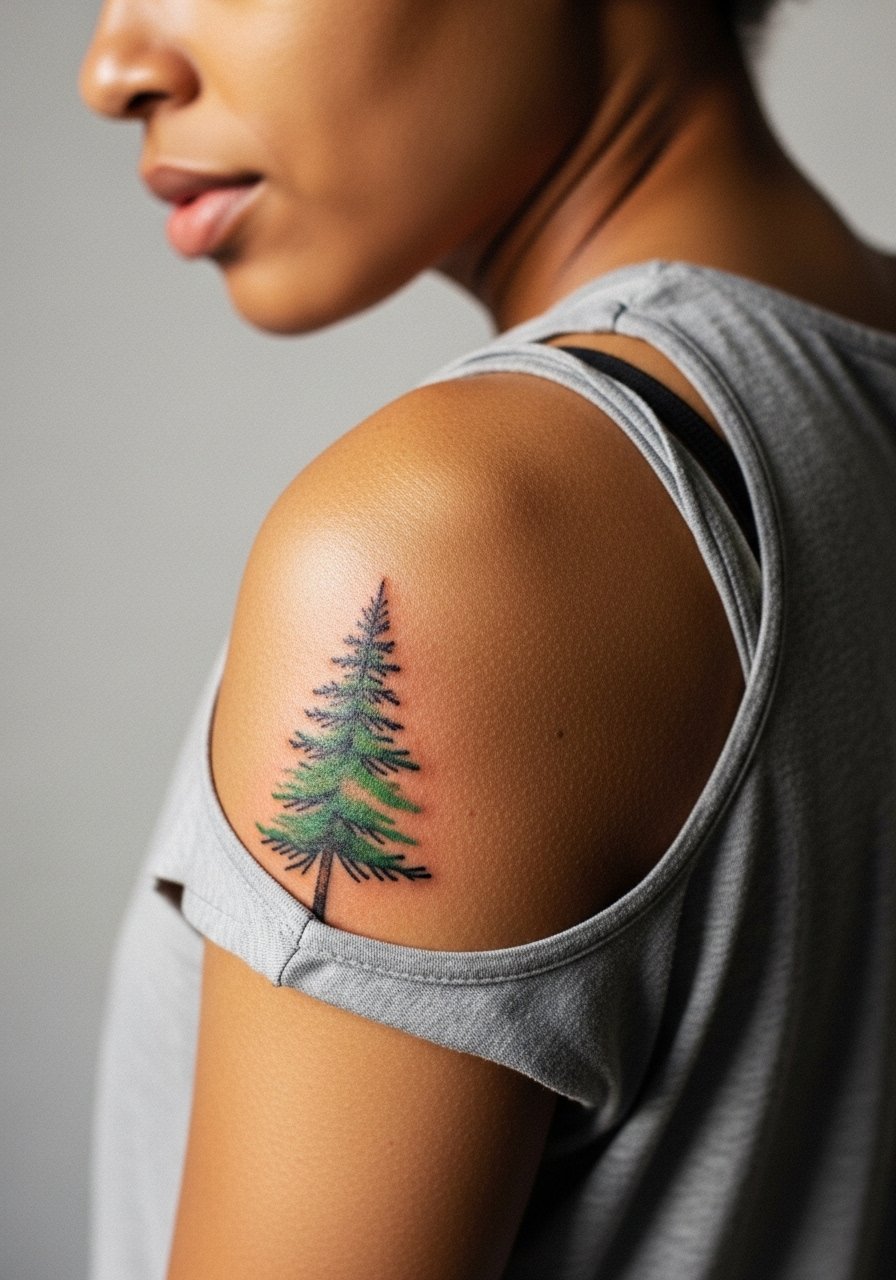
Watercolor pines look painterly but they demand more upkeep than black and gray. When you ask for watercolor, specify that the artist should anchor the design with a thin black outline on select elements so the piece can be read from a distance as it fades. A common regret is choosing large color fills in a micro size because the pigment can disperse. Session time varies from 45 minutes to 90 minutes for layered washes and a pain level is usually 4. For wardrobe, an open-back dress or a kimono jacket frames the shoulder blade without hiding it.
10. Tiny traditional American pine flash on the outer forearm
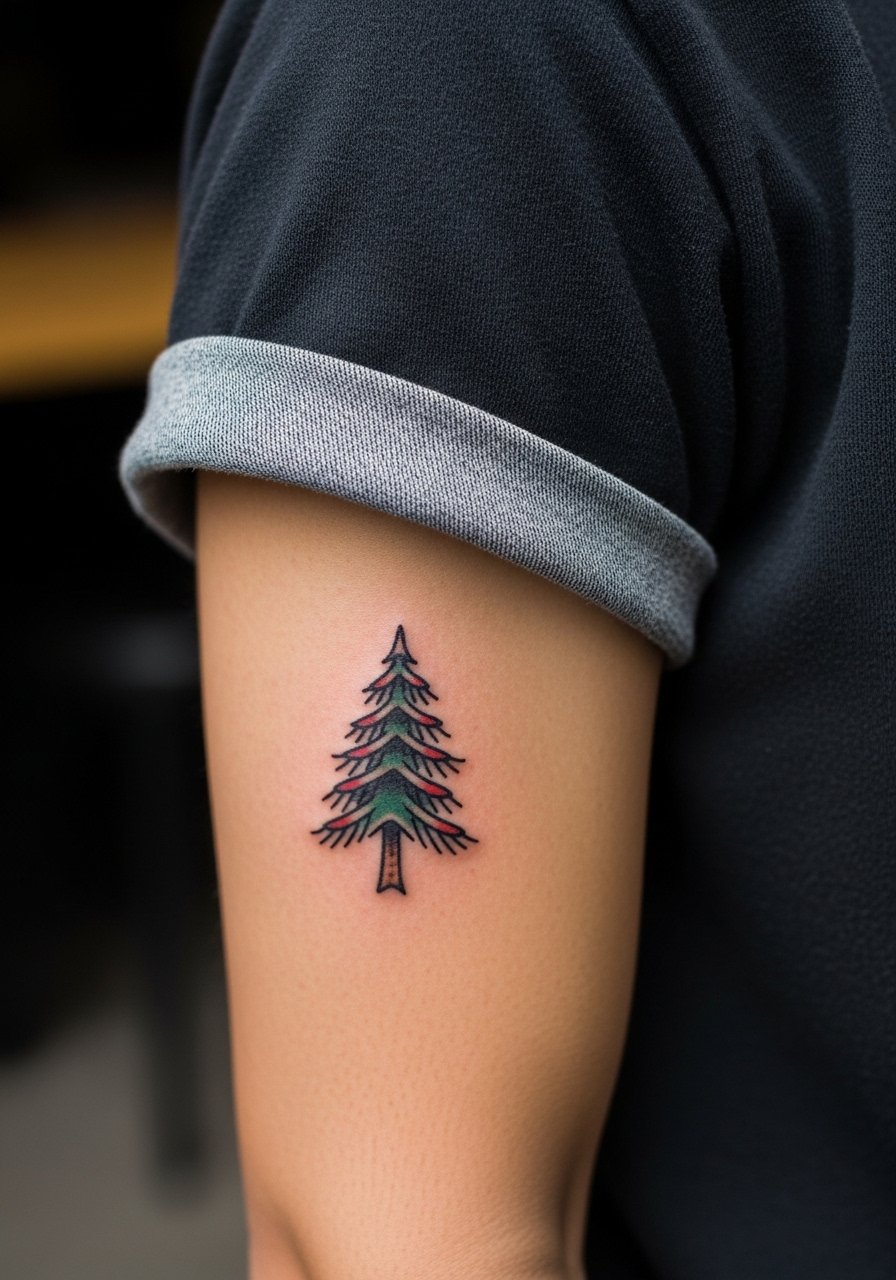
Traditional saturation ages well, which is why some people choose classic green and black in a micro size. Ask for slightly bolder outlines than the classic flash if you want a one- to two-inch piece so the color remains crisp after several years. The mistake is compressing traditional shading into a space too small for proper color layering. Sessions take roughly 30 to 60 minutes and pain is moderate. When showing it off, rolled sleeves or a button front tank help the saturated greens pop against neutral clothing.
11. Ornamental pine with vine accents on the ribcage
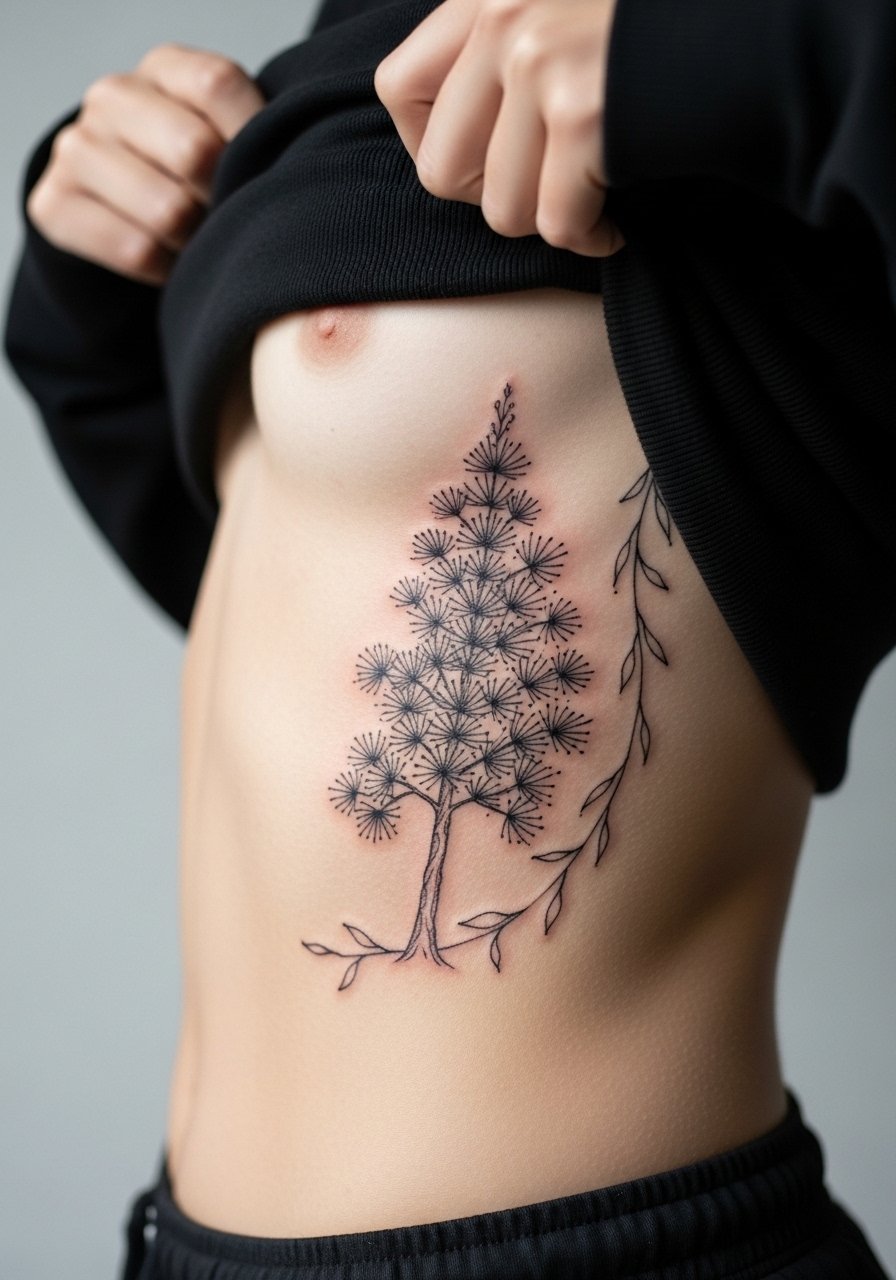
Fair warning, the ribcage is a higher pain zone, often around 7 out of 10, but it holds small ornamental detail beautifully if you can handle a longer session. Tell your artist to space vines and leaves so they read when the skin stretches with breathing. One common error is packing ornate filigree too tight, which blurs on the first healing cycle. Expect 60 to 90 minutes for a two-inch ornamental piece and plan for a calm session with short breaks. For session wear bring a loose cropped top you can lift slightly, and ask the artist how they prefer to drape you.
12. Micro pine with constellation overlay behind the ear
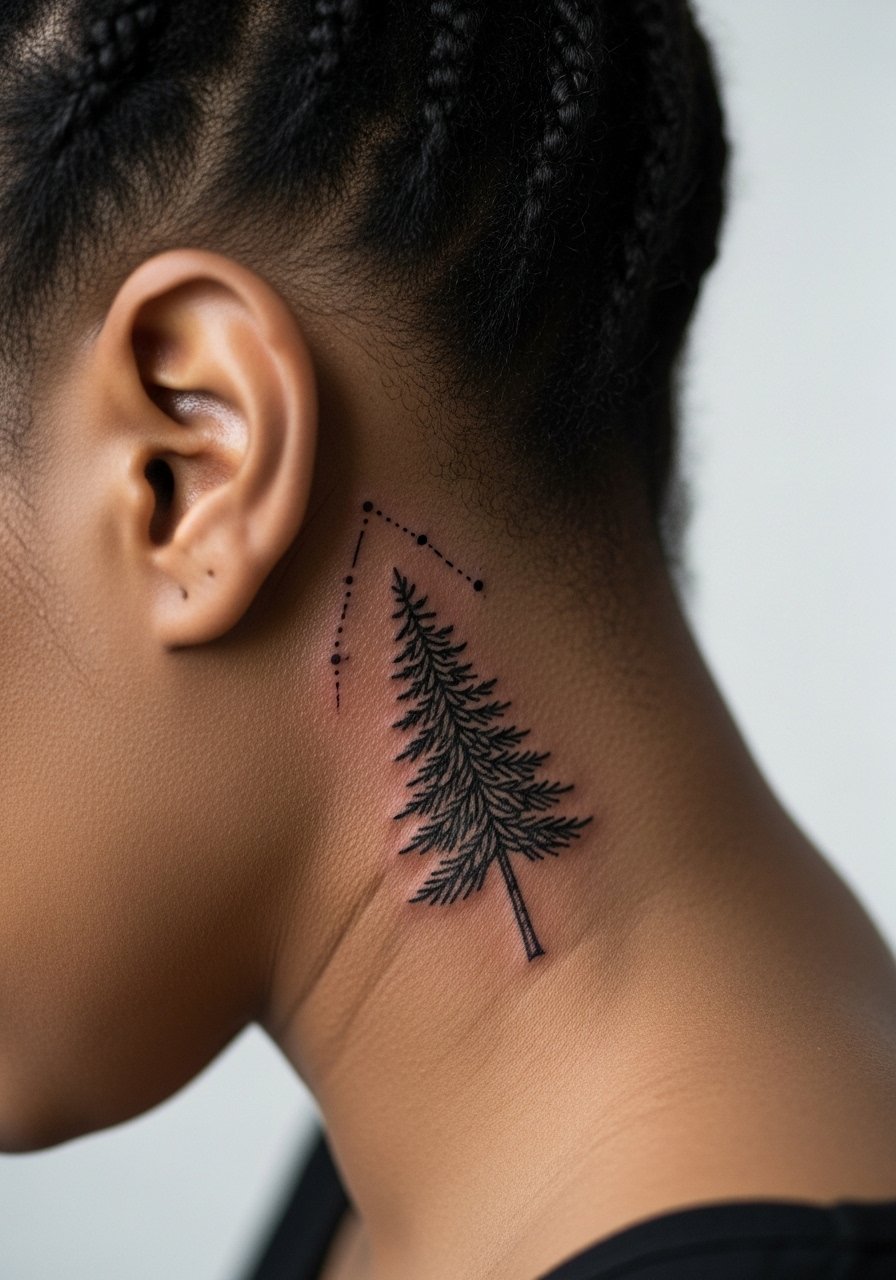
A behind-the-ear micro with star dots reads intimate and personal. When you consult, request that constellation dots be spaced to avoid merging into the hairline as hair grows back. Artists debate wrap-style healing versus dry healing for tiny placements like this, with one camp using protective film and the other promoting air drying to reduce trapped moisture. The session is brief, under 30 minutes, and pain is sharp but short. For visibility style your hair pulled back or use a dainty chain pendant necklace to balance the side profile without covering the area.
13. Micro-realism pine trunk cross-section on the ankle
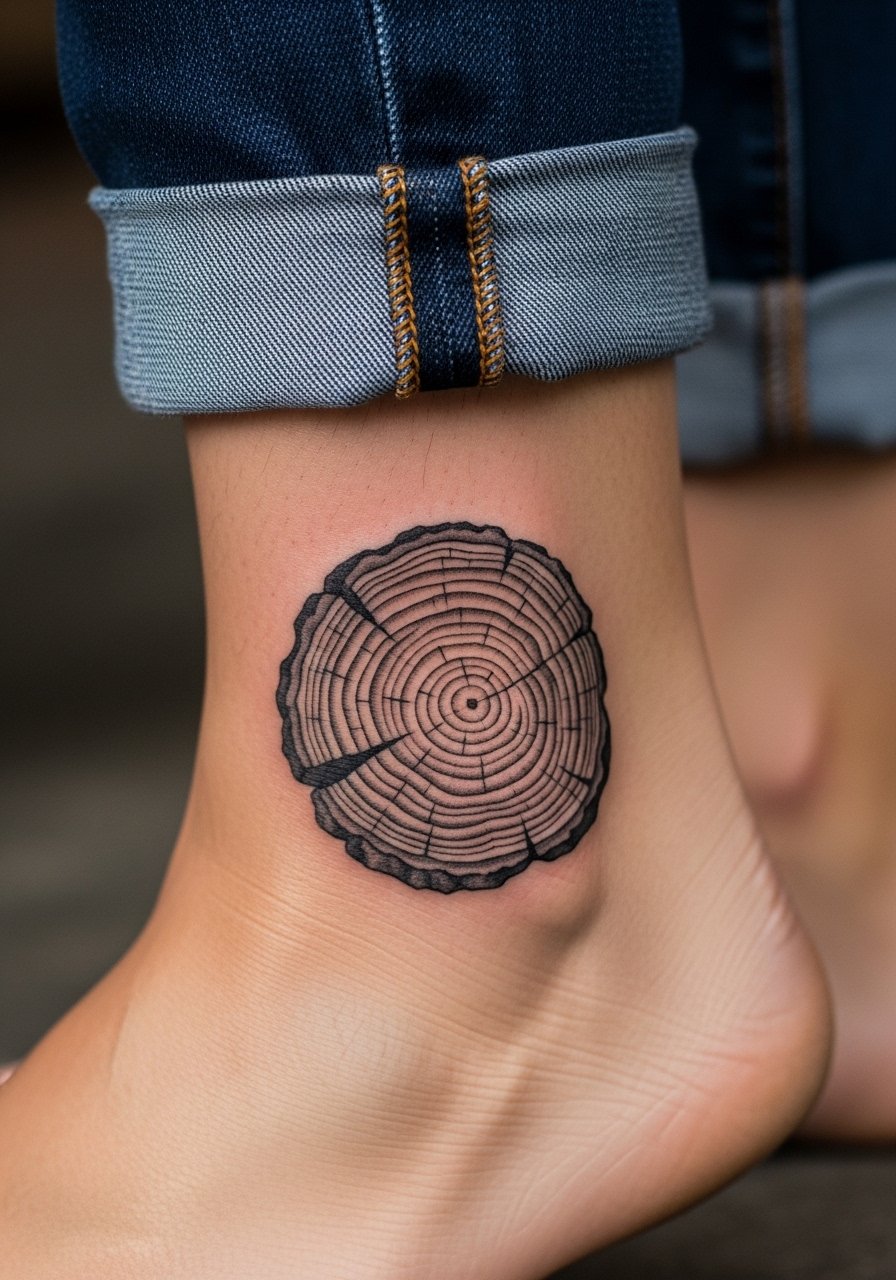
A tiny tree-ring motif is a neat memorial option and it reads well when the contrast is planned. Ask for tight gray shading in concentric rings with a small trunk knot rather than a flat circle. The ankle can be prone to scabbing due to sock friction, so size and placement must avoid the exact sock line. Expect 30 to 45 minutes and a pain level of 4. The mistake is choosing too small a diameter that loses its rings by six months. For show-off looks pair with cuffed ankle jeans and sandals so the detail is visible without strain.
14. Ignorant-style chunky pine outline on the thigh
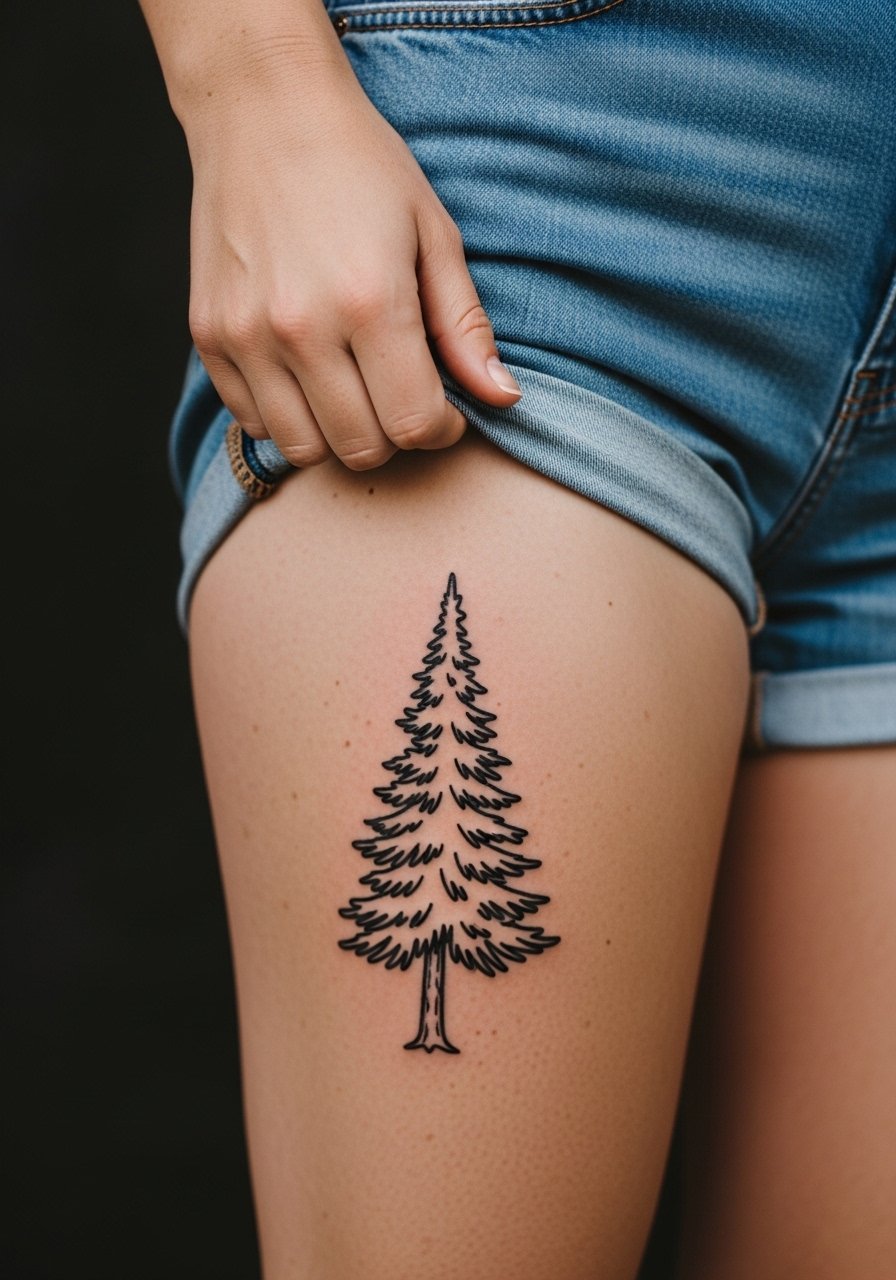
If you want playful, chunky lines that do not try to be precise, the ignorant style is forgiving and ages into friendly blots rather than gray fuzz. On the thigh you can run with thicker strokes that keep their personality through weight changes. Common pitfalls are requesting ultra-precise edges in this style, which defeats the aesthetic. Session time is short for a small thigh piece and pain is moderate. For summer photos pick high waist shorts or a slit skirt so the outline reads without competing fabric.
15. Tiny black and gray pine cluster behind the knee
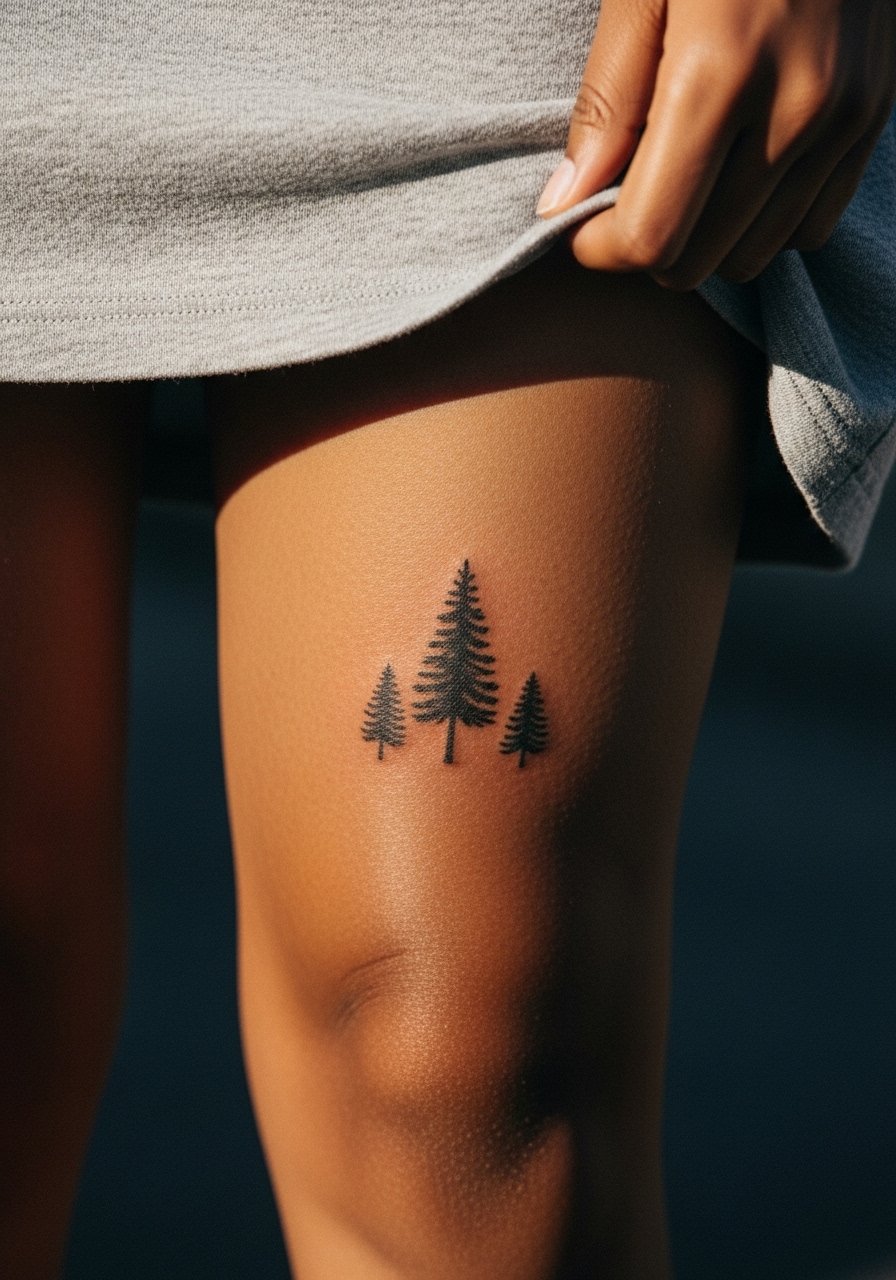
Behind-the-knee placements are low friction when standing but they fold with motion, which impacts long-term detail. Ask for slightly simplified silhouettes so the small trees do not collapse into one shape when the knee bends. The usual problem is cramming micro detail into an area that is constantly moving, which causes early softening. Sessions for a small cluster are around 40 minutes and pain is mild to moderate. For photos or showing it off wear a midi skirt flowy that reveals the back knee with a clean line.
16. Fine line pine on the collarbone
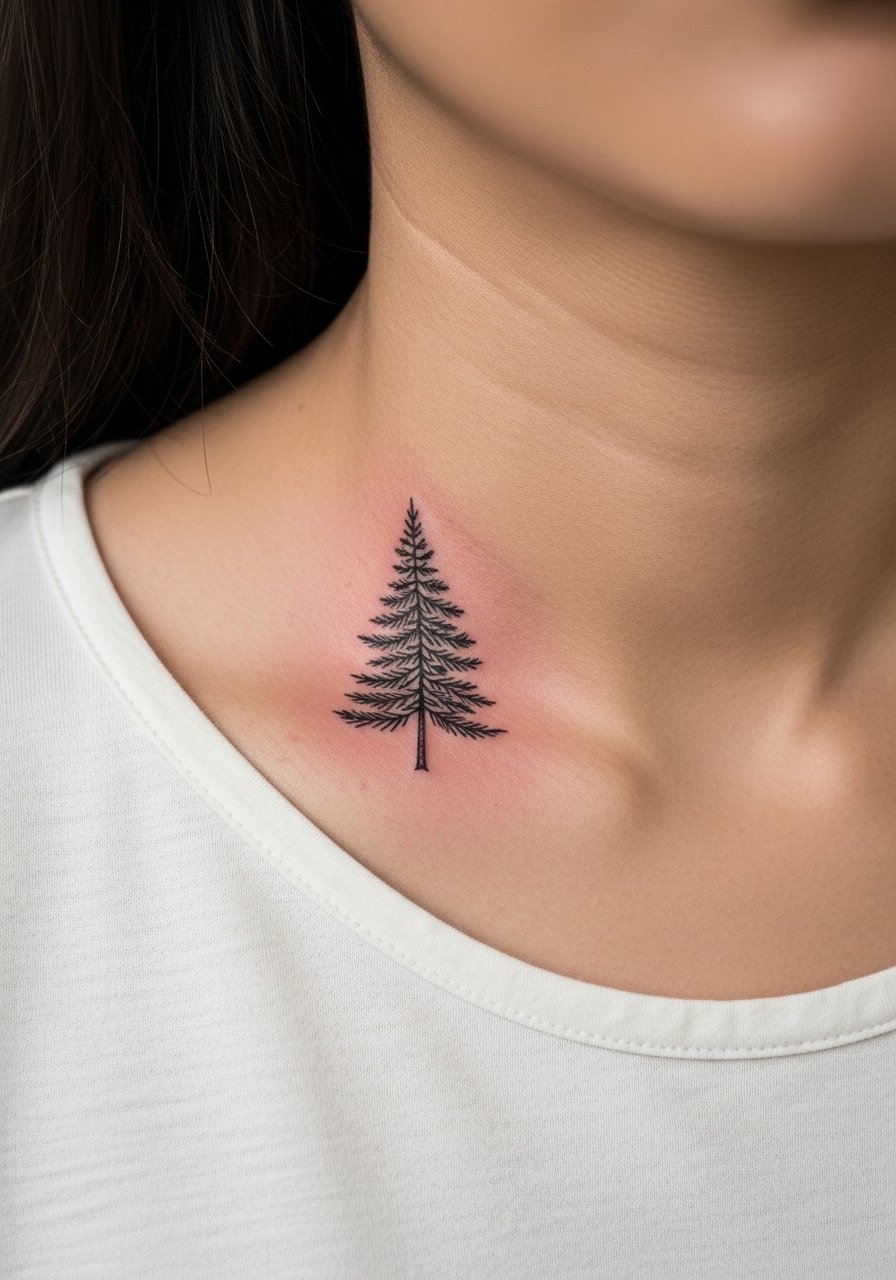
Collarbones are great for show-off micros that age well if protected from sun. Ask your artist for a slightly heavier trunk and light negative space between needles so sunlight does not wash the silhouette. A common mistake is placing the design where bra straps rub, which accelerates fading. Sessions are short and pain is around 4 for many people. For evening outfits a strapless sundress or off-shoulder top frames the collarbone and keeps attention on the ink.
17. Tiny pine with mushroom hybrid on the hip
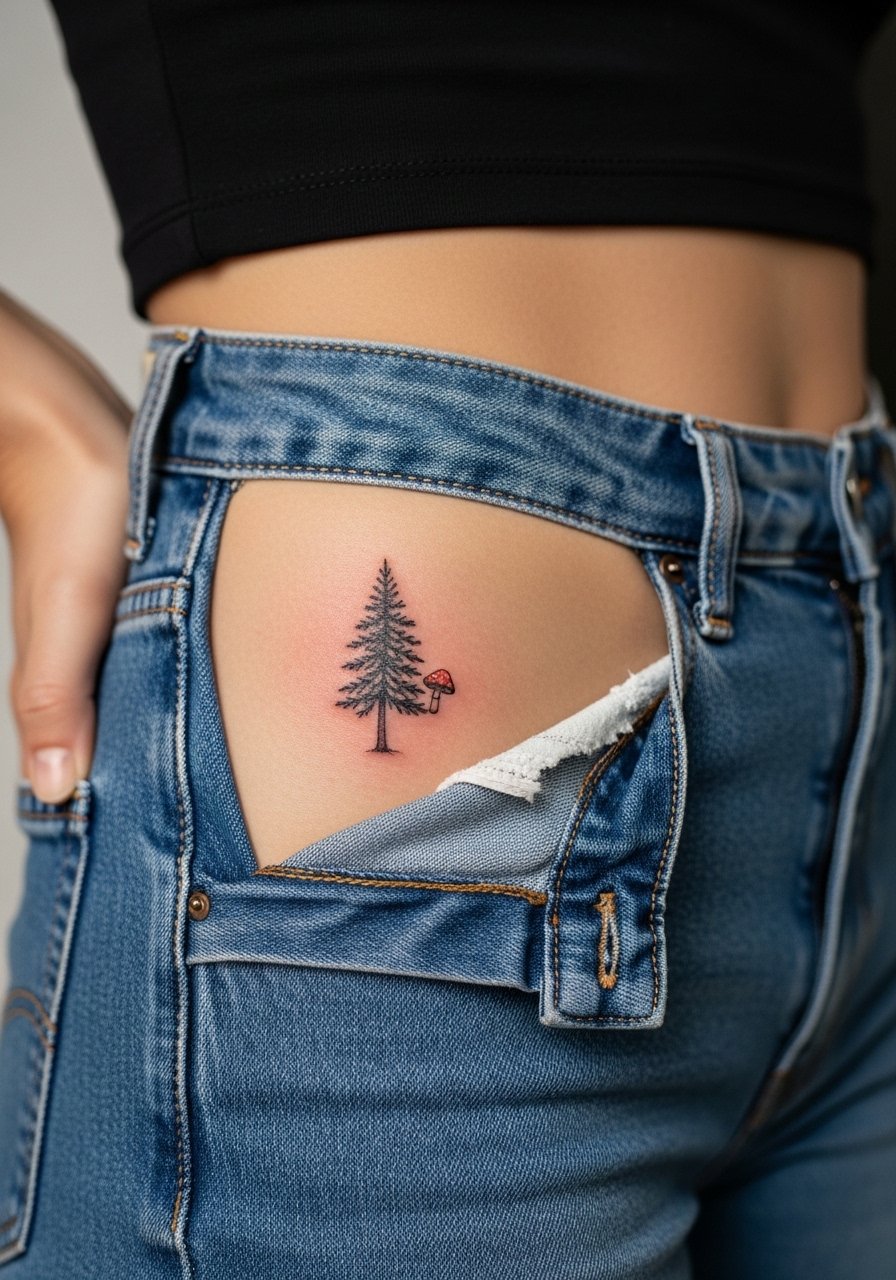
A hybrid pine-mushroom motif nods to foraging trends and reads whimsical without being literal. For consultation ask the artist to keep the mushroom cap small and the pine lean so the two elements do not crowd each other in a one to two-inch zone. Hip pieces can hide well but they need rehearsal for placement so curves do not distort shapes. The session is often 30 to 50 minutes and pain varies. For sessions wear high-waisted bottoms you can shift slightly. A high-cut denim pair makes the area easy to access while keeping discretion.
18. Micro pine silhouette on the back of the neck
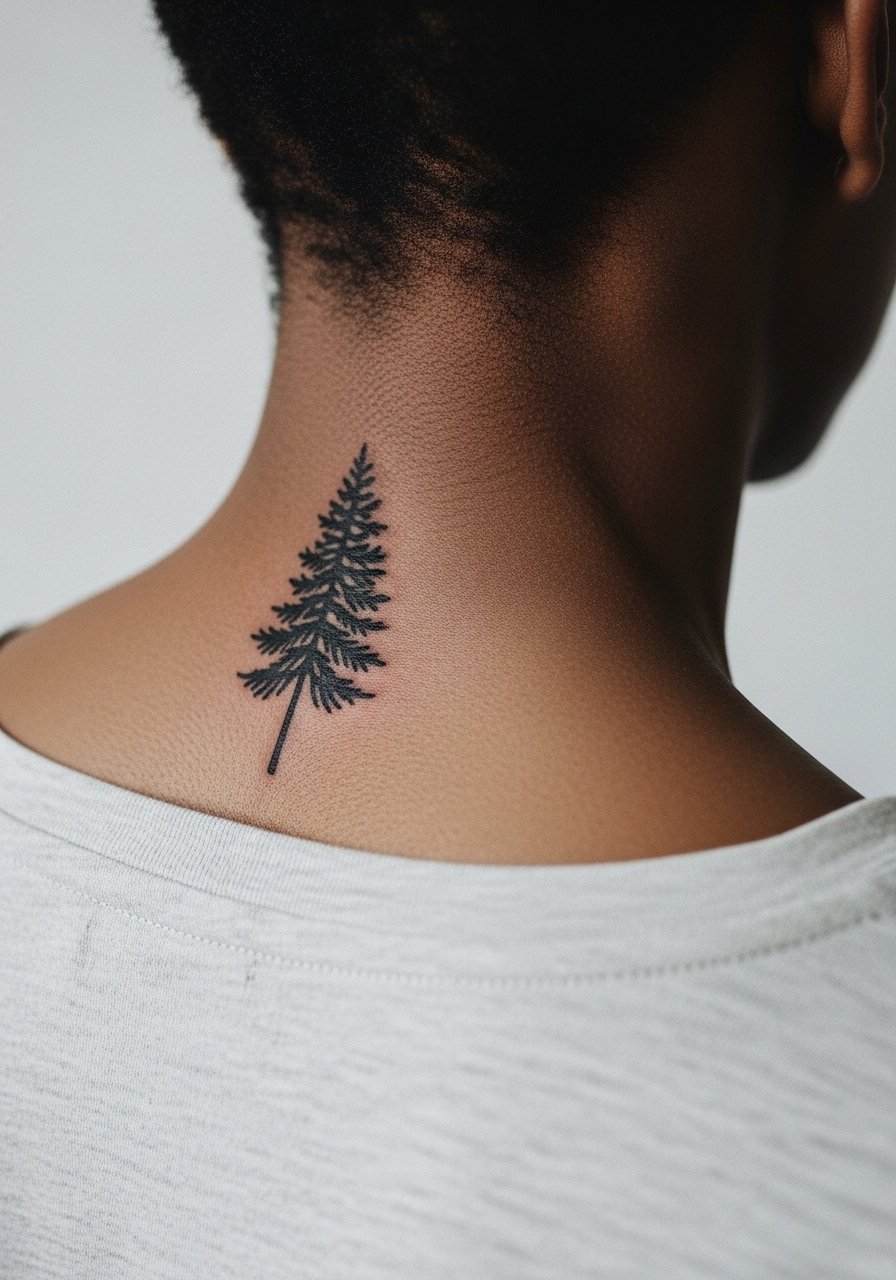
Neck placements are subtle and require exact positioning so the tree sits centered with hairlines. Tell the artist to mark the piece with the exact posture you will wear day to day so the trunk stands straight when you look forward. The controversy over wraps versus dry healing shows up here because necks can trap sweat; some artists use protective film while others prefer airing. Session times are short and pain is moderate. For display pick shirts with a wide-neck shirt so the tattoo can be seen without full exposure.
19. Micro pine forest banded around the wrist
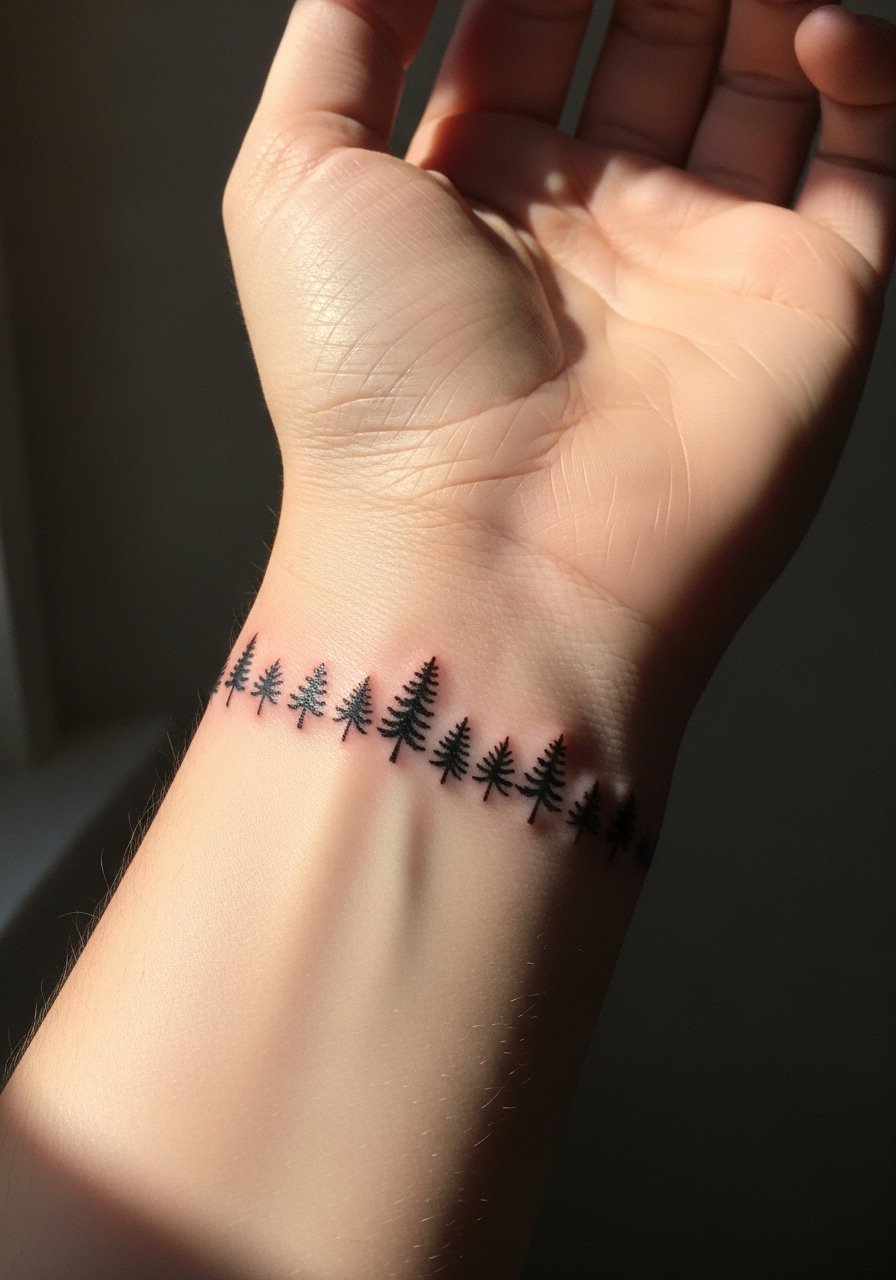
A wrist band of tiny trees gives a repeated motif that reads like a bracelet. Ask for deliberate spacing and slight variation so the band reads organic instead of a stamped repeat. The main issue is friction from watches and sleeves, which erode thin lines. Sessions can be 30 to 45 minutes and pain is a steady 4. For wearing this design pair with a thin silver cuff bracelet on the opposite wrist so the tattoos do not compete with bulky wristwear during healing.
20. Tiny pine with a small moon overlay on the calf
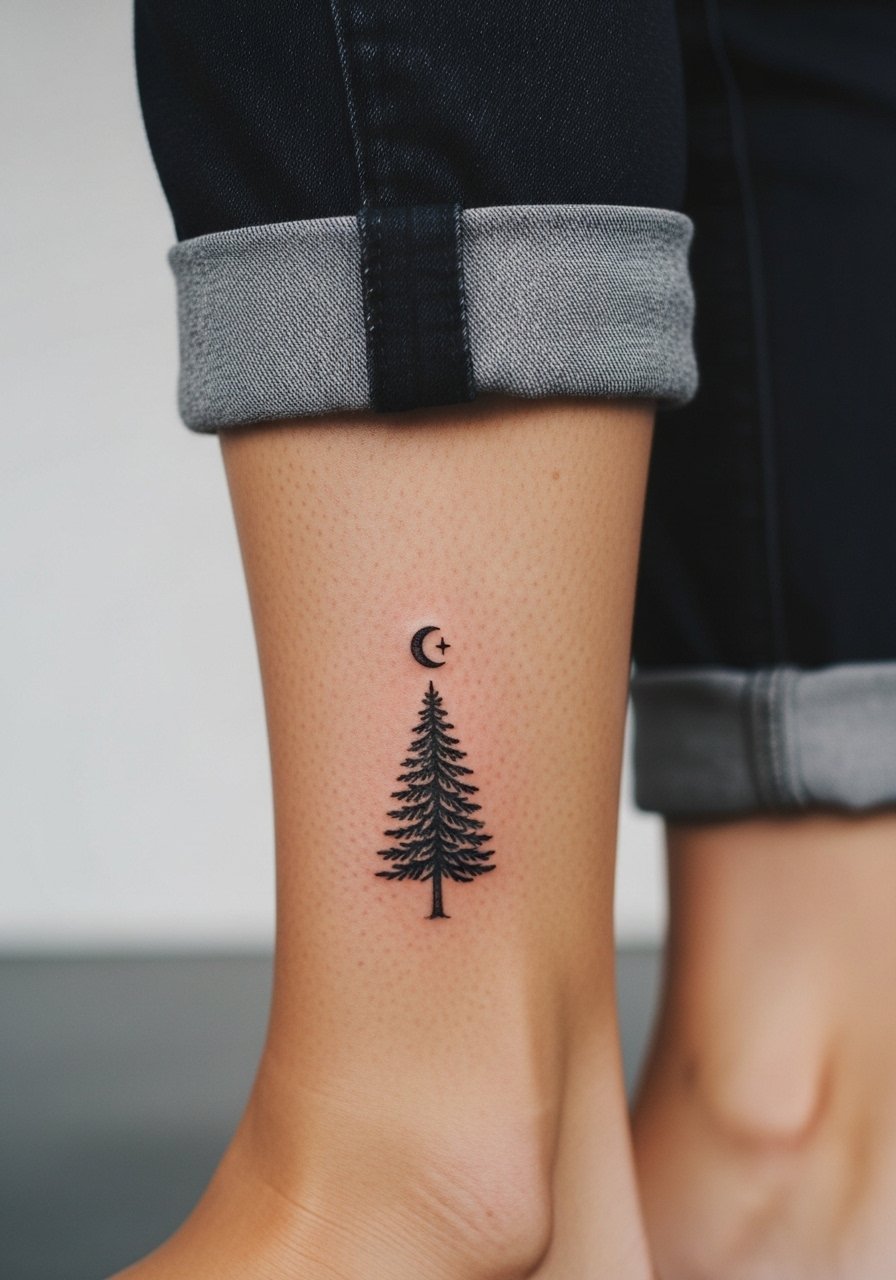
Calf placements are forgiving for saturation and allow vertical designs that hold detail. For a moon overlay ask for stark contrast between the black pine and a thin moon outline so both elements keep their forms over time. The common mistake is putting dense shading into a micro pine and asking for a pastel moon, which fades unevenly. Sessions for this size are 30 to 60 minutes and pain is lower. For athletic looks try rolled jogger pants or shorts to show the piece during movement.
21. Single pine silhouette on the sternum
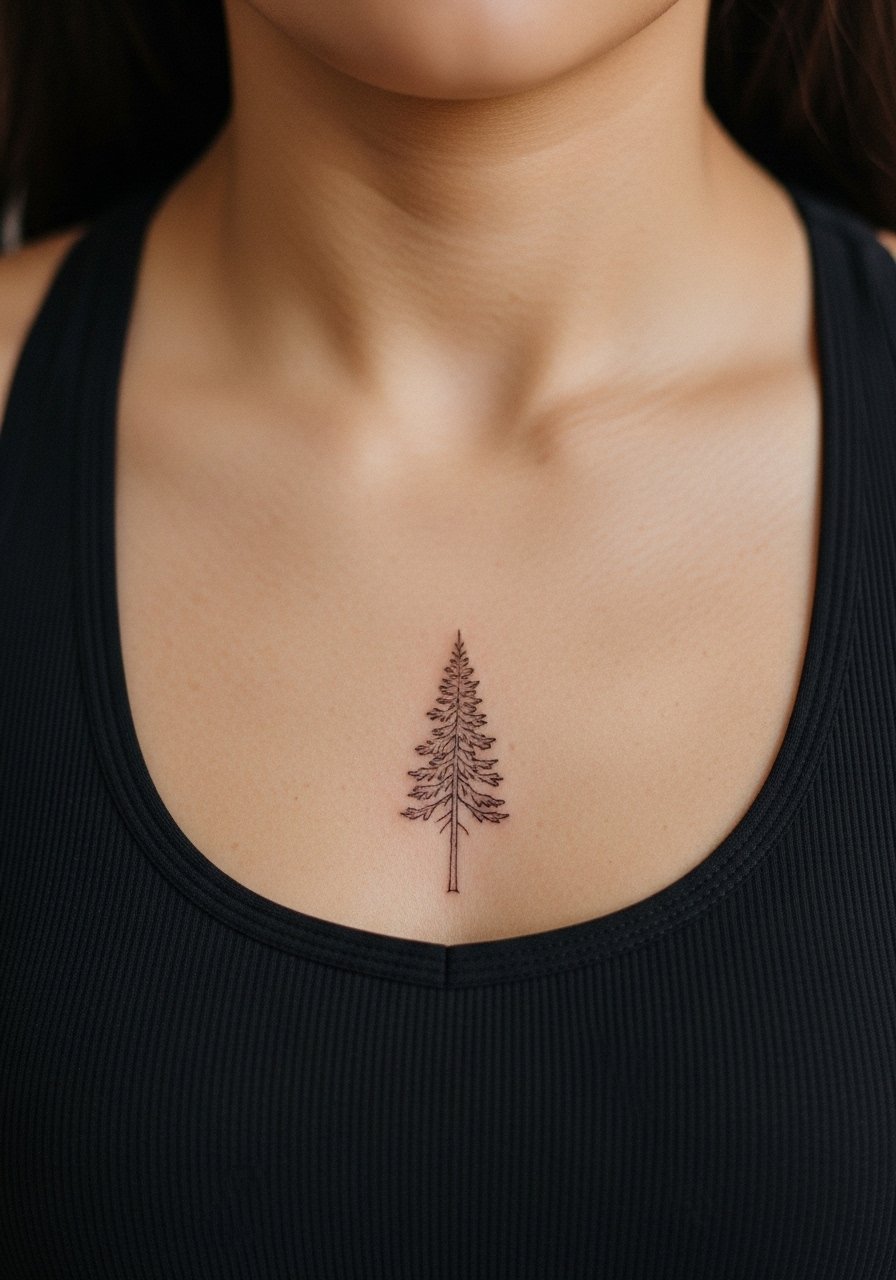
Sternum pieces demand careful conversation because they sit close to the rib cartilage and can be painful. Ask your artist for shallow line depth and measured spacing so the trunk does not sink into the sternum crease. One camp favors protective film for chest healing, and the other recommends dry healing to let scabs breathe. The session may run 45 to 90 minutes depending on size and pain is often higher than limb work. Wear a fitted sports bra that the artist can work around and that will not rub the piece during the first week.
22. Tiny pine and constellation on the upper back
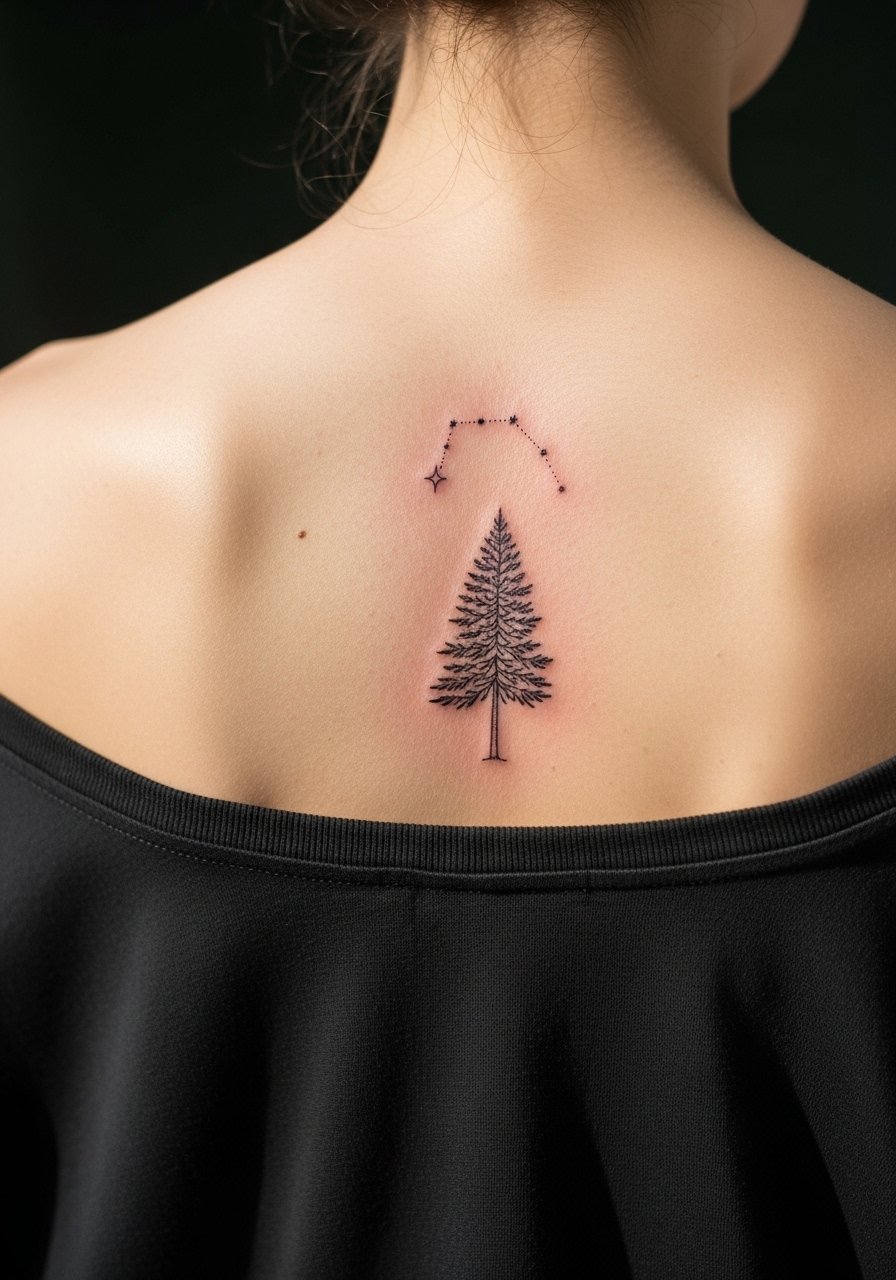
The upper back lends itself to small vertical compositions that can later expand into a modest back piece. Tell your artist you want the constellation dots spaced to avoid merging into the tree silhouette. A common issue is asking for ultra-fine stars that vanish into shoulder movement. Session time is moderate and pain is low for this location. Show-off wardrobe like a button front tank keeps the area easy to reveal for photos while being office friendly.
23. Tiny pine sleeve accent near the wrist crease
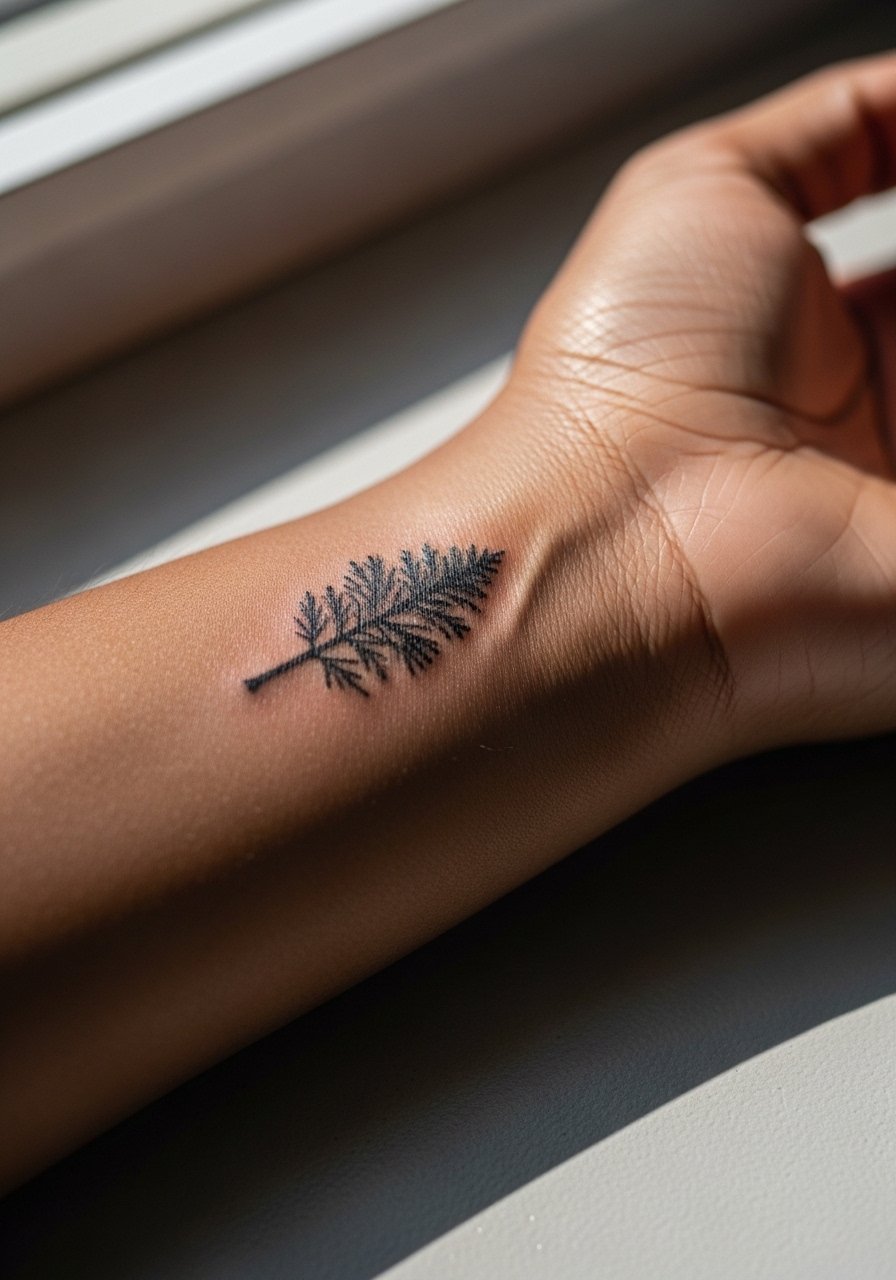
A small sleeve accent works if you already have bandwork or plan a subtle forearm story. In the consult, map the exact wrist crease so the design does not sit where skin folds most. People often pick the wrong scale, which forces later rework when lines soften in the fold. Expect 20 to 40 minutes and a pain level around 4. For photos and daily wear pair it with a minimalist gold watch on the other wrist to balance the composition.
24. Micro pine on the side torso near the waist
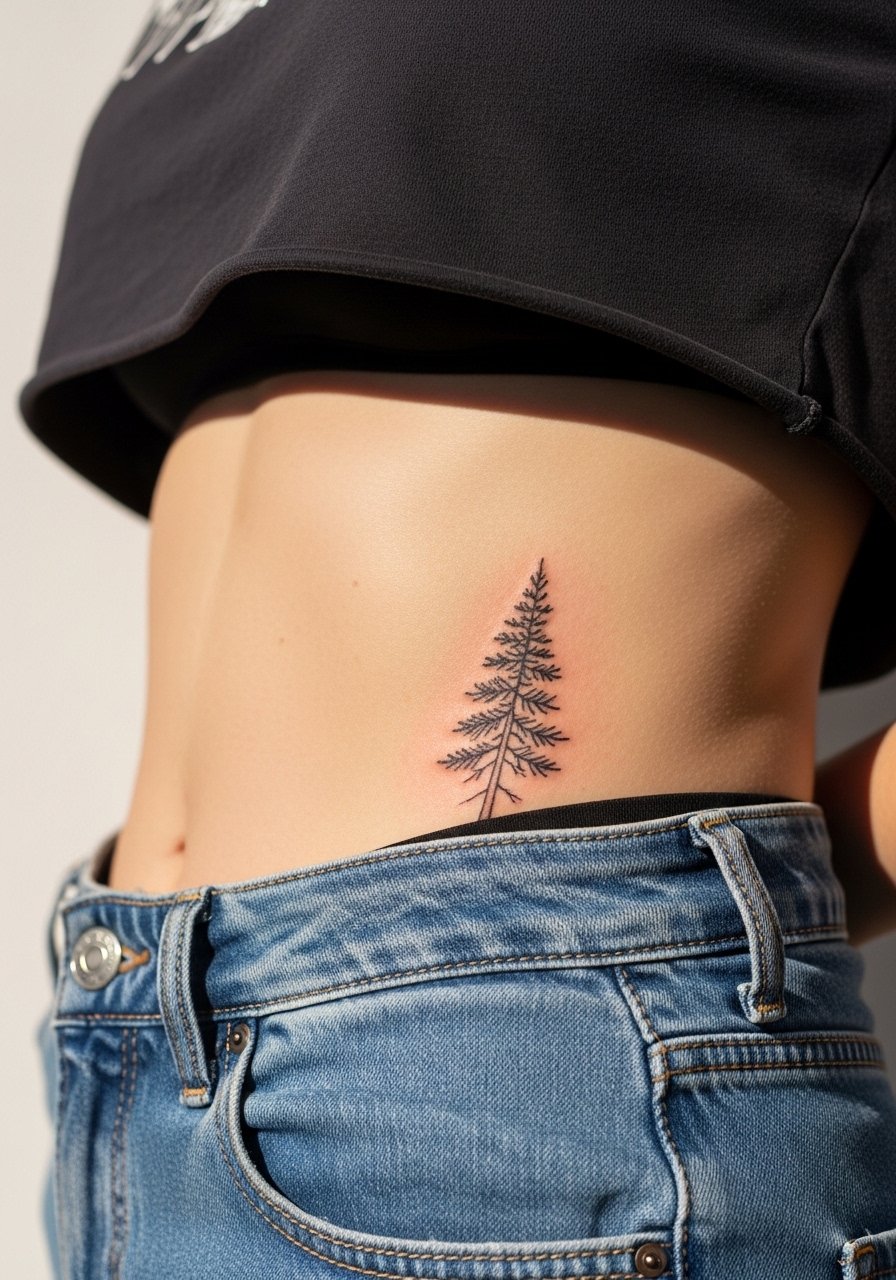
Side torso placements move with breathing and clothing, so plan for slightly bolder trunks and open negative space for needle clusters. A common mistake is underestimating how a waistband will sit over the piece during daily wear, causing early abrasion. Sessions are often 40 to 60 minutes and pain is moderate. For session comfort bring a pair of high-waisted bottoms you can shift, and later pair the tattoo with a crop top for summer photos.
25. Micro pine cluster along the spine
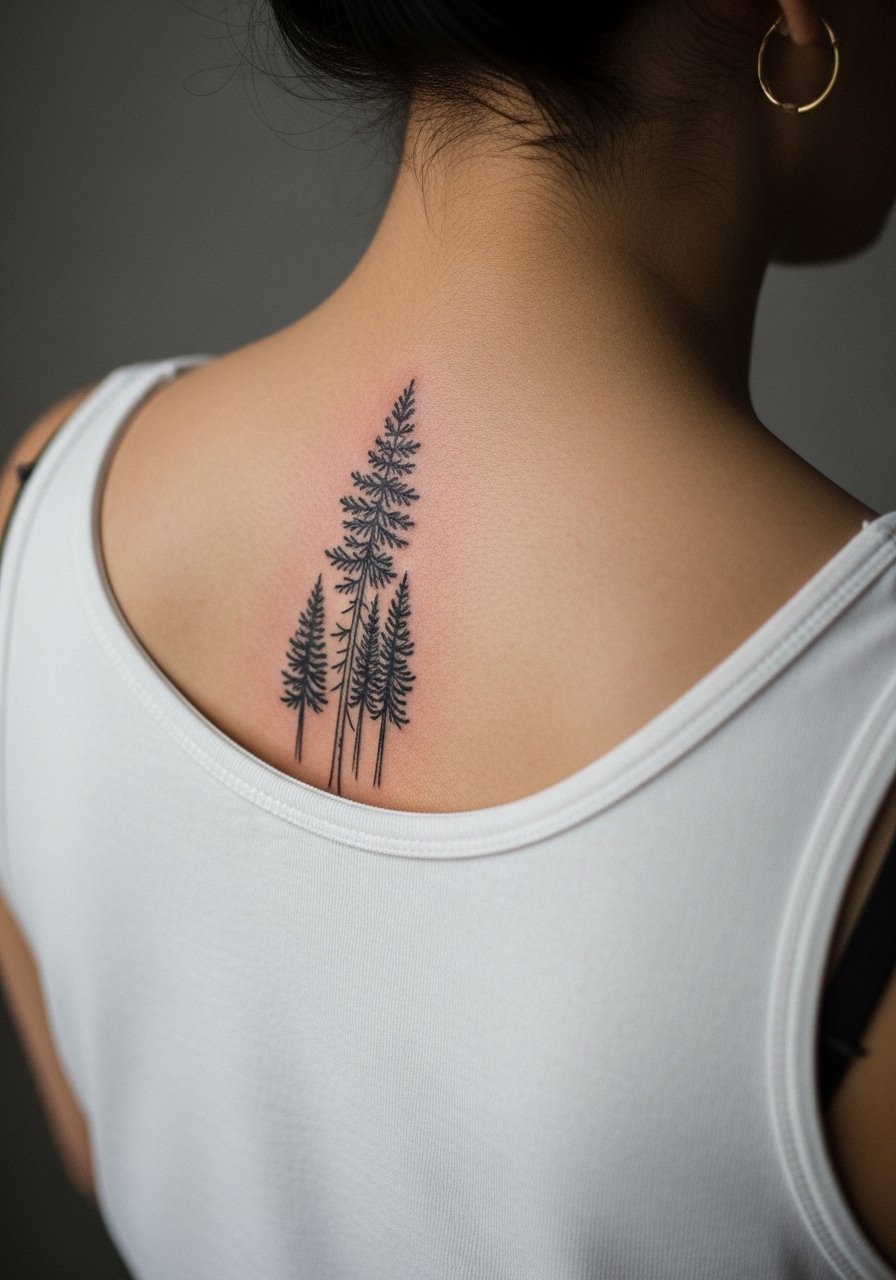
Spine placements can feel meditative for yoga practitioners because they align with posture. When you consult, explain how you position during practice so the tallest tree sits with your natural alignment. The spine is sensitive and sessions might require short breaks. A typical mistake is requesting dense stippling over the vertebrae which can create uncomfortable scabbing. Expect 45 to 90 minutes and a pain level from 6 to 8 depending on depth. Pair with an open-back top or halter when you want to show the vertical line.
26. Tiny ornamental pine wreath on the rib border
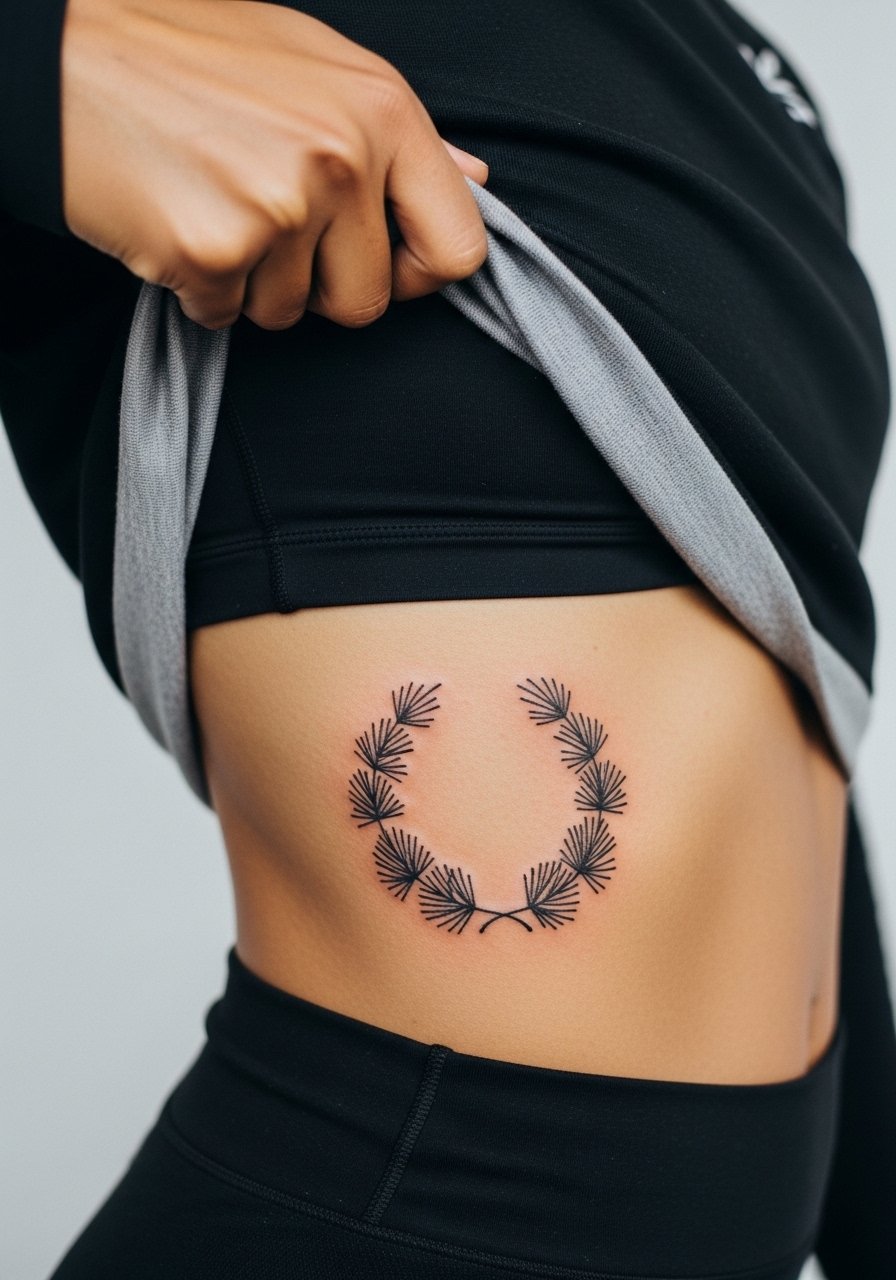
An ornamental wreath packs symbolism in a compact round. Ask for spaced needles and a thin open ring so each element keeps presence when the body moves. The rib border is tender, and many artists recommend short sessions with breaks. A common error is asking for fine fill inside the wreath which can blur into a gray patch after healing. Plan for a 60 to 90 minute session and a higher pain threshold. For visibility pick a top you can lift slightly during sessions and consider off-shoulder styles for showing the wreath without full exposure.
27. Micro pine with tiny star field on the clavicle edge
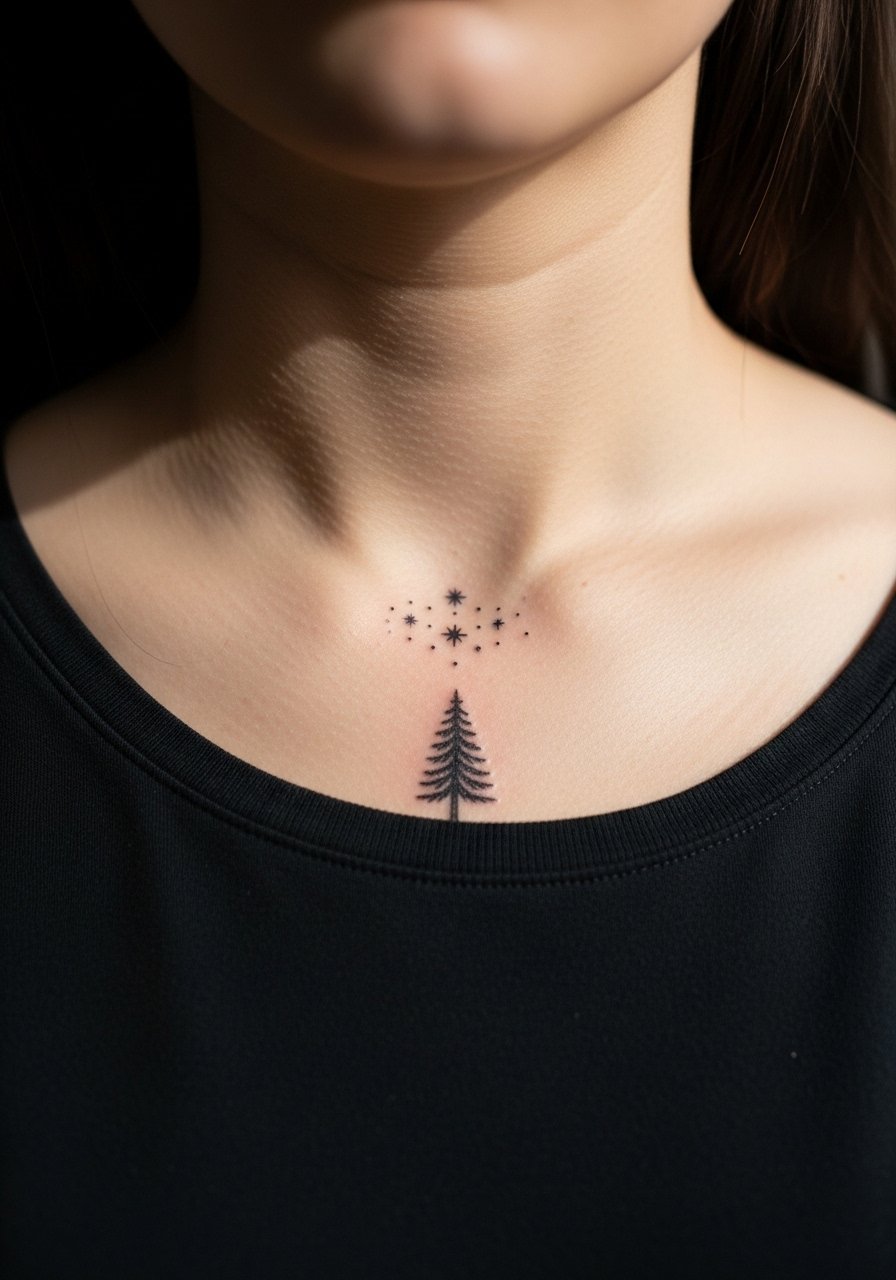
This last placement is subtle but elegant where collar meets shoulder. Ask for an off-center layout if you wear necklaces so the tree and stars do not compete with pendants. A frequent mistake is overpacking stars near the bones, which creates an uneven fade. Sessions are brief and pain is about 3 to 4. For show-off looks pick an off shoulder blouse or a thin chain that sits above the cluster.
Frequently Asked Questions
Q: How long before a fine line micro pine needs a touch-up?
A: From what I have seen, fine line micro pines often need a touch-up in the 6 to 24 month window depending on placement and sun exposure. Wrists and fingers tend to fade faster because of friction. Ask your artist for a realistic touch-up timeline during the consult and request a healed photo follow-up at six months so you can plan.
Q: Is dry healing or protective film better for tiny pines on fingers and wrists?
A: Artists are split on this. One camp prefers protective film for the first few days to keep contamination down. The other camp favors dry healing to avoid trapped moisture and softer scab formation. The better choice depends on your skin type and the specific placement, so ask the artist which method they prefer and why before you leave the chair.
Q: Will blackwork or micro-realism hold up better on darker skin tones?
A: High-contrast blackwork usually reads more clearly on darker skin because saturation creates a solid silhouette. Micro-realism can pop when the artist adjusts contrast and depth intentionally. Bring healed photos or ask for examples the artist has on similar skin tones so you get a sense of how their work translates.
Q: How much should I budget for a micro pine if studios now charge more?
A: Prices vary by city and artist, but people are commonly seeing 150-400 for one-inch micro work depending on style and guest spots. If cost is a concern consider apprentice portfolios or compare three quotes via booking platforms. Remember touch-ups may add an extra session cost later.
Q: Which placements are least likely to distort with weight changes or pregnancy?
A: Areas with less soft tissue change tend to hold detail better. Collarbone, shoulder cap, and outer calf usually survive body fluctuation more predictably than forearms or abdominal areas. If you expect major body changes, discuss placement alternatives with your artist during consultation.
