
Fine line trends look great on a phone screen, but what holds up after a year is a different conversation. I have seen spiral forearms soften, tiny wrist faces blur, and bold blackwork keep its impact where fine line failed. If you want Junji Ito motifs that still read as horror after regular wear and washing, start with placement and line weight, not only with the reference photo. The first idea below is a classic for a reason and it also shows the practical tweaks that make it last.
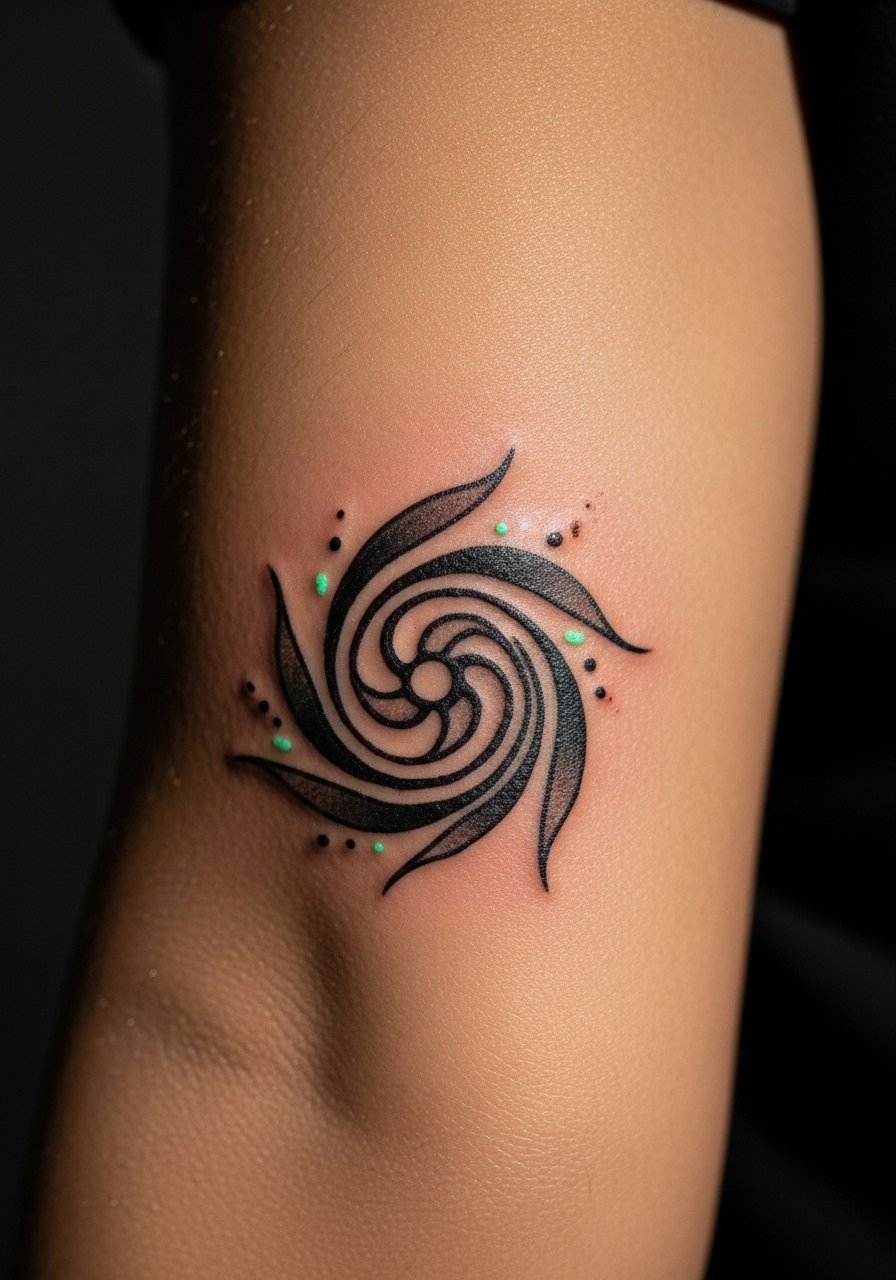
1. Uzumaki Spiral Forearm Piece
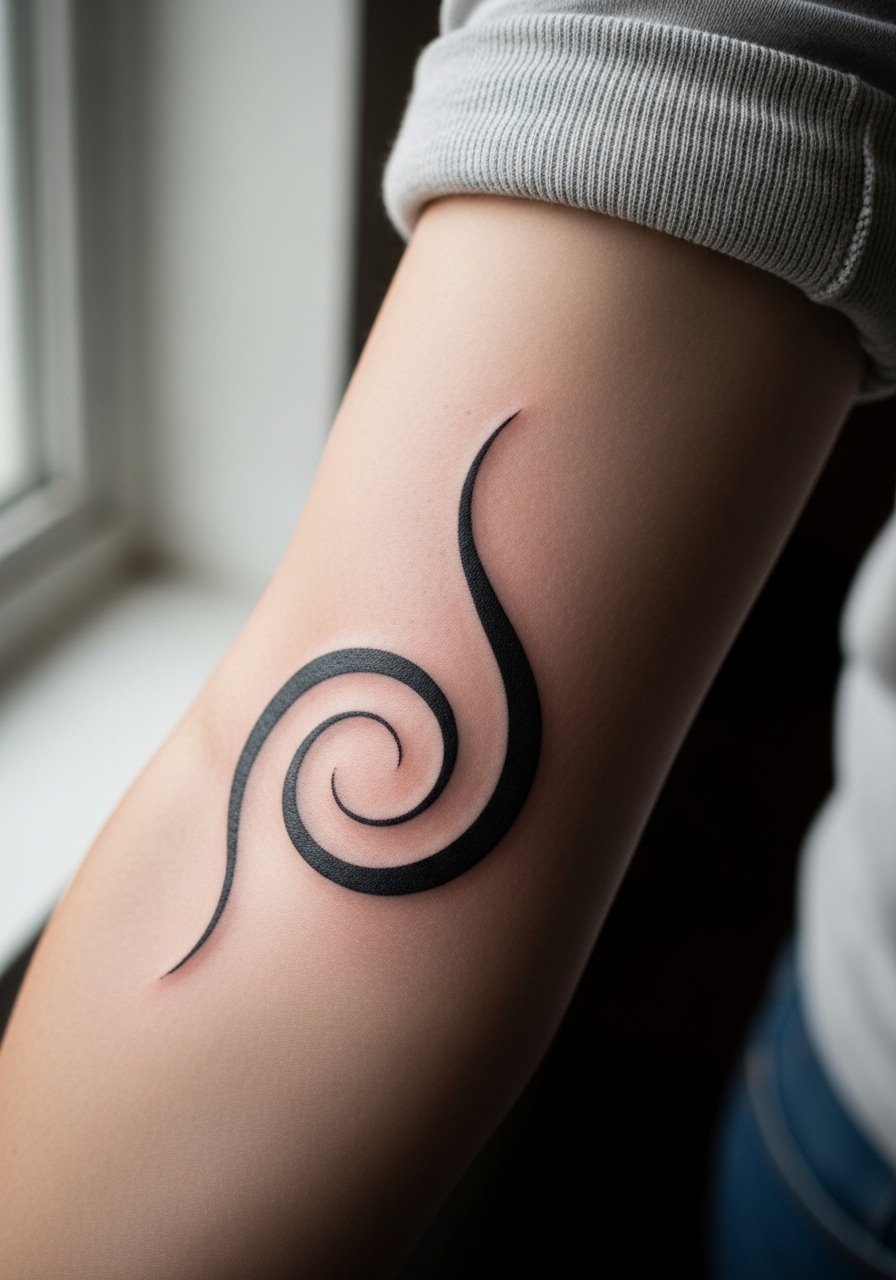
I've seen this design on dozens of forearms and it reads loud even from a distance. For longevity pick heavier linework and dense black shading rather than fragile fine lines. Tell your artist you want geometric spacing and slightly wider outer lines so the spiral keeps its shape at year two and five. Common mistake is shrinking the spiral too small to fit the inner wrist, which invites blur and ovaling when the arm changes shape. Pain is moderate and most people sit for a single session under two hours. For showing it off, pair with a fitted black tee and roll the sleeves up to the elbow.
2. Tomie Portrait Thigh Tattoo
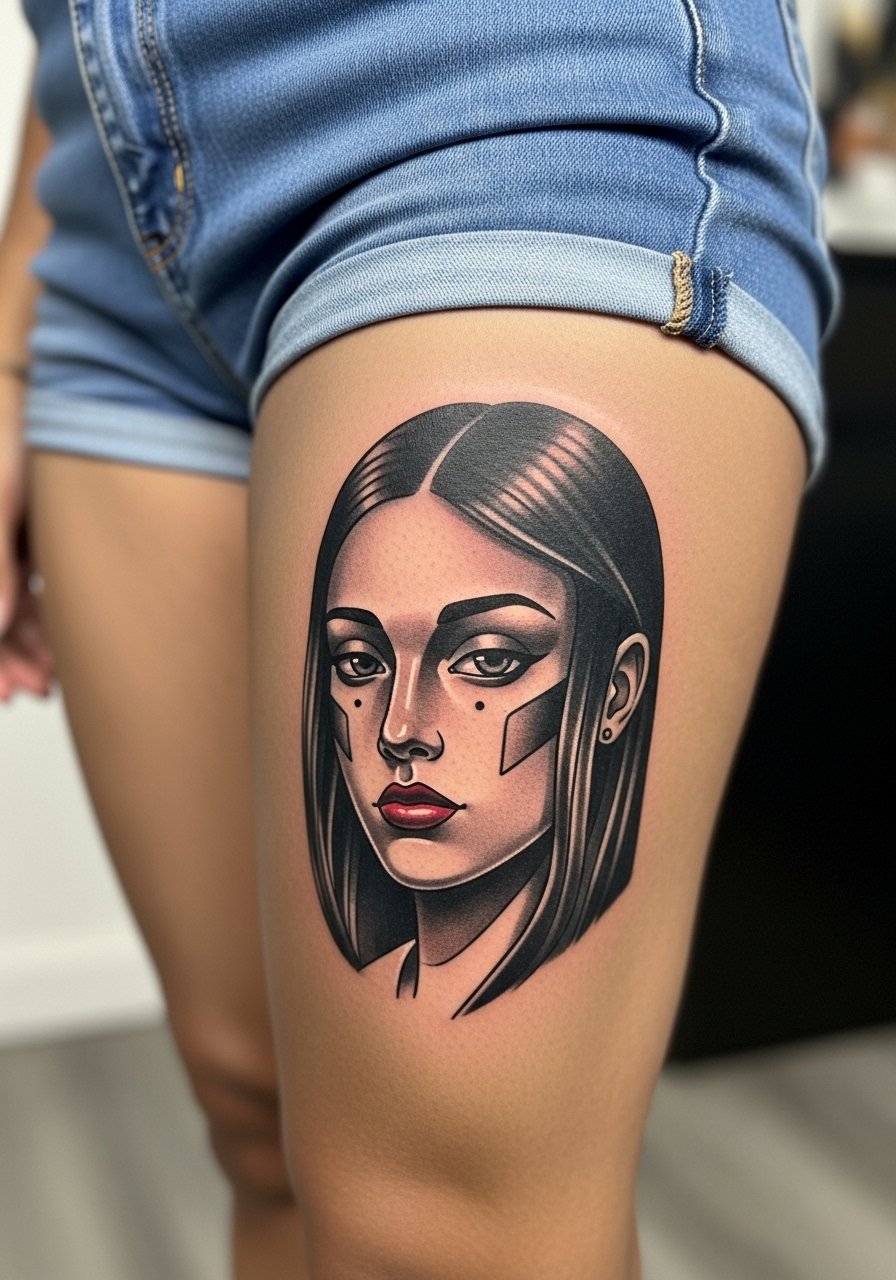
The thigh gives room to render Tomie's unsettling beauty without crowding lines, and it hides when needed. Expect two to three sessions for layered gray wash and a color pop on the lips. Artists split on fine line versus heavier outlines for portraits on darker skin. One camp uses negative space and gray saturation for contrast. The other prefers stronger black outlines to prevent blending. Ask how they plan to keep highlights visible on your tone. During the session wear loose drawstring shorts so the artist can work without pressure, and consider pairing the healed piece with high-waisted shorts for nights out.
3. Souichi Kadokura Hand Tattoo
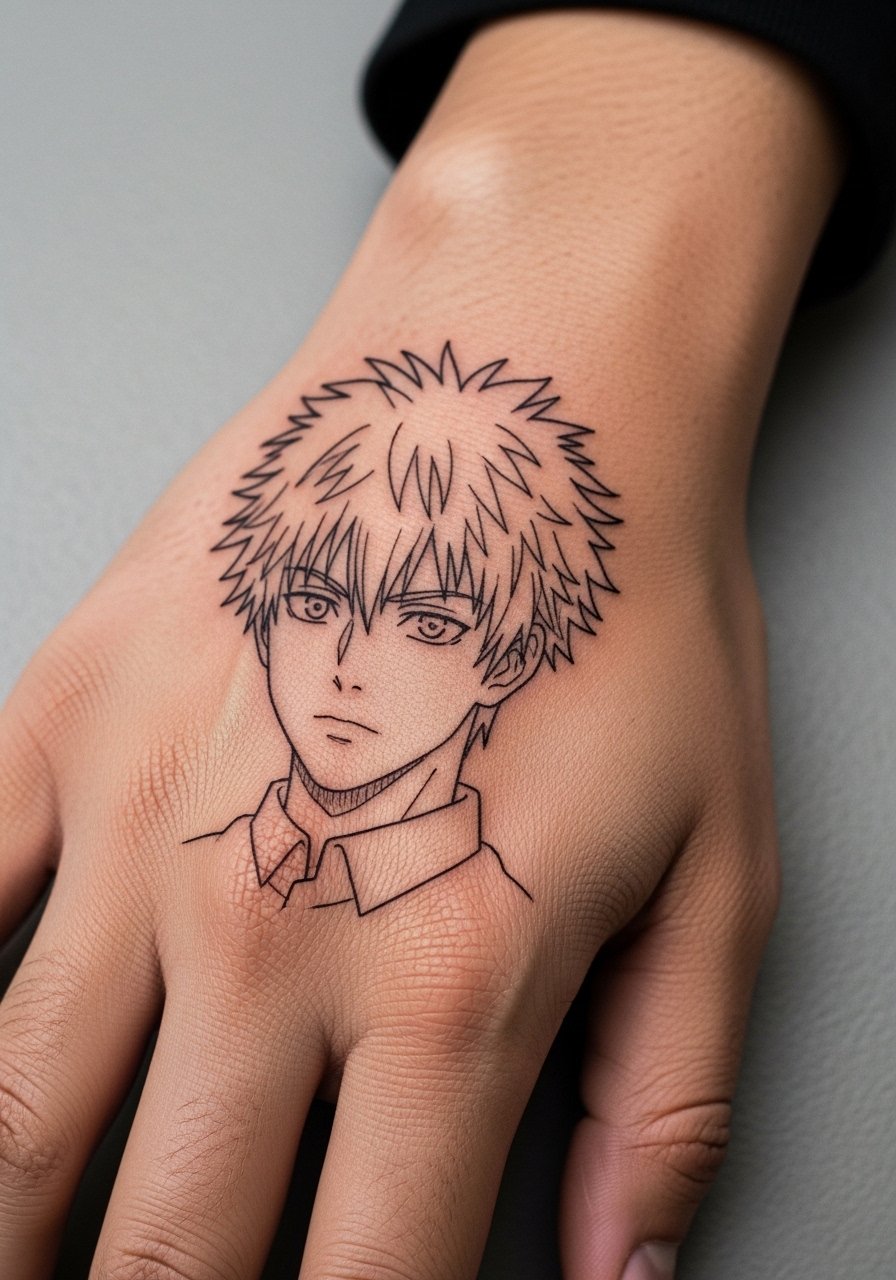
Hand tattoos age fast under daily friction, so understand touch-up timelines before committing. This one hits hard as a small icon and usually sits in a single session. The common mistake is insisting on ultra-thin linework for a spot that smudges easily. If you want crisp features ask for slightly bolder contour lines and expect a touch-up within 12 to 18 months. Pain is higher and the skin is thin, so bring up numbing preferences beforehand. For session day, remove rings and wear a loose button-down so cuffs do not rub the fresh ink while you travel home.
4. Horror Snail Shell Calf Wrap
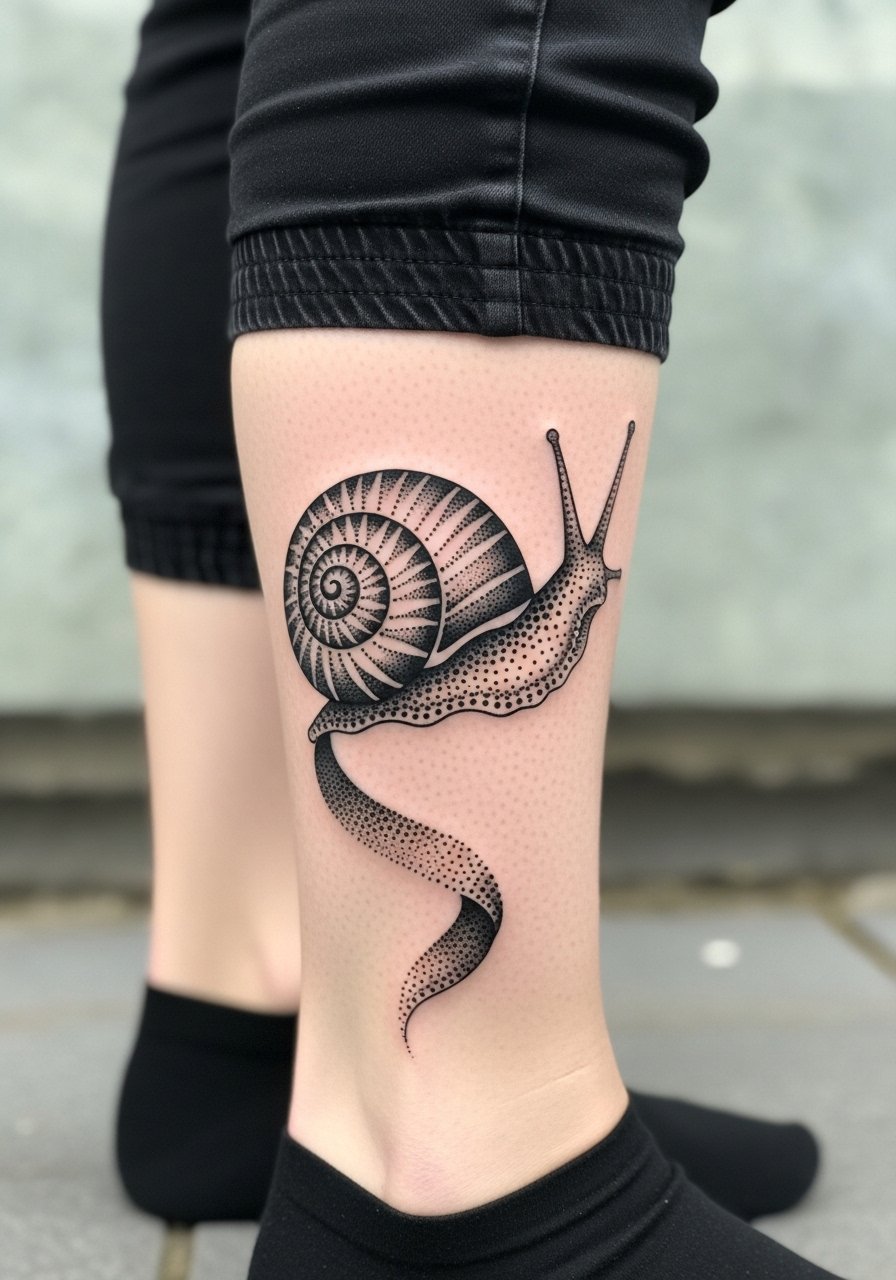
Curved surfaces like the calf are perfect for the spiral shell motif because the design can wrap without distortion when drawn to follow muscle lines. I recommend stipple shading for texture rather than smooth gradients that can wash out. A single session often does it, but insist your artist plan the flow to avoid obvious seams where the wrap meets. The session is comfortable compared with ribs, and healing is straightforward unless you wear tight socks. Showing it off pairs well with cuffed joggers or shorts, try a cuffed jogger so the tattoo reads cleanly at the ankle.
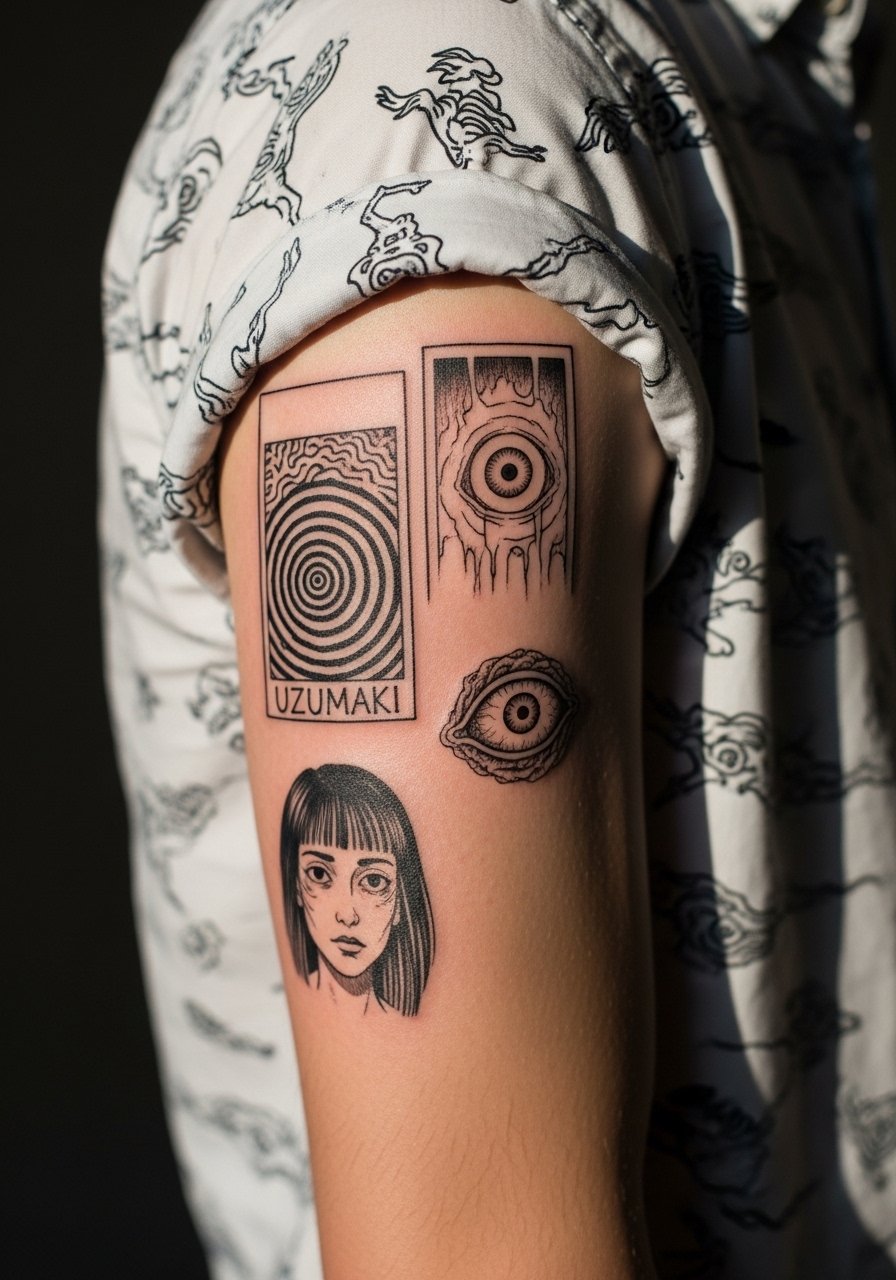
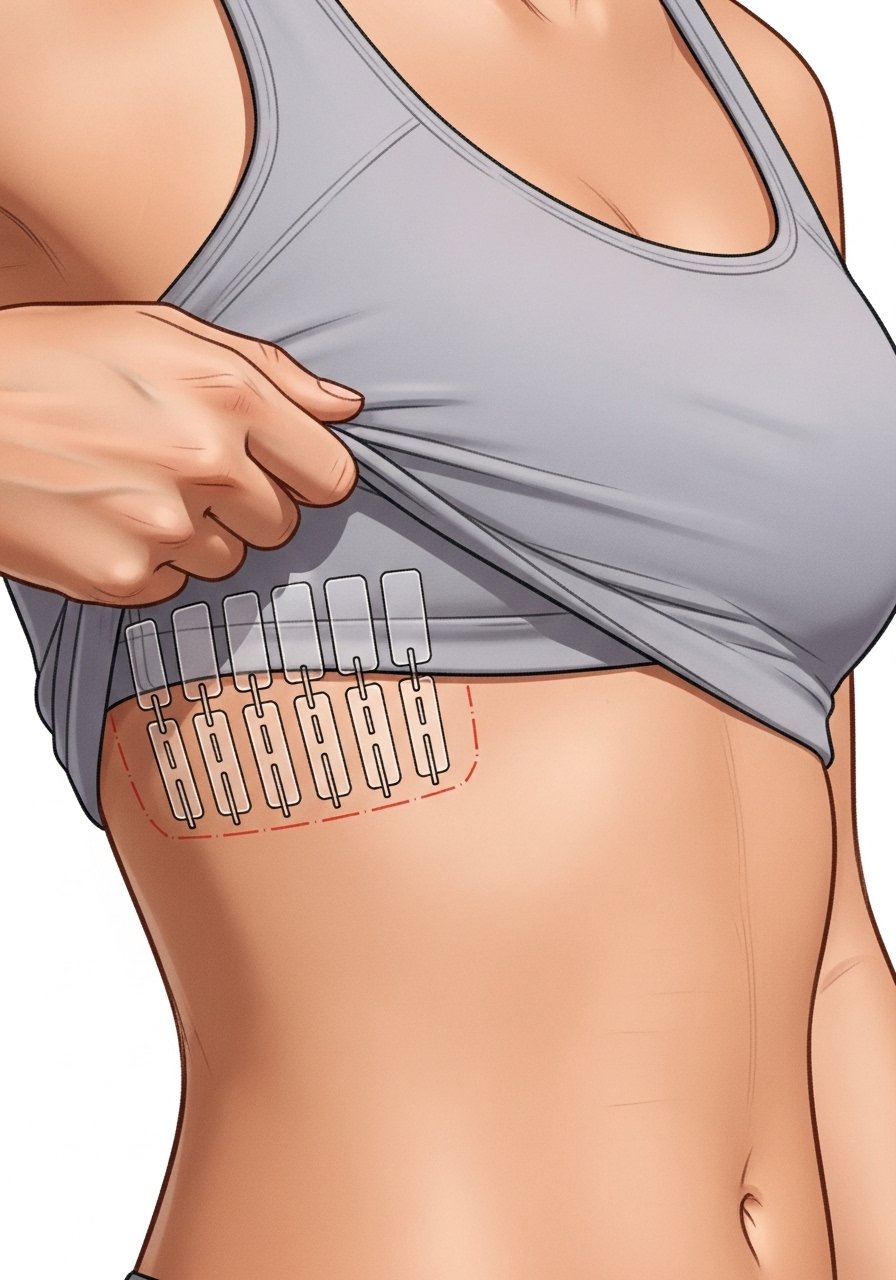
5. Manga Panel Ribcage Sequence
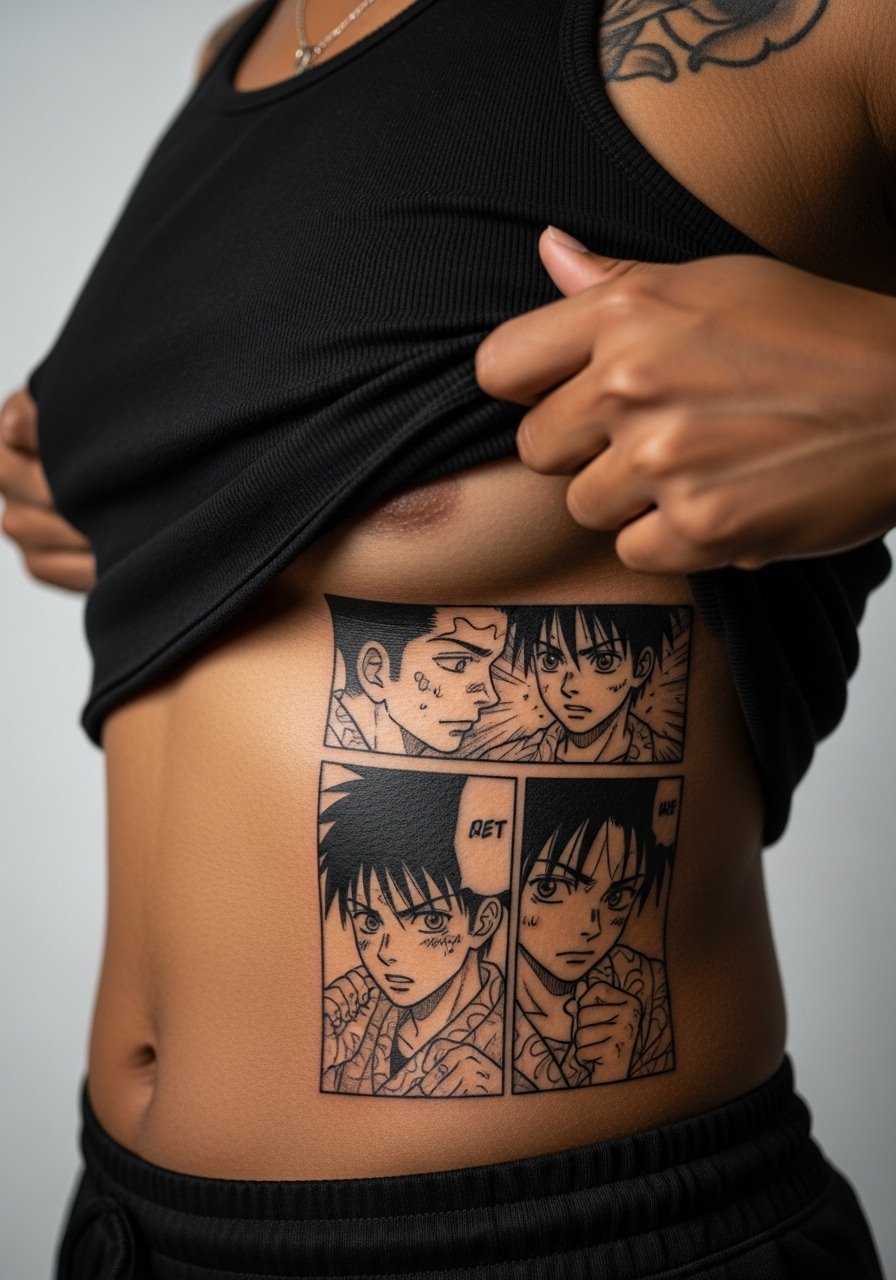
Ribcage sequences give you narrative space for multiple Ito panels but they test your pain tolerance. Most clients split this into three to four sessions for shading and linework. The mistake is cramming too much panel detail into a narrow strip. Leave white gutters between panels so each scene breathes and the contrast holds as the skin stretches over time. Expect heavier soreness during sessions and plan recovery days. If you want a preview put temporary transfers on the torso to check scale before booking the first appointment.
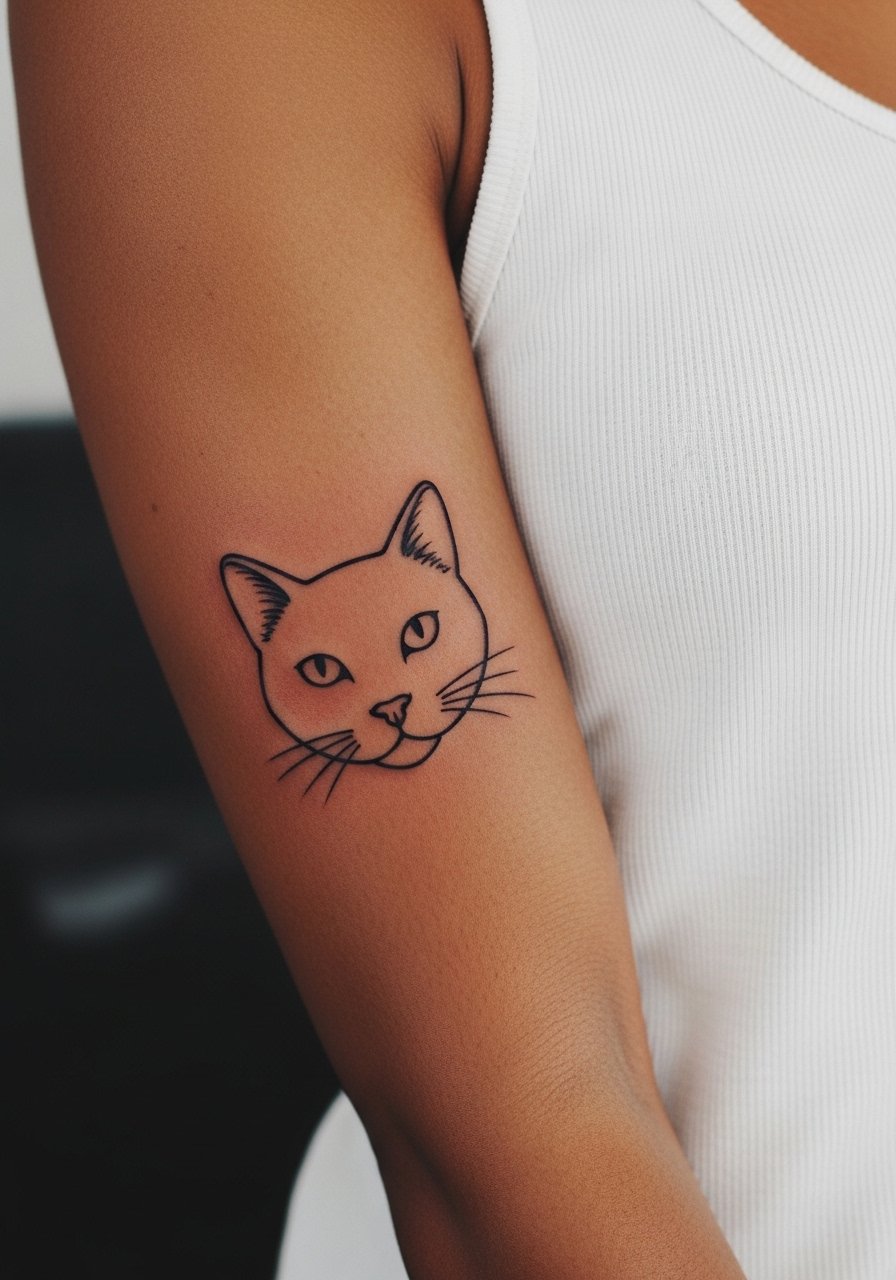
6. Cat Is White Face Mask Wrist Tattoo
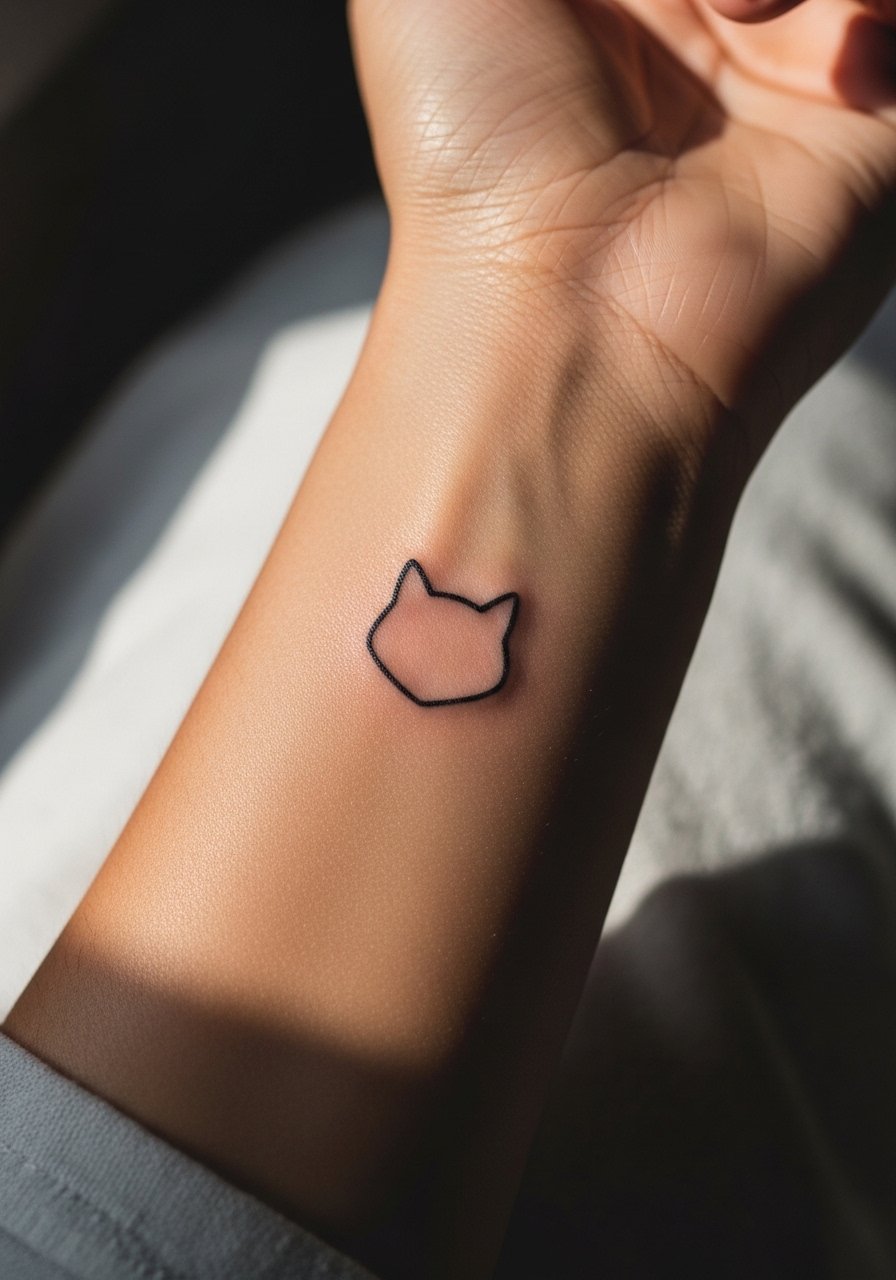
Small wrist icons are great for first-timers but they come with trade-offs. Fine line wrist work can blur within a year if the lines are too tight. A compact outline with careful negative space preserves the mask look on most skin tones. Tell your artist you want clear separation between the outer whisker contour and internal negative areas so the cat reads even after occasional blurring. Pain is low to moderate and healing needs light movement to avoid cracking scabs. Pair the finished piece with a thin silver chain bracelet on the opposite wrist for contrast.
Pack Smart
The forearm pieces and small wrist icons above heal differently from larger thigh and rib work, so bring a few items to the chair and have a gentle aftercare plan ready.
-
Tattoo Goo balm. A thinner ointment that users report doesn't clog the denser blackwork on spirals and forearms during the first week.
-
Frida aftercare spray. A no-touch mist useful for hand and neck pieces where constant touching is tempting.
-
Ink-Ichiban lightweight balm. Good for humid climates and for keeping shoulder cap and thigh micro-realism from looking shiny.
-
Manuka honey ointment. Natural antibacterial support for odd scabbing patterns after surreal body horror pieces.
-
Aquaphor healing ointment. Thin application for the early days helps lock in moisture on fine line wrist work without heavy buildup.
7. Flower of Flesh and Blood Shoulder Cap
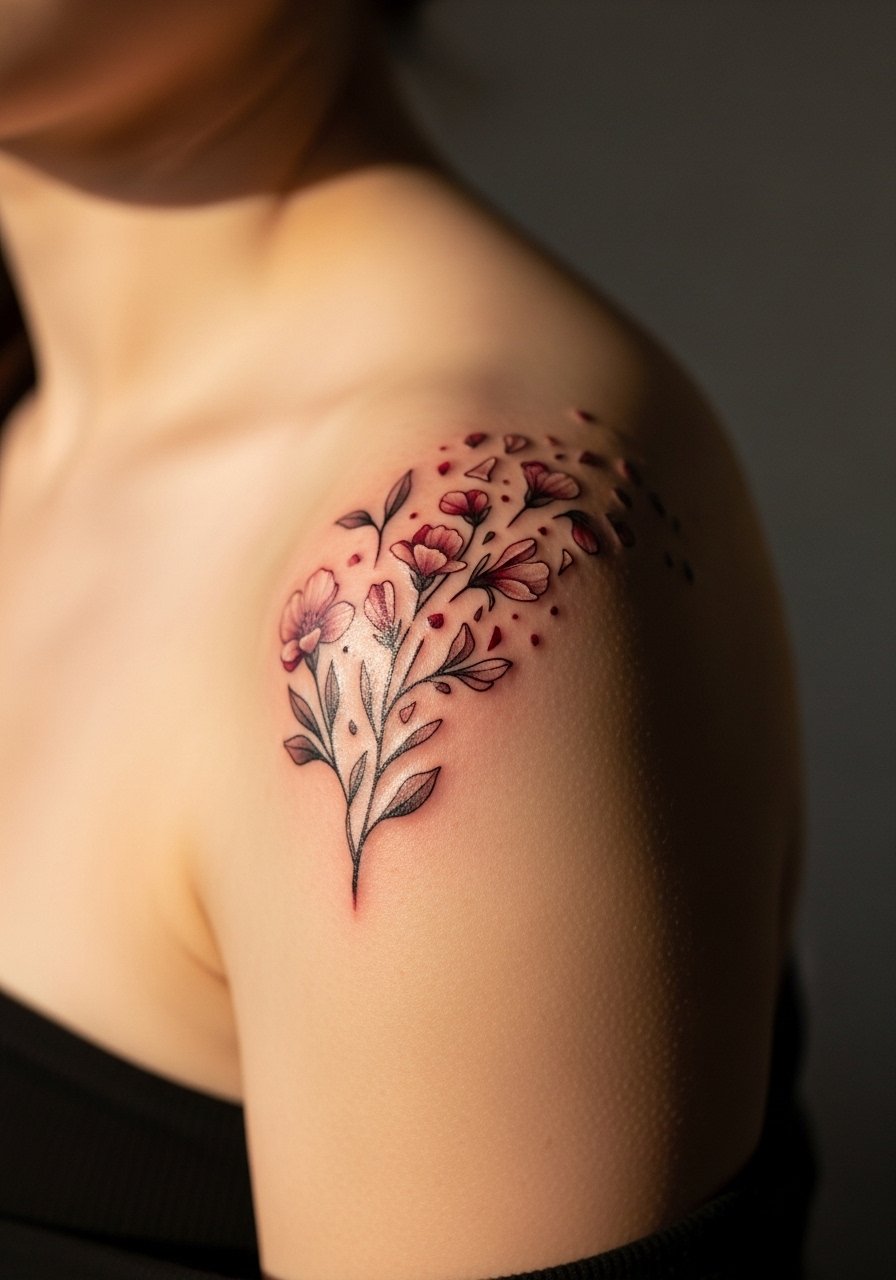
Shoulder caps take shading well and sit in a place that rarely sees daily friction, which helps micro-realism hold. Two sessions usually do the trick for layered gray washes and a pop of red where needed. One common mistake is crowding tiny petals into the curvature, which loses definition after a year. During consultation ask for contrast between the outer petal outlines and internal stipple so the form survives sun exposure. For showing it off pick strapless tops or off-shoulder sweaters and try an off shoulder sweater that frames the cap.
8. Small Gyo Fish Mutant Ankle Tattoo
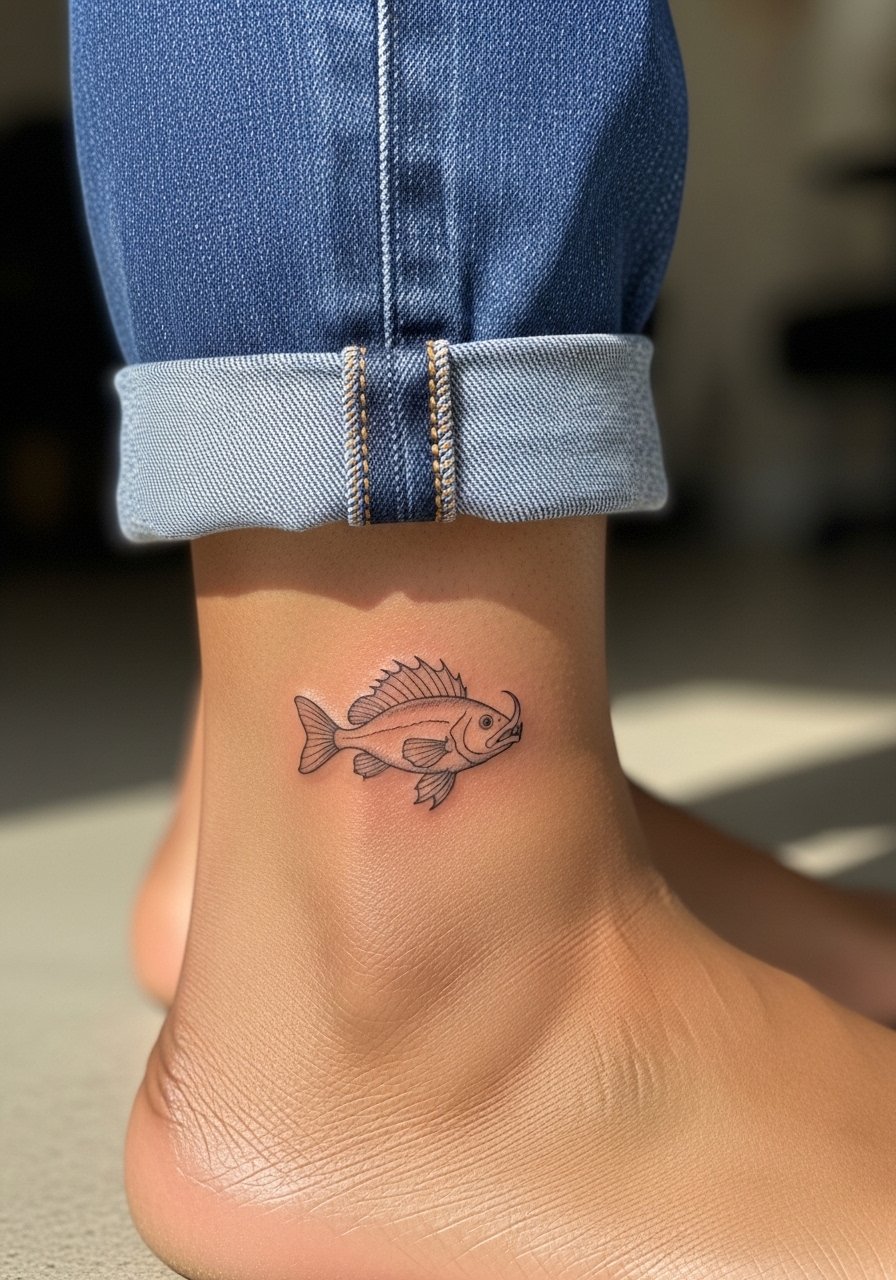
Ankle pieces are small and discreet but they face constant rubbing from socks and shoes. Fine line Gyo fish can hold if the design uses clear negative space and avoids tiny internal lines. Mistakes happen when clients insist on extreme micro detail that the ankle skin cannot keep. This is an ideal single-session starter if you want Ito vibes without a big commitment. For the appointment wear pants you can roll up and consider sandals when you leave to reduce immediate friction.
9. Enigma of Amigara Fault Hole Forearm

Inner forearm lines read well and they are easier to show or hide than hands. This linear void motif benefits from deep blacks and strong negative space so the hole seems to pull inward even after a few years. A common error is rendering the hole too shaded with gray gradients only, which flattens as the skin heals. For consultations ask your artist to keep a crisp rim and heavy inner black so contrast survives fading. Session time is typically one to two hours and your arm will be stiff for a day. Wear a loose tank top so the artist can pivot your arm without tugging fabric.
10. Hanging Ball Thigh Outline

Inner thigh placements suit surreal dangling motifs but they demand privacy and careful session planning. Outline-only designs age predictably if lines are spaced to allow touch-ups. The biggest mistake is treating the inner thigh like a flat canvas. Weight gain or muscle changes can distort the orb over time. Expect two sessions if the piece needs careful contouring and shadow to suggest depth. For the session wear loose drawstring shorts so the artist can work without compressing the area.
11. Spiral Hair Tomie Variant Collarbone
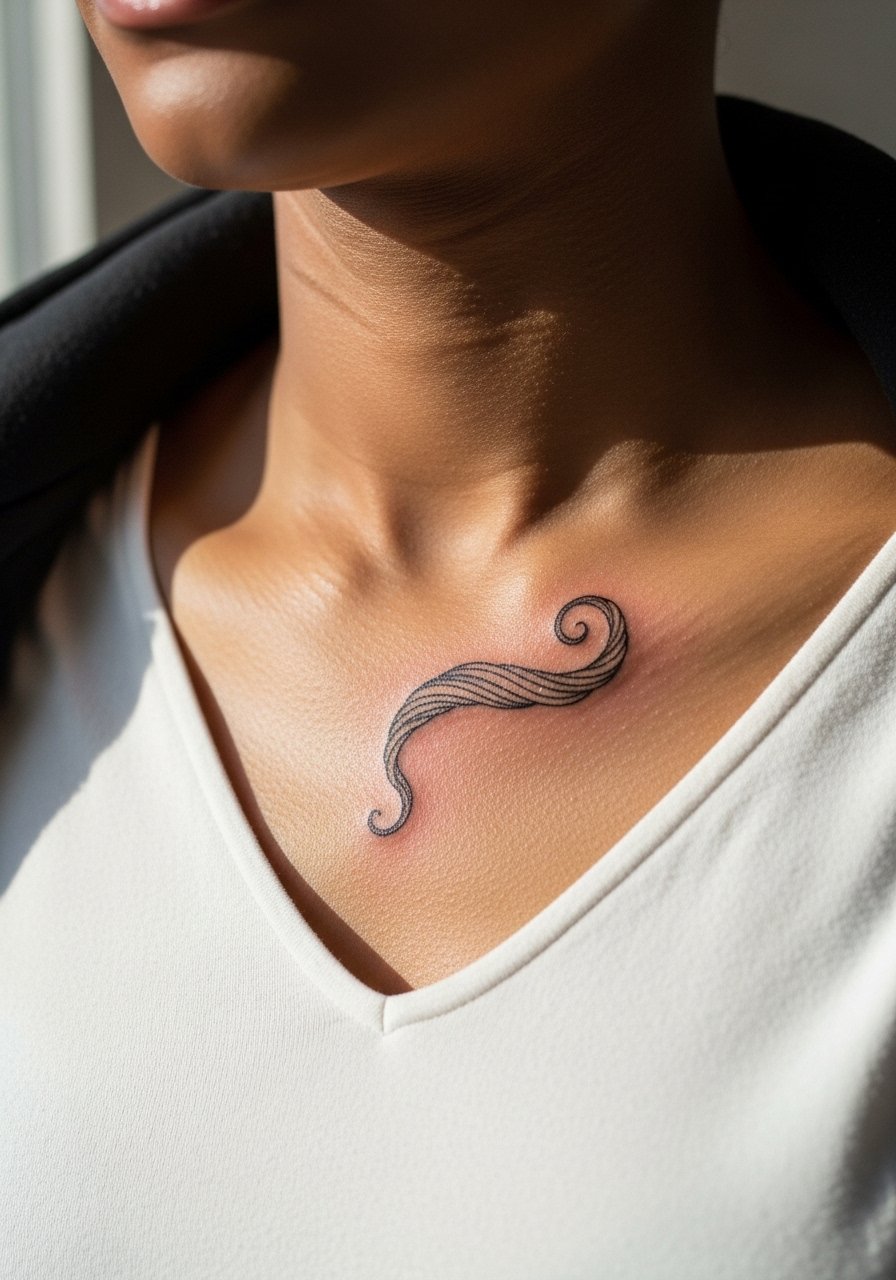
Collarbones are a visible canvas that can make a subtle horror look feel elegant. The hair-spiral variant uses fine lines but artists often recommend slightly wider strokes near bone to avoid blowout. Pain is sharp at the bone and sessions are short. A common regret is underscaling the design so it disappears under necklaces and clothing. Pair this with V-neck tops and small pendants to draw attention to the piece and try a v neck black tee to frame it without competing.
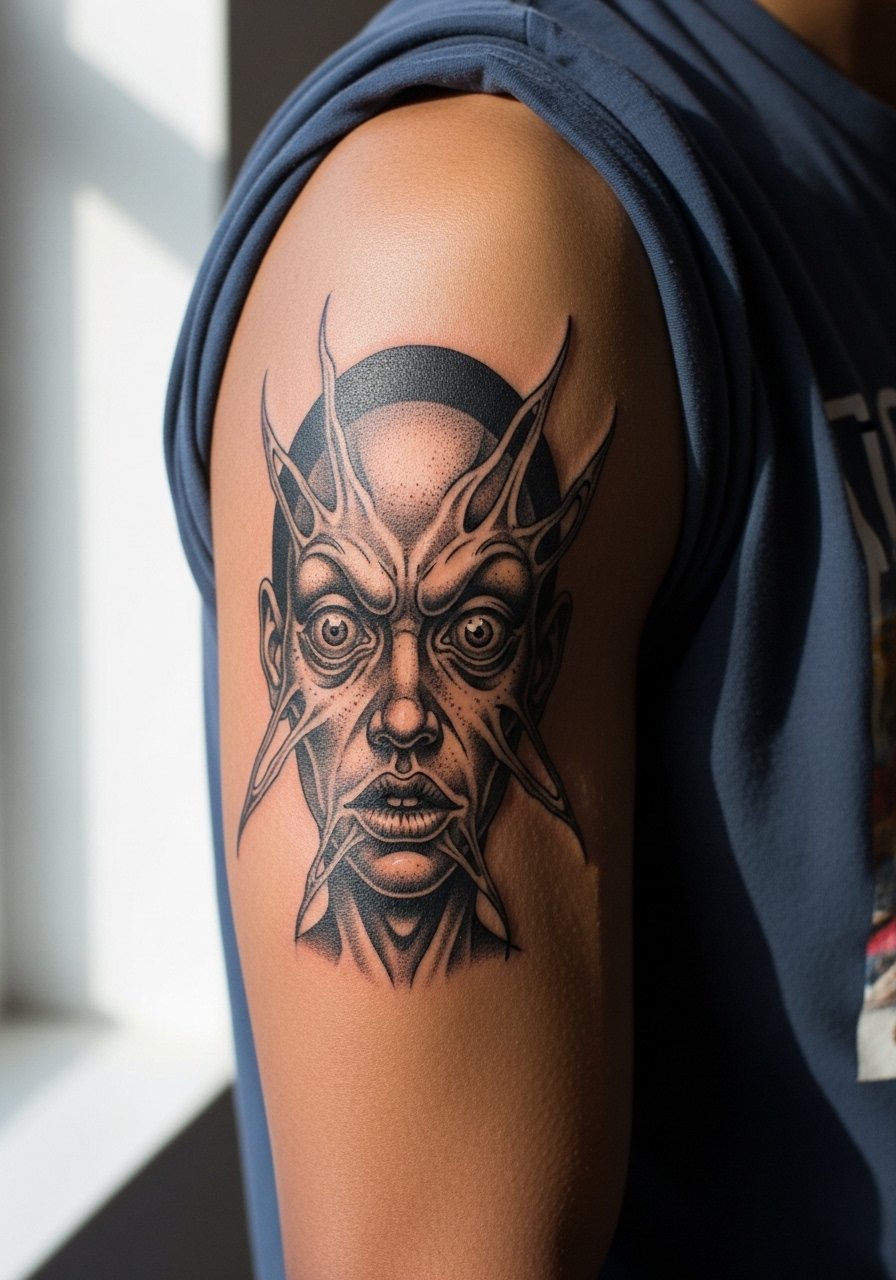
12. Absurdist Face Stretch Neck Tattoo

Neck tattoos are bold and they age under sun and friction from collars. This face-stretch pattern uses ornamental blackwork to convey distortion, and it often needs two sessions for clean density. Artists are divided about neck fine line work. One group warns that neck skin shifts and blurs lines quickly. The other group says accurate needle depth keeps things sharp. Ask where the artist stands and request healed photos of similar placements. For the session wear a wide-neck shirt so the collar does not rub the fresh area.
13. Patchwork Ito Motifs for Future Sleeves
If you plan to build a sleeve over years, consider patchwork motifs that connect visually later. Start with anchor pieces like a snail shell and a spiral, spaced so subsequent additions can weave between them. The common error is placing elements too close together early on, which forces awkward filler work. When you consult mention future linking and ask for compatible line weights so the new pieces do not clash. Session feeling is normal arm discomfort and multiple small sessions keep healing manageable. For dressing on show days try rolled sleeves and a loose button-down shirt that complements the arm art.
14. UV-Reactive Uzumaki Accent Lines
UV ink is experimental and it can add a hidden layer to an Uzumaki piece that only glows under blacklight. It requires careful planning because not all shops supply UV-friendly inks and longevity varies with exposure. People often expect the glow to last like black ink and are surprised when it fades faster. If you try this, limit UV to highlights rather than main outlines, and ask for healed examples in the studio. The session itself is similar to a normal forearm piece but discuss visibility expectations first.
15. Gyo Fish Half-Sleeve Around the Wrist
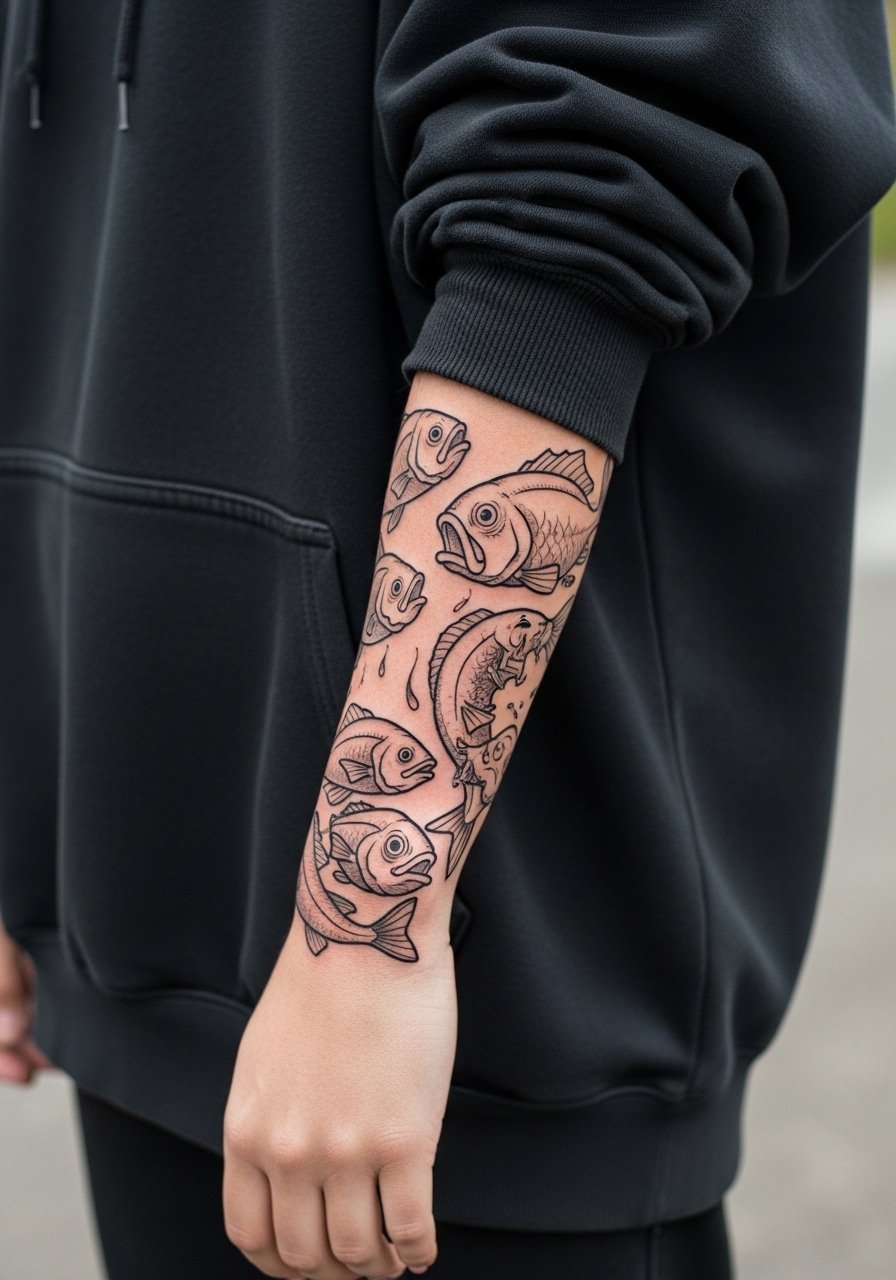
A wrist-to-forearm wrap creates movement and tells a small story as the fish progress. Start with fish that have clear negative space between scales so the pattern does not collapse into a blot as it heals. Mistakes include over-detailing the scales near the wrist where skin moves most. Expect multiple short sessions and touch-ups in the first year. On session day wear an oversized hoodie you can push up without forcing the fabric across the fresh ink.
16. Negative Space Cat Face for Dark Skin
For darker skin tones negative space can act as the "white" in a cat face, letting skin tone provide contrast. That technique needs deliberate planning in the stencil and careful spacing so the face reads from afar. A common problem is filling in what should stay empty, which flattens the design. Tell your artist you prefer skin-tone highlights rather than added white ink. Healing looks great when the negative areas are consistent and the surrounding blacks are saturated. Session time is short and touch-up checks at three months are helpful.
17. Small Uzumaki Wrist Spiral for First Horror Tattoo
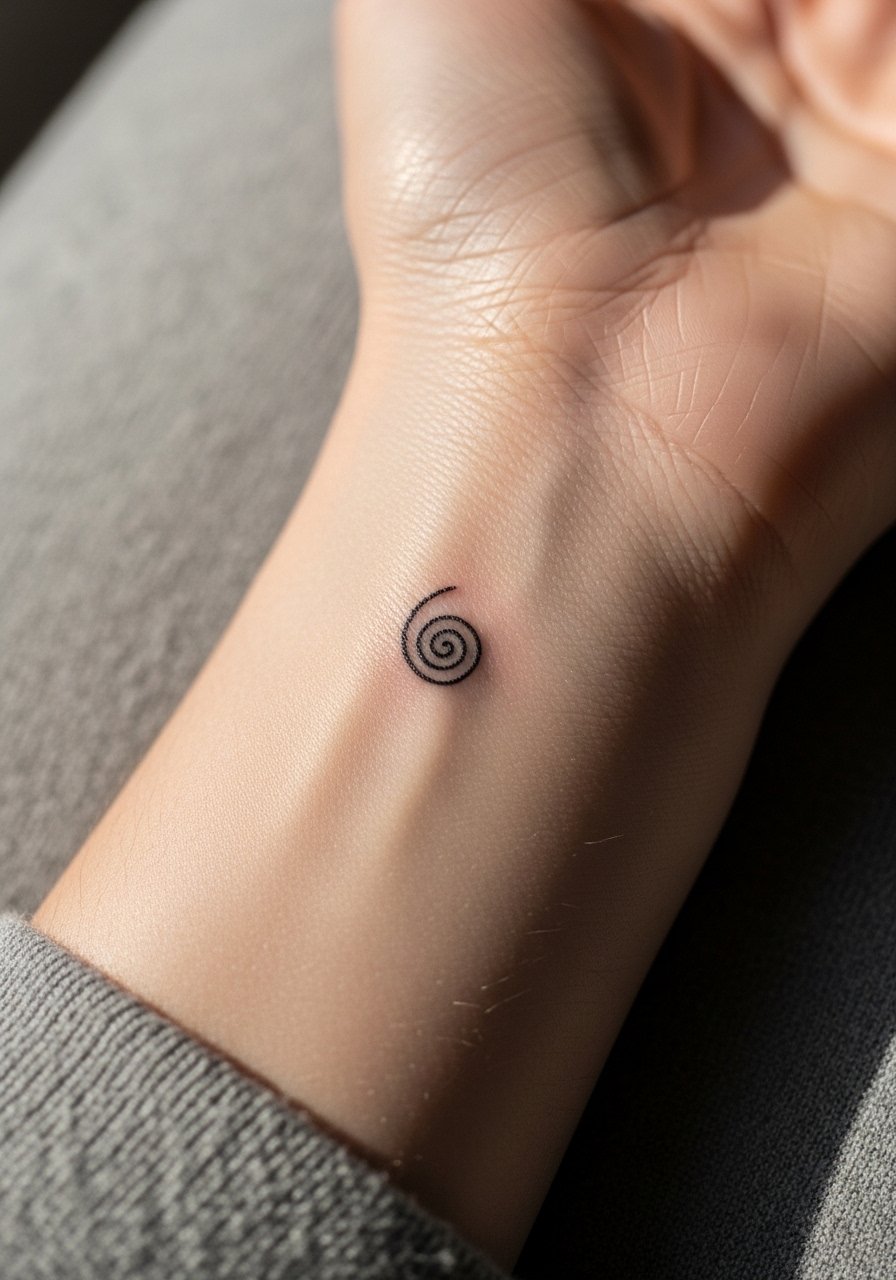
Micro Uzumaki wrist spirals are trendy and easy to test as a first horror tattoo. They are a one-session commitment but they age faster than forearm versions because of wrist movement and sun exposure. The usual mistake is choosing an ultra-micro scale that vanishes in months. Increase the outer line thickness slightly and plan for a touch-up at year one. For the appointment wear an oversized hoodie pushed up so the artist can work without fabric rubbing while the stencil transfers.
18. Calf-Wrapping Horror Snail with Dot Work

Dotwork plays beautifully on the calf because texture follows muscle curves. The trick is to balance dense dots with open spaces so the shell pattern keeps depth as it heals. People sometimes request packed dots that later appear muddy. Ask for varied dot sizes and a plan for touch-ups if dots settle unevenly. One session usually suffices and the area tolerates longer needle time. To show it off pick shorts and sandals, for example a loose athletic short that keeps the tattoo visible.
19. Tomie Variant with Spiral Hair Around the Nape
The nape is intimate and shows well with updos. Spiral hair elements need spacing so the lines do not merge under the thin neck skin. Artists debate fine line on the neck because of movement and constant exposure to the sun and shirts. One practical approach is to pair delicate lines with heavier anchor strokes so the pattern remains readable. For session comfort put your hair up and wear a button-down you can pull aside.
20. Absurd Mutant Face on the Upper Arm
Upper arms are forgiving and great for experimental Ito faces that need room to breathe. The larger canvas lets you exaggerate stretch motifs without worrying about blowout. The usual mistake is shrinking a wide face into a small bicep spot which loses the absurd quality. One to two sessions typically cover linework and shading. Wear a short-sleeve tee you can roll up without compressing the area during travel home.
21. Ribcage Panel With a Slow-Build Patchwork Plan
If you want a dramatic rib sequence that grows into a full torso story, plan panels with consistent gutters and matching line weight. The big mistake is inconsistent scale between early panels, which makes later linking awkward. Expect multiple sessions and bring a friend for support on the pain-heavy days. Consider temporary transfers for session one so you can breathe with the stencil on. After the first panel, confirm the studio's touch-up policy for continuity before booking the next session.
Frequently Asked Questions
Q: Will fine line Junji Ito tattoos blur faster than blackwork on the forearm or wrist?
A: From what I have seen fine line tends to soften sooner in high-friction zones like wrists and hands. Blackwork and slightly heavier contour lines usually keep the motif readable longer. If you love delicate line work ask your artist about planned touch-ups at 12 to 18 months and scale the design so it has breathing room.
Q: How should I adapt a Tomie thigh portrait for darker skin tones so it does not blend in?
A: Use negative space strategically and add mid-tone gray wash to create contrast against dark skin. Ask the artist to show healed examples on similar skin tones during consultation and plan for subtle color pops only where they will remain visible after healing.
Q: Are ribcage manga panels worth the pain for storytelling pieces?
A: They are if you want a vertical narrative that can expand. Ribs are painful and sessions are longer, but the torso takes shading well and panels age predictably when you leave white gutters between scenes. Take recovery days and book sessions spaced out so you can evaluate how each panel heals before adding the next.
Q: What should I wear to a thigh or rib session to make the appointment easier?
A: For thigh work wear loose drawstring shorts or a skirt so the artist can access the area without fabric pressure. For ribs wear a loose tank or sports bra you can lift. A loose drawstring linen pant can be handy if you are traveling after a long session.
Q: How do UV-reactive accents hold up compared with traditional black ink?
A: UV accents are fun but they fade faster and their visibility depends on the ink quality and your sun exposure. Use UV for highlights rather than main lines and treat them as a decorative layer that may need refreshes if you want the glow to persist.
