
Fine line Toothless tattoos are everywhere on mood boards, but trends that look delicate on screen do not always age well in real life. The catch is picking placement and scale that match the style, not the feed. These 17 cute How To Train Your Dragon tattoo designs balance character charm with practical choices you can actually live with, plus what to tell your artist in the consultation so the result still reads after a few summers in the sun.
1. Fine Line Toothless on Inner Forearm
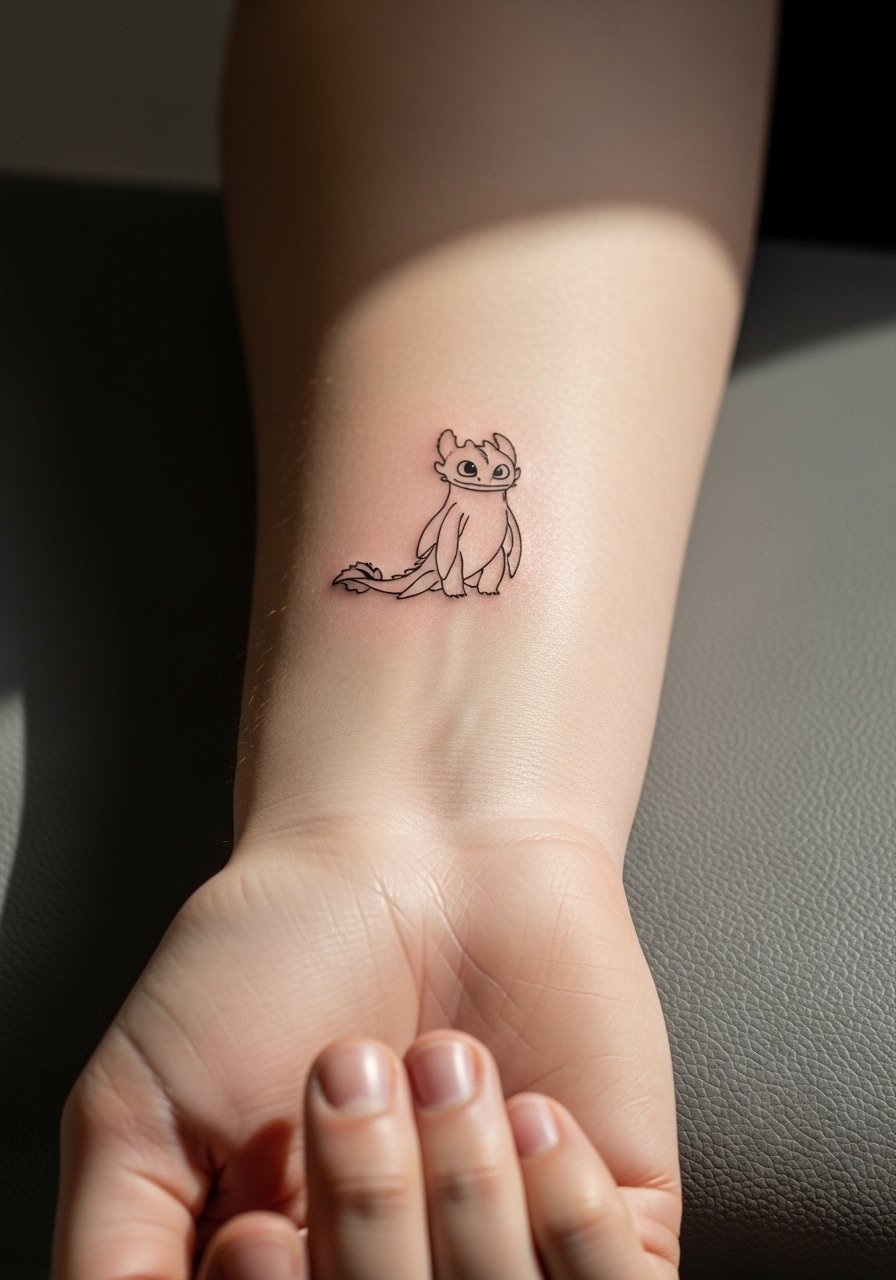
I recommend this for first-timers who want a recognizable character without a big time or cost commitment. Tell your artist to keep the linework single-needle and slightly bolder than your reference so the lines do not blur into one another over time. Expect a one to two hour session and light discomfort on the inner forearm. A common mistake is asking for hairline lines that will disappear; ask for intentional spacing and solid linework instead. For showing this off casually, roll sleeves up and pair with a minimalist watch that keeps attention on the forearm without crowding the art.
2. Watercolor Light Fury Back of Shoulder Splash
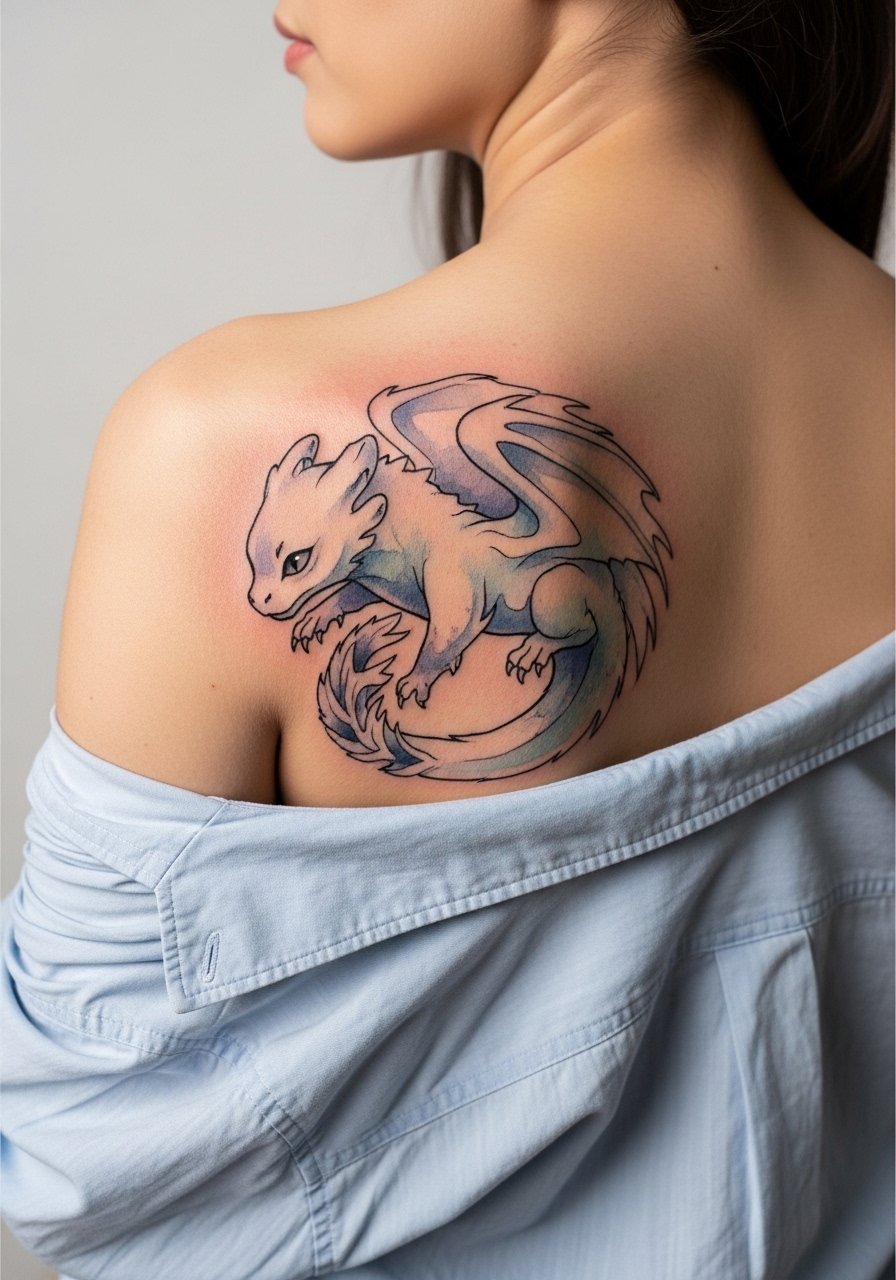
If you want color but not a full sleeve, shoulder pads and rounded color washes read beautifully here. Watercolor pigments need room so plan for a larger piece around four inches across to keep the washes from becoming muddled. Mention layered sessions in your consult because multiple short passes let color sit without overworking the skin. Pain is mild and the session feels like steady buzzing with occasional sensitive spots when the artist does saturation. For evenings, slip into an open-back midi dress so the color shows without constant sun exposure.
3. Neo-Traditional Toothless Portrait on Upper Arm
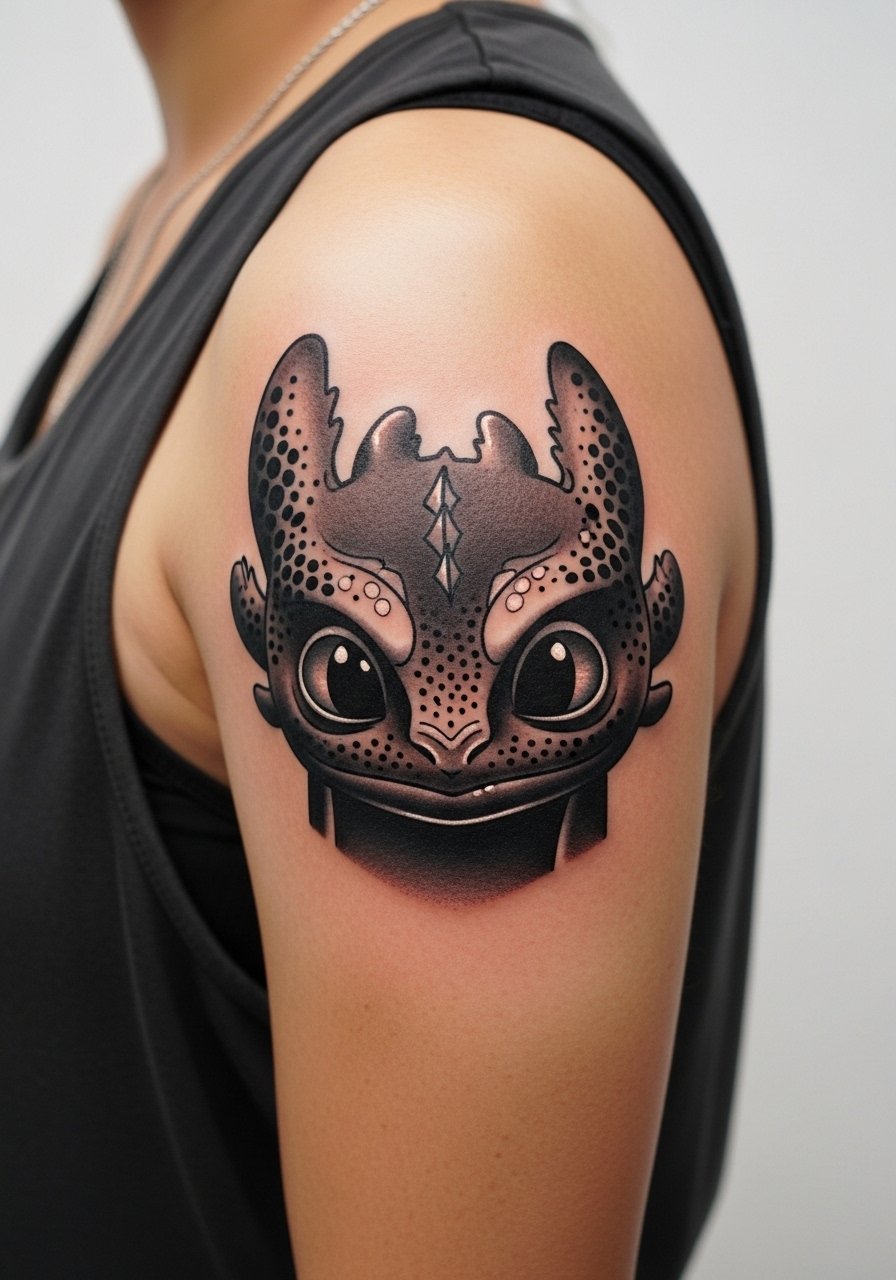
This version leans on saturated color and bold outlines so the character keeps personality as it heals. Ask for reference images that show the exact expression and color blocking you want, and request medium-weight outlines to preserve silhouette clarity. Artists sometimes over-detail faces at small sizes which blurs later, so plan for at least four inches for facial detail. The outer upper arm takes pressure well and the session is moderate in length. Pair with a loose tank top on session day so the artist has clean access and you stay comfortable.
4. Minimalist Night Fury Wrist Band
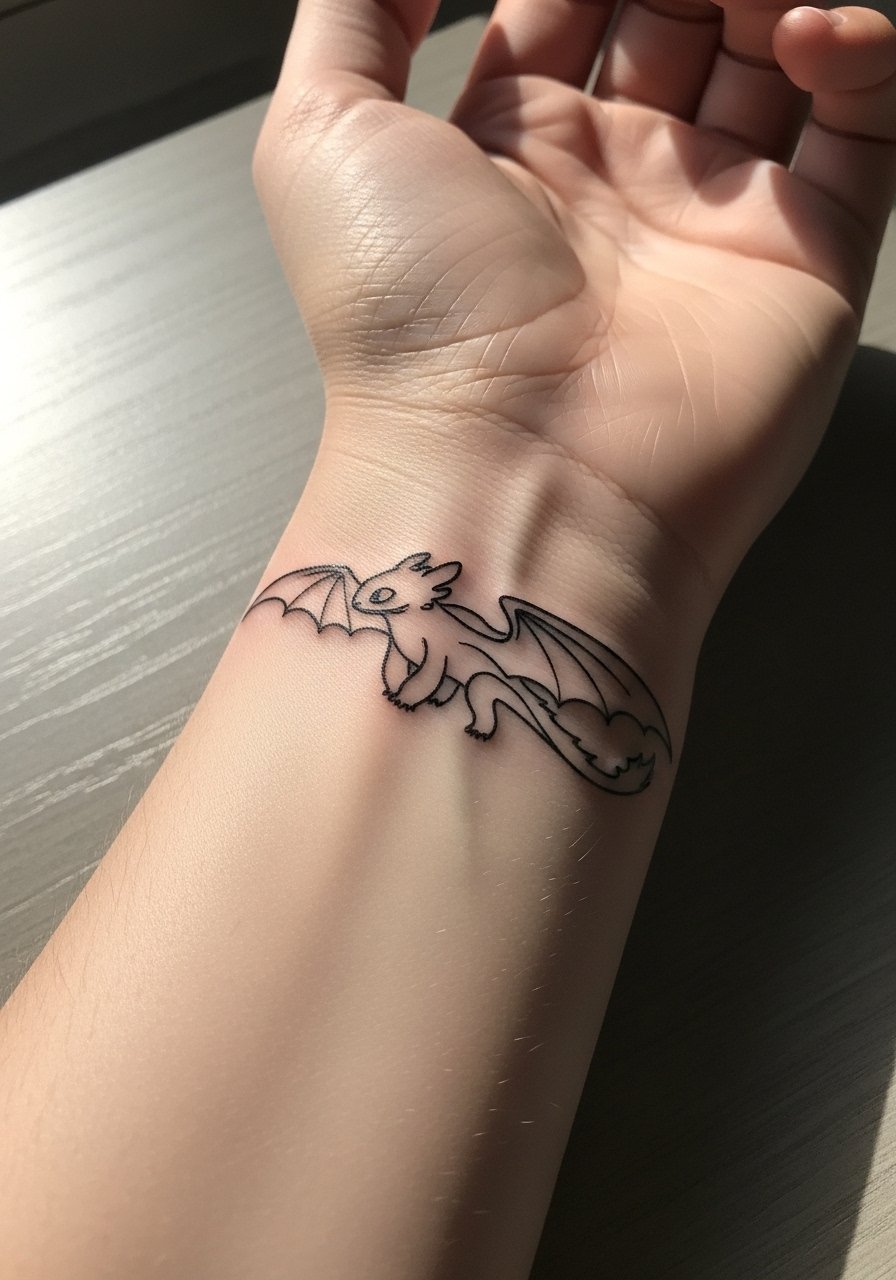
Wrist bands read delicate but face heavy friction from washing and jewelry. I advise slightly thicker linework than a pure micro line so the band holds up for years. The wrist is a higher blowout risk area because of thin skin, so spacing and line depth matter more than perfect hairlines. Sessions are short but expect touch-ups at year three. Style this with stacked dainty bracelets and a thin chain bracelet to frame the band without rubbing it raw.
5. Chibi Toothless Ankle Accent
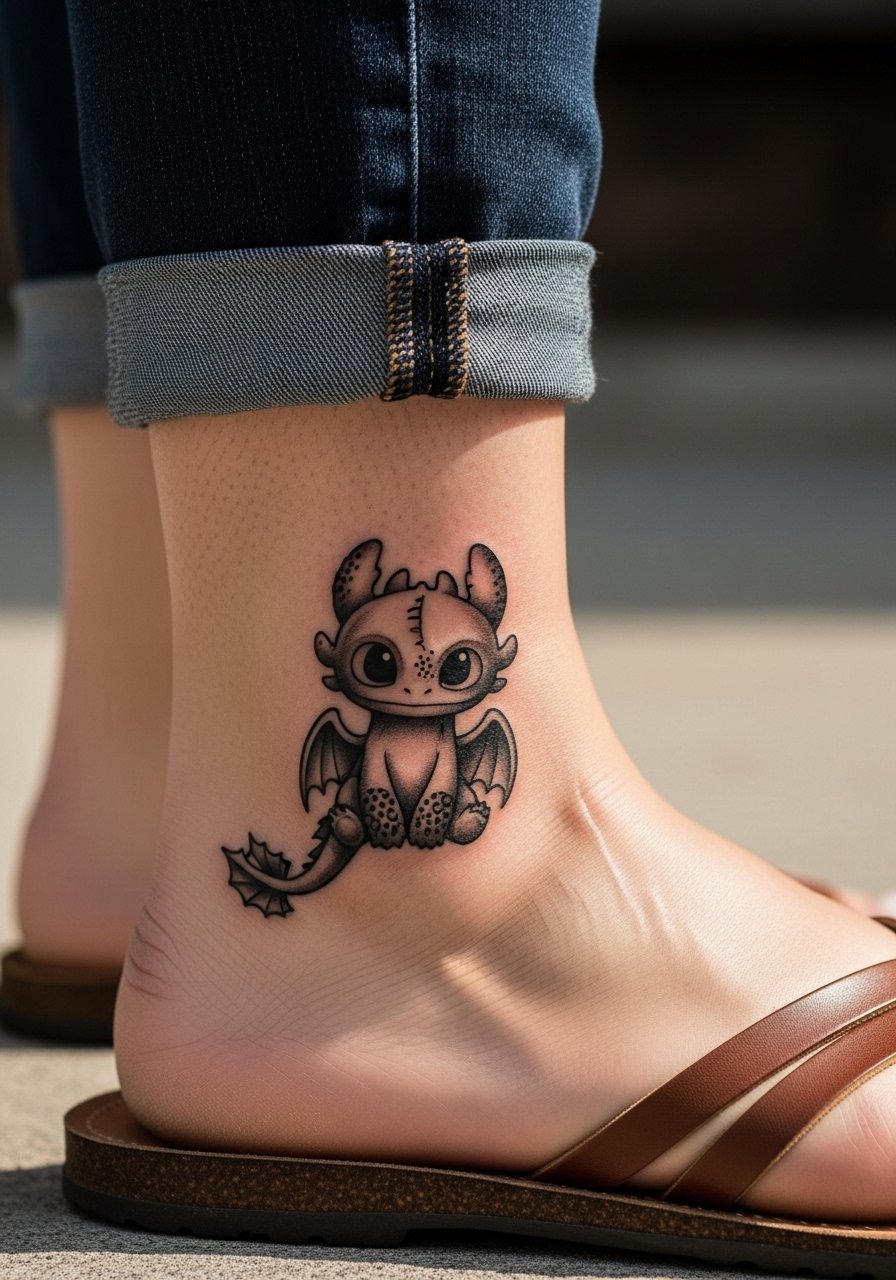
Tiny chibi characters are adorable on the ankle but the area faces constant friction from socks and shoes. Ask for a compact silhouette with solid black anchor points rather than micro-detail that will soften. The session is quick and pain is low on the ankle bone, though healing can feel awkward because of rubbing. For showing it off, wear sandals or roll jeans up and consider a linen drawstring pant on session day so you can keep the area exposed without tight waistbands.
6. Watercolor Flight Scene Across Upper Back
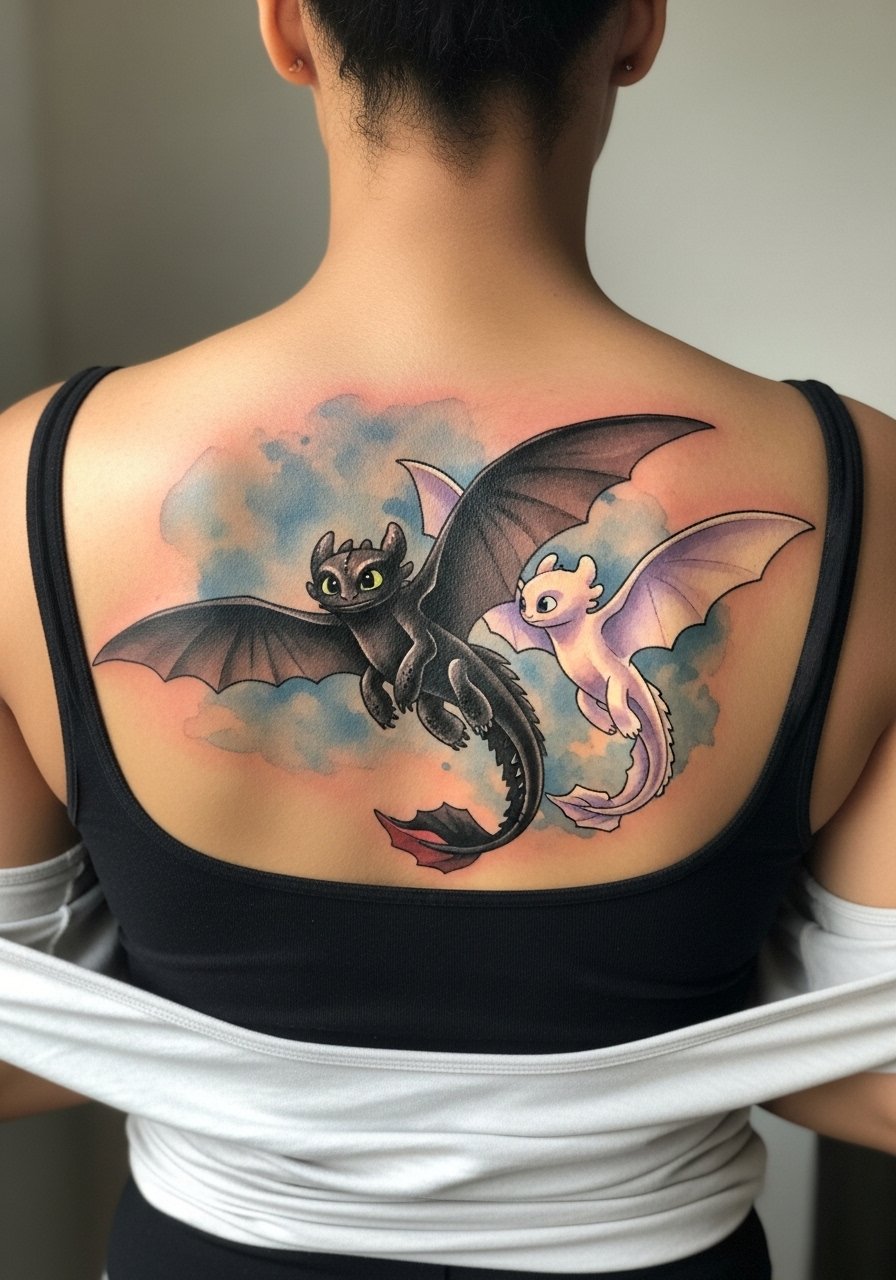
Large watercolor pieces shine on the back because the skin holds saturation and the space allows motion. Plan for two or three sessions for layering and let your artist know you want translucent washes rather than heavy color slabs. Some artists debate whether watercolor fades faster than traditional color. One camp says the soft edges are fragile and need touch-ups; the other argues that larger scale and proper saturation keep the washes readable. Ask your artist where they fall before booking. For photos, an open-back top makes the scene sing.
Studio Day Picks
The ankle, wrist, and forearm pieces above need different prep than the mid-back watercolor, and these items smooth out the session and the first week of healing.
- Stencil transfer paper kit. Lets you preview the placement and line weight on skin before the session, which is helpful for the inner forearm and wrist designs above.
- Topical numbing cream. Applied as directed before the appointment so you can sit through tighter placements like the ankle without flinching.
- Thin protective film roll. Useful for small areas that rub against clothing, such as wrist bands and ankle accents during the first 24 hours.
- Fragrance-free gentle body wash. Cleans the tattooed skin without stripping pigment or irritating fresh linework on forearms and shoulders.
- Aquaphor healing ointment. Thin layers in the first days lock in moisture and ease the itch phase for both fine line and saturated pieces.
7. Tribal Viking-Style Dragon on Upper Arm
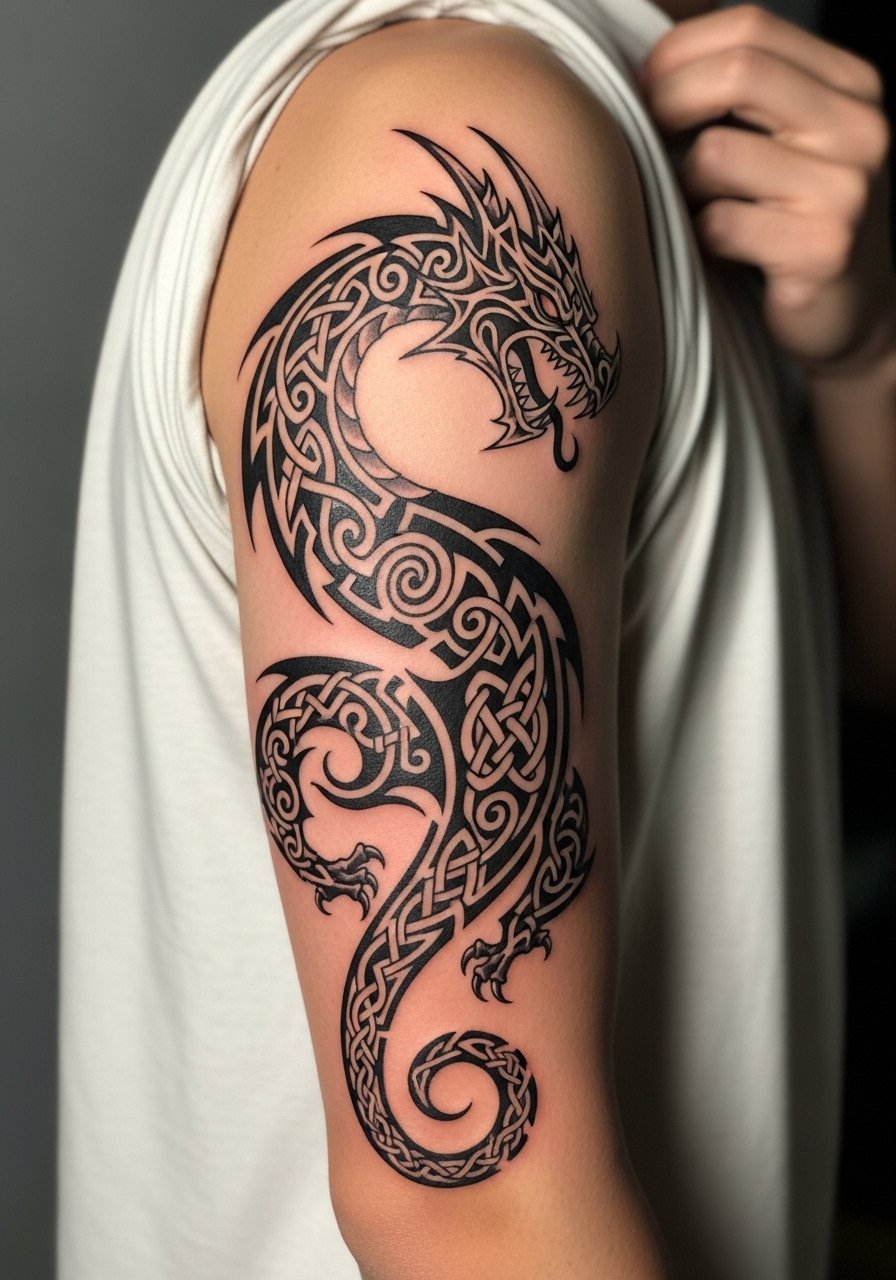
For a take that nods to the franchise without copying character art, tribal knotwork with a dragon silhouette reads strong. Ask for larger line weights and negative space to prevent dense knot areas from filling in. The outer arm is forgiving and this style ages well when the artist respects spacing. A common error is crowding knotwork into a small patch which causes an indistinct mass after healing. Wear a loose button-down shirt on the session day so the artist can access the shoulder without tugging.
8. Dragon Egg Micro-Realism on Sternum
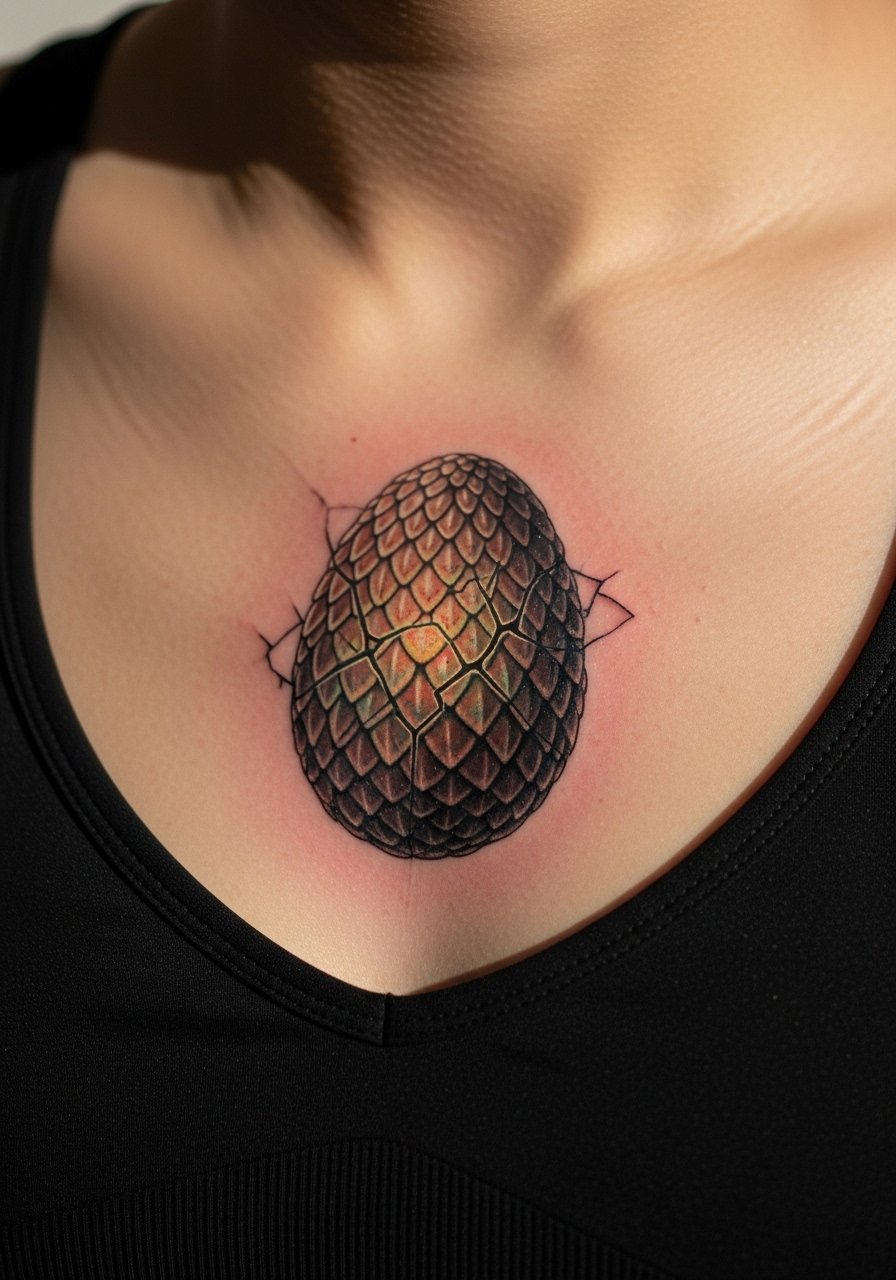
Sternum pieces read intimate and require a steady hand for small texture work. Expect higher discomfort and a need for an artist experienced in chest detail. The downside is that thin skin and movement can blur micro-realism faster than on flatter areas. The smart route is to scale the egg slightly larger than you think and request crisp contrast in the hatch and highlights. Session wear that gives access without exposing more than needed is a fitted sports bra or zip-up hoodie.
9. Minimal Silhouette Toothless Behind the Ear
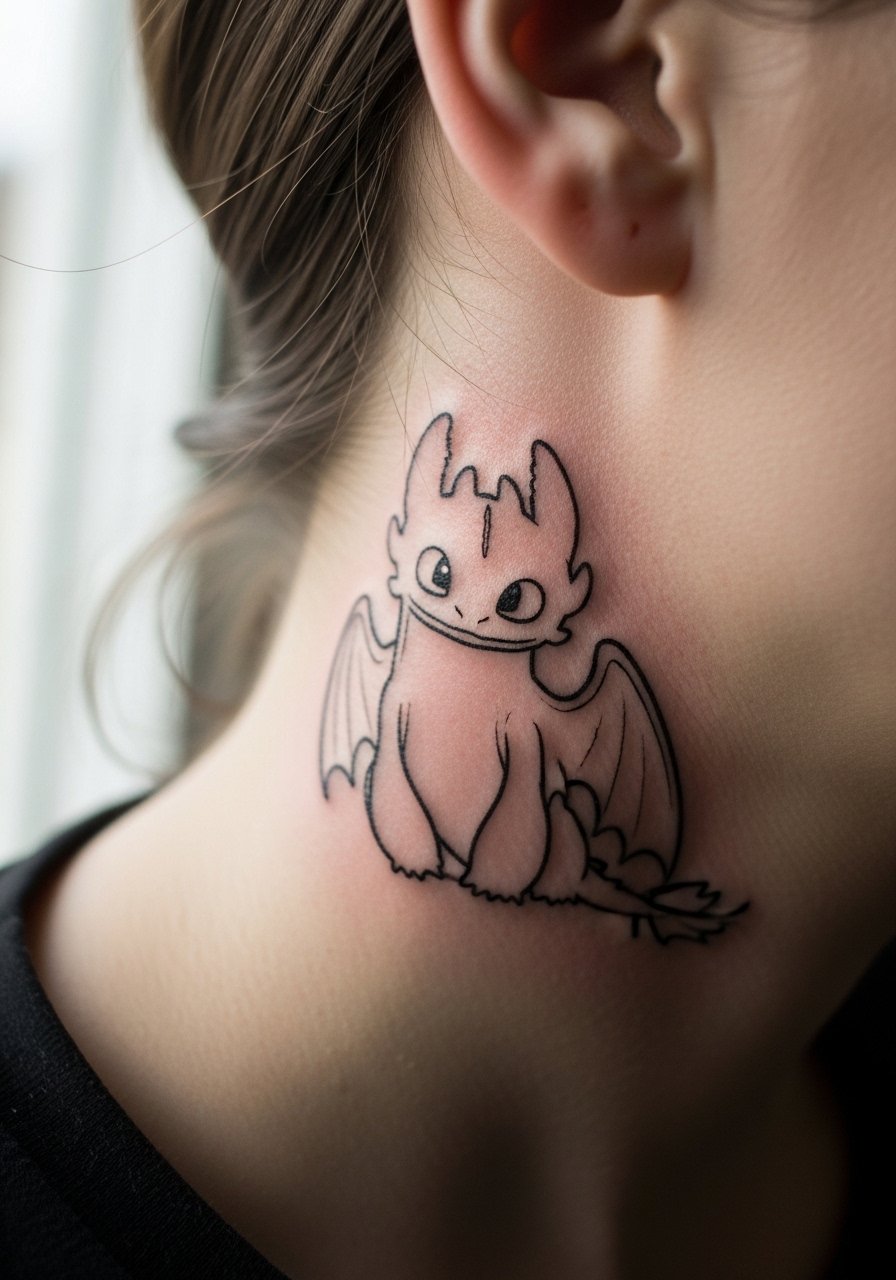
Behind-the-ear placements are subtle and perfect for a tiny franchise nod. The area needs tiny, confident linework and often requires touch-ups because the skin there is flexible and moves with hair and clothing. Tell your artist you want a silhouette rather than facial detail so the image keeps clarity. Healing is quick but plan for a follow-up if any lines soften. Because the spot is small and near hair, skip heavy hair products for a week after the session.
10. Scripted Quote with Tiny Toothless on Collarbone
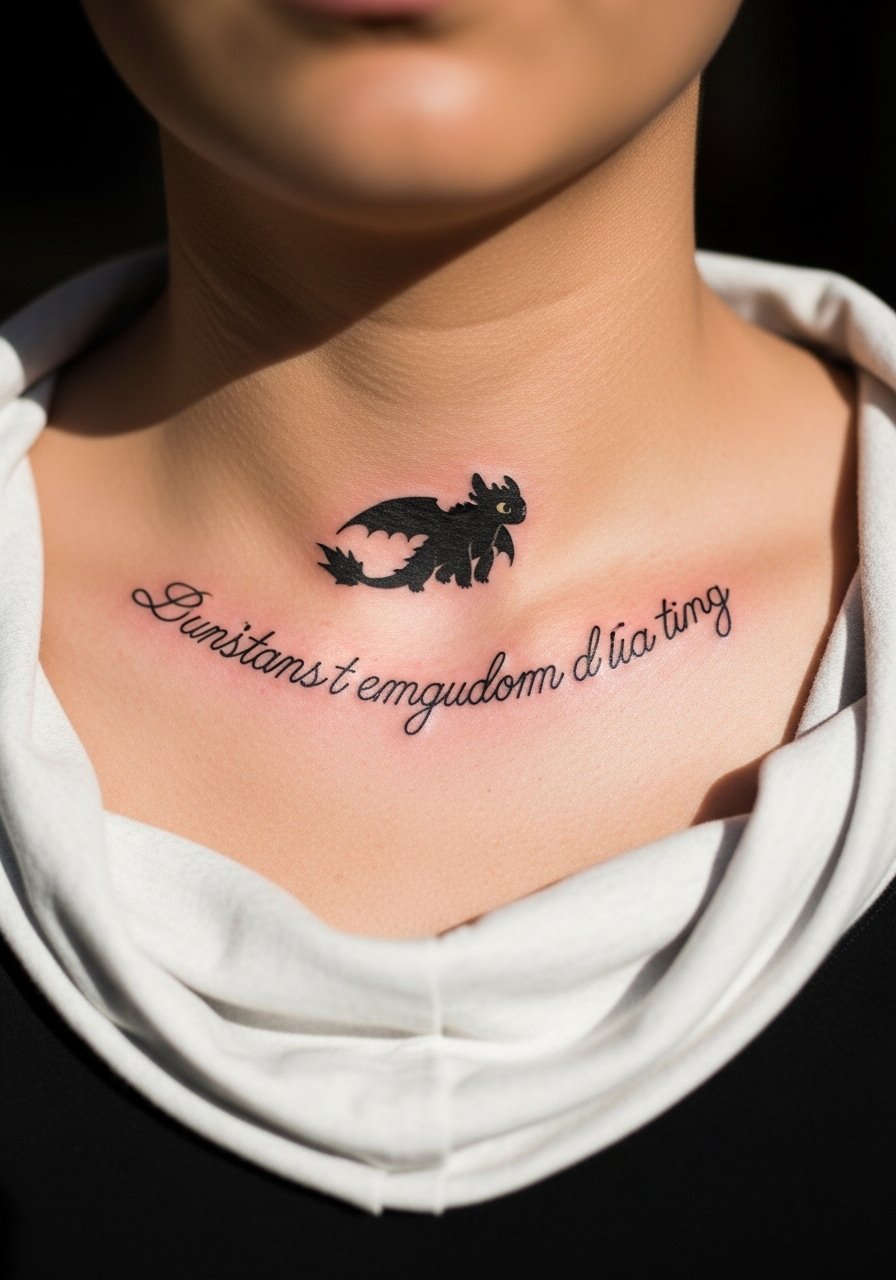
Collarbone pieces show nicely with thin script paired to a tiny character mark. The collarbone can be bony so expect sharper sensations during the session. Ask for slightly heavier script strokes so letters do not wash out over time. A common mistake is cramming long text into the area; keep the phrase short and allow breathing room around Toothless. Show-off pairing with a thin chain pendant necklace keeps the neckline focused without covering the work.
11. Stipple-Shaded Dragon Skull on Calf
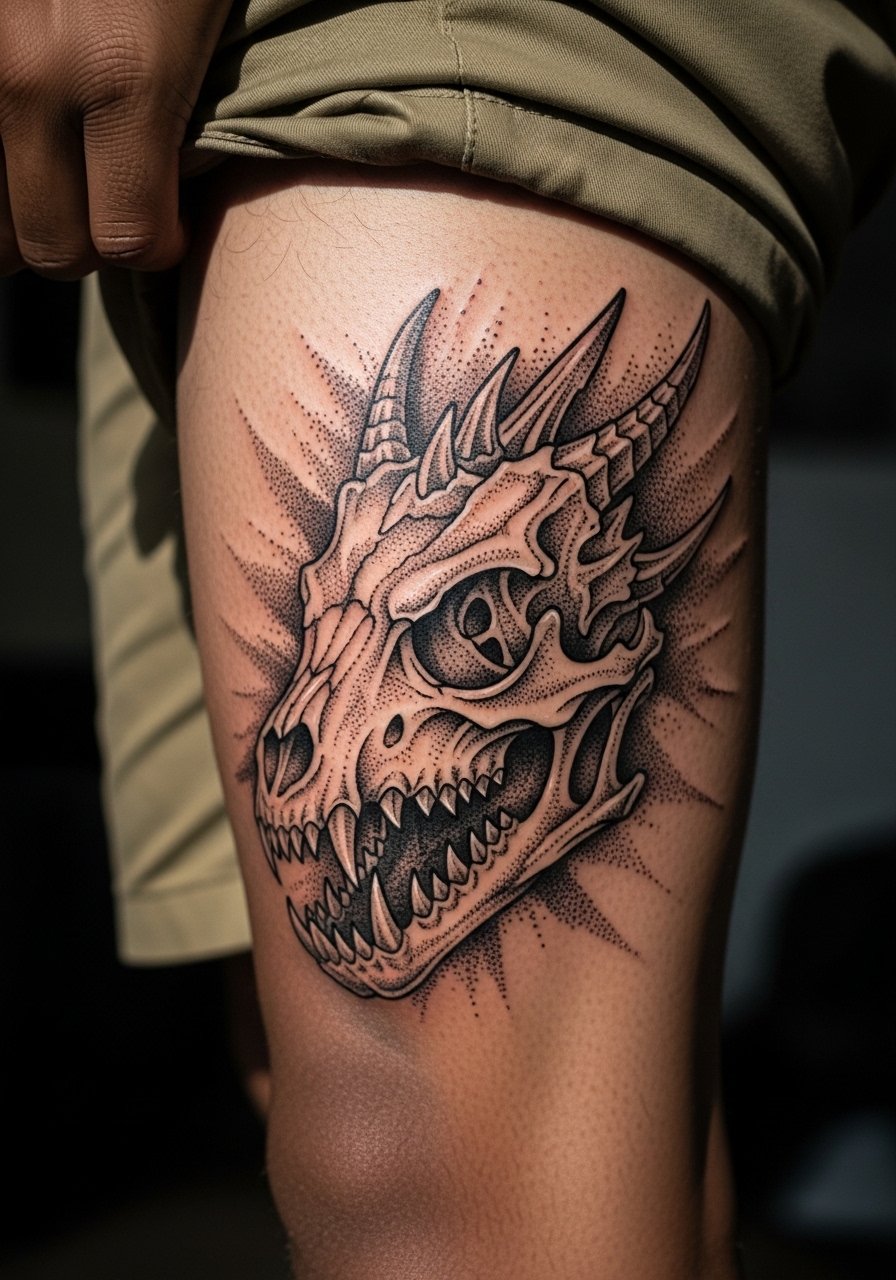
Dot work and stipple shading age predictably because they rely on contrast, not thin lines. The calf is a forgiving canvas for texture and detail, and sessions can be longer as circulation handles extended passes. Ask the artist for treatment of midtones with dot density rather than fuzzy shading, and avoid cramming tiny text into the same area. Session wear that keeps the leg free and relaxed is best to avoid shifting during long sittings.
12. Constellation Toothless Finger Dot Work
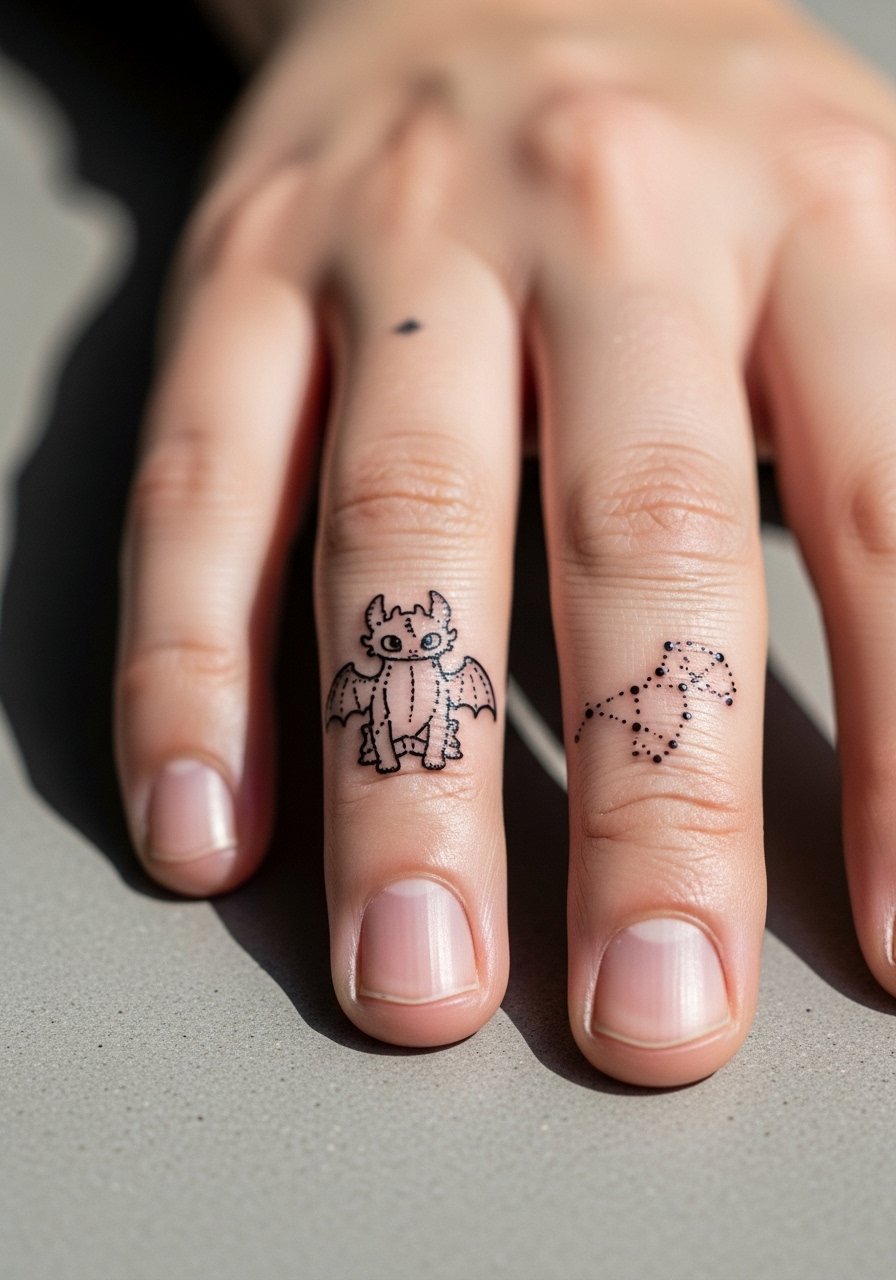
Finger tattoos are notoriously high maintenance because of constant washing and skin turnover. For this style, request solid black anchor points and simplified shapes rather than tiny hairlines. Expect at least one touch-up within a year. The session is quick but the aftercare feels prolonged because fingers rub against surfaces constantly. If your job tolerates visible ink, this is a playful choice. Keep in mind friction zones will fade faster than forearm pieces.
13. Full Chest Flight Scene with Stipple Clouds
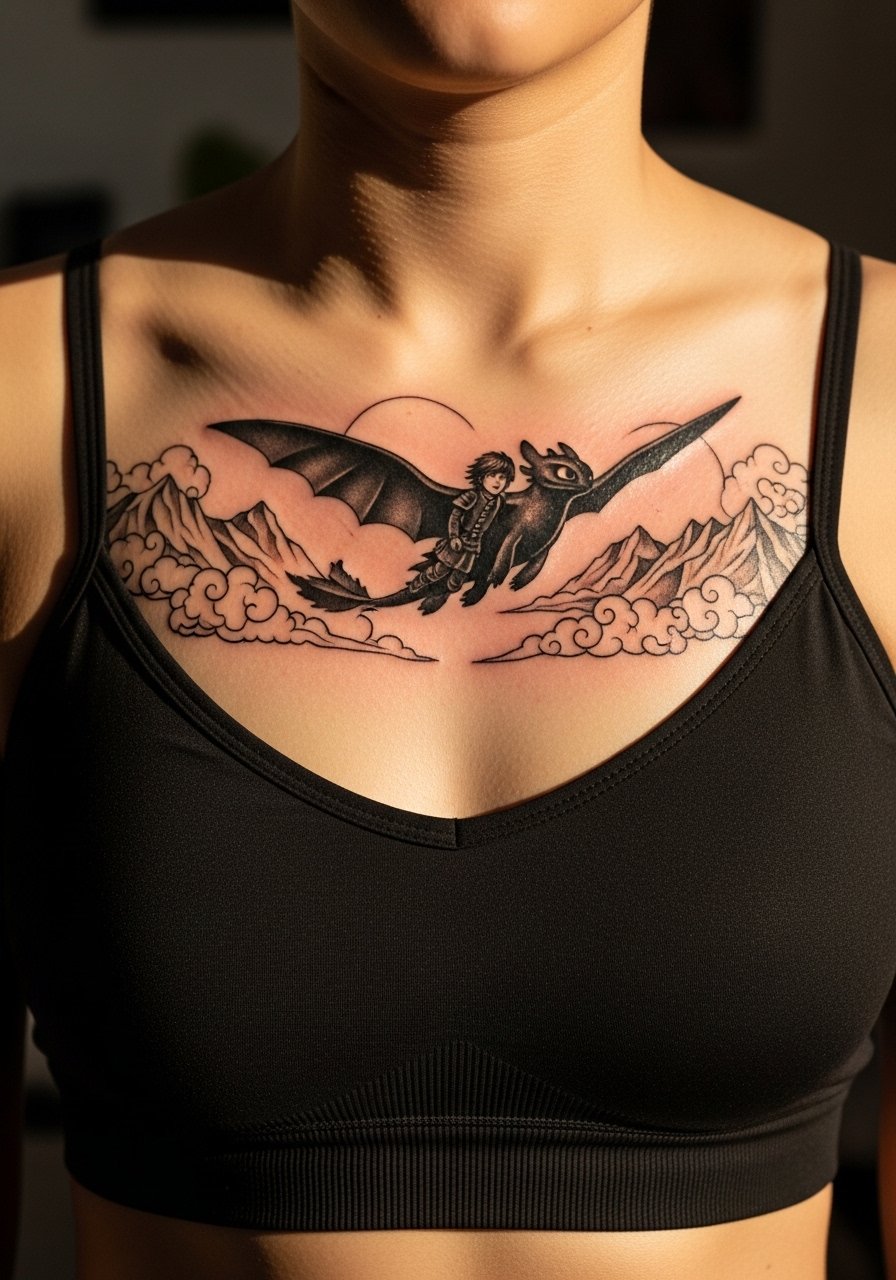
Large chest pieces read dramatic and photograph well, but they require planning for expansion and future touch-ups. The sternum and chest skin move with breathing so ask about how the composition shifts when you stand versus lie down. Artists split on whether dense stippling holds better on chest than soft watercolor. One camp prefers stipple for longevity, the other prefers broad saturation for strong color. Name the look you prefer and ask the artist for a healed mockup in photos before booking.
14. Neck Nape Tiny Toothless with Dot Halo
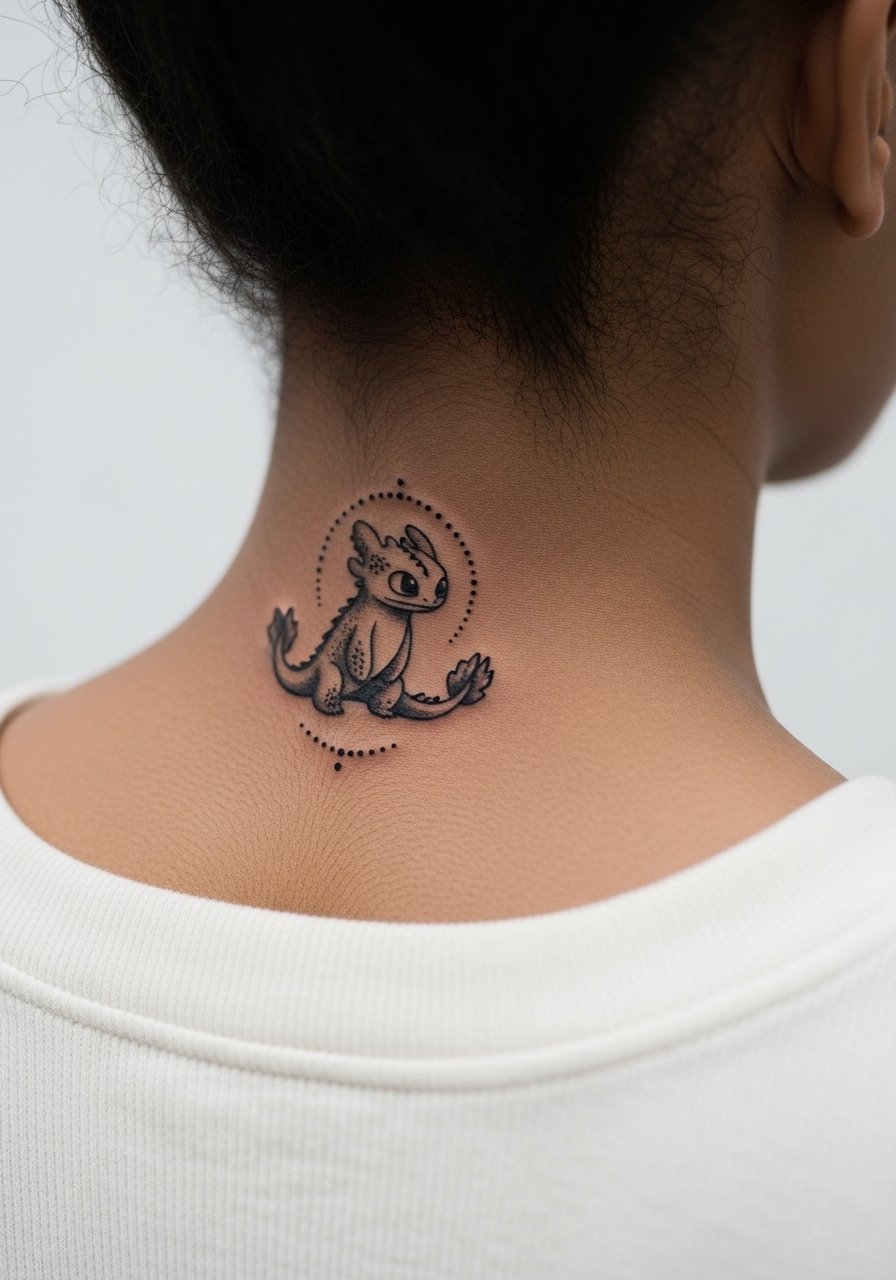
Nape tattoos are visible with certain haircuts and hidden with others. The skin there heals well but can scar if overworked, so a brief session with crisp single passes is better than long heavy shading. Ask for a stencil you can wear for a day to check placement, especially if your hair will sometimes cover it. This placement pairs with updo hairstyles for evenings or loose hair when you want it private.
15. Film-Style Poster Piece on Thigh
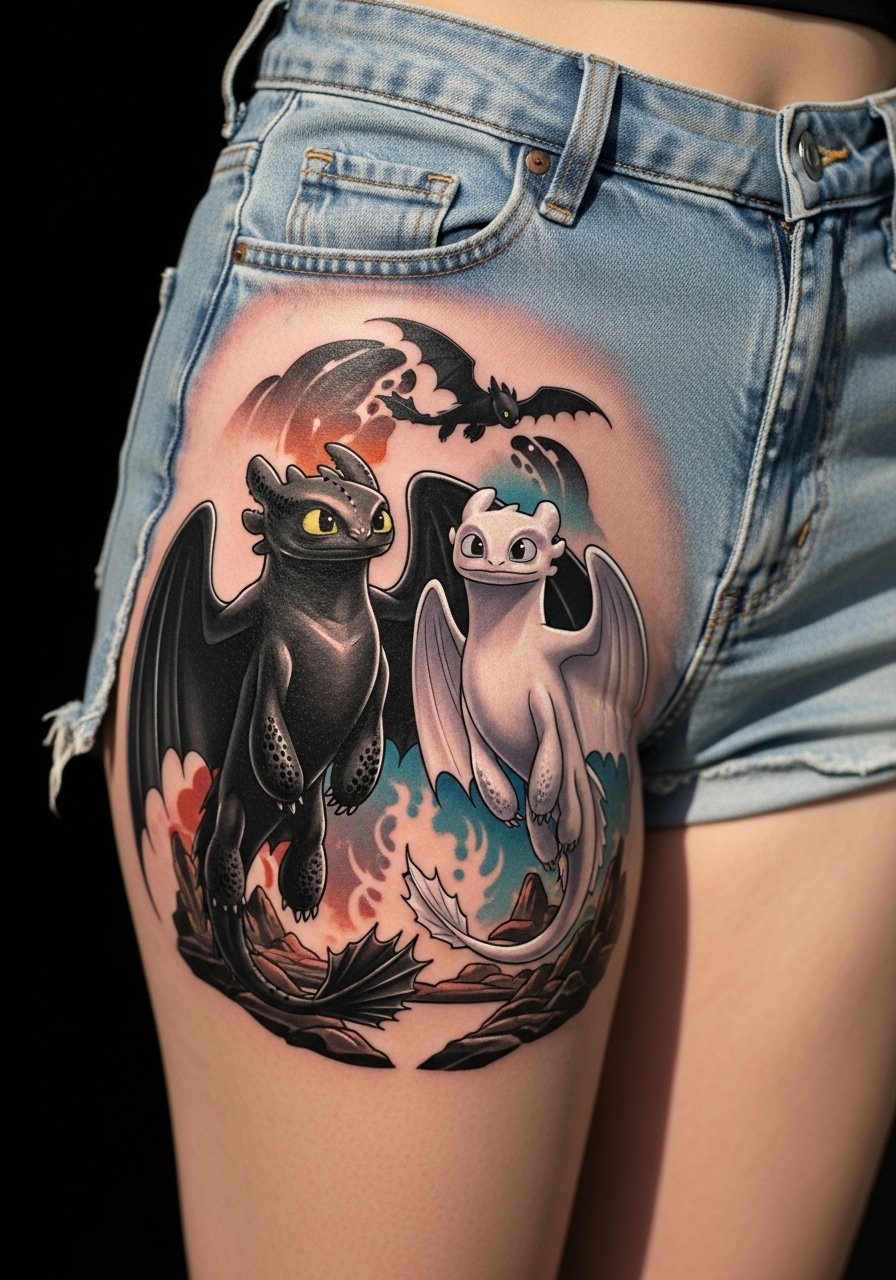
Thighs are ideal for larger narrative pieces with mixed techniques, because they allow scale and protect color from daily sun. Plan for multiple sessions and ask for color layering to avoid patchiness. The downside is that tight clothing can rub during healing, so wear loose bottoms afterward. For the session and recovery, bring a loose drawstring linen pant to keep pressure off the area while moving around.
16. Spine Flight Linework with Minimal Color
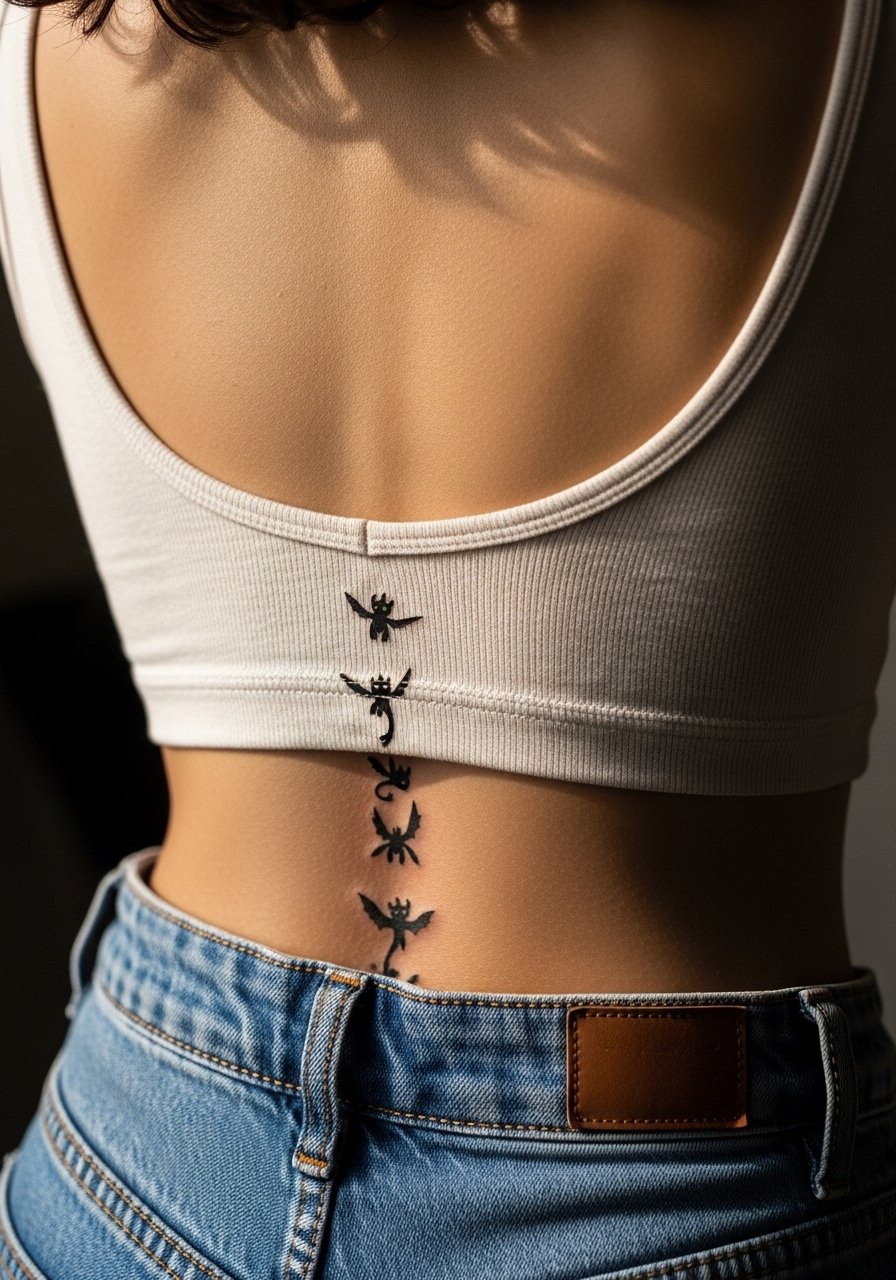
Spine pieces read elegantly but can be painful where the vertebrae are close to skin. Keep the figures small to medium and avoid over-detail that will blur along the vertical axis. Stagger spacing so each silhouette keeps definition over time and request touch-up planning in your consult. For showing off, open-back tops look great and do not drag across the column of work. Recovery requires sleep adjustments if you tend to lie on your back.
17. Playful Neo-Traditional Toothless on Hand
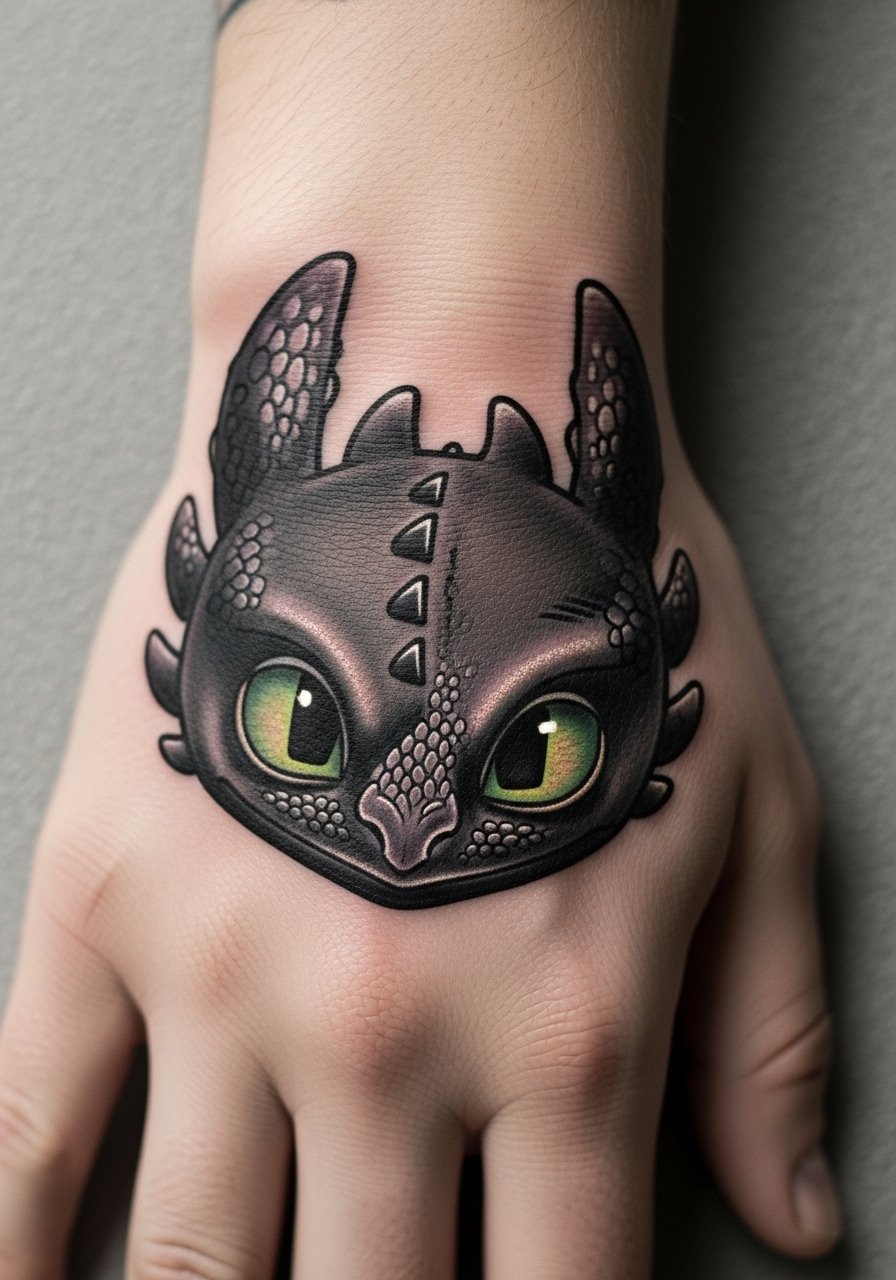
Hand tattoos still affect hiring in some industries and fade faster from sun and washing. If you want a hand piece, choose bold shapes and saturated color rather than tiny facial detail. Artists often caution about hands for their high touch and exposure. If you move forward, plan for yearly touch-ups and ask the artist to reinforce outlines. On the appointment day, wear a sleeve you can roll up easily so the artist has clean access without transferring fabric lint onto fresh ink.
Frequently Asked Questions
Q: Will a fine line Toothless on my forearm blur faster than a neo-traditional piece?
A: In my experience, fine line tattoos depend heavily on placement and spacing. Forearms can hold linework well if the lines are given breathing room and slightly more weight than micro hairlines. Neo-traditional pieces with solid outlines and saturation tend to keep their silhouette longer, but both styles can look great for years with proper sun protection and occasional touch-ups.
Q: Do watercolor-style dragon tattoos need a different aftercare approach than blackwork?
A: Watercolor pieces need gentle handling because the color sits more diffusely in the skin, but the core aftercare is the same: clean gently, keep it moisturized, and avoid sun while healing. Expect color to settle and soften over a few months, and schedule a color-refresh session if you want the original vibrancy restored later.
Q: How big should a Toothless face be to keep facial detail readable after two years?
A: From what I have seen, facial detail starts to blur under three inches unless the artist uses confident line weight and strong contrast. If you want expression to last, aim for four inches or ask your artist to simplify facial elements into strong shapes rather than hairline detail.
Q: Are hand and finger placements worth it if I want a small character nod?
A: Hands and fingers are high maintenance and will likely need touch-ups more often. If you want a small nod, consider the wrist or behind the ear instead. If the hand is important to you, pick bold, simplified shapes and accept that annual refreshes are common.
Q: What should I wear to a ribcage or sternum session to make it easier for the artist?
A: Wear a fitted sports bra, bandeau, or a wide-neck shirt you can pull aside so only the tattoo zone is exposed. Comfort is the priority, so pick something you can move in and that gives the artist clean access without requiring you to be fully undressed.
