
Fine line tattoos are everywhere on saved boards, and the gap between the trend and what lasts is getting louder. Hyper-delicate scripts and album nods look gorgeous fresh, but where you place them and how the line weight is handled will decide if they need touch-ups at year two or still read clean at year seven. Below are 21 Frank Ocean–inspired concepts with consultation notes, aging expectations, and outfit tips for showing them off.
1. Blonde Album Cover Outline on Inner Forearm
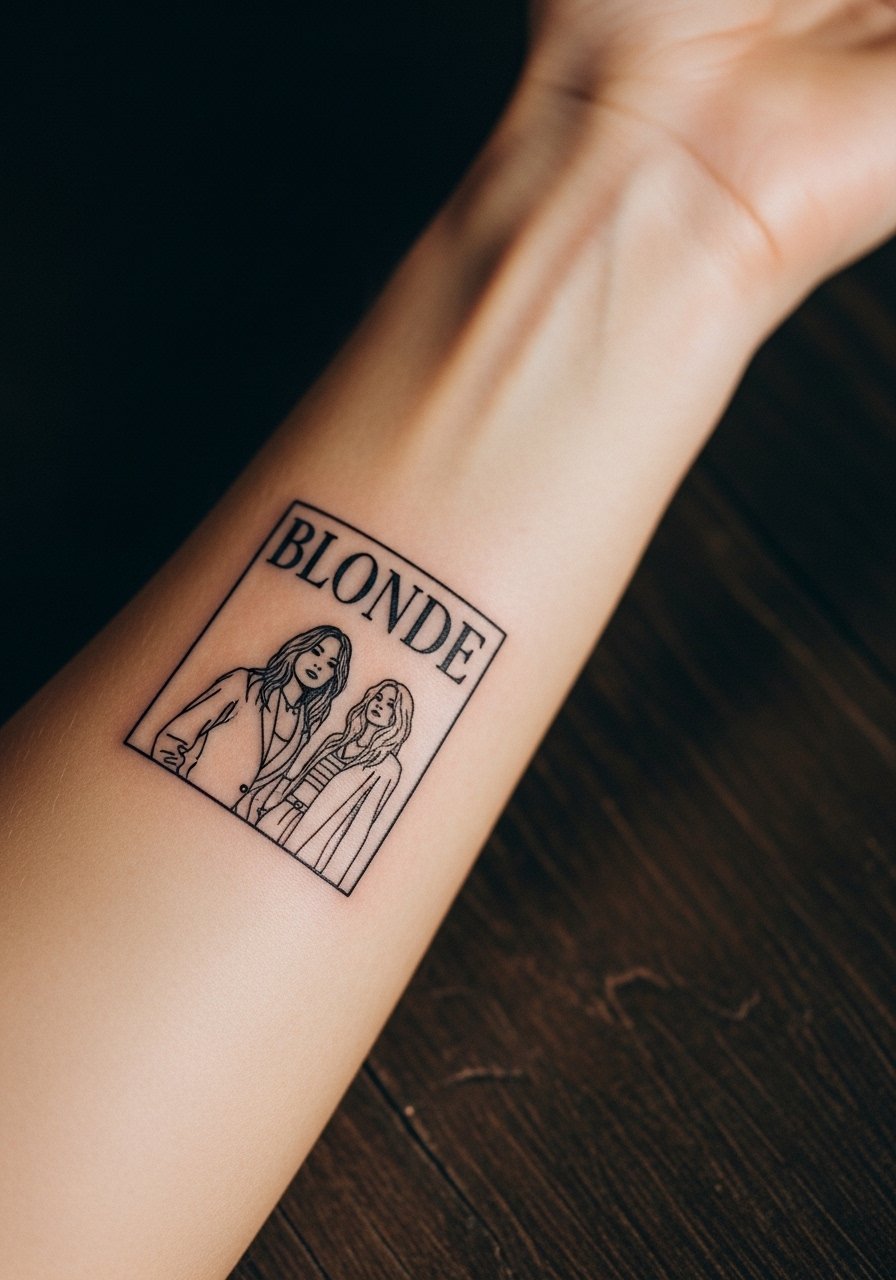
I recommend this as a first Frank Ocean piece because the inner forearm gives you a flat canvas and predictable aging. Tell your artist you want single-pass fine line with slightly heavier anchor points near corners so the contour holds. Common mistake is asking for ultra-needle-thin lines that disappear on medium and dark tones after a year. Expect the piece to read crisp at six months, soften by two years, and need a touch-up around year three if you want those edges unchanged. Session feels tame, about 45 to 75 minutes. For showing it off, roll a chambray shirt rolled cuff and a slim gold chain bracelet to balance the forearm without crowding the linework.
2. Channel Orange Vinyl Script on Wrist
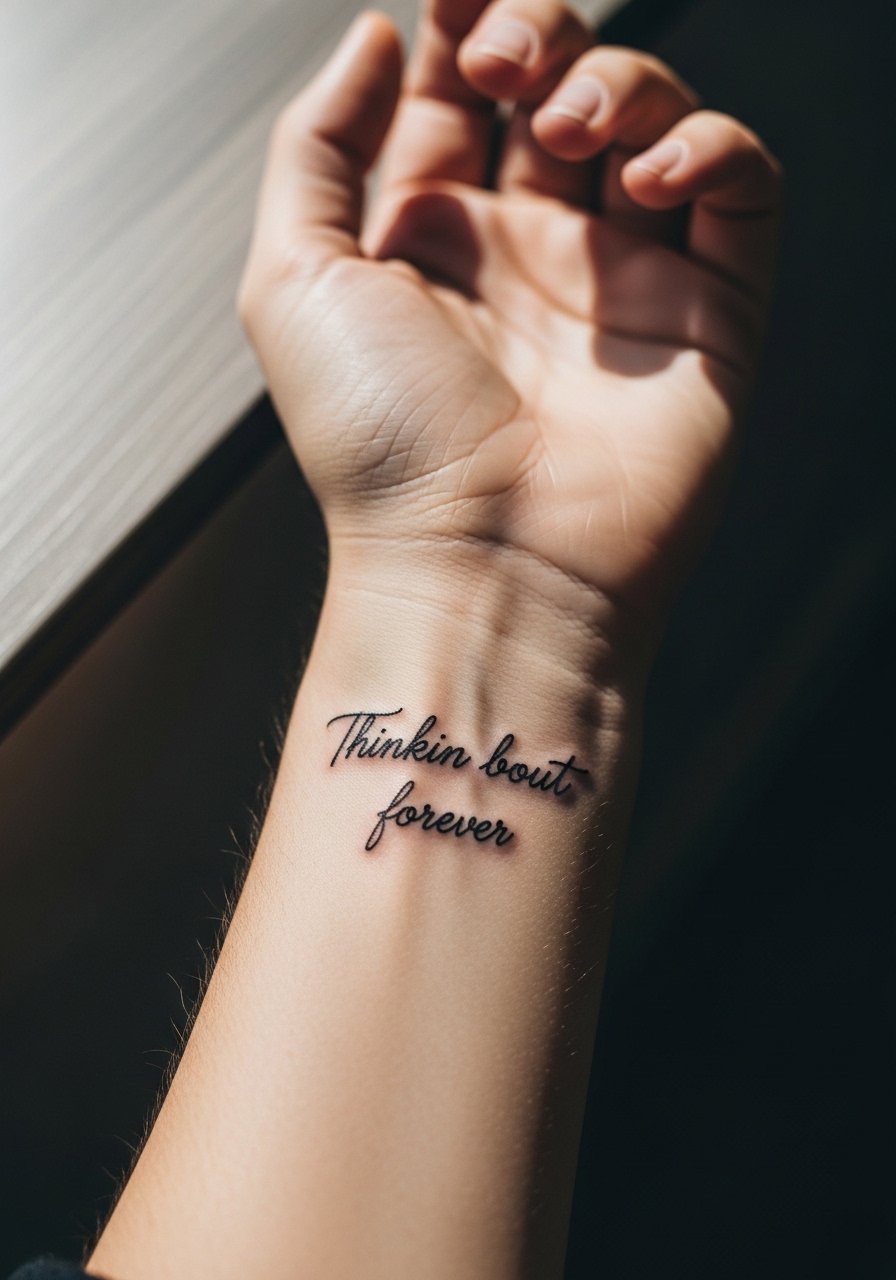
Wrist script reads intimate but faces friction from sleeves and washing. In consultation, ask for fine line script with a slightly thicker spine on each character so the quote holds. Artists split on whether wrists are fine line-friendly. One camp says wrists blur fast because of constant motion and washing. The other camp insists that careful depth and slightly bolder single-needle strokes settle beautifully. I advise leaning toward the bolder fine line approach for longevity. Expect 30 to 60 minutes in the chair and a likely touch-up at year two. Show it with a thin leather cuff bracelet on the opposite wrist and skip heavy watches when you want to showcase the script.
3. Patchwork Blonde Elements on Outer Forearm
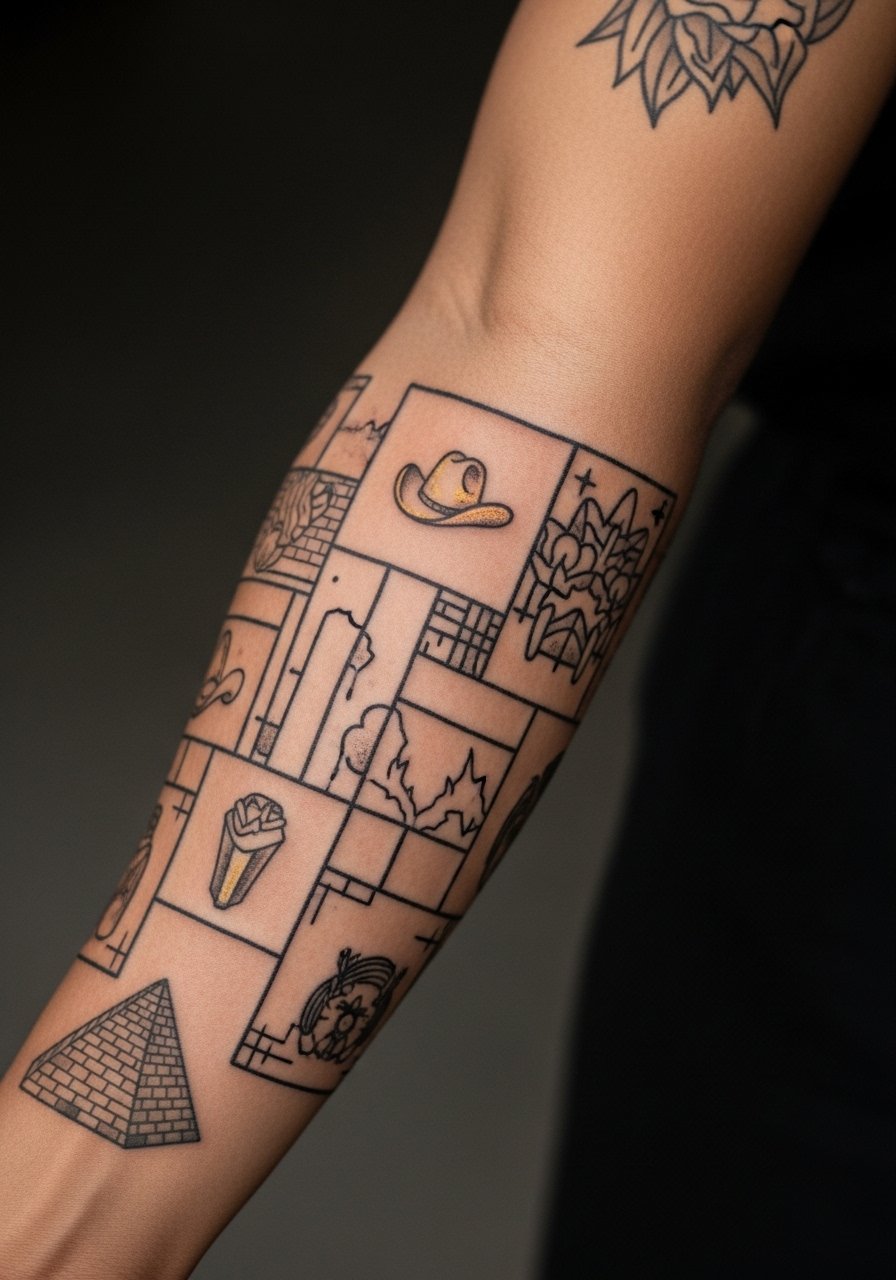
Patchwork lets you start with a single symbol and build a sleeve over time. I suggest beginning with a motif that has a simple silhouette, like the cowboy hat, and spacing pieces so they can breathe as you add more. A frequent error is crowding symbols too close early on. Outer forearm work tolerates color accents, but remember color fades differently so plan for re-saturation later. Sessions are modular, one to three hours per piece depending on color. The outer forearm shows well with rolled-up sleeves, but on session day wear a loose fit short sleeve tee so the artist has full access without fabric tugging.
4. Micro Nikes Logo at Ankle
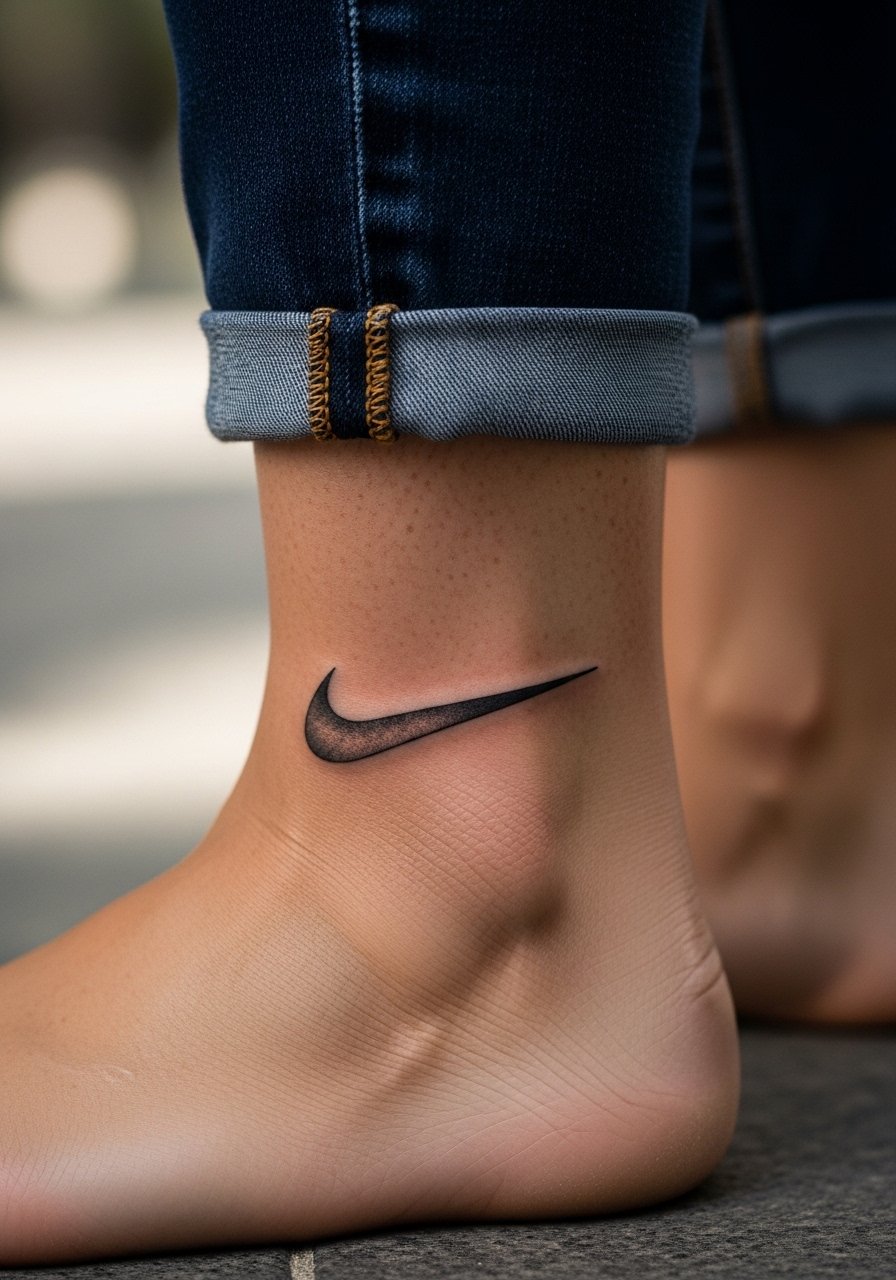
Micro-realism logos are a subtle fan flex that stay discreet. The ankle is a classic spot for a one-inch swoosh but watch for blowout because the skin there is thin. Ask for crisp single-needle shading with soft highlights and a shallow curvature that follows the ankle bone. Many people forget how footwear rubs this area, so expect slight fading from shoes and socks. Session time is short, around 30 to 45 minutes, but plan to roll jeans up for at least two weeks after. For summer wear, cuffed straight-leg jeans or strappy flat sandals put the micro piece on display without overstressing the area.
5. Self Control Wave with Lyric Script on Inner Bicep
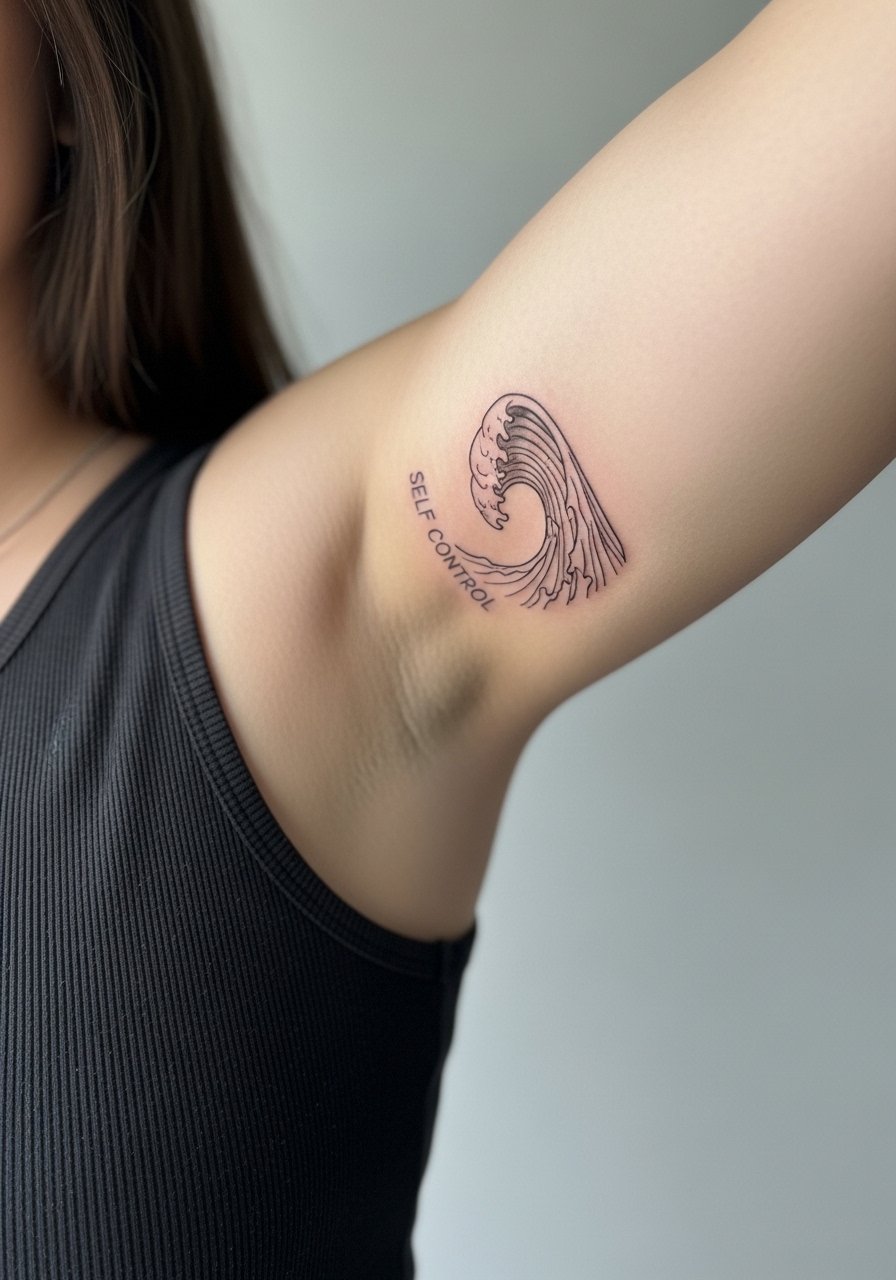
Inner bicep work gives a private vertical canvas that reads like a secret. The skin here takes ink well but can bruise early, so expect a tender few days. Ask your artist to map the wave flow vertically so it compresses gracefully when the arm moves. A common mistake is making the script too tiny on this curved area, which can make letters blur into the wave as it heals. At six months the wave keeps its motion; at two years the fine script may need a light touch-up. Sessions run one to two hours depending on length. For the appointment, wear a sleeveless cotton tank to let the artist work cleanly.
6. Pyramid Minimalist Dot Work Behind Ear
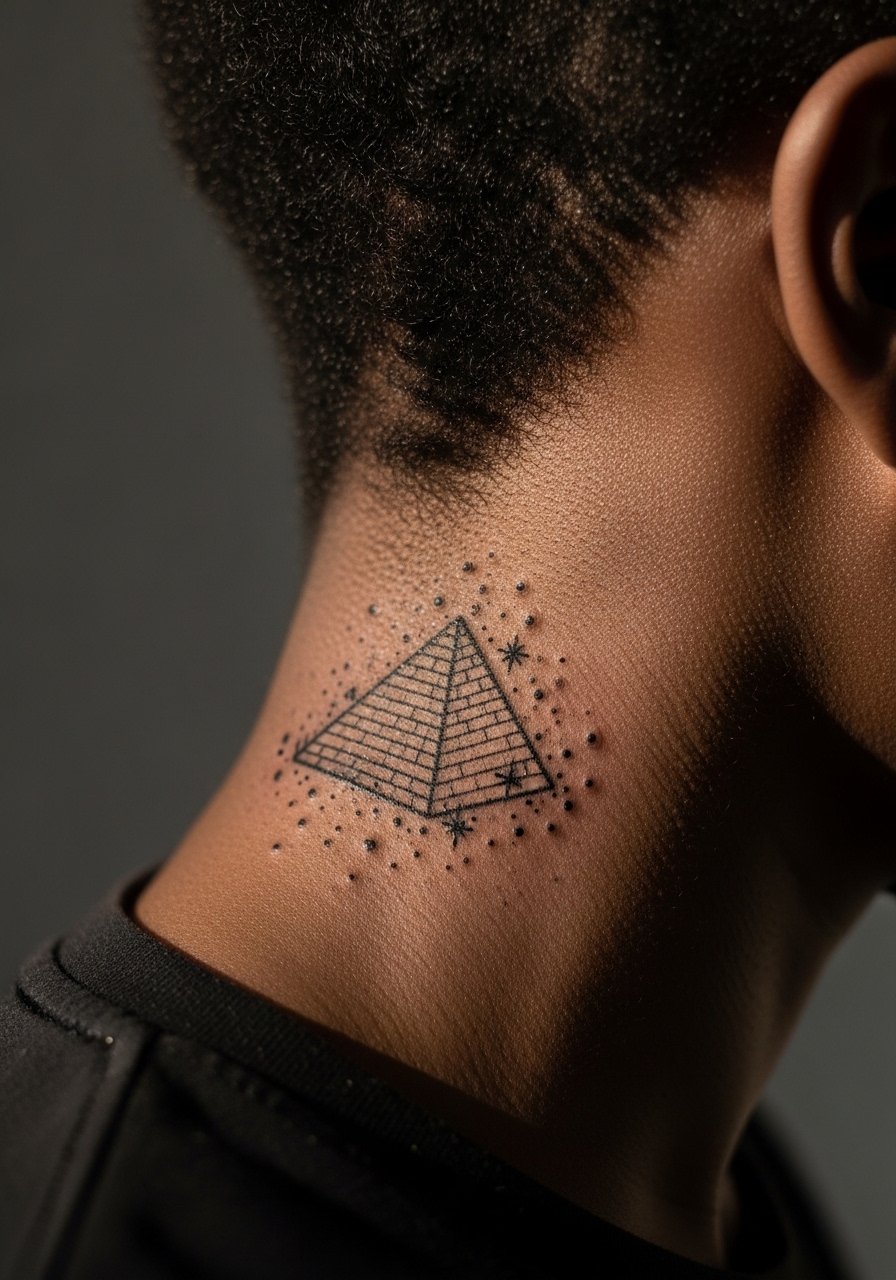
Tiny geometric pieces behind the ear are a discreet nod to Blonde themes, and they age well if spaced properly. The biggest mistake is packing dots too close together so they melt over time. Tell your artist you want single-line geometry with dot-work accents spaced evenly. This spot is low friction but high movement from hair and collars. Artists also disagree about fine line on such thin skin. One group warns that the area can lose definition quickly. The other group has seen clean results when the needle depth is dialed in. Plan for a short session and ask about touch-up timelines at consultation. Keep hair styled to partially cover the area if you want it hidden.
Studio Day Picks
These items smooth out the small-work sessions above, especially wrist, ankle, and behind-ear placements that face friction and frequent washing.
-
Stencil transfer paper kit. Helps you preview placement on skin before the needle hits, which is useful for inner forearm and wrist scripts.
-
Topical numbing cream. Applied before short sessions eases ankle and wrist sensitivity without adding major downtime.
-
Thin protective film roll. Keeps small pieces like finger and wrist tattoos cleaner through everyday hand washing and friction.
-
Fragrance-free body wash. Gentle cleansing prevents irritation on delicate linework in the first week.
-
Aquaphor healing ointment. Thin layers during initial days help fine line work retain saturation without clogging.
7. Ivy Script in Blackwork on Calf
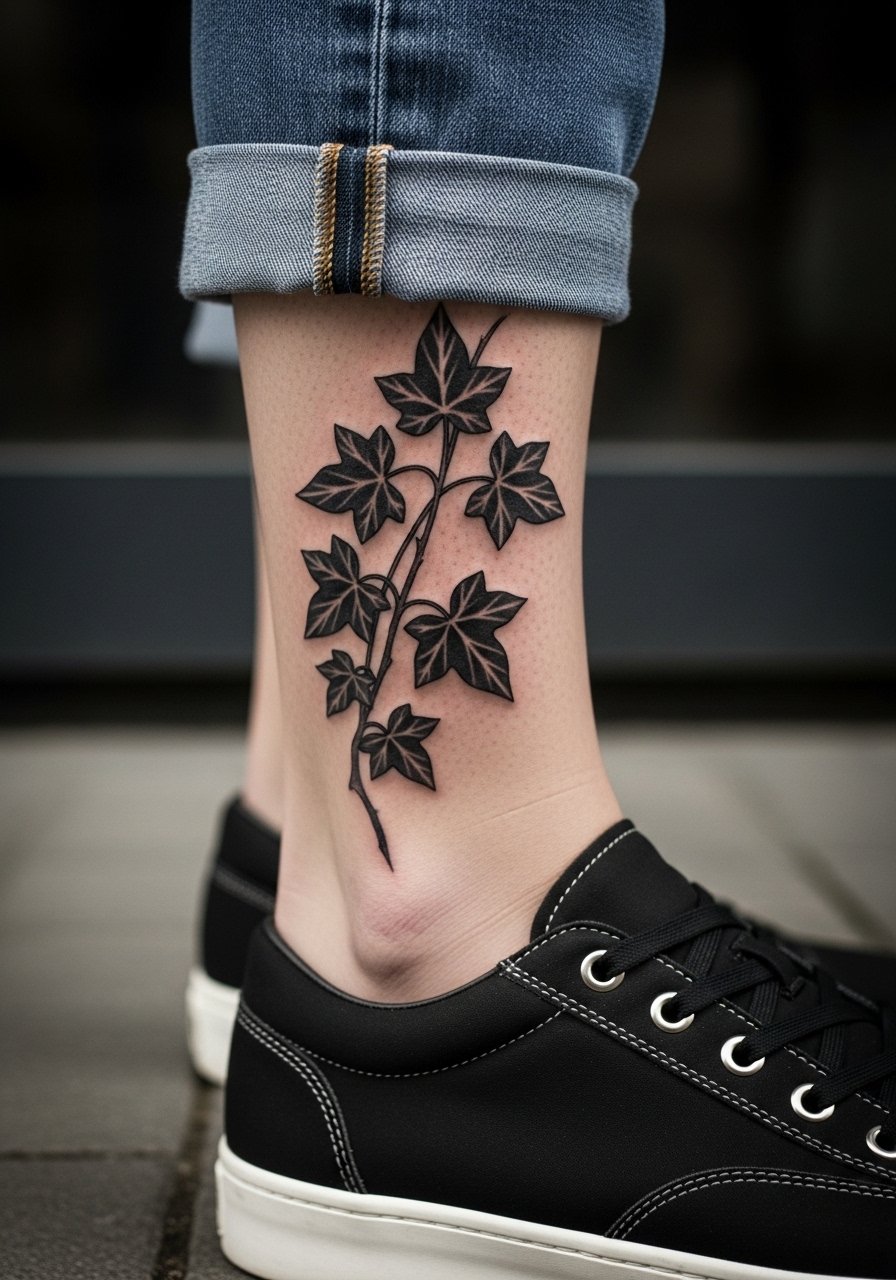
If you want visibility and longevity, blackwork script on the calf is a strong choice. The calf takes saturation well and resists blowout when lines are bold. Ask for thicker strokes than you might pick on the wrist so the letters stay legible on darker skin tones. A common error is requesting thin script like a wrist piece and finding it fades into texture. Calf sessions are comfortable for most people and usually take an hour or two. Healed at six months the outline reads solid and by five years it often keeps its weight without many touch-ups. Pair tall boots or rolled trousers that reveal the script along with simple sneakers when you want to show it off.
8. Endless Spiral Abstract on Side Ribs
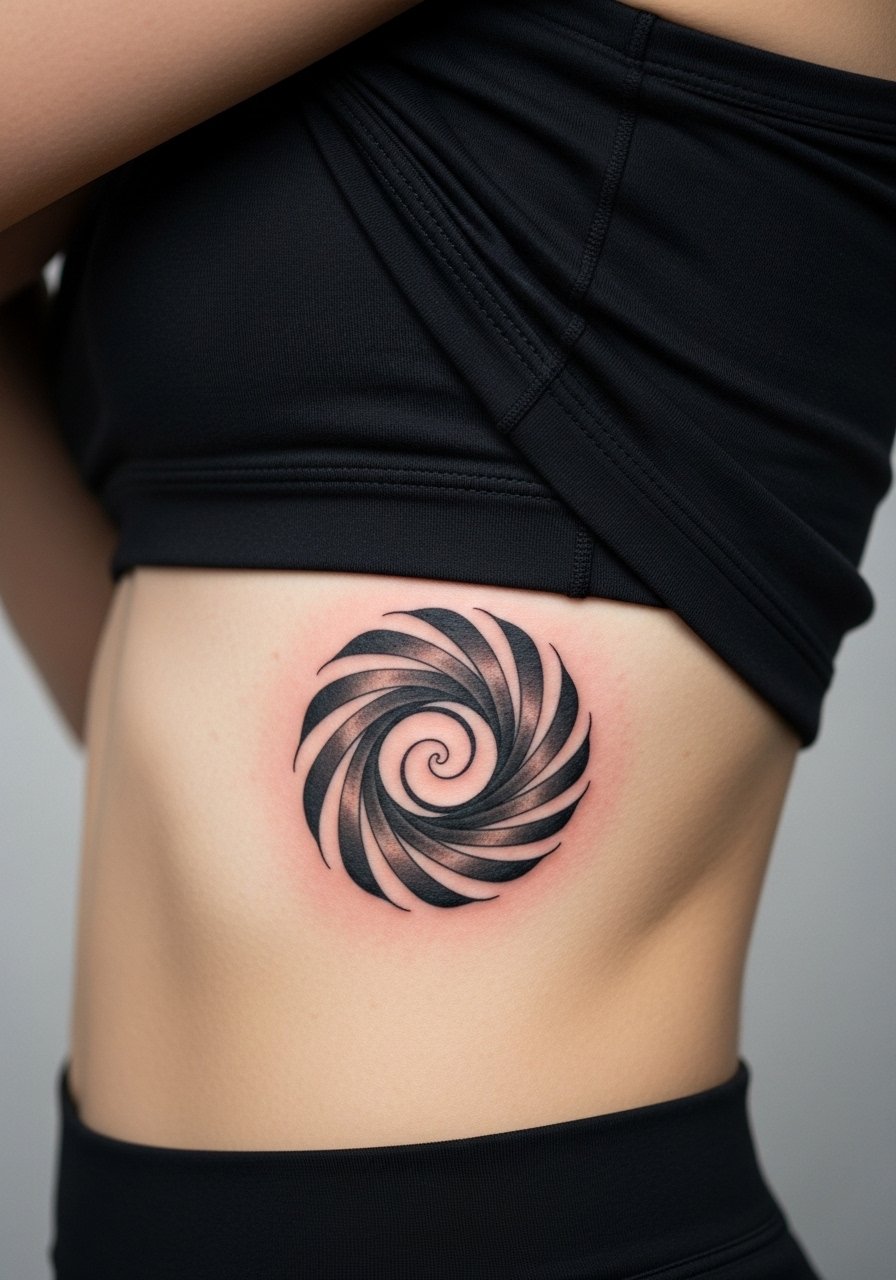
Ribcage sessions are famously tender, so weigh the aesthetic against the session intensity. The spiral motif benefits from spacing and gradient that create depth without dense linework that can merge. Artists split on fine line here because of skin stretch during breathing. One camp warns of blurring. The other camp argues proper spacing and shading make fine line work last. Preparation advice is simple. Hydrate, eat, and expect longer sessions with breaks. At two years expect some softening in the gradients on the outermost edges. For an outfit that teases the piece, a side slit black dress or a cropped top works well for nights out.
9. Pyramid Micro on Finger
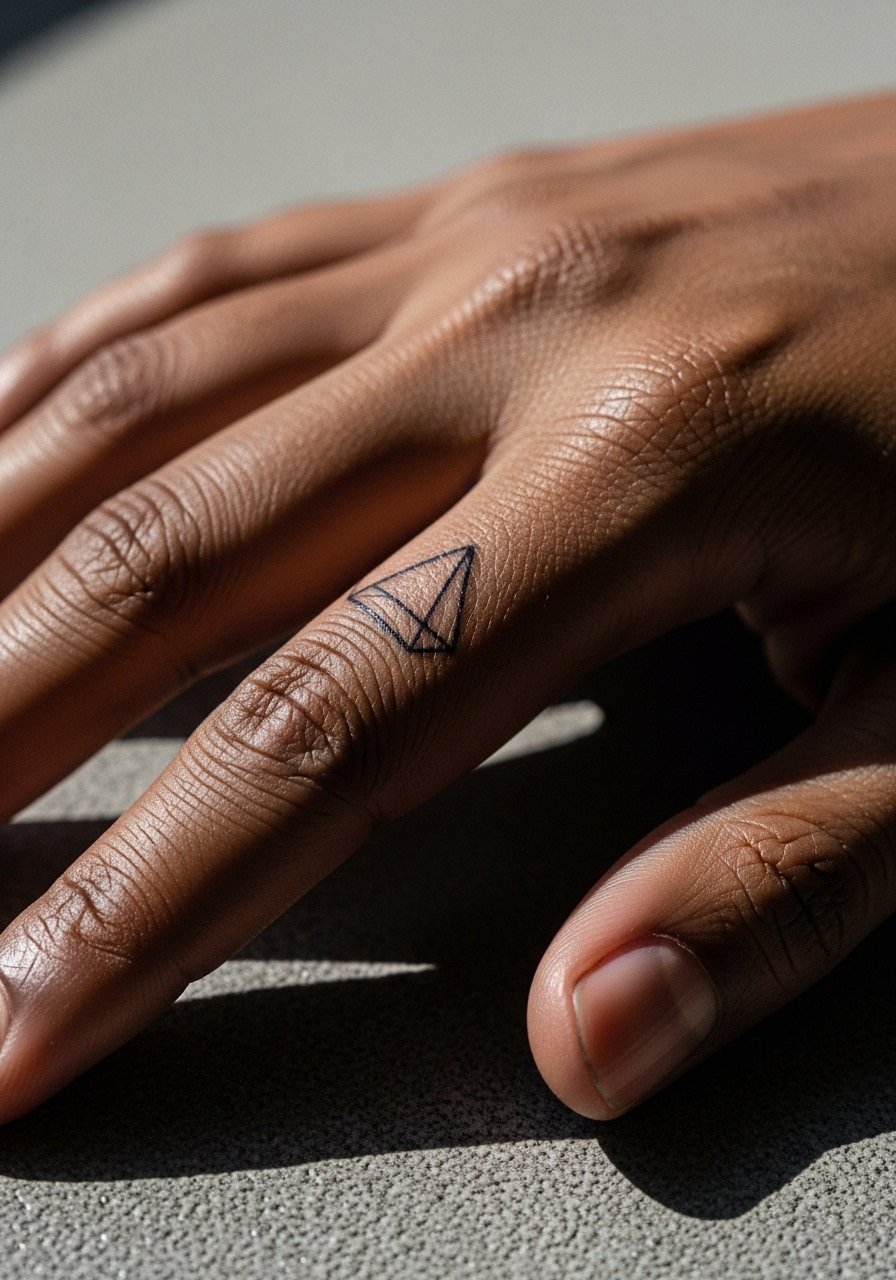
Finger tattoos are bold choices but carry a higher fade and touch-up rate because of frequent washing and skin renewal. For a clean pyramid, ask for slightly bolder perimeter lines and negative-space interior for contrast. The usual mistake is going too small and too faint. Expect a quick session under 30 minutes but plan on touch-ups in one to two years. Recovery involves extra care because of daily hand use. For showing this micro piece, keep other hand jewelry minimal so the geometric shape reads clearly.
10. Channel Orange Vinyl Accent on Collarbone
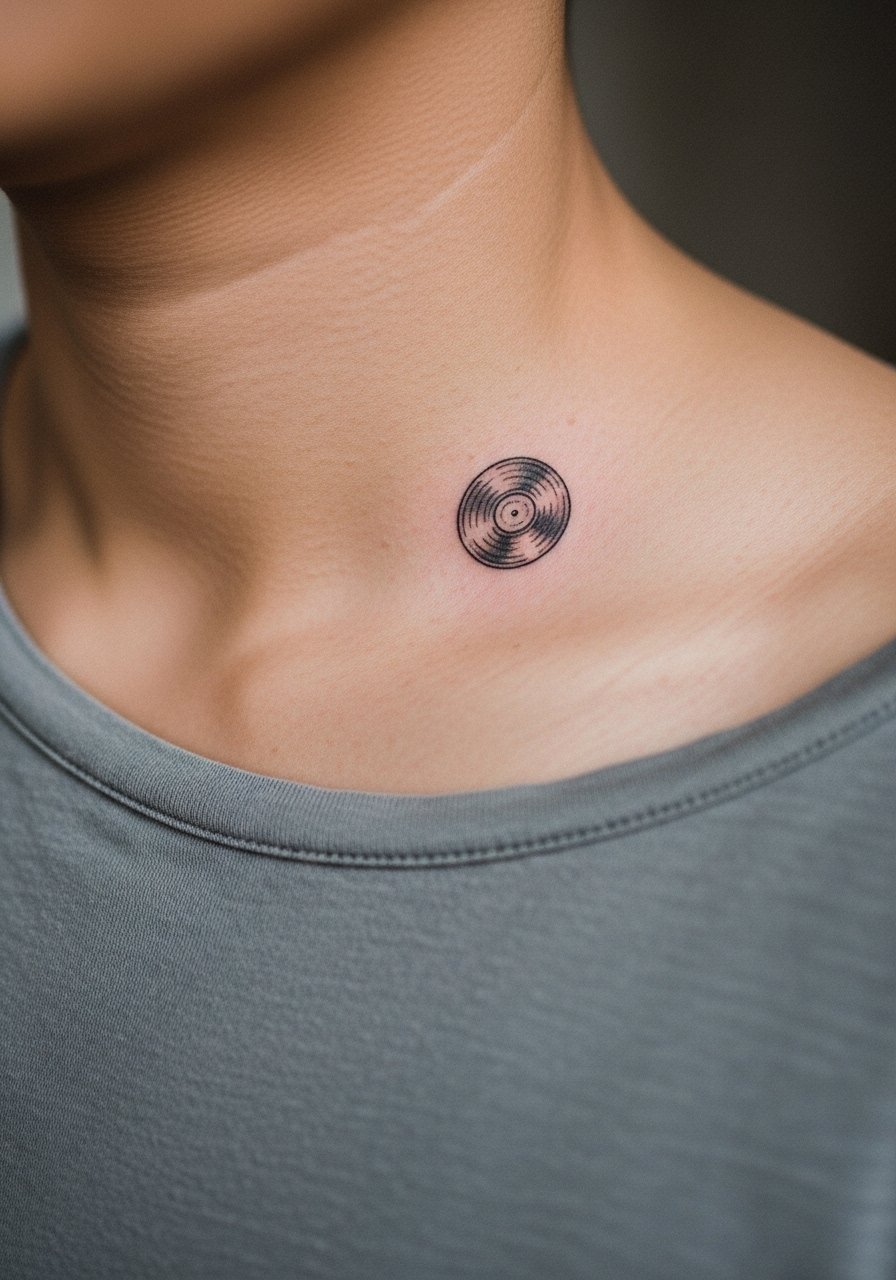
Collarbone scripts and small icons sit beautifully under necklaces but can suffer from contour and movement. Ask your artist to map the vinyl motif to the clavicle curve so the image sits level when you stand naturally. A common error is centering the design without checking proportions with your posture. Sessions are short and tolerable. For jewelry, a thin chain pendant necklace complements the vinyl without crowding it. On photos, collarbone pieces read strong when the skin has even tone and the necklace sits below the ink.
11. Minimalist Pyramid Behind Finger Knuckle
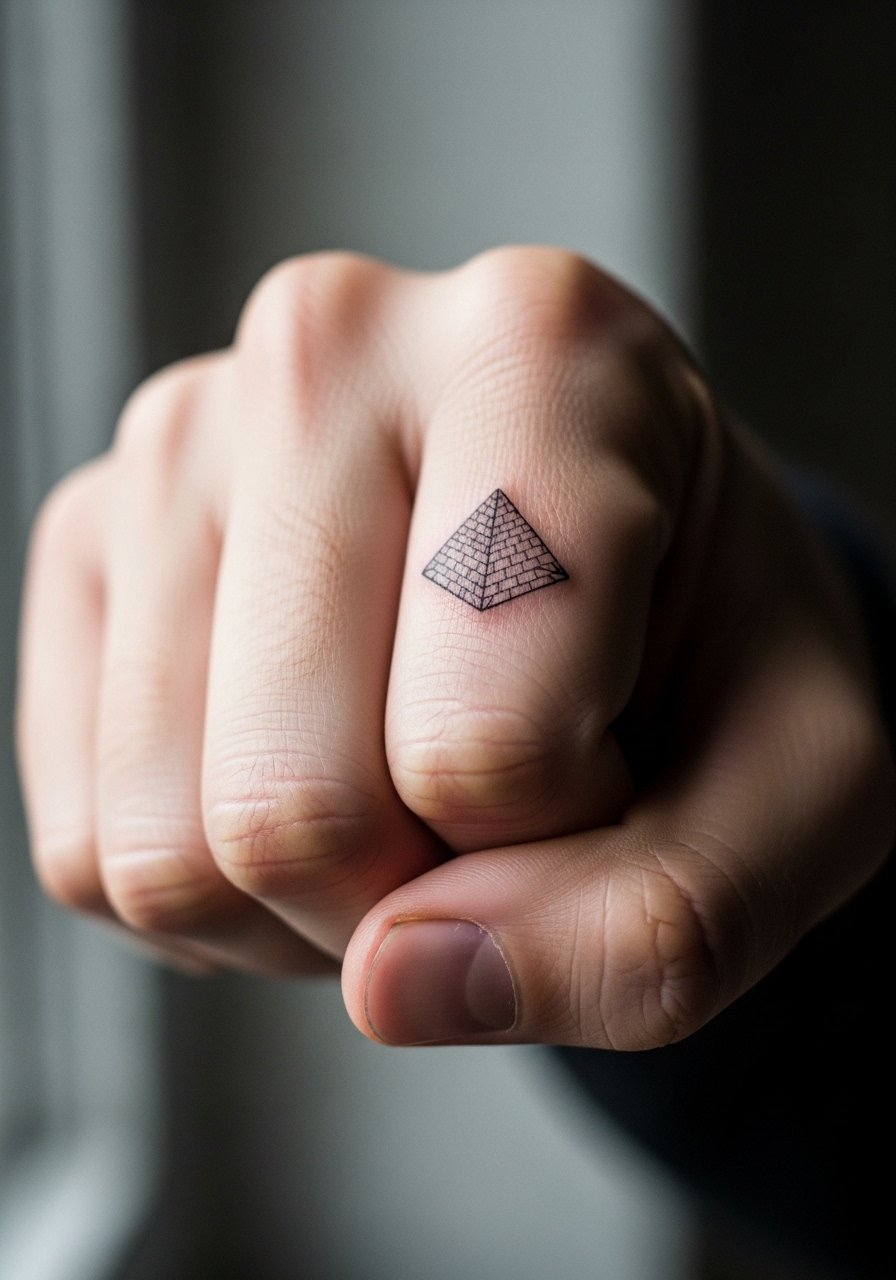
Knuckle and near-knuckle placements demand boldness because repeated motion and washing accelerate fading. Ask your artist for clear silhouette and slightly heavier outlines that avoid interior stippling. The biggest error is choosing ultra-fine detail for an area that will blur. Sessions are quick but healing requires care when using soap. Expect touch-ups sooner than forearm work. Keep rings minimal while it heals to avoid friction and show the shape cleanly.
12. Ribcage Lyric Strip for Private Lines
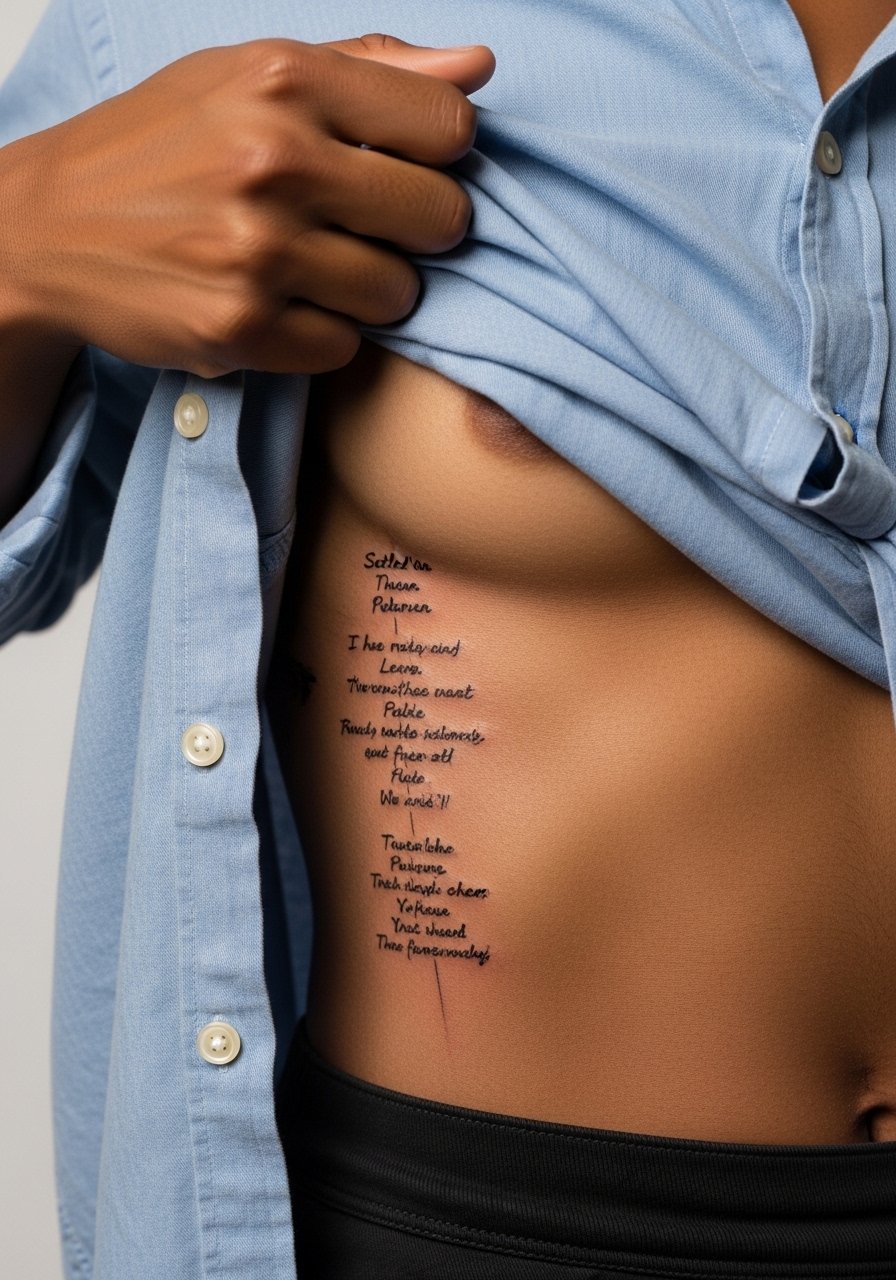
Ribcage is a go-to when you want lyrics private and close to the body. Fair warning, this placement is on the higher end of the pain scale. When you sit with your artist bring exact typeface references and ask for slightly increased stroke to preserve readability. The mistake is tiny script that gets swallowed when the skin stretches. Expect an honest conversation about touch-up timelines because ribs can soften in dense scripts. For session comfort, wear a loose button-down you can shift so the artist has access without you feeling exposed.
13. Blonde Cowboy Hat on Shoulder Blade
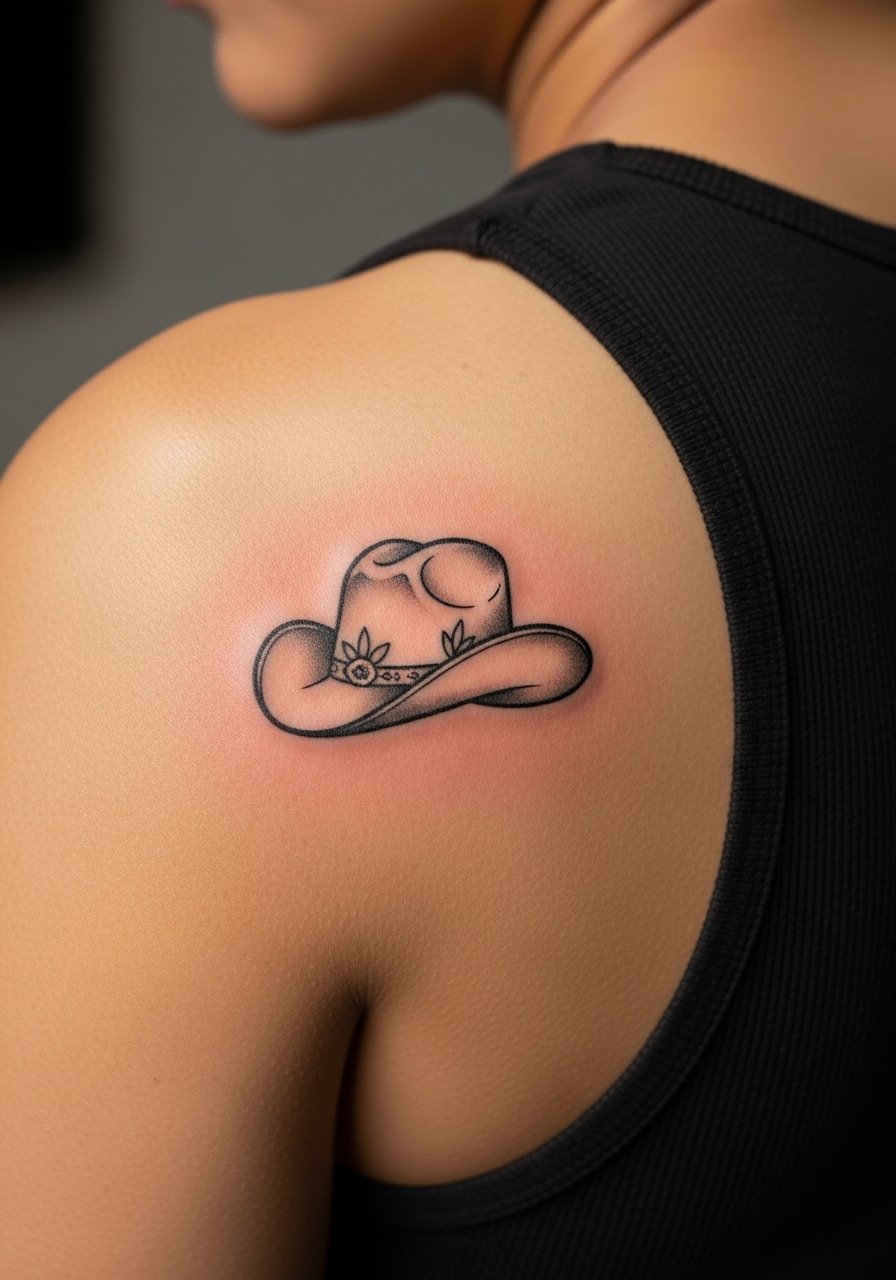
Shoulder blade spots handle small illustrative icons nicely and resist blowout with proper spacing. The area is lower pain and great for starting a patchwork sleeve later. Tell your artist you want clean silhouette and subtle color accents rather than dense fills. A common oversight is not accounting for shoulder movement which can distort long motifs. Sessions are comfortable and often under an hour. For showing off, an off shoulder cream tee frames the area while keeping focus on the outline.
14. Small Nikes Swoosh on Ribcage
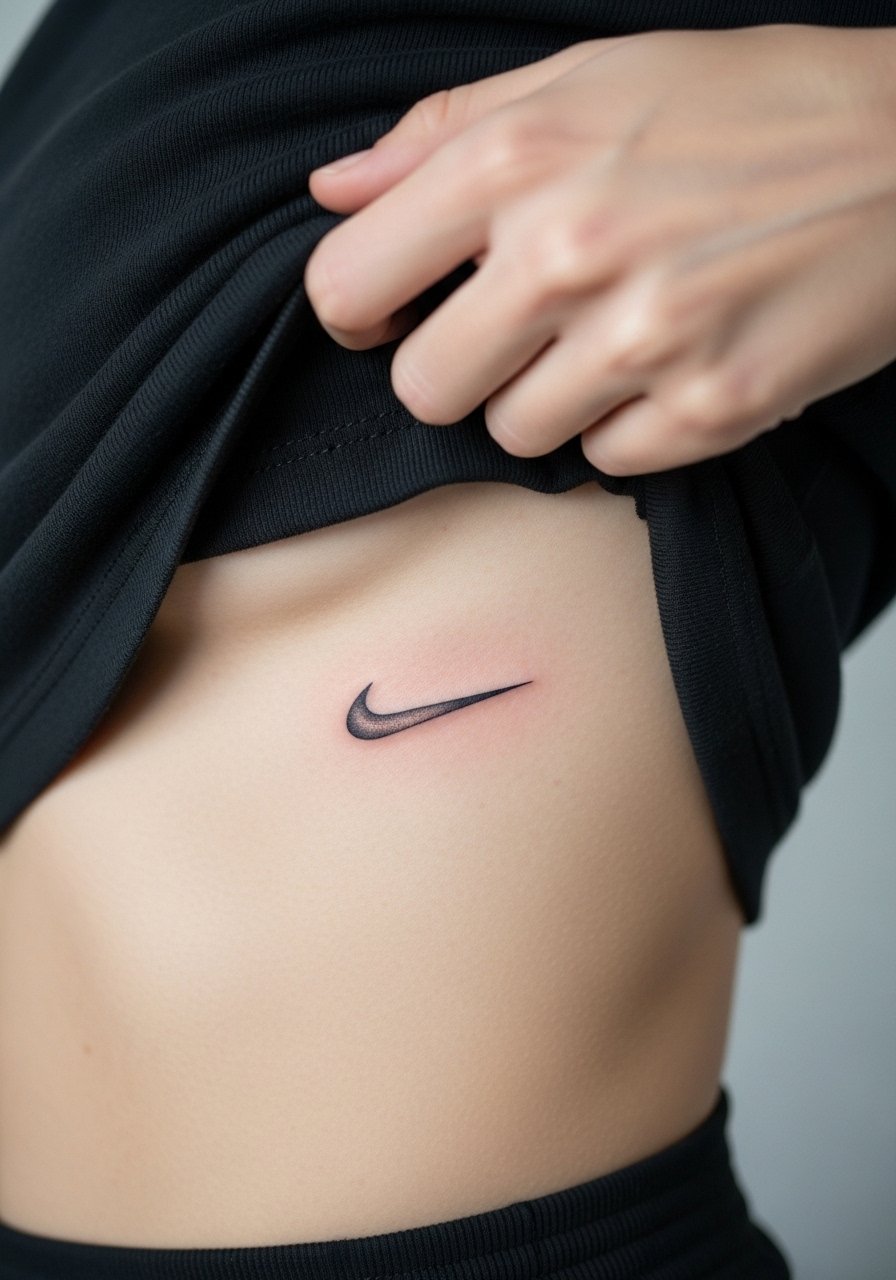
Placing a micro-realism swoosh on the ribcage keeps the symbol private and less subject to daily wear. The rib skin takes detail but is sensitive, so expect discomfort. Ask for contrast in the highlights so the micro shading reads on darker tones too. Many forget that breathing and torso movement affect how a logo settles. Session time is usually brief but plan breaks. For nights out, side-slit dresses or cropped tops can reveal the piece subtly.
15. Fine Line Wave Along the Spine

Spine tattoos have dramatic visual impact but demand careful spacing to avoid line merging. The wave motif benefits from rhythm and negative space between curls. A typical mistake is compressing curls too tightly which leads to merging after a few years. Sessions can be long and prone to soreness, so split work into two sittings if needed. For evenings, an open-back top or a loose fit crop tank gives glimpses without exposing the whole back. Keep in mind that sleeping positions may affect early healing comfort.
16. Micro Portrait Symbol on Upper Arm
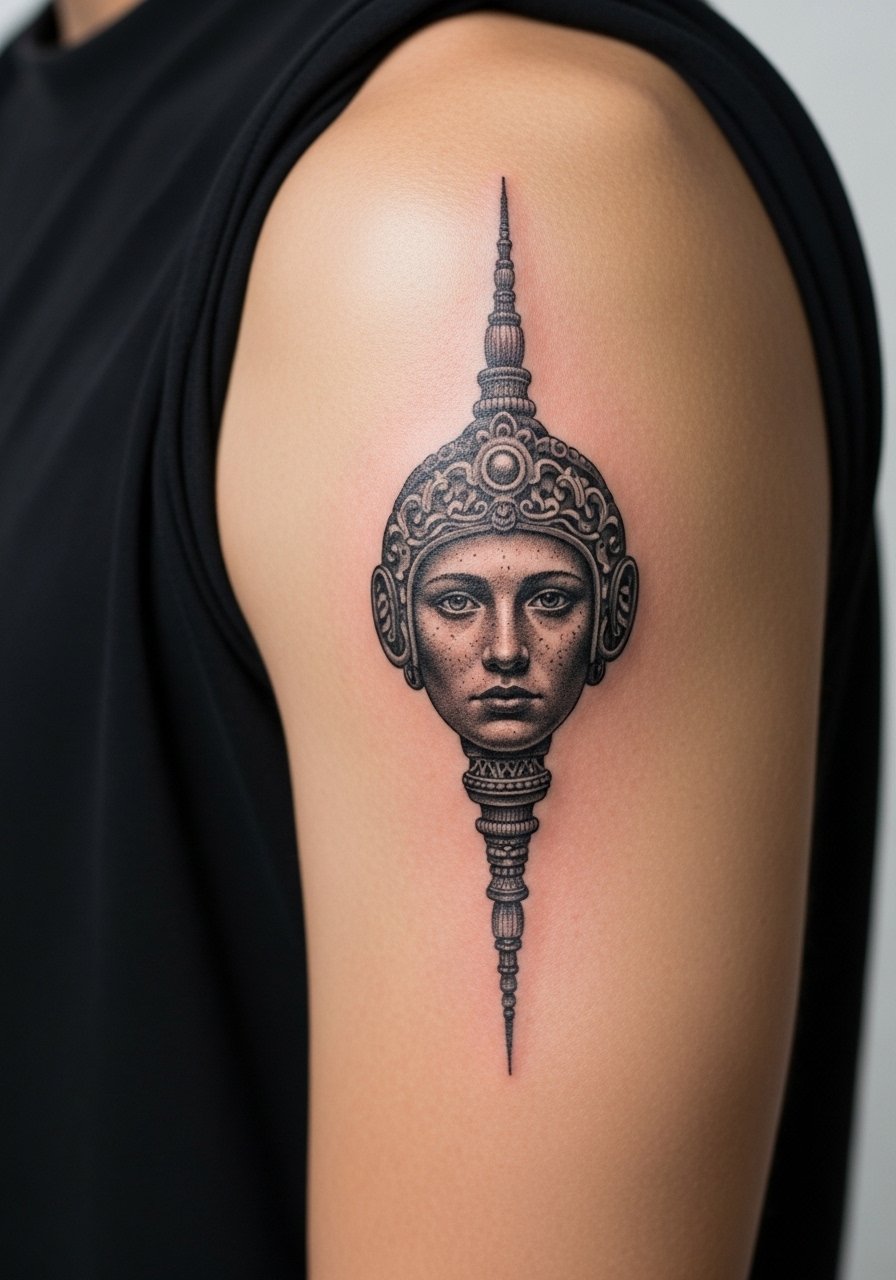
Micro portraiture shifted toward symbols like Nikes because tiny faces can lose expression when scaled down. For an upper arm symbol, ask your artist to focus on clear, readable shapes and tiny highlights. The upper arm tolerates fine shading and keeps detail longer than hands or ankles. Sessions run around one hour. A common error is asking for too much facial detail at micro scale which then looks muddied. Show it with casual summer tanks to let the arm read without distractions.
17. Single-Note Lyric on Collarbone Curve
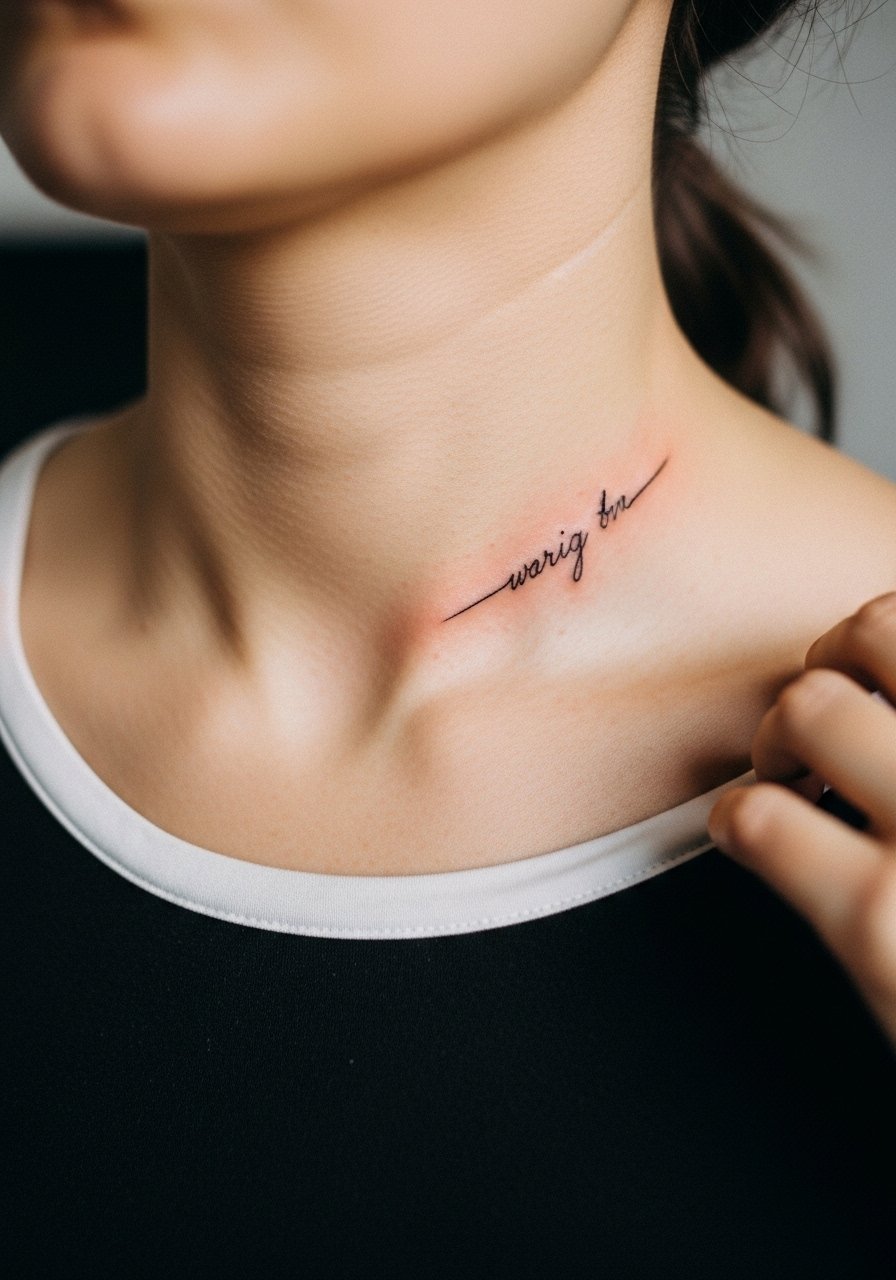
A one-word lyric on the collarbone reads like jewelry. The trick is to place the word along the natural curve so it sits level with your posture. Too-small lettering or uneven spacing leads to legibility loss. Sessions are short and recovery straightforward. Pair the piece with a layered delicate necklace to let the script sit in a jewelry-like frame rather than compete with heavy chains.
18. Inner Thigh Fine Line Floral Accent
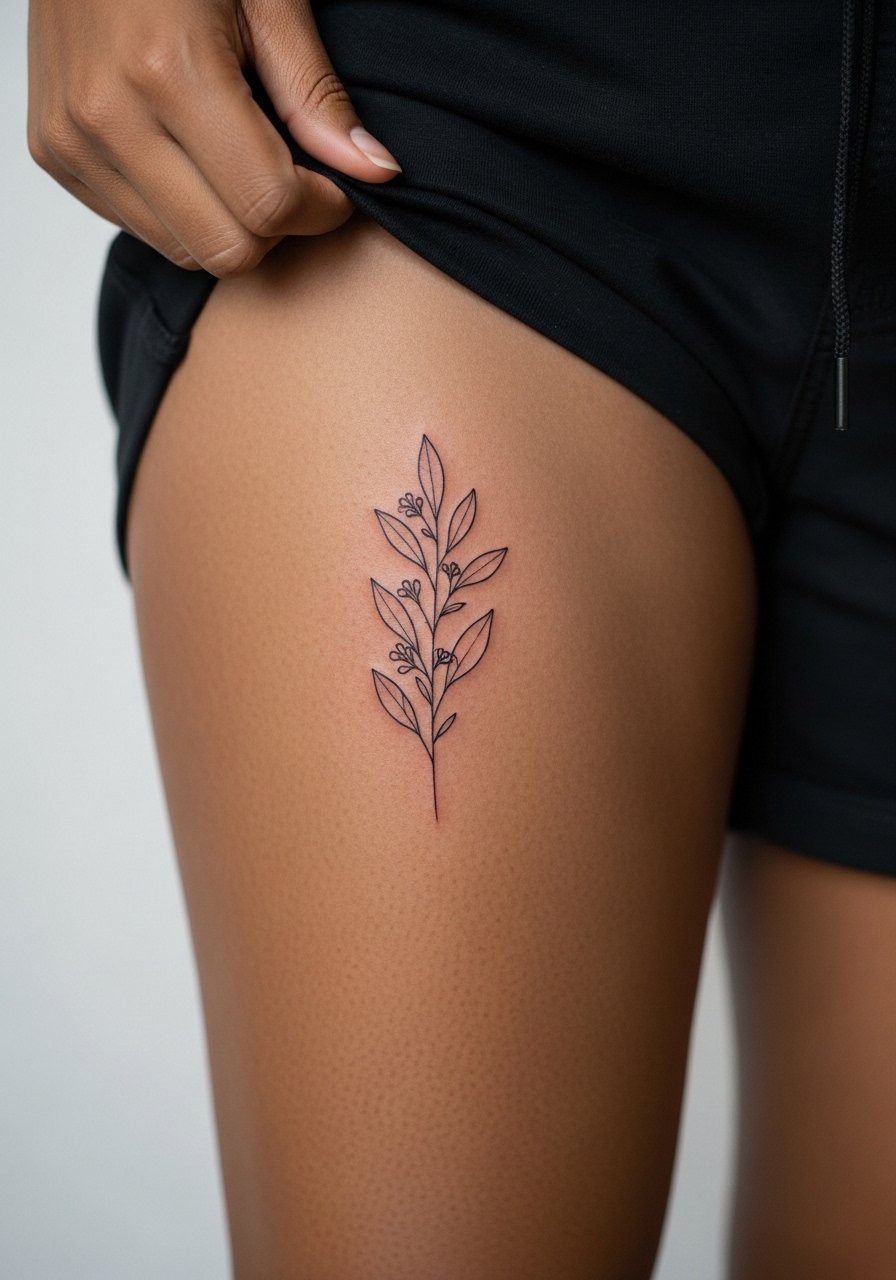
Inner thigh work is private and heals in a friction-prone zone, so plan session wear carefully. The main consultation point is size. Avoid ultra-fine details that will blur with skin stretch. A common mistake is underestimating tenderness and post-session mobility limits. Sessions can be longer because artists often work cautiously near nerves and vessels. For the appointment, wear shorts or a swimsuit bottom you can shift easily so the artist has access without exposure.
19. Small Wave Behind the Ear, Hidden by Hair
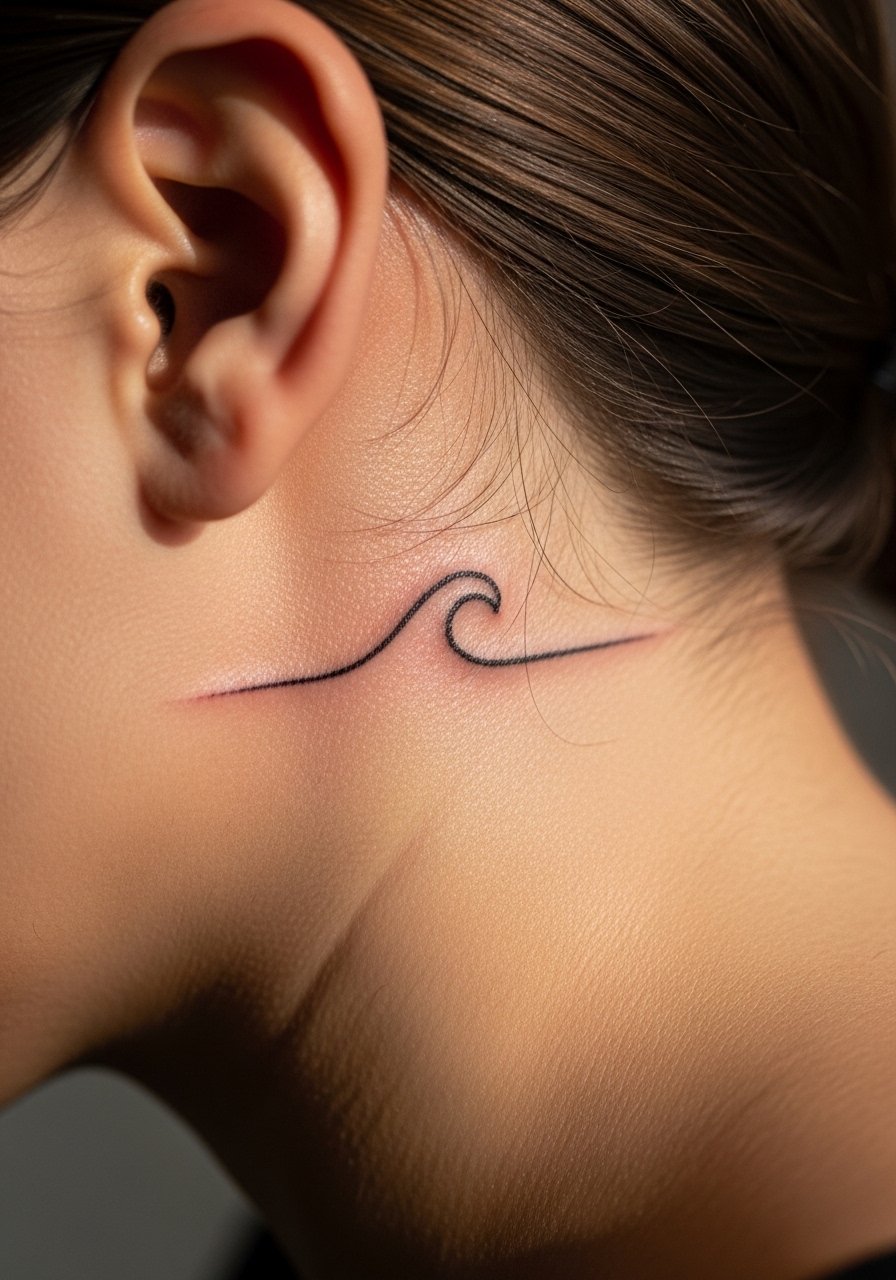
A tiny wave tucked under the hairline works as a discreet nod to Blonde motifs. Placement needs a confident hand because the area is small and close to hair follicles. Ask your artist to keep lines clean and minimal with clear negative space. The mistake is over-detailing a tiny zone that cannot hold it. Sessions are fast and you can hide or reveal the piece by styling your hair. This is a good option if you want a personal symbol with easy concealment.
20. Calf Stipple-Shaded Endless Spiral
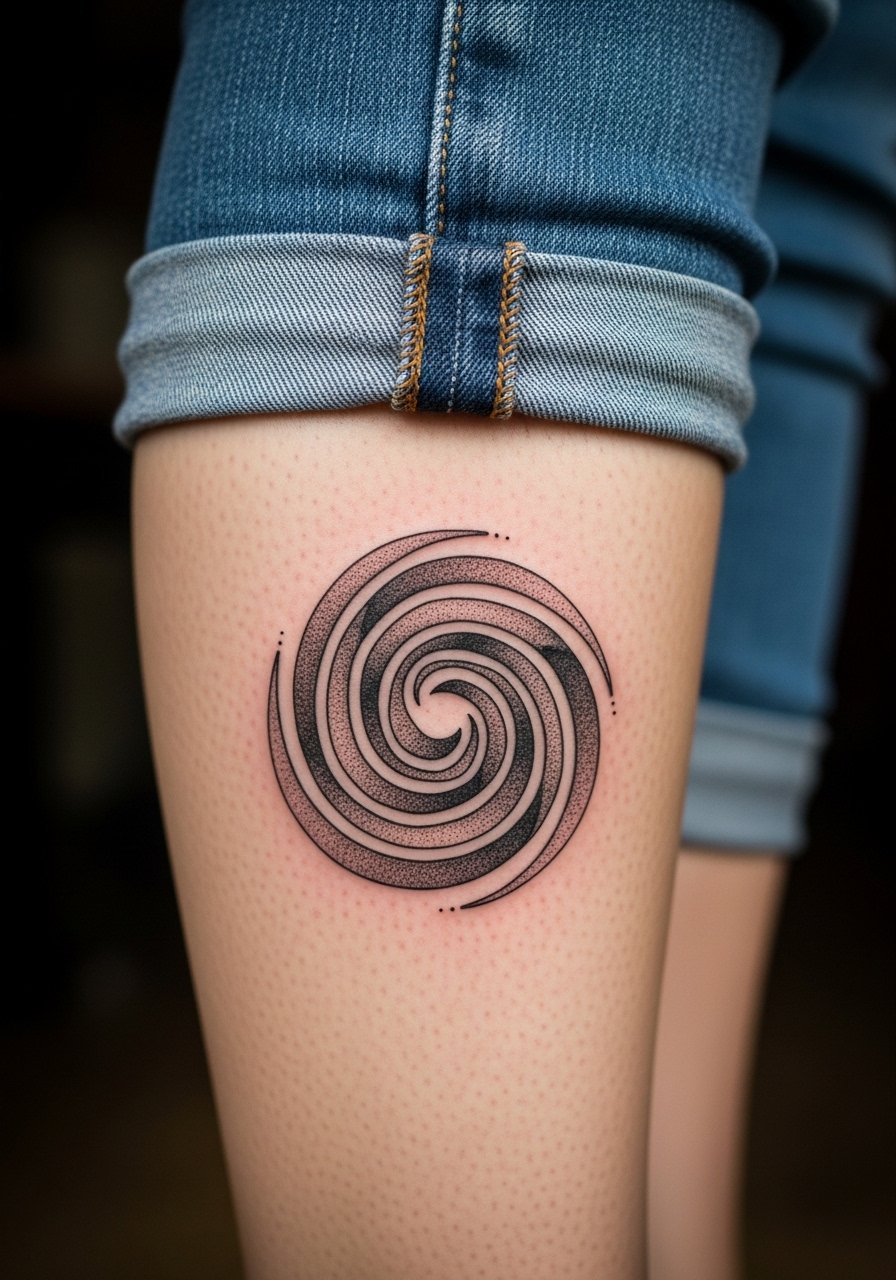
Stipple shading on the calf gives ornament that reads well from a distance and keeps texture as it heals. The calf handles subtle gradients without blowout, but avoid packing dots so densely that they merge. Ask for a stipple scale that preserves negative space. Sessions can last one to two hours. For casual looks, pair with sneakers and rolled jeans or a midi skirt to frame the spiral without letting it disappear.
21. Patchwork Starter Piece on Outer Shoulder

Outer shoulder starters are great if you plan a patchwork sleeve. The area tolerates moderate color and sits nicely under summer tops. The common error is choosing overly complex first pieces that make later cohesion hard. Begin with bold silhouettes and leave negative space. Sessions are comfortable and often short. For the appointment, wear a strapless tank top or loose tank so the artist can access the shoulder without you feeling exposed.
Frequently Asked Questions
Q: Do fine line Frank Ocean lyrics blur faster on medium or dark skin?
A: From what I have seen, ultra-thin single-needle scripts can appear to soften sooner on medium and dark tones if the line is too faint. Ask your artist for slightly increased stroke weight and solid black ink to create contrast. This approach often extends readable life without changing the aesthetic.
Q: How should I prepare differently for ribcage sessions versus forearm ones?
A: Ribs require more hydration, pain planning, and often longer breaks during the session because of breathing and sensitivity. For forearm work, wear a loose fit short sleeve tee so the artist has full access. For ribs, choose a cropped top or button-down you can shift so access is precise and you feel covered.
Q: If I want a patchwork sleeve, how should I start to avoid mismatched styles later?
A: Start with a single motif that has a clear silhouette and consistent line weight. In your consult, discuss a loose palette and spacing plan so future pieces can be added without crowding. Bringing reference boards that show scale helps your artist plan negative space intentionally.
Q: Are ankle and finger micro designs worth the upkeep?
A: They are worth it if you value discreet, personal pieces and accept touch-ups as part of the plan. Fingers and ankles face high friction and washing, so expect more frequent color loss. Keep expectations realistic and budget a minor touch-up window within one to two years.
Q: How do I find an artist who understands Frank Ocean visual motifs without naming someone?
A: Use discovery paths like searching hashtags such as #FrankOceanTattoo and #BlondeTattoo on Instagram, filter fine line portfolios on Tattoodo, and check local guest spots on Booksy. Watch TikTok reels tagged with "fine line tattoo [city]" to see process videos and healed results before you book.
