
Fine line and watercolor wolf faces are trending everywhere, but the reality is they age differently than the glossy photos suggest. Fine line pieces can blur faster than saturated blackwork, pricing has crept up on small pieces, and darker skin tones can lose subtle shadow details in photos. Read on for 27 feminine wolf face approaches, where to place them, how they age, and what to say at the consult so you get a result you still like in year three.
1. Geometric Wolf Face on the Forearm
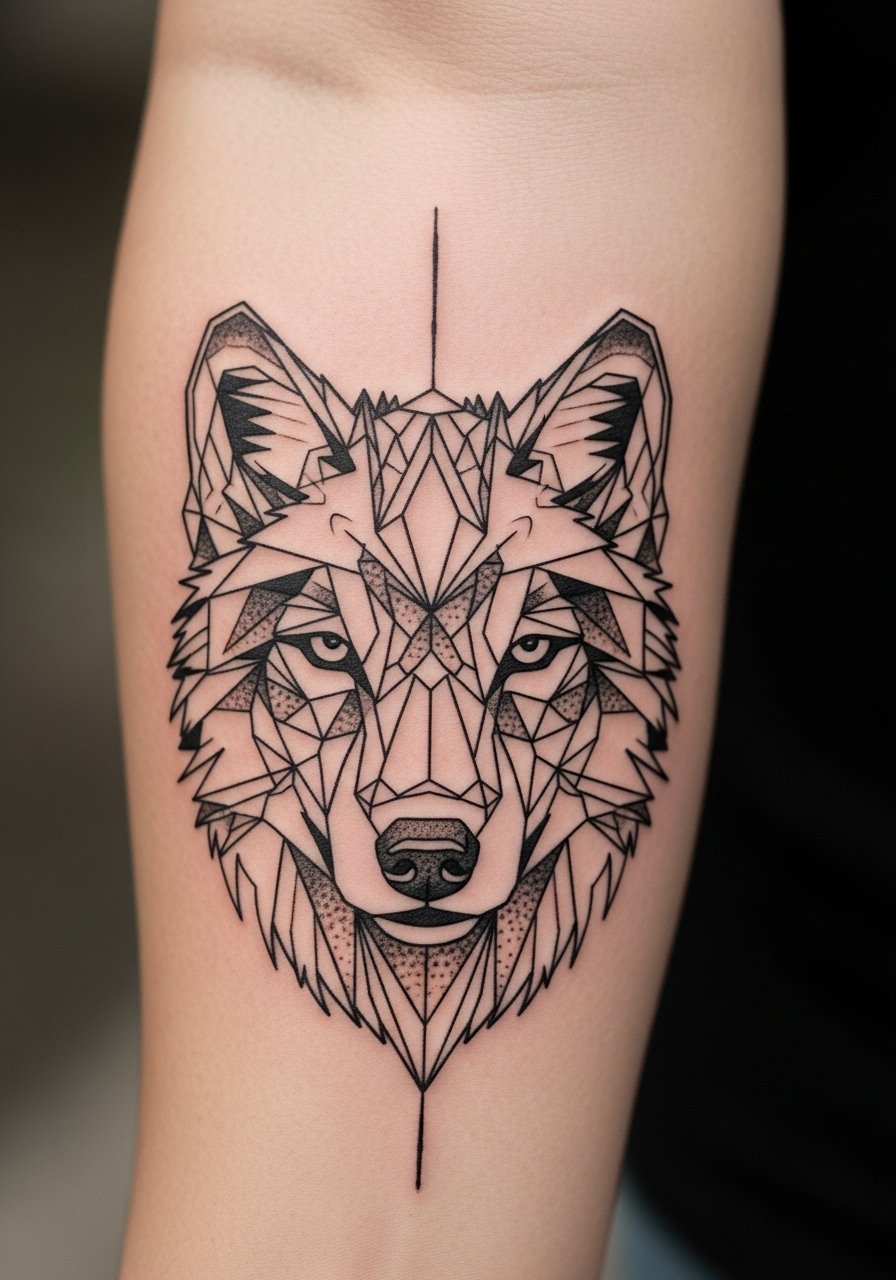
I recommend geometric blackwork on the forearm when you want structure that reads well at a distance. Ask your artist for slightly thicker primary lines and clear negative space so the angles do not merge over time. Fair warning, the biggest mistake is pinching the design too small. At about a 3 to 5 inch scale the facets have room to breathe and touch-ups are usually at year three. The session feels like steady linework, moderate pain for most people. For showing it off pair this with a rolled sleeve cotton tee and a slim gold cuff on the opposite arm so the geometry stands out.
2. Moon Phases Howling Wolf on the Collarbone
A collarbone moon-phase wolf reads intimate and symbolic. Bring reference photos that show the moon sizes you want and tell the artist which phase should sit above the snout. The collarbone can be itchier during healing and the area sees clothes friction, so plan for gentle movement in the first week. This placement favors black and gray highlights over fragile color for longevity. For evenings out wear a v-neck silk blouse to frame the moons without covering them.
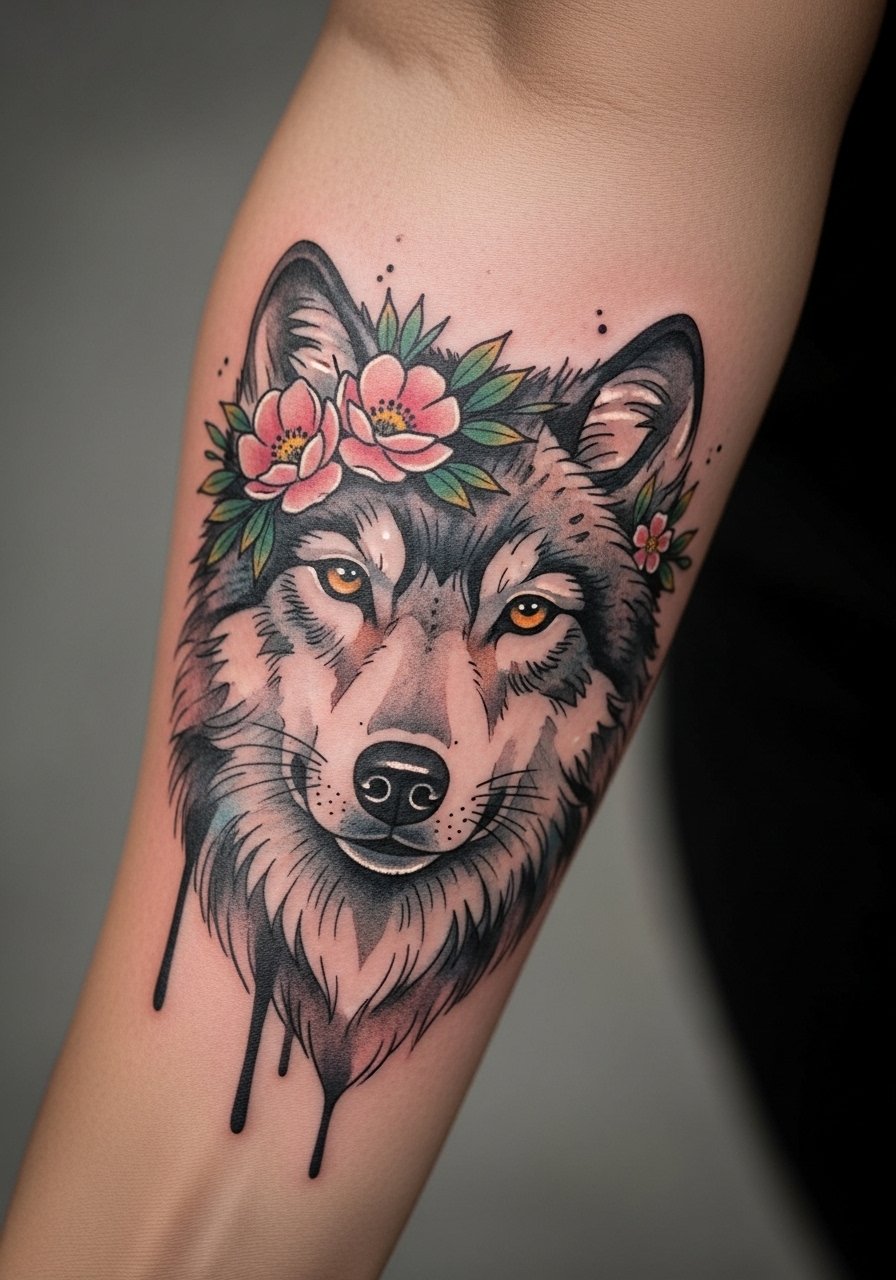
3. Floral-Accented Feminine Wolf Face on the Upper Arm
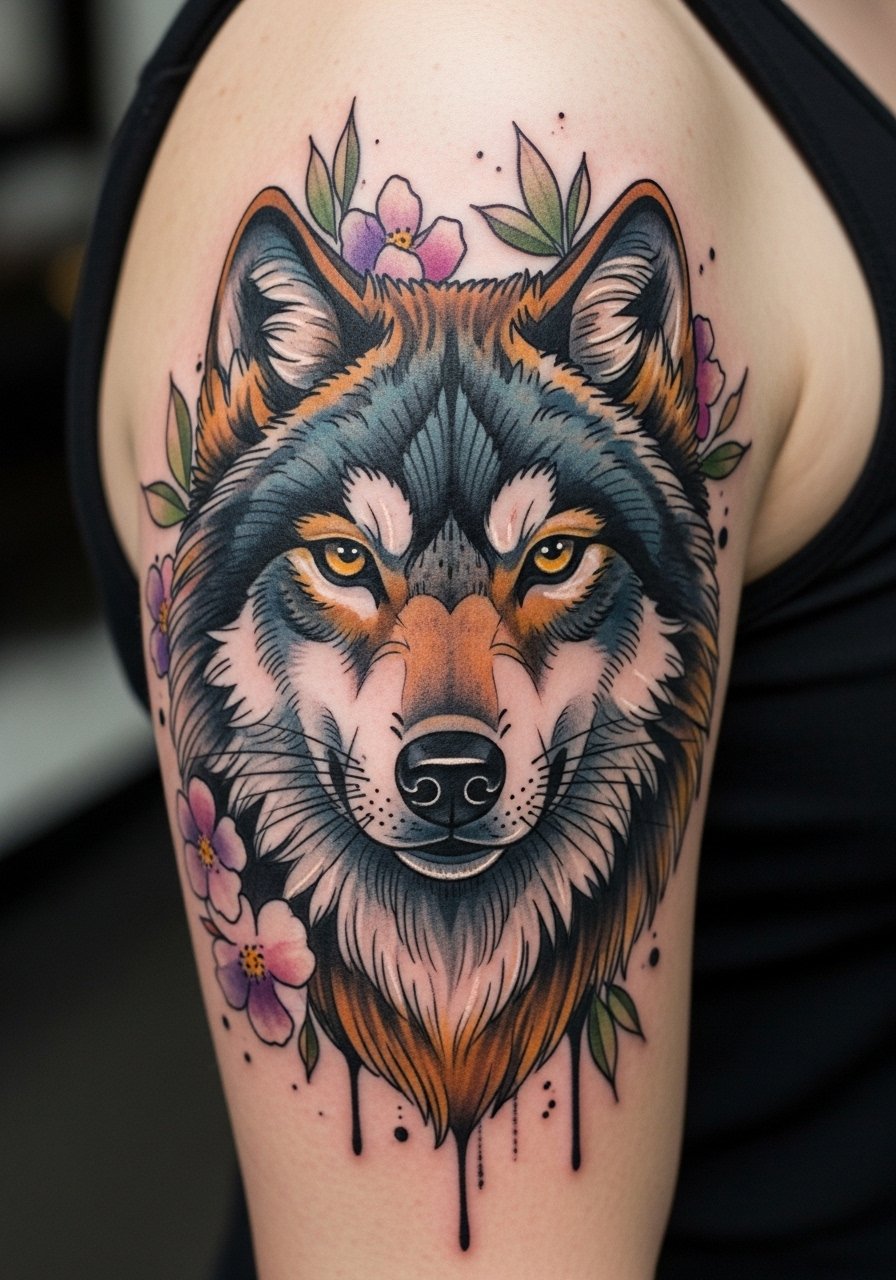
If you want to soften a fierce wolf, add a floral wreath around the face in muted watercolor edges. Tell your artist to keep floral colors lightly saturated so they age into soft washes while the black contours remain crisp. A common version that ages poorly loads too much watercolor over thin linework. Ask for bold linework on the face and delicate, airy fill on the petals. The session is medium length and the upper arm tolerates long work. Show it off with an off-shoulder blouse on warm days.
4. Watercolor Wolf Silhouette on the Thigh
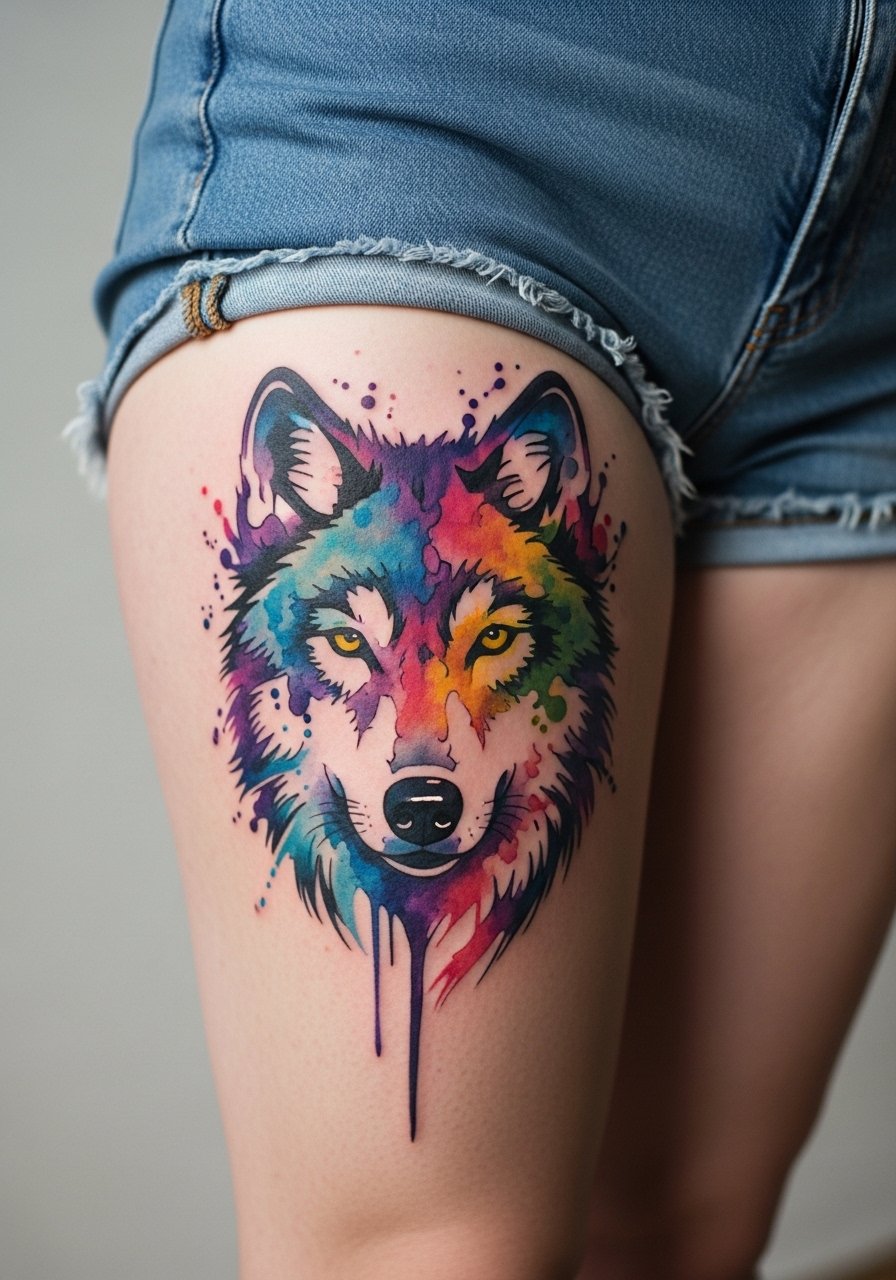
Thigh placements let watercolor breathe but they sweat more in summer. If you love fluid color go for a larger scale, around six inches, so the splashes do not congeal into fuzzy patches. Tell your artist you want bold black silhouette anchors under the color so the design keeps definition as the pigment settles. The mistake is squeezing watercolor into a two-inch piece. For sessions wear loose jogger pants that you can pull down slightly and still sit comfortably.
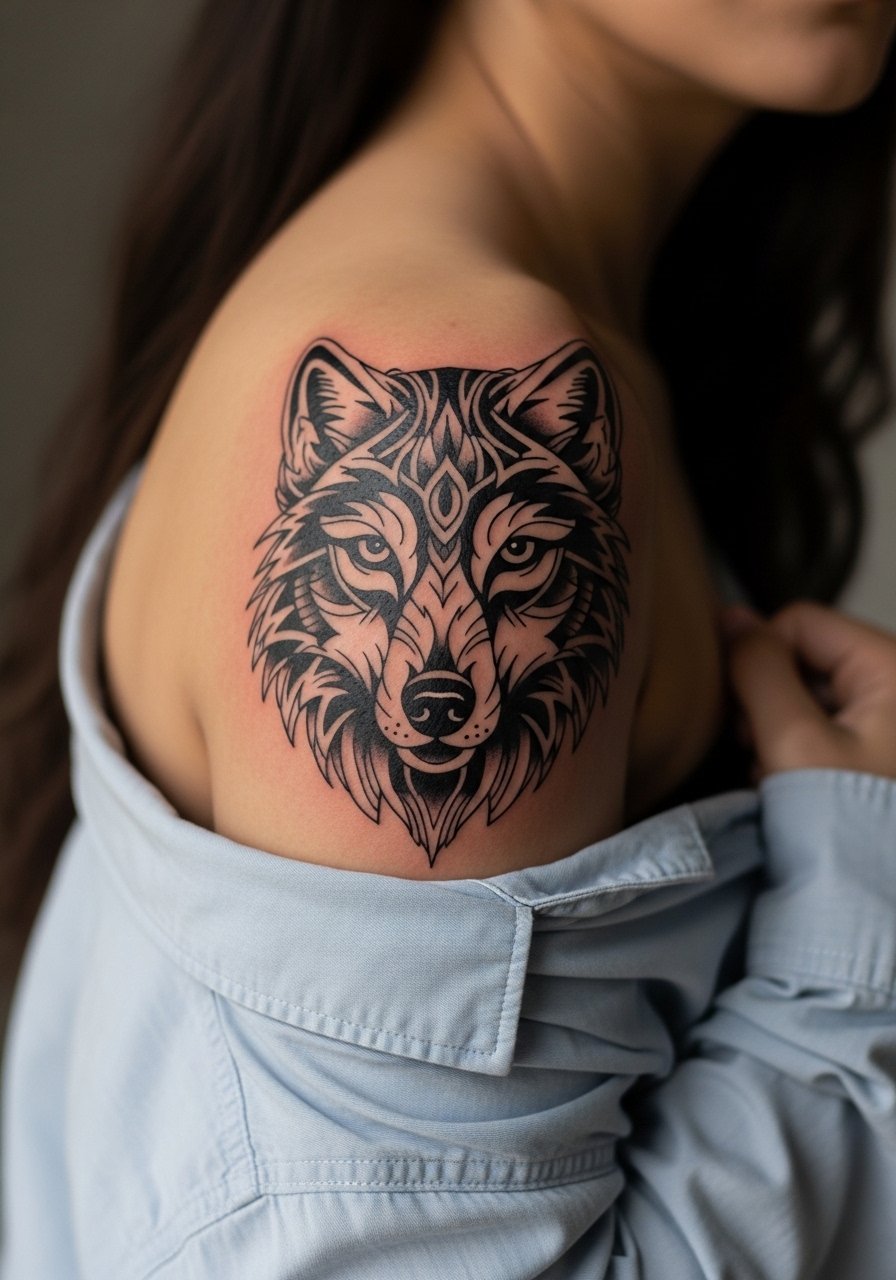
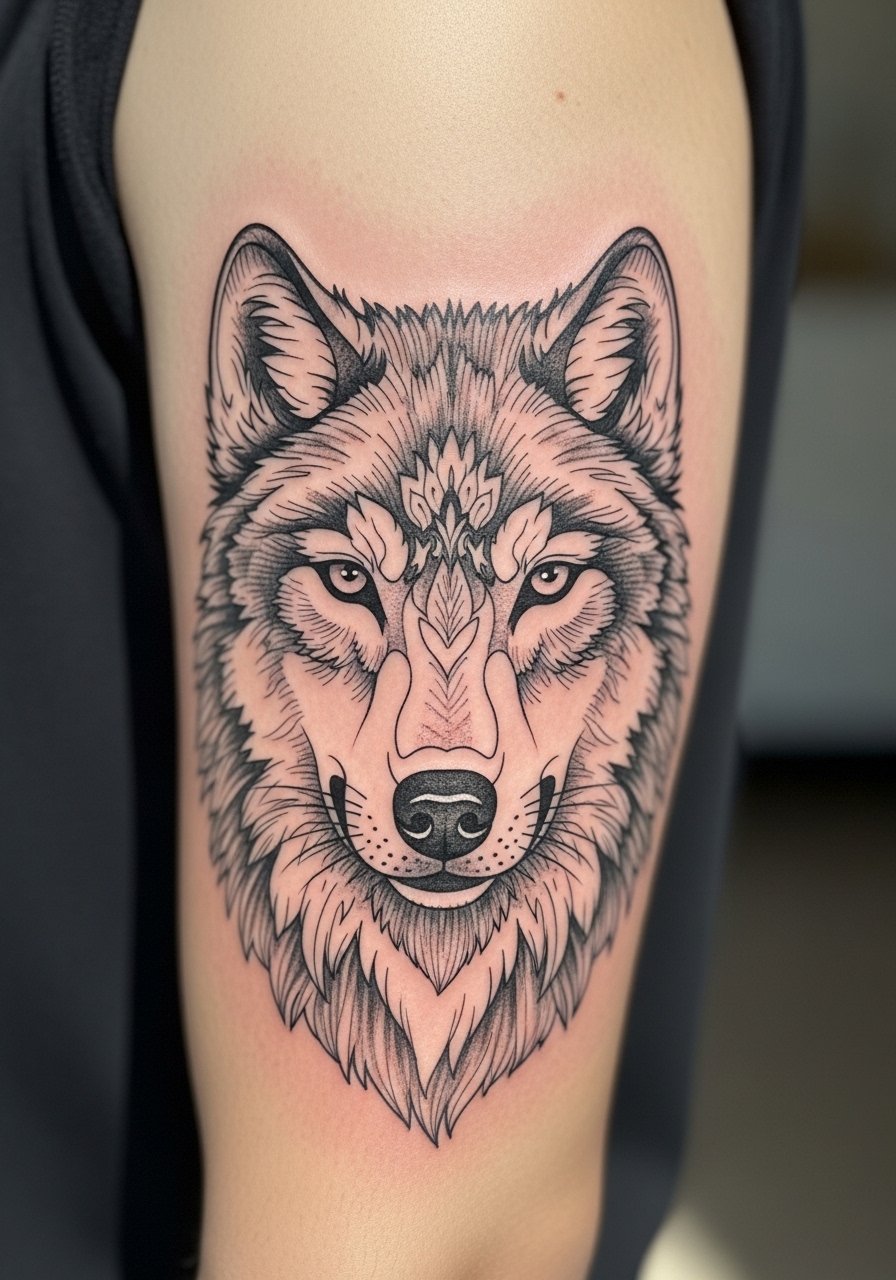
5. Black and Gray Wolf Face Portrait on the Shoulder
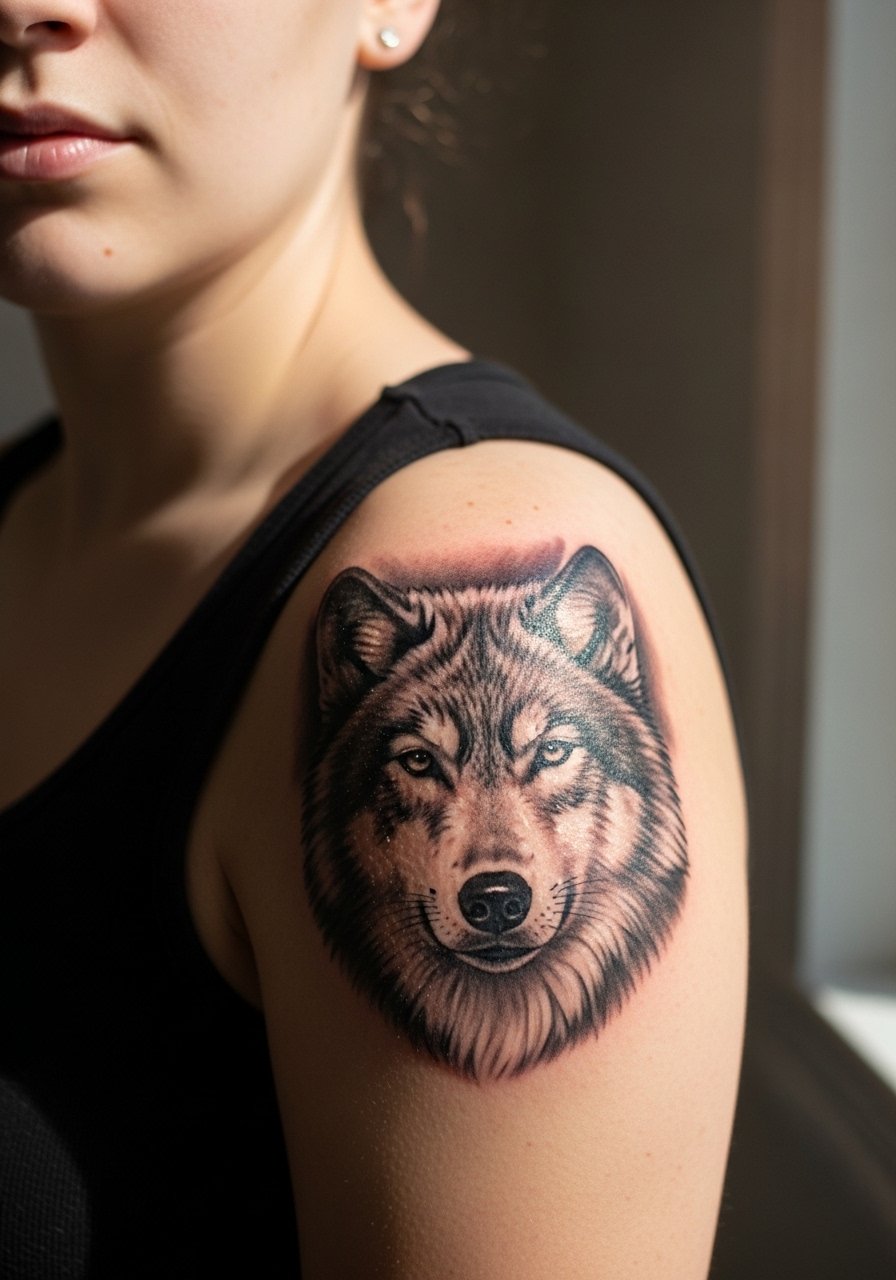
Black and gray portraits are the best bet when you want eyes that hold emotional weight over time. Request strong contrast around the eyes and restrained stipple shading for texture. A common error is overworking midtones instead of locking in eye contrast. Shoulders can be an easier place for saturation, and touch-ups often land at year three to five. For showing it off choose an off-shoulder blouse so the portrait peeks from under fabric.
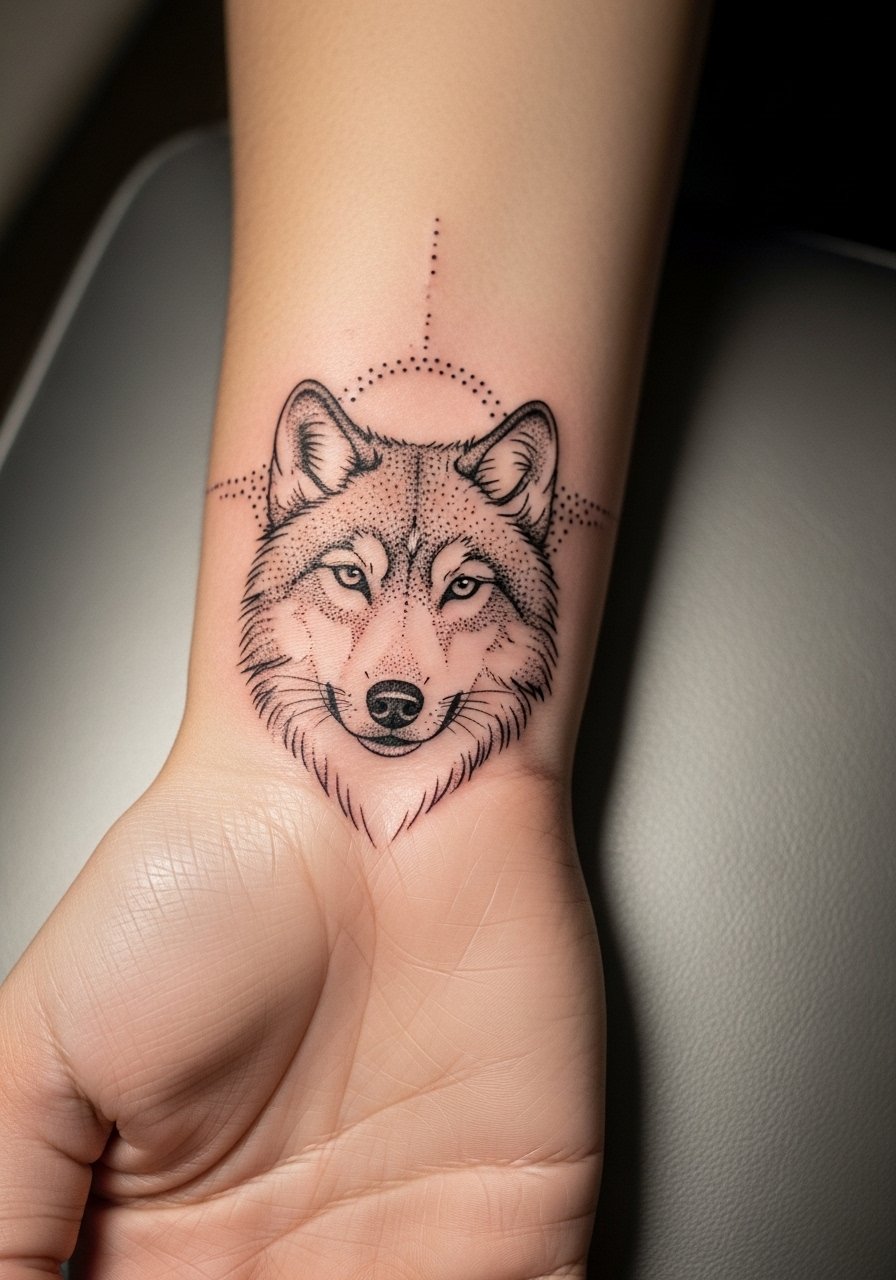
6. Minimalist Wolf Face Outline on the Wrist

A wrist outline reads discreet and calm but is vulnerable to early fading. For first-timers ask the artist to use slightly heavier linework than a hairline so the contour survives daily washing and friction. The wrist is a sensitive site and sessions are short but sharp. Expect a touch-up window at 12 to 18 months for fine line work. For session comfort wear a short sleeve and leave jewelry off. Pair the healed piece with a thin bangle bracelet set on the opposite wrist to balance attention.
Studio Day Picks
Those first six placements have different friction and exposure patterns, and a few compact items make the session and the first week easier.
- Indie tattoo balm. A thinner balm keeps color work from looking greasy while still locking in moisture during early healing for forearm and upper arm pieces.
- Alcohol-free aftercare spray. Handy for collarbone and shoulder areas where gentle cleansing matters and scabs should not be scrubbed.
- Natural healing gel. Good for thigh sessions in warm months when sweat can irritate watercolor edges.
- Thin protective film roll. Useful for wrist and hand placements that face constant washing and friction.
- Aquaphor healing ointment. A trusted thin layer option for the first few days when fine line pieces need moisture without clogging.
7. Wolf Face with Stars and Moon on the Upper Back
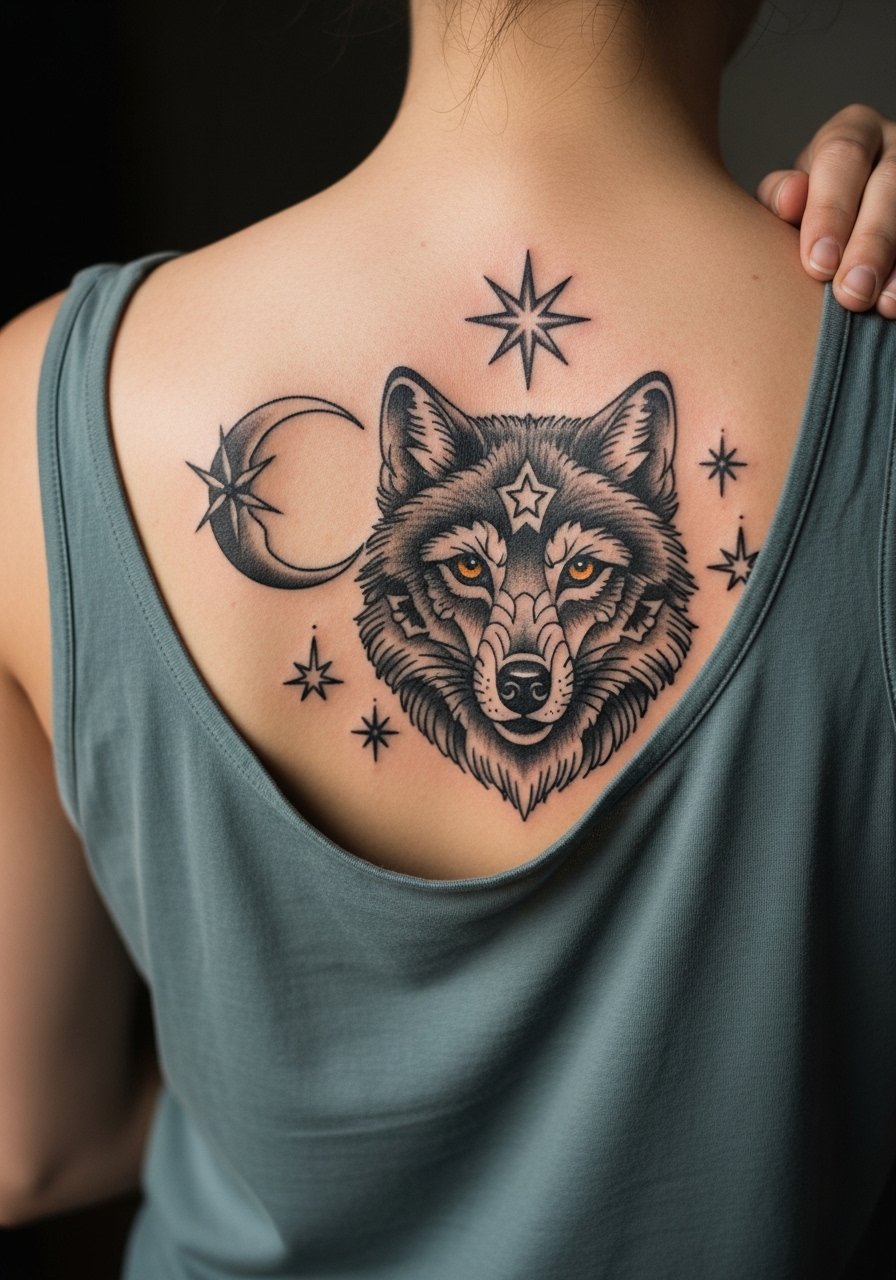
Upper back placements let you scale up celestial motifs without crowding. Ask for star points that are small negative space rather than tiny dots placed over shaded areas. The common mistake is packing too many tiny stars near dense shading which can blur. Upper back sessions are two-stage friendly and pain is low. Show it off with a backless halter top or low-back dress so the moons sit center stage.
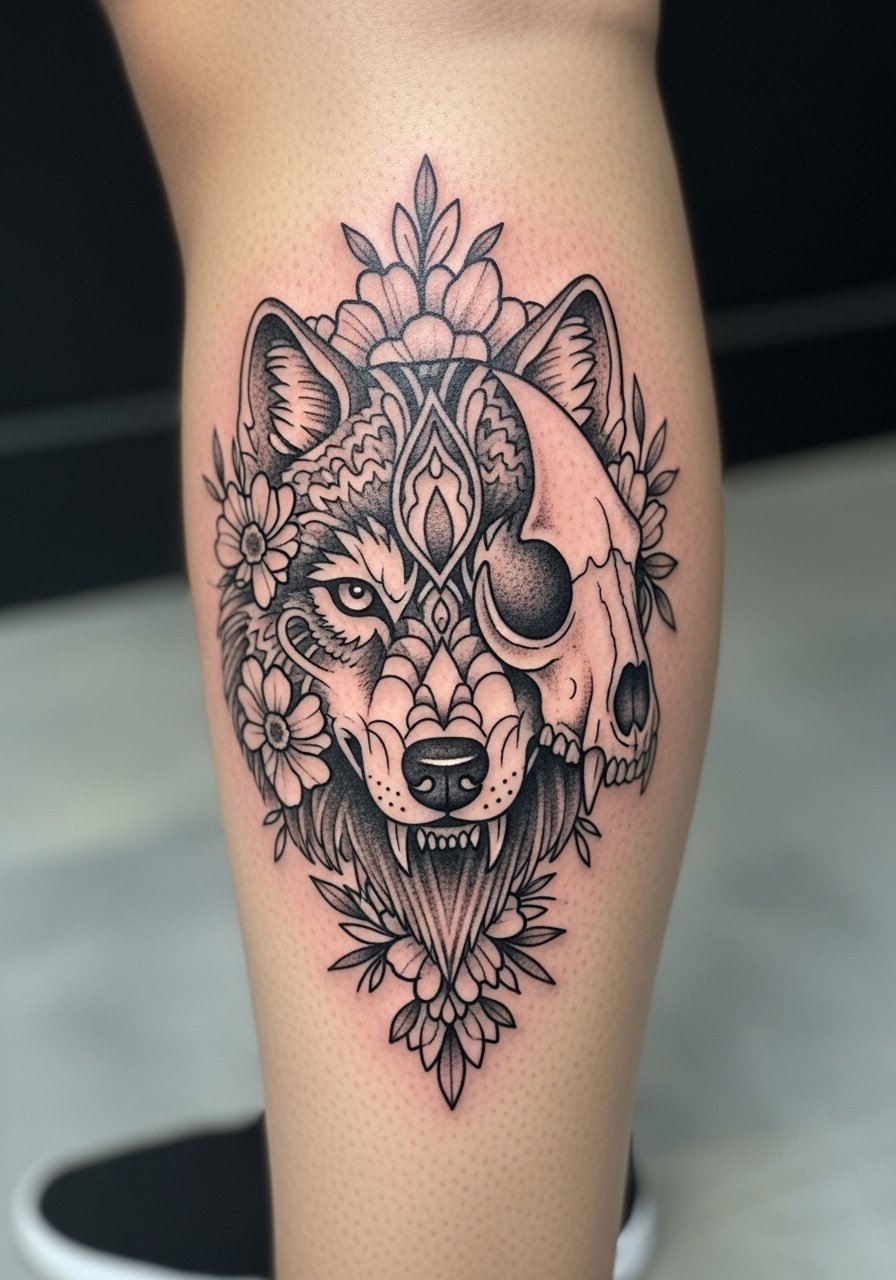
8. Skull-Integrated Wolf Face on the Outer Thigh
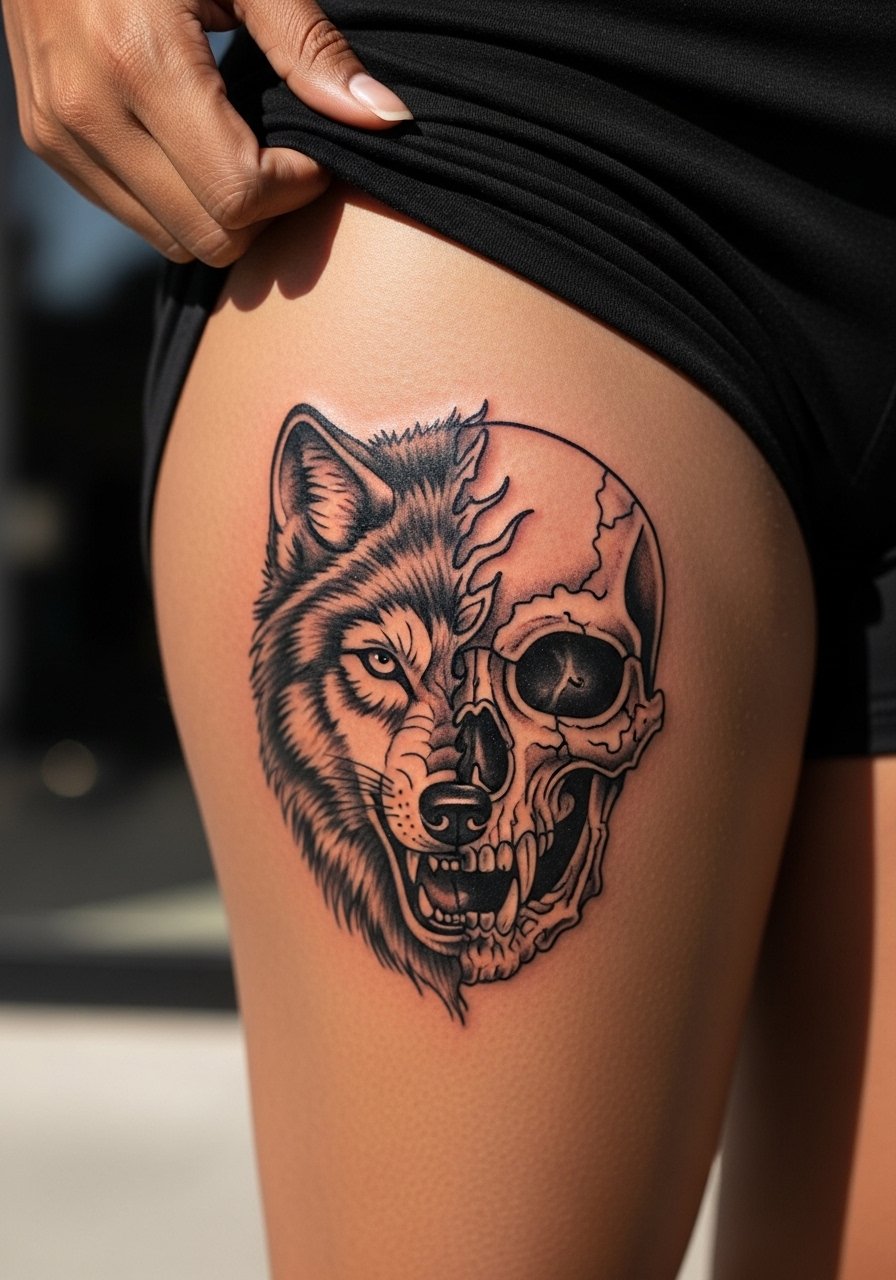
Skull integrations read edge-forward and age predictably when the black outlines are bold. If you want floral contrast ask for thinner botanical elements so they do not compete with the skull. The thigh tolerates heavy blackwork well, and larger fills mean fewer touch-ups versus tiny shaded patches. Plan for two sessions and expect moderate discomfort when seated. For the session wear high waist denim shorts so the artist can access the outer thigh without shifting your outfit.
9. Poised Wolf Face with Flowing Lines on the Inner Bicep
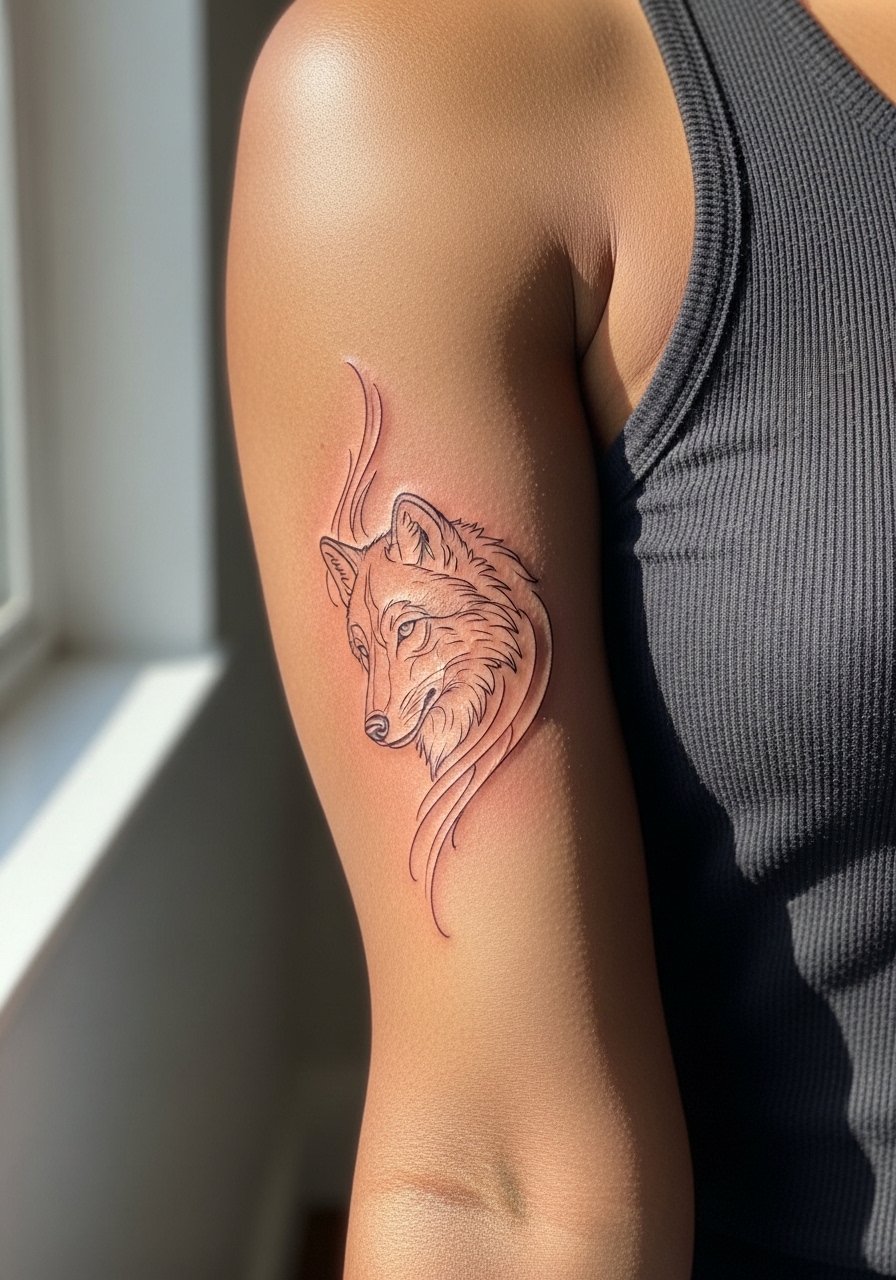
Inner bicep placements have a unique canvas that flexes with motion. Tell the artist you want flowing linework that follows the natural muscle lines so the design does not warp when you move. A frequent misstep is ignoring stretch lines which causes subtle distortion at six months. The inner bicep can be more painful and sessions are often broken into short segments. For the session bring a loose tank to keep the armpit area covered and comfortable.
10. Tribal-Inspired Wolf Face on the Shoulder Blade
Shoulder blade tribal motifs benefit from ample negative space to avoid blowout in dense curves. Ask for deliberate spacing between bold lines and for the artist to map the curves to your shoulder blade contour. Artists disagree on how much density the area tolerates, and the safe route is fewer, stronger lines. Sessions are moderate and you may need two visits for full saturation. For show-off wear a sleeveless button down you can easily slide off for photos.
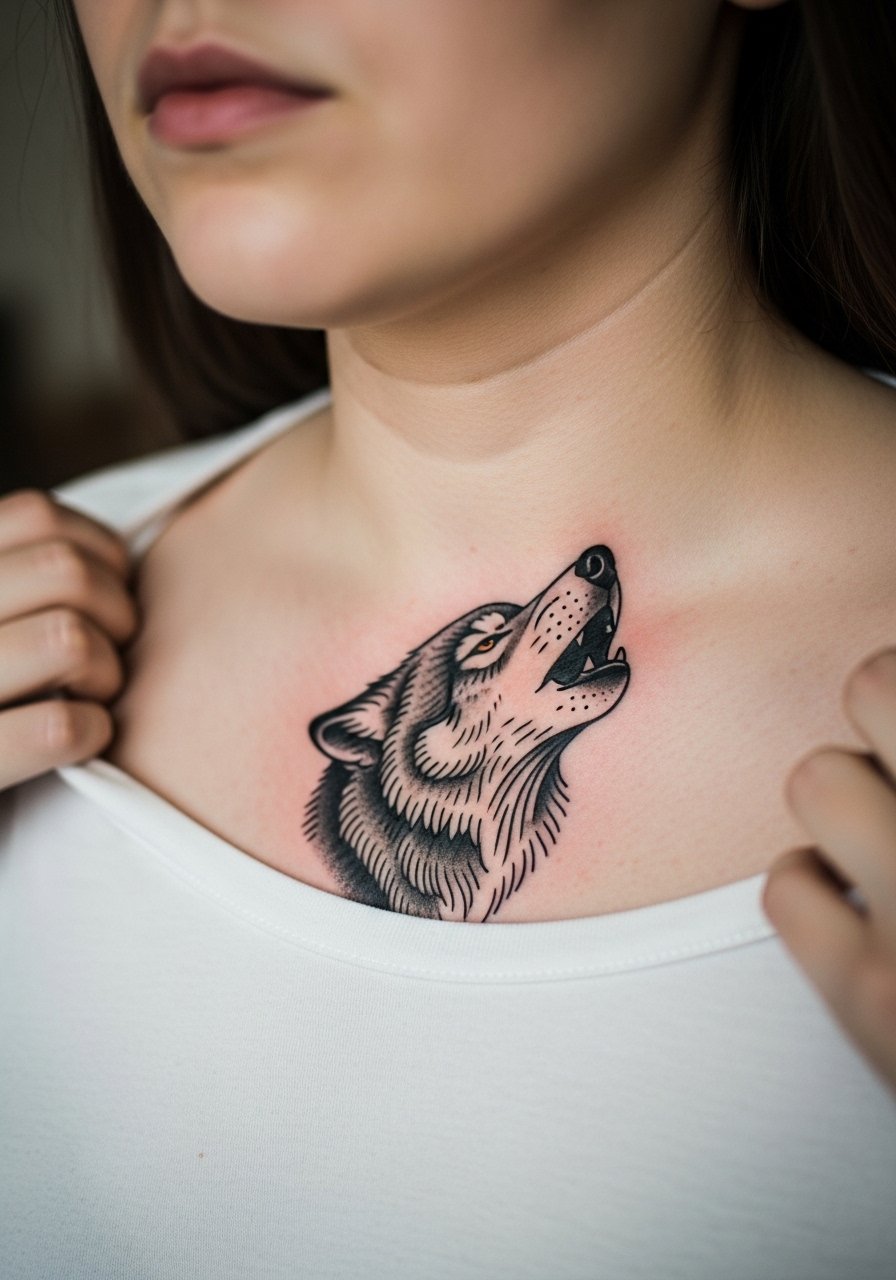
11. Howling Wolf Silhouette at the Collarbone

A silhouette howling wolf keeps symbolism simple and bold. Because of the shallow detail, ask for solid black fill and clean edges so the silhouette reads across distance. The collarbone area is picky about movement and friction, so avoid tiny silhouettes under three inches. This piece is quick to tattoo and heals predictably if you avoid rubbing from straps. Pair it with a dainty choker necklace to frame the negative space elegantly.
12. Wolf Face with Floral Crown on the Forearm
Forearm floral crowns are a classic way to balance ferocity and softness. Ask your artist for saturated black on the wolf face and lighter watercolor washes in the flowers. A frequent error is overdoing bright pigments that fade unevenly against black contours. Forearm pieces are easy to photograph and usually need one touch-up within two to four years depending on sun exposure. For session comfort roll up a loose button-down shirt so the artist can work without tugging fabric.
13. Geometric Wolf with Moon Phases on the Forearm
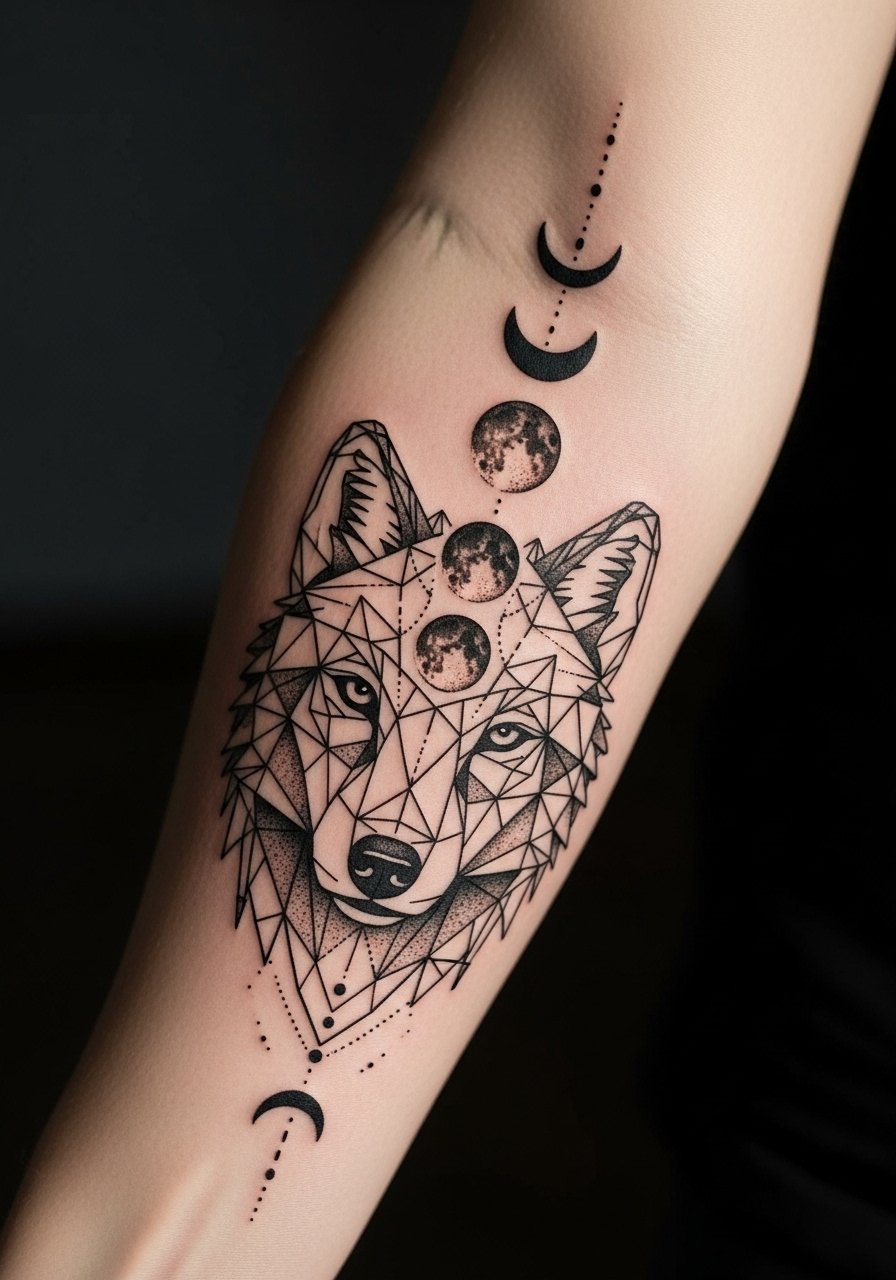
Combining geometric planes and moons gives a modern spiritual edge. Tell the artist to keep moon crescents larger than the thinnest geometry lines so they remain legible as the ink softens. The main mistake is packing small moons into tight facets. Forearm sessions are straightforward and most clients tolerate 1 to 2 hours easily. For show-off pair this with a slim gold arm cuff that does not touch the tattoo.
14. Micro-Realism Wolf Eyes on the Forearm
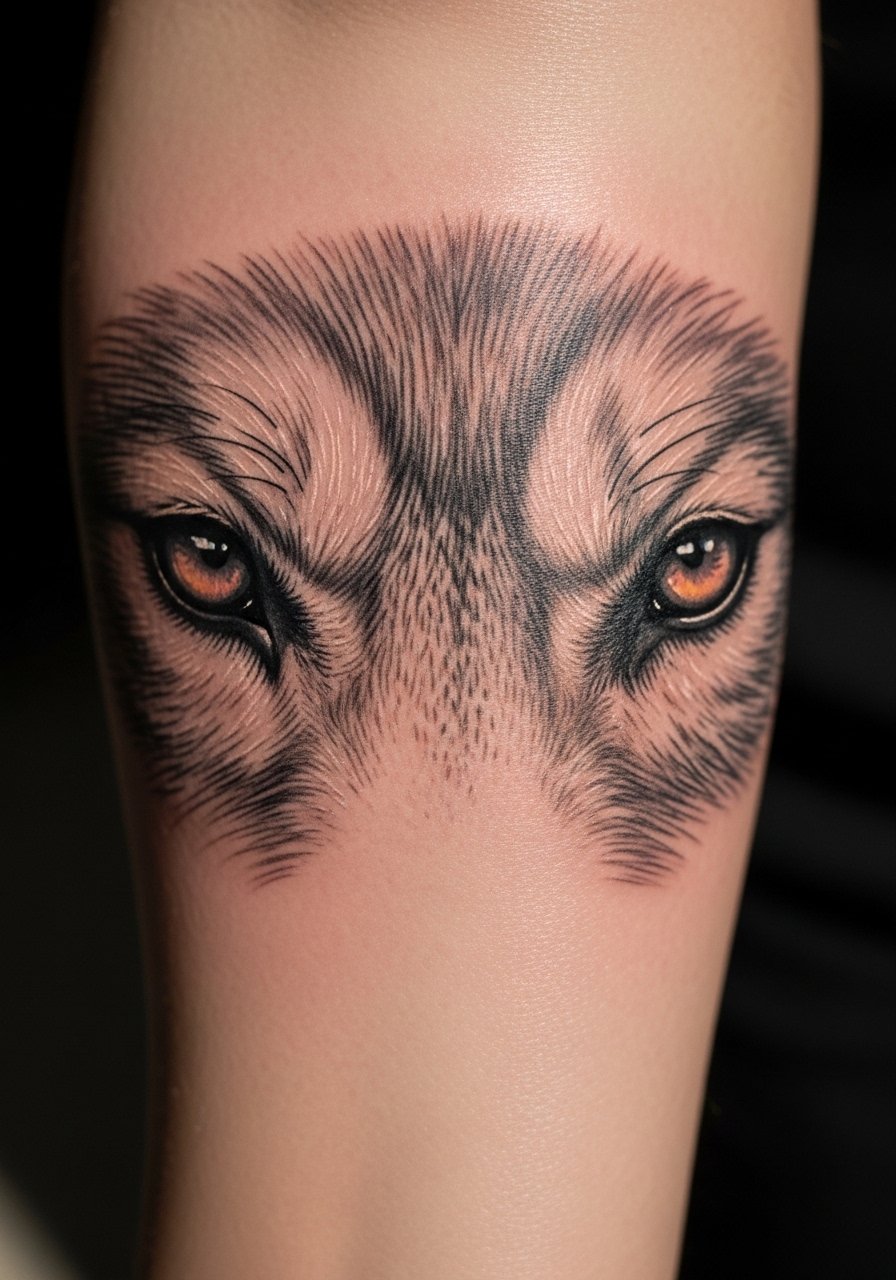
If you want emotion in the eyes, micro-realism focuses the session on tiny details. Ask the artist to plan for at least two sessions so they can map depth without overworking skin. This style carries risk on darker skin because subtle gray washes can disappear in photos, so request higher contrast and bold whites for highlights. The inner forearm is moderate on pain and often needs a touch-up at year three. For casual styling wear a loose long-sleeve button-up you can roll for access.
15. Dot Work Mandala Wolf at the Nape
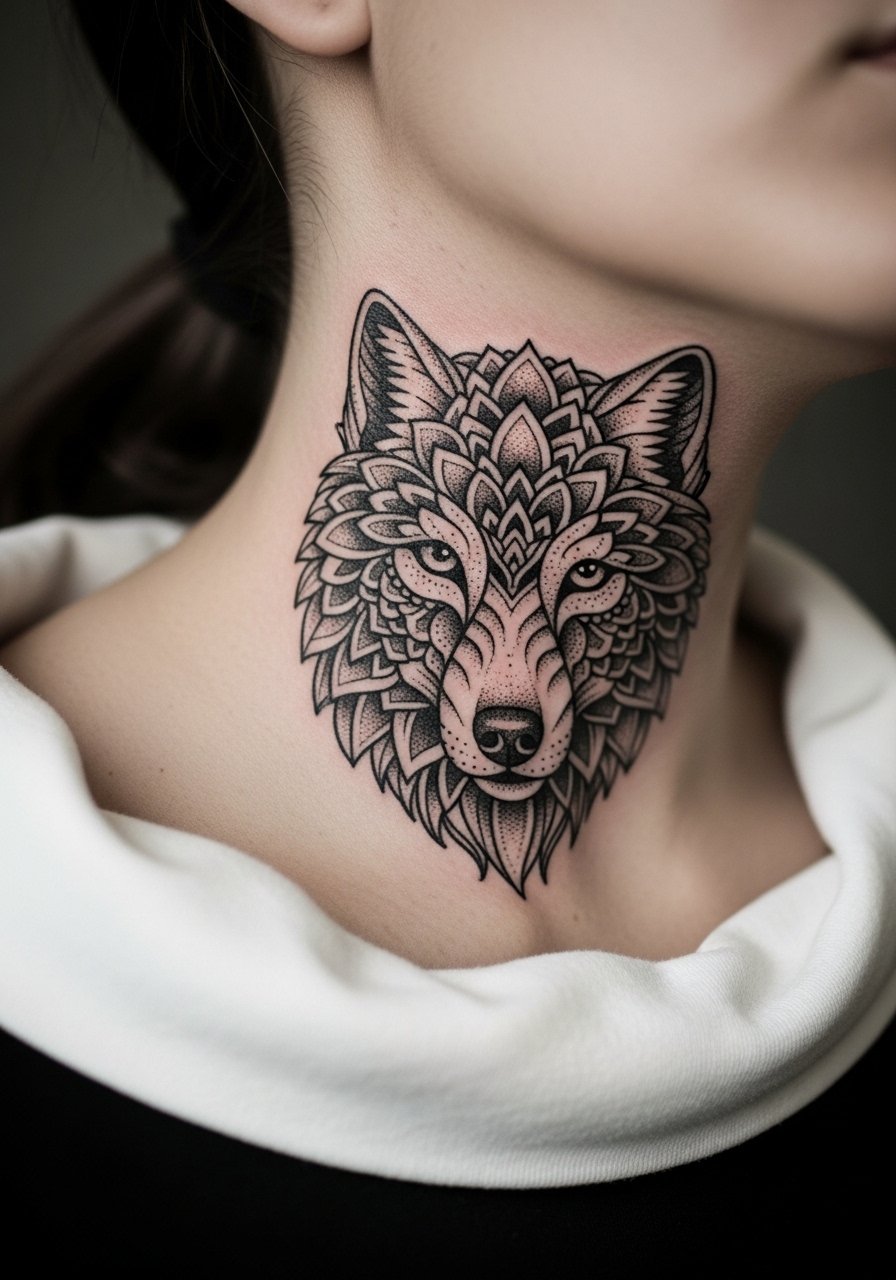
Neck placements demand artist experience with stipple shading because skin there reacts differently. Ask for test dots at similar scale on less visible skin if possible so you know how the stippling will settle. A tattoo mistake is relying on dense dot clusters that merge with motion. Expect higher sensitivity and a shorter single-session window. Keep hair up to show off the mandala, and plan touch-ups earlier than on the torso.
16. Linework Wolf on the Ankle
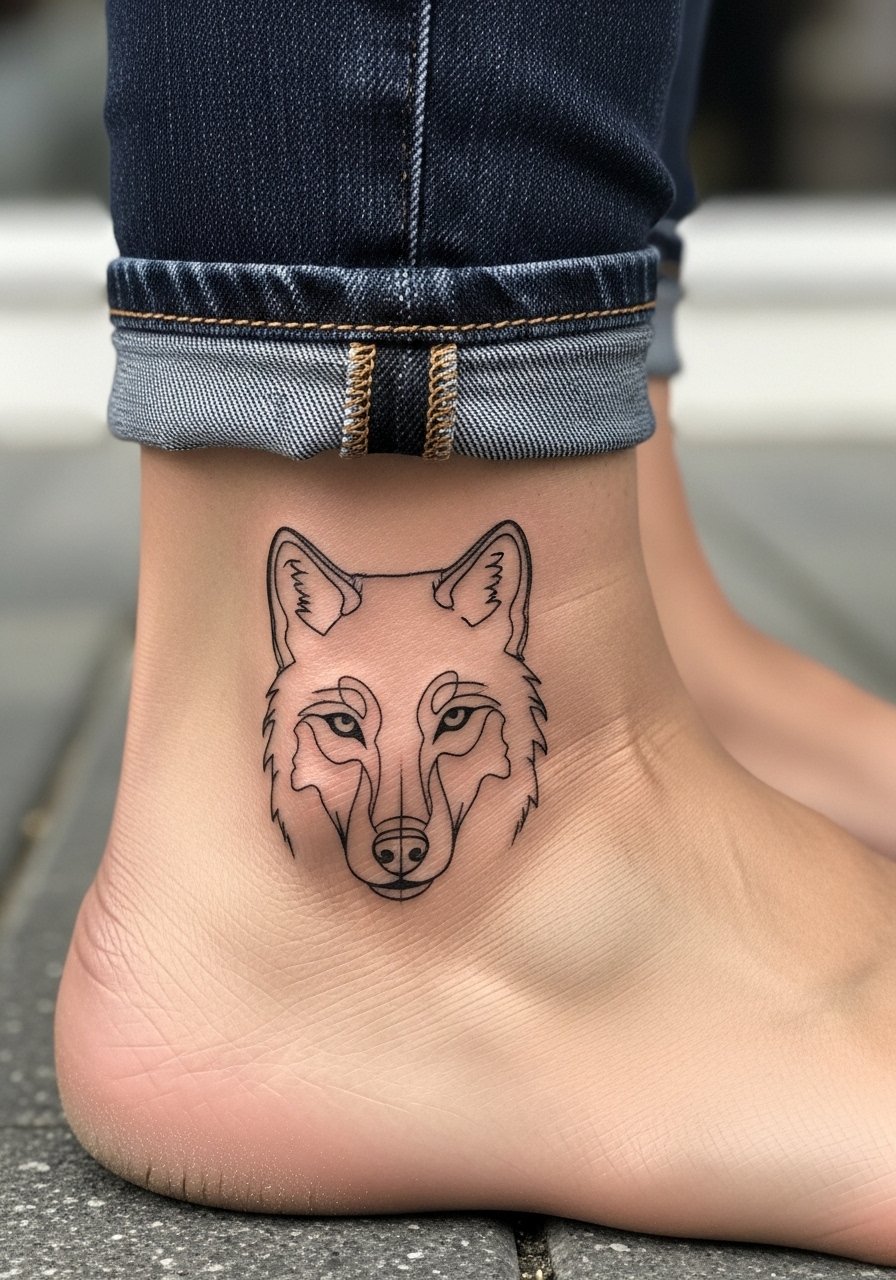
Ankle pieces are charming but face heavy friction from shoes and socks. Ask for a compact design with slightly reinforced outlines so tiny blowout is less visible. The ankle often needs a touch-up within 12 to 24 months if you wear snug footwear. Sessions are short but sharp. For seasonal show-off choose ankle strap heels or cropped pants that keep the area exposed.
17. Stylized Wolf Face with Whip Shading on the Calf
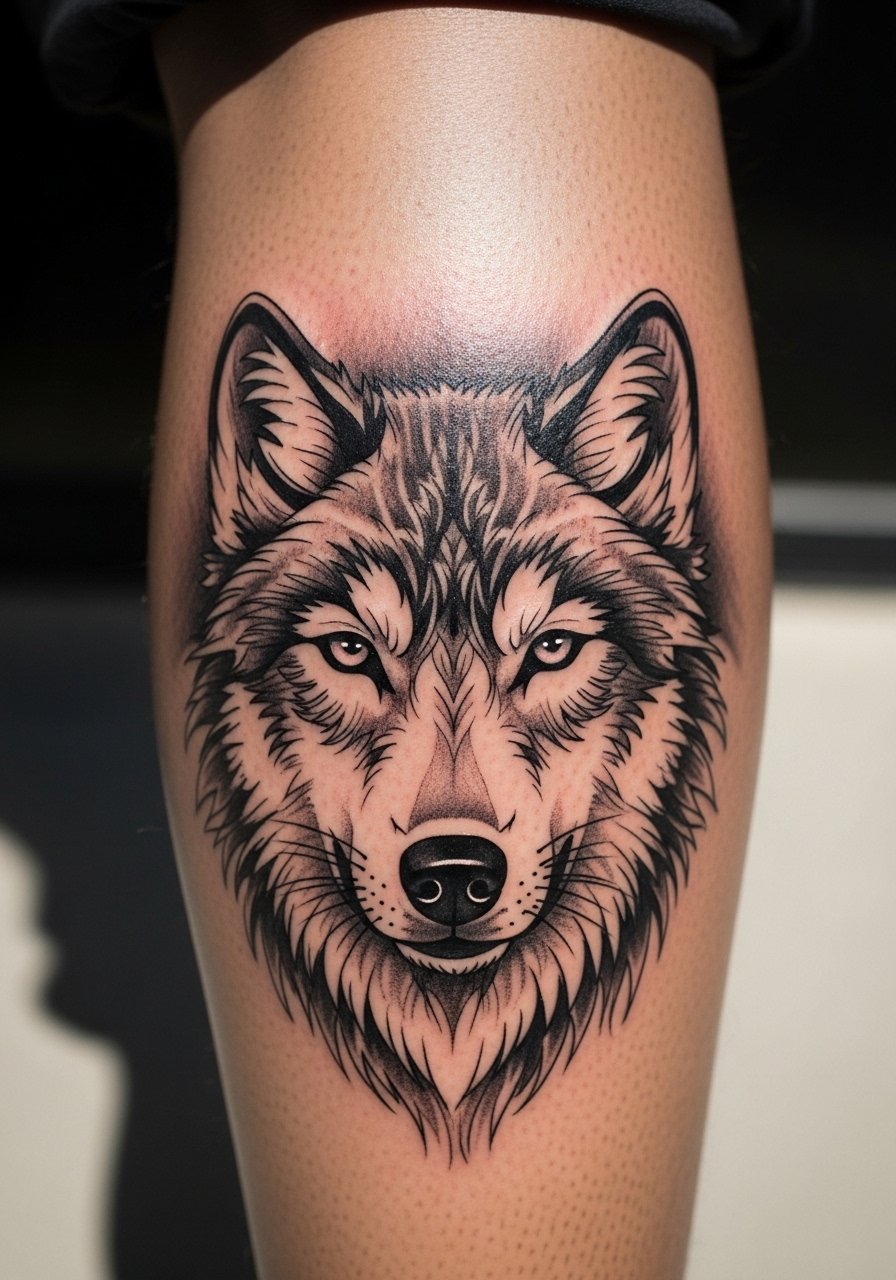
Calves handle whip shading well because the skin is thicker. Specify the direction of shading so the shadow follows the muscle rather than fighting it. A common mistake is asking for overly thin gradients that blur at three years. Expect a medium-length session with manageable pain. Wear pants you can roll up, and for nights out cuff jeans to show off the flow of the shading.
18. Feminine Wolf Face with Stipple Shading on the Ribcage
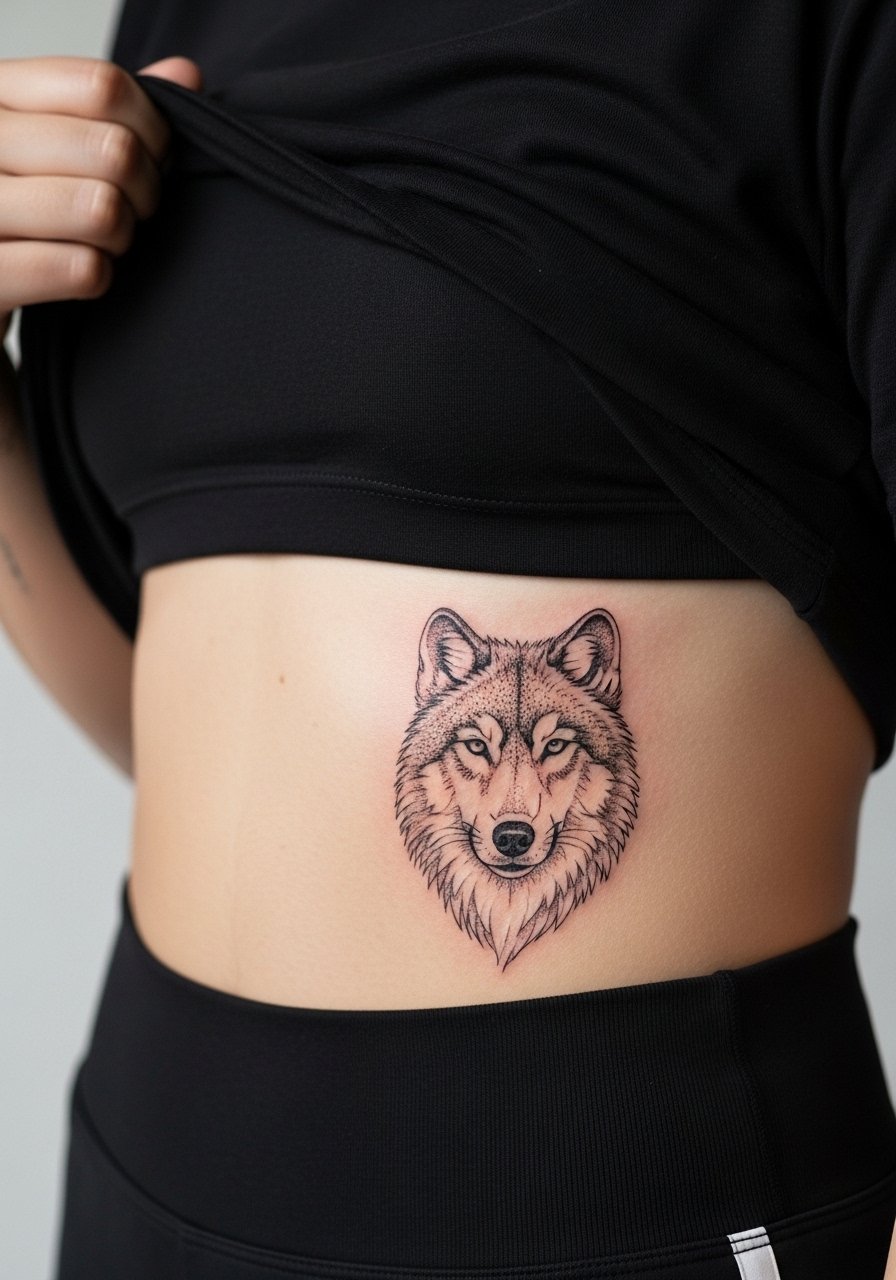
Ribcage tattoos are notorious for pain but they photograph beautifully. Artists vary on fine line ribs because one camp says the skin stretches and blurs lines, and the other camp argues that with precise depth it settles well. Name your preference and ask any artist exactly how they approach ribs. Expect multiple short sessions and a touch-up possibility at year two. For the appointment wear a strapless or sports bra for easy access.
19. Wolf Face with Floral Neckline on the Sternum

Sternum placements read intimate and are sensitive during the session. Ask the artist to anchor the face with bold central lines so the delicate floral edges do not vanish. One mistake is expecting heavy color saturation in that area from a single session. Pain is higher and sessions are often shorter. For showing it off pick a fitted bandeau or low-cut top that keeps the design visible without exposing more than necessary.
20. Small Wolf Face Tattoo for the Ankle Bone
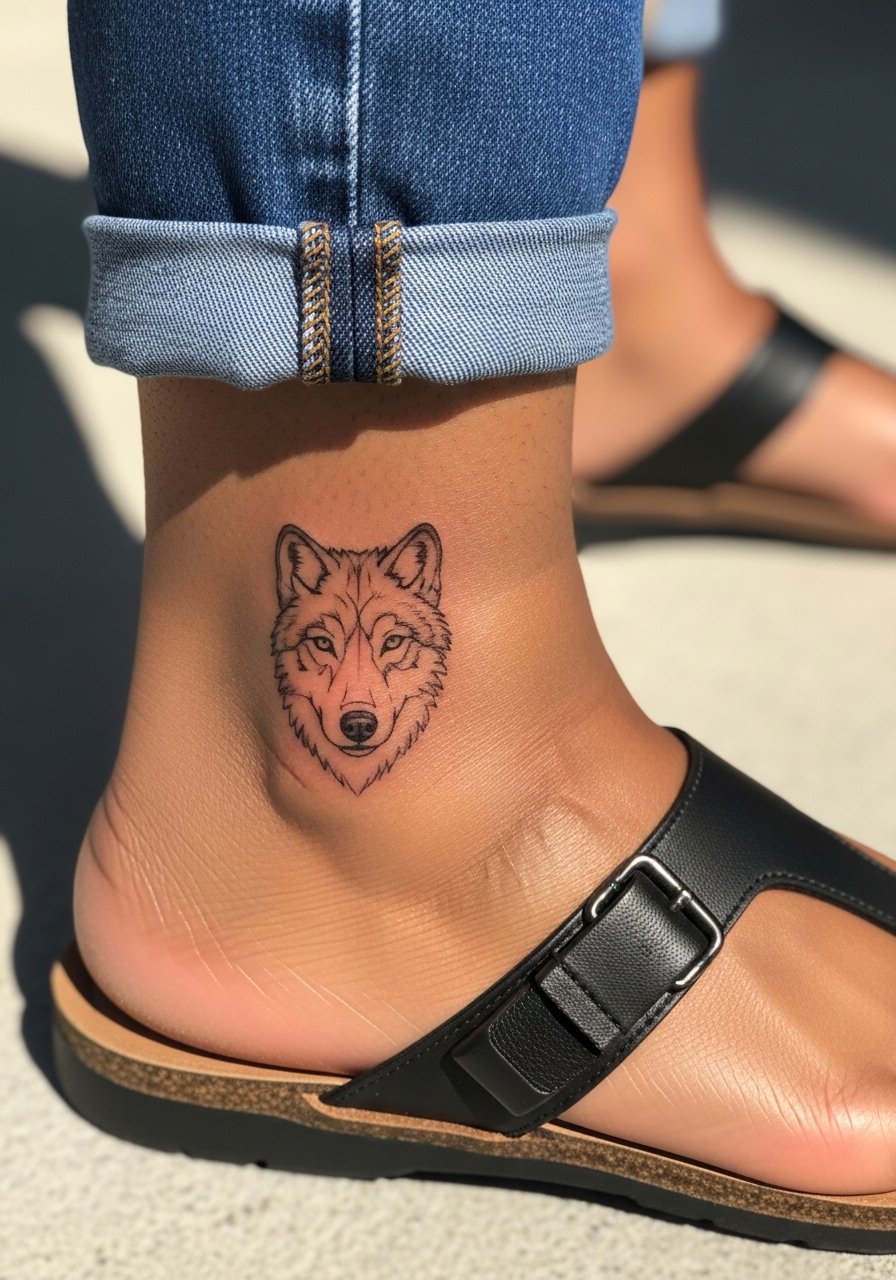
Tiny ankle faces are discreet but demand careful scaling. Tell your artist you want simplified features and thicker primary contours so the eyes do not blur into a smudge. The ankle sees friction and often needs touch-ups sooner than larger placements. Sessions are quick and the pain is localized. For warm weather shows choose cropped pants or strappy sandals to keep the piece visible.
21. Wolf Face with Crowned Florals on the Forearm Sleeve

When expanding into a sleeve, plan modular elements so the wolf face can be isolated visually when you want it to be. Tell your artist which piece should remain the focal point and ask for negative space buffers around the face. A frequent mistake is crowding a sleeve so the main portrait is lost at arm scale. Expect multiple sessions and scheduled touch-ups. For outfit pairing try rolled linen shirts and a slim gold arm cuff that complements the sleeve without covering it.
22. Geometric Half-Face Wolf at the Collarbone
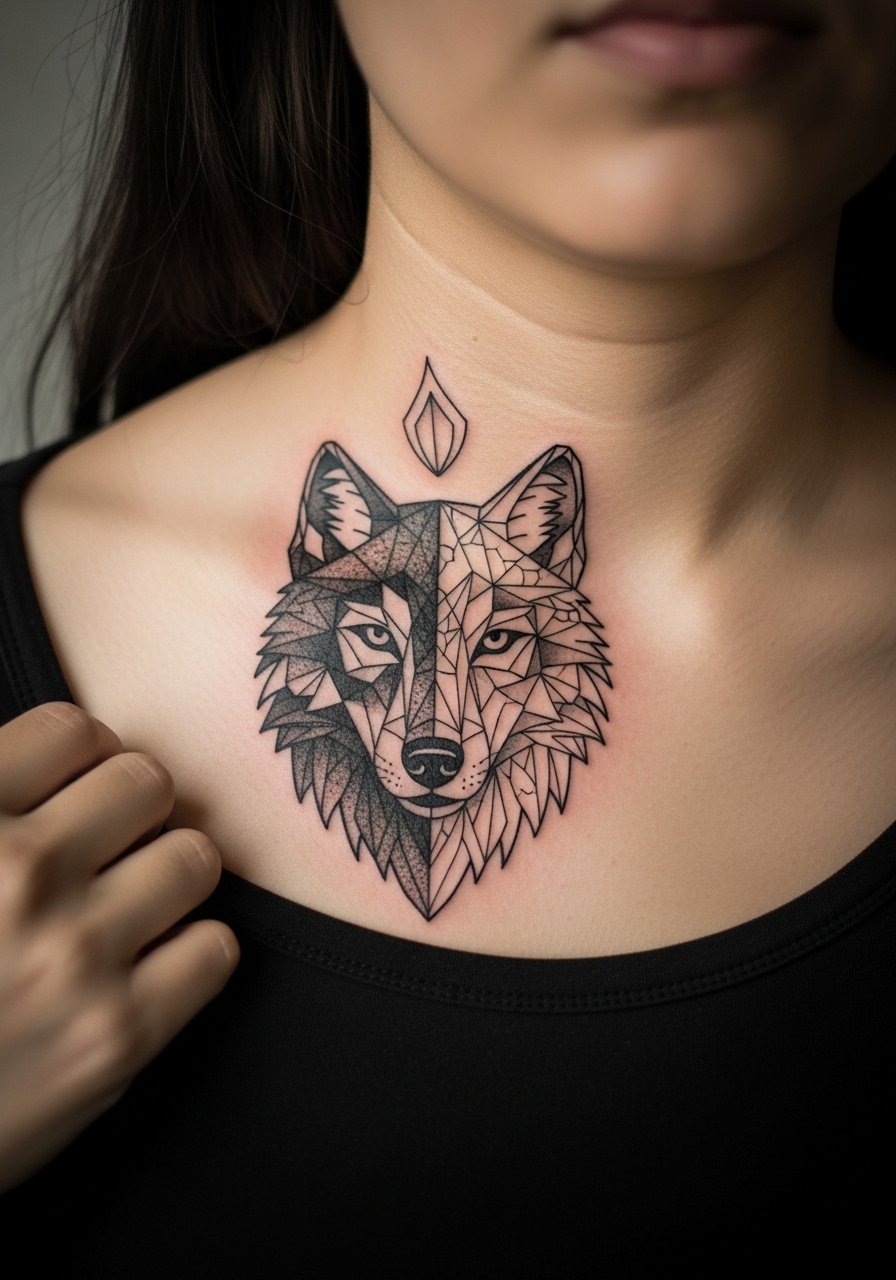
Half-face geometric pieces use negative space cleverly along collarbones. Ask for larger facets near joints so movement does not collapse tiny shapes into blotches. The collarbone will scab differently than flat skin and needs gentle aftercare. Sessions tend to be short and focused. Wear a strapless or wide-neck top on the day so the artist has clear access.
23. Howling Wolf with Starfield on the Upper Thigh
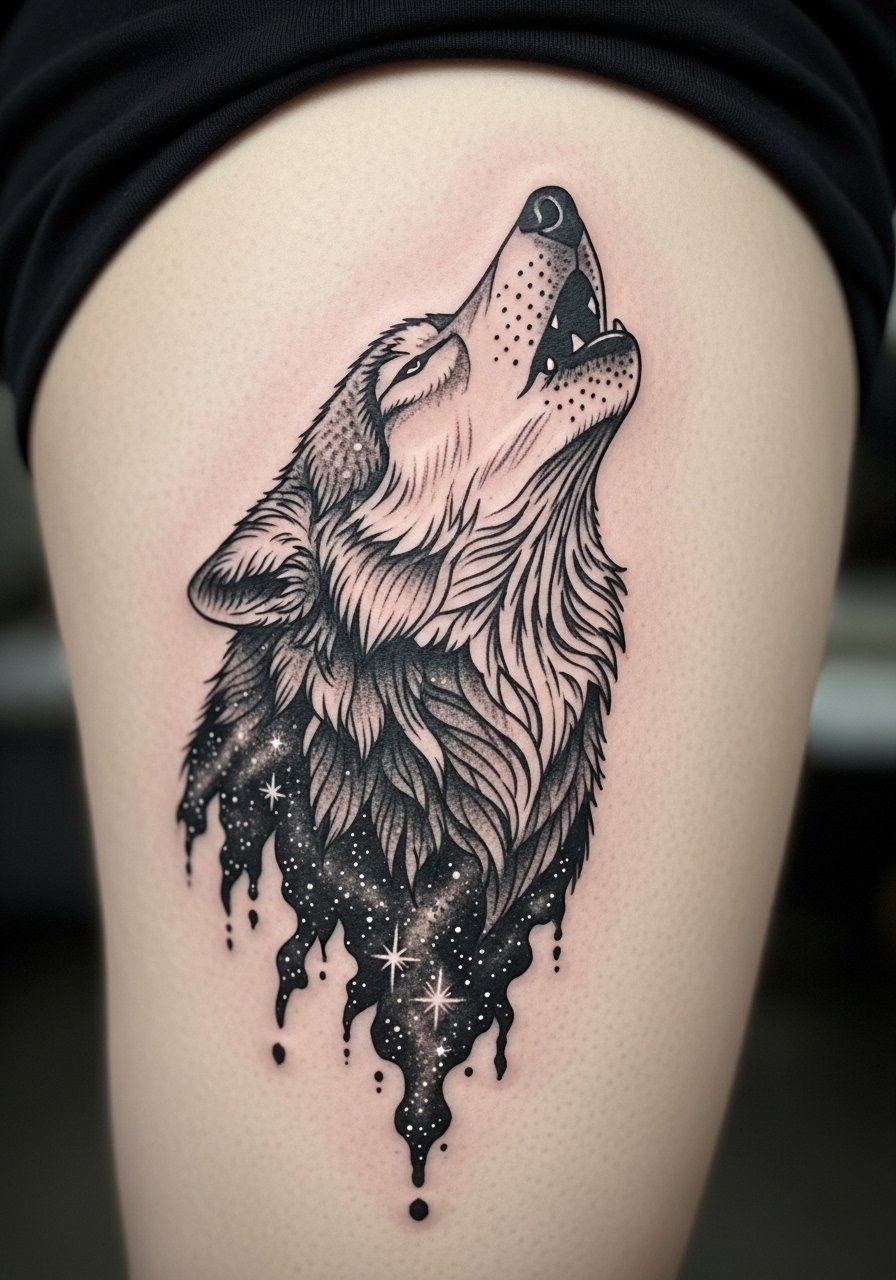
Upper thigh allows dramatic scale and star fields that fade into negative space. Ask for controlled stippling for the stars rather than tiny dots over shaded regions. Mistakes happen when the starfield is too dense near shaded areas, which speeds blending. Thigh sessions tolerate longer times and recover well with rest. For session comfort wear a wrap skirt or loose shorts.
24. Minimalist Single-Line Wolf Face Behind the Ear
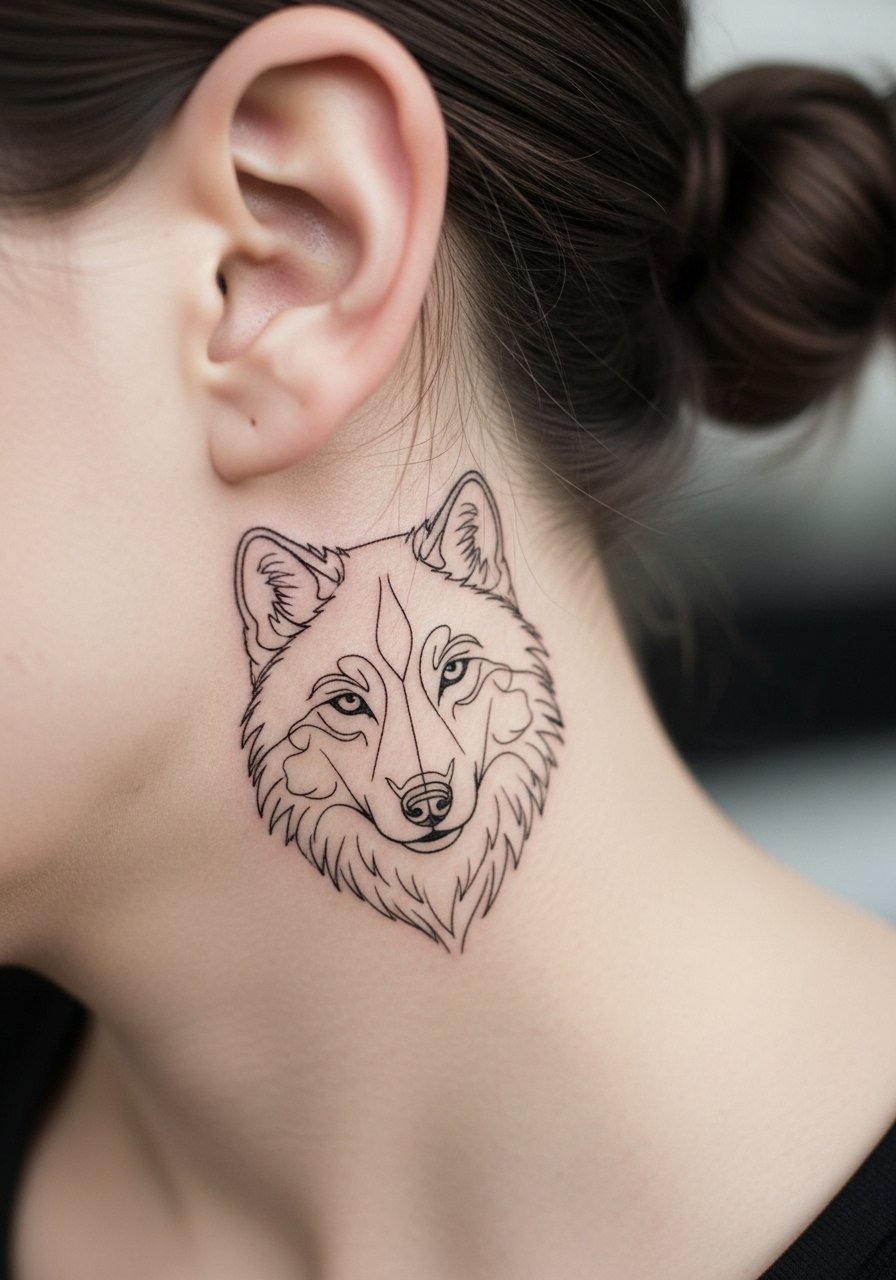
Behind-the-ear placements are intimate and need precise, shallow mapping so the design sits below the hairline. Request a single-line or micro-outline and ask for a scale mockup so you can see how it reads with hair down. The area is sensitive and often done quickly. Keep hair tied up during the session and consider the visibility if your workplace is strict.
25. Wolf Face with Skull and Flowers on the Calf
Calf pieces combine drama and mobility. If you want both skull edge and floral softness, ask for clear border work around the skull so the flowers do not blur into dark fields. A common mistake is mixing too many tiny petals with heavy black fills. Sessions are comfortable for most and touch-ups tend to be rare if outlines are strong. For show-off cuff jeans or opt for boots depending on season.
26. Poised Wolf Face with Stipple Halo on the Inner Wrist
Inner wrist stipple halos look delicate but need deliberate spacing to avoid merging into a gray wash. Ask the artist to test a halo density on a less visible area first if possible. The wrist is a high-motion site and fine dot work may need a touch-up at one to two years. Sessions are quick and often more uncomfortable than the forearm. For daily wear choose minimalist bangles on the opposite wrist.
27. Scaled Wolf Face Modular for Sleeve Expansion on the Upper Arm
If you plan to expand into a sleeve over time, design the wolf face with clear anchor points and open background space for future pieces. Tell the artist you want modular edges and note where future elements will connect. A frequent mistake is treating a standalone piece as the final composition. Sessions are typically staged and touch-ups common after connecting new panels. For the session wear a sleeveless tank you can pull aside easily.
Frequently Asked Questions
Q: Will fine line wolf faces blur faster than black and gray portraits on my forearm?
A: Fine line does tend to soften faster, especially on high-friction zones like forearms. The trade-off is subtlety versus longevity. If you want the delicate look with better staying power ask for slightly heavier key contours and plan a touch-up around year two or three.
Q: How should I communicate scale and detail to avoid a cartoonish feminine wolf face?
A: Bring multiple references that show the exact eye shape and jawline you like, not just general vibes. Tell the artist which elements must be realistic and which can be stylized. Ask to see healed photos of similar placements so you know how their style photographs after settling.
Q: For darker skin tones what wolf face styles hold up best in photos?
A: High-contrast blackwork and bold outlines keep details visible on darker skin. Ask for stronger contrast around the eyes and consider negative space highlights. Photographers also recommend softer side lighting over flash to preserve texture in photos.
Q: Artists disagree on Saniderm versus dry healing for fine line work. Which is better for wolf faces?
A: Both camps have merits. One group favors protective film for less scabbing and cleaner early weeks. The other group prefers dry healing to protect color vibrancy. Talk to your artist about what they use and why, then follow their protocol for the best result.
Q: If I want a watercolor thigh wolf but worry about fading, what should I ask for at the consult?
A: Request larger, bolder color fields and an underlying black silhouette to give definition as pigments soften. Ask the artist about pigment brands they prefer for longevity and whether they recommend a second session to deepen color once healed.
Q: How often do fine line wrist wolf tattoos need touch-ups, and is tipping the artist expected?
A: Expect touch-ups for fine line wrist work around 12 to 18 months depending on exposure. Tipping norms vary by region, but many clients tip around twenty percent for a first session. If you plan to return for touch-ups, discuss any booking expectations with the artist up front.
