
Fine line tattoos dominate saved boards and salon feeds, and the people booking them are surprised by how much placement and spacing decide longevity. The pieces that still read like art after five years are usually planned with spacing and thicker starting lines, not the ones that look impossibly fragile fresh. Read through these 21 feminine tattoo style drawings, and you will have clear notes to bring to your consultation.
1. Delicate Floral Sprig on the Wrist
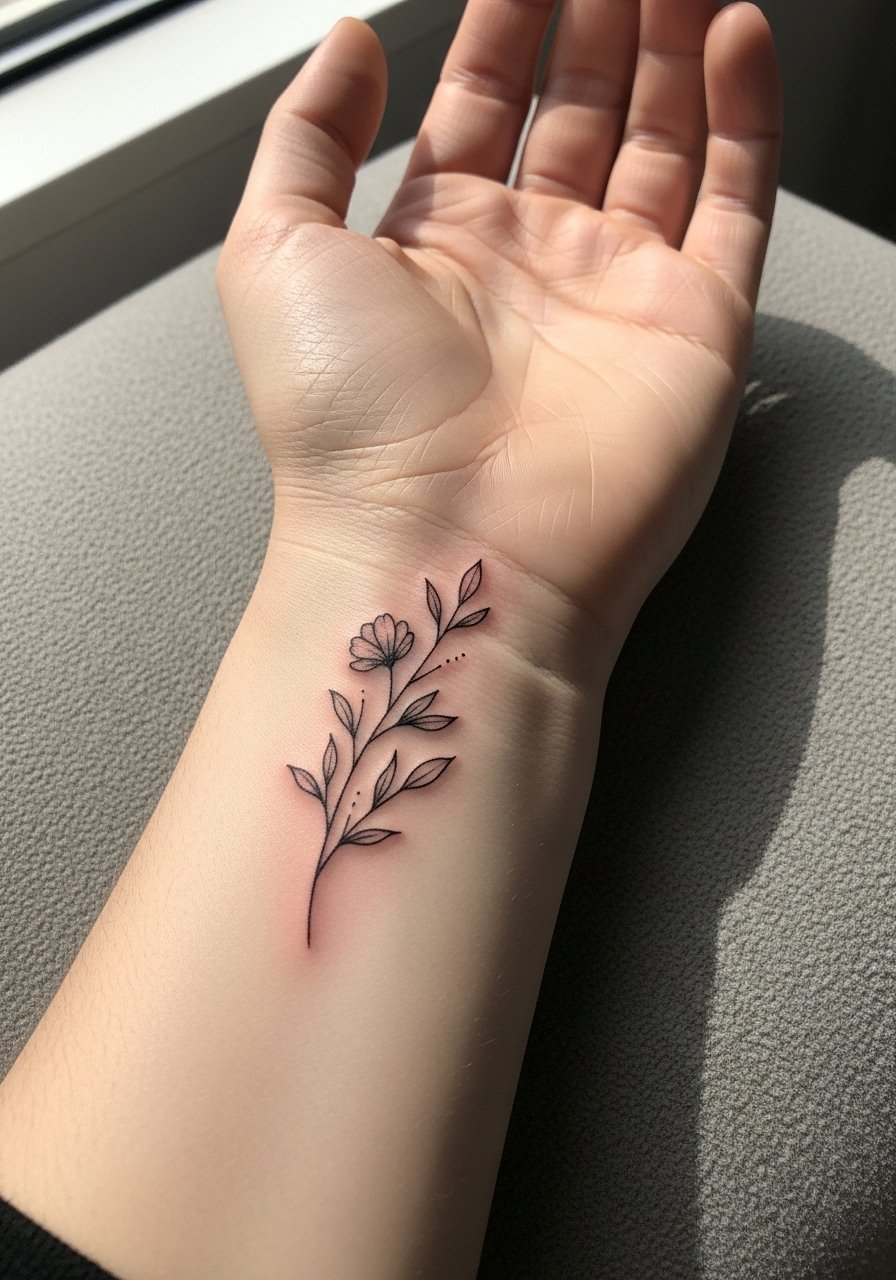
I’ve seen this tiny sprig live as a day-to-day signature on dozens of wrists. Opt for a slightly bolder primary stem so the sprig still reads after a year. In consultation, ask for single-needle detail on the leaves but a 1.5x-thicker stem than the leaves to prevent early blur. Wrist is a high-friction spot, so expect a touch-up at year one or two. For the appointment wear a sage green tank top so the artist can set the arm comfortably and you can roll sleeves up without tugging. When showing it off, thin silver bangle stacks frame the area without crowding the linework.
2. Lotus Outline on the Collarbone
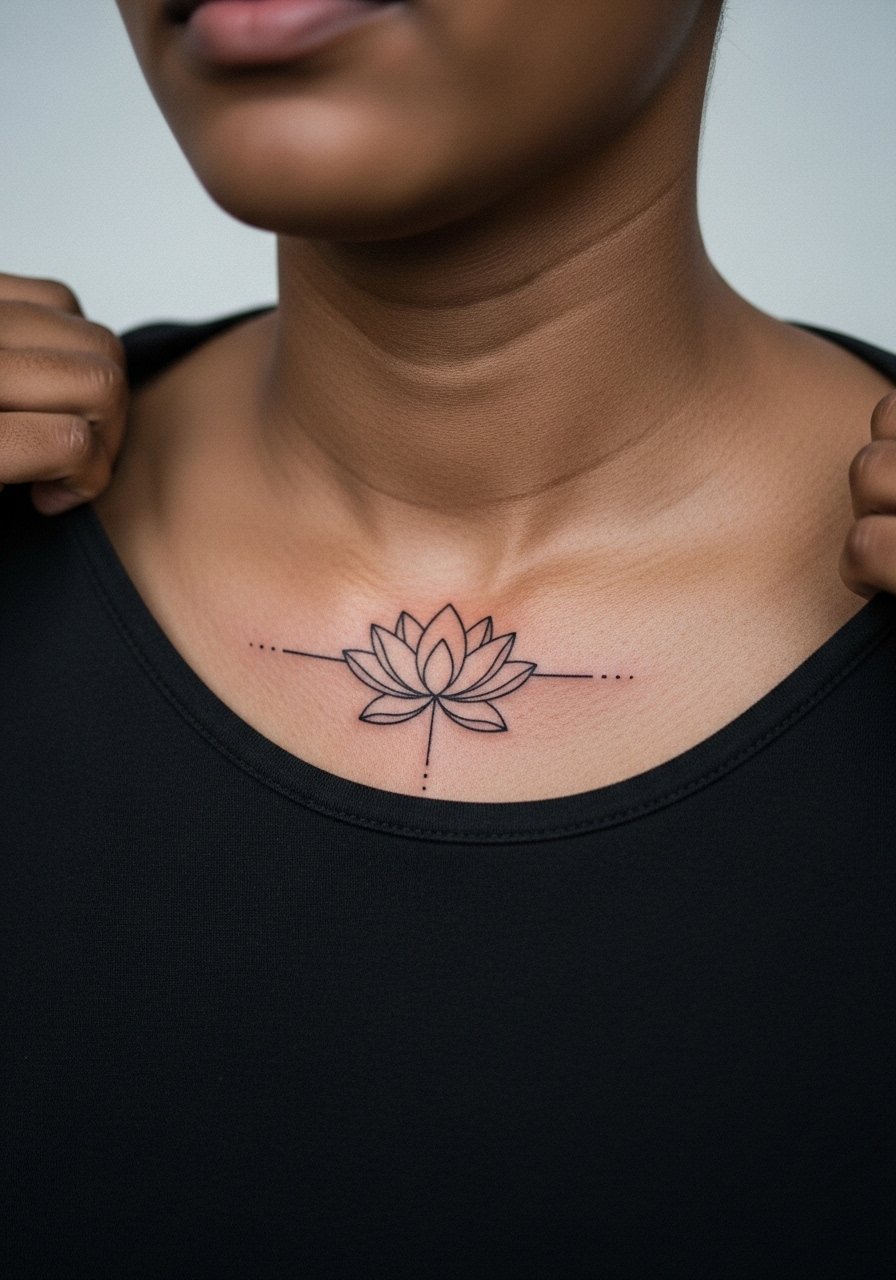
Fair warning: collarbone receives more sun and movement than people expect. I recommend a lotus with open petals and internal negative space rather than dense stippling. Tell your artist to keep the main lines clear and avoid tiny cross-hatching that can merge with collarbone motion. Session time is typically under two hours and the pain is moderate. For showing it off, pair with an off shoulder sweater or layered delicate necklaces that sit above the ink. If you want to track healed results, expect softening around the edges after two years if you skip sunscreen.
3. Goddess Symbols with Moon Phases on the Shoulder
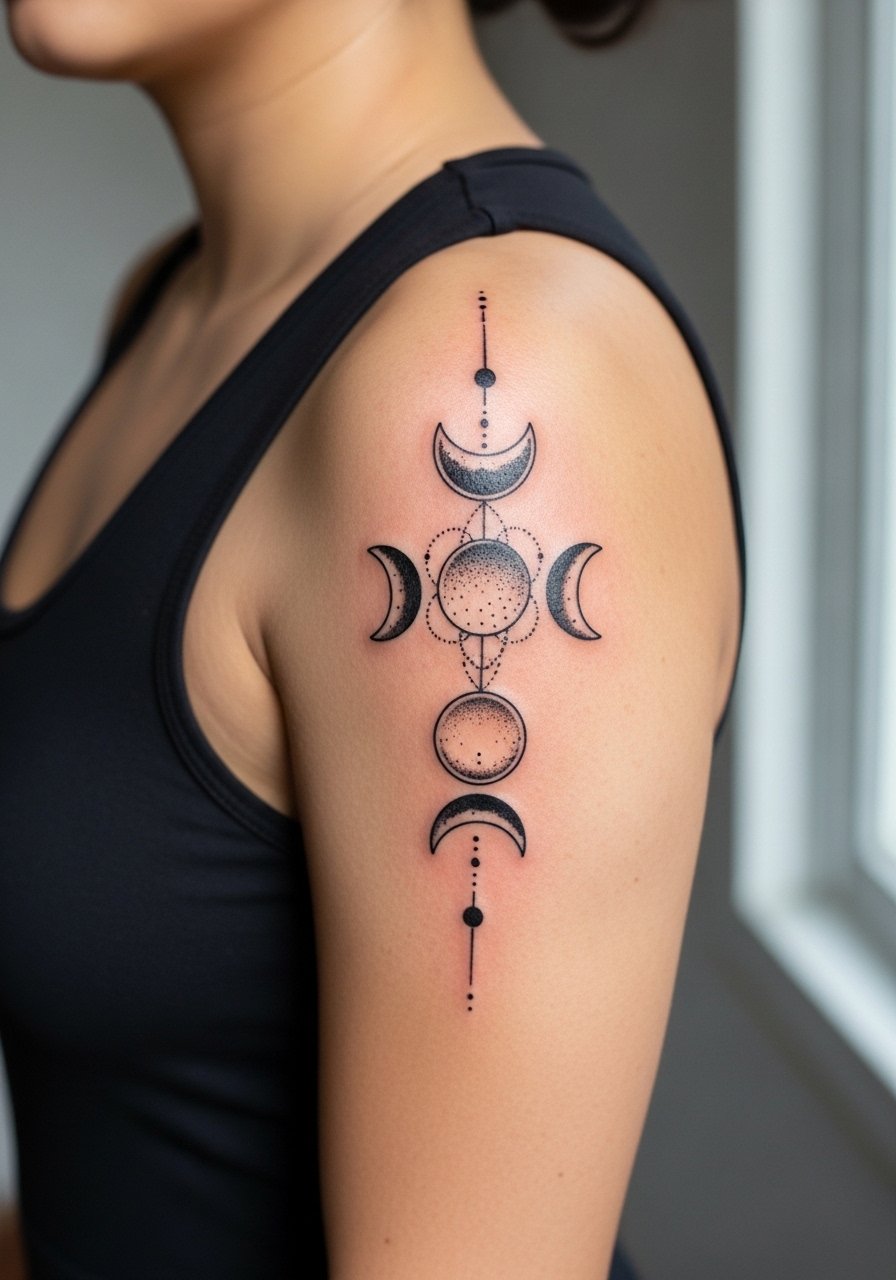
When people want symbolic geometry, shoulder is forgiving. Ask the artist to space the moons and geometric fills so the blackwork breathes. The shoulder tolerates denser blackwork better than ribs or inner wrist. This piece usually needs two short sessions for crisp geometric fills and clean outlines. Controversy exists around ornamented blackwork and long-term sun exposure. One camp says geometric black holds well with solid saturation. The other camp warns that dense blackwork on rounded shoulders can develop faint patchiness if not sun-protected. Pack a sleeveless bodysuit on session day and plan for sunscreen afterward.
4. Minimalist Line Art Face on the Inner Forearm
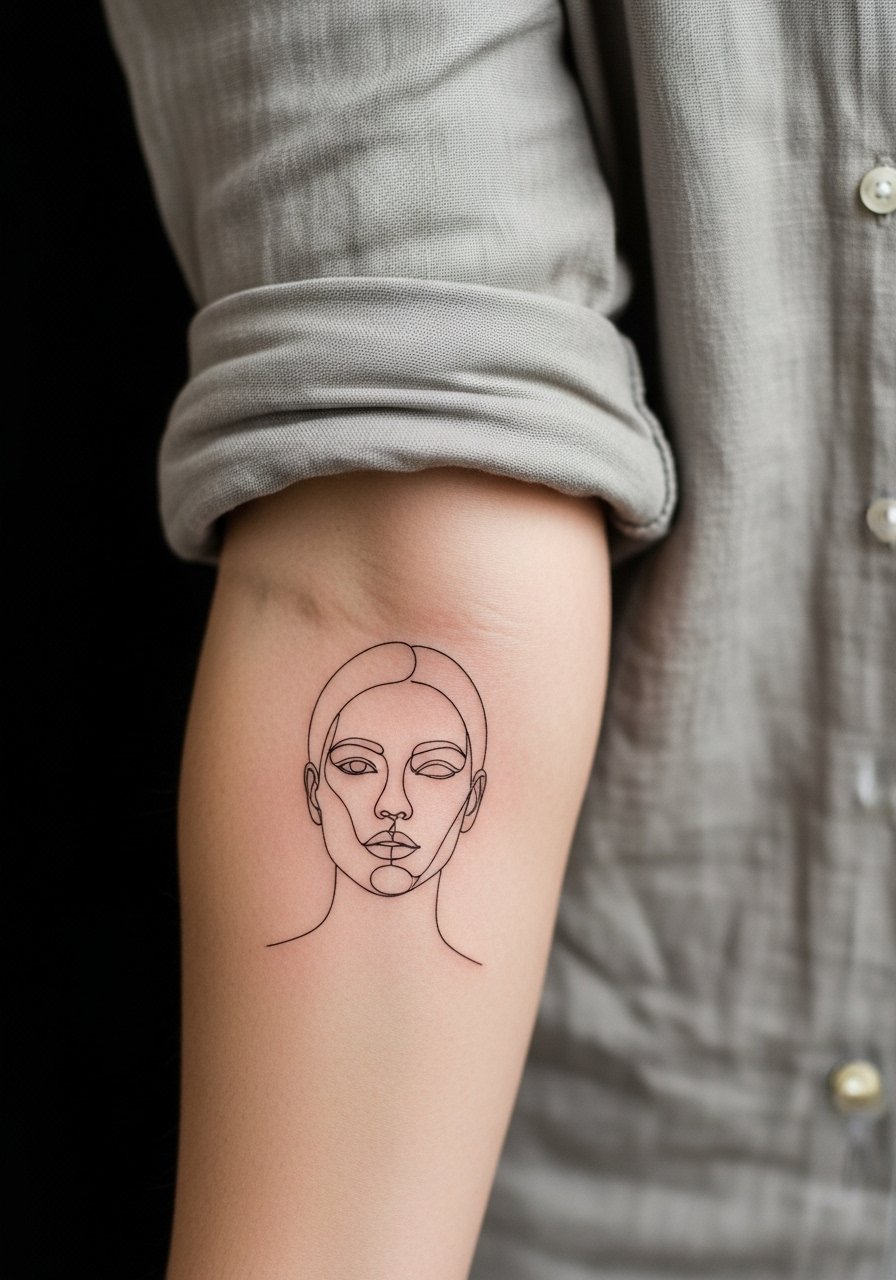
The inner forearm is a showcase spot for single-line portraits, but it also shows fading differently across skin tones. A continuous line face looks clean at six months when contrast is fresh. By year two it can soften, especially if the initial line weight was ultra-micro. During consultation, ask for a slightly increased line weight and fewer micro-hooks. The session is quick and tolerable. For showing the piece, roll a linen button down shirt to the elbow so the portrait sits in natural sight when you move your arm.
5. Snake Coiled Around a Flower on the Thigh
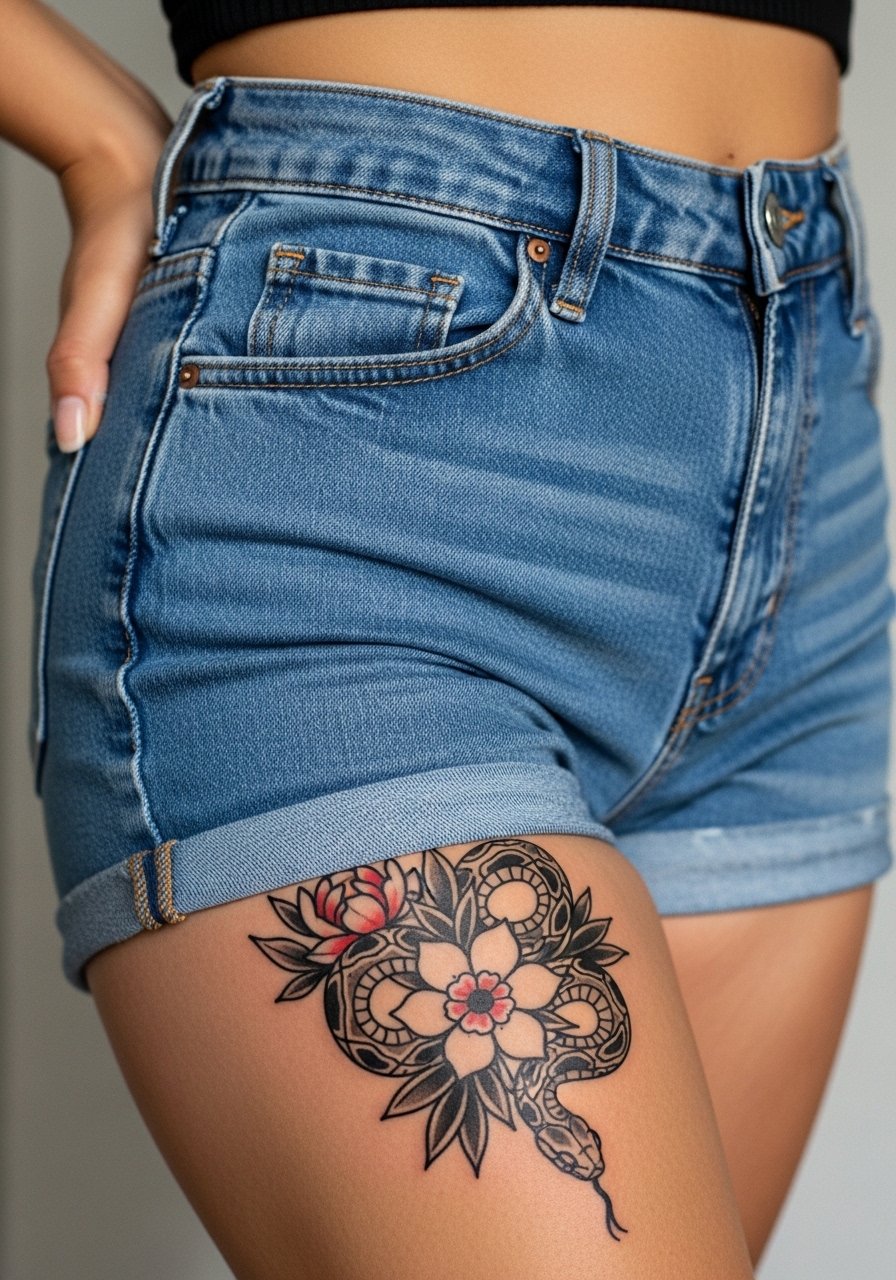
Thigh pieces let neo-traditional scales and color breathe. I tell people the thigh is great if you want detail and color that lasts because it sees less friction than ankles. For a coiled snake, ask for solid linework and mid-tone color saturation so the scales age into texture rather than patchy spots. Sessions run longer, two to three hours typically, and the pain is lower than ribs. When wearing a high-slit dress or thigh-high boots it becomes a dramatic reveal. Think ahead about weight changes because significant shifts can stretch the composition.
6. Crescent Moon Phases on the Ribcage
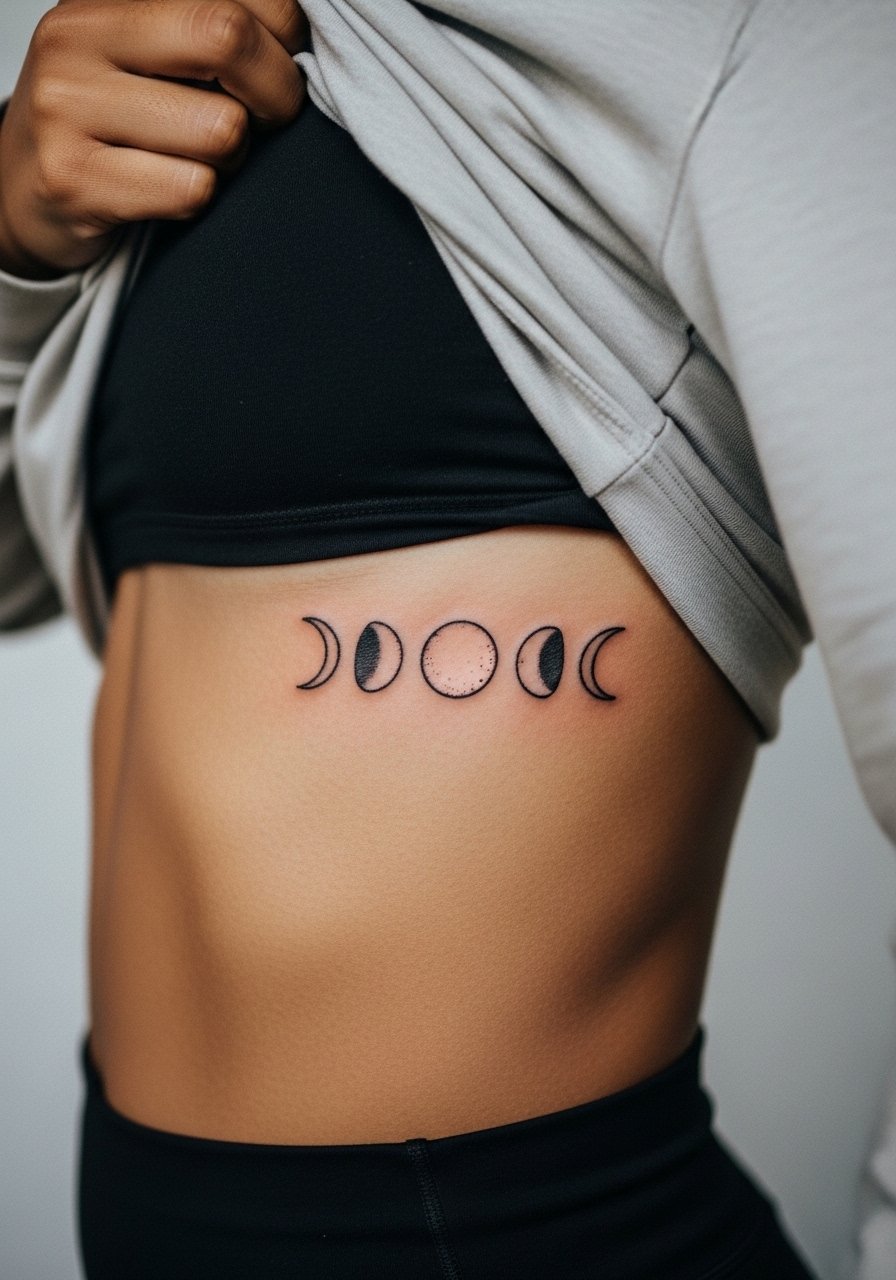
Ribcage work is honest about pain and aging. Expect a higher pain rating during the session and more movement during healing. Artists split on fine line on ribs. One camp says the skin there stretches and softens fine lines within two years. The other camp believes careful needle depth and spacing keep fine line readable. Ask your artist where they stand and request spacing between phase symbols. For the appointment wear a sports bra that lifts so the artist can angle comfortably. For cycle symbolism, water-based shading changes most over five years, so plan touch-ups proactively.
Studio Day Picks
The wrist, collarbone and ribcage pieces above have different prep needs, so a focused kit helps the session and the first healing week.
-
Fragrance free tattoo balm. Lightweight, non-clogging balms help fine line sprigs and collarbone outlines keep moisture without smothering the needle channels.
-
Breathable second-skin patches. These thin films protect small wrist and finger tattoos from daily friction while letting the area breathe.
-
Tea tree salve. In humid climates a fast-drying salve can reduce surface moisture that blurs micro-detail in the first week.
-
Thin protective film roll. Handy to cover awkward placements like ribs and inner bicep during sleep and travel.
-
Aquaphor healing ointment. A thin layer during the initial days keeps ink from drying into thick crusts on fine line pieces.
7. Skull with Floral Crown on the Upper Arm
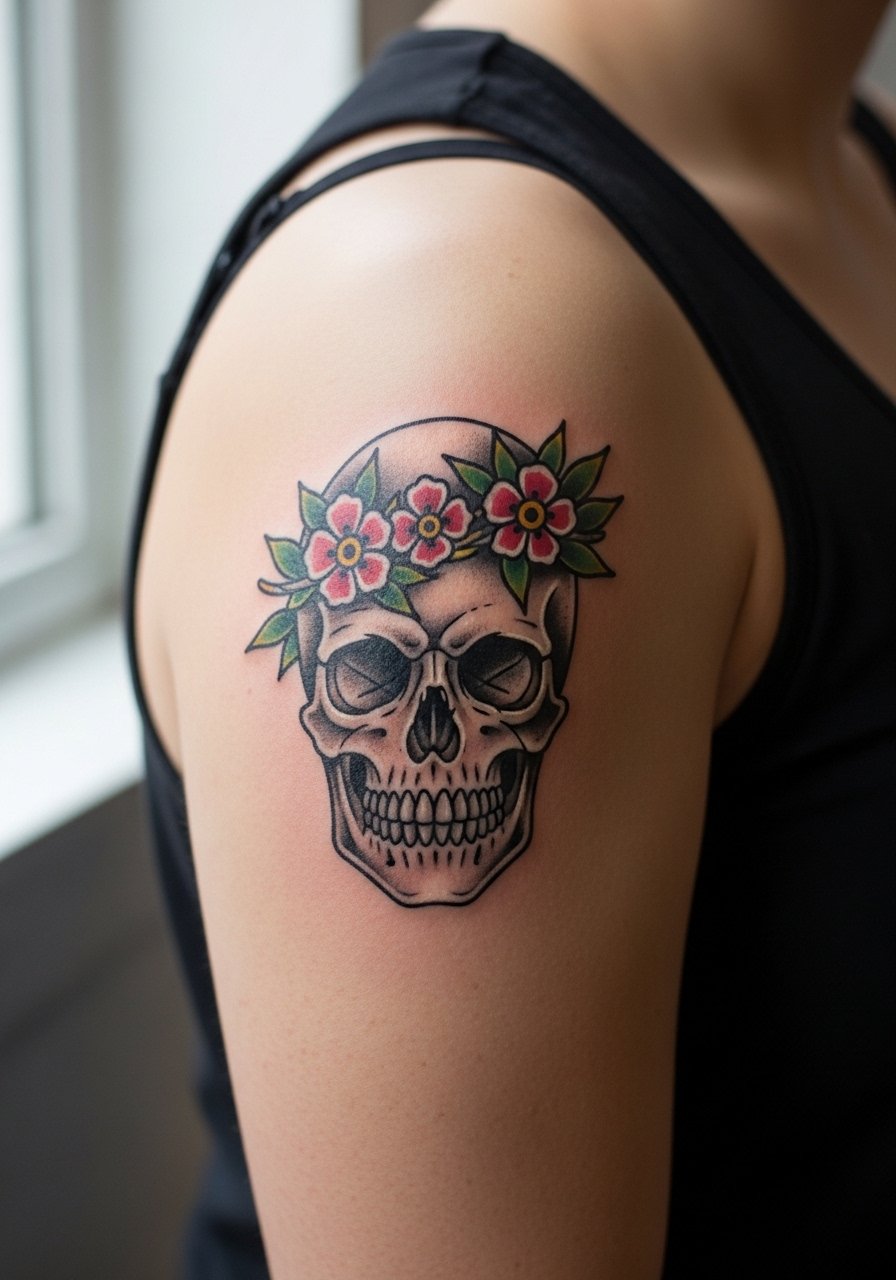
Upper arm takes both bold and soft treatments well. For a skull crowned in flowers, I'd ask for heavier outlines on the skull and more delicate petals, so the florals keep their identity as the skull ages. Expect two sessions if you want color and depth. The biggest mistake is compressing too much tiny detail into the petals. During the session wear a sleeveless top so the artist has clear access. For evening wear, a sleeveless bodysuit in deep jewel tones creates contrast with the black and color work.
8. Unicorn Silhouette on the Ankle
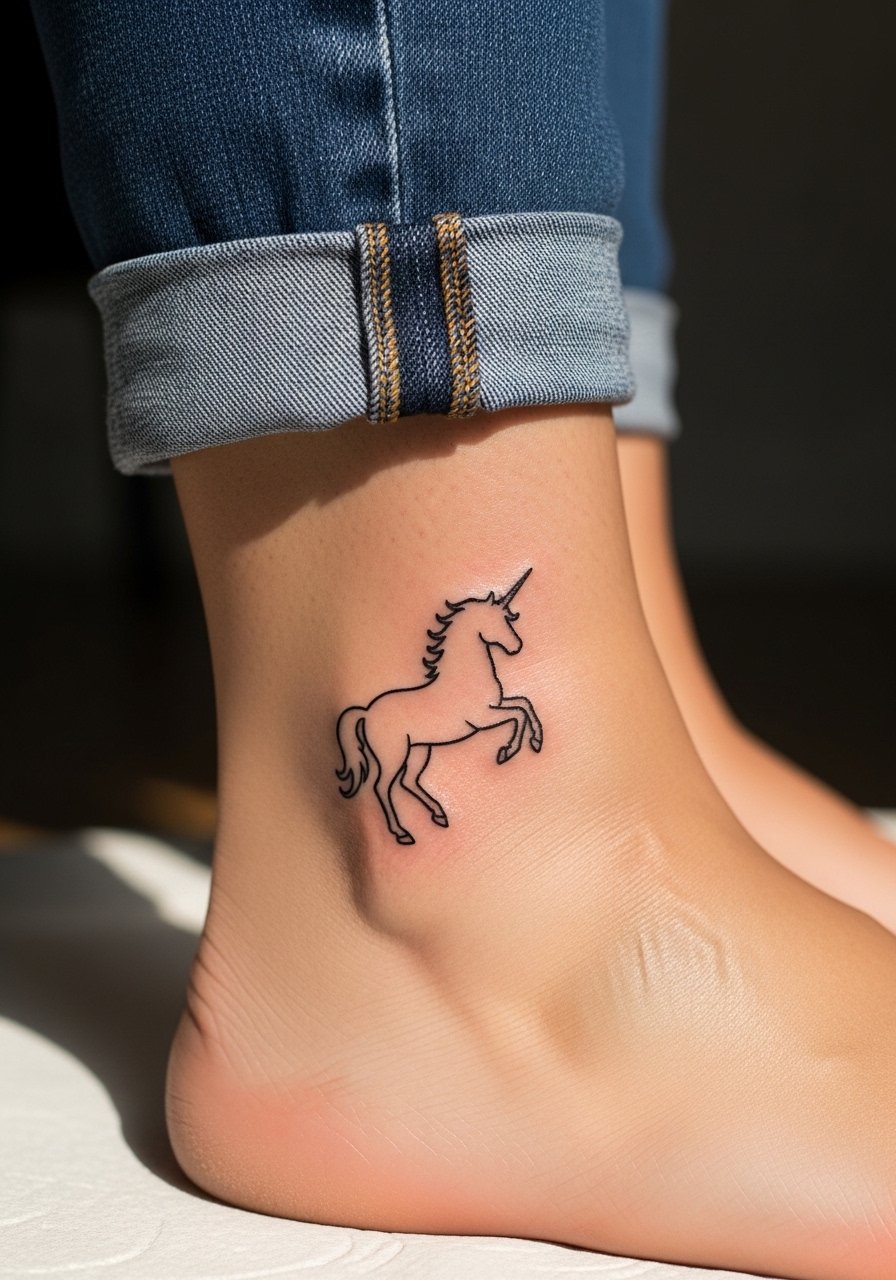
Ankle tattoos are charming but experience more wear from shoes and socks. I recommend a slightly higher contrast outline on the unicorn so it survives seasonal rubbing. Ask your artist to avoid extremely thin filigree at the base of the hoof which can dissolve into faint smudges. Session time is short and pain varies. For showing off, cuffed straight-leg jeans or strappy sandals frame the ankle piece. Wear shorts or rolled denim to your appointment so the artist can work without compression from clothing.
9. Lavender Sprig Branch on the Inner Wrist
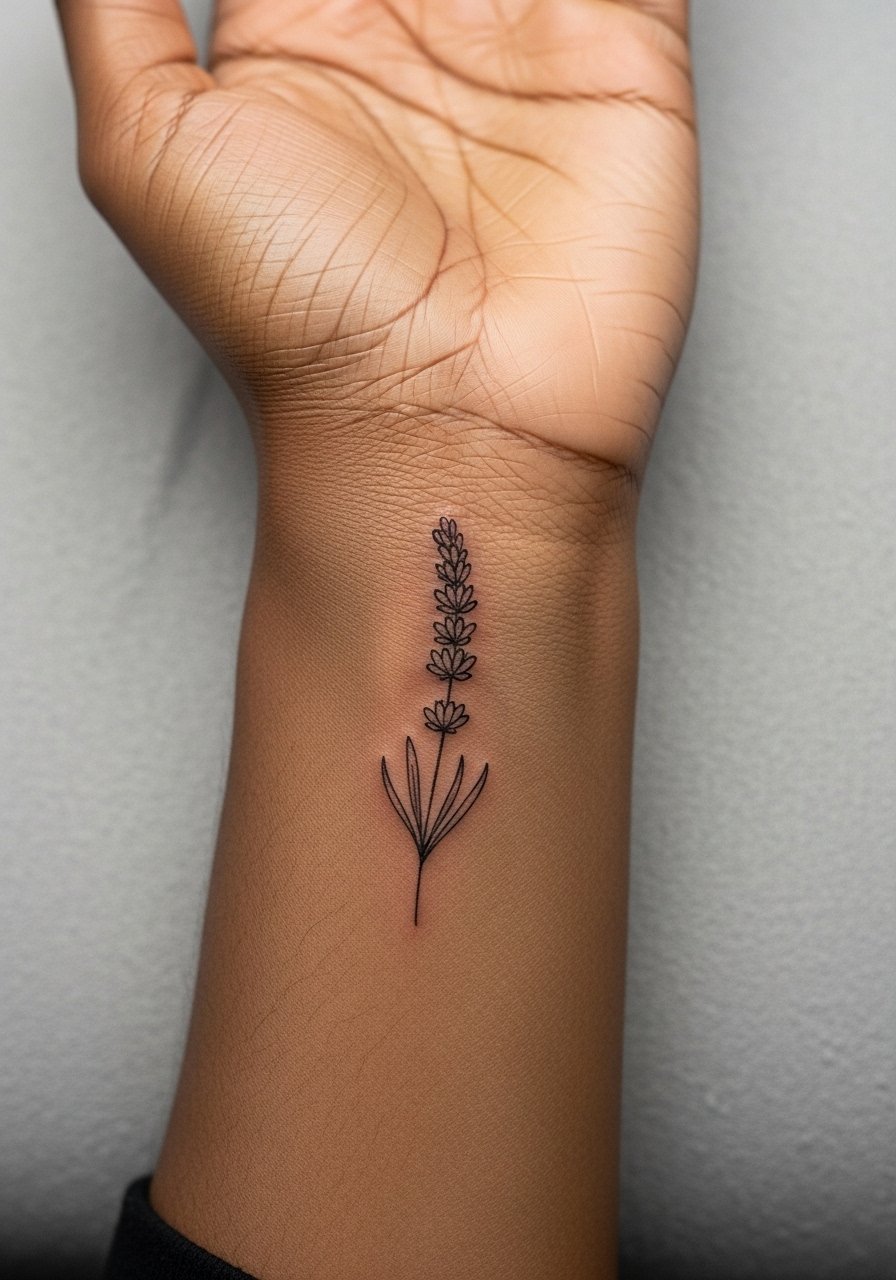
Inner wrist ink can itch heavily in the first week. I tell clients to expect intense early itch and to avoid scratching because that disrupts delicate stems. For longevity, request slightly denser leaf dots rather than feathered micro-lines that blur on darker skin. Touch-up timelines are often within 12 to 18 months for micro botanical work. For session day, choose a sage green tank top so sleeves do not rub the area. When styling, cuffed sleeves and thin chain bracelets keep attention on the sprig without crowding the wrist.
10. Single Line Woman Portrait on the Collarbone
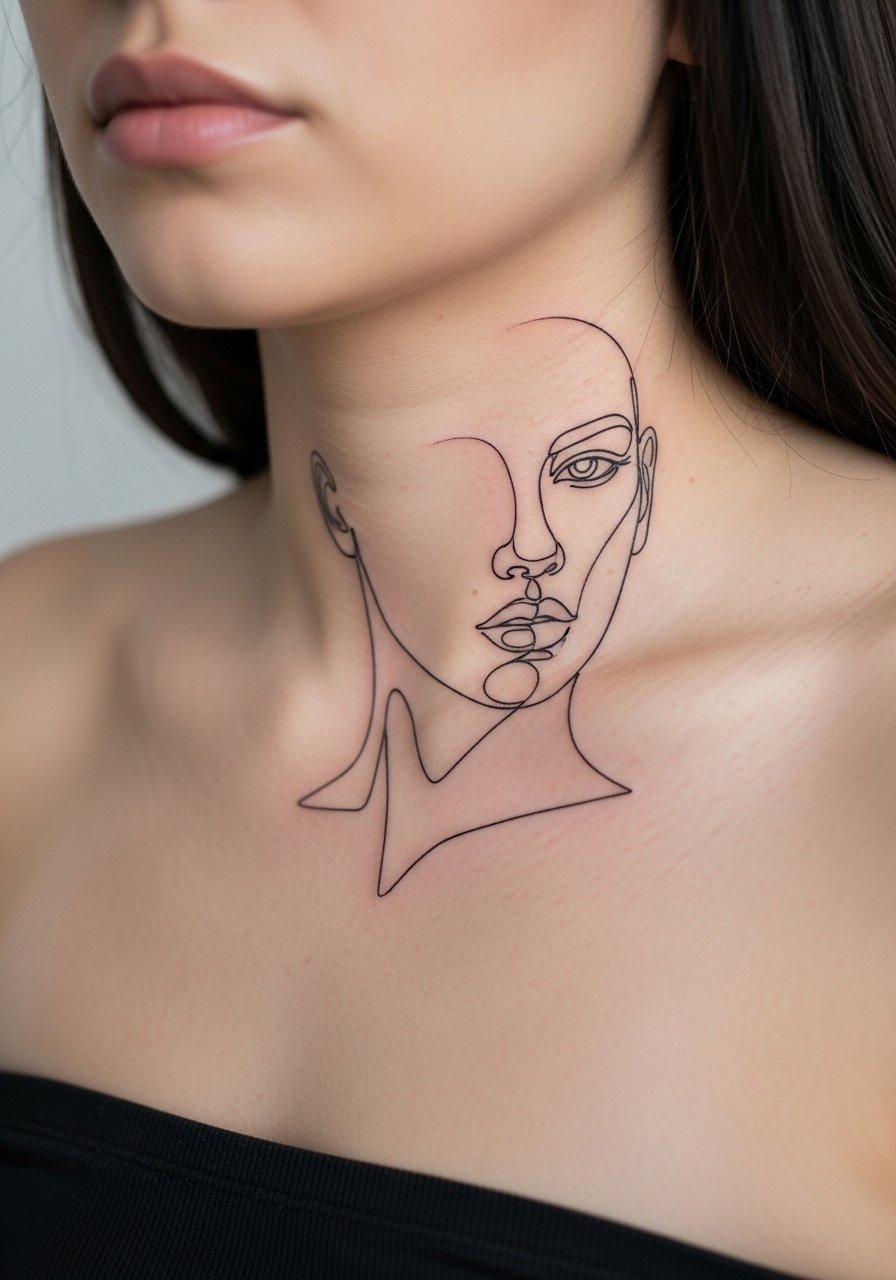
Continuous portraits on the collarbone read beautifully with the curve of the bone. My consultation tip is to ask the artist to map the line flow along the bone so the face flows with your anatomy. A common mistake is forcing a symmetrical face on an asymmetrical collarbone. Session time is moderate and pain is manageable. For the session wear a strapless or button-front top so the artist can angle the stencil cleanly. Layering thin pendant necklaces above the portrait balances the negative space.
11. Minimalist Constellation Cluster on the Ankle
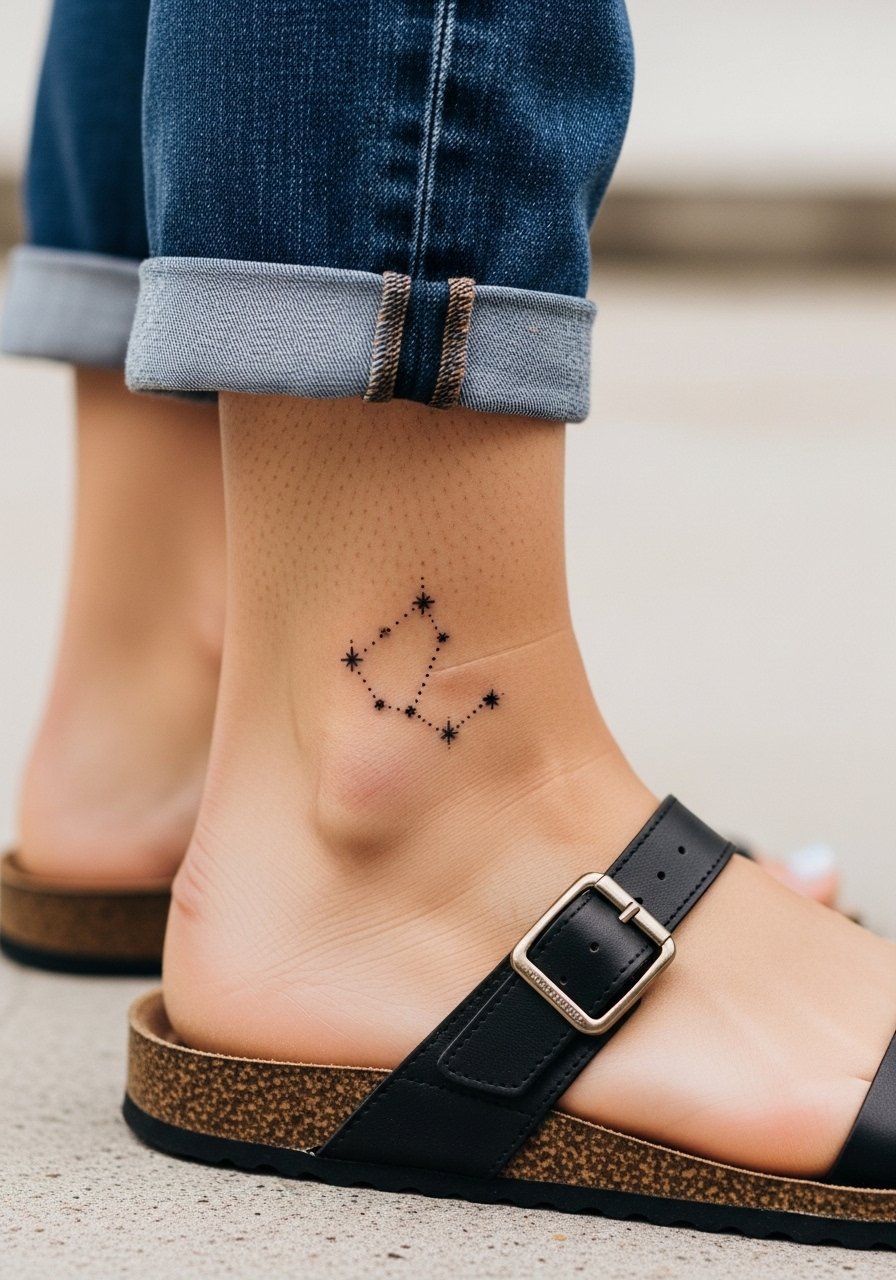
Tiny celestial clusters show well on ankles if you avoid clustering the dots too tightly. Ask the artist to space the pinprick stars so each one keeps definition at six months. The ankle endures sock friction, so expect micro-softening unless you protect it. The session is quick and tolerable. For show-off outfits, pair with strappy flat sandals or midi skirts that reveal the lower leg. During booking, mention you plan to wear closed shoes right after the session so the artist can advise immediate care.
12. Micro-Realism Bee on the Inner Bicep
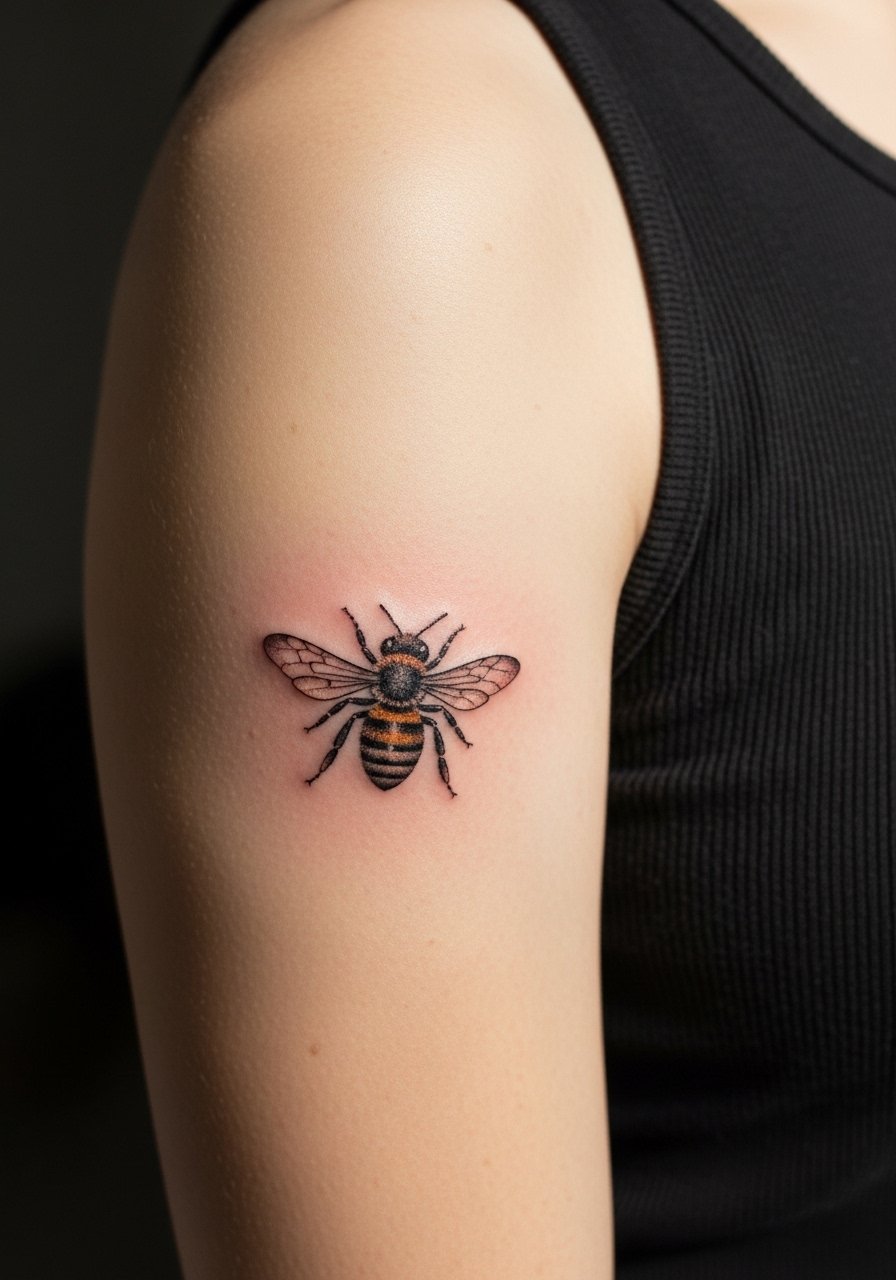
Inner bicep is intimate and forgiving for small realism. The skin there takes dot work well but can be sensitive during touch-ups. Tell your artist you want tight stipple shading for texture and avoid fuzzy half-tone gradients that fade into flatness. Sessions are short but the area can throb for a day. For the appointment wear a tank top with good shoulder mobility. This placement often pairs with mid-sleeve pieces later if you want a cohesive cluster.
13. Geometric Mandala on the Outer Thigh
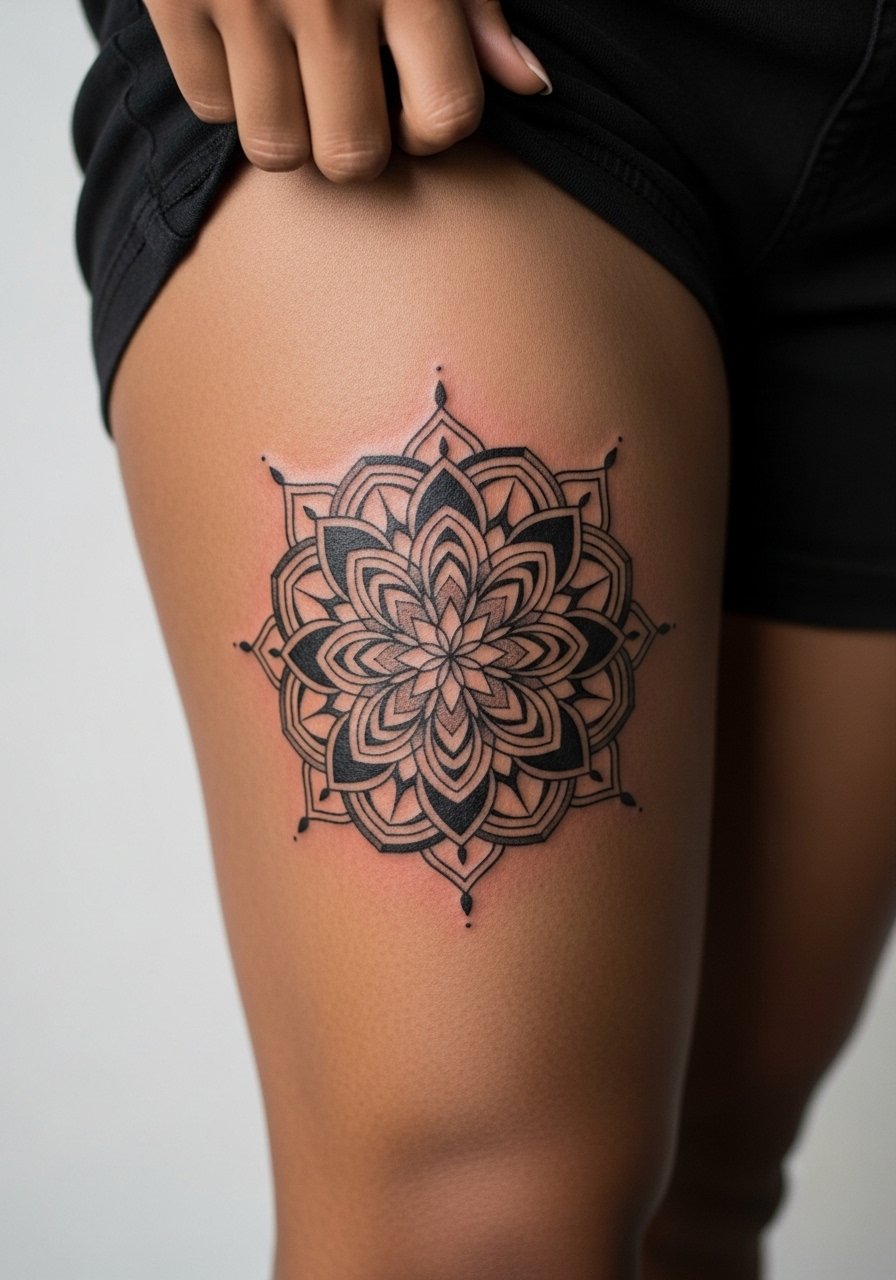
Mandala detail needs room. The biggest mistake is sizing a mandala too small which causes line merging. On the outer thigh you can push scale and keep negative space between spokes. Ask for alternating line weights and small gaps to avoid dense packing. Sessions may run two hours or longer depending on size. For showing the work, high-slit dresses or fitted shorts display the mandala. If you plan weight fluctuation, consult the artist about composition size so the pattern keeps its proportions over time.
14. Tiny Script Behind the Ear
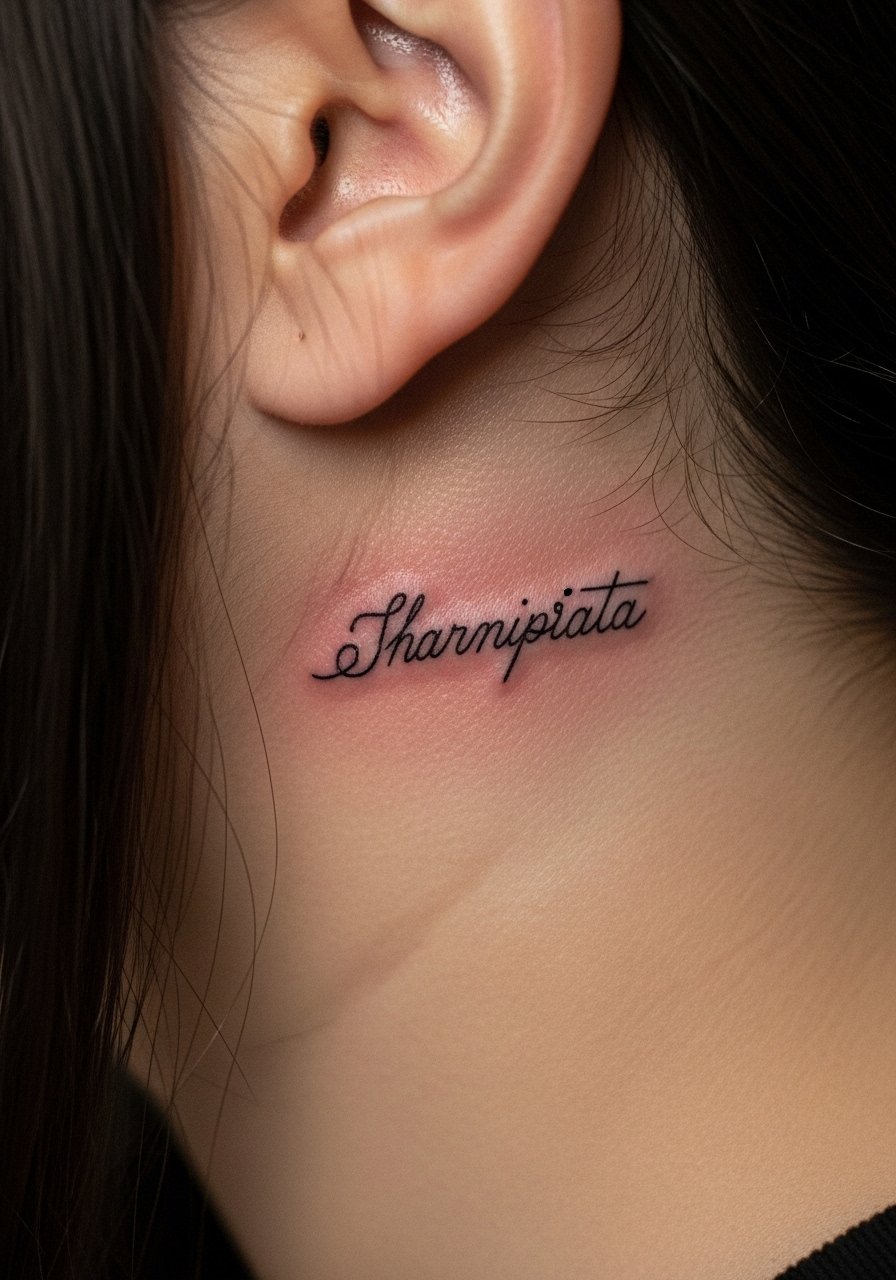
Behind-the-ear pieces require a careful clothing choice for the session and a discreet reveal later. The area heals fast but is sensitive to daily hair friction. Ask your artist to place the lettering slightly further from the hairline so it does not get tugged during styling. For the session come with hair clipped up and bring a soft headband so the artist has clear access. Keep in mind that hair and scarves will partially hide the piece most days.
15. Watercolor Crescent with Subtle Linework on the Rib Side
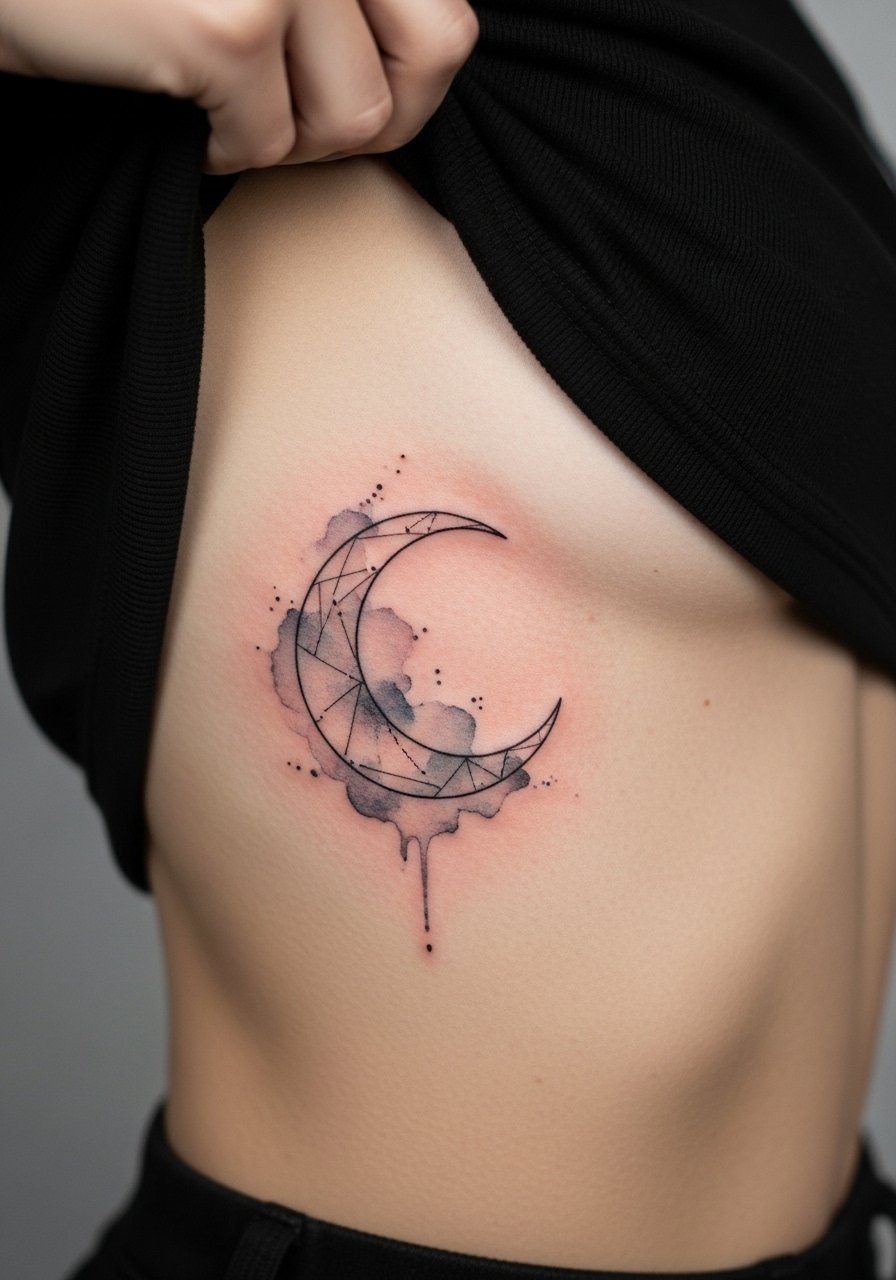
Watercolor hybrids on ribs are visually soft and require honest expectations about fade. The debate about fine line on ribs matters here. One camp in shops prefers dry healing to let delicate colors settle naturally. The other camp favors breathable protective films for the first few days to prevent scabbing that ruins watercolor edges. Ask your artist which healing route they use and why. Sessions can be painful but quick. Wear a cropped top that lifts so the artist can access and you can adjust comfort during the session.
16. Small Floral Ankle Band
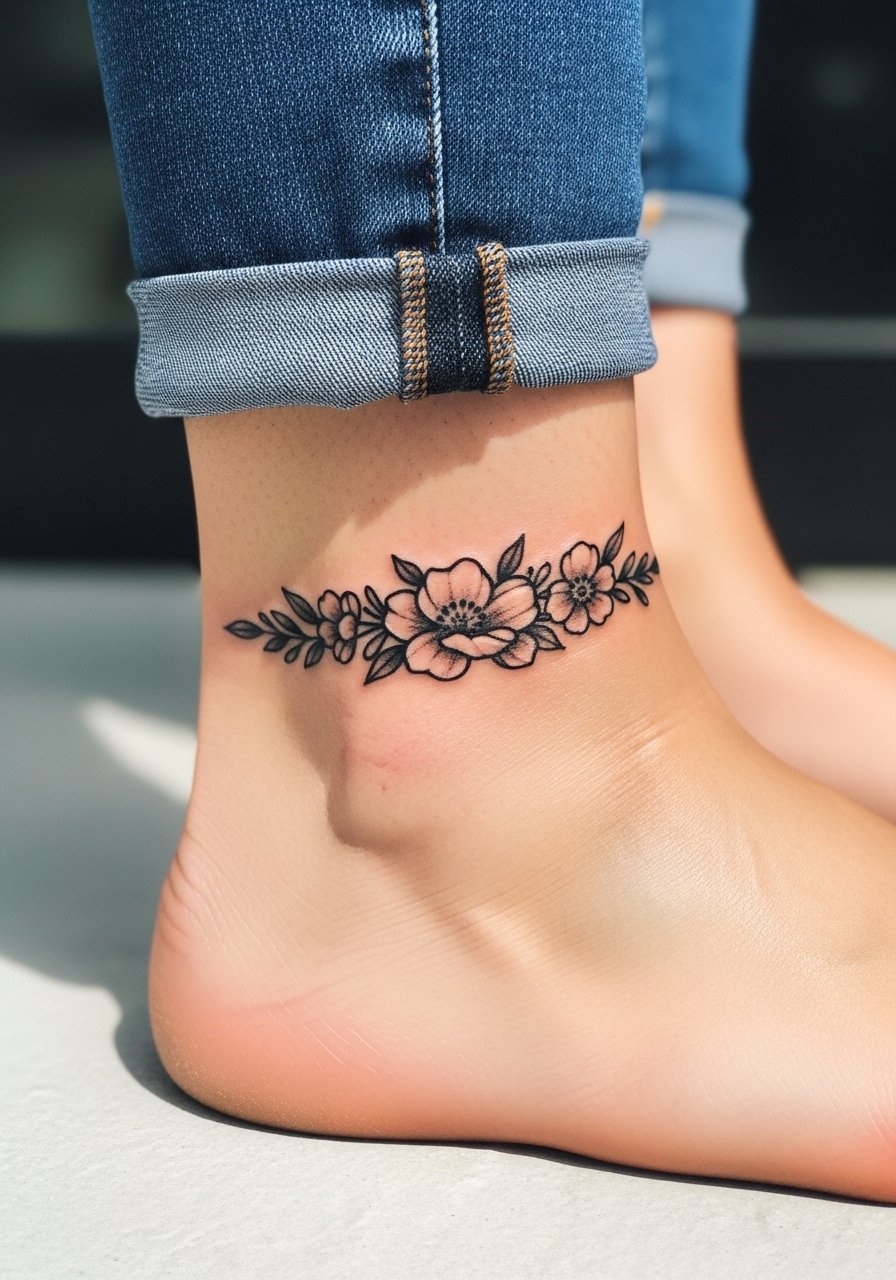
Ankle bands are about repetition and rhythm. The mistake I see most is overcrowded blooms that lose petal definition under sock pressure. Ask for slightly spaced flowers and a stronger outer outline so petals read after a year. Session time is short and pain is localized. Style the ankle with cuffed ankle jeans or strappy sandals to keep the band visible. For the session wear shorts or rolled pants so the artist can work without fabric pressure.
17. Petite Moon and Star Cluster on the Sternum Edge
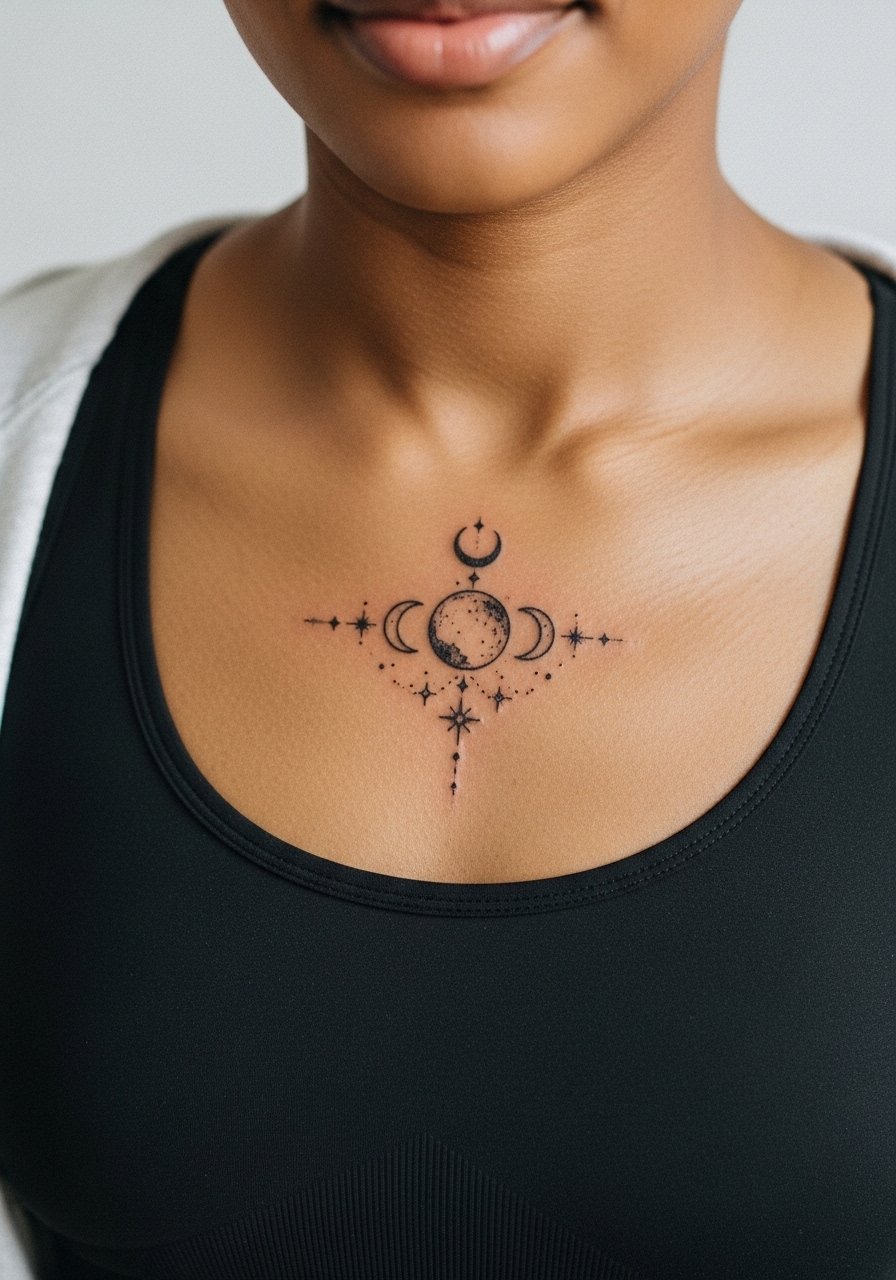
Sternum edge pieces are intimate and bright when framed with neckline-revealing tops. Pain is higher in the center but the edges settle more cleanly. A tiny moon and star cluster benefits from slight spacing and crisp anchors so the shapes do not blur during healing. For the session wear a fitted sports bra so the artist can work without full exposure. Consider future layering with chest pieces when planning scale.
18. Single Needle Floral on the Back of the Neck
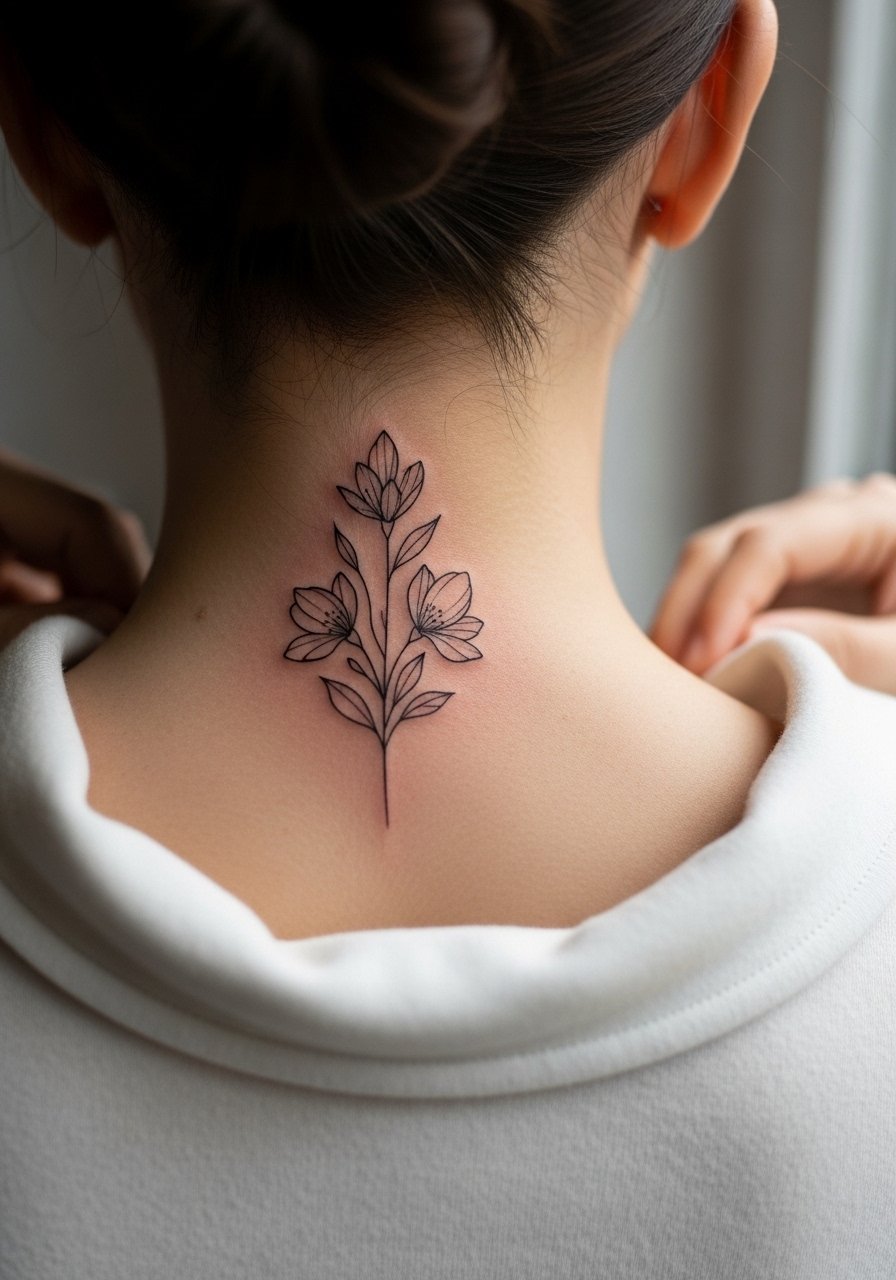
Back-of-neck tattoos are discreet and pop with certain haircuts. The area tolerates single-needle work but expect some early itch where hair rubs. Ask for placement slightly lower if you plan to wear high collars. Session is short but positioning can be awkward, so wear a wide-neck shirt you can pull aside. When showing it off, a low bun or braids help reveal the piece without exposing the whole neck.
19. Micro Script on the Side of the Finger
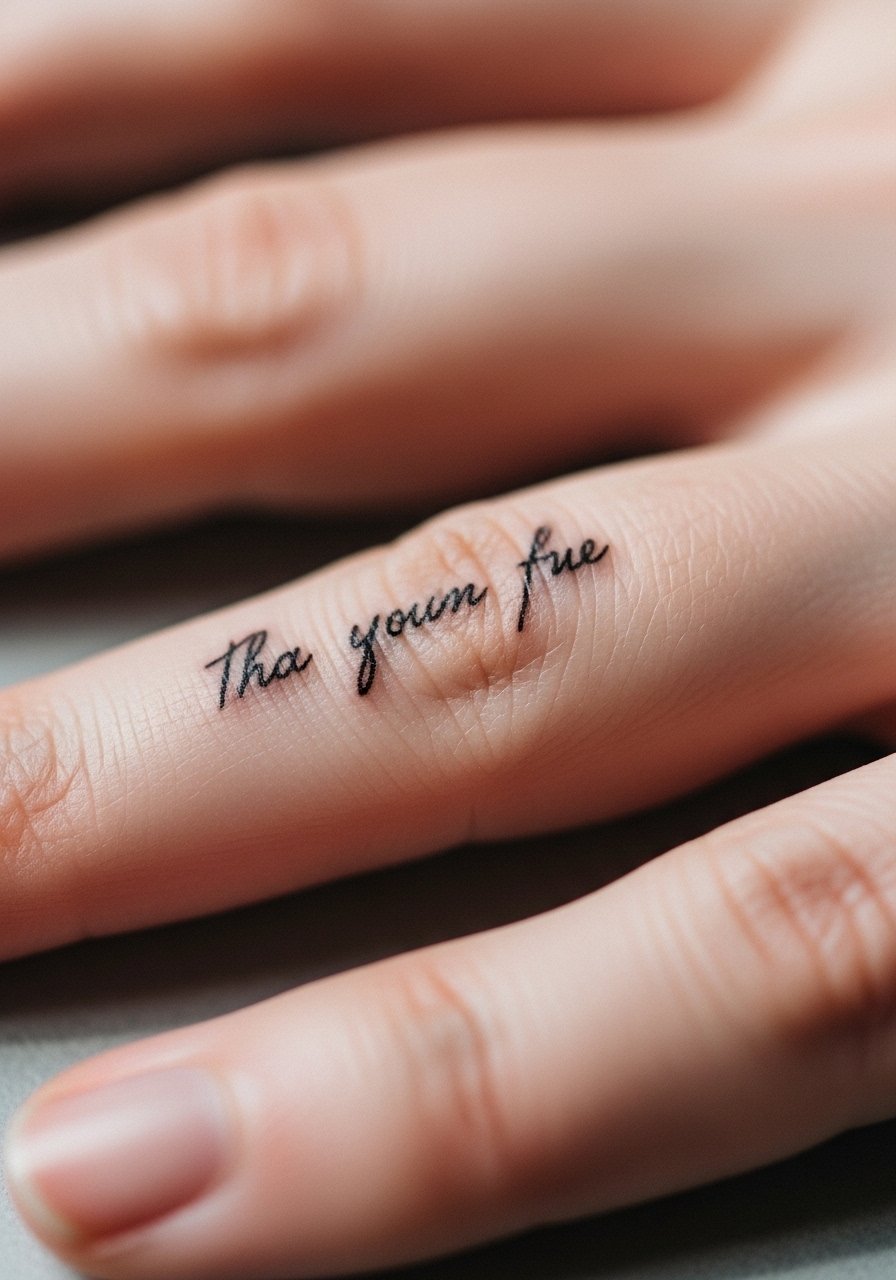
Finger sides are notoriously high-maintenance. Expect the line to fade faster than elsewhere because the skin is thin and frequently washed. I advise slightly bolder lettering and flexible placement that avoids the joint crease. The session is quick and stingy. Consider a thin gap between letters to help prevent merging. If you want visible jewelry to complement it, thin sterling bands on adjacent fingers can direct attention.
20. Tiny Botanical Behind the Knee
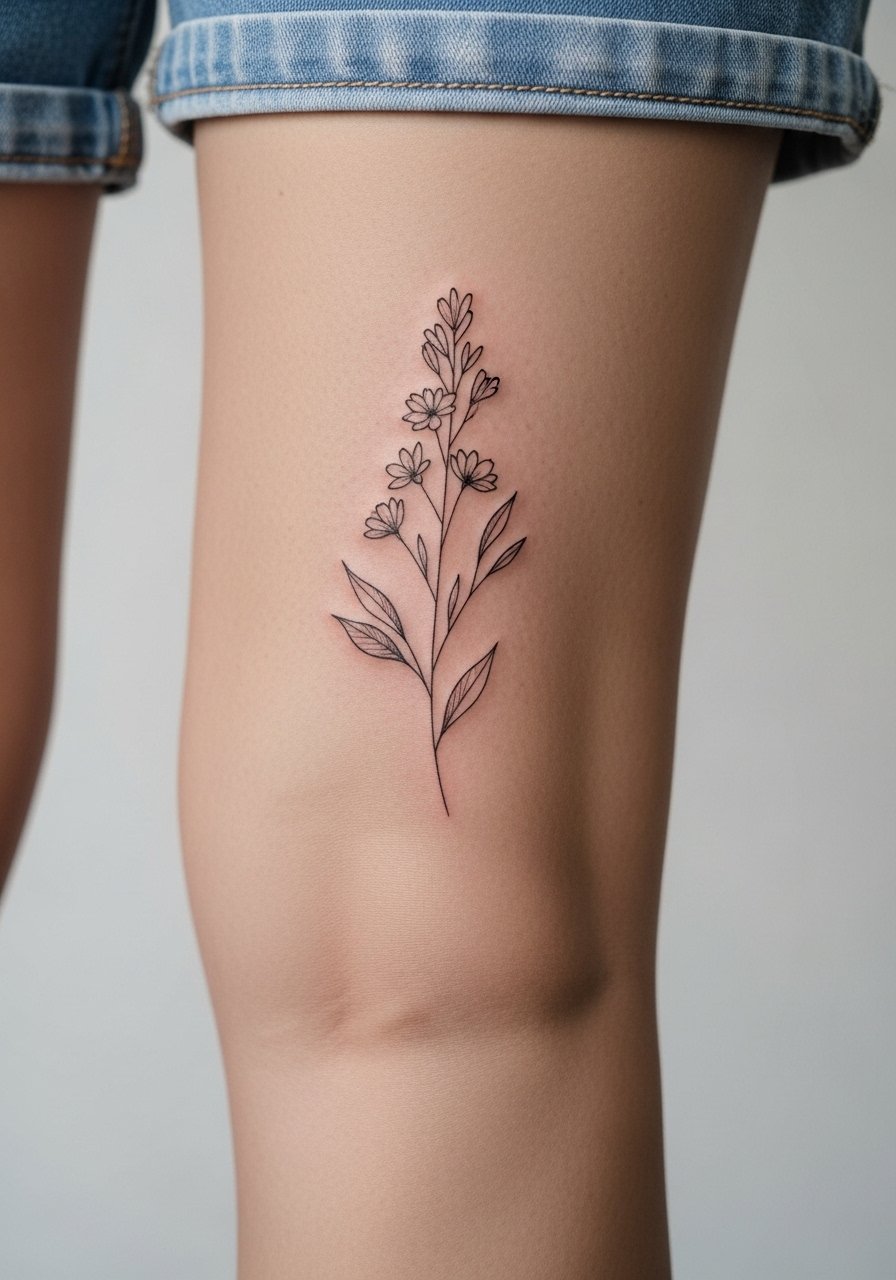
The back of the knee is rarely chosen but it works if you want a peek-a-boo element. The skin there moves a lot so thin sprigs should be given small breaks in line to preserve shape. Sessions are manageable but position can be awkward for both client and artist. For show-off outfits, midi skirts or summer dresses reveal the piece nicely. For the appointment wear shorts that can be shifted without compressing the area.
21. Continuous Line Mountain Range on the Outer Calf
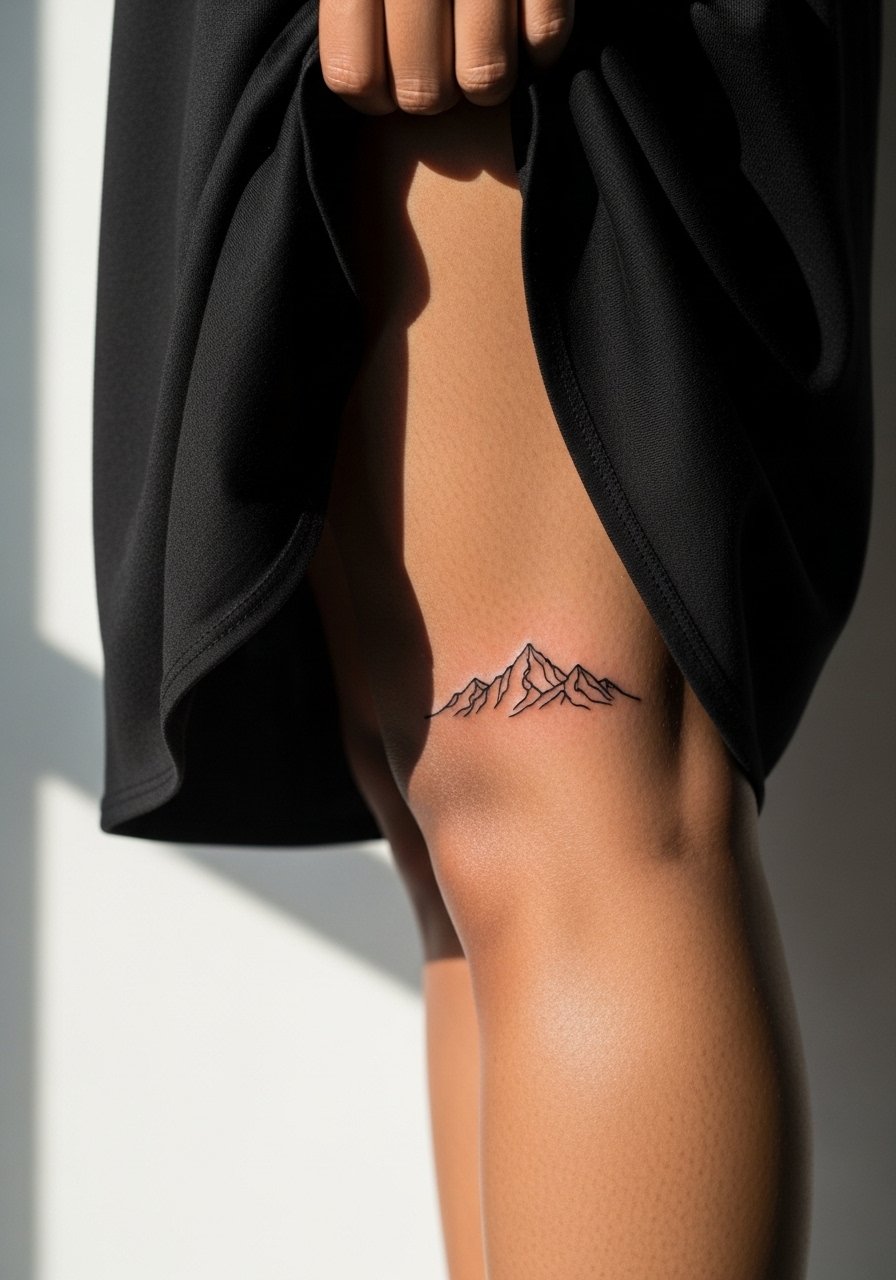
Calf placements are robust for linear work and age predictably. Continuous mountain lines read well because the skin sees less abrasion than hands or feet. Ask the artist to follow the natural slope of your calf for flow. Sessions are short and pain is mild. For showing it off, pair with midi skirts or cuffed jeans. If you plan to add landscape elements later, leave small negative margins so new pieces integrate cleanly.
Frequently Asked Questions
Q: Will micro fine line sprigs on wrists need touch-ups sooner than the same design on a collarbone?
A: Yes. Wrists face constant friction and washing, so micro sprigs there generally need a touch-up sooner than collarbone pieces. Ask your artist about increasing base line weight slightly and schedule a check at 6 to 12 months to assess healing.
Q: How should I decide between dry healing and using a protective film for a ribcage watercolor crescent?
A: Artists split into two camps on this. One favors dry healing to let delicate watercolor scab and settle naturally. The other recommends a breathable protective film the first few days to control scabbing and reduce external contamination. Ask your artist which approach they use most and why, and pick the method that matches their healed portfolios.
Q: For dark skin tones, what tweaks help floral tattoos stay visible in photos?
A: Denser black outlines and slightly less internal fine shading help floral forms stay visible on darker skin. During consultation request high-contrast anchors in the design so petals and stems remain defined in different lighting.
Q: What should I wear to a thigh session for a snake coiled around a flower?
A: Wear loose shorts or a wrap skirt that can be shifted easily so the artist can access the upper thigh without fabric pressure. A loose cotton shorts option makes positioning comfortable and keeps the area clean during the appointment.
Q: Do single-line portraits on the collarbone keep their flow as the body ages?
A: They generally hold their character if the artist places the line to follow the bone and leaves breathing room in the linework. Major weight or surgical changes can alter surface curves, so factor future body changes into size and placement decisions.
Q: Are ankle and finger pieces worth it if I use protective films during healing?
A: Protective films help reduce early wear and infection risk, but they cannot fully prevent long-term fading from friction. For ankles and fingers think about slightly bolder initial lines and realistic touch-up timelines. Protective film is just one part of a sensible maintenance plan.
Q: Where can I find style-specific references and recent healed examples for these looks?
A: Search hashtags like #FineLineTattoo, #MoonPhaseInk, and #SnakeTattoo on platforms with location filters. Apps and community forums focused on minimalist or neo-traditional styles also surface recent healed photos so you can compare how similar pieces age.
