
Fine line trends look great on saved boards, but the reality is different once the stencil hits living skin. Some of these "trust no one" concepts read crisp for a year and then soften, while others age into a new kind of edge that still says something. The list below gives designs that read hard now and still read with intention years down the line, and what to ask for at the consult.
1. Minimalist Eye on the Inner Forearm
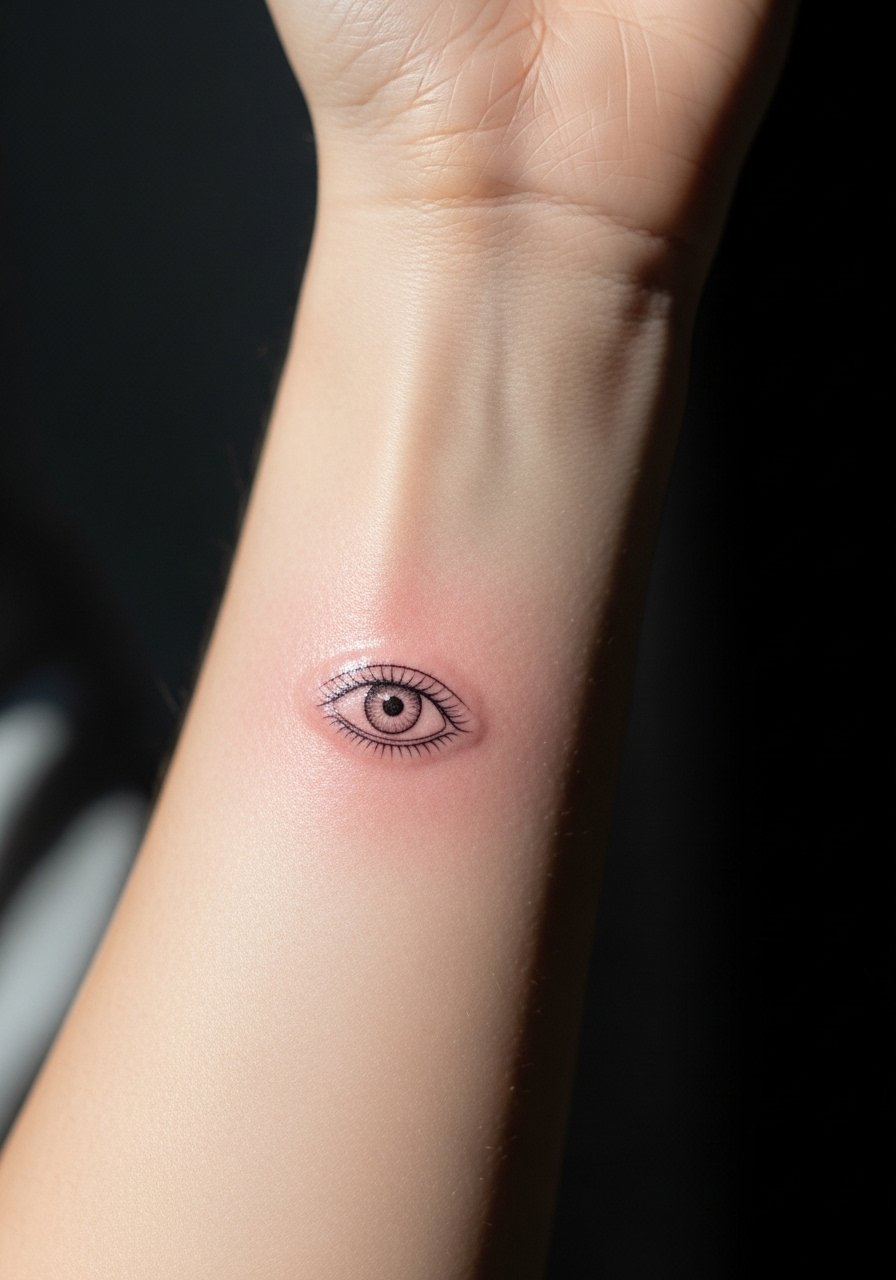
This small eye reads like a quiet warning on the inner forearm. I recommend slightly bolder linework than a true micro-fine version so the pupil and lashes hold at year two and five. Tell your artist you want a steady one-needle outline with a touch of stipple shading instead of dense shading. Common mistake: asking for the thinnest possible lines, which often blur on soft inner forearm skin. Session feels like a long wrist session, tolerable but expect vibration near the ulna. For showing it off, roll your sleeve or wear short-sleeve linen shirts that frame the piece without crowding the linework.
2. Micro-Realism Wolf Head on the Bicep
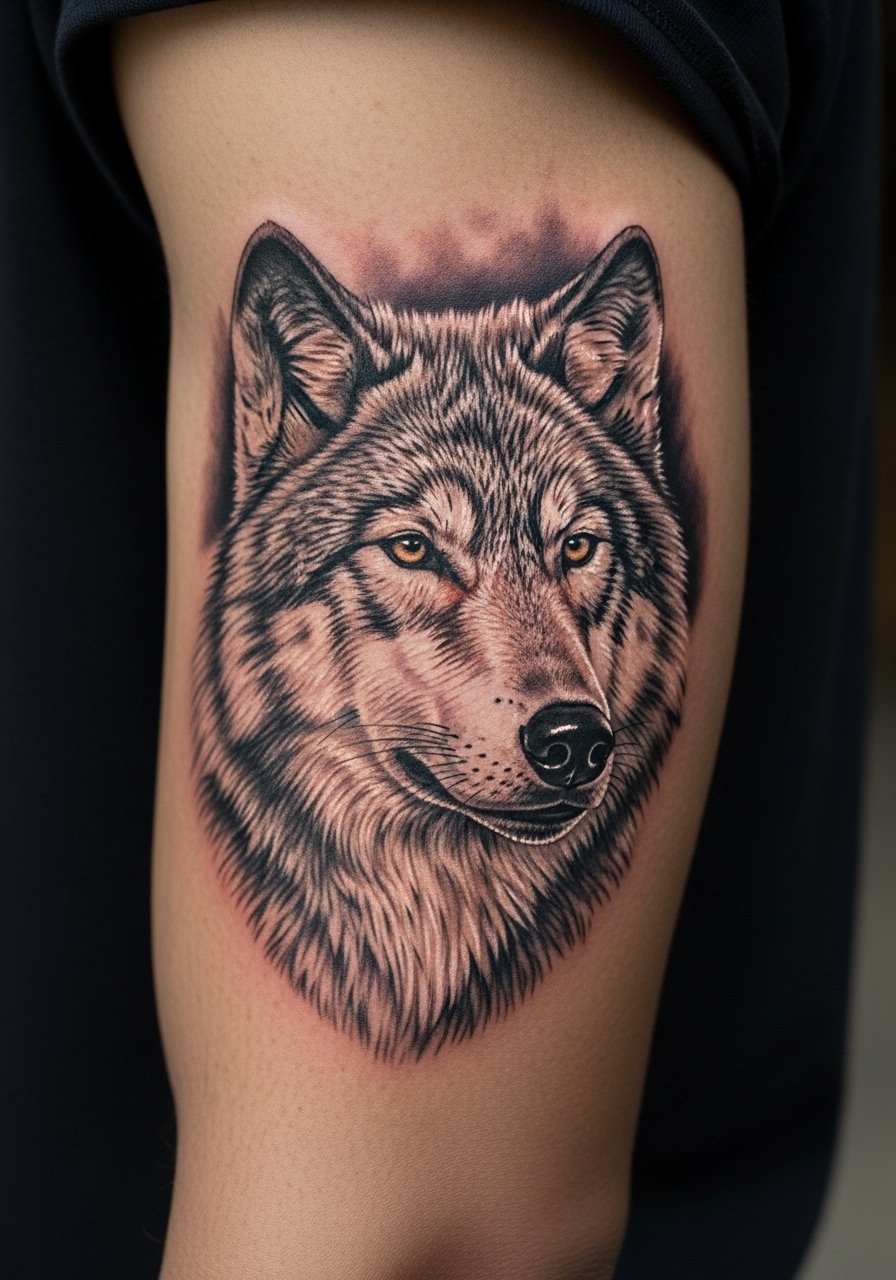
Choose micro-realism for a wolf head when you want moody detail without full sleeve commitment. Ask for a slightly larger eye and jawline than the reference to avoid early loss of contrast. A common aging issue is low contrast in small realistic spots, which looks muddy by year three. The bicep is forgiving for touch-ups, and saturation holds well with minimal blowout risk here. The session can be brisk if the piece is mid-sized. Pair this with a rolled sleeve t-shirt so the silhouette reads from across a room.
3. Scripted "Trust No One" on the Ribcage
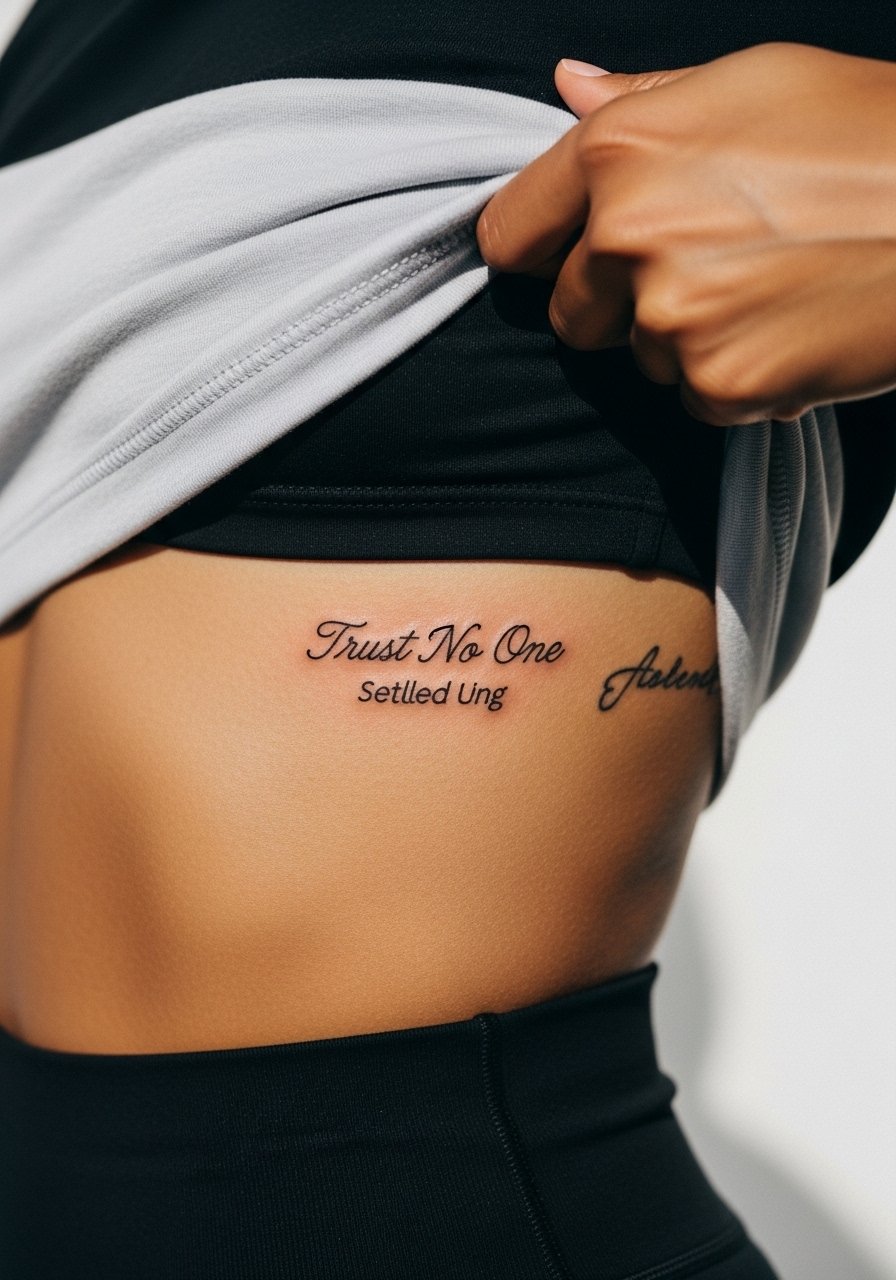
Ribcage script splits artists into two camps. One camp warns that ribs stretch and blur small script within two years. The other says with proper depth and spacing fine script can settle clean. Ask your artist which camp they sit in and show examples of spacing you prefer. Expect higher pain on the ribs, but a striking result when placed with negative space. Common mistake: insisting on tiny cursive without enough letter spacing. For the session, bring a loose zip hoodie or a cropped top you can lift so the artist has access without discomfort.
4. Blackwork Floral Sternum Accent
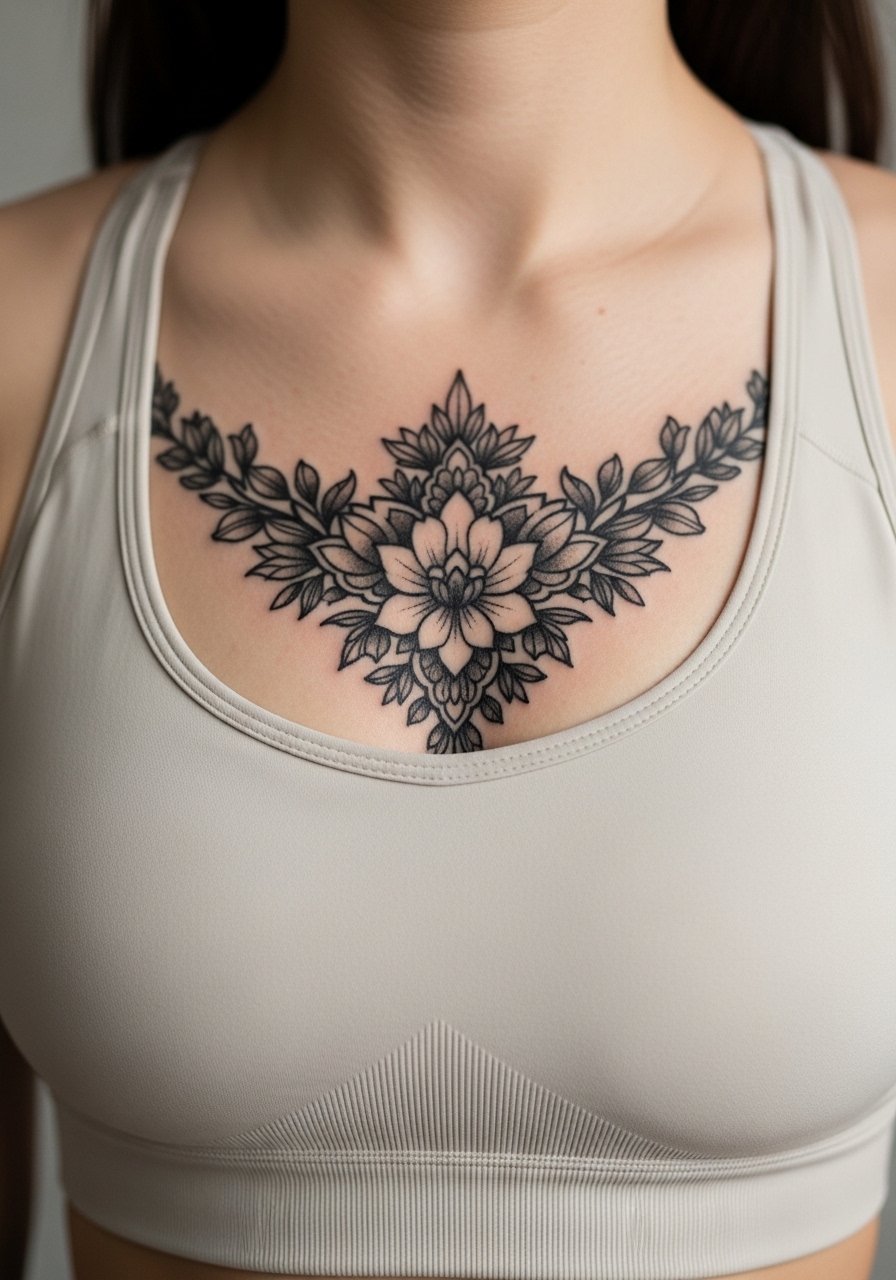
Sternum blackwork reads bold and keeps its edge as it heals. Ask for solid blocks of black with clean margins rather than tiny stippling in the center, which fades unevenly under chest motion. This placement needs an artist experienced with curved surfaces. The session is intense but usually quick for a compact design. Hand a stylist a bandeau top for the appointment so you expose only the sternum cleanly. Be mindful that some designs draw from religious or cultural motifs, so consider a respectful variation rather than a direct copy.
5. Chain-Link Finger Accent
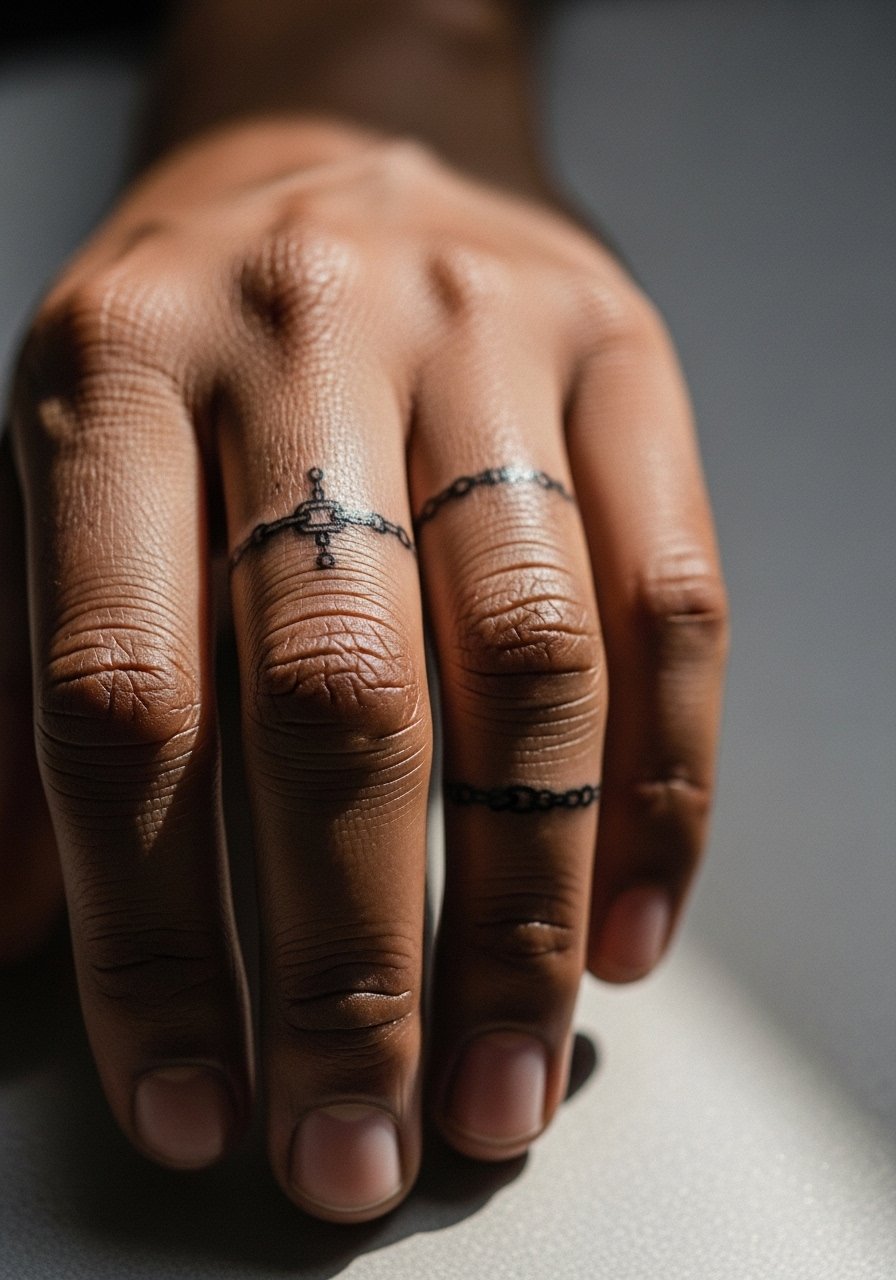
Finger tattoos are bold and immediate but very prone to early wear. For a chain-link, ask for a slightly thicker contour and avoid filled black interiors that can migrate. The main mistake is going paper-thin on finger lines. Expect touch-ups earlier than arm work, usually within the first two years. The session is quick and sharp. Finger work is visible daily, so pair it with thin stackable rings rather than bulky bands that can scrape the area. A little planning on jewelry reduces friction during healing and beyond.
6. Neo-Traditional Crow on the Ribcage Side
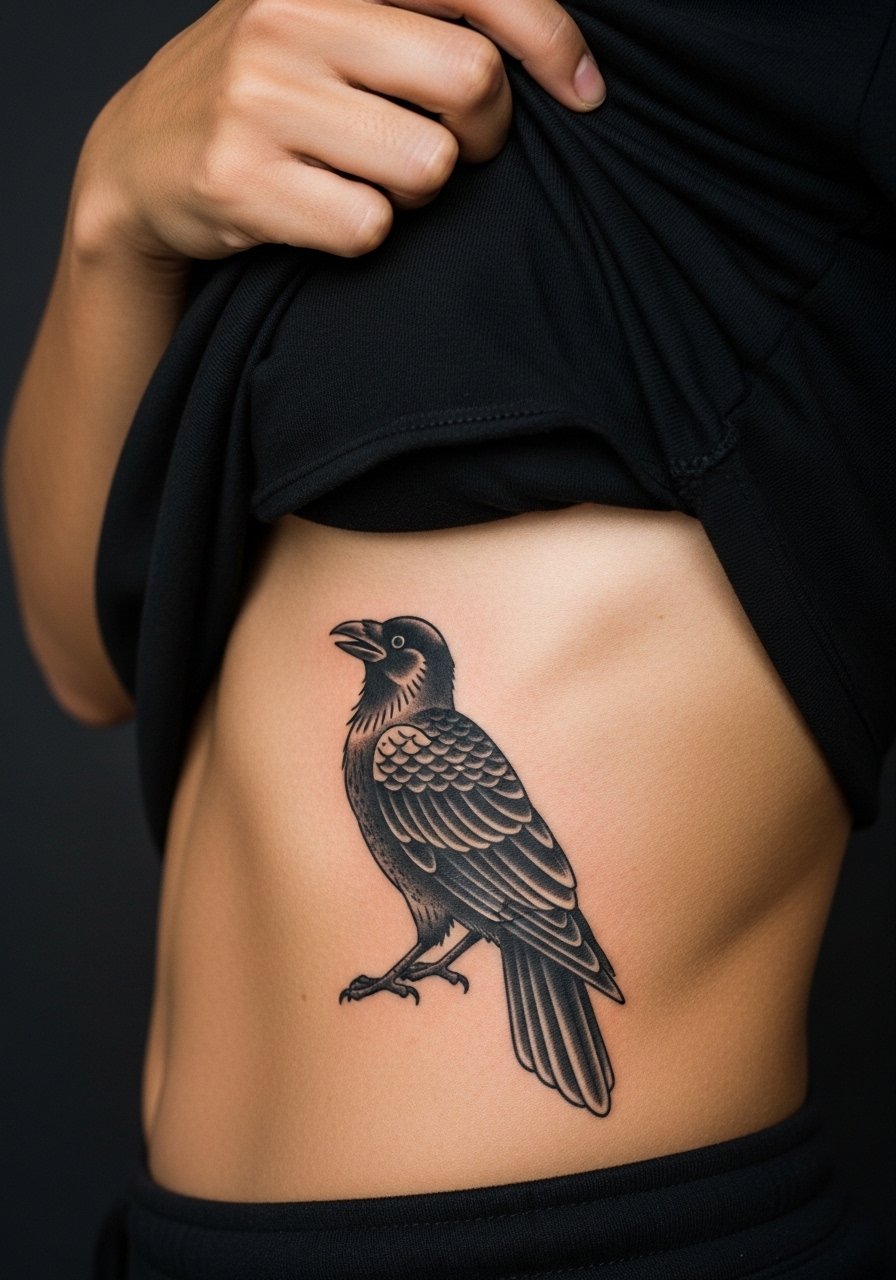
Neo-traditional pieces with bold outlines and saturated fills age into a confident look on ribcage skin. Tell your artist you want stronger outlines and slightly larger color fields to prevent early blurring in the dense areas. Expect a higher pain rating and longer breathing breaks. A common error is compressing detail to fit a small rib patch. This placement benefits from pre-session rest and a warm sweater to put on after. For the appointment wear a cropped athletic top you can lift easily without exposing more than the rib zone.
Studio Day Picks
The inner forearm, rib scripts, and sternum accents above ask for different prep and healing strategies. These picks smooth the session and reduce friction during the first week.
-
Stencil transfer paper kit. Lets you preview placement on skin before committing, which is especially helpful for the eye and script pieces above.
-
Topical numbing cream. Applied before the session eases the sting on sensitive ribs and sternum without changing the artist's linework when used correctly.
-
Thin protective film roll. Keeps finger and wrist pieces clean during the first week of constant hand washing and phone use.
-
Fragrance-free body wash. Gentle cleansers reduce irritation around fresh inner forearm and rib pieces while you shower.
-
Aquaphor healing ointment. Thin layers in the first days help fine line work on the forearm settle without over-moisturizing.
7. Minimalist Compass on the Ankle
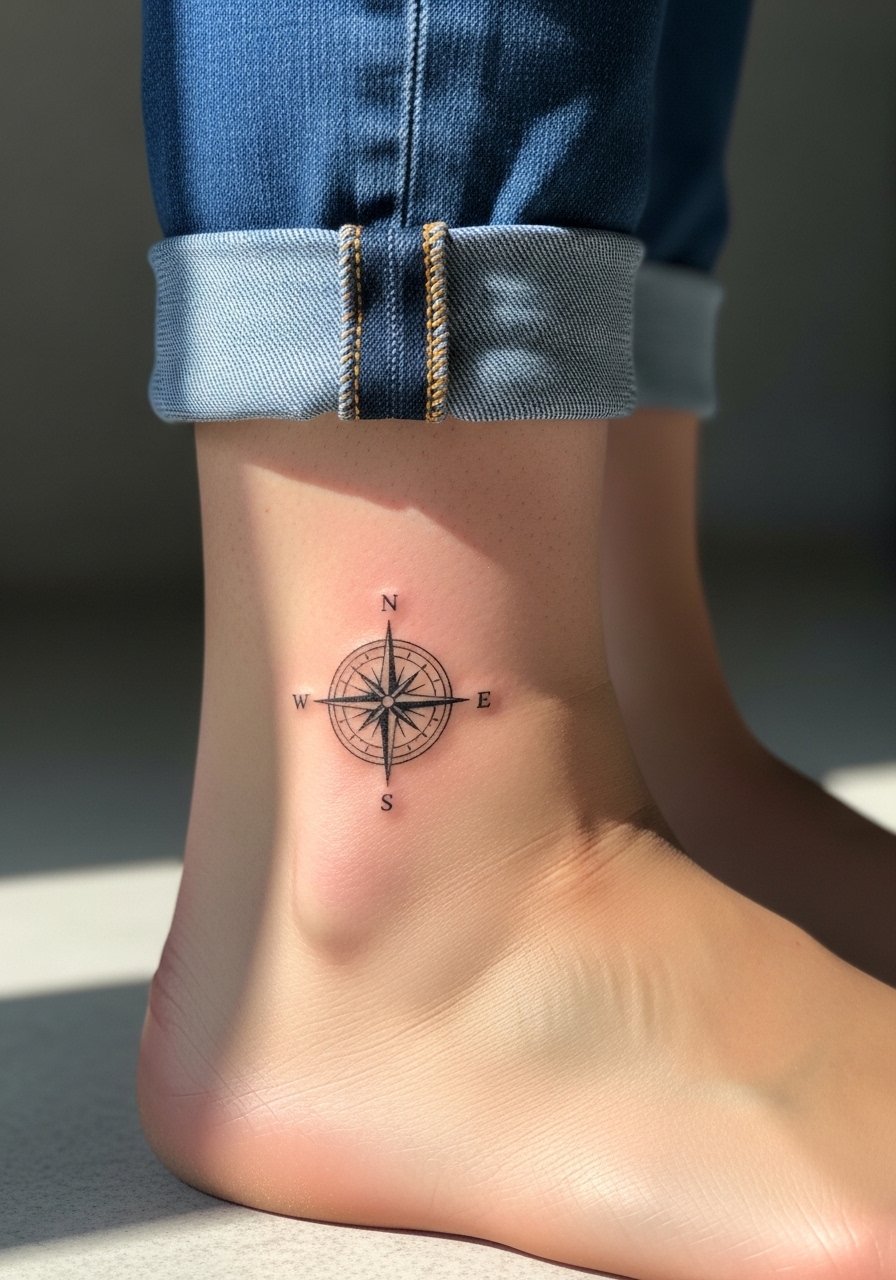
Ankle compasses read purposeful and frame footwear nicely. Ask for slightly bolder cardinal points for longevity against shoe rubbing. The ankle takes friction from socks and shoes, so expect faster fade in the lowest points. Session time is short and the pain is moderate. A rookie mistake is requesting ultra-fine spokes that vanish by year two. Pair this with jeans rolled to the ankle and minimalist sandals when you want the piece to stand out.
8. Fragmented Portrait Micro-Tattoo on the Collarbone
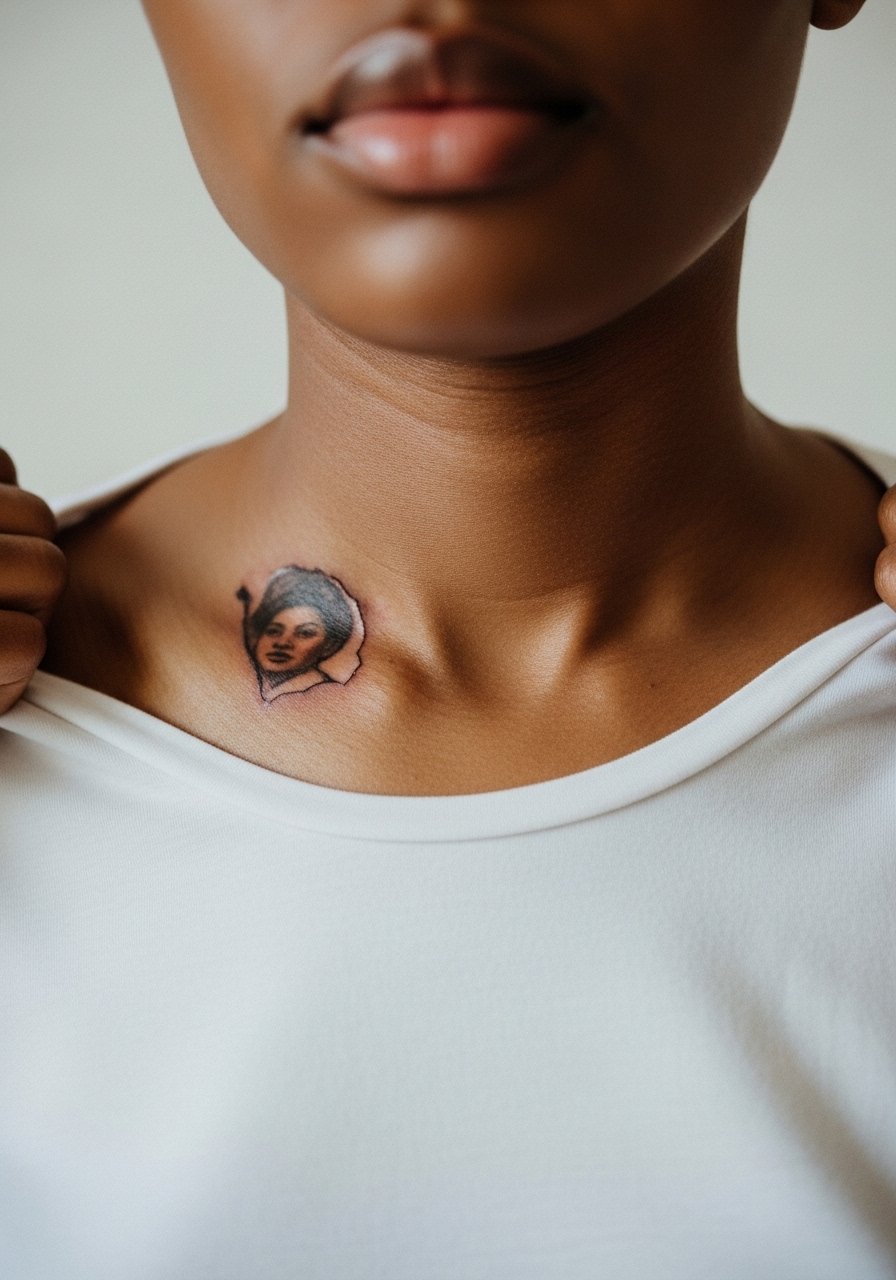
Fragmented portraits on the collarbone make a statement without taking a full chest panel. Ask for slightly stronger contrast in the shadowed areas so features hold after healing. The collarbone moves with breathing and clothing, which can affect tiny details. Common mistake: shrinking a portrait too small for the placement. Pain is moderate and the session tends to be steady. For evenings out, pair with open-neck blouses that show the art without competing.
9. Single-Needle Constellation on the Wrist
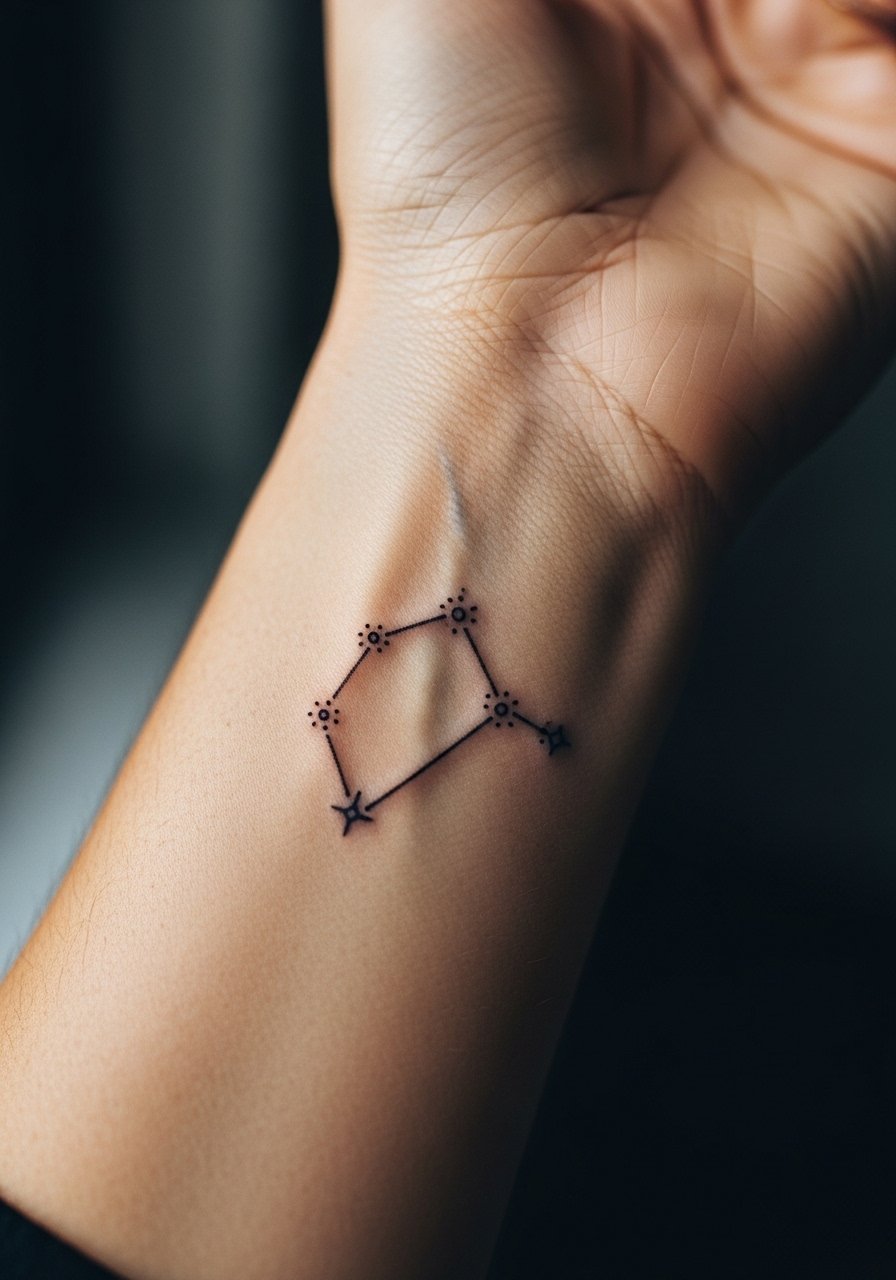
Wrist constellations read subtle but can blur if dot spacing is too tight. Ask for slightly larger dot spacing and a touch of tiny negative space between stars. Common aging problem: cluster dots merging into a soft smudge by year three. The session is short but precise. For the appointment bring a long-sleeve shirt you can roll without tugging, and style with a thin chain bracelet that complements the wrist instead of rubbing the ink during healing.
10. Blackline Snake Coiling the Upper Arm
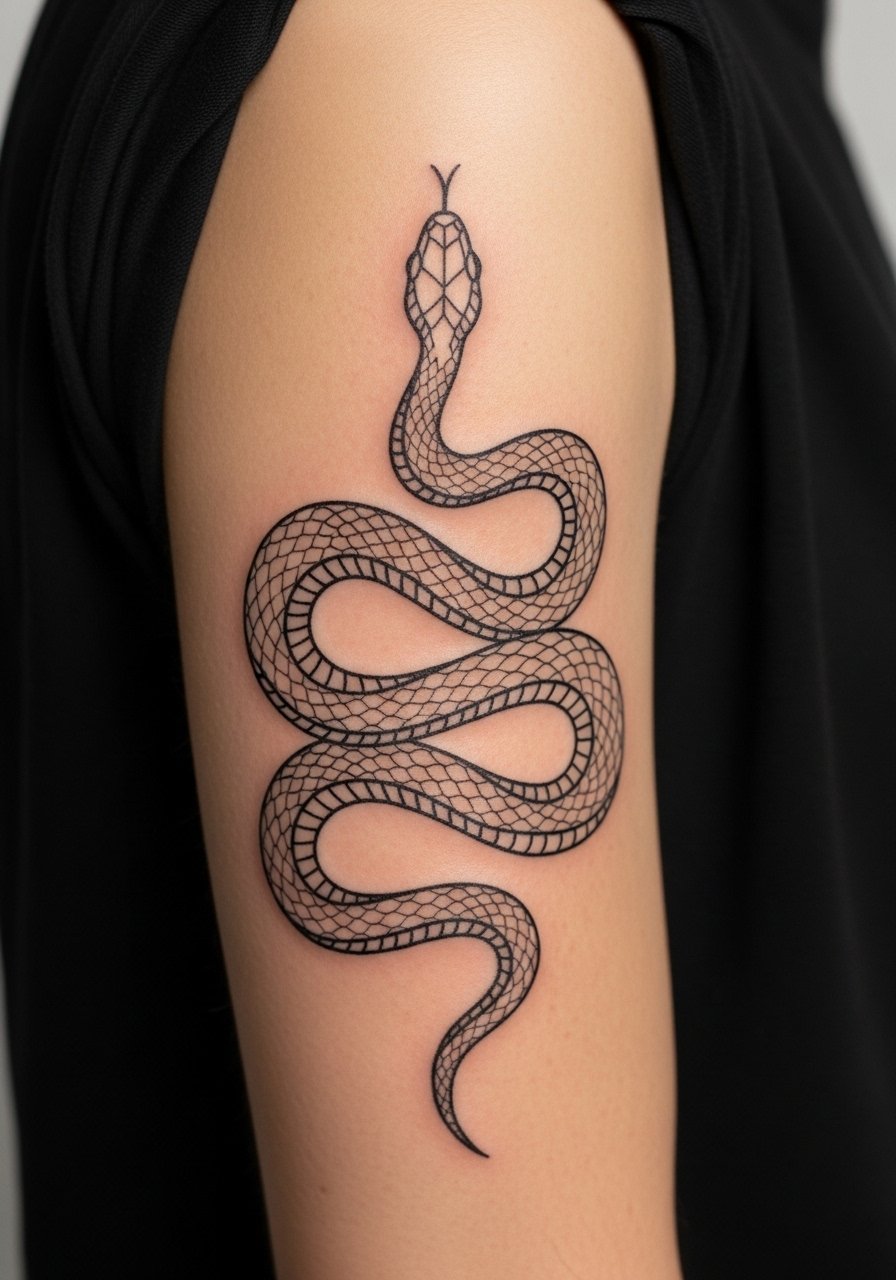
A blackline snake that hugs the upper arm looks sharp over time because the skin there is stable. Request a slightly heavier outer contour and open interior curves to avoid line merging. The biggest mistake is overly tight coils that crowd the muscle. Session pain is moderate and healing is forgiving. Show it off with sleeveless tees that let the coil read as a repeat accessory.
11. Single Dot Morse Code on the Side of the Finger
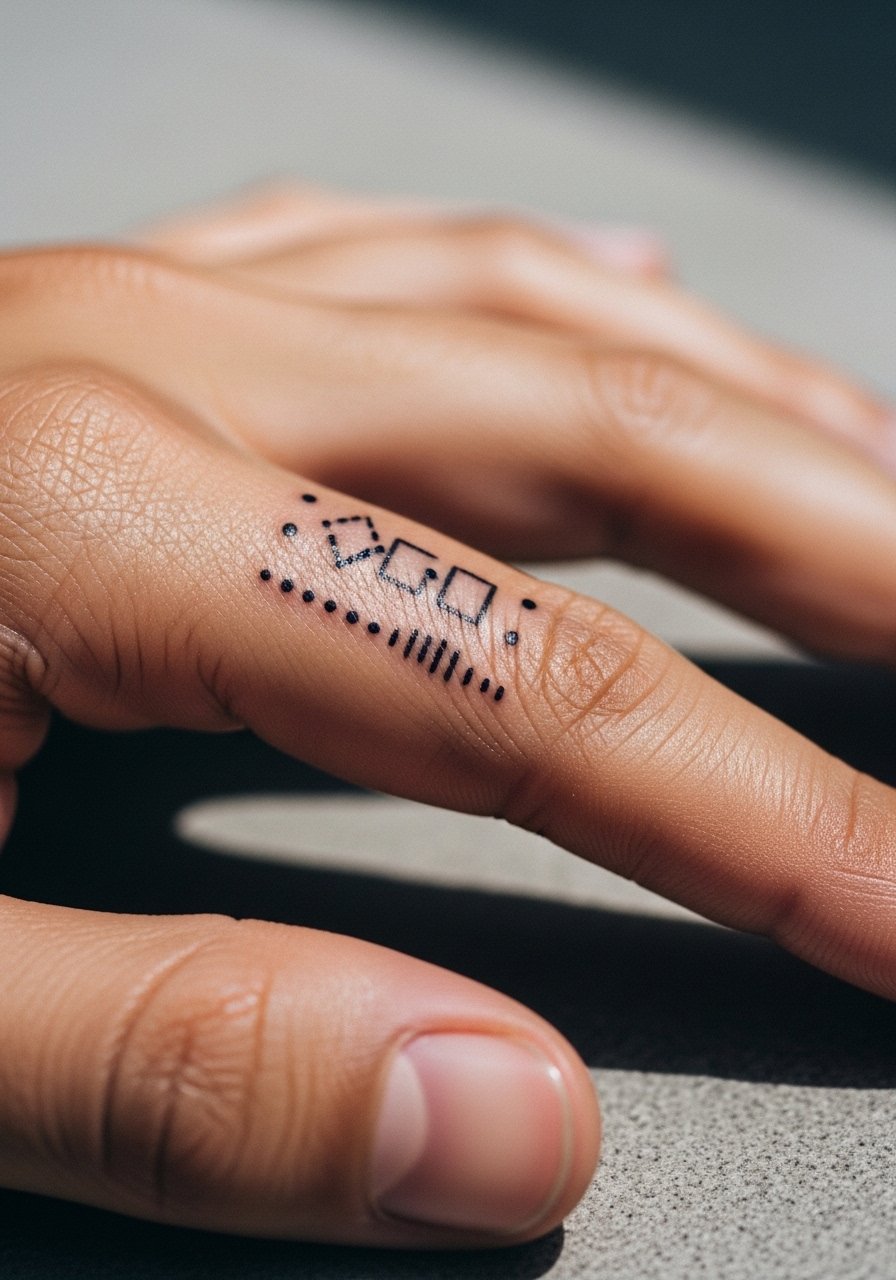
Side-of-finger Morse code is discreet and personal, but these placements age fastest. Keep the code short and space dots slightly to prevent early bleed. Mistake: trying to encode long phrases that lose legibility. Expect touch-ups sooner than wrist work. The session is quick and sharp pain. Because the side of the finger sees a lot of movement, avoid heavy everyday rings while healing.
12. Geometric Mandala on the Upper Thigh
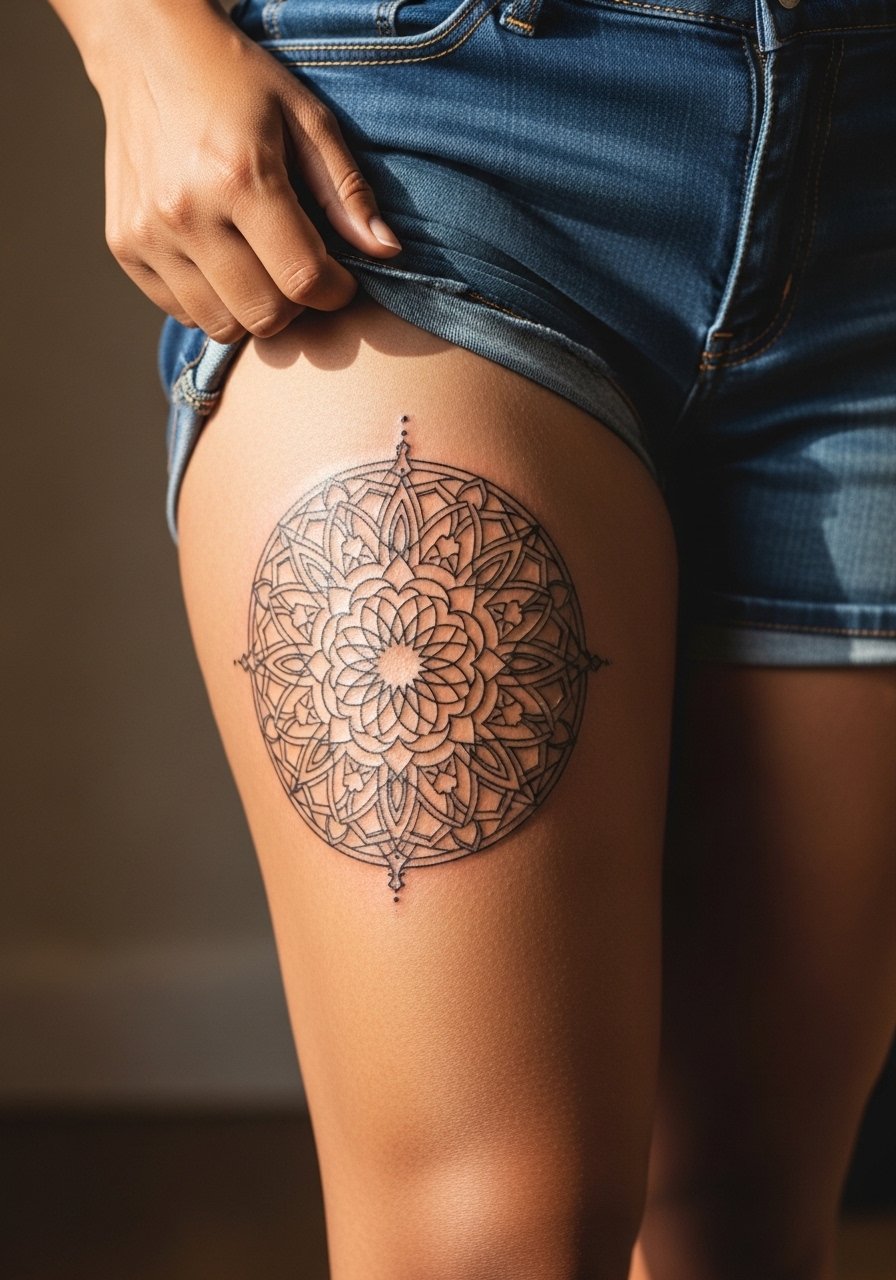
Thigh mandalas can remain crisp with room left between lines. Ask your artist for deliberate spacing and avoid hyper-compressed line density toward the center. The mistake is forcing a wall of close lines into a small area. This placement ages well due to low sun exposure and lower friction. Sessions are comfortable and often longer. For the appointment wear loose drawstring shorts so the artist can access the area without fabric drag.
13. Stippled Moth Behind the Ear
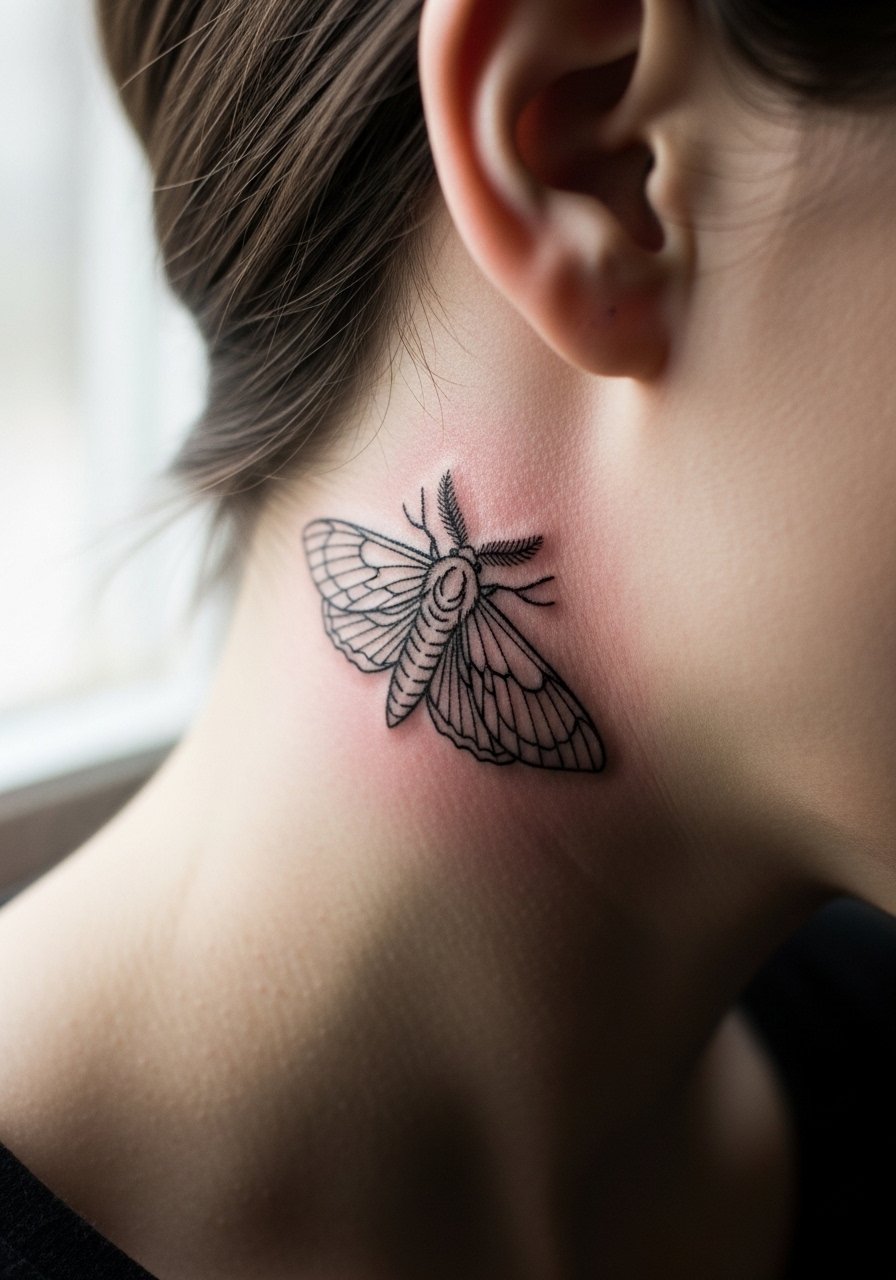
Behind-the-ear moths are intimate and catch attention only when hair is up. Because the site is small and curving, pick stipple shading over dense fills for a softer aging path. A common error is demanding heavy black fills that look patchy after a year. Pain is mild but the area is sensitive. For sessions, wear hair up and loose so the artist only works on the area. This spot can be tricky for some studios, so use discovery pathways like local portfolio searches or convention listings to find someone experienced.
14. Matchstick and Flame on the Wrist
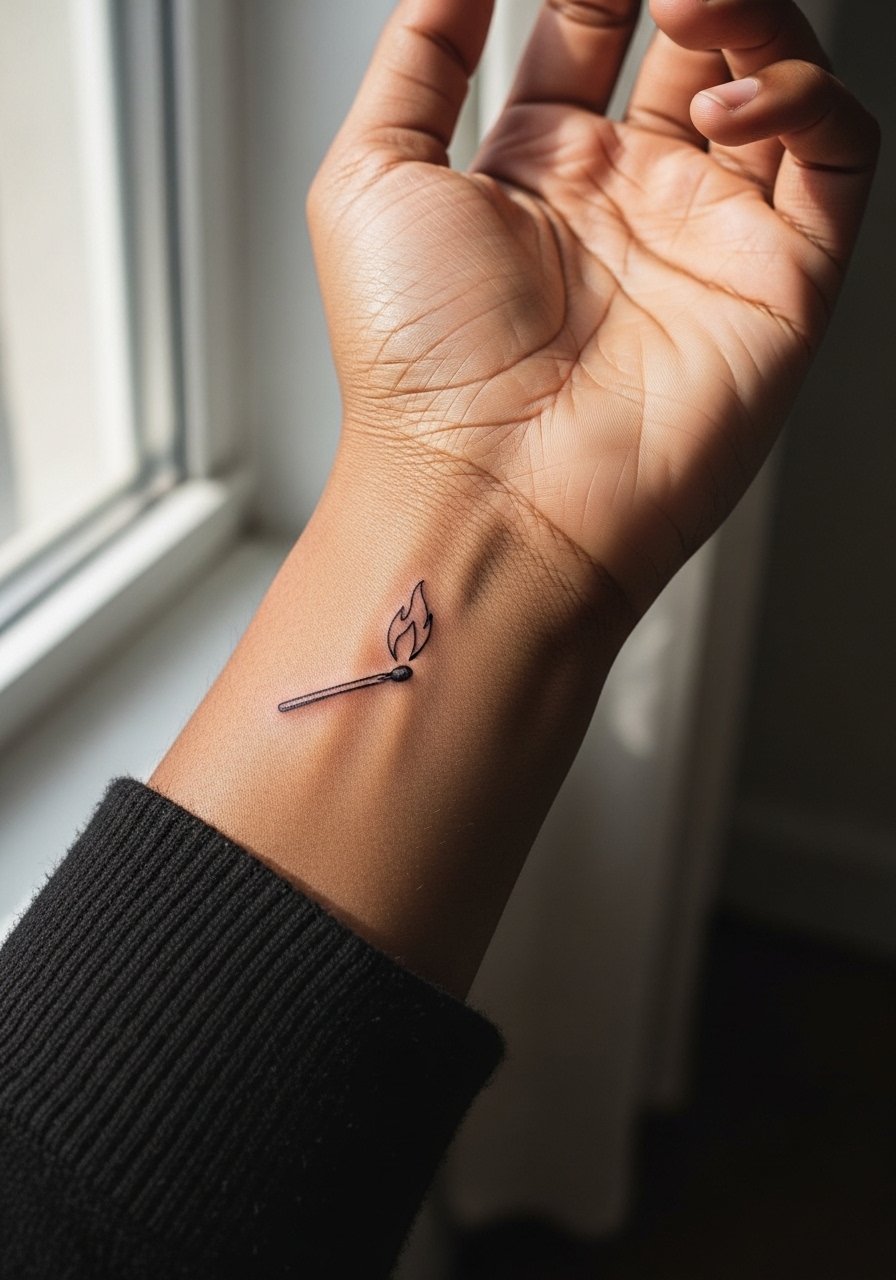
A matchstick reads like a quick, sharp statement on exposed skin. Ask for a slightly heavier flame outline to keep contrast against ring shadow and daily washing. Mistake: choosing hairline stems that vanish. Wrist pieces need touch-ups faster than upper-arm work. The session is quick and stingy. Style with a minimalist watch worn opposite the design to avoid rubbing during healing.
15. Small Scripted Coordinates on the Collarbone
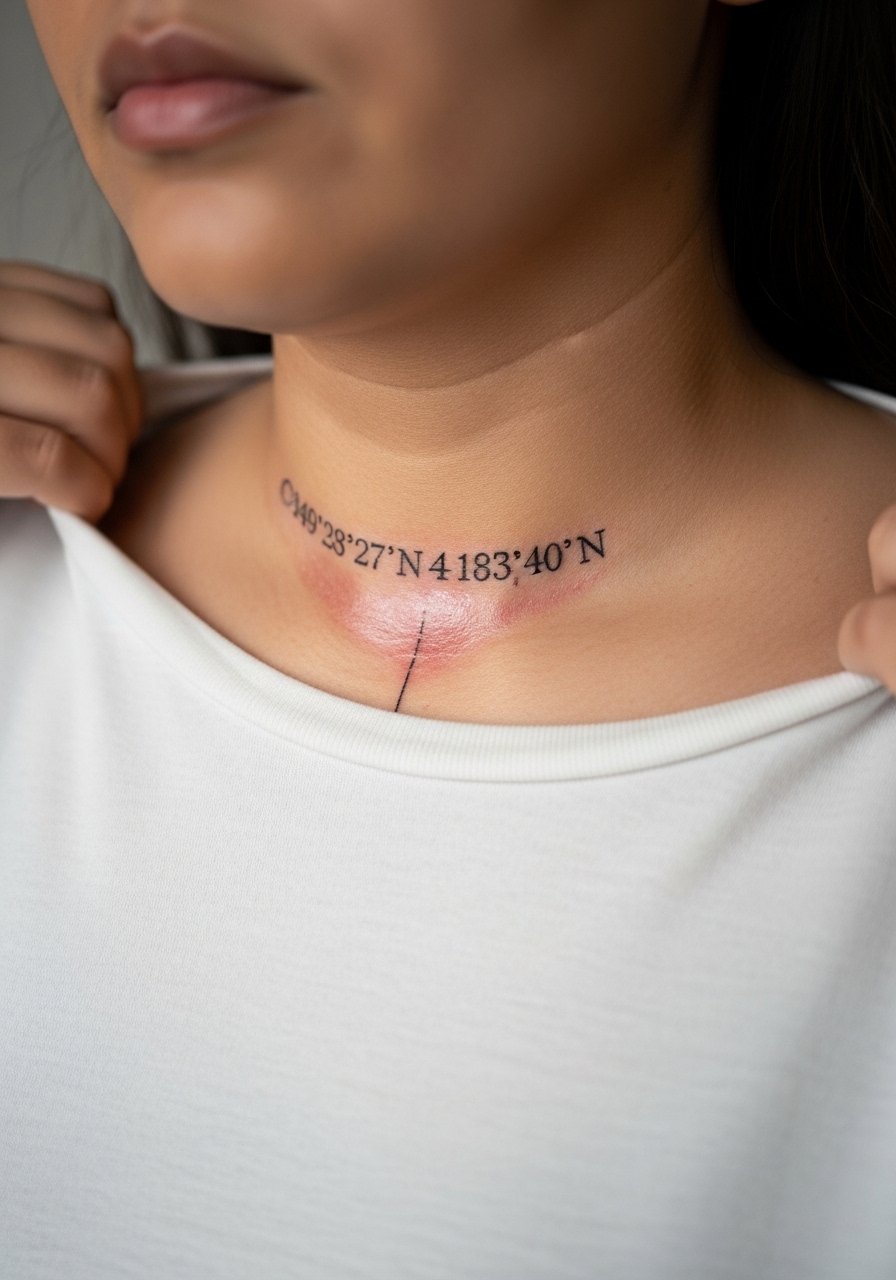
Coordinates are crisp when set in a clean, slightly enlarged type. Ask the artist for a monospace reference so numbers keep equal spacing. A mistake is shrinking numerals into illegibility. The collarbone moves, so expect minor settling in the first six months. Sessions are brief. For outfits, a thin chain pendant sits above the script and frames the area without covering it.
16. Dot Work Crescent Moon on the Calf
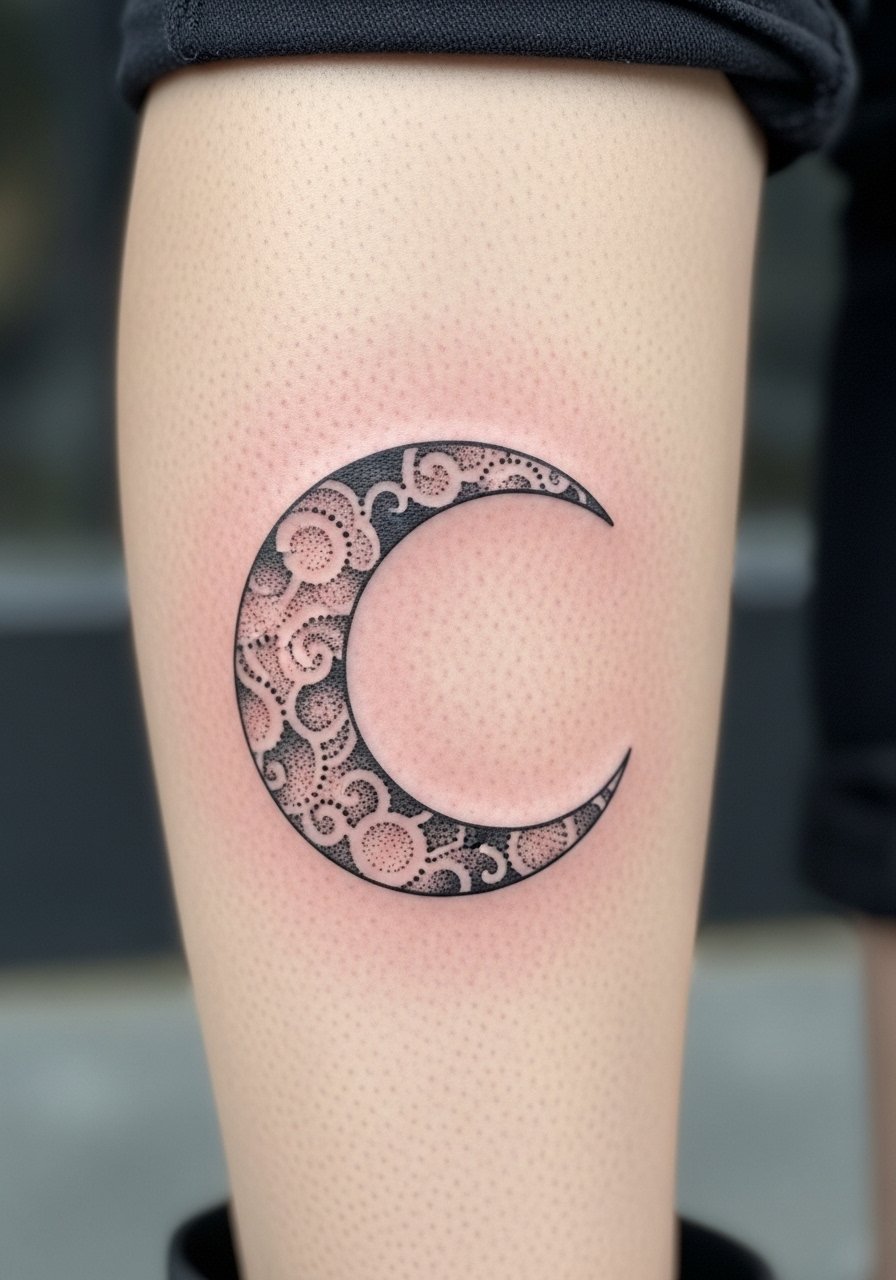
Calf placements hold dot work well because the skin is thick and the area sees low friction. Ask for a graduated stipple pattern that leaves breathing room near the edges. The frequent error is over-densifying the center which flattens over time. Sessions are tolerable and healing is straightforward. Pair with mid-calf boots or cropped trousers to let the moon peek from footwear.
17. Thin Barbed Wire Around the Wrist
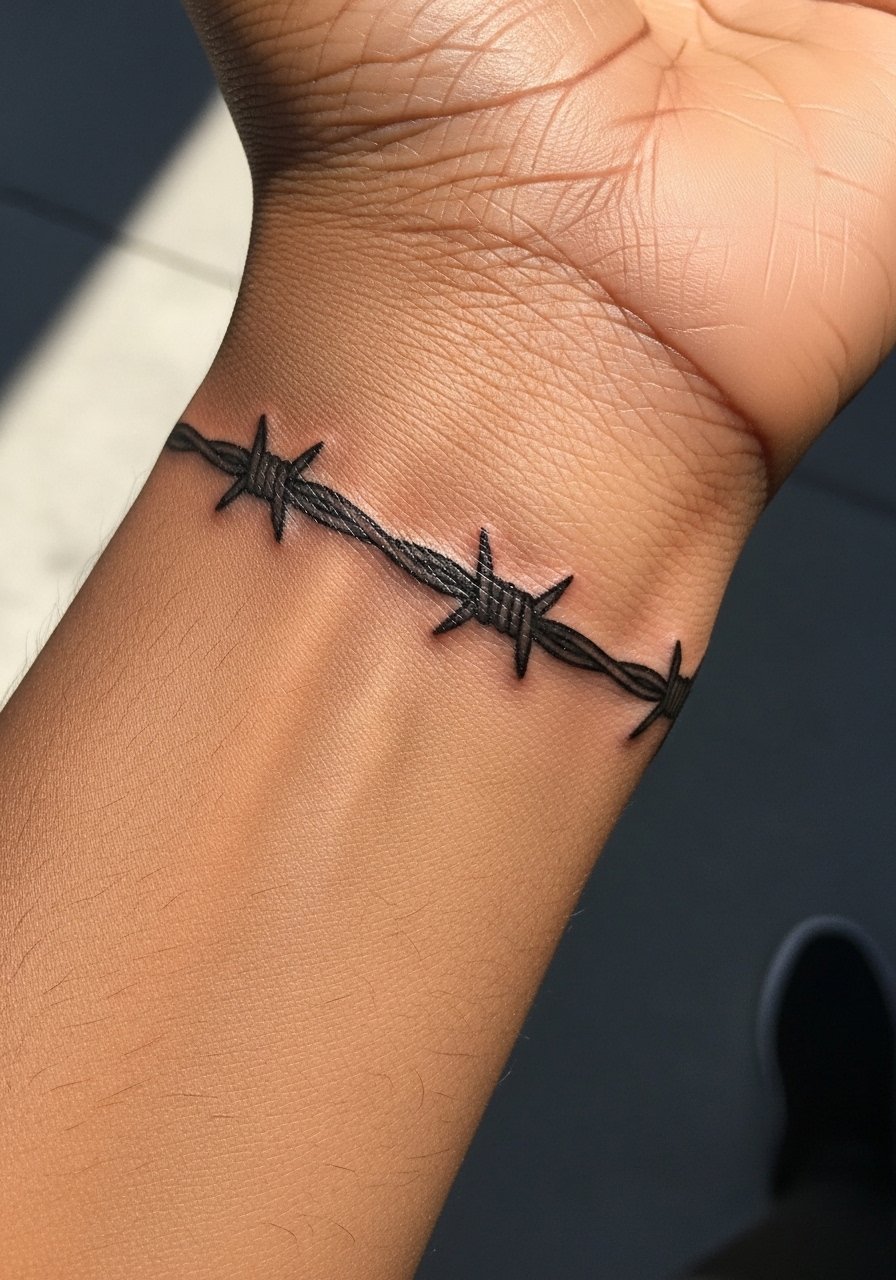
An encircling barbed wire looks bold but the wrap brings constant rubbing. Ask for slightly thicker barbs and spacing to reduce early merging. Mistake: making the wire hairline thin which the skin will blur. Expect touch-ups sooner than upper-arm bands. Sessions are fast. Be careful with metal bracelets the first month, and consider simple fabric bands for style instead.
18. Minimalist Wave on the Side Ankle
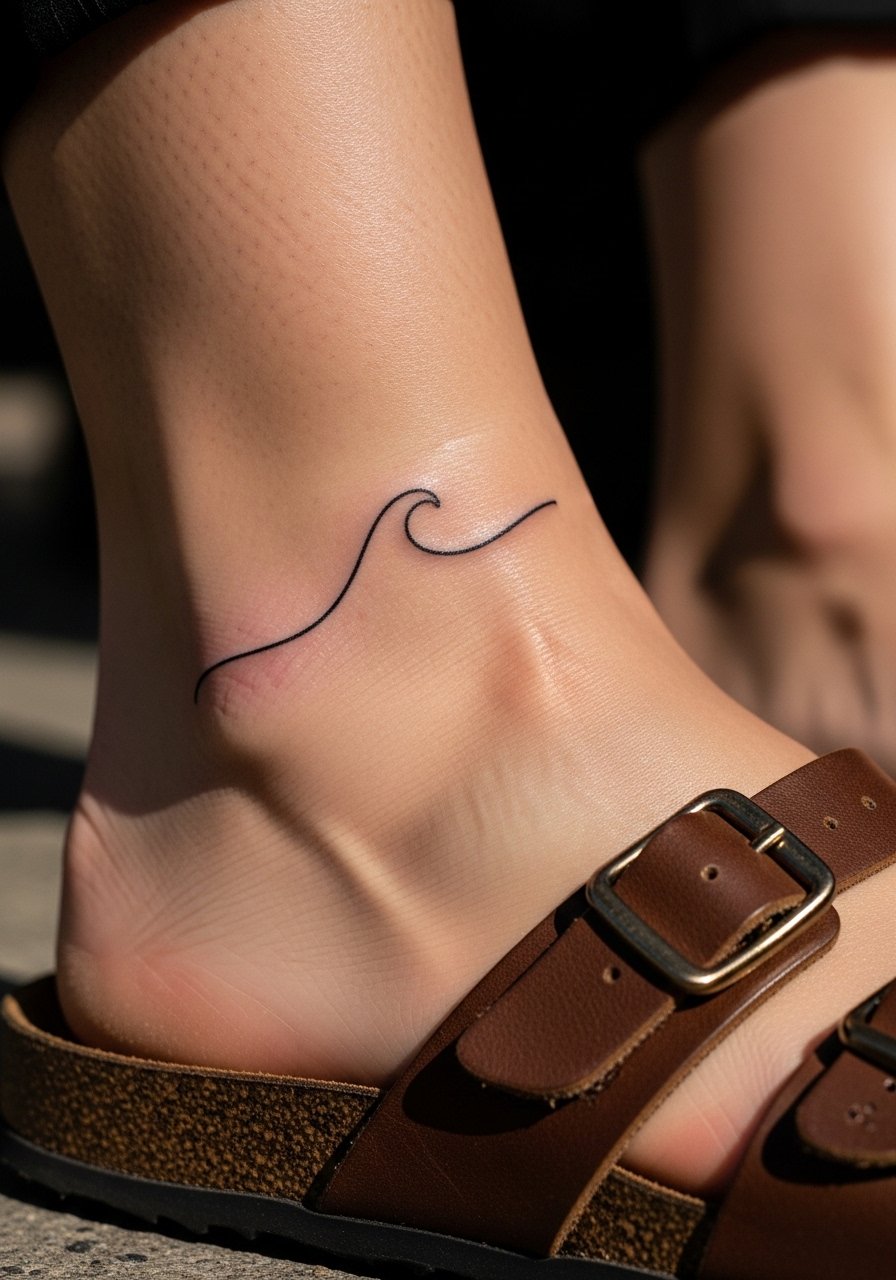
Side-ankle waves sit nicely against sandals and low shoes. Ask for a slightly bolder crest to preserve the design against shoe straps. The ankle sees lots of movement and washing, so expect the piece to soften faster than thigh or upper arm work. The session is quick and sharp. Style with low strap sandals or cropped pants to highlight the curve.
19. Blackout Strip Accent on the Forearm
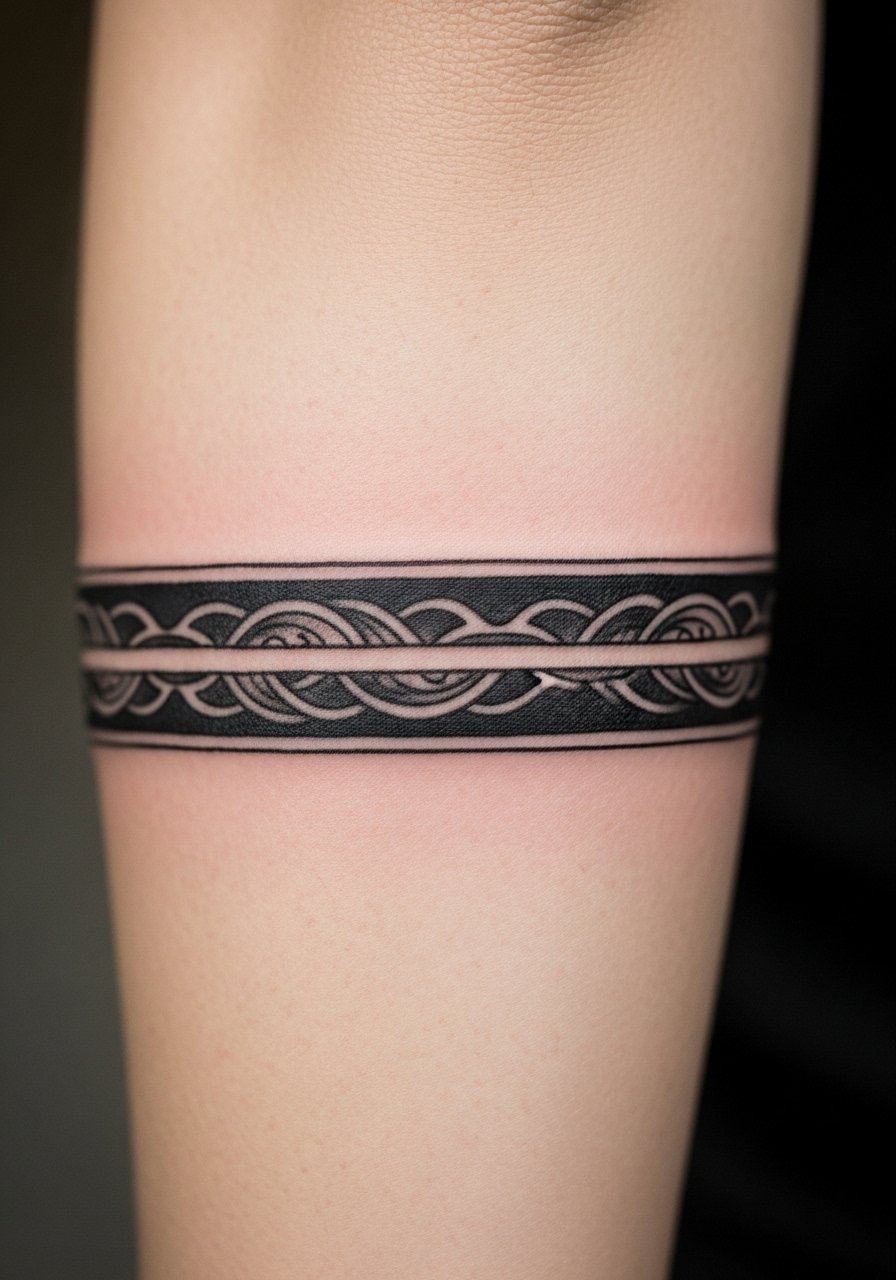
A thin blackout strip reads modern and resists early blurring because the area is filled in solid. The caveat is the commitment. Ask for a test patch or a slightly tapered edge so the visual weight feels intentional. Mistake: choosing an overly wide strip that limits future sleeve work. Sessions are longer and can feel thermal. For showing it off, roll sleeves and wear short-sleeve linen shirts in neutral tones.
20. Tiny Anchor Behind the Wrist
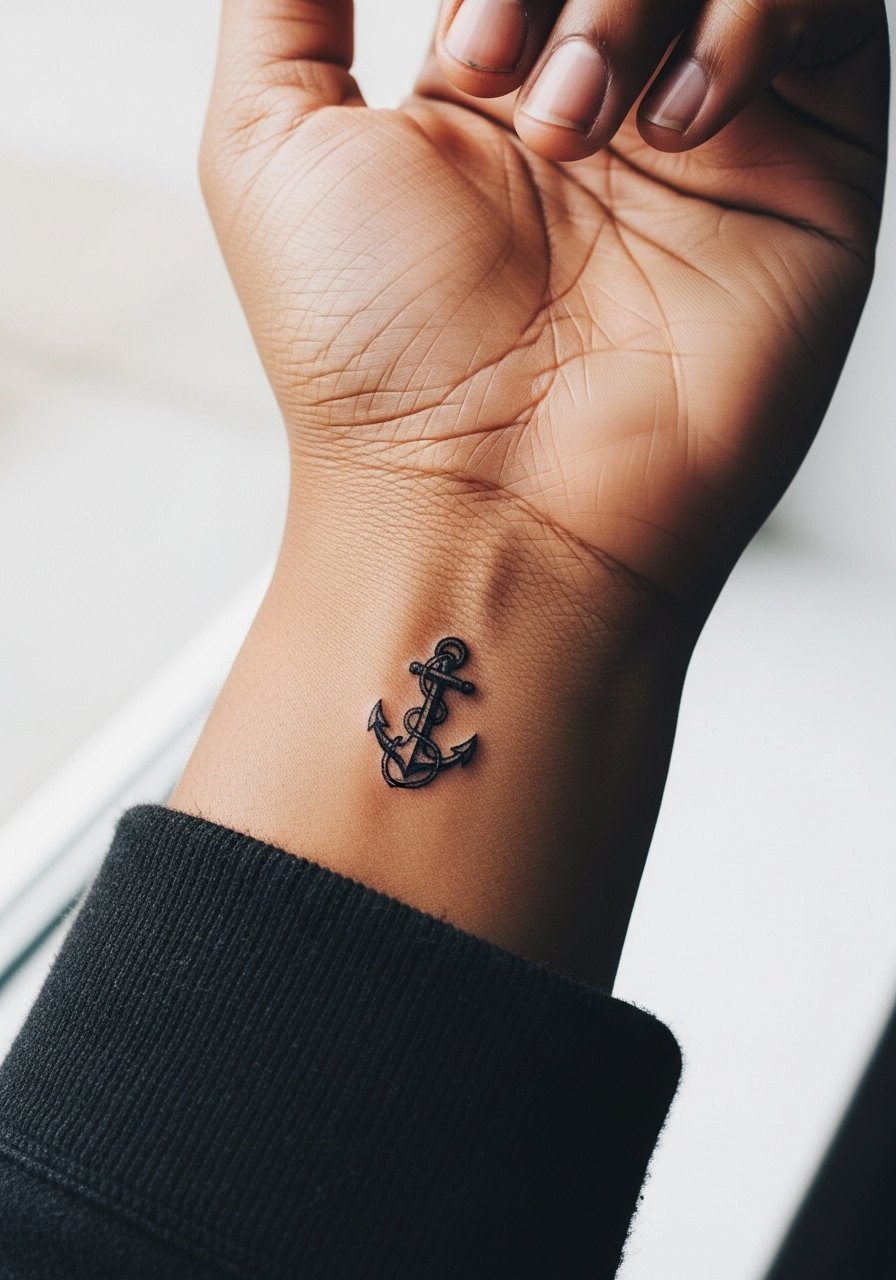
A tiny anchor sits well where cufflines meet wrist hardware. Keep the anchor slightly larger than you think so the shank remains distinct over time. Mistake: aiming for micro-minimalism and losing form with daily wear. Sessions are brief. Pair with a thin nautical bracelet or a cuff on the opposite wrist to balance visual weight.
21. Gothic Script Word on the Upper Arm
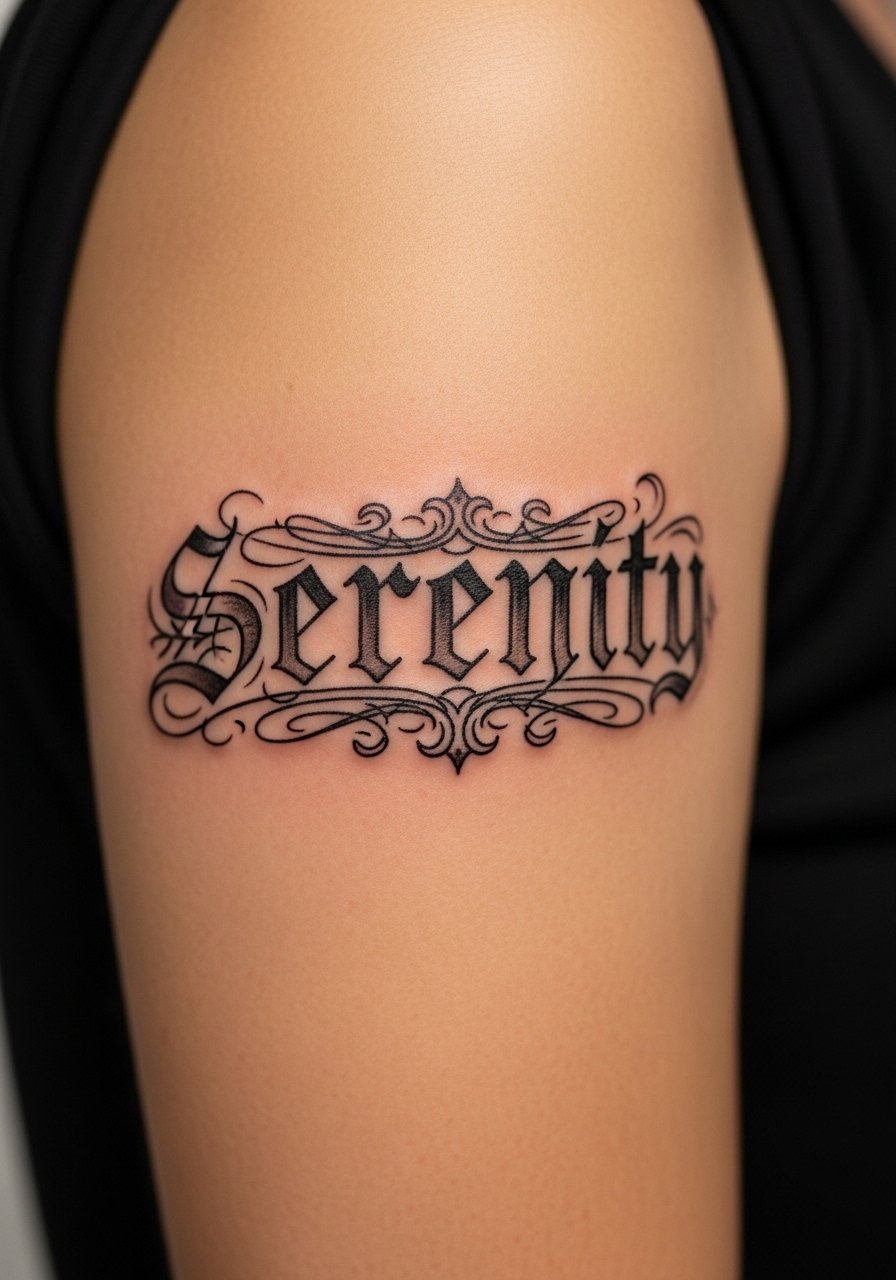
Gothic script reads hard when letterforms have guarded spacing. Ask for letters with thicker interior strokes and controlled negative space. The mistake is tight lettering that blurs into a black block. Upper-arm skin is stable, so these scripts often sit well for years. Sessions can be steady and longer depending on length. Wear short-sleeve shirts that let the word breathe.
22. Small Keyhole at the Base of the Neck
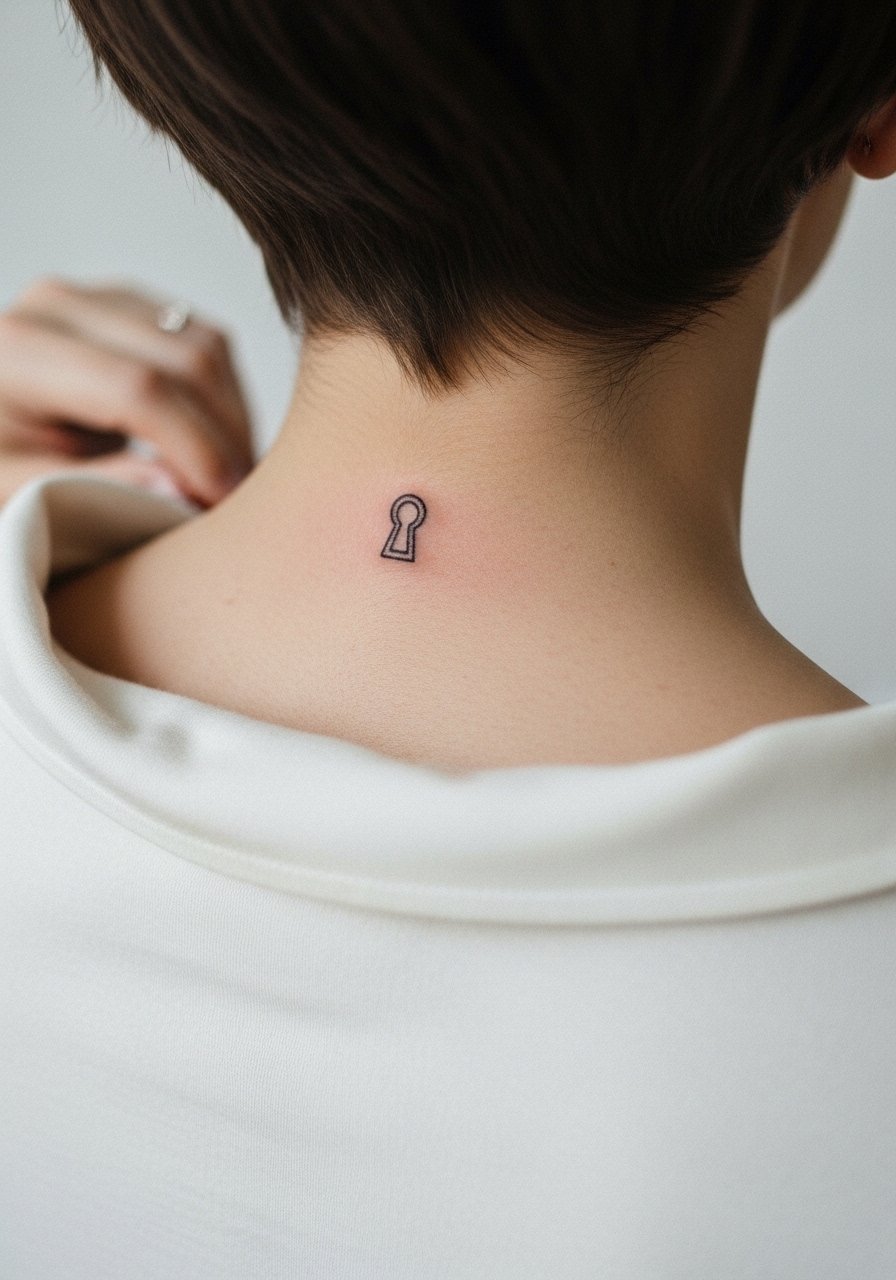
A keyhole at the nape is subtle and easily hidden or revealed. Ask for a compact silhouette with light interior shading to keep it readable. The site can fidget with clothing, so expect minor irritation if collars rub. Sessions are quick. For the appointment wear a loose wide-neck top you can pull aside without exposing the chest.
23. Stacked Tiny Triangles Along the Spine
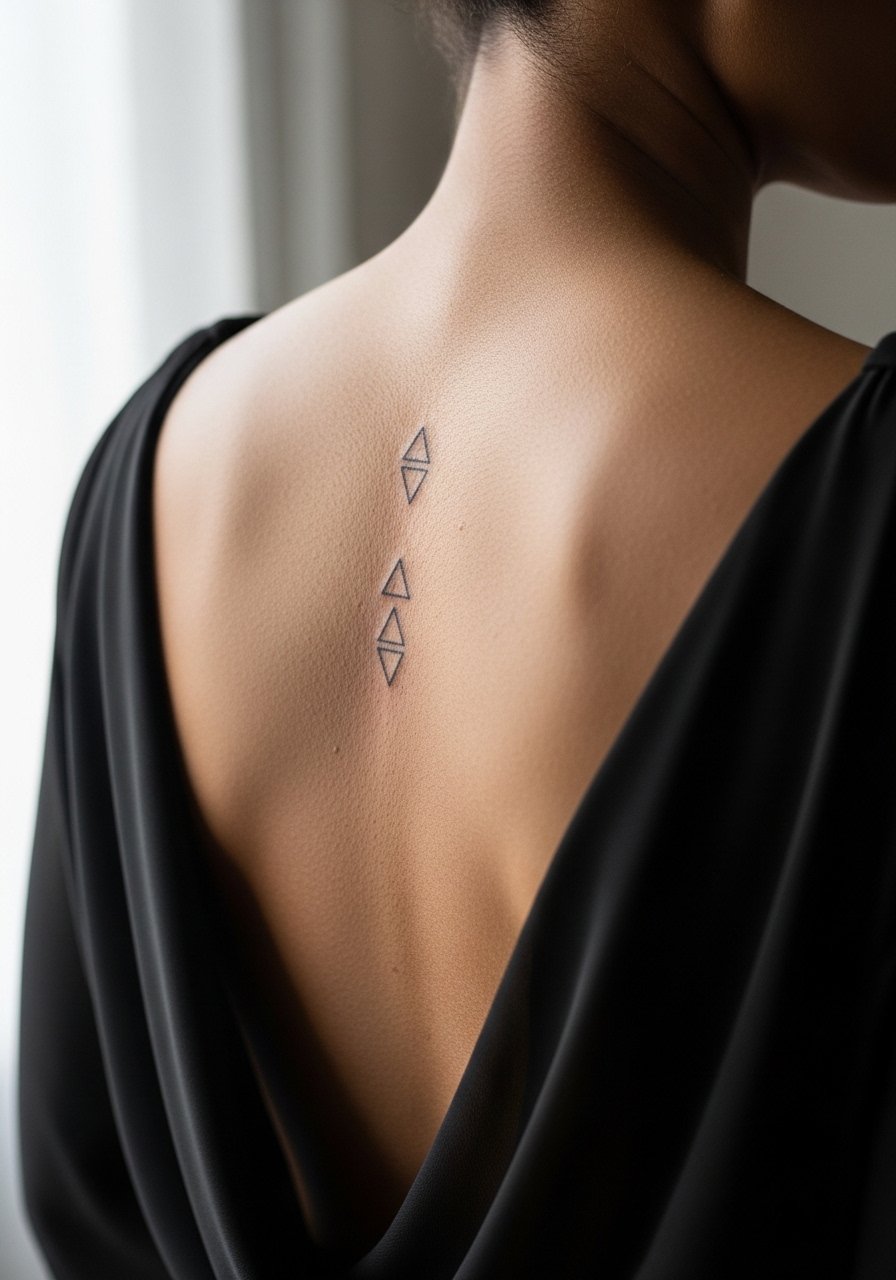
Stacked triangles on the spine look striking when spaced for breath. Ask your artist for consistent spacing and a touch stronger base lines so the vertical read stays intact. Mistake: compressing them too close so the stack turns into a strip. Sessions can be intense in certain points along the spine. Pair with open-back dresses to let the vertical rhythm show.
24. Tiny Crescent and Dot on the Thumb Side
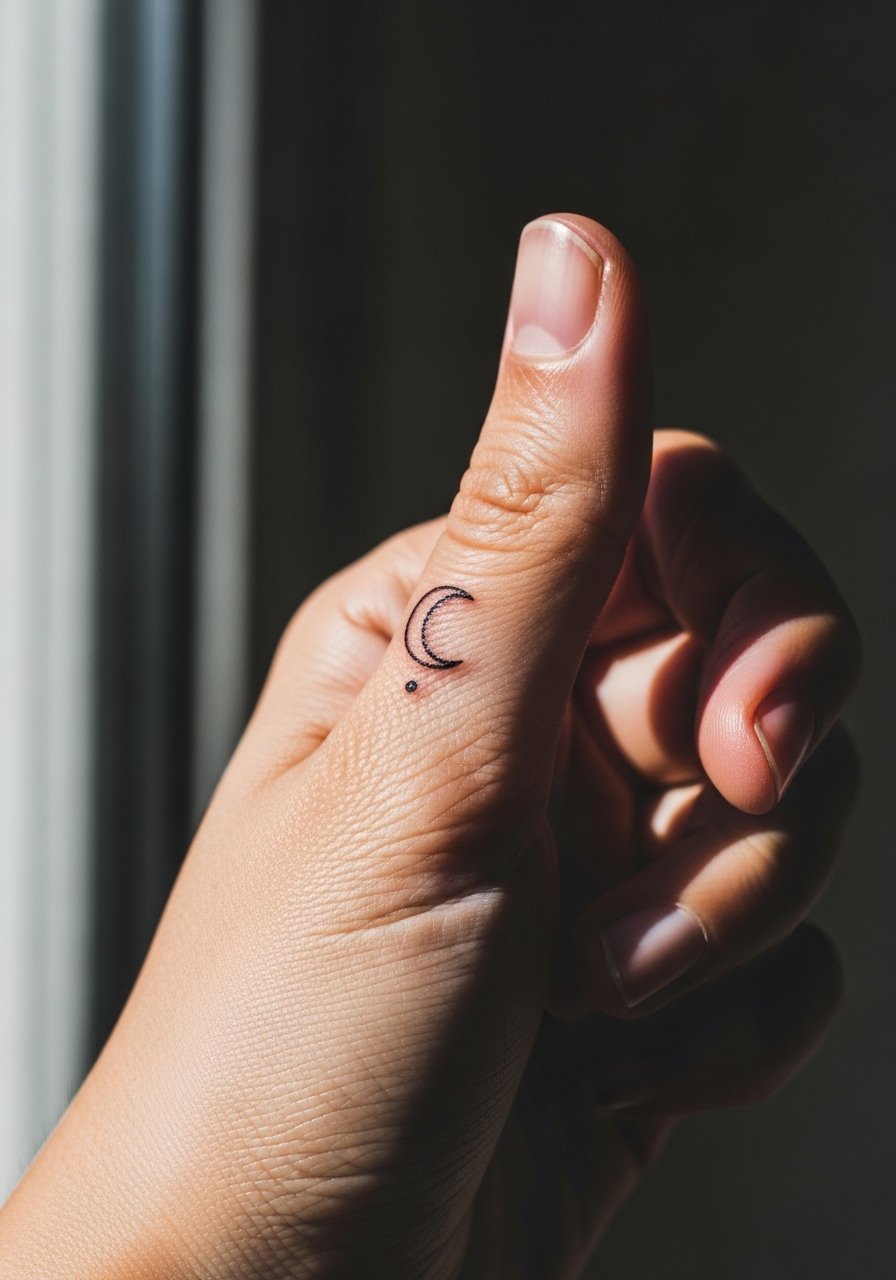
Thumb-side marks are intimate and hit the eye during gestures. Keep them slightly bolder than you think because hands see constant washing. The common error is hairline lines that disappear quickly. Sessions are quick but persistent. Match with a thin ring on the next finger rather than thumb rings that press during healing. Wearing a thin protective glove during chores can limit early abrasion.
25. Ornamental Eye Patch on the Upper Back
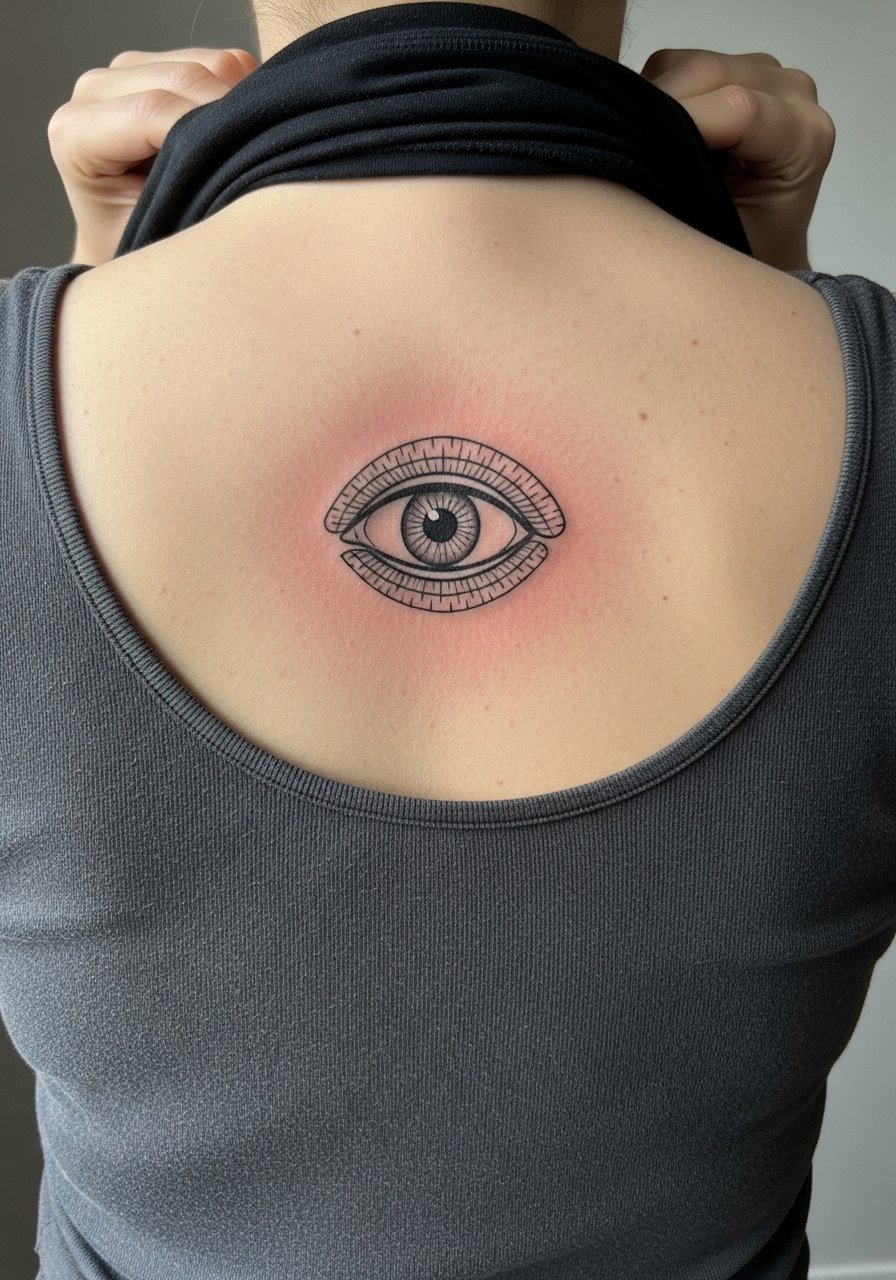
An ornamental eye patch on the upper back reads like a hidden sigil when hair is down and a reveal when hair is up. Ask for open negative space and slightly thicker outer lines to keep the shape from softening. The mistake is cramming small ornaments into a tiny panel. Sessions are moderate in length. For showing it off, choose a strap or halter top that frames the design.
26. Fragmented Barcode on the Side Hip
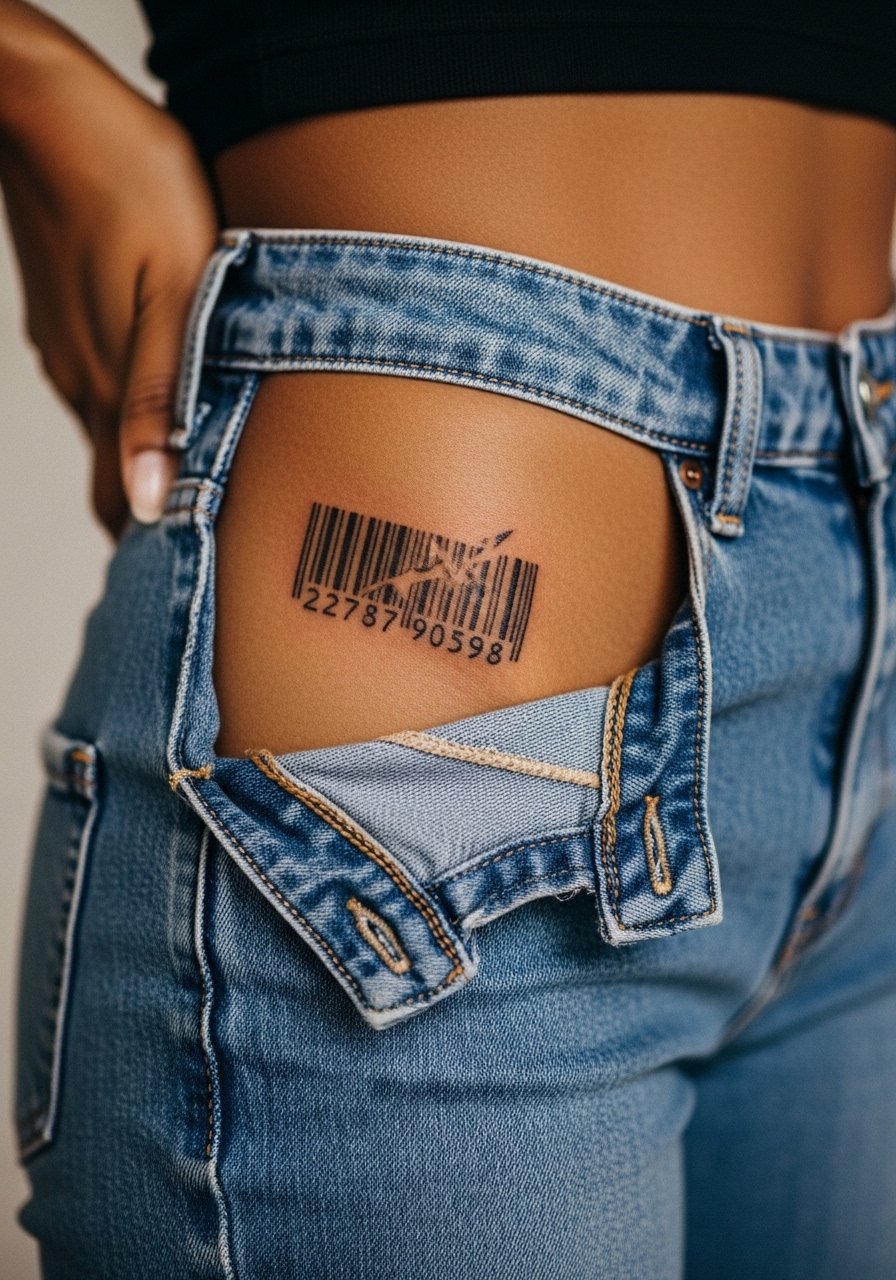
Hip barcodes are modern and private. Request clean vertical bars with careful spacing that account for body curvature. The main error is ignoring the sweep of the hip and forcing linear geometry. This area heals well if you avoid tight waistbands for the first weeks. Session comfort varies. Bring breathable underwear and high-waisted jeans you can slide down slightly for access during the appointment.
27. Small Broken Mirror Fragment on the Inner Arm
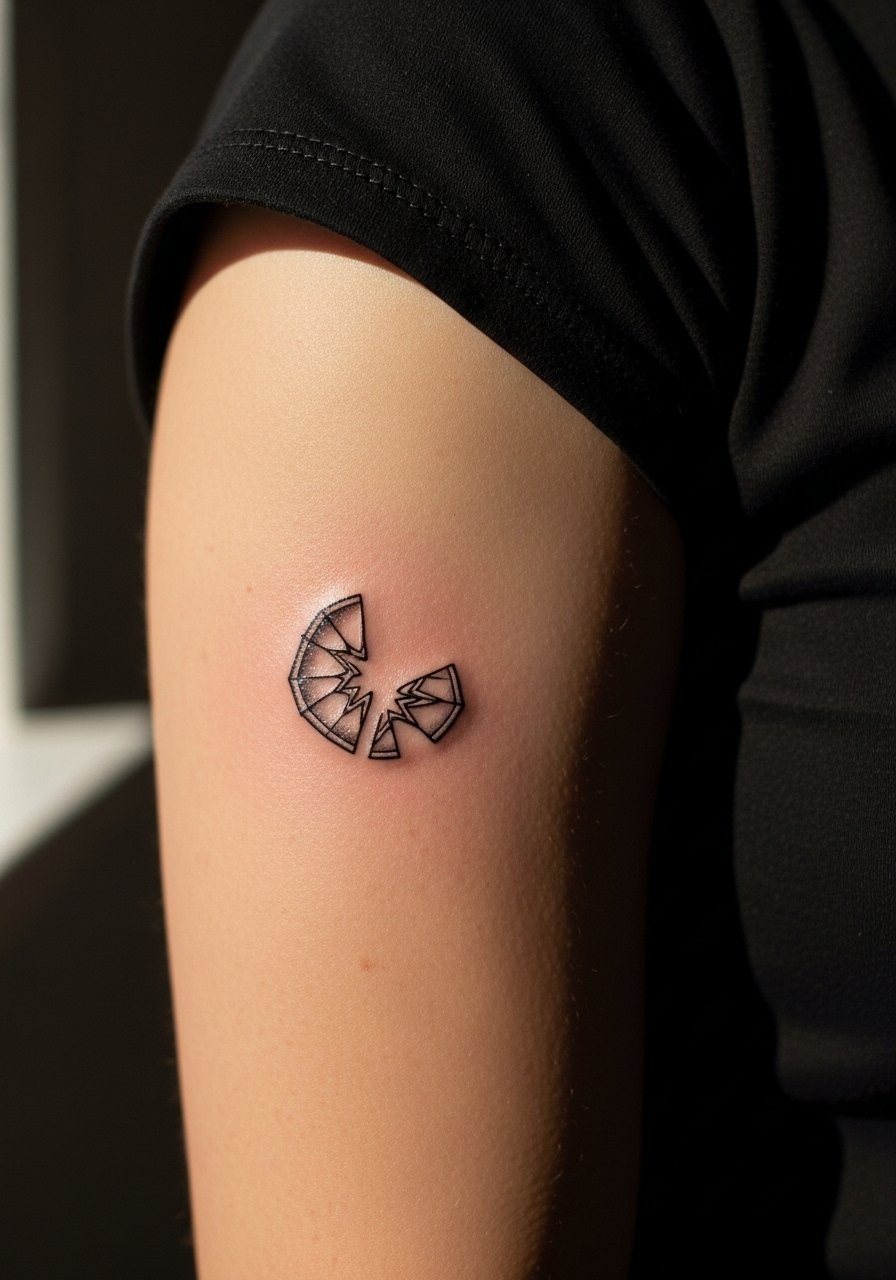
A broken mirror shard on the inner arm carries the "trust no one" edge literally. Ask for a composition that leans into negative space and avoids tiny shard details that blur. Artists debate fine detail on inner arms because the skin can shift. One camp says careful depth and spacing preserve detail, and the other warns many fine shards will soften into blotches. The session is ticklish and may need short breaks. For the appointment wear a tank top so the artist has clear access without tugging the sleeve.
Frequently Asked Questions
Q: Will fine line script on the ribs hold up, or will it blur fast?
A: It depends. Ribs move and flex more than forearms, and fine scripts without enough letter spacing often lose clarity by year two or three. Ask for slightly larger lettering and show spacing examples in your consult. If your artist supports tight fine work on ribs, expect to schedule a touch-up sooner.
Q: How often should I expect touch-ups for finger and wrist pieces?
A: Finger and wrist work live in high-friction zones and often need touch-ups sooner than limb pieces. From what I have seen, plan on revisiting the shop in the first two years for small fixes. Keep daily jewelry and heavy wear in mind while healing to slow the need for early touch-ups.
Q: Are blackout strips a commitment I can change later if I want more detailed work?
A: A narrow blackout strip can be a base for future negative-space work, but a wide blackout limits options without a major cover-up. If you might want a sleeve later, discuss tapering edges and preserving some margin so future designs can integrate the block.
Q: What should I wear to a sternum or rib session to stay comfortable and give the artist access?
A: Wear a sports bra or a wide-neck top you can pull slightly aside so only the work zone is exposed. A zip hoodie over a strapless layer is also handy. These options keep you comfortable and prevent cold chills after the session.
Q: Are hand and finger tattoos a red flag for some workplaces?
A: Yes, some industries still scrutinize visible hand tattoos. If that matters to your career path, consider placement that can be covered by sleeves or rings, or ask for very small, discreet marks that are easier to conceal.
Q: How do I find an artist who understands how these edgy "trust no one" themes should age?
A: Use discovery pathways like local shop directories, convention portfolios, and curated social galleries. Look for healed photos in portfolios rather than fresh shots. A brief consult asking about their experience with similar placements and how the work has come back for touch-ups will tell you much.
