
Fine line ink is all over feeds right now, but the pieces that still look crisp after a few summers are rarely the ones that photograph best on day one. Placement, line weight, and how you plan to show the arm make the difference between a look that needs touch-ups at year two and one that still reads clean at year five. Below are 27 small-arm ideas with practical notes on aging, pain, styling for sessions, and what to ask your artist.
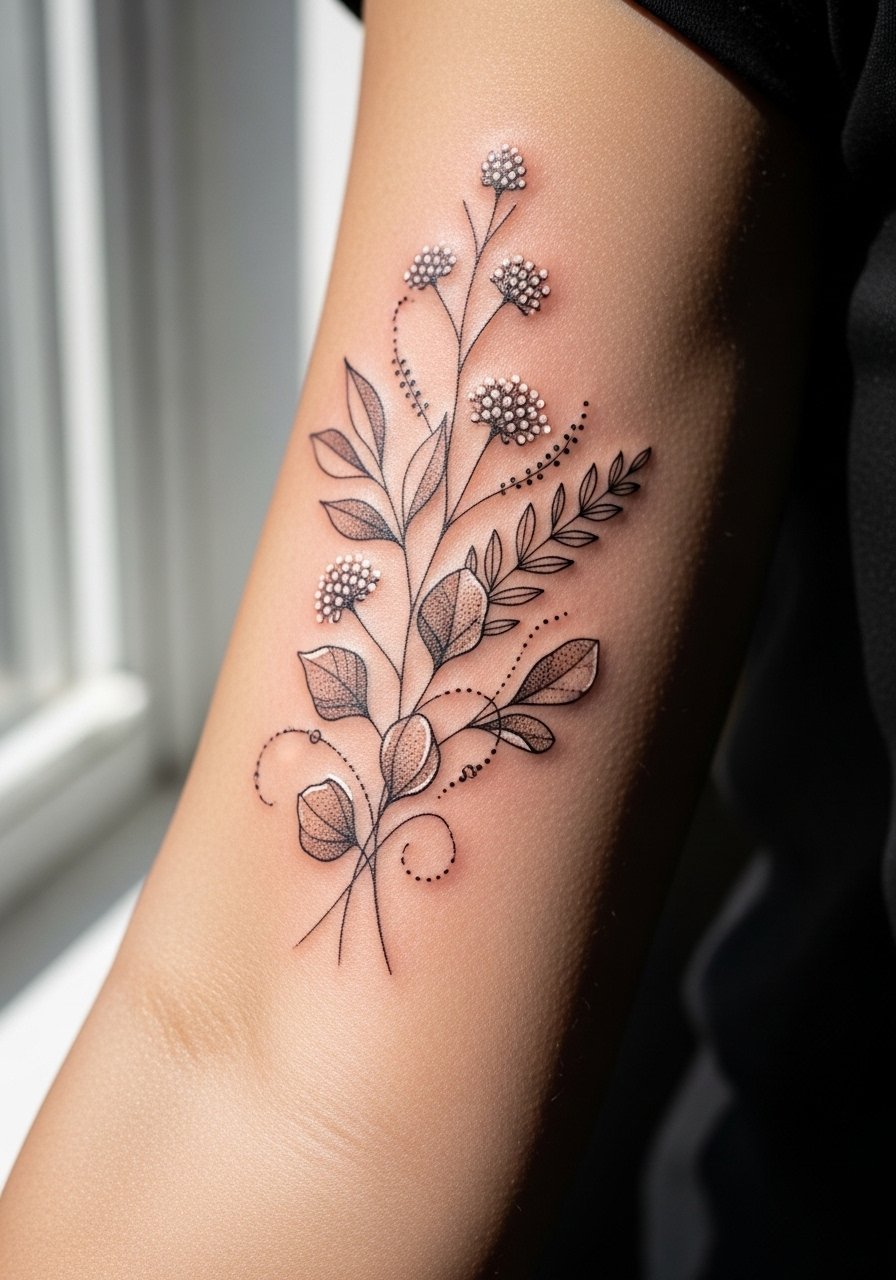
1. Fine Line Floral Wrist Cuff
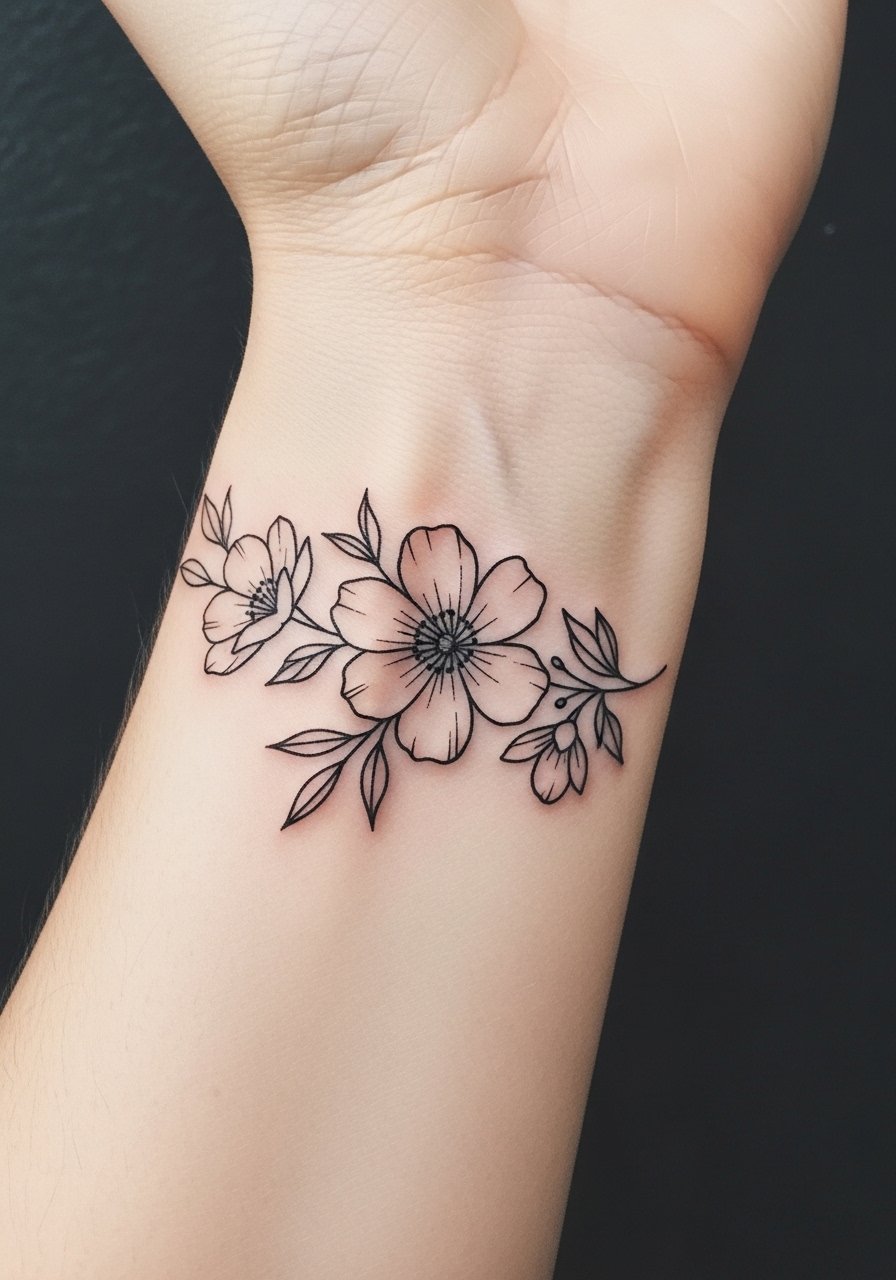
I recommend this for people who want a band that still reads delicate but will hold up better than ultra-hairline work. Ask your artist for slightly heavier fine lines and spacing within petals so the cuff does not merge at the edges over time. Expect low pain and a single short session. Common mistake is asking for everything at 0.1mm needle depth. For the appointment wear a sleeveless blouse you can roll up without rubbing the fresh ink, and plan a touch-up at 6 to 12 months if you want razor-thin detail renewed.
2. Minimalist Butterfly Forearm Outline

This is a great first-timer piece that reads as transformation without a big time commitment. During consult ask the artist for a 2-3 inch span and subtle gray wash under the wings to keep visual weight on darker skin. Outer forearm placement reduces distortion from weight changes. Session feels manageable, about one hour. A frequent error is requesting extra tiny details that blur. Show-off pairing includes a fitted olive green tee with pushed sleeves to frame the outline.
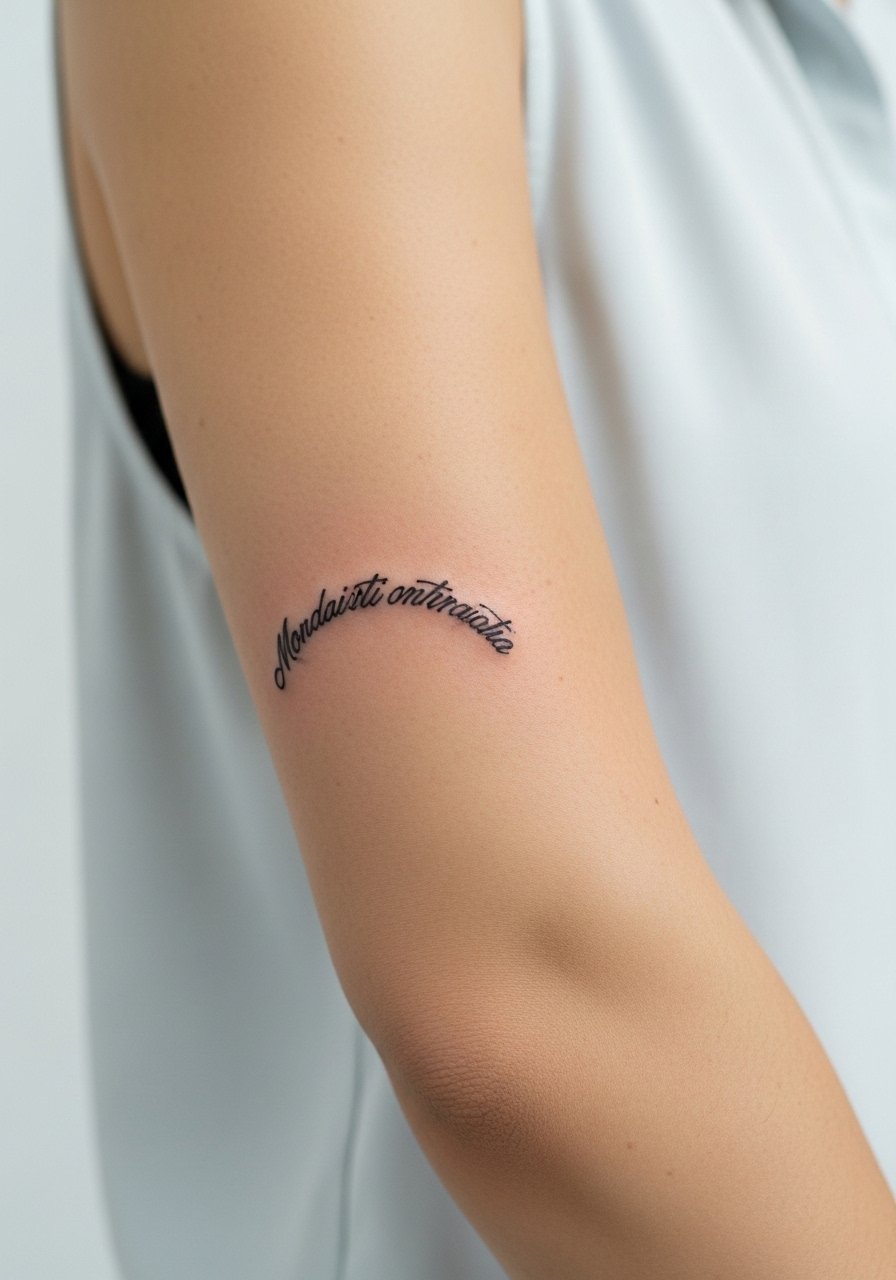
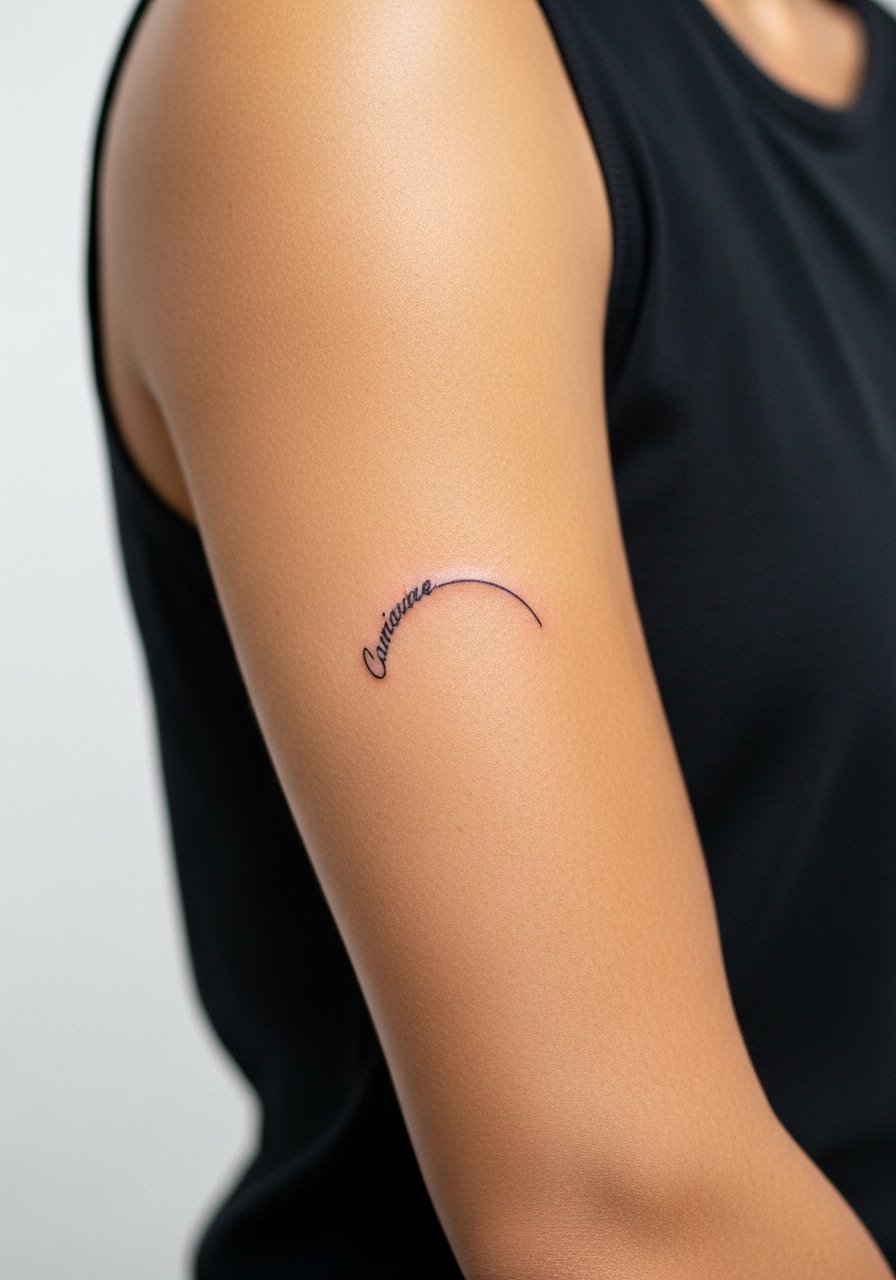
3. Dainty Script Quote on Inner Forearm
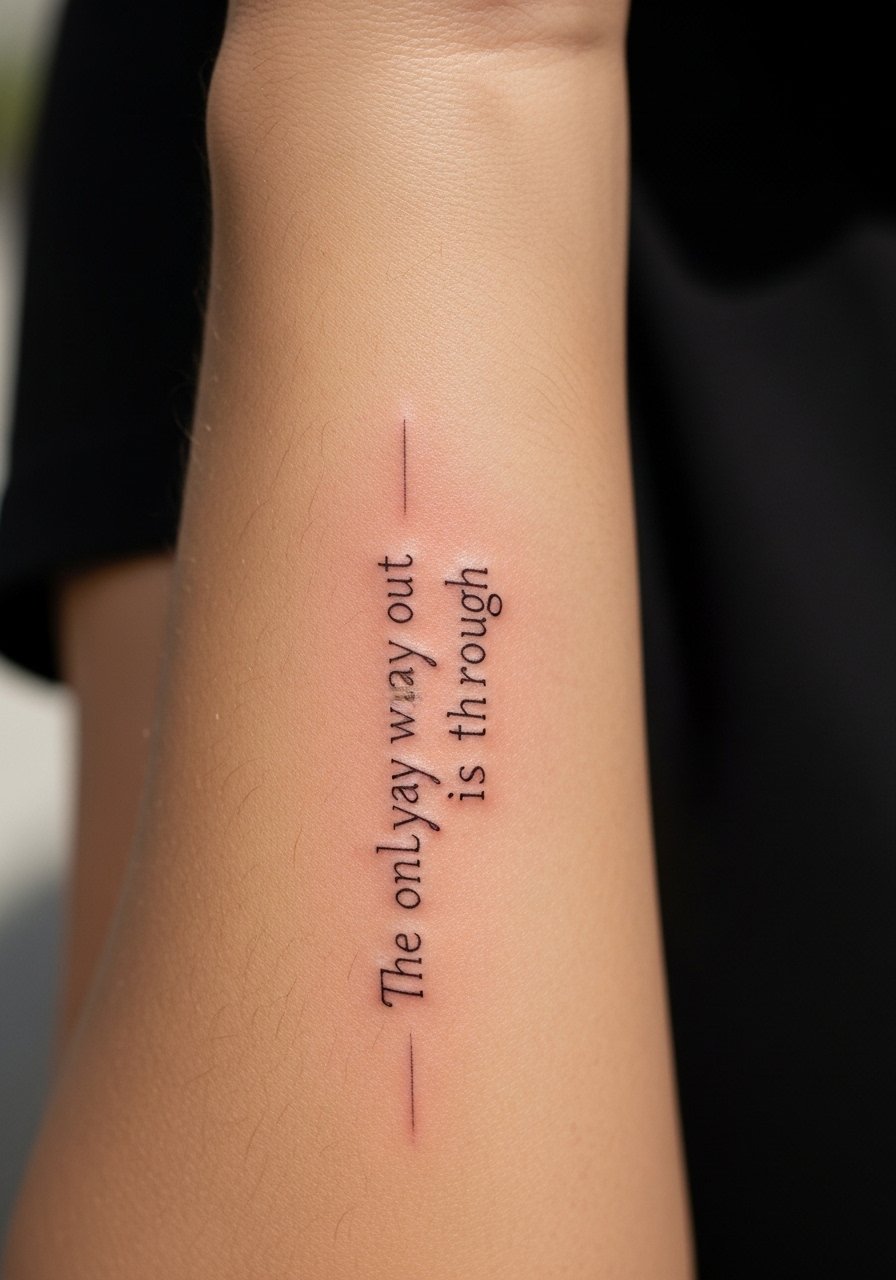
Pick a phrase that fits a 4 to 6 inch vertical column so letters breathe when the arm bends. Tell your artist you want slightly taller lettering and regular spacing to avoid blurring with time. Inner forearm hurts more than the outer side but the placement makes the script private and visible when you want it to show. Common mistake is asking for extremely thin cursive which can smudge. For the session wear a loose button-down shirt you can pull aside for access without stretching the skin.
4. Micro Peony Bloom on Upper Arm
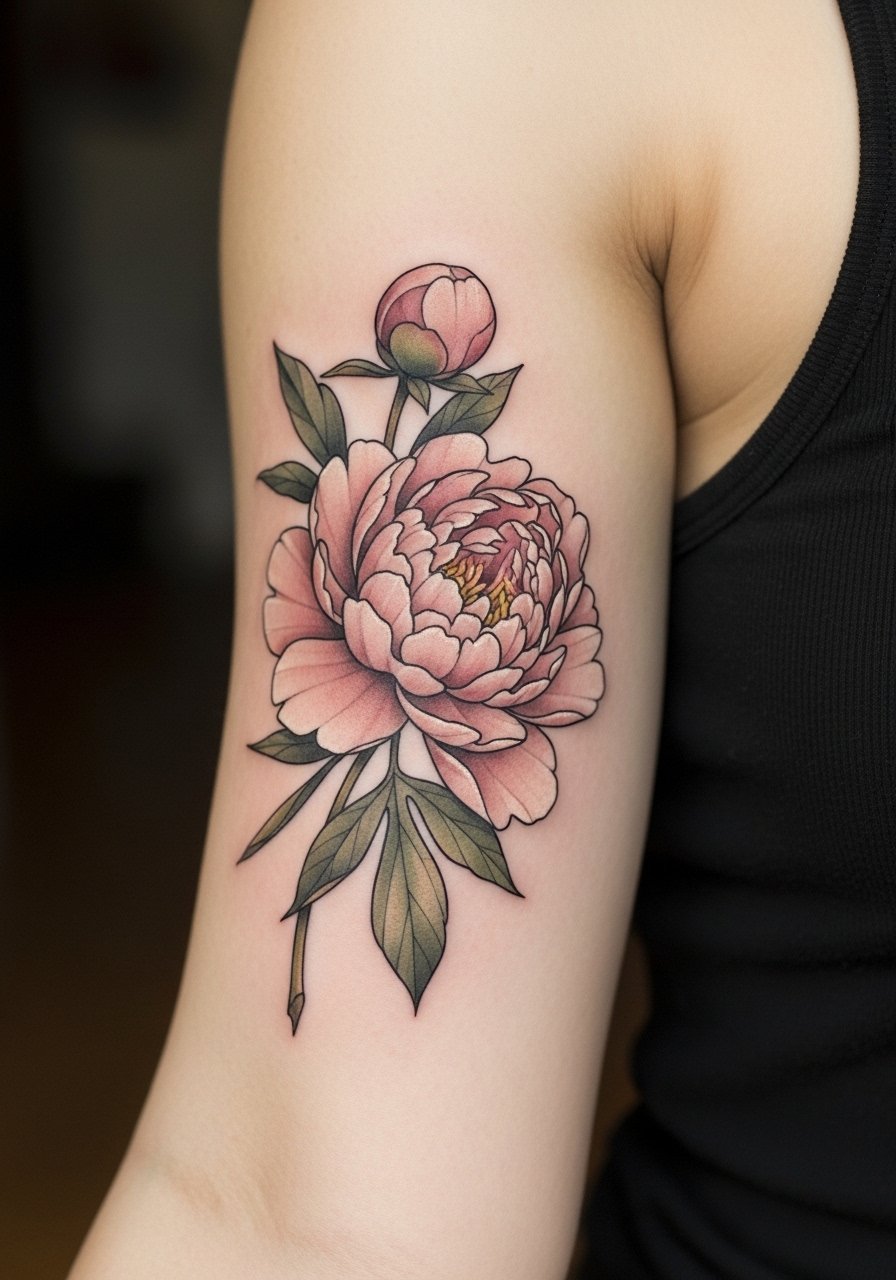
Micro-realism adds color with minimal coverage and ages nicely when placed on the rounded bicep. Ask for slightly muted pigments to avoid early patchy fading from constant sun exposure. Session is short, often under an hour. People often overload small flowers with too much shading which loses definition. This placement pairs well with off-shoulder tops, so wear an off shoulder top on appointment day for easy access and a flattering reveal.
5. Ornamental Vine Half-Sleeve Flow

This is a better choice than a dense sleeve for someone who wants elongation without full coverage. In consult request flow that follows muscle lines and breathe room between repeats. Expect multiple sessions and plan for stretching if body shape changes. A common regret is squeezing too many motifs into a small arc. For longevity ask about touch-up scheduling after full healing and skip heavy color in high-friction zones.
6. Watercolor Cherry Blossom Shoulder Cap

The shoulder cap is forgiving for painterly edges as the curve hides minor softening. Tell your artist you want more negative space and less saturation near the edges so the blossoms blur into skin gracefully. Session is two shorter sittings if color layering is involved. Wear a halter neck top or racerback so you can expose the shoulder without getting fabric on fresh ink.
Heal Smart
The wrist, inner forearm, and shoulder pieces above each need different prep and first-week care, so a few targeted items make the session and the first days easier.
-
Tea tree balm indie-style salve. Lighter than greasy ointments, good for oily arm skin and for the micro peony where too much shine hides fine shading.
-
Japanese rice bran lotion substitute. A subtle moisturizer that keeps fine line florals from looking shiny while helping delicate lines settle.
-
Unscented healing salve, sensitive skin formula. Ideal for inner forearm script and bicep work where fragrance can irritate.
-
Small-batch manuka cream option. Good for shoulders and larger clusters that scab more, users report faster scab shed in exposed areas.
-
Hustle Butter Deluxe. A thin, non-clogging ointment many prefer over heavier balms for flexible arm locations that rub clothing.
7. Ignorant Style Heart on Inner Forearm

This naive, bold outline reads playful and resists early blurring because the lines are heavier. Ask for confident solid outlines rather than micro detail. The inner forearm placement has moderate pain and usually one session. People trying to make an ignorant heart too intricate often lose the style's charm. For showing it off, rolled sleeves or a loose chambray shirt frames bold blackwork without overwhelming it.
8. Neo-Traditional Rose on Inner Bicep

Inner bicep pieces have a private reveal and work well with saturated neo-traditional color. Tell your artist you want solid saturation in shadow areas and softer edges near highlights. Pain is higher inside the arm and appointments can be jumpy if you tense up. A common mistake is underestimating the need for a touch-up in the first six weeks. Wear a sleeveless bodysuit so the artist has clear access without fabric dragging.
9. Blackwork Geometric Band at Wrist
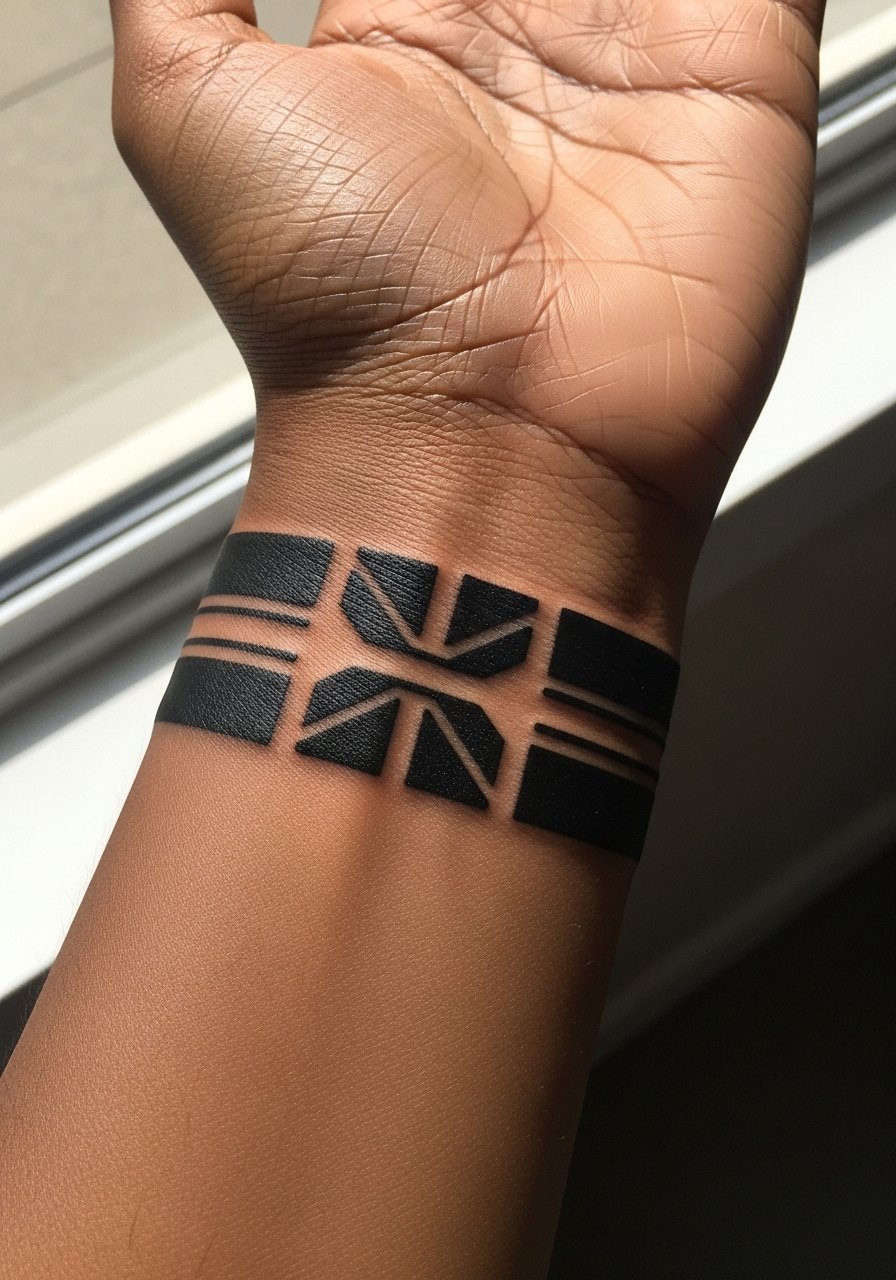
Solid black bands age well on wrists and stack nicely with jewelry. Ask for crisp negative space between elements to avoid early merging. The wrist sees friction so expect touch-ups sooner than forearm pieces. Many make the band too thin and then regret it when edges soften. Pair with a thin gold chain bracelet on the opposite wrist to highlight the band without clutter.
10. Fine Line Constellation Elbow Wrap
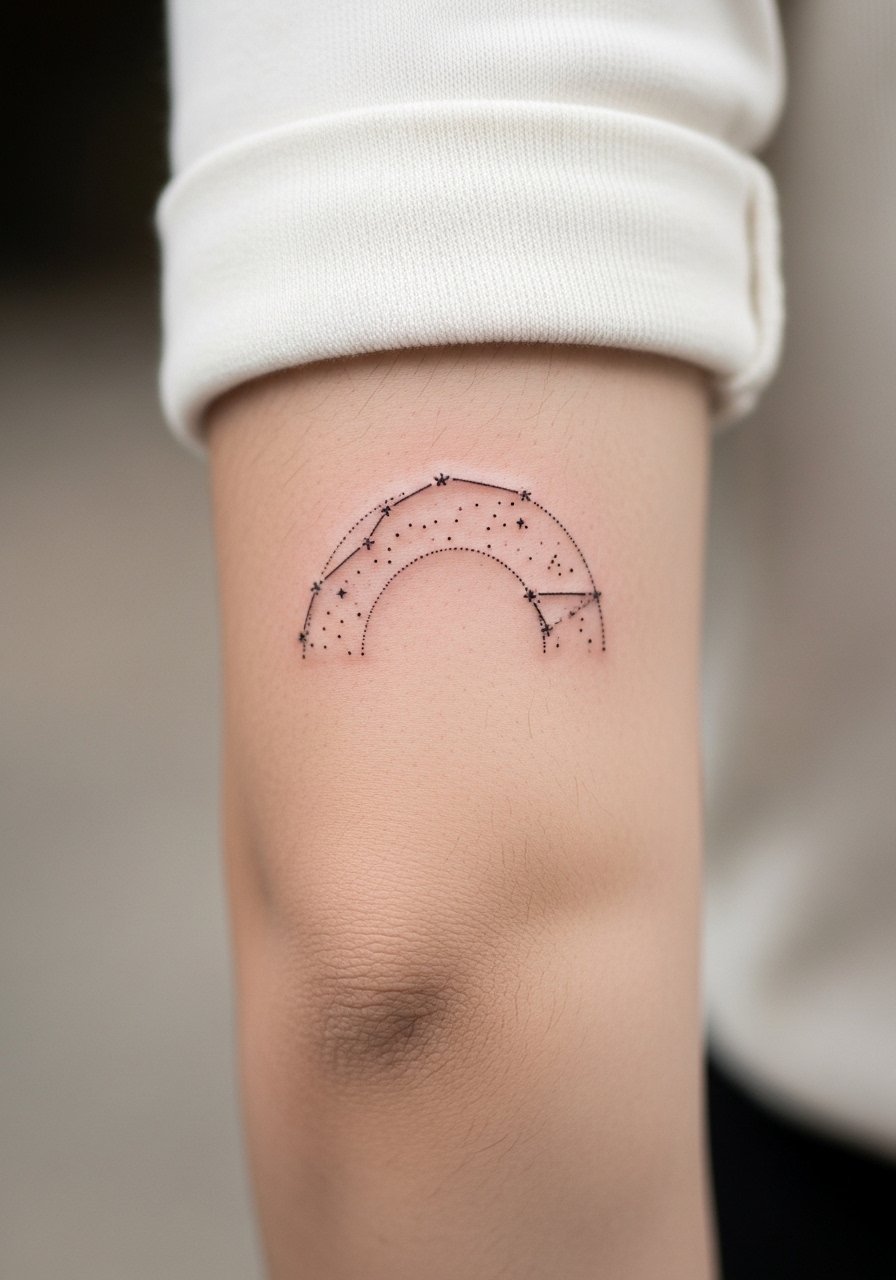
Elbow wraps need special planning because the joint moves and swells. Request slightly wider spacing and a few anchor dots so the design reads when you bend the arm. Expect higher pain and sometimes two short sit-ins. Artists disagree on fine line at joints. One camp says the stretch blurs lines fast. The other camp says proper depth and spacing solve that. Ask your artist where they stand. For show-off looks, wear an elbow length sleeve top you can push up without rubbing.
11. Minimalist Wave on Upper Forearm
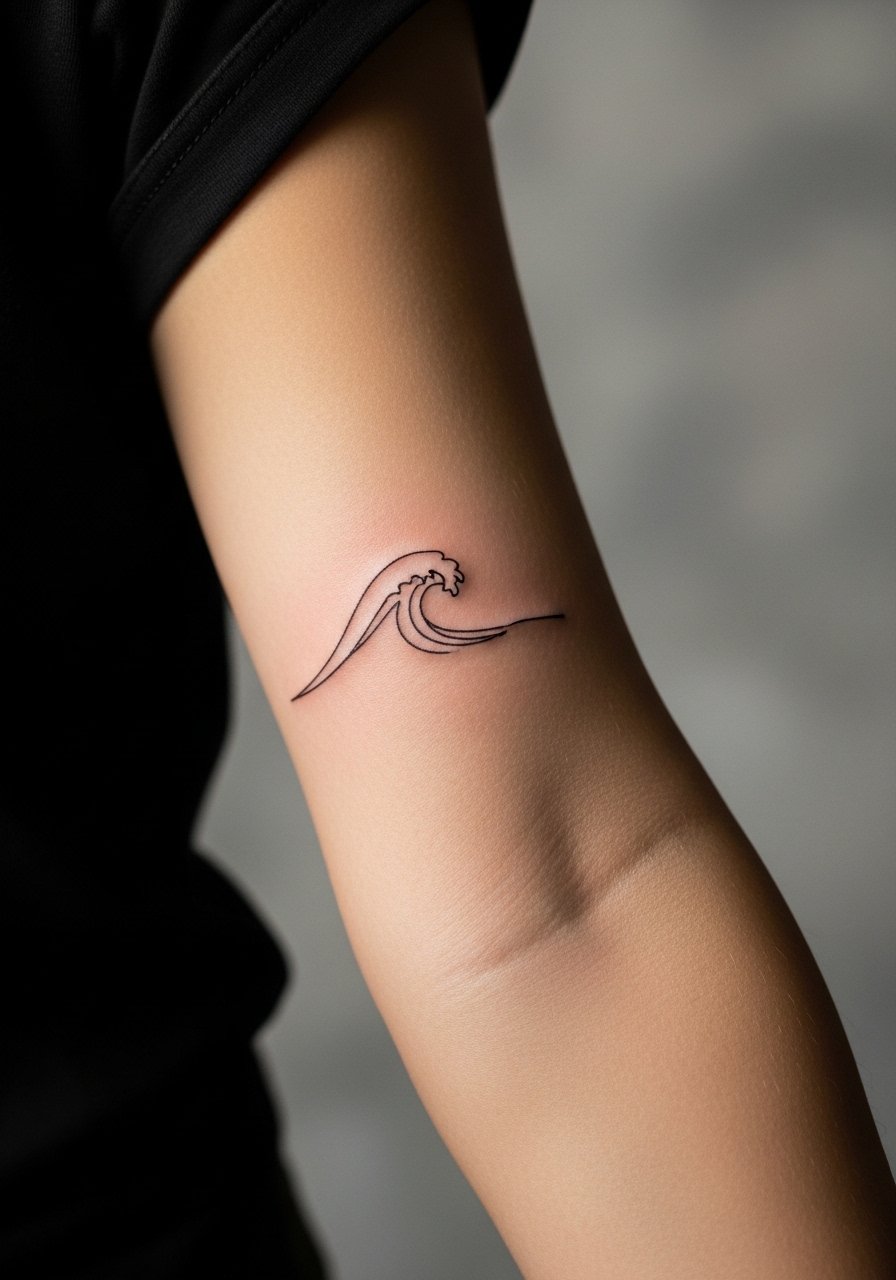
This calming horizontal motif works because it reads from a distance and adapts to size. Tell your artist you want a confident single stroke with slightly heavier beginning and end for longevity. Low pain and quick session. Avoid cramming extra little waves inside one another. Pair with a cropped cardigan or olive green tee for an effortless casual frame.
12. Botanical Leaf Cluster on Bicep
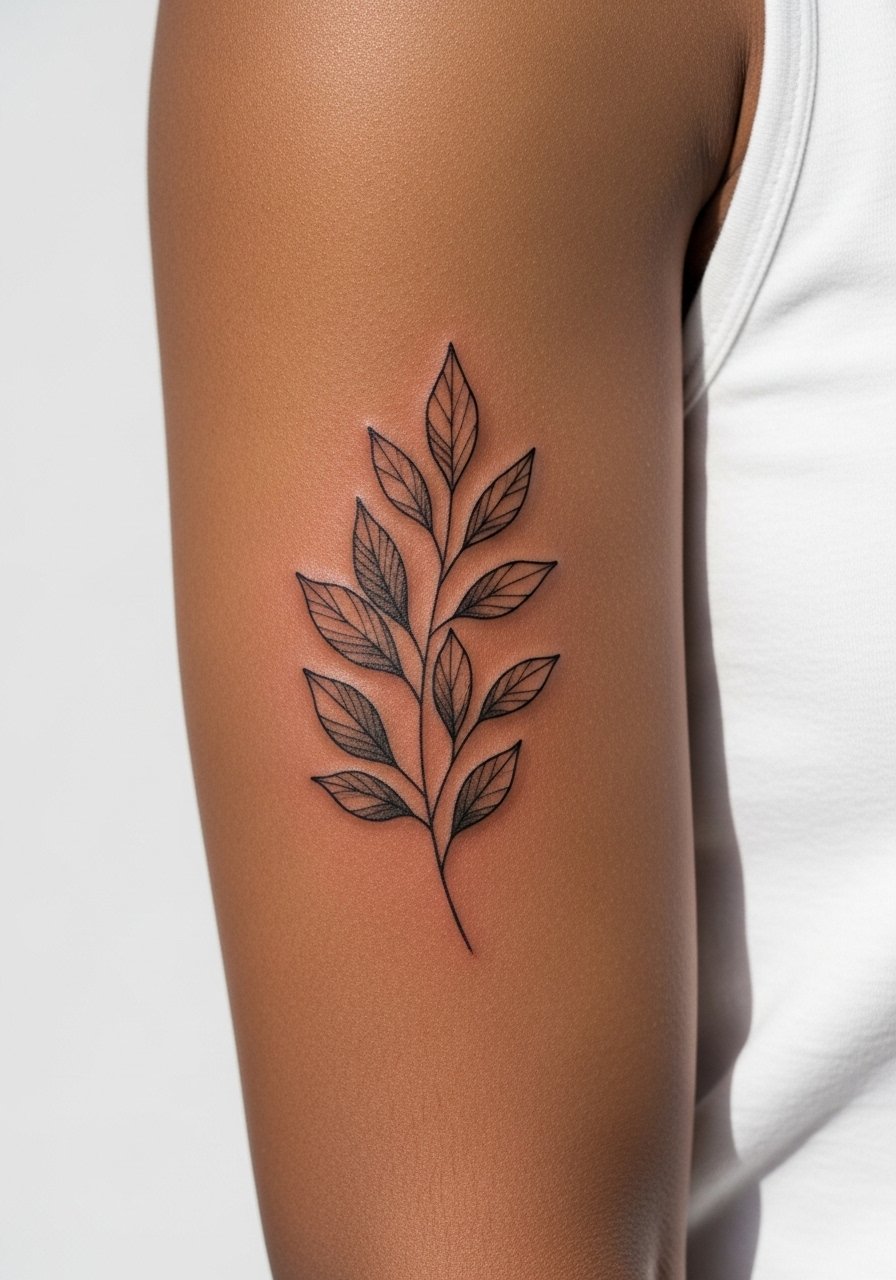
Clusters follow curves and age nicely on the bicep where the skin is stable. Ask for directional leaf stems that follow the muscle for natural flow. People often request tiny veins that blur, so keep shading soft and minimal. This area tolerates color well. For the session wearing an off shoulder top helps access without shifting fabric over the arm.
13. Curved Script That Adapts to Elbow Flex
This is one of the under-covered ideas that actually improves readability while you move. Bring references showing the font on a bent forearm so the artist maps the curvature. The joint area hurts and swells, so plan a short session and expect touch-up if you want crisp letters long-term. A common mistake is placing script without testing on a bent arm. For appointment wear a loose tank top so the artist can have full range when checking flex.
14. Hybrid Fine Line with Subtle Dotwork for Darker Tones
This hybrid adds dot shading behind thin lines so the design reads on richer skin tones. Tell your artist you want slightly more contrast and stipple underlayers. Risk of fading is lower because contrast protects the silhouette. Session takes a bit longer than a straight fine line piece. A common error is keeping line weight too hairline. For showing it off, a racerback tank keeps focus on the arm.
15. Glow-Reactive Accent on Inner Forearm
A rare but playful choice is a tiny reactive pigment dot that glows under specific lighting. Discuss pigment safety and realistic expectations with the artist because longevity and reaction vary. This is a one-session add-on to a simple line motif. The biggest mistake is treating it like standard color. For the session wear a sleeveless tank to give the artist clear access without fabric rubbing.
16. Micro Stars Cluster on Inner Forearm
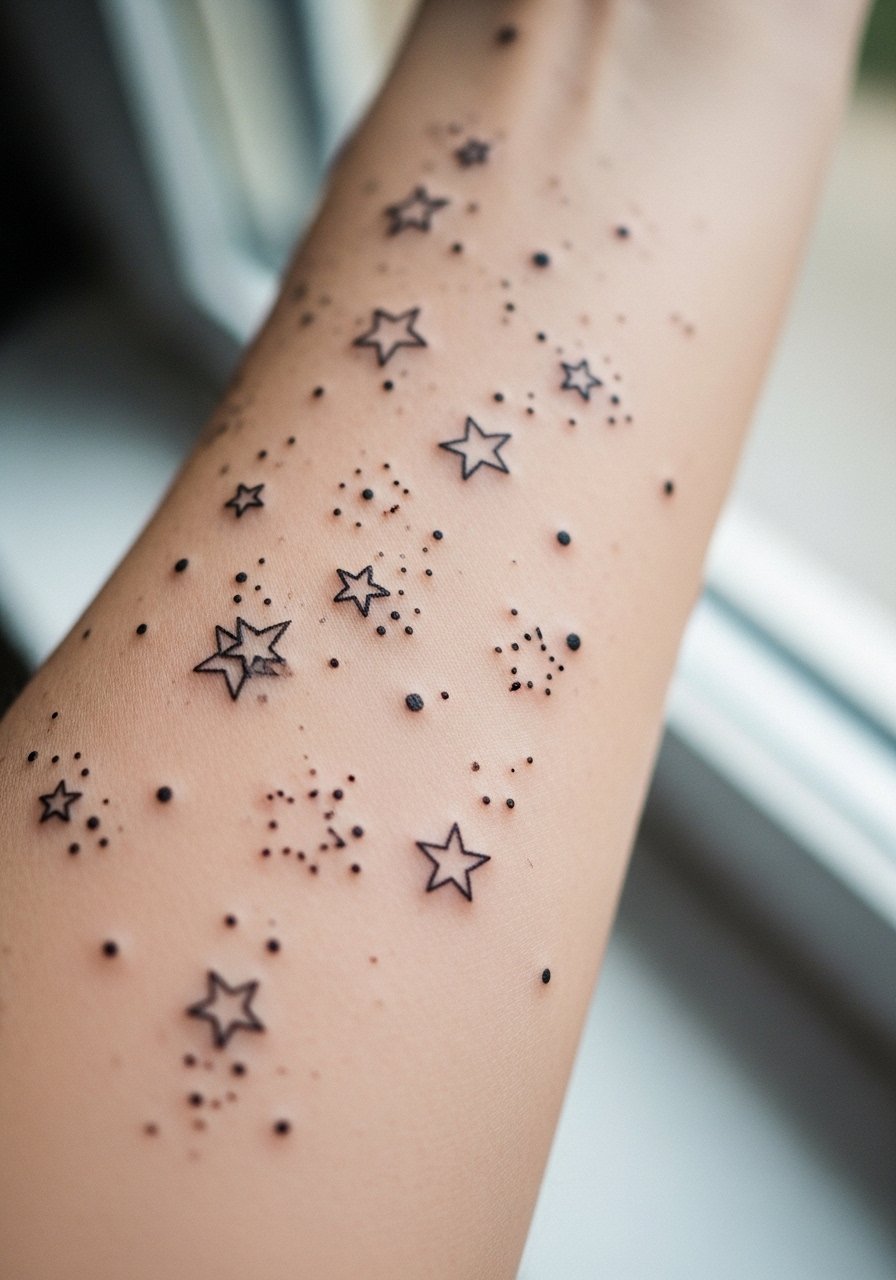
Micro symbols like this are trending and work well as a row or scattered cluster. Ask for deliberate spacing and tiny anchor dots to keep the negative space crisp. Inner forearm sensitivity is moderate and sessions are quick. A common regret is asking for too many stars in too small a space. Pair with a thin chain bracelet on the opposite wrist so the cluster feels intentional.
17. Micro-Realism Insect on Upper Arm

Tiny realistic animals can look striking when scaled to the bicep curve. Tell your artist you want contrast in the shell and soft stipple shadow, not heavy saturation. Session is short but demands a steady hand. Common mistake is crowding details that later merge. For appointment wear an off shoulder top so the artist has room to angle the arm.
18. Minimalist Mountain Range on Outer Forearm
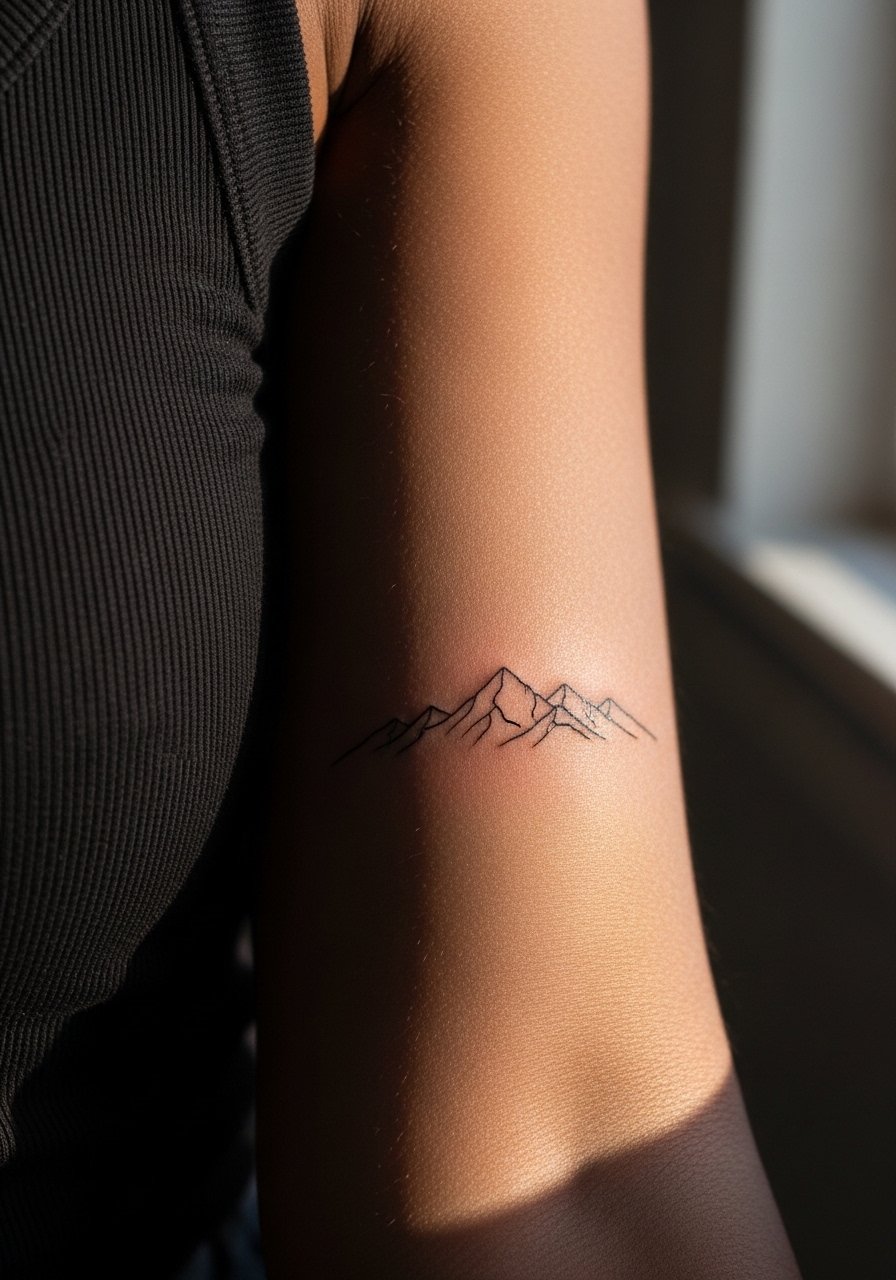
This linear landscape looks modern and ages well because it keeps negative space. Ask for slightly tapered line endings so the peaks hold when resting dulls a little. Low pain and very quick. People sometimes insist on micro hatch shading that fades unevenly. Show-off pairing works with a cropped cardigan or short sleeve tee.
19. Stipple Moon on the Wrist
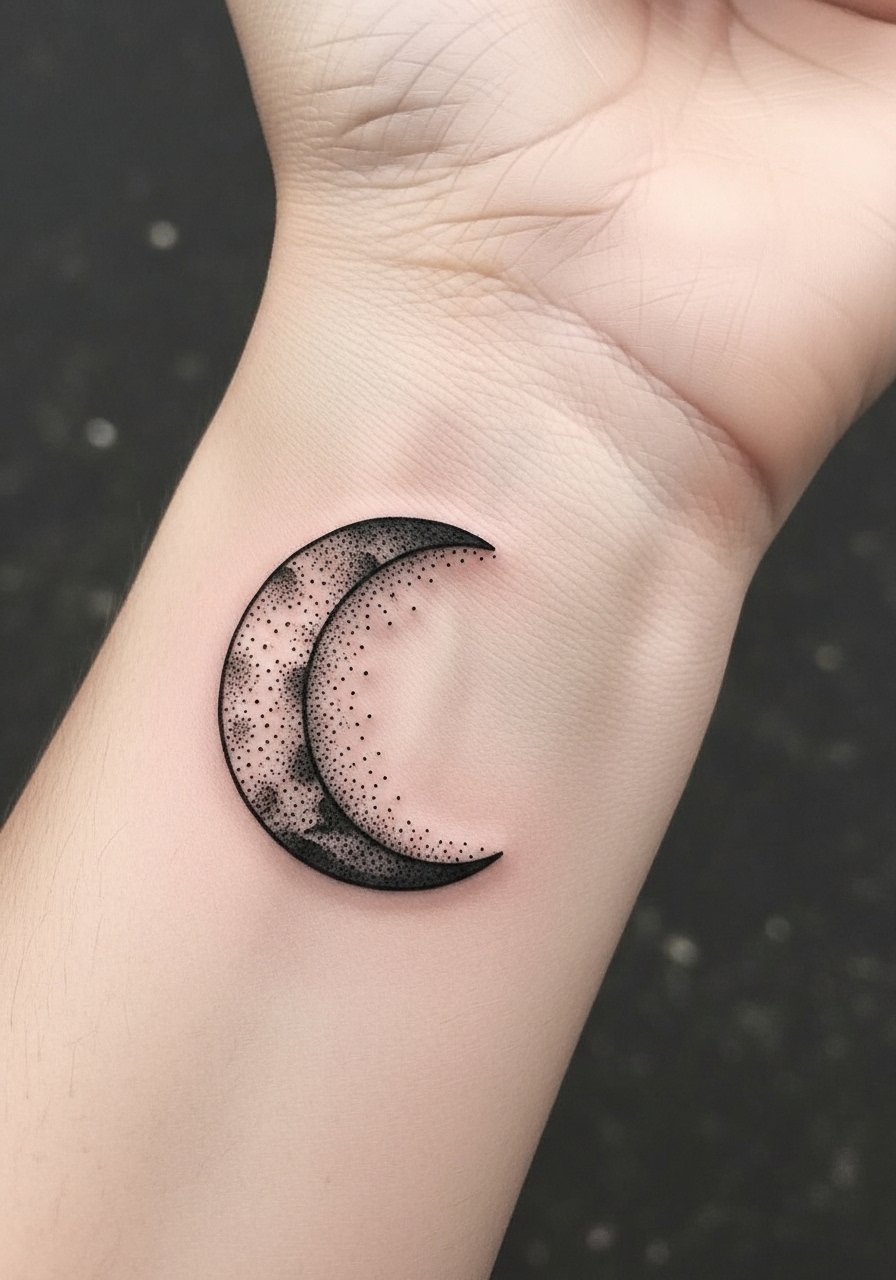
Stipple shading offers depth without solid fills and sits well on the wrist where small details can still read. Make sure the dot density is lower toward edges to avoid muddying. Session is short but precise. A common error is requesting too tight a stipple field that merges after healing. This pairs simply with stacked bangles for contrast.
20. Minimalist Anchor Near the Elbow
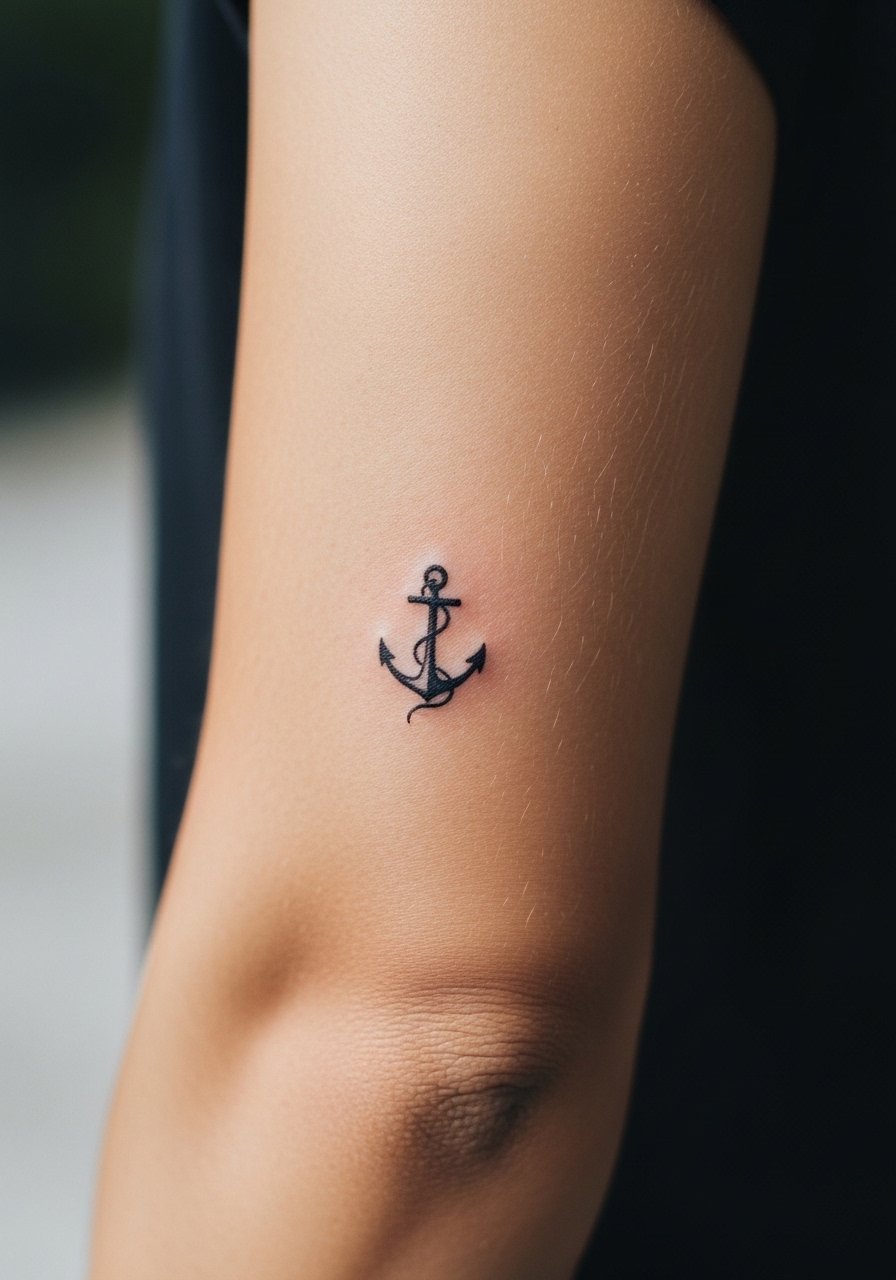
Placing motifs near but not on the joint gives the symbol permanence without the flex-related blurring. Ask the artist to sit the anchor just off the crease so motion does not compress the linework. Expect higher pain if closer to the actual bend. Avoid micro cross-hatching inside the anchor which will soften quickly. For the session wear a short-sleeve tee that can be rolled up.
21. Tiny Coordinates on Inner Wrist

Coordinates feel personal and read clean when the font is bold enough to survive years of hand washing. Ask for a slightly heavier serif and test the exact numbers on skin before committing. The wrist takes friction so plan for touch-up. Avoid ultra-thin type or extreme letter spacing. When revealing, a stackable bangles set on the opposite wrist keeps attention balanced.
22. Geometric Mandala Accent on Upper Arm
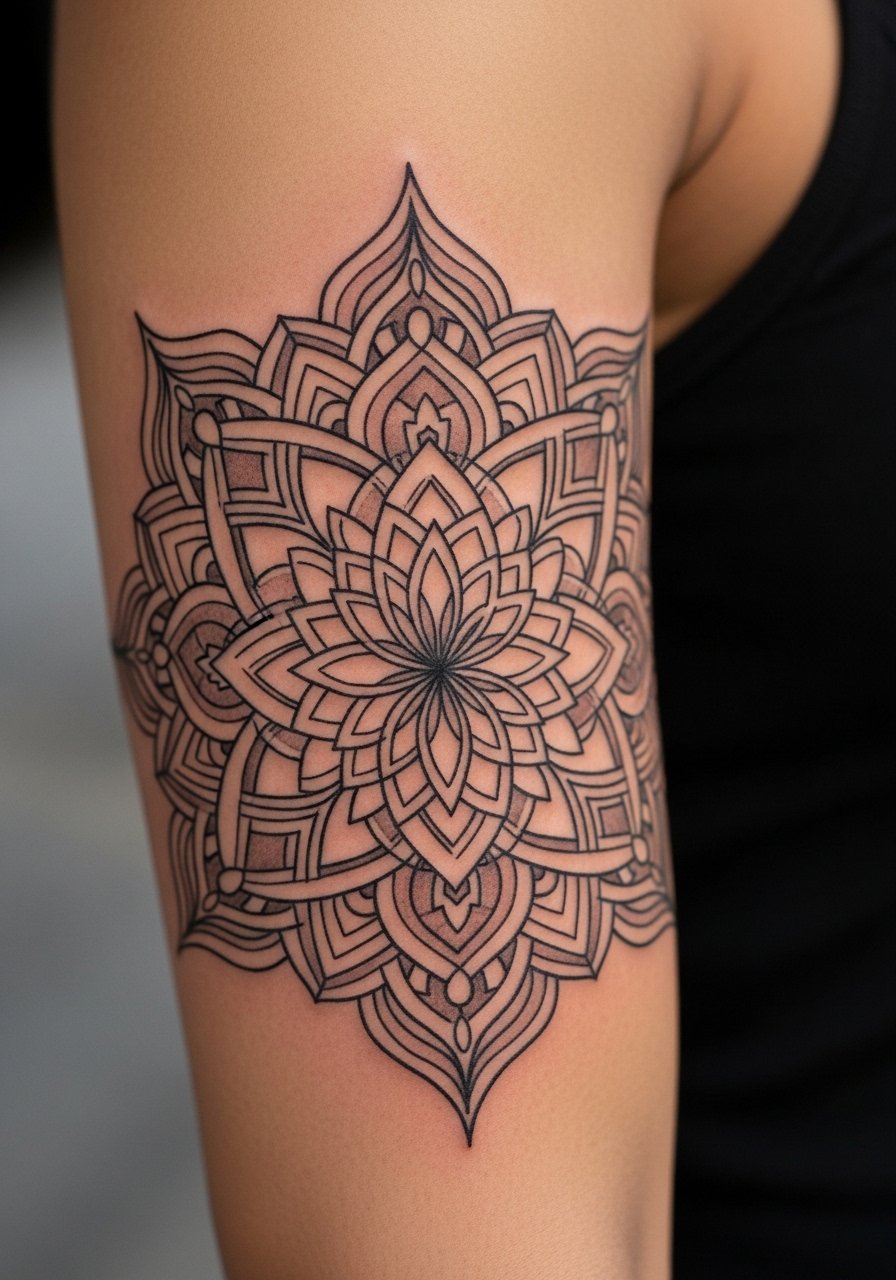
Mandala elements scaled to the arm curve look intentional and avoid the overpacked center problem. Ask for spacing between petals and simple anchors so dense areas do not merge. Sessions can be longer depending on repeat work. The main mistake is going too small. For showing it off try an open-back midi dress or a sleeveless top that frames the arm.
23. Floral Band Around Mid-Arm
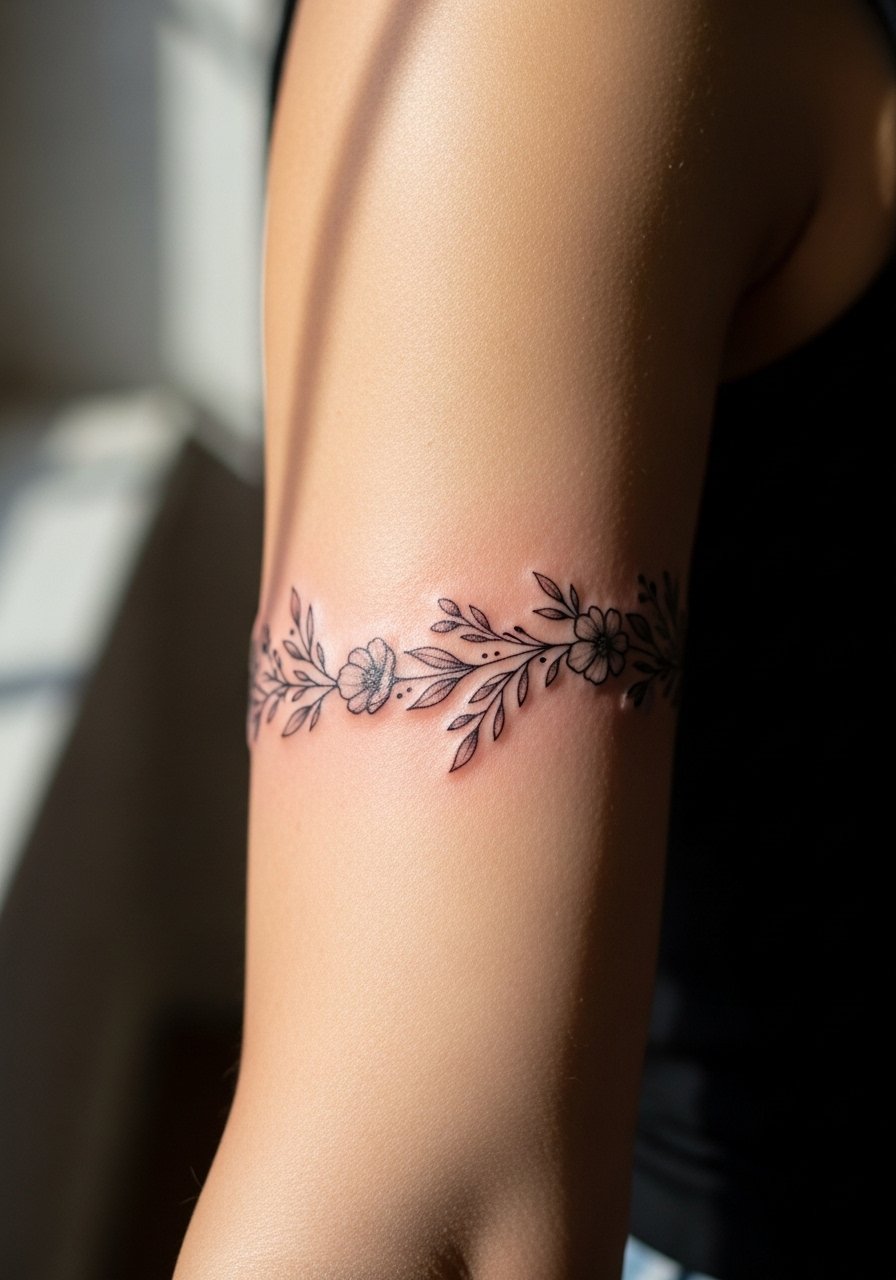
A band creates a cuff effect and is less likely to distort than wrist bands because the mid-arm is more stable. Ask for breathing room between blooms and avoid tiny filler leaves. Sessions are moderate and you may want a touch-up at the one-year mark. A common regret is trying to compress too many elements into one narrow band. For the appointment wear a strapless top or loosened tank strap for unobstructed access.
24. Single-Line Continuous Wave Around Wrist

A continuous one-line wrap reads very modern and is forgiving because it does not depend on micro detail. Ask for a confident, slightly thicker start point so the line retains character as it settles. The wrist is high-friction so expect touch-up planning. Avoid ultra-fine single passes that come out patchy. Pair it with a thin gold chain bracelet when you want a delicate layered look.
25. Curved Mini Script Around the Elbow Crease
This follows the elbow contour without sitting on the joint so readability improves when the arm moves. Ask for wider letter spacing and a test stencil on a bent arm. Pain is noticeable around the hinge but manageable in short bursts. A frequent error is placing text too close to the crease where folds alter letter shapes. For the session wear a loose tank top to let the artist check flex.
26. Minimal Arrow Along the Outer Forearm

An arrow is simple and ages well because of its directional emphasis. Request a slightly beefed-up shaft and tapered feather to avoid the center line disappearing after a few years. Low pain and a single quick session. People often pick an arrow too thin and later want it darker. For showing it off wear a cropped tee or push sleeves up to let the line read.
27. Delicate Vine That Wraps Toward the Wrist

This gives sleeve-like flow without a full commitment and follows natural arm curvature for longevity. Ask for anchor points at bends so the vine keeps form as skin moves. Multiple short sessions may be required for longer wraps. The common mistake is adding too many tiny leaves that later lose shape. For the session a loose button-down shirt you can slide aside keeps fabric off the arm while you get inked.
Frequently Asked Questions
Q: My fine line wrist piece faded fast. What actually helps it last longer?
A: In my experience the three levers are line weight, placement, and sun protection. Slightly thicker fine lines and more spacing buy years. Outer forearm or mid-arm holds detail better than the wrist. Also plan a touch-up at six to twelve months if you want the initial crispness refreshed.
Q: I'm on a waiting list and my guest artist keeps canceling. Any booking hacks?
A: Book via platforms that show cancellation history and keep two local backups so you can move a deposit if needed. I also suggest asking the artist about their guest spot policy during consultation so you know how firm the date is.
Q: How do I pick a dainty style that shows up on darker skin tones?
A: Favor higher contrast. Swap ultra-hairline strokes for slightly bolder fine lines, add dotwork shadows behind lines, or choose solid black elements. Ask to see healed work on similar skin tones in portfolios and test a bold line sample on-site if the artist allows.
Q: Should I use Saniderm or dry heal for my forearm tattoo?
A: Artists split on this. One camp prefers Saniderm for less mess and predictable sealing. The other camp prefers dry healing saying films can trap bacteria. It depends on your skin type and your artist's aftercare routine. Ask them which method they use and why, and follow their timeline.
Q: Does fine line really fade faster than bold blackwork?
A: From what I've seen, fine line tends to soften sooner because there is less pigment mass, while bold blackwork holds contrast longer. That trade-off is why I recommend slightly heavier fine lines and planned touch-ups when longevity matters.
Q: What should I wear to a session for an upper arm or shoulder piece?
A: Wear clothing that exposes the area without rubbing fresh ink. For shoulders bring a halter neck top or racerback so the artist has clean access and fabric stays clear of the site.
