
Fine line Junji Ito pieces look like postcards from a nightmare, bright ink that refuses to read cute. Color exaggerates the surreal, makes the eyes and teeth pop, and also makes aging and touch-ups obvious sooner than neutral blackwork. If you want creepy that still reads as intentional in five years, these ideas pair color choices, placement, and consultation notes so the design keeps its chill without going mushy. First up is a small forearm study.
1. Minimized Tomie Portrait on Outer Forearm
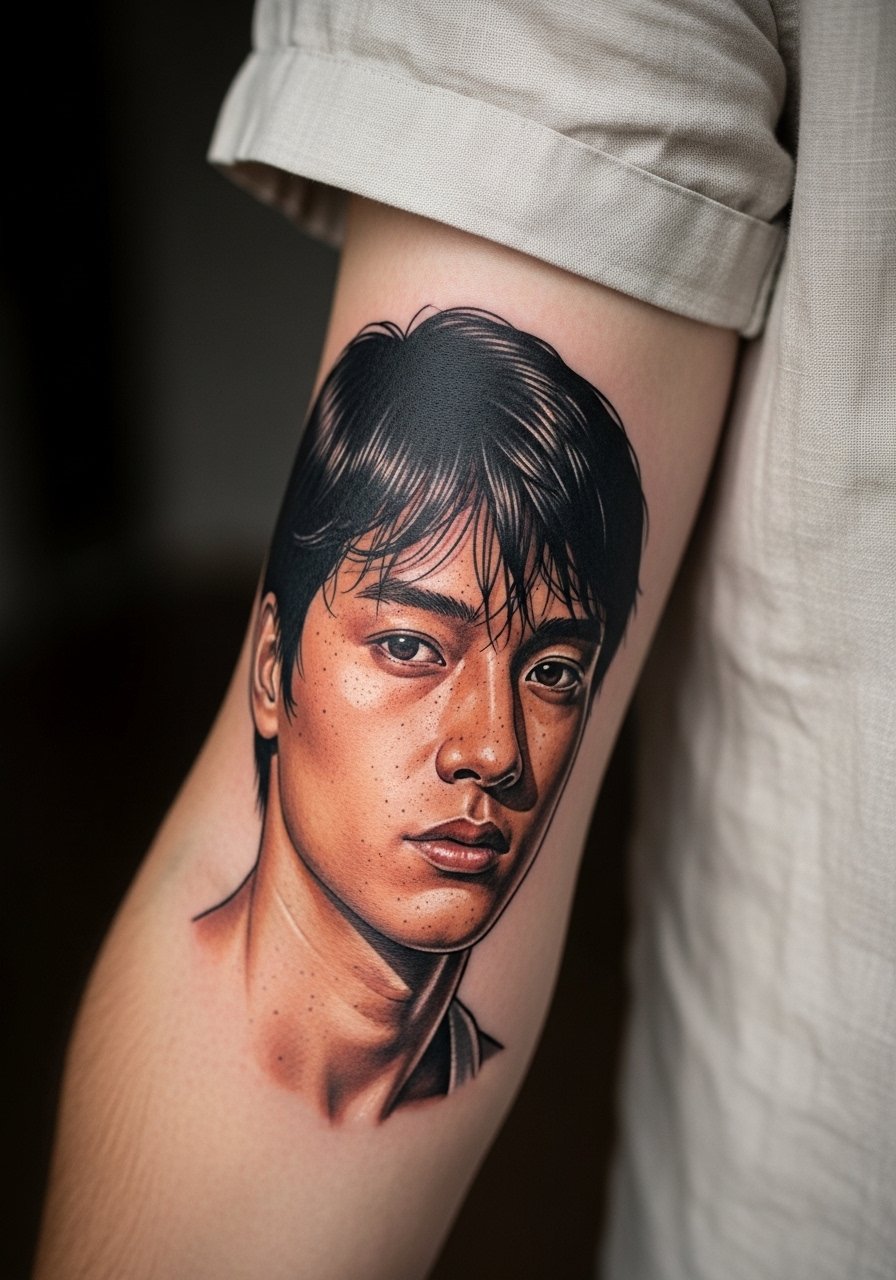
Personal observation lead: I've seen this scaled down for people who want Ito faces without a whole sleeve, and the forearm keeps the motion readable across time. Tell your artist to use slightly heavier linework on contours and to space pupils a touch wider. Common mistake is asking for hyper-detail at 1:1 scale, which blurs into mush at year three. Expect a moderate session, a five to seven pain note depending on your tolerance. For showing it off, roll sleeves up with a short-sleeve linen shirt so the portrait sits in clean negative space.
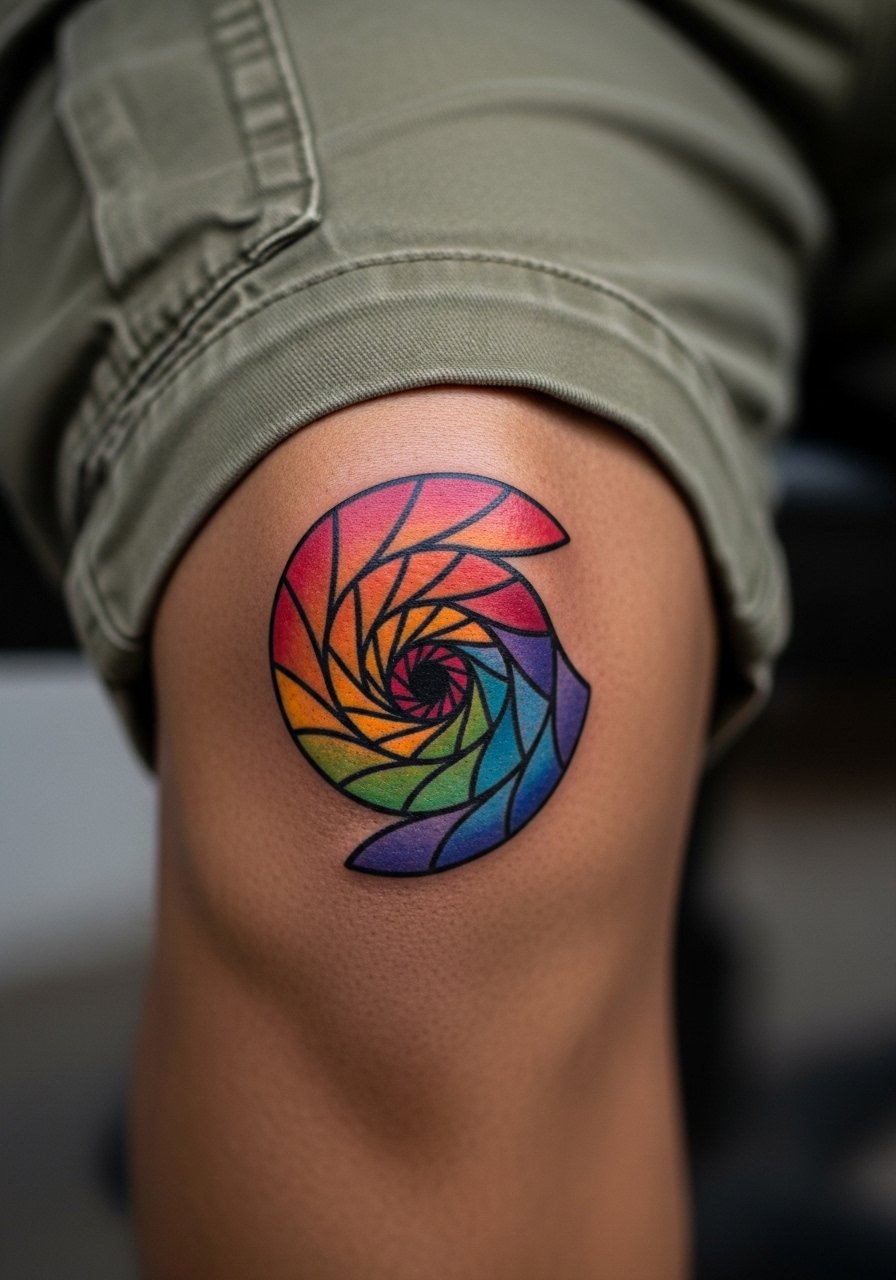
2. Spiraling Eyeballs Sleeve Accent on Upper Arm
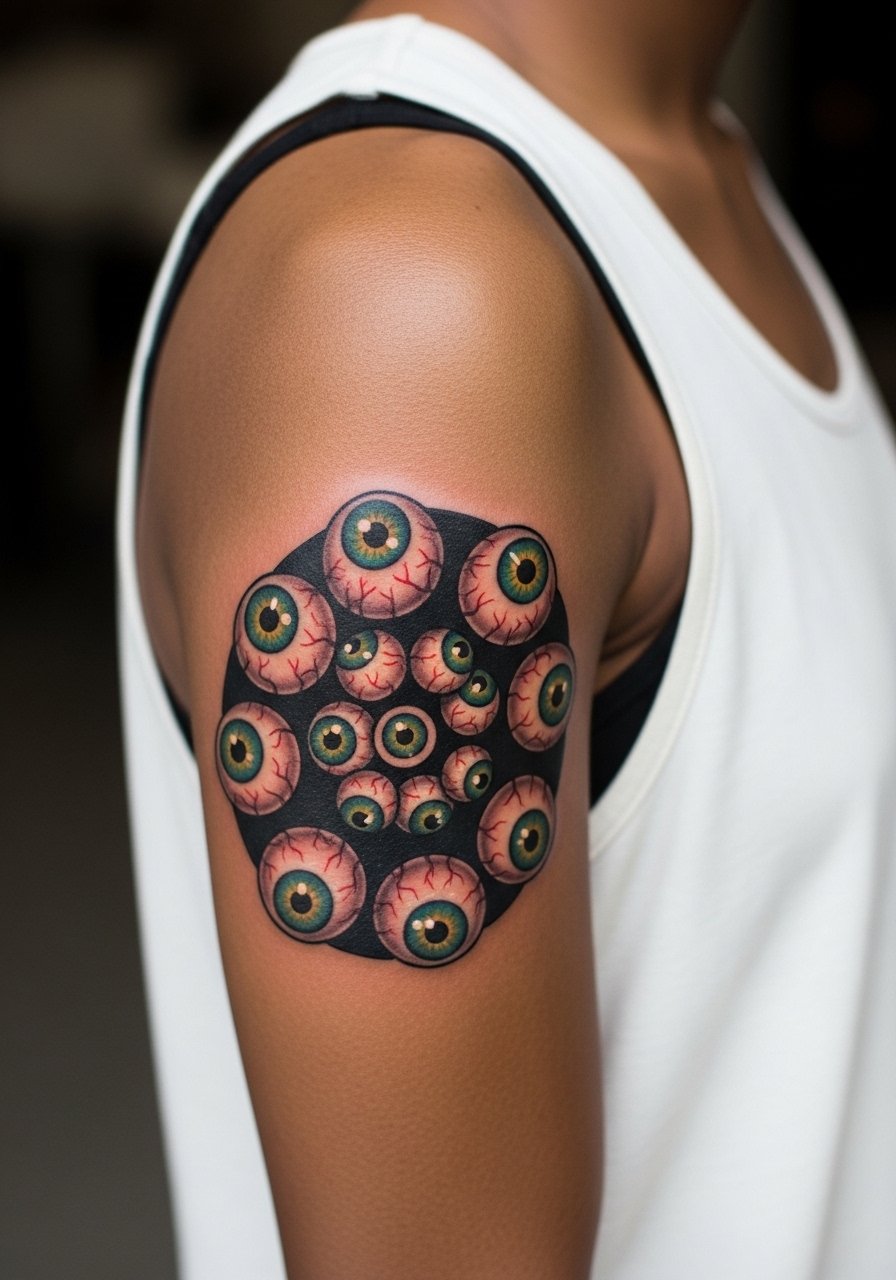
Pain warning lead: the upper arm is forgiving and sessions are comfortable enough to build color density without too many breaks. Ask for saturated teals and magentas that contrast but do not rely on white highlights alone. A common aging issue is overuse of white ink to sell shine. Instead, ask for layered color and stipple shading to keep the glow without white that ghosts later. Session time is usually two to three hours for a half-cluster. Pair this with a loose tank top on the day so the artist has clear access.
3. Creepy Spiral Pocket on Inner Wrist
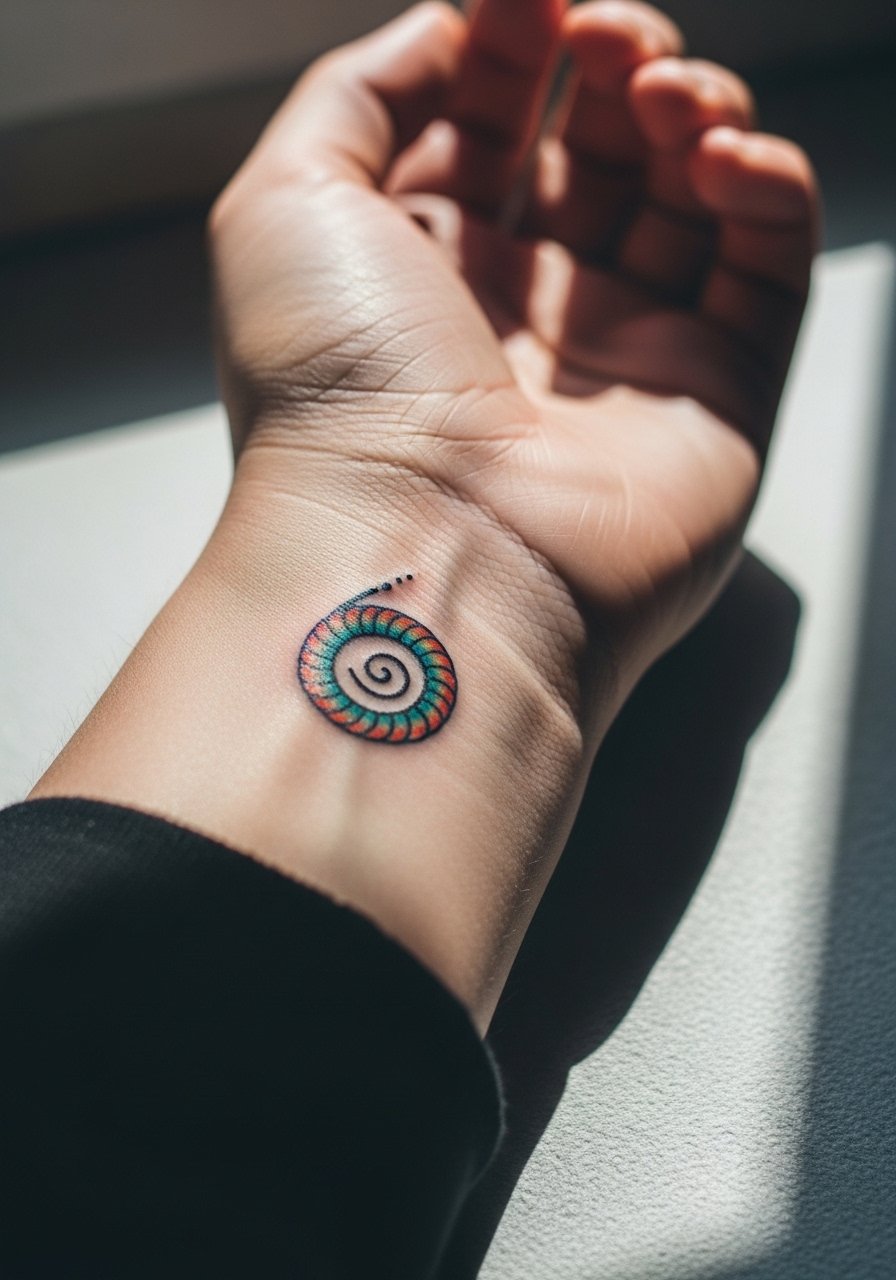
Aging lead: wrist skin rubs against clothing and watches so dense color fades fastest here. Keep the design small but bold in core shapes so the spiral still reads after frequent washing. The biggest mistake I see is too-fine detail at the wrist. Expect sharp contrast at six months, then softening by year two. Wear a thin chain or minimalist bracelet to frame the piece, like a thin chain bracelet that does not sit directly on the spiral.
4. Floating Worms Across Collarbone
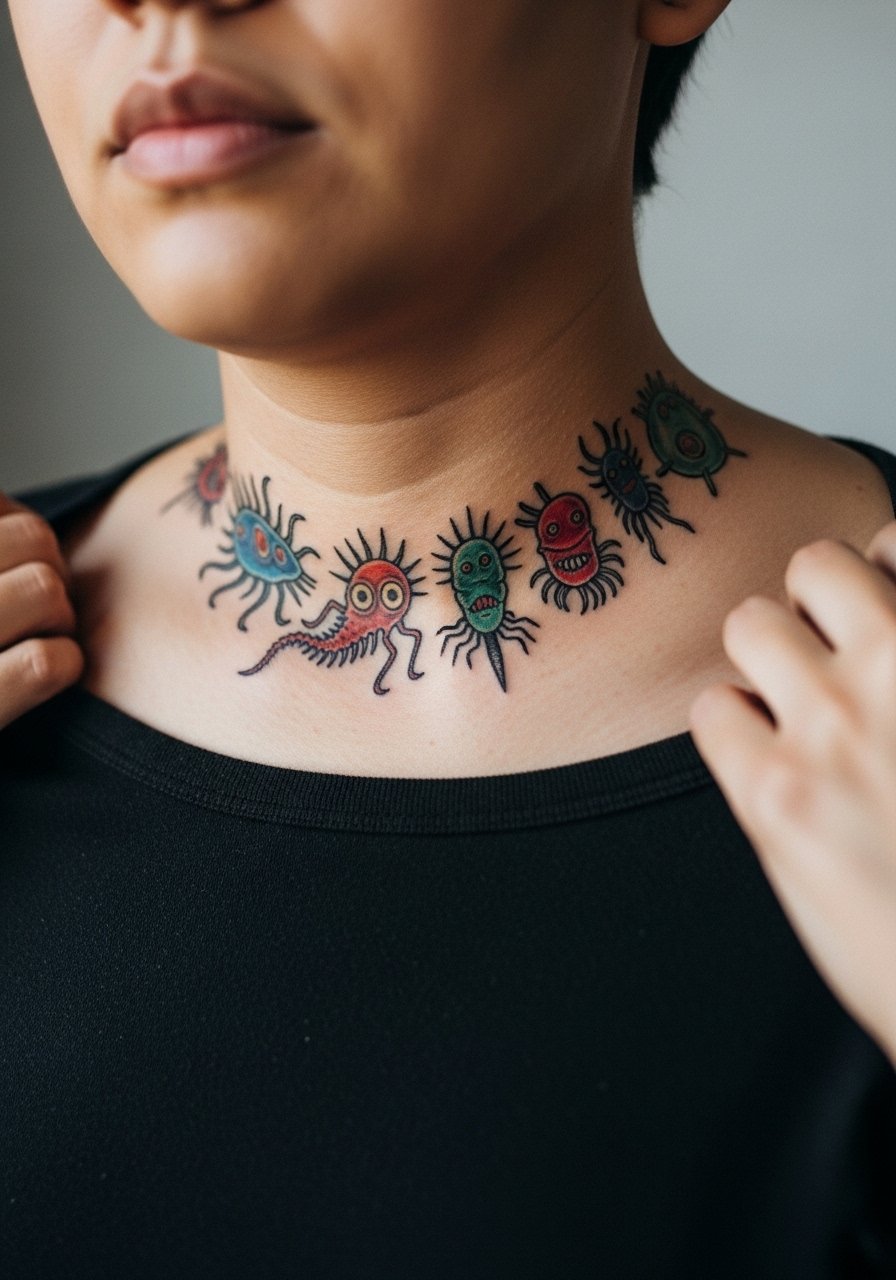
Visual impact lead: collarbone placement reads cinematic because the bone gives the creatures a frame. Tell the artist to keep saturation lower near the bone to avoid ink migration into creases. Pain is moderate and sessions are punctuated by the bony contour. Mistake to avoid is insisting on full heavy saturation right by the bone. For showing this off, a wide-neck top pulled slightly aside keeps attention on the creatures without revealing more than you want.
5. Worm-Infested Ankle Chain
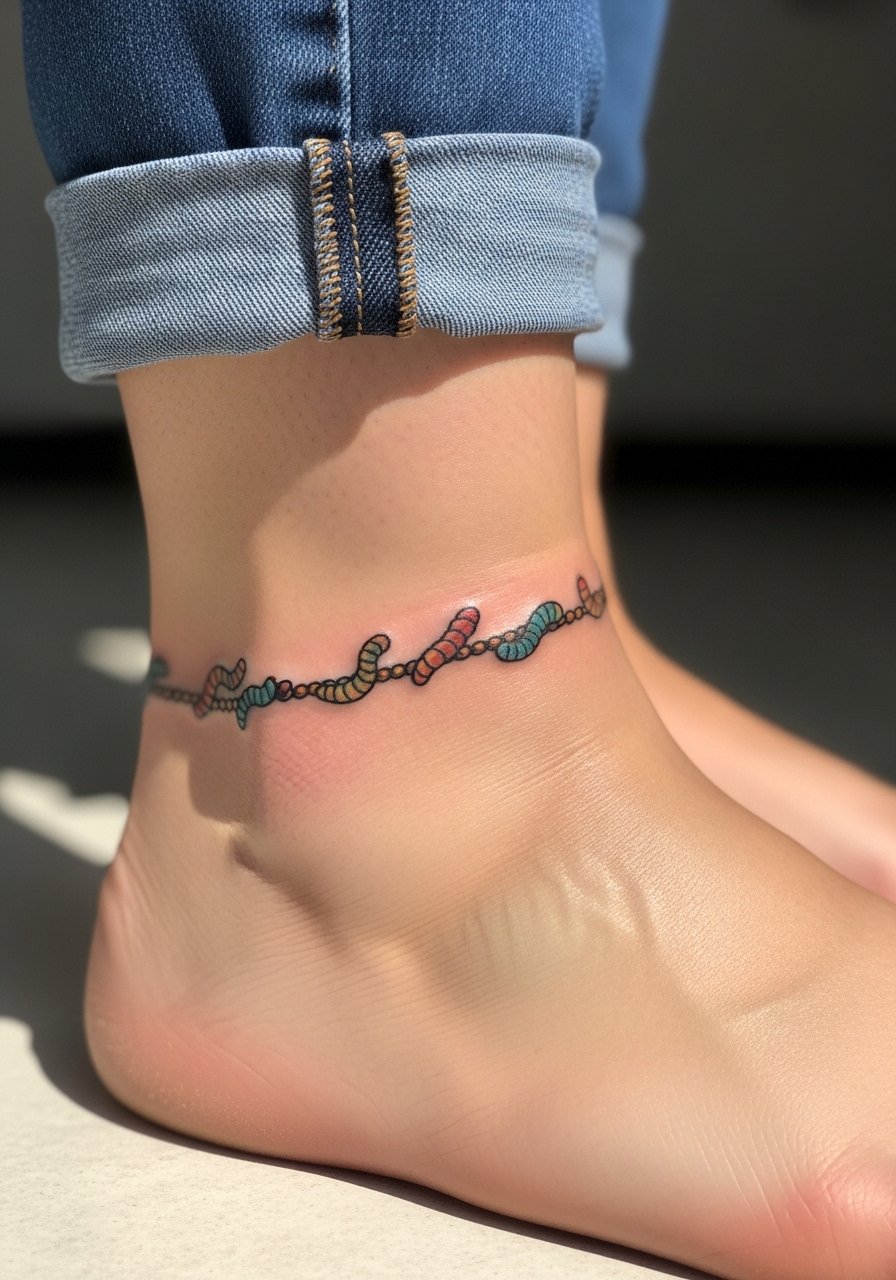
Consultation lead: ankle work needs careful placement so the chain reads continuous when you walk. Discuss how the curve will sit with shoes and socks to avoid the design sitting under friction zones. Pain is higher around bone but sessions are short. Expect touch-up within two to four years if you wear closed shoes a lot. A pair of sandals on show days keeps the link visible without rubbing.
6. Eye-Cluster Sternum Panel
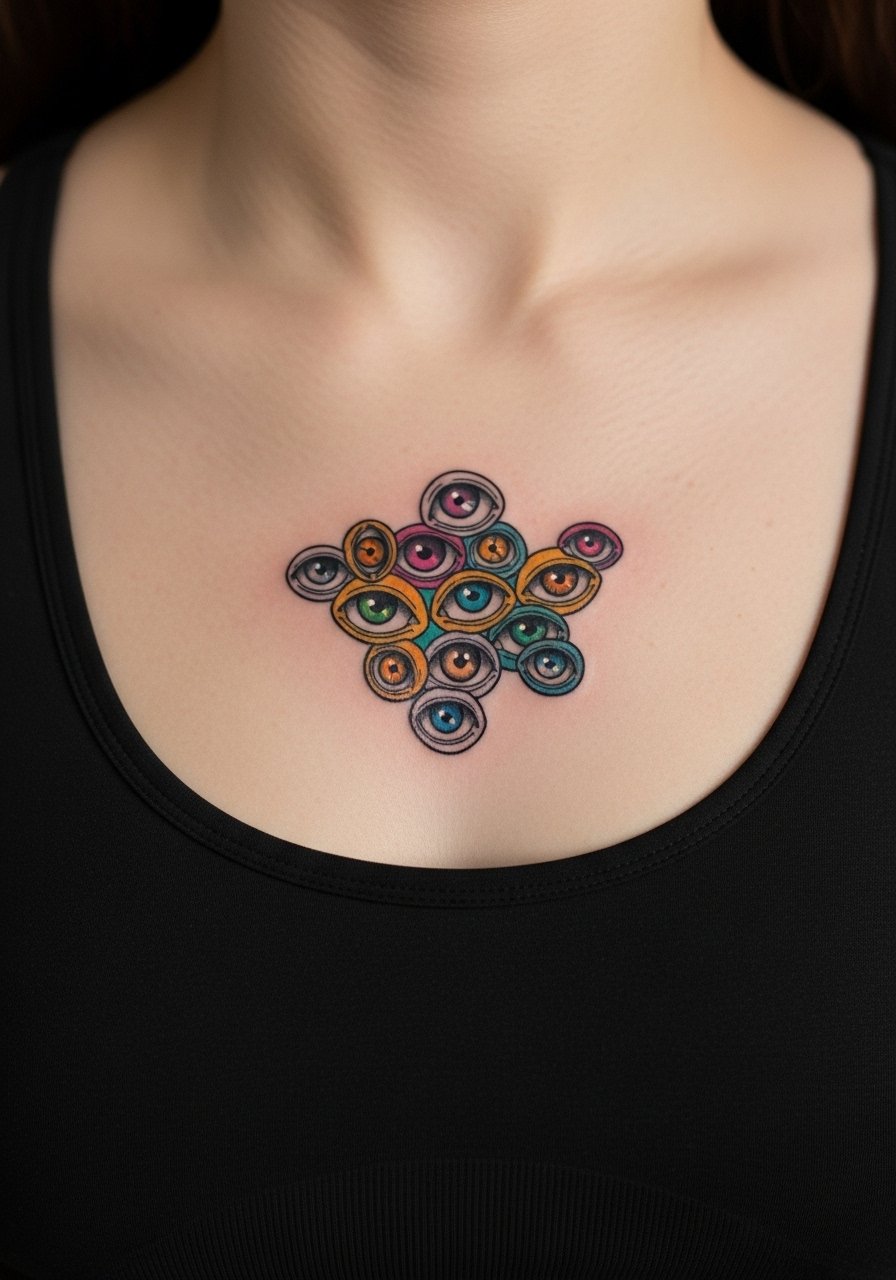
Mistake lead: designers often overload the sternum with dense detail that compresses as skin settles. The sternum stretches and shifts with breathing so ask for slightly more spacing between elements and stable contour lines. This placement is sensitive for pain and for visibility in daily life. Session feels intense in short bursts. For session wear bring a zip-up hoodie or a fitted sports bra you can lift without disrobing. Note that artists split on fine line here. One camp says the motion and skin texture blur lines fast. The other camp says with controlled depth and spacing it can hold fine. Ask your artist which side they favor.
Studio Day Picks
The wrist, ankle, and sternum pieces above each ask for different prep, so a small kit tailored to access and friction zones makes the session and first week easier.
-
Stencil transfer paper kit. Lets you preview the line placement on skin, which matters for small wrist and ankle designs discussed above.
-
Topical numbing cream. Applied as directed before the session it eases sternum sensitivity without masking important feedback to the artist.
-
Thin protective film roll. Helps keep ankle and wrist tattoos clean during the first few days of movement and washing.
-
Fragrance-free gentle body wash. Gentle cleansing reduces irritation for small, detailed color work while healing.
-
Aquaphor healing ointment. Thin layers in the first 48 hours help retain moisture for fine color without over-occluding the skin.
7. Teeth-Grid Inner Bicep Strip
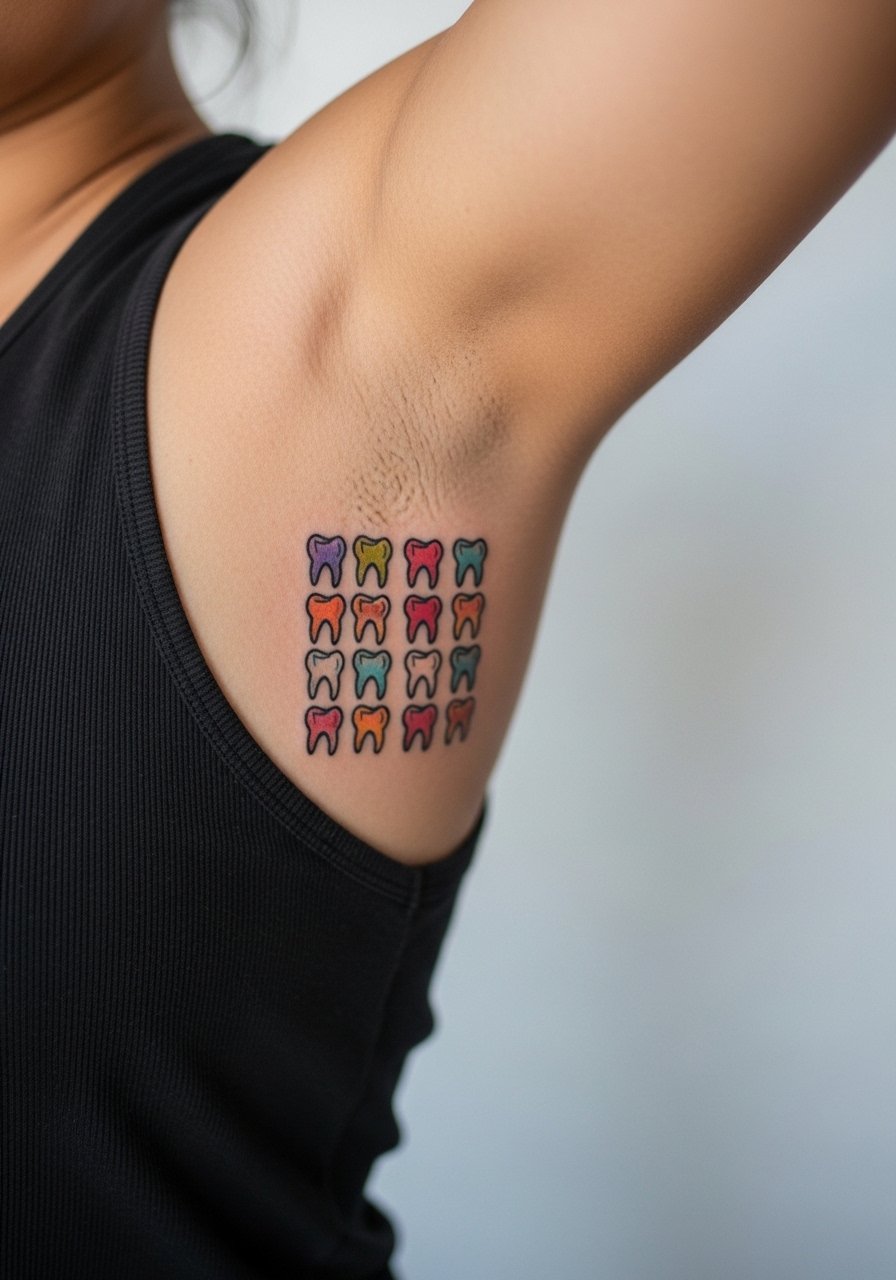
Personal observation lead: inner bicep sits oddly between visible and private, which makes teeth motifs feel like a secret. Ask for slightly bolder contour lines and stipple shading for the color fills so edges read after healing. The armpit-adjacent skin moves a lot so expect slower saturation and a likely touch-up at year two. Wear a tank top to the session so the artist can angle access without stretching you out unnaturally.
8. Coral-Gore Ribcage Spread
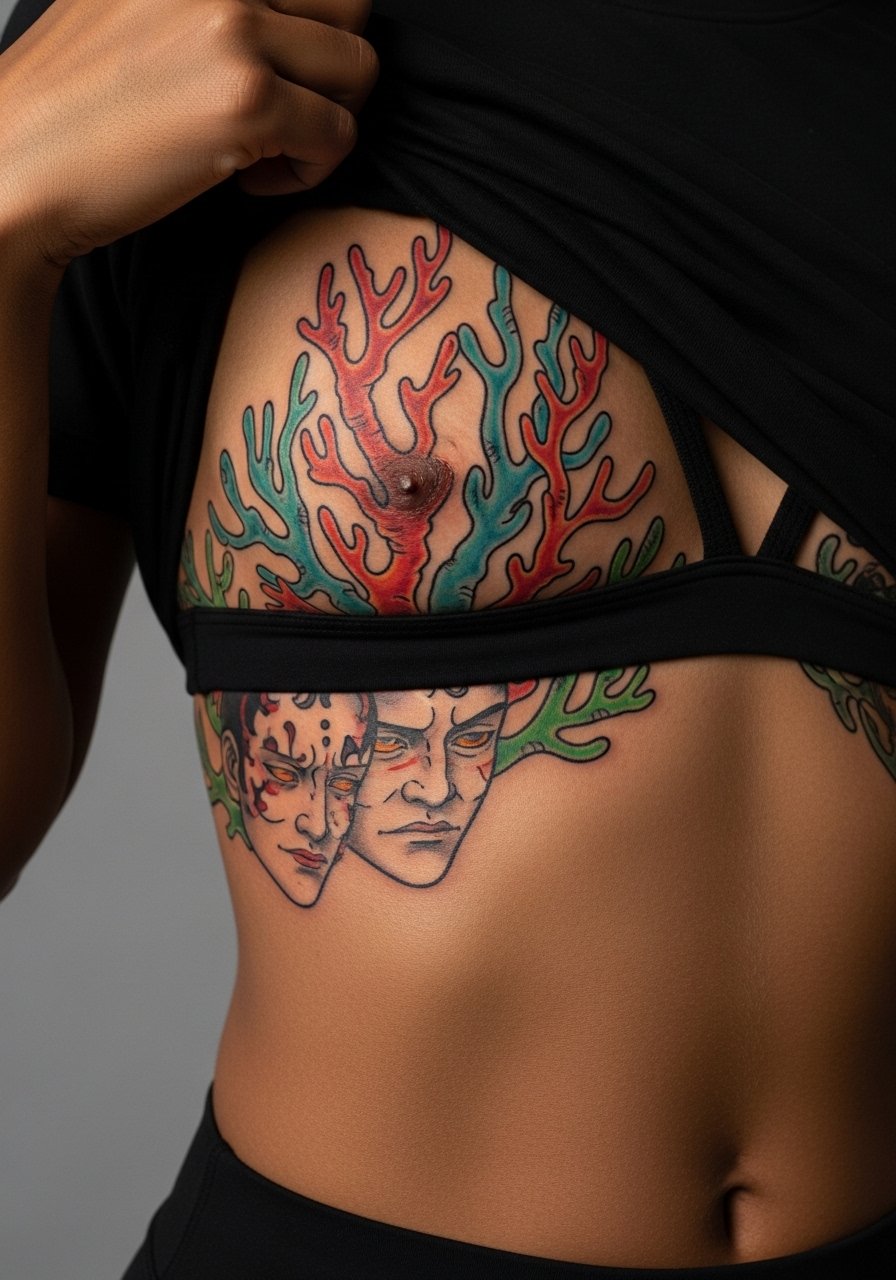
Pain warning lead: ribs clock high on pain scales for a reason, and large saturated color there needs patience. The common mistake is tiny line density near the curve of the ribs. Make the composition breathe, and accept longer sessions or multiple visits. Expect significant fading in areas where clothing rubs. Artists also disagree about fine line on ribs. One group says the stretch blurs lines quickly. The other group says with spacing and the right depth it can settle well. Clarify this with the artist before booking.
9. Watery Mouth on Thigh Panel
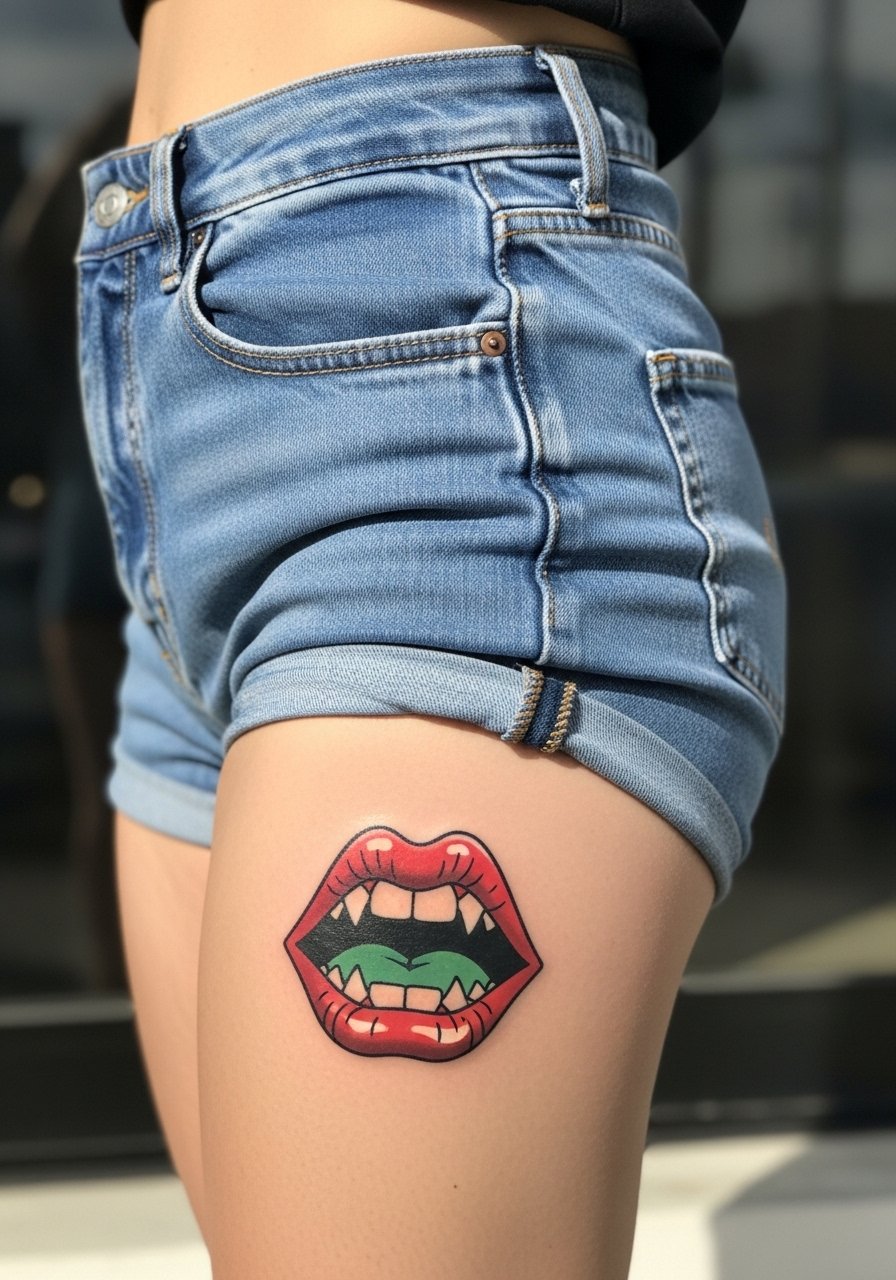
Consultation lead: the thigh has forgiving flesh for saturation and color transitions, which suits mouths and dripping forms. A common mistake is over-detail at small scale. This placement reads best with layered color and stipple shading rather than flat fills. Sessions are comfortable and allow longer runs. Wear high-waisted shorts for the appointment so the artist can adjust the reveal without you changing.
10. TV-Head Ghost on Calf
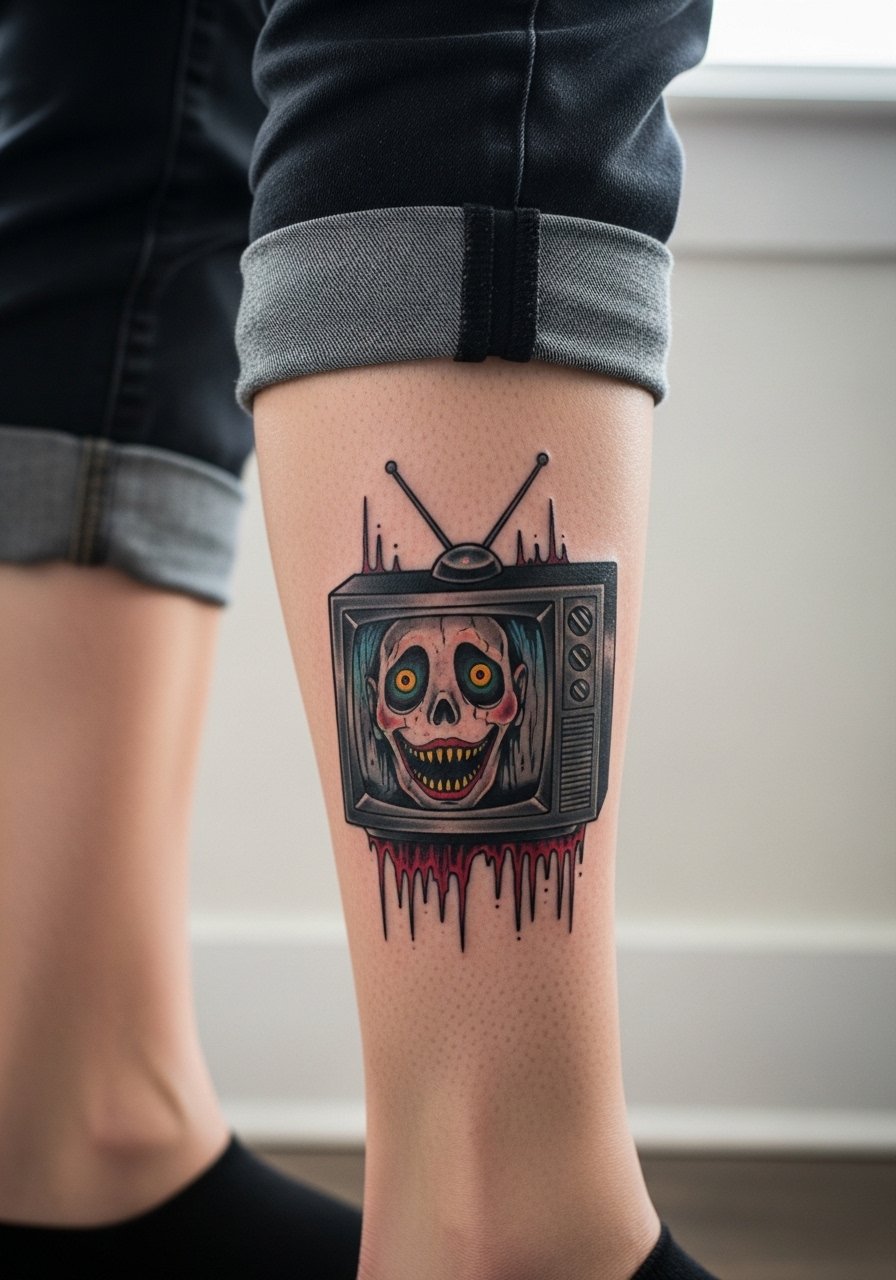
Visual impact lead: the vertical plane of the calf suits a single figure with long negative space. Tell your artist to balance saturated color on the screen area with softer washes on the ghost body. A common healing issue is color pooling where the skin is thicker, so expect a small touch-up if you want flat saturation. Session feels moderate, you may stand for short stretches. Pair with rolled-up pants or a casual cropped pant when you want to show it.
11. Worm-Filled Ear Lobe Accent
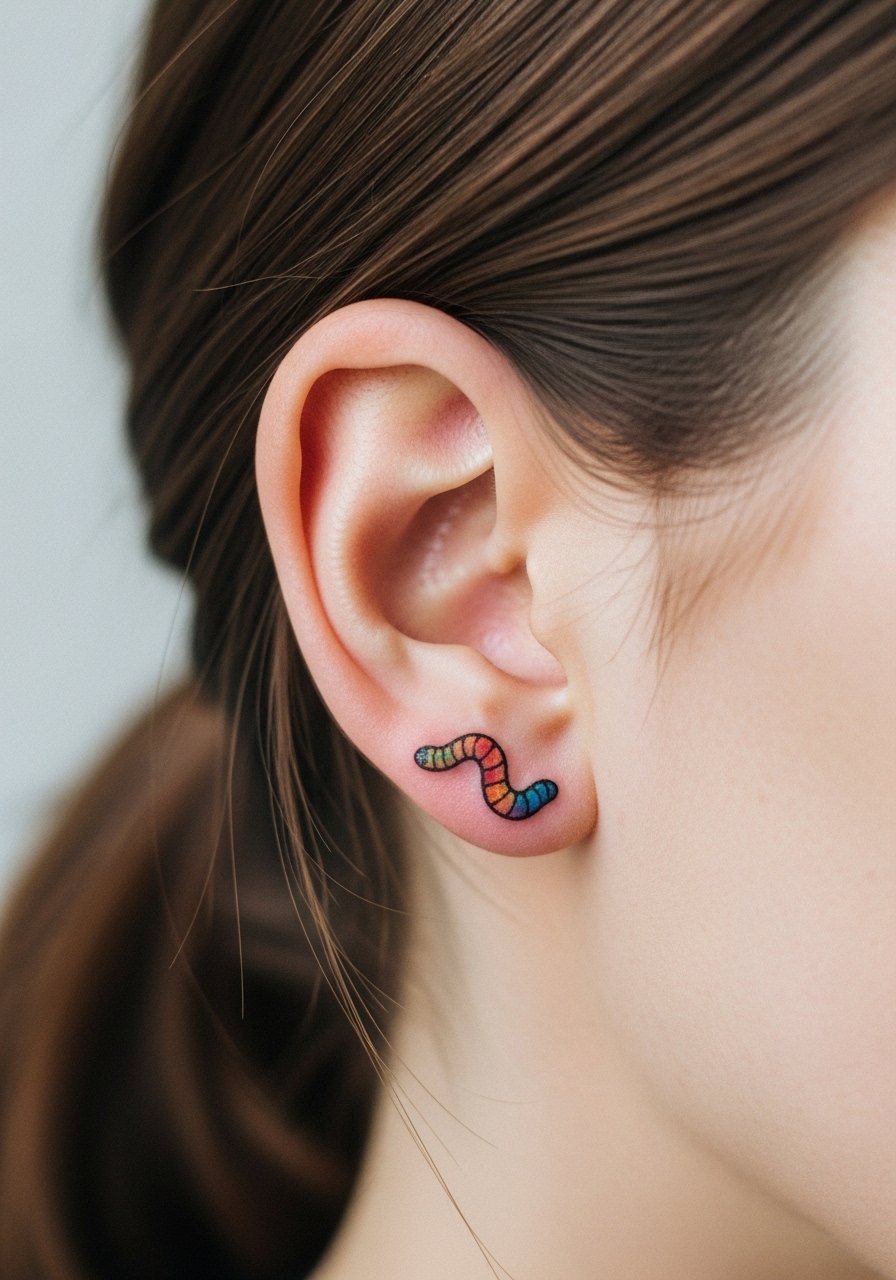
Mistake lead: ear and lobe skin is delicate and prone to blowout if the needle goes too deep. Ask for micro-linework with minimal saturation. The session is short but precise. For healing, avoid heavy earrings rubbing the piece. A simple pair of studs during reveal keeps the area calm. Consider a minimal stud earring set for first wear.
12. Spiral-Eyed Back-of-Hand Accent
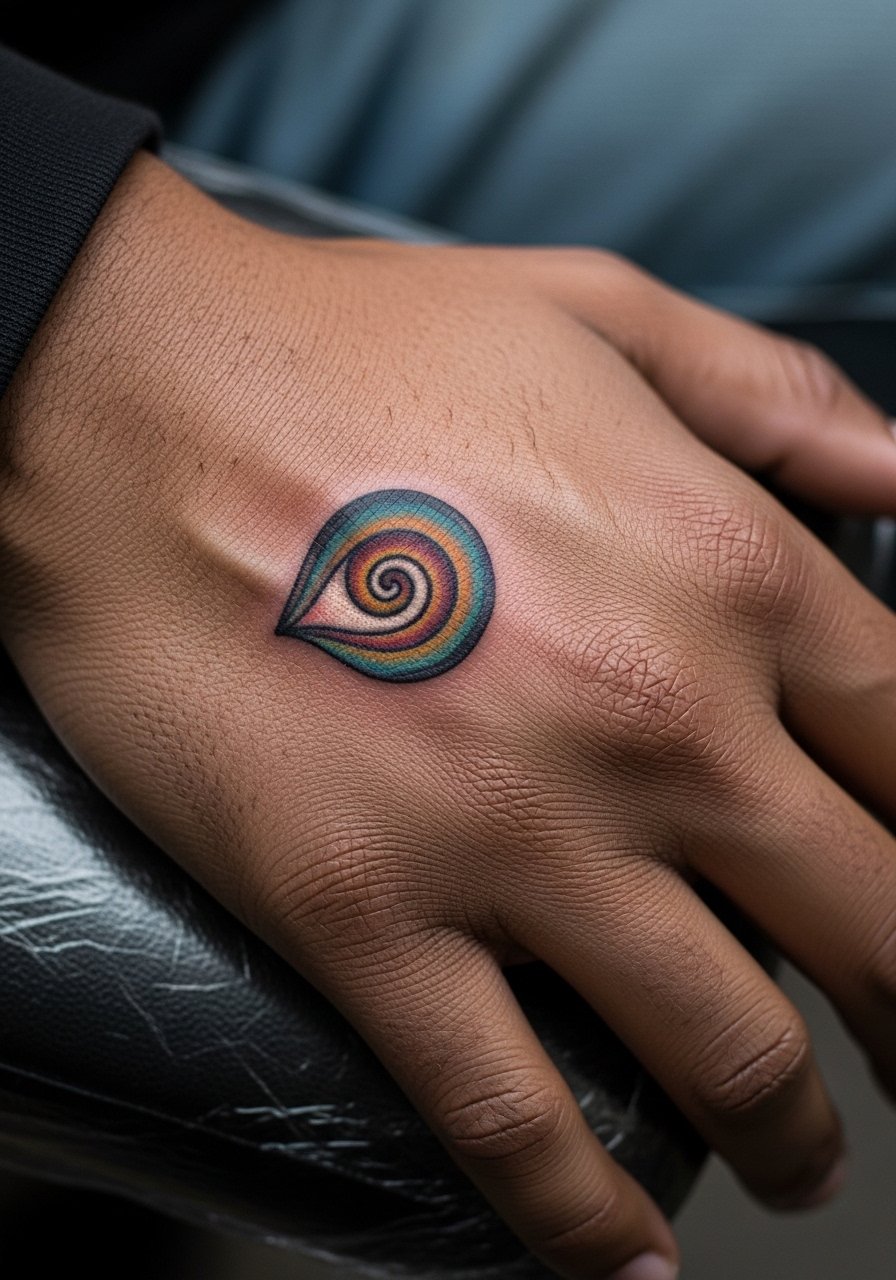
Mistake lead: hand tattoos are high friction and often need early touch-ups. The wrong ask is for tiny detail without bolder anchors. Expect a quick session that still stings more than forearm work. Consider placement on the back of the hand rather than fingers to improve longevity. Wear a thin ring or let the piece breathe before heavy manual work.
13. Creepy Coral Neck Side Accent
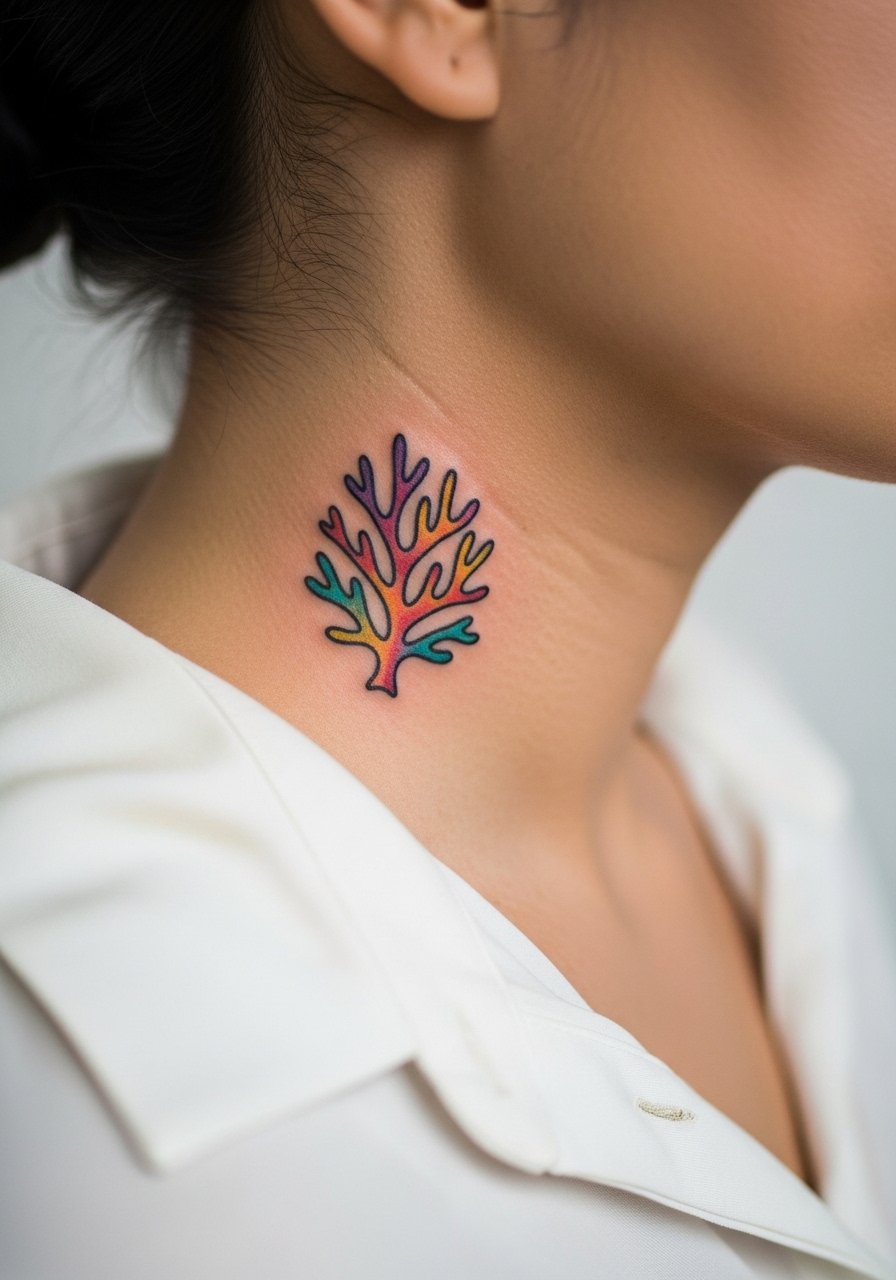
Styling lead: side neck pieces read strongly when paired with open collars or layered chains. Ask for stacked contrast tones in the design so it reads under necklaces. Pain is moderate given thin skin and motion. For showing this off try a delicate chain necklace worn a bit above the tattoo to frame it without covering the ink.
14. Bright Tongue of Wallpaper on Lower Back
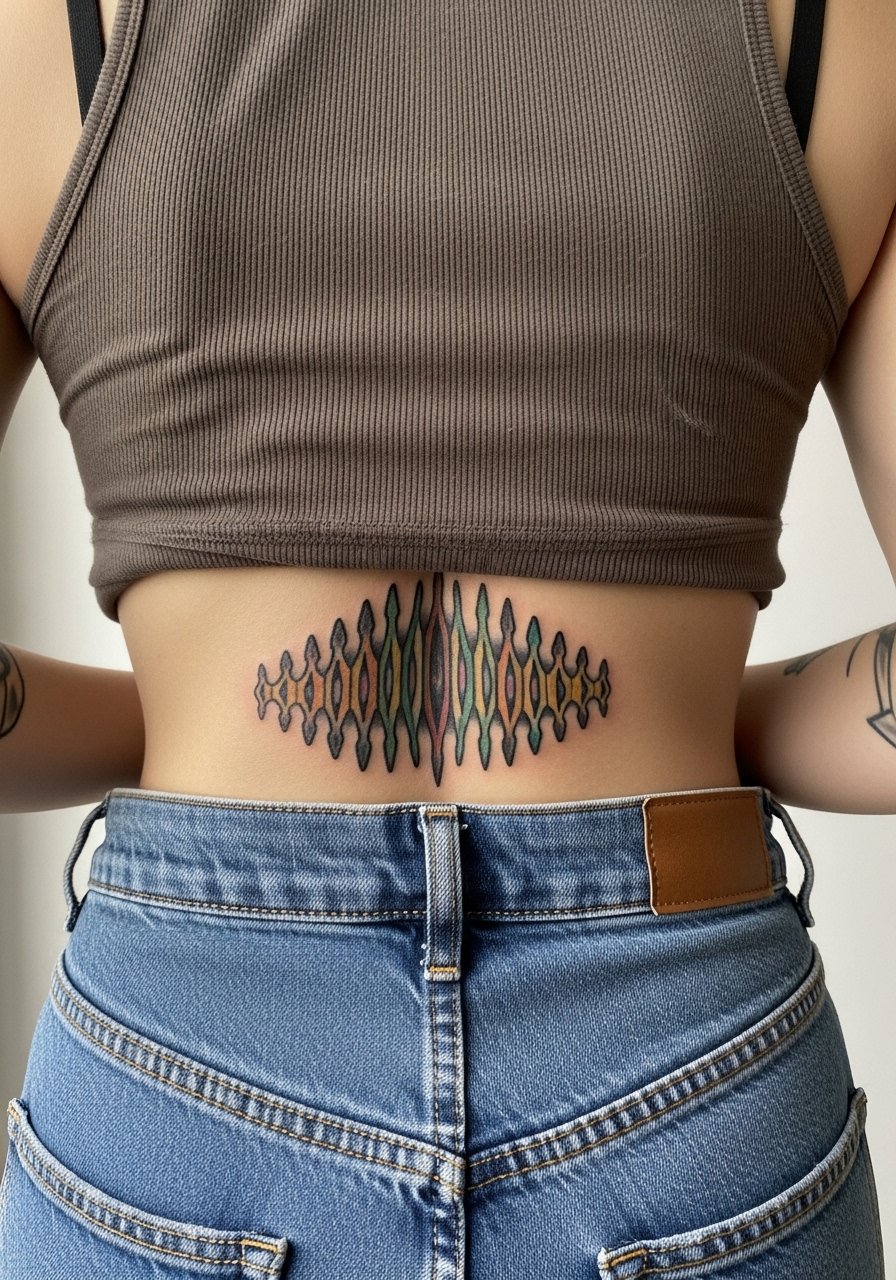
Consultation lead: lower back gives a long canvas, which works well for repeating wallpaper motifs. Discuss how the pattern will sit with movement and waistband lines to avoid distortion. The mistake is compressing too many small elements. Session time can be long depending on width. For session wear bring a tank you can pull up or down easily, like a basic tank top.
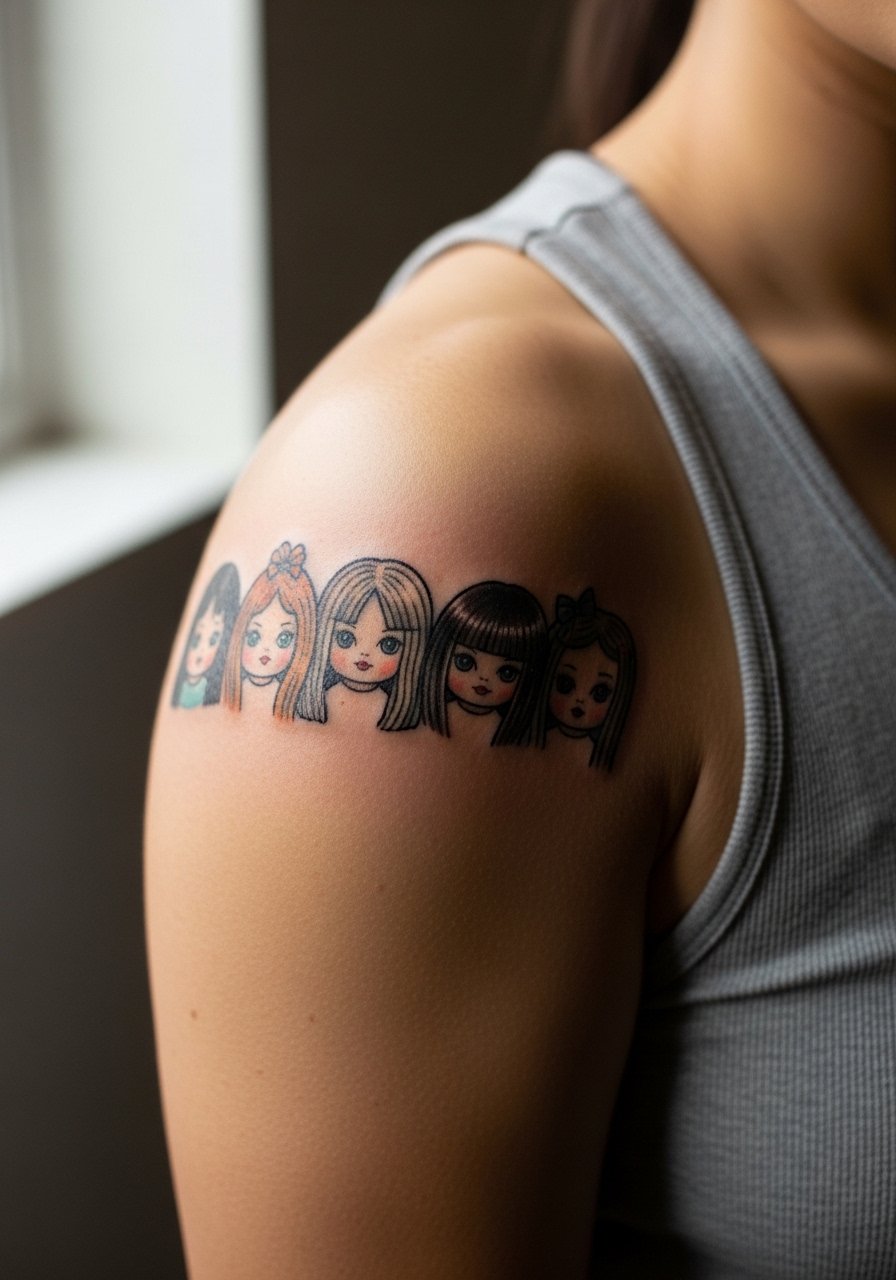
15. Grotesque Doll Collarbone Line
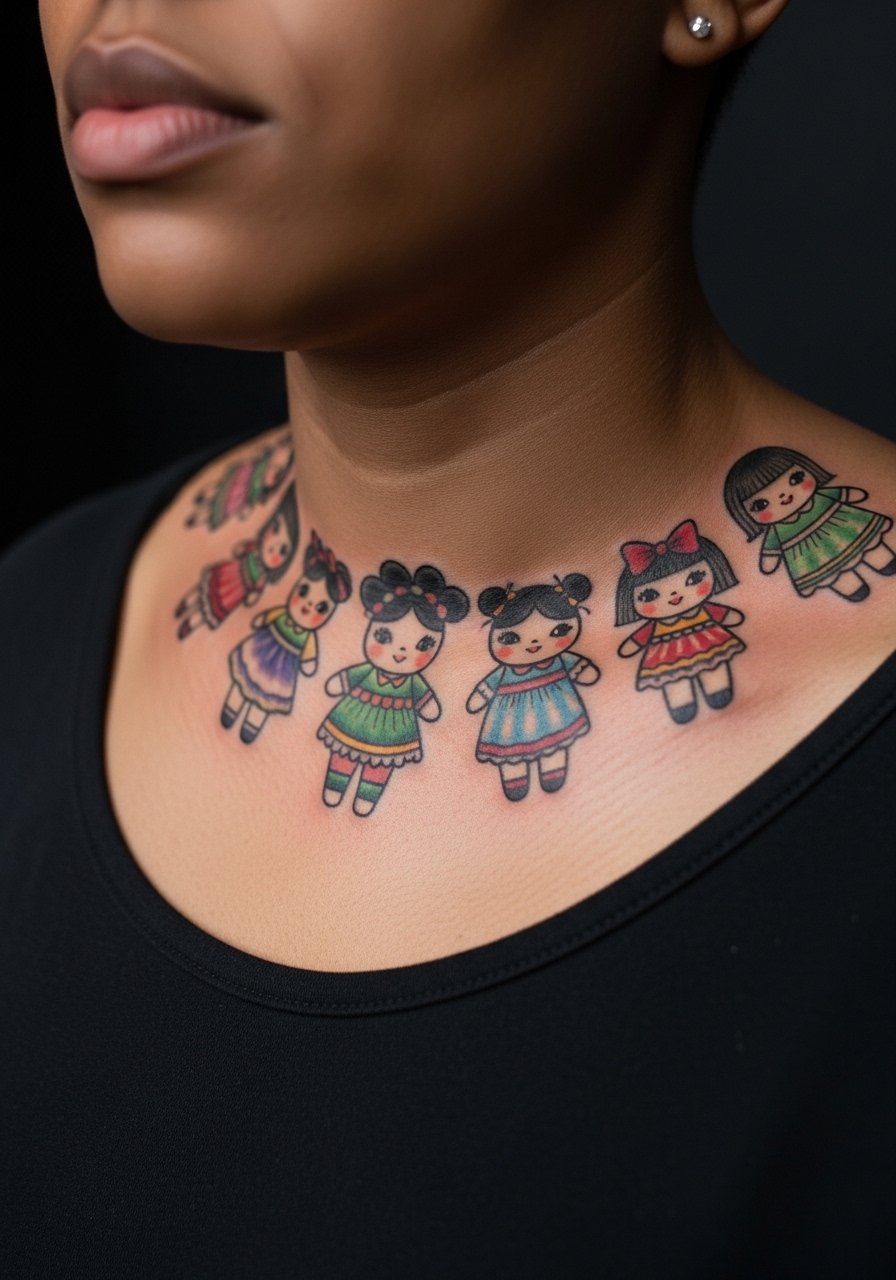
Personal observation lead: collarbone sees a lot of motion and the doll motifs should be spaced so faces keep expression after healing. The common mistake is tiny facial detail that blends. Expect moderate pain and a one to two session plan if you want saturated color. For show-off moments try an open-neck blouse that frames the dolls.
16. Eye-Socket Cluster on Shoulder Blade
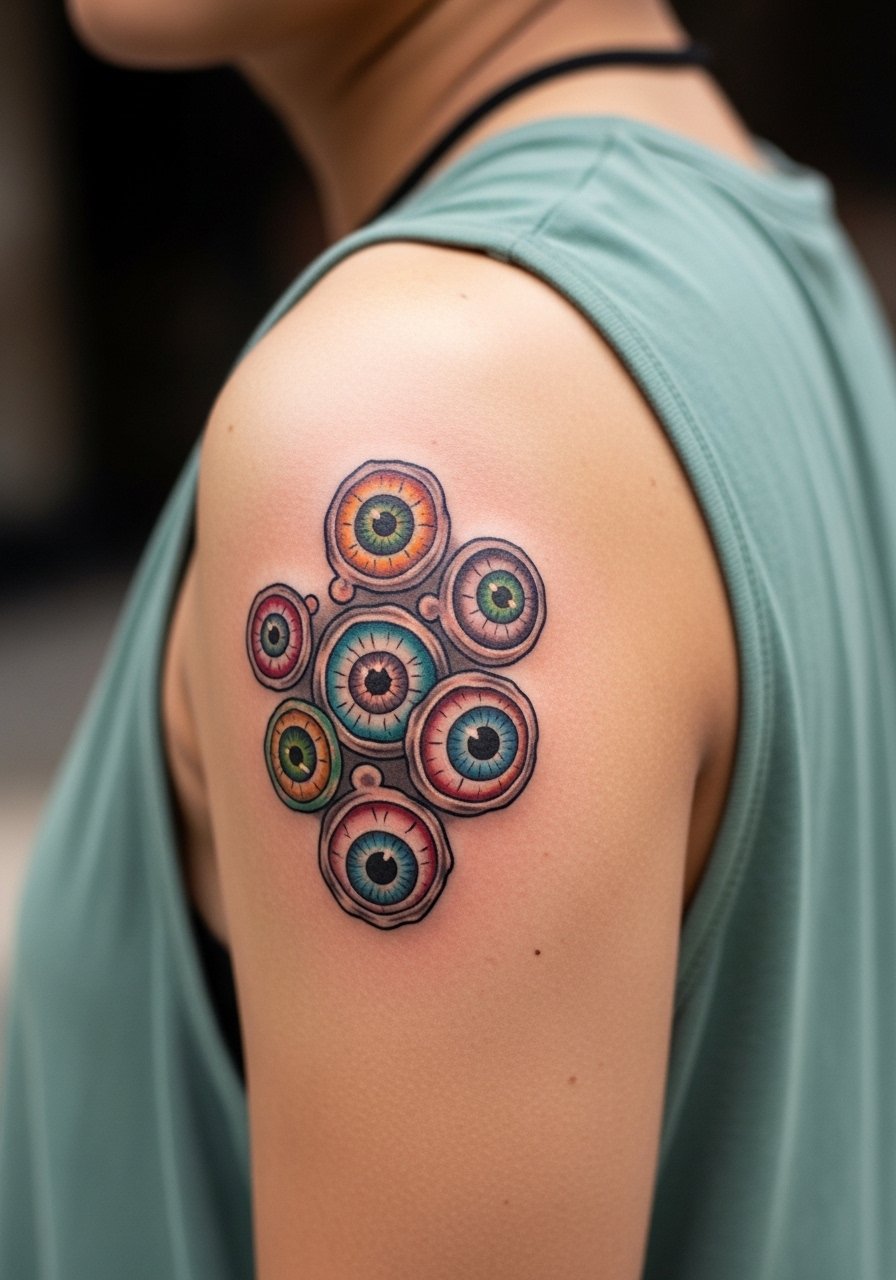
Visual impact lead: shoulder blade is excellent for eye clusters because the plane moves gently, preserving shape. Tell the artist to stagger sizes so the eyes do not merge as they heal. Mistake to avoid is too-tight clustering at the spine edge. Session is comfortable and you can lie forward or on your side for access. For the appointment wear a loose button-down shirt you can slide aside.
17. Color-Saturated Spiral Ribcage Patch
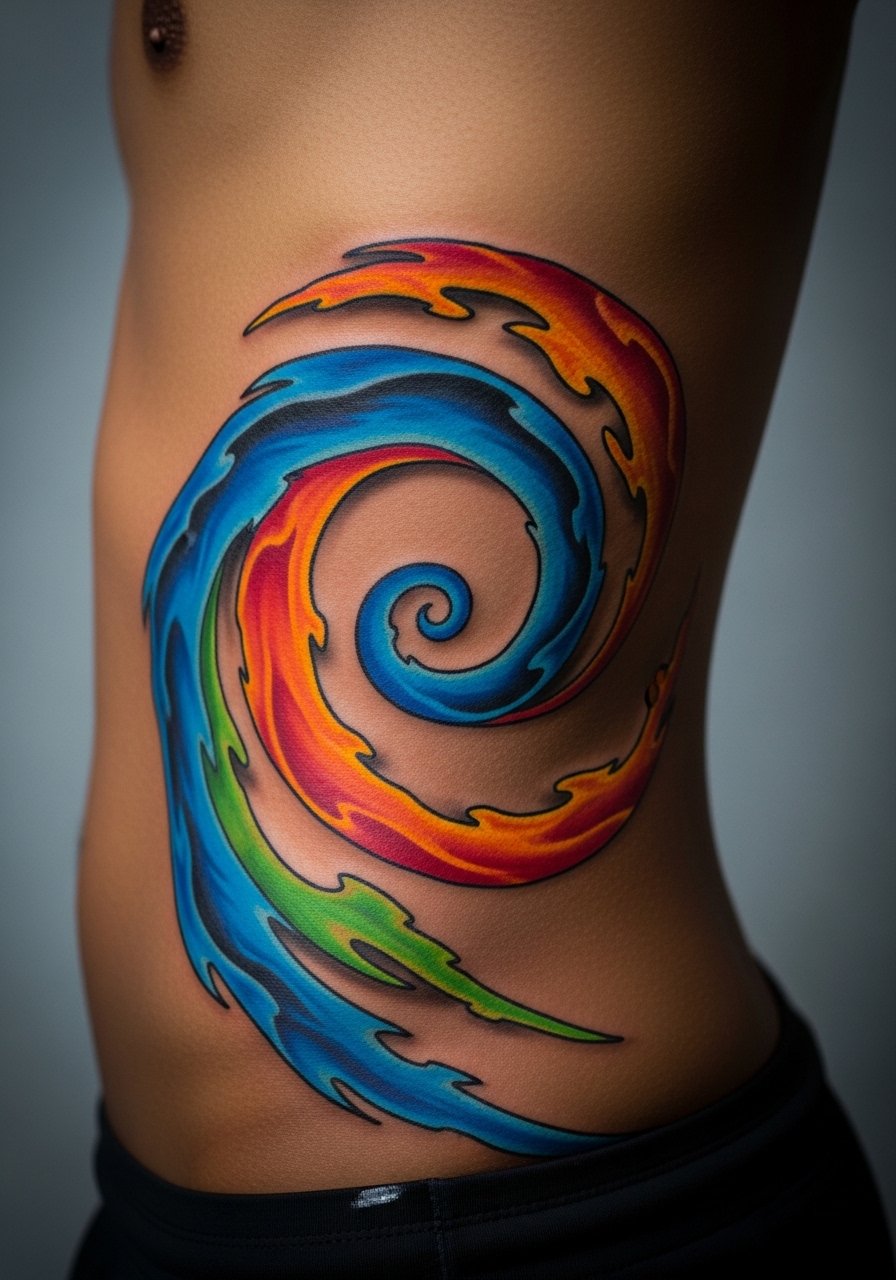
Aging lead: ribs rub against bras and clothing and color can lose crisp edges faster than on limbs. Space high-contrast elements more generously and accept staged sessions to build saturation. Pain is high and sessions should be planned around breaks. Artists argue about fine line on ribs. One camp says the skin stretch will blur delicate lines within a few years. The other camp says increased spacing and controlled needle depth can make it last. Decide which claim your artist backs.
18. Junji-Inspired Coral Throat Collar
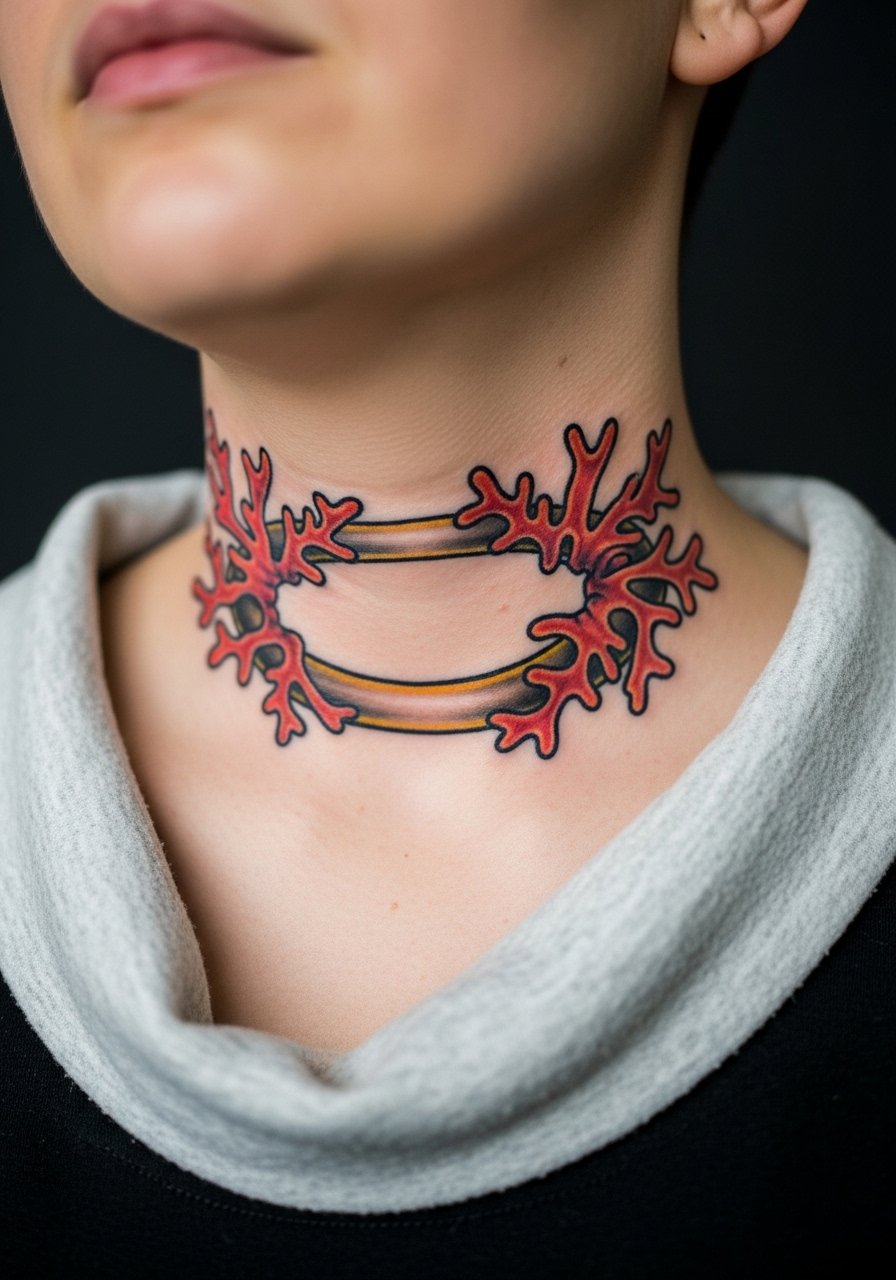
Mistake lead: neck lines are unforgiving if too tight. Ask for slightly larger scale and stronger contour lines in the color transitions. Expect a sensitive session and take a short rest when needed. For evenings out pair the piece with a wide-neck top that complements the collar placement.
19. Mouth-Full of Tears Over the Elbow
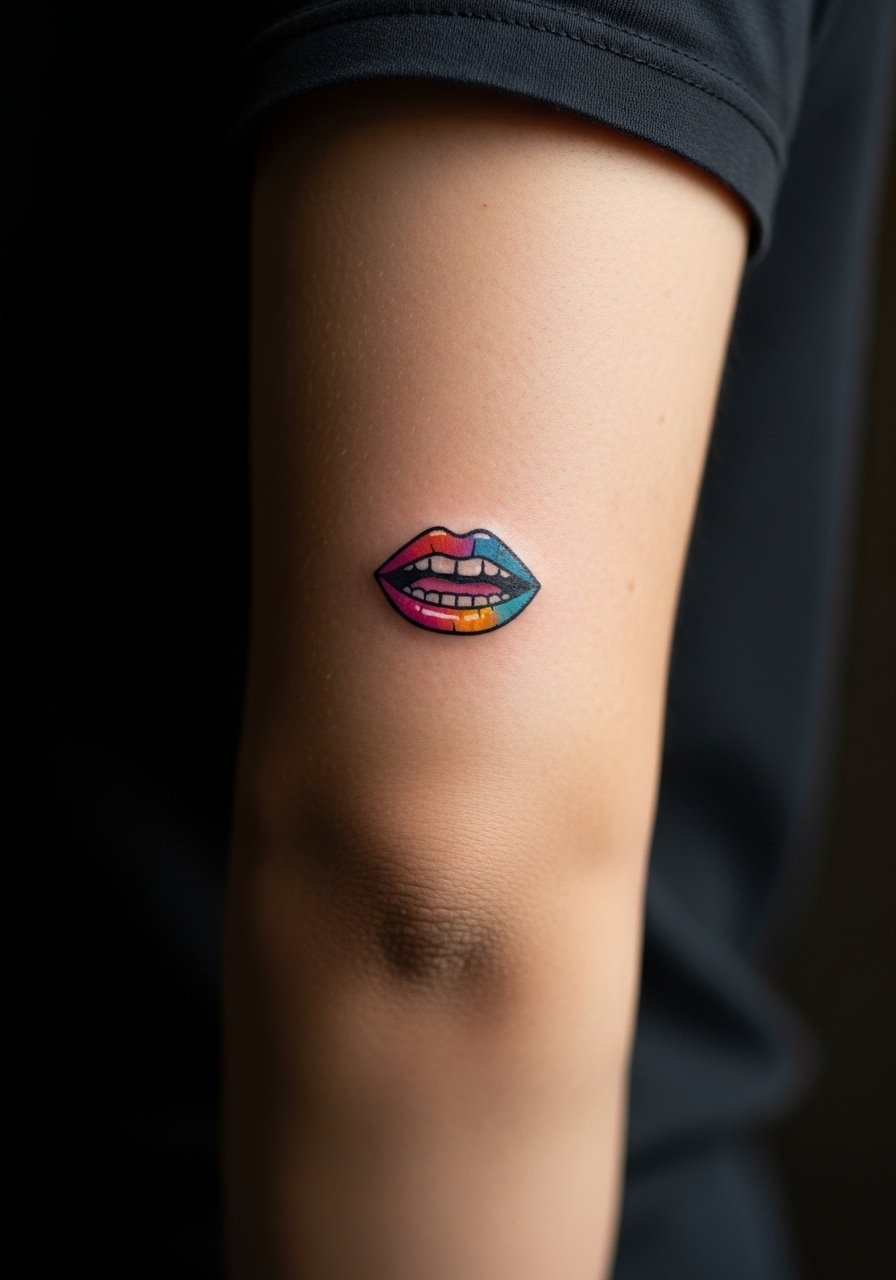
Consultation lead: elbow and crease areas distort with bending so avoid tight detail exactly in the fold. The typical mistake is pushing detail into the crease where it won't hold. Sessions may be chunked into short passes to manage pain. For the session wear a short-sleeve shirt so the area is reachable without stretching the elbow.
20. Scuttling Insect Line Along Foot Top
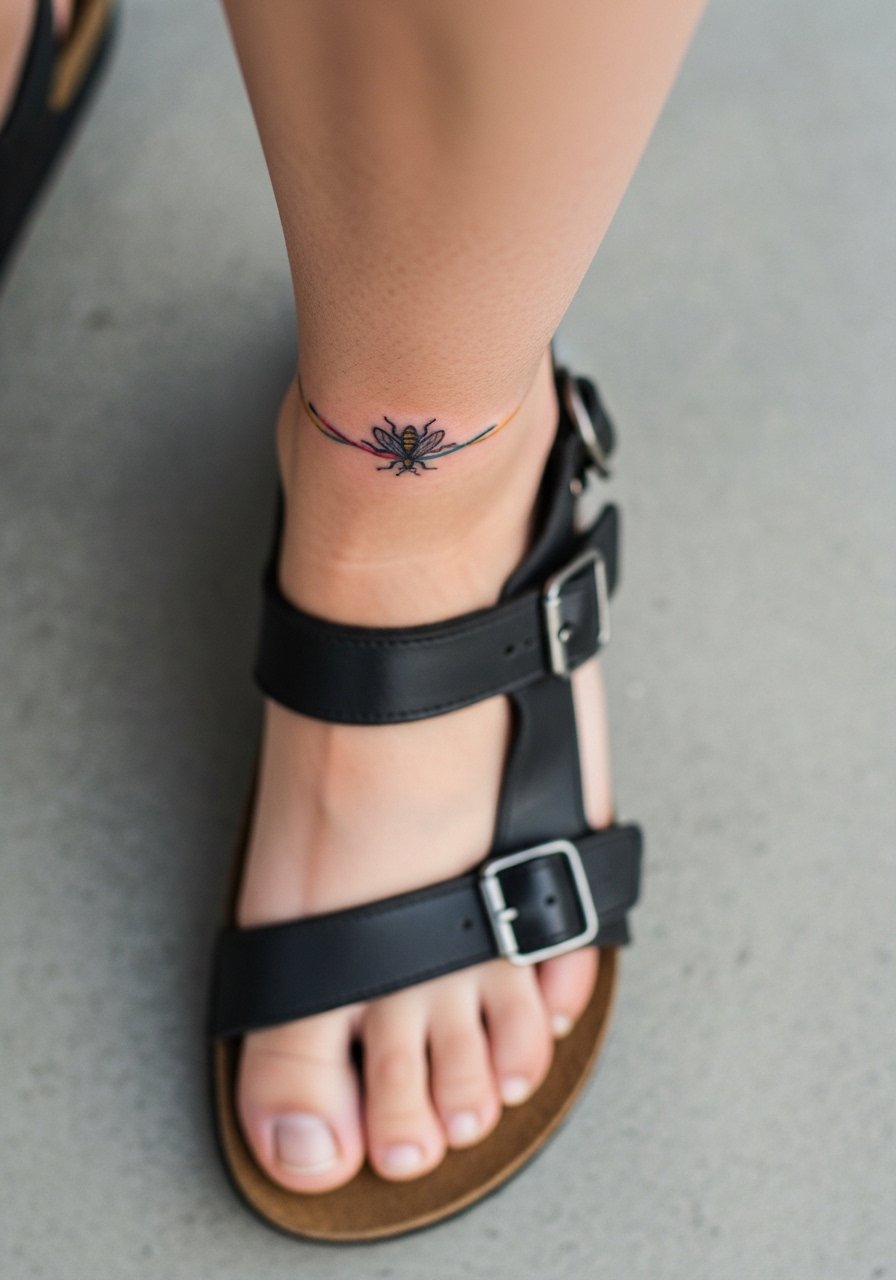
Personal observation lead: top-of-foot tattoos look great in sneakers but see a lot of friction. Keep the linework slightly bolder to resist early softening. The session is brief and often sharp due to thin skin. For reveal days try an easy sandals style that avoids straps across the design.
21. Psychedelic Spiral Over the Knee Cap
Visual impact lead: knee pieces warp with bending so center the main element on the cap and keep surrounding detail looser. The mistake is packing detail in the fold lines. Sessions require movement breaks and careful aftercare. Wear shorts you can move in, such as athletic shorts, for the appointment.
22. Doll-Faced Shoulder Cap Cluster
Mistake lead: over-detail on curved shoulder caps can flatten as the skin settles. Ask for rounds of stipple shading and larger pupils so the faces remain readable. Sessions are moderate and often single-visit if kept compact. For show-off outfits try sleeveless tops that keep focus on the cap.
23. Bright, Creepy Spine Linework
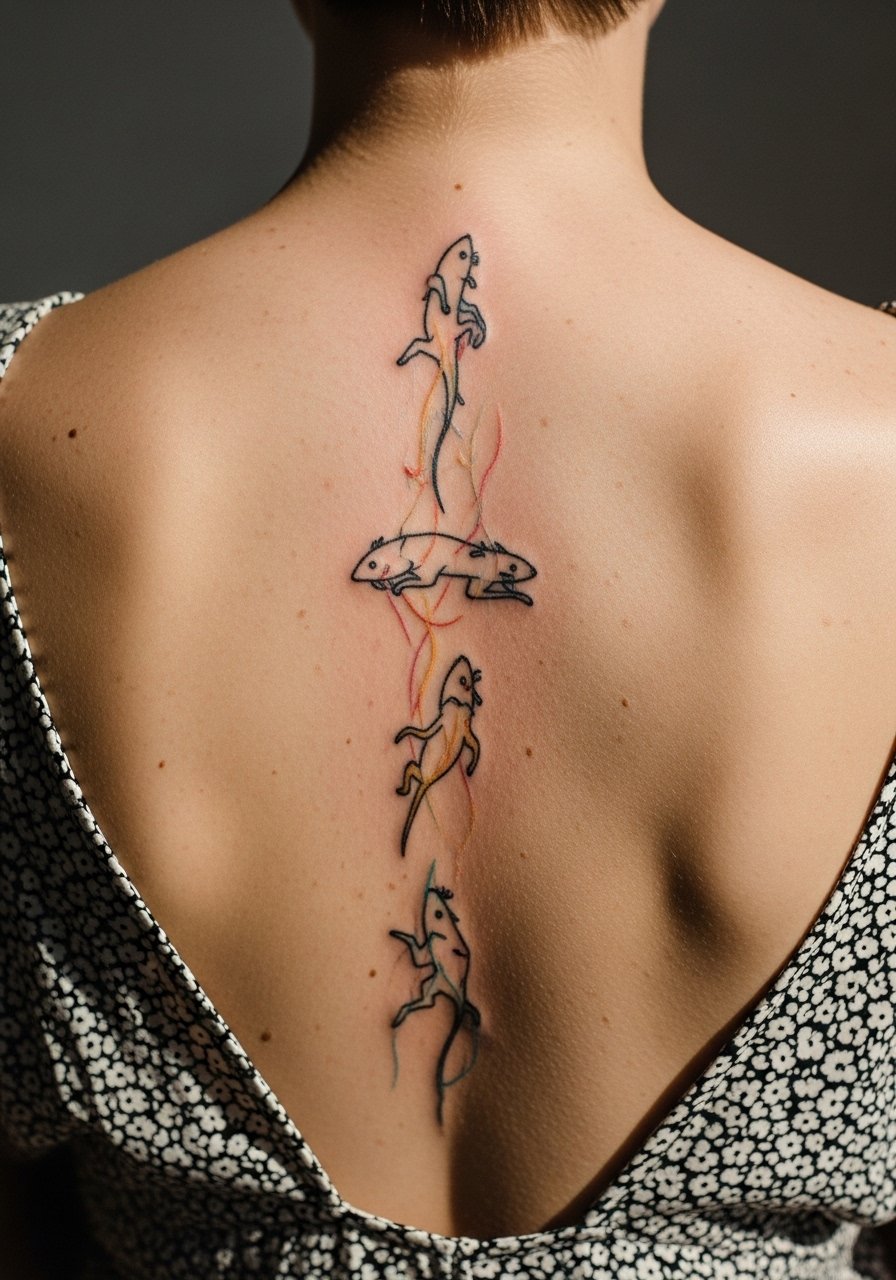
Styling lead: spine work looks fantastic with open-back garments. Ask for slightly increased spacing between elements so the design does not merge along the central axis. Expect longer sessions and plan rest days after. Pair with an open-back dress for evenings you want the piece visible.
24. Mouth-Ring Pair on Fingers
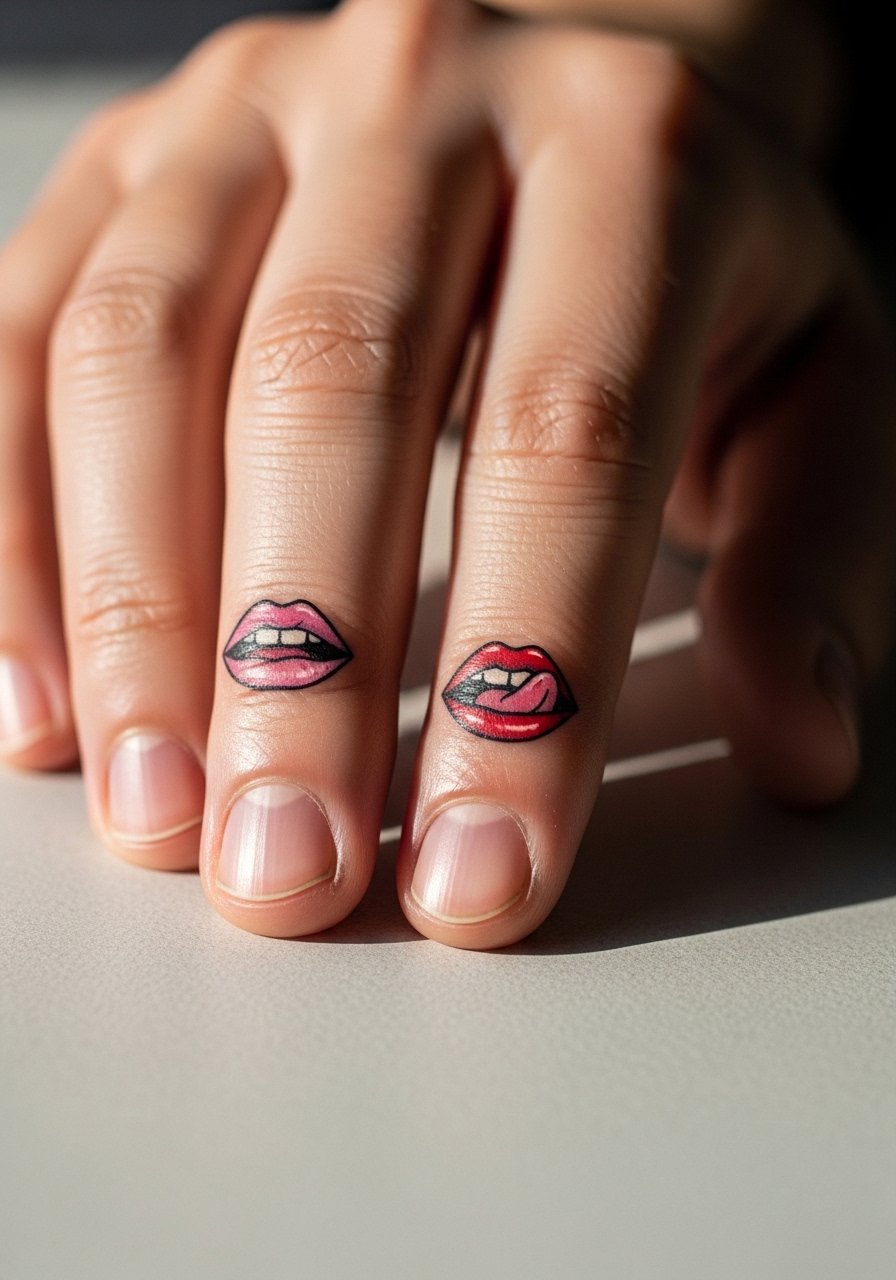
Mistake lead: finger tattoos suffer heavy wear and often need frequent touch-ups. The wrong approach is too much inner detail. Keep color minimal and anchor with a darker contour. Sessions are short and sharp. Consider finger placement on outer phalanges instead of the pad to extend life.
25. Clustered Teeth on the Back
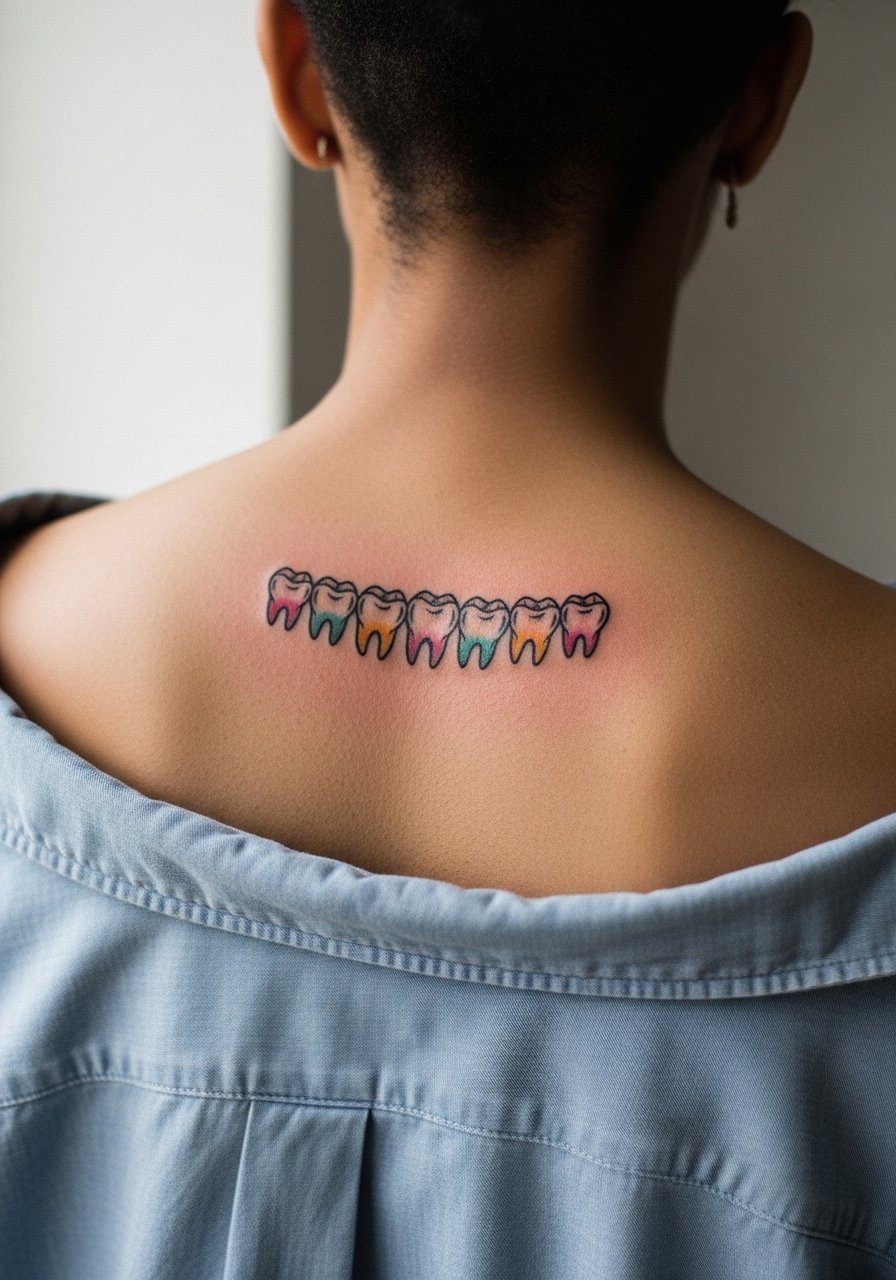
Consultation lead: upper back has room for repeating teeth motifs with space to age. Tell the artist you want soft stipple shading under teeth to read as depth without heavy white. Sessions can be split and each pass layered to reach rich color. For the appointment, button-downs worn backwards make access easy, or bring a loose button-down shirt.
26. Single Bold Eye on the Nape
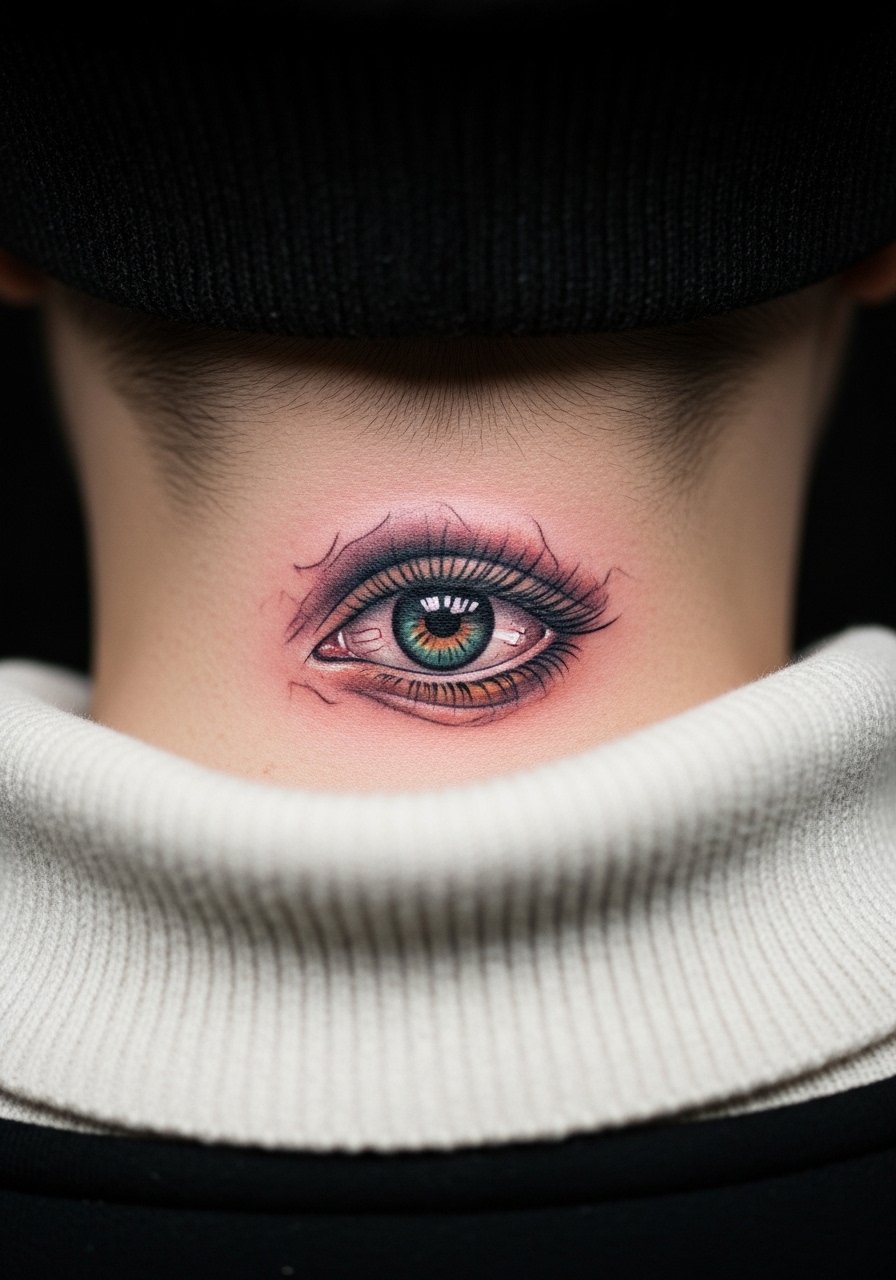
Personal observation lead: nape placement is subtle and can be shown off with collars or longer hair. Ask for slightly heavier linework to counter motion and short hair friction. The session is quick but sensitive. If your job is conservative think about visibility and wear a crew neck tee when you need to hide or show the piece.
27. Watery Face Panel on the Thigh
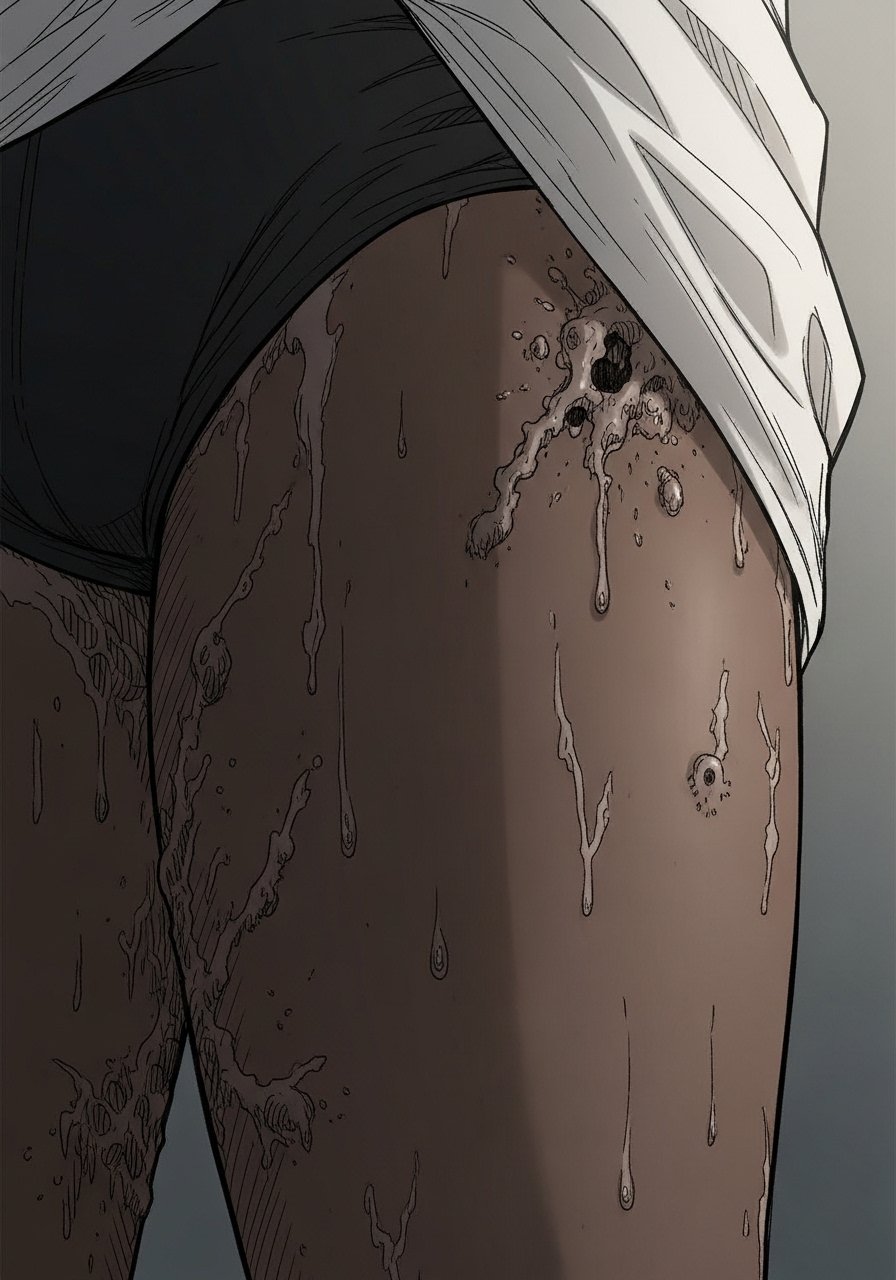
Visual impact lead: the outer thigh supports large panels with strong color gradients, which suits watery faces well. Avoid tiny facial lines and favor broad color transitions and stipple shading for depth. Sessions are comfortable and allow long passes for saturation. For the session wear high-waisted bottoms or shorts so the artist has access without you changing.
Frequently Asked Questions
Q: Will colorful Junji Ito tattoos fade faster than blackwork on visible spots like wrists and hands?
A: Color can fade faster in high-friction places because pigments sit differently in thinner skin. From what I've seen, bold color blocks with slightly heavier contour lines hold better than micro-detail color on wrists and hands. Expect touch-ups sooner than for heavy blackwork, and plan for wearing protective clothing or minimal jewelry while healing.
Q: Are there placement-specific risks for fine line Junji Ito pieces on ribs and sternum?
A: Yes, ribs and sternum move and stretch with breathing, which can soften fine lines. Two camps exist in artist practice. One says the movement blurs delicate lines quickly. The other says with controlled needle depth and spacing it can last. Ask your artist which method they use and look for healed portfolios showing at least two- to three-year results.
Q: How should I dress for a session if I choose a colorful thigh or ribcage panel?
A: Wear something you can adjust without full disrobing, like a cropped top or high-waisted shorts that the artist can slide for access. Loose clothing reduces friction on the fresh ink during travel home and in the first week.
Q: Do hand and finger spiral motifs require different aftercare than larger thigh panels?
A: The aftercare steps are similar, but hands and fingers face more washing and movement which affects healing. That means more frequent gentle cleansing and an acceptance of early touch-ups. For small high-wear spots, schedule a follow-up consultation at three to six months to assess saturation.
Q: How do I find an artist who understands colorful Junji Ito translation without naming specific people?
A: Use discovery pathways like dedicated tattoo directories, convention portfolios, and niche Reddit communities that focus on horror and color realism. Search hashtags for horror colorwork and look for healed photos over multiple years. Ask for healed images in consultation and discuss how they approach spacing and saturation for fine detail.
