
Bold blackwork with red floral accents has a way of reading both graphic and intimate at once. It holds from a distance because of saturated black fields and it pops close up because red breathes against the dark. If you want a tattoo that reads like jewelry and still ages honestly, consider how scale, placement, and line spacing will determine what stays crisp. The first idea below shows a simple forearm layout that proves the point.
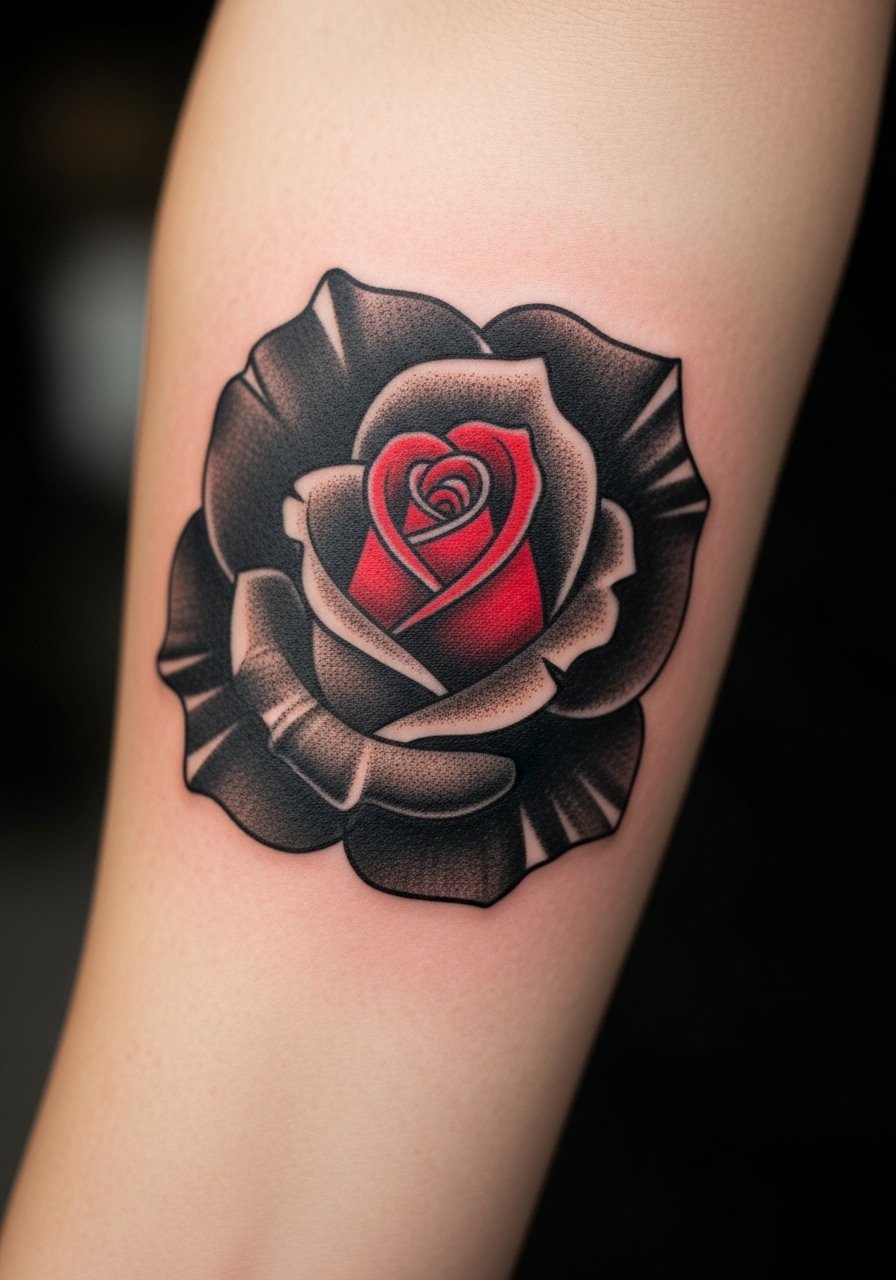
1. Bold Black Rose on Inner Forearm
This classic reads like a statement when done in heavy black fills with a single red center. I recommend asking the artist for slightly wider spacing between petals to prevent dense areas from merging over time. Pain on the inner forearm is mild to moderate and a single session of 60 to 90 minutes usually handles a medium-sized piece. A common mistake is compressing too many tiny details into a small patch. For showing it off, roll up a linen button-down so the forearm sits visible without looking staged.
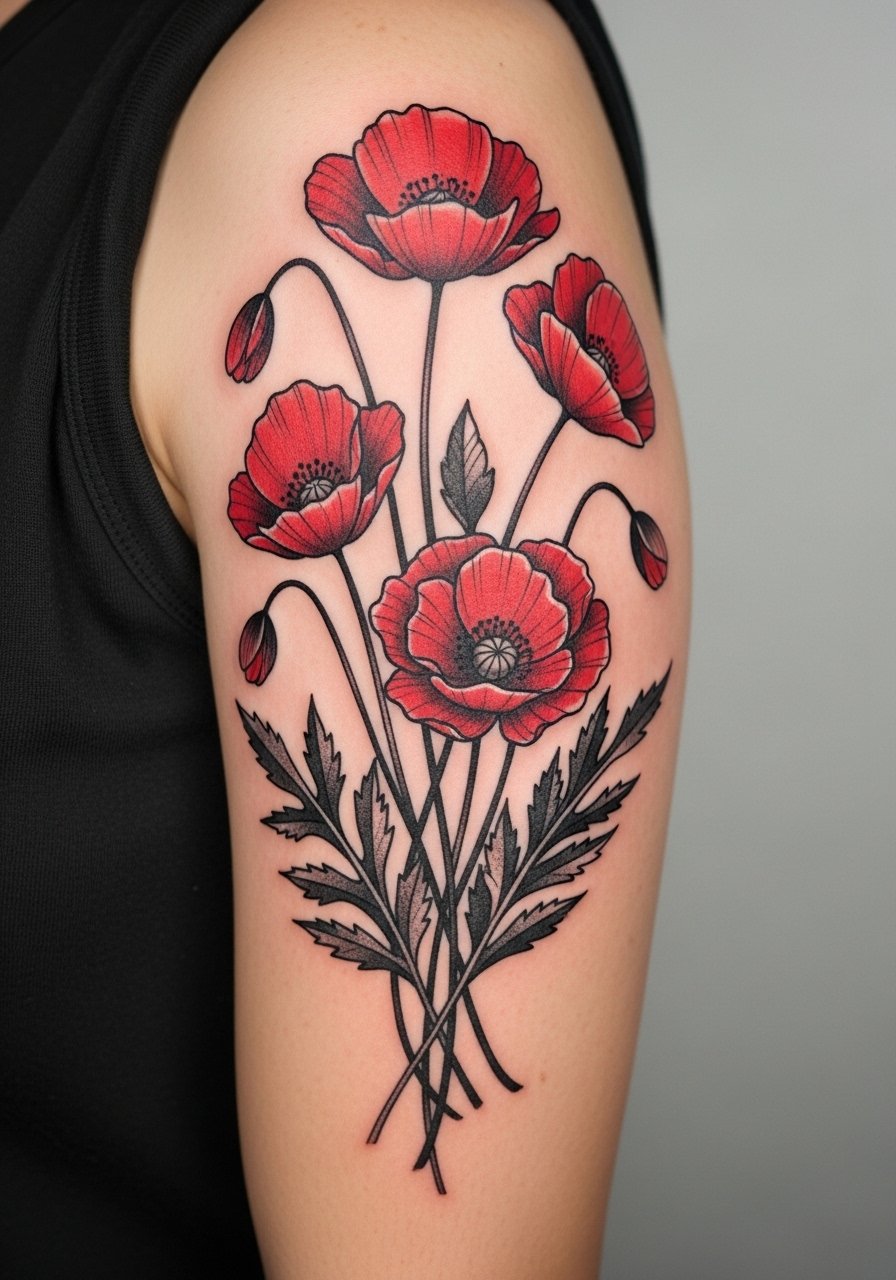
2. Thick-Outline Poppy Cluster on Upper Arm
Upper arm blackwork handles saturation well and usually ages cleanly because the skin is stable. Ask your artist for a heavier outline and solid black fills that anchor the red petals. Expect moderate discomfort and a session that runs 90 to 150 minutes for a clustered piece. The visual reads strong from across a room and stays legible after a few years if you avoid tiny inner lines. Pair this with a sleeveless tank to show off the curve of the arm without crowding the design.
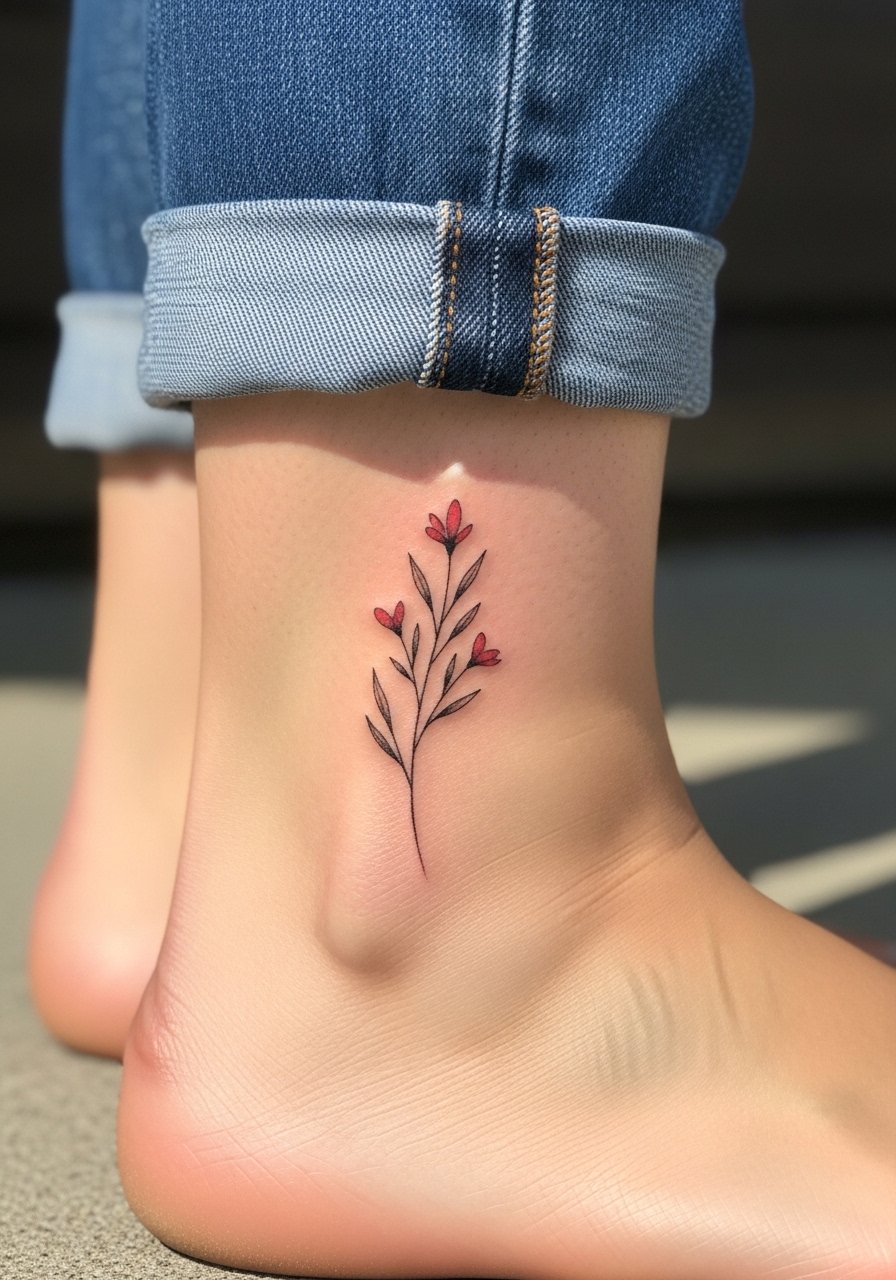
3. Micro Blackwork Red Ankle Sprig
Ankle pieces are small and hit hard visually when the black is solid. Fair warning, ankles see friction from shoes and socks so fine details can soften faster. Ask the artist to simplify the stems and make the red petals slightly larger to keep the motif readable past year two. Session time is short, often 30 to 60 minutes, but expect touch-up chances earlier than on the arm. Wear rolled jeans or low-cut slip-on shoes to frame the tattoo without rubbing it.
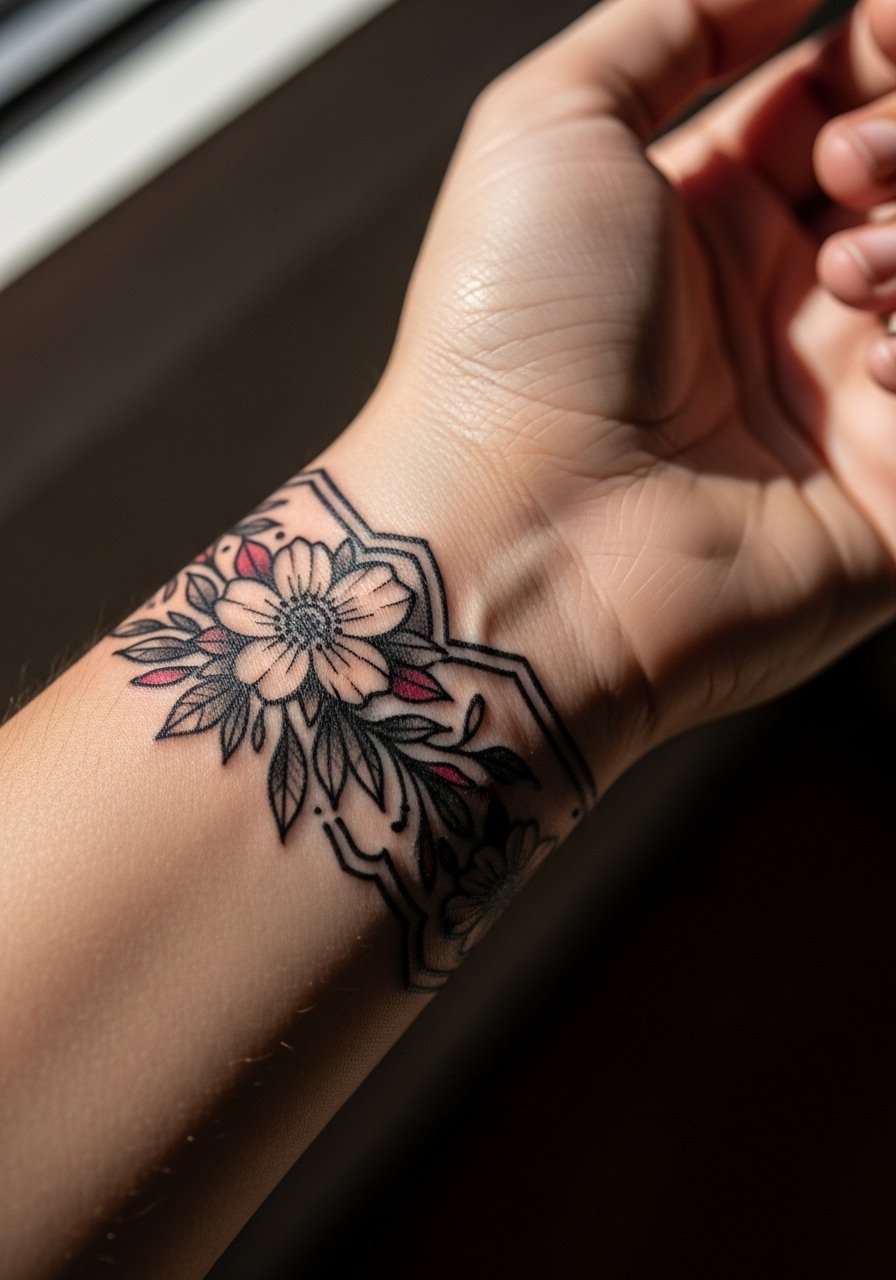
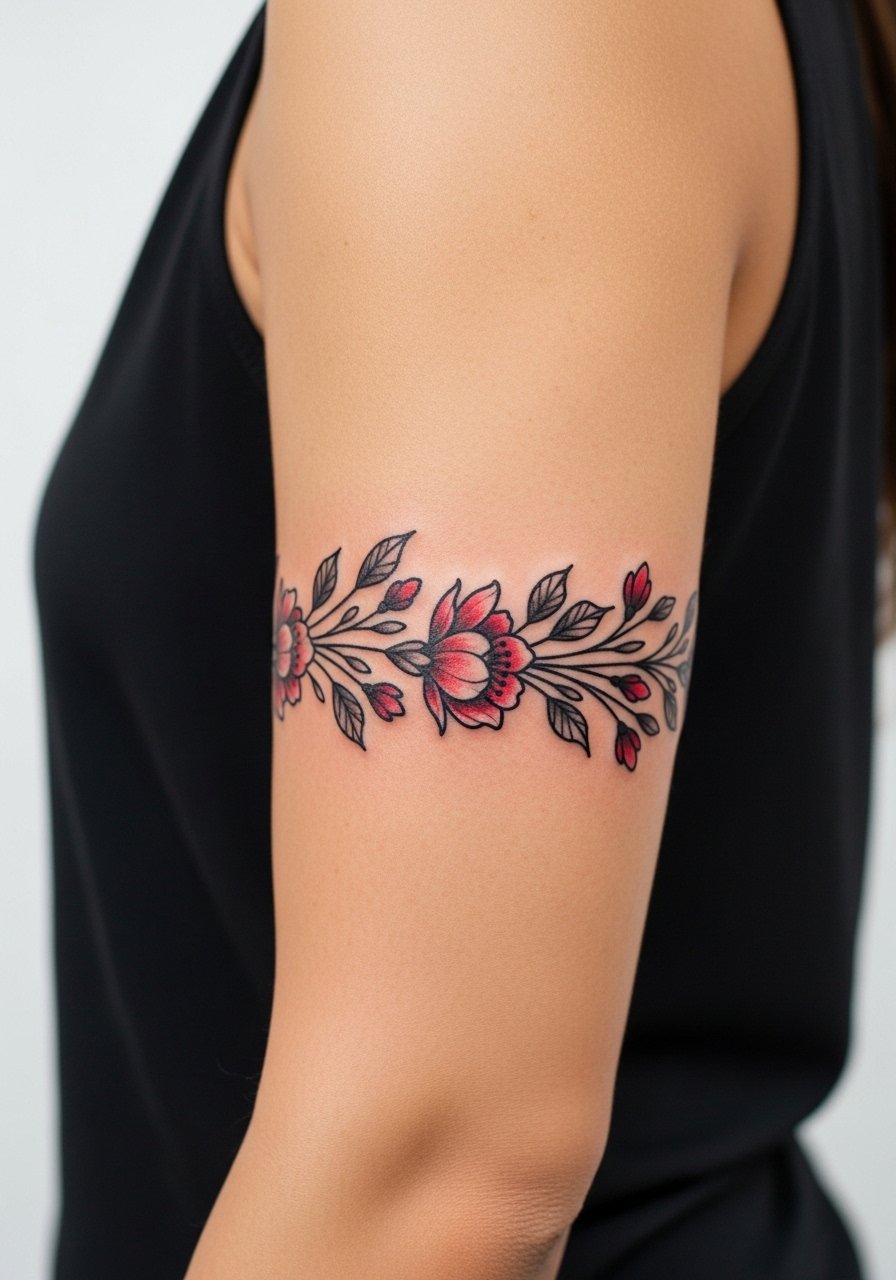
4. Blackwork Red Blossom on Wrist Band
Wrist bands use repetition and negative space to feel like an accessory. The wrist is a high-movement zone so keep elements bold and avoid tiny script inside the band. Expect a 40 to 80 minute session and be prepared for earlier softening near the joint. A common mistake is asking for too many fine lines in the band. For styling, a thin chain bracelet worn above the band can anchor attention without competing with the linework.
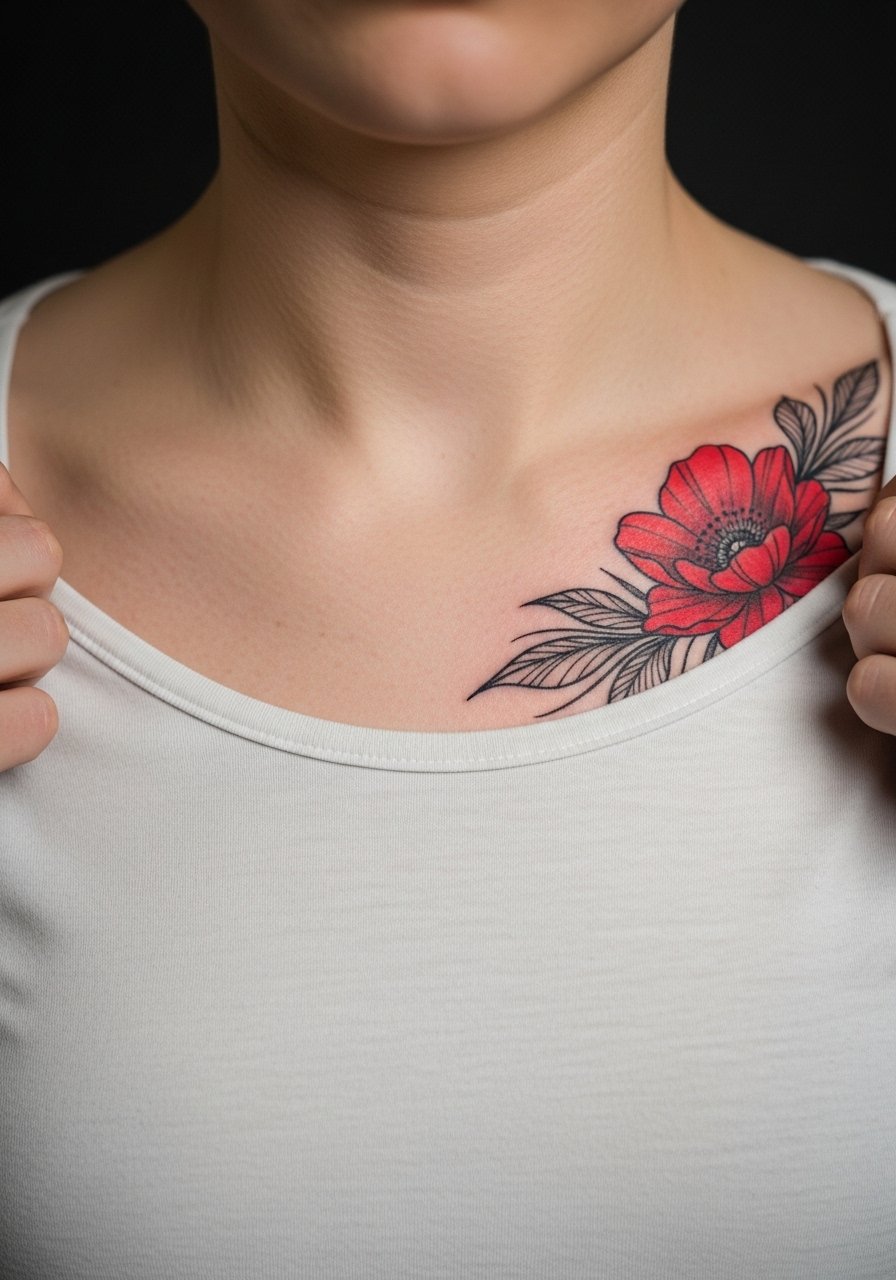
5. Bold Chest Bloom Near Collarbone
Upper chest accepts bold blackwork well when the artist accounts for chest movement. For this placement, wear a wide-neck shirt pulled slightly aside to the appointment so the artist can see the exact placement. Sessions can be 90 to 180 minutes depending on size and contour work. A mistake I see is placing too much detail right on the collarbone where the skin shifts. Pair the piece with a delicate pendant necklace that sits just above the bloom and frames the area.
6. Negative-Space Blackwork Stem on Side Ribcage
Ribcage pieces are high on the pain scale and they age differently than arm work. Expect a longer session split into two visits for larger pieces. Artists split into two camps on ribs. One camp says tight fine lines blur quickly because of skin stretch. The other camp argues that with proper depth and spacing the work settles fine. Ask the artist which approach they use and how they space the negative areas. For the session, wear a cropped top you can lift slightly so only the rib zone is exposed.
Studio Day Picks
Those forearm, wrist, chest, and ribcage ideas above each demand different prep and first-week care, and a few targeted items smooth the session and the initial healing window.
-
Stencil transfer paper kit. Helps preview placement on skin so the wrist and forearm alignments above match your vision.
-
Topical numbing cream. Applied before appointment it can take the edge off ribcage sensitivity without changing linework.
-
Thin protective film roll. Useful for ankle and wrist pieces that rub against clothing during the first days.
-
Fragrance-free gentle body wash. Keeps fresh tattoos clean without irritating black ink contrast.
-
Healing barrier ointment. A thin layer in the first few days helps prevent scabbing from pulling at fine black edges.
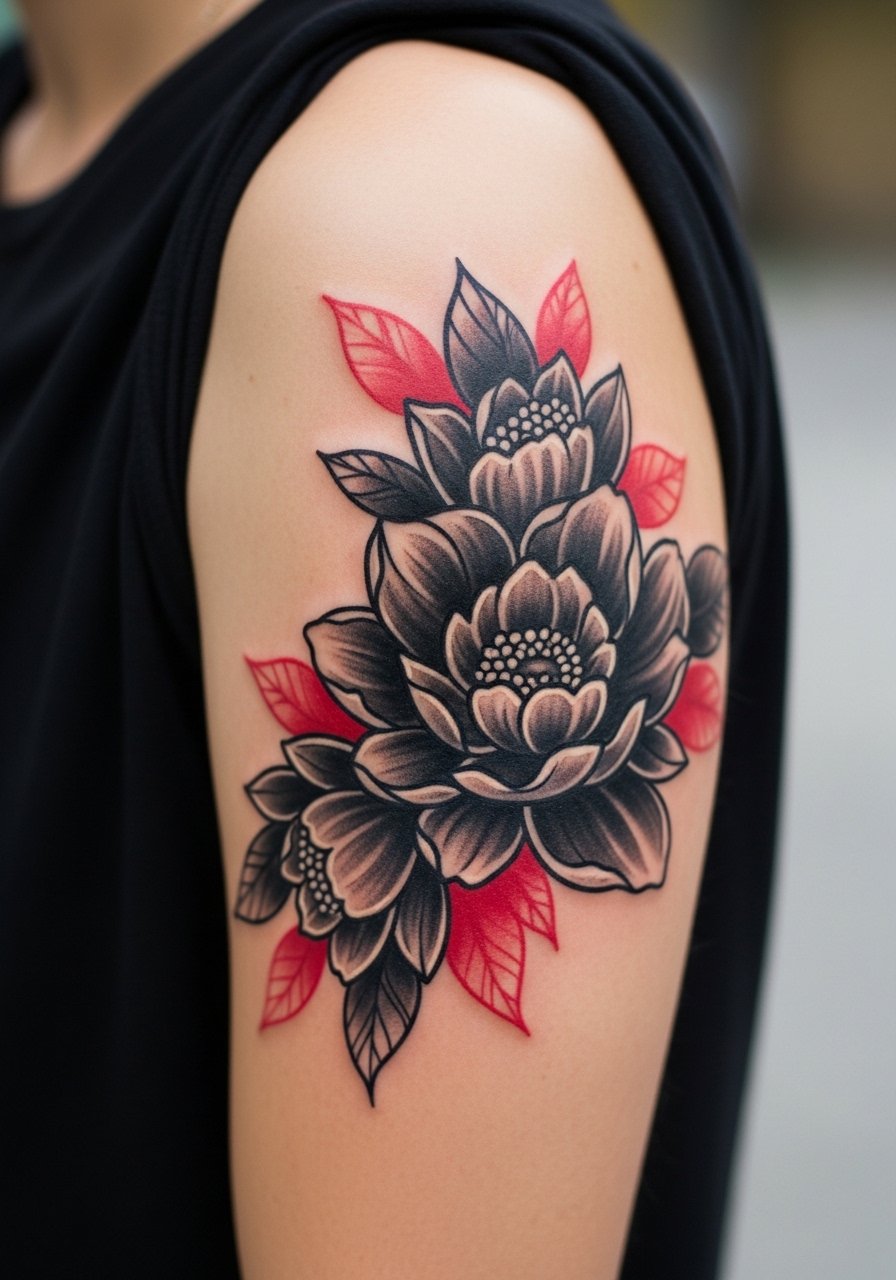
7. Heavy Black Petal Sleeve Starter
Start a half-sleeve with a cluster of bold black petals and intermittent red fills to let future work wrap around them. This approach gives room for growth and reduces the risk of overcrowding later. Sessions are staged across multiple visits and the skin on the upper arm takes saturation well. Tell your artist you want the black areas to read as blocks rather than cross-hatched texture. For showing it off, a rolled sleeve linen shirt keeps the arm visible without hiding the composition.
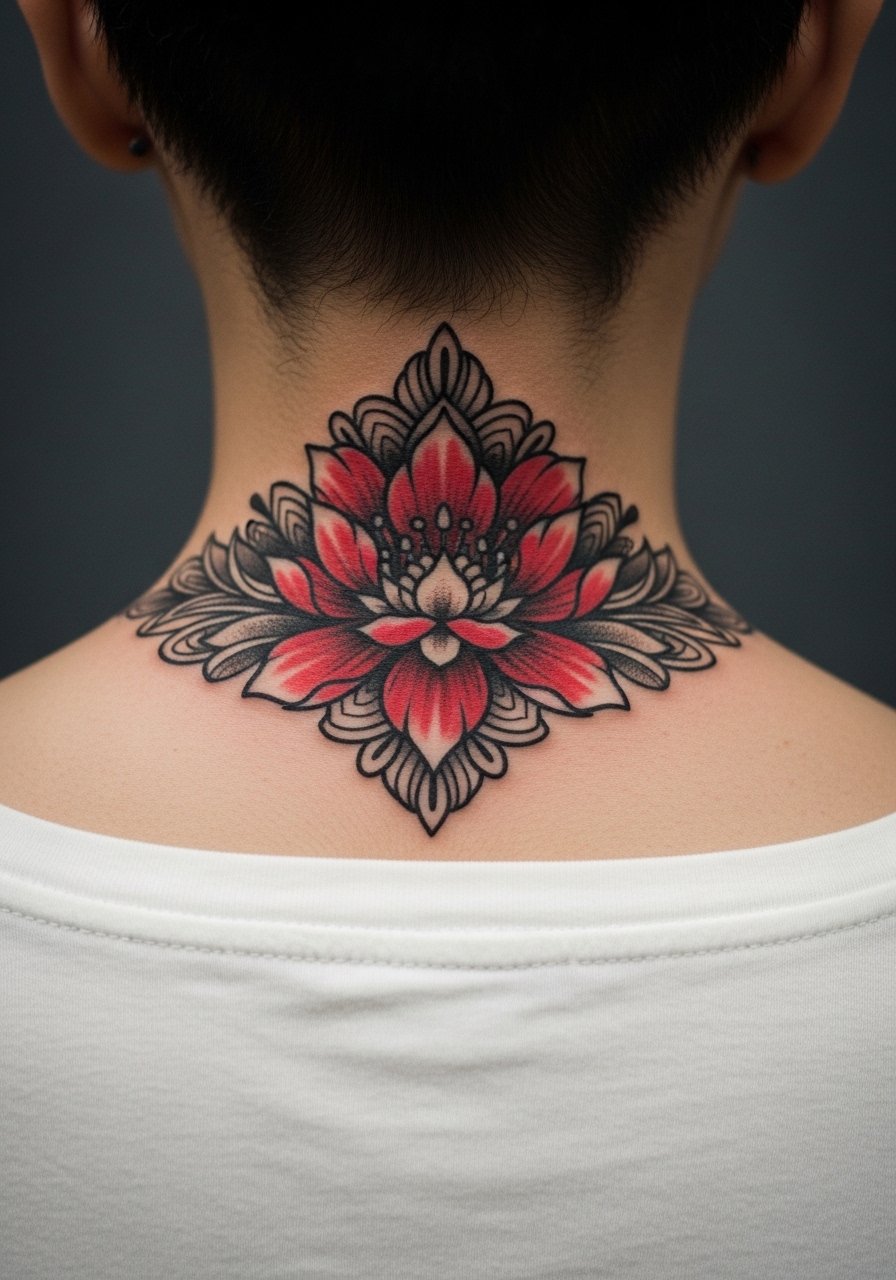
8. Compact Black Lotus on Back of Neck
Neck tattoos require careful portfolio review and sometimes specialized technique. Wear a wide-neck shirt with the collar pulled aside so only the neck area is exposed for the photo. The back of neck can blur where hair rubs the area, so ask how the artist manages depth near the hairline. A compact black lotus with a red center reads like a small emblem and can be done in 45 to 90 minutes. Hand over a clear reference for lineweight that favors bold main lines and simplified interior detail.

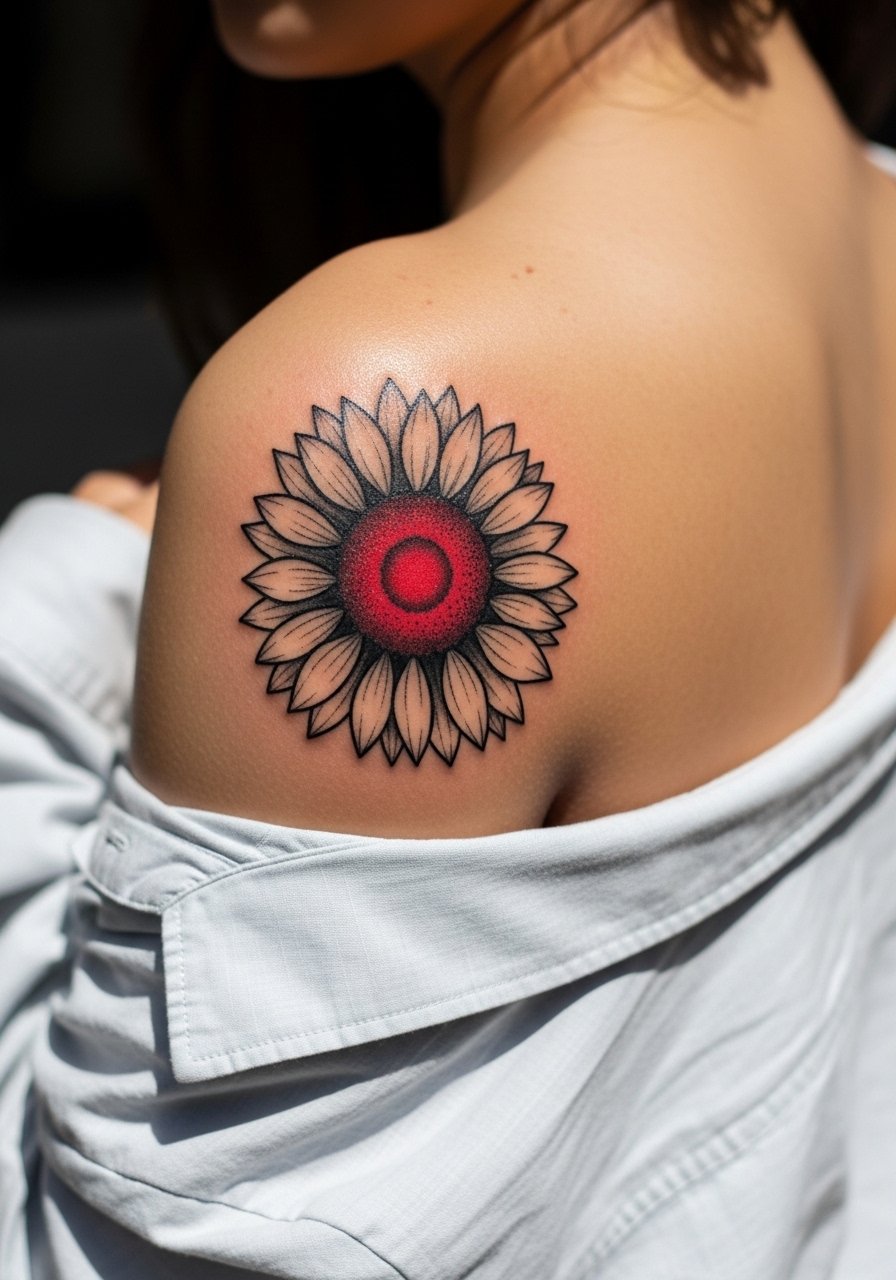
9. Bold Red-Centered Sunflower on Shoulder Blade
Shoulder blade pieces sit on a stable canvas and handle saturated black fields around a red center. Movement is low and the design ages predictably. Sessions are typically 90 to 150 minutes. A common mistake is shrinking the sunflower too small so the center loses its contrast over time. For the session, wear a button-down you can pull aside so the artist has clear access to the upper back without you being uncomfortable.
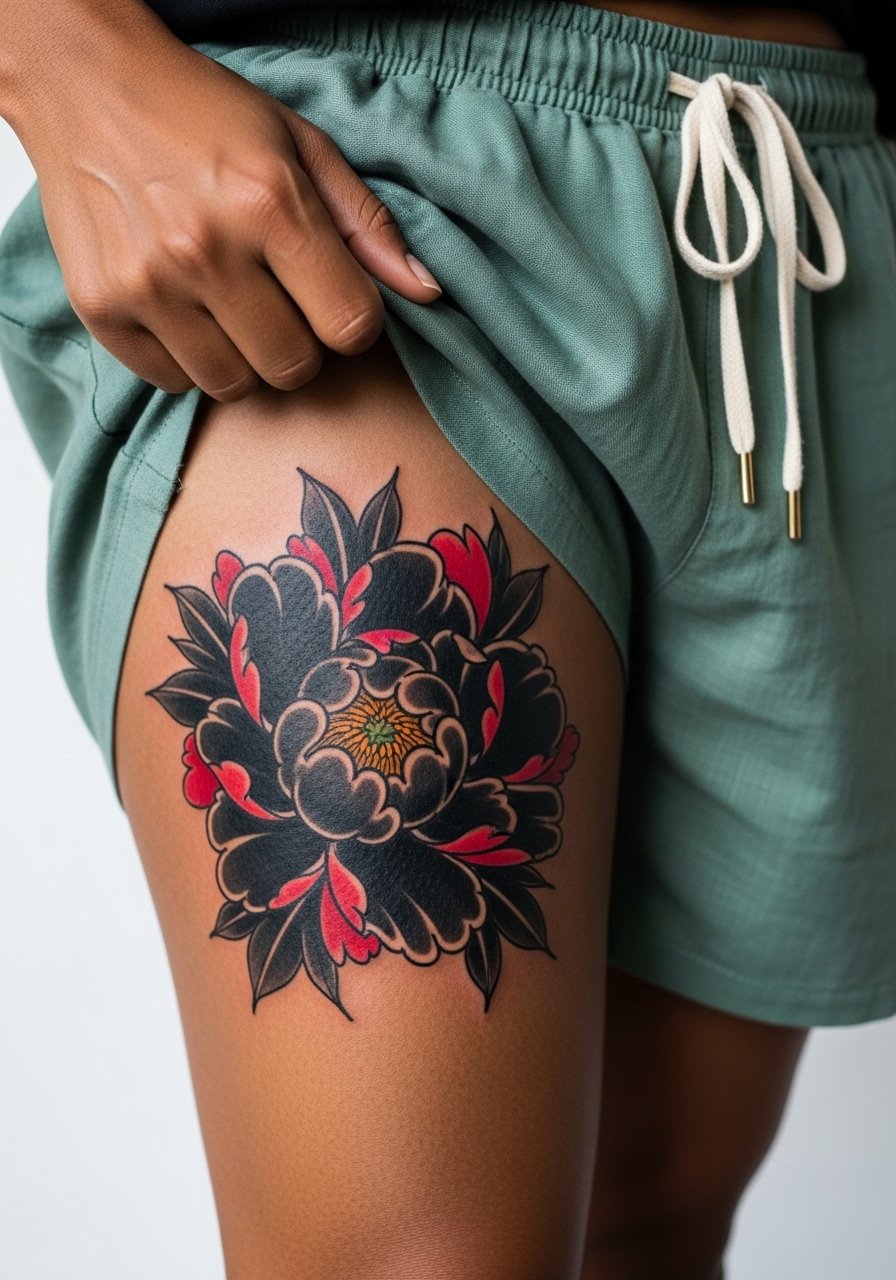
10. Heavy Black Outline Single Peony on Thigh
Thigh work supports heavy black fills and larger red details really stand out here. The skin on the outer thigh is forgiving so artists can build saturation in one session or two depending on size. Expect mild to moderate pain and good longevity if spacing avoids tight inner lines. When you consult, ask for petal edges that breathe and avoid overlapping strokes that can compress. For the appointment wear loose drawstring linen shorts so the artist can roll the leg without pressure on the area.
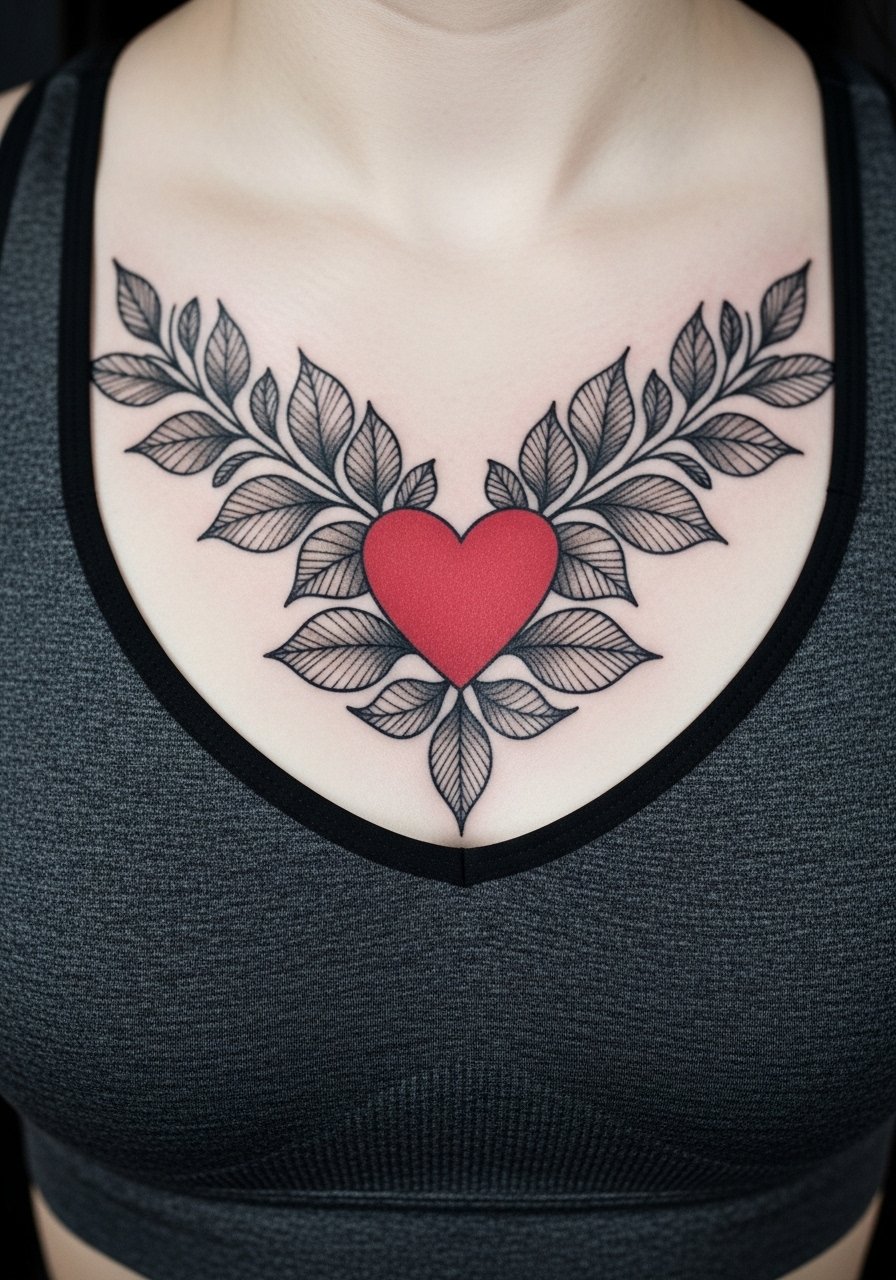
11. Graphic Red Heart with Blackwork Leaves on Sternum
Sternum placements require a fitted sports bra or bandeau for safe photography and studio access. This zone moves with breathing and some artists split sessions for comfort. A solid black frame with a red heart center reads cleanly if the artist spaces the inner details. Artists divide on fine lines over the sternum. One camp warns that too-fine work fades into shadow with time. The other camp says careful depth and spacing avoids that. Ask for examples of healed sternum work before booking.
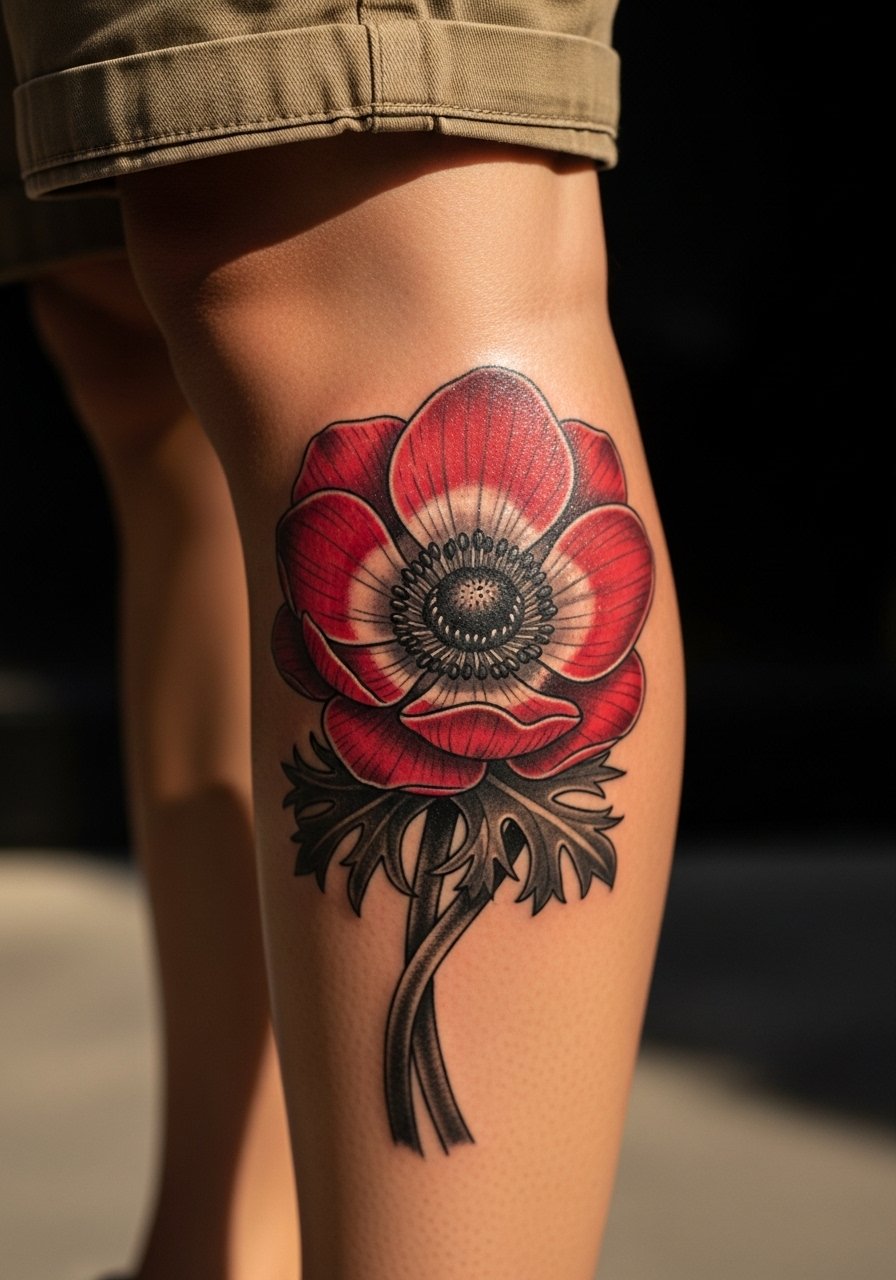
12. High-Contrast Red Anemone on Calf
Calf tattoos sit well with saturated black and bold red. The vertical canvas lets a single red anemone read from a distance. Expect a session of 60 to 120 minutes and moderate pain. A typical mistake is over-detailing the interior stamen, which can blur under tight texture. For showing it off, wear a mid-length skirt or shorts that stops above the calf so the piece reads like part of an outfit.
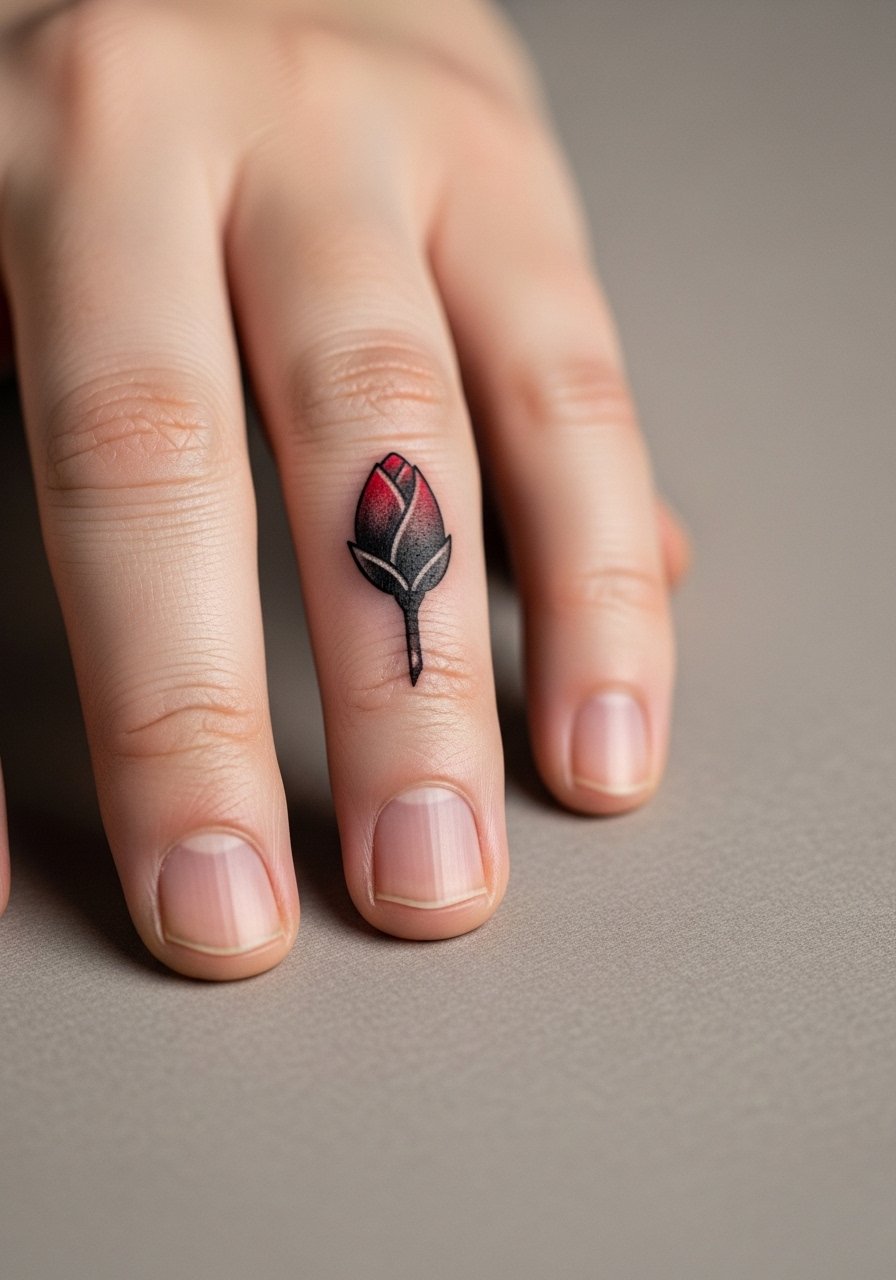
13. Red Accent Blackwork Finger Bud
Finger tattoos are high risk for fading and loss of edge because of constant washing and friction. For this reason ask for bolder shapes rather than thin filigree. Expect a short session but plan for touch-ups earlier than other placements. A common mistake is requesting tiny script inside the finger motif. If you want to show it off, a simple minimalist ring set around the digit frames the design without obscuring it.
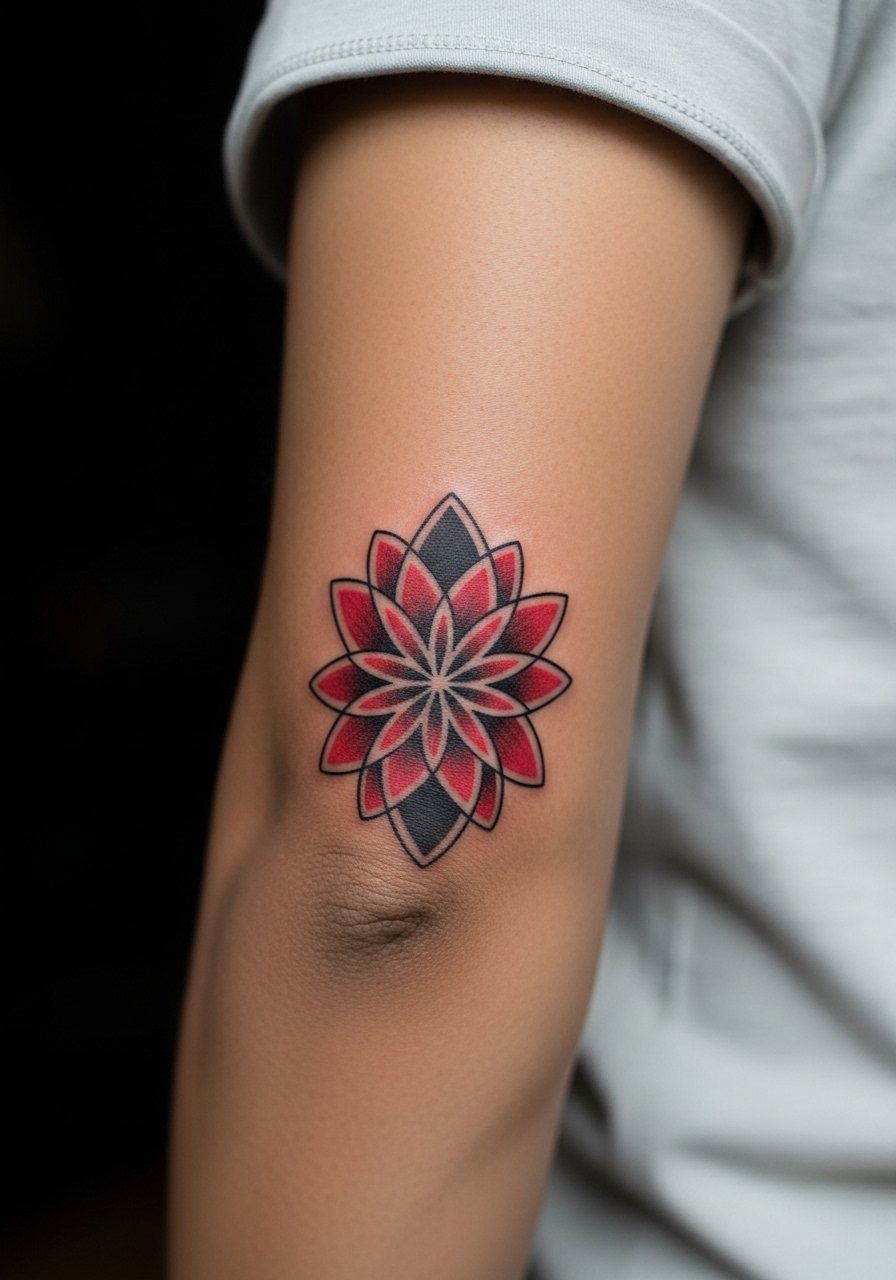
14. Geometric Blackwork Flower Over Elbow Cap
Elbow tattoos sit over a joint that creases, so heavy black fields with open red petals age better than dense micro detail. Pain is higher and sessions may be paused for healing. I tell clients to expect touch-ups because that area receives a lot of movement. The mistake is packing too many tiny dots into the crease. For the session wear a short-sleeve tee you can roll up so the artist can access the area without strain.
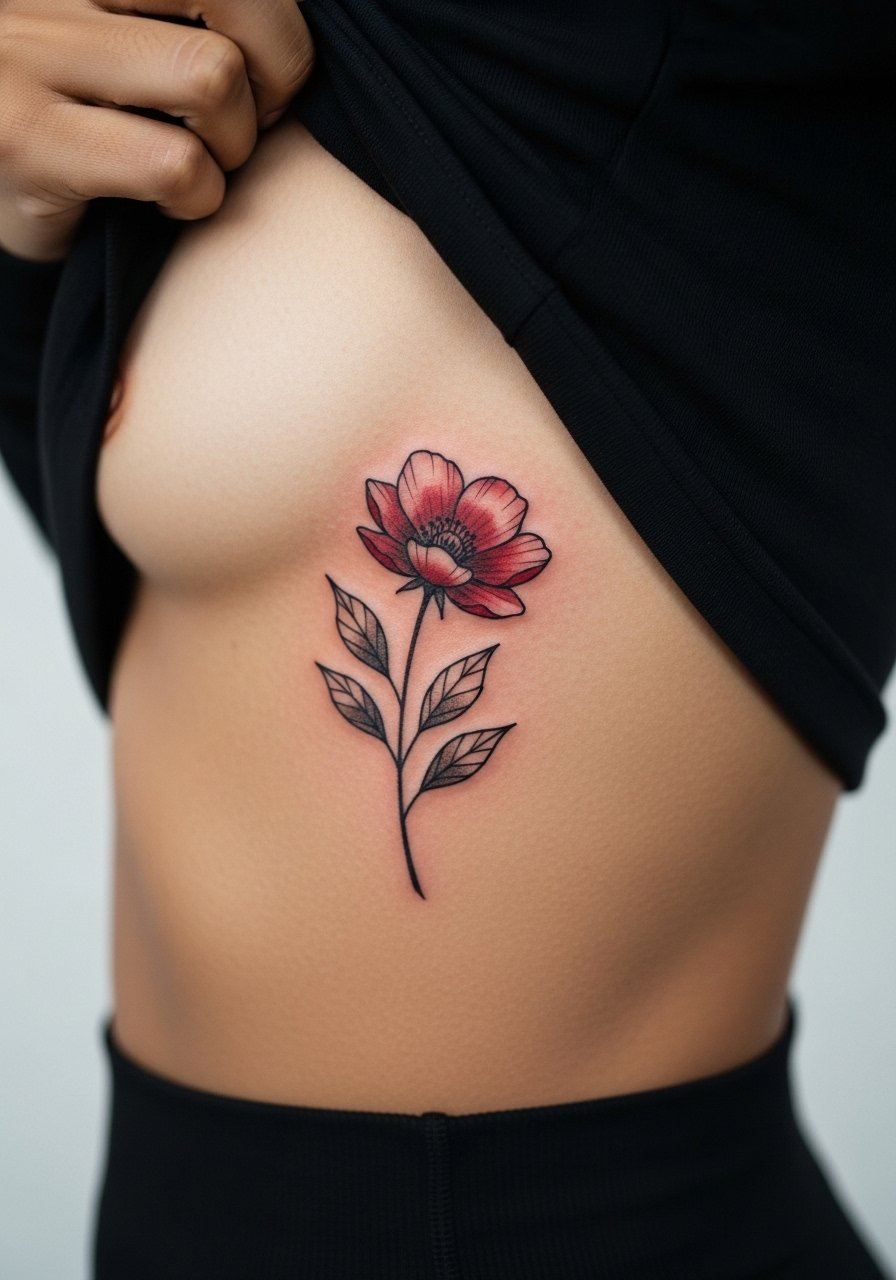
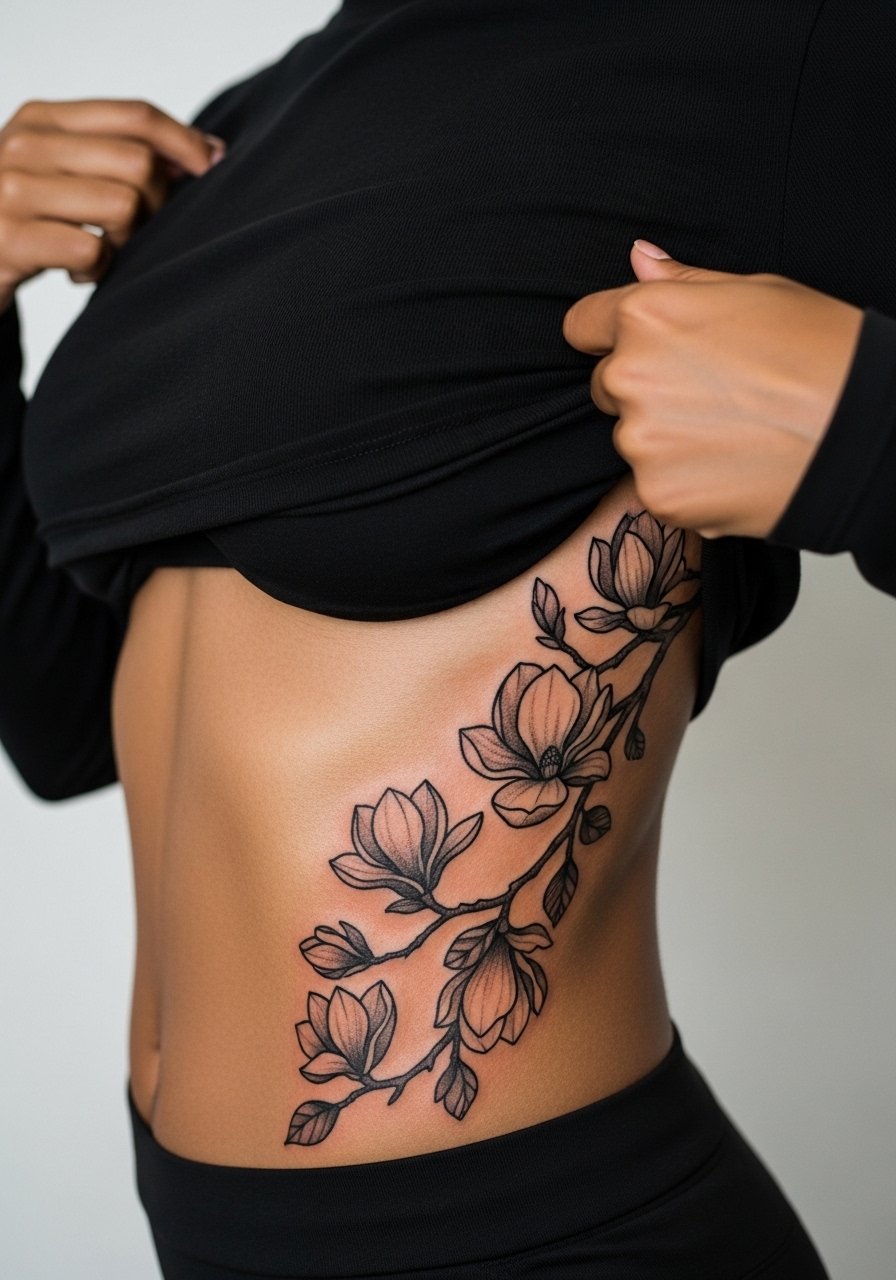
15. Heavy Blackwork Magnolia Along the Rib Line
This full-curve placement follows the rib and is intimate by design. Expect a higher pain rating and a multi-session approach. One error is compressing several blooms into a narrow strip which later becomes a dense dark area. The version that ages best keeps each bloom spaced so shadows do not merge. For discovery look at community directories and hashtag searches to find artists who show healed rib work, since healed examples matter here.
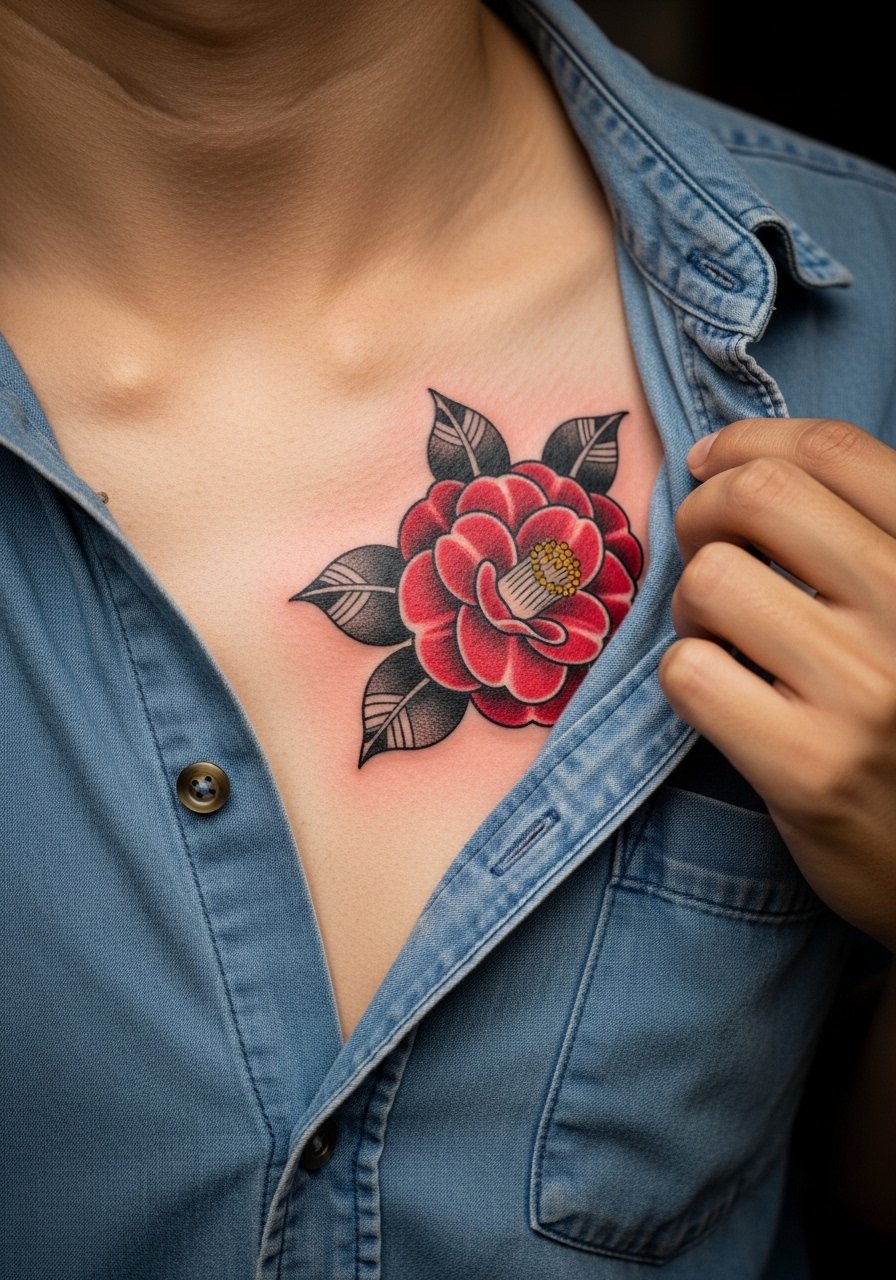
16. Stark Black Outline Red Camellia on Chest Pocket
A pocket-sized chest piece near the heart reads intimate and bold. Keep the outline weight consistent so the red petals keep contrast against the black anchors. Sessions are moderate in time and the chest is forgiving for saturation. The common mistake is placing the center too close to the sternum where healing puckers can affect detail. For showing it off, a simple button-up shirt left slightly open presents the tattoo without exposing the torso.
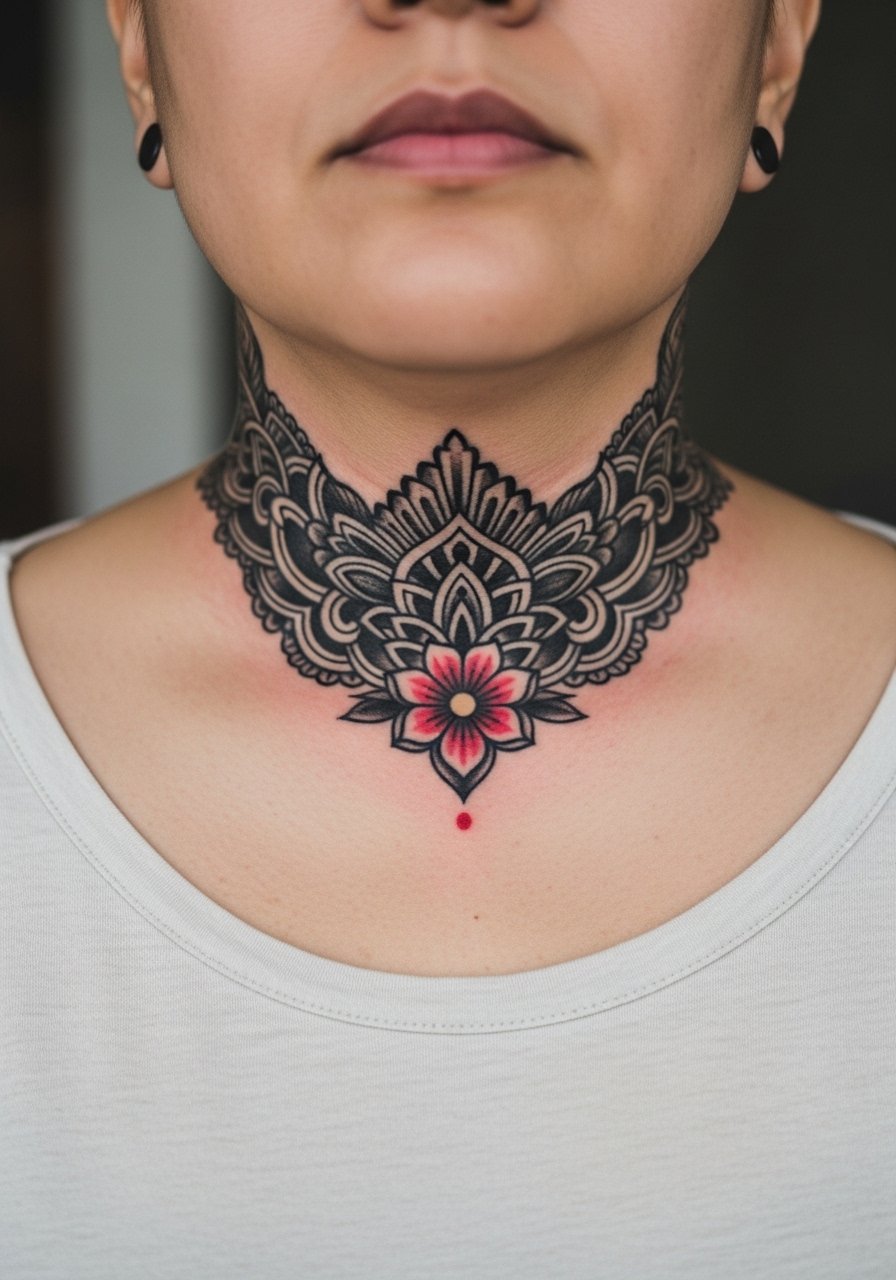
17. Bold Blackwork Throat Accent with Small Red Bloom
Neck placements can be divisive for career reasons and require honest planning. If you choose this spot, insist on bold shapes and avoid whisper-fine stems. The session is quick but the area is visible in everyday life. One common mistake is expecting fine script to last here. For this placement consider discovery paths like online directories and in-person portfolios to find artists experienced with visible neck work.
18. Red Anther Center with Blackwork Dot Shading on Upper Back
Upper back tattoos can be larger and incorporate dot work with saturated black shapes surrounding a red center. This area heals reliably and tolerates dense saturation. A mistake is placing too many tiny dot gradients near the spine where touch-ups become fiddly. Wear a loose button-down you can shift for the appointment so the artist can work comfortably. For showing off the piece later choose an open-back dress or top to let the negative space read.

19. Solid Black Silhouette Rose on Outer Calf with Red Edge
Silhouette work uses black to define shape and a thin red edge to give the bloom dimension. This approach ages well because the silhouette stays solid while the red edge softens gracefully. Sessions are moderate and the calf tolerates saturation. One mistake is expecting the red edge to stay crisp if it is too thin. For style pair it with canvas sneakers and cropped pants so the silhouette reads as part of your outfit.

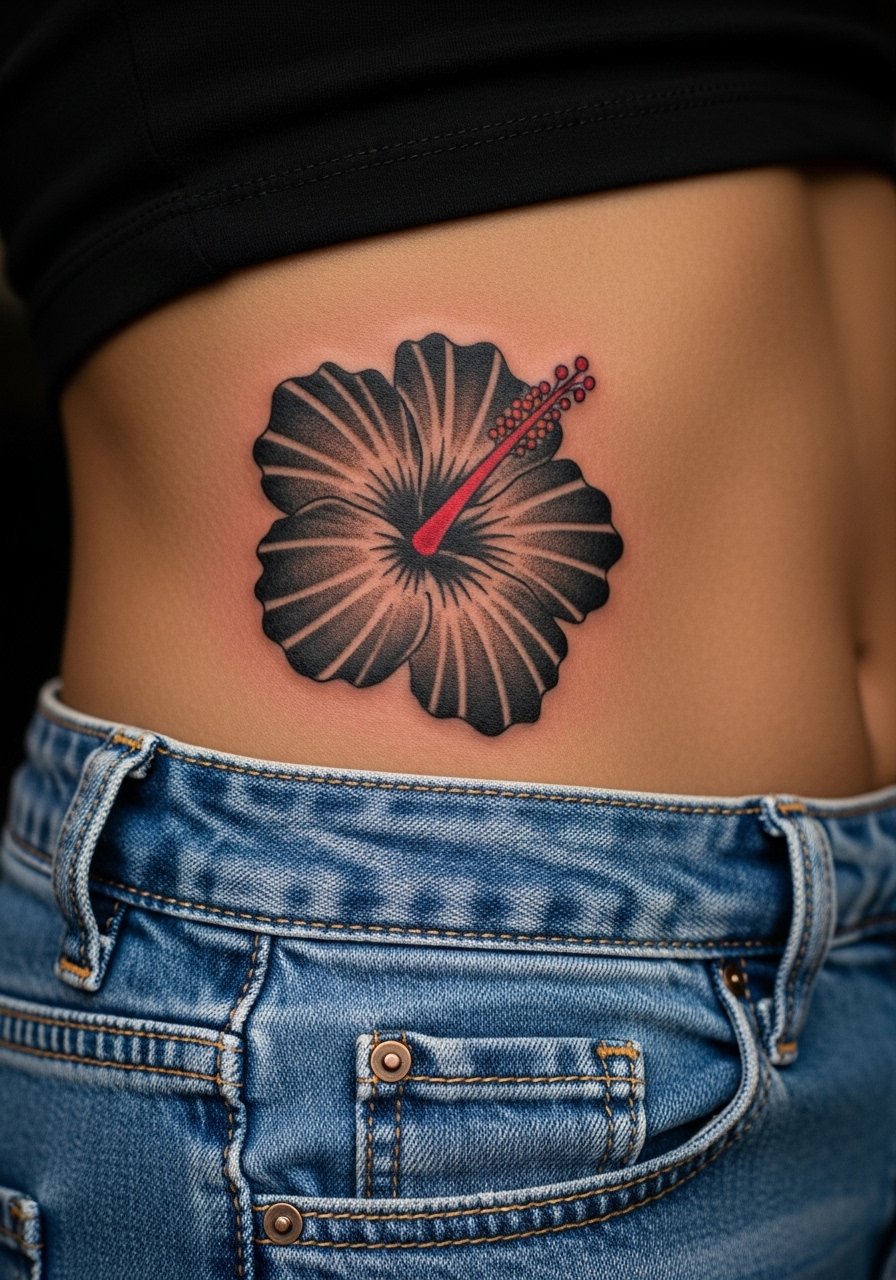
20. Heavy Blackwork Red Hibiscus on Hip
Hip tattoos need careful framing in the photo and for the session. Wear high-waisted denim pulled slightly down at the hip or high-cut shorts so only the tattoo zone shows. The hip is prone to shifting during weight changes so avoid overly tight inner detail. This placement can be done in a single longer session or two shorter ones. For showing it off select high-waisted pieces that reveal the top of the motif when you sit or stand.
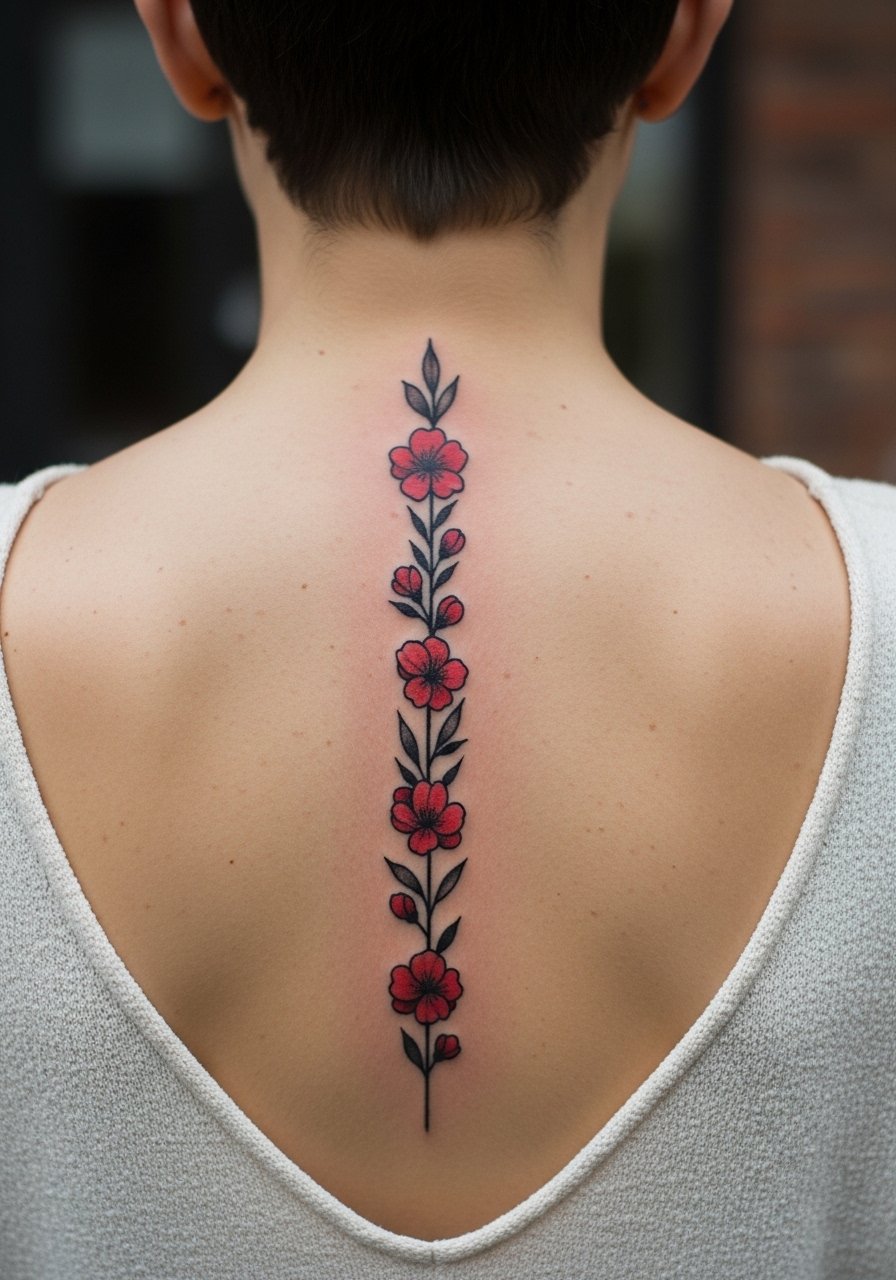
21. Anchor Blackwork Stem Along the Spine
Spine work is dramatic when done as a linear black stem with red blooms breaking the axis. Pain varies and each vertebral area can feel different. Sessions are usually split for comfort. Avoid packing too many tiny elements into the axis because they can blur with time. For showing this off choose an open-back top or dress so the spine reads like jewelry and not a busy field.
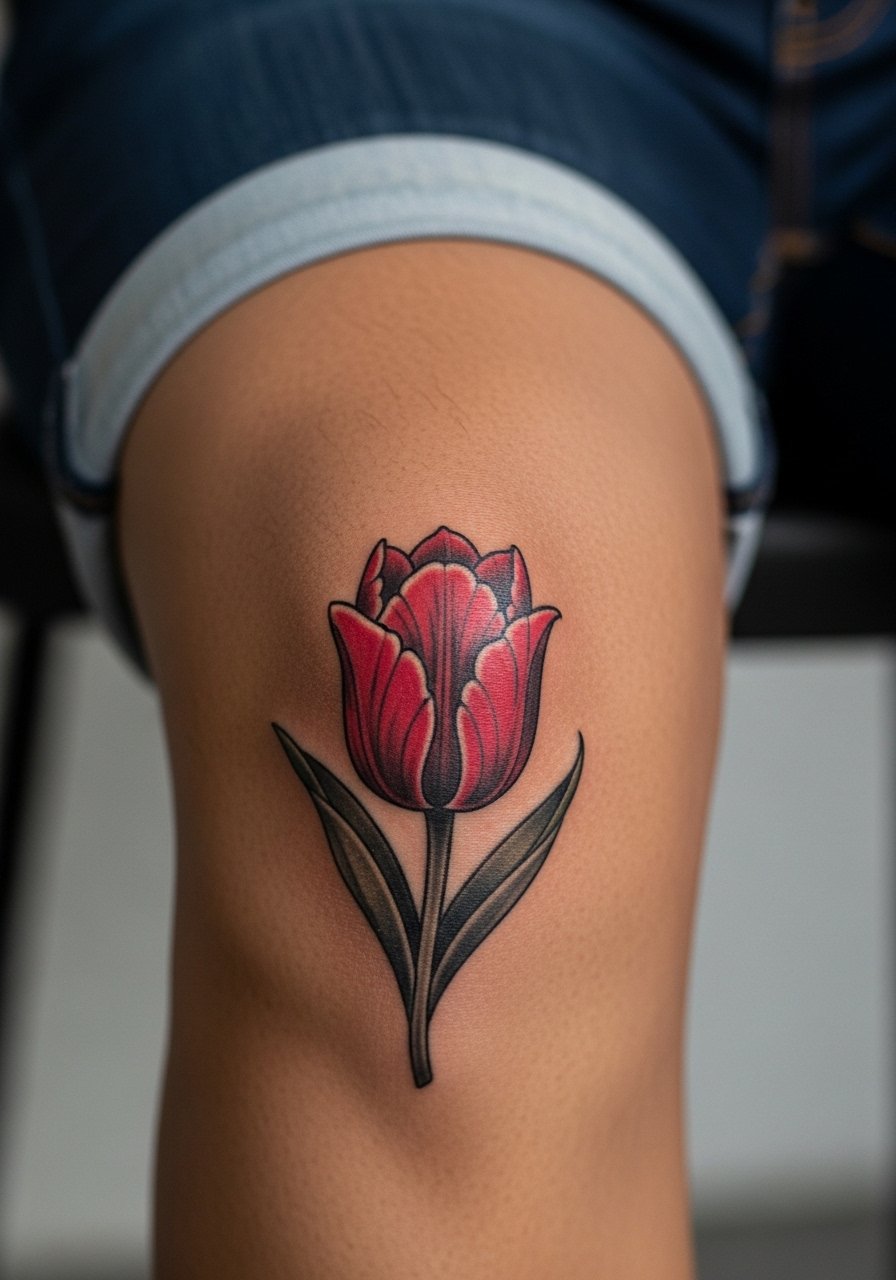
22. Blackwork Red Tulip Near the Knee Cap
Knee placements sit over a mobile joint and demand bolder shapes. Expect higher discomfort and potential for earlier fading. Artists disagree about how close to the cap to place detail. One camp favors moving elements slightly off the cap to avoid constant flex. The other camp will tattoo closer with heavier fill. Ask the artist for healed examples in both approaches before committing. For the session wear shorts you can adjust without constricting the leg.
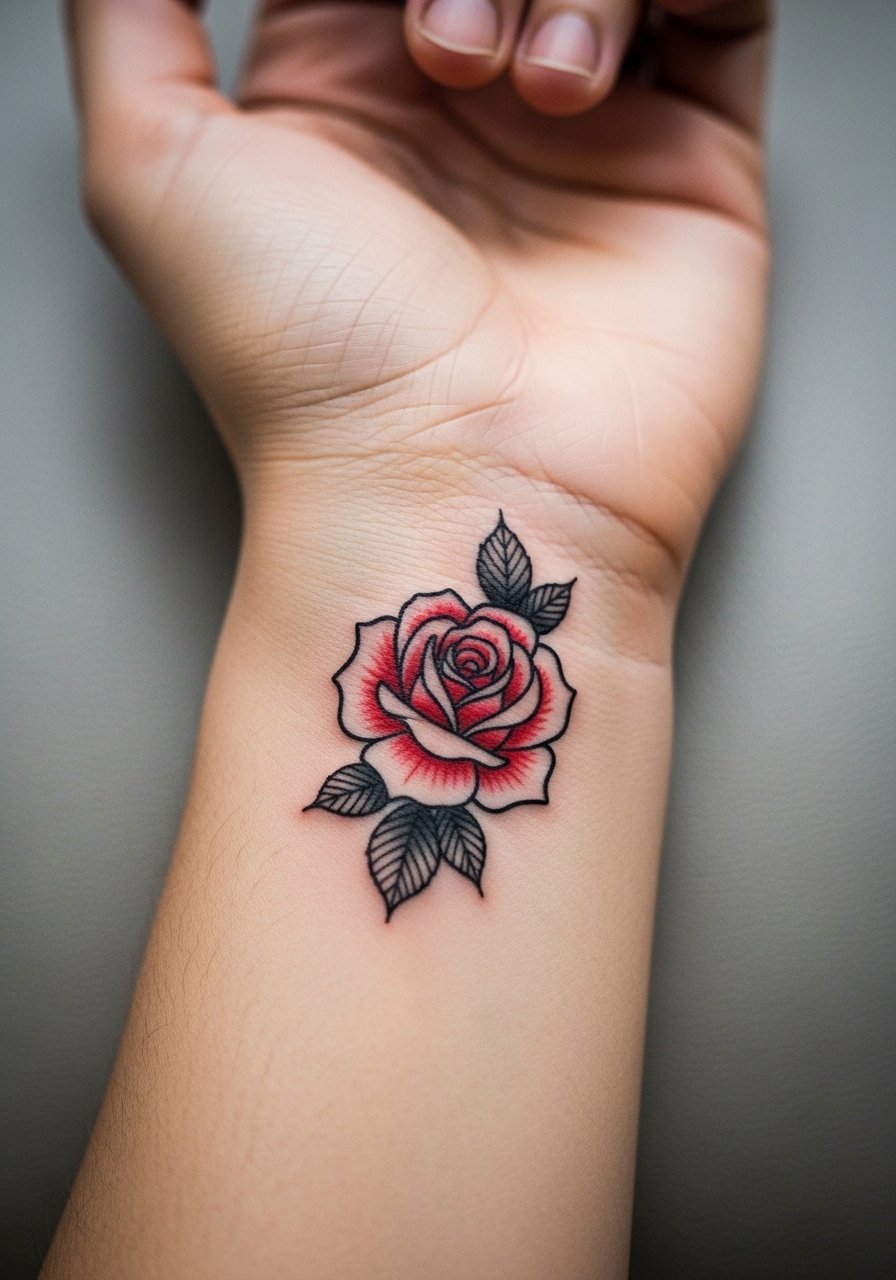
23. Graphic Red Rose Wrist Accent Paired with Rings
This small wrist accent uses a bold black anchor and a red rose to read like a charm. The wrist sees a lot of washing and friction so keep the shapes chunky. Session time is brief but touch-ups may be needed. For styling, layer with thin stacking rings that echo the bloom without covering it.
24. Blackwork Floral Band Around Biceps
A biceps band made of blackwork petals with intermittent red fills feels wearable and classic. Biceps tolerate bold saturation well and the piece can be a single-session project. A mistake is wrapping too tightly so the design looks like one continuous dark stripe. Leave negative space between blooms so each element ages clearly. For appointments wear a loose sleeveless top so the artist can work without you readjusting clothing.
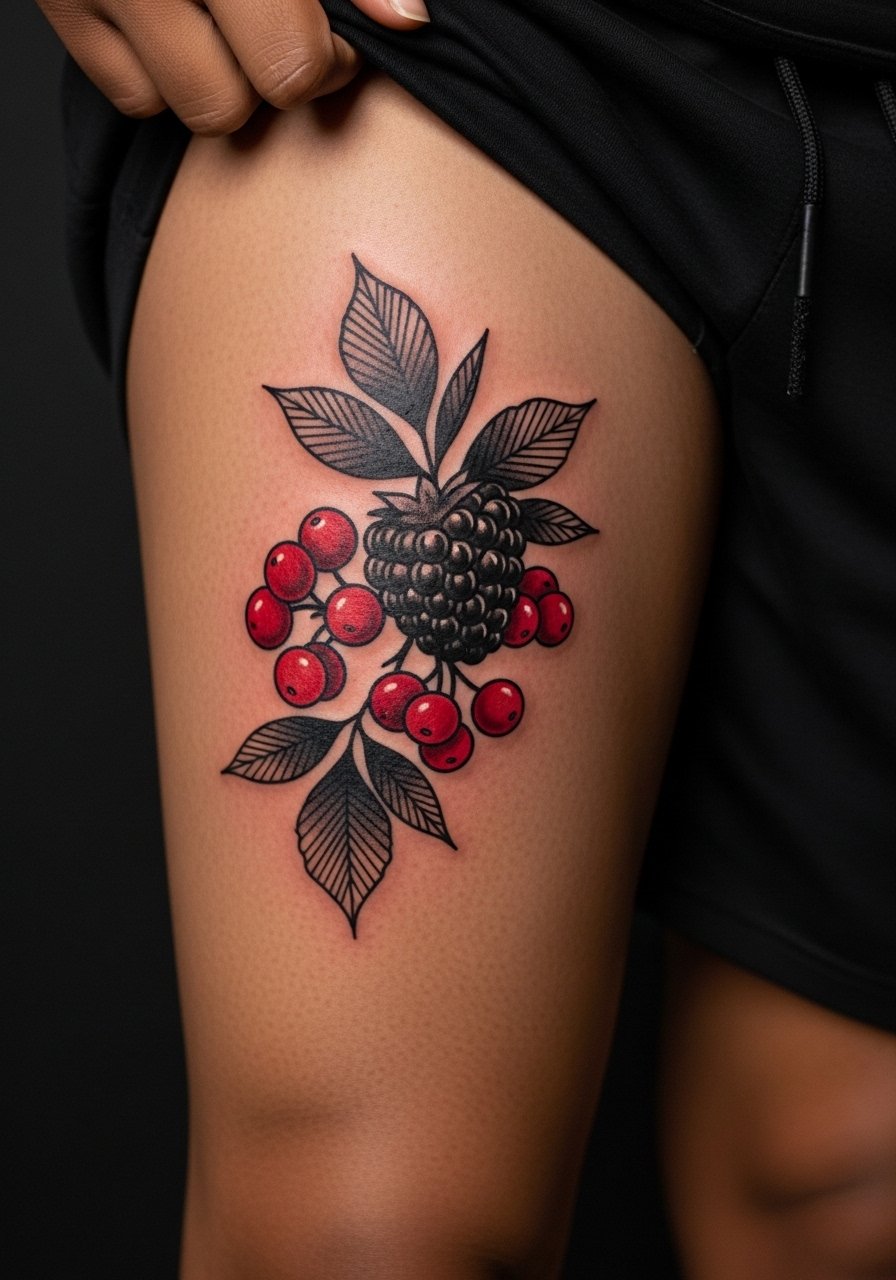
25. Blackwork Red Berry Cluster on Inner Thigh
Inner thigh tattoos require discretion at the session and careful planning about friction from clothing. Wear shorts pulled up slightly to reveal only the area being worked on. The inner thigh can blur if too many small dots are used so ask for clear shapes and bold contrast. Sessions are moderate and healing can be sensitive because clothing may rub the area. For showing it off later choose skirts or shorts that reveal a narrow strip without chafing the site.
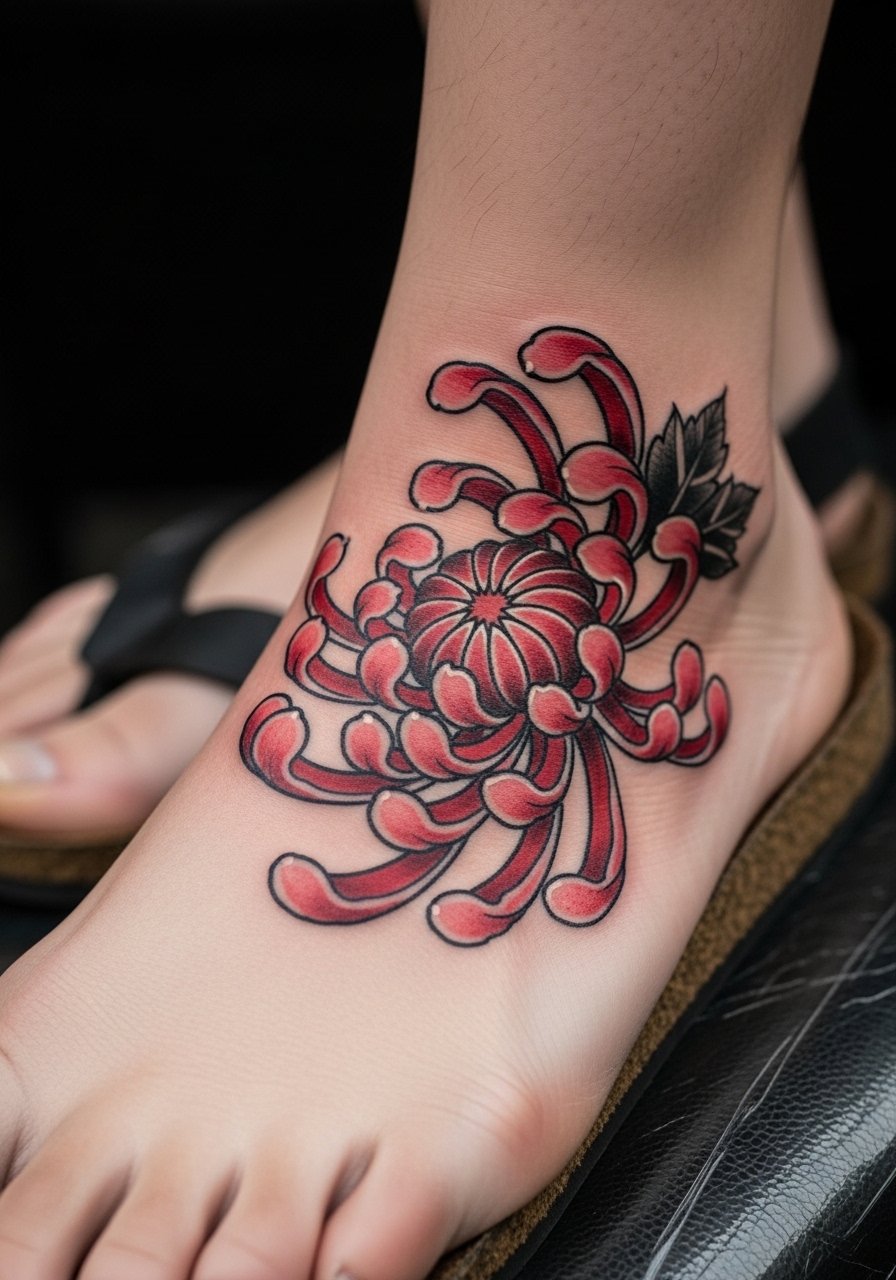
26. Graphic Black Chrysanthemum on Foot Arch
Foot arch tattoos live in a high-friction zone and need bolder shapes to last. Expect touch-ups earlier than on the arm or thigh. The session is short but healing can be fussy because socks and shoes touch the area. A common mistake is picking delicate shading in a zone that will see constant abrasion. For showing it off pick low shoes or sandals during outings so the arch motif can peek without being hidden.
27. Bold Blackwork Red Flower Nape Accent
A small nape piece sits at the base of the skull and reads neat when done as a bold black anchor with red bloom. Wear a wide-neck shirt with the collar pulled aside so the area is exposed safely for the session. The nape can blur if inner hairline rubs the area too much. Ask the artist how they approach healed touch-ups around the hairline. For style, pair with a low bun or a loose collar to reveal the tattoo selectively.
Frequently Asked Questions
Q: How does heavy blackwork with red accents age compared with purely black tattoos?
A: From what I have seen, saturated blackwork usually keeps shape the longest because the large fields anchor the design. Red accents tend to soften a bit faster, especially on high-friction areas like fingers and ankles. Plan for a possible touch-up for the red at year two to three depending on placement and sun exposure.
Q: Are there specific placements to avoid if I want the red to stay bright longer?
A: Yes. Fingers, the tops of feet, and the inner wrist face more washing and abrasion so red will fade sooner there. If you want lasting color pick thicker red fills on the outer thigh, upper arm, or shoulder blade instead.
Q: If an artist prefers pure blackwork and refuses red, how do I find someone who will do both?
A: Use discovery pathways like local studio directories, targeted hashtags, and community forums to find portfolios that show healed black and red pieces. Look for healed photos rather than only fresh tattoos so you see how the red settled.
Q: Will a blackwork red flower tattoo hurt more than a similar-sized black-only piece?
A: Pain is driven by placement and session time more than color choices. Adding red does not increase discomfort by itself, but if you plan to saturate an area in one sitting that can make the session longer and feel more intense.
Q: Can I wear normal clothes to the appointment or are there wardrobe rules for certain placements?
A: For most areas pick clothing that gives the artist easy access without you exposing more than needed. Examples are a loose button-down for the upper back, a cropped top for ribs, and shorts for thigh work. A loose button-down is a versatile option for many sessions.
