
Fine line stars are everywhere right now, and that surge has a cost most people only notice at year two. The fresh photos are crisp, but the small lines and tiny rays need spacing and depth that most saved pins do not show. Read these references so you can pick a North Star design that still reads well after a touch-up or two, starting with a simple forearm option.
1. Minimalist Single North Star on Inner Forearm
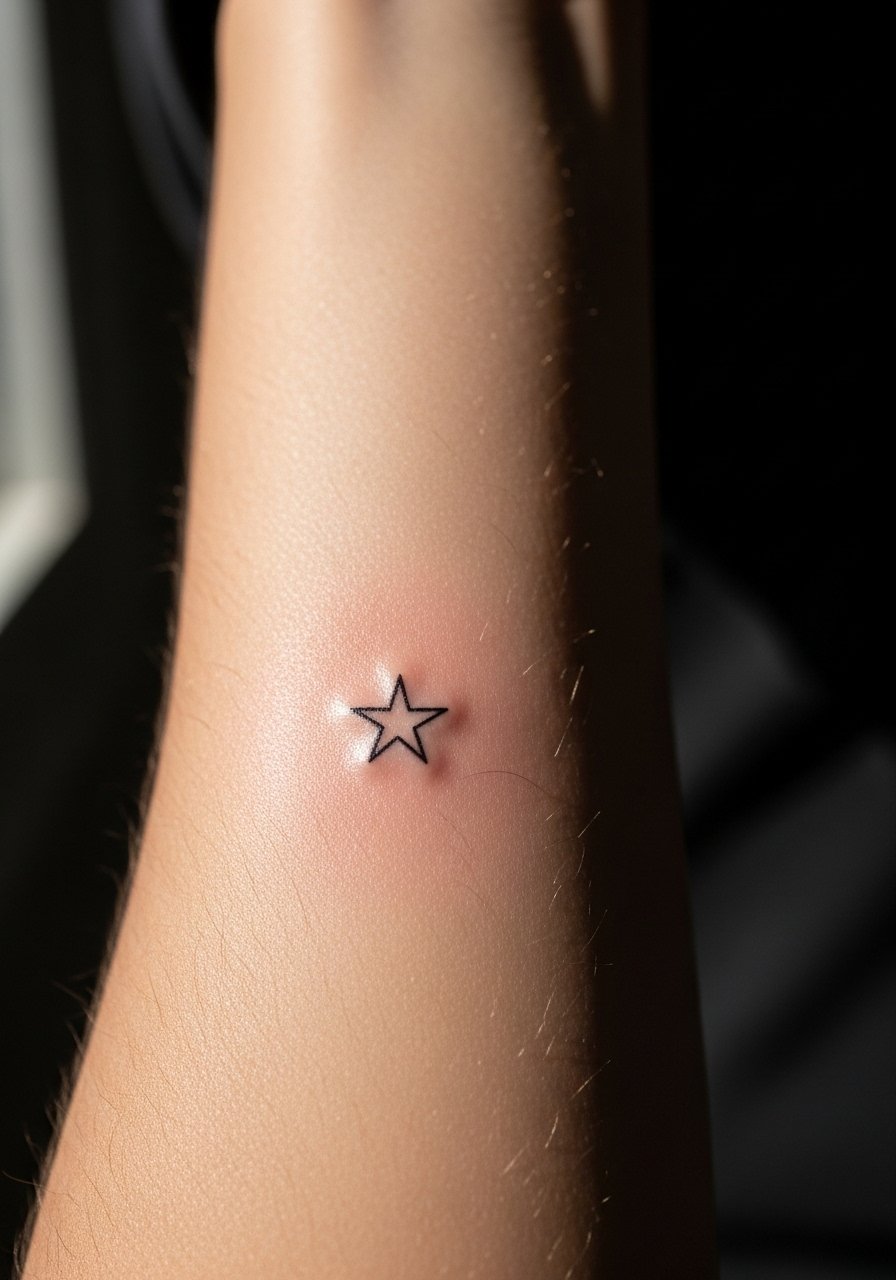
I've seen this tiny outline last best when artists map a slightly thicker main point and keep the rays short. Fair warning, the inner forearm feels easier to tolerate than ribs but still needs clear access during the session. Tell your artist you want 2–3mm line weight for longevity and ask for a temporary transfer to wear a day before booking. A common mistake is asking for hair-thin rays that look delicate fresh but blur into a soft blur by year three. For showing it off, roll up a rolled cuff chambray shirt and wear a slim gold chain bracelet on the opposite arm so both pieces balance without crowding the forearm.
2. Fine Line North Star with Rays on Inner Wrist
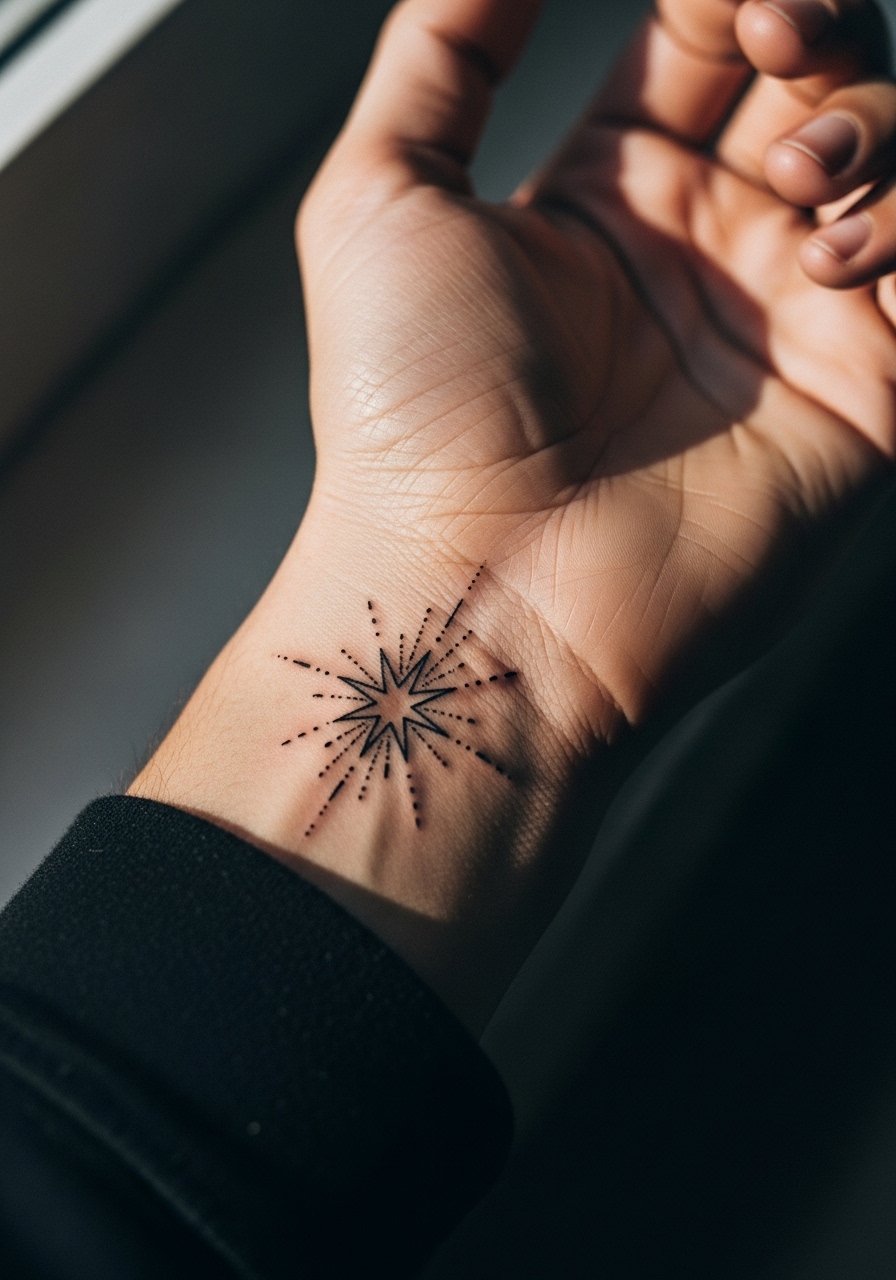
Most people who regret wrist stars ask for lines that are too close together. The wrist moves and washes constantly, so ask the artist for slightly bolder primary rays and a tiny gap between secondary strokes. Pain is low to moderate and sessions are short, about thirty minutes for a 1–2 inch piece. Expect touch-up at year two or three if you choose minimal spacing. For the appointment wear a sleeveless tank top so the artist has clear access, and for daily wear a thin leather cuff helps frame the star without covering it.
3. Compass-Integrated North Star on Ankle
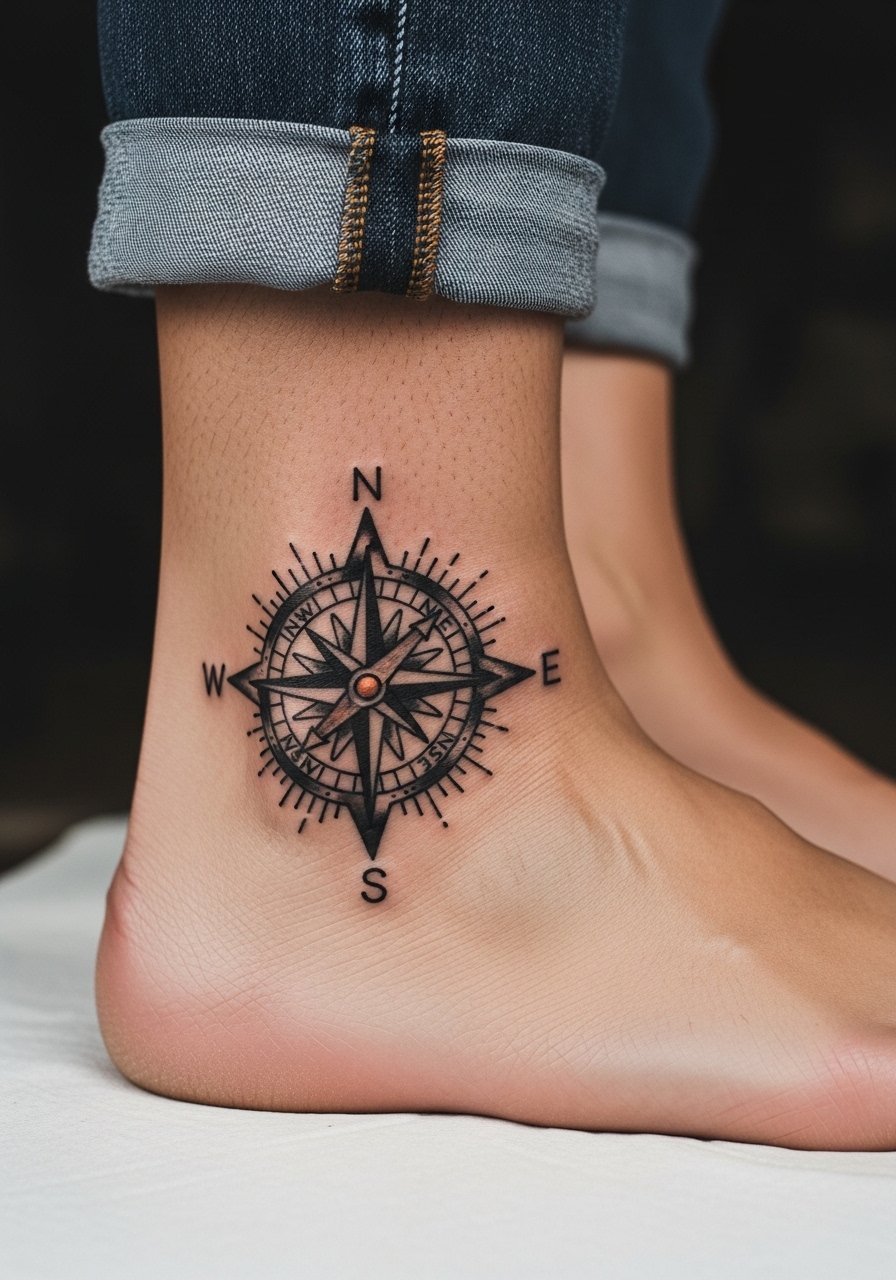
The ankle is a classic spot for travel-forward motifs, but ankle skin shifts with footwear friction. I recommend keeping the compass frame simple with bold outlines and limited color accents so the piece reads through socks and sandals seasons. The session is one to two hours and feels spotty when the needle nears bone. A common mistake is over-detailing the compass spokes. If you want to show it off in summer, pair the tattoo with strappy flat sandals or cuffed slim jeans that stop above the anklet line. Talk with your artist about elasticity and how they will space elements to avoid stretching.
4. Watercolor North Star Burst on Outer Forearm
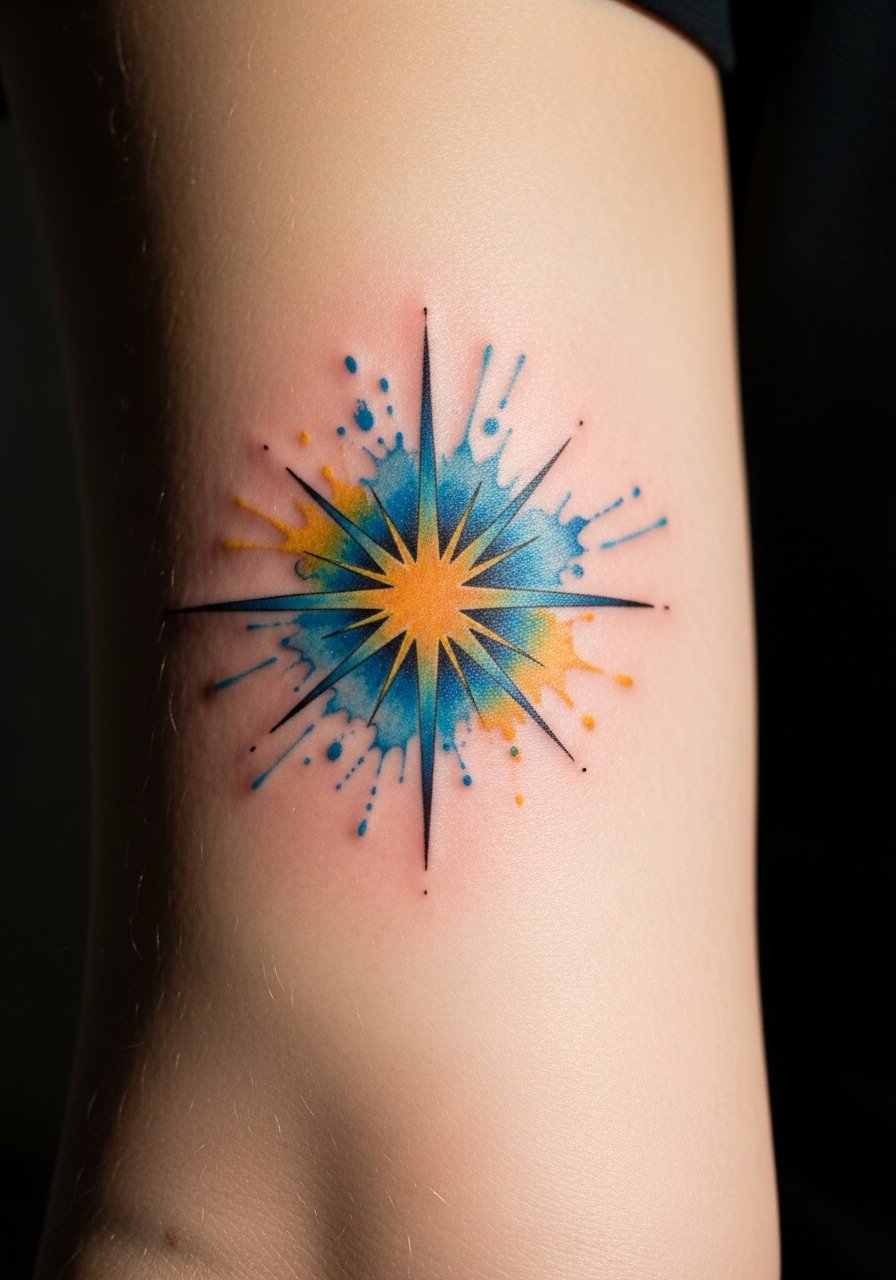
Watercolor effects read vibrant fresh but they rely on saturation and placement to survive. For an outer forearm burst, ask for pigment anchors around the star so the color has a structure to settle into. Pain is moderate and a single longer session usually works for a four-inch piece. Most watercolor fades more in high-sun areas, so expect a softer palette at two years without heavy restoration. The biggest mistake is requesting wash-like gradients without the supporting black anchors. Show this piece off with a rolled-up sleeve and a loose fit short sleeve tee that keeps attention on the color without competing.
5. Geometric North Star Mandala on Upper Chest
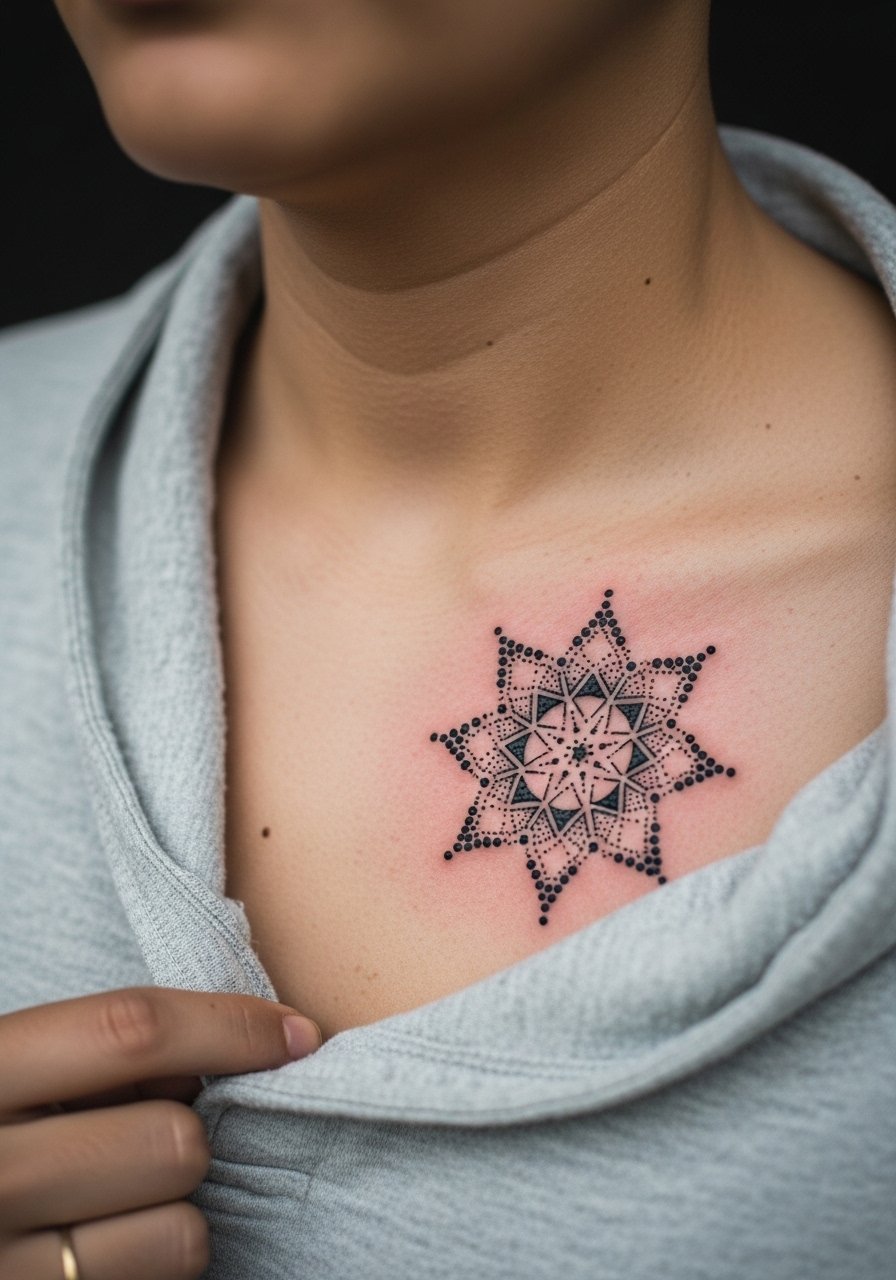
This mandala-style star needs room. Most failures happen when clients ask for mandala density at small scale. On the chest, scale up to at least five inches and build dot work spacing to avoid merging. The session runs two to three hours across multiple sittings for precise stippling. Pain on the upper chest varies but expect sensitivity near the sternum. Artists split on fine line mandalas in this zone. One camp says tiny dot work blurs with body movement. The other camp argues proper spacing and depth keep dots distinct. Ask your artist which approach they favor and why. For evenings, pair the tattoo with a deep v neck tee so the mandala sits naturally above the neckline.
6. Realistic North Star with Radiant Beams on Upper Back
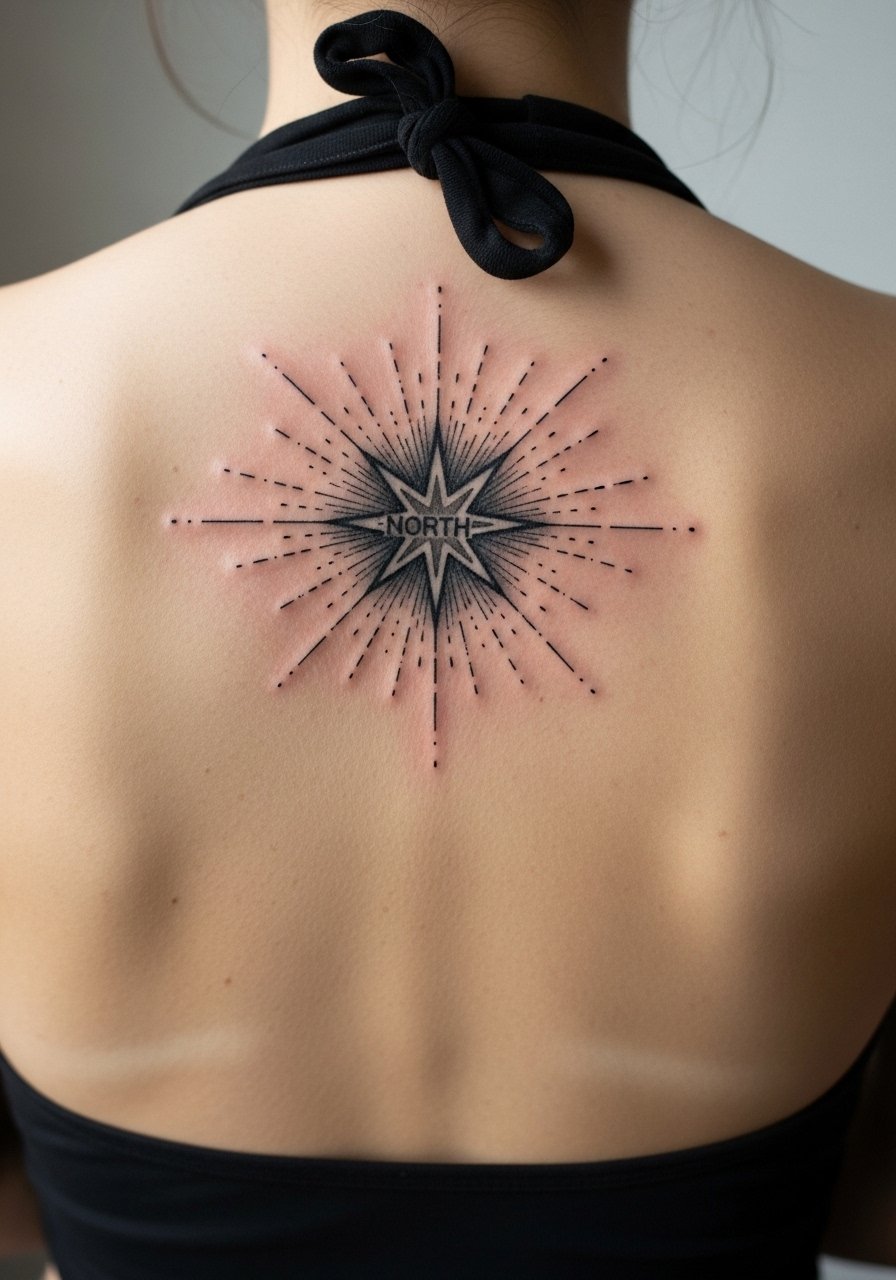
Upper back realism gives you size and subtlety that chest work sometimes lacks. Expect two sessions for 4–6 inches with an emphasis on gradual black and gray gradients. The pain is low to moderate but sessions can be longer due to the shading. A common mistake is crowding the beams into thin lines that fade quickly. Tell your artist you want soft edges and broad gradients so the beams remain visible after healing. For session day wear a strapless bralette or a loose tank for easy access. This placement supports the "always at your back" angle if you want the star to be private guidance rather than a daily display.
Pack Smart
The small, visible pieces above need different prep than larger back or chest work, and a few items smooth both the session and the first week.
-
Stencil transfer paper kit. Lets you preview line placement on skin, which is crucial for tiny wrist and forearm stars so you can live with the scale before the needle hits.
-
Topical numbing cream. Applied before a longer upper-back or chest session it reduces edge pain without changing how the artist works.
-
Thin protective film roll. Useful on ankle and foot pieces during the first week when friction from socks and shoes is highest.
-
Fragrance-free gentle body wash. Cleanses healing areas like forearms and wrists without harsh irritants that can dull fine line pigments.
-
Aquaphor healing ointment. A thin layer in the first couple of days keeps delicate lines from forming heavy scabs that pull ink from tiny channels.
7. Fine Line North Star with Rays on Inner Forearm (Artist Consultation Lead)
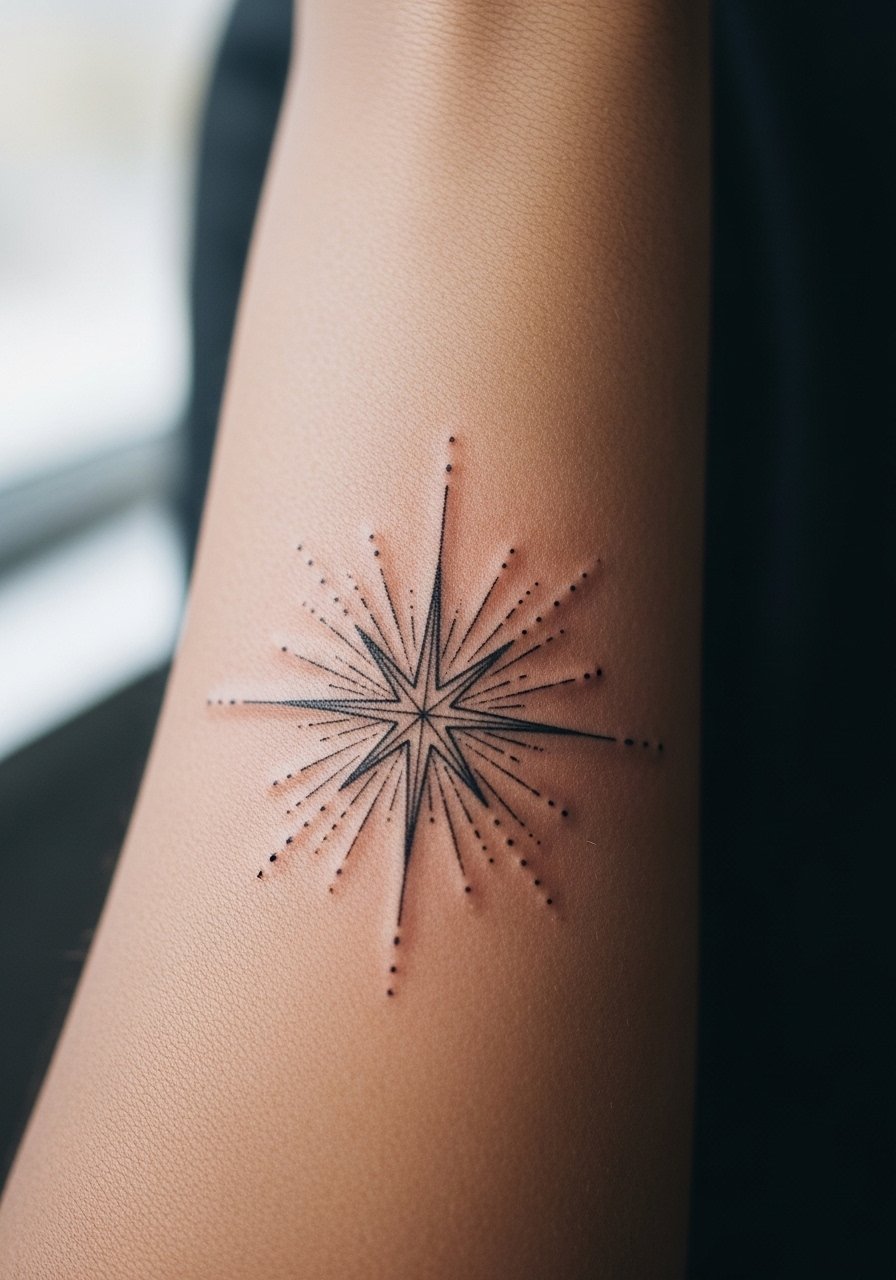
When you sit down for this one, bring reference photos that show the exact line weight you want. Tell the artist you prefer single-needle fine line but request a slightly heavier main axis so the motif keeps reading in photos. In my experience, a two-needle or a slightly thicker anchor point makes a huge difference for contrast on medium and dark skin. Expect a single session under an hour and a touch-up window at year two. For session wear, choose a loose short-sleeve tee so the artist can roll the sleeve without tugging.
8. Blackwork North Star Silhouette on Shoulder (Visual Impact Lead)
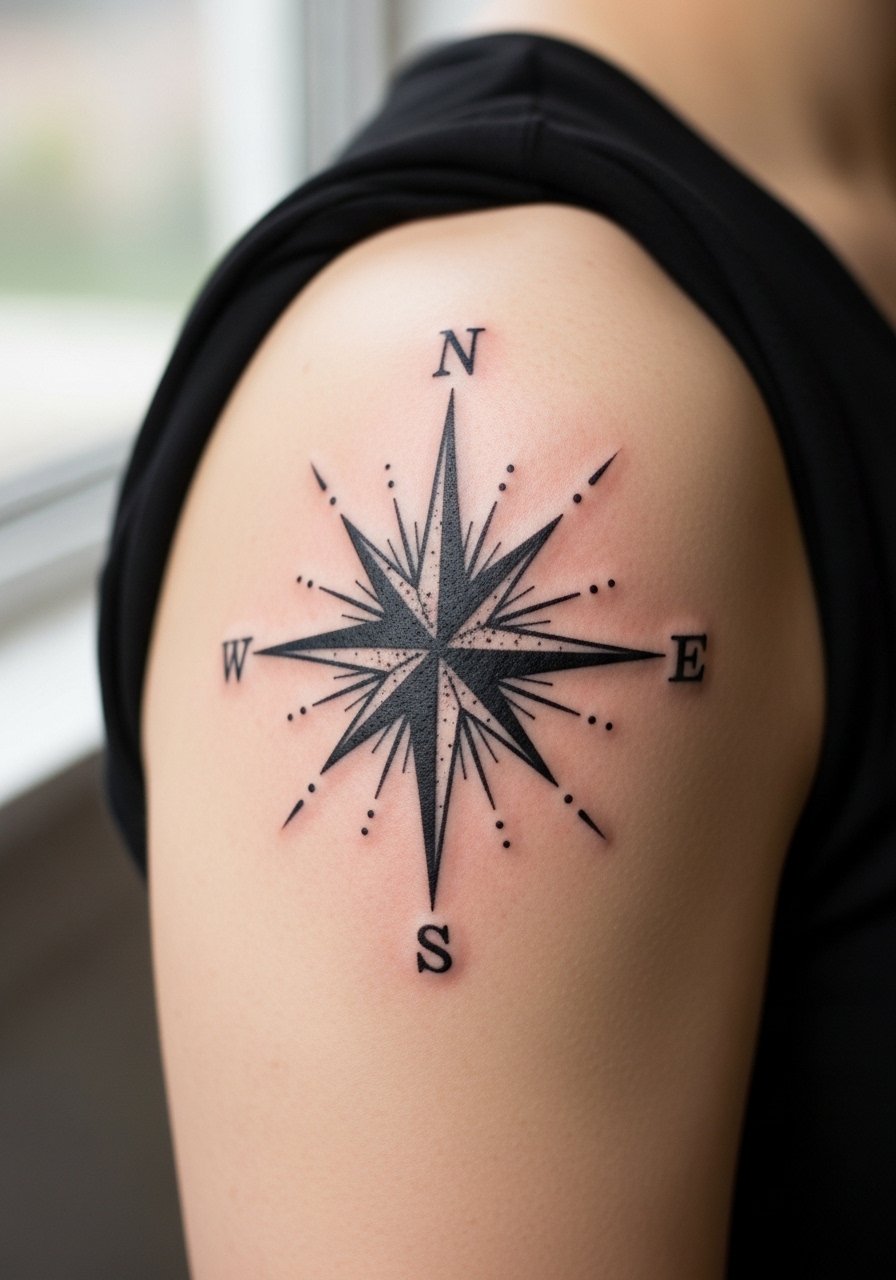
There is a presence to solid black fills that reads from across a room, which is why blackwork suits shoulder canvases. Sessions can stretch across two to three sittings for large six-inch pieces. The biggest mistake is over-texturing inside the silhouette. Keep the shape bold and the inner fields clean so saturation ages into a strong block rather than uneven patches. Pain is moderate and the shoulder tolerates longer sessions. For outfits, sleeveless muscle tanks or a cropped olive jacket work well to frame the piece without hiding it.
9. Tribal North Star Outline on Calf (Mistake Lead)
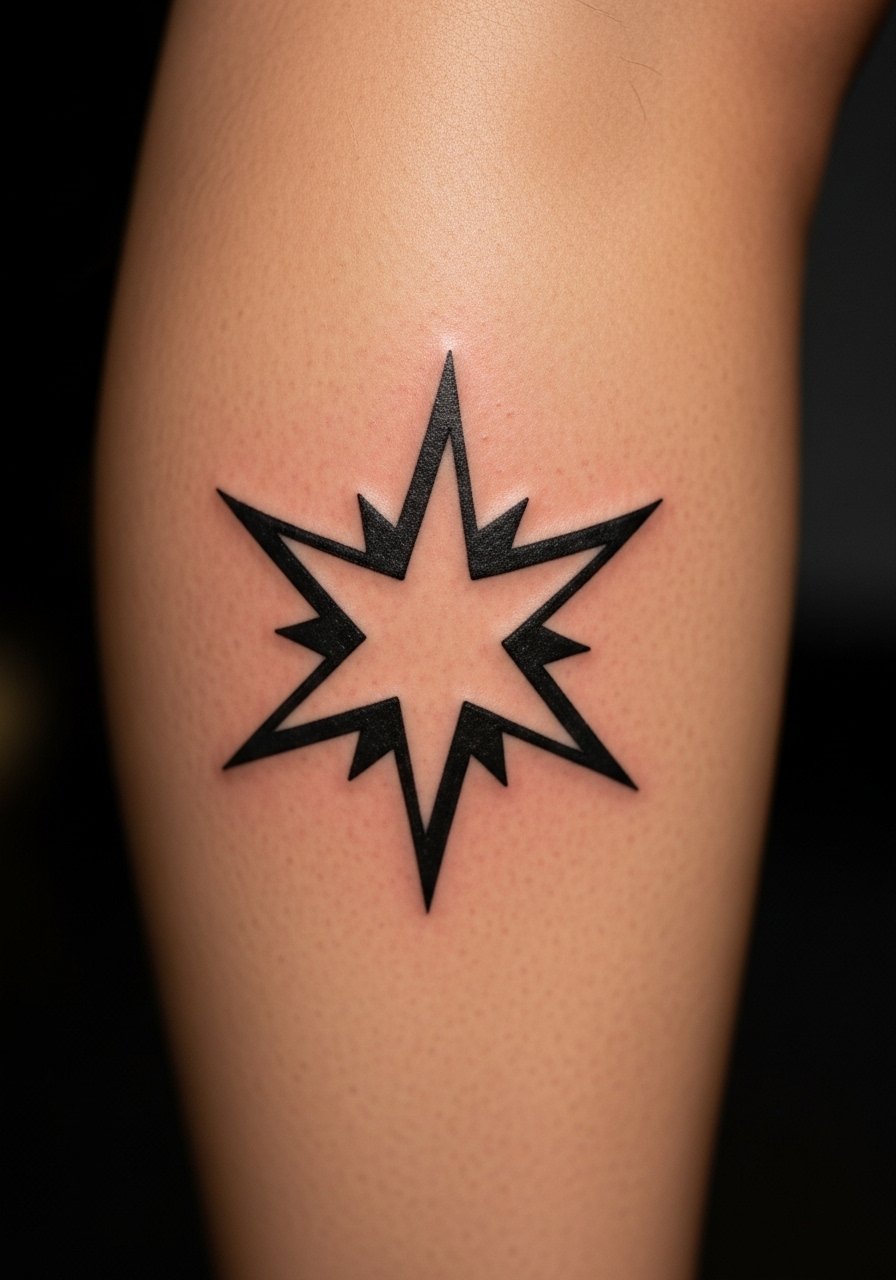
Tribal lines need correct proportion to the calf shape. The common error is copying a flat tribal pattern and forcing it onto a rounded surface; the lines then misalign when the leg moves. Ask for a wrap test of the stencil while standing and walking to see how the design behaves across muscle contours. Two sessions typically get the placement and final cleanup right. Pain is moderate and manageable. For showing it off, pair the calf work with cropped pants or summer shorts and strappy sandals that let the pattern breathe.
10. Moon and North Star Pairing on Upper Back (Aging/Healing Lead)
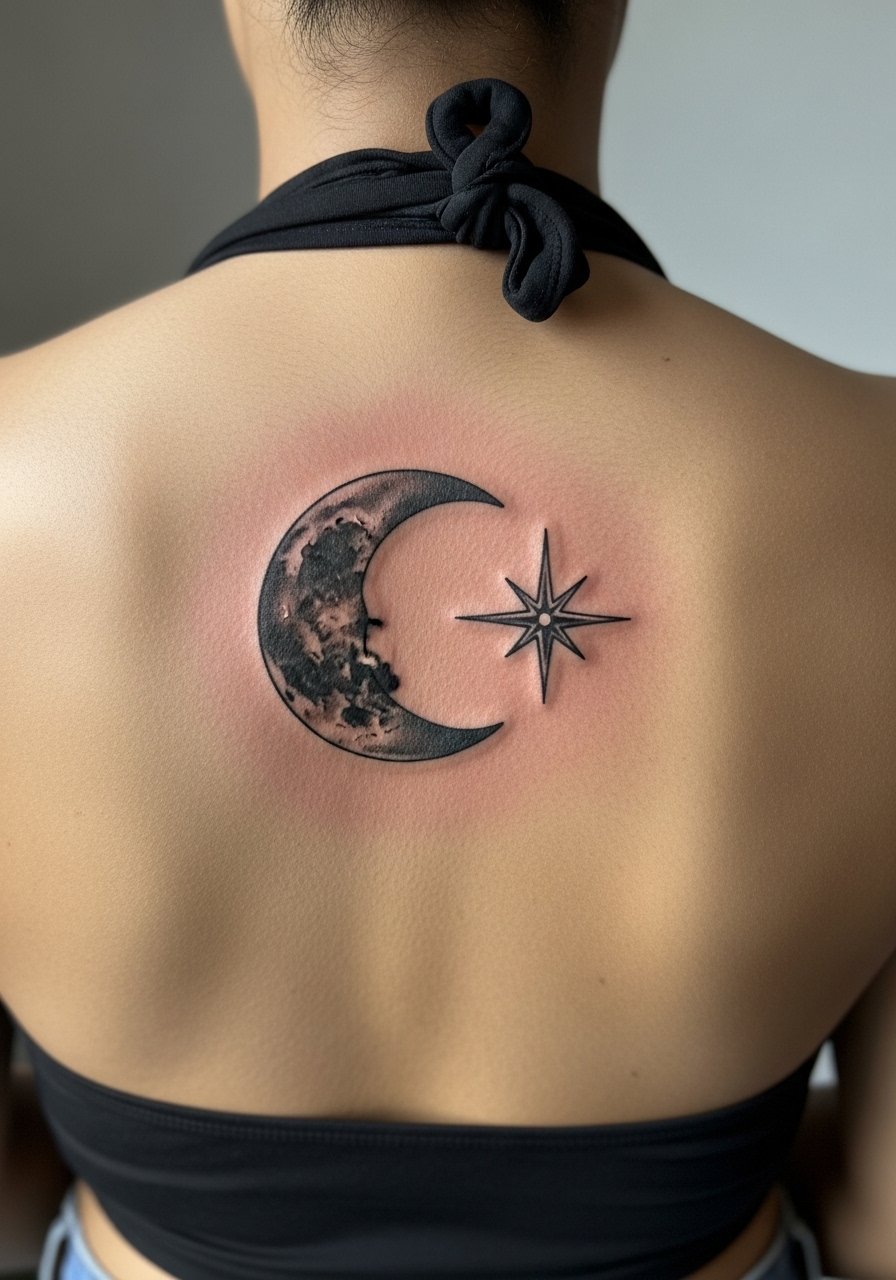
Moon pairings add emotional range but require spacing choices that prevent overlap as shading softens. Realistic moon shading adjacent to a bright star can blend if placed too close. For a 3 by 3 inch composition on the upper back plan two shorter sessions and expect subtle softening at two years if the shading is dense. A common mistake is pushing the moon too close to the star for composition symmetry. For the session wear a strapless bra or a loose tank so the artist has clear upper-back access.
11. 3D North Star with Glow Effect on Chest (Pain Warning Lead)
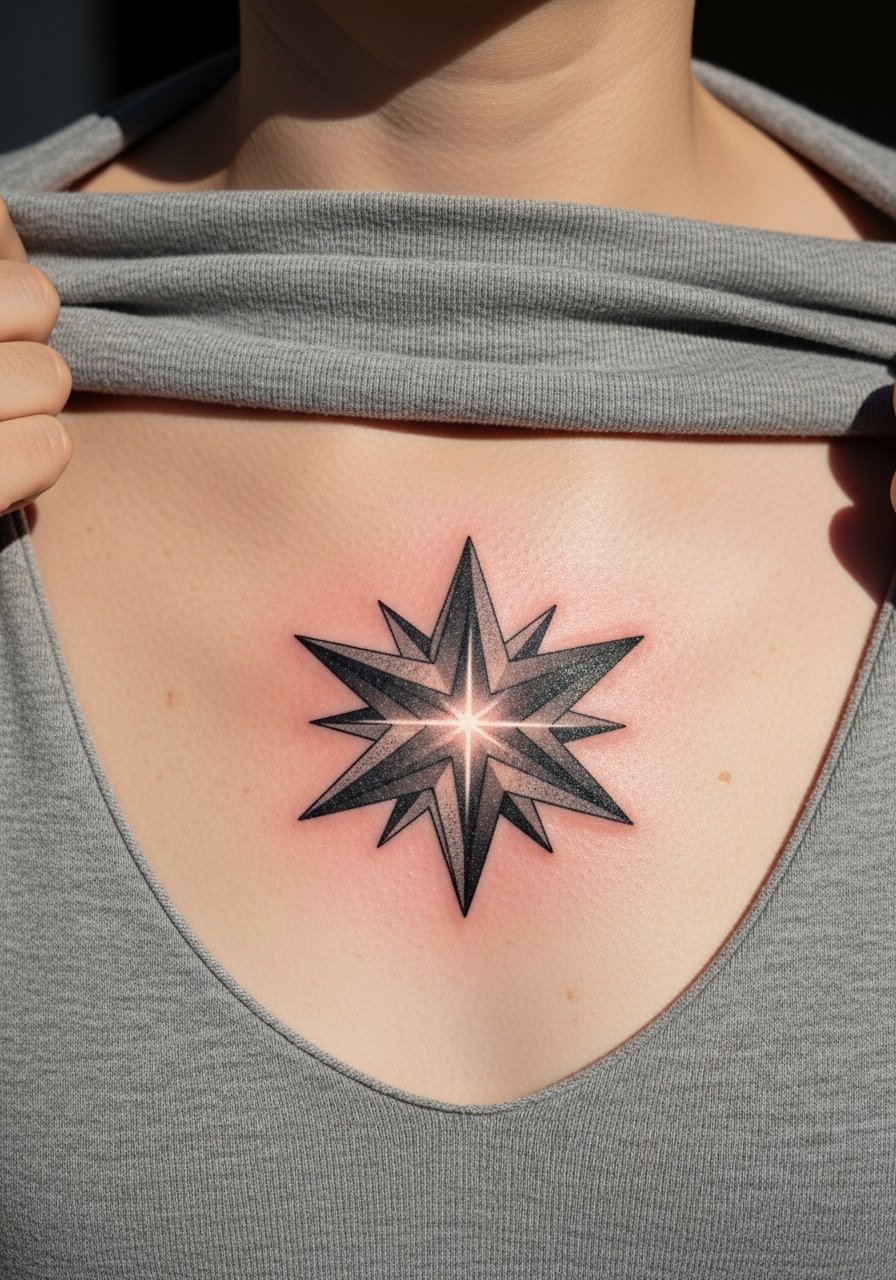
Chest placements read big but they are sensitive. Expect three to four sessions for a five-inch micro-realism star with glow. Pain on the sternum region can be sharp so numbing creams come up in consultations often. Artists are split on numbing; some use it for longer chest sessions while others avoid it to preserve the skin response. If you choose numbing, talk specifics and timing. The common mistake is underestimating recovery time between sessions. For show-off outfits choose open button-downs or a deep v neck tee to let the star sit naturally on the chest.
12. Dotwork North Star Constellation on Upper Back (Personal Observation Lead)
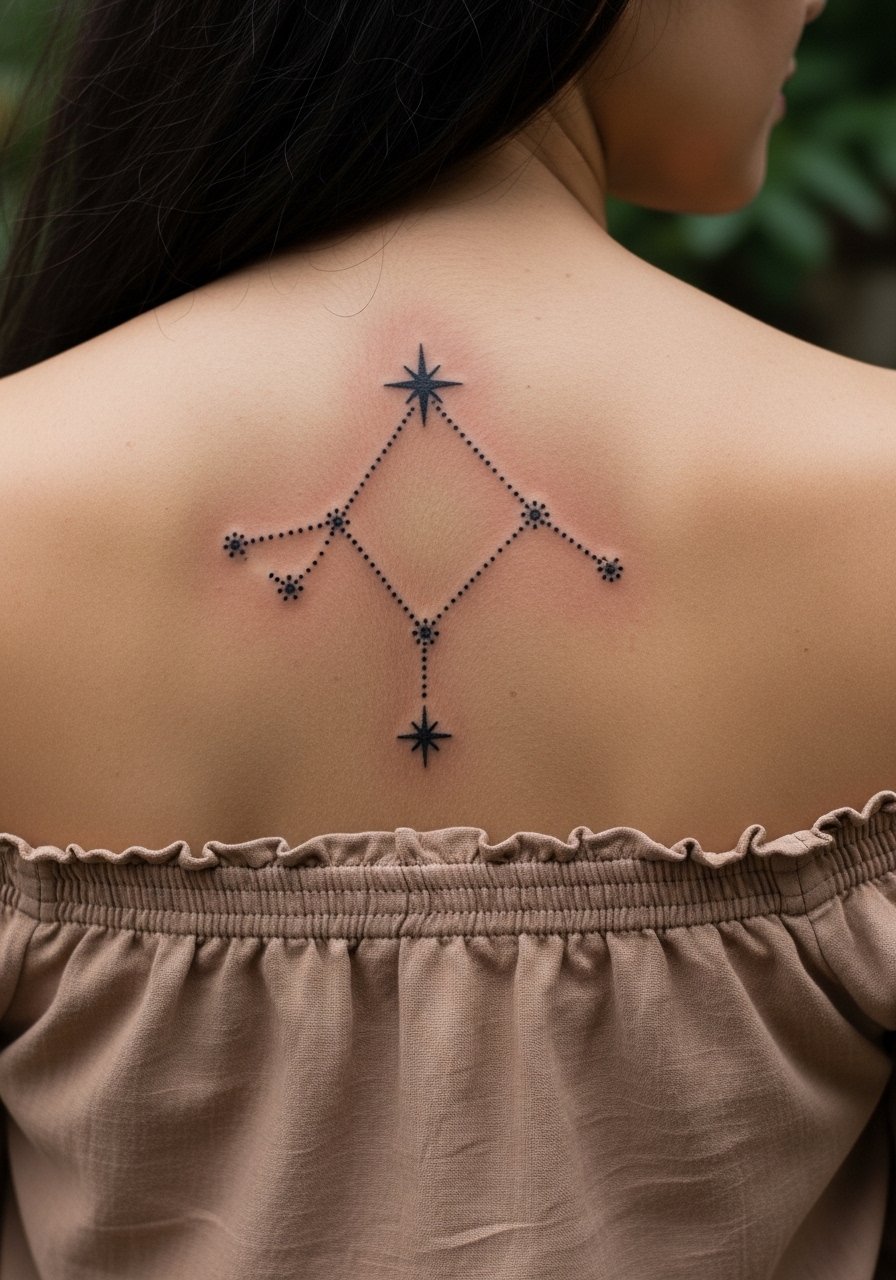
I've seen dotwork constellations hold beautifully when artists use spacing as a design element rather than packing dots densely. On a six-inch back piece, plan for two to three sessions and insist on consistent dot depth so the pattern heals evenly. Dotwork ages differently than lines; the effect softens gracefully when spaced right. A real mistake is asking for maximum density to mimic a printed image. For wardrobe, an off shoulder blouse frames the makeup of dots without covering the pattern.
13. Neo-Traditional North Star with Anchor on Forearm (Styling Lead)
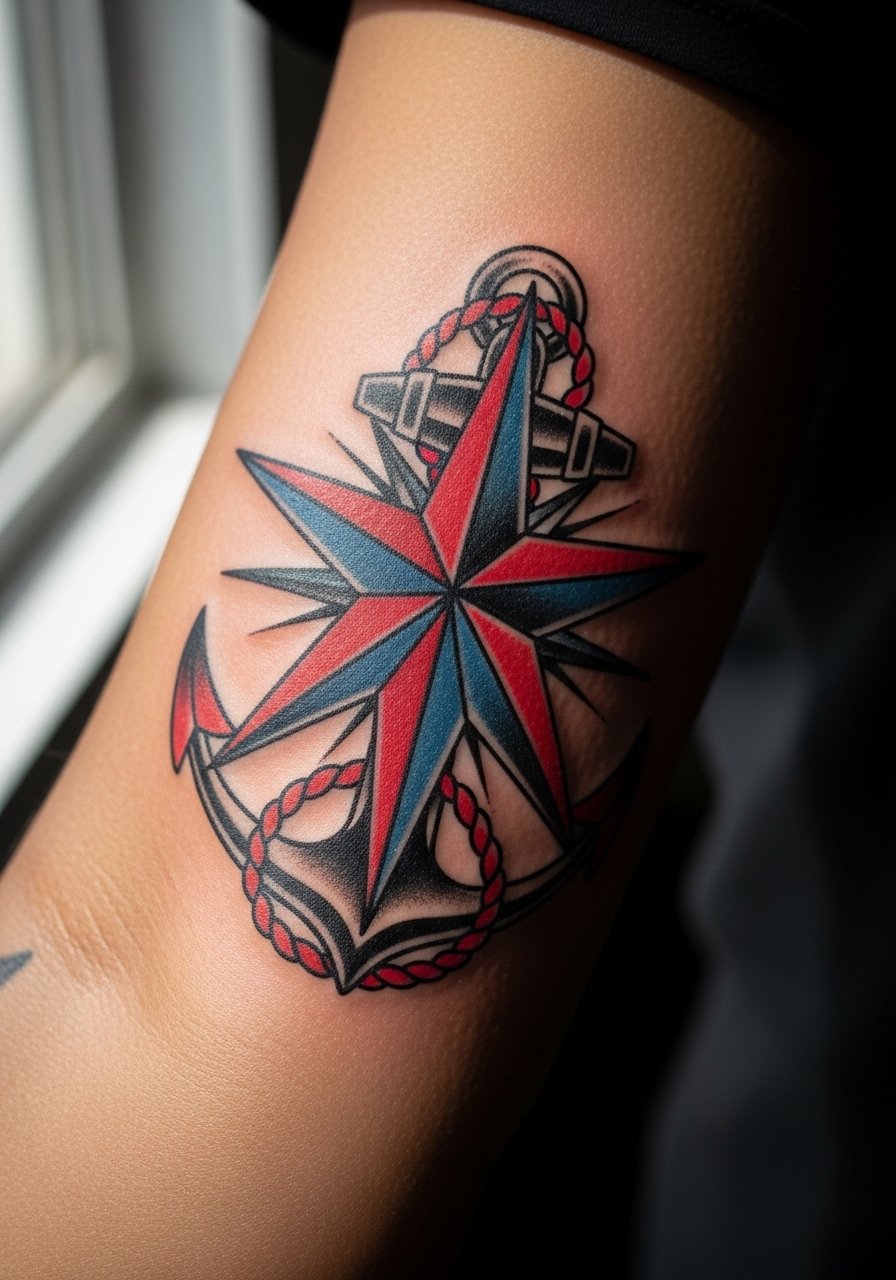
This sailor-inspired pairing reads best with bold outlines and selective color pops to resist fading. The forearm session is two sittings for crisp outlines and color saturation. A common mistake is overloading the forearm with tiny anchor details that blur at small scale. Keep the anchor readable and let the star remain primary. For showing it off wear a rolled-up sleeve and a slim gold chain bracelet to balance the visual weight on the arm.
14. Micro-Realism 3D North Star on Sternum (Consultation Lead)
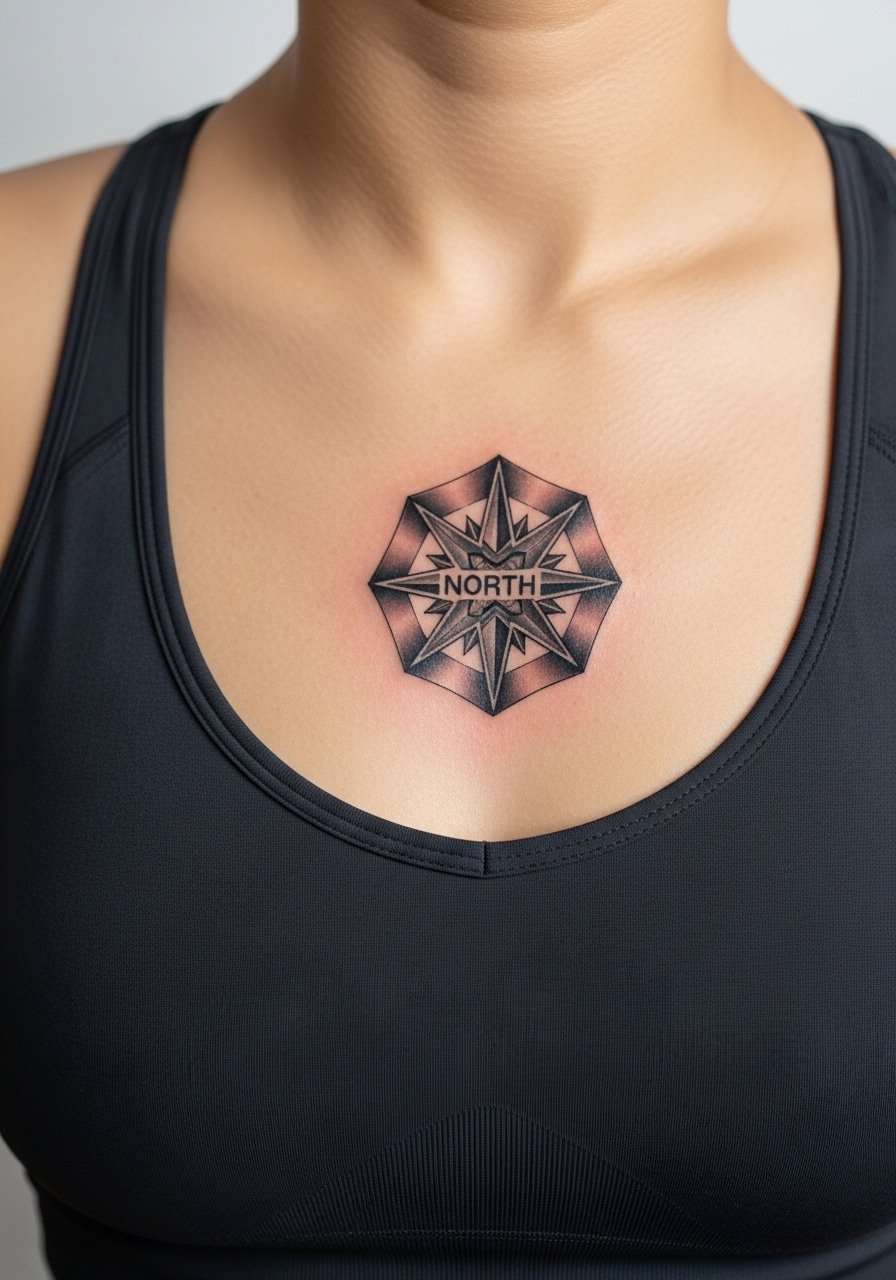
When you consult for sternum micro-realism prepare for a detailed discussion about session length and numbing. This area is sensitive and artists often prefer short, focused sessions to manage swelling. The mistake is booking a marathon session that becomes painful and shifts positioning. Expect three to four sittings for a five-inch piece, and ask for a staged plan that allows checking healed progress between sessions. Clothing for the appointment should be a fitted sports bra or bandeau so the artist can access the sternum without full exposure.
15. Tiny North Star Finger Tattoo (Mistake Lead)
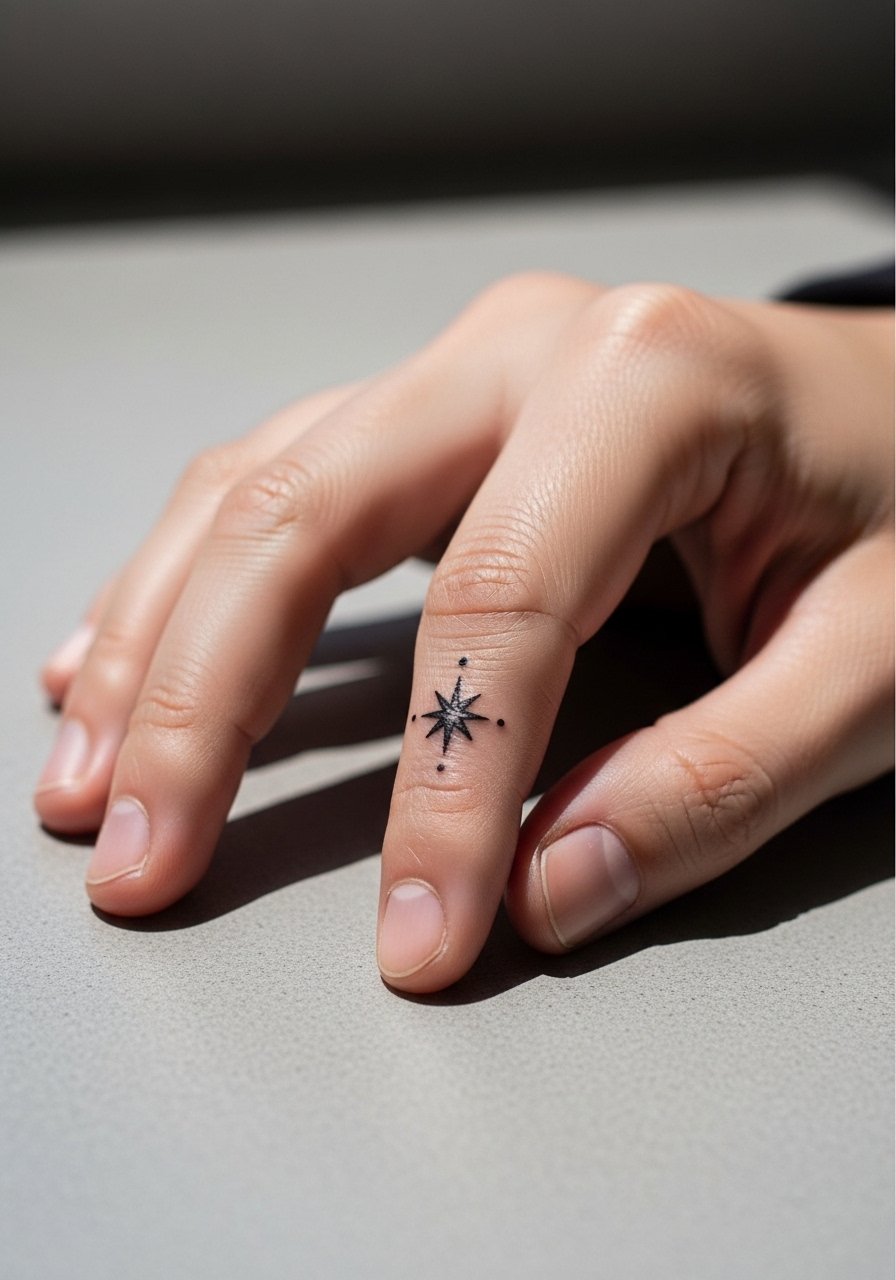
Finger tattoos suffer from high wear and frequent touch-ups. The biggest mistake is opting for detailed rays on such a narrow canvas. If you want a finger star, choose a simplified silhouette and accept touch-up as likely at year one or two. Pain is sharp but brief. Also note that hands still influence some hiring decisions, so weigh visibility against career considerations. For the session keep it brief and bring a glove for warmth between runs if you have short breaks.
16. North Star as "Always at Your Back" Upper Back Placement (Unique Angle, Personal Observation Lead)
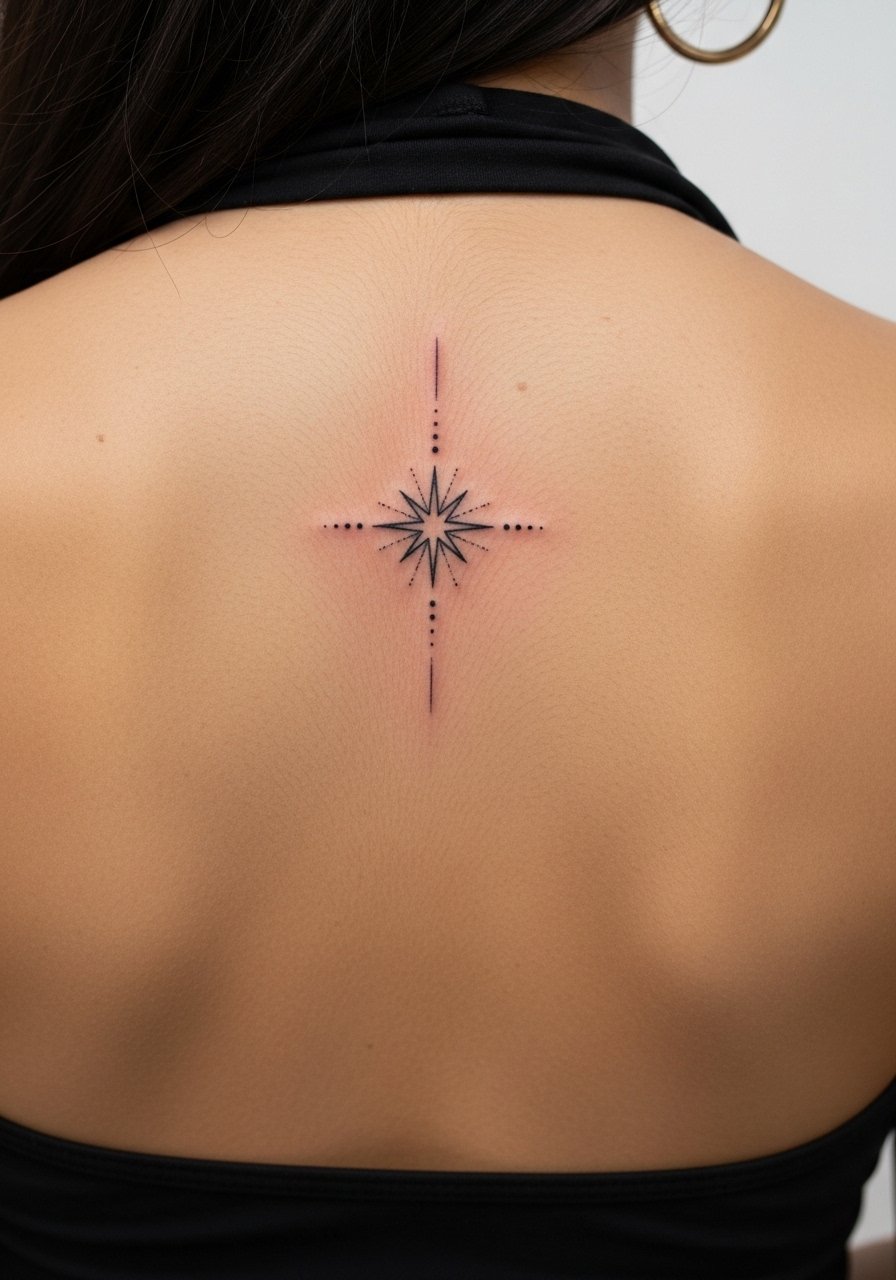
Placing the North Star on the upper back lets you keep the symbol private while still living with it. I like this for people who want meaning without constant display. Two sessions can refine a 4-inch minimal star with clean beams. The mistake is making it too small for the back; scale matters here. For sessions wear a strapless bra or a loose tank for easy access. If your goal is unseen guidance rather than a daily visible reminder, the upper back is a strong choice.
17. Geometric Mandala North Star on Chest Center (Controversy Lead)
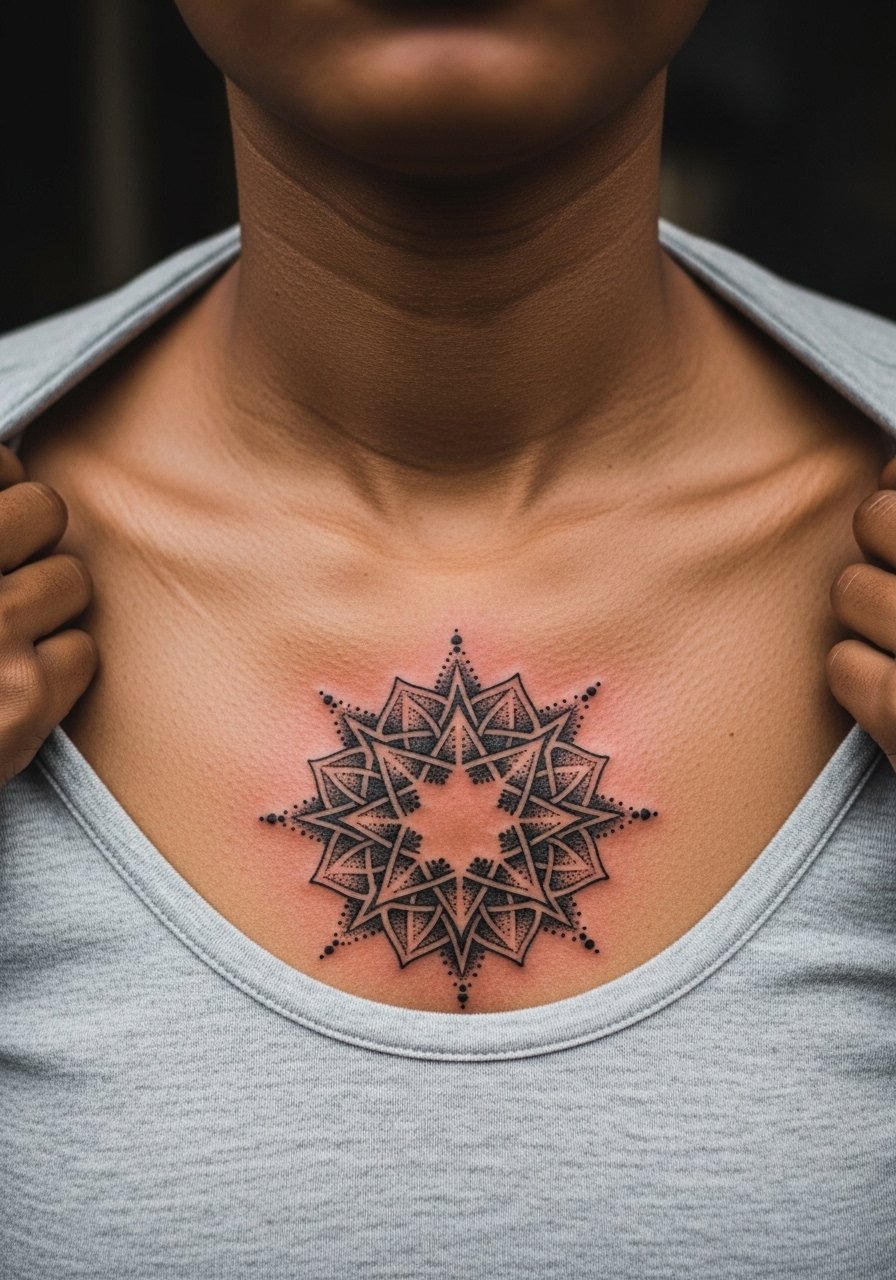
Artists split on tight geometric work on the chest. One camp says dense linework and small dots can merge with movement and breathing, making mandalas look muddy over time. The other camp maintains that with larger scale and correct spacing the geometry stays crisp. The truth is scale and the artist's dot depth matter most. Expect two to three sittings and ask to see healed photos of similar chest mandalas. For show-off outfits, choose open button-downs or a deep v neck tee that lets symmetry sit naturally.
18. Tribal Edge North Star on Calf with Cultural Note (Mistake Lead)
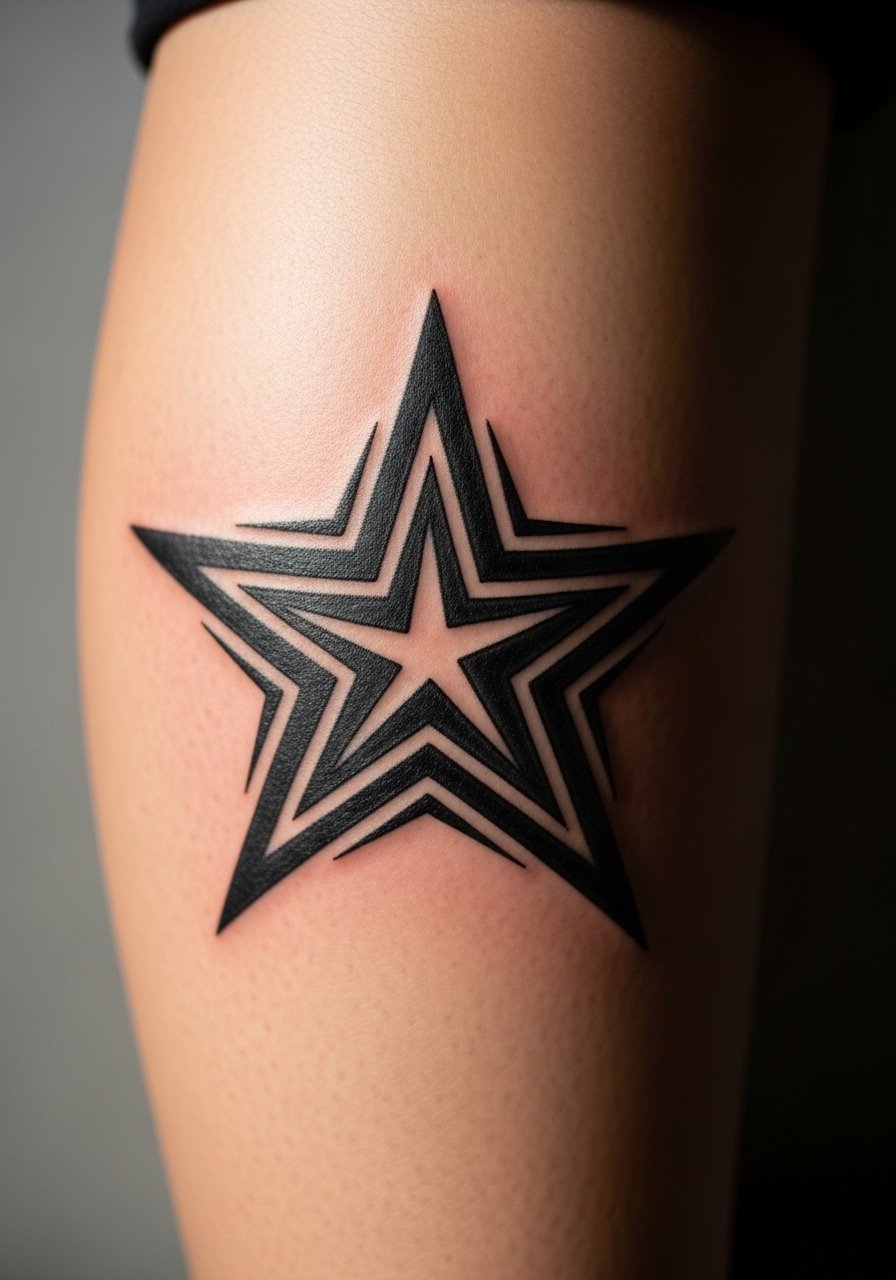
This tribal variant borrows visual language that traces to multiple indigenous traditions. If choosing this route be explicit with your artist about adaptation versus replication. The common mistake is using imagery with cultural specificity without acknowledging or adapting it respectfully. For placement, the calf handles bold lines well and usually needs two sessions for crisp edges. Pain is moderate. For showing it off, cropped pants or shorts frame the motif cleanly.
19. North Star Integrated with Personal Dates or Coordinates on Ribcage (Sensitive Placement Lead)
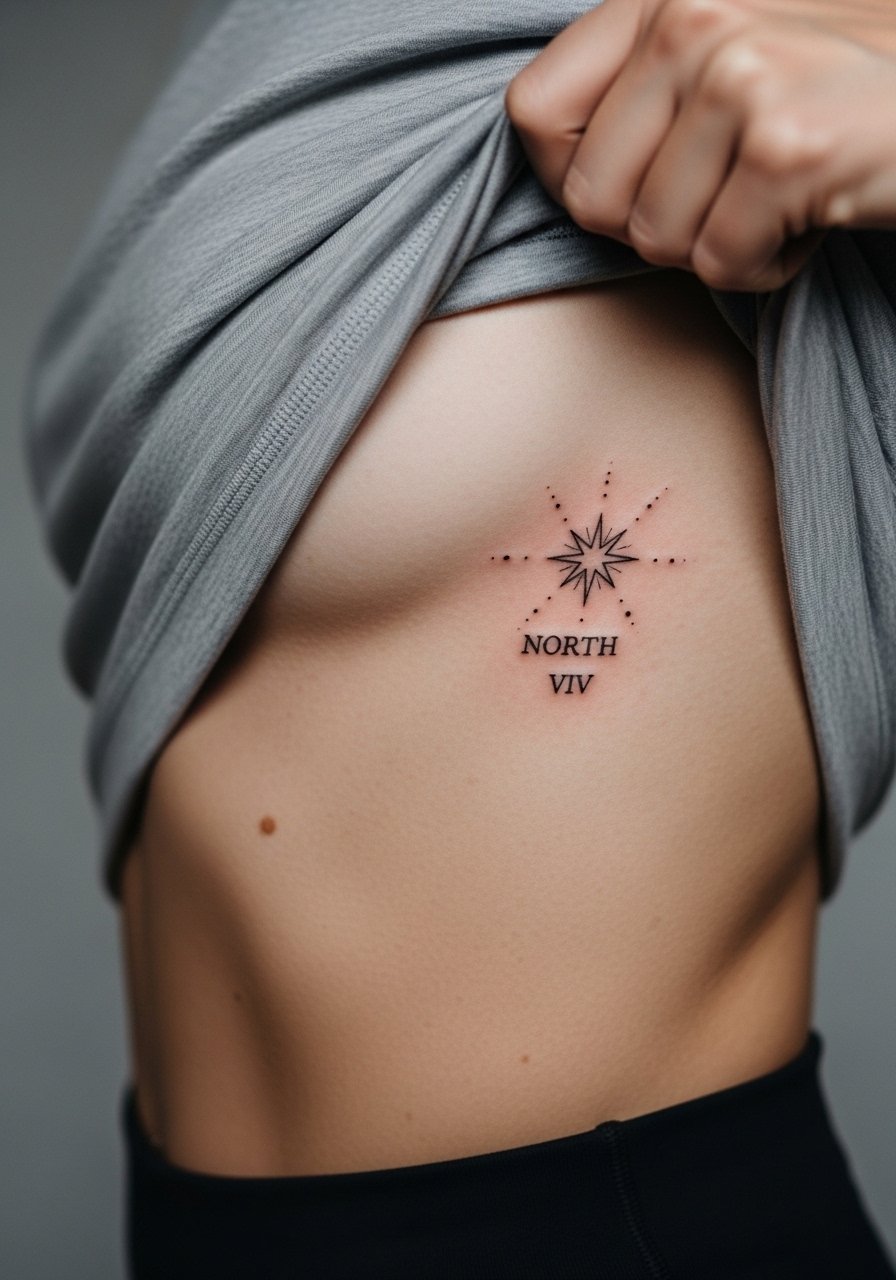
Ribcage work reads intimate and the skin there stretches with body changes. If you plan to include dates or coordinates, know that the lines need slightly more space than you expect to avoid future merging. Pain is high on the ribs and sessions are usually short with breaks. The mistake is crowding tiny numerals too close to the star. For the appointment wear a cropped top that lifts easily so the artist can work without fabric drag. This placement is best for someone comfortable with a more private piece.
20. Inner Bicep Micro-Realism North Star (Pain Warning Lead)
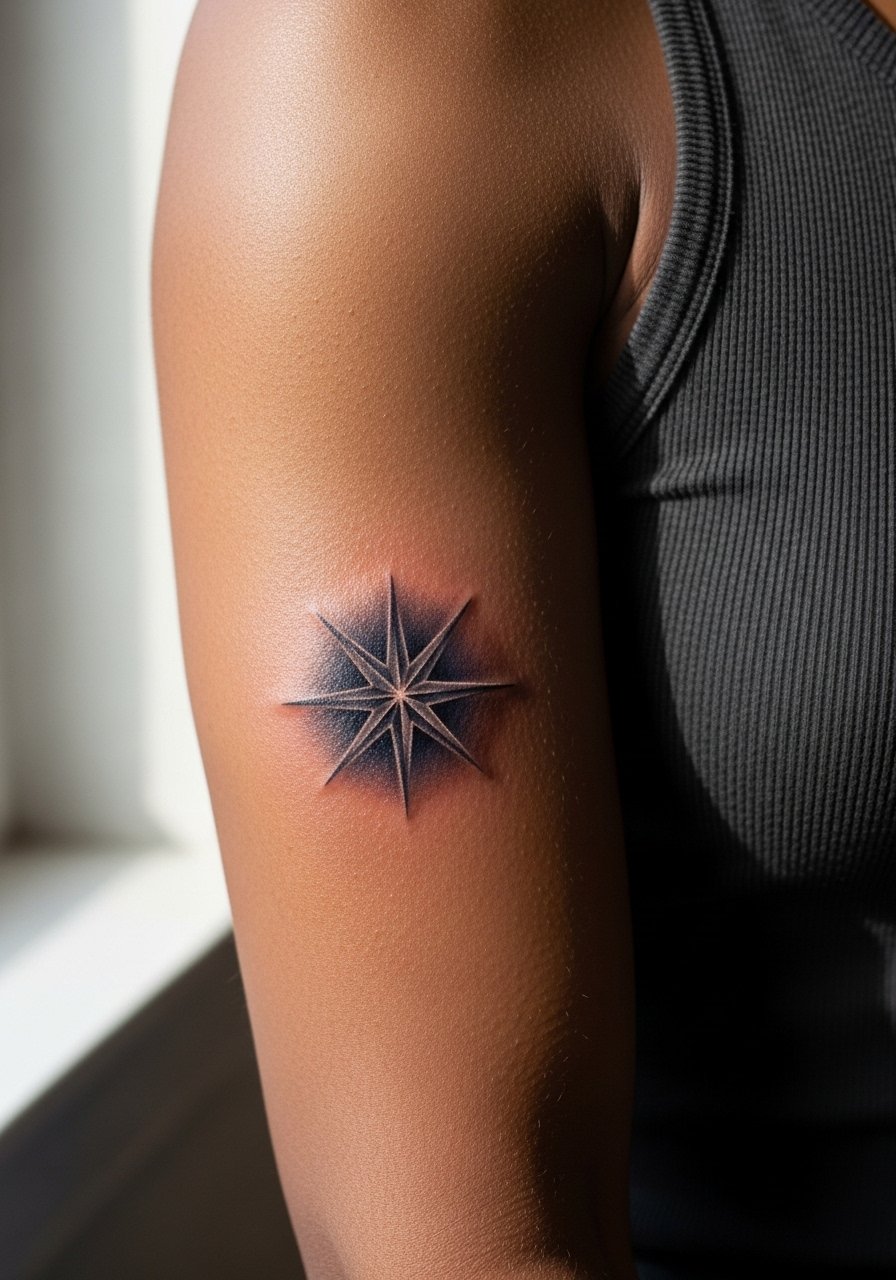
Inner bicep pieces take longer than they look because the area can swell and bruise. Pain ranges moderate to high depending on sensitivity and session length. The biggest mistake is scheduling a marathon appointment without planning for swelling; shorter, staged sittings work better. Micro-realism needs precise gradients that heal differently than bold work, so ask for a staged plan and photos of healed inner biceps the artist has done. For session wear a tank top you can undress from the shoulder to avoid tugging.
21. Ankle Compass-Star for Rooted Adventure (Show-Off Styling Lead)
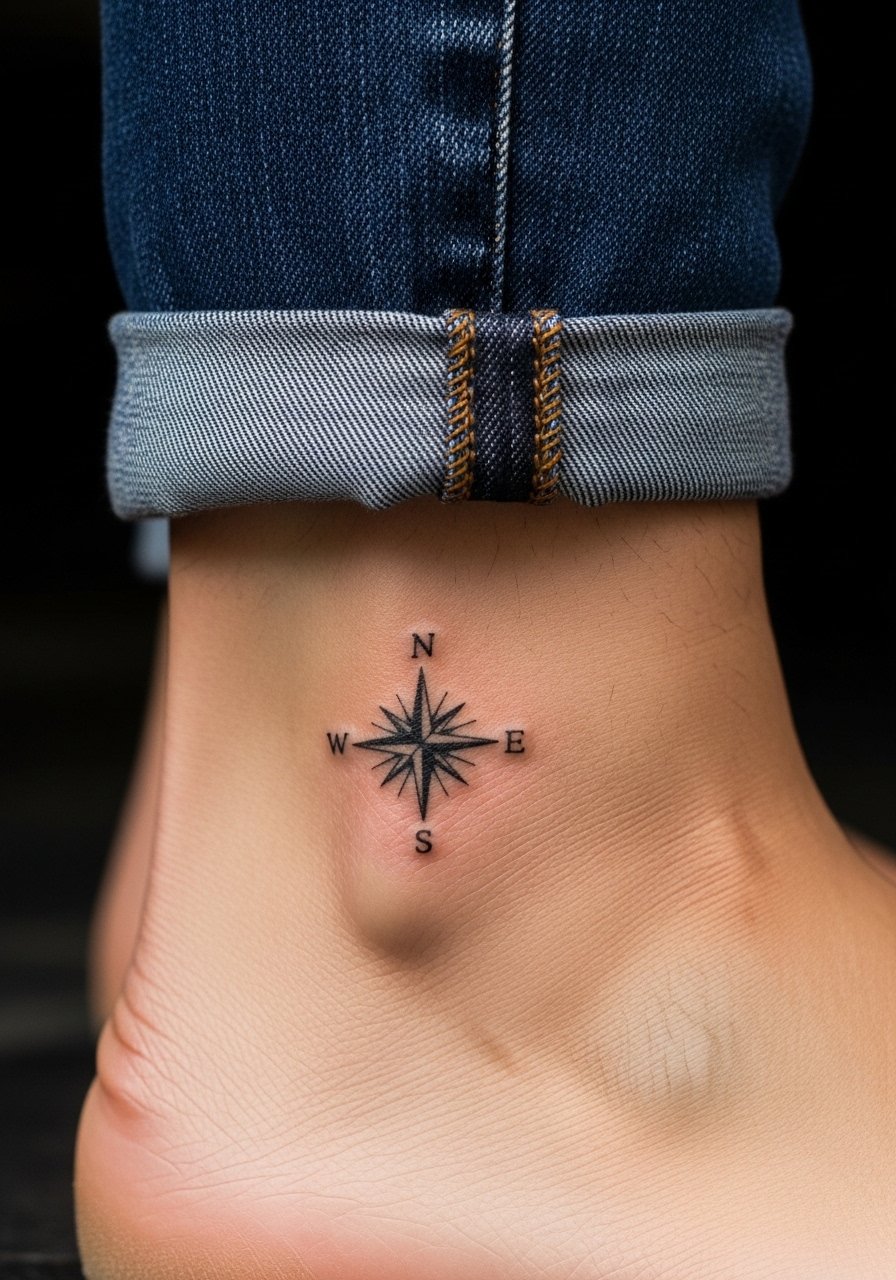
The ankle compass-star is a rare but effective pairing for people who want a travel motif that reads grounded. Keep the compass elements simple and the star slightly bolder so it does not disappear under footwear friction. The session is one to two hours and you should expect touch-up at year two. For summer show-off, wear cuffed slim ankle jeans or strappy flat sandals so the tattoo sits visibly. If you anticipate weight change discuss elasticity with your artist so rays and compass lines avoid areas prone to stretching.
Frequently Asked Questions
Q: Do fine line North Star tattoos on wrists blur faster than bold versions?
A: Yes, fine line work on high-motion, high-wash areas like wrists tends to soften sooner than bold work. One camp prefers fine line for its delicate look and accepts touch-ups. The other camp favors bolder lines for longevity. If you want the delicate look with better lasting power ask for slightly thicker anchor lines and wider spacing between rays.
Q: How should I prep clothing for a chest or sternum session?
A: Wear a wide-neck shirt, fitted sports bra, or zip-front top you can pull aside without full removal. That keeps access clean and helps the artist position the stencil without fabric interference. Bring layers to stay warm during breaks.
Q: Which placements need the most touch-ups and why?
A: Fingers, hands, and ankles get the most friction and sun exposure so they often need touch-ups earlier. Fine line work on wrists also tends to require a refresh at year two or three. Larger, saturated pieces on shoulders or back usually hold longer before a touch-up is needed.
Q: Is watercolor better on forearms than on darker skin tones?
A: Watercolor can look beautiful on medium and dark skin when paired with supporting black anchors that hold the color. The key is saturation strategy and experienced color blending. Ask your artist to show healed examples on similar skin tones.
Q: Where can I find portfolios that match specific North Star styles?
A: Search hashtags like #NorthStarTattoo and #FineLineStar, filter Tattoodo by city and style, and check r/tattoos for healed photos. For neo-traditional or guest spots look up Booksy calendars and local studio pages to find openings that match the technique you want.
