
Fine line work looks gorgeous on a saved board and fragile on real skin under salon lights. Many people find themselves stuck between choosing a placement that hides for work, guessing how much a session will hurt, and worrying about aftercare because every artist gives slightly different instructions. I’ve sat through portfolio reviews at five shops across Brooklyn and this list balances what looks good now with what actually holds up, starting with a bold, colorful option.
1. Neo-Traditional Floral Eagle Upper Arm Wrap
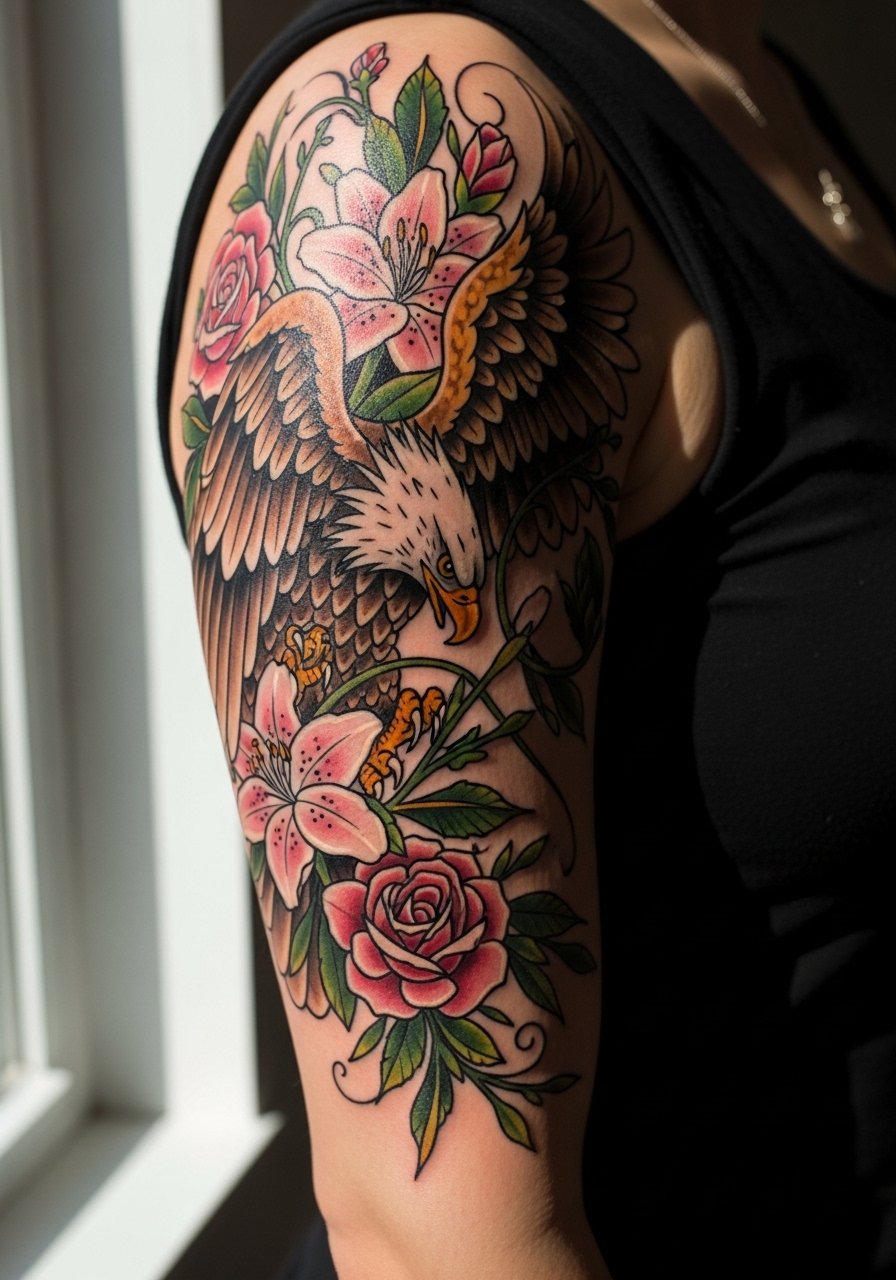
I’ve seen this kind of neo-traditional floral eagle hold its personality for years when artists keep the outlines slightly heavier and the color blocks clear. Tell your artist you want bold linework with painterly floral fillers so the eagle reads from a distance and the petals do not blur into the feathers. Fair warning, the biggest mistake is asking for too much micro detail inside feathers; that tends to soften into muddiness at year three. Expect the session to be moderately painful on the outer bicep and to need two sessions for saturation and edge cleanup. For showing it off, a fitted crewneck tee in solid navy frames the wrap nicely and rolling sleeves midway gives a peek without overexposing the whole piece. fitted crewneck tee men
2. Black and Grey Realism Forearm Portrait
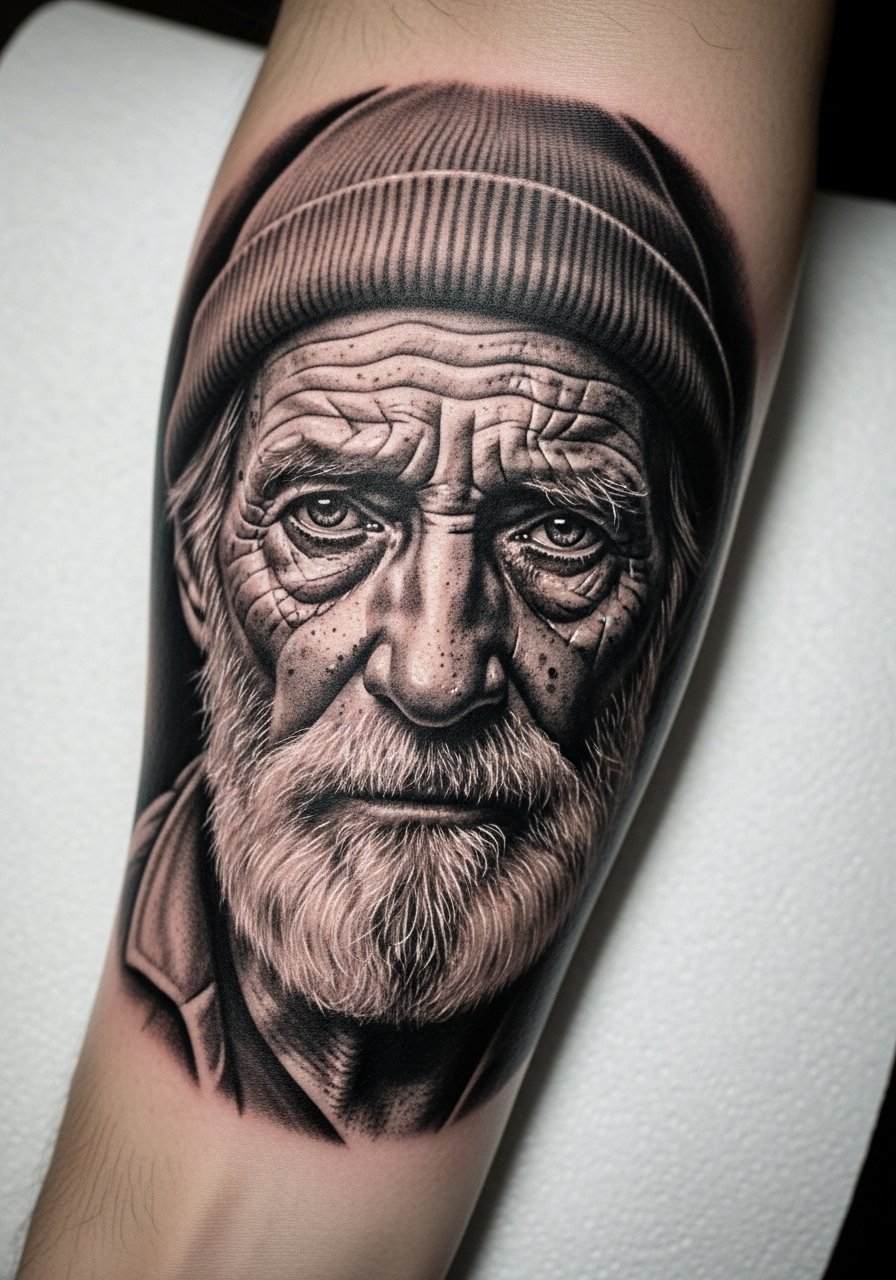
Most realism portraits on a forearm need an honest conversation about reference quality and lighting. Bring a high-contrast photo and say you want the darkest values on the outer edge to keep the face readable. A common mistake is pushing too much fine texture into small facial areas, which looks incredible fresh and then loses crispness by year two. This forearm placement is visible during daily activity so pain is moderate and sessions usually run longer, often four hours per sitting. Touch-ups are typical at year two for skin that sun-exposes a lot. For session wear, pick a short sleeve button-up so the artist has full forearm access without shifting fabric. short sleeve button up
3. Watercolor Shoulder-to-Elbow Nature Scene
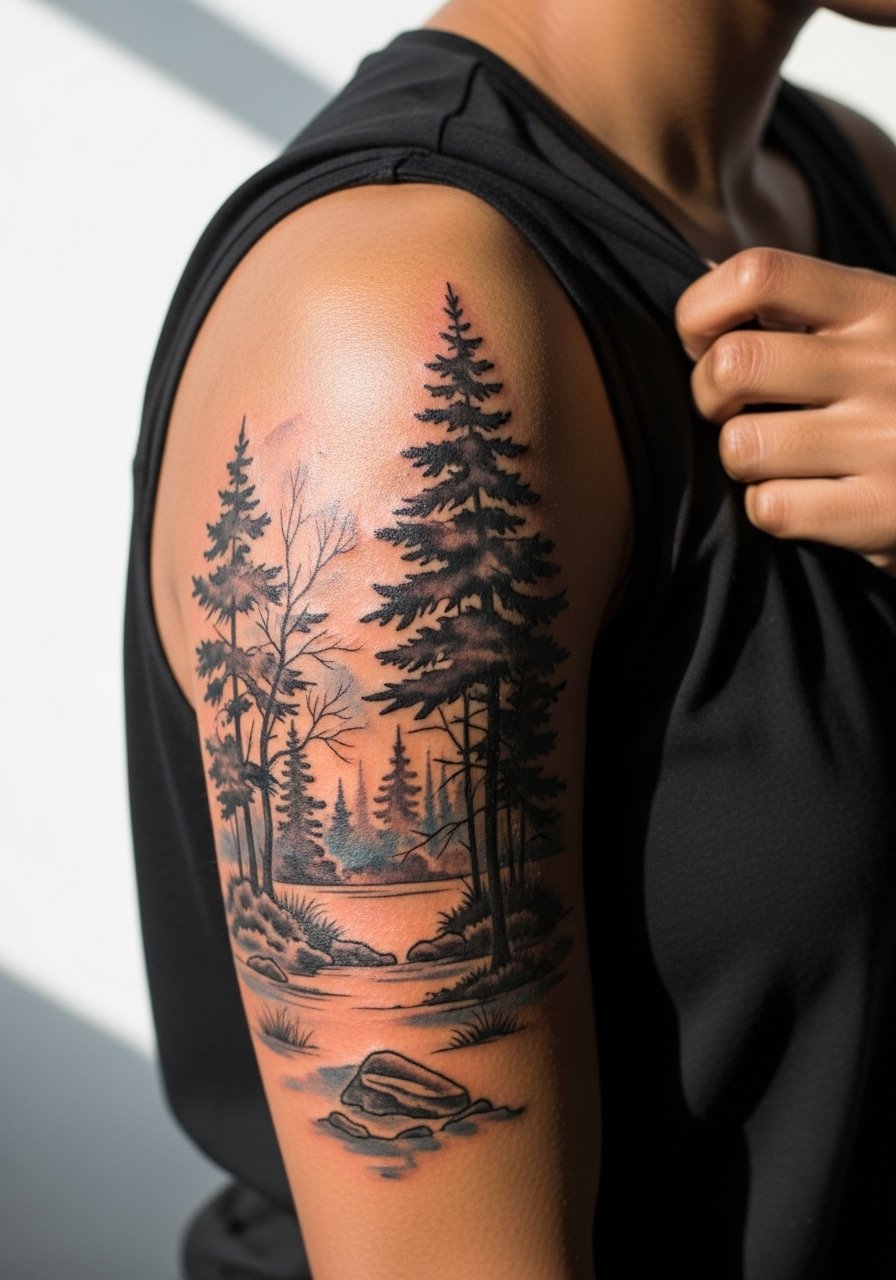
Watercolor pieces look painterly because they avoid heavy outlines, but that same choice makes them prone to blotchy fades if placed where friction or sun exposure is constant. I recommend this for someone who wants an artful, less literal sleeve and who plans for a two-session approach with touch-up at year two. During consultation say you want color fields that fade into negative space rather than tiny watercolor splatter packed tightly together. The shoulder placement heals well when you wear a loose tank top to sessions so the artist can work without fabric rubbing the fresh ink. For evenings out, an off-shoulder blouse in deep tones complements the soft edges without competing. off shoulder blouse
4. Geometric Mandala Inner Forearm Band
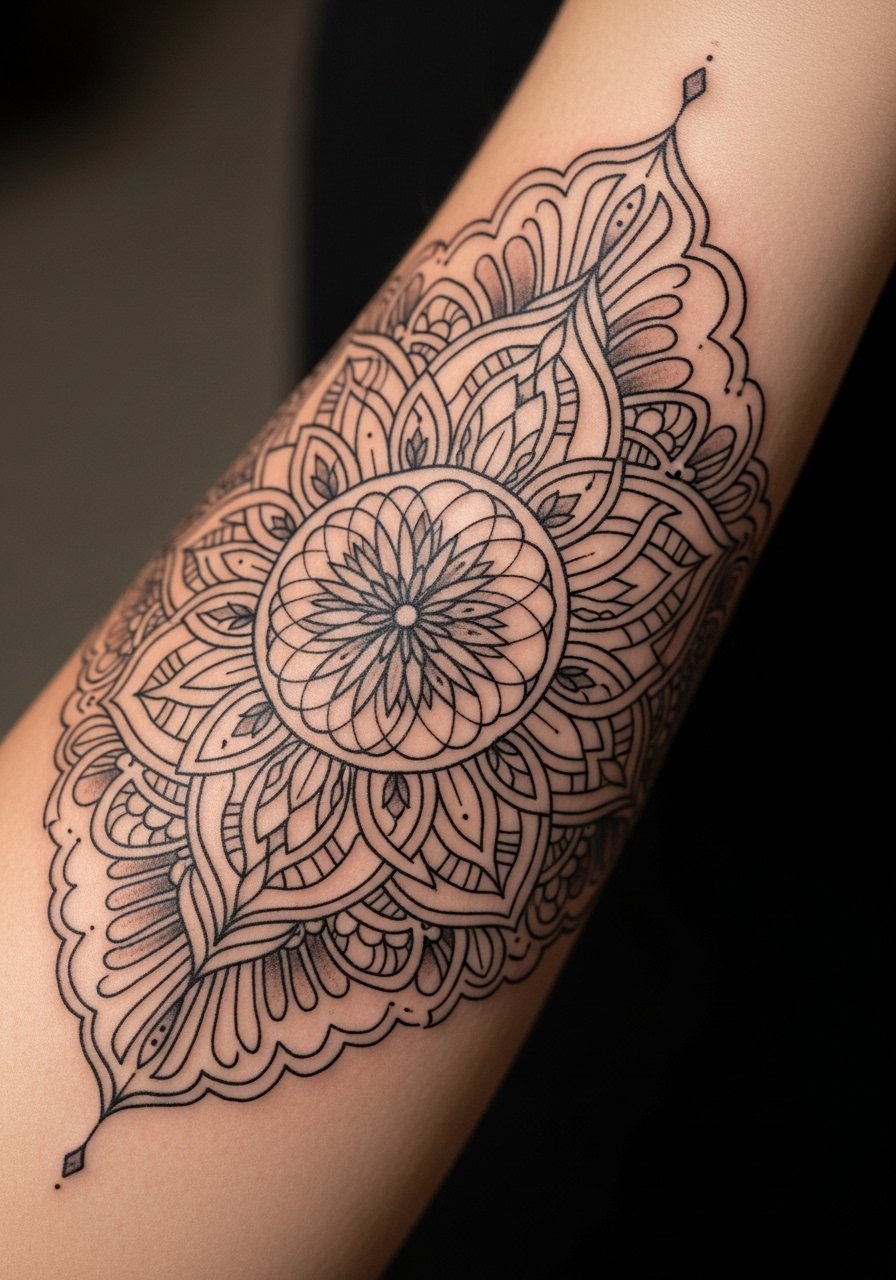
The biggest mistake with mandalas is scaling them too small. Dense linework needs breathing room or the concentric rings will merge in a few years. I recommend larger spacing between repeat elements and a test stencil that follows the curve of your inner forearm. Pain here is mild to moderate depending on sensitivity, and three shorter sessions usually give the artist time to maintain crisp linework. There is a split among artists on mandala size. One camp argues tight geometry keeps detail, the other says spacing prevents lines from merging. Ask where your artist stands before booking. For a casual look, roll up a chambray shirt sleeve and add a slim leather cuff on the opposite wrist to balance visual weight. rolled cuff chambray shirt slim leather cuff bracelet
5. Dotwork Sacred Geometry Elbow-to-Wrist Sleeve
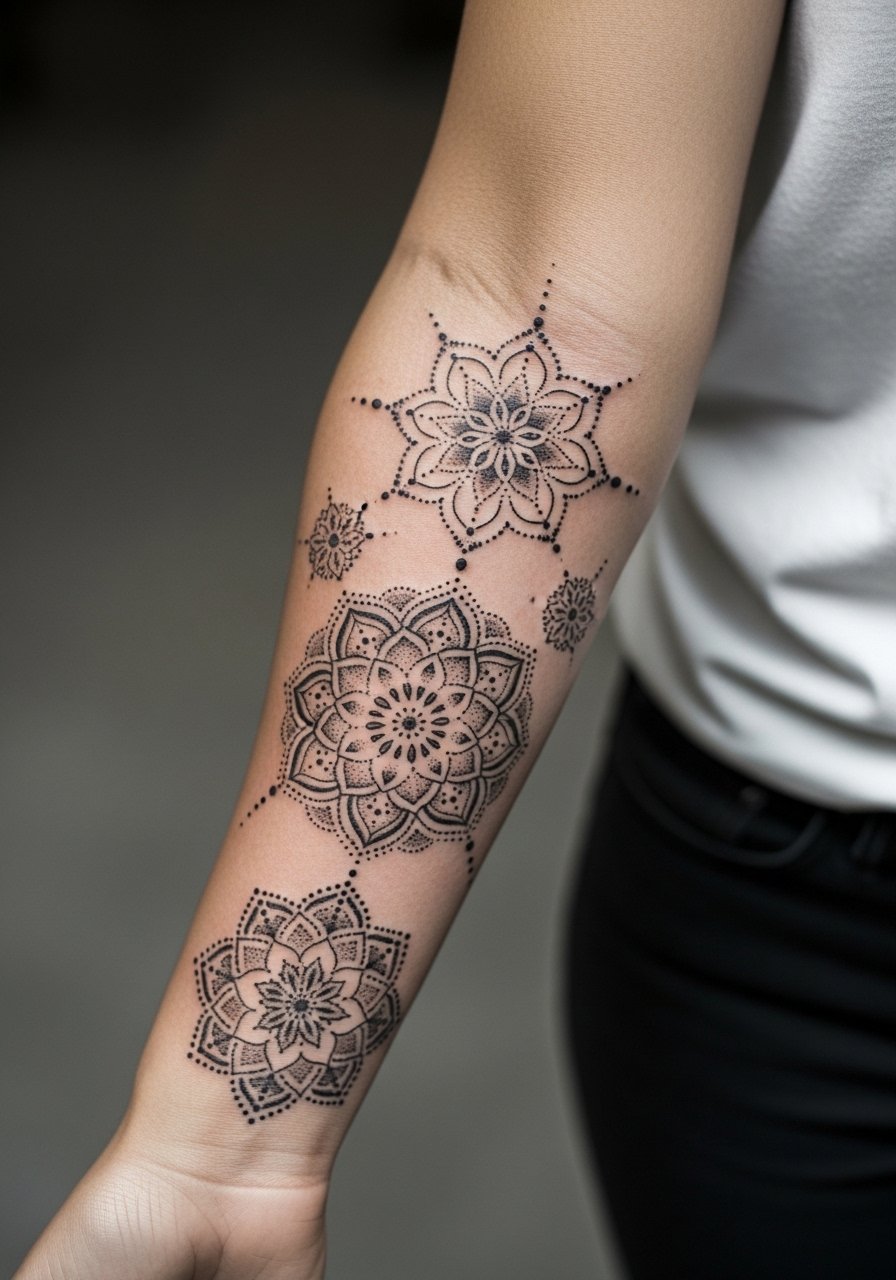
Dotwork relies on density and rhythm, so when the dots are packed too tightly near joints you risk softening as skin stretches. I suggest asking for dot spacing that follows muscle direction and for stipple transitions rather than hard fills. Expect the elbow area to be more painful and to require careful positioning during the session to avoid excessive movement. A touch-up at year three is common for high-contrast dotwork, especially if you sweat or sunbathe frequently. For showing it off, a slim leather cuff on the opposite wrist helps frame intricate dotwork without crowding the tattooed arm. slim leather cuff bracelet
6. Japanese-Inspired Dragon Flowing Bicep
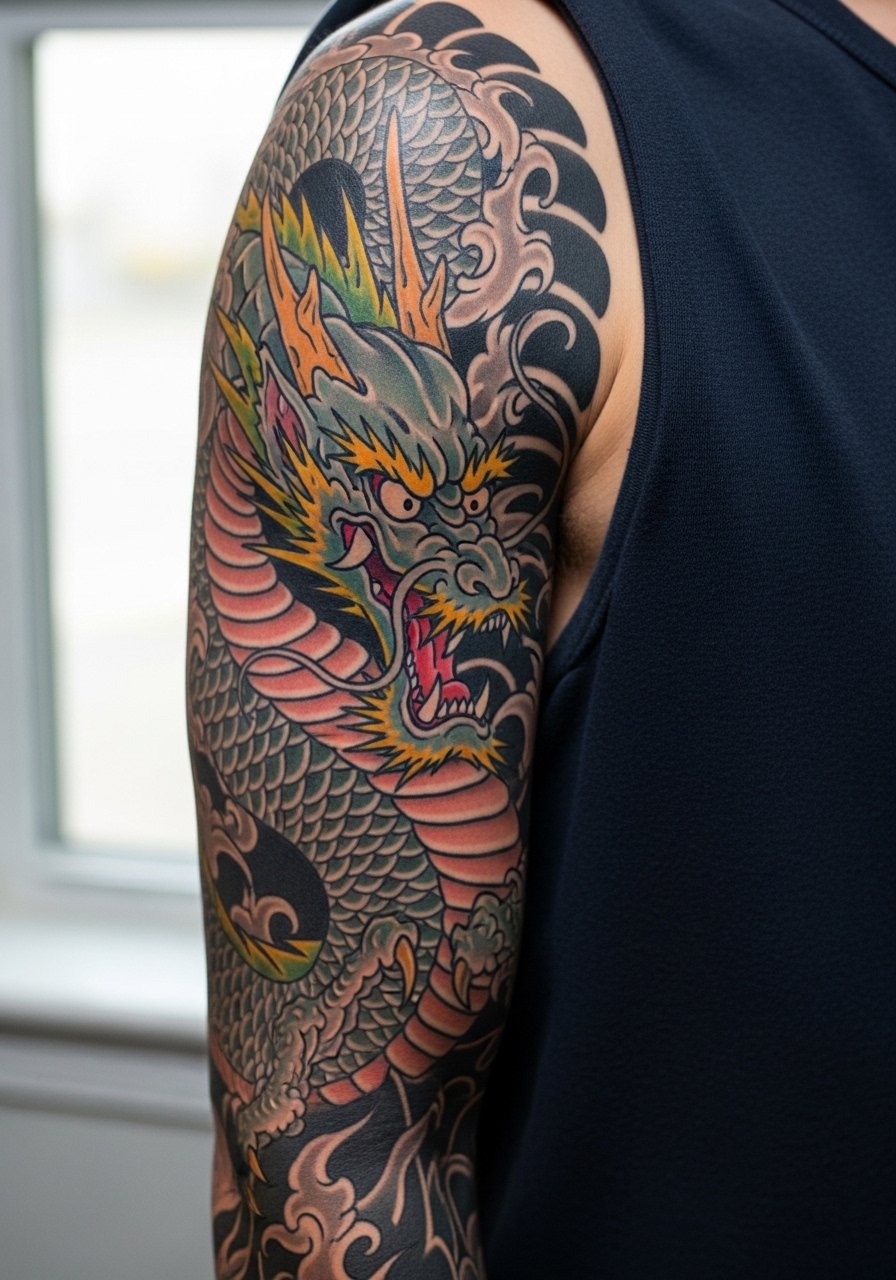
There is a particular motion to Irezumi-style dragons that benefits from muscular contours, so tell your artist you want the dragon to "flex" with the bicep without breaking contour lines. The common misstep is compressing the design to fit the arm instead of letting the motifs wrap naturally. Sessions here are longer and often planned as multiple appointments to protect saturation and allow color to settle. Expect moderate pain on the inner bicep and heavier saturation work for reds and yellows. For session comfort, a loose button-down gives access without rubbing fresh ink. loose button down shirt
Studio Day Picks
The upper-arm wraps and shoulder pieces above need slightly different prep than delicate inner forearm work, and these picks smooth the studio day and early healing window.
-
Stencil transfer paper kit. Lets you preview how the linework will sit on curved skin, very helpful for wraparound dragons and floral eagles.
-
Topical numbing cream. Applied per instructions before longer bicep or forearm sessions takes the edge off tight spots without dulling the artist's ability to work.
-
Thin protective film roll. Useful for areas that rub clothing in the first few days, such as inner forearm bands or wrist wraps.
-
Fragrance free gentle body wash. Cleanses healing tattoos without irritating linework, important for large color fields and fine line sections alike.
-
Aquaphor healing ointment. Thin layers for the initial days lock in moisture, which helps keep fine lines from scabbing heavy on forearm work.
7. Biomechanical Cybernetic Outer Forearm
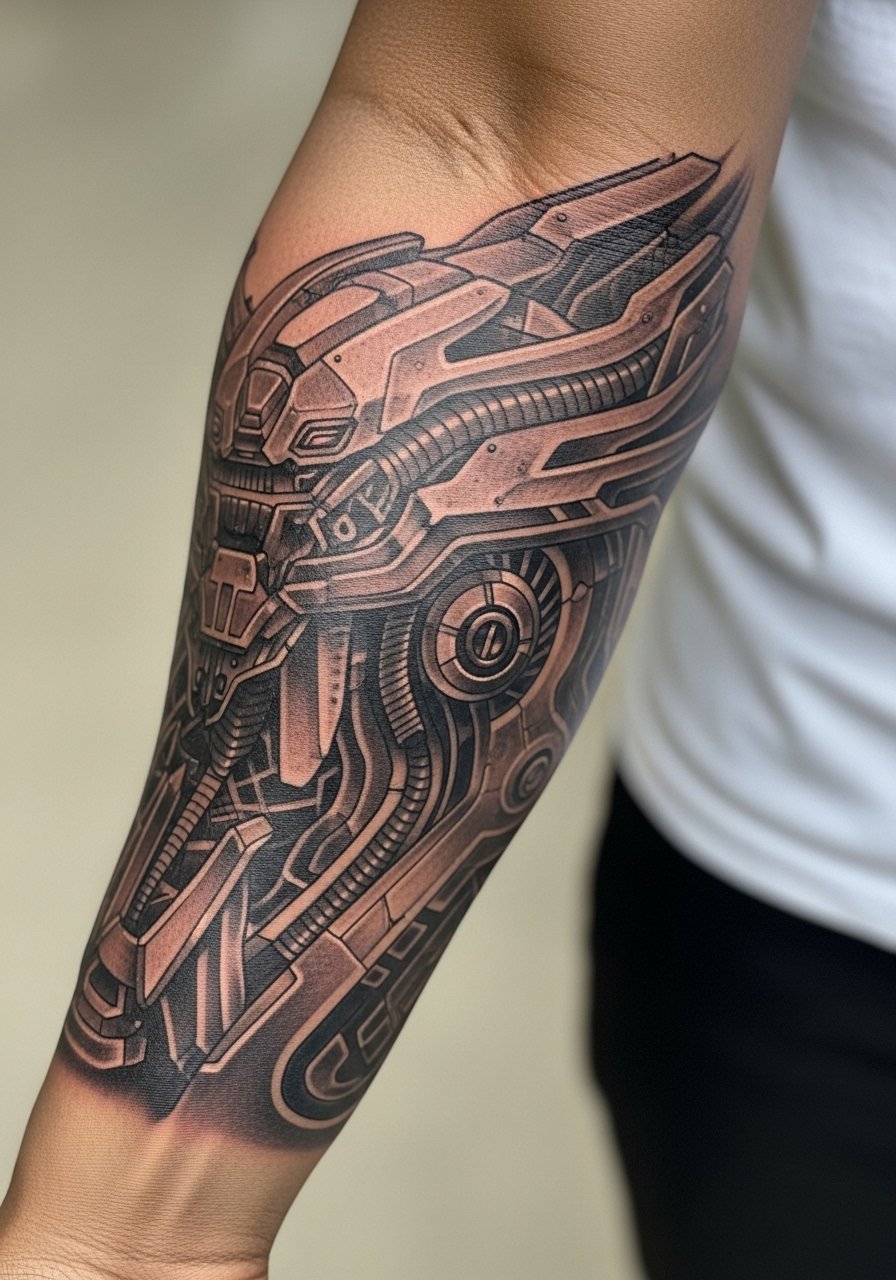
Biomechanical pieces need clear contrast between organic curves and mechanical edges. I suggest asking for a mixture of heavy black anchors and softer gray blends so the metallic parts keep their pop as the skin ages. The outer forearm is forgiving for saturation but still needs careful placement so the "gears" do not fall into muscle creases. Sessions are medium-length with careful shading passes to avoid overworking skin. For showing it off, a rolled sleeve graphic tee gives a vintage contrast that highlights the mechanical motifs. rolled sleeve graphic shirt
8. Fine Line Cherry Blossom Branch Inner Forearm

Fine line is beautiful on the inner forearm when scaled correctly, but one artist opinion split affects this placement. One camp says fine line blurs faster on thinner skin and near sweat zones, while the other camp insists proper needle depth and spacing keep lines readable for years. I advise asking for slightly bolder line weight than a single hairline if you want the piece to last. The inner forearm is a low to moderate pain zone and usually finishes in two shorter sessions. A common error is requesting extremely faint script-level lines across long branches; the result looks fragile after the first year. For casual wear, a loose linen short-sleeve in cream or olive frames the work without crowding the delicate branch. linen short sleeve shirt
9. Blackwork Tribal Waves Full Half-Sleeve
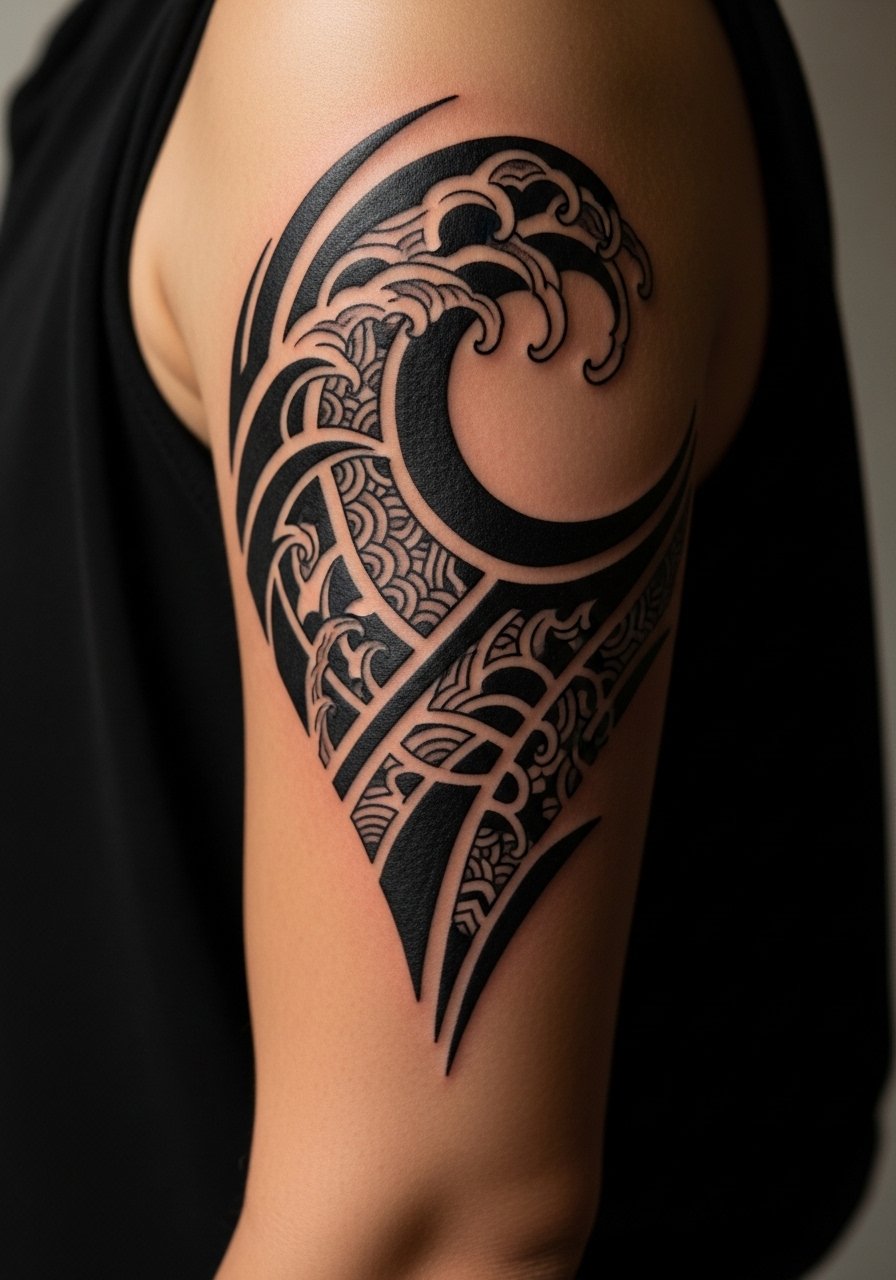
Blackwork thrives on solid contrast, so ask your artist to prioritize clean blocks of black and deliberate negative space rather than tiny ornamental fills. Muscular arms hold blackwork best, and the wraparound effect reads strong in movement. The elbow zone can sting more than the bicep, so prepare for sharper sessions near joints. Touch-ups at year three are common where the fill meets fine lines. If you want to keep edges expandable for a future full sleeve, explicitly plan border motifs rather than abrupt cutoffs. A vintage band tee with rolled sleeves pairs well for showing off the bold opacity. vintage band tee
10. Linework Animal Portrait at Elbow Focal
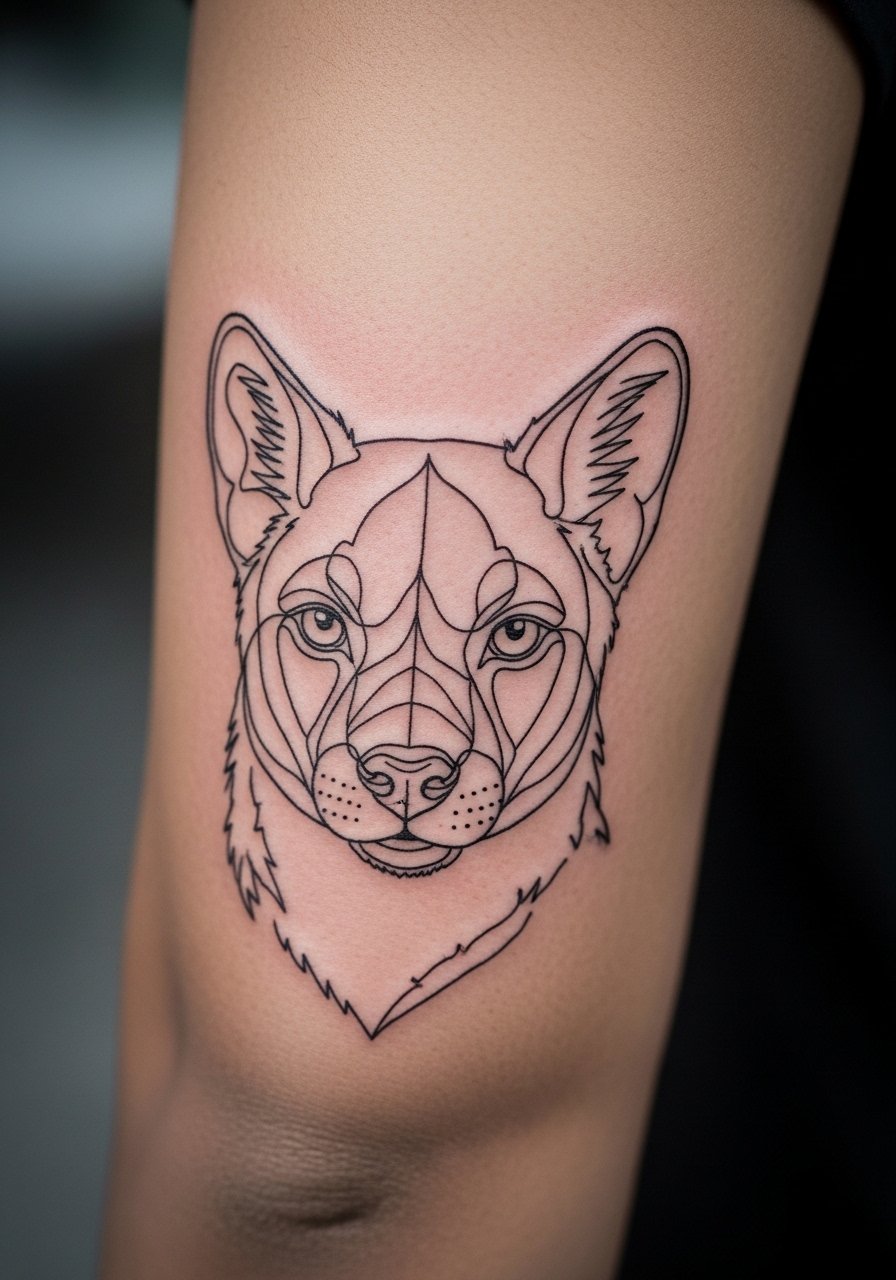
An elbow focal needs a design that accounts for bending and stretching. I recommend centering the main facial features away from the joint crease so the face does not distort when you flex. People often request fine single-line portraits that look neat fresh and then soften into an indistinct shape. For durability, ask for slightly stronger landmark lines around eyes and nose. The session feels spiky at the elbow bone itself but is otherwise tolerable. This placement is great with a fitted polo that shows the elbow in movement. fitted polo shirt
11. Trash Polka Collage Forearm-to-Shoulder
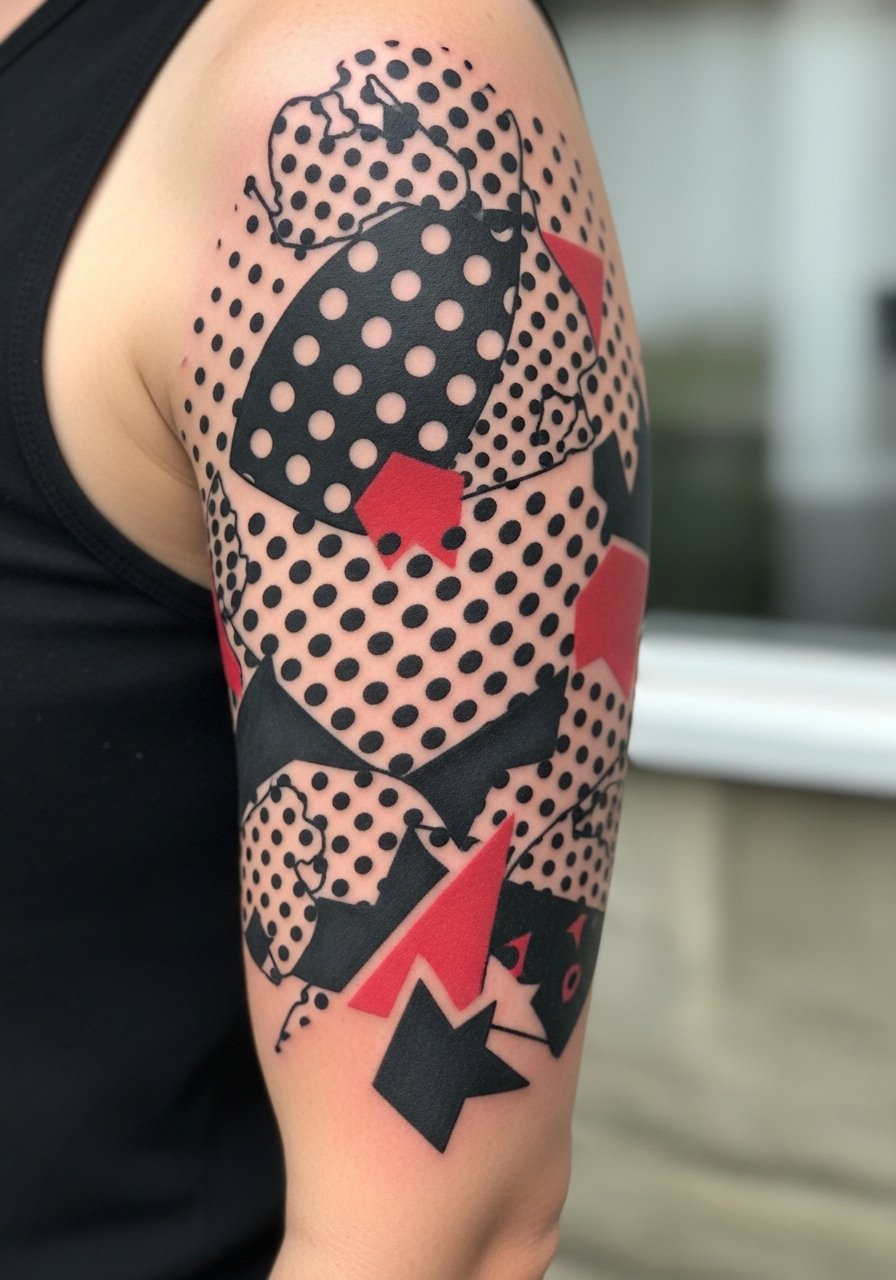
Trash polka is intentionally chaotic and bold, so clarify how much red accent you want versus black negative space. The risk is over-layering photographic elements that fight with dense black strokes; simpler compositions age cleaner. This style often needs multiple sessions to balance saturation and contrast across the forearm. During consults, show collages as separate pieces rather than a single flattened image to help the artist map layers. For session wear, a short sleeve button-up gives the artist easy access while keeping your torso covered. short sleeve button up
12. Ornamental Vine Filler for Patchwork Connectors
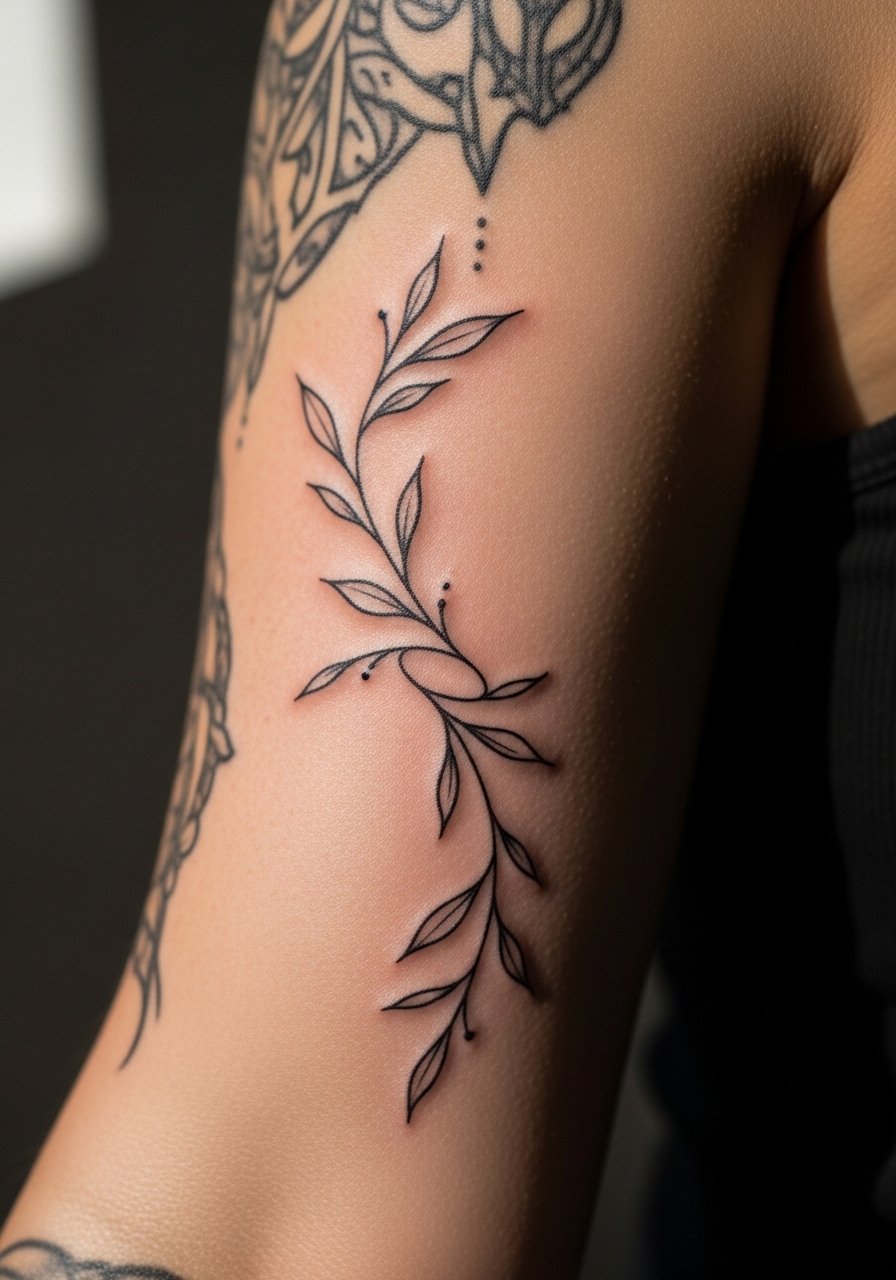
If you already have a few mismatched pieces, ornamental vine filler is the low-risk way to make the half-sleeve feel cohesive. Tell the artist to match line weight and spacing to the surrounding tattoos so the vines read as intentional connectors. Common mistakes include vines that are too busy or that compete with focal motifs, which looks crowded after healing. These fillers are generally low pain on the outer arm and can be finished in a single session. Planning edges for future sleeve expansion is key, so specify gentle borders rather than abrupt ends. For session convenience, wear a loose tank top so shoulder access is easy. sleeveless muscle tank
13. Micro-Realism Insect Study Outer Upper Arm
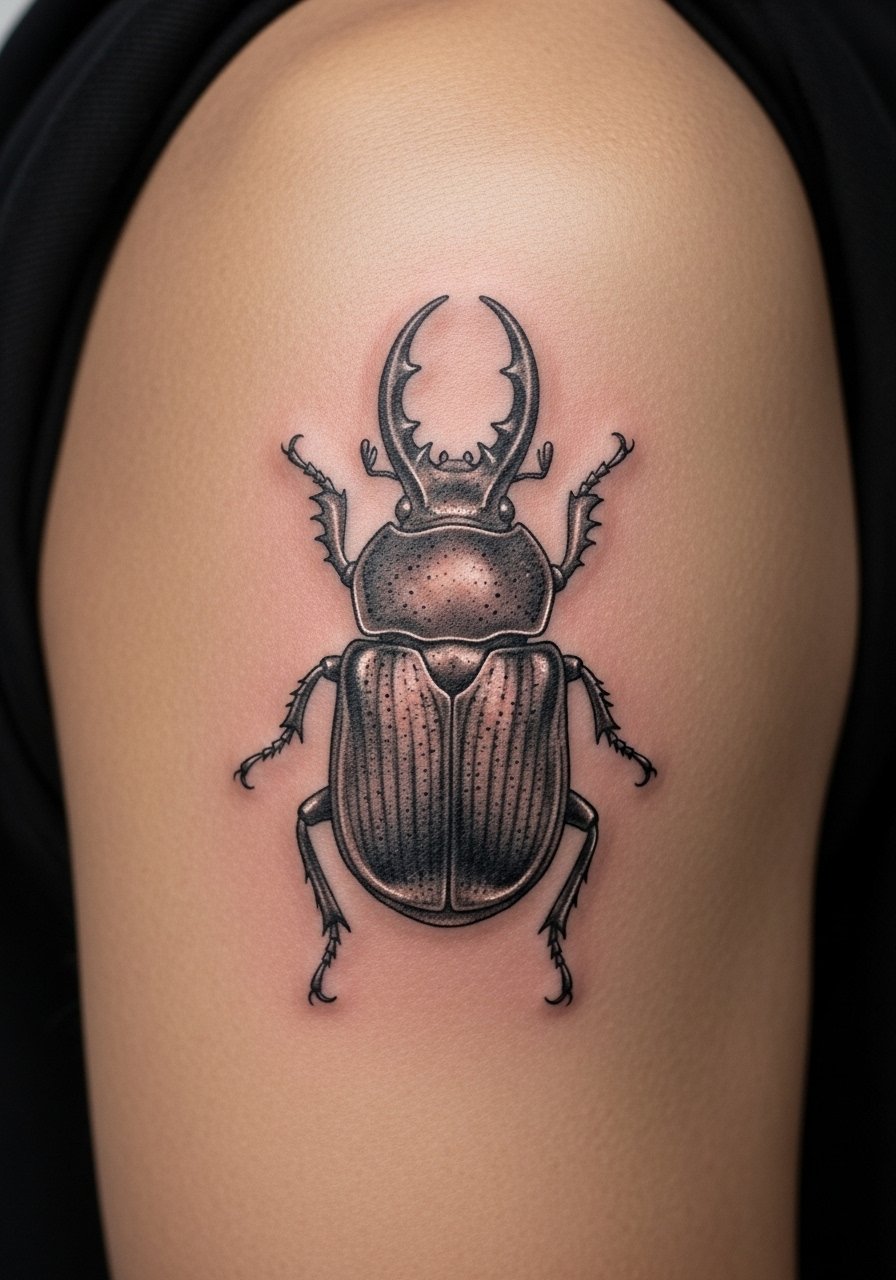
Micro-realism rewards clients who crave museum-like detail in a compact area. For insects or small scientific studies, insist your artist has magnified references and a portfolio of tight work. The biggest mistake is scaling too large and losing micro texture, which ironically reduces realism. Expect moderate pain on the upper arm and multiple short sittings to keep the skin from being overworked. These pieces often need a touch-up at year two to recover tiny highlights. For showing it off, a henley or fitted tee that leaves the shoulder and upper arm visible keeps the focus on the study. button henley shirt
14. Neo-Tribal Cyber Sigil Below the Elbow
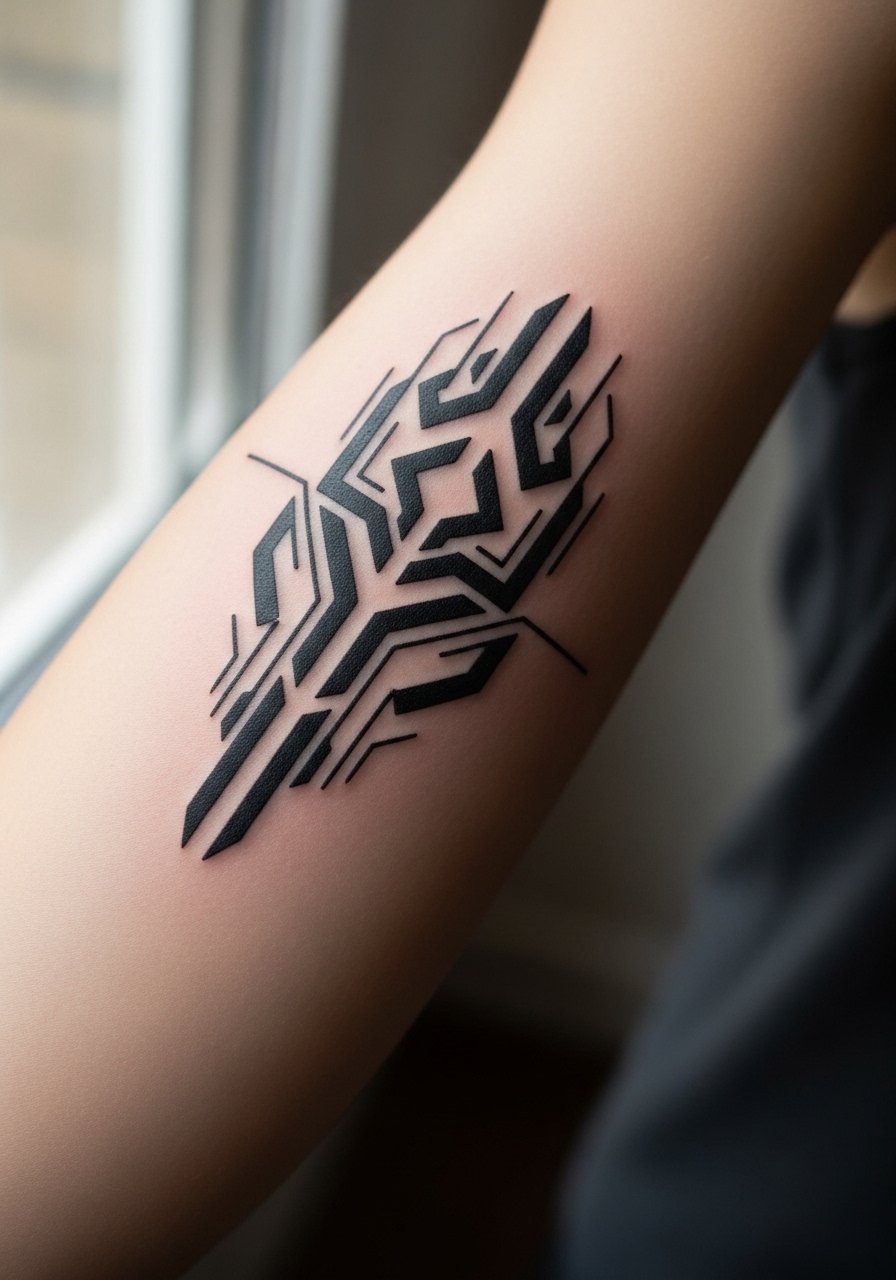
Neo-tribal cyber pieces merge ancient motifs with modern geometry. When you request this, say you want clean continuity across the forearm with occasional negative-space breaks for breathability. The common error is cramming dense patterning too close to the wrist where movement blurs detail. This area is moderate on pain and usually fits into two shorter sessions. For a balanced look, pair the piece with neutral short-sleeve polos so the forearm reads as a stylistic accent. neutral short sleeve polo
15. Vertical Phoenix for Slender Arms
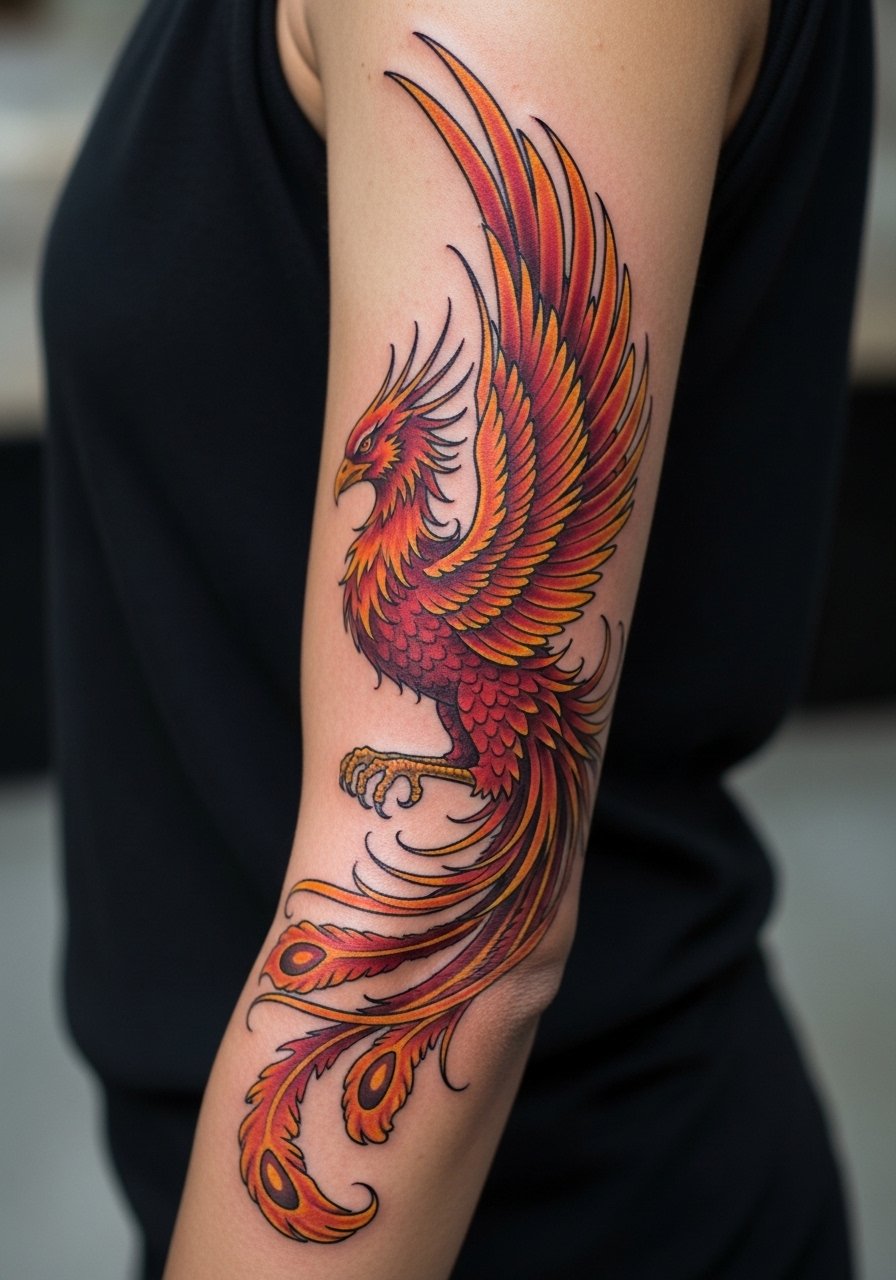
Vertical compositions like a phoenix make slender arms appear longer, which is a design detail many artists forget to suggest. Tell the artist you want an upward motion that ends before the elbow so the design reads tall without wrapping awkwardly. A common mistake is placing a phoenix that spreads horizontally, which reduces the elongation effect. Sessions are moderate and usually quick if the piece uses linework with selective saturation. For session wear, a loose tank or button-down that exposes the shoulder makes positioning simple. loose button down shirt
16. Minimalist Compass and Map Forearm Band
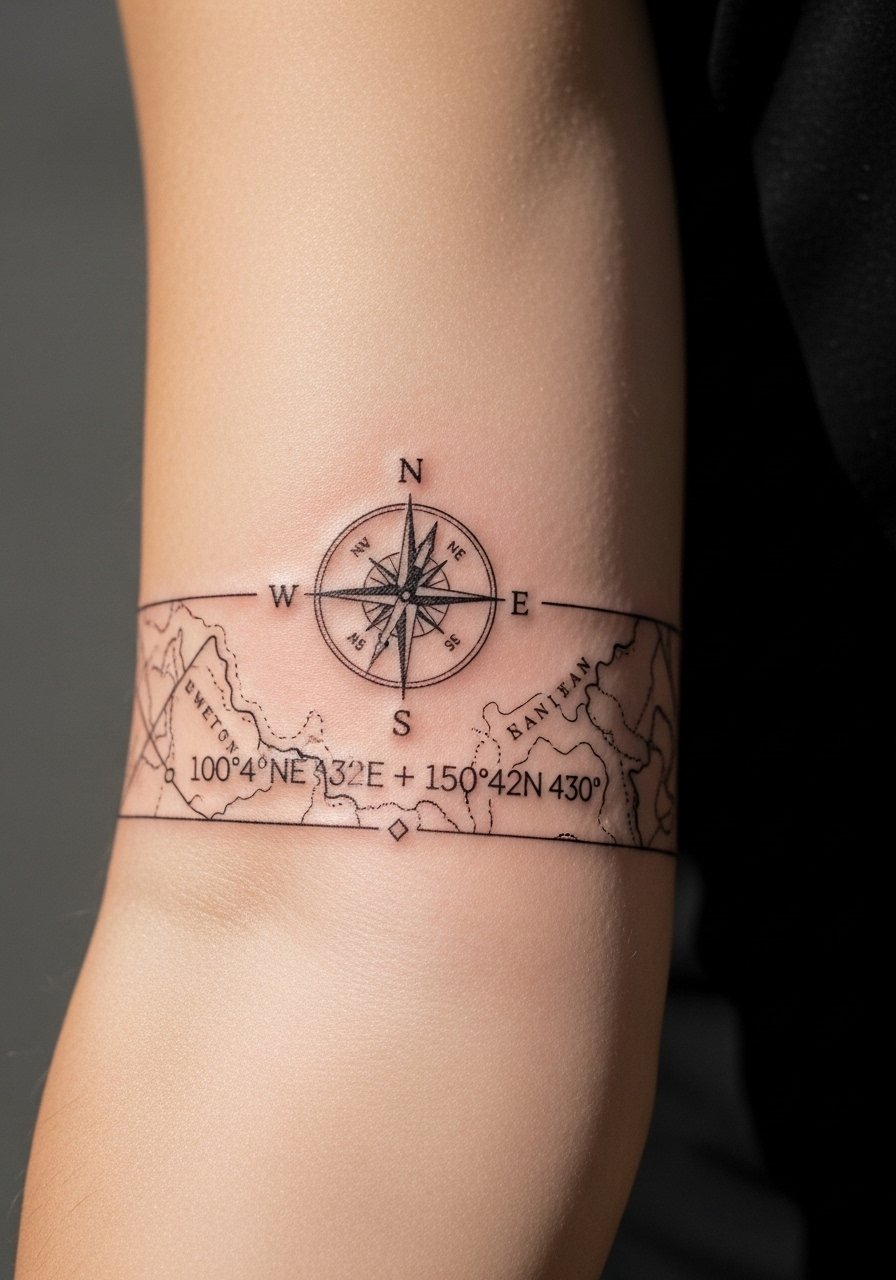
Travel motifs work well as half-sleeve bands when you want symbolism without visual noise. For clarity ask the artist to keep coordinates in a readable monospace and to anchor the compass with slightly heavier cardinal points. The mistake people make is compressing script and symbols into a thin band, which can blur with time. This placement is low pain and quick to tattoo. Pair this with rolled-up linen shirts for a lived-in look that shows off the clean compass lines. cream linen tee
17. Script Ribbon That Wraps the Inner Arm
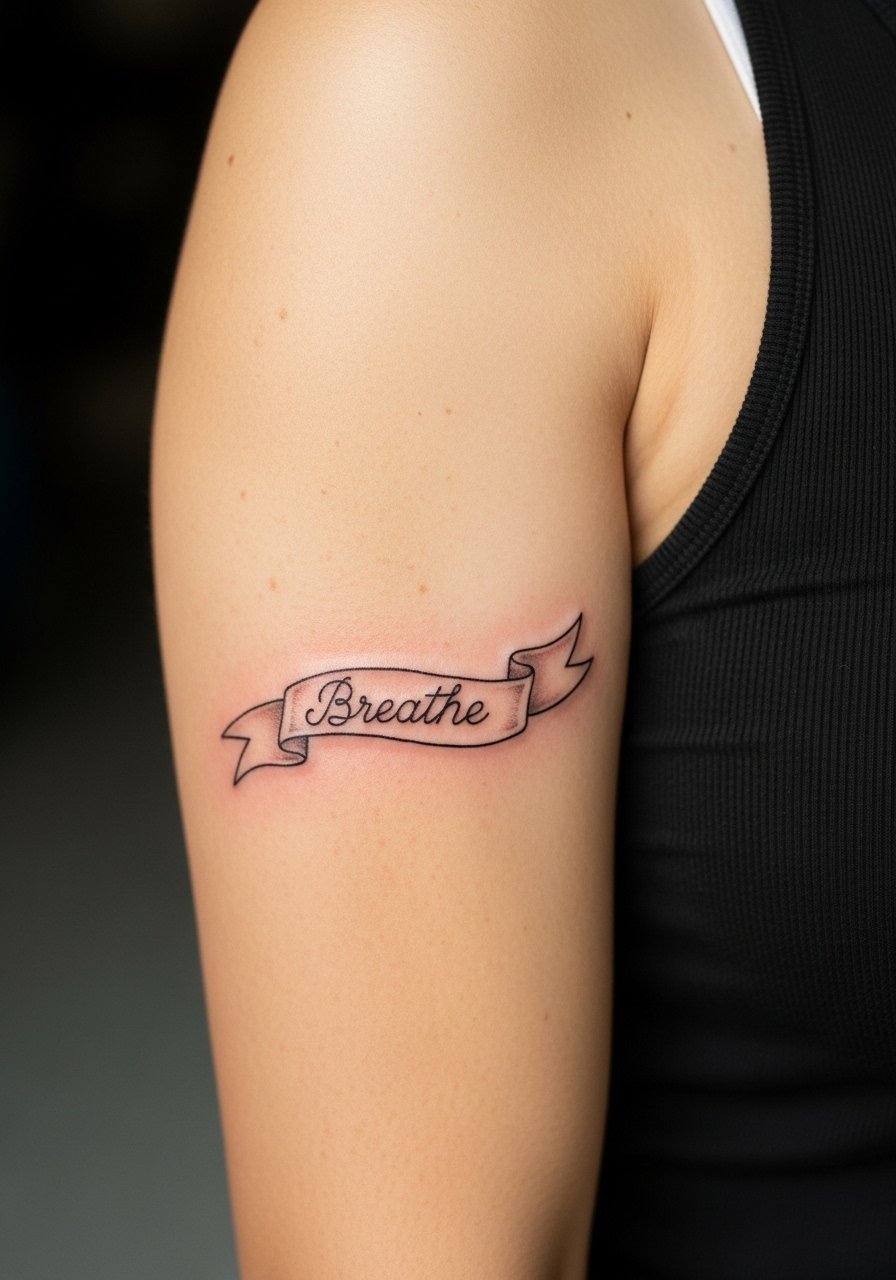
Script ribbons can be elegant when sizing and placement respect skin movement. For inner arm ribbons, request that the artist test the line curvature by having you flex and relax; tiny adjustments prevent the text from warping. One real mistake is asking for extremely thin cursive over a long run, which loses legibility. Inner arm work can be tender so expect sharp moments during the session. For session wear, a sleeveless tee with raised arm access keeps fabric from rubbing the area. sleeveless muscle tank
18. Negative-Space Wave Band at Elbow Crease
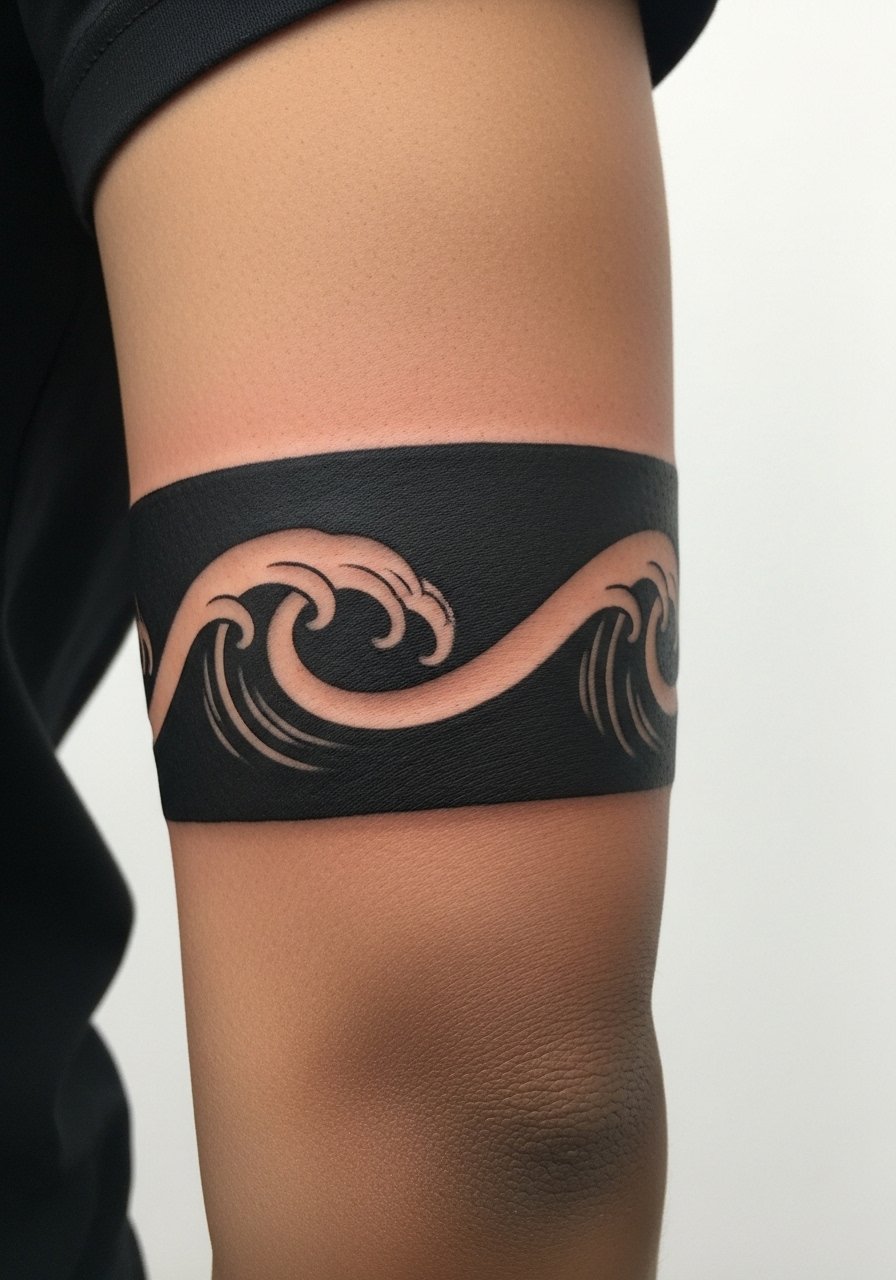
Negative-space techniques let skin play an active role in the design, but the elbow crease is unforgiving. I recommend a thicker negative band so the wave motif remains readable as the joint flexes. A common error is relying on tiny negative slivers that fill in over time. The elbow itself is a higher pain spot and benefits from breaks during the session. Plan for a short touch-up once healed around the flex lines. For showing off the band, a fitted polo that bends at the elbow highlights the effect without stretching it. elbow sleeve polo
19. Botanical Sleeve with Edge Planning for Future Extension
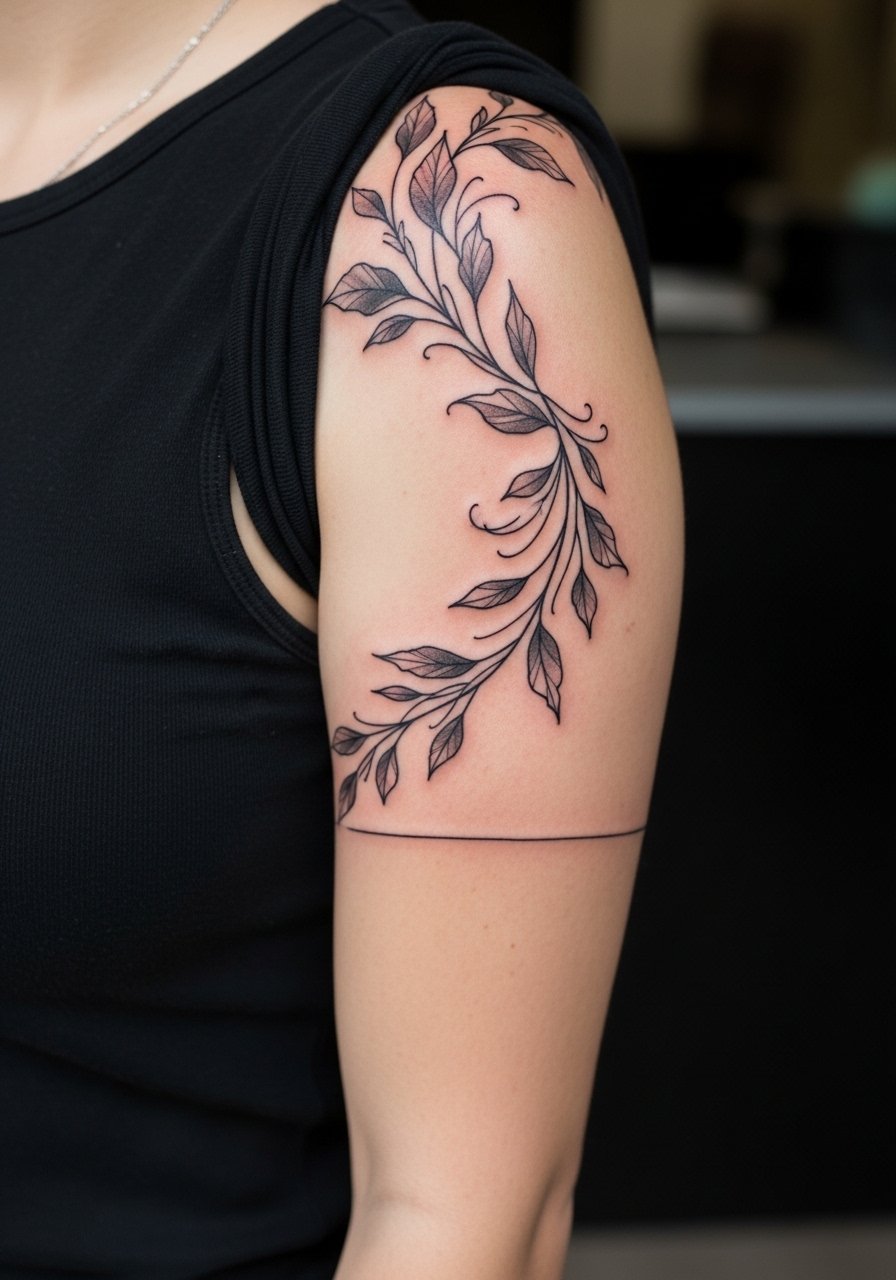
If you plan to expand to a full sleeve later, edge planning saves countless awkward fill-ins. Tell your artist to design a soft border that can be continued instead of putting abrupt black edges that are hard to match later. A frequent mistake is ending a half-sleeve with heavy black framing that clashes with future styles. Sessions vary depending on how much negative space you leave. For session comfort, wear a loose tank or button-down that allows shoulder and upper arm access. loose button down shirt
20. Compass Rose and Stars Forearm Cluster

Clusters of small elements around a main compass let you choose focal density. I suggest a main compass with stars placed following natural lines of the arm so the cluster does not look pasted on. A real mistake is scattering elements without directional flow, which confuses the eye. This is a low-pain placement and can usually be completed in one session. For showing it off, roll the cuff of a chambray shirt and keep wrist accessories minimal so the compass reads clean. rolled cuff chambray shirt
21. Geometric Sleeve Accent for Office-Friendly Forearm
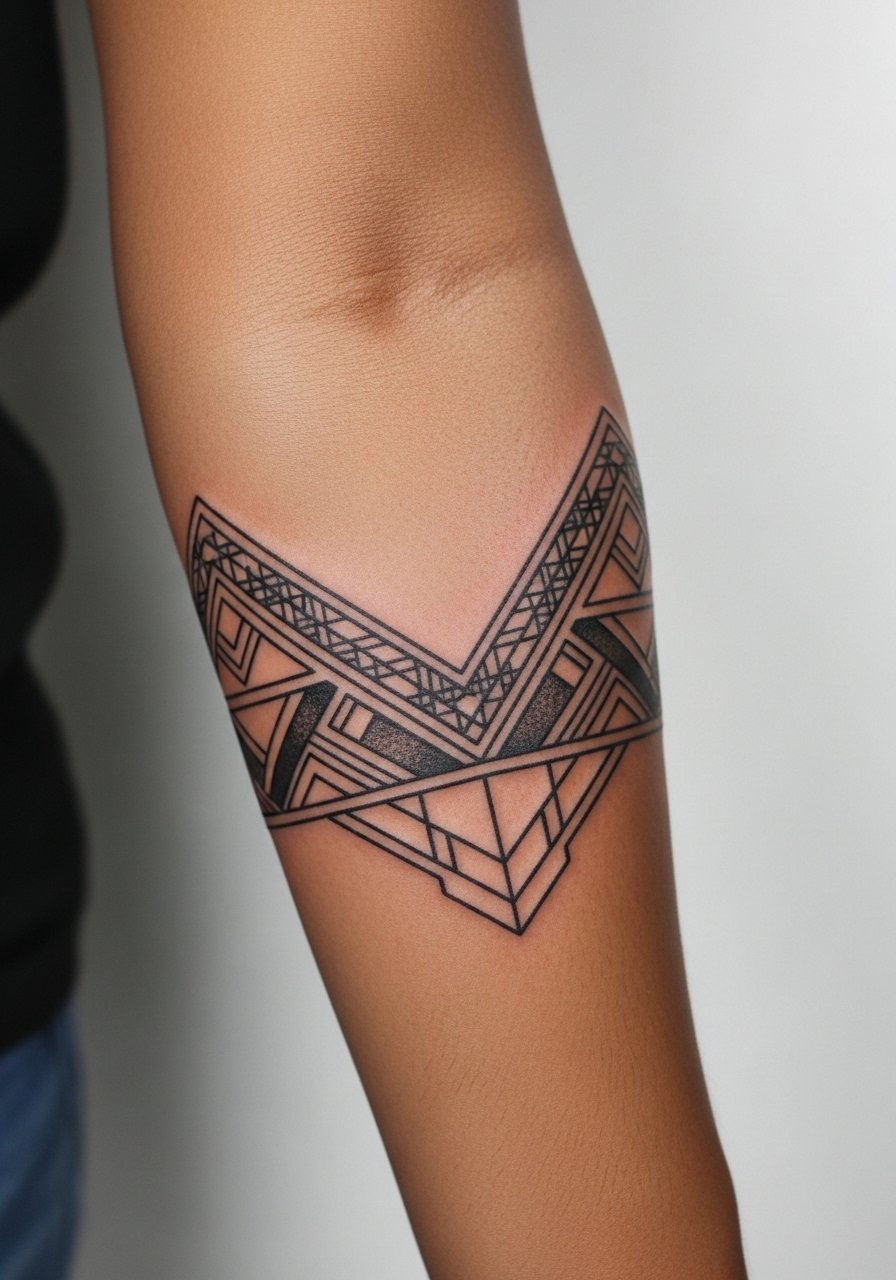
For those who need concealment for work, outer forearm accents with defined negative space read clean and are easy to hide under long sleeves. The mistake is overcomplicating the pattern so it peeks through thin fabrics or looks uneven when covered. Ask your artist how the piece looks with a long-sleeve fabric draped over it during the consult. Pain is moderate and sessions are typically shorter since the focus is linework. A loose button-down that you can pull aside for the session keeps things professional on appointment day. loose button down shirt
Frequently Asked Questions
Q: How should I choose between color and black-and-grey for a half arm sleeve?
A: Think about long-term wear. Color offers vibrancy up front but asks for more sun protection and occasional saturation touch-ups. Black-and-grey tends to age into a cohesive look with less maintenance. Consider where the sleeve sits on your arm and how often that area gets sun. For a balanced everyday wardrobe, a solid navy crewneck keeps color shots framed without overexposing them. fitted crewneck tee men
Q: Will fine line work on the inner forearm need touch-ups sooner than bold styles?
A: In my experience fine line often needs attention earlier, especially if lines are very thin or placed near frequent friction zones. Expect a realistic touch-up timeline around year two to three for some pieces. Ask your artist about slightly increased line weight if longevity is a priority.
Q: How painful is a half arm sleeve versus smaller forearm pieces?
A: Pain varies with placement. Outer upper arm sections feel easier and often finish in longer sessions. Joints, inner bicep, and the elbow crease feel sharper and may require breaks. Plan sessions with hydration, and avoid alcohol before appointments to keep pain manageable.
Q: Can I plan a half sleeve that moves into a full sleeve later without a mismatch?
A: Yes. Tell the artist during the consult that you want expansion in the future and ask them to leave soft, extendable edges and motifs that can continue logically. Edge planning prevents abrupt black borders that are hard to marry with new artwork later.
Q: Are there design choices that help tattoos hold up better on darker skin tones?
A: Higher contrast and slightly bolder linework usually read more consistently across time on deeper skin tones. Ask the artist how they adjust saturation and line weight for the skin tone they will tattoo. Many artists show healed work across different tones in their portfolios during consults, and that helps set expectations.
