
Fine line violets are all over saved boards right now, and the reality is that what looks fragile and perfect the day you leave the chair often reads very different after a year. The trending pastels and whisper-thin stems are gorgeous in photos, but placement and line weight decide whether a piece survives or needs a touch-up. Read on for 17 soft February birth flower takes, each with real-world wear notes and what to tell your artist.
1. Fine Line Single Violet Outline on the Wrist
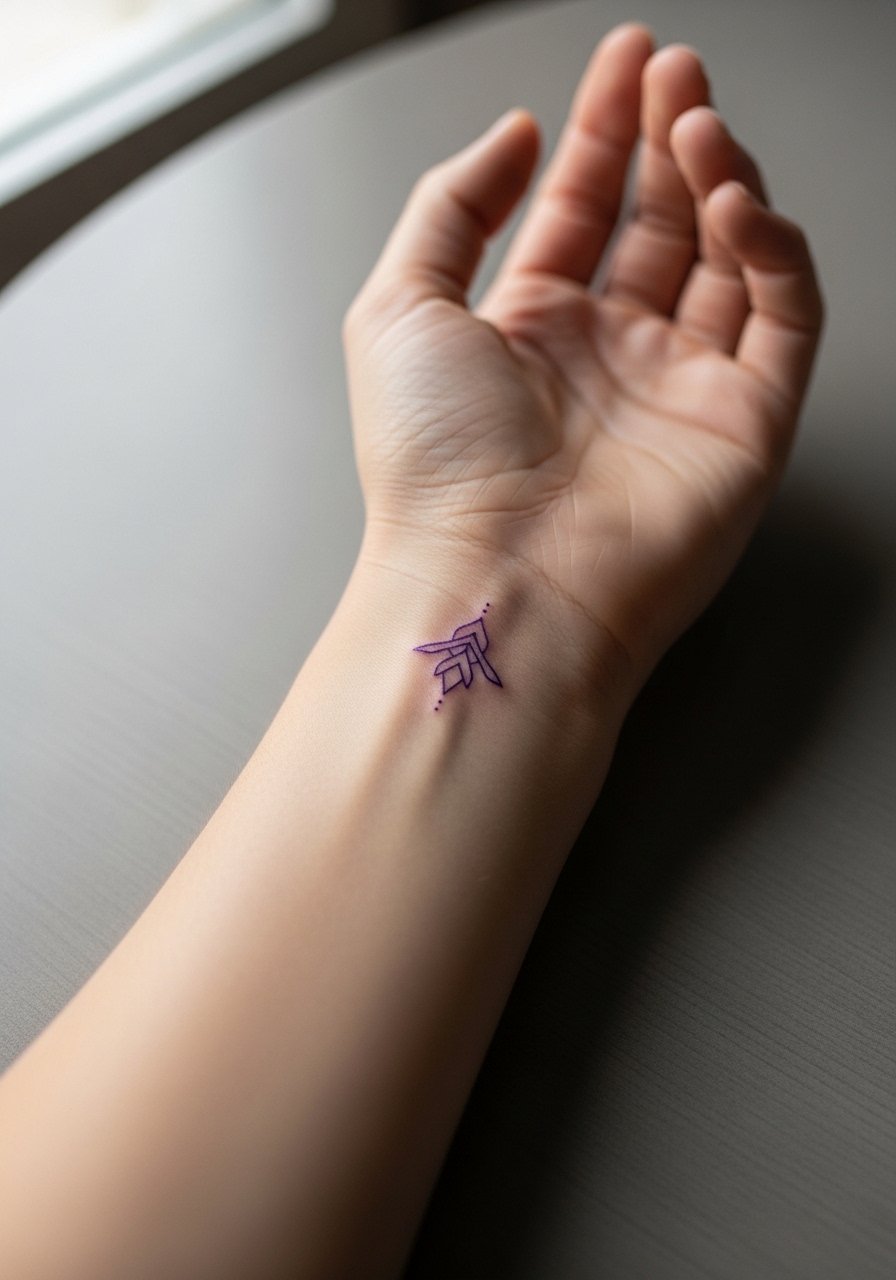
I recommend this when you want a single subtle nod to February without committing to color. Fair warning, thin linework on the wrist faces more friction and sun than other spots, so ask for slightly heavier line weight in the consultation rather than the hairline sketch you love on your phone. Tell your artist you want 2mm-plus line weight and a clean single-pass outline. Expect a quick session and moderate pain. Common mistake is going too tiny with superhairline strokes, which often fade into a faint gray by year two. Pair this with thin silver chain bracelets when showing it off, and wear a linen tank top to the appointment so the wrist is clear.
2. Watercolor Violet Cluster on the Inner Forearm
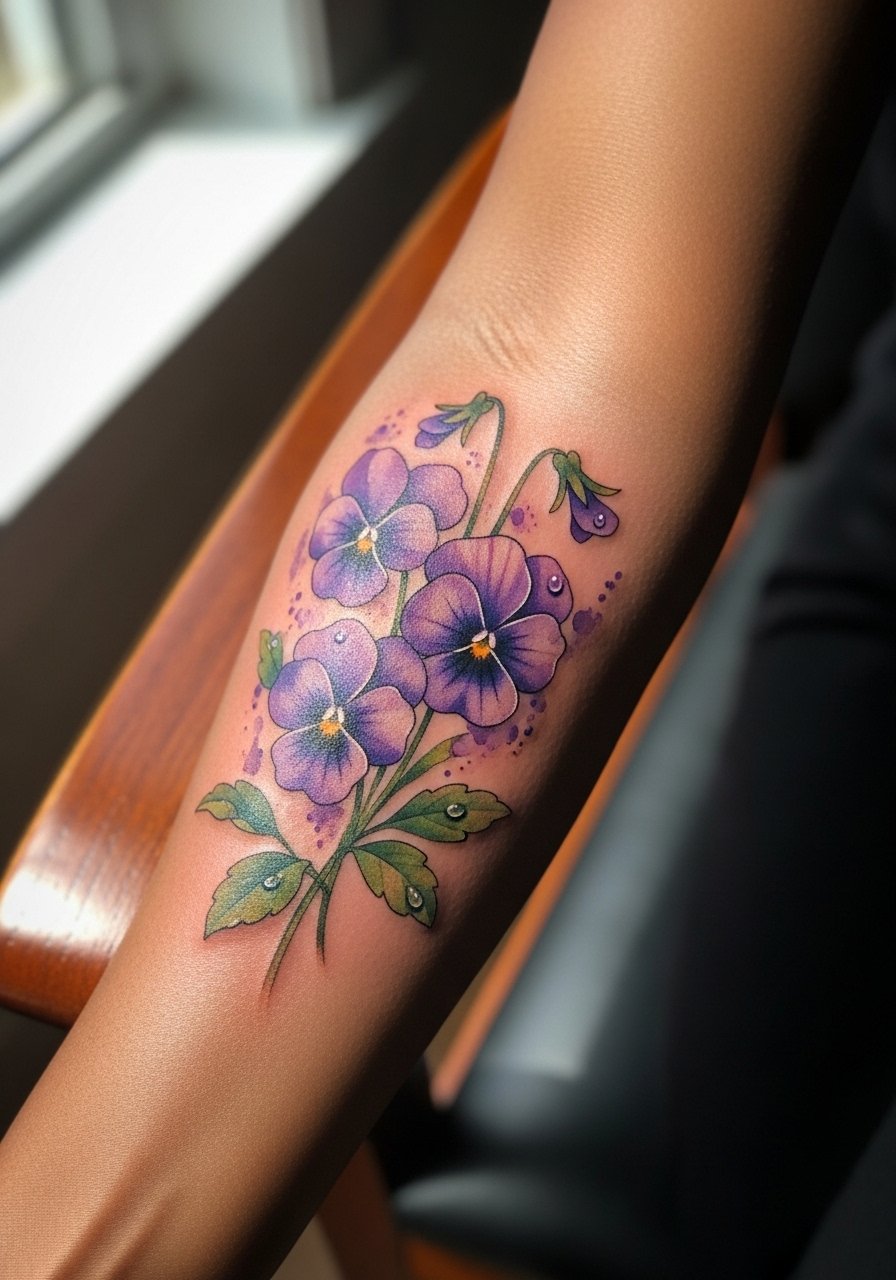
This dreamy pastel approach reads best when sized to three to four inches so color has room to breathe. For the consultation bring palette references and ask the artist to anchor the design with a faint black outline or dotted edge so the color has edges to hold. The inner forearm is forgiving for saturation, but pastel washes can heal patchy without proper saturation. A common version that ages poorly uses only dilute color with no anchor lines. Pain is low to moderate and touch-up at 12 to 18 months is common for pastel areas. Show it off with rolled cuffs or a chambray button down shirt to echo the soft tones.
3. Neo-Traditional Violet Bouquet on the Shoulder
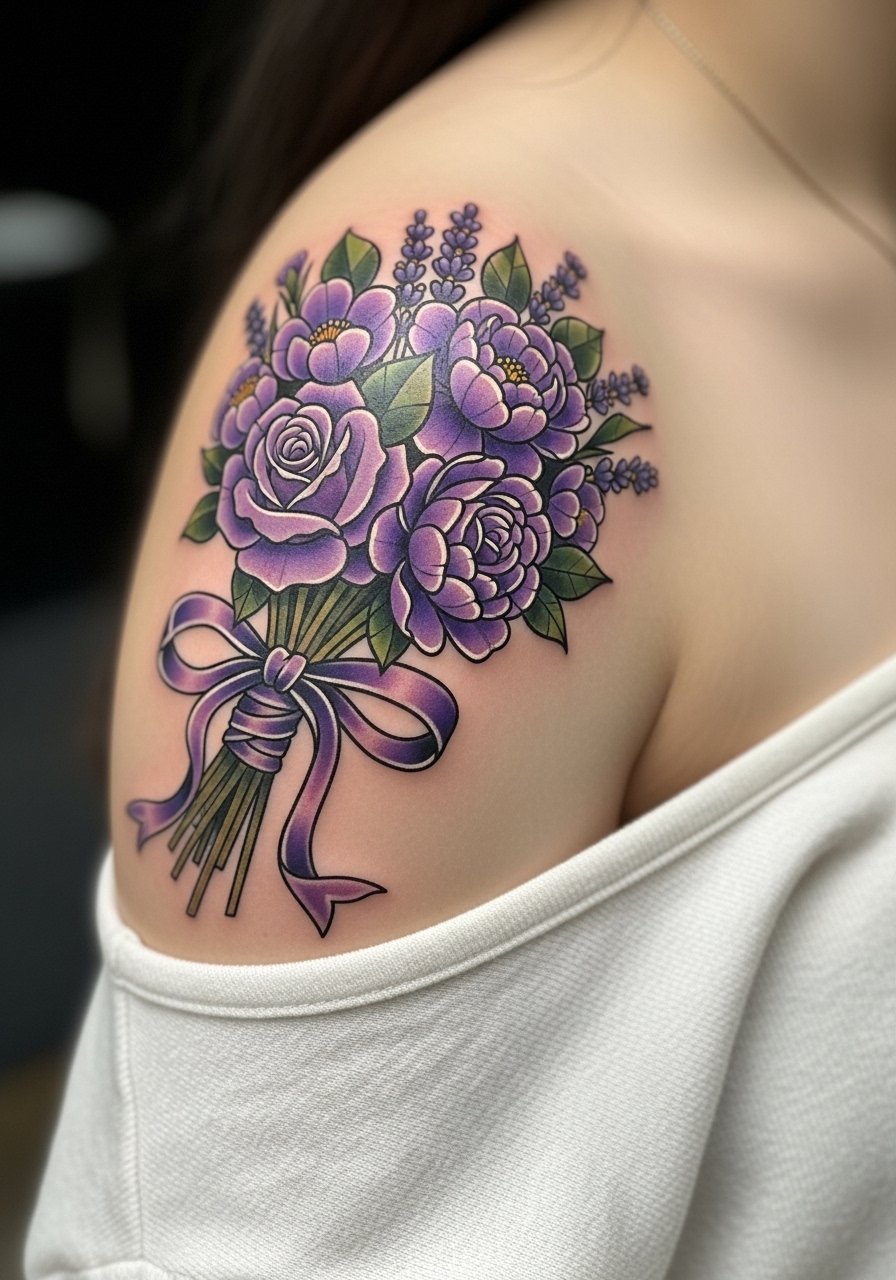
There is something about bold outlines and saturated purple that ages into a confident, readable piece. Book this when you want a design that reads across seasons and works with layered jewelry. In the consult ask for solid linework and heavier saturation in the petals so it survives beach summers. Shoulder sessions are moderate in pain and usually take two sessions for a complex bouquet. A frequent mistake is asking for tiny neo-trad detail, which undermines the style. For show-off looks pair the piece with an off shoulder blouse and a delicate gold necklace that frames the top of the shoulder.
4. Blackwork Violet Mandala on the Upper Arm
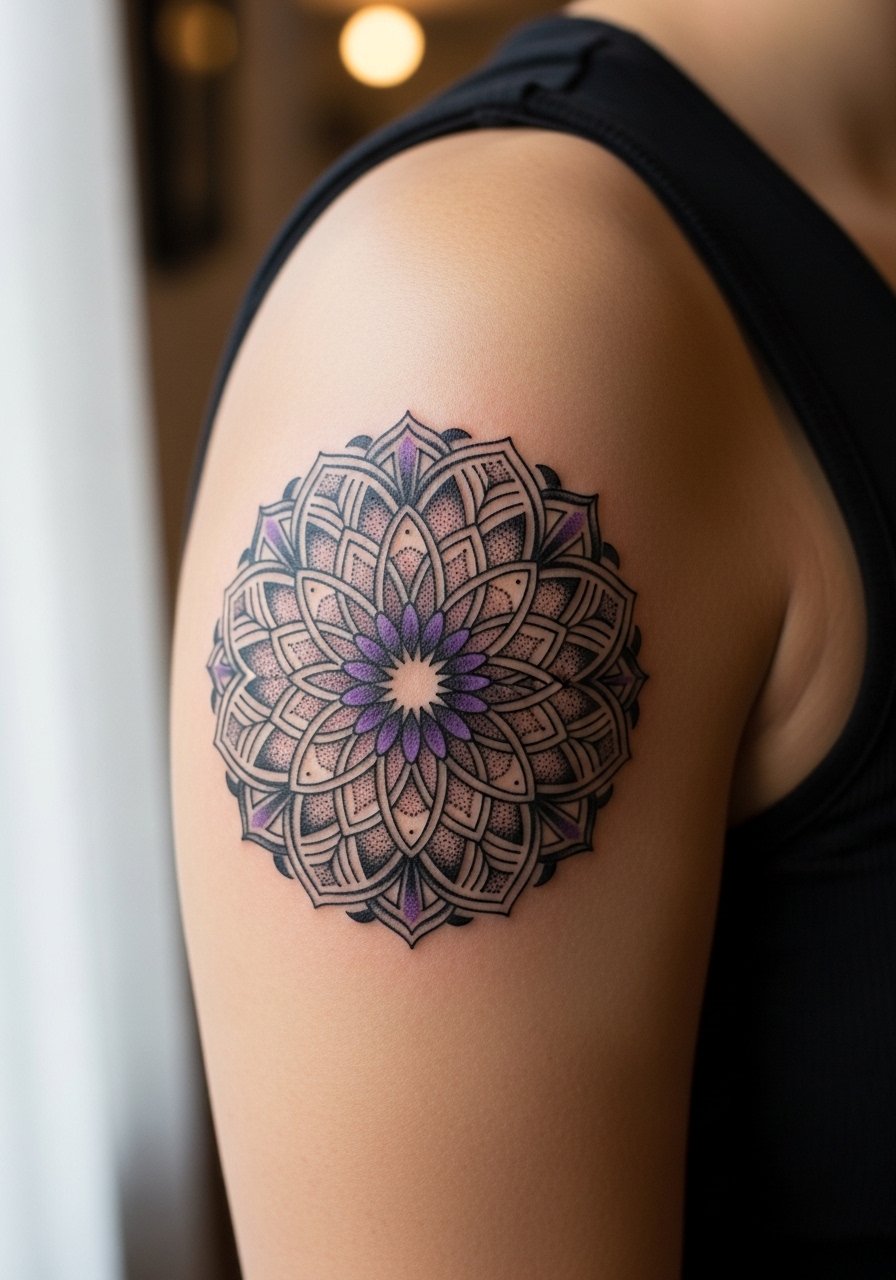
Choose blackwork when you want graphic longevity and contrast. Heavy black saturation tends to hold far better than muted purples, and geometric spacing prevents lines from merging. When you sit with your artist say you want dot work and stipple shading rather than continuous gray, that keeps texture crisp over time. Upper arm is low blowout risk, but dense mandalas need spacing to avoid long-term merging. Pain is low and a single session often covers a three-inch piece. This style suits jeans and rolled sleeves, so consider rolled jeans or a short-sleeve tee when you show it off.
5. Micro-Realism Violet Bud on the Collarbone
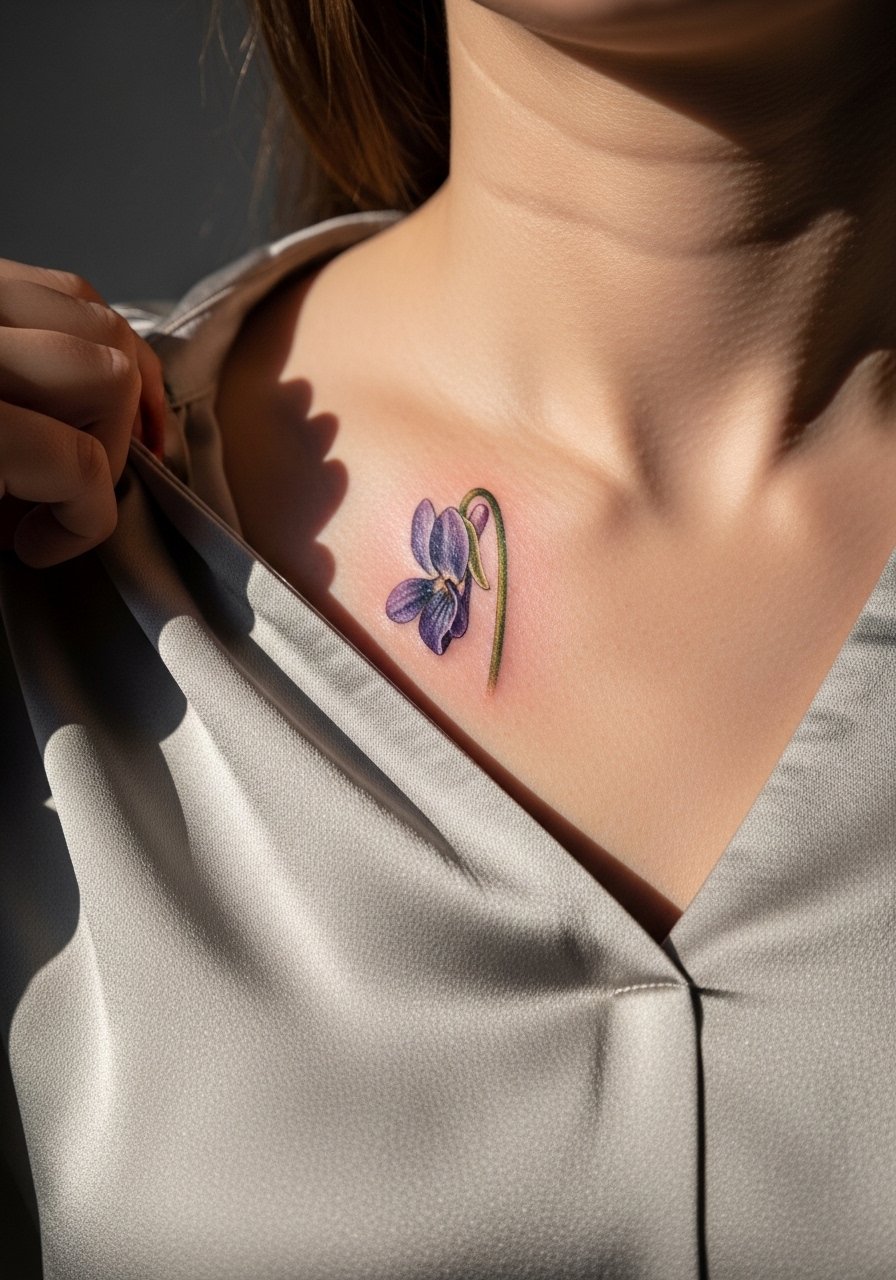
Micro-realism reads best in small focal areas like the collarbone where viewers get a close look. The collarbone is a high-visibility placement and subtle detail can be lost if the lines are too wispy, so ask for crisp black-and-gray anchor lines beneath the gray shading. Expect a sharper pain near bone and a short single session. Common mistake is asking for ultra-tiny hypertexture with no outline, which blurs faster than expected. For evenings pair it with a v neck silk blouse and wear a strapless bra to the session so the area is fully accessible.
6. Minimalist Violet Stem on the Ribcage

Fair warning about ribs, this placement is high on the pain scale but it creates a private canvas that peeks out in summer. Artists split on fine line rib work. One camp says fine line blurs quickly there because the skin stretches a lot. The other camp insists that with correct needle depth and spacing fine line settles fine. Ask your artist which side they fall on and request slightly more spacing between lines if they favor tighter strokes. Expect touch-up conversations during booking. Wear a loose tank top to the appointment for easy access and a wireless bralette under it for comfort.
Studio Day Picks
The wrist and rib pieces above need different prep from shoulder work, so a few items smooth the session and the first week.
-
Tea tree salve tattoo aftercare. Lighter absorption helps linework on oily skin stay crisp during the first week, useful for wrist and ankle pieces that rub against clothing.
-
Lanolin-free healing balm. Performs well in humid climates and avoids the greasiness that can make pastel areas gummy, good for inner forearm washes.
-
Hinoki aftercare oil. Breathable oil that soothes inflammation on bony areas like the collarbone without a heavy occlusive layer.
-
Mushroom extract anti-inflammatory serum. Helpful for larger shaded pieces after long sessions, reduces tenderness and speeds comfort return.
-
Hustle Butter Deluxe. A thinner alternative to heavier ointments that many artists prefer for watercolor and color saturation without clogging.
7. Ignorant Style Chunky Violet on the Calf

This playful chunky outline works well on vertical canvas like the calf where bold shapes read from a distance. The style’s imperfect charm comes from confident, uneven strokes rather than tight precision. In consult say you want unapologetically uneven line quality and ask for heavier black outlines. Calf sessions are low pain and heal fast. A common mistake is shrinking the ignorant feel into too small an area, which turns charm into mess. For off-duty looks pair it with bootcut jeans rolled up and leather ankle boots.
8. Traditional American Violet with Banner on the Outer Forearm
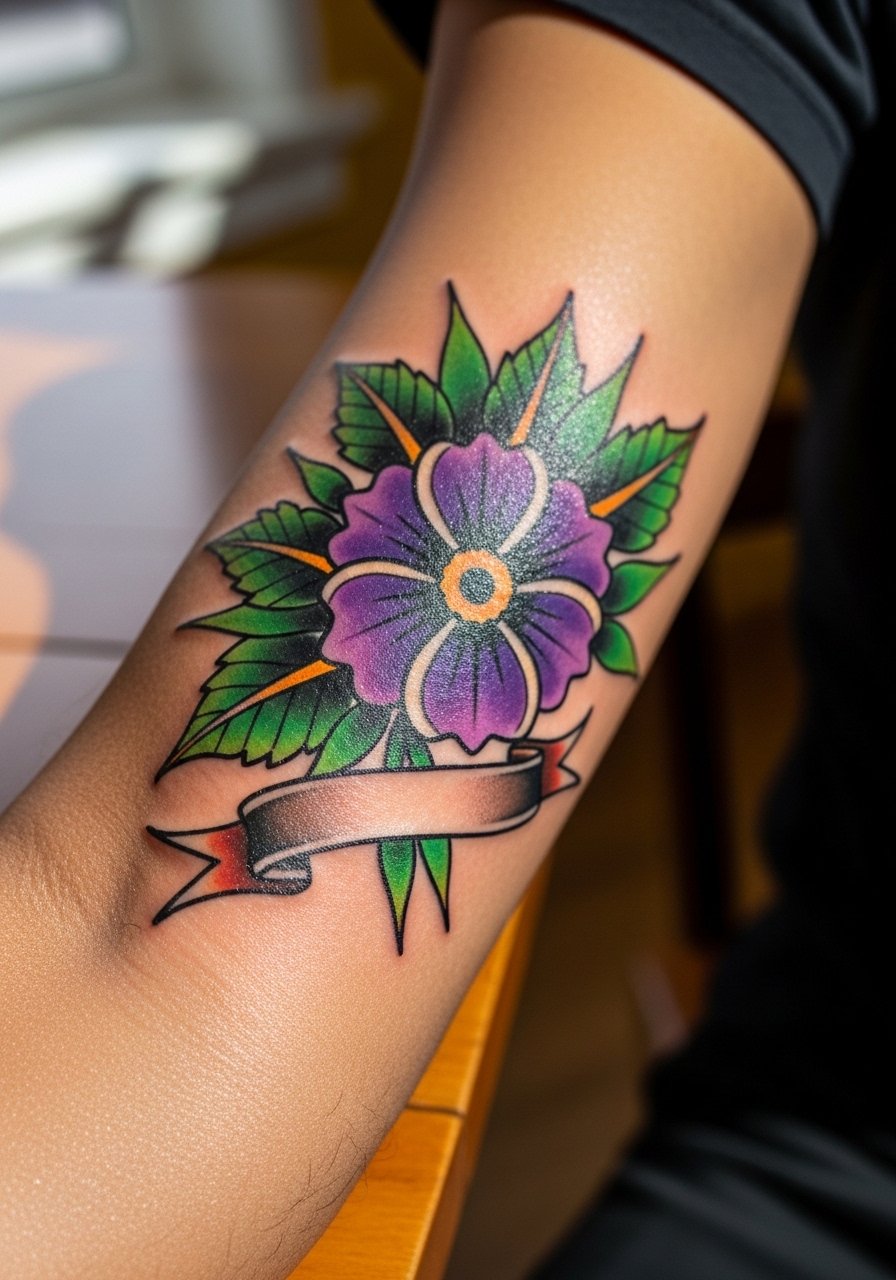
Traditional styles age into bold, readable pieces because of thick outlines and solid saturation. This is a good pick if you want an heirloom aesthetic that still reads in photos years later. Tell your artist you want classic saturated fills in the petals and a clean banner with room for lettering if desired. Outer forearm pain is manageable and a single session often covers a three- to five-inch piece. Avoid asking for tiny microdetail inside the banner, it competes with the style. Show it with short sleeves or a rolled chambray button down for a vintage vibe.
9. Fine Line Violet and Primrose Duo on the Ankle
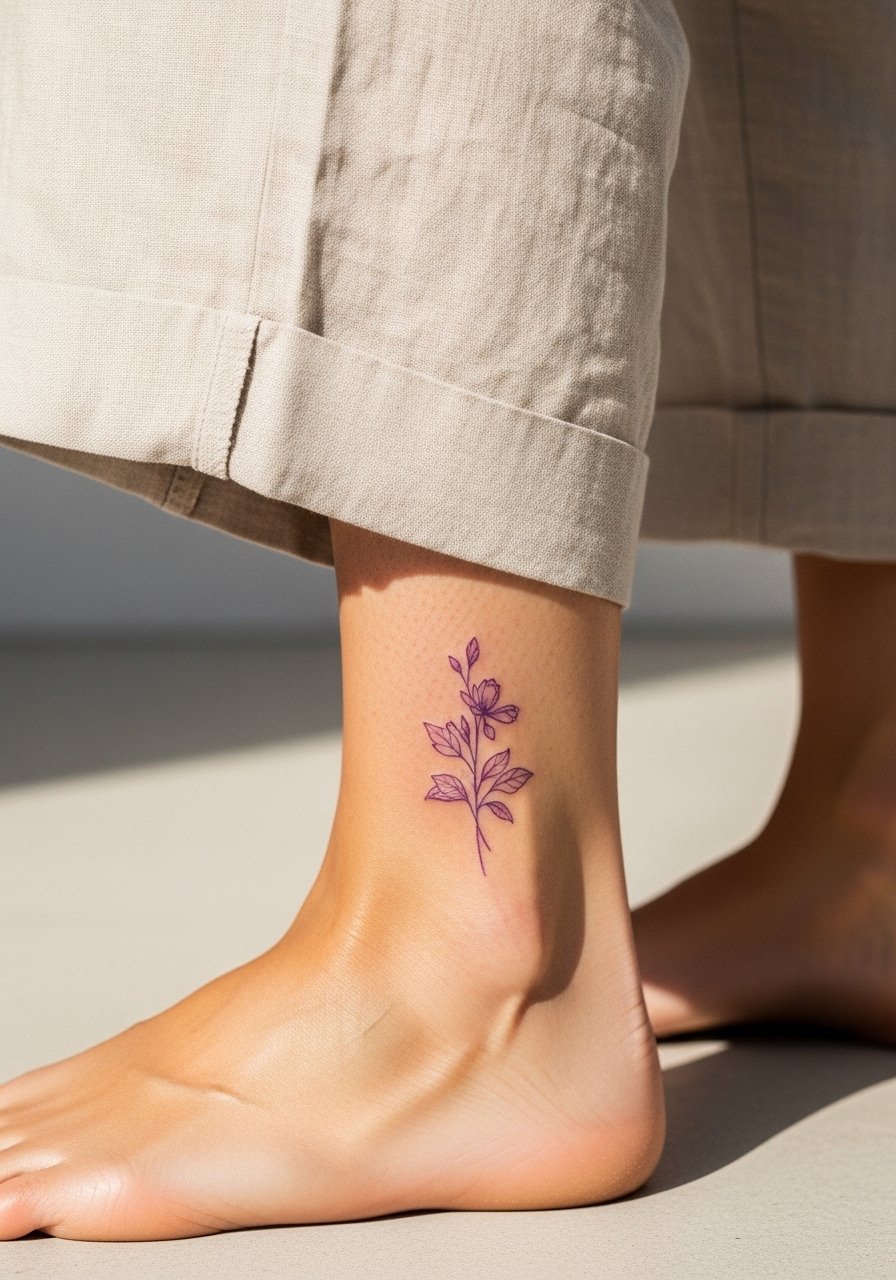
Ankle placements need designs that stand up to rubbing and shoe straps. If you love fine line duos, ask for slightly bolder anchor lines around petals so the shapes remain readable after a year. The ankle is low to moderate on pain but vulnerable to wear. Common mistake is expecting fine hairline detail to last under shoe straps and socks. For showing off in summer pair the piece with wide leg linen pants cuffed high or strappy sandals.
10. Ornamental Violet Frame on the Shoulder Blade
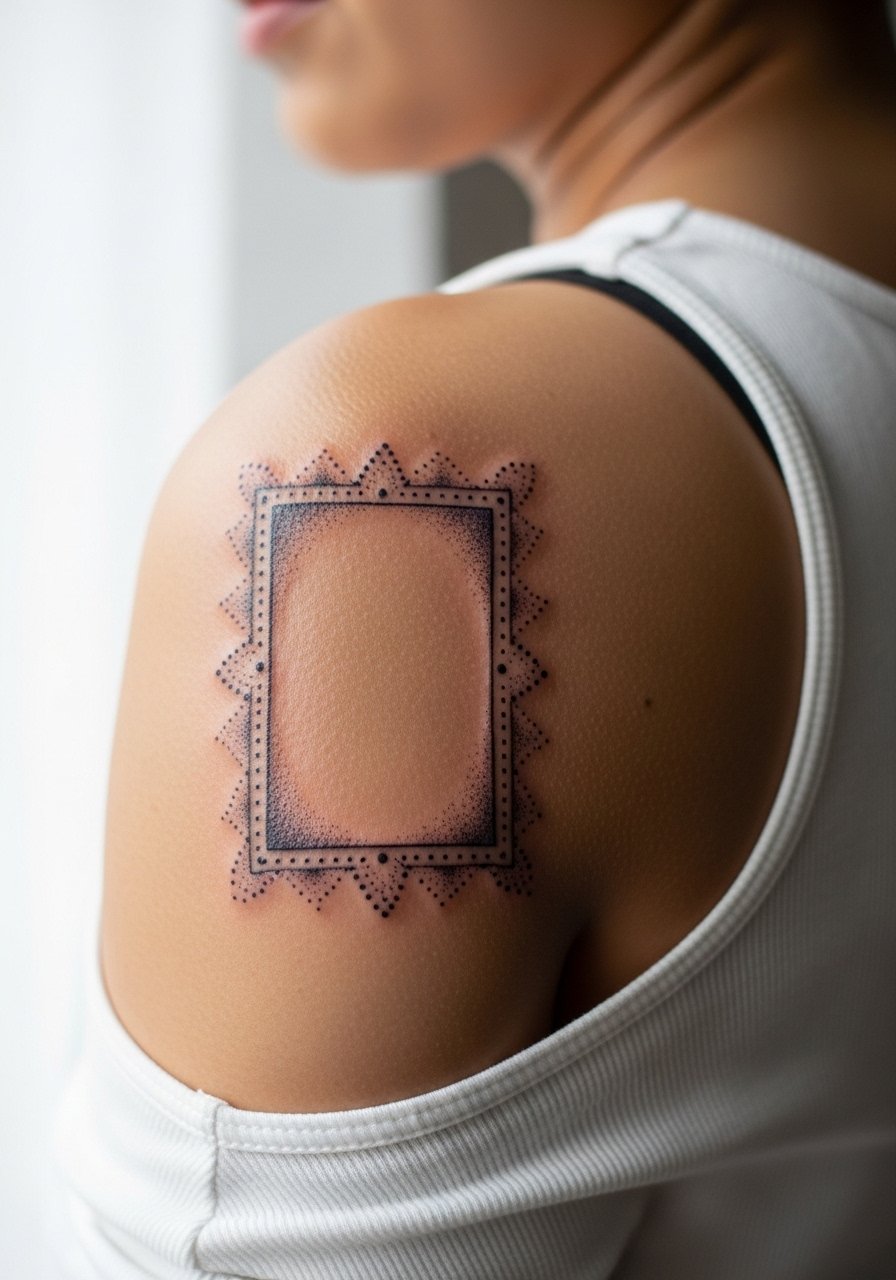
Ornamental frames work best on broader canvases like the shoulder blade where symmetry can breathe. Tell your artist you want spacing between dot work clusters to prevent merging at the edges. Shoulder blade pieces are low pain and photograph beautifully under natural light. A mistake to avoid is packing too many tiny dots in a small area, which loses contrast once healed. For session wear use a strapless top or an open button-down so the artist can access the area without tugging.
11. Pastel Watercolor Single Violet Petal on the Inner Wrist

A single petal is a low-commitment way to show birth month pride, but pastels here can heal uneven if saturation is too light. Ask the artist for a slightly deeper lavender base with graduated fades to pink at the edges. Inner wrist has constant movement and sun exposure, so touch-ups at year one are common. The biggest error is skimping on saturation to keep it "soft" initially, which often leads to patchy healing. Pair with a dainty bracelet stack to frame the piece when you want it seen.
12. Black and Gray Realism Violet Sprig on the Ribs
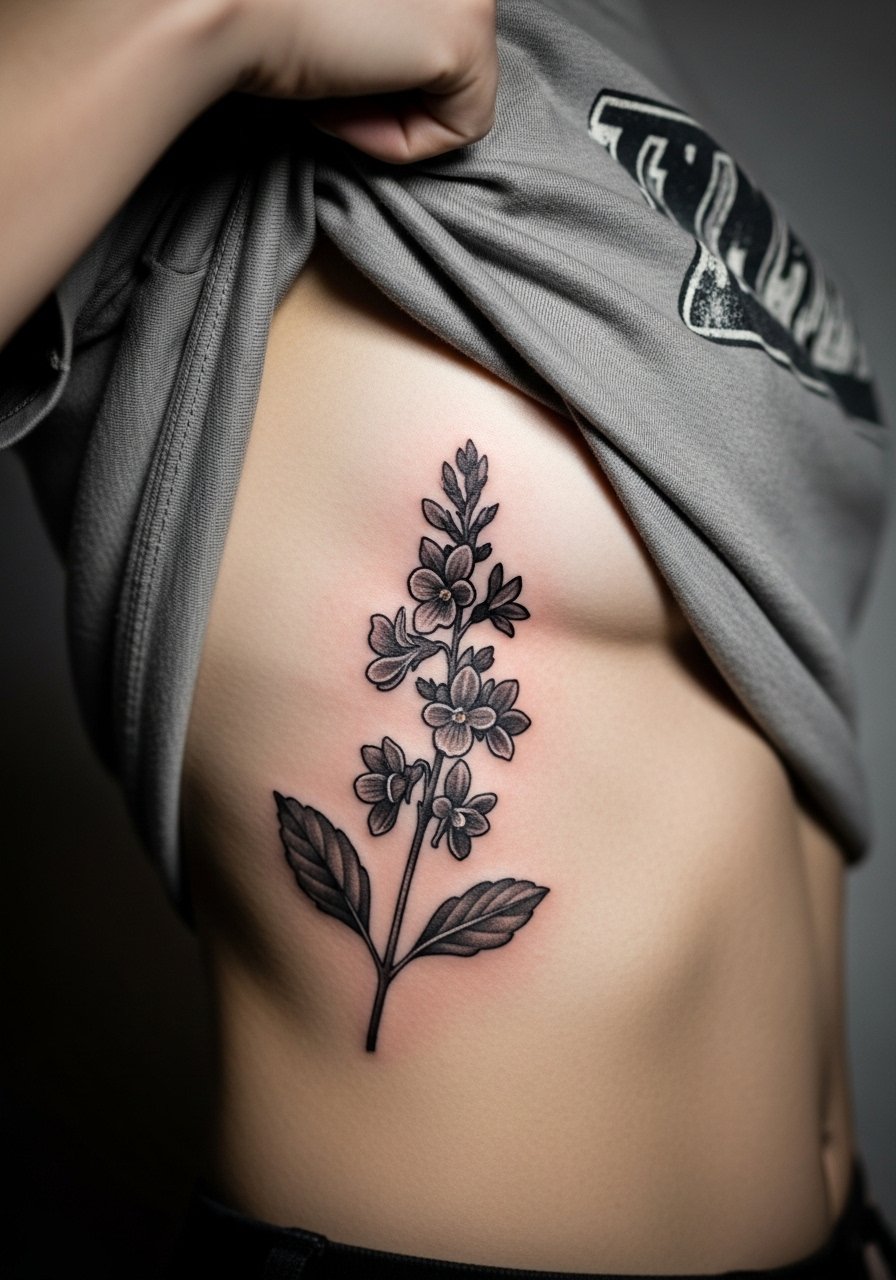
Realism in black and gray gives texture and depth, especially on larger rib placements. Be honest about pain expectations, ribs are tender for most people, but the result can be striking. In the consult bring clear reference photos of the texture you want and ask for graduated shading rather than thick block shading. A frequent misstep is overcrowding the ribs with tiny details that blur as the skin stretches. Note on professional considerations, rib placements are intimate and some prefer to keep them private for work reasons. Schedule touch-up within a year for dense gray work.
13. Patchwork Fine Line Violets for a Sleeve Build
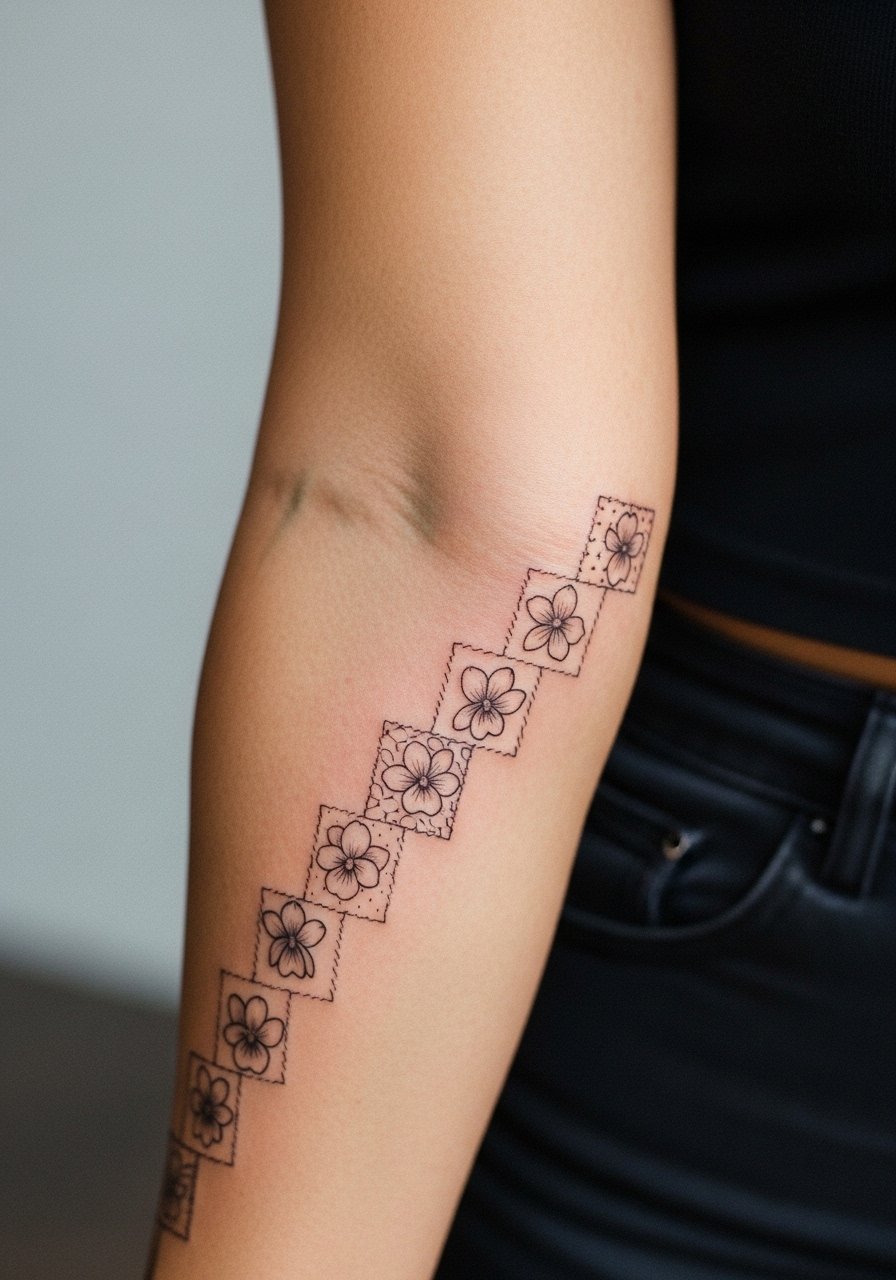
If you plan a sleeve, this approach lets you add small two-inch motifs over time. The strategy is to keep each piece readable on its own and leave negative space for future connectors. When consulting, tell your artist you want consistent line weight across appointments and bring healed photos of previous pieces so they can match spacing. Common mistake is mismatched line weights between sessions, which reads uneven in a sleeve. Inner arm pieces can be sensitive but are usually manageable in short sittings. For session day wear bring a loose drawstring linen pant or shirts that roll easily so the artist can work without fabric tension.
14. Negative Space Violet Knuckles
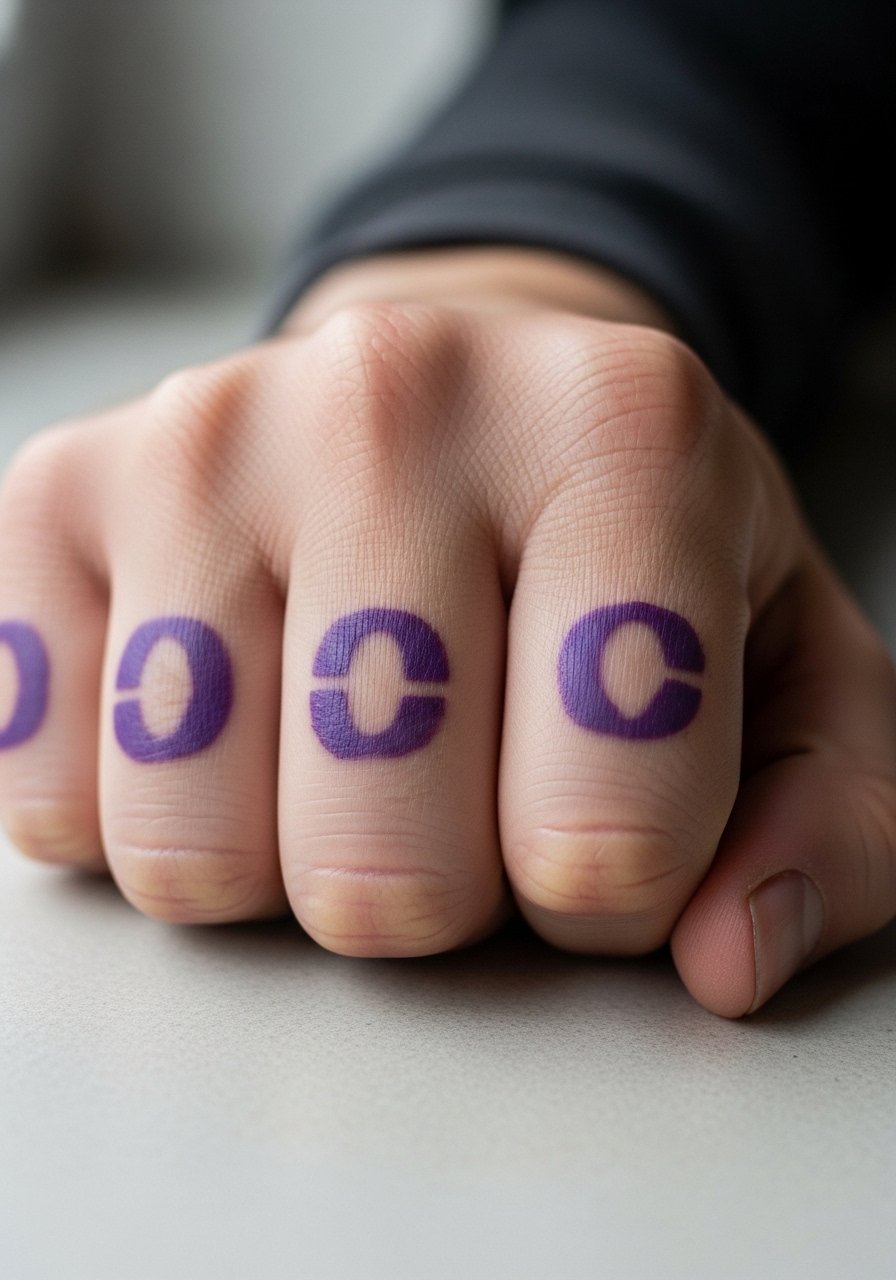
This bold minimalist idea uses skin as the color, carved out from surrounding black or bold strokes for a high-contrast effect. Ask for precise stencil placement and a slightly larger scale than your initial thought so the negative space reads after healing. Knuckle work heals differently because of constant motion and frequent washing, so expect more touch-up than an arm piece. A common mistake is shrinking the design to finger width without considering future blurring. Keep in mind hand tattoos still affect some industries, so think about career context before committing.
15. Violet with Winter Evergreen Sprig on the Thigh
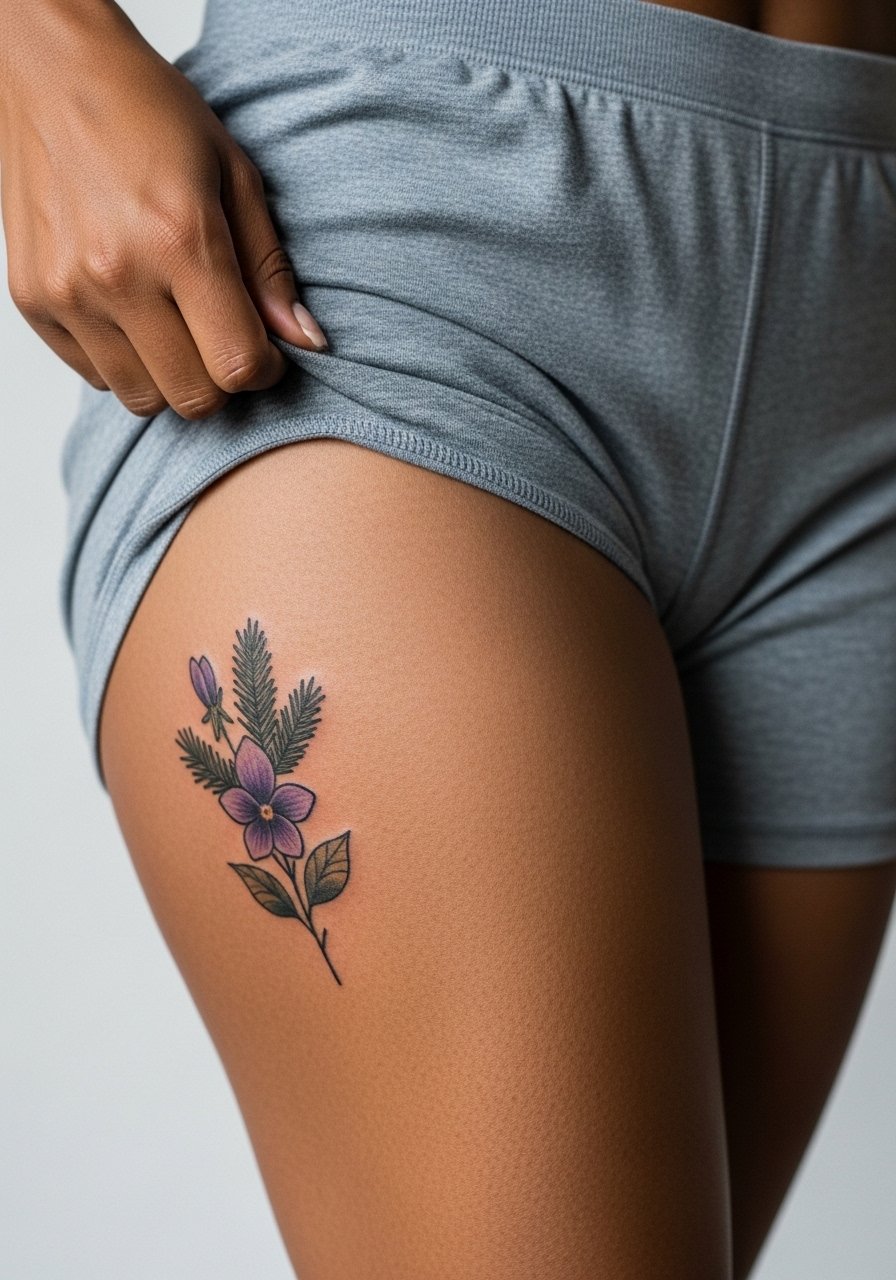
Pairing violets with evergreen sprigs stretches the loyalty metaphor across seasons and creates visual contrast with evergreen texture. Thigh work gives room for roots or additional seasonal motifs and it scales well if you want a larger piece later. Ask for root or evergreen placement that complements natural leg lines so the piece moves with the body. Thigh sessions are moderate pain and heal under clothing, so be prepared for friction from tight fabrics. The mistake is over-detailing small areas that will be covered by cloth during healing, which can scab and disrupt fine strokes.
16. Violet Root System on the Inner Thigh
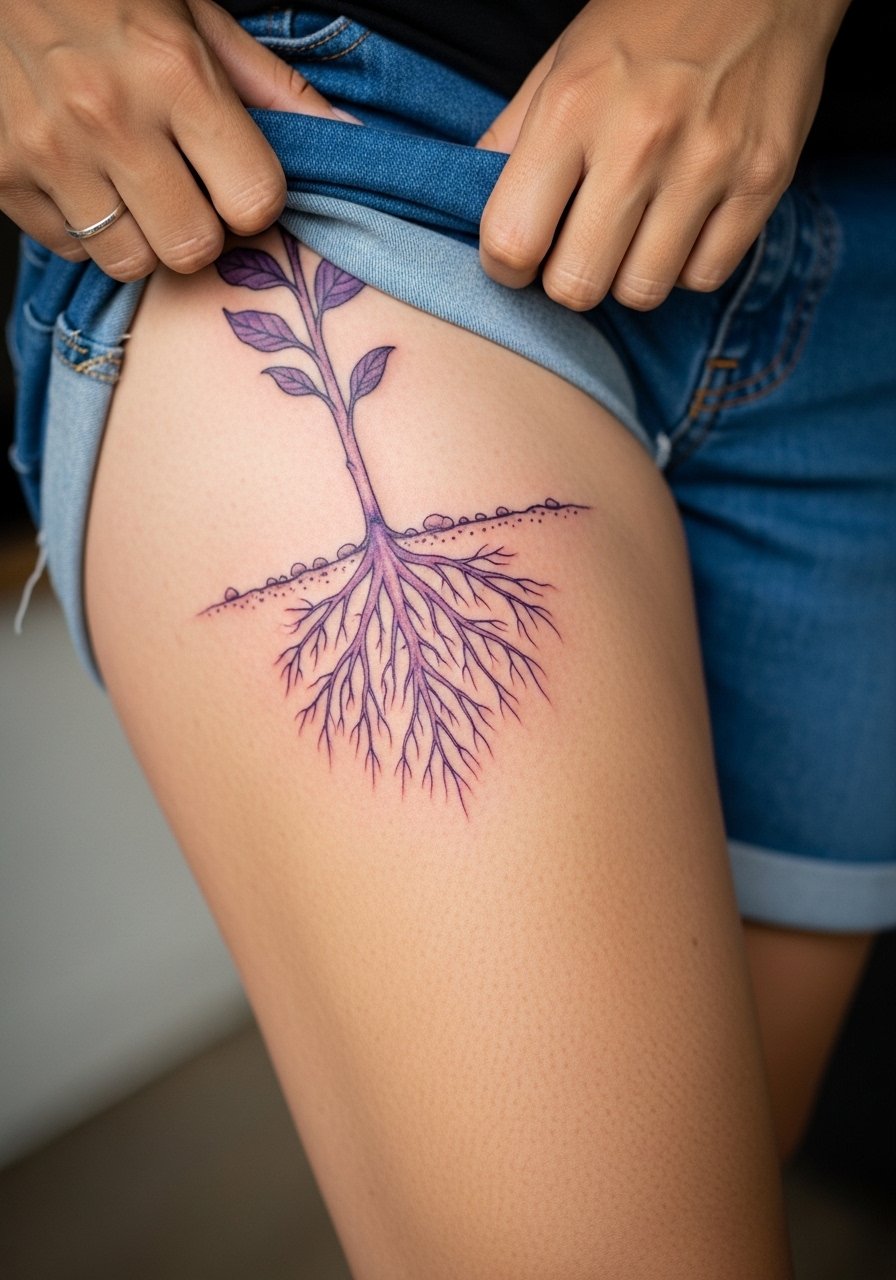
This underground-style design suggests hidden strength and scales beautifully on the inner thigh where curvature gives movement to roots. Inner thigh tattoos require specialized handling and a careful consult about swelling and aftercare. One-sentence profession note, intimate placements call for a studio with experience in private sessions. Common mistake is trying to compress a full root system into too small a space, which loses detail when healed. Wear loose shorts to your session so the area can be accessed without tight seams.
17. UV-Reactive Fine Line Violet Hidden Accent
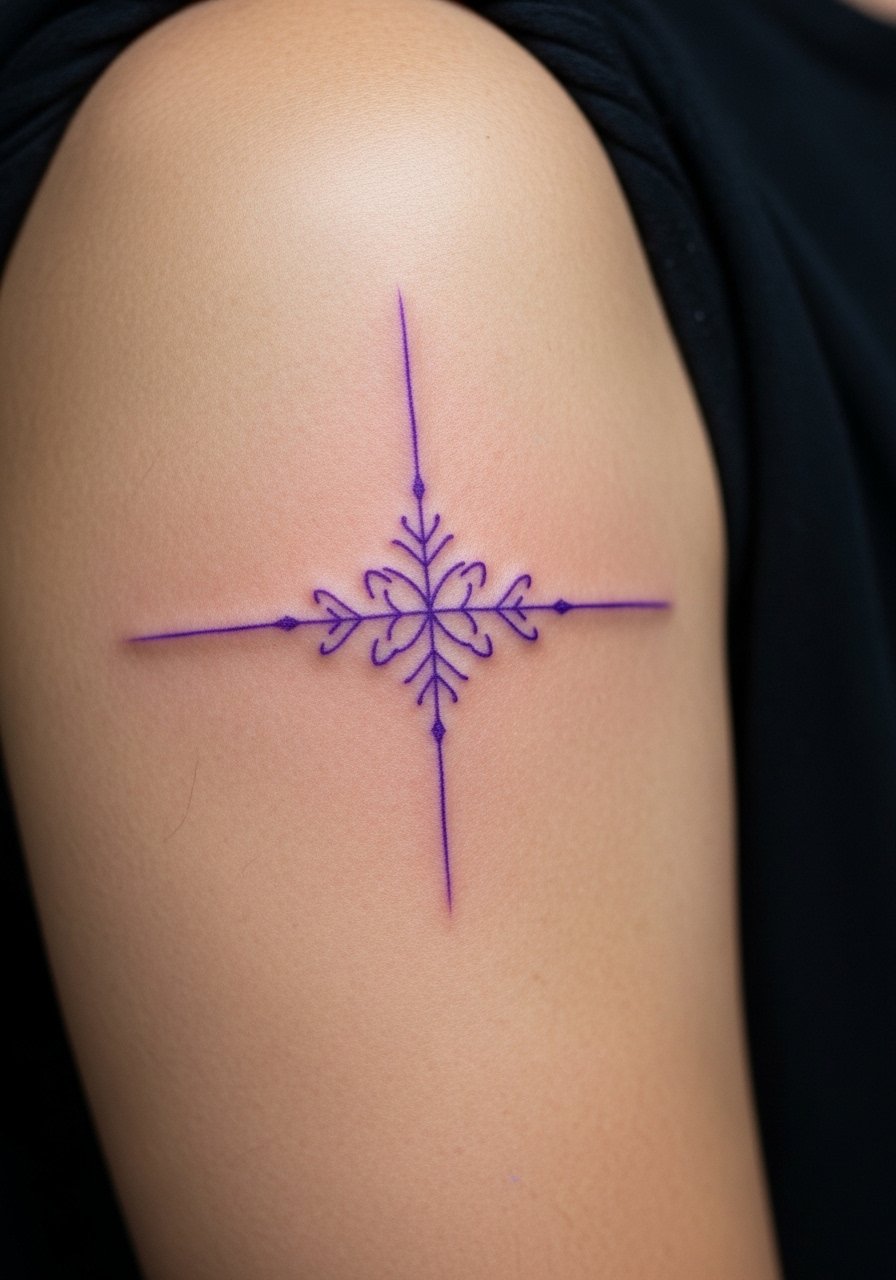
A niche option is a tiny fine line accent that uses UV-reactive ink paired with visible black line anchors. This reads subtle in daylight and reveals a glow under black light for events. Ask your artist about safety and testing a small patch of UV ink on your skin tone first, and discuss long-term visibility since UV pigments have different fading profiles. Expect a slightly longer consult and patch test session before a full application. A common error is expecting the same saturation and longevity as traditional pigments. This idea is best as a layered accent rather than the main tattoo.
Frequently Asked Questions
Q: Will fine line violets fade faster on wrists and forearms than on shoulders and calves?
A: Yes, from what I've seen, wrists and forearms take more sun and friction so fine lines often soften sooner than on shoulders or calves. If you want longevity, ask your artist for slightly heavier anchor lines and plan a touch-up at 12 to 18 months for thin work.
Q: Should I wrap a pastel watercolor violet or dry heal it?
A: Artists and healers split into two camps here. One group prefers protective film like Saniderm for faster, less messy closure. The other group favors dry healing and natural scab separation. Your best move is to ask the studio what they recommend for the specific color saturation you chose and follow the artist's post-session protocol.
Q: Are violets visible on darker skin tones or do they look muddy?
A: Darker skin tones can handle violets, but they often show best when paired with a high-contrast black outline or bolder saturation. Request a tone test patch or a staged outline first so you can see how the color sits on your skin before full filling.
Q: How do I find affordable small violet work without sacrificing quality?
A: Look for guest spots, apprentices supervised by senior artists, or convention walk-ins focused on small pieces. Bring clear reference images and ask about minimum session pricing during booking so there are no surprises at the chair.
Q: Which placements are safest if I plan to have children or expect weight fluctuation?
A: Areas like the collarbone and upper arm tend to change less with weight gain or loss than forearms and the midsection. If you expect body change, choose placements with less stretch and ask the artist about scalability for future cover-ups or extensions.
