
Fine line tattoos dominate saved boards right now, and the pieces that still look deliberate after five years are not always the flashiest on day one. Bold outlines and careful spacing age into legible marks. If you want a playful Cheshire Cat sketch that reads the same in a year, think through line weight, placement, and what you will wear while it heals. The first idea below shows a neo-traditional forearm option that makes those decisions simple to visualize.
1. Neo-Traditional Cheshire Head on Forearm
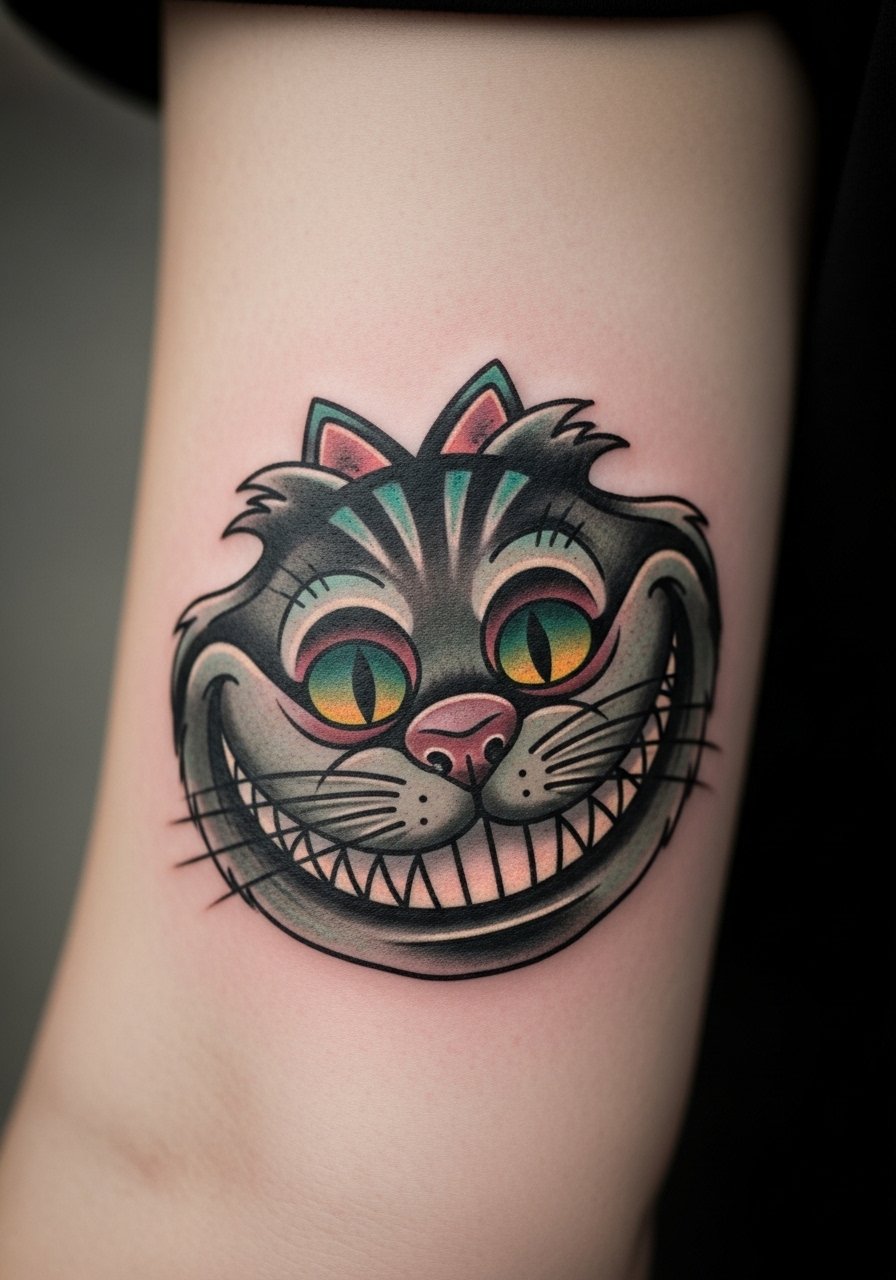
I recommend this when you want a playful face that still reads from a distance. Tell your artist you want bold outline work with saturated fills and a slightly exaggerated crescent smile, not tiny crosshatching. Pain is mild on the outer forearm and most sessions finish in one to two hours. A common mistake is asking for too-small details inside a compact head, which softens into a blur by year three. Expect touch-ups at year two to keep saturation bright. For showing it off, roll up sleeves and try a rolled sleeve graphic tee with a loose fit tank for session comfort.
2. Tim Burton–Inspired Striped Body Fading Into Smoke, Thigh
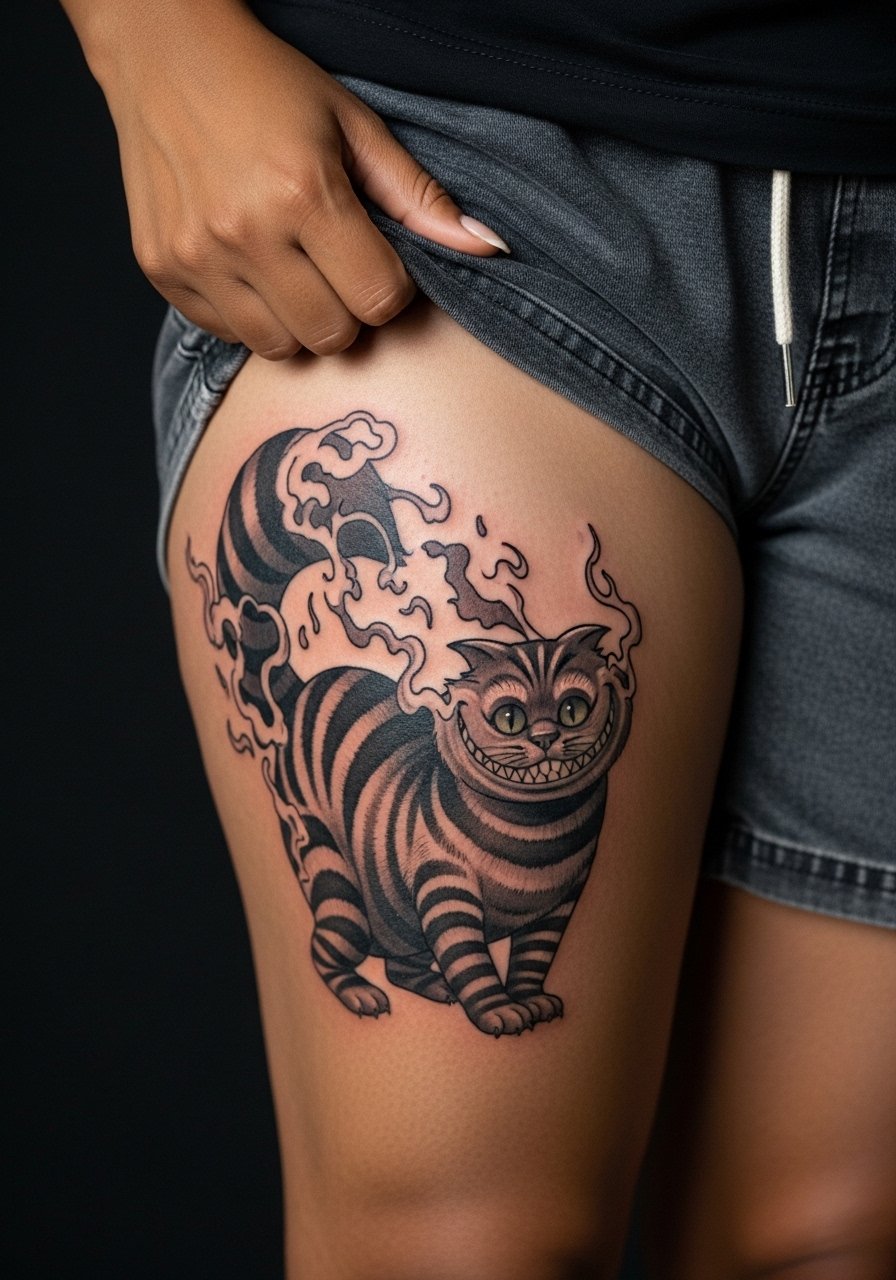
There are two camps on this darker take. One camp prefers black and gray for depth and longevity on large pieces. The other camp argues color brings necessary contrast for the stripes. Both are valid. If you lean gothic, ask for strong value contrast and layered stipple shading so the smoke reads at a distance. Thigh pain rates moderate and most sessions run two to three hours. A frequent error is crowding the smoke with tiny details that vanish after movement. For session wear, pull on high waist denim shorts so the artist can work without tugging.
3. Minimalist Grin Outline on the Wrist
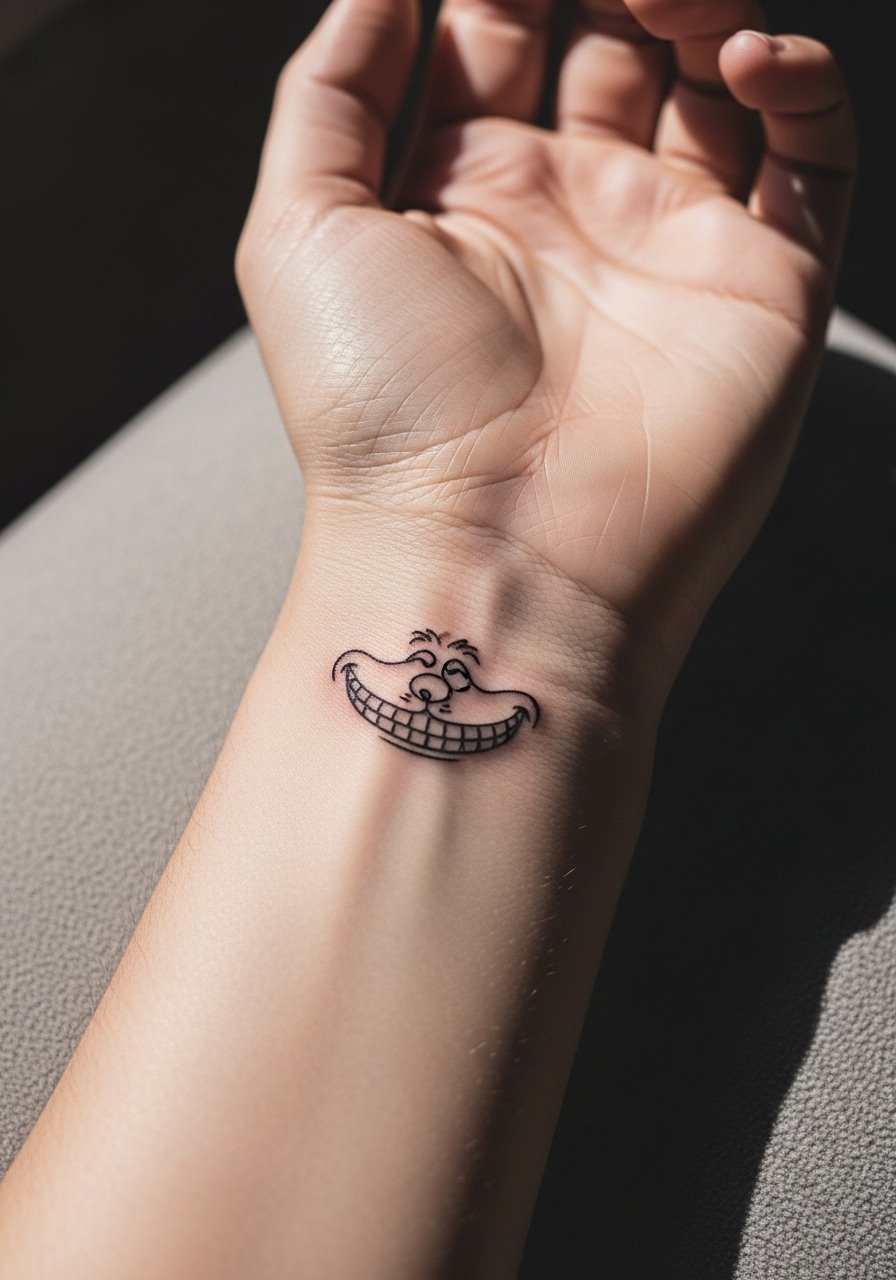
Most people pick this for subtle symbolism and a first tattoo. Tell your artist you want a single consistent line weight and to test a stencil while your wrist is relaxed. Wrist pain is low to moderate and the session often takes under an hour. The controversy here is clear. One group says fine line on wrists fades fastest and needs touch-ups by year two. The other group says careful spacing and slightly deeper placement keep lines readable longer. Expect a touch-up around year two. Avoid tiny interior details. Wear a thin leather cuff bracelet opposite the tattoo when showing it off.
4. Black-and-Gray Horror Grin on Upper Arm
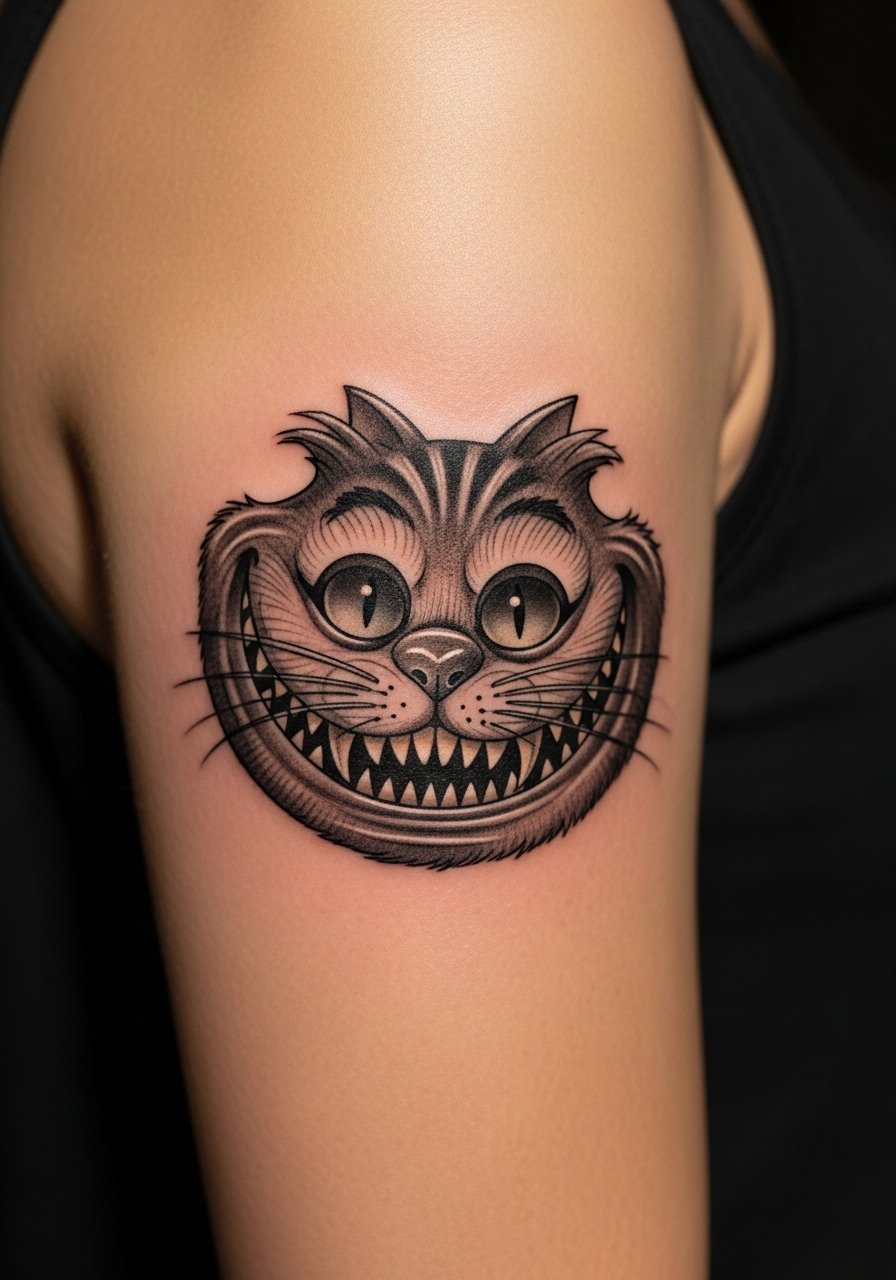
This version leans into eerie vibes with detailed shading and sharp tooth geometry. The upper arm is forgiving for shading and sessions usually run two to three hours. A common mistake is requesting photoreal detail in too-small a space. That detail loses contrast by year five. Ask for mid-tone separation and stipple shading to keep texture without overworking the skin. Blowout risk is low on the upper arm but pick a heavier line for outer contours to anchor the piece. For session comfort, wear a sleeveless muscle tank you can pull aside.
5. Classic Book-Illustration Fine Line on Collarbone
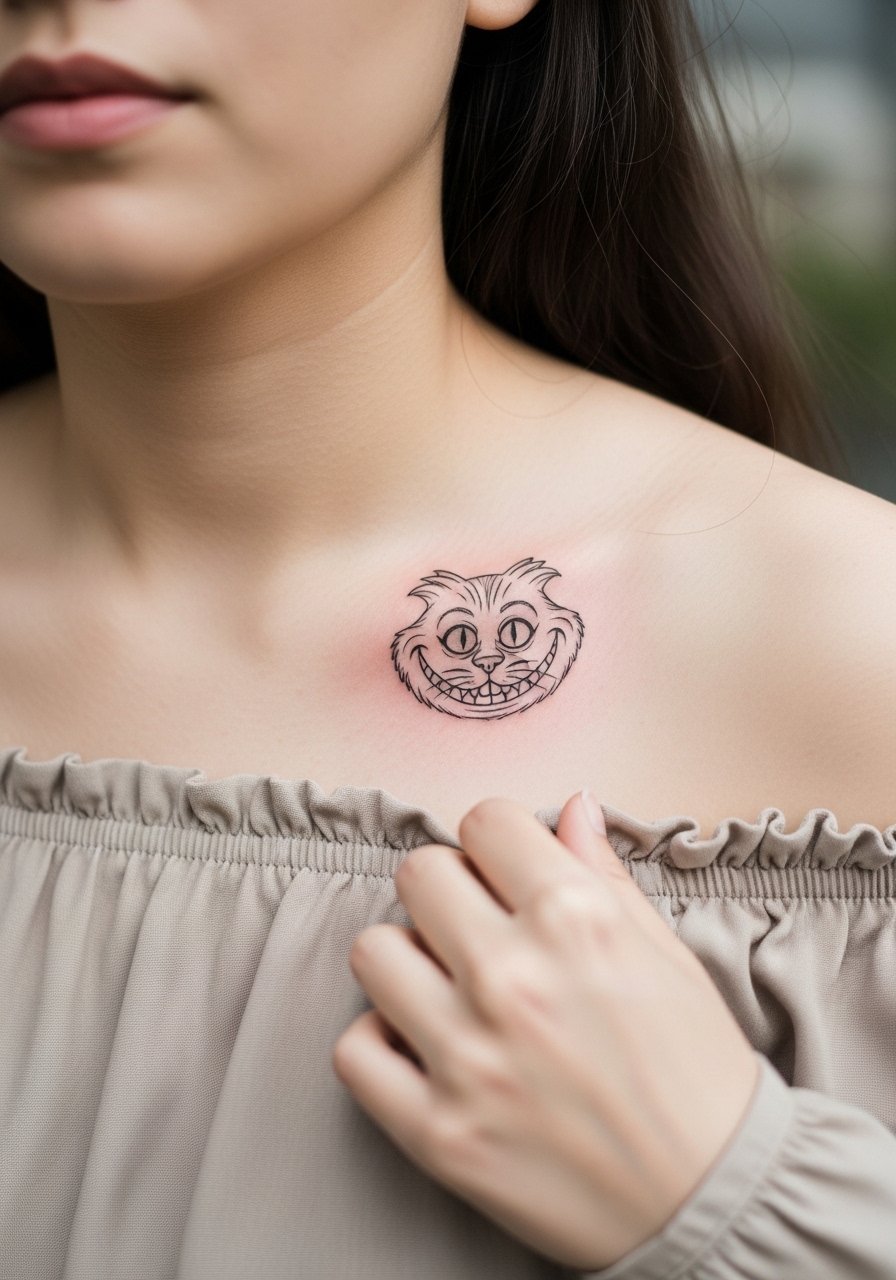
This nod to the 1865 book illustrations works best slightly above the collarbone where lines can breathe. Tell your artist you want thin contour linework with minimal fill and graceful whisker strokes. Collarbone tattoos can be more painful because of bone proximity and a typical session is one hour. The main mistake is placing dense crosshatching in a narrow band, which merges over time. Expect touch-ups at year three for the faintest lines. Pair with an off shoulder blouse for show-off looks and wear a strapless or button-up top to the appointment.
6. Disappearing Tail Into Florals, Ankle
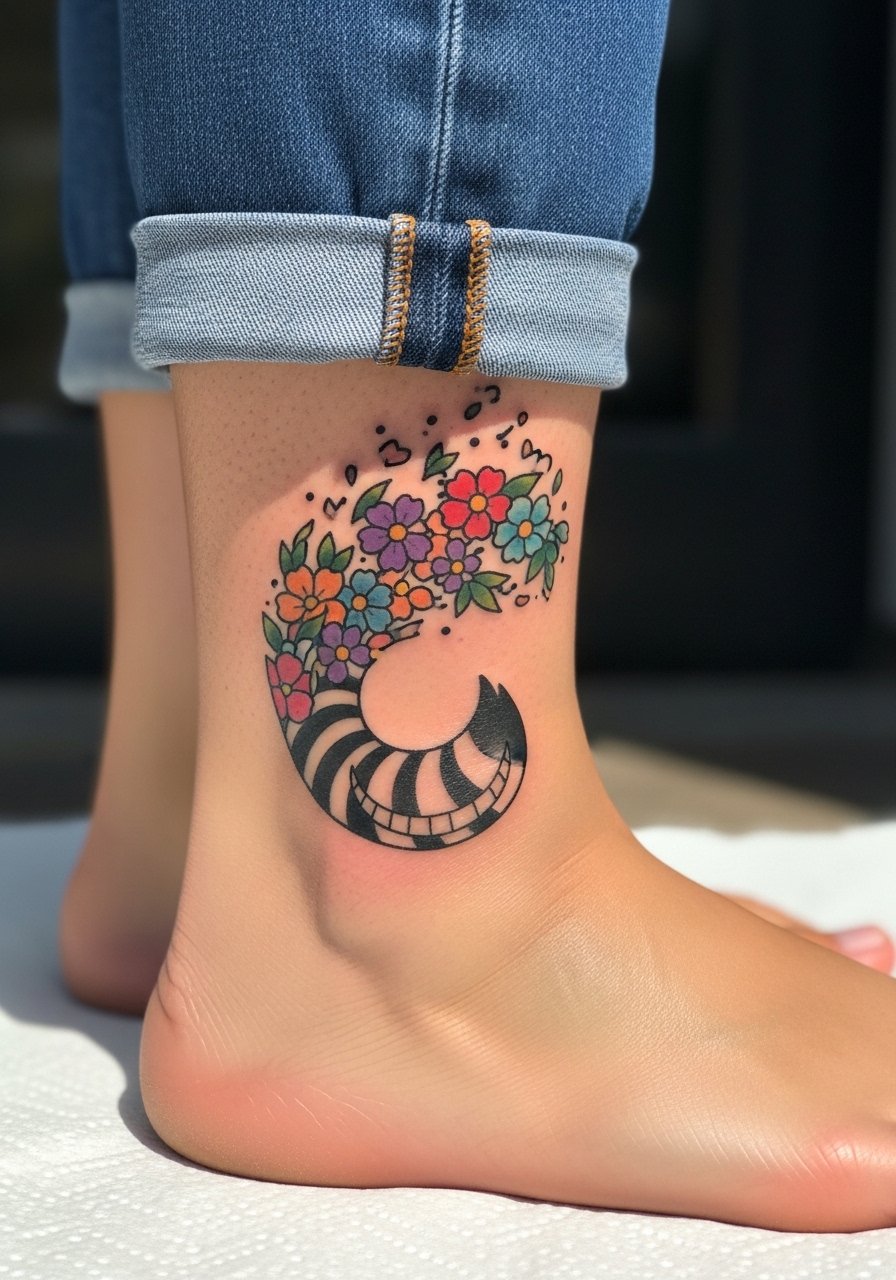
This hybrid ties character with botanical elements for personalization. The ankle is a high-friction area and small details can fade faster because socks and shoes rub. One real mistake is expecting the same saturation you get on the forearm. Ask for slightly larger petal shapes and heavier color packing. Session time is often one to one and a half hours. For showing it off, try cropped jogger pants or rolled ankle pants with canvas sneakers. Expect a touch-up at year two if your shoe choices create constant friction.
Studio Day Picks
The forearm, wrist, collarbone, ankle, and thigh pieces above ask for different prep and a few items smooth the session and the first week.
-
Stencil transfer paper kit. Lets you preview exact placement on skin, which is useful for the collarbone and wrist pieces above.
-
Topical numbing cream. Applied before the appointment eases sensitivity on wrists and ankles without changing linework.
-
Thin protective film roll. Keeps ankle and finger tattoos clean during the first week of washing and movement.
-
Fragrance-free body wash. Gentle cleansing helps collarbone and thigh work avoid irritation while healing.
-
Aquaphor healing ointment. A thin layer in the early days keeps fine lines from drying and cracking.
7. Watercolor Grin on the Shoulder Blade
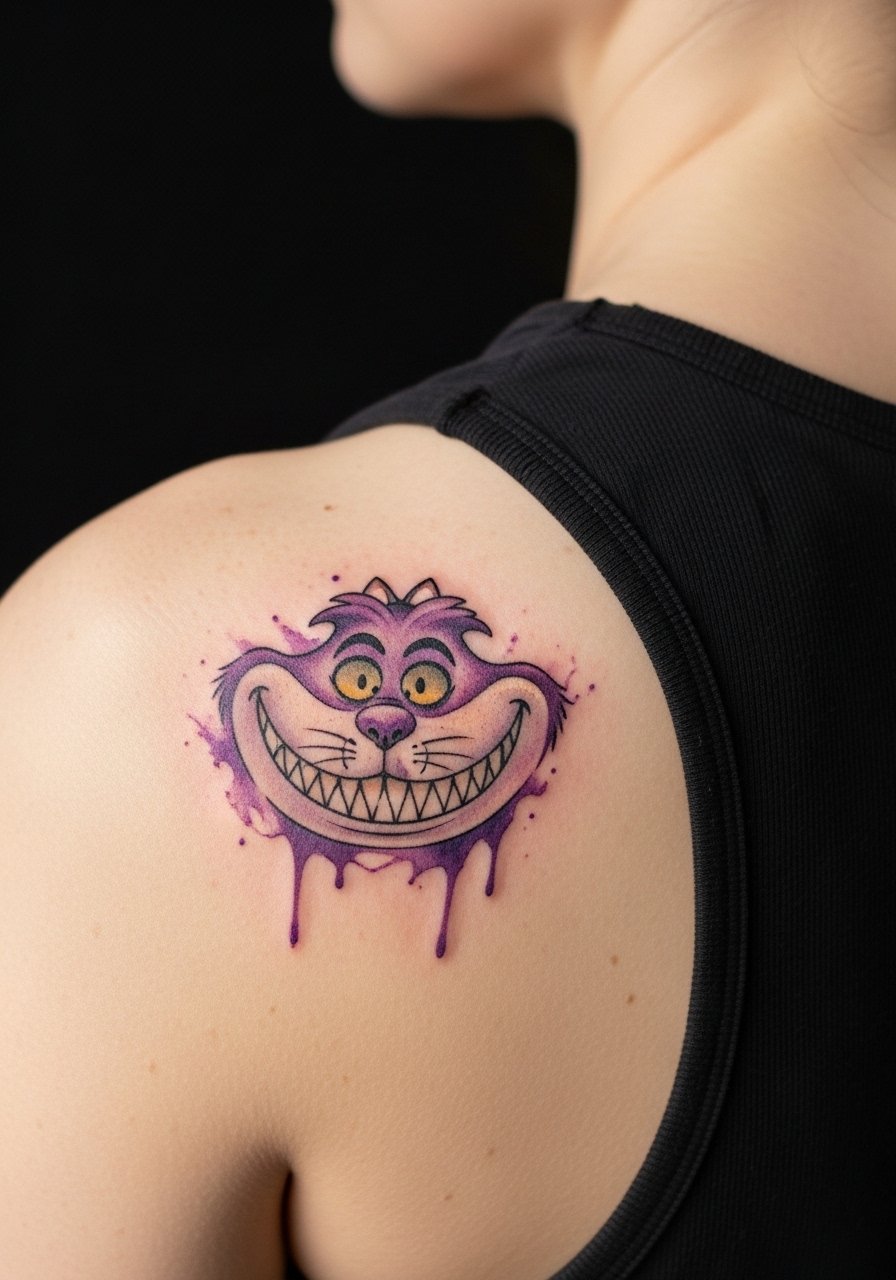
Watercolor captures the vanish effect with color washes rather than hard edges. Most watercolor pieces sit well on the shoulder blade because the area is low friction and holds pigment. The common mistake is relying only on watercolor without any anchor outline. Ask for faint contouring to protect shape as colors soften. Sessions usually last around one to one and a half hours and touch-ups at year two keep pigments lively. Wear a racerback tank the day of the session so the artist can work without pulling fabric.
8. Gothic Full-Body Cat on Calf
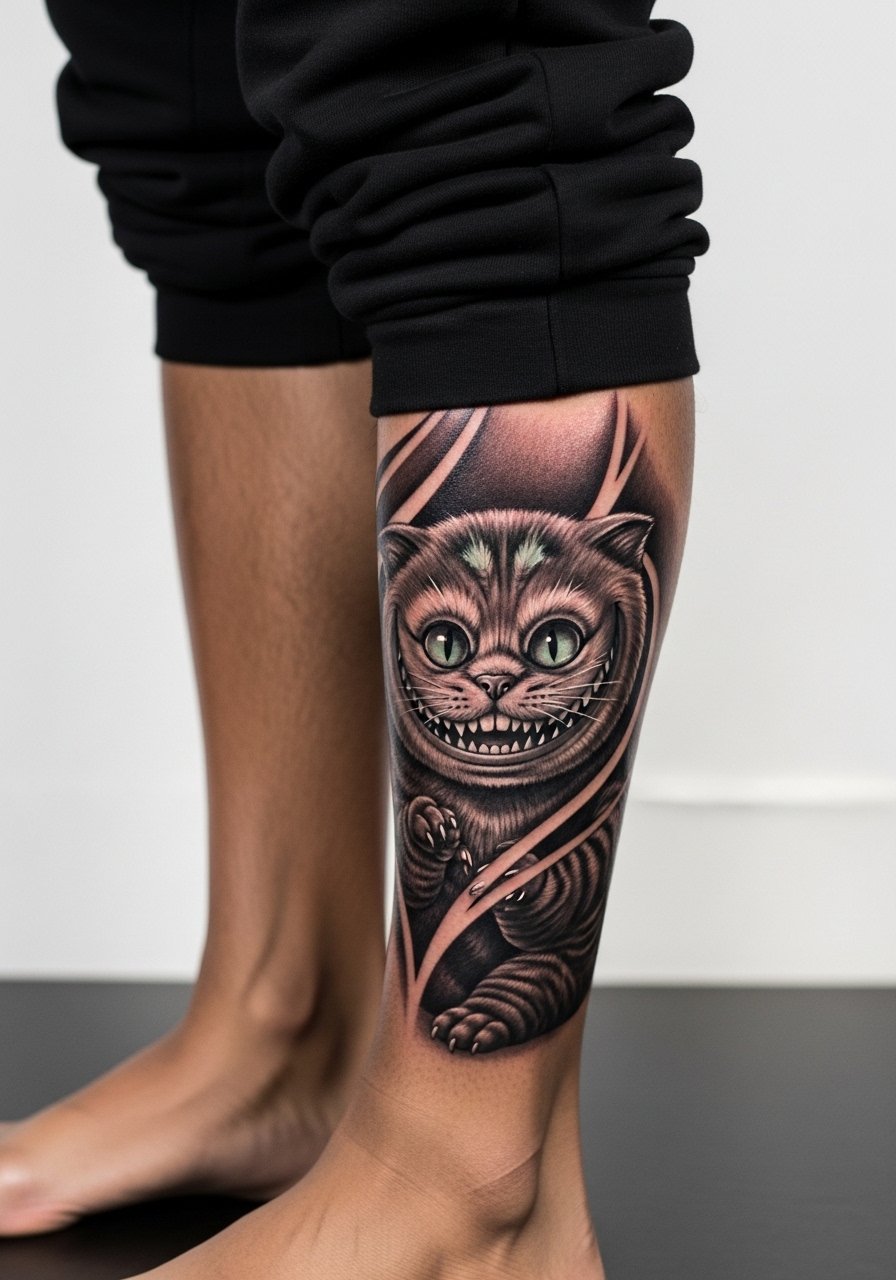
Large calf pieces let you tell a story with posture and negative space. Expect three sessions for a detailed realism piece and moderate to high pain around the shin. A common error is squashing too many small textures into the lower leg, which blurs with muscle movement. Ask for clear separation between major shapes and to place the darkest values near the silhouette. For show-off days, try cropped jogger pants or rolled ankle trousers so the artwork sits above shoes.
9. Micro Eyes Peeking From Clouds, Finger
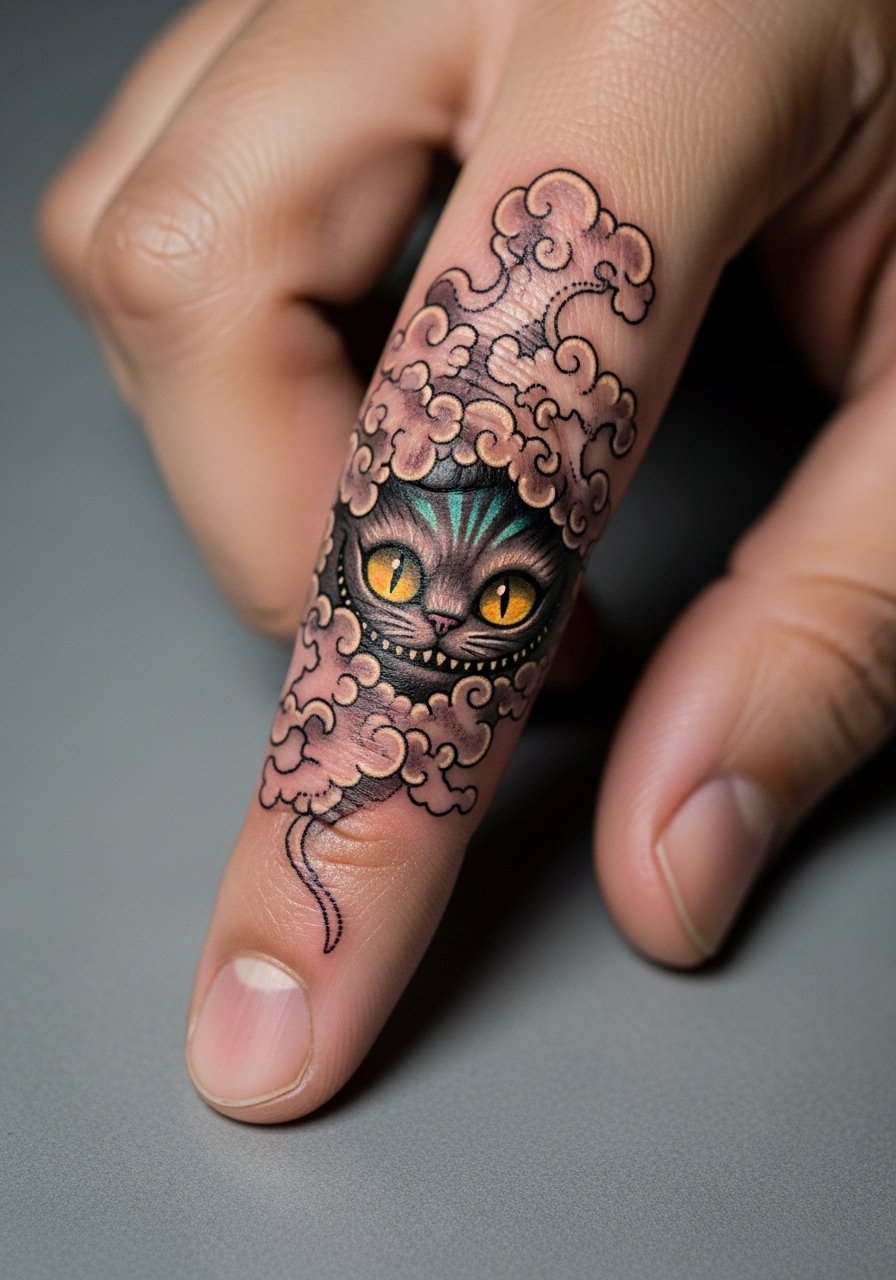
Finger tattoos are charming but they live in a harsh environment. Expect fading faster than forearm work because of washing and use. The typical session is thirty to forty-five minutes. A frequent mistake is cramming a complex motif into a one-inch canvas. I advise scaling back to bold pupil shapes and negative space clouds. If you want a wearable look, pair a minimalist leather wristband across the opposite arm when showing this off. Plan on touch-ups sooner, usually within a year.
10. Ornamental Grin Mandala on Upper Back
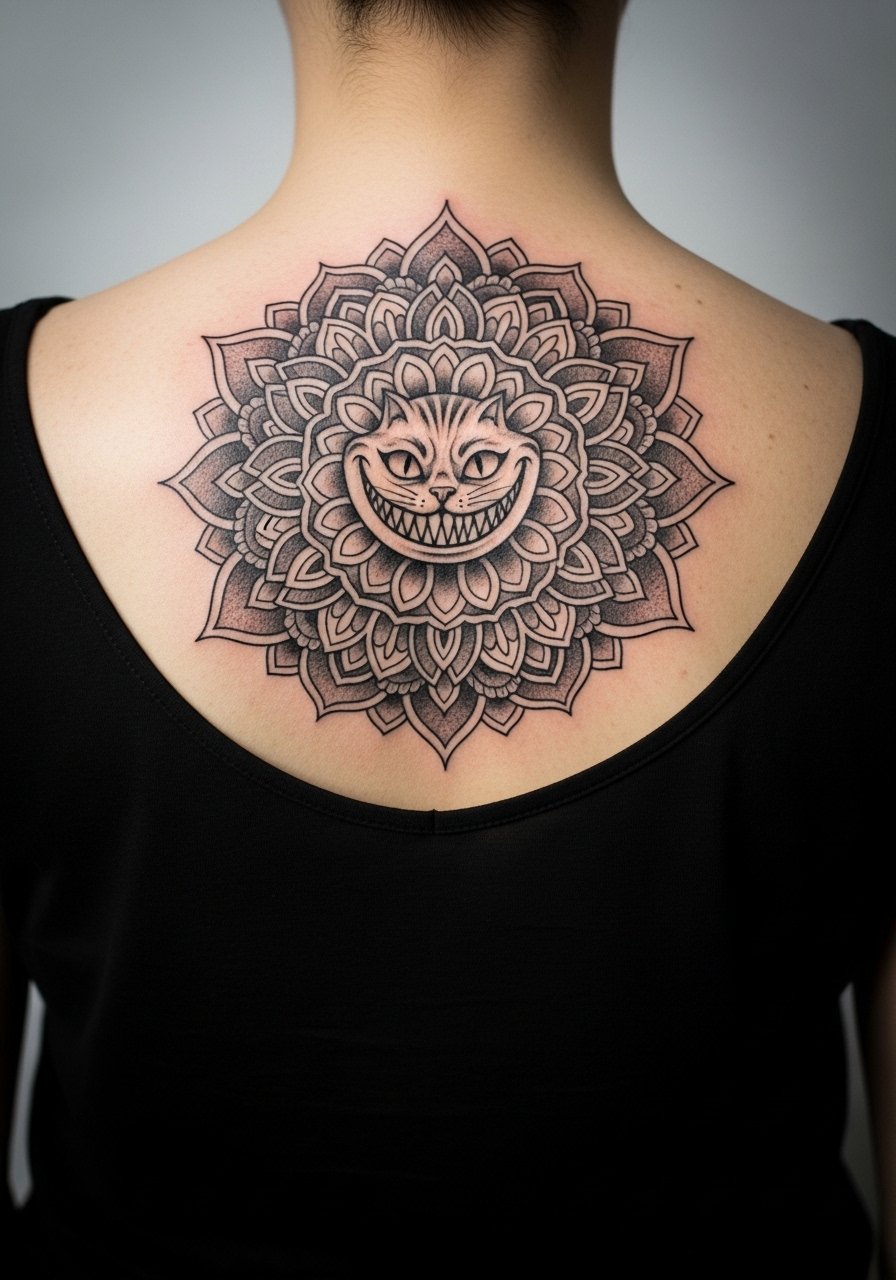
Mandala work needs breathing room. On the upper back you can keep density and still avoid merging. Tell the artist you want radial spacing and to avoid tiny knots near the center. Sessions are often two sessions of one to two hours each. A common misstep is adding too many small dots near the central grin, which can fill in as the skin settles. For wardrobe, open-back tops or a loose button-down shirt worn backwards highlight the pattern when you want to show it.
11. Ignorant-Style Naive Lines on Inner Bicep
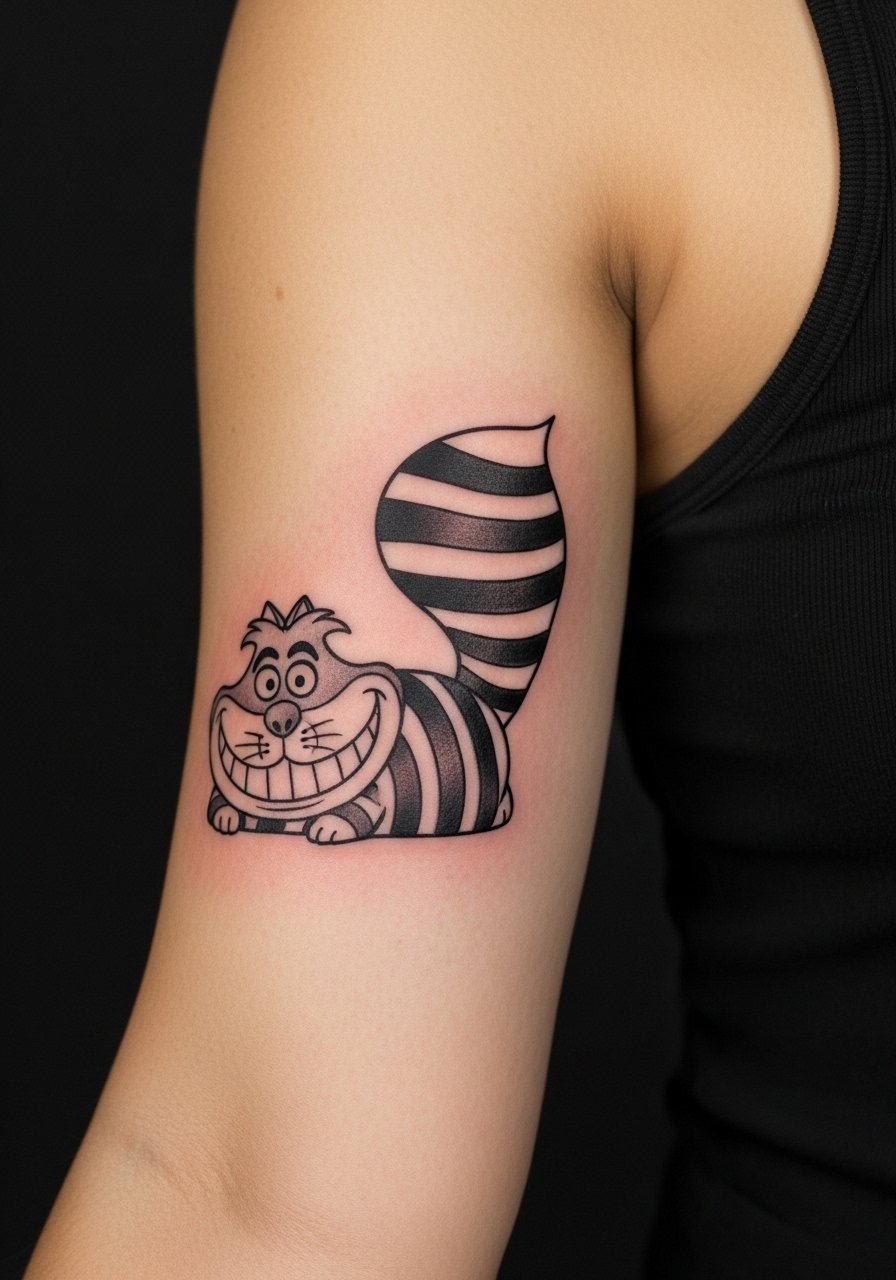
The ignorant style is playful and forgiving, which helps if you avoid tiny detail. Inner bicep sessions tend to be a lower-to-moderate pain and often finish in an hour. Avoid asking for micro realism in the ignorant aesthetic, it conflicts with the naive line energy and creates a muddled look. For showing it off, a fitted tank or an unzipped zip hoodie neutral works well. Tell the artist you want confident thick strokes and leave breathing space around the figure.
12. Patchwork Integration for Sleeve Starts
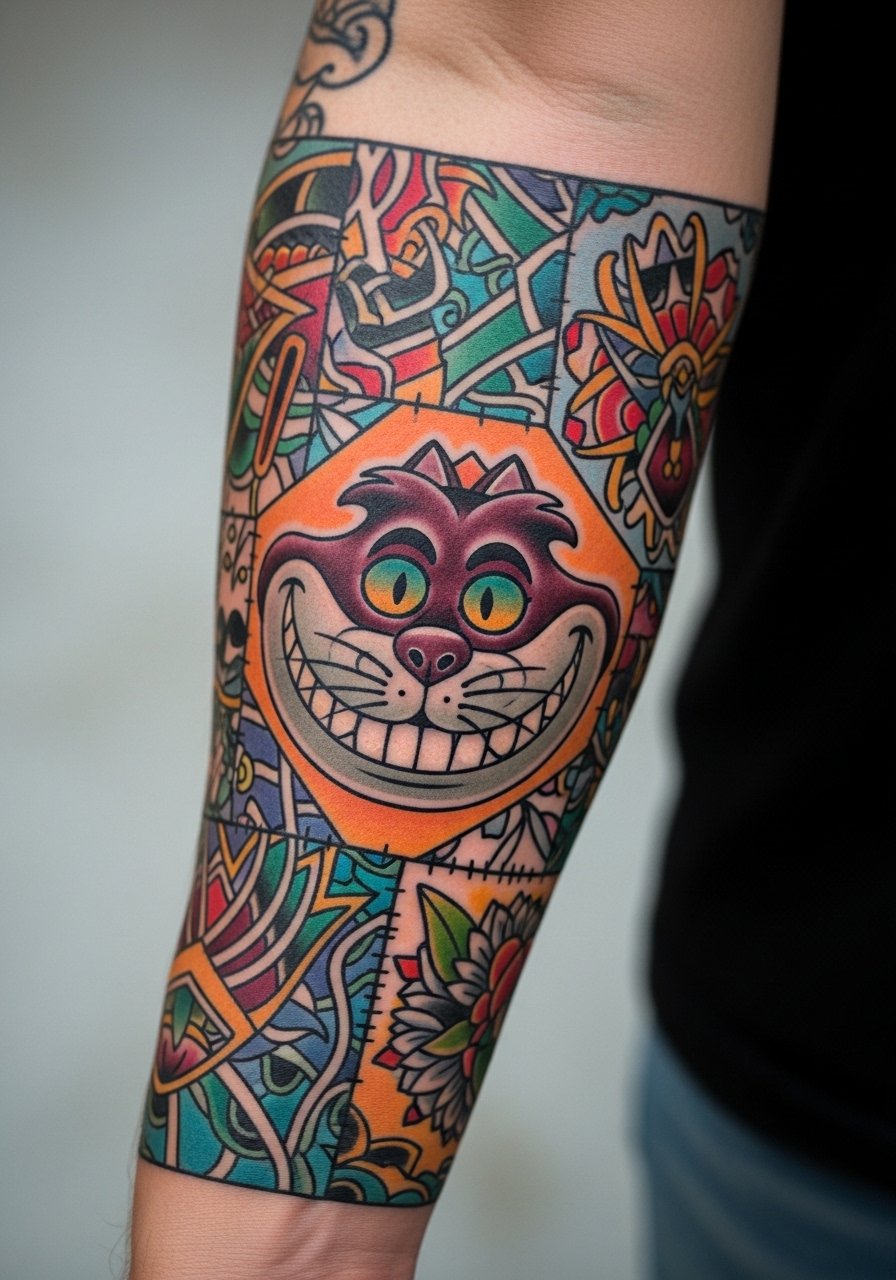
Collectors who expand sleeves need themes that read at arm length. I usually suggest making the Cheshire Cat a mid-sized element and using color pops to tie it to nearby pieces. A mistake is matching every style exactly instead of harmonizing scale and palette. Forearm sessions for a patchwork start are typically two sessions for layout and color. Ask your artist to sketch how the cat sits with existing pieces and to show a mockup. Roll sleeves and wear a loose fit tank top for the appointment.
13. Micro Constellation Grin Behind the Ear
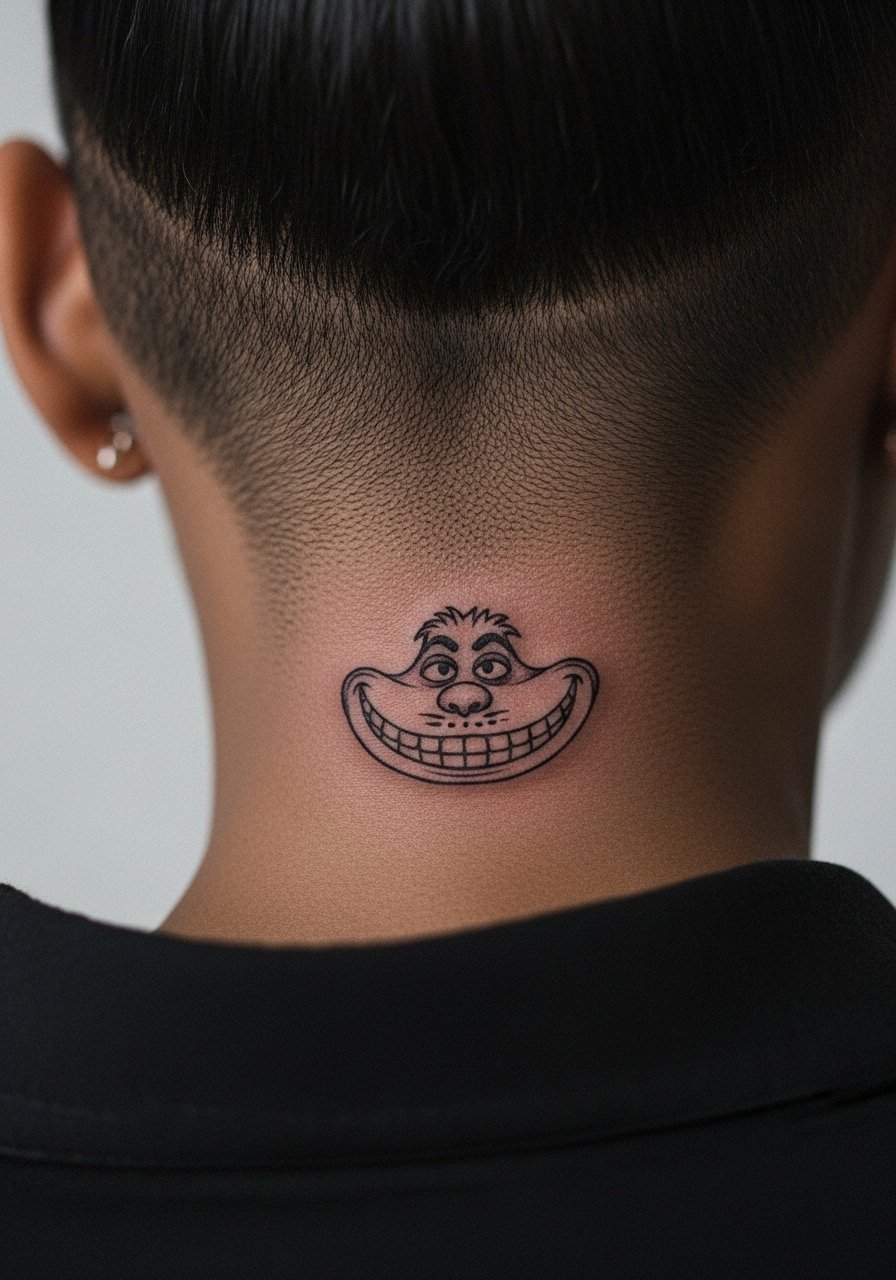
Behind-the-ear micro work is subtle and discrete. The area is sensitive but quick to tattoo, often under thirty minutes. A typical mistake is expecting large detail in that tiny space. Ask for a clear, single-line contour and minimal interior shading. Because of visibility constraints with hair, consider placement slightly below the hairline so the grin peeks only when you tuck hair. This kind of discreet placement pairs with simple stud earrings for off-duty styling.
14. Disappearing Grin in Abstract Shapes, Side Rib
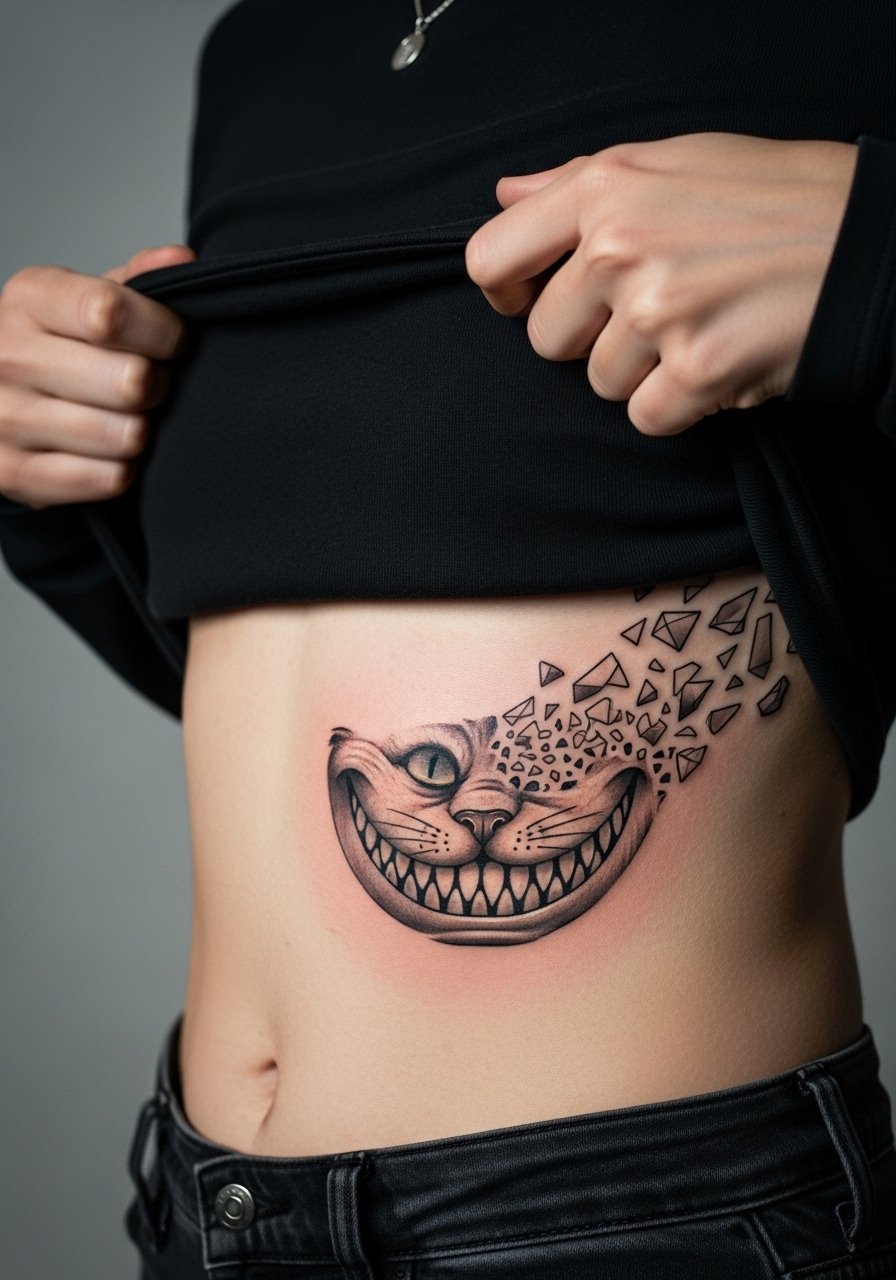
Ribcage tattoos can be painful and they also move with breathing. The controversy about fine line aging on ribs is alive here. One camp warns that stretch and movement blur thin lines quickly. The other camp says that with proper needle depth and spacing, fine line settles fine. I advise asking your artist about their rib experience and to favor slightly open negative spaces so the abstract shapes do not merge. Sessions often need two shorter sittings. Wear a strapless top or a sports bra you can pull aside for the session.
15. Watercolor Calf Grin With Purple Fades
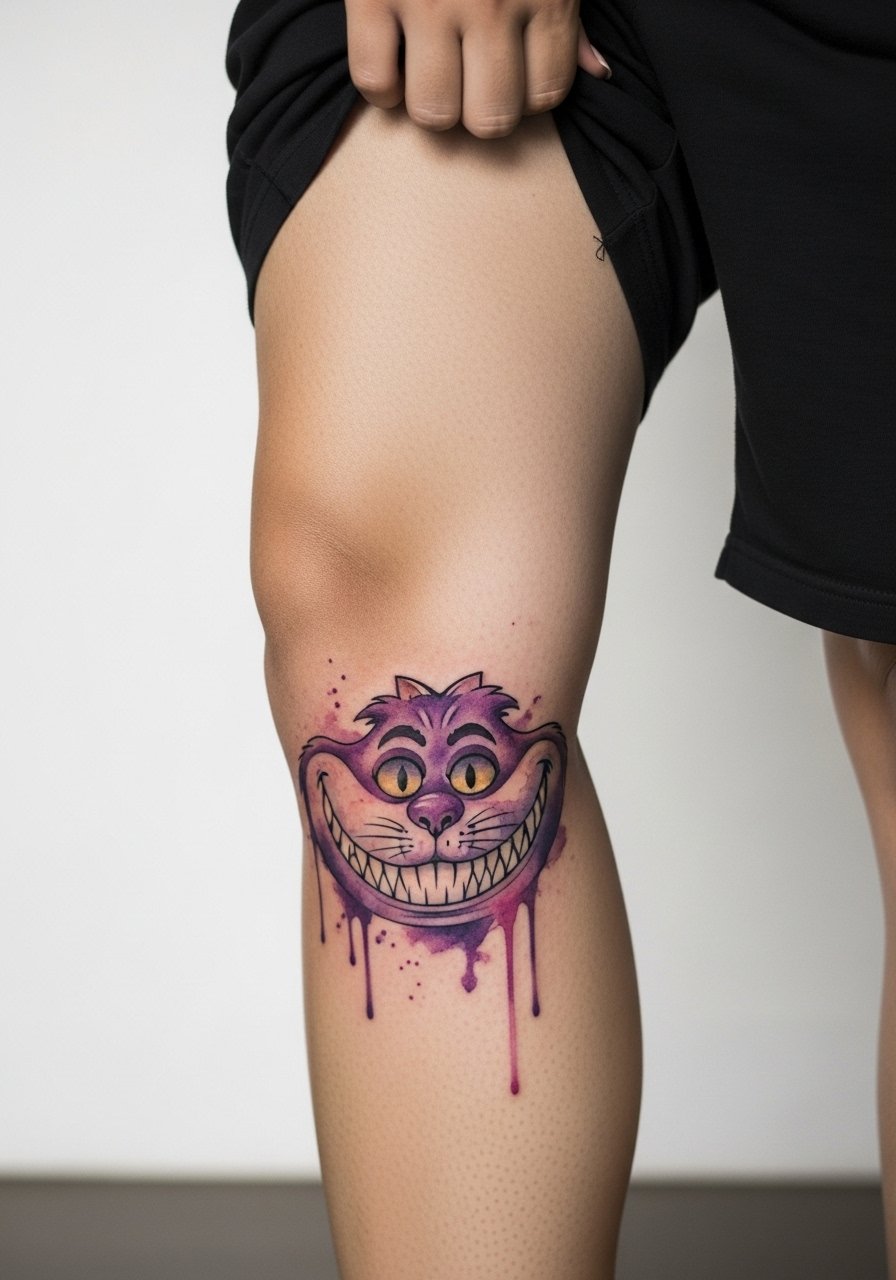
Calf placements let watercolor breathe. The common error is skipping a light outline to keep shape as pigments fade. Ask for soft anchor lines or light stippling to maintain form. Sessions often take two hours for color glazing and a touch-up may be needed at year two. For show-off outfits, cropped joggers or rolled pants work best and a rolled ankle pants men look keeps attention on color washes.
16. Gothic Collarbone Script and Small Grin
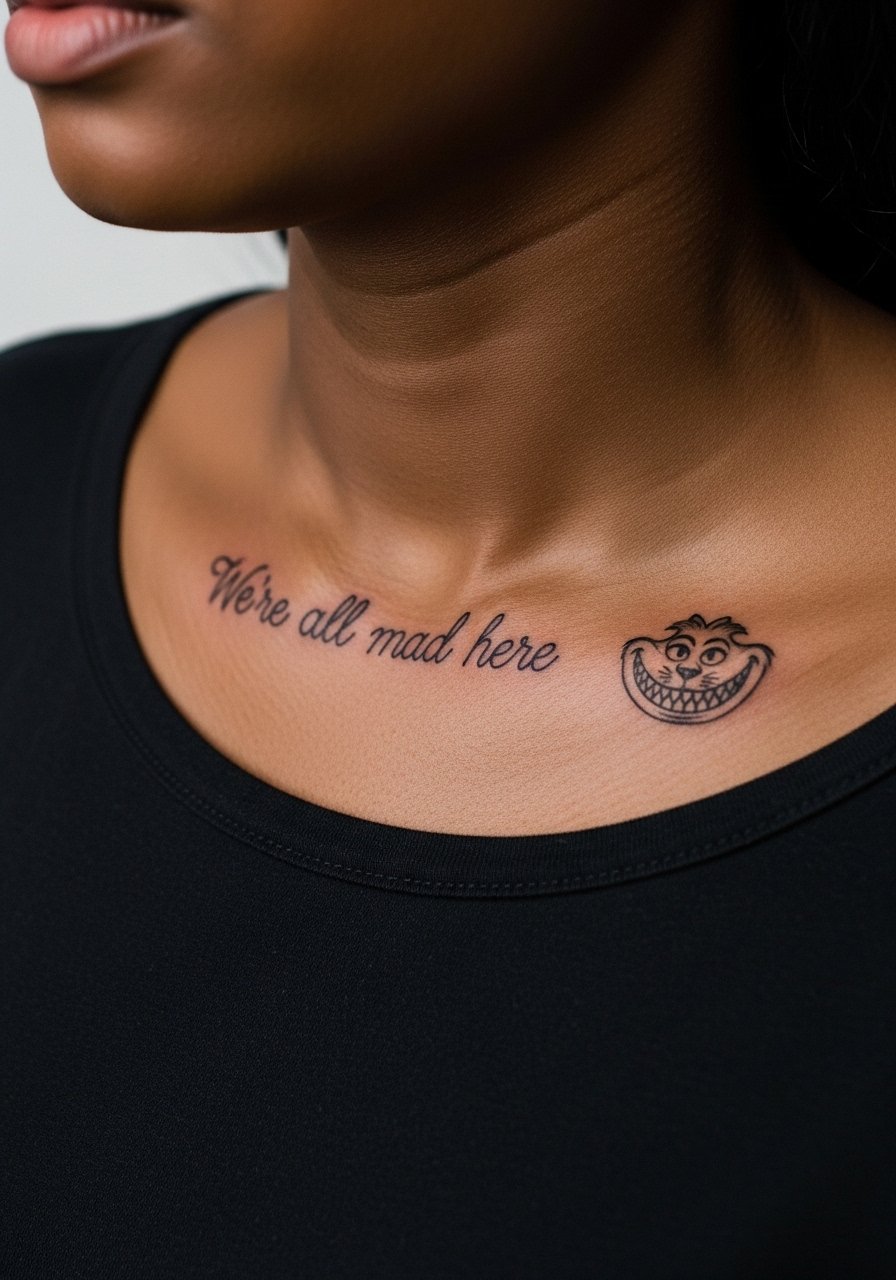
Pairing text and a small motif near the collarbone requires spacing planning. The collarbone moves and the thin script can blur, so pick slightly bolder script spacing. Pain near the bone is higher and session time is usually under an hour for small work. The common mistake is combining tiny script with equally tiny imagery. Ask for a mockup of the whole layout before inking. An off shoulder blouse works well to frame the area when you want to show it.
17. Geometric Grin Necklace on Sternum
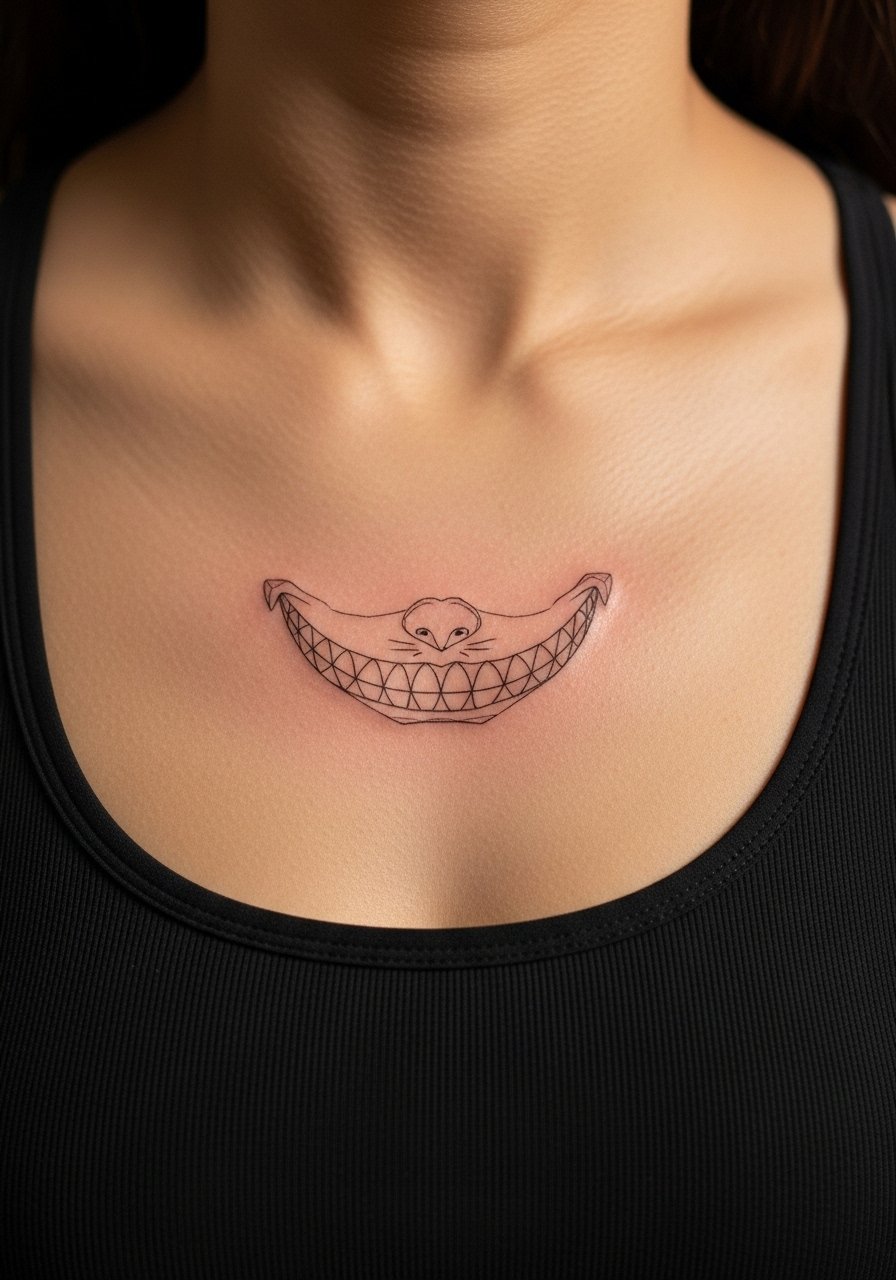
Sternum pieces need careful sizing to avoid pain and distortion. The sternum is higher on the pain chart and session time varies with symmetry work. A frequent error is requesting dense geometry that pulls together as swelling subsides. Ask for breathing space in the pattern and for the artist to draw the piece on while you sit up and down so you can confirm how it moves. A thin chain pendant placed just above the work complements the design, and you can wear a thin chain pendant necklace to balance the area.
18. Micro-Realism Paw Prints Along the Ankle
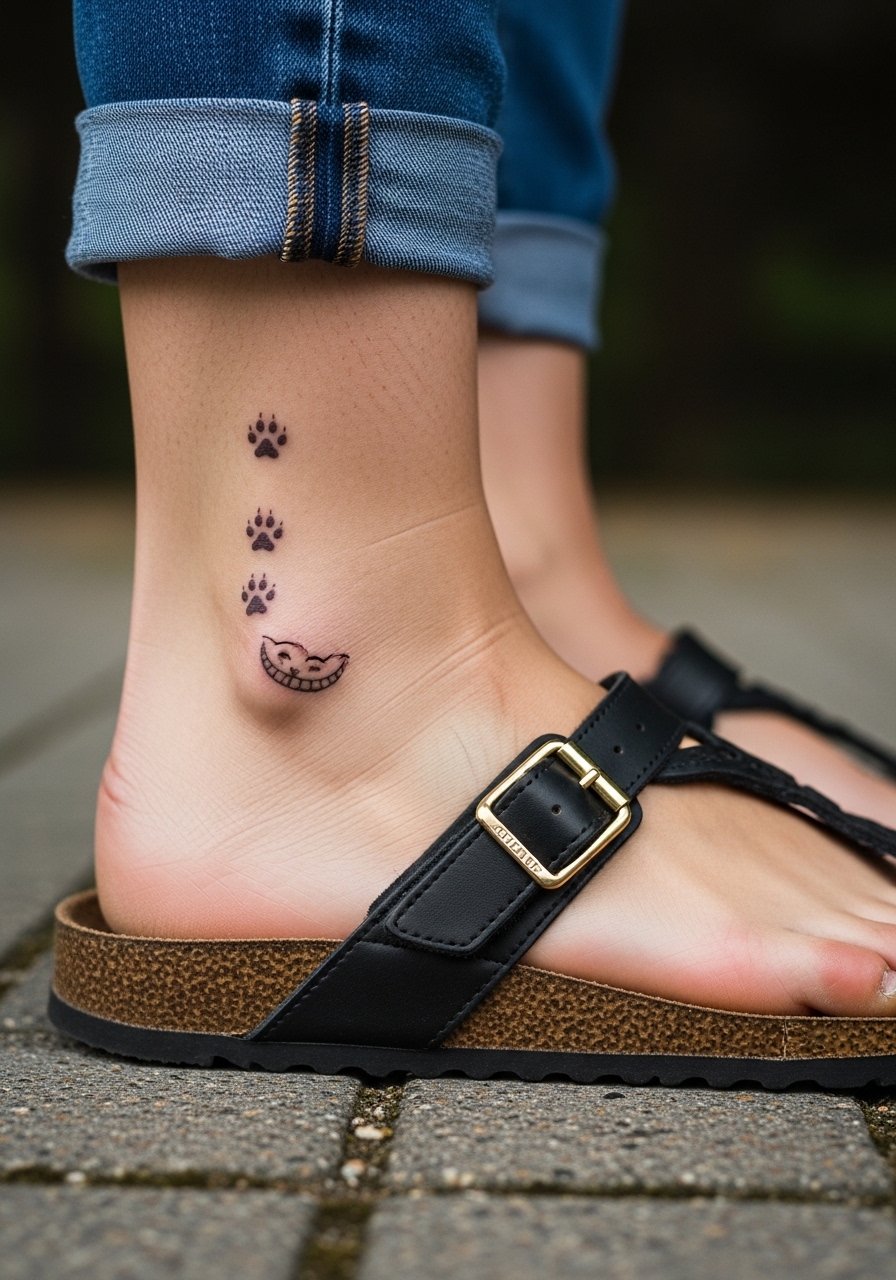
Tiny sequences on the ankle are delicate and need spacing to avoid merge. The ankle is subject to shoe friction and the common mistake is grouping prints too close. Sessions are quick, often under an hour. Ask for slightly larger negative spaces between each print and for a thin outer contour to keep shape. For show-off days, try sandals or rolled jeans so the prints sit above footwear. Plan on touch-ups within a year if you wear tight shoes that rub.
19. Patchwork Sleeve Connector on Inner Forearm
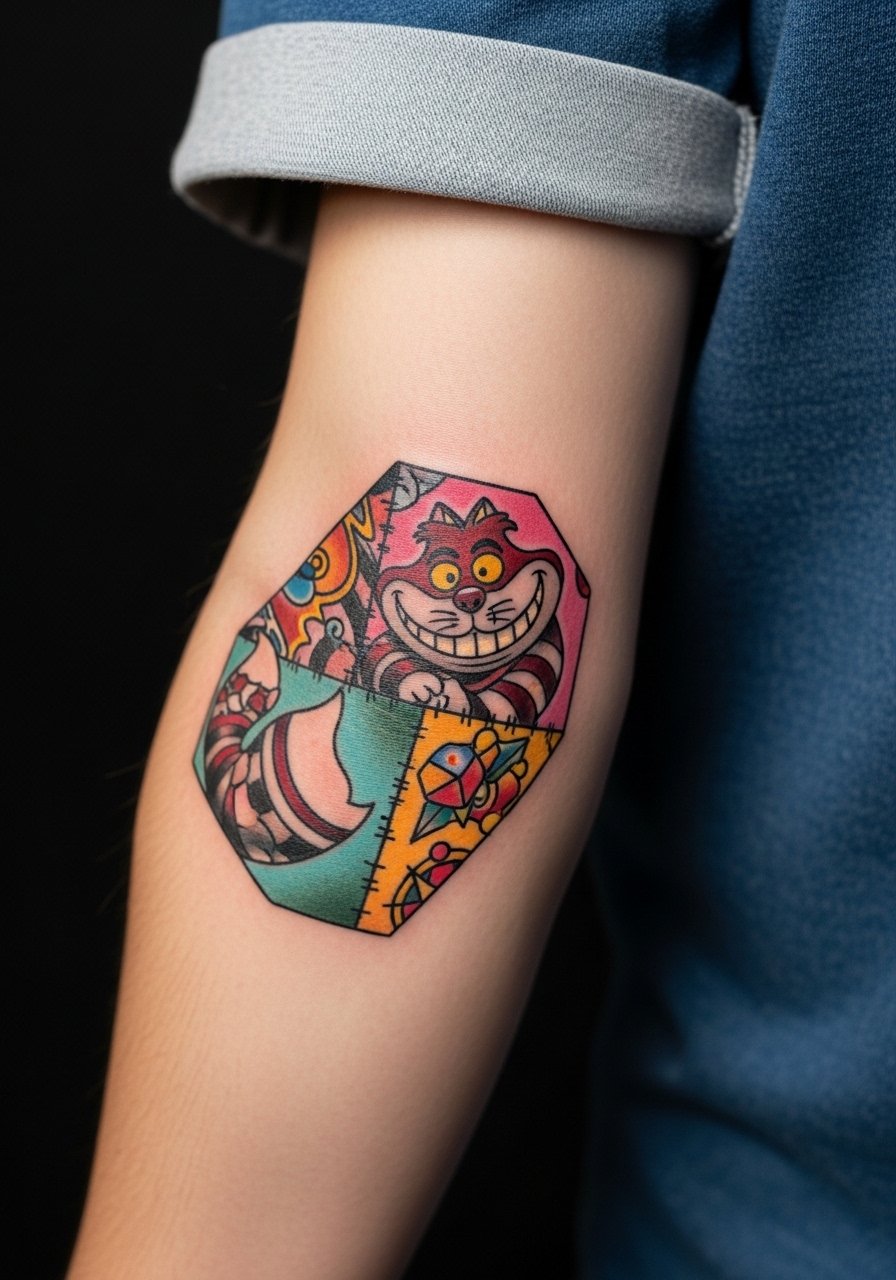
Inner forearm connection pieces help sleeves feel cohesive. The inner forearm accepts detail well but needs line spacing to avoid future softening. A mistake is using identical line weights as bordering pieces that have different ages and saturation. Request a color study and a mockup so the cat sits naturally between elements. Sessions vary from one to three hours depending on color. For the appointment, a loose fit tank top gives full access.
20. Abstract Fluidity Metaphor on Side Thigh
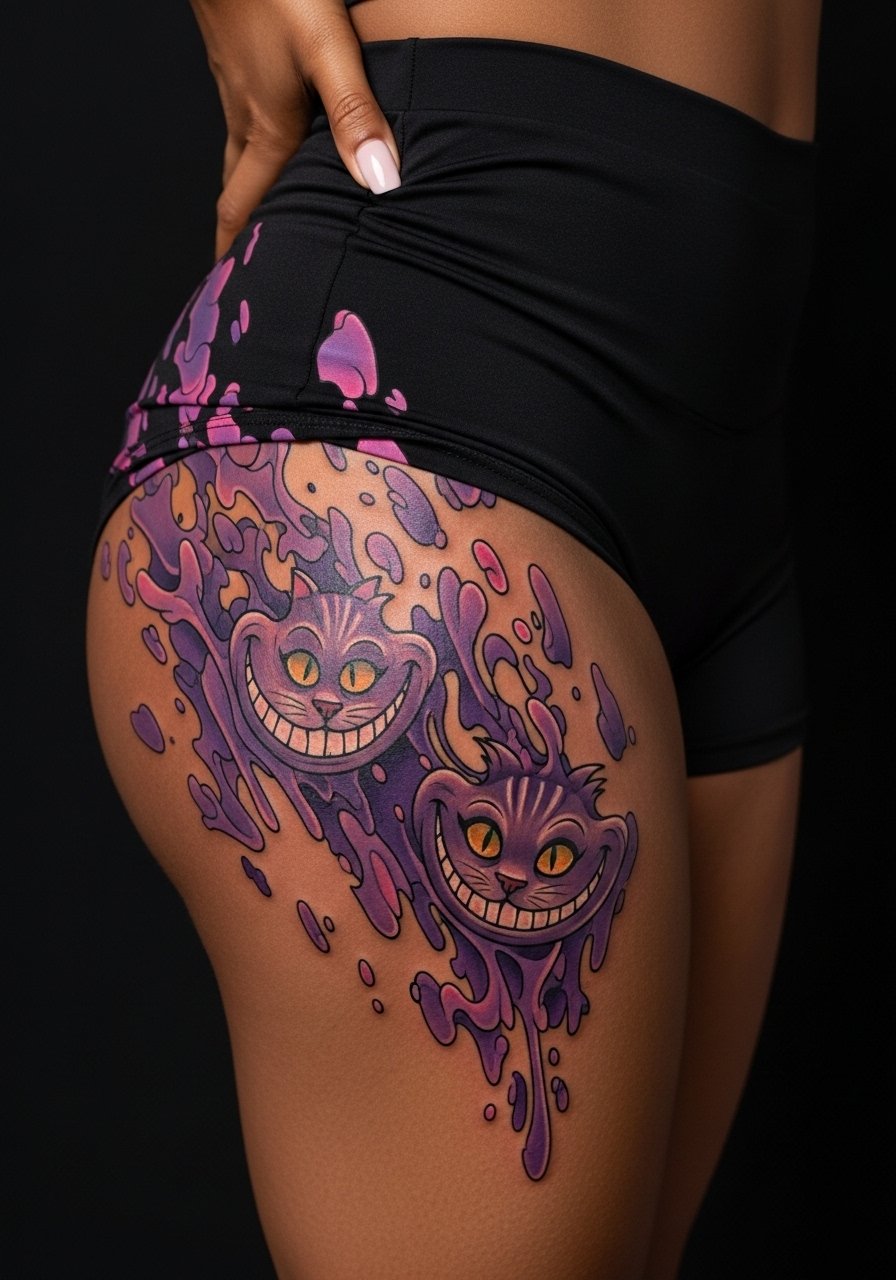
This under-covered angle treats the cat as movement rather than a literal face. Thigh placements hold larger fields of color and are forgiving for fluid shapes. The mistake is packing too many tiny curves into the same band. Sessions are typically two hours for mapping and another for color. Ask your artist to map the flow with you while standing so the design sits well with body contours. For showing it off, high-waisted shorts with fishnets or leather accents can frame the area.
21. Micro Grin Tattoo As a Sleeve Accent Near Elbow
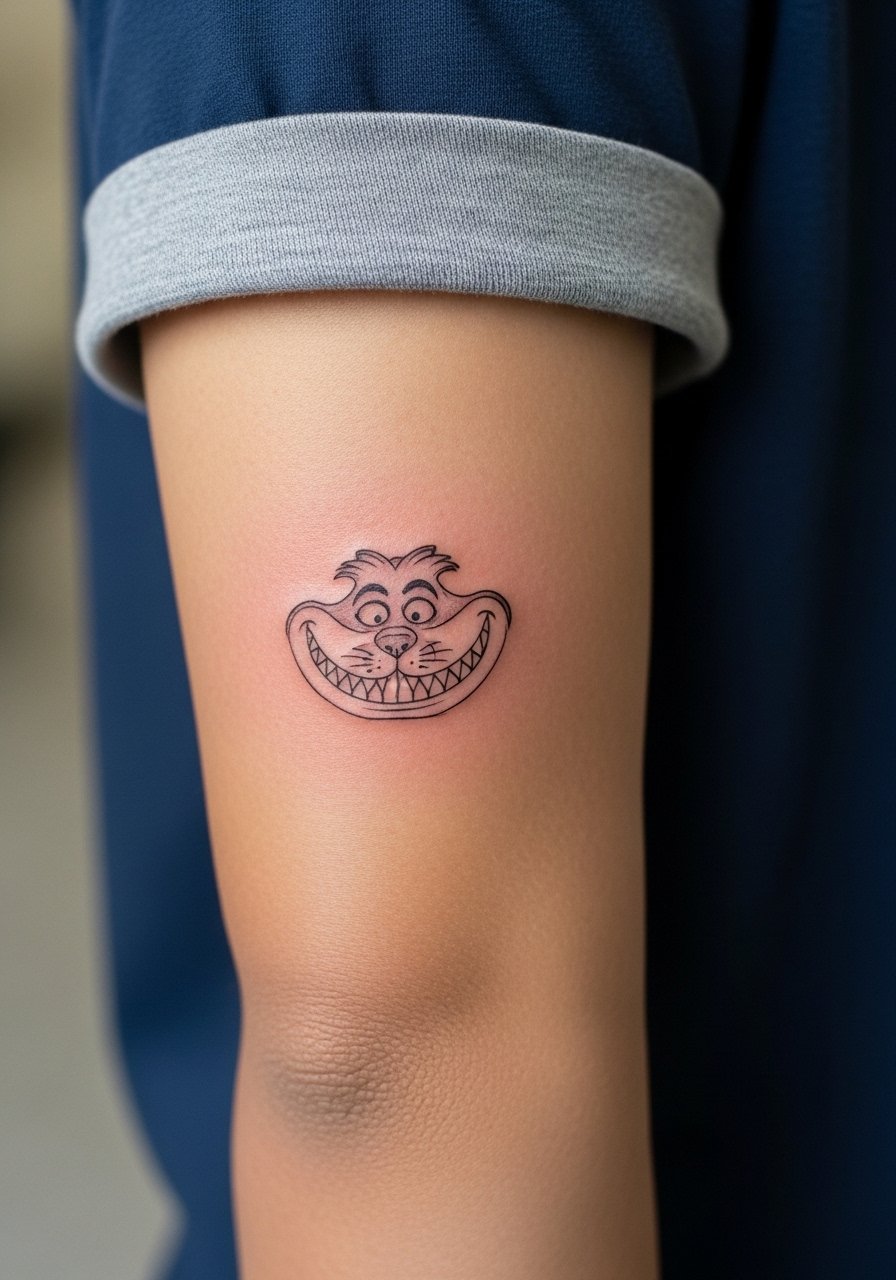
Placement near the elbow must account for flex points. The elbow creases can distort fine lines over time. A common mistake is centering a tiny motif exactly on the crease. Ask your artist to position the grin slightly above the fold and to use slightly heavier contour lines so the mark ages cleaner. Sessions are brief, typically thirty to forty-five minutes. For session comfort, wear a loose button-down shirt you can pull aside so the artist has access.
Frequently Asked Questions
Q: How do fine line Cheshire pieces hold up compared with neo-traditional work?
A: From what I have seen, fine line pieces show more visible softening by year three if placed on high-movement zones. Neo-traditional work with stronger outlines and saturation tends to keep its shape longer. The trade-off is that fine line reads more delicate fresh. Ask your artist which approach they use to balance longevity and the look you want.
Q: Will a watercolor Cheshire tattoo need different aftercare than a black-and-gray piece?
A: The basic aftercare steps are the same, but watercolor relies on lighter saturation and can appear to fade more quickly under UV exposure. Keep the area covered in strong sunlight and plan a color touch-up at year two if you want the original vibrancy maintained.
Q: What should I bring to a consultation to get the exact Cheshire concept I want?
A: Bring reference sketches that show line weight and spacing, notes on placement, and a photo of the area on your body for scale. Mention whether you want bold outlines or softer edges and ask to see healed examples from the artist or shop portfolio. Hashtags like #CheshireCatTattoo or #NeoTraditionalCat help you find style matches online.
Q: Are there placements I should avoid if I want minimal touch-ups over time?
A: High-friction zones like fingers, wrists, and ankles often need touch-ups sooner. Ribs and areas that stretch with weight change can also soften lines. If longevity matters most, pick fleshy, low-friction areas like the outer forearm, calf, or shoulder blade.
Q: How many sessions will a medium-sized neo-traditional chest or thigh piece require?
A: A medium six-inch piece with color usually needs one to three sessions depending on saturation goals and how much layering you want. Expect session lengths of one to three hours each. Breaks and realistic scheduling make for better saturation and a cleaner healed result.
Q: Where can I look to find an artist who specializes in the styles shown here?
A: Search hashtags like #CheshireCatTattoo and #NeoTraditionalCat on Instagram, browse Pinterest boards titled "Cheshire cat fine line," and check tattoo directories that list studio style specialties. Also ask for healed photos rather than fresh work during consultations so you can assess how the style ages.
