
Fine line shin work is everywhere online, and the trend often looks effortless in photos. The reality is that shins are high-friction, close to bone, and picky about spacing and line weight, so what looks delicate on a screen can blur or need touch-ups sooner than you expect. Pain, fading from socks, and wardrobe fit are all part of the decision. Below are ideas that balance flash and longevity, starting with a wrap that reads huge in shorts.
1. Traditional Japanese Dragon Wraparound
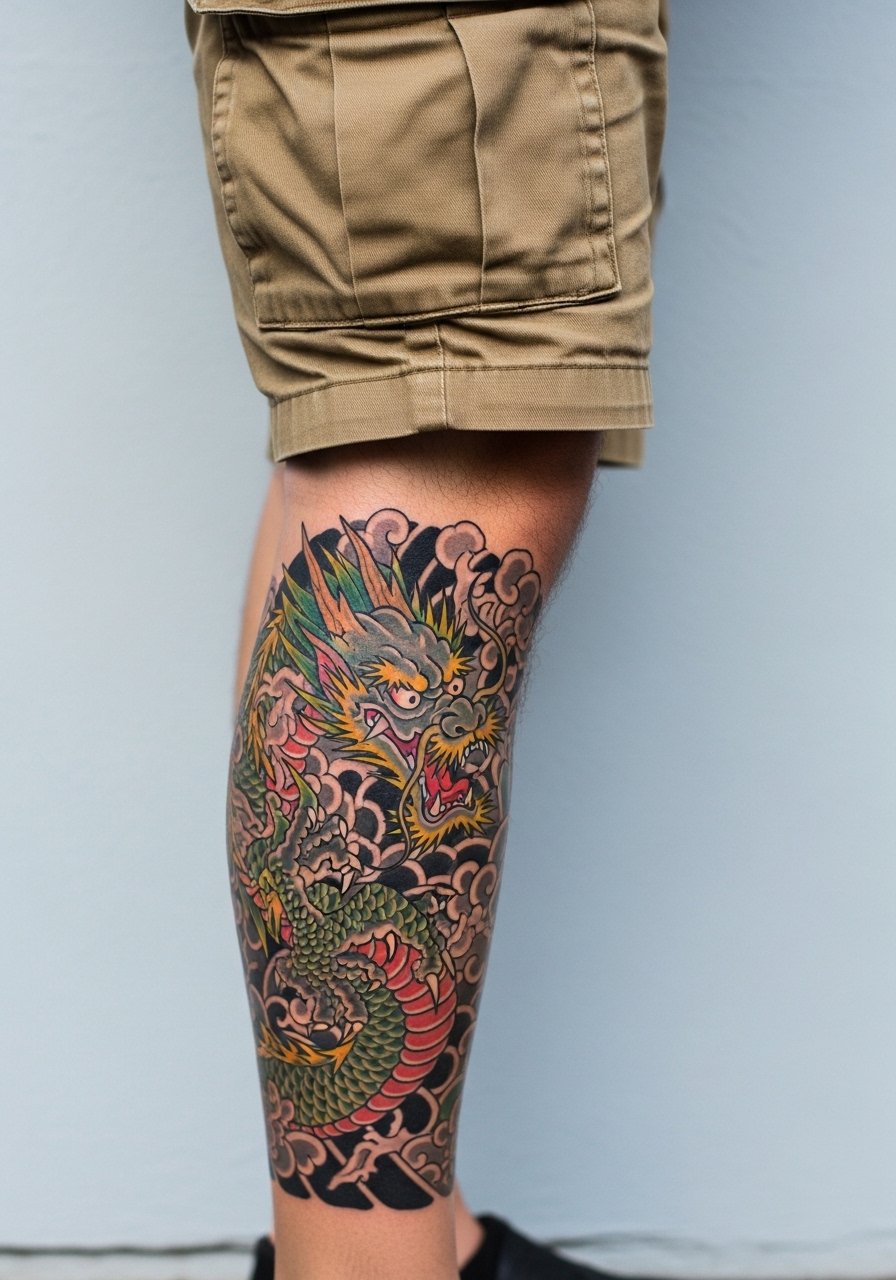
A dragon that wraps the shin uses the leg curve to sell motion. Choose thicker outlines near the bone and slightly larger color fields so saturation holds under friction from socks and boots. Tell your artist you want flow that reads front to back rather than a flat panel. Expect multiple sessions and a sharper sting when the needle hits the shin bone, but the result reads from across a room when you pull on shorts. Common mistakes include cramming tiny details into a wrap and under-sizing the scales, which leads to muddy texture after a couple of years. For session day wear, pull on khaki cargo shorts so the artist can access the full wrap without tugging fabric.
2. Blackwork Tribal Skull Vertical
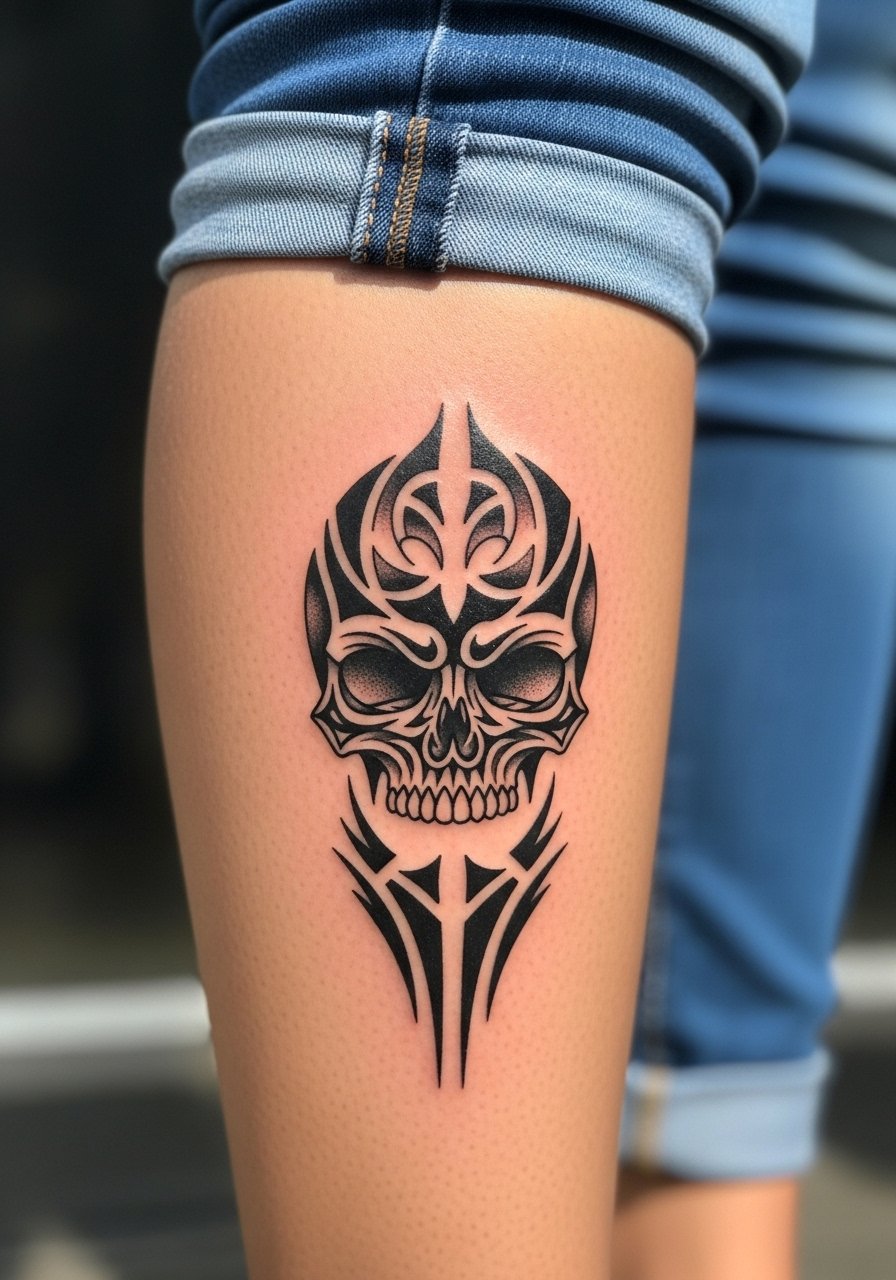
Blackwork holds up well on shins because saturation ages into a solid silhouette. Ask for bold anchor outlines and dense fill that resists early fade. The session usually runs one to two hours and the pain spikes over the bone. A frequent error is asking for too many thin interior lines inside a skull face. That detail risks merging into a blotchy patch. If your skin is darker, request higher contrast outlines so the motif reads the same way it does on lighter skin. This vertical layout also hides under slacks during work weeks.
3. Neo-Traditional Lion Head Profile
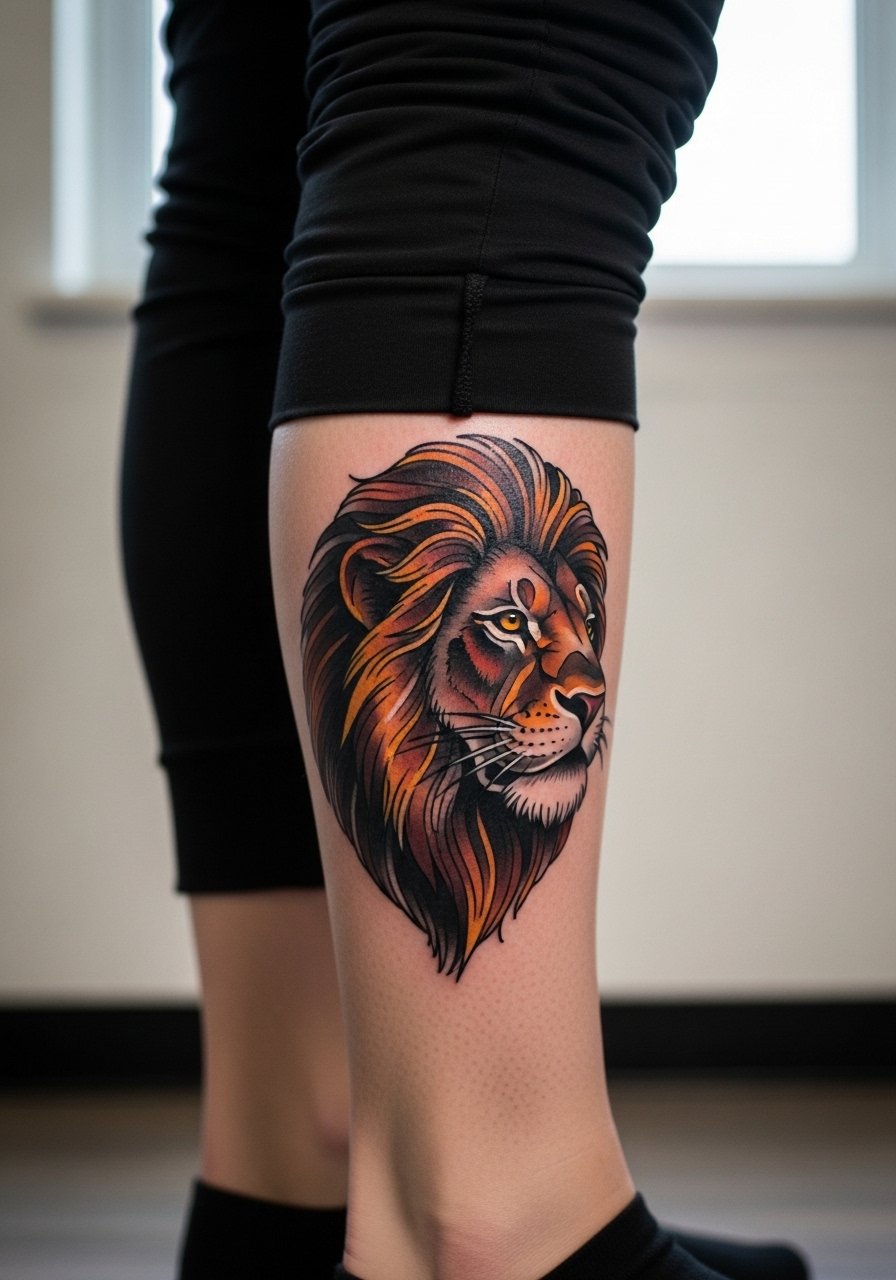
A lion head with exaggerated features transports classic symbolism into a bold lower-leg piece. Tell your artist you want strong black outlines with saturated color blocking and a darkened mane edge for longevity. The outer shin takes slightly less pain than the direct bone line, and the piece usually needs two sessions for color saturation. Commonly people ask for micro-detail inside the mane, which blurs; the better route is to ask for stipple highlights and broad value shapes. Pair this with tapered track pants you can roll up to show the image cleanly.
4. Fine Line Compass Rose
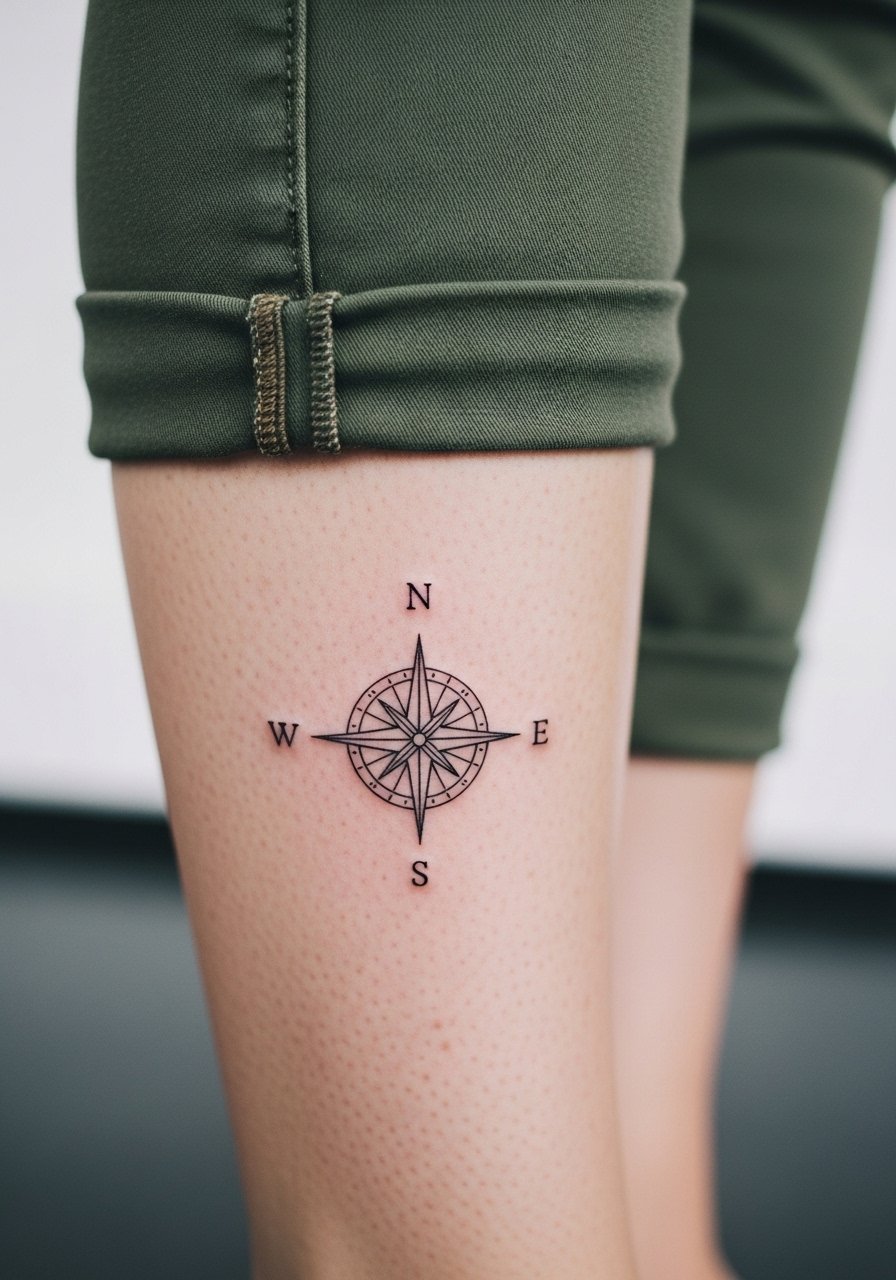
This minimalist compass reads like a subtle statement for people testing shin placement. The inner shin is more painful and fine lines there risk faster blur. When consulting, request slightly heavier key points in the compass and give the artist a size floor so the spokes have breathing room. Expect one shorter session but plan for touch-ups at year two depending on activity and sun exposure. A common mistake is choosing too small a size. When you want to show it off, roll up slim chino pants for a clean reveal.
5. Realistic Wolf Pack Silhouette
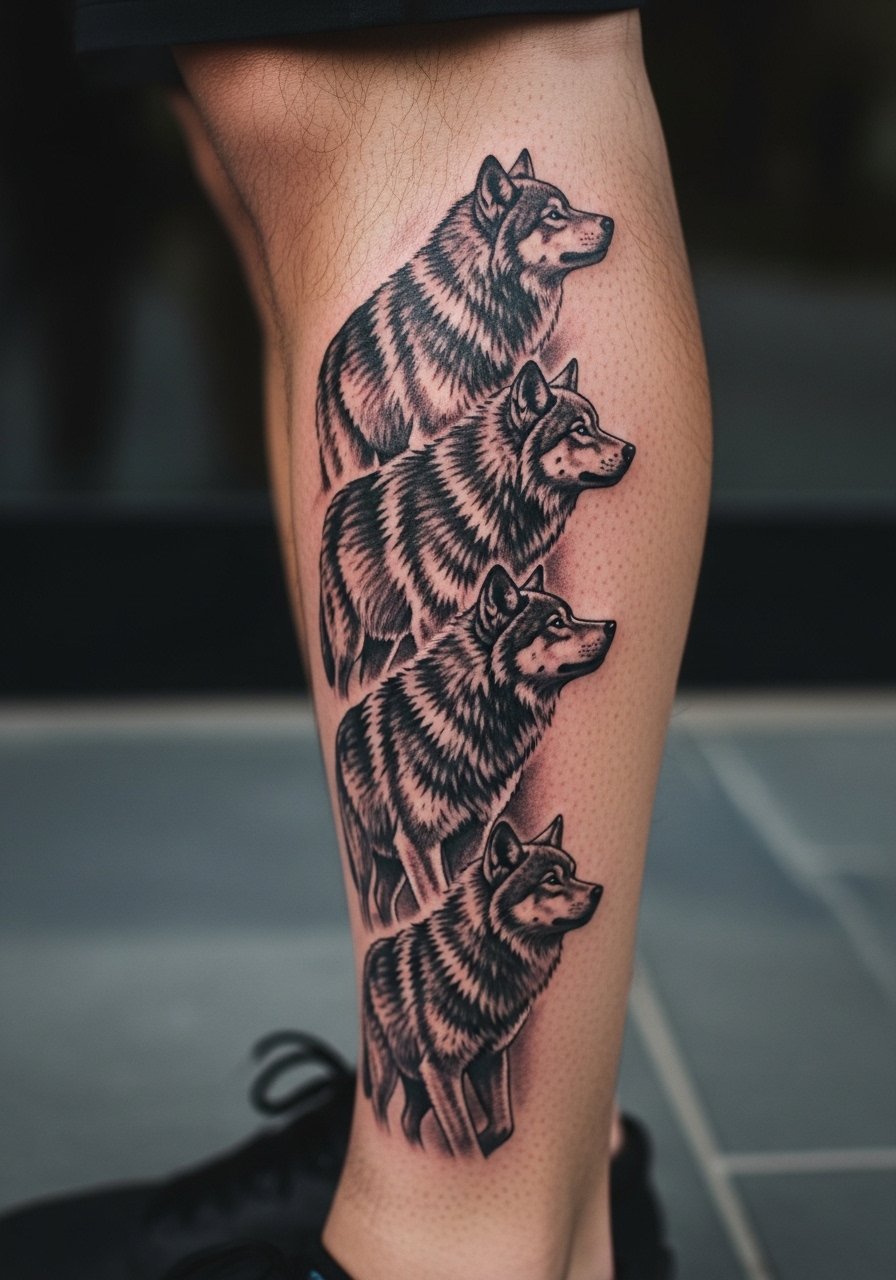
A vertical pack uses negative space to suggest distance and motion. For realism, insist on reference photos that show fur texture and clear lighting so the artist can plan shading that will age. This design requires more time and a steadier hand, usually multiple long sessions. It looks incredible at six months when fresh and still strong at year two if the shading was planned with striping that survives friction. Mistakes include overworking tiny fur lines next to bone, which can produce blowout. Expect a heavier pain curve near the lower shin.
6. Ornamental Mandala Half-Sleeve
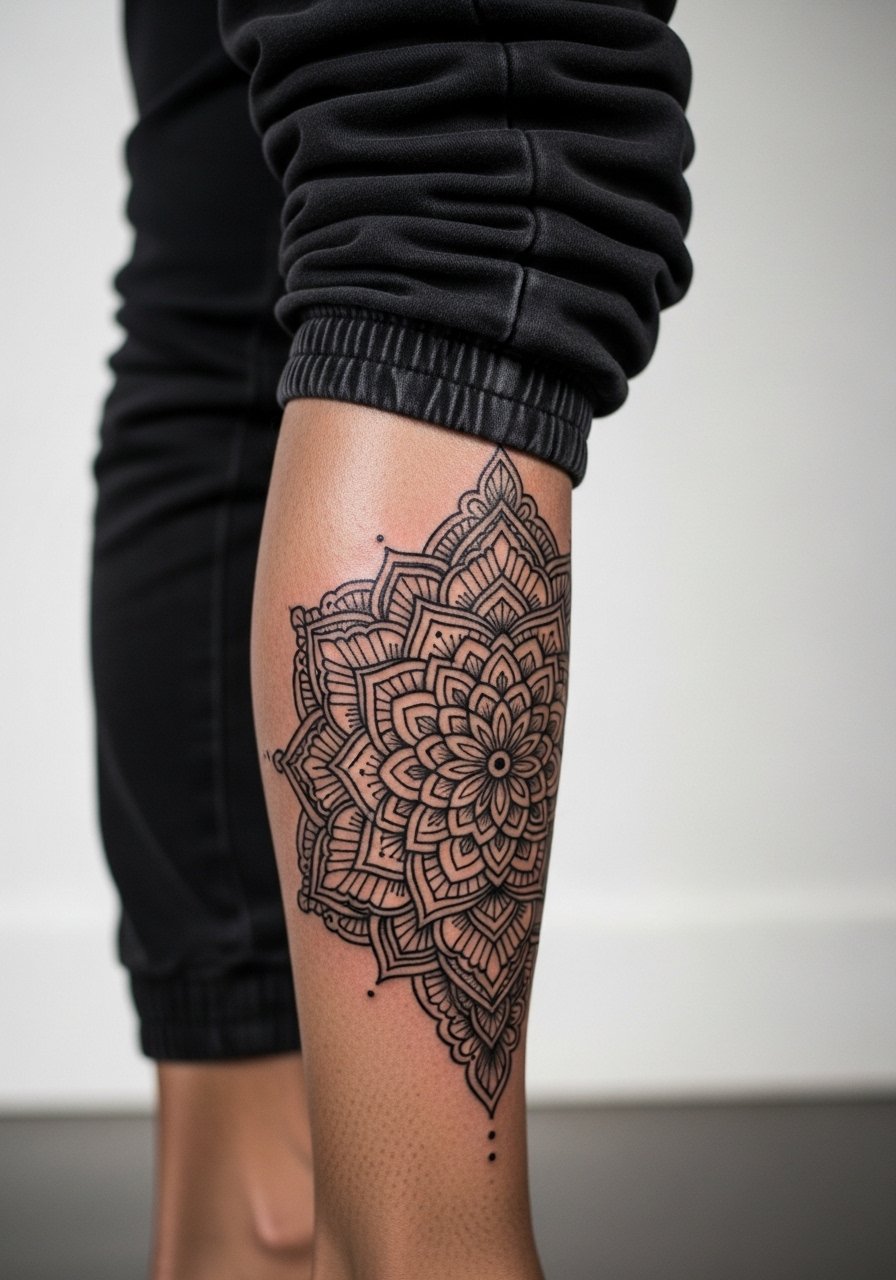
A mandala that grows into a half-sleeve lets you expand into calf work later. Ask for spacing in the dense areas so the dots and stipple shading have room to breathe. The wrap needs 360 degree access, so wear athletic boxer briefs or shorts on session day. The main mistake is crowding too many fine details into a small radius, which merges after a few years. Touch-ups are common for dense black geometry, but the symmetry reads powerful once healed.
Heal Smart
The dragon, blackwork skull, lion, compass, wolf, and mandala above cover a range of wrap and vertical needs. Lower leg pieces face more friction and sun exposure than arm work, so these five items smooth the session and the first week.
-
CeraVe Healing Ointment. A low-grease balm that users report avoids pilling on dry winter skin, helpful for shin spots that rub against socks.
-
Australian Gold SPF 30 Post-Tattoo Lotion. Lightweight sun protection for healed color retention when you start wearing shorts again.
-
Tatt2Away balm. A frictionless initial layer that absorbs quickly, which helps shins during early walks and workouts.
-
Hada Labo Lotion. Gentle hydration for darker skin tones where heavy balms can pill.
-
Hustle Butter. Thinner than thicker ointments for the gym-going client who wants moisture without clogging pores.
7. Traditional Anchor with Rope
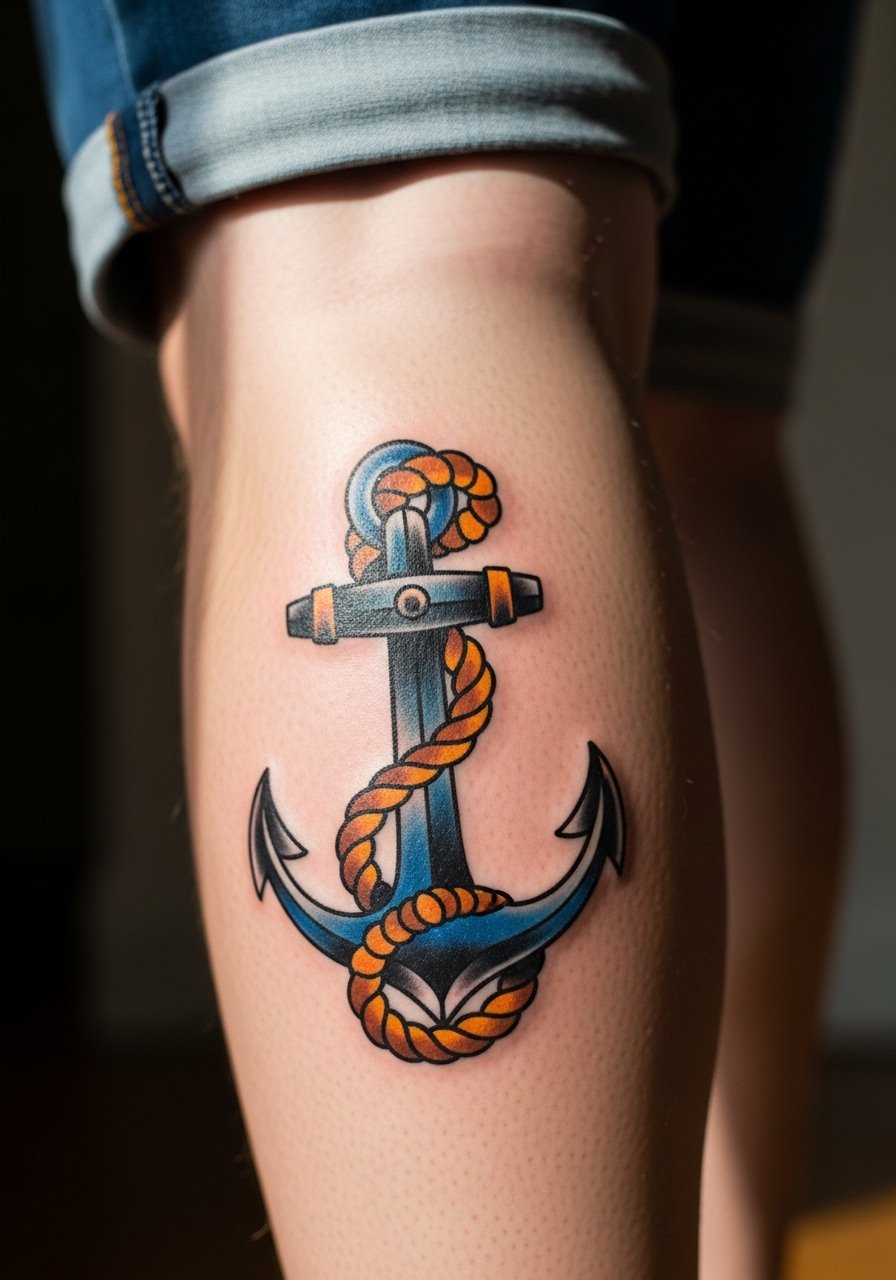
A lower shin anchor reads nautical and conceals well under pants. Ask for heavy outlines and simple shading that will stay crisp on the high-movement area near socks. Sessions are short and the pain centers lower on the shin but still near bone. The biggest mistake is tiny script wrapped around the rope. Keep lettering larger or ditch it. For showing off, ankle socks with high top sneakers frame the anchor cleanly.
8. Black and Gray Koi Fish Ascending
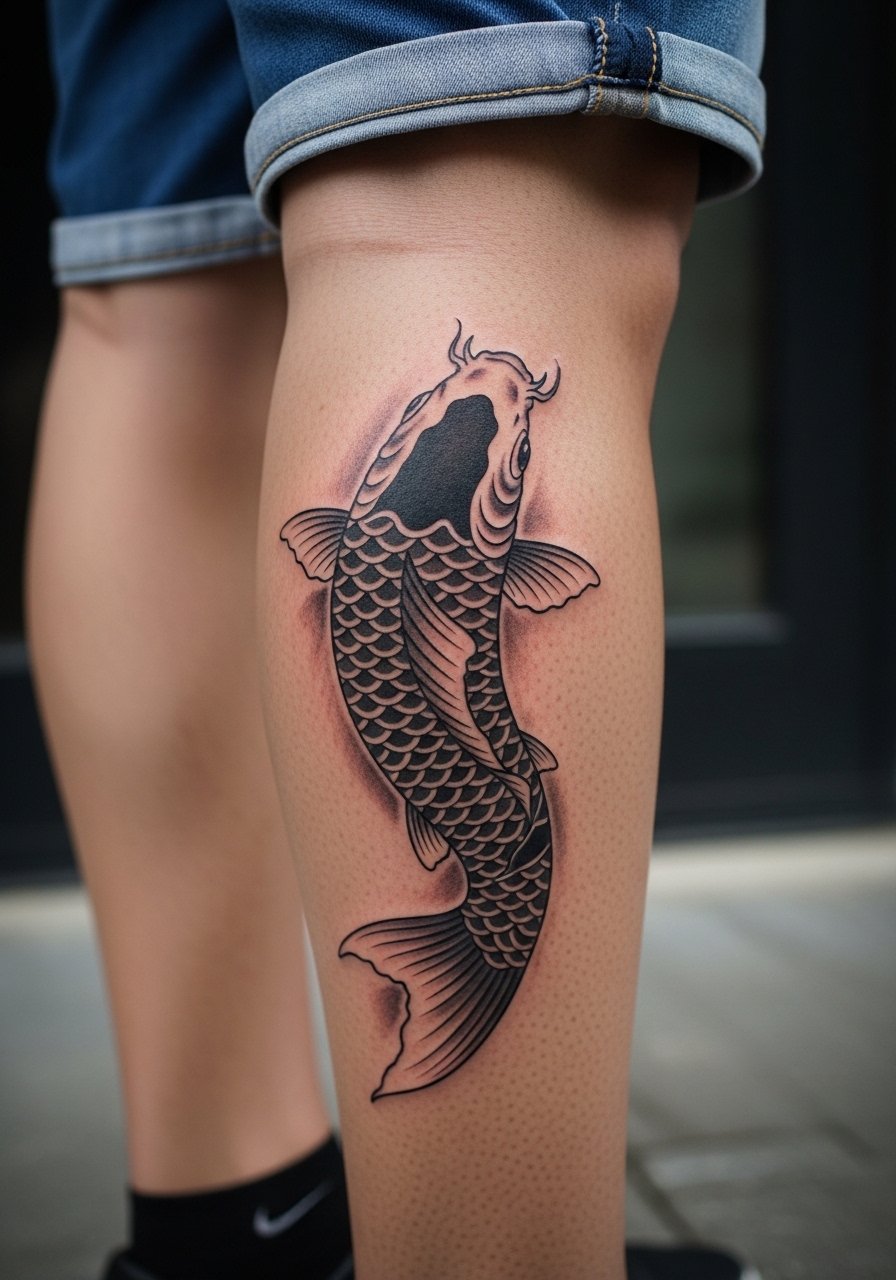
Koi fish follow the shin curve naturally and symbolize perseverance. Request a clear direction for movement so fins and scales are readable from both sides. Gray wash holds up better than watercolor on legs because it has less risk of color migration. Common errors include low-contrast midtones that flatten after healing. Plan for two sessions so the artist can layer washes without overworking the skin, and expect a moderate pain level along the shin.
9. Ignorant Style Grim Reaper
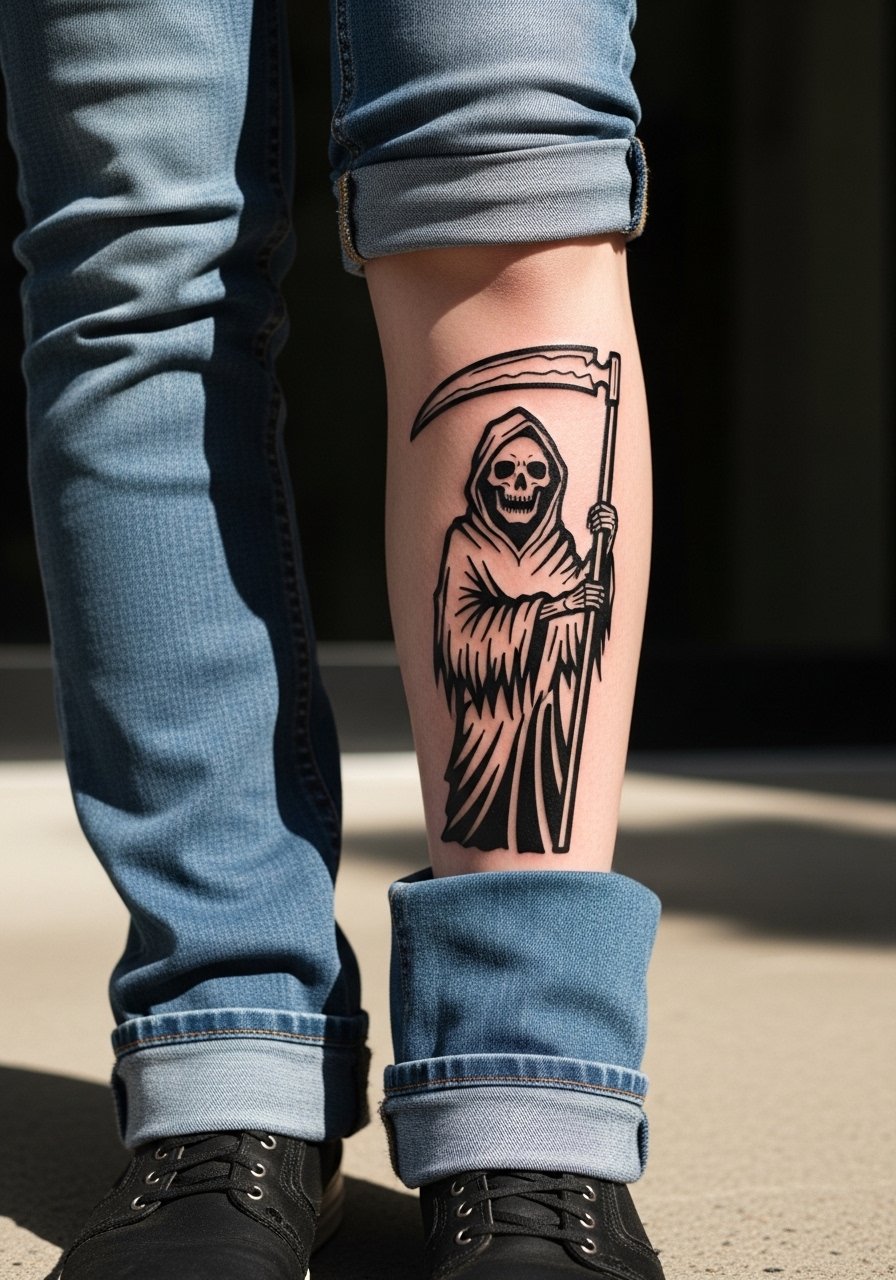
This bold, cartoon-adjacent reaper reads hard from distance and ages into a strong silhouette. The ignorant style benefits from thick lines that resist blowout and friction. Tell your artist you want flat black fills and minimal micro-detail inside faces to avoid early softening. Sessions are quick and the tolerance for pain varies by proximity to bone. For session day, cuff bootcut jeans so the artist has steady access.
10. Watercolor Samurai Helmet
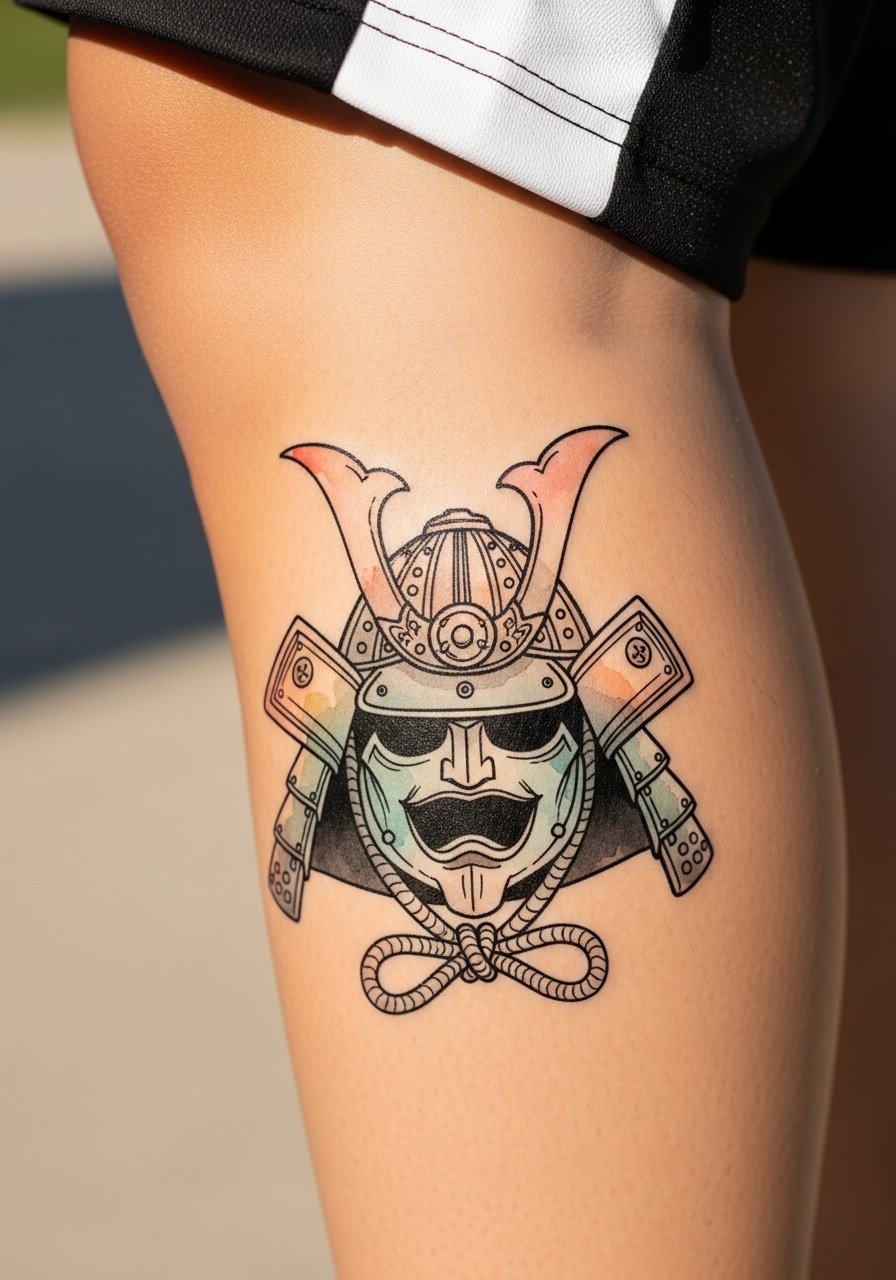
Watercolor on shins is striking but carries color bleed risk. Ask for strong anchoring outlines and ask the artist to reserve color washes in areas away from the bone. The healing timeline can be picky because leg movement and friction accelerate fade, so expect touch-ups sooner than with blackwork. Avoid asking for very pale washes over thin skin. If you love painterly color, plan sessions across a few months to let layers settle.
11. Minimalist Arrow Stack
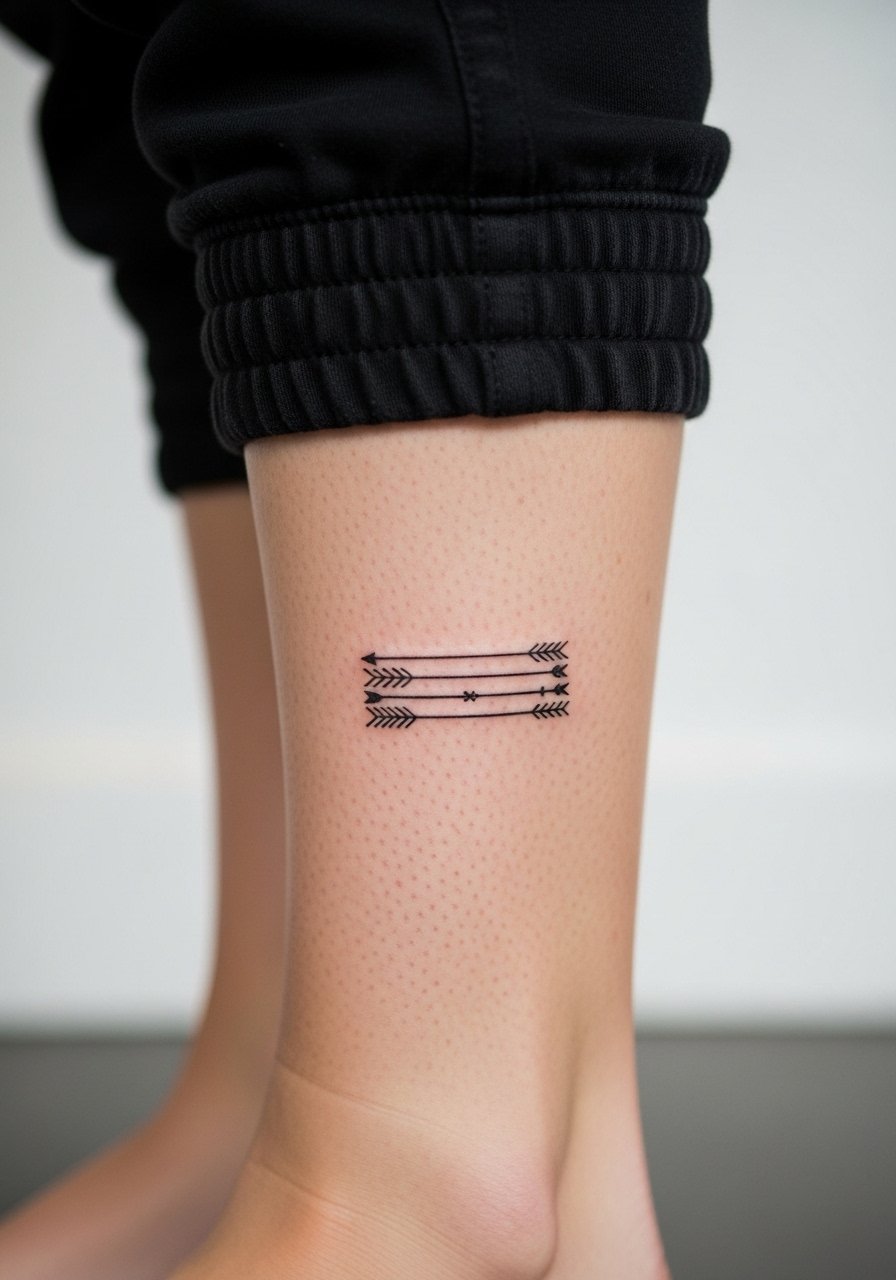
Small, stacked arrows make a discreet shin test piece. Inner shin is sensitive and fine lines can blur from friction and sunlight. Ask for slightly heavier main lines and a modest size so spacing survives. The session is quick but expect higher pain than the outer shin. A common mistake is picking a size that would be better suited to an arm. For session comfort, wear cropped jogger pants that let the artist work without fabric interference.
12. Neo-Traditional Eagle in Flight
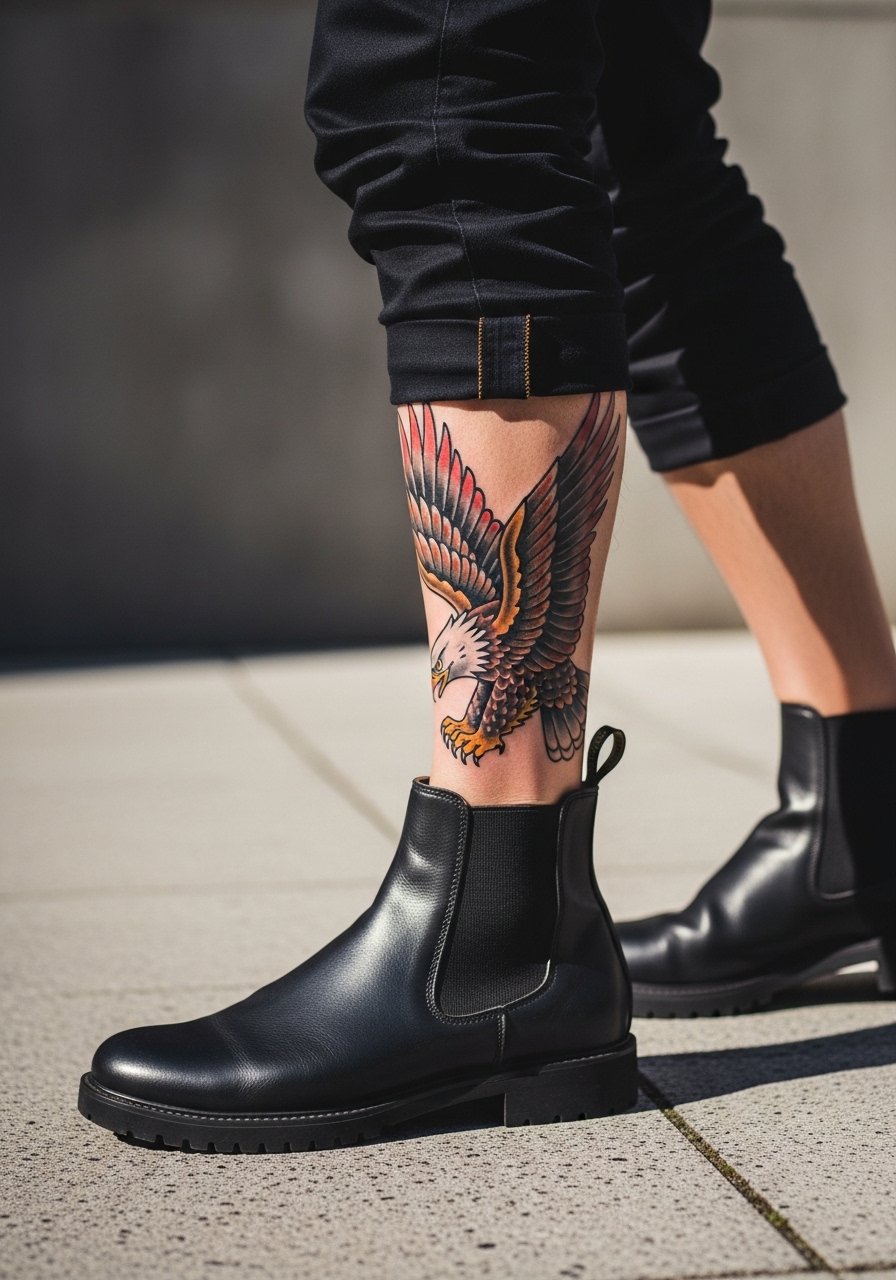
An eagle wrap reads dramatic when the wing tips tuck around calf contours. Ask for bold outlines and exaggerated wing feathers that read at distance. This piece typically needs two to three sessions and can sting along tendons. The mistake is over-detailing the feathers near the ankle where blowout risk is higher. Pair with Chelsea boots and tapered pants for a polished reveal.
13. Symmetrical Dual Dragon Halves
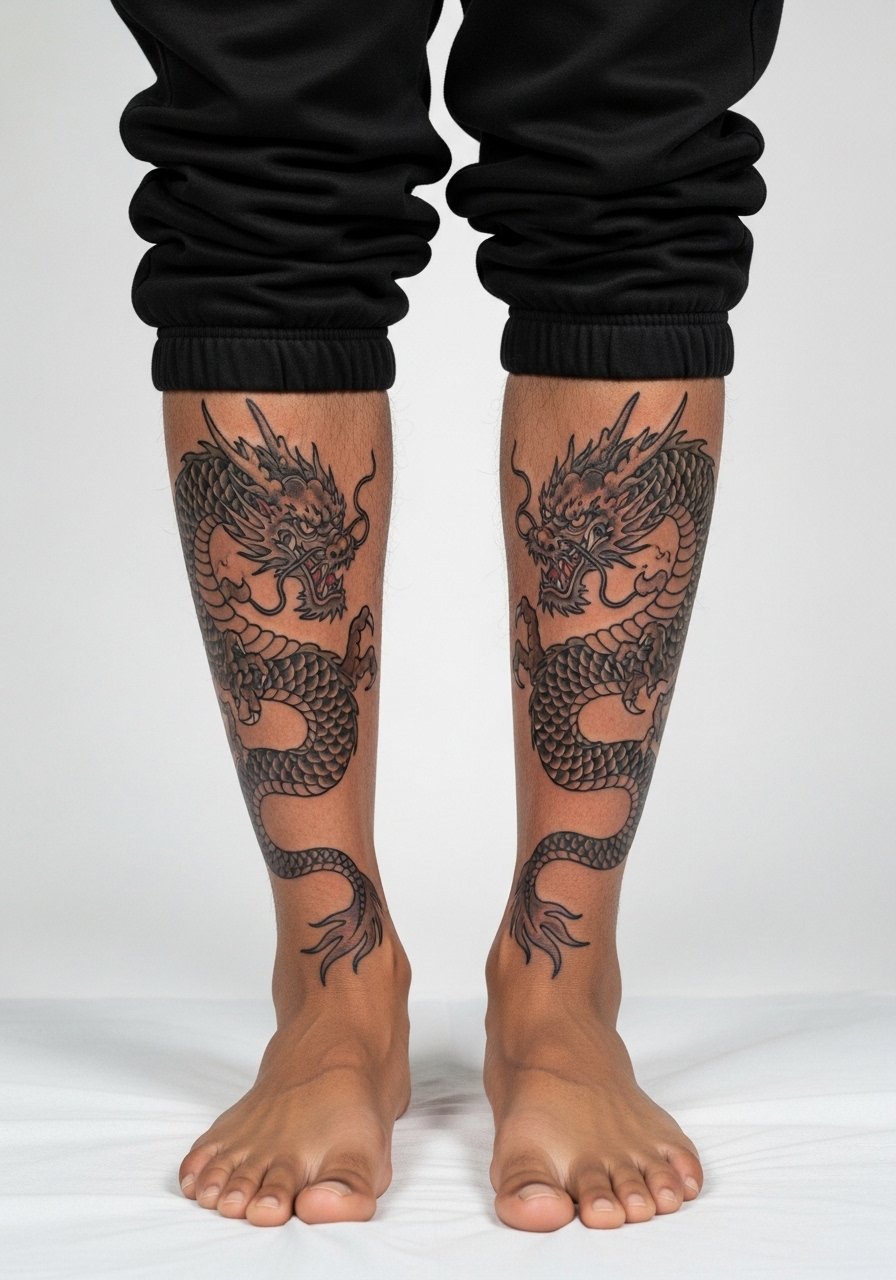
Splitting a single image across both shins creates a theatrical moment when you stand square. Precision matters because the halves must align at natural stance width. Book both sessions close together and ask the artist for a template to ensure symmetry. This design ages well if each side uses bold contours rather than micro-detail that could shift with weight changes. It is a rare, high-impact approach and people often underprepare logistics like booking back-to-back time slots.
14. Shin-to-Knee Transition Wrap
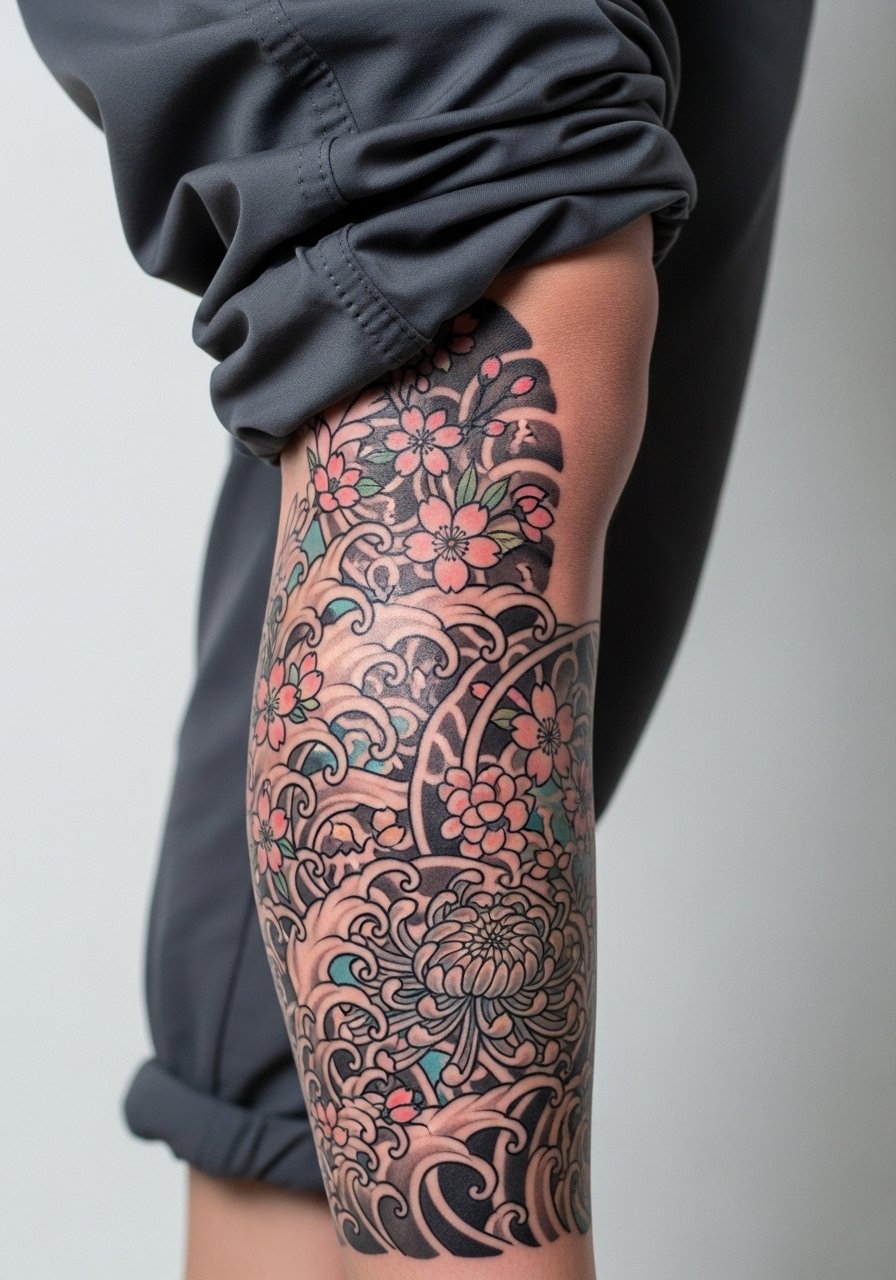
A transition wrap lets a story climb toward the knee and into a future sleeve. Ask for clear value breaks where the shin ends and the knee begins so movement stays readable when you bend. This needs multiple sessions and careful planning around the knee cap so the piece does not warp with motion. A common misstep is treating the knee as flat canvas. For session day, wear loose track pants so the artist can access both shin and knee with ease.
15. Bone-Shadow Contour Technique
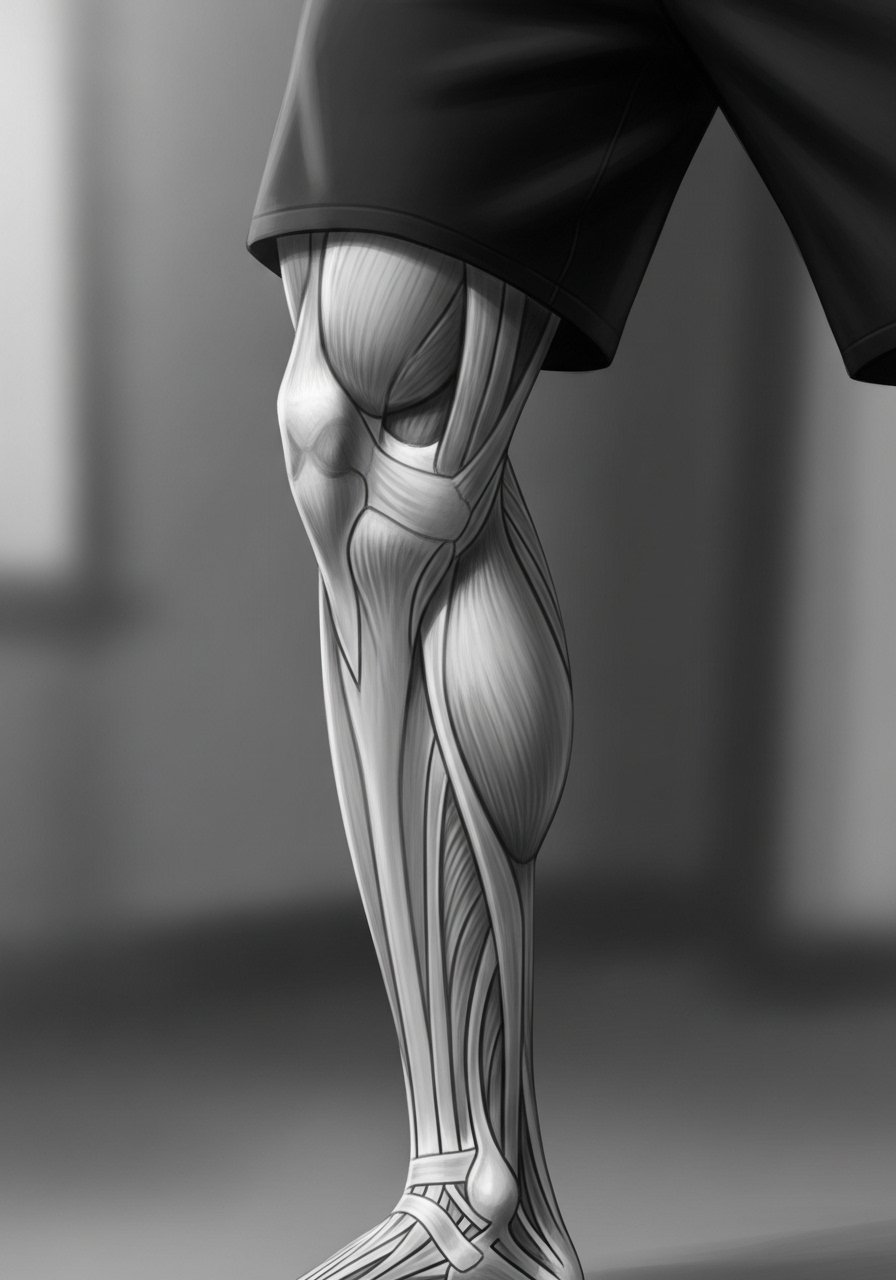
This shading technique leans into leg anatomy to make the tattoo sit with the shin rather than on top of it. When consulting, ask how the design will use bone shadowing to enhance muscles instead of fighting contours. It helps for athletes who want the piece to read sharp during motion. The session can be fiddly and may need test shading. A mistake is over-emphasizing shadow depth that later looks like bruising. Discuss how the work will age especially if you anticipate leg size changes.
16. Micro-Realism Ascending Fox
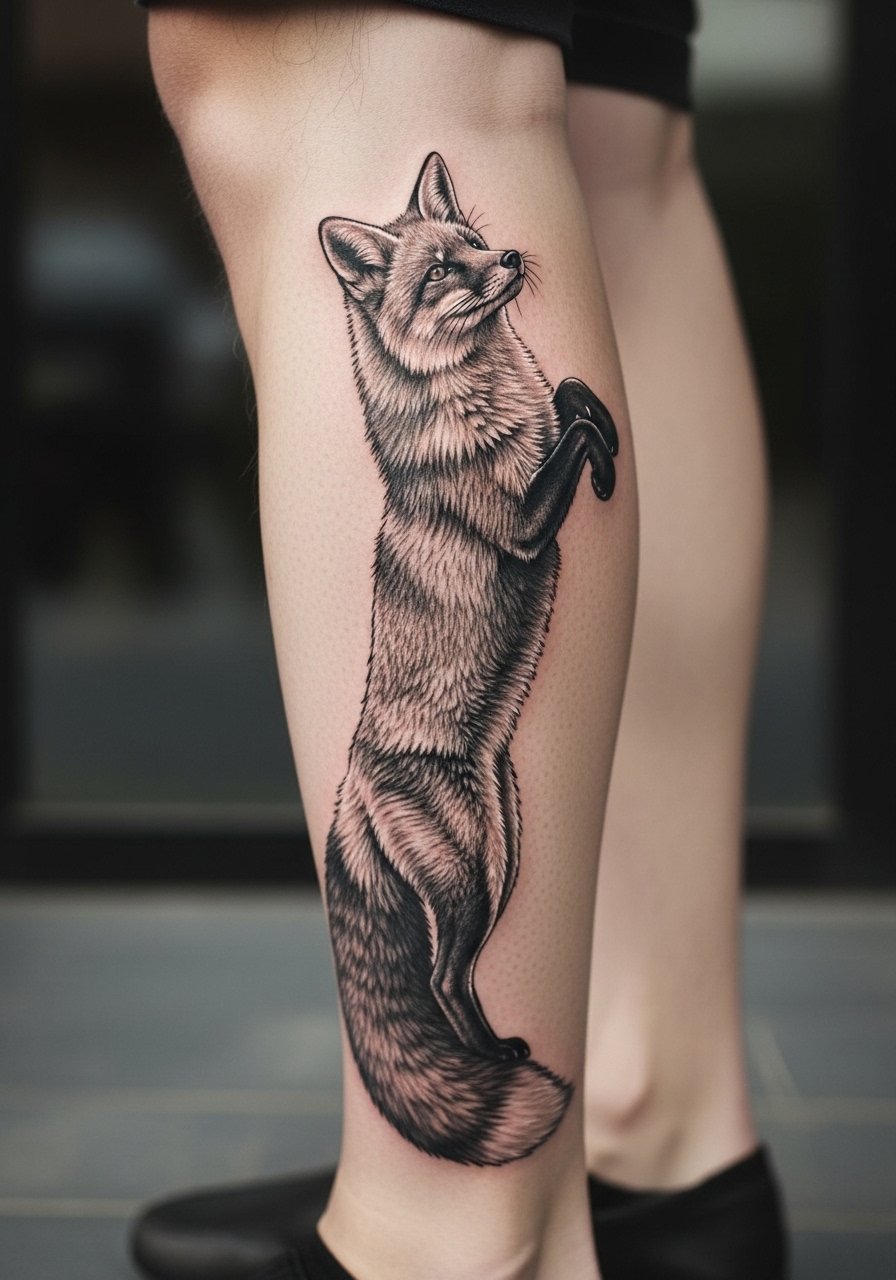
Micro-realism showcases artist skill but asks for careful sizing and contrast on shins. Ask for simplified background negative space so the main figure stays legible after a few years. Sessions are long and require rest between passes. Clients often regret tiny details that soften over time. If you run or cycle a lot, mention that in the consult because friction from calf sleeves and socks affects longevity.
17. Vertical Memorial Portrait
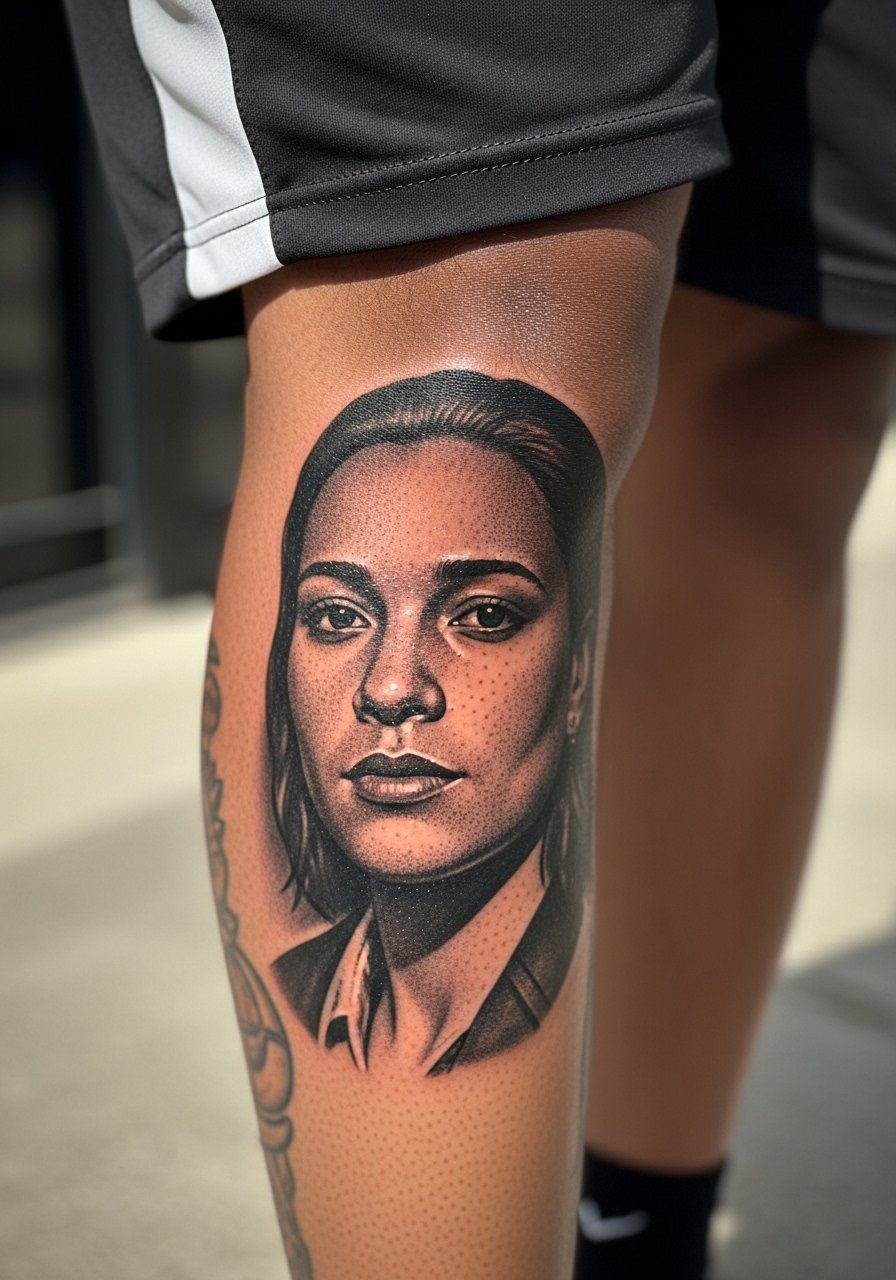
A vertical portrait for memorial work fits the shin's narrow format. Be explicit with your artist about intended emotion and reference lighting for the face so they can plan contrast that survives healing. Portraits on the shin are high-skill requests and typically need several sessions for both line and tonal work. A common error is insisting on a very small portrait. Size matters for facial read after year two. Discuss touch-up expectations up front.
18. Bold Blackwork Geometric Column
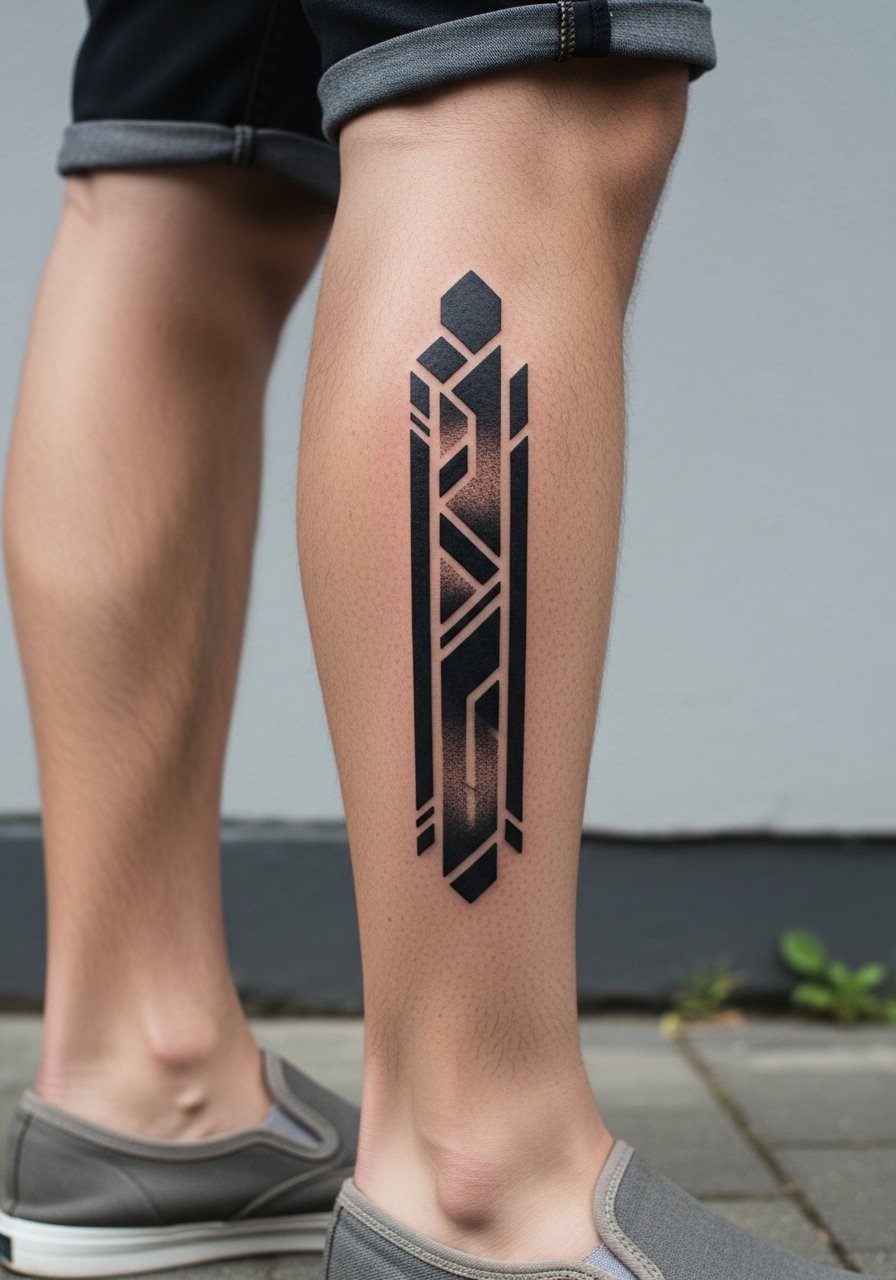
Geometric columns look strong and resist the fade that affects thin-lined geometry. Request larger volumes of black and clear negative space between repeating units to avoid merging. This one-hour to two-hour session hits differently depending on how much fill you want. Missteps include too-dense patterns packed into a narrow band. Blackwork also hides well under darker socks while still reading when you expose your leg.
19. Half-Sleeve Floral with Negative Space
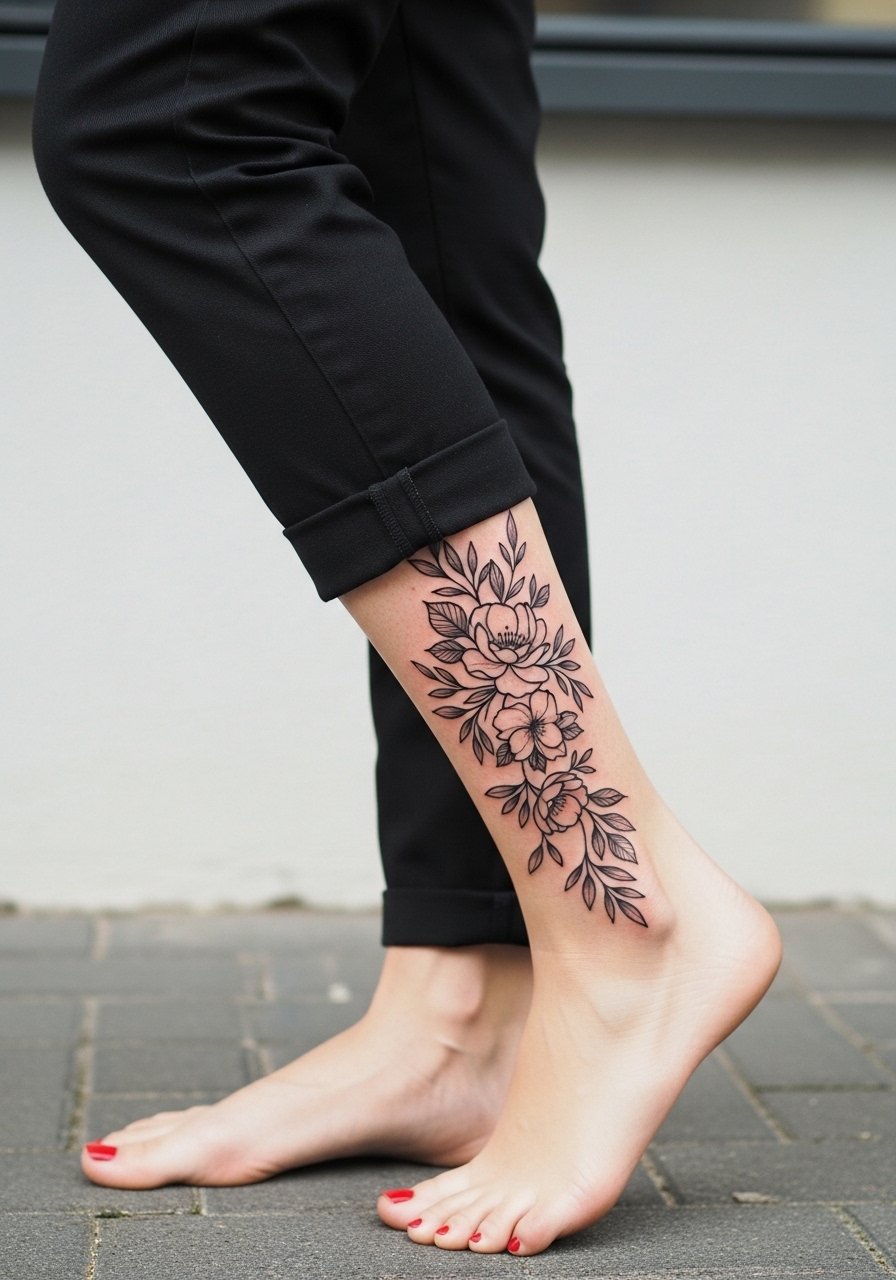
Using negative space keeps floral halves from blending together as they age on the leg. Tell your artist to design stems and petals with clear gaps so the silhouette stays readable at a distance. This approach reduces the need for early touch-ups and ages into a crisp motif. Sessions require planning around calf expansion and knee motion. Pair with tapered athletic pants that you can roll to show off the floral curve.
20. Script Band with Roman Numerals
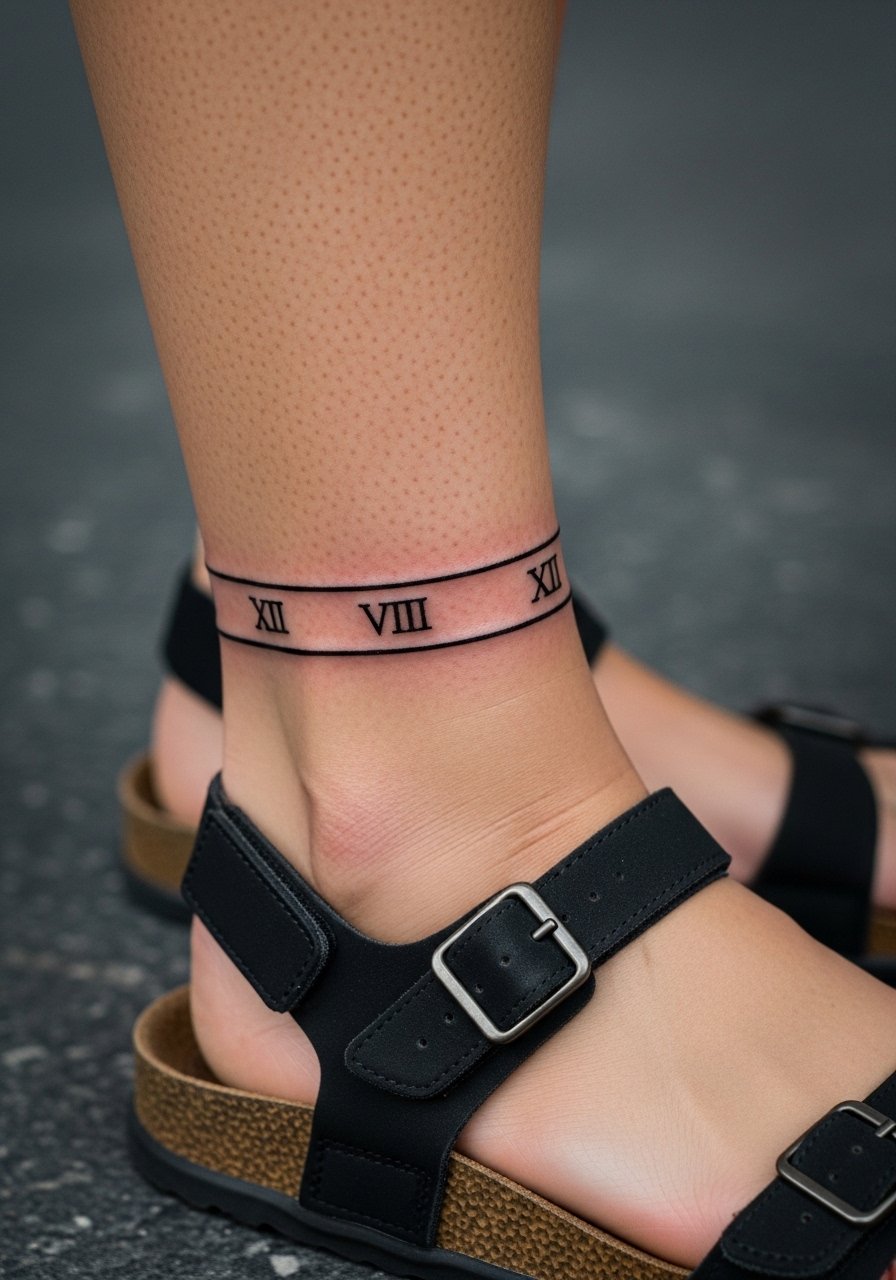
Bands of script or dates can be striking but risk stretching with leg size changes. For Roman numerals, pick a heavier script style with breathing room between characters to avoid merging. The lower shin has particular tendency to rub against socks, so keep the band slightly higher if you want longevity. Small text often needs a touch-up after a few years. On session day, wear sandals or low socks so the area is exposed.
21. Anchored Compass Fusion
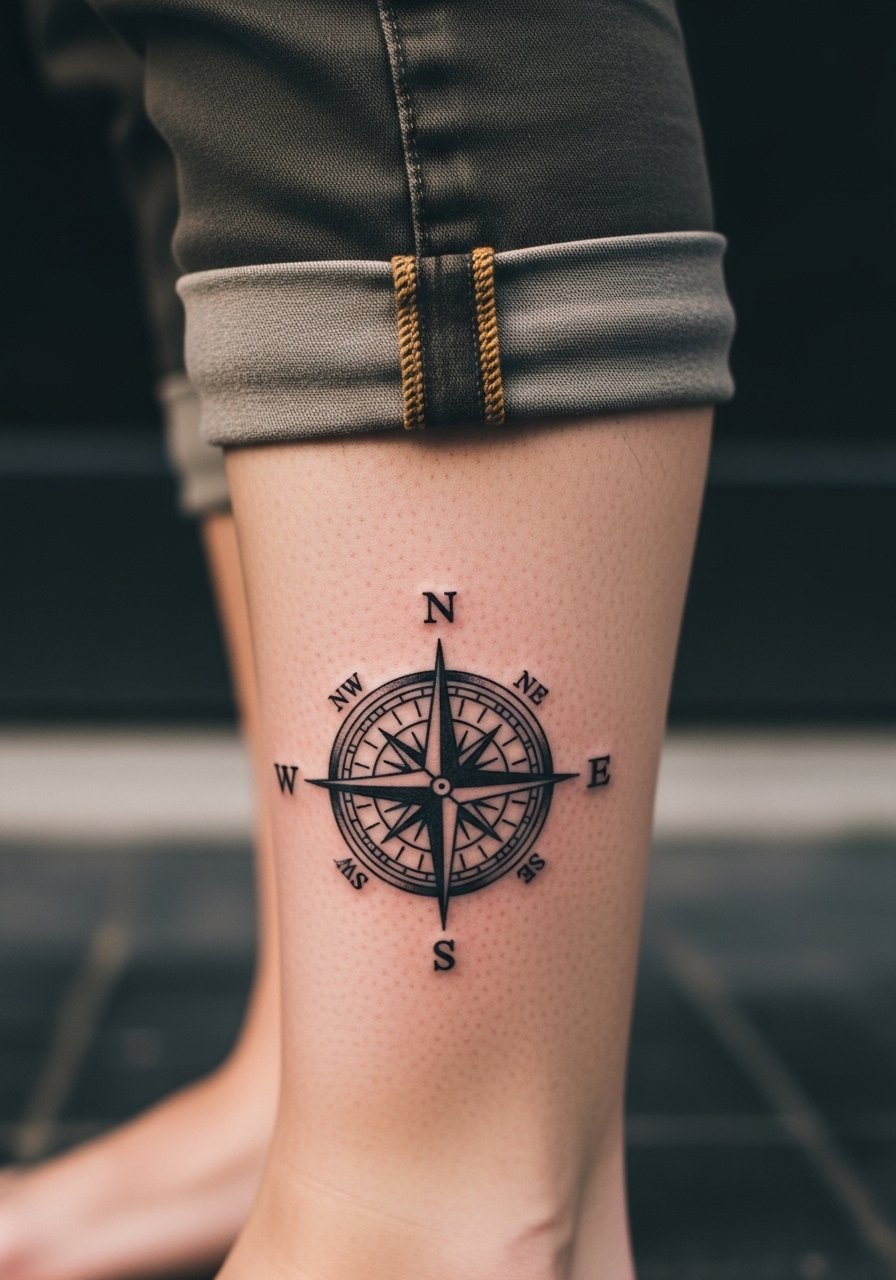
Combining an anchor with a compass gives old-school symbolism a modern vertical slant. Ask for bold anchor edges and relatively thicker compass points so the compass remains legible in five years. This piece usually fits medium size and takes one to two sessions. The primary mistake people make is tiny directional markings that disappear under friction. For outings, cuff chinos or roll slim chino pants to show the fusion.
22. Kintsugi-Inspired Broken Line Design
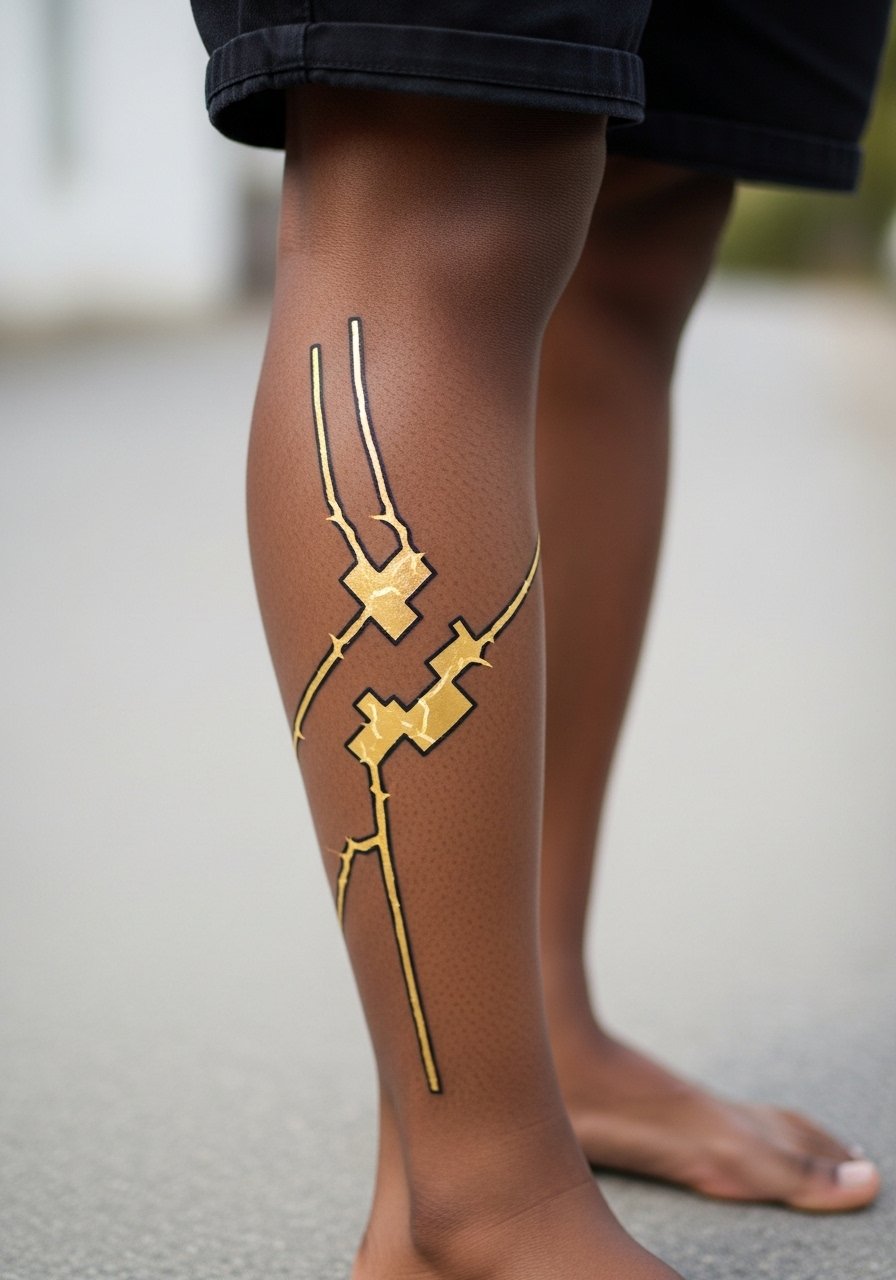
Kintsugi themes translate well to shins by using breaks and intentional gaps rather than continuous fine lines. Ask your artist to suggest where natural leg contours will accentuate the breaks. This design absorbs movement and disguises small shifts over time. A mistake is trying to replicate super-fine gold leaf texture with tiny strokes. Keep the gold accents simple so they remain readable through seasons.
23. Stipple-Shaded Mandala Strip
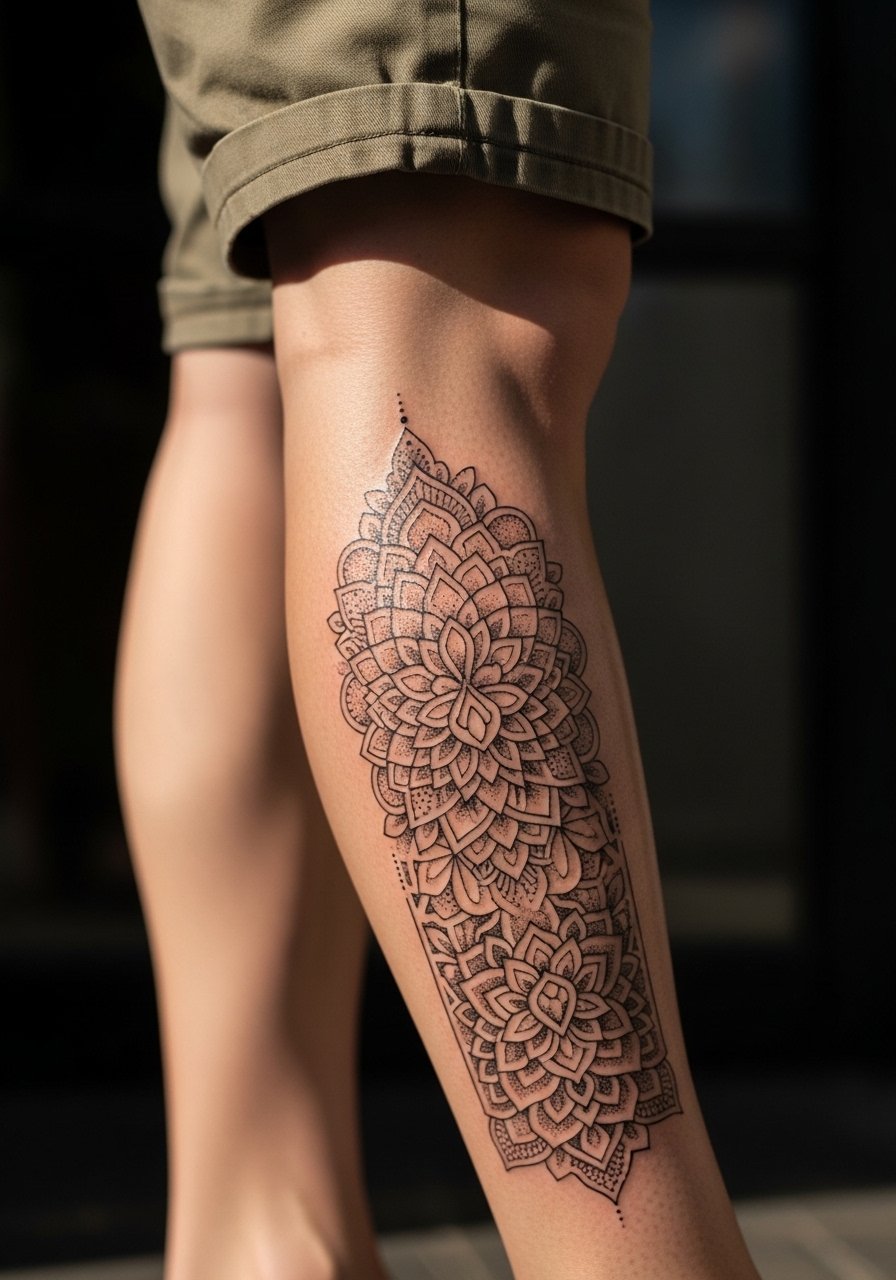
Dot work can be forgiving if planned with gradient spacing. Insist the mandala sections have generous spacing and avoid packing dots too densely near bone. Sessions are measured since stipple shading takes time. People sometimes expect stipple to look identical to a fresh photo after six months. In reality, it softens then stabilizes, so budget time for a touch-up if you want raw contrast kept.
24. Minimalist Map Outline
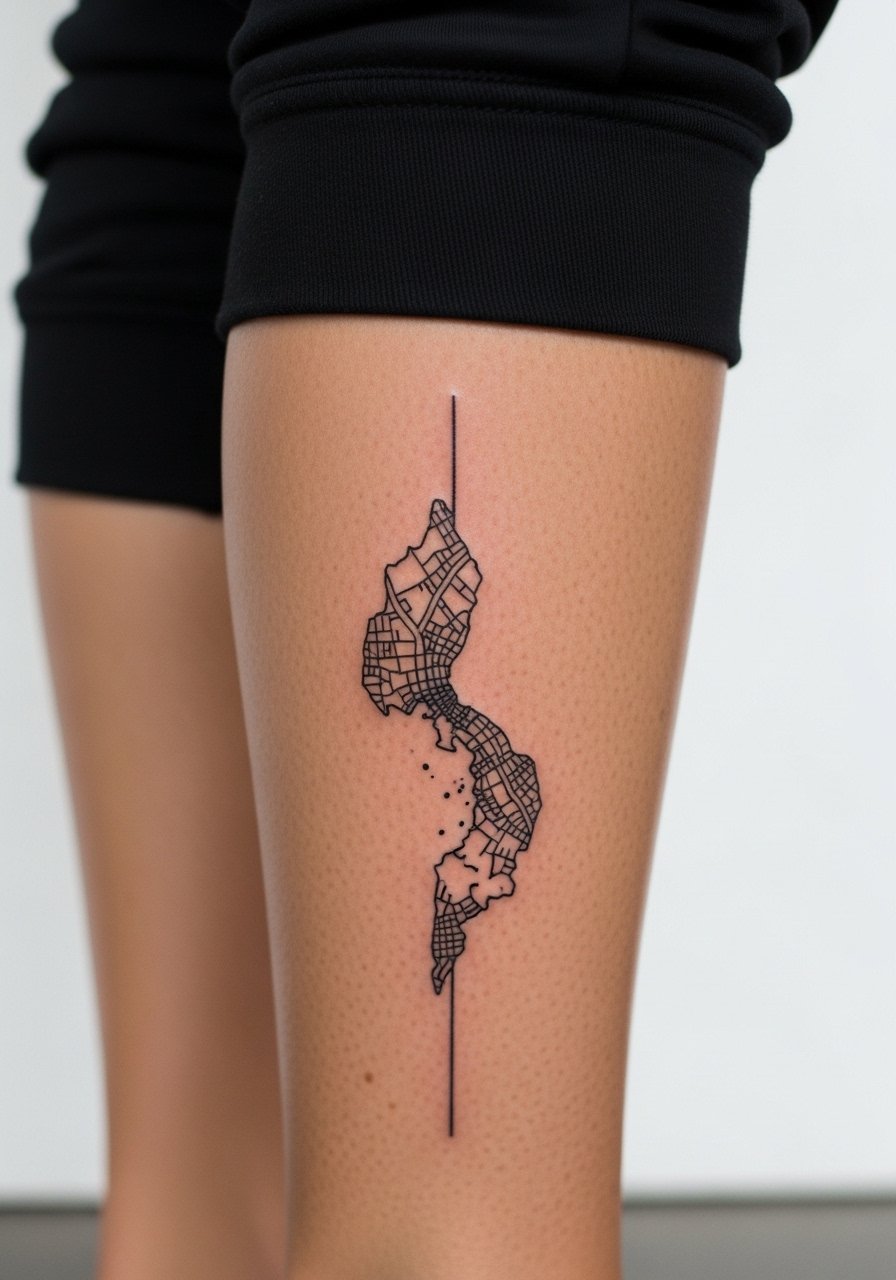
A map outline that follows the shin can be an elegant way to reference place without heavy detail. Keep lines slightly bolder than you would on the arm for the same reason we use stronger lines on shins. The inner curve of the calf can help a map read three-dimensional. Mistakes include trying to fit dense labels or tiny symbols into the map. For session wear, use cropped joggers that allow easy access.
25. Tiny Rune Column
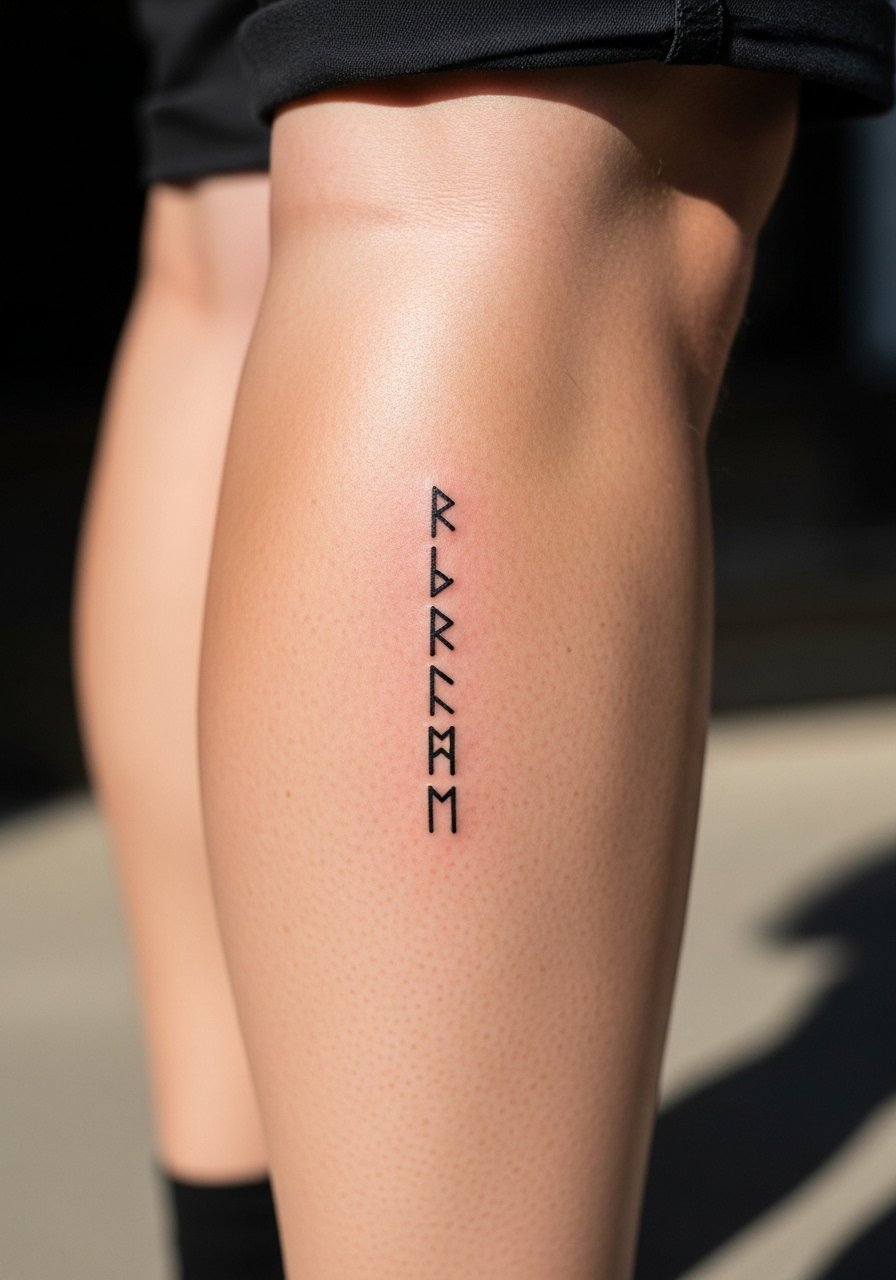
Stacked runes can fit the shin nicely but need spacing and size planning to avoid merging. Ask for each rune to have a clear minimum size and spacing so the vertical column keeps definition. The inner shin is more painful, so think about starting with shorter sessions. People who rush to tiny symbols regret how quickly they soften with repeated friction. Leave room for future expansion or a surrounding pattern.
26. Wave and Mount Silhouette
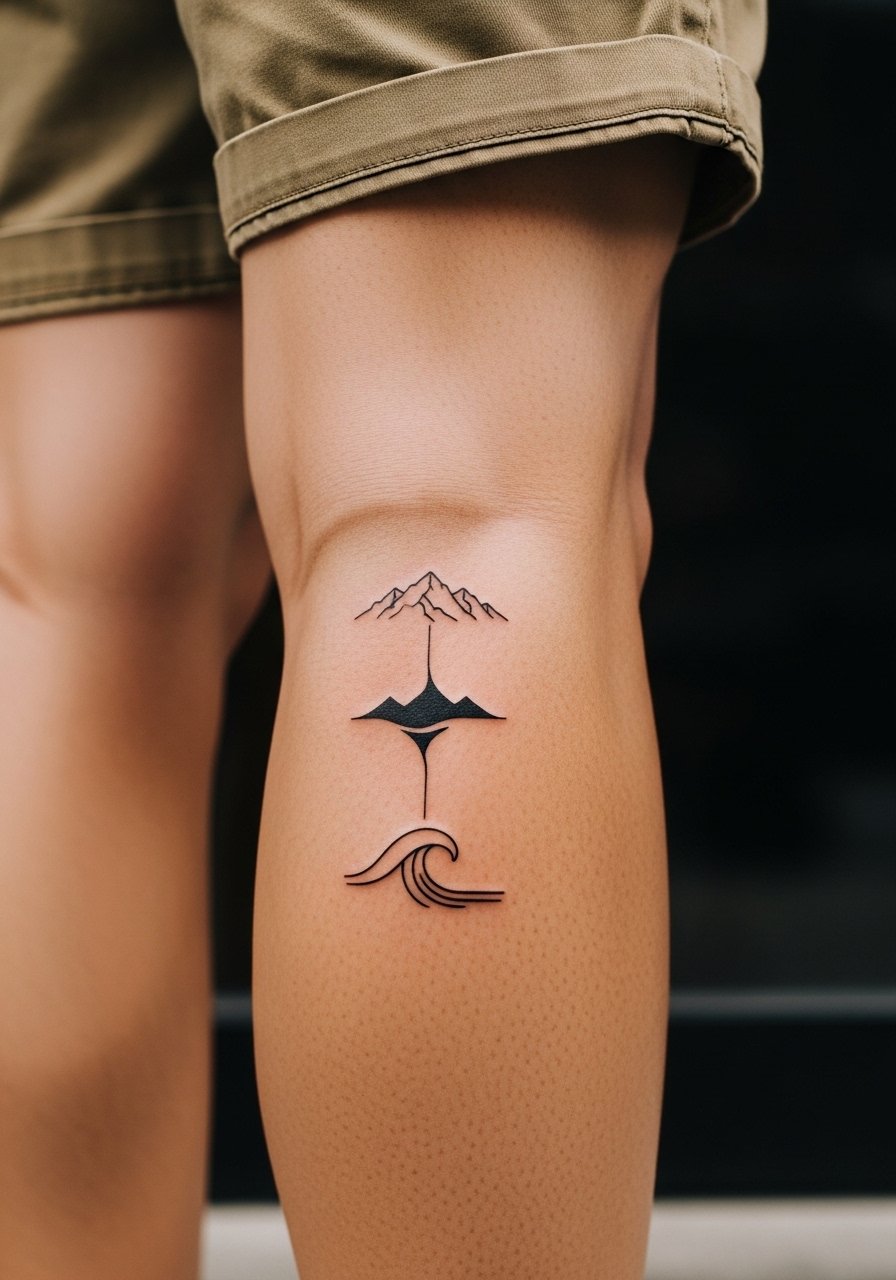
A bold silhouette uses large black shapes to resist fade and look graphic over time. For athletes or sailors who want a single motif, this design reads well when simplified. Tell your artist to favor clear mass shapes over internal micro-detail. That keeps the profile legible at distance. It also hides well under work socks while still making a statement when you switch to shorts.
27. Geometric Arrow Maze
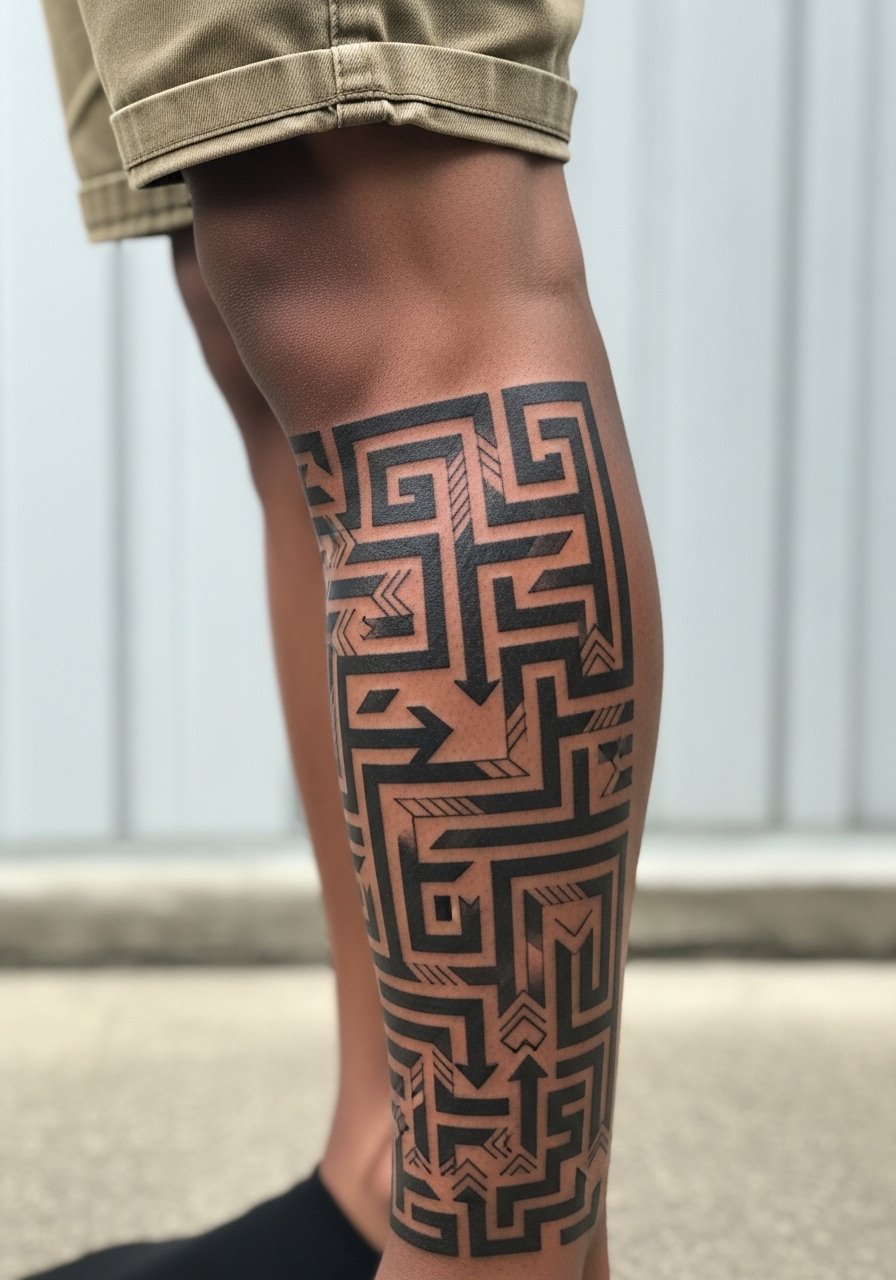
A geometric maze of arrows can make a long, narrow canvas feel dynamic. Ask your artist to set strong negative-space rules so repeating elements do not blur into one another. This design wears well if you plan for the natural swelling and muscle changes of the lower leg. The main mistake is making the repeat units too tight. Keep the pattern bold and breathing room intentional.
Frequently Asked Questions
Q: How much does a shin wrap like the dragon or mandala usually cost compared to a small compass?
A: Expect larger wrap jobs to take multiple sessions and therefore more time and money than a small compass rose. Prices vary by city and artist, but wraps usually need more planning and time. Shop around on platforms that show portfolios and ask for session estimates so you can budget properly.
Q: Will fine line work on the inner shin blur faster than blackwork?
A: Fine line on the inner shin is more likely to soften sooner because the skin there gets more movement and abrasion. Many artists prefer slightly heavier anchor points for inner-shin fine line so the design keeps its shape. If longevity matters, ask about sizing, line weight, and a realistic touch-up timeline.
Q: Are symmetrical dual shins worth the extra coordination and booking?
A: Yes if you want the dramatic pairing effect. Book the sessions close together and request templates so the halves align. The extra planning reduces the chance of misalignment. It is a rare move that pays off visually but requires discipline in scheduling.
Q: Does blackwork really hold up better on darker skin tones?
A: Blackwork with clear contrast and strong outlines often reads well across skin tones. For darker skin, request high-contrast outlines and bold shapes from the artist. A portfolio showing healed work on diverse skin will help you see how the style ages in practice.
Q: Should I use a protective film or dry heal my shin during the first days?
A: Artists and collectors split on protective films versus dry healing. Some prefer a breathability-first approach because legs trap sweat, while others like thin film for very active clients. Ask your artist what they recommend for shin placements and follow their protocol during the first week.
Q: How should I dress to the session for a shin-to-knee wrap or a lower shin anchor?
A: Wear loose shorts or pants you can roll and a comfortable bottom that gives the artist full access. For wraps that move toward the knee, choose track pants or tapered pants you can roll without stretching the area. Bringing clothing that is easy to shift reduces session time and keeps the stencil accurate.
Q: What timeline should I expect for touch-ups on micro-realism or watercolor shins?
A: Micro-realism and watercolor styles often need touch-ups earlier than bold blackwork. Plan on checking the healed result around six to twelve months and expect a possible touch-up at year two depending on activity and sun exposure. Discuss touch-up policy and timing with the artist before booking.
