
Fine line mother-daughter tattoos are everywhere on saved boards, but the reality is more complicated. Fine line pieces fade faster on wrists, darker skin needs higher contrast, and scheduling two matching sessions can blow a birthday plan if an artist cancels. This list balances what looks lovely fresh with what actually holds up, and it starts with small, wearable drawings that solve common fade, placement, and visibility problems for both generations.
1. Matching Butterfly Outline on Inner Wrist
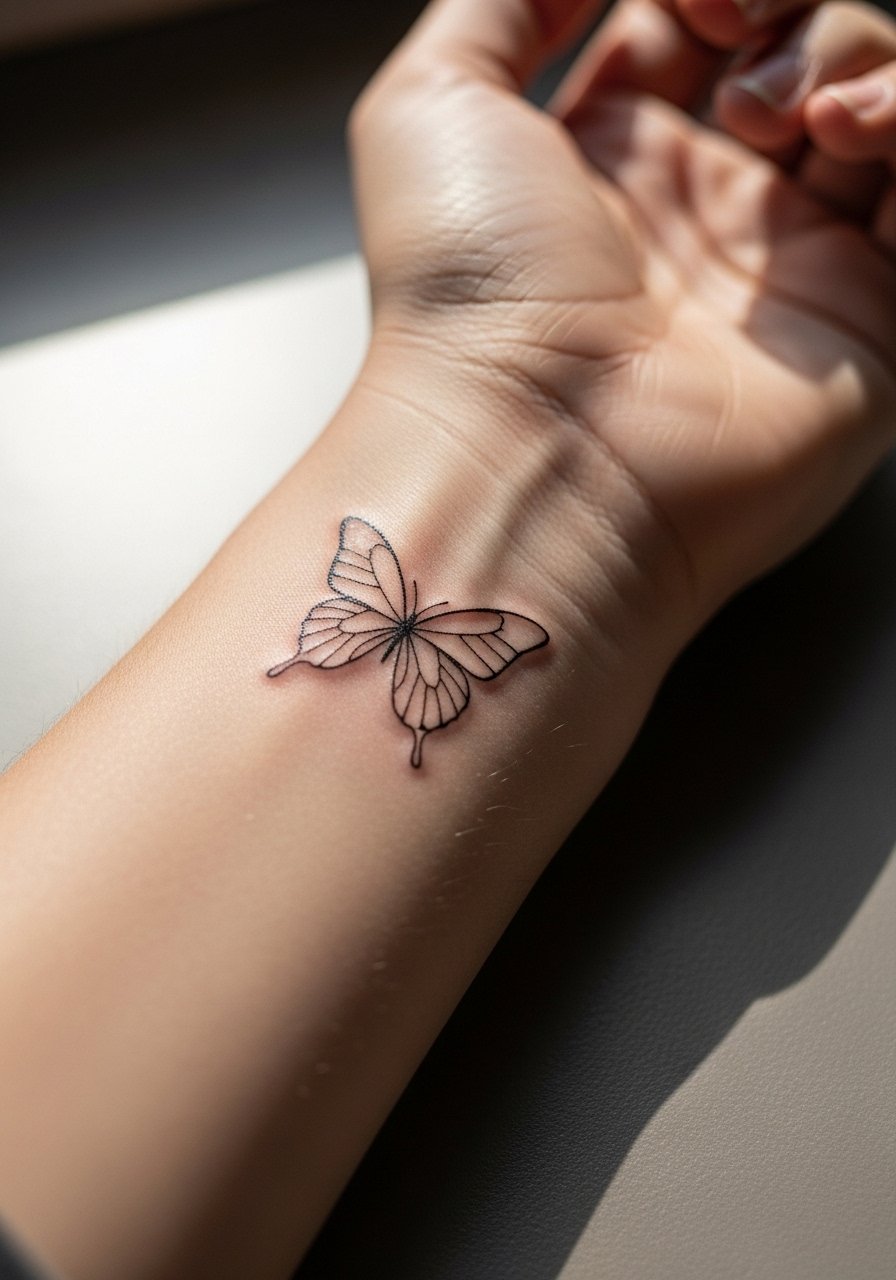
A simple fine line butterfly on the inner wrist gives a compact symbol that reads well when spaced correctly. I've seen wrist outlines blur when artists go too tiny, so ask for slightly heavier linework than your saved image to improve longevity. Pain is low to moderate and a session is usually under an hour. For showing it off, pair the piece with a thin gold chain bracelet on the opposite wrist so the tattoo doesn't compete with chunky jewelry. Common mistake is asking for micro script around the butterfly which crowds the negative space and accelerates blotting. Expect a touch-up at 1 to 3 years for very fine work.
2. Elephant Silhouettes (Mother and Baby) on the Ankle
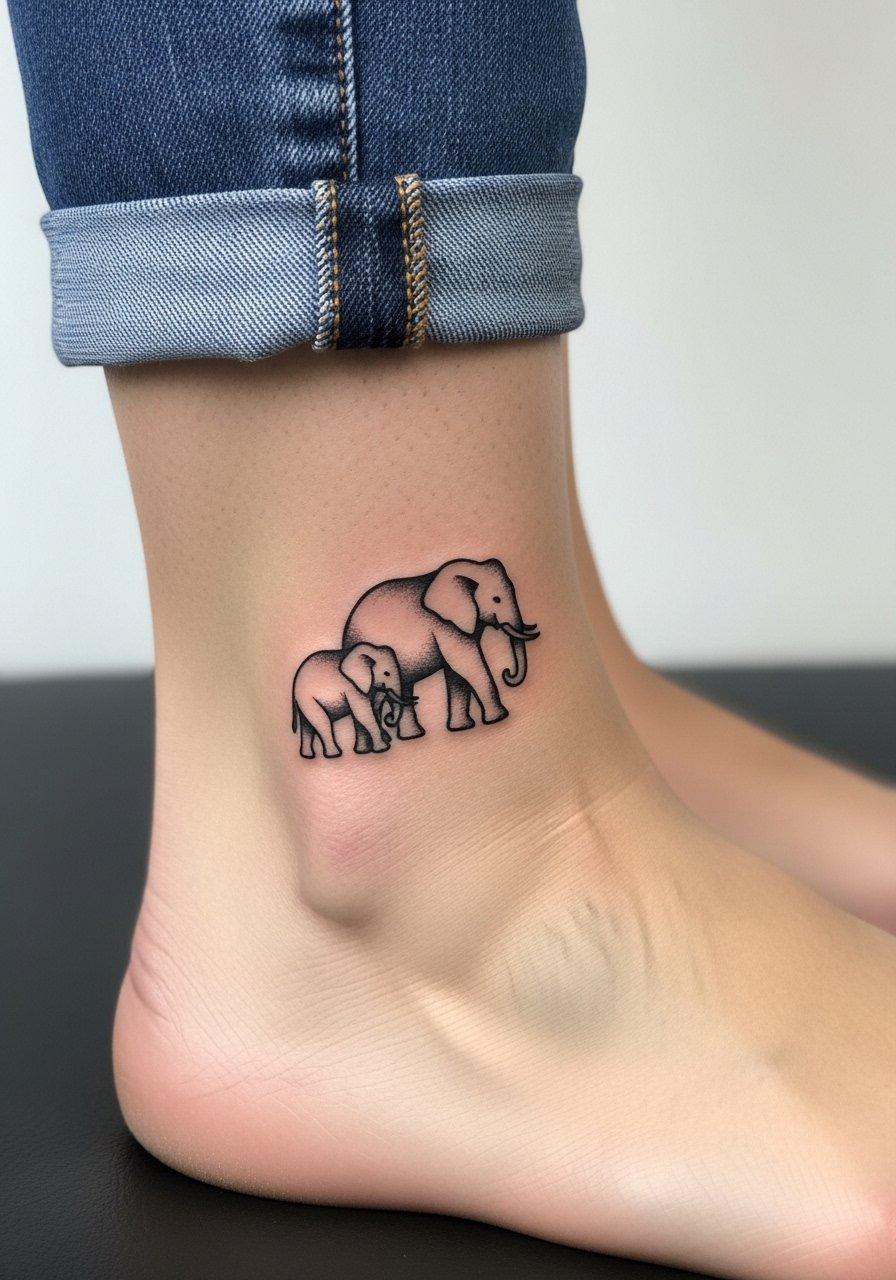
Elephant outlines scale nicely for ankles and convey maternal themes without text. The ankle sees friction from shoes and socks, so tell your artist you want bold outlines and solid black fill to resist early fading. Session time is usually 1 session under two hours and pain is mild to moderate. For summer show-off looks, pair the ankle design with strappy heeled sandals and cropped straight jeans. A common error is going too small, which allows the ink to migrate from constant rubbing. Plan a touch-up after the first year if you wear a lot of closed shoes.
3. Dandelion Seeds Drifting Across the Collarbone
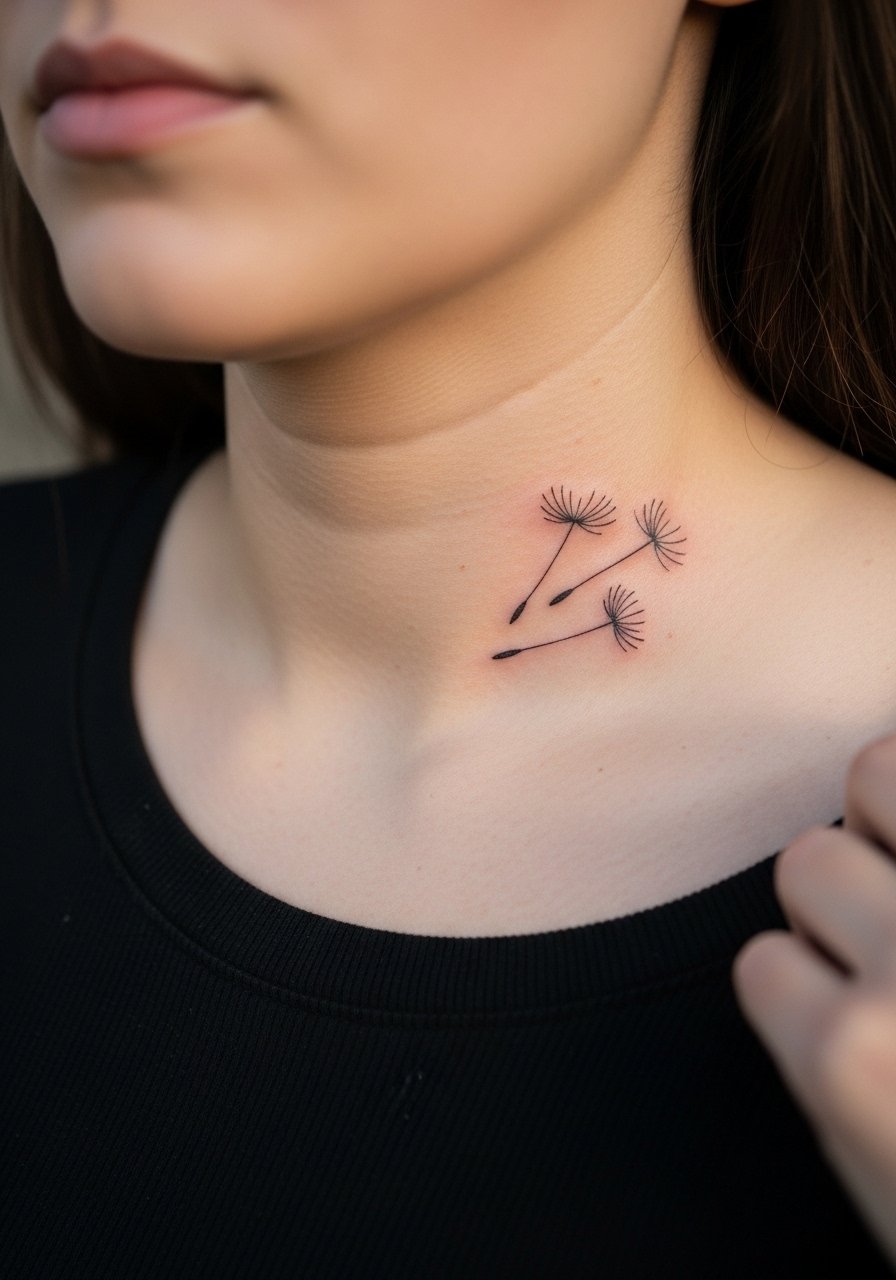
Collarbone placements show off delicate drift motifs beautifully, but the skin there moves with breathing so spacing matters. When you consult, ask the artist to scale seeds with varied negative space so the seeds don't cluster as they heal. Expect moderate pain and a single session for a small to medium piece. For outfits, an off shoulder sweater frames the design and keeps attention where you want it. A common misstep is requesting ultra-fine dots that look fragile; slightly bolder dot work lasts longer and photographs better on different skin tones.
4. Bear Mother and Cub on the Shoulder
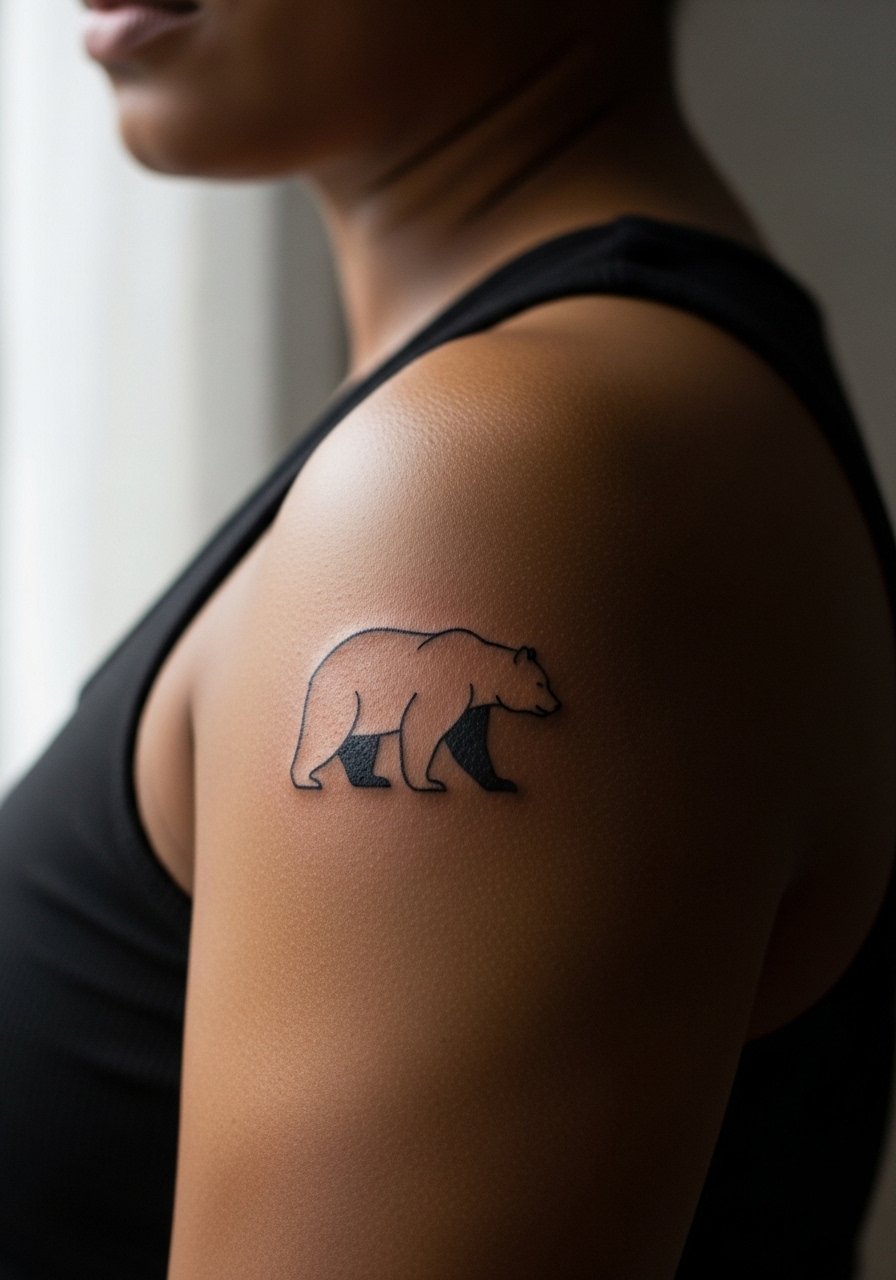
A shoulder placement gives space for a protective mother-and-cub silhouette to breathe. The shoulder is forgiving for linework and ages predictably, making this a low-risk choice for matching pieces. Pain is moderate and sessions are short. For session comfort, wear a loose tank top so the artist has easy access without exposing other areas. A frequent mistake is over-detailing the cub; keep the forms simple so the outline remains clean at year two and beyond. Shoulder flesh rarely stretches dramatically, so the same stencil on both mother and daughter will read similarly over time.
5. One-Line Butterfly Pair on Ankle or Inner Wrist
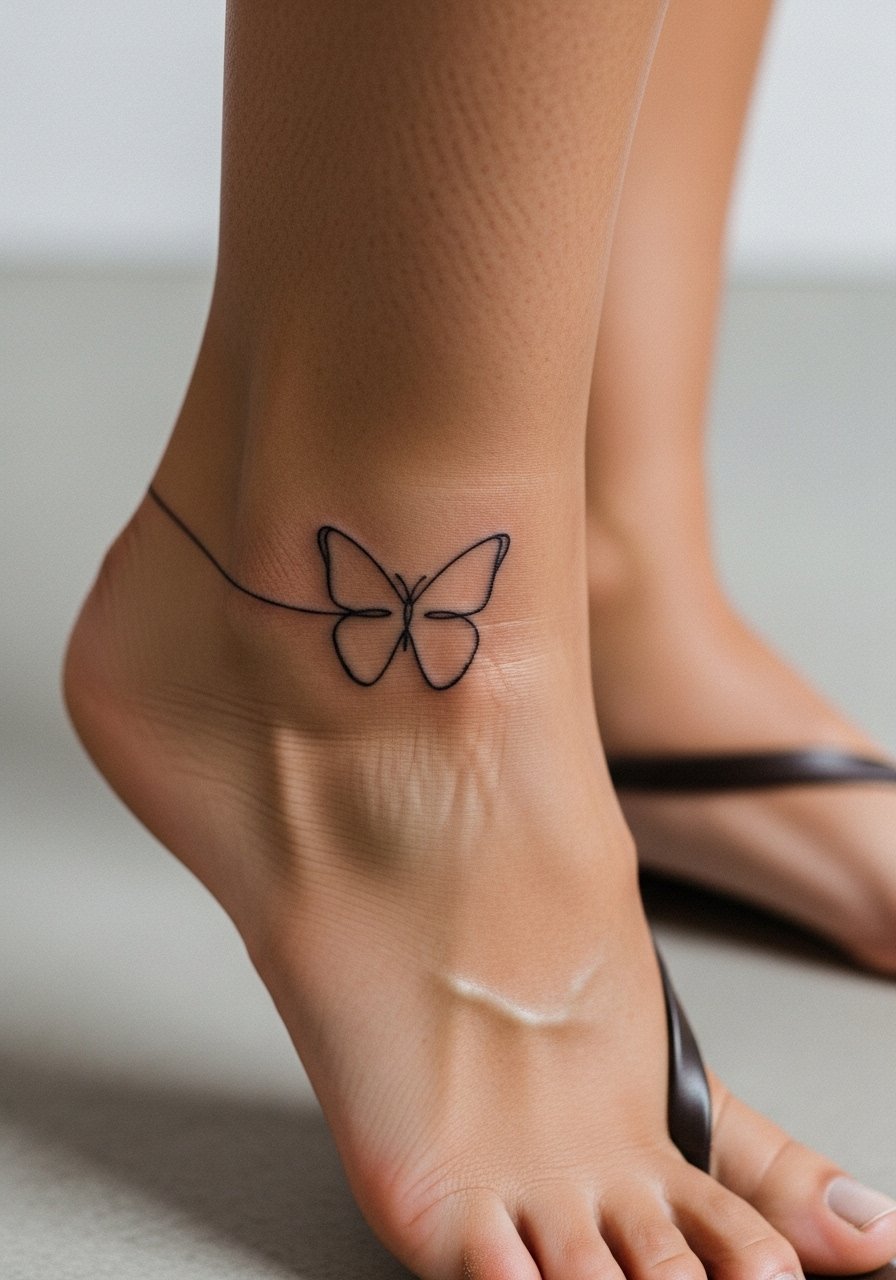
One-line single-stroke butterflies feel elegant and modern, but their success depends on scale. Micro one-liners on wrists tend to lose definition faster than slightly larger versions on forearms or ankles. For the consultation, bring an exact reference and ask the artist to test a temporary transfer sized at least 1.5 inches. Pain is mild on ankles and low on wrists. A common mistake is requesting perfect symmetry; the charm of continuous-line work is subtle asymmetry, which looks intentional and ages better. Expect a 6- to 18-month check for most fine single-line pieces.
6. Daisy Petal Split, One Petal on Daughter, Rest on Mother
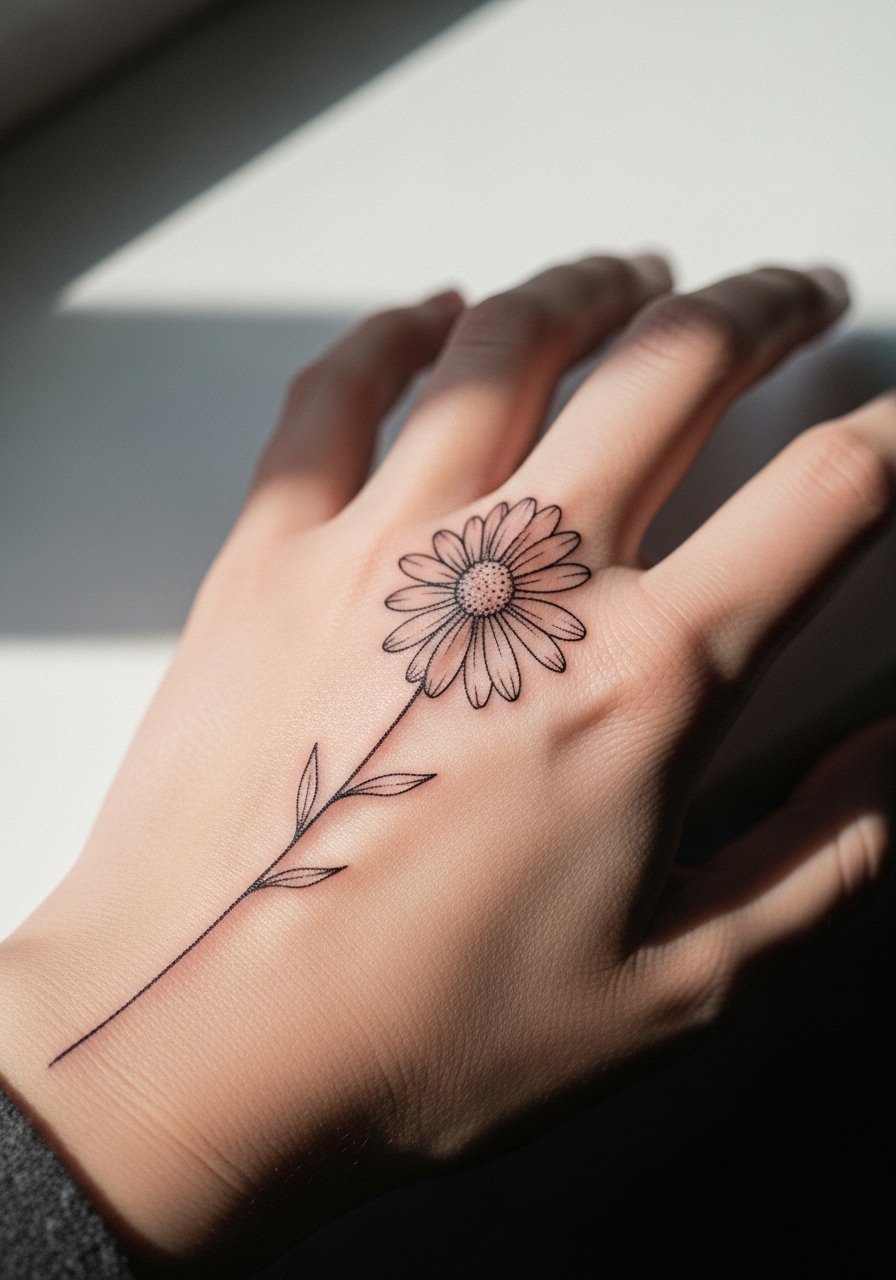
Split botanical pieces are intimate and symbolic without heavy text. Finger and wrist placements have very different healing realities. Fingers endure constant washing and friction, so place the single petal on a protected part of the finger or choose the wrist for longevity. During consultation, request slightly bolder outlines for the finger petal and plan for a touch-up at six months. For the session, remove jewelry and wear a loose tank top so the artist can work without obstruction. The biggest mistake is asking for tiny color fills on fingers, which fade quickest.
Pack Smart
The small placements above often need different prep than larger pieces, so a few items smooth the session and first week.
-
Stencil transfer paper kit. Lets you preview exact placement on skin, helpful for split florals and wrist butterflies.
-
Topical numbing cream. Applied before a wrist or ankle session reduces edge pain without changing the artist's linework.
-
Thin protective film roll. Protects finger and ankle pieces from early friction while you heal.
-
Fragrance free gentle body wash. Cleanses healing areas gently, useful for fine line pieces that can blister from harsh soaps.
-
Aquaphor healing ointment. Thin application in the first days helps protect delicate linework without clogging.
7. Horse Silhouette with Heart on Outer Forearm
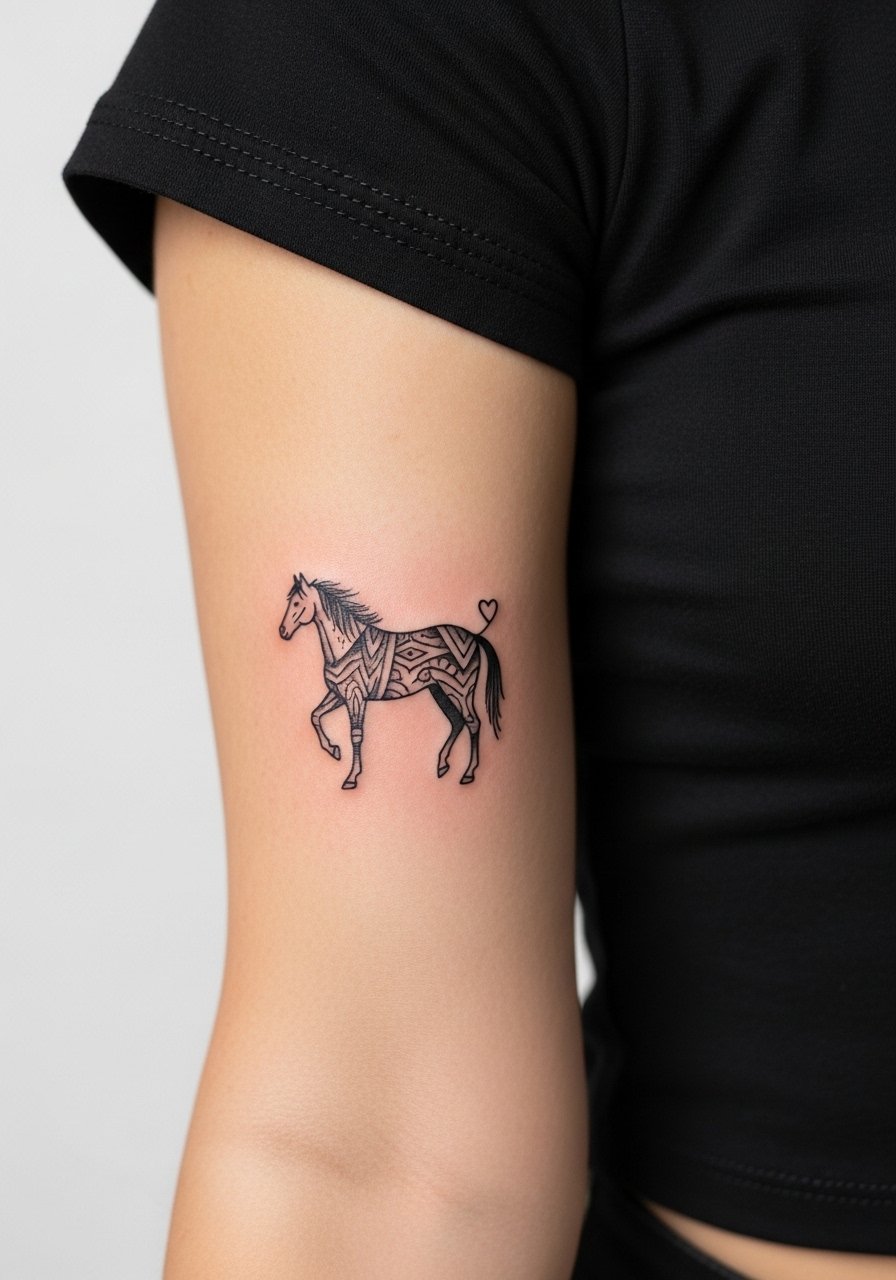
A neo-traditional horse with a tiny heart reads well on the outer forearm and scales with personal detail. The forearm is a stable canvas, which helps matching designs stay similar across different bodies. Tell your artist you want bold contours and restrained gray wash for longevity. Session time is usually one to two hours with moderate pain. For styling, this piece pairs with a fitted short sleeve tee and a leather wrap bracelet opposite the arm. A common error is asking for excessive tiny lettering beneath the silhouette, which competes with the horse's flow.
8. Purple Butterfly Wings in Watercolor on Upper Arm
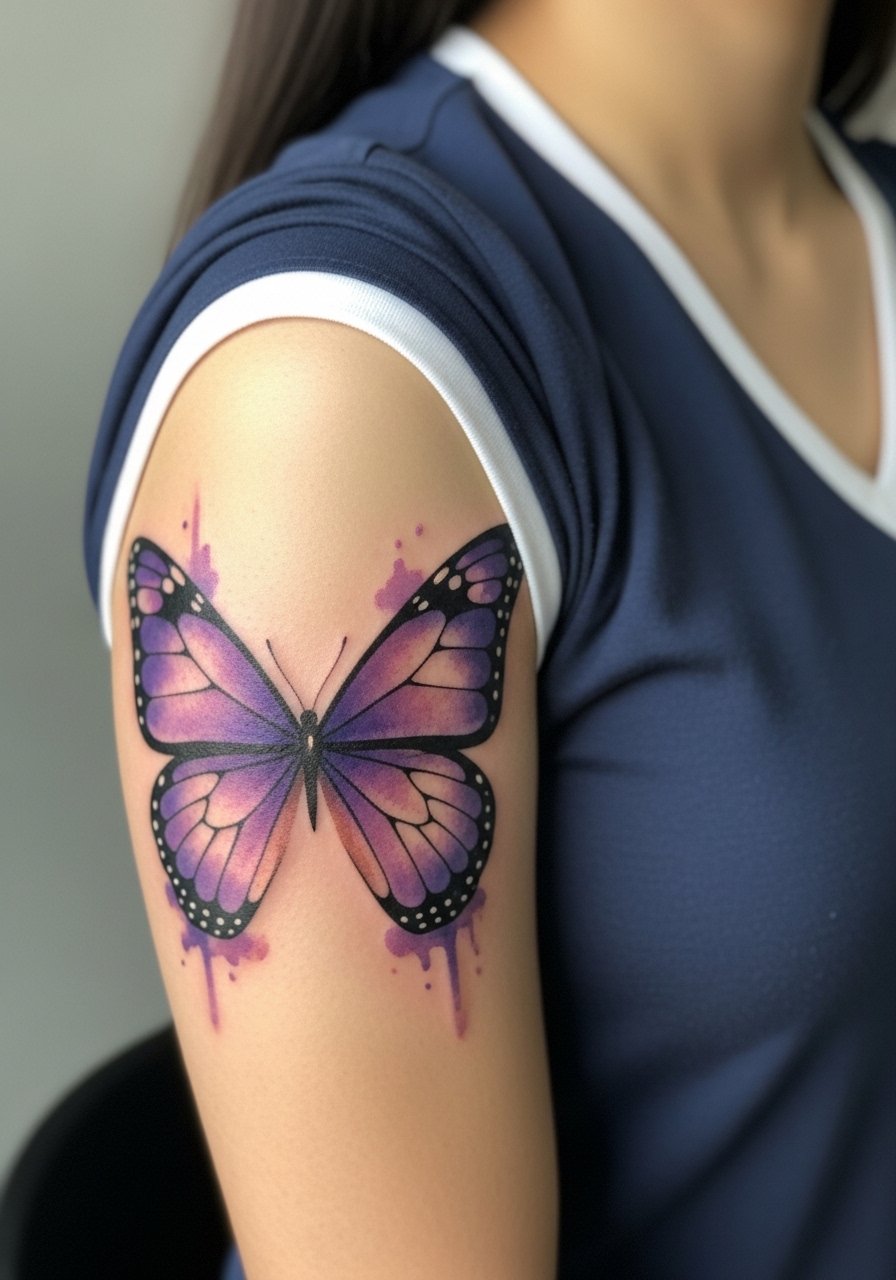
Watercolor butterflies make a bold visual statement, but color saturation needs planning. Watercolor fades faster than black, so artists often recommend layered sessions for vibrancy that lasts. Upper arm flesh tolerates color well and usually hurts less than rib work. For nights out, pair with a V neck silk blouse that shows the wing without competing prints. The trade-off is that watercolors need more touch-ups over time than blackwork. If longevity matters more than color, consider a blackwork version with a hint of purple accent.
9. Interlocking Hearts with Initials on the Collarbone
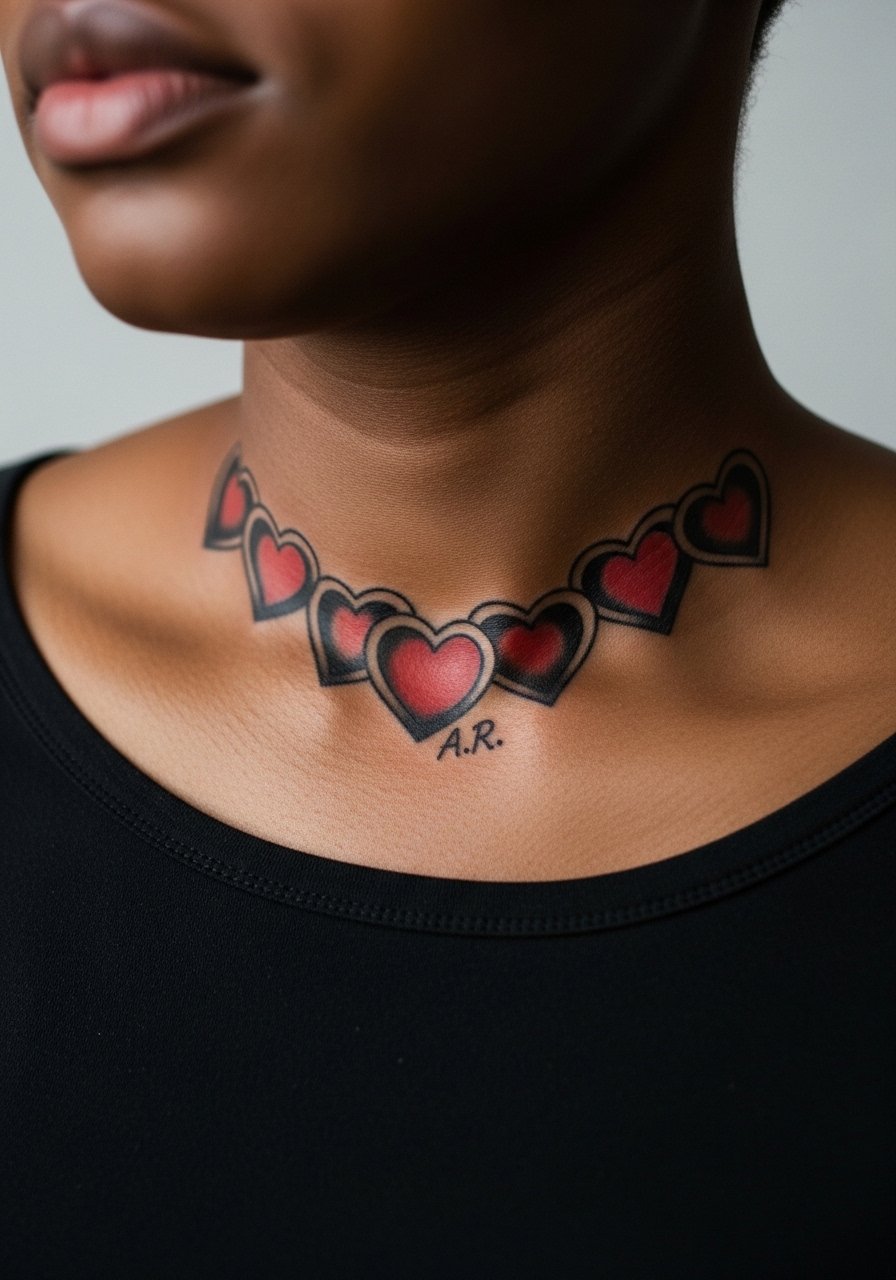
Personalized hearts work well on the collarbone for visible yet tasteful placement. Click-sized initials can blur if too small, so instruct the artist to use larger initials in a clean script and test a transfer. Pain is moderate and a single session suffices for small pieces. For outfits, an off shoulder sweater or V-neck keeps the collarbone area visible without crowding the design. The main mistake is asking for red fill that is too thin; a solid red patch holds color better on varied skin tones.
10. Tree of Life Roots and Branches Along the Ribcage
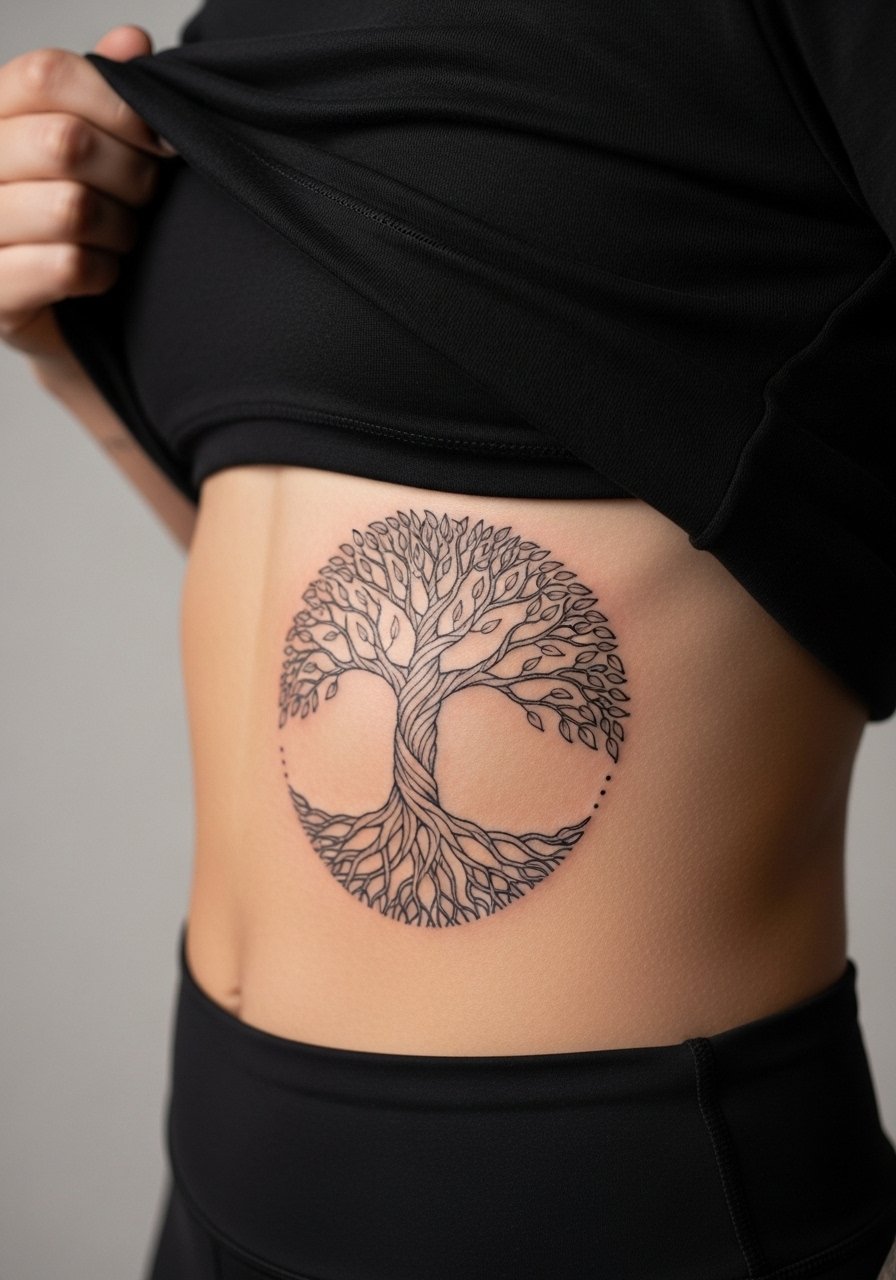
The ribcage gives room for a generational Tree of Life with roots and branches to unfold. Fair warning, ribs are a higher pain zone. Artists split on fine line there, and the debate matters. One camp warns that ribs stretch and blur fine lines within two years. The other camp says meticulous spacing and proper needle depth can settle fine line well. Ask your artist which camp they sit with and what spacing they recommend. Wear a sports bra to the session for modest coverage. Expect two sessions for larger trees and plan touch-ups after healing.
11. Matching Infinity Symbols with Birthdates on the Inner Wrist
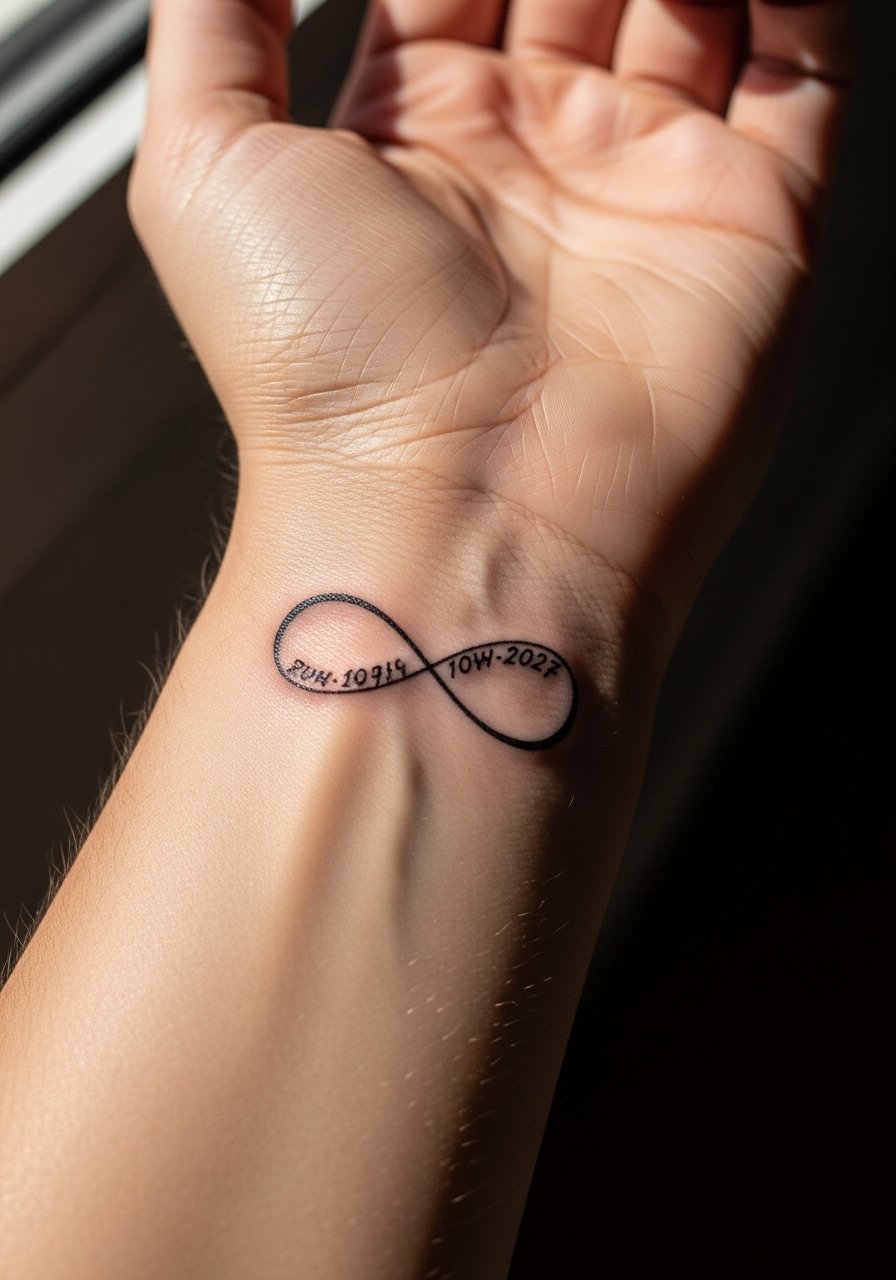
Infinity scripts with dates are a minimalist route for personalization, but dates in tiny type on the wrist can blur. When you talk to an artist, ask for slightly bolder numerals or Roman numerals to maintain legibility. Pain is low and session time is short. For a subtle show-off, a thin chain pendant necklace sits just above the wrist line without drawing focus from the script. A common mistake is squeezing long dates into micro font. Keep text short and spaced to age more predictably.
12. Floral Vine Matching Half on Forearm
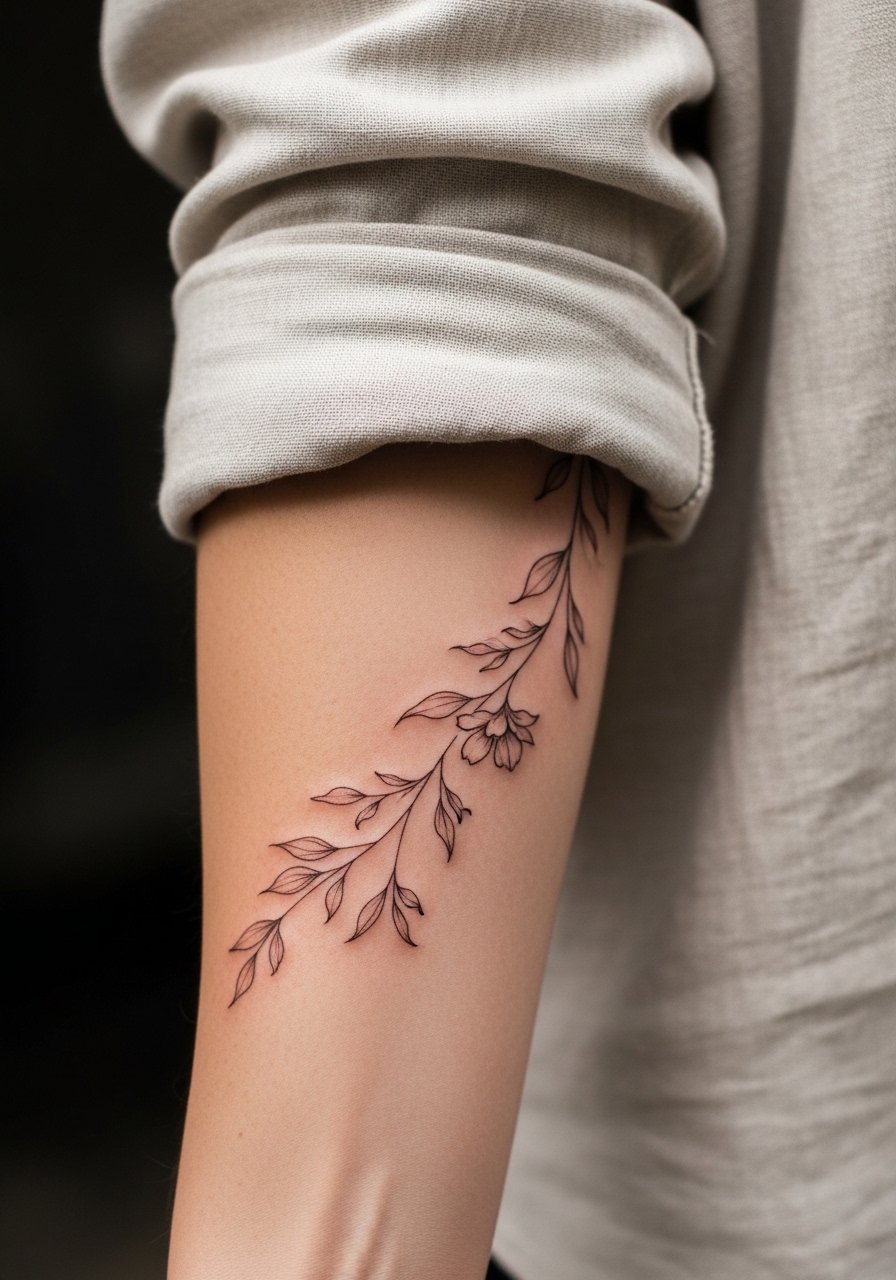
Complementary vine halves that connect when arms touch are a sweet visual. The forearm gives the artist space to balance negative space and avoid density that leads to blurring. Ask for alternating stipple shading rather than solid fills if you want depth without heavy saturation. Session time is one to two hours and pain is moderate. For styling, roll a linen cuff shirt so the vine sits in view while keeping a casual look. Avoid asking for tiny clustered flowers that merge over time.
13. Birds in Flight Pair on Shoulder Blades
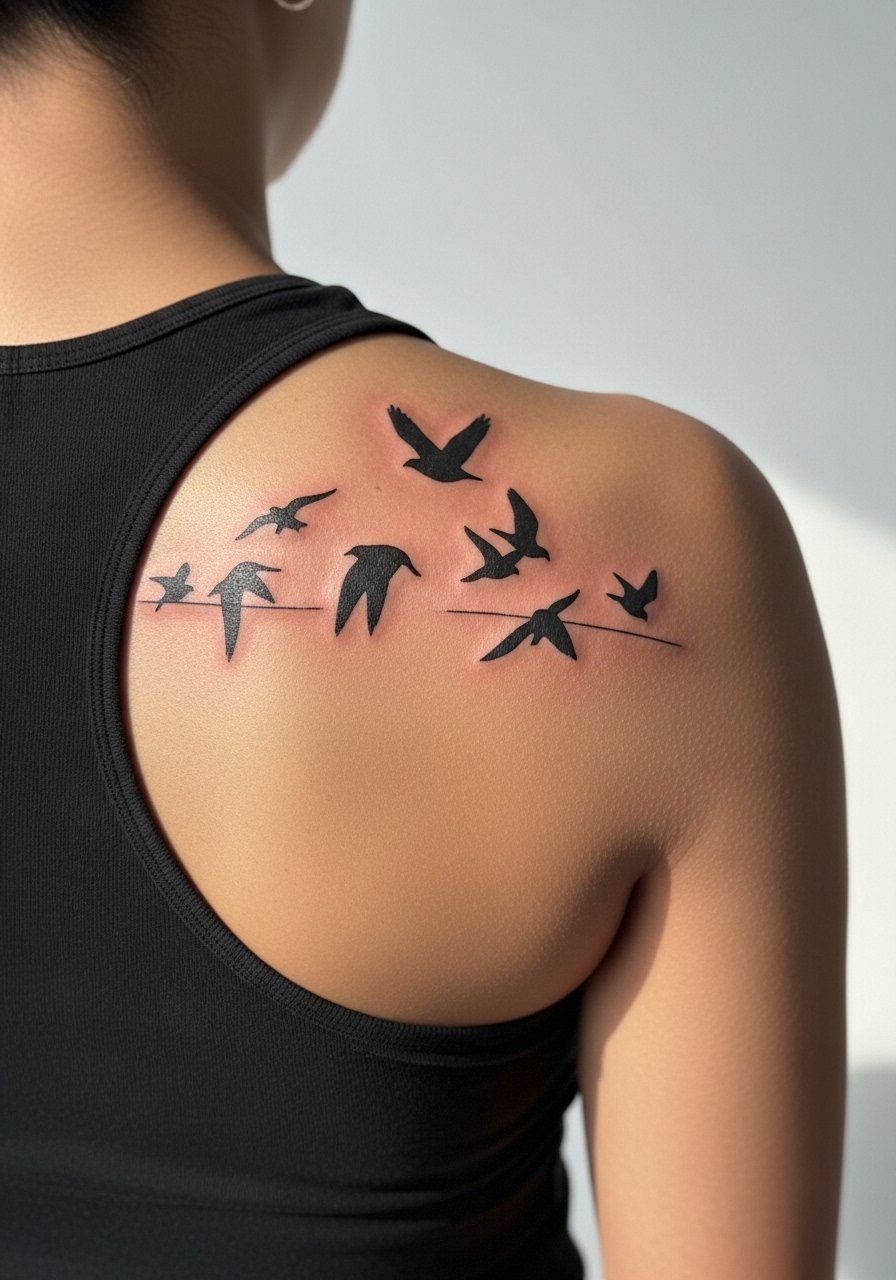
Shoulder blade wings let mirrored bird pairs breathe and photograph well under straps. The area is low on friction and holds detail, making it ideal for micro-realism outlines. Sessions are usually single and pain is low. For summer styling, try a racerback tank so the designs peek out without being overstated. A real mistake is packing too many tiny feathers into one spot; give each bird negative space so the group reads clearly when healed.
14. Minimalist Constellation Pair on Ankle or Foot
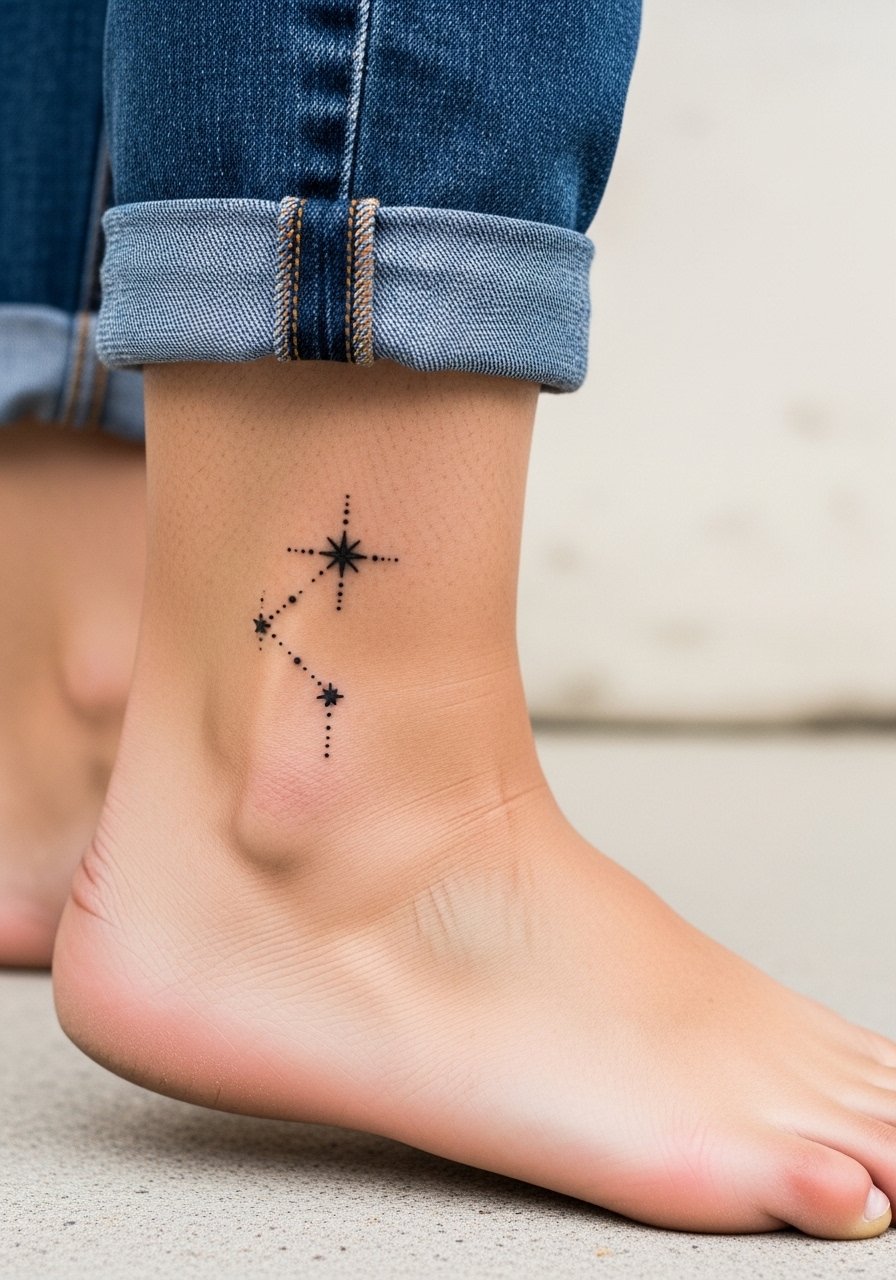
Constellations are discreet and meaningful when scaled for ankles. The ankle endures shoe friction, which pushes you to prefer bolder dots and slightly thicker connector lines for durability. Session time is short and pain is mild. Pair it with cropped straight jeans and delicate sandals to let the tiny design be visible. Artists warn against micro-dot clusters too close together because they can merge. Ask for spaced dots and a touch-up plan.
15. Mother and Daughter Bear Cub on Thigh
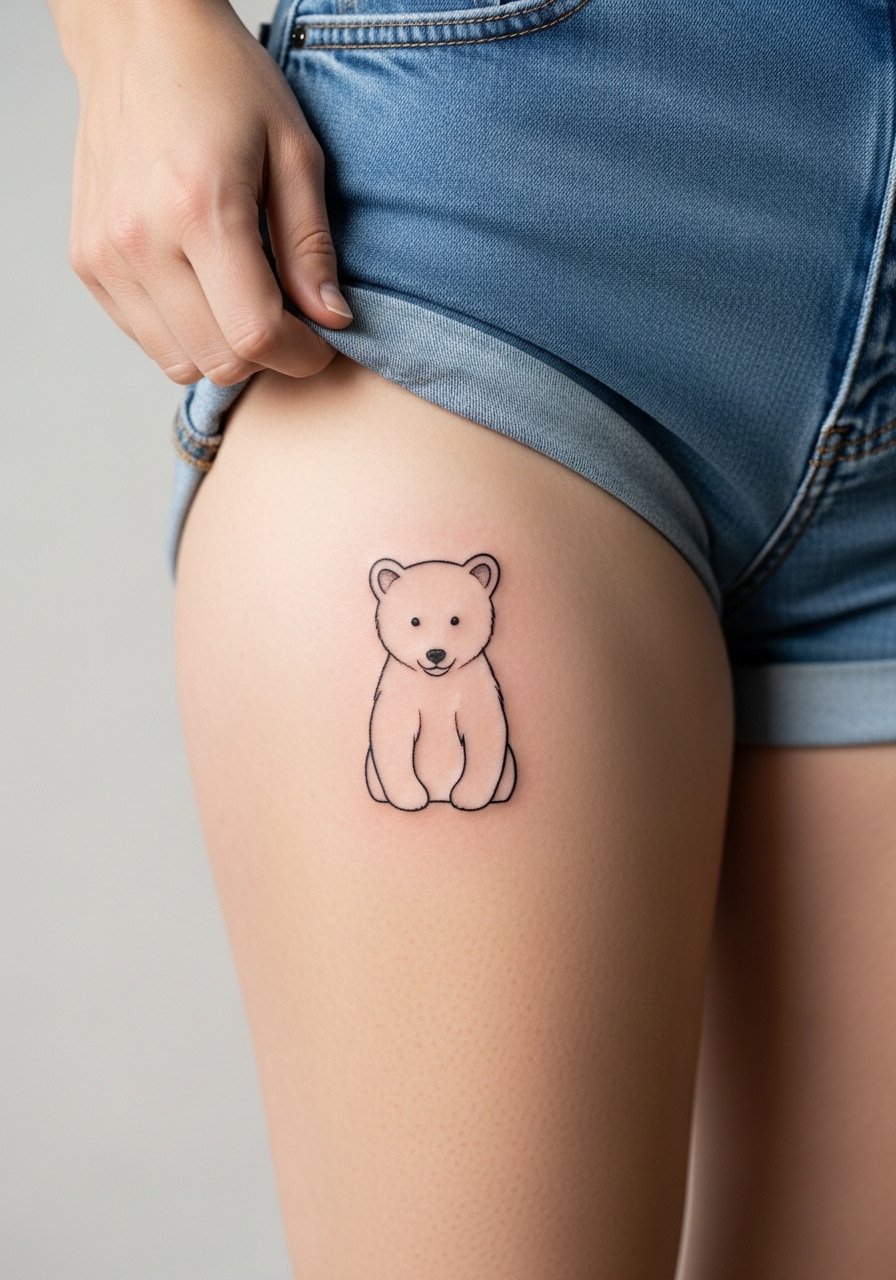
Thigh placements allow for slightly larger matching silhouettes while keeping them private. Thigh flesh tolerates shading and holds contrast well. Session time varies but is often comfortable for most people who prefer seated or side-lying sessions. For summer outfits, high-waisted shorts or a slit midi skirt lets the tattoo appear when you want it to. The common error is compressing too many small details into the silhouette. Keep forms bold so they stay readable after weight or contour changes.
16. Micro Script Quote Along the Collarbone
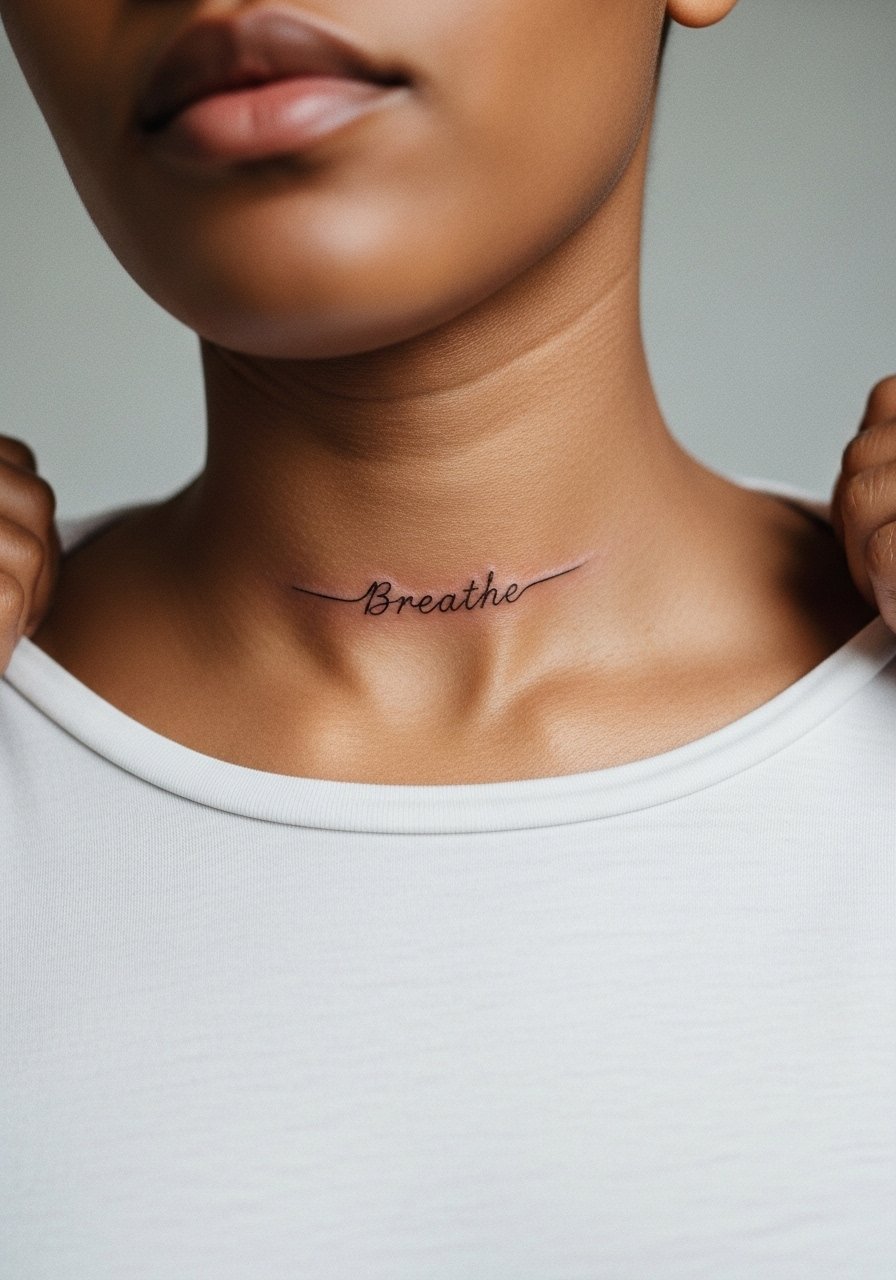
Micro script reads elegantly on the collarbone when the lettering is given breathing room. Short words photograph better than long quotes because the skin stretches with movement. Pain is moderate and the session is quick. If you want to highlight the line, pair it with an off shoulder sweater that reveals the line naturally. Avoid requesting long blocks of text which look cramped and lose legibility over time. Ask the artist to show a transfer that matches your intended font size before committing.
17. Matching Small Bears Behind the Ankle
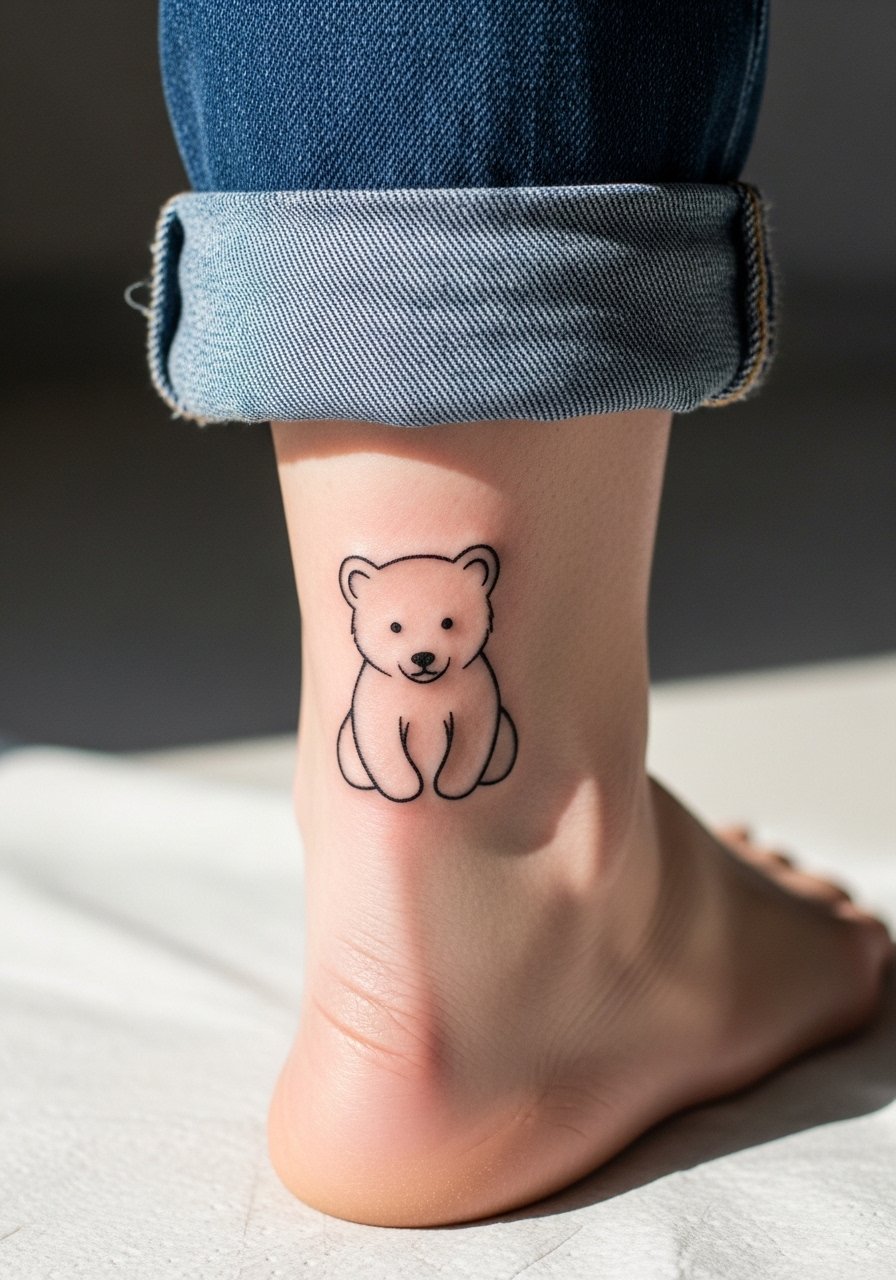
The skin behind the ankle offers a low-friction zone that hides well under socks yet peeks out in summer footwear. Tell your artist you want slightly bolder outlines so the small silhouettes do not bleed. Pain is mild and sessions are short. A frequent misstep is placing the design too low into areas that rub against shoes. Keep placement just above the heel line to avoid constant abrasion. For easy access to the area in-session, wear pants you can roll up without pressure.
18. Mother-Daughter Sun and Moon Pair on Upper Arm
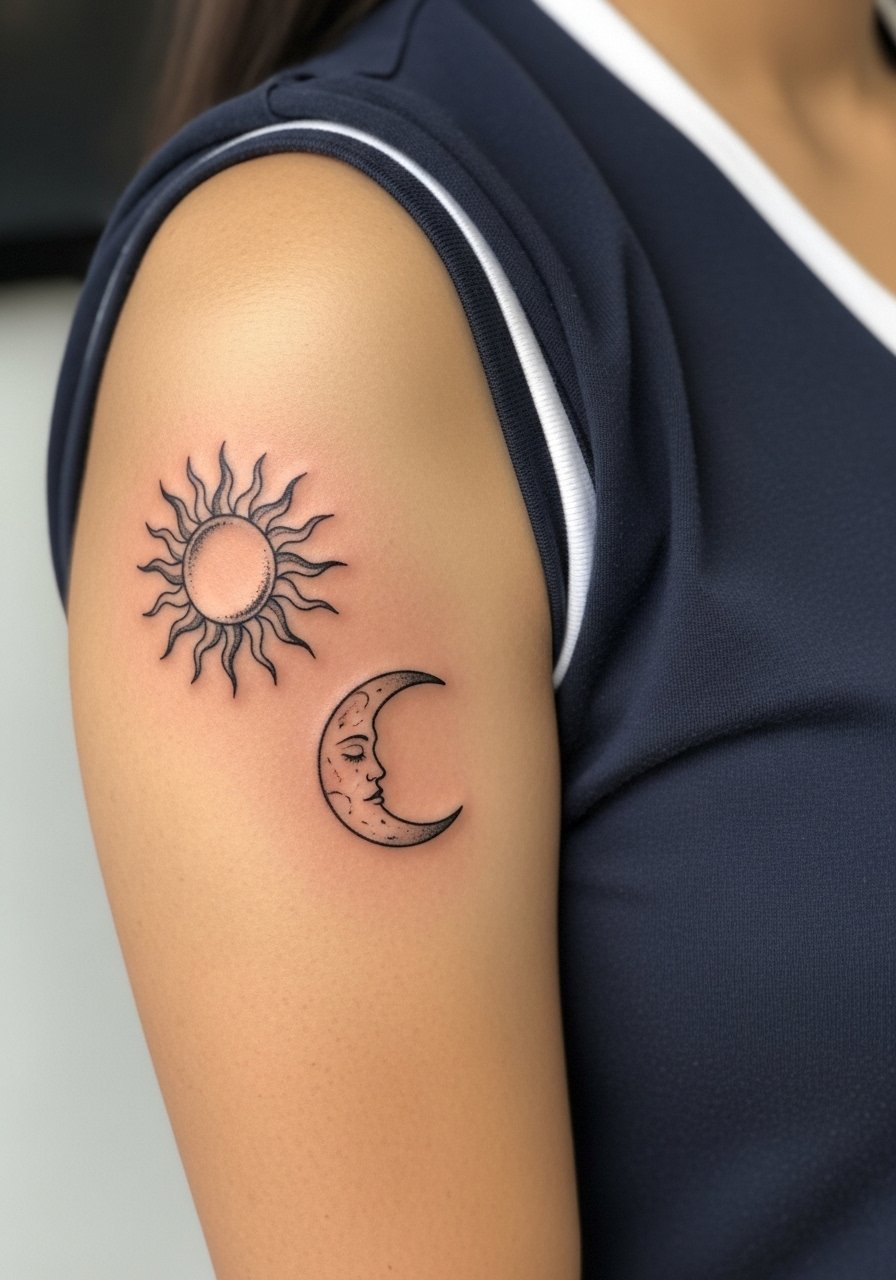
Sun and moon pairings play with contrast and sit well on the upper arm. Upper arm skin holds dot and whip shading without rapid blur, so the design can include light shading for depth. Session time is moderate and pain is lower than on ribs. For casual looks, a short sleeve V-neck shirt shows off the pair and keeps it wearable. Avoid requesting very tight stipple areas that can look muddy after healing. Plan for a single session for small to medium sizes.
19. Split Floral Half-Sleeves That Meet When You Hold Hands
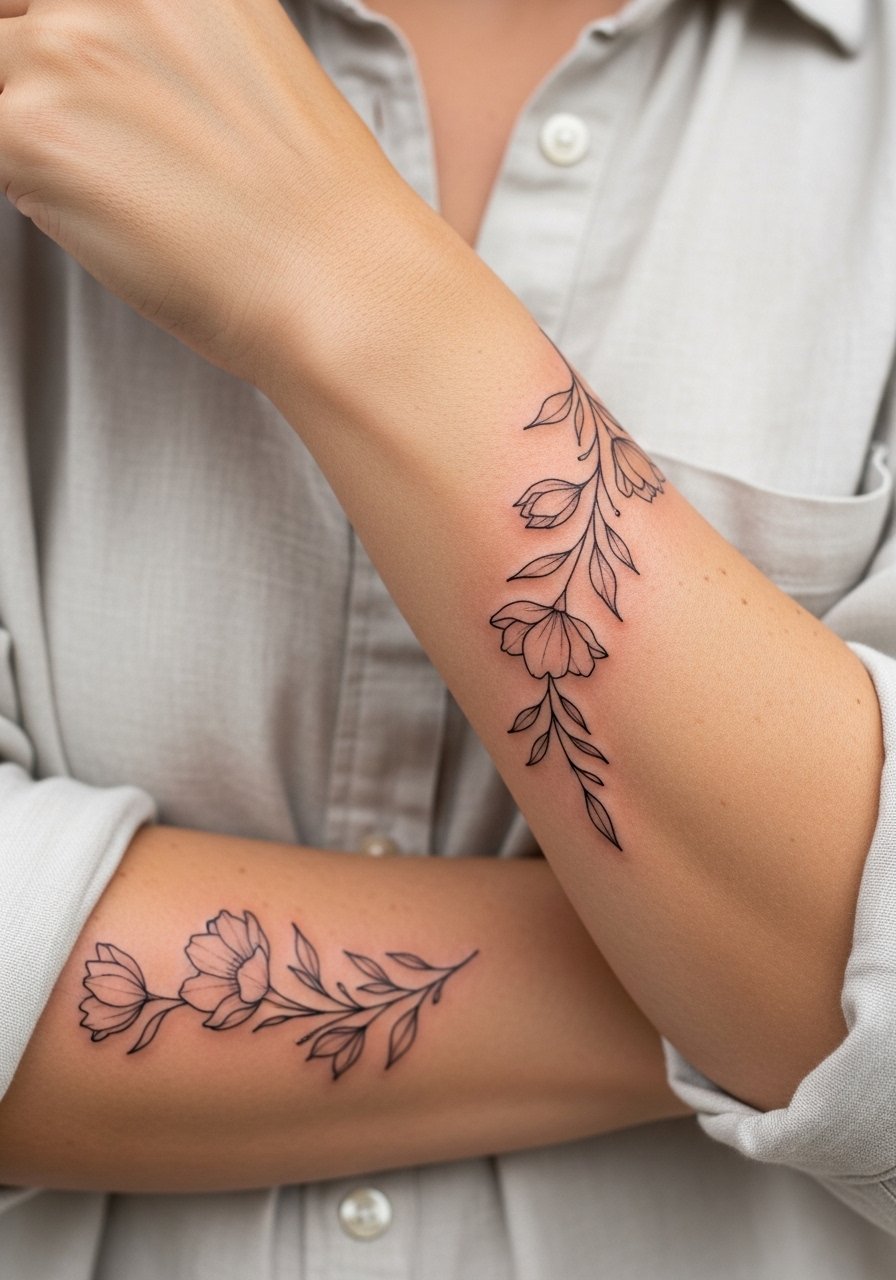
Half-sleeve halves that connect through touch are a playful way to share a motif without identical copies. Forearms are stable for this work, so artists can use fine line with confident spacing. Consultation should cover how the halves align when arms are at rest versus extended. Session time may be one or two sessions depending on complexity. For wardrobe, roll sleeves on a linen shirt to display the connection casually. A common issue is matching scale; have both stencils printed at the same scale to avoid mismatch.
20. Tiny Heart Outline Behind the Ear, Below the Hairline
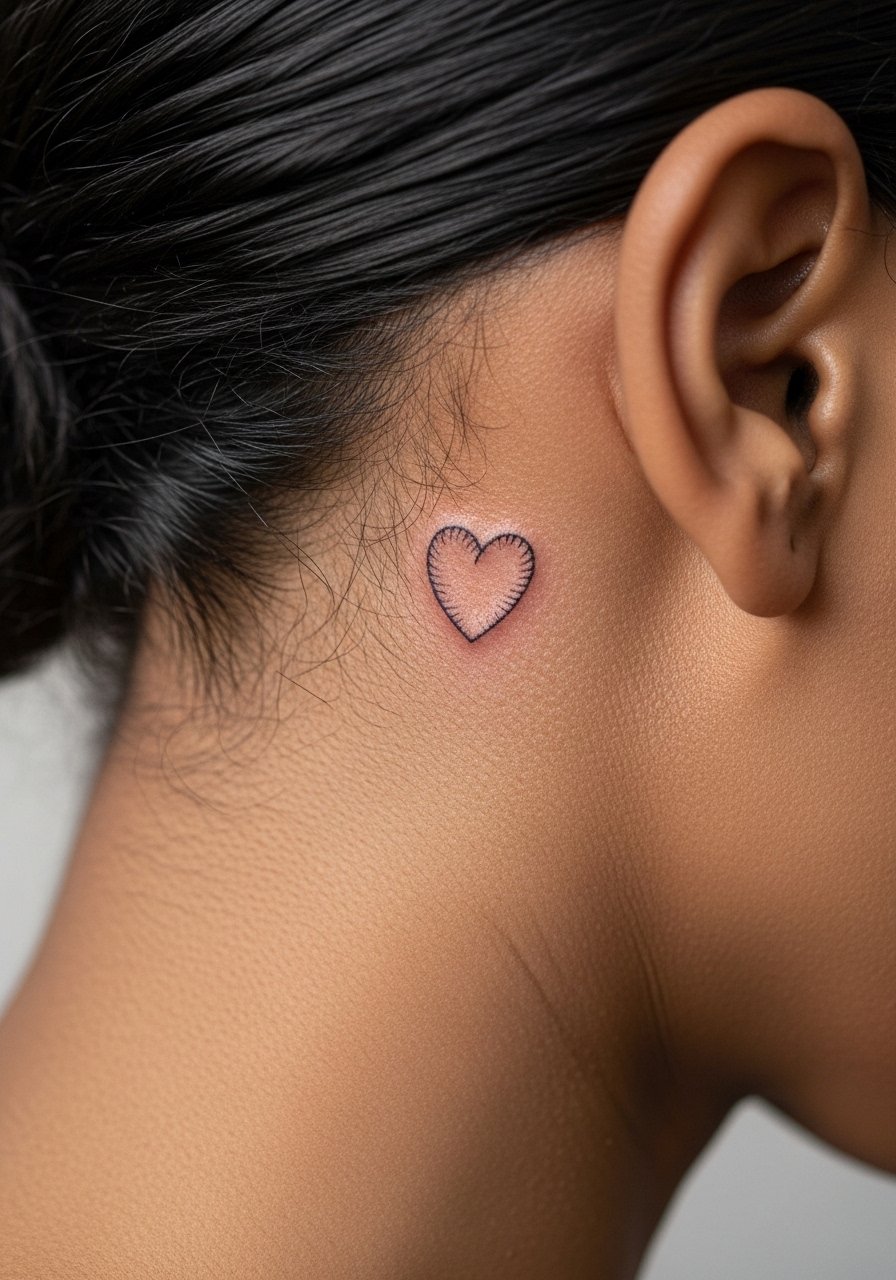
Placed just behind the ear, a tiny heart is intimate and easy to hide. Follow the placement safety rule and show the artist the exact spot below the hairline to avoid misplacement. Pain is mild and session time is minutes. For session wear, pull hair into a low bun so the area is accessible without requiring removal of clothing. The biggest mistake is assuming this area heals like the wrist; skin density and hair follicles change how ink sits so ask about touch-up likelihood. Some shops treat behind-ear work as specialized, so confirm experience during booking.
21. Birds in Flight Along the Spine Near the Neck
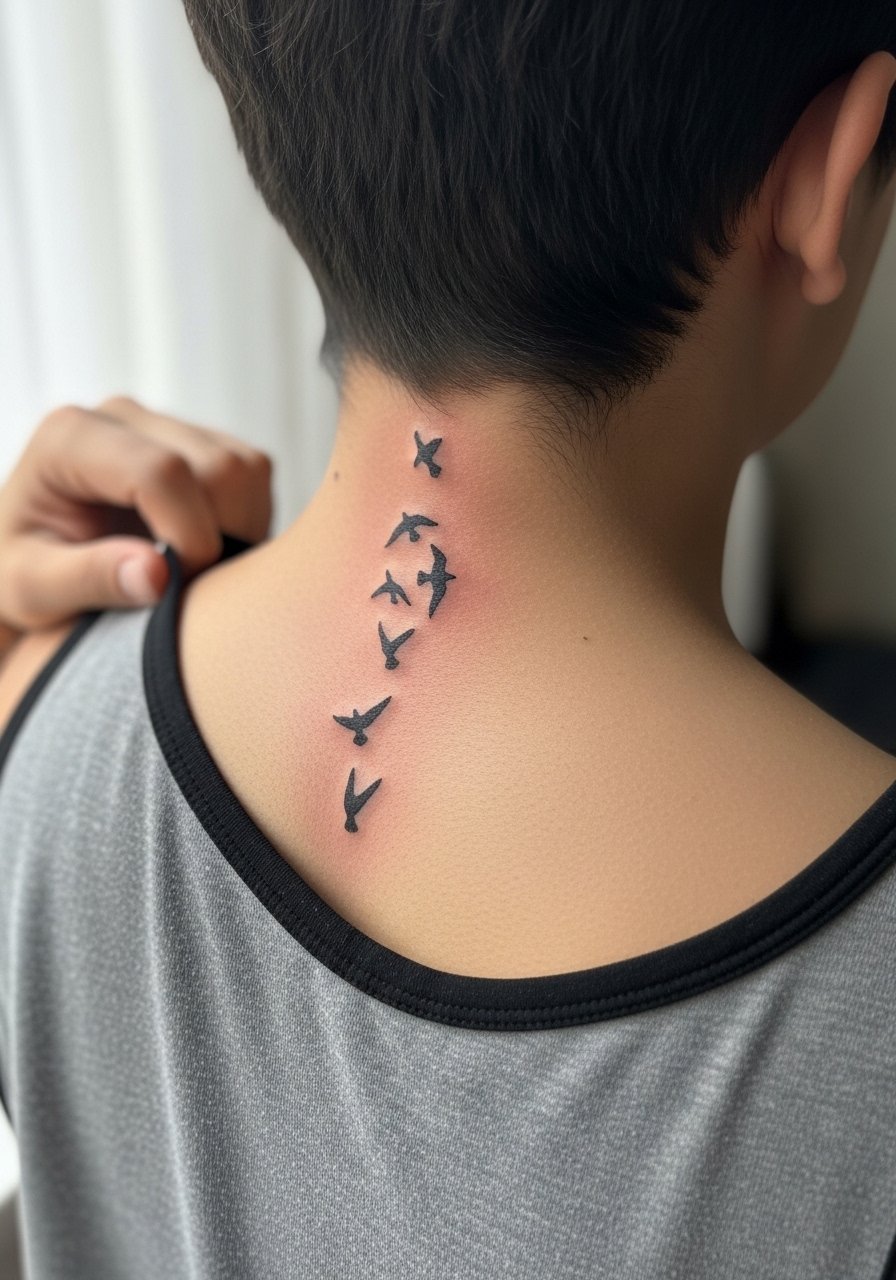
A vertical flock along the upper spine creates movement and pairs well for mother-daughter variations with different flock sizes. The upper spine is a visible area with moderate pain and needs careful planning for curvature. Ask your artist to account for posture so the birds read when standing naturally. For showing the design, an open-back dress or racerback top reveals the line without excess. The common pitfall is stacking birds too closely; spacing prevents merging and preserves silhouette clarity over time.
Frequently Asked Questions
Q: Why do fine line butterfly wrist tattoos blur faster than the same design on the forearm?
A: Wrist skin is thinner and experiences more washing and sun exposure. Fine line work on wrists lives longer with slightly heavier lineweight and regular touch-ups at year one or two. If longevity is a priority, ask the artist for bolder outlines or move the piece a little higher on the forearm.
Q: Can mother-daughter tattoos look good on darker skin tones, and what changes?
A: They can look great when contrast is prioritized. High-contrast blackwork and slightly bolder linework help details remain crisp. Discuss spacing and ink density with your artist and test a temporary transfer to see how the design photographs on your skin.
Q: Should we use Saniderm or dry healing for these small matching pieces?
A: Artists are split. One camp prefers Saniderm for faster, cleaner healing and less scabbing. The other camp favors dry healing to let scabs fall naturally. Ask your artist which method they trust and follow their protocol, since technique and aftercare consistency matter more than the product choice.
Q: How do I prepare clothing for a collarbone or ribcage session to keep the stencil safe?
A: For collarbone work wear a wide-neck shirt or an off-shoulder top you can pull aside. For ribs bring a sports bra that can be adjusted to expose only the area. Comfort and easy access prevent repeated stencil shifts and speed the session.
Q: If my artist cancels a mother-daughter appointment, how should we reschedule to avoid missing a milestone?
A: Book with a deposit and confirm 48 hours before the session. Have a secondary artist or studio in mind using discovery pathways like local hashtag searches or Booksy so you can rebook quickly if needed.
Q: How often should we plan touch-ups for fine line matching pieces?
A: Expect a touch-up window around 6 to 12 months for most fine line work and then every few years as needed. Placement, skin type, and sun exposure change timelines, so plan a realistic maintenance schedule with your artist.
