
Fine line pines are everywhere online, but the pieces that still read clean after a few years are rarely the flashiest ones. Many people find their wrist lines fading fast, struggle to find artists who can render delicate forests without cartooning them, or watch summer humidity turn a fresh tattoo into a scabby mess. This list skips the generic gallery approach and gives practical minimalist pine drawings you can actually live with, starting with a tiny wrist silhouette you can book tomorrow.
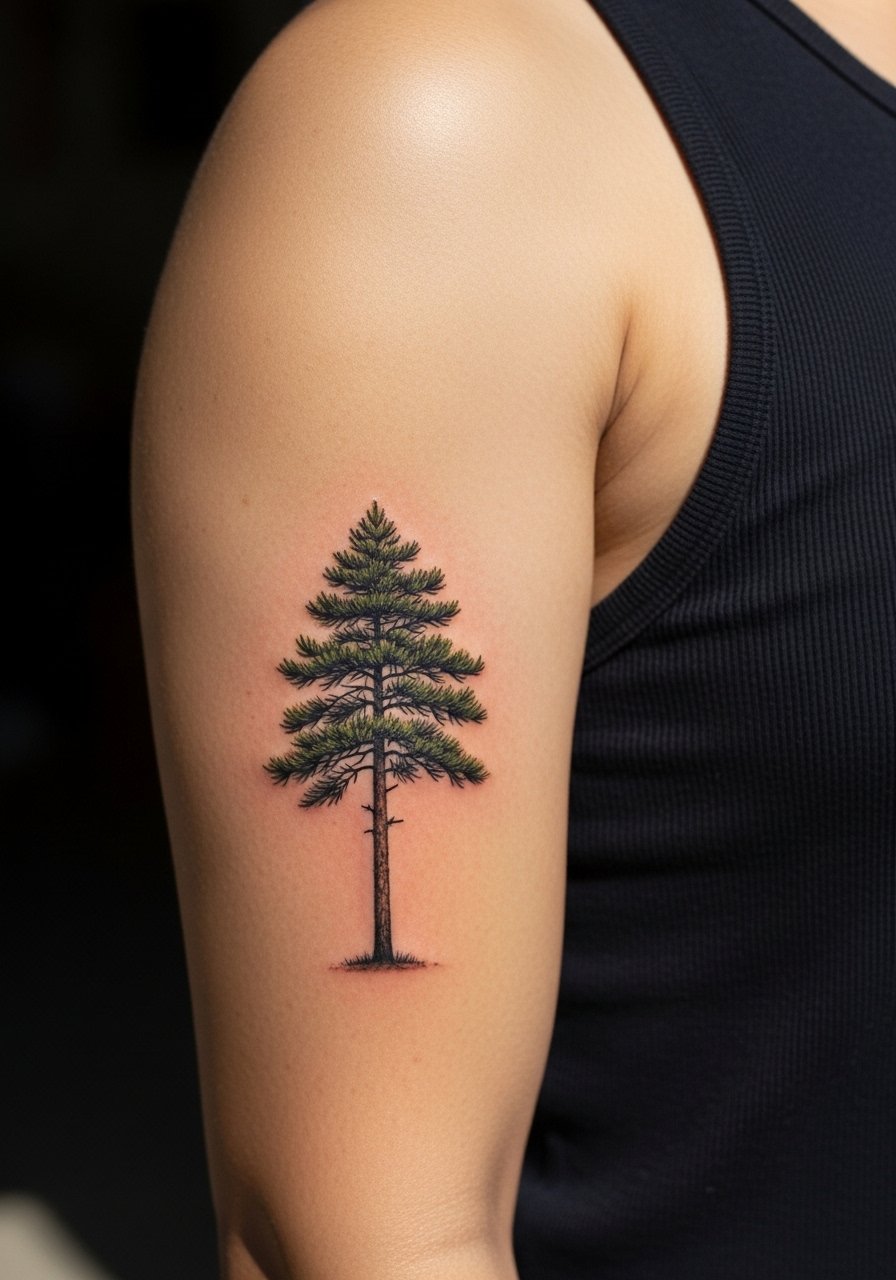
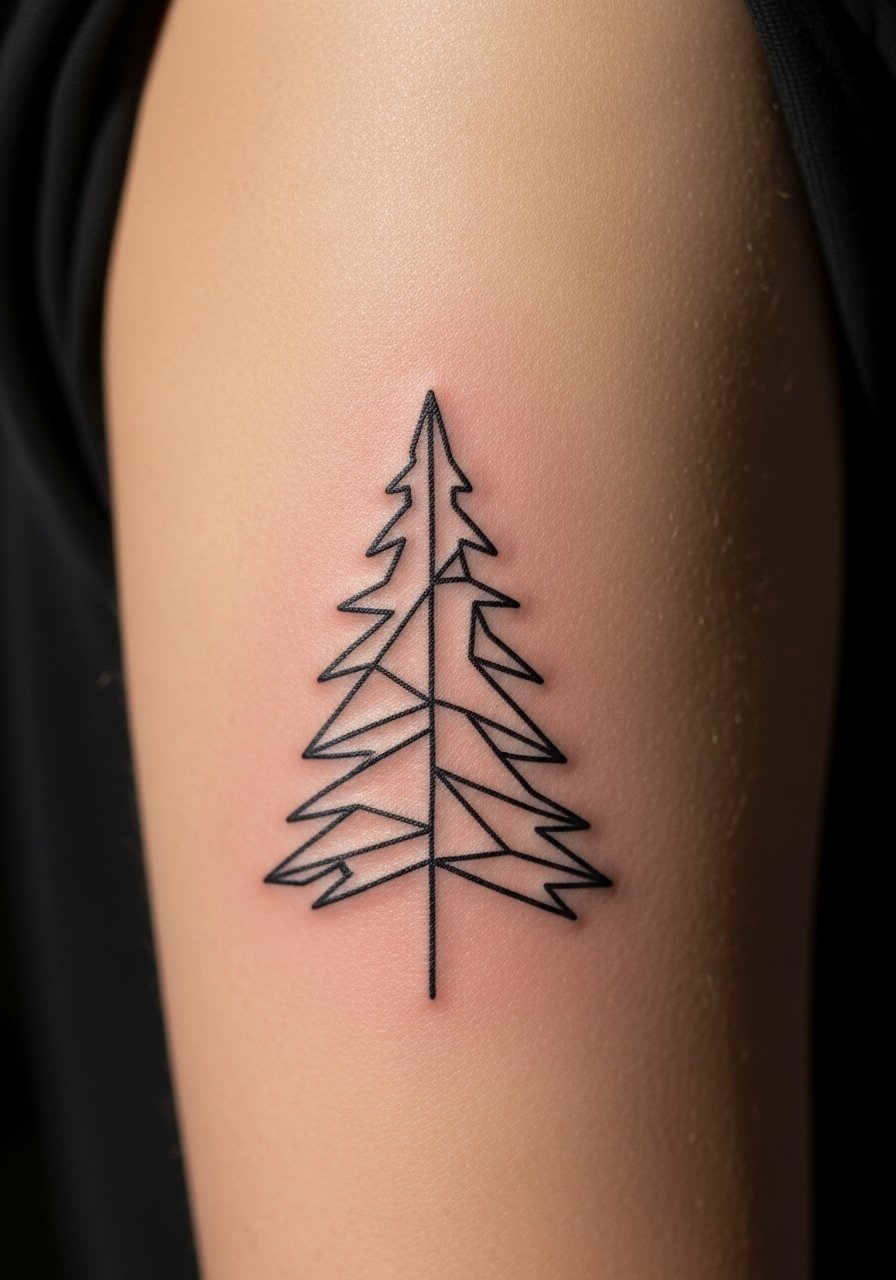
1. Minimalist Single Pine Silhouette on the Wrist
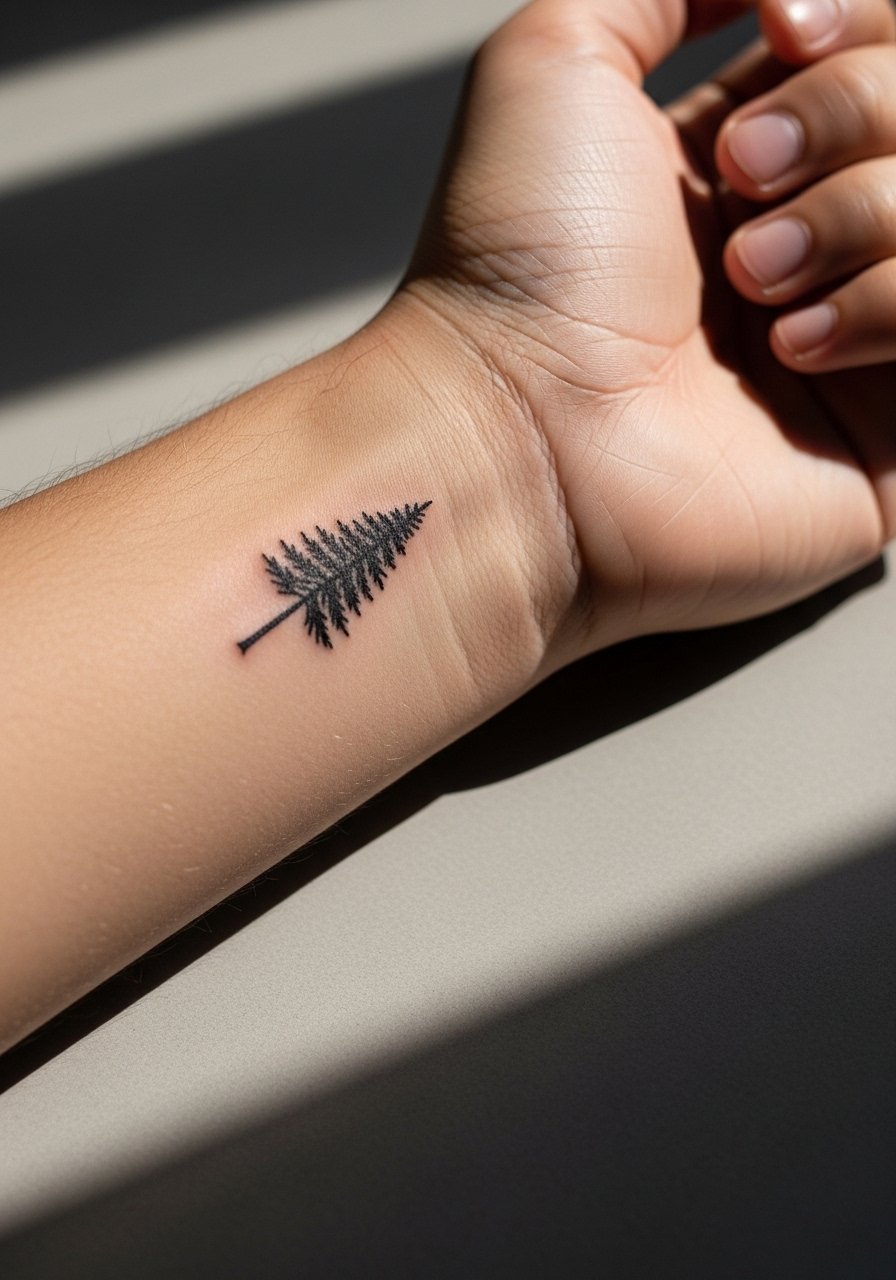
If you want a first small piece, this wrist silhouette is classic for a reason. I tell people to ask their artist for a slightly heavier line weight than what looks delicate on screen so the needles have room to breathe, and to expect a short session under thirty minutes. Fair warning, wrists see constant movement and hand washing, so plan on a touch-up at year one if you use fine line only. For showing it off, stack a set of thin silver bangles on the opposite wrist and keep the tattoo side uncluttered for visibility during casual wear.
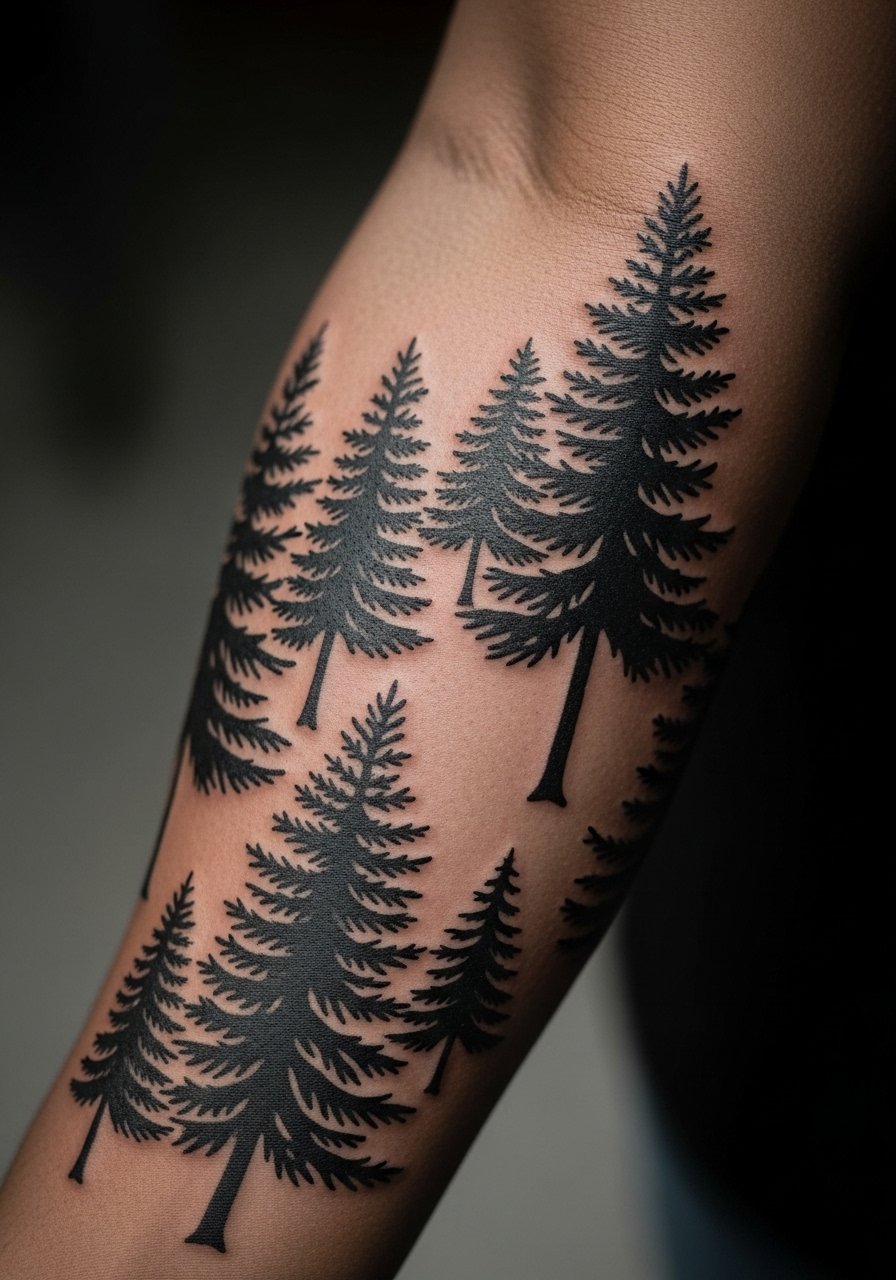
2. Fine Line Pine Forest Horizon on the Forearm
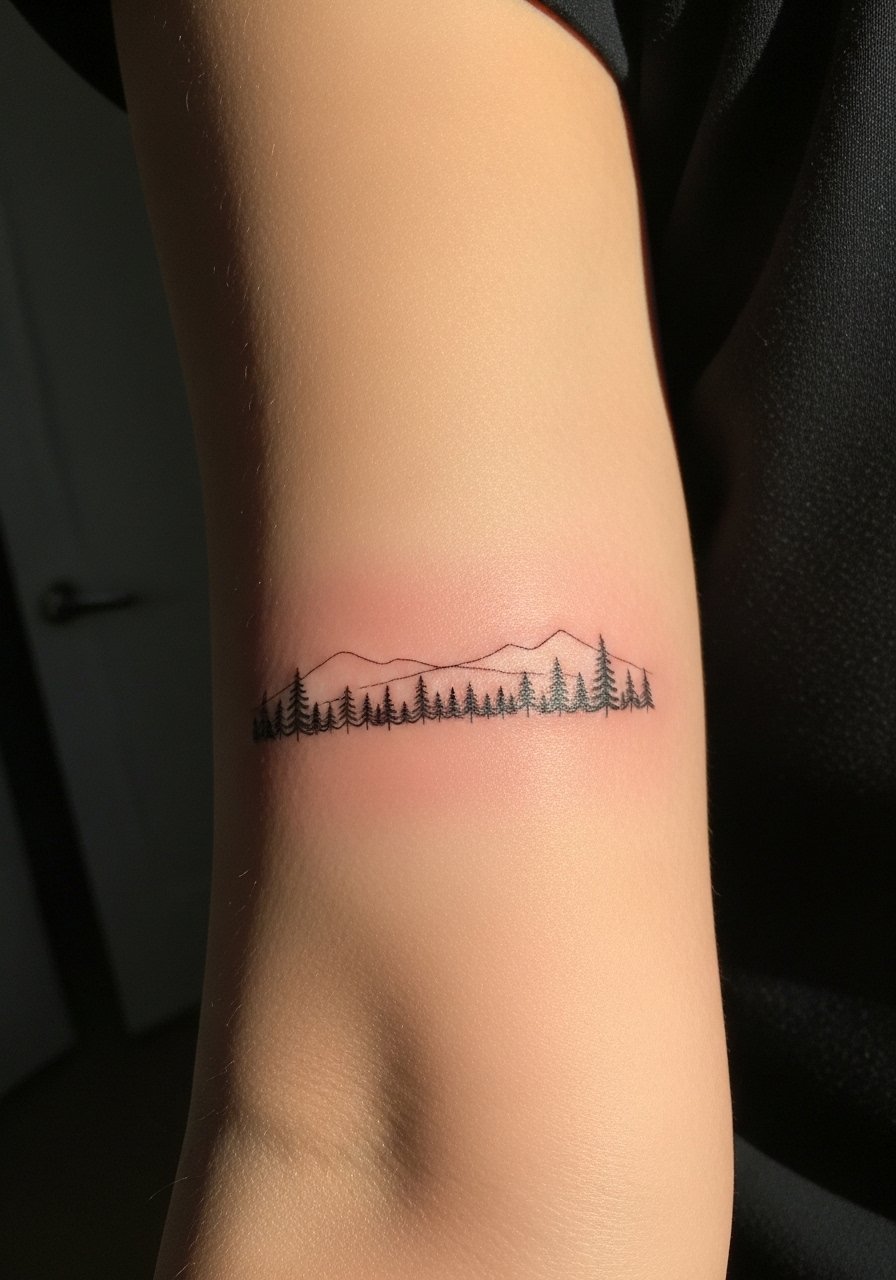
Forearm horizons age better than tiny hand pieces because there is more flat real estate and less friction. Bring reference photos that show the line weight you like and ask the artist to space trees so the negative space holds up at two years. Expect a one to two hour session depending on width. If you want to wear it, roll up a chambray button-up to frame the scene, or keep a thin leather cuff on the opposite arm for balance. Tell your artist if you plan a sleeve later so they can size the horizon for future layering.
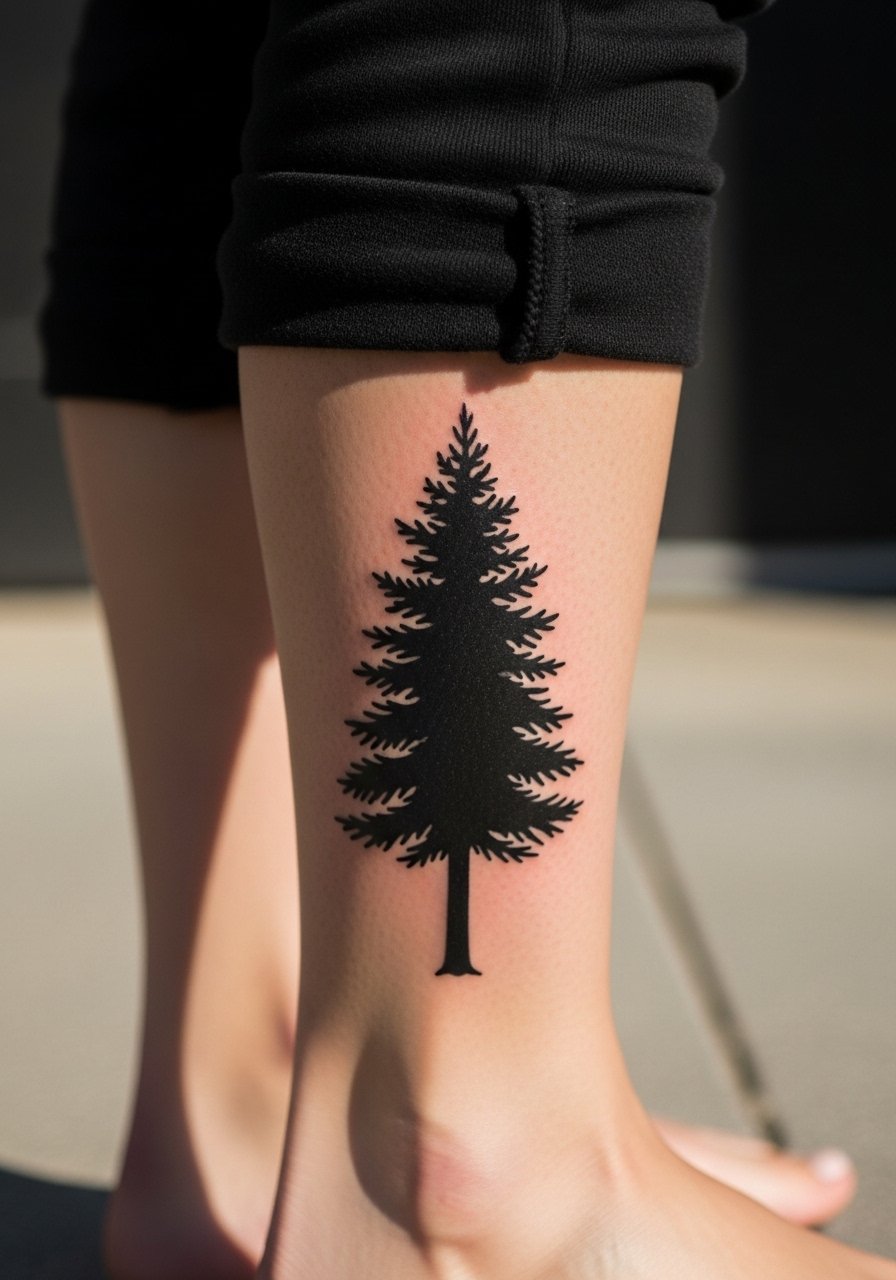
3. Single-Line Pine Silhouette on the Ankle

Ankle work is deceptively sensitive because shoes and socks can rub during healing. Wear loose pants the day of the session so the artist can access the area without pressure. The biggest mistake here is going so small the pine loses shape after a year. Ask for a modest negative space buffer around the silhouette to prevent merging with footwear friction. Pain sits around a five out of ten depending on your tolerance. If you hike a lot, mention that to the artist so they consider a slightly bolder outline that withstands movement and seasonal swelling.
4. Traditional Pine with Mountains on the Outer Forearm
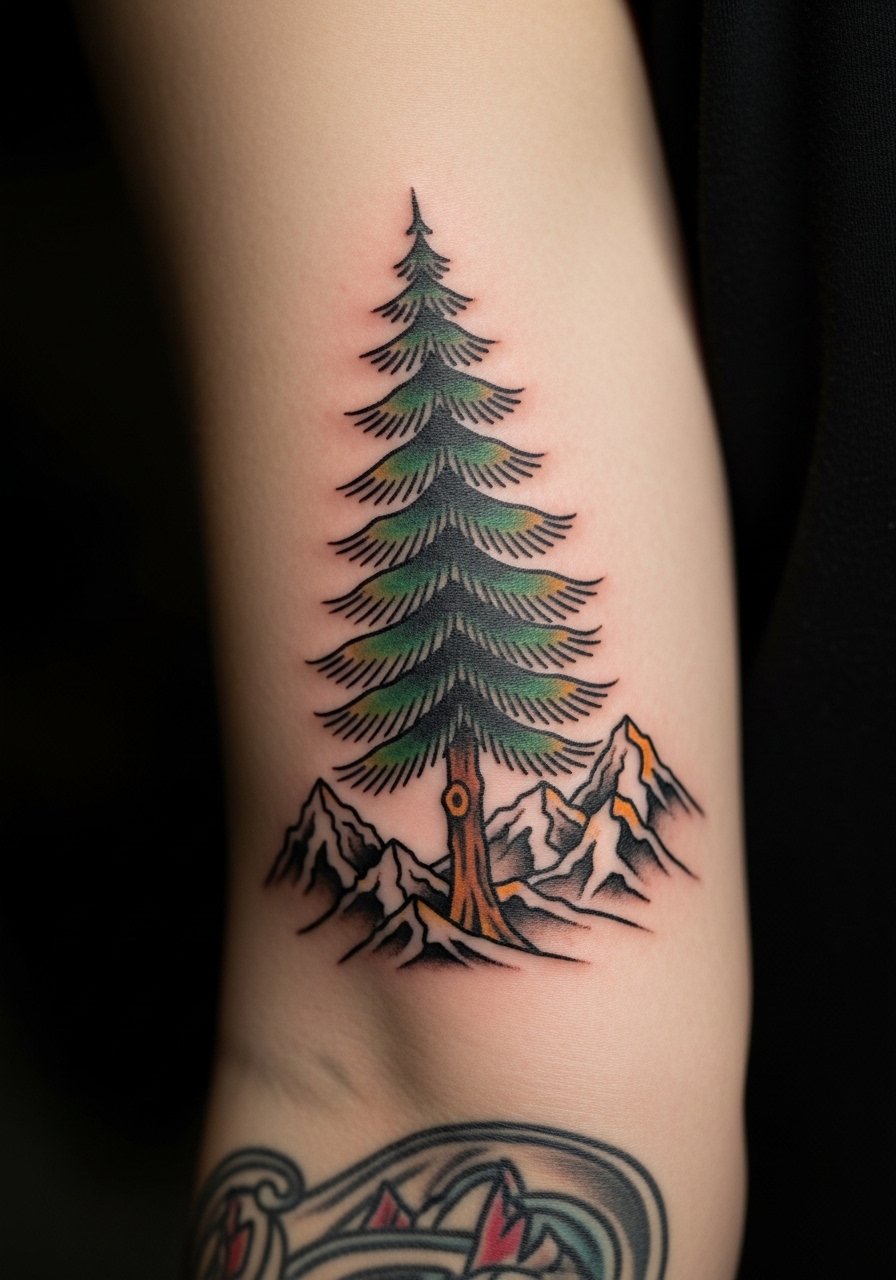
Traditional saturation reads bold and ages into a solid graphic. If you like color accents on trunks and peaks, expect a two session piece and plan for a touch-up that focuses on color saturation after the first session heals. The common error is packing too many tiny mountain details into a small forearm space. Tell your artist you want defined silhouettes and clear separations between trees and mountains. For show-off outfits, cuff a pair of slim chinos or roll sleeves on a cuffed ankle pant so the artwork sits cleanly against neutral fabrics.
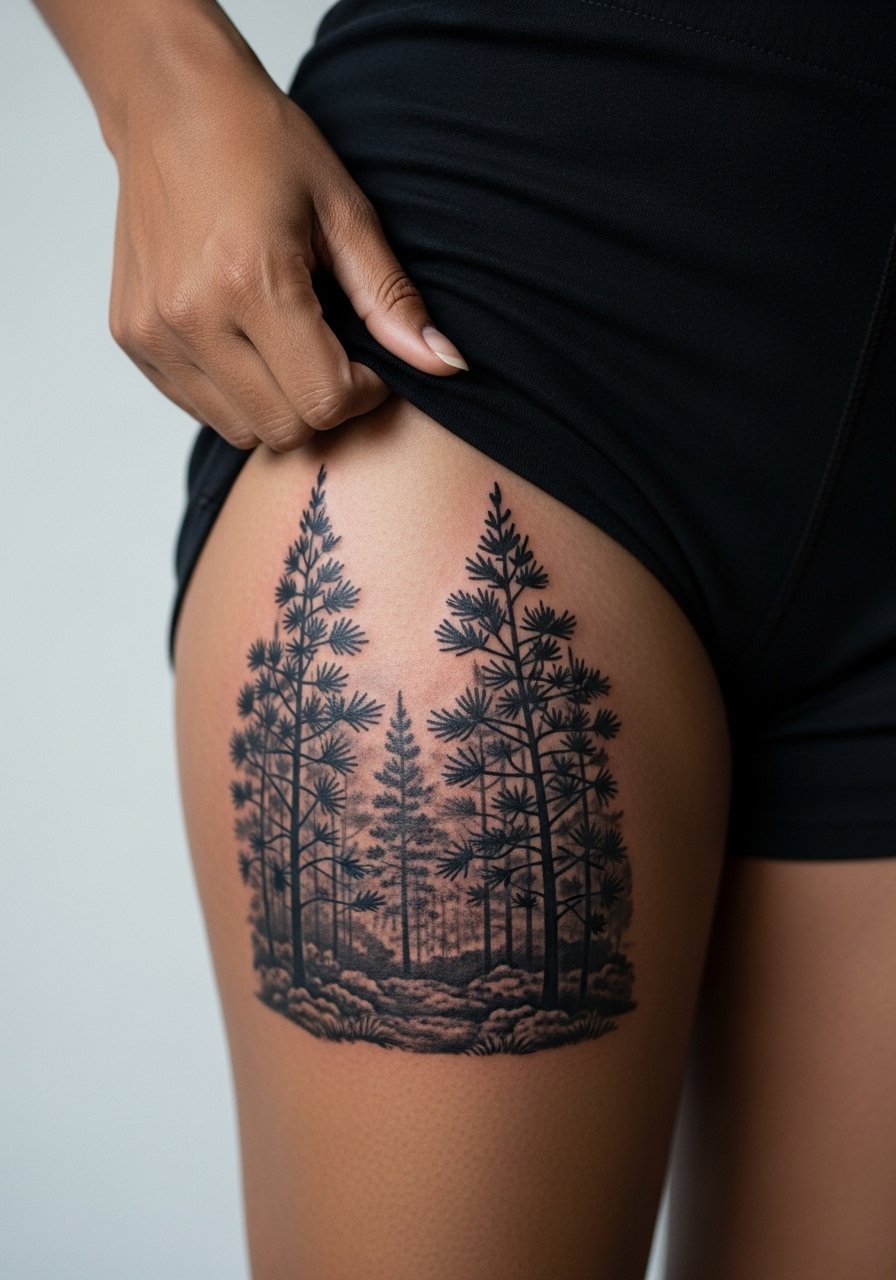
5. Blackwork Geometric Pine Outline on the Thigh

Blackwork pieces are forgiving on darker skin because solid fills maintain contrast. The thigh gives the artist room for geometric framing and solid saturation without blowout risk. Sessions can run longer because of area size, but the payoff is longevity. A common misstep is making geometric lines too tight; give them breathing space. For warm-weather show-offs, pair the piece with tailored shorts like tailored chino shorts to keep focus on clean shapes and negative space.
6. Watercolor Pine Branches along the Collarbone
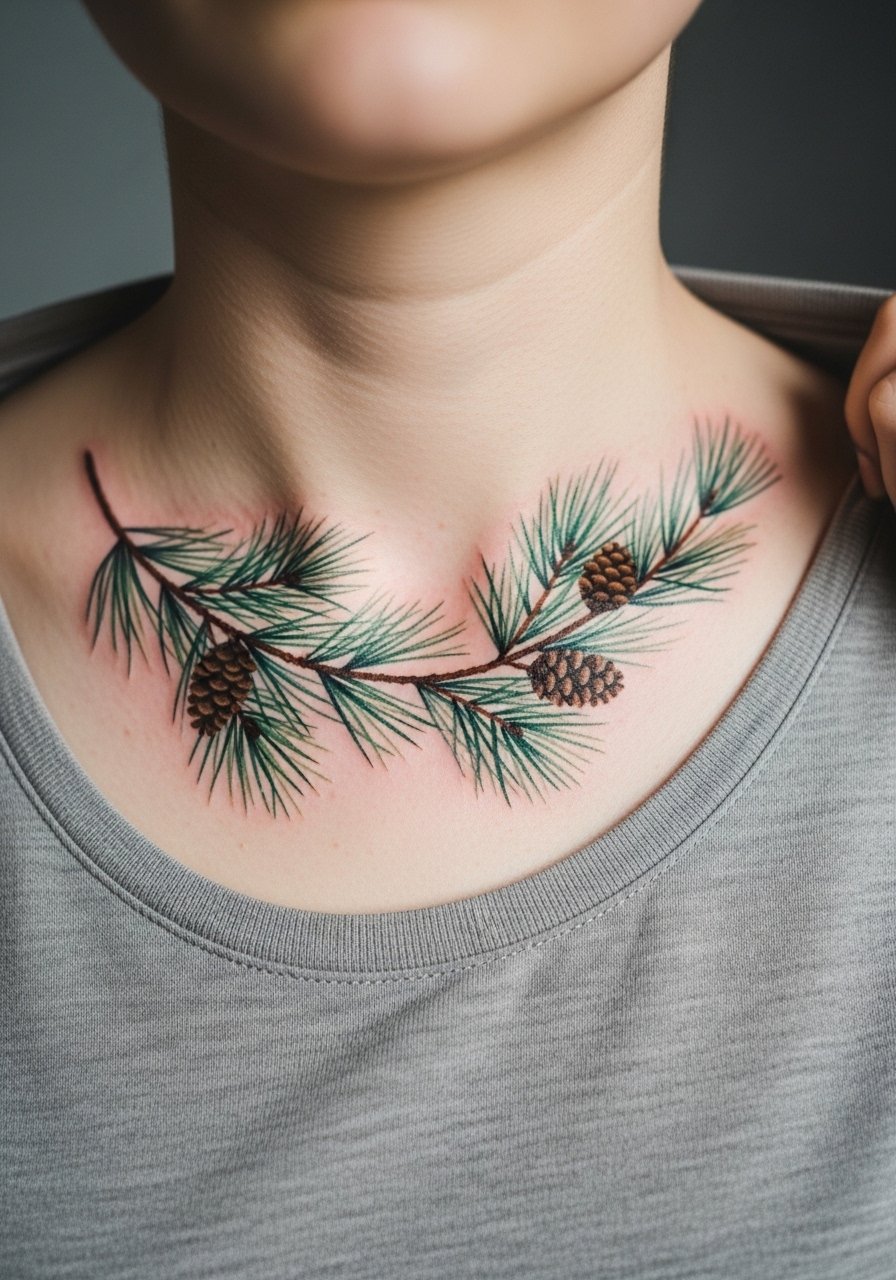
Watercolor brings a painterly feel but it can soften faster than black linework, especially in high-motion chest areas. For collarbone placement wear a wide-neck top to the session so the artist can easily access the canvas. The usual mistake is asking for too many blended colors in a tight area. Ask your artist for bolder anchor lines under watercolor washes so the composition keeps structure as it fades. For evenings out, a v neck blouse frames the branches without competing with the color palette.
Studio Day Picks
These first six placements include wrists, forearms, ankles, thighs, and the collarbone, and they demand different prep and protection during the first week.
-
Stencil transfer paper kit. Lets you preview line placement directly on skin, which is handy for tiny wrist silhouettes and forearm horizons that need exact alignment.
-
Topical numbing cream. Use it when booked for longer thigh or collarbone sessions to ease the initial pain without changing the artist's technique.
-
Thin protective film roll. Ideal for ankle and wrist pieces that get rubbed by clothing and shoes during the first few days.
-
Fragrance-free gentle body wash. Cleanses healing areas without stripping color from fine line work on the forearm or collarbone.
-
Aquaphor healing ointment. A thin layer for the initial healing window helps keep fine line channels hydrated while you follow your artist's aftercare plan.
7. Micro-Realism Lone Pine Trunk on the Inner Bicep
Micro-realism delivers texture and bark detail that reads like a tiny photograph. Inner bicep skin is softer, so depth control matters. Ask for photo references of bark texture and a plan for contrast so the trunk reads at six months and two years. Sessions take longer because of tiny needlework, expect two sessions for crisp texturing. The inner bicep can ache more than outer arm placements, rated around a six on most pain charts. Mention any future sleeve plans so the artist sizes the trunk for cohesive flow.
8. Minimalist Pine Trio Stack on the Spine
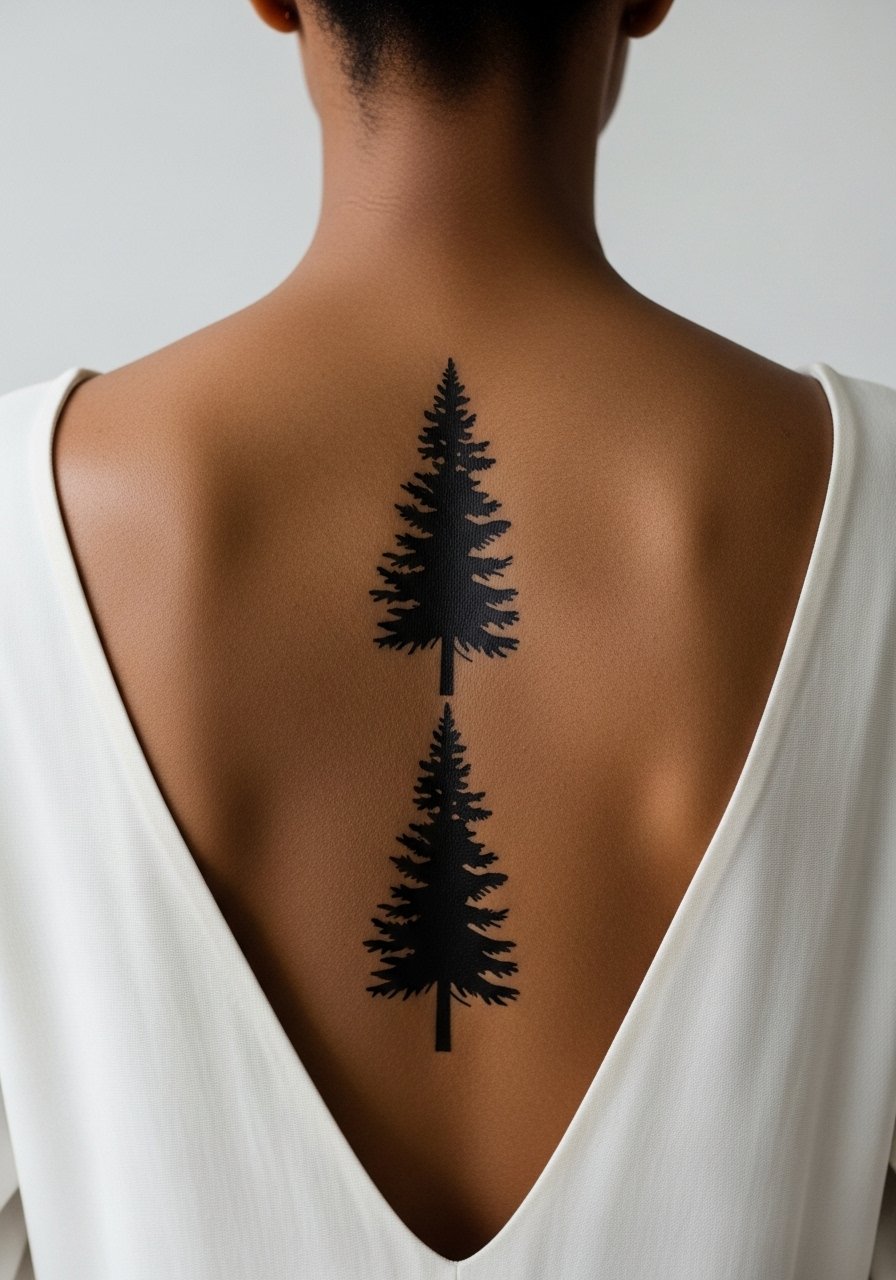
Stacked vertical motifs work well along the spine because the alignment reads naturally with the body line. Keep each pine at least one inch tall to avoid merging and ask for dot accents to separate them. Spine placement can be sensitive, so expect sharp moments during the session and plan breaks. For showing the stack, open-back dresses highlight the vertical rhythm and keep attention on negative space. If you plan to add on later, discuss spacing now so the trio can act as anchors for future work.
9. Ignorant-Style Blocky Pine Forest on the Ankle
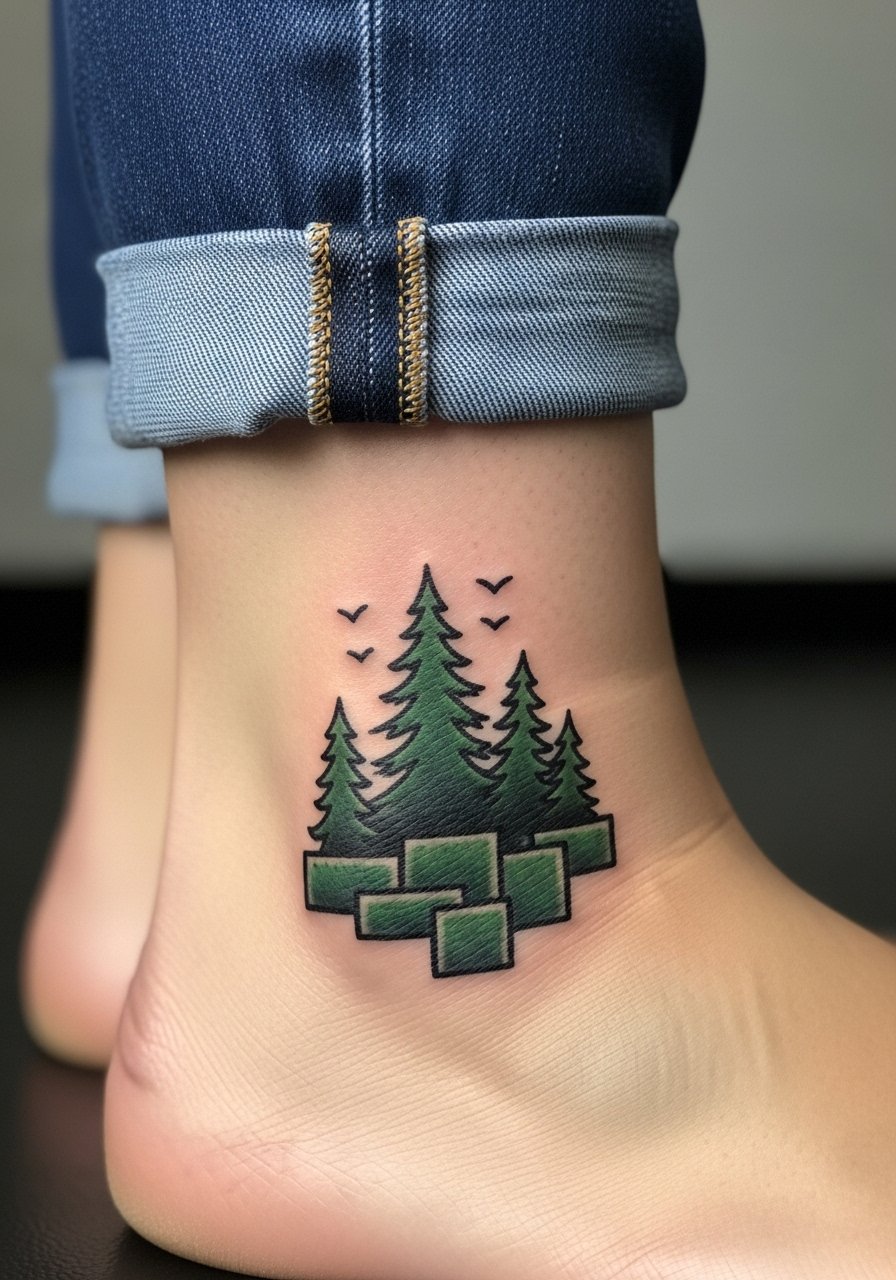
Ignorant style embraces raw, hand-sketched energy with bold black lines. On the ankle this reads punk and accidental in a good way. The single-session approach is common, but remember ankle skin gets a lot of abrasion from shoes. Ask the artist to leave clean negative edges that resist early wear. A frequent error is overfilling small areas which leads to bleeding under the skin. If you hike or wear boots often, consider an outline with spacing to prevent early smudging from friction.
10. Fine Line Pine with Exposed Roots on the Inner Forearm
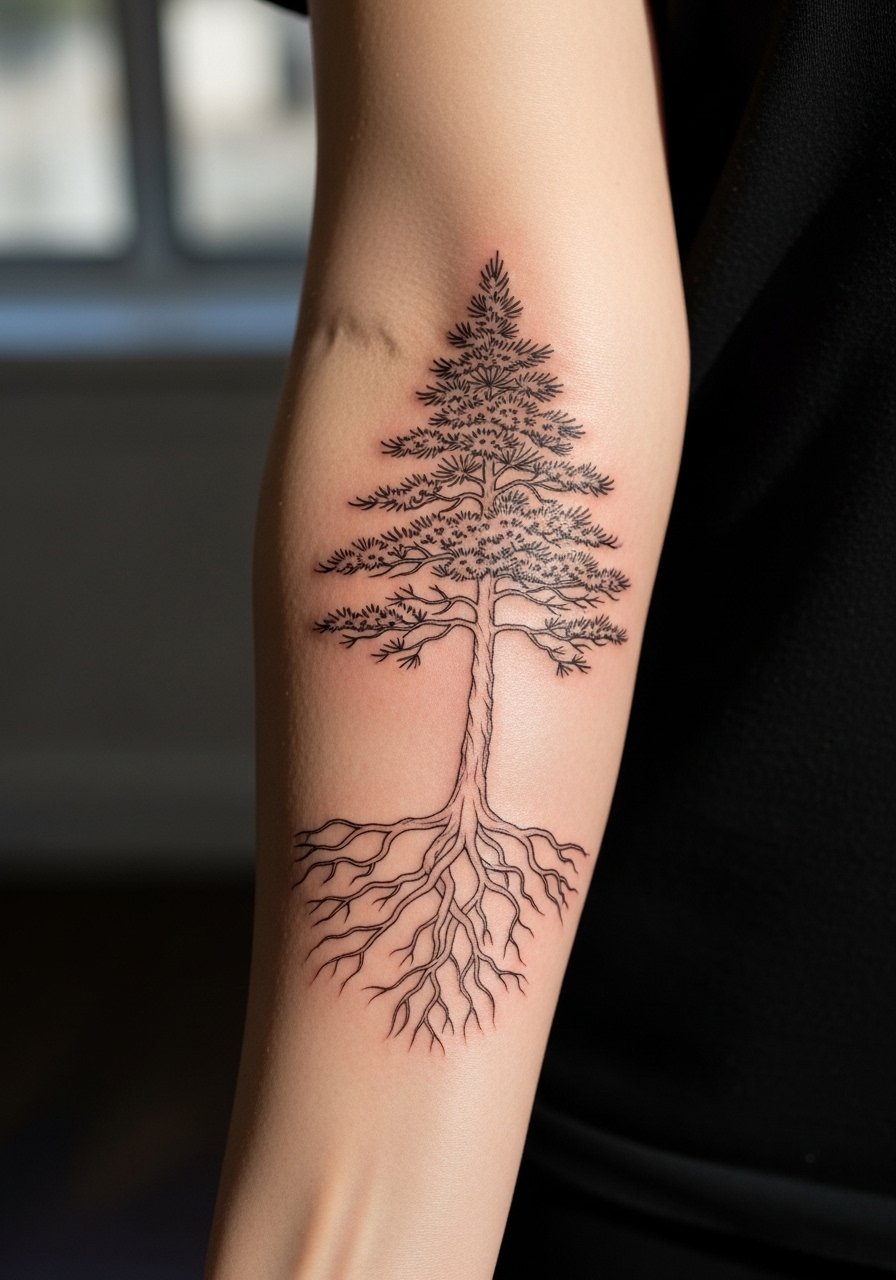
Roots add narrative depth to a minimalist pine and forearm placement lets the roots run naturally with the arm. I advise clients to request slightly bolder root junctions so they do not vanish at year two. Ask your artist about spacing and depth to avoid blur where roots meet trunk. This piece shows well with rolled-up sleeves and a olive chambray shirt so the linework sits cleanly against neutral fabric. Expect a one-session job if kept to a single tree and roots.
11. Black and Gray Realism Pine Grove on the Thigh
Realism on the thigh creates moody depth because there is room for layered shading and stipple work. Sessions run long and often require multiple appointments for full tonal range. The common mistake is compressing too many tiny trees into a small frame which flattens the scene. Tell your artist you want believable distance and focal points so larger trees retain contrast. Thigh flesh takes ink well, and touch-ups tend to be rarer than on high-friction areas. Pair with tailored shorts when you want to show the piece without distractions.
12. Geometric Pine Outline on the Upper Arm
Upper arm geometry combines clean linework with easy visibility for styling and concealment. Ask for lines with slight spacing to avoid blowout on softer skin. Pain here is moderate and sessions are forgiving. A mistake is overcomplicating the internal geometry in a small motif. Keep it bold and balanced so negative space supports the shapes over time. For session day, a loose button-down shirt you can pull aside gives the artist access while keeping you comfortable.
13. Layered Pine Designs for Patchwork Sleeves on Darker Skin
Layered pines let you build a sleeve in sections while maintaining cohesion. For darker skin tones ask for bold negative space and occasional solid black fills to maintain contrast. The hard part is matching saturation across different sessions. Tell your artist you want a roadmap for future additions so each pass reads consistent. This approach fills a gap many galleries miss for darker complexions. Expect touch-ups at the joins as the sleeve ages, and discuss pigment choices that preserve depth against melanin-rich skin.
14. Ornamental Pine Mandala Frame on the Shoulder Blade

Ornamental frames pair pine silhouettes with repetitive dot work and stipple shading for a meditative composition. Shoulder blade placement has moderate pain and good flatness for even stippling. Avoid packing too many concentric rings close together because they can blur over time. Ask for slightly larger negative gaps between mandala elements to preserve pattern definition. For an off-shoulder look, try an off shoulder tee that reveals the piece without crowding it during outings.
15. Micro-Realism Pine Cone Cluster behind the Ear Area
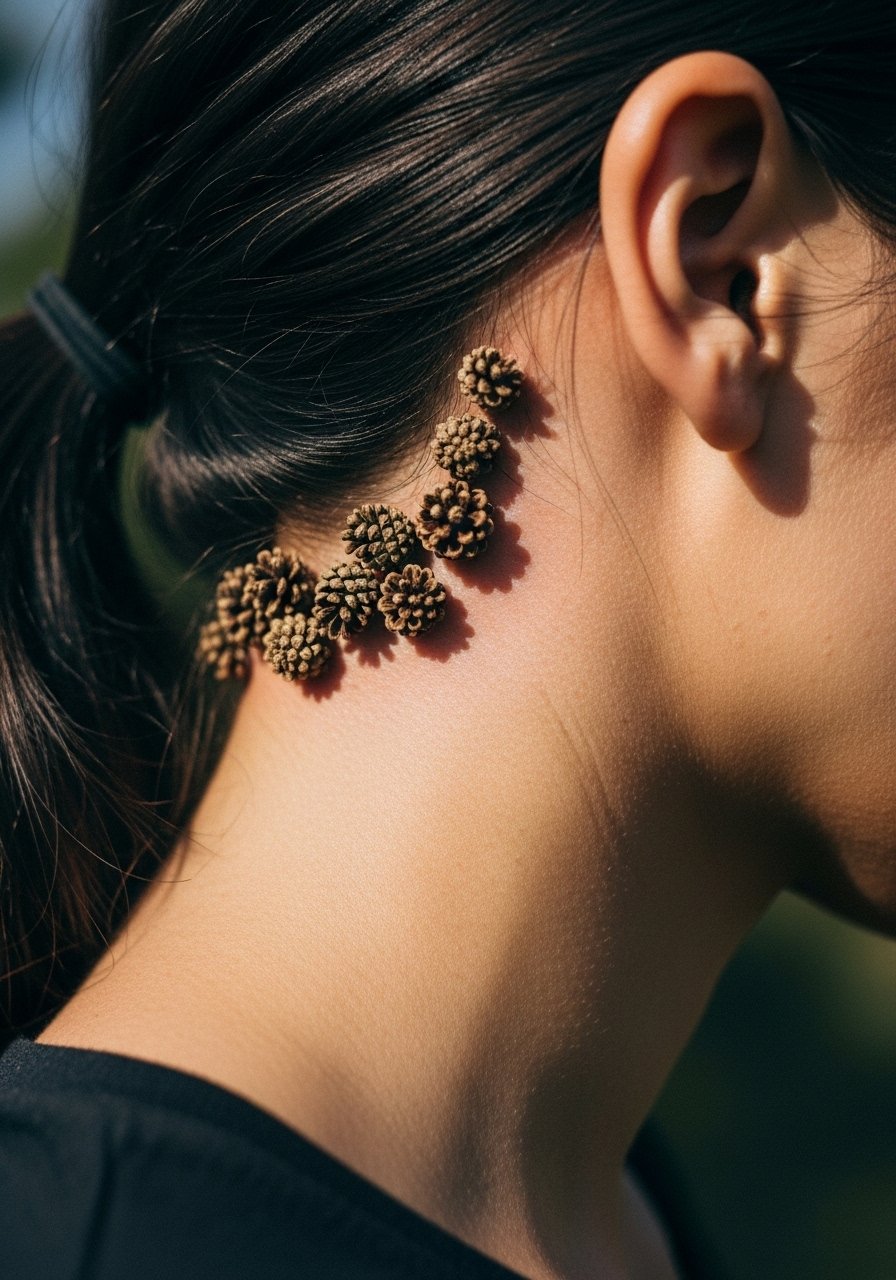
Behind the ear placements must be described as just below the hairline on the neck and framed tightly. Micro cones are delicate and demand crisp stipple shading. The main risk is low visibility and slower healing because hair oils can affect the area. Tell your artist about your hairstyle and grooming so they can plan for stencil placement that hides or reveals the cluster as you prefer. This spot is subtle when shown and easy to conceal for professional settings.
16. Minimalist Vertical Line Pine on the Collarbone Edge
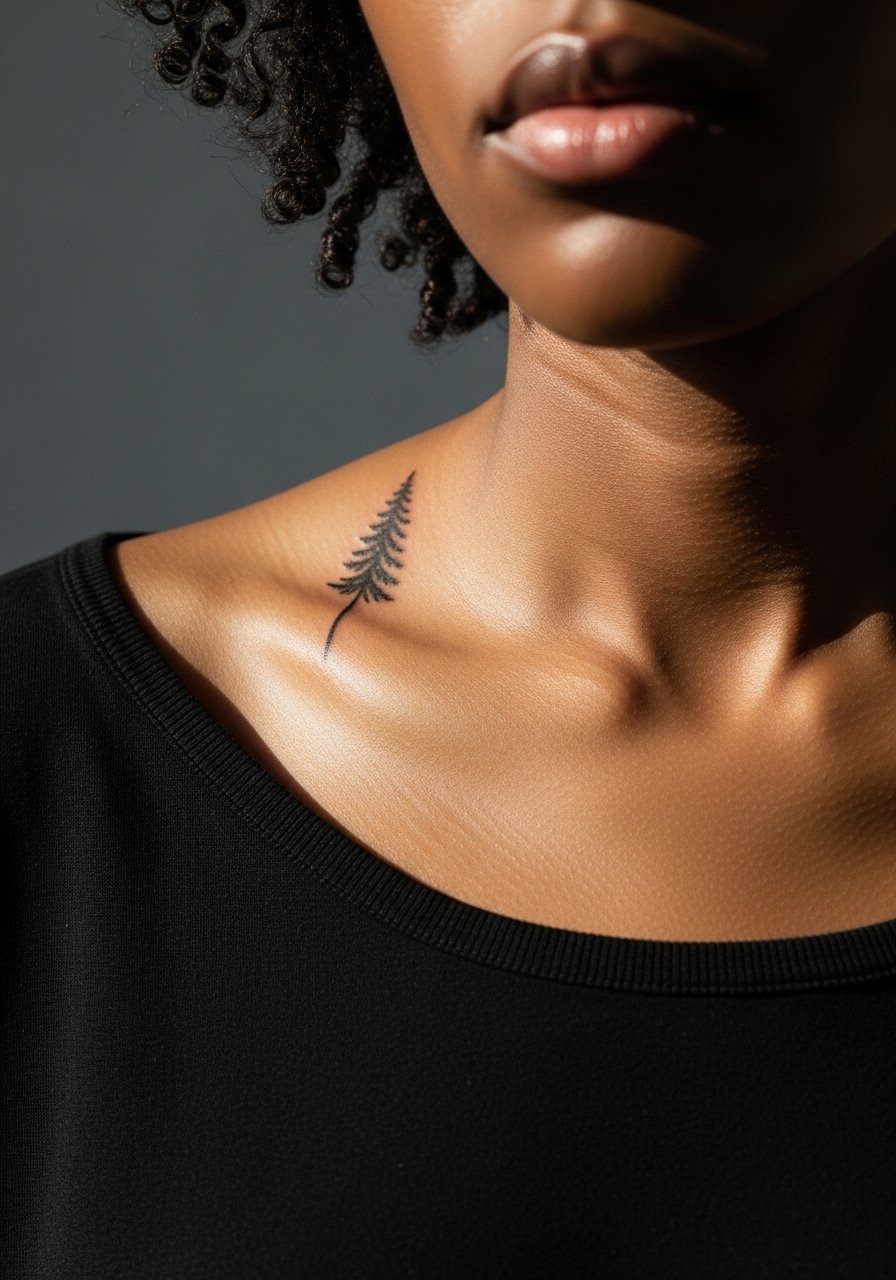
Collarbone edges are visually striking but sit on a bony area that reacts differently to shading and linework. Ask for slightly increased line weight so the pine reads against moving tissue and bones. Sessions are shorter but can sting more than fleshy placements. For showing the line, a strapless sundress or wide-neck top highlights the placement without distraction. Avoid ultra-fine hairline strokes here unless you accept likely early feathering.
17. Minimalist Pine Band around the Finger
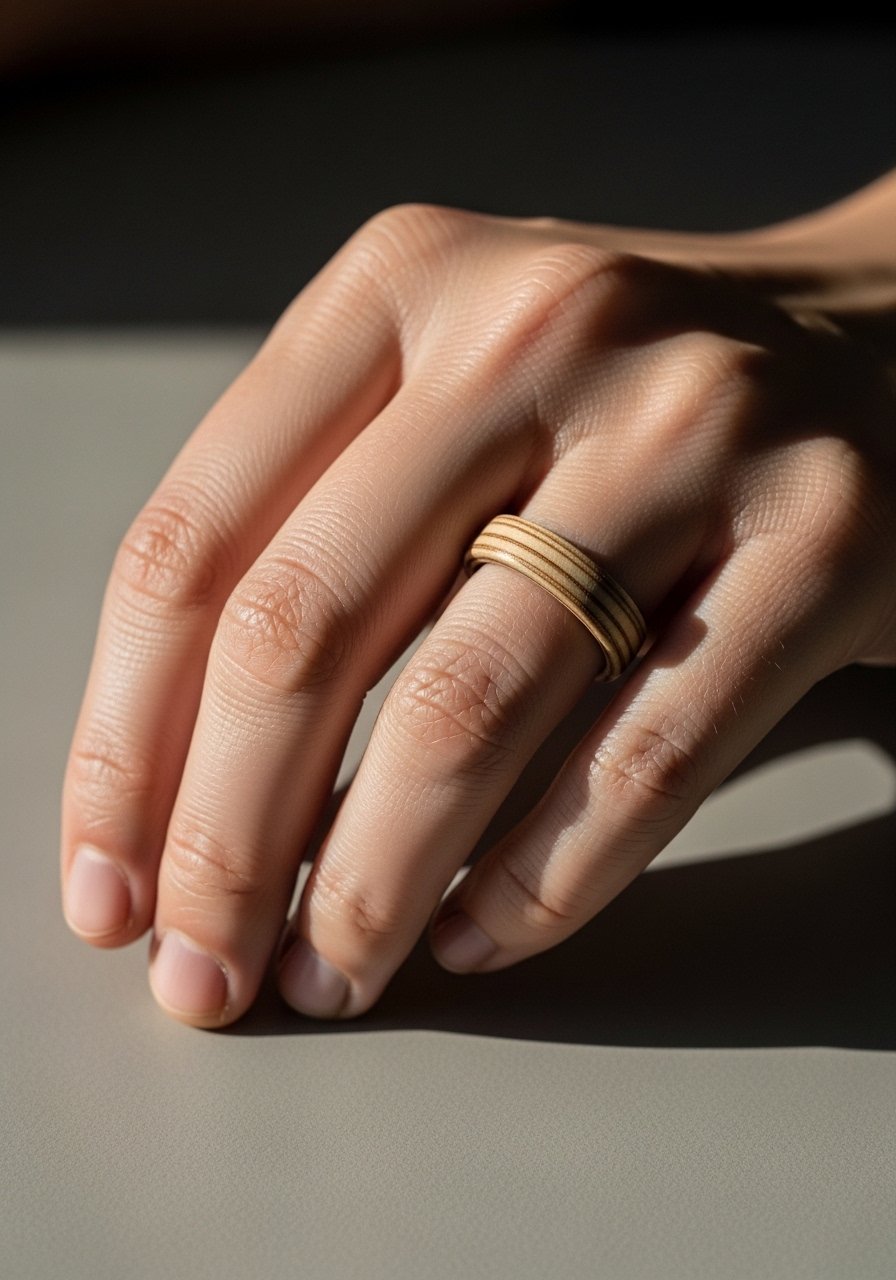
Finger tattoos are small commitment pieces that face heavy abrasion from hand use and washing. Expect significant fading and plan a realistic touch-up timeline of six to twelve months, especially for fine line bands. Ask for slightly bolder anchor points at the band seams to keep the pattern readable. The common error is asking for too much tiny detail in the wrap. Fingers are best for simple silhouettes and short session times. If you need visibility, pair with a dainty ring on the opposite hand rather than layered bands.
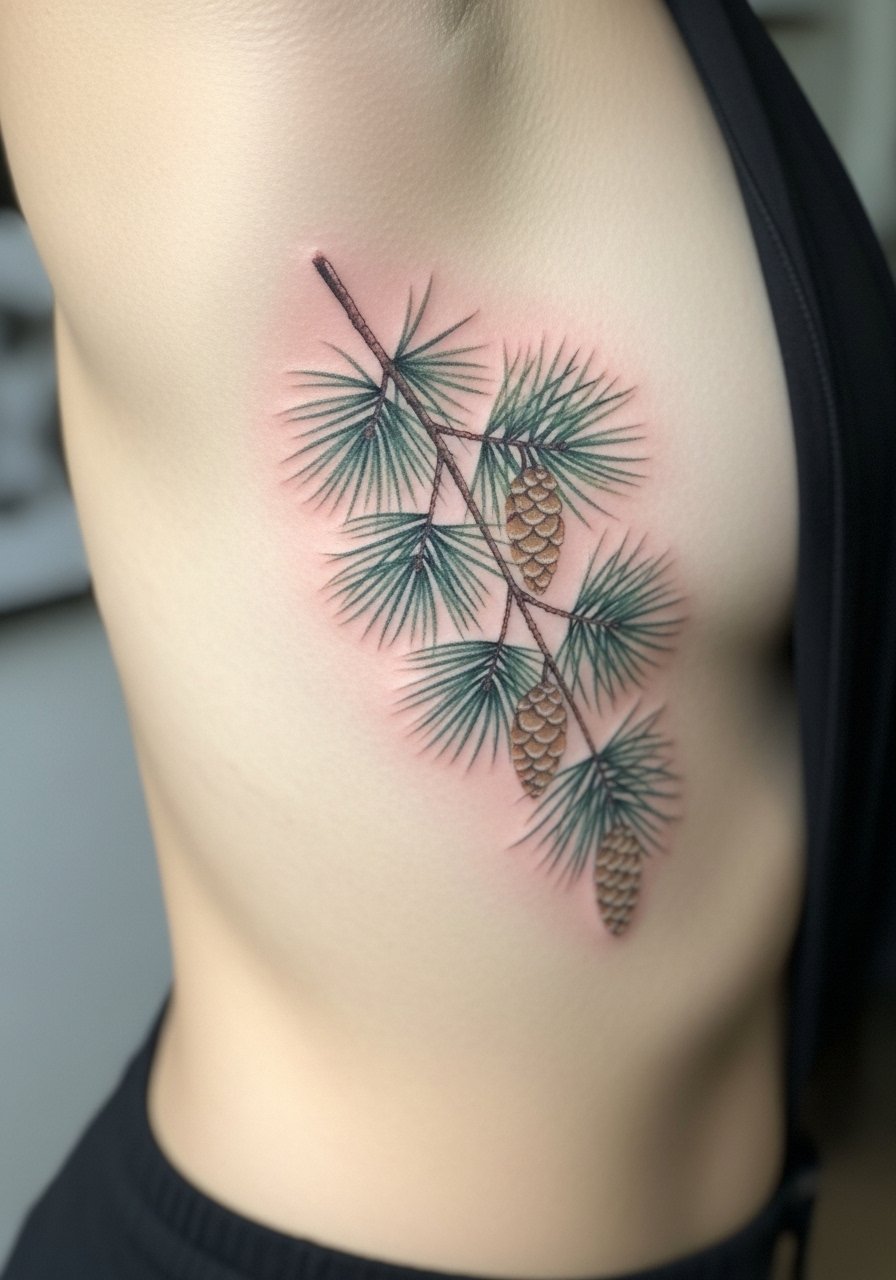
18. Pine Branch Wrist Wrap with Cone Detail
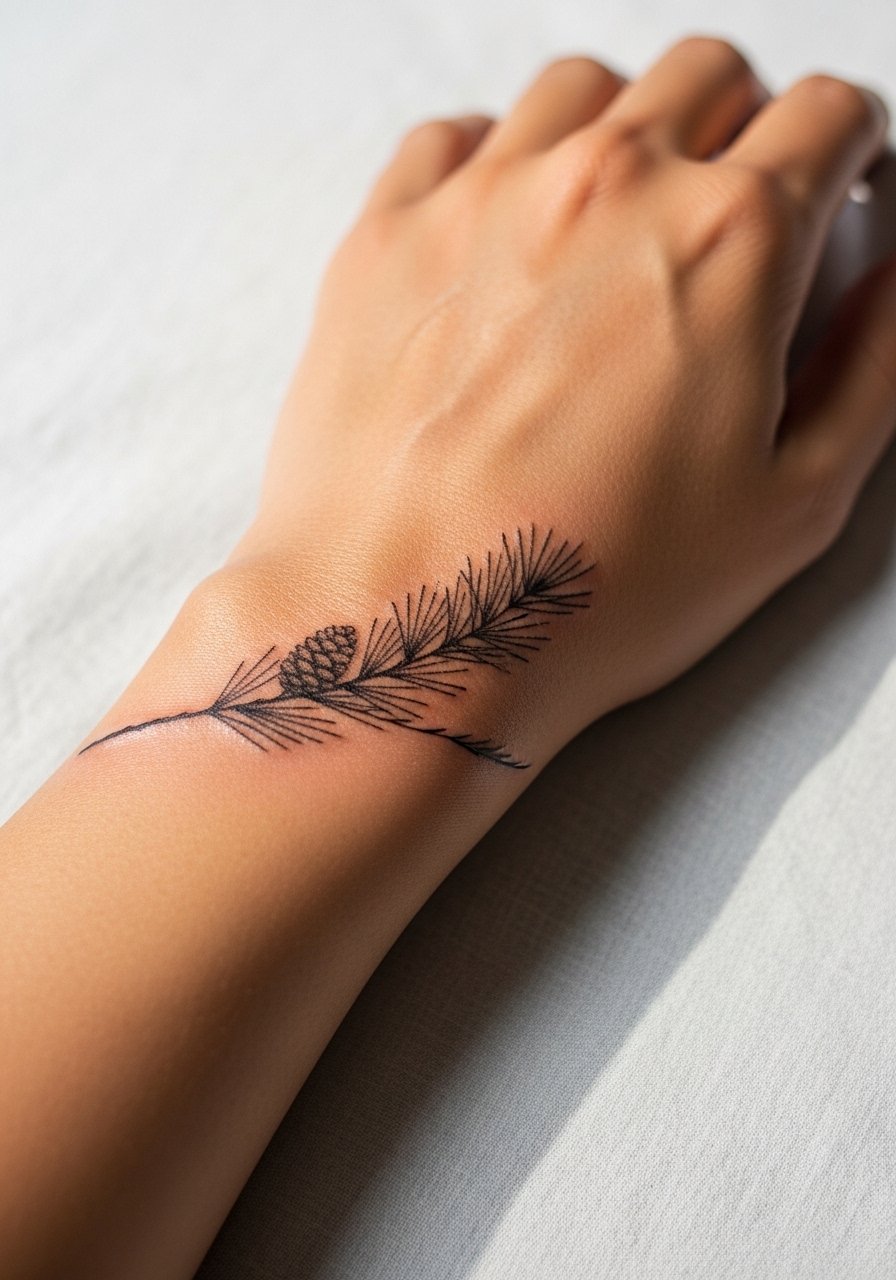
Wrist wraps look elegant but wrists are high-motion and often require touch-ups at year one. For hikers or outdoor workers, ask for a slightly stronger outline and isolated cones rather than continuous tiny shading that can blur. For the session, wear a sleeveless tank and avoid jewelry on that side. For show-offs, a dainty bangle stack on the opposite wrist frames the piece without crowding the lines. Tell your artist about daily hand use so they can gauge line weight.
19. Pine Trunk Silhouette on the Calf
Calf placements benefit from muscle padding and lower friction, so black silhouettes survive well here. Sessions are comfortable and permit larger scale detail without blowout risk. Avoid compressing trunk texture into too small a rectangle. Ask your artist how the piece will look with movement because calves change shape with walking and muscle tension. Pair the piece with rolled joggers or shorts to keep the silhouette visible and clean.
20. Minimalist Pine Trio on the Spine Lower

Lower spine pieces are subtle and frame well with certain clothing. The skin there can be taut and receptive to fine lines, though stretching from weight fluctuation is possible. Tell your artist if you anticipate body changes so they can advise sizing. For session comfort bring a cushion and expect moderate discomfort when the needle hits bone-proximate areas. When you want to reveal the trio, high-waisted skirts or pants keep the lower back visible without exposing too much.
21. Watercolor Pine Branch on the Ribcage
Ribcage work is painful and contentious for fine watercolor. Artists split into two camps on rib pigmentation and fine line hold. One camp says ribs stretch and blur lines quickly. The other camp argues that with precise depth and spacing fine work can last. Name both camps and ask your artist where they stand before booking. Expect multiple shorter sessions and a higher vigilance for aftercare because sweat and movement can affect pigment retention during early healing.
22. Minimalist Pine Silhouette on the Back of the Shoulder
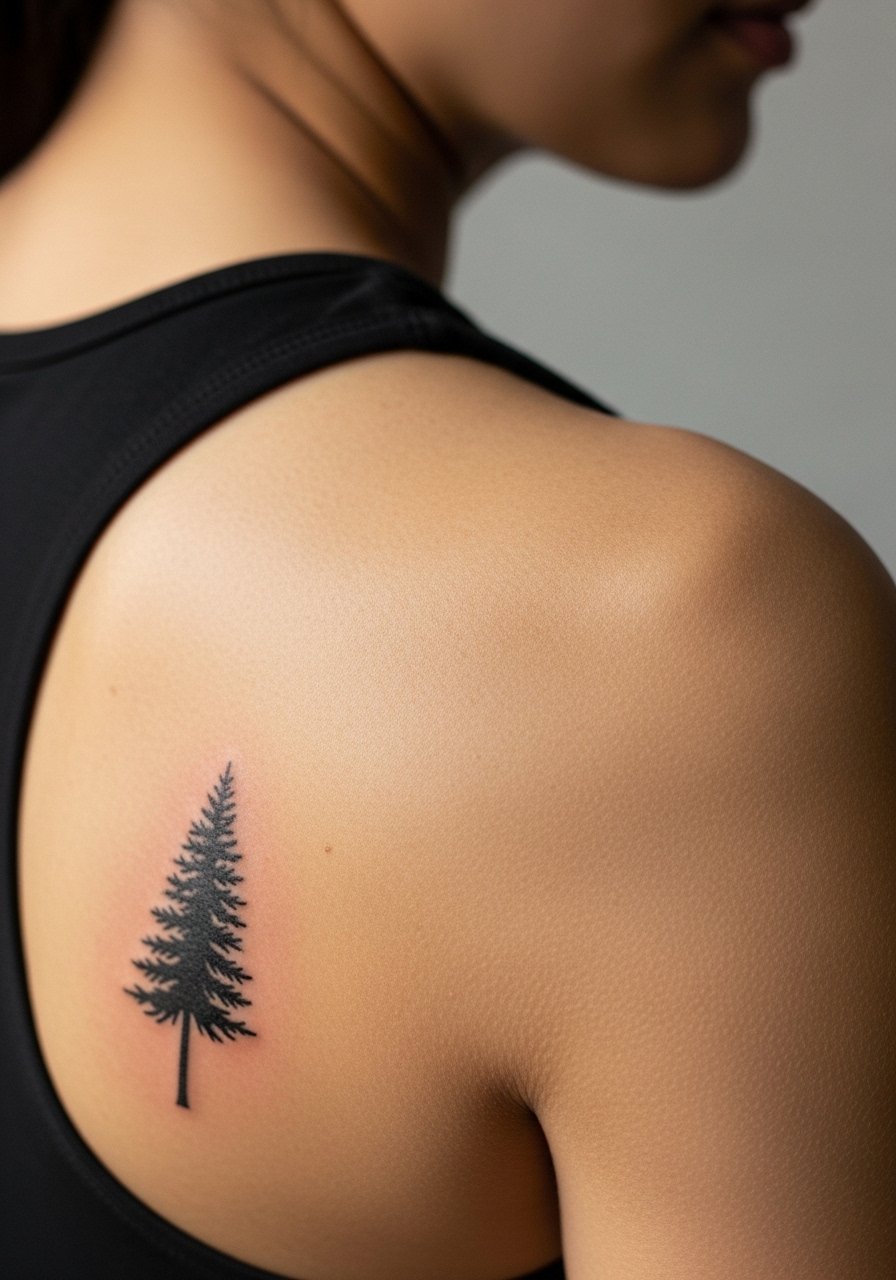
The back of the shoulder is forgiving and easy to conceal with clothing when needed. This area lets you keep a small silhouette legible without aggressive line weight. A standard mistake is crowding the silhouette with nearby flash; keep it isolated. For session access, bring a racerback top so the artist can reach the area without you getting uncomfortable. This placement works well with vintage band tees or off-shoulder looks for showing the piece.
23. Pine Roots as an Inner Thigh Anchor
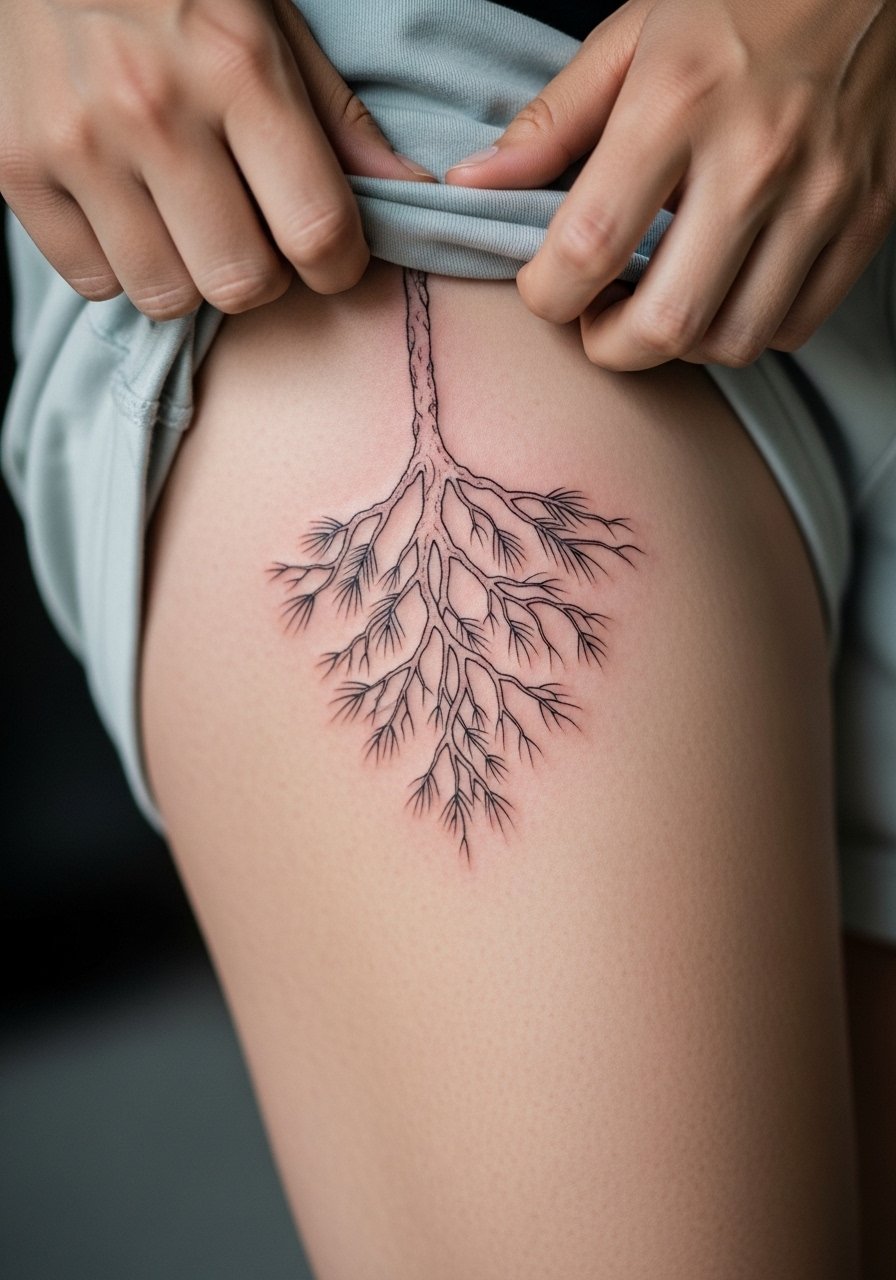
Inner thigh skin heals differently than limbs and can be sensitive. Roots here read intimate and symbolic for grounding. Wear loose shorts to the session and expect a few breaks for comfort. A frequent error is creating long, thin roots that fade into washing and friction. Ask for slightly bolder root hubs where they meet the trunk for longevity. This placement is private unless you choose to display it, which makes it a good spot for personal narrative pieces.
24. Neo-Traditional Pine with Wildlife Accent on the Calf
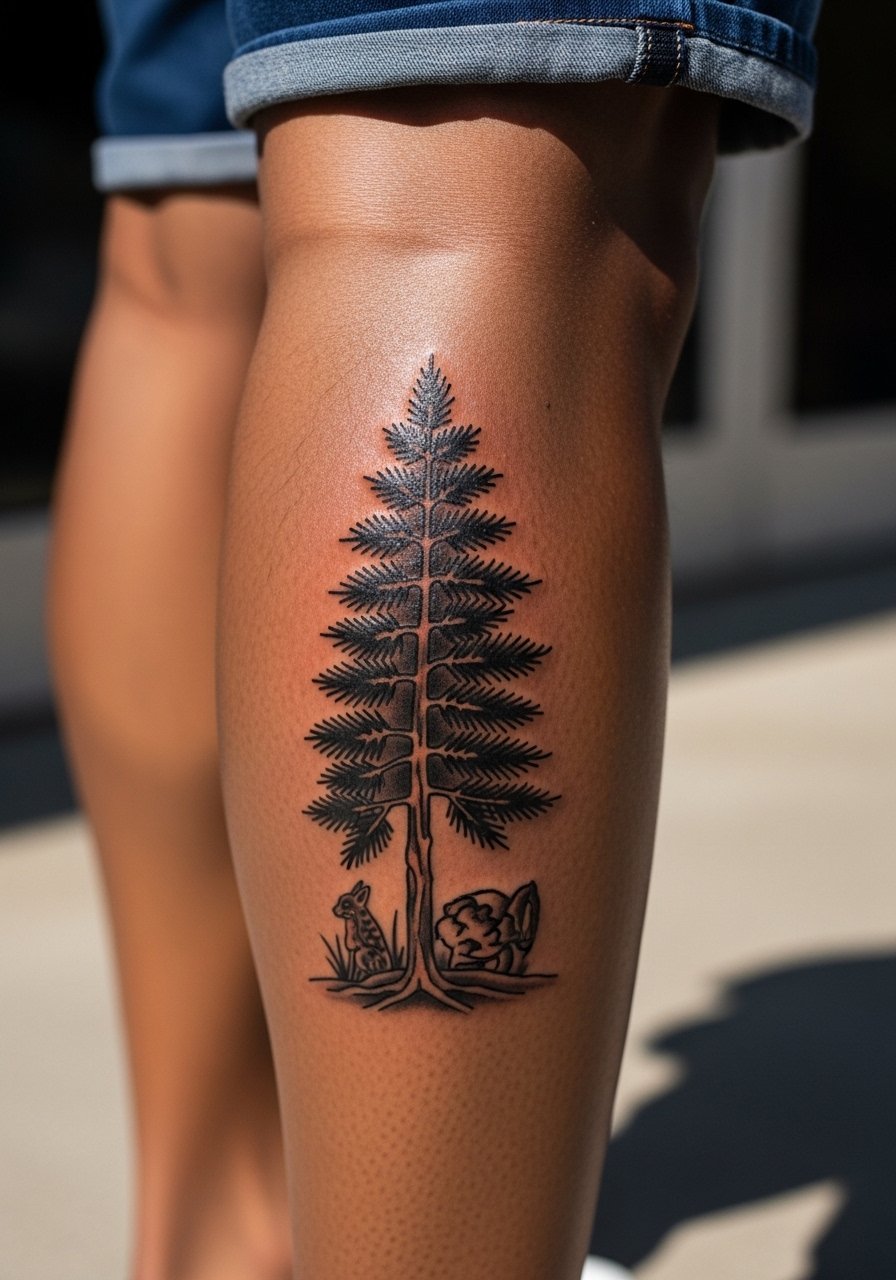
Neo-traditional pieces let you tell a small story with stylized animals and saturated fills. Calf scale is perfect for a fox or bird tucked among branches. The main mistake is over-detailing the wildlife at the same scale as the tree. Ask your artist to prioritize silhouette clarity first, then color fills for accents. For summer shows, rolled shorts in solid navy keep attention on bold black shapes and color accents. Sessions may take two visits depending on color blending.
25. Ignorant-Style Single Pine on the Hand
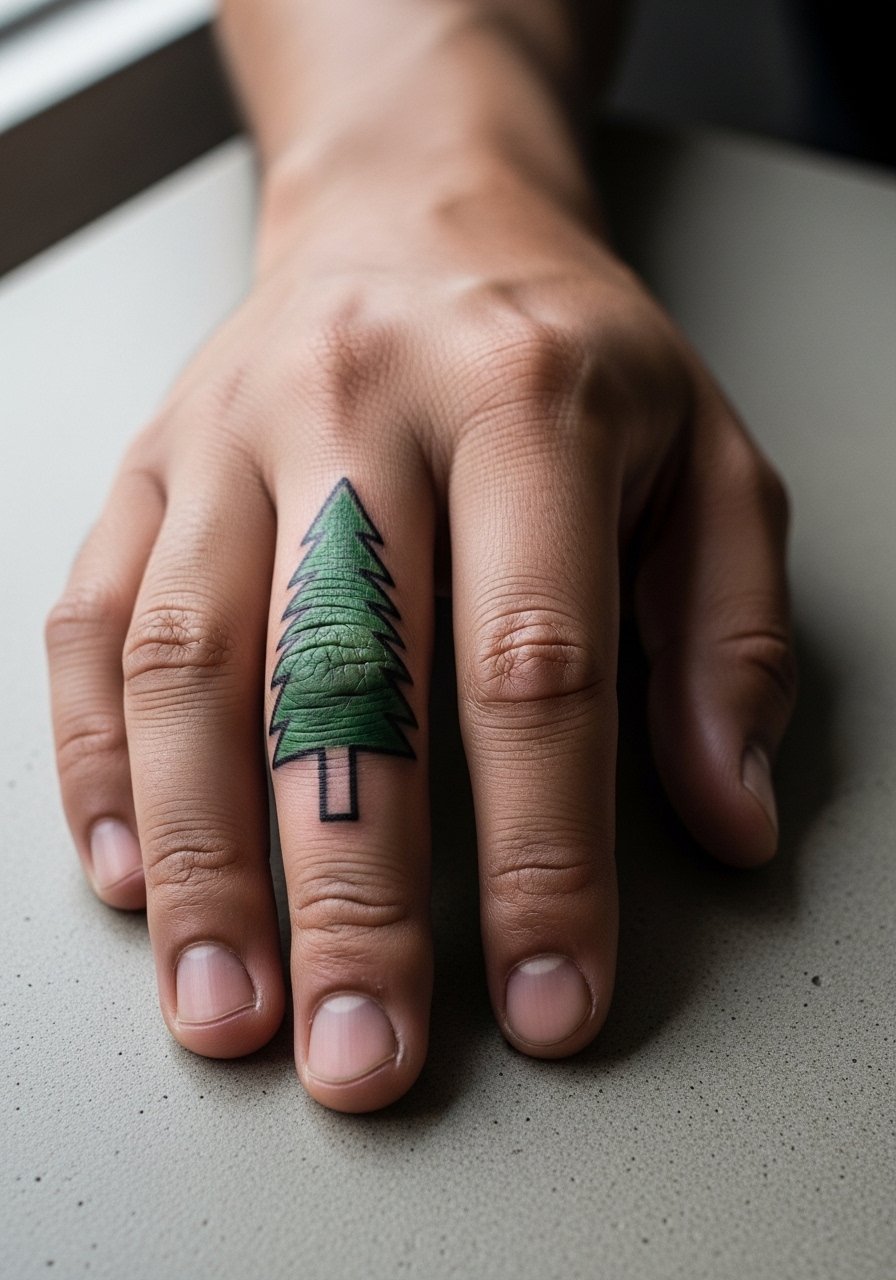
Hand tattoos are high maintenance and visible in many professional settings. Expect fading and occasional touch-ups because hands wash a lot and skin regenerates quickly. If you pursue a hand piece, request thick anchor lines and accept periodic refresher sessions. The common misstep is tiny filler shading that disappears within months. For clarity, choose a bold silhouette that reads at a glance and plan placement away from knuckles if you need longevity.
26. Minimalist Pine Cluster on the Upper Chest Edge
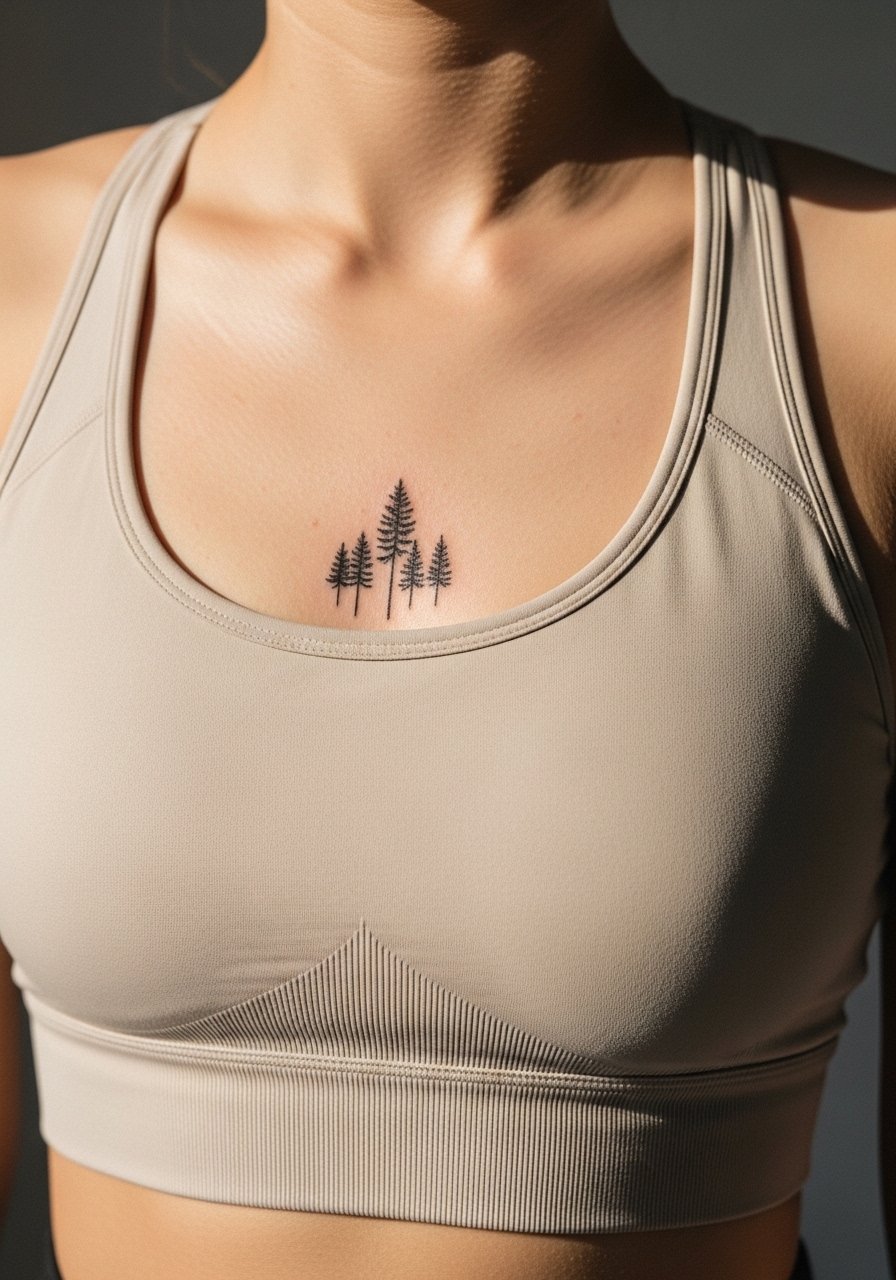
Upper chest pieces can peek out of shirts and dresses and look intentional with the right wardrobe. The skin there can be sensitive and movements like deep breaths travel through the canvas. Ask for line weights that balance with your skin tone so the cluster does not disappear at six months. For showing the piece, a flowy v neck top highlights the shapes without pinching the area. Sessions are usually short and manageable if scaled small.
27. Ankle Pine with Cone Detail for Hikers
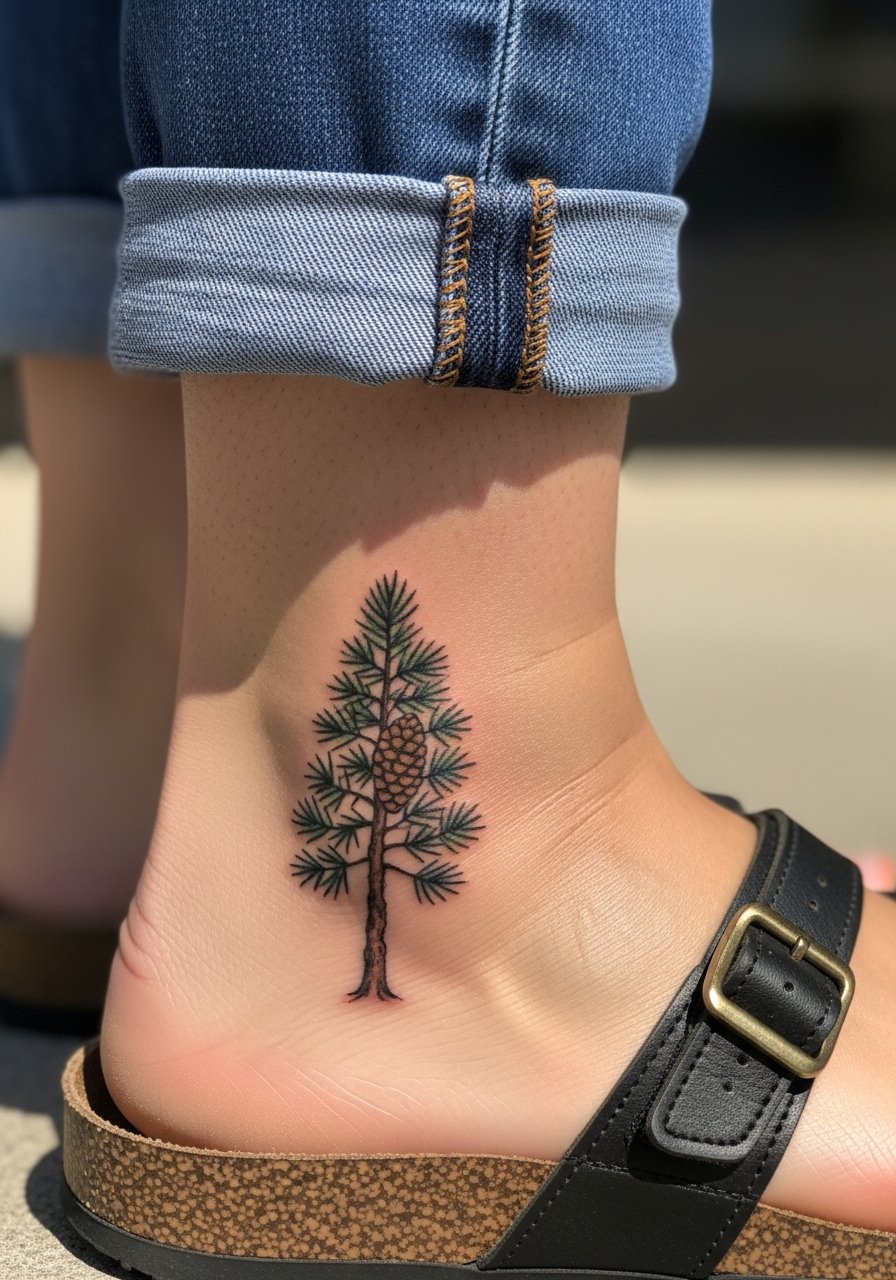
Ankle pines aimed at hikers should account for boots and trail wear. Ask for cone detail that reads as a graphic element rather than tiny realistic shading, because cones can get lost under abrasion. A good consultation includes notes on footwear and hiking frequency so the artist can choose an appropriate outline thickness. For casual show-off looks, lightweight boat shoes or cuffed chinos present the piece cleanly and keep it from rubbing against high socks during healing.
Frequently Asked Questions
Q: Will fine line pine tattoos on my hands or wrists need touch-ups more often than forearm pieces?
A: Yes, hands and wrists face more friction and washing, so fine line work often needs touch-ups around year one. If you want less frequent maintenance, ask for slightly bolder anchor lines or consider blackwork elements that hold longer.
Q: How should I prepare clothing for a collarbone or ribcage session?
A: Wear a wide-neck shirt or a fitted sports bra you do not mind pulling aside so the artist has clean access. For collarbone pieces consider a v neck blouse for the session and later show-offs that frame the area.
Q: Are watercolor pines worth it given the fade concerns?
A: Watercolor looks soft and painterly at first but fades faster than saturated blackwork. If you love the look, ask the artist for subtle anchor lines beneath washes so the design keeps shape as color softens, and expect touch-ups more commonly than for pure black linework.
Q: Which placements are best if I plan to build a sleeve later?
A: Forearm horizons and inner forearm roots are ideal anchors for future sleeves. Tell your artist about long-term plans during the consultation so they can size pieces and leave connective negative space for cohesive expansion.
Q: How do I find artists who can render fine pine forests without them looking cartoonish?
A: Use discovery paths like searching #PineTreeTattoo and #FineLinePine on social platforms, check tattoo directories for nature specialists, and look for healed work in portfolios rather than fresh photos. Ask about healed shots in the consultation and bring reference images that show the exact line weight you want.
