
Fine line temple trends look incredible in saved boards, but the pieces that actually read well five years later are usually the ones that started with roomier spacing, stronger linework, and sensible placement. I have seen pale skin types watch tiny details wash out during healing, people struggle to find authentically trained irezumi artists, and budgets shift upward between consult and chair. Below are practical, aesthetic options that balance trend and longevity.
1. Tebori-Style Pagoda Tower with Koi Base, Outer Forearm
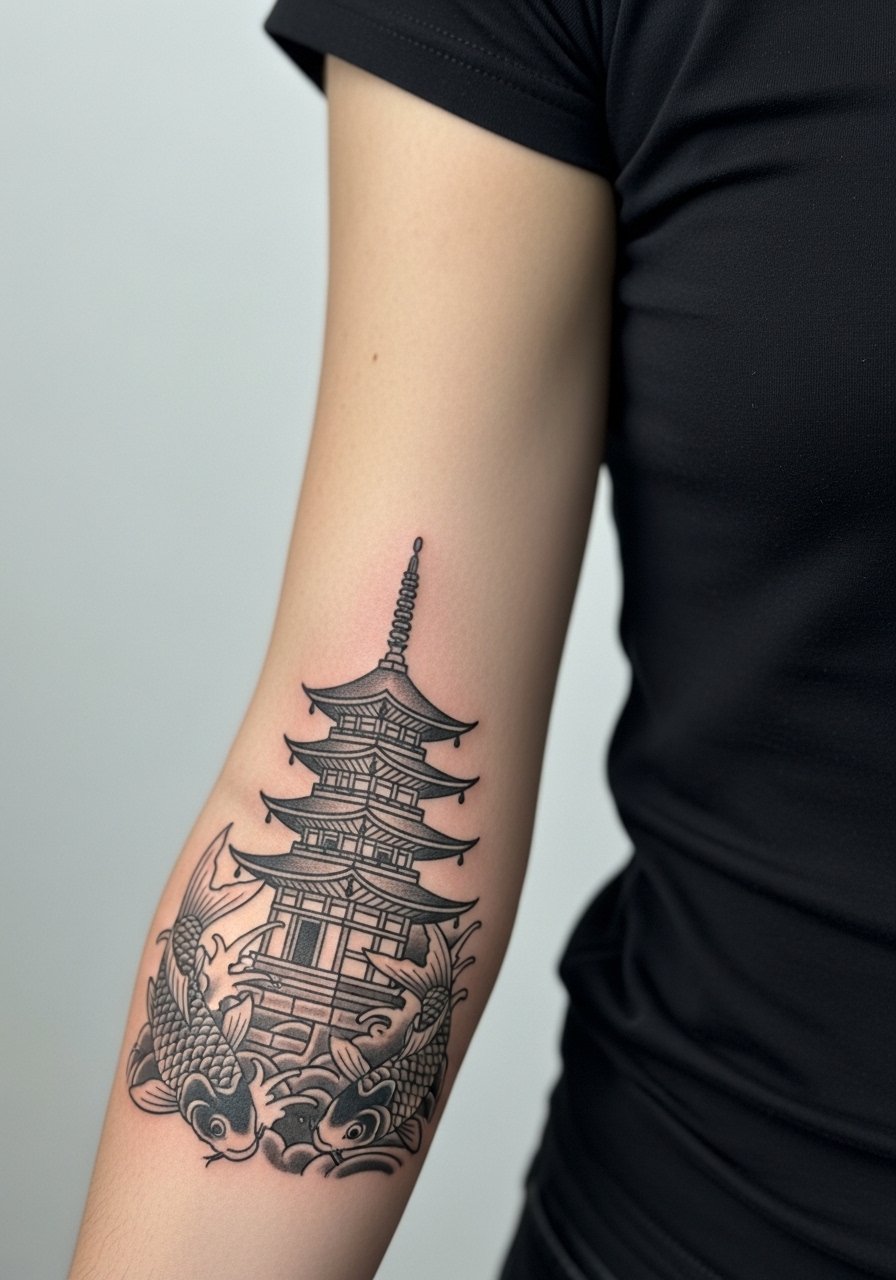
I recommend this when you want architecture that reads from across a room. On the forearm the pain is moderate and a single 6 to 10 hour session split into two sittings usually works. Tell your artist you want thicker primary outlines and selective red accents rather than ultra-fine textures so the pagoda keeps shape as it heals. Common mistakes are packing tiny ornamental filigree too close to the edges, which leads to muddy detail at year two. For showing it off, pair with a fitted black v-neck tee or roll sleeves; for the session wear a loose linen button down you can pull aside.
2. Cherry Blossom-Adorned Torii Gate, Shoulder Blade
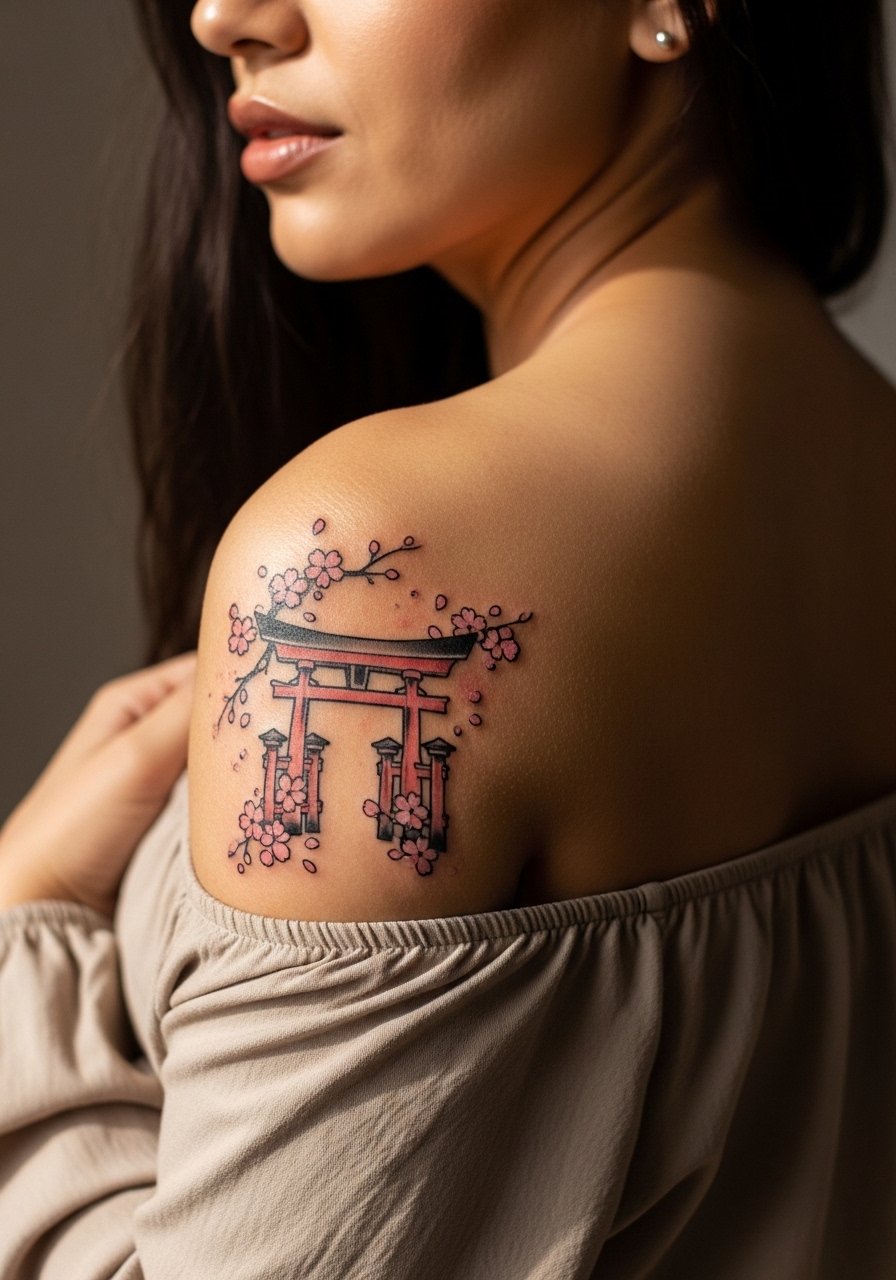
When transformation is the theme this placement sings, especially on women and anyone who wants seasonal visibility. Expect one to two sessions for a 4×6 inch piece and mild discomfort when the needle crosses the bone near the shoulder. Ask for pink washes that sit under the linework so the petals soften instead of fighting the architecture. A common aging issue is using watercolor-style fills without solid outlines, which leads to blown-out color edges by year three. Wear an off shoulder blouse women to frame the gate when you want it visible, and bring a strapless tank for the session.
3. Full Temple Facade with Lanterns and Mountains, Upper Arm Sleeve Start
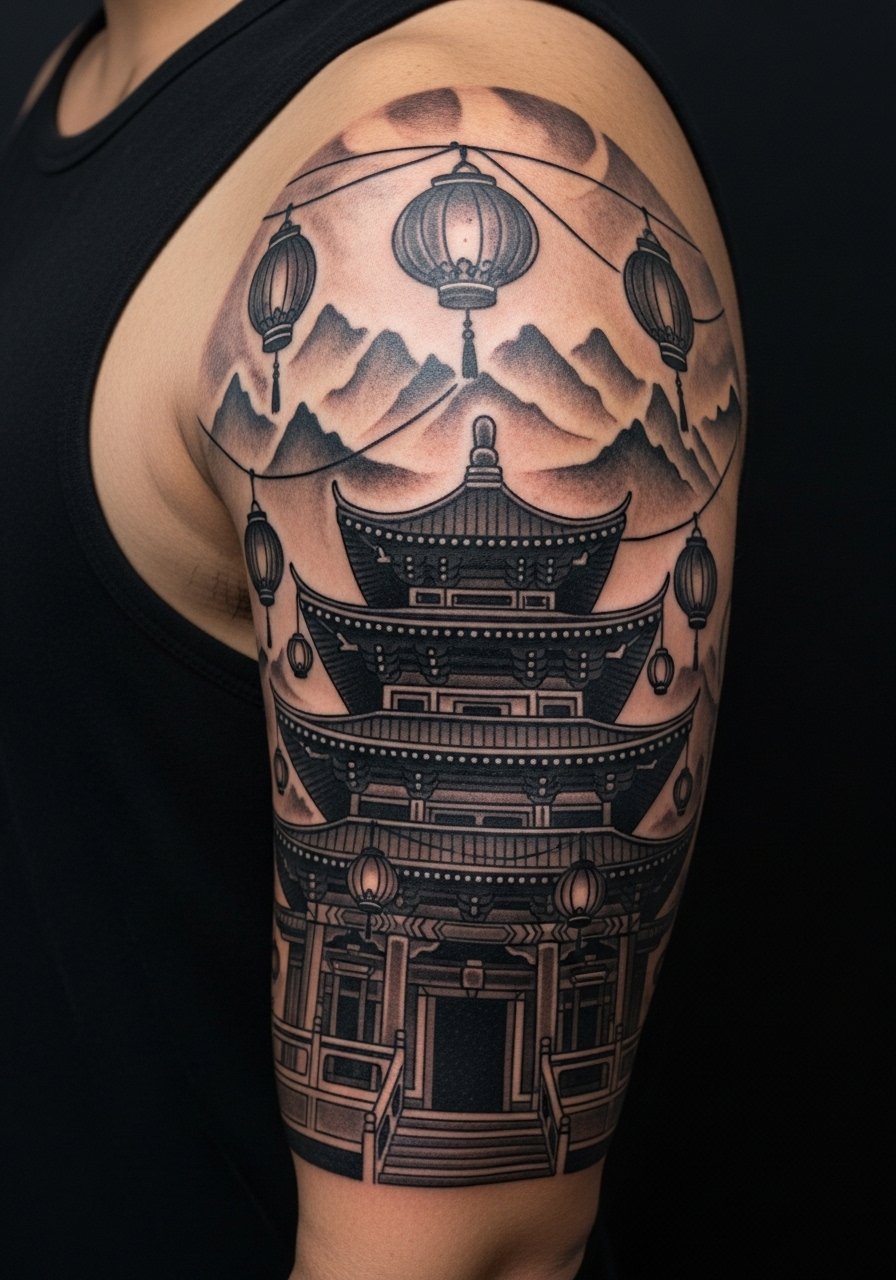
I've seen these read like a silhouette that anchors a sleeve for years if the saturation is dense and the negative space is planned. This is a multi-session build that benefits from staggered appointments to let layers settle between passes. A mistake people make is trying to compress a full facade into a single short session; the result loses the depth lanterns need. Expect touch-ups around year two to three on outer edges where friction meets clothing. The piece suits someone who wants dramatic blackwork rather than delicate detail.
4. Mini Pagoda Silhouette with Incense Smoke Wisps, Wrist
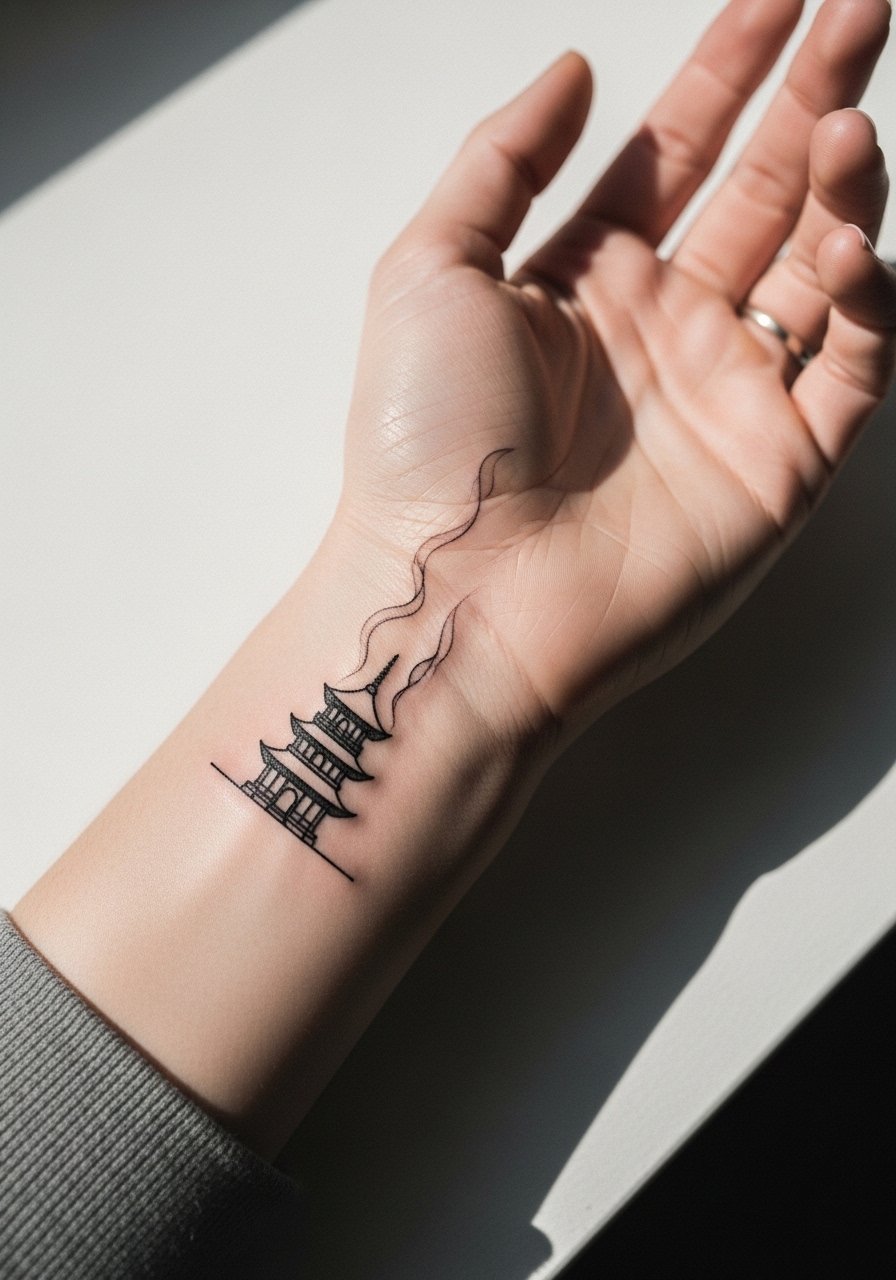
Fair warning, the wrist is a high-friction area and tiny lines can merge faster than owners expect. This minimalist blackwork is perfect for first-timers who want temple cues without a big commitment. Tell your artist to keep the pagoda slightly larger than you think and to use bold primary outlines so the smoke still reads after a year. Blowout risk is real here, so avoid ultra-fine single-needle tight details. For showing it off, a thin leather cuff bracelet on the opposite wrist highlights the piece, and wear short sleeves during the session.
5. Temple Roof with Dragon Guardian, Outer Calf
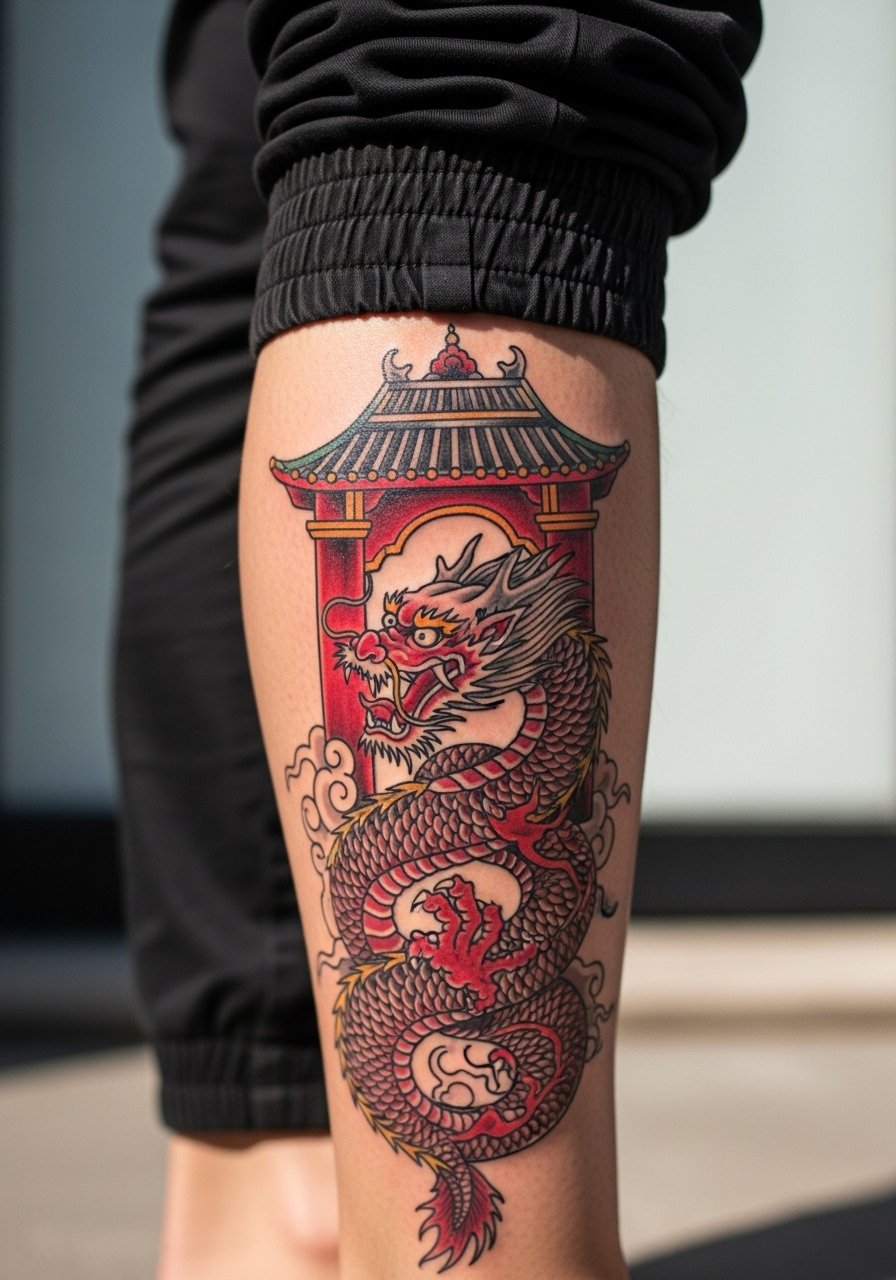
There's a reason the calf is a favorite for combined architecture and myth. The flesh there tolerates long sessions and the curve lets the roof and dragon wrap without distortion during reasonable weight changes. Plan for two to three sessions and tell the artist to balance reds against heavy black to stop early fading from sun and sweat. Avoid cramming the dragon into a narrow vertical slice, which can age into a smudged silhouette. Show it off with rolled cuff joggers men or summer shorts.
6. Ornate Temple Bell with Prayer Flags, Inner Bicep
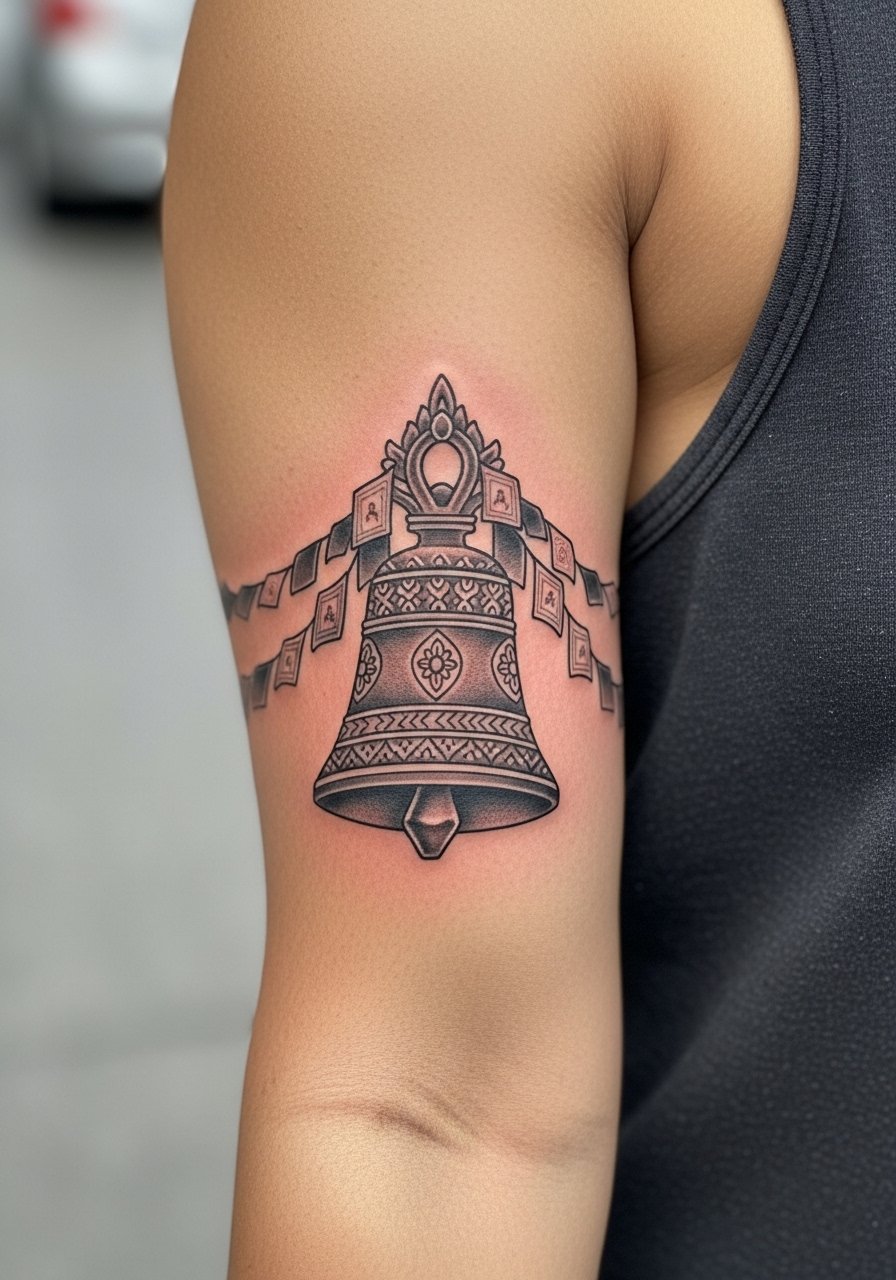
Consider this if you want detail that sits a bit hidden but is easy to reveal. The inner bicep can be tender, expect a moderate to high pain rating and a session that may be interrupted for breaks. Tell your artist to use stipple shading and avoid tiny crosshatching near the edges so the bell keeps its clarity. A common error is heavy saturation next to soft flags, which creates contrast issues as the flags fade sooner. For session day, wear a tank top so the artist has clear access to the area.
Studio Day Picks
The forearm, shoulder, wrist, calf, and inner bicep pieces above all ask for small prep items that make the session and first week smoother.
-
Stencil transfer paper kit. Lets you preview line placement on skin and adjust scale before the needle starts, especially useful for the forearm and collarbone ideas.
-
Topical numbing cream. Applied as directed about 45 minutes before can ease the sting on sensitive ribs or inner bicep sessions.
-
Thin protective film roll. Helps wrist and calf work survive daily friction and showering during the first days.
-
Fragrance free gentle body wash. Cleanses healing areas without irritating the delicate edges of fine line lanterns and smoke details.
-
Aquaphor healing ointment. A thin, short-term layer for the initial days helps maintain moisture without clogging small needle channels on fine line pieces.
7. Pagoda Spire Emerging from a Lotus Pond, Thigh
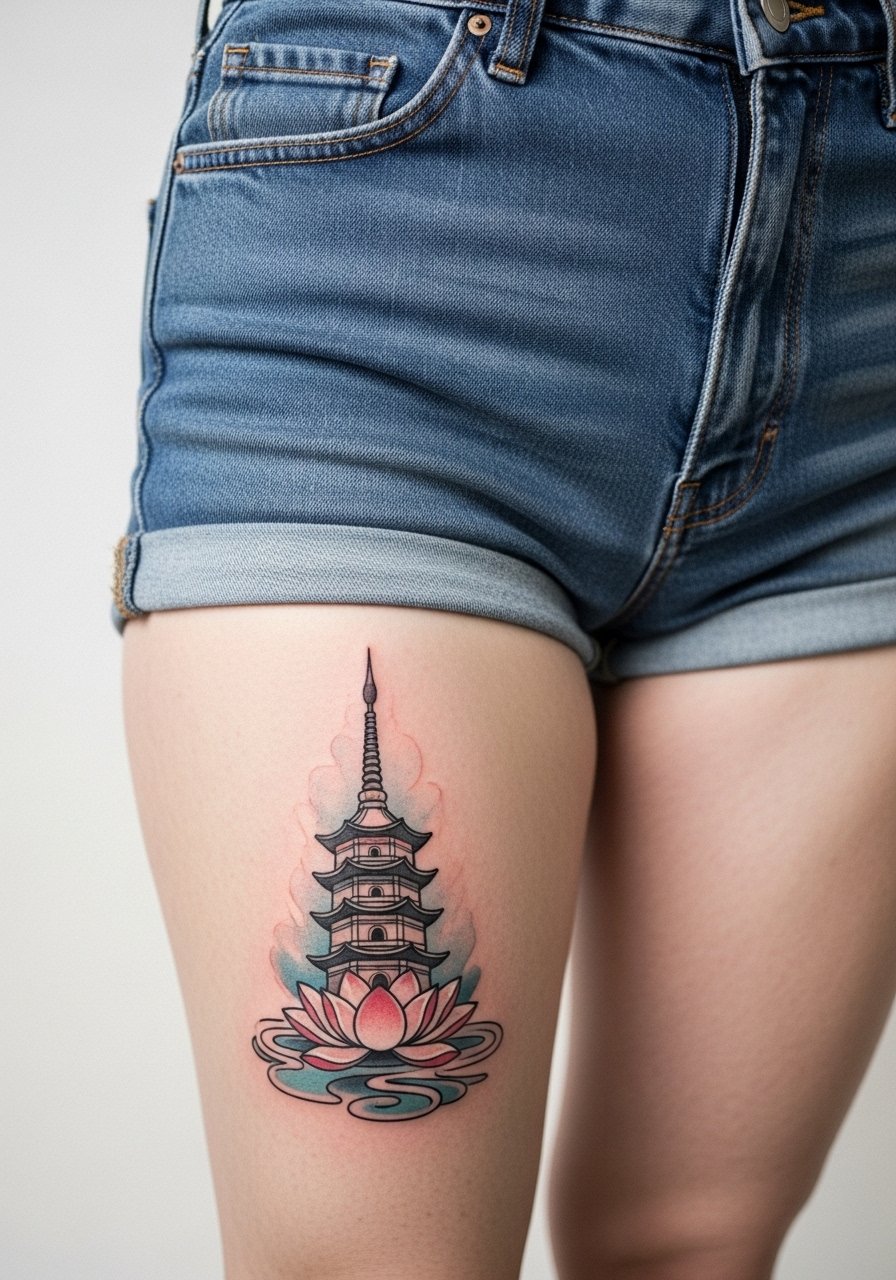
This one ages nicely on the thigh because the area stretches less with minor weight changes. Expect three sessions for soft gradients and plan for touch-ups at year two if you want the watercolor effect refreshed. When consulting, ask for slightly denser saturation at the base where water reflections meet the pagoda pillars. A common mistake is overdoing tiny stipple on the lotus, which blurs into a gray patch after healing. For warm months wear high waist athletic shorts to show the piece without constricting the area during sessions.
8. Shrine Torii Path with Fox Spirits, Full Back Panel Start
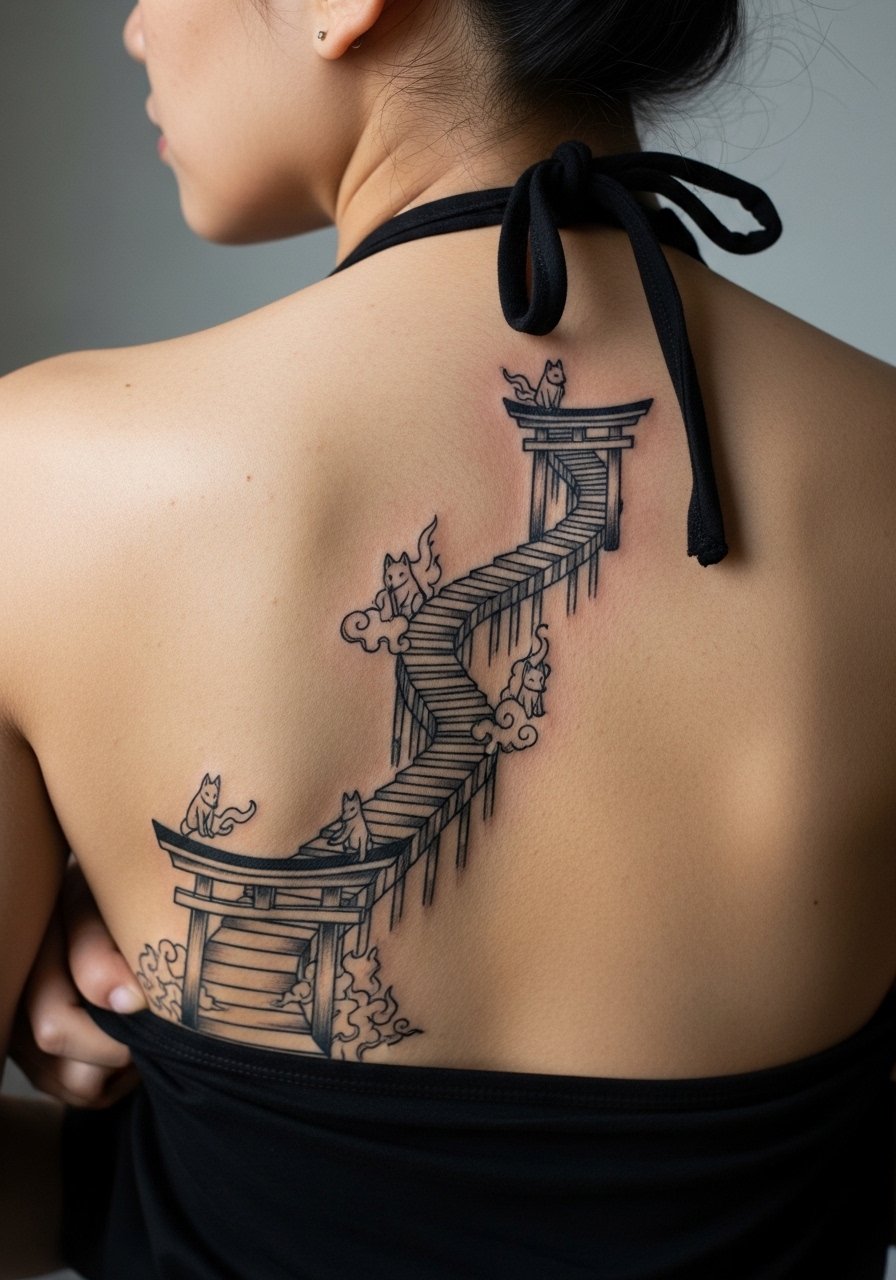
There is room for narrative here, which is why people choose a back panel for a torii path. The scale allows fine detail in the path and foxes while protecting those details with heavier surrounding black. A common misstep is trying to force too much intricate dot work into a single pass, which extends sessions unnecessarily. Plan multiple sessions and ask the artist about how the composition will flow with the spine and shoulder blades. For evenings out, a backless halter top frames the shrine without covering the scene.
9. Single Temple Lantern in Fine Line, Collarbone
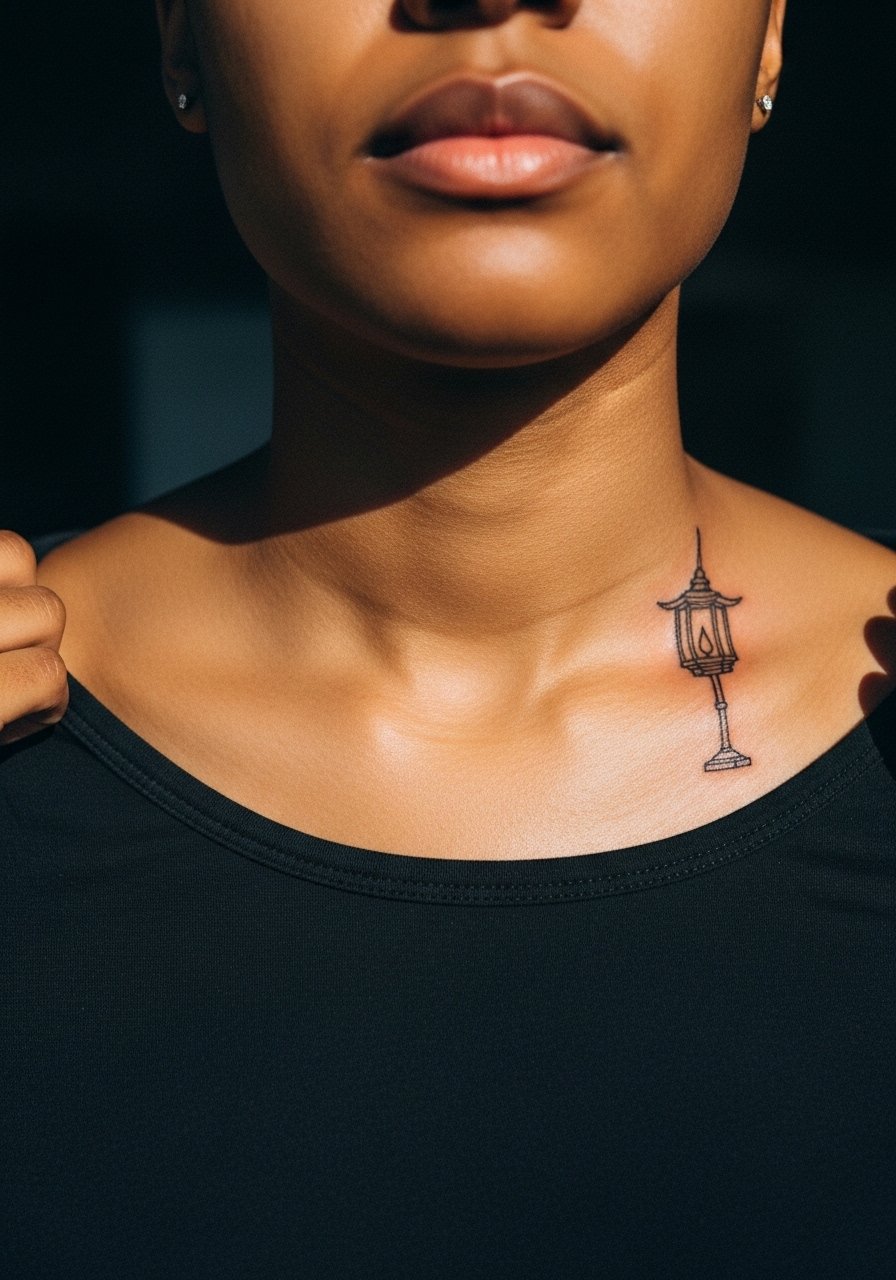
Most collectors choose this when they want a small symbol of guidance. The collarbone can make the needle feel sharp near the bone, so expect a brief, focused session. Artists are split on fine line preservation here. One camp says single needle holds its delicacy if depth and spacing are perfect. The other camp warns that collarbone motion and sun exposure blur thin lines faster than on the forearm. Ask where the artist stands and what spacing they recommend. A lightweight thin chain pendant necklace sits above the lantern without competing.
10. Multi-Tiered Pagoda with Samurai Silhouette, Chest to Shoulder
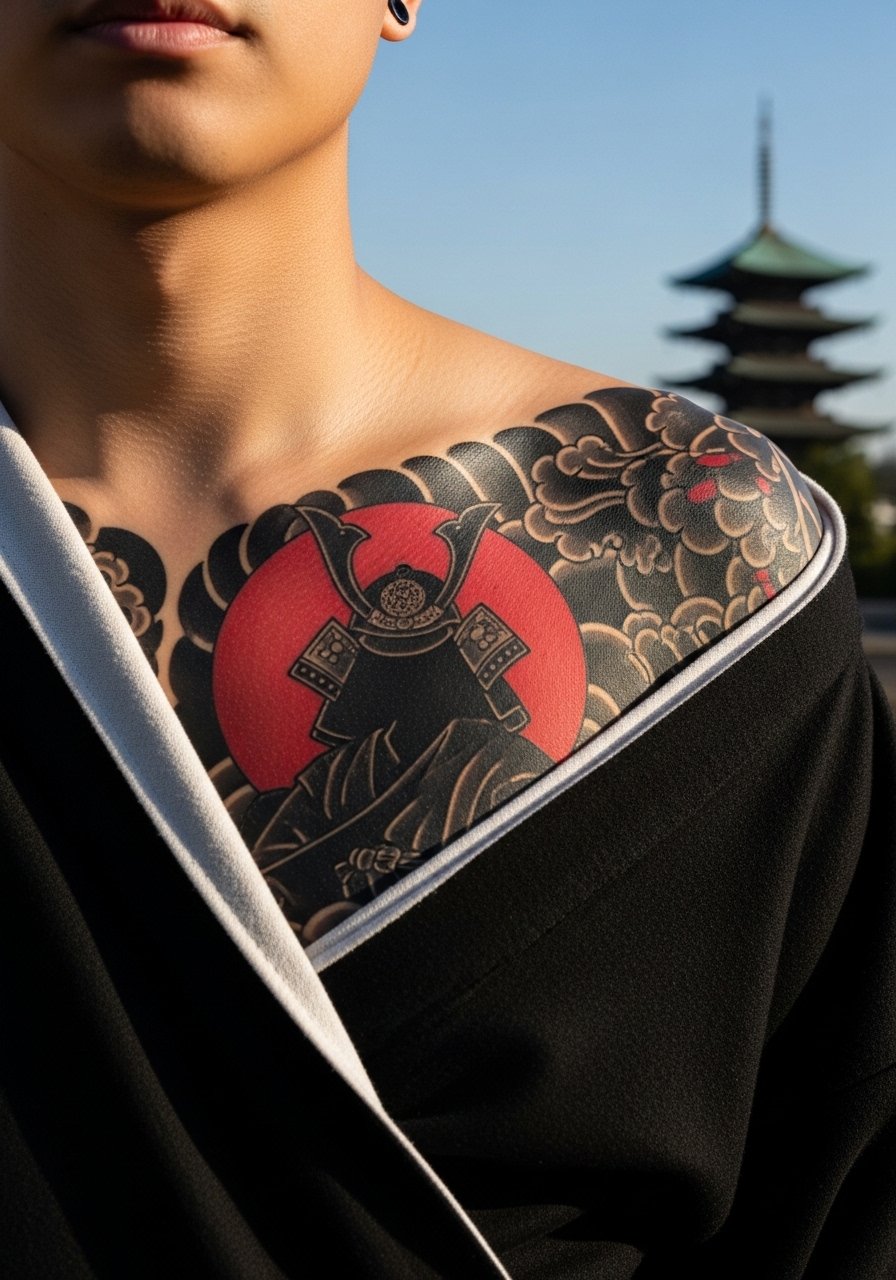
This combination is for people who want both sanctuary and resolve in one piece. Expect a five-plus session commitment when color and bold outlines meet portrait-like silhouettes. A practical consultation tip is to bring samurai silhouette references that match the pose you want, not a random photo mash. The biggest mistake is crowding the chest with small facial detail, which ages poorly under the movement of the pectoral muscles. For the session, wear a wide-neck shirt you can pull aside so the artist has clean access.
11. Temple Dragon Arcing Around an Upper Arm Pagoda, Sleeve Starter
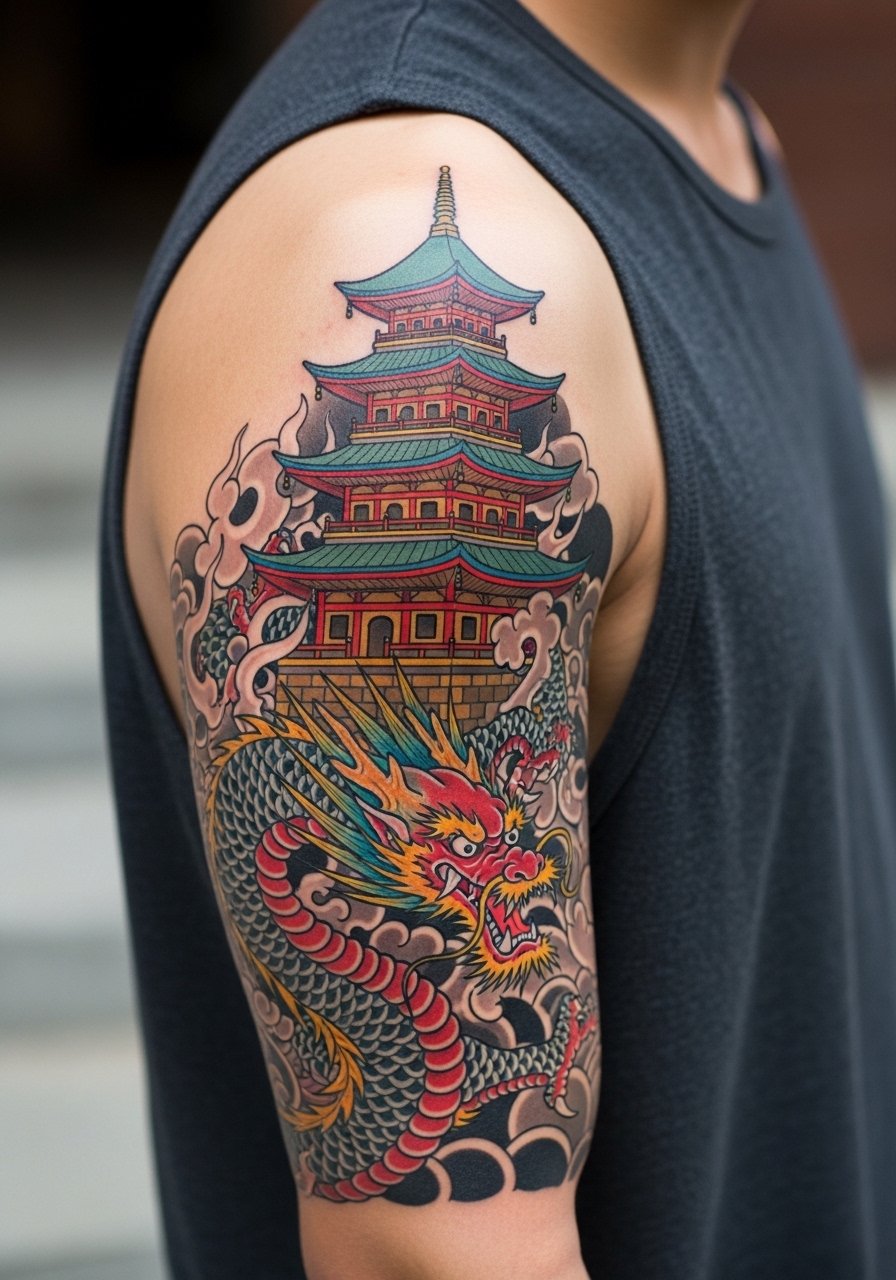
When you want a sleeve-ready element that reads at a distance, the upper arm is forgiving and ages better than inner forearm choices. Sessions feel longer but less painful than ribs. For a sleeve starter tell the artist where you want the dragon head to sit when your arm is relaxed. Avoid requesting tiny scales everywhere, which become indistinct on long-term healed photos. Pair this with a sleeveless muscle tee for a rugged look and easy session access.
12. Pagoda on the Ribcage for a Breath-Synced Meditation Illusion
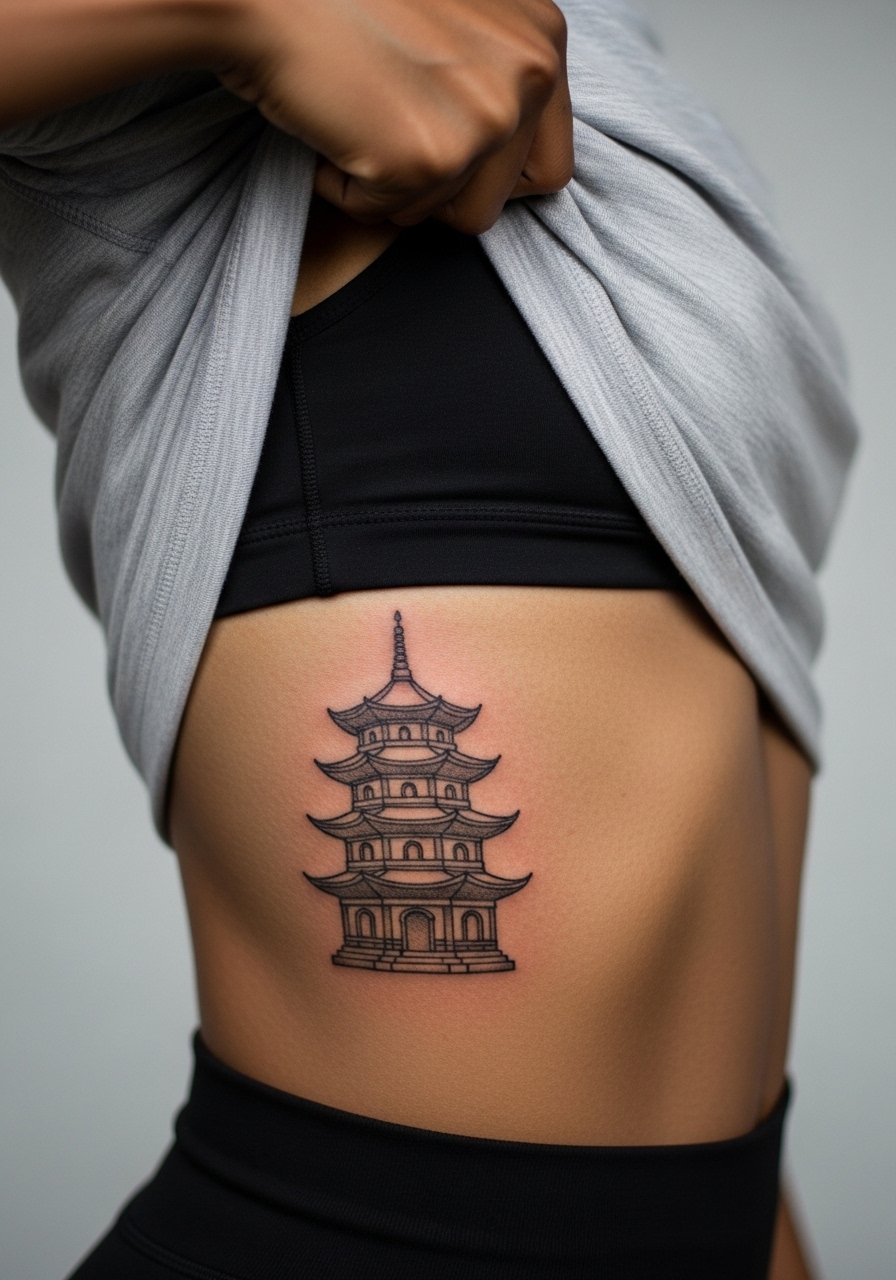
Fair warning about the ribs, this placement rates high on most pain scales but can deliver a personal piece that literally expands and contracts with breath. There is a debate among artists about fine line on ribs. One side says the skin stretch and movement blur lines within two years. The other says with intentional spacing and proper needle depth it can settle fine. Ask your artist which approach they use and plan for touch-ups. Also consider the session logistics; bring layers and expect to pause for rest.
13. Incense Smoke Morphing into Dragons, Sternum
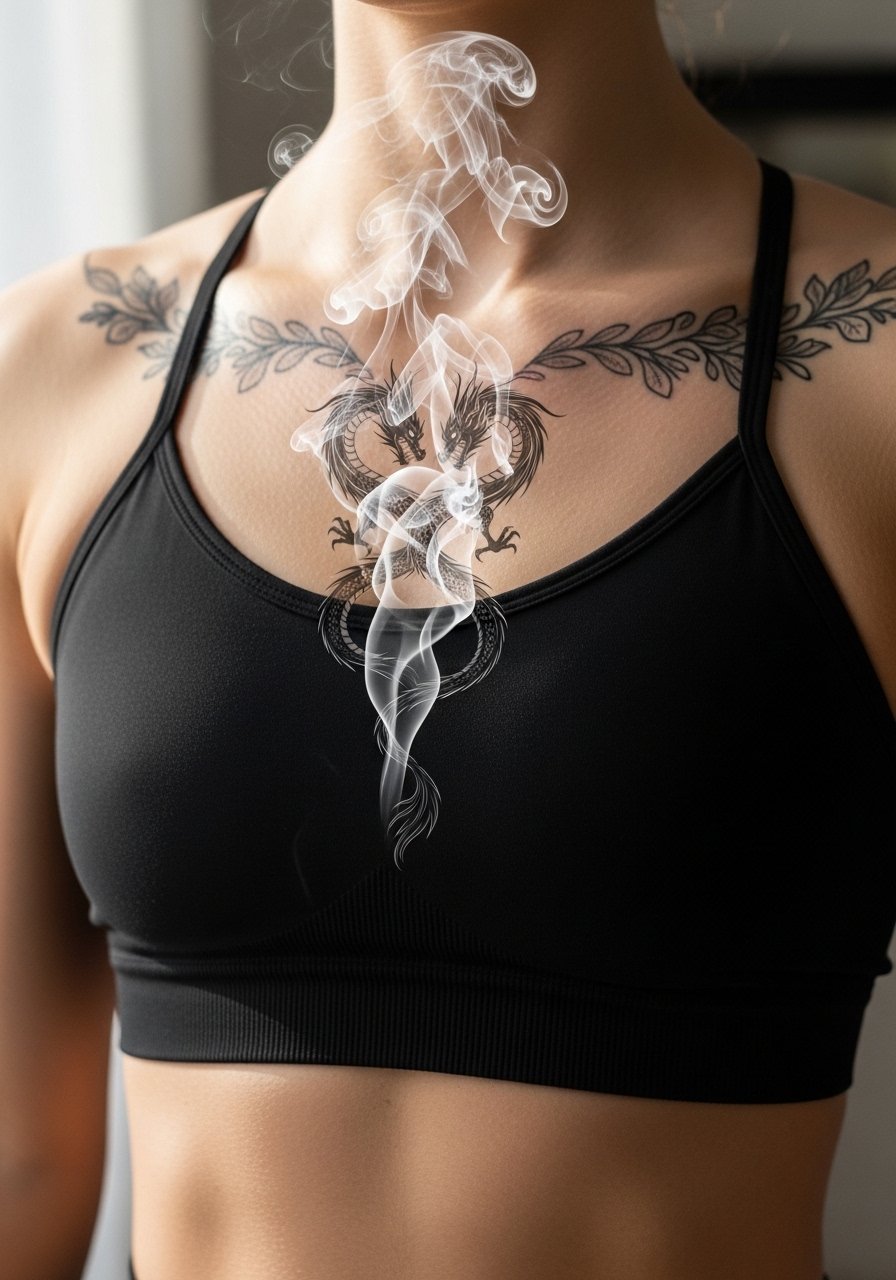
This idea leans into transformation and works best when the smoke lines are given breathing room. The sternum is sensitive and requires an artist comfortable with midline anatomy, not a novice who mostly does extreme color work. A common mistake is layering too many tiny smoke curls over the sternum which become indistinct as the skin settles. Ask for a mock stencil and discuss break timing in advance. Because this sits near the chest midline, consider career and wardrobe implications.
14. Micro Pagoda on the Ankle, Minimalist Constellation Pairing
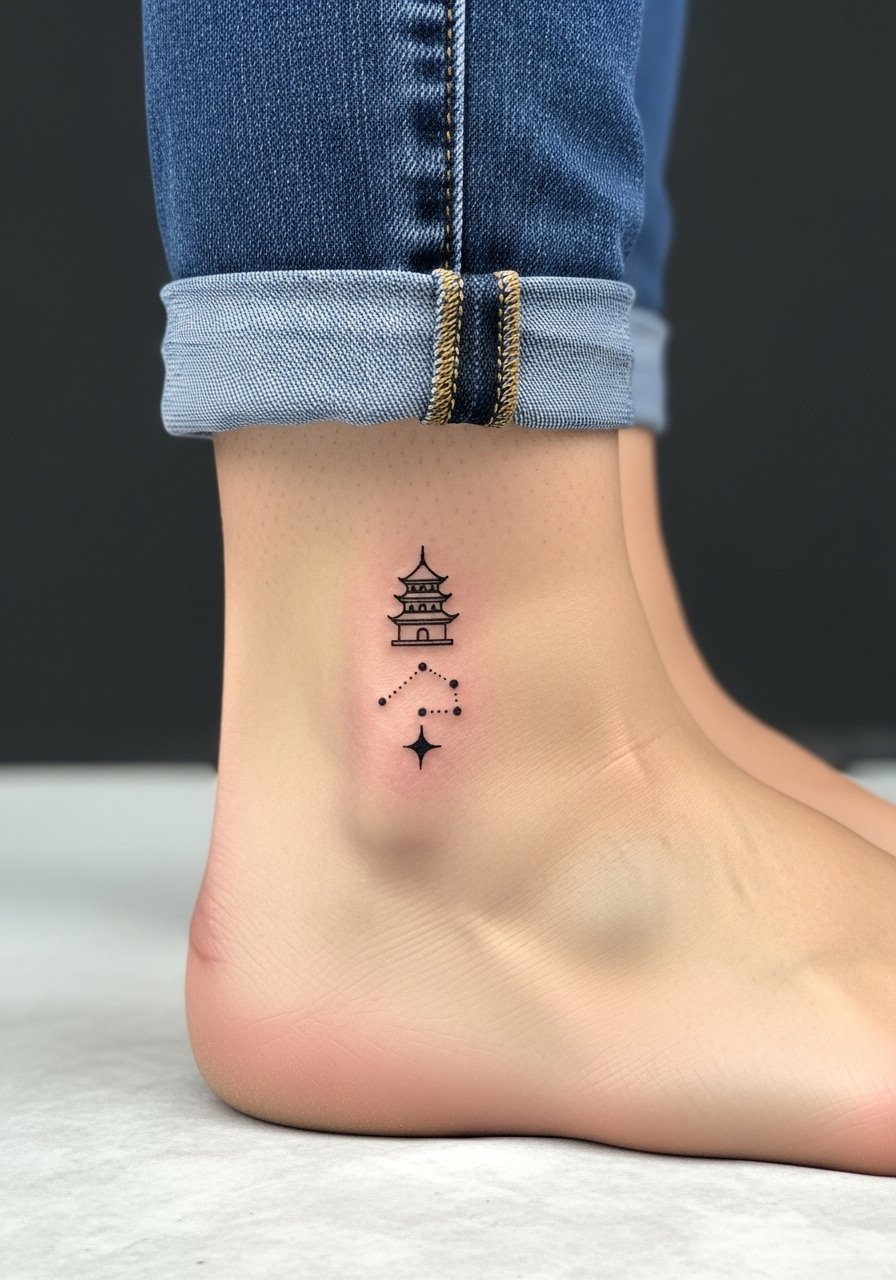
Ankle tattoos can look delicate and are perfect for someone who wants temple imagery that can stay private or be shown off. Pressure from shoes and socks is the main aging factor, so ask your artist to keep the primary lines slightly bolder than a true micro single-needle. Expect a single short session and a higher chance of early touch-up because of friction. Pair with sandals or jeans rolled up for visibility and try rolled cuff joggers men for casual display.
15. Torii Gate Forearm Wrap, Mid-Forearm Band
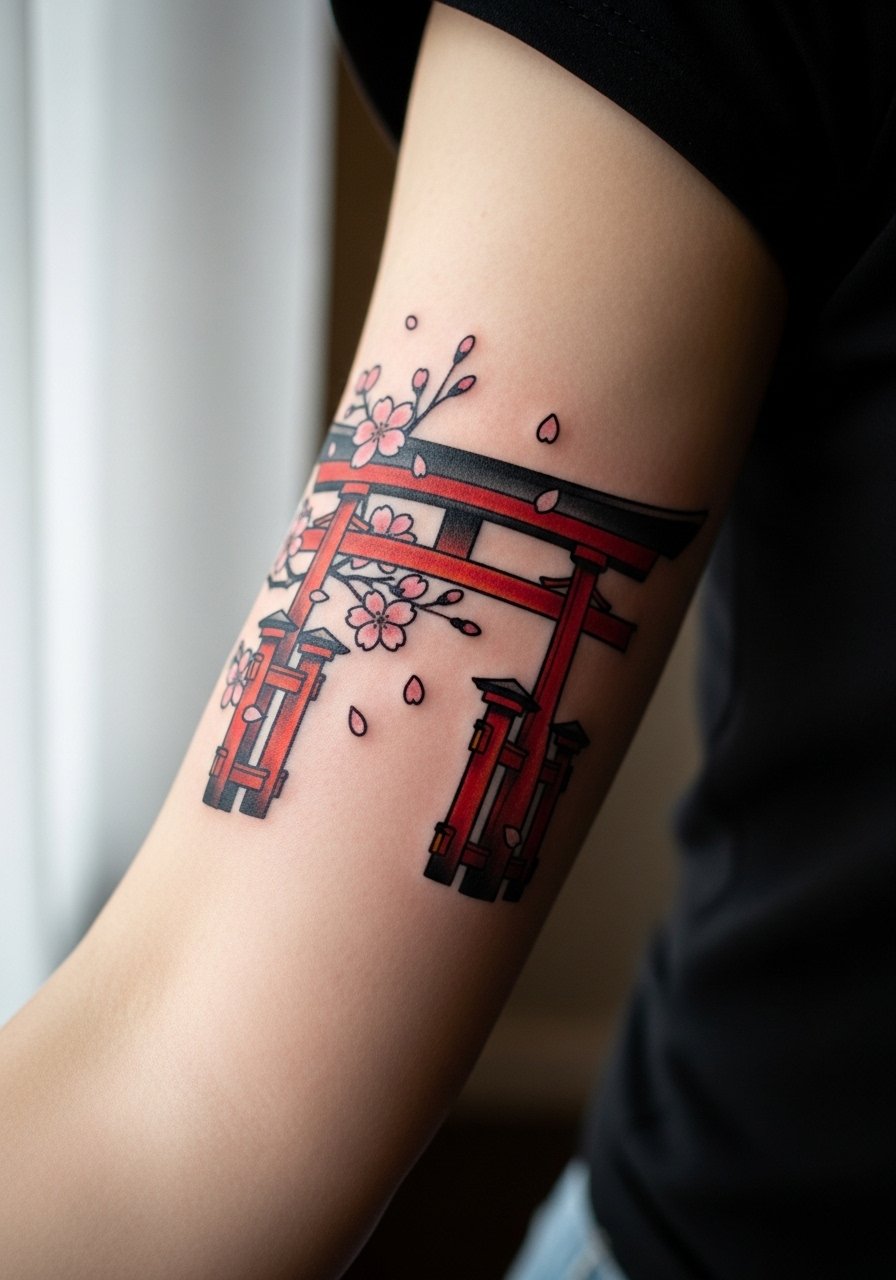
This forearm wrap reads cleanly when the gate is given negative space and the sakura are used sparingly. The mid-forearm tolerates a fair amount of saturation, but the mistake is trying to pack too many petals into a tight band. During consultation ask for reference shots in the exact pose you will wear it in so the artist can test wrap alignments. The session typically takes a few hours and touch-ups around year two are common on the petal edges. For evenings try a black kimono sleeve shirt as a styling nod.
16. Low-Slung Shrine Roof Across the Lower Back
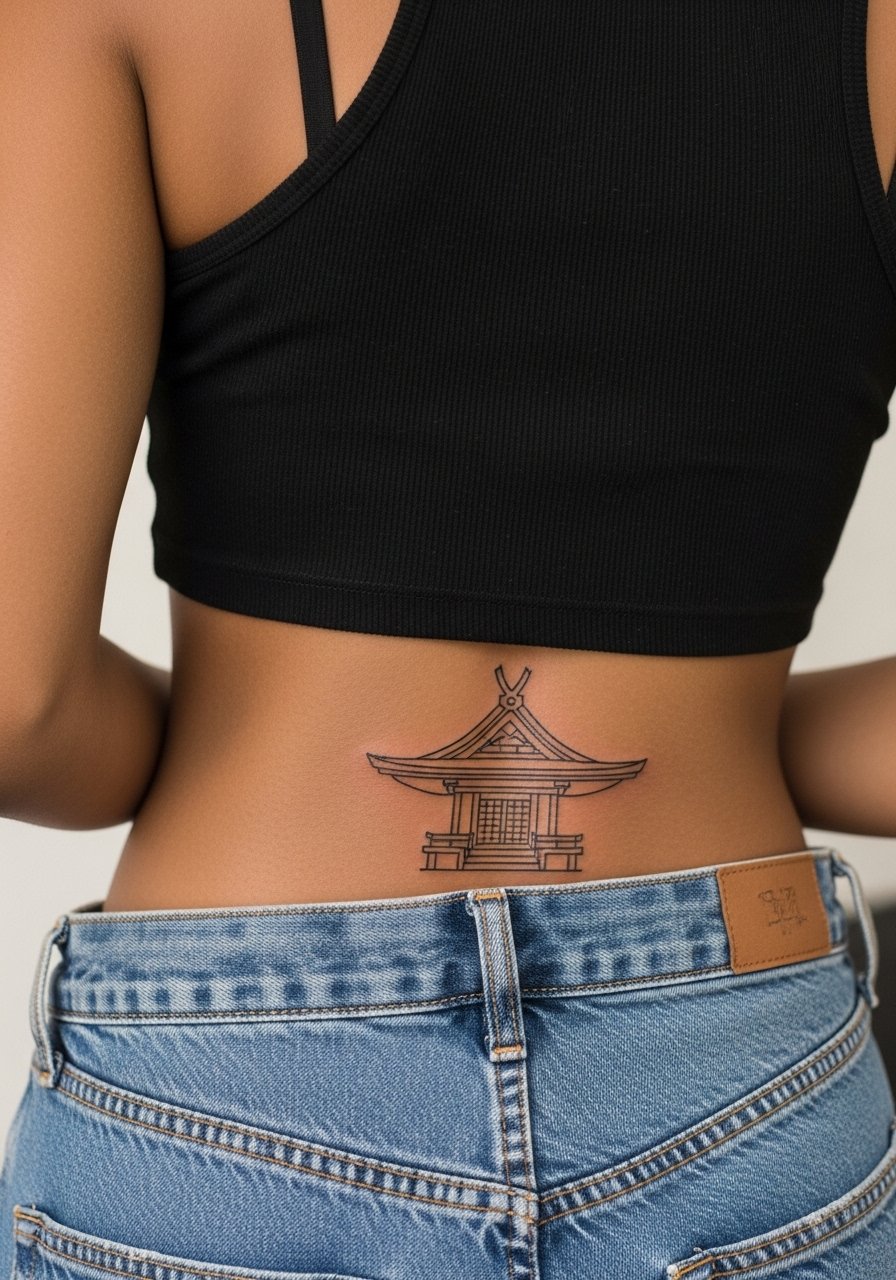
Lower back placement gives architectural designs room to breathe and it avoids many of the stretch issues other torso placements face. The visual impact is subtle unless you actively show it with low-rise or backless pieces, which makes it a good option for people balancing privacy and art. Expect one to two sessions for a simple roof motif and plan for sun protection when you expose the area. For seasonal wear consider a tank top and high-waisted bottoms that reveal just the roof line.
17. Tiny Pagoda as a Finger Ring, Side of Finger
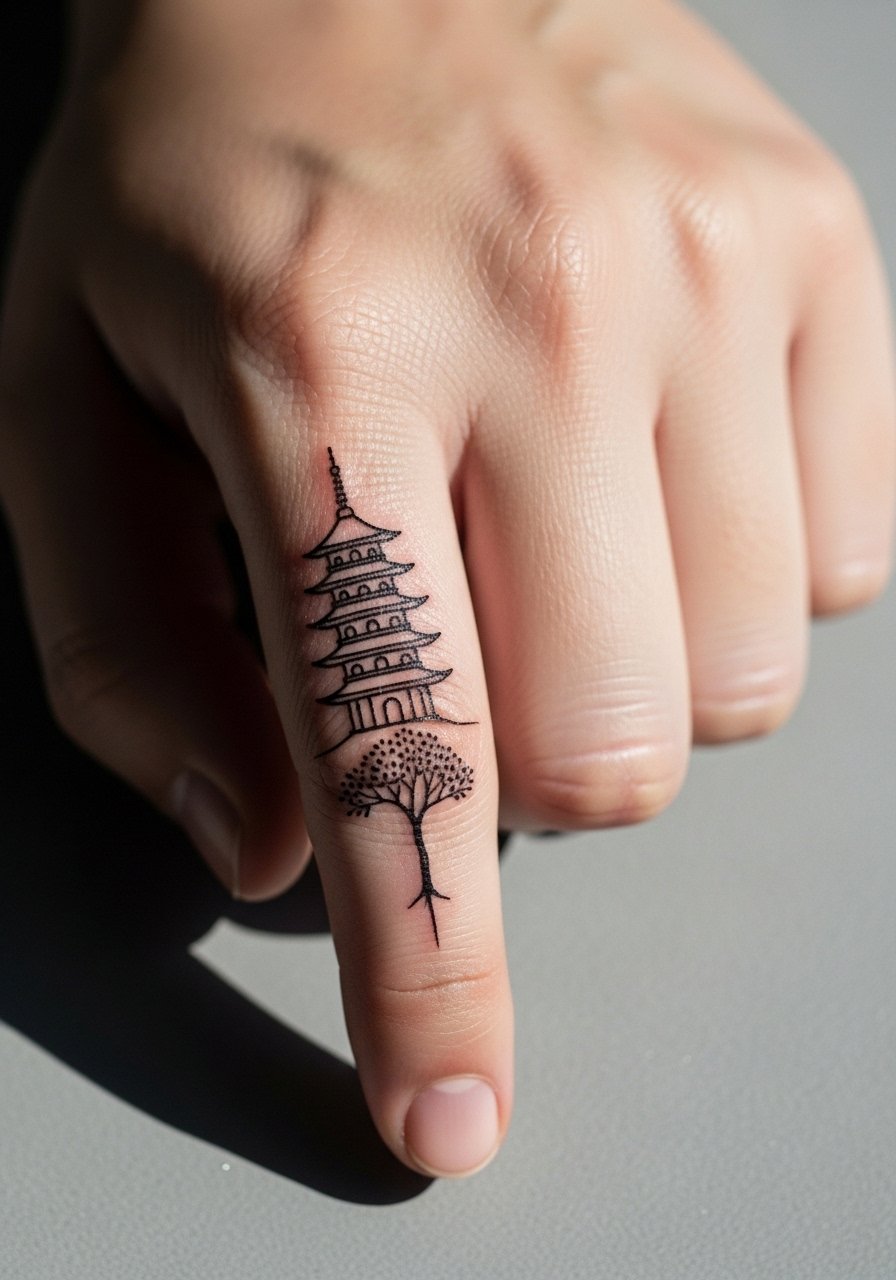
Finger placement is tempting but it comes with trade-offs. The skin there sees constant use and repeated washing, so plan for more frequent touch-ups and possible fading into soft edges by year two. If you still want it, ask the artist to thicken the primary outline slightly and to avoid tiny interior details that will vanish. A real mistake is expecting single-needle crispness to stay unchanged; prepare mentally for maintenance. Keep rings light and avoid tight bands that press the ink daily.
Frequently Asked Questions
Q: Will a fine line temple tattoo blur faster on pale skin during healing?
A: From what I've seen, pale skin can show redness more visibly during healing which sometimes masks initial crispness, but the real risk is fine detail and placement. Choose slightly larger spacing and stronger primary outlines for better longevity, and discuss touch-up timelines with your artist.
Q: How do I find an authentic irezumi or temple specialist without chasing anyone linked to yakuza aesthetics?
A: Search hashtags like #irezumi and #japanesetempletattoo, filter portfolios by full healed photos, and look for artists who document multi-session builds. Also try searches for "[city] irezumi guest spots" and reputable app filters to find artists who specialize in temple architecture.
Q: Is Saniderm better than dry healing for these temple styles?
A: Artists split into two camps. One group prefers Saniderm for less mess and faster initial protection. The other prefers dry healing to watch scab formation and avoid occlusion. Ask your artist which method they usually recommend and why. Your skin type and the placement will affect which approach you choose.
Q: How much should I budget for a medium-sized temple piece if prices feel higher than expected?
A: Pricing varies by region and artist, and I have seen small temple pieces start at different levels than a few years ago. Expect to pay by session, so break your budget into session-level chunks and consider conventions or guest spots as possible ways to plan costs.
Q: Will a temple tattoo on my ribs or sternum affect how visible it is in professional settings?
A: Ribcage and sternum placements are easy to keep private under typical work clothing, but consider how often you might want to show it. Also think about session pain and healing logistics since those areas are more sensitive and sometimes require longer recovery windows.
Q: Can wardrobe choices reduce wear on visible temple tattoos over time?
A: Yes. Neutral tones and loose sleeves reduce friction and sun exposure which are two big aging factors. For example a wide-neck shirt or rolled sleeves lessen constant rubbing against collars and cuffs.
