
Fine line and flashy trends keep changing, but the traditional flash drawings that keep people coming back are the ones that read well healed. I say that after spending time in shop waiting rooms and watching healed portfolios. These classic motifs age predictably when scaled and inked right, and the notes below show which placements hold saturation, which need spacing, and what to ask your artist before the needle touches skin.
1. American Anchor with Rope on the Forearm
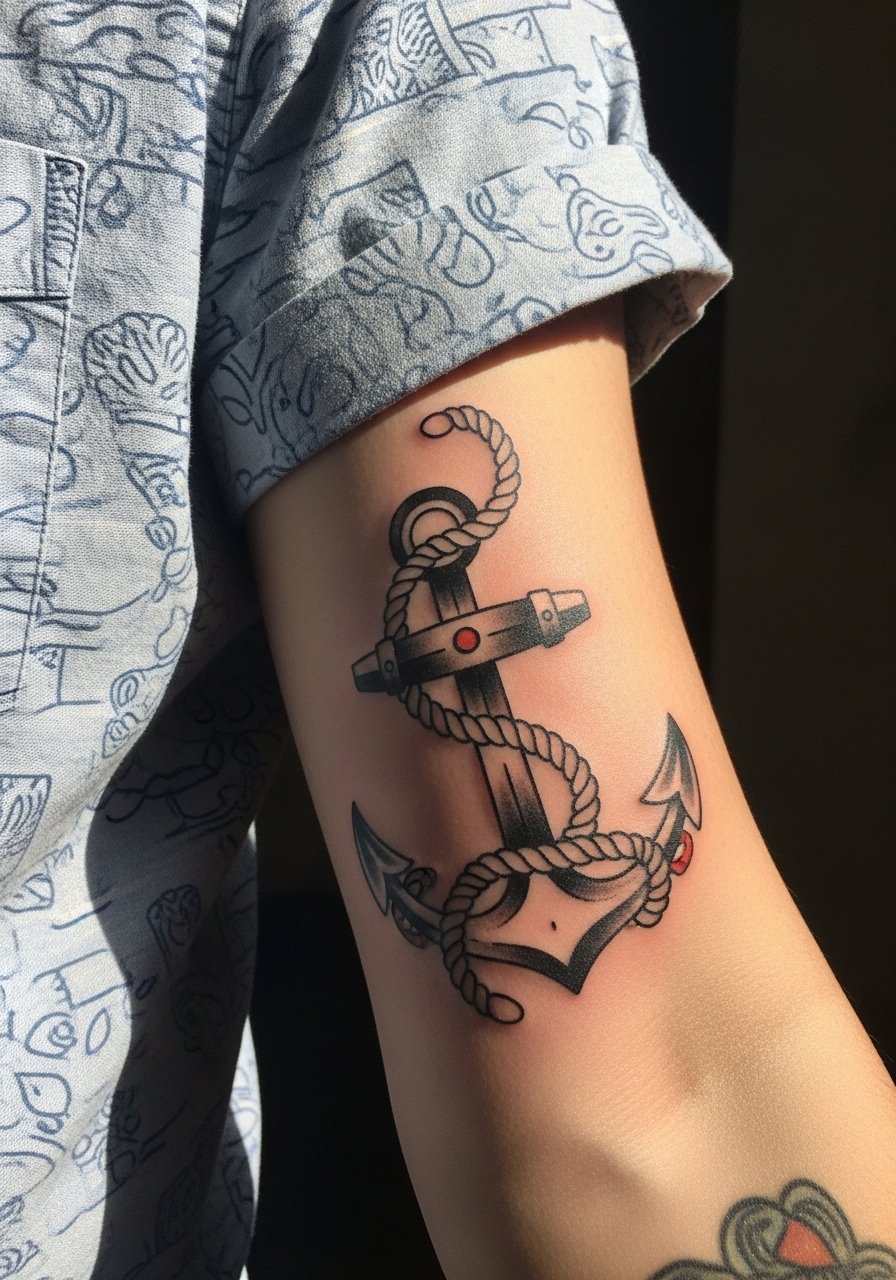
I've seen anchors heal beautifully on forearms because the canvas is flat and movement is predictable. Ask your artist to scale the rope loops larger than the flash sheet so the twist does not collapse as the skin settles. A common mistake is shrinking the anchor to under three inches, which makes the rope and anchor detail merge after a year. Expect a one to two hour session with medium discomfort, mostly during the inner forearm strokes. For showing it off, roll up a chambray shirt and add a leather cuff bracelet opposite the piece. Forearms rarely need early touch-ups if linework depth is consistent.
2. Bold Rose with Banner Across the Upper Arm
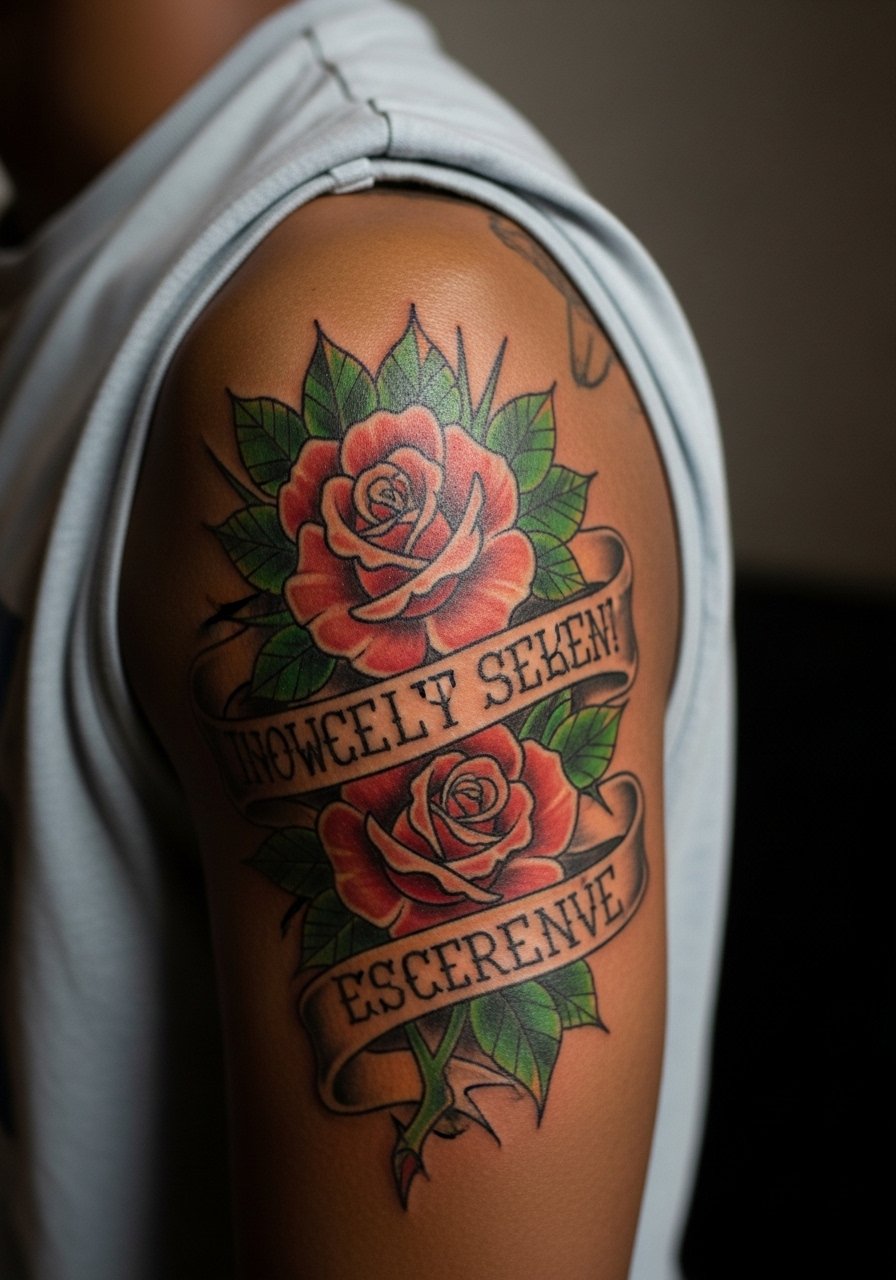
Fair warning, the upper arm swells less during healing than thinner spots, so saturated petals retain color longer. During consultation, specify readable banner text and request the banner curve follow the muscle shape so it does not look distorted when the arm moves. The mistake I see most often is using too-fine script inside the banner. That washes out by year two. Session time is typically a single, focused sitting under two hours with moderate pain. Pair the finished piece with a fitted muscle tank top for summer looks and bring a loose tank on session day so the artist can rotate the shoulder freely.
3. Swallow Bird in Flight for Collarbone or Wrist
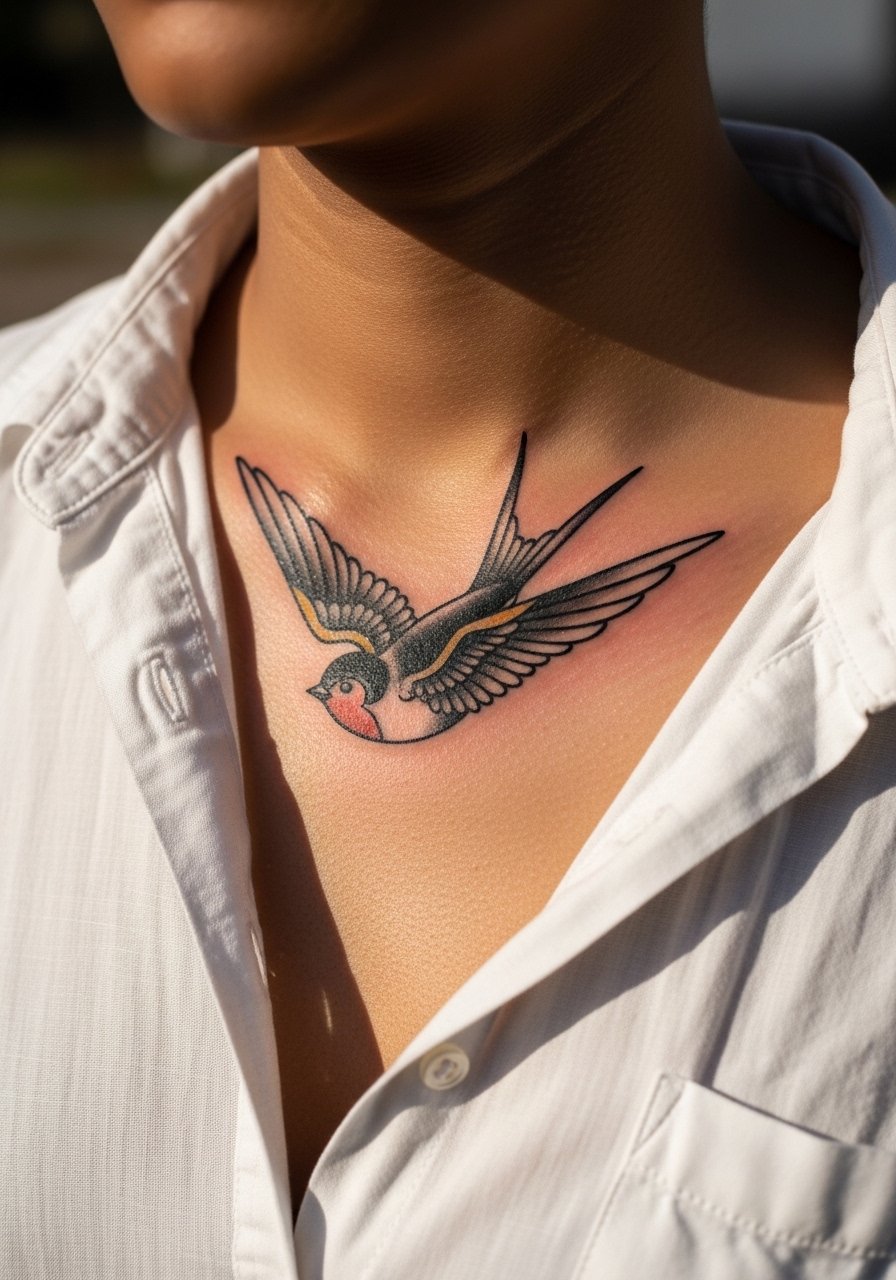
Most people pick a swallow for safe-return symbolism and the motif works across collarbone and wrist because of the simple silhouette. If you want the swallow on the collarbone, ask for slightly thicker wing outlines than the flash sheet recommends to preserve definition as the skin moves. A swallow on the wrist is a smaller commitment but expect more frequent touch-ups because of hand washing and sun exposure. The consultation tip is to point out how visible you want it in tank tops and to ask for healed photos of similar placements. For showing off, an open button-down shirt works well with collarbone placements.
4. Dagger with Droplets on the Calf
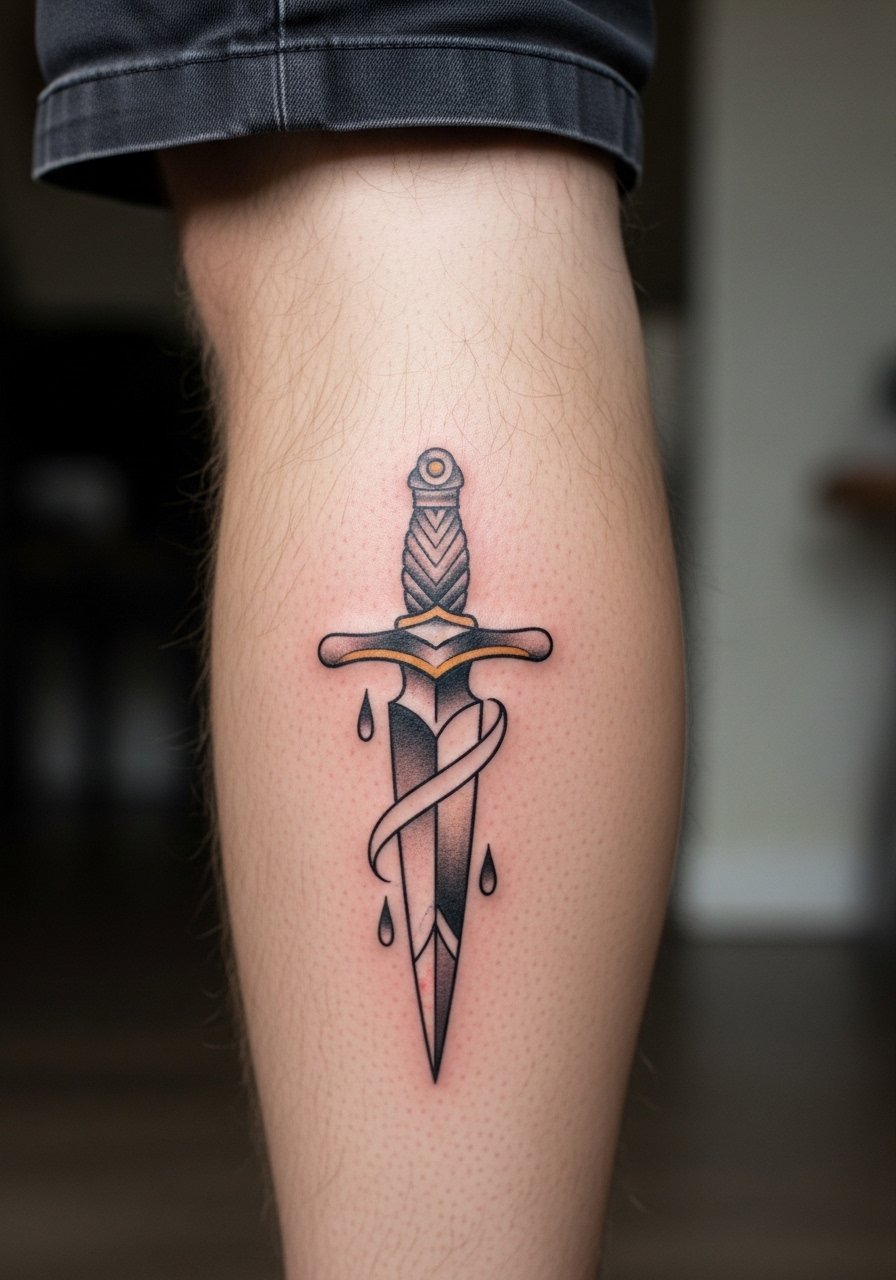
There's something about a long dagger that reads clean on a vertical canvas like the calf. The biggest mistake is wrapping too much background into the blade area, which blurs after a few years. Ask your artist to keep the blade contrast high with a thin band of negative space around it so the silver reads next to the reds in the droplets. Calf sessions are more comfortable than ribs, but the skin can be bouncy near the muscle so expect the artist to reposition your leg. Pair this design with rolled chinos or slim joggers when you show it off. Touch-ups are common at year two if the droplets are tiny.
5. Heart with "Mom" Banner on Inner Bicep or Rib
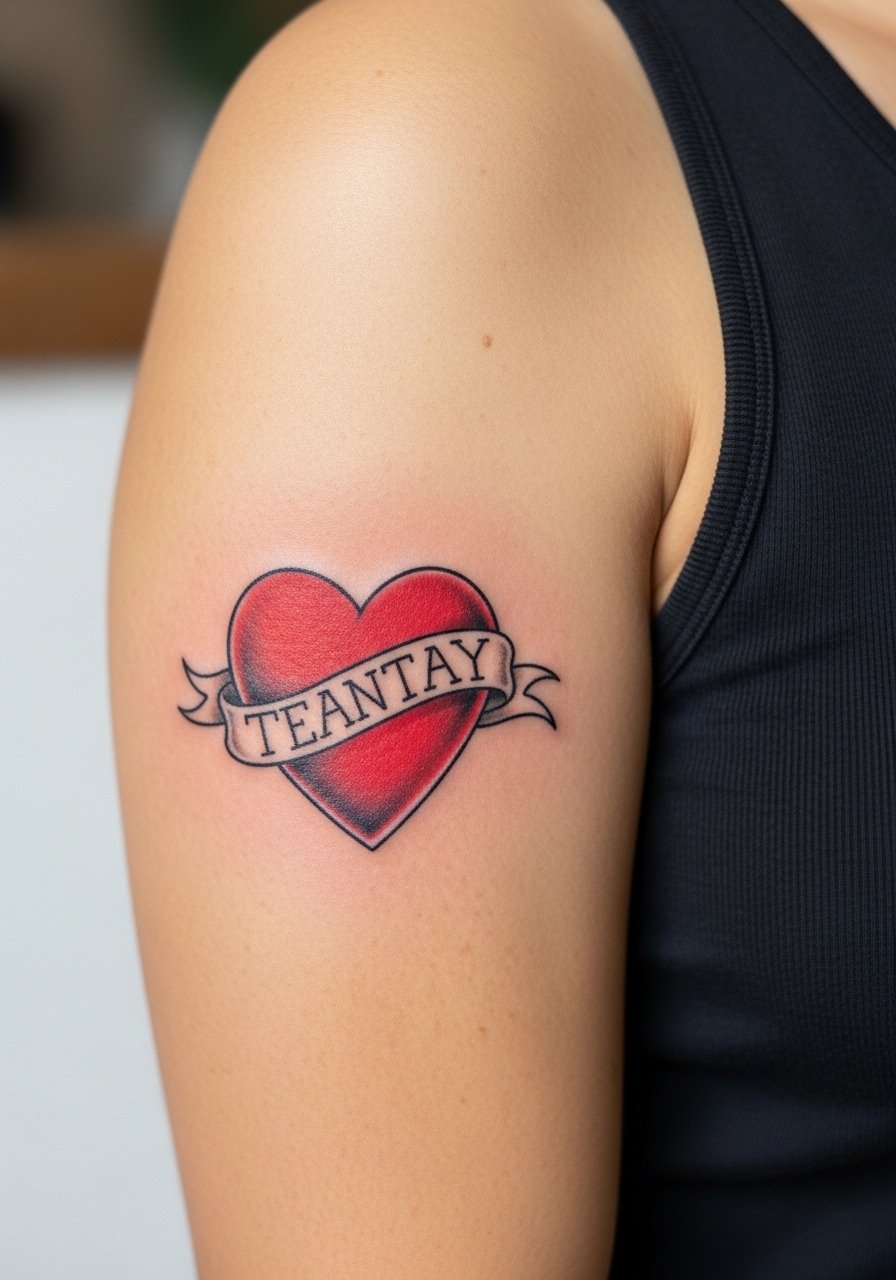
Pain warning, the inner bicep can be sensitive, but it is a forgiving place for saturated color and legible banners. Ask for blocky lettering that reads when you flex because script tends to blur on the inner arm. A frequent error is placing the heart too close to the armpit crease, which causes friction during healing. Session time is usually under two hours and the inner bicep keeps saturation well. For the appointment, wear a tank top or a sleeveless shirt you can move aside easily. If you pick the rib version, be prepared for higher pain and a slightly longer healing curve.
6. Panther Head Sneer on the Shoulder
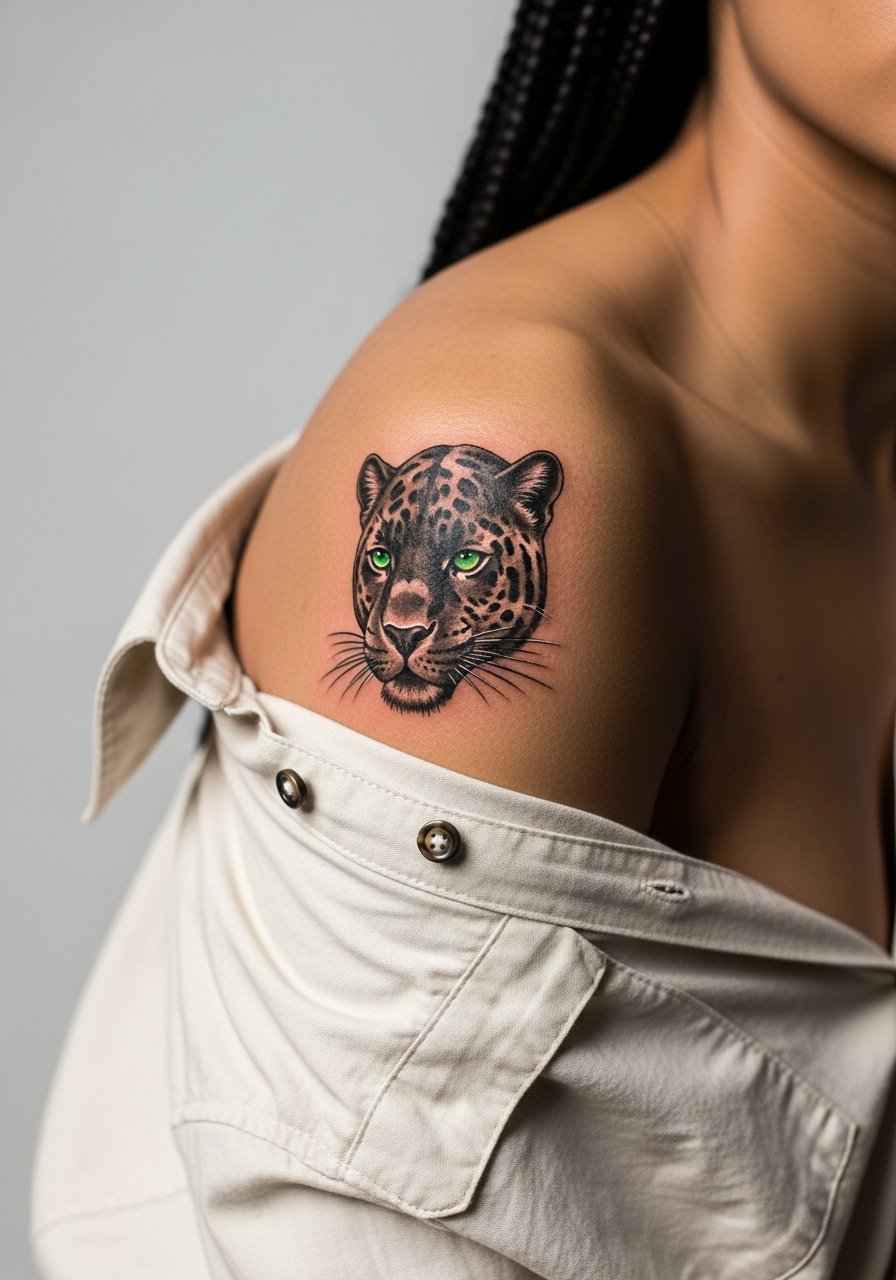
When scaled for the shoulder, panther heads read as bold statement pieces that age into a silhouette rather than a photo. The common mistake is over-detailing the whisker region in a small patch, which can dissolve into muddiness. Tell your artist to prioritize heavy silhouettes and saturated blacks around the jaw so the expression remains fierce for years. Shoulder sessions are tolerable and usually done in one to two sittings depending on size. For showing it off, a loose open button-down shirt or tank top highlights the cap without crowding the image.
Studio Day Picks
These first six flash drawings cover wrists, arms, calves, and shoulders, and a few simple items smooth the session and first-week healing.
- Stencil transfer paper kit. Lets you preview how the anchor and swallow scale on skin before the needle starts, which helps avoid last-minute resizing.
- Topical numbing cream. Useful for inner bicep and rib sessions if you need a gentler first sit.
- Thin protective film roll. Keeps calf and shoulder work clean during the first days of movement and sweat.
- Fragrance-free gentle body wash. Cleans healing skin without stripping saturated pigment from heart and banner pieces.
- Aquaphor healing ointment. Thin layers protect fresh flash in the first few days without suffocating the needle channels.
7. Eagle with Banner for Upper Arm or Back
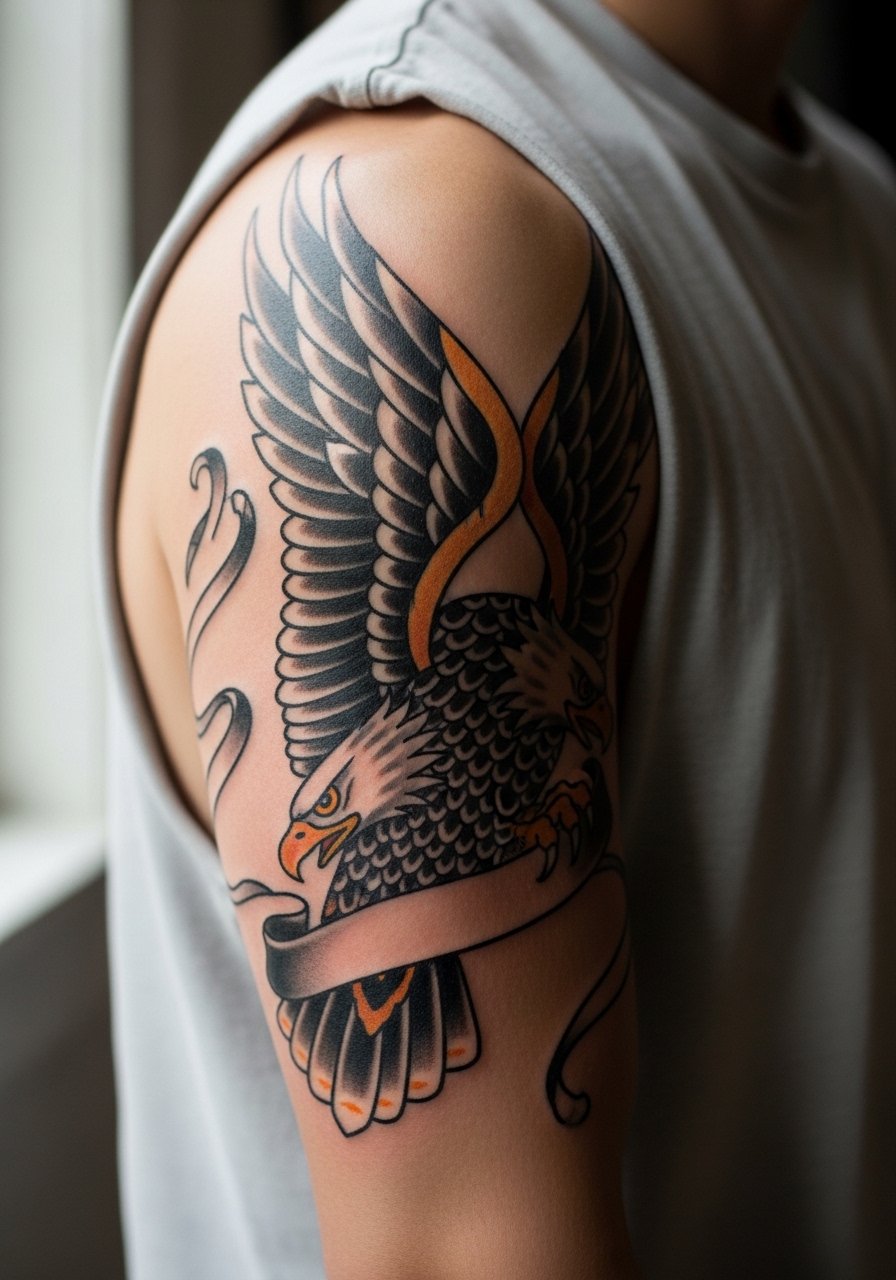
Visual impact is why the eagle continues to show up in flash. For back placements, scale it up so the talons and wing feathers read at a distance. On the upper arm, the banner should arc to follow the deltoid. A mistake I see is cramming intricate clouds behind the eagle, which softens quickly and distracts from the core silhouette. Sessions for a medium eagle are two to three hours with breaks. Pair upper arm eagles with vintage band tees when you want the graphic to peek through. Ask for healed portfolio shots of comparable sizes during consults.
8. Skeleton Hand Holding Dice on the Forearm
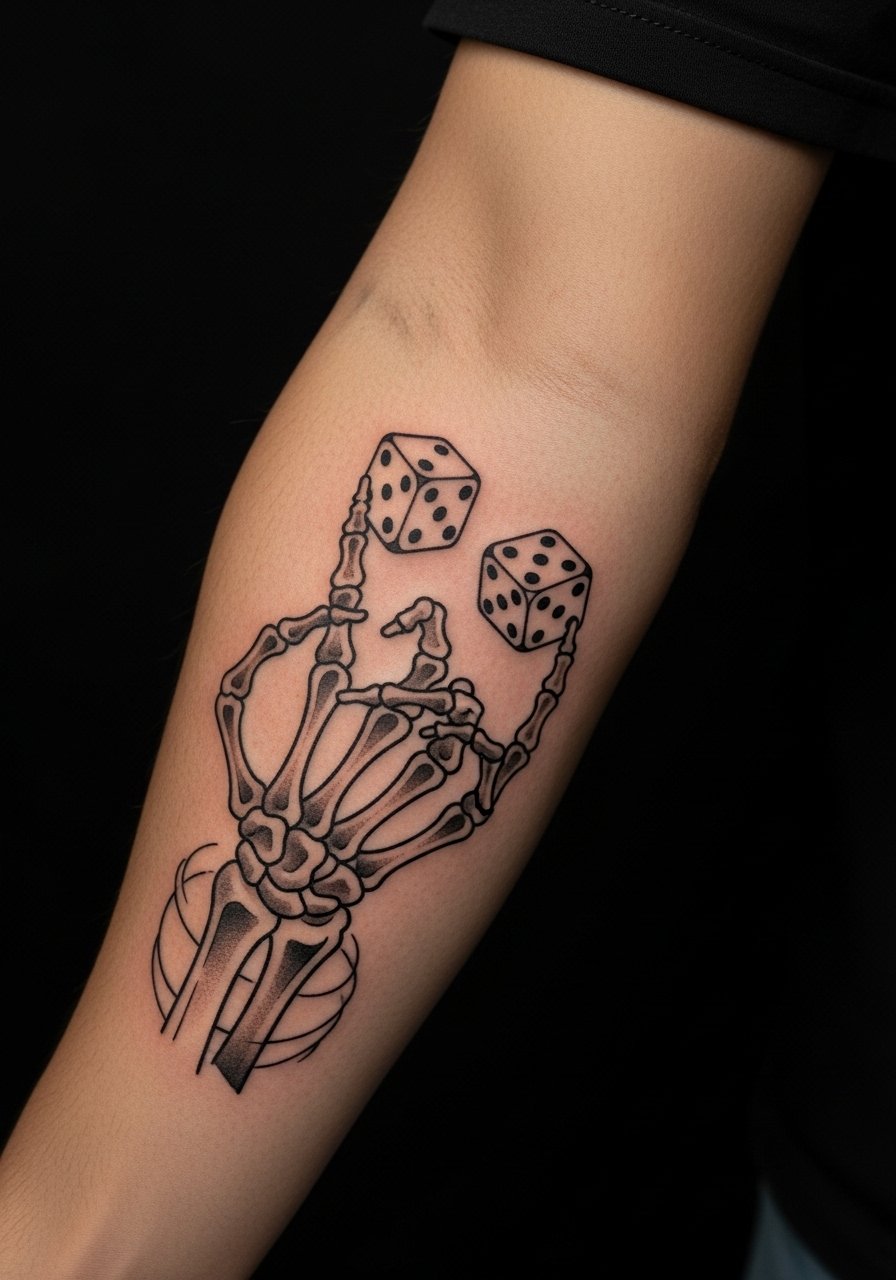
Most clients choose this for the fate motif and because bone white contrasts well against saturated reds. The key consultation note is to request clear negative space between finger bones so blowout does not turn the metacarpal area into a gray block. Forearm sessions are moderate in pain and usually finish quickly. For showing the piece, keep accessories minimal and add a leather cuff bracelet opposite the forearm so the graphic reads uncluttered.
9. Pinup Girl with Rose on the Thigh
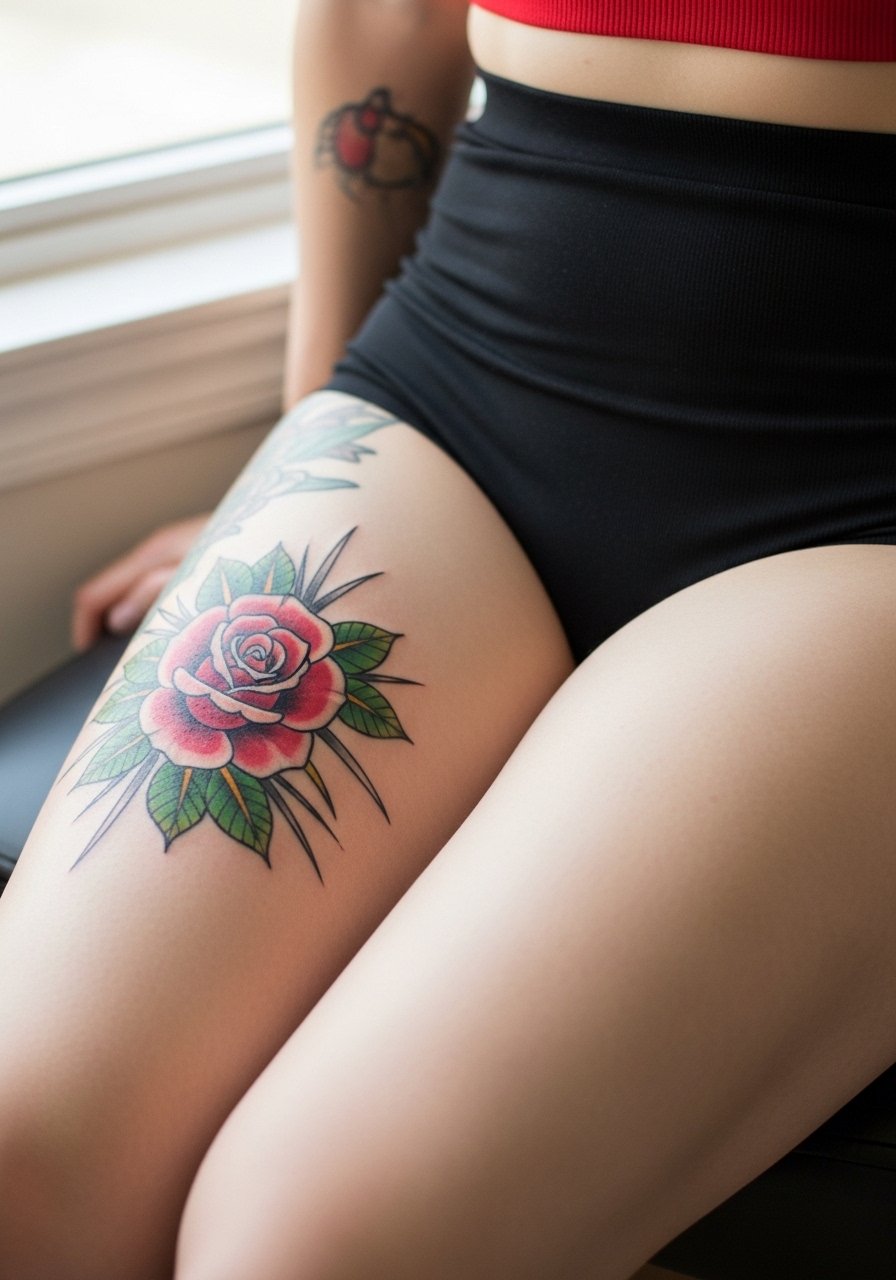
If you pick a pinup, expect a longer session and multiple sittings for full color saturation. The common error is placing a large pinup too low on the thigh where fabric rub and cell turnover dull the color. Ask for a composition that keeps the focal point centered on the fleshy outer thigh and request medium-sized color blocks rather than tiny dots that lose saturation. Thigh pieces have lower pain than ribs and usually heal well. Pair the final look with tailored swim shorts or high-cut denim for summer reveals.
10. Nautical Star for Collarbone or Upper Back
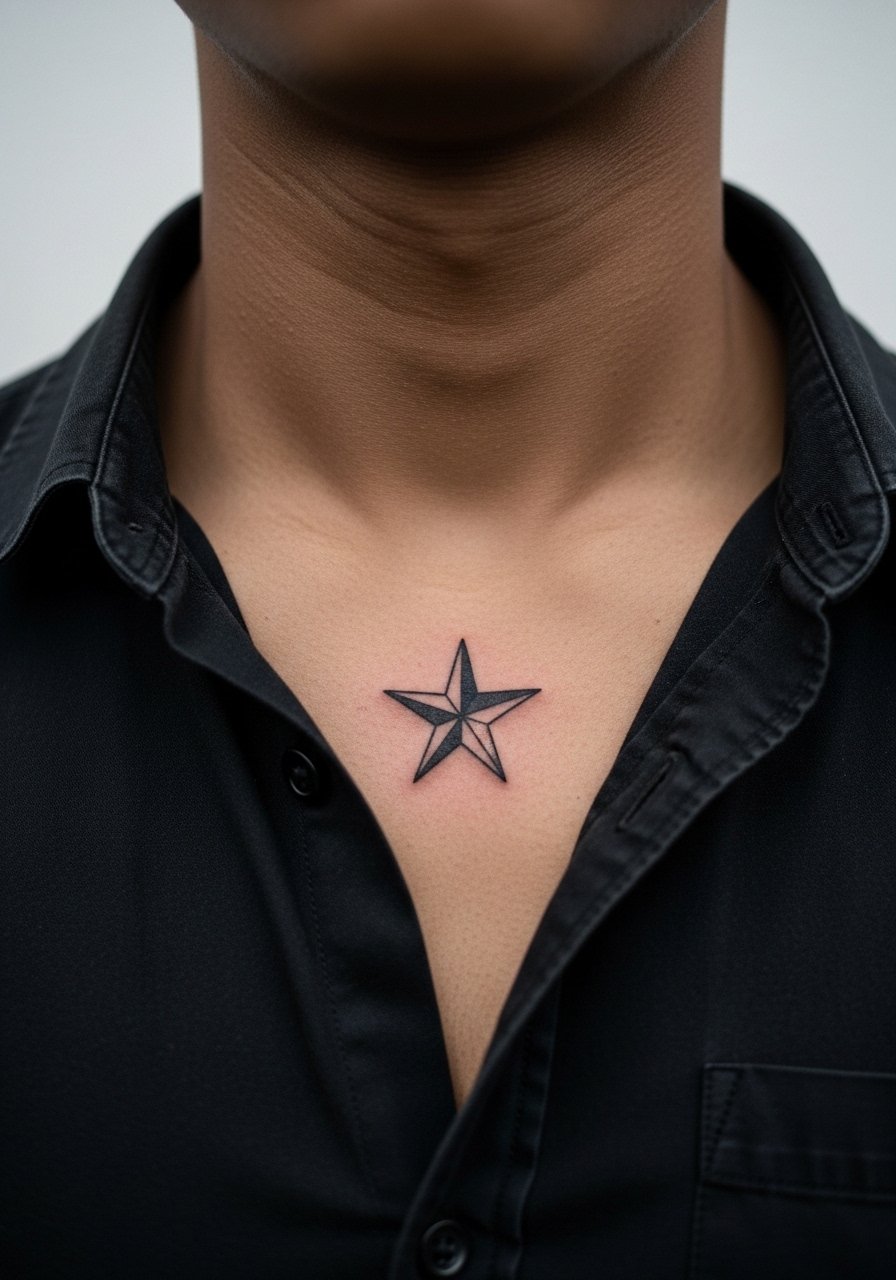
Most people underestimate how the collarbone catches sun and friction from necklaces. The safe choice is to keep the star at least three inches wide and ask for a bold outline so the central geometry stays crisp as the pigment settles. Small stars under two inches often soften into tiny smudges by year three. Collarbone is a medium pain spot and sessions are short. For showing off, an open button-down shirt frames the star without competing.
11. Ship in Strong Seas on the Calf or Upper Arm
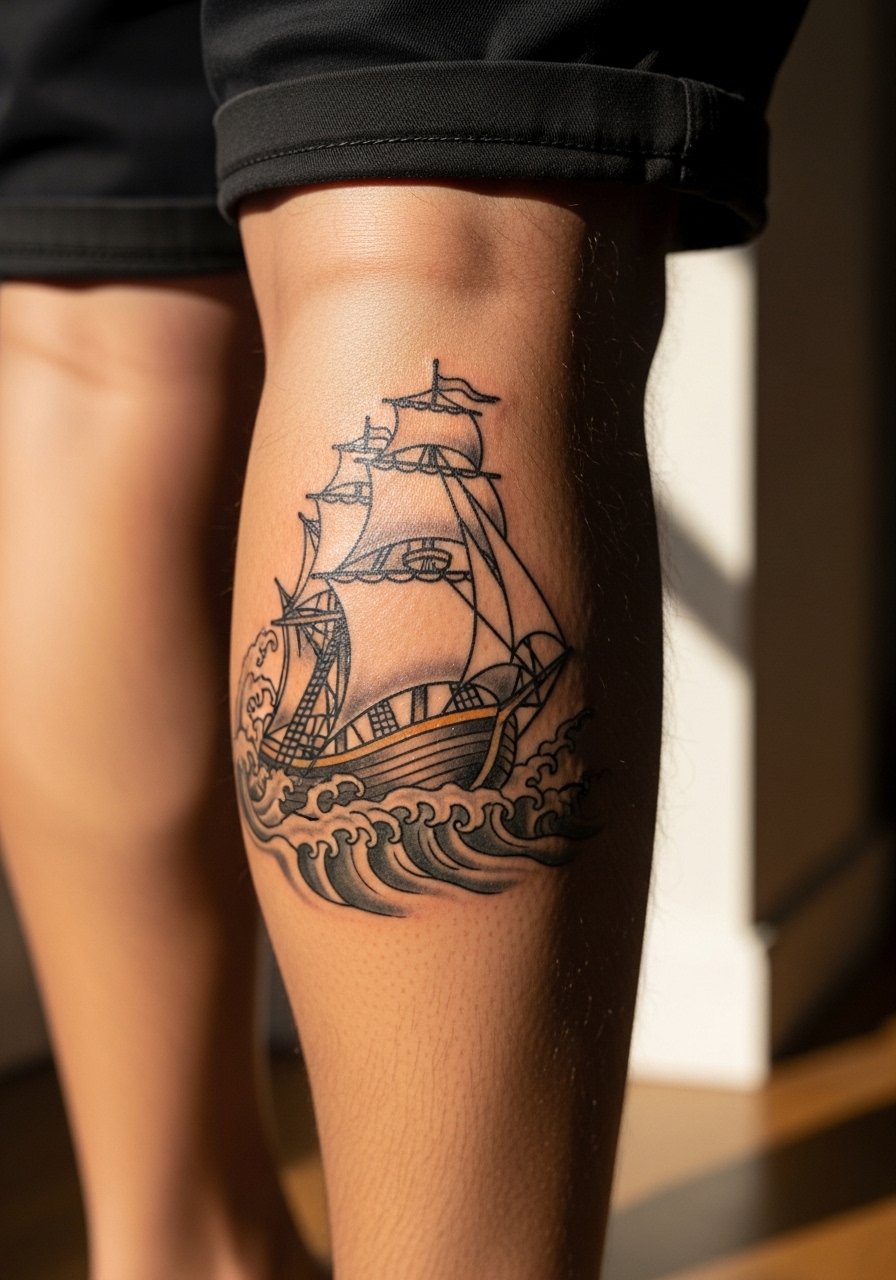
I've noticed ships age well when simplified. Too many tiny rigging lines are a recipe for blurring. During your consult, ask the artist to use broad sailors' linework and flat color planes for sky and hull. Calf placement allows vertical composition that reads from a distance. Sessions run one to two hours, and if you plan shorts season show-off, roll the cuff of slim joggers or chinos. Touch-ups at year two are common for water shading if you want the blues to stay vivid.
12. Snake and Rose Wrap on the Forearm or Thigh
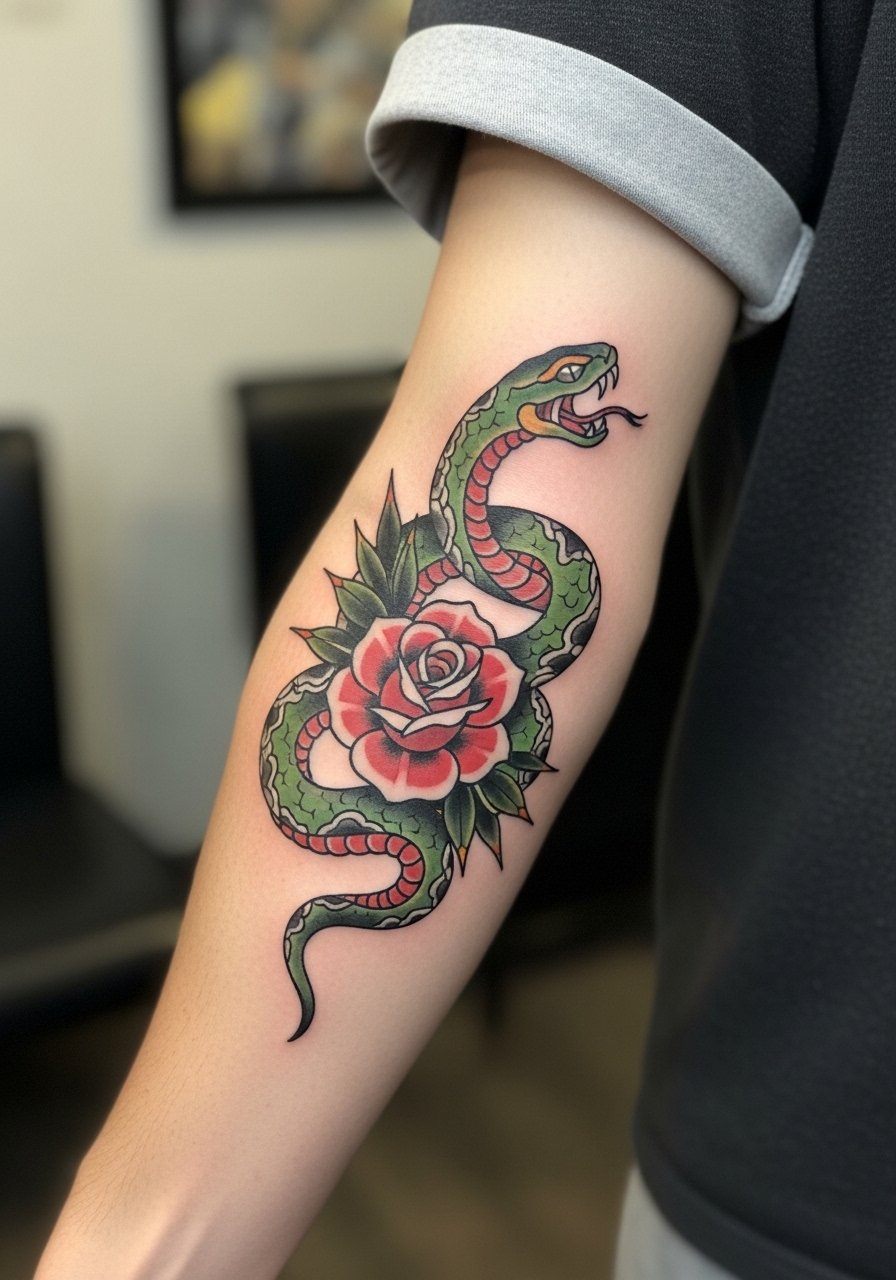
A snake and rose combination can crowd itself easily. The consultation tip is to give the snake breathing room around the petals and avoid tiny scales that will blur. Forearm wraps read as bold bands and heal predictably. The session feels like a steady rhythm of linework and color filling. For casual wear, rolled sleeves or a simple bracelet keep the focus on the motif. Expect a touch-up at year three for any thin color fields.
13. Skull with Rose on the Upper Arm
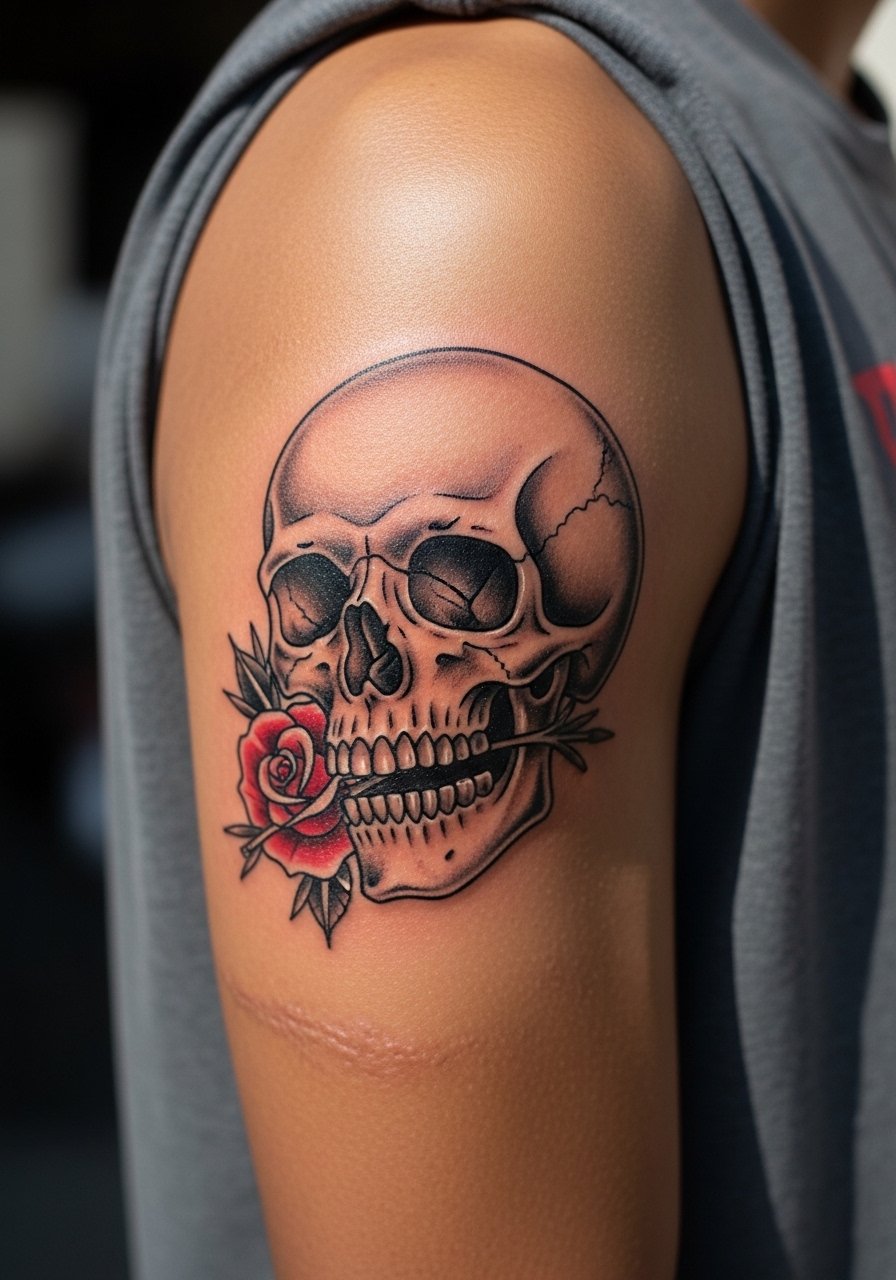
The skull and rose is a common flash with strong readability when the skull outline is heavy. The mistake is over-detailing the skull teeth with tiny lines that do not survive skin movement. Ask for bold jaw contours and flat rose petals to keep contrast high. Upper arm placement ages well and session times are moderate. This design pairs nicely with sleeveless tees and a thin chain for a mixed look.
14. Compass with Banner for Chest or Sternum
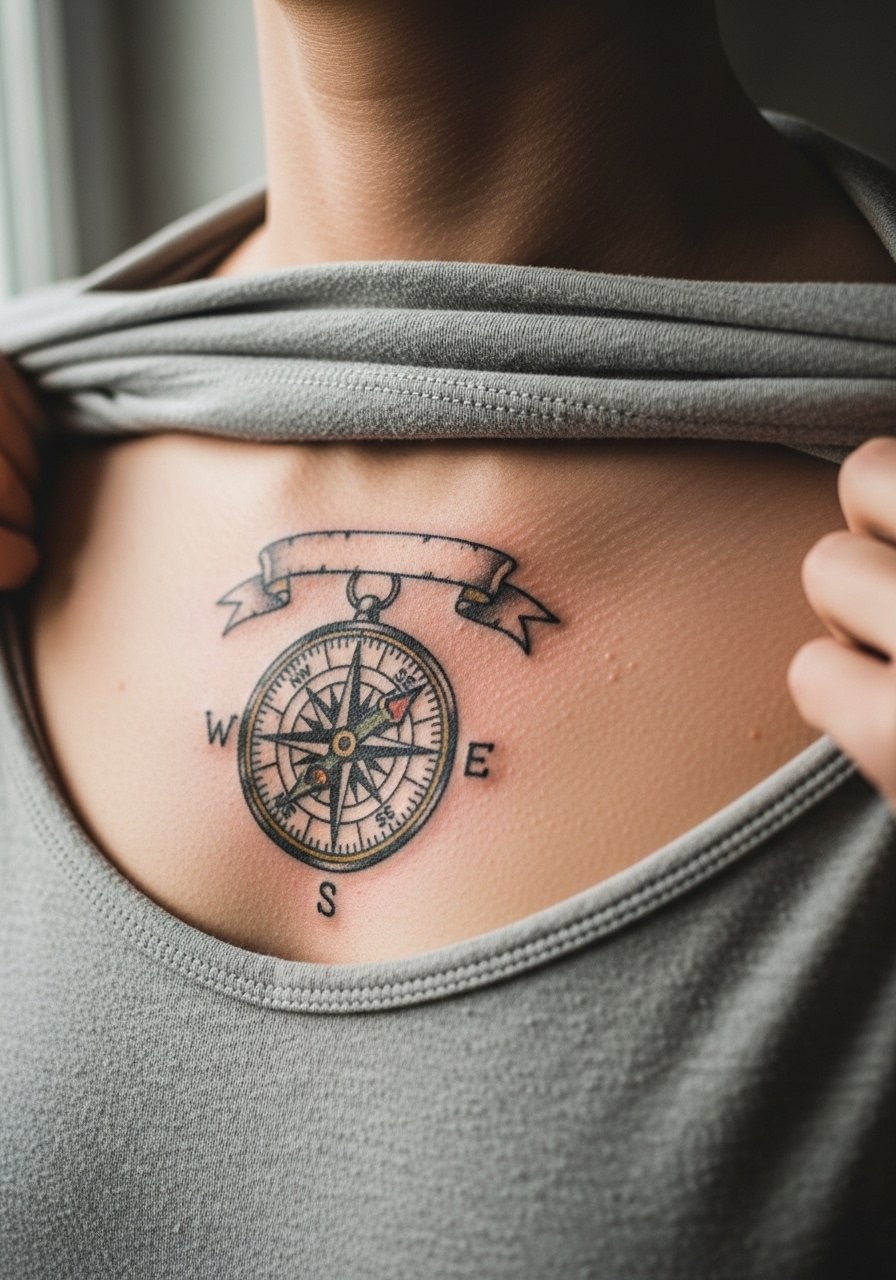
A compass centered on the chest needs symmetry and space. My consultation advice is to have the artist stencil it large enough to avoid overly crowded directional points. Sternum work is sensitive and often debated among artists for placement accuracy. If you choose the sternum, wear a fitted sports bra or wide-neck top to the session. Expect higher pain and one longer sitting.
15. Tiny Swallow Pair on the Wrist
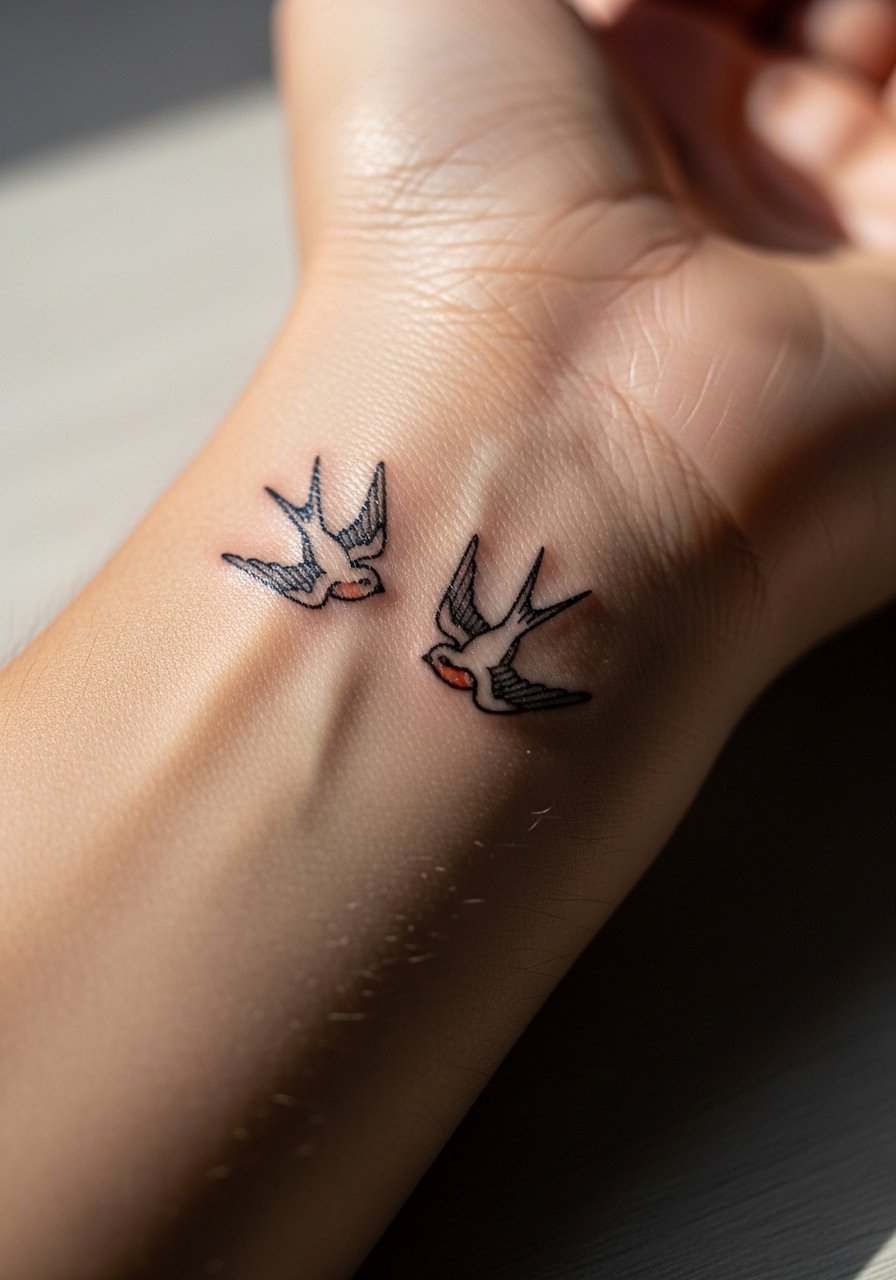
Mistake warning, wrist pieces face constant washing and friction which can dull tiny detail. For small swallows, request simple silhouettes and slightly thicker wing outlines so they hold. Wrist tattoos feel sharp during the session but heal into a softer edge after a few months. Keep jewelry minimal and consider a leather wrap bracelet on the opposite wrist to balance the look.
16. Horseshoe and Flowers for Ankle
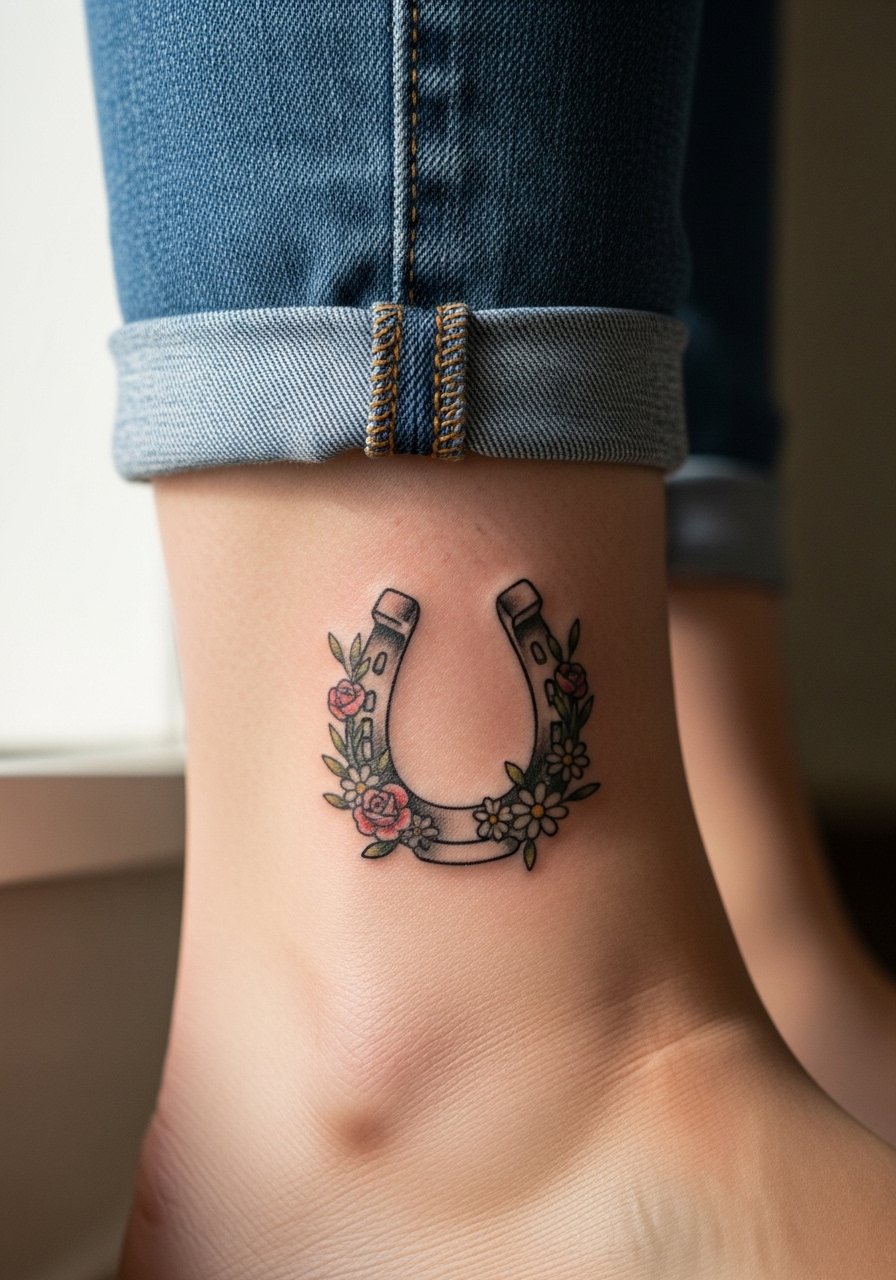
Ankle tattoos endure shoe and sock friction, so the safe move is to increase the horseshoe's outline thickness and keep flowers simplified. A common error is too much fine dot shading that disappears under recurring abrasion. Ankle sessions are short but the first week needs careful bandaging and low friction footwear. For display, roll jeans or choose sandals so the horseshoe gets visibility.
17. Candle with Flame and Script on the Ribcage
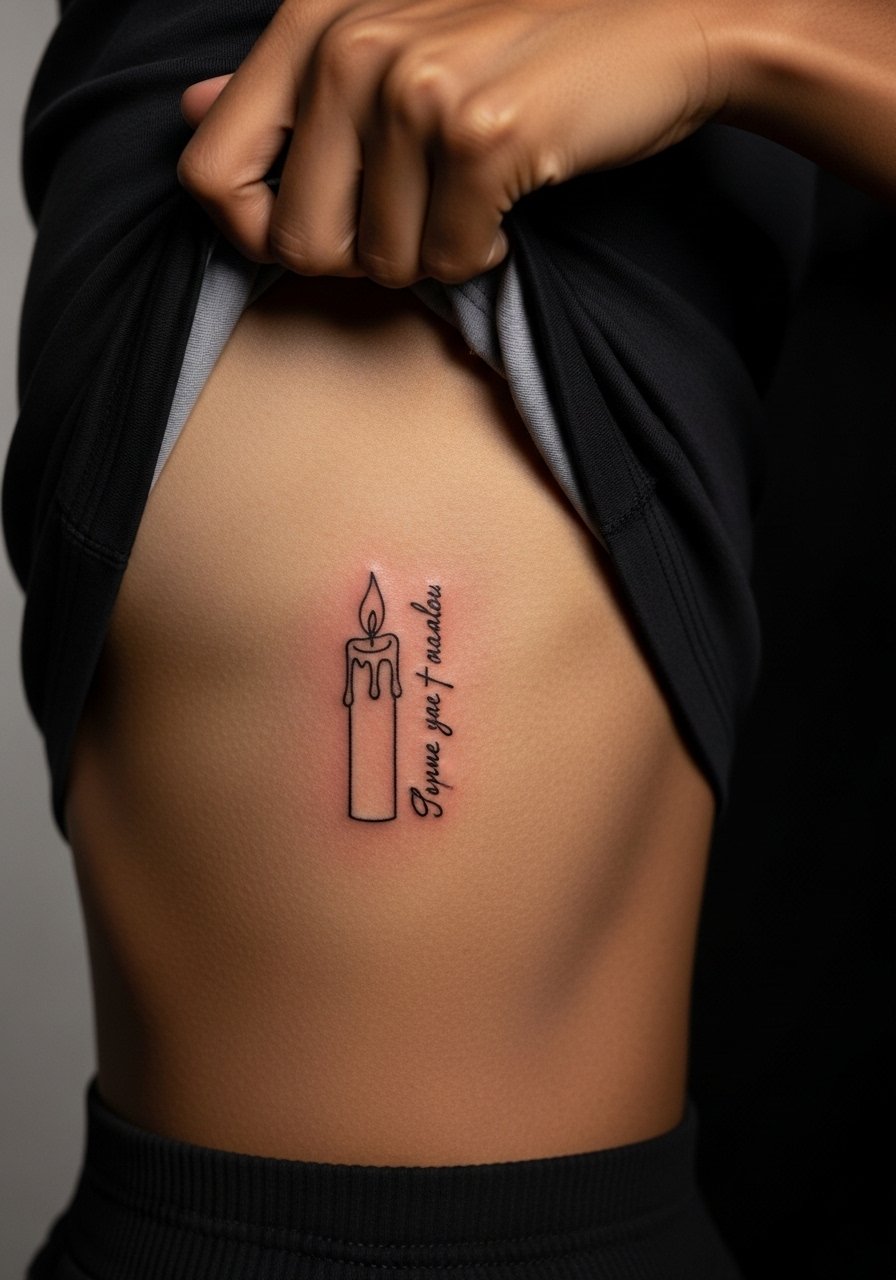
Controversy note, ribs are a place where fine line splits artists into camps. One group says constant breathing motion and thin skin cause lines to blur within two years. The other group maintains that with correct needle depth and spacing, fine line settles fine. Ask your artist which camp they belong to and request spacing that errs wider rather than tighter. Rib sessions are painful and take patience. Keep session clothing loose and bring a zip-up you can take off without overreaching.
18. Anchor Mini on the Wrist or Finger
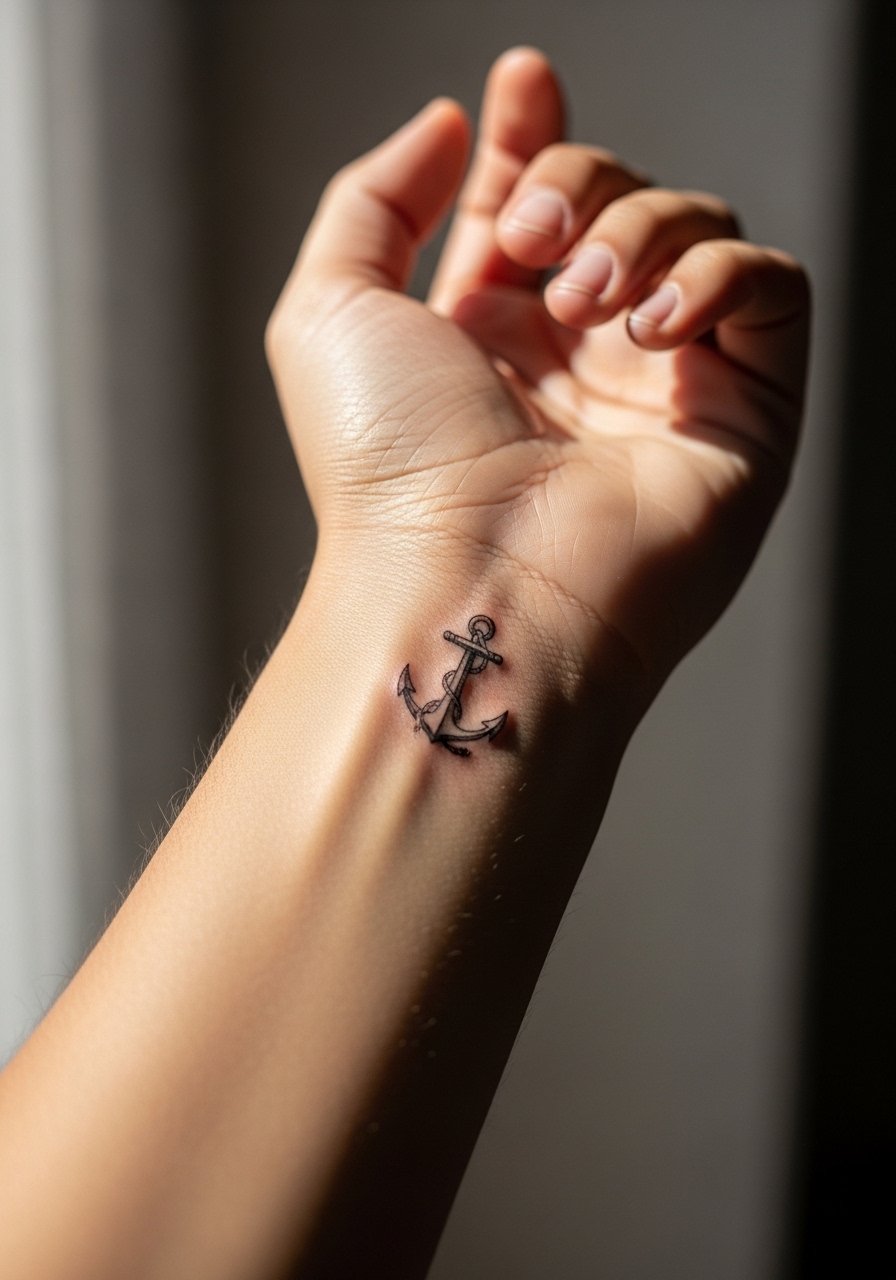
Small wrist or finger anchors are popular but they need bold outlines to avoid early fading. The usual mistake is too-fine detail for such a high-movement spot. For session day wear, take off rings and avoid jewelry on the tattoo wrist. Expect touch-ups at year one for finger placements and at year two for tiny wrist pieces.
19. Traditional Rose Cluster on the Chest
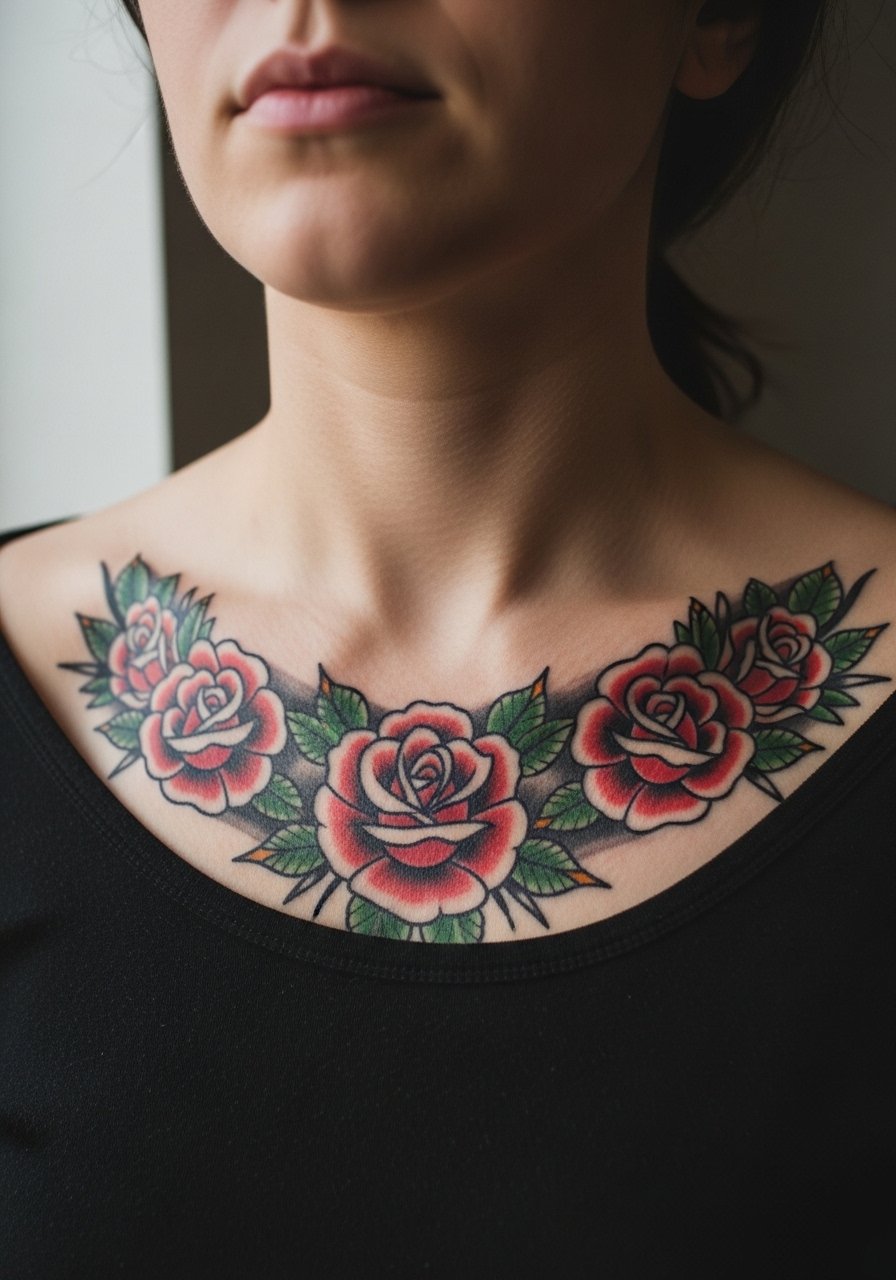
Chest pieces face sun and shirt friction, so keep petals saturated and outlines a touch thicker than you might on an arm piece. A common error is placing many small buds too close together. Ask for a composition that spaces each bloom to let the color breathe. For the session, wear a loose v-neck or button-down you can unbutton. Show-off pairing with open shirts frames the roses well.
20. Tiny Matchstick with Flame on the Wrist
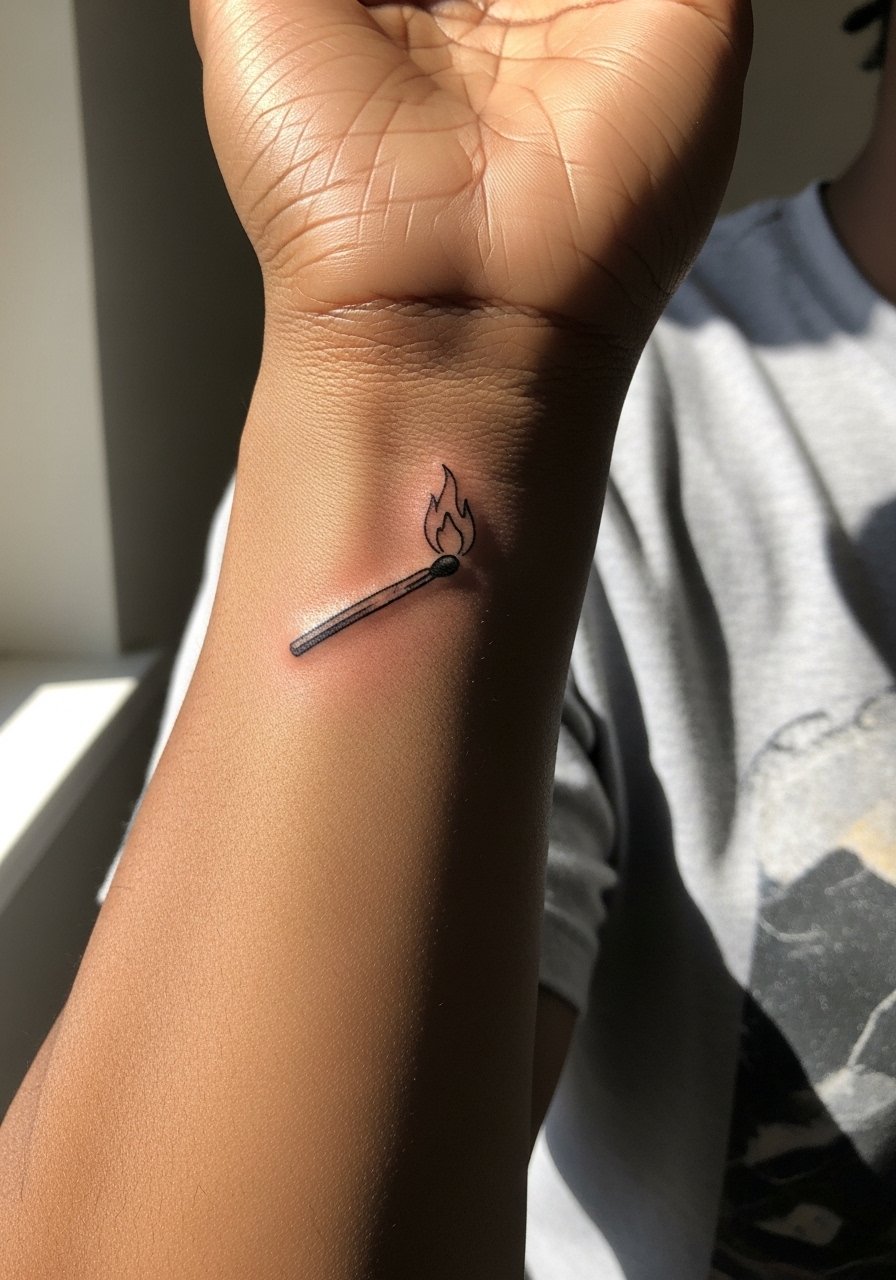
Tiny matchstick motifs are quick but they demand a thick enough shaft so the piece does not blur into a dark smudge. The session is brief and feels like quick needle taps. A tip for the consult is to preview healed photos of similar sizes on comparable skin tones. Keep rings off and consider a thin thin leather cord bracelet on the opposite wrist to balance scale.
21. Panther Profile for Outer Thigh or Shoulder Blade
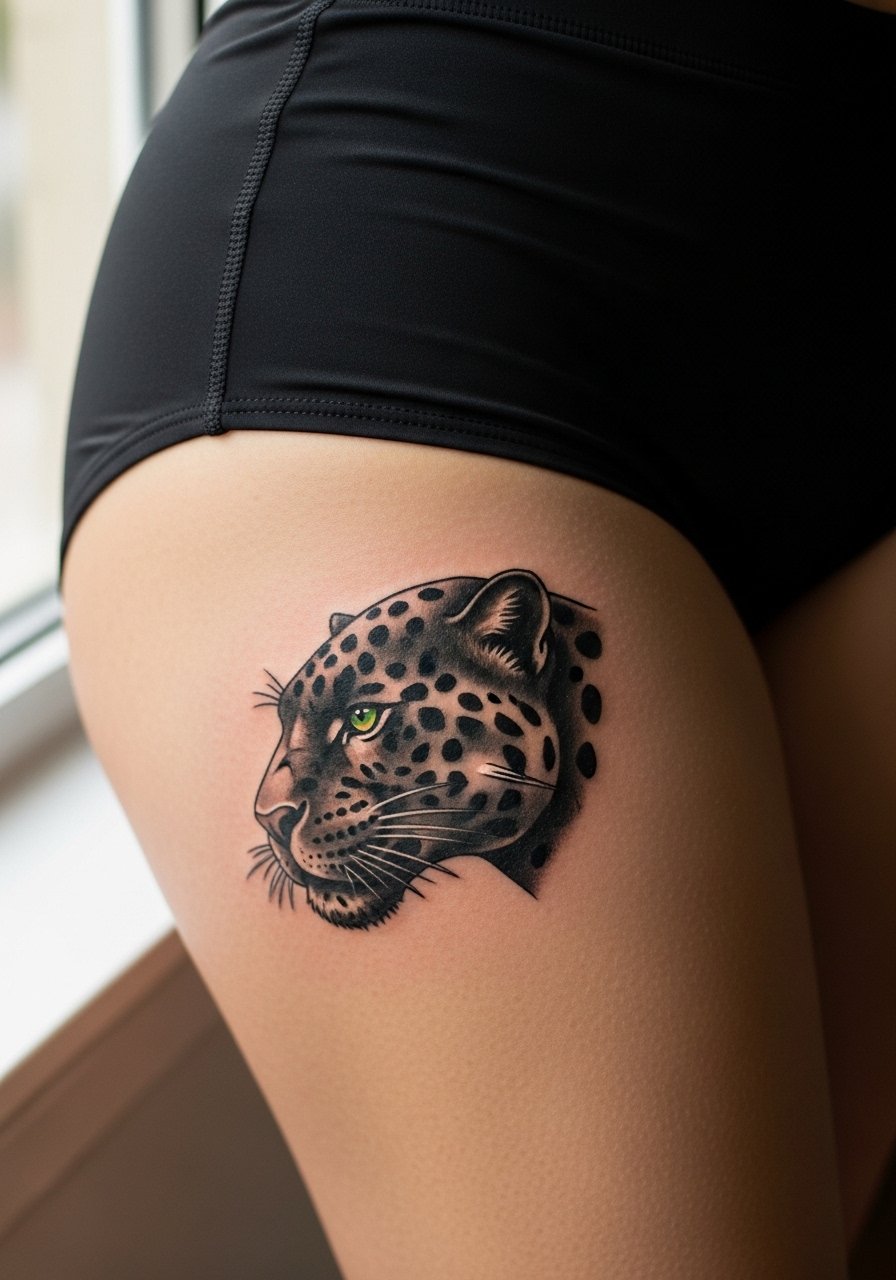
The outer thigh gives enough room for a panther profile with strong jawlines and eye color that stays vivid. The mistake is compressing facial features into a small patch which leads to muddiness. Thigh sessions are forgiving on pain and let the artist work larger. Wear loose shorts on session day and choose swim or gym shorts for easy reveal once healed. For hip or thigh designs, consider slight placement shifts so clothing seams do not rub the focal area during healing.
Frequently Asked Questions
Q: Will small traditional wrist tattoos like a swallow or anchor blur faster than forearm pieces?
A: Yes, smaller wrist tattoos face more friction and frequent washing, which accelerates fading. Ask for slightly thicker outlines and expect touch-ups earlier than forearm pieces, usually around the one to three year mark depending on exposure.
Q: Do chest and sternum traditional pieces need different session wear than arm tattoos?
A: They do. For chest or sternum sessions wear a wide-neck shirt or fitted sports bra so the artist can access only the tattoo zone without you removing layers. Loose tops also reduce tearing of fresh adhesive and keep the area calm during the first week.
Q: How do traditional flash roses age on different skin tones?
A: On darker tones, higher contrast outlines and saturated midtones help petals read clearly in photos. On lighter tones, subtler shading holds. In every case, ask for healed examples on similar skin before booking and plan for a touch-up at two to three years if you want peak saturation.
Q: Should I use a protective film or go dry for healing with a traditional flash piece?
A: Artists split on this. One camp prefers protective film for reduced scabbing and cleaner early healing. The other camp favors air exposure to avoid trapped moisture. Ask your artist which method they use and follow their specific timeline for changes and cleansing.
Q: How should I plan wardrobe on session day for an inner thigh or ribcage tattoo?
A: Wear loose shorts for inner thigh work and a cropped top or loosened shirt for ribcage sessions so the artist can expose only the tattoo zone. The right clothing limits unnecessary fabric friction and makes post-session dressing easier.
