
Fine line work looks stunning fresh, but the designs that still read crisp after three years are often the ones that started with spacing and intent. Line weight, placement, and realistic expectations matter more than chasing the smallest possible sketch. Below are 27 bumble bee tattoo sketches with practical notes on aging, consultation language to use, and how to show each piece off once it heals.
1. Fine Line Bumble Bee Outline on the Inner Wrist
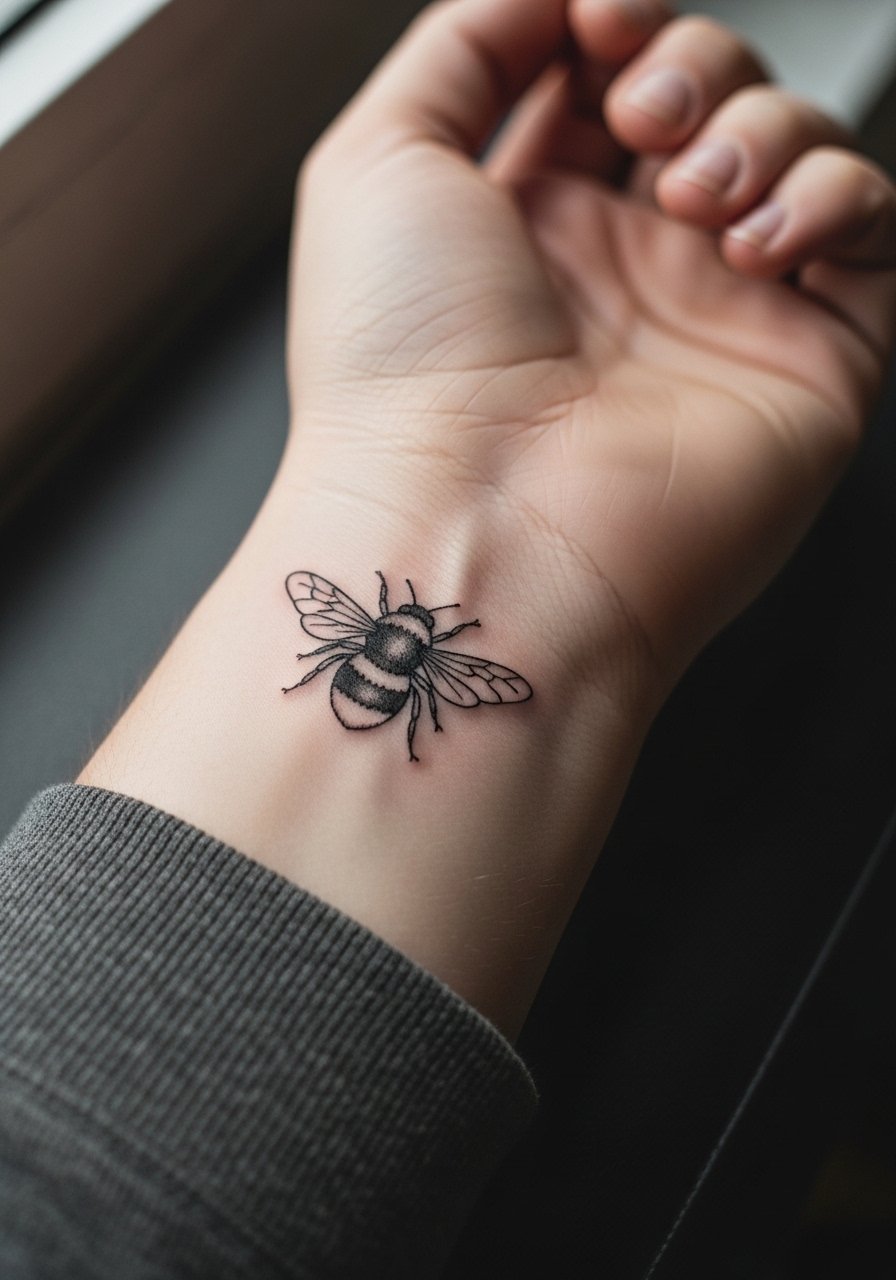
If you want a subtle reference that reads like jewelry, this minimal outline is the one to ask for. I tell clients to request a slightly thicker primary contour than what appears on Instagram, because ultra-thin lines on the wrist can blur faster with daily washing and friction. Expect a short session for a 1- to 1.5-inch piece and plan for a touch-up around year two to three. For the appointment wear a sleeveless top so the artist can work without fabric getting in the way. A common mistake is asking for hairline lines without accounting for wrist movement and washing.
2. Traditional American Bumble Bee on the Outer Forearm
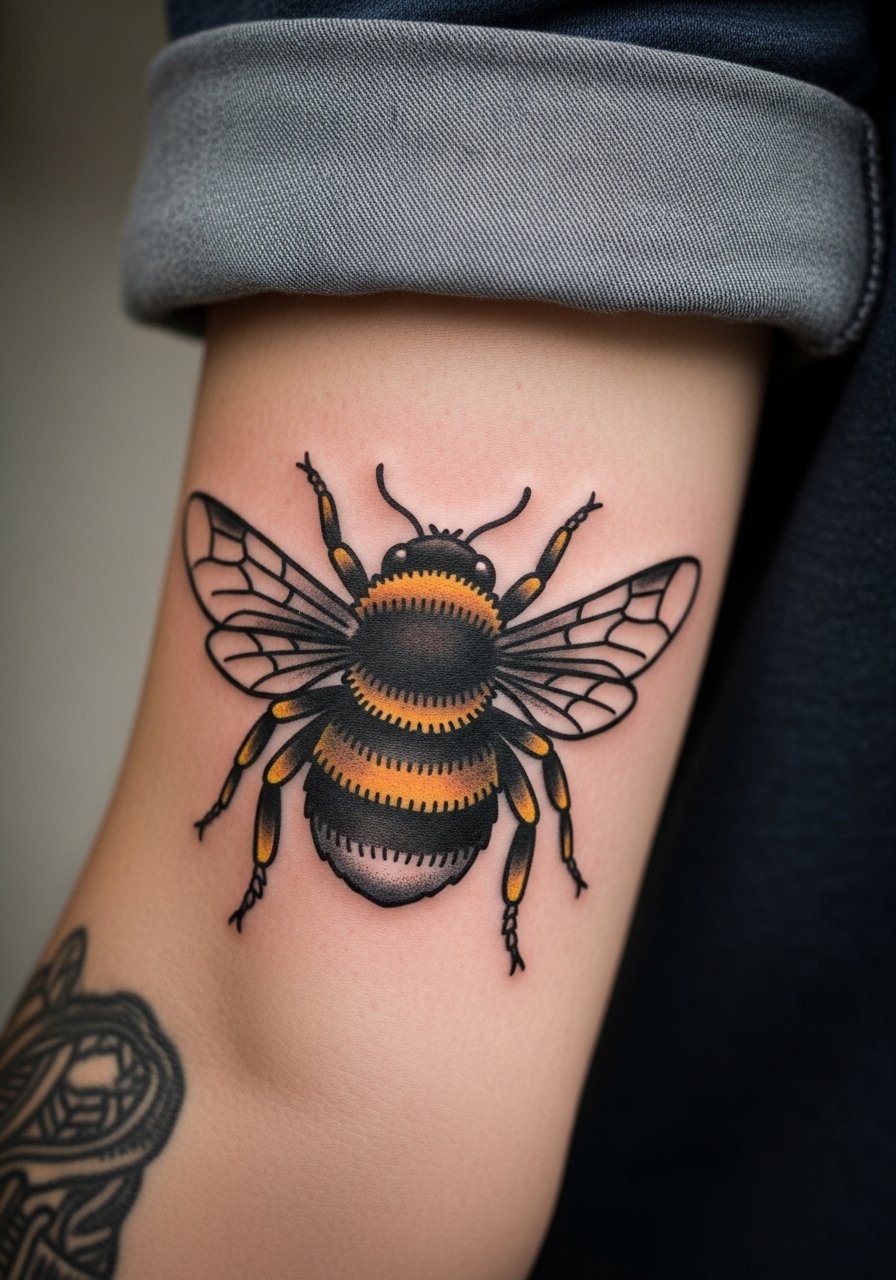
There is something about thick black outlines filled with saturated yellow and black stripes that reads from across a room. This style ages into a strong silhouette because the bold linework resists early fading. Tell your artist you want classic American saturation and steady black outlines, and ask them to place the wings at a slight angle for movement. Forearm sessions are comfortable for most people and usually finish in one to two sittings. Pair the healed piece with a rolled cuff chambray shirt when you want it visible. Avoid requesting tiny versioning of this style because the color fields need room to breathe.
3. Watercolor Bumble Bee with Paint-Style Splatters on the Shoulder
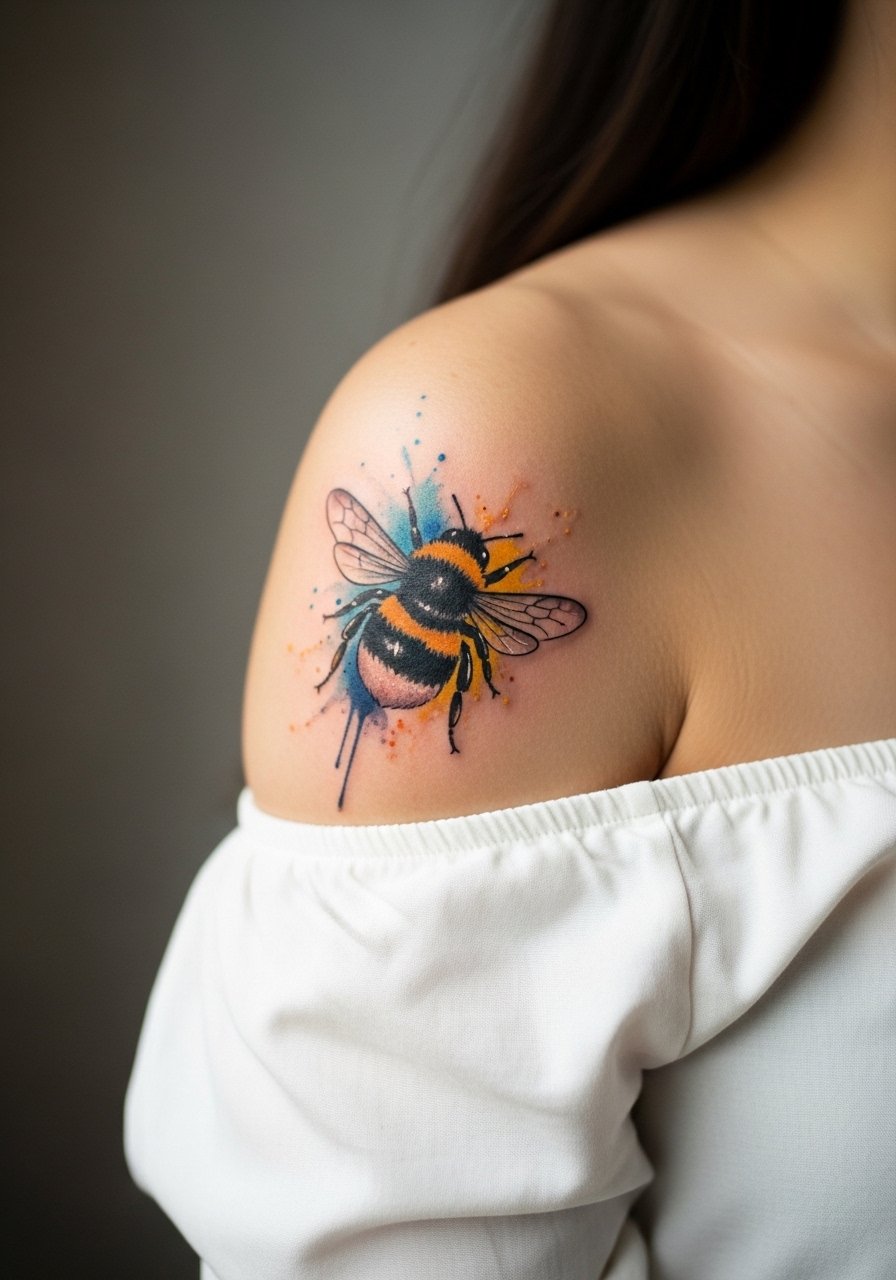
Watercolor effects feel lively when done with soft saturation and layered washes. The trade-off is color loss over time if the tattoo sits in direct sun. For this shoulder placement request that the artist keep washes shallow and rely on black anchors around the thorax so the composition retains shape as color fades. Sessions run longer because of layering, and two sittings are common. For showing it off, go with an off shoulder blouse in a pastel so the splash of yellow stands out. A frequent mistake is asking for extreme painterly smudges without enough black structure, which makes the design lose definition as it heals.
4. Neo-Traditional Bumble Bee with Flowers on the Thigh

Neo-traditional pieces let you mix vibrant color with solid outlines and ornamental shapes. Thigh skin takes color well and is a forgiving canvas for larger compositions. During consultation ask for bolder outlines around the bee and stipple shading for the petals to avoid muddying. Expect two to three sessions for a 4- to 5-inch piece and plan clothing that makes sessions easy, like high waisted denim shorts. The most common error is compressing too many tiny floral details into a small area, which becomes indistinct as the piece settles.
5. Blackwork Bumble Bee with Tribal Patterns on the Calf
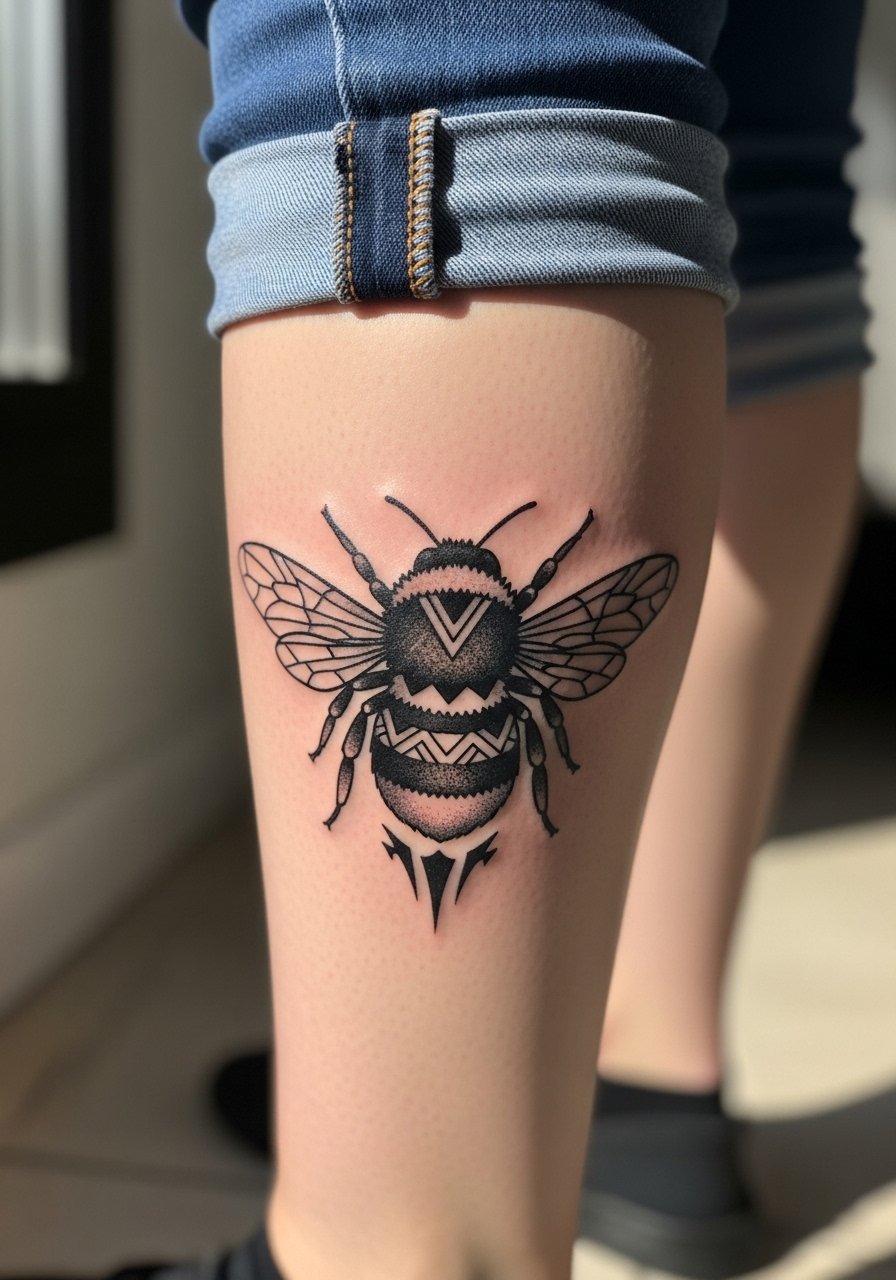
High-contrast blackwork reads for years because saturation is heavy and edges hold. The calf is a low-friction zone, so bold black ages reliably here. Ask for dense black fills and strong negative space to keep the tribal motifs readable over time. Pain is moderate on the calf, and sessions are usually one sitting. Avoid crowding the design against muscle curves, which can distort when you move. This placement does not need session-wear advice beyond rolled pants, but plan for an outfit that avoids tight boots rubbing the area during the first two weeks.
6. Micro-Realism Bumble Bee on the Side of a Finger
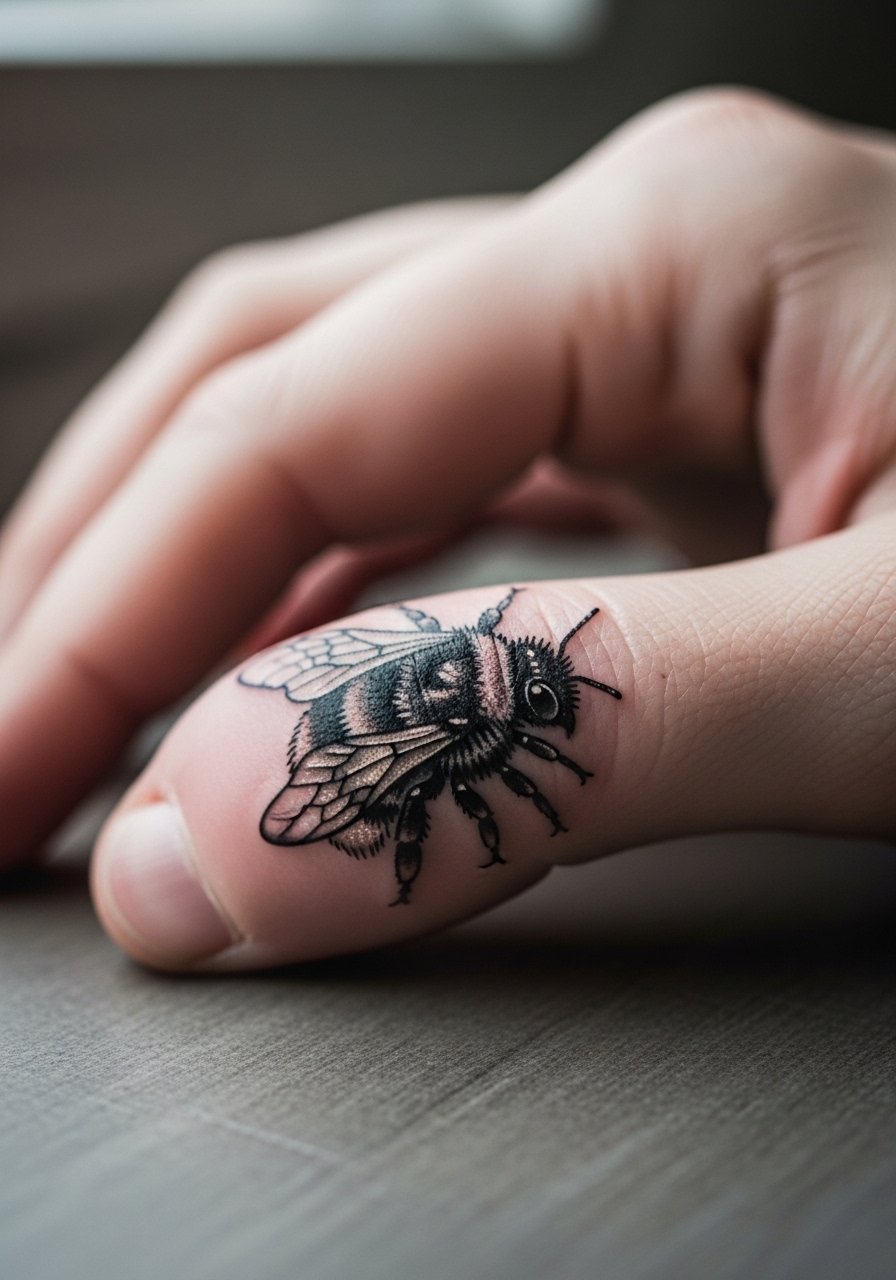
Micro-realism gives a lifelike feel in a tiny format, but fingers are one of the highest touch and wash zones. Tell your artist you want denser black contrast rather than faint gray fur details, because the subtle shading will disappear faster. Expect a quick session, but count on touch-ups within a year or two. Thin protective habits help, and a common mistake is placing too much expectation on longevity for fingers. For the appointment wear something that allows clear access to the hand, like a short-sleeve top. Understand that finger pieces often require more maintenance than arm or thigh work.
Before You Book
The wrist, forearm, and shoulder pieces above have different prep and healing needs, so pack a few items that smooth the session and the first week.
- Stencil transfer paper kit. Lets you preview where linework sits on skin, which is useful for precise wrist and collarbone placements in the ideas above.
- Topical numbing cream. Applied as directed before the session it can ease the bite on sensitive areas like the finger and inner forearm.
- Thin protective film roll. Keeps small pieces on hands and ankles cleaner during the first week of movement and washing.
- Fragrance free gentle body wash. Mild cleansing prevents irritation around fine line work on the wrist and shoulder.
- Aquaphor healing ointment. A thin layer in the earliest days helps lock in moisture for delicate linework without clogging.
7. Ignorant-Style Wobbly Bee on the Ankle
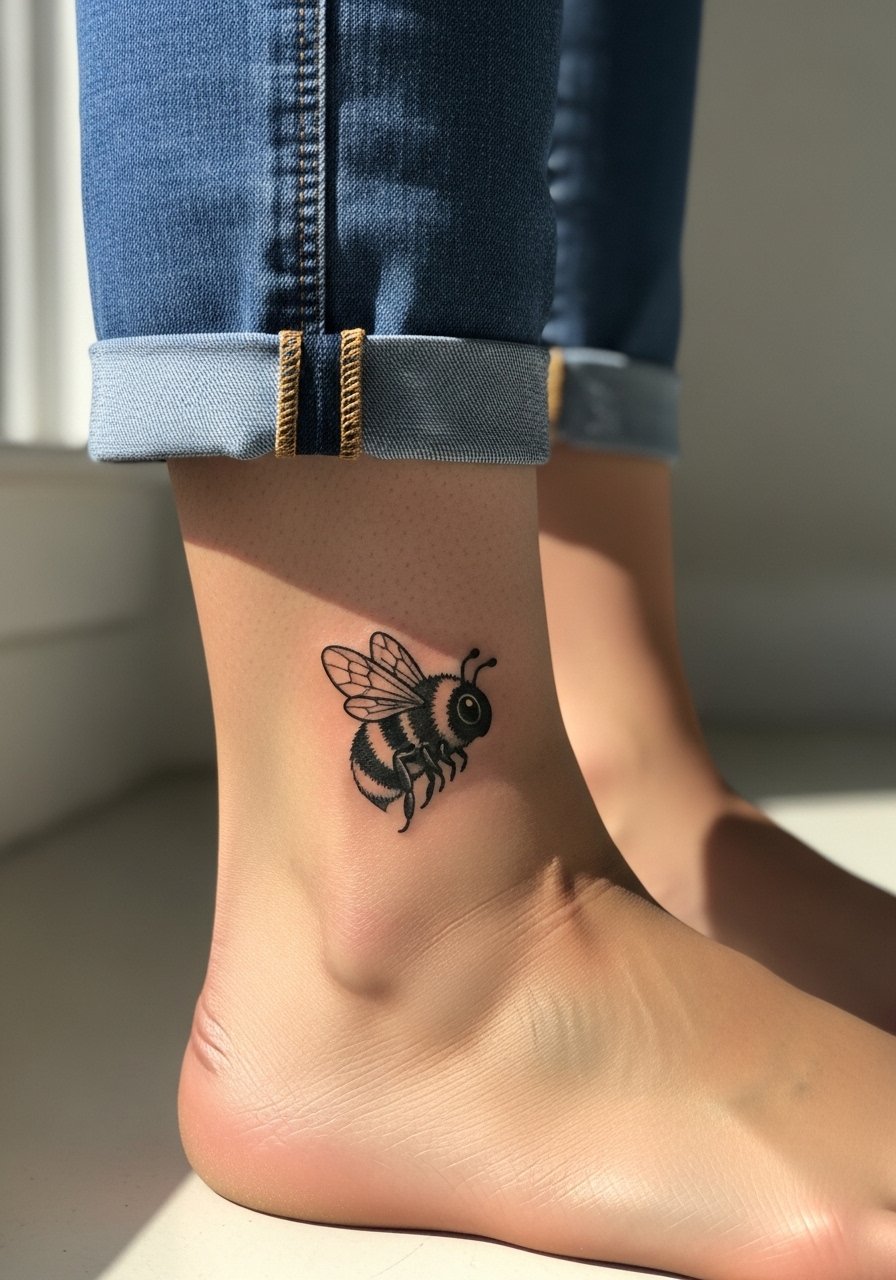
This intentionally imperfect cartooning feels playful and low-pressure. Ankle placements are visible during summer and sit in a moderate-friction zone. Ask your artist to keep the wobbly lines slightly bolder than drawn on paper to preserve the hand-drawn vibe after healing. Sessions are short and generally well tolerated. For showing it off, pair with strappy flat sandals and cropped trousers. A common mistake is requesting extremely thin scribbles that disappear with shoe straps and socks.
8. Ornamental Mandala Bee on the Upper Arm
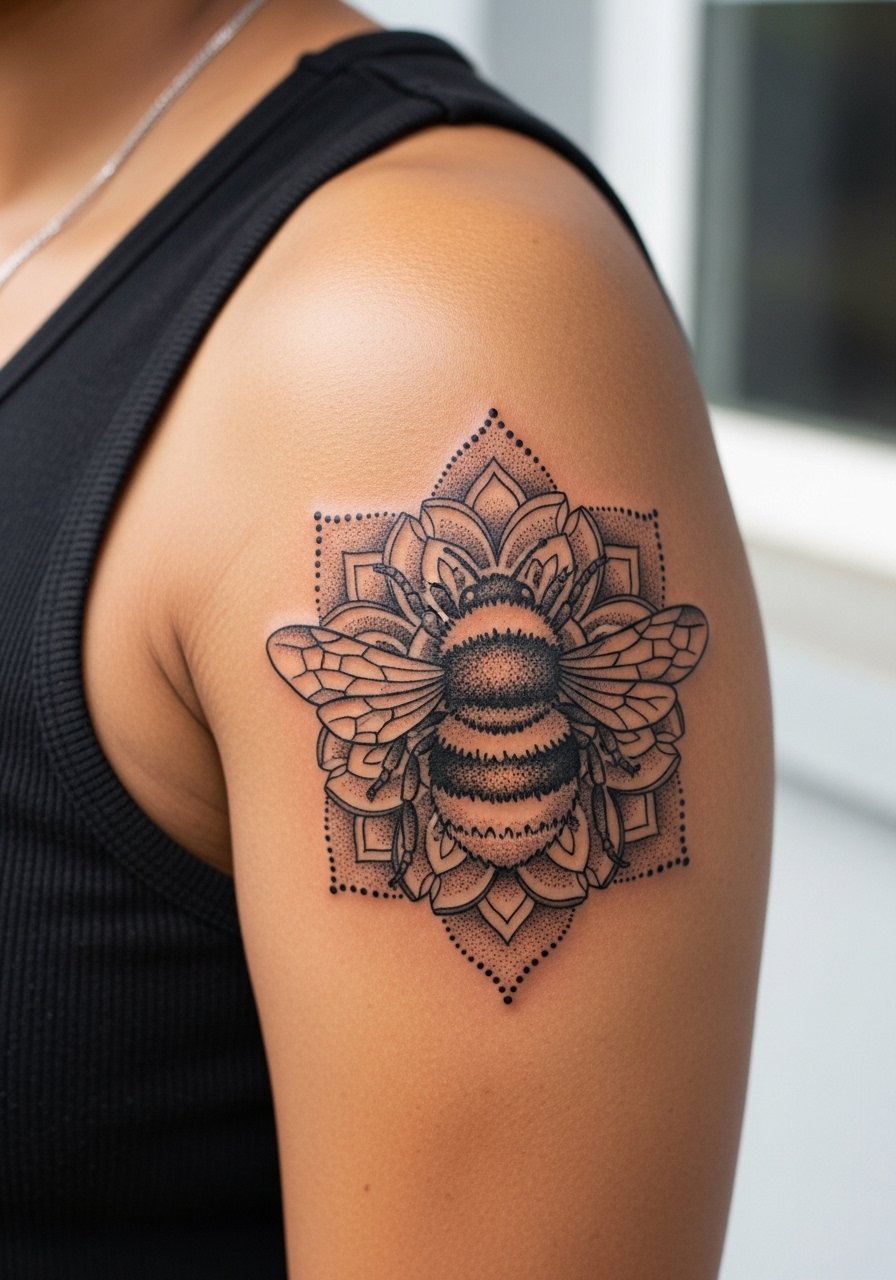
Mandala and dotwork bees make for a meditative composition that reads well on the upper arm. The technique relies on fine stipple shading and symmetrical spacing, so during consultation ask the artist to map the negative space before any dense dotwork is applied. Upper arm skin is stable, so this one tends to age well when spacing is respected. Sessions can stretch to multiple sittings for dense dotwork. Avoid cramming too many concentric rings close together, which invites line merging years down the road.
9. Fine Line Honeycomb and Bee on the Collarbone
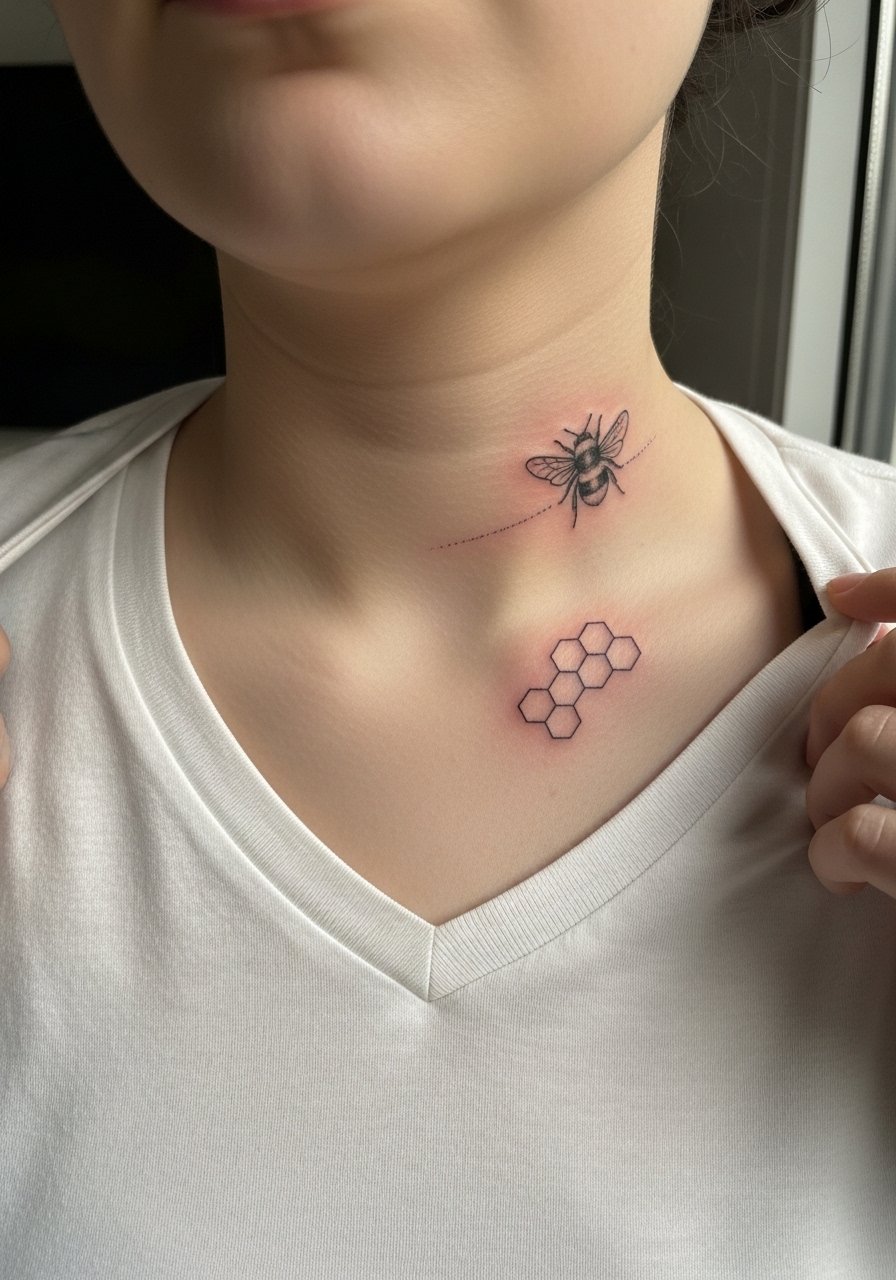
Honeycomb geometry paired with delicate linework looks modern on the collarbone, but the area moves a lot and sits close to bone. Ask for slightly heavier outer contours on the bee and fewer tiny honey cells so the design keeps breathing room as it heals. A single session usually does it for a 3-inch piece, and touch-ups at year two are common. For showing the healed piece, a v neck cotton tee and a dainty necklace sit well without crowding the art. Avoid requesting overly dense honeycomb detail because it tends to blur on collarbone curvature.
10. Realistic 3D Bumble Bee Hovering Over a Flower on the Outer Forearm
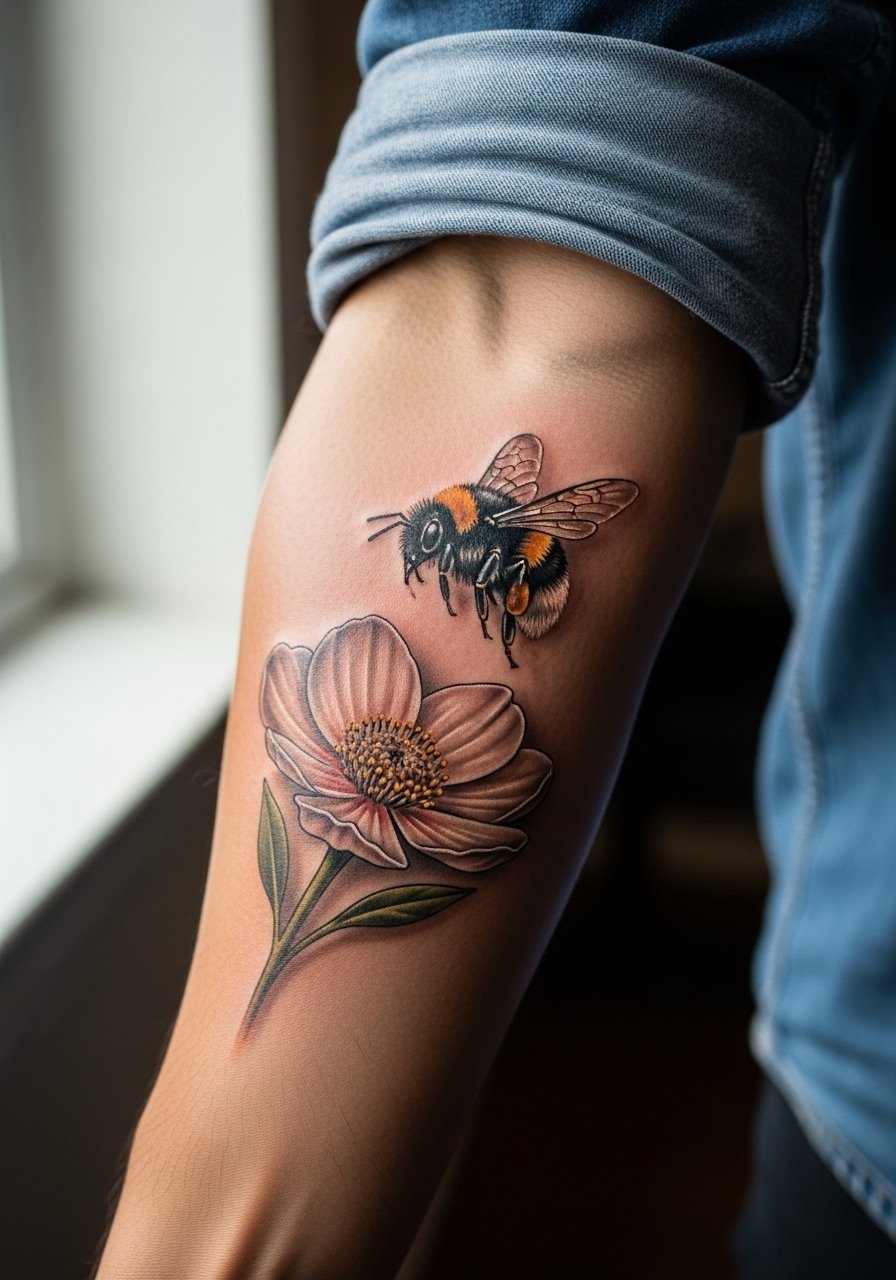
Photorealistic bees depend on strong contrast and careful wing translucency. For a forearm composition ask for bold core shading around the thorax and softer whip shading on the wings so they retain depth as the piece heals. This style often requires multiple sessions to layer color and shading. The forearm tolerates longer sittings and shows the work clearly. A mistake I see is expecting portrait-level detail in a small space. Pair the healed piece with rolled sleeves to display it whenever you want.
11. Bee Cluster Running Along the Spine
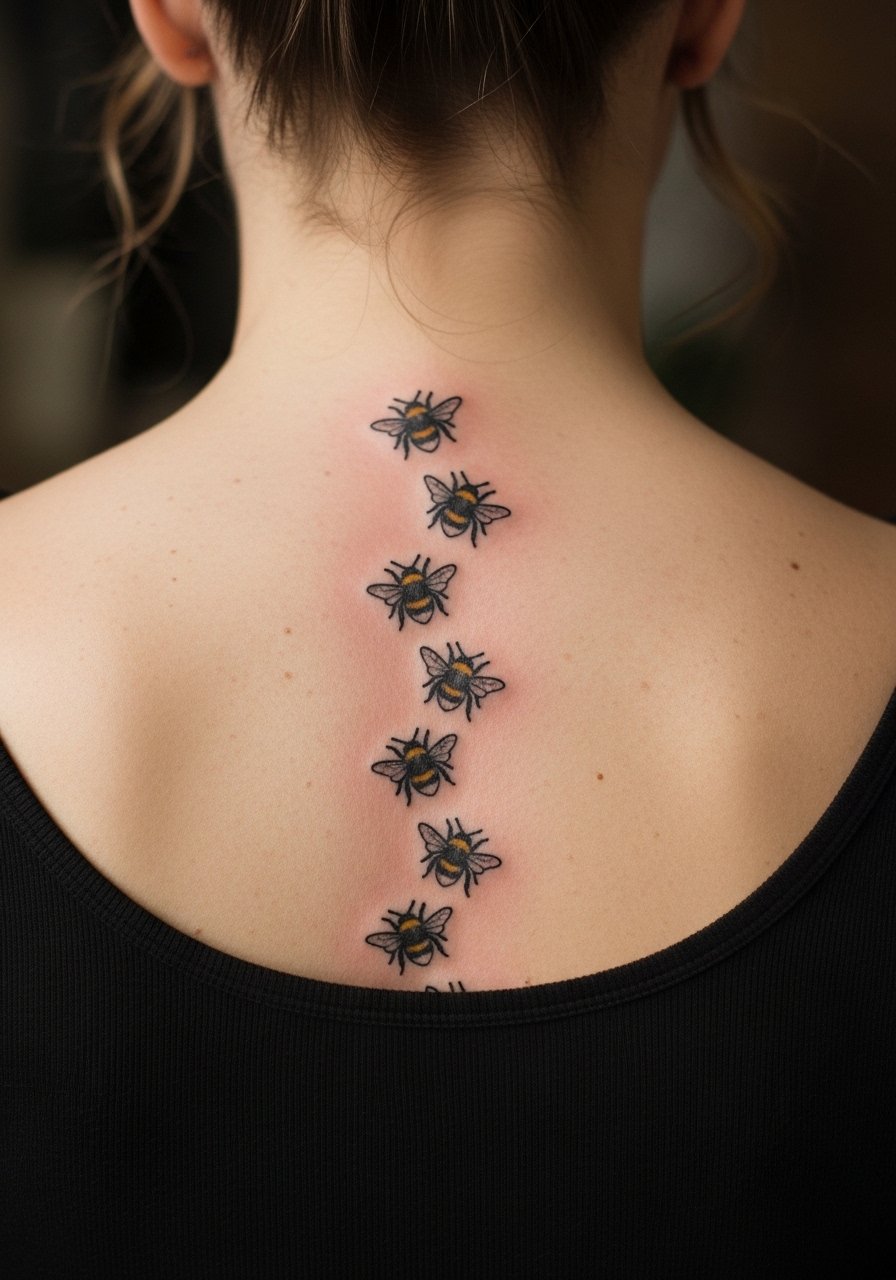
A vertical cluster reads like motion when spaced correctly. Spine skin flexes with movement, so ask the artist to stagger bees and use slightly stronger outlines on the central elements. Pain is higher over the spine, so plan for breaks. Sessions depend on the count and size, often split over two sittings. Avoid putting every bee at the same angle, because uniformity can distort when your posture shifts over time. For wardrobe, open-back tops show the line without exposing more skin than necessary.
12. Micro Bee with Detailed Fur Texture Behind the Ear
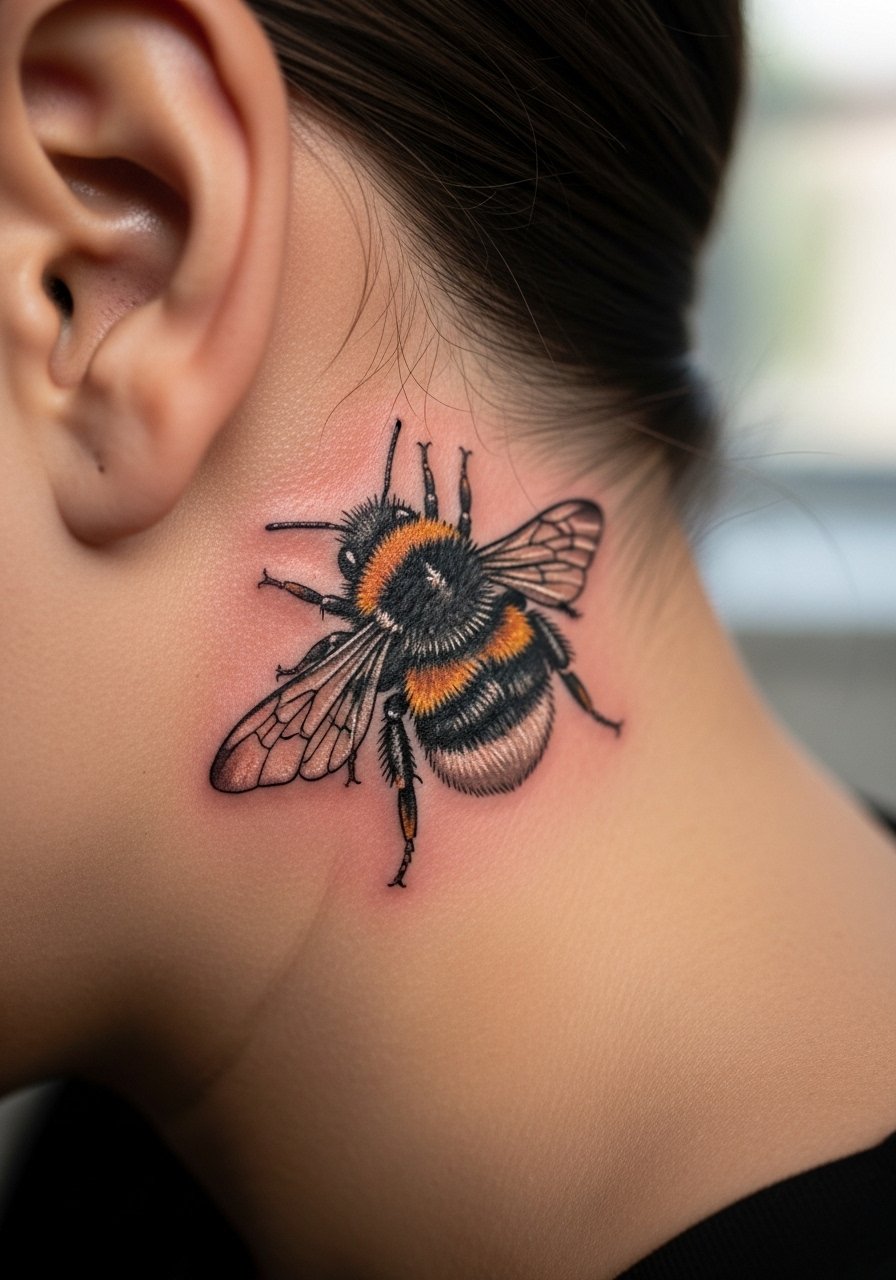
Behind-the-ear placements are intimate and subtle. The skin there is thin, and artists need steady depth control for micro-realism. Expect a short session and a discussion about visibility versus longevity during consultation. Because the area is close to hair, the artist might advise trimming the hairline for stencil placement. This spot is often chosen for its secretive quality, but understand fading can occur if hair rubs the area. If you want it unseen in professional settings, this placement is useful.
13. Bumble Bee with Honey Jar Element on the Outer Thigh
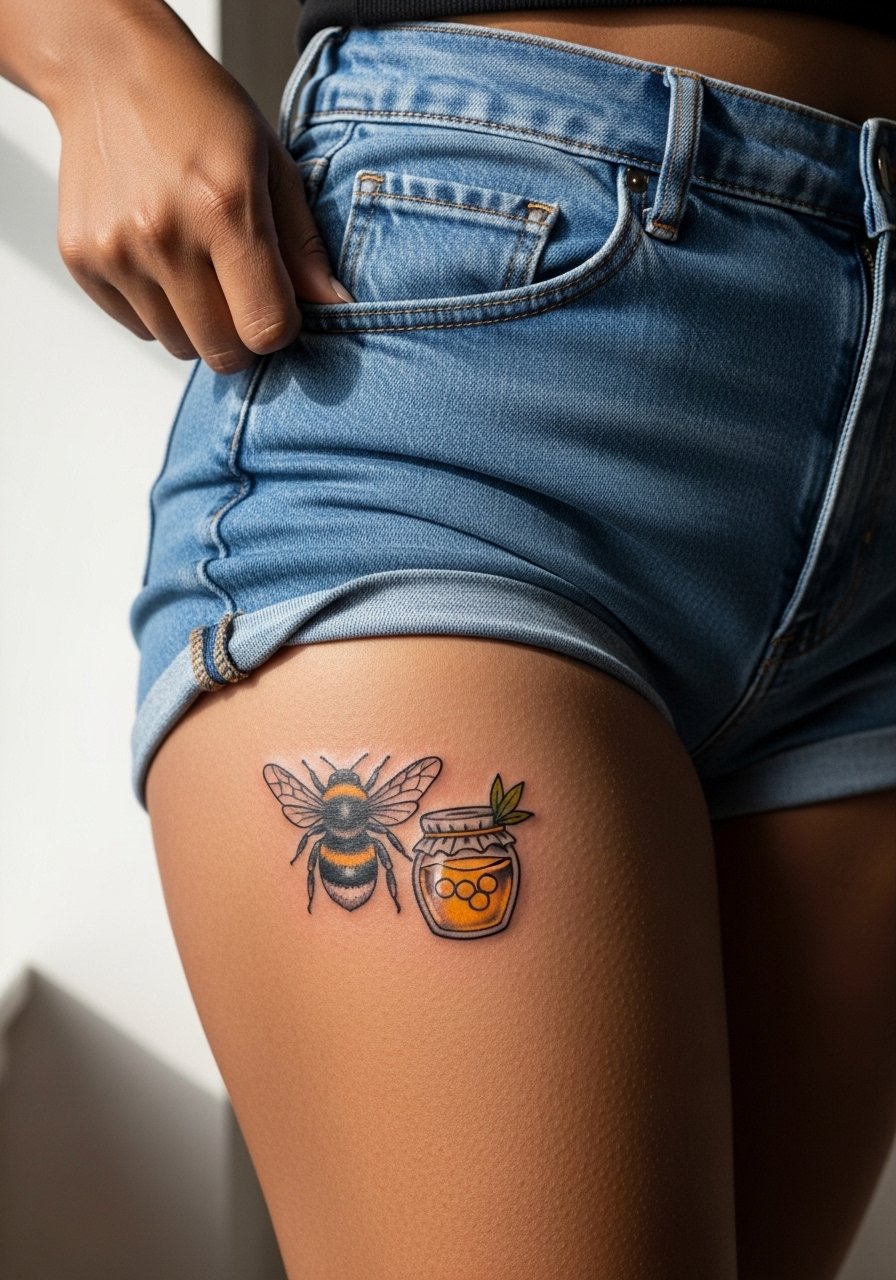
Combining small pictorial elements like a jar gives the piece narrative. Thigh skin supports color and layering, so request clear negative space between the bee and jar. Sessions are comfortable for longer sittings and often require two appointments for saturation. A common error is compressing too many tiny labels or script into the jar area, which reads as noise after healing. For shows-off attire try high-waisted shorts or skirts when you want the piece visible.
14. Decorative Bee Bracelet Around the Wrist
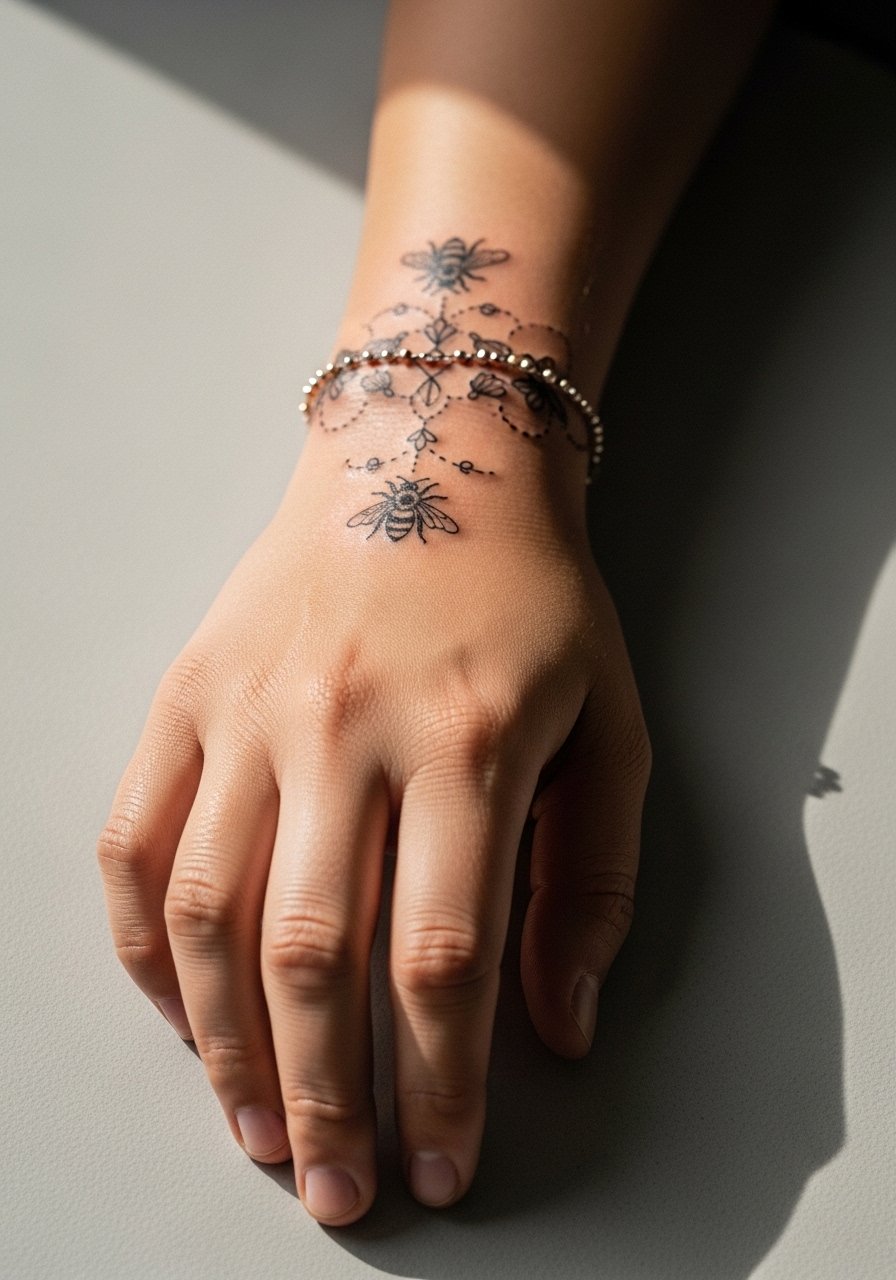
A continuous bracelet motif feels like permanent jewelry. Because it encircles the wrist and meets friction from watches and bracelets, ask for slightly bolder connecting lines and small spacing between repeating bees to reduce rubbing loss. Sessions are modest in length, but watch for movement while healing. Pair the healed tattoo with a thin silver chain bracelet on the opposite wrist to balance attention. The top mistake is asking for ultra-fine repeating elements that wear down quickly with daily motion.
15. UV-Reactive Bumble Bee That Glows Under Blacklight
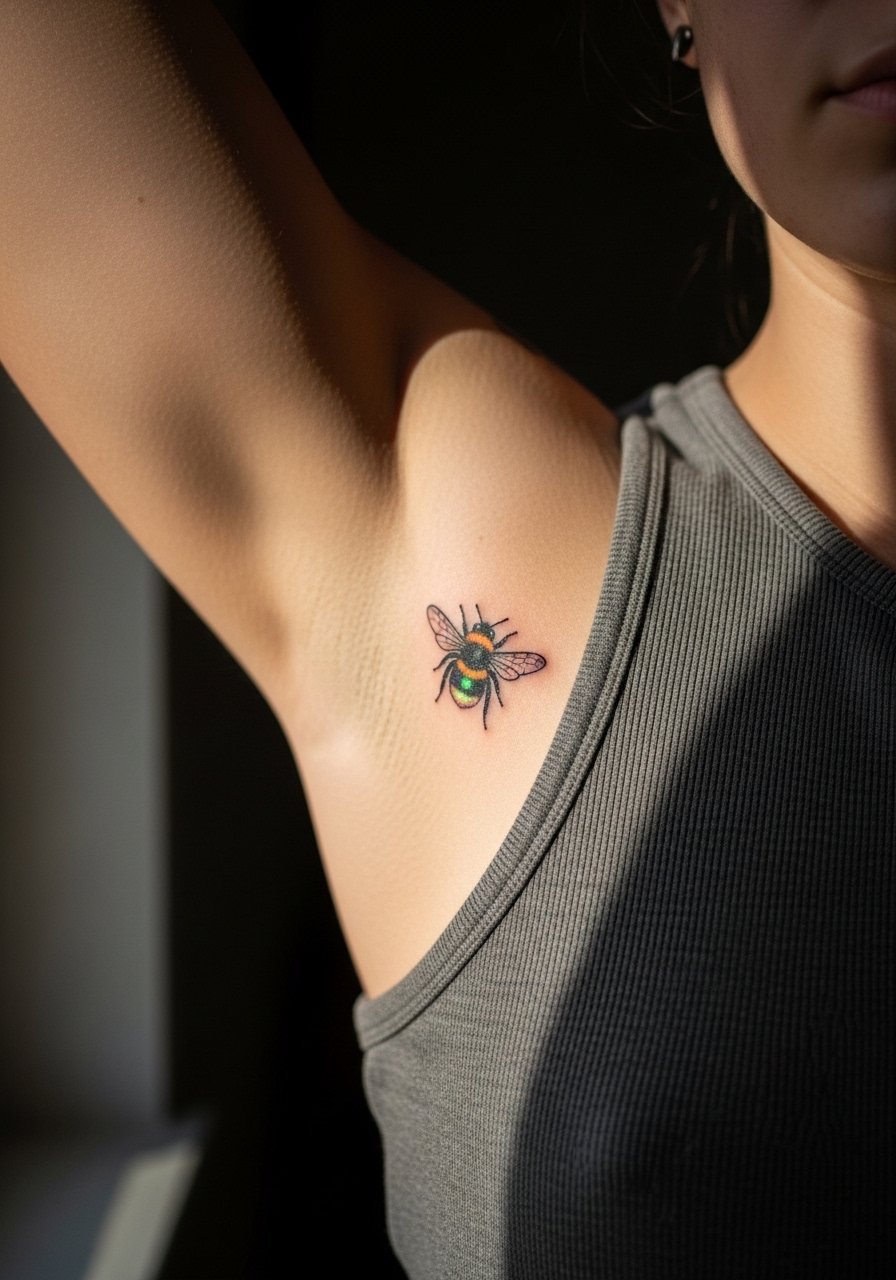
UV-reactive ink is a novelty that gives a hidden glow under blacklight. Not every studio offers it, and artists differ on pigment reliability. Name both camps when you ask about it. One group says UV inks are fine when used sparingly, and another warns about faster fade and limited color range. If you pursue this, ask for a hybrid with standard black anchors so the design still reads in normal light. Plan for touch-ups more frequently than with conventional color.
16. Bee with Geometric Wings on the Thigh
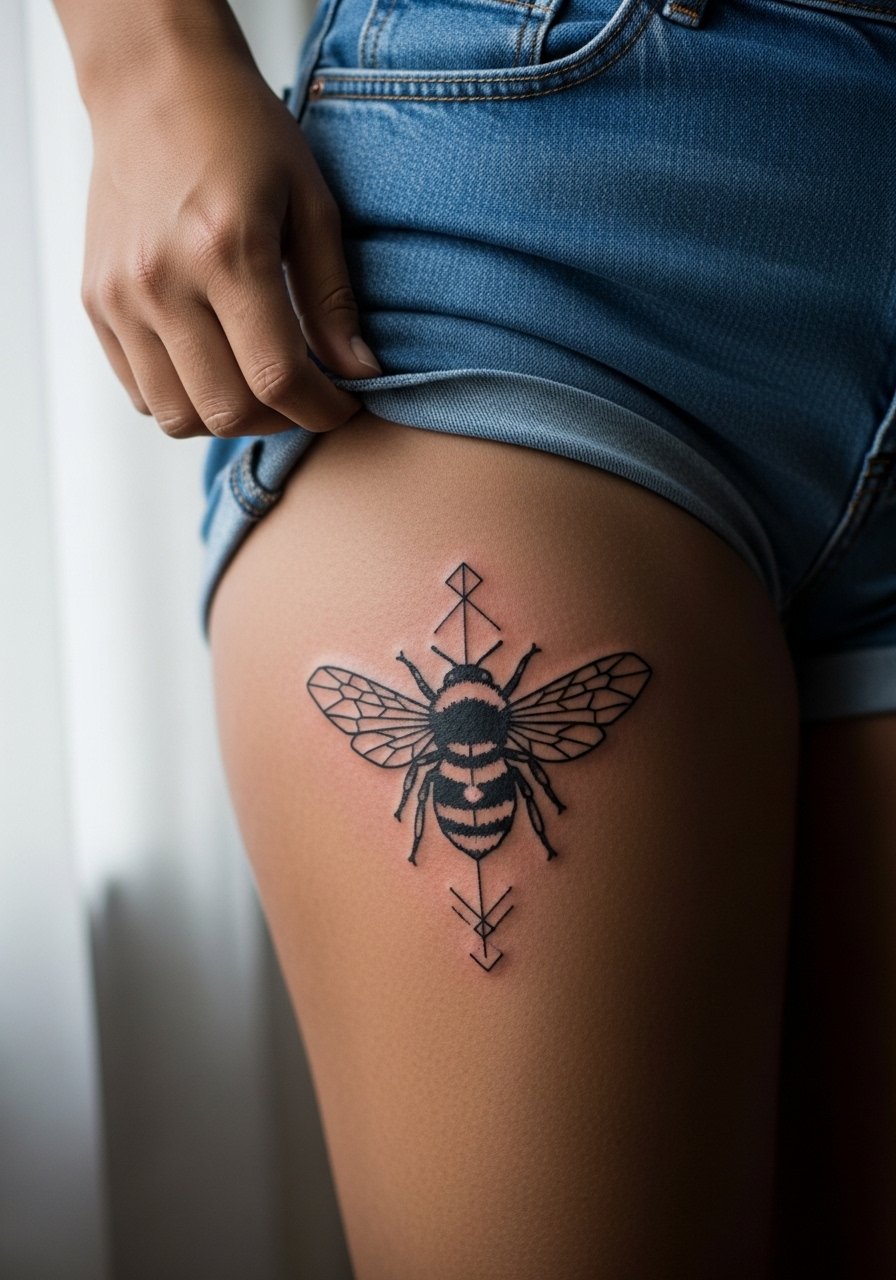
Geometric wings give a modern edge to a classic subject. Thigh placement lets you use larger negative spaces to separate intersecting lines. Tell your artist to prioritize spacing and avoid tiny intersecting points, which can bleed into one another over time. Sessions are typically comfortable and may require multiple passes for crisp geometry. Pair with high-waisted shorts when you want to show it. A common mistake is shrinking the geometry below the scale where the lines can hold.
17. Bumble Bee with Scripted Coordinates on the Ribcage
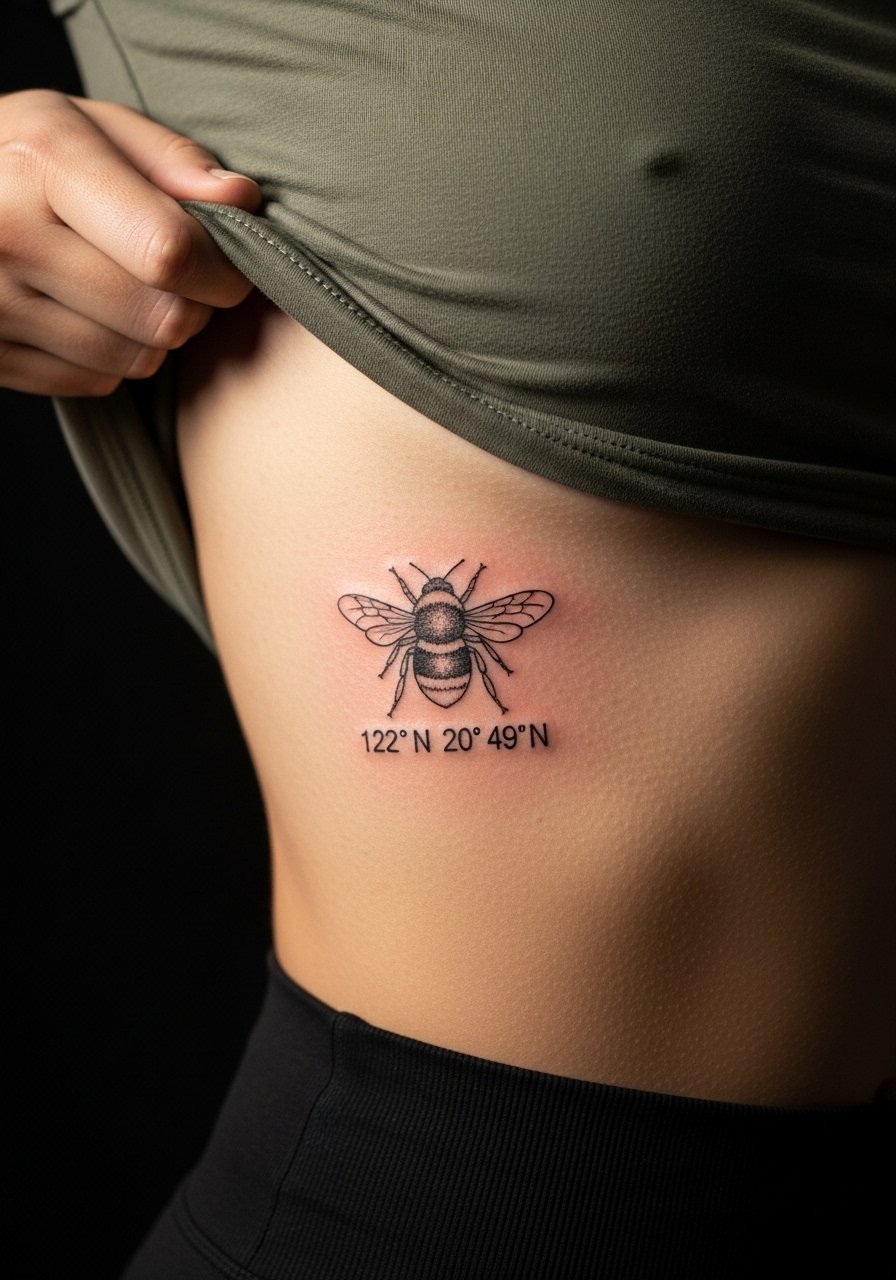
Ribcage placements read intimate but are prone to movement and stretch. If you want coordinates as text, specify exact characters for the stencil so the lettering renders correctly. Artists are split on fine line on ribs. One camp argues the skin stretch blurs lines within two years, and the other camp says with proper needle depth and spacing it settles fine. Bring that question up in consultation and ask how they handle small lettering on lateral torso. Expect higher pain and consider splitting the session.
18. Ornamental Bee Mandala with Dotwork Wings on the Chest Collarbone Area
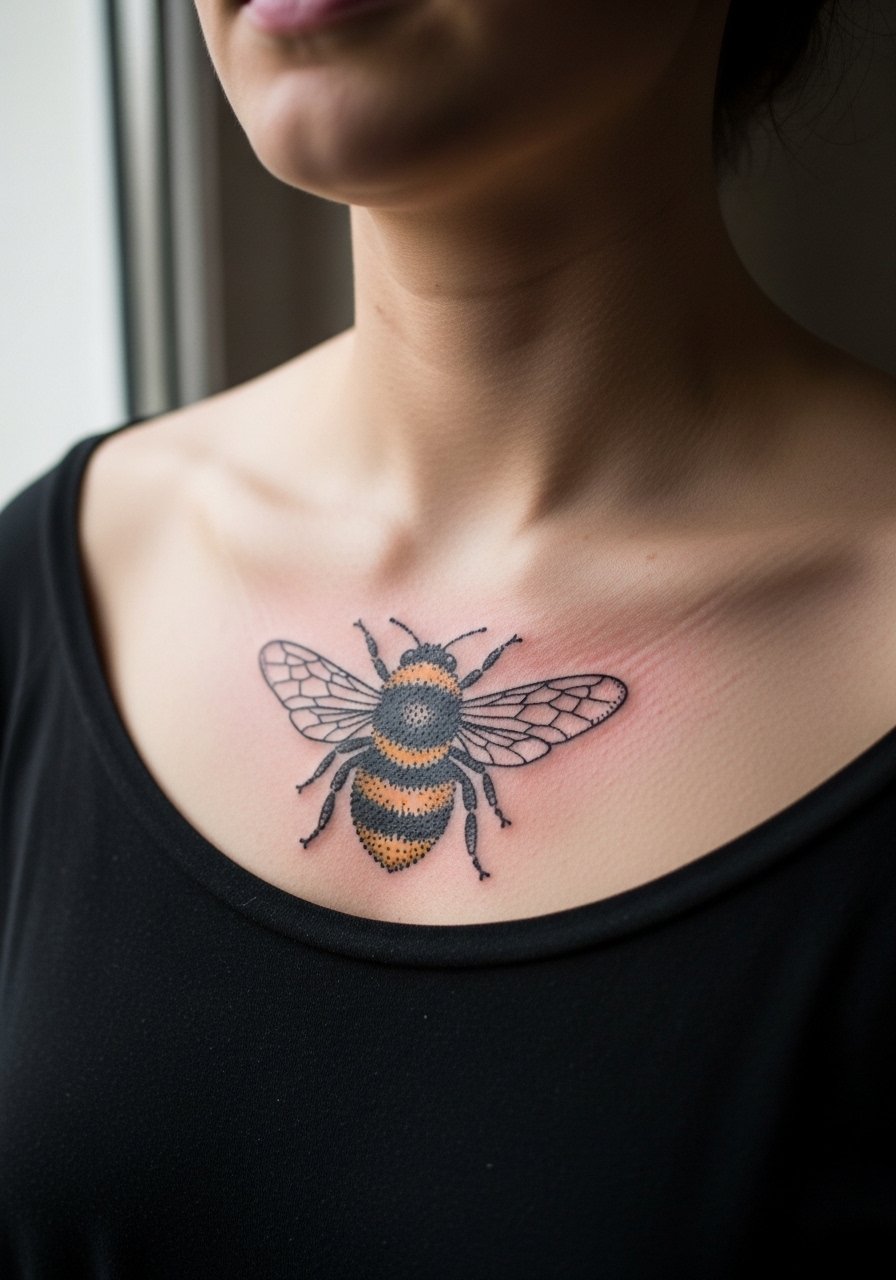
Dotwork mandalas on the upper chest require precision and patience. The area sits close to bone and breathes a lot when you move, so ask the artist to stagger dot density so the composition retains its shape across different angles. Sessions can be taxing, so plan breaks. For show-off wardrobe, a wider-neck top keeps attention on the piece without revealing more than you want. The risk is over-concentration of tiny dots near the collarbone where lines can merge as skin stretches.
19. Micro-Realism Bee on the Inner Bicep

Inner bicep skin is soft and forgiving for realistic shading, but it sees less sunlight so delicate shading can remain readable. Ask your artist for slightly higher contrast in core areas to maintain the three-dimensional feel. Sessions can be comfortable if you relax the arm, but expect the area to bruise more than outer arm spots. A common mistake is trying to miniaturize hyper-detailed reference photos without allowing for necessary contrast. For session day, a loose tank top makes access simple.
20. Tiny Bumble Bee Ankle Accent
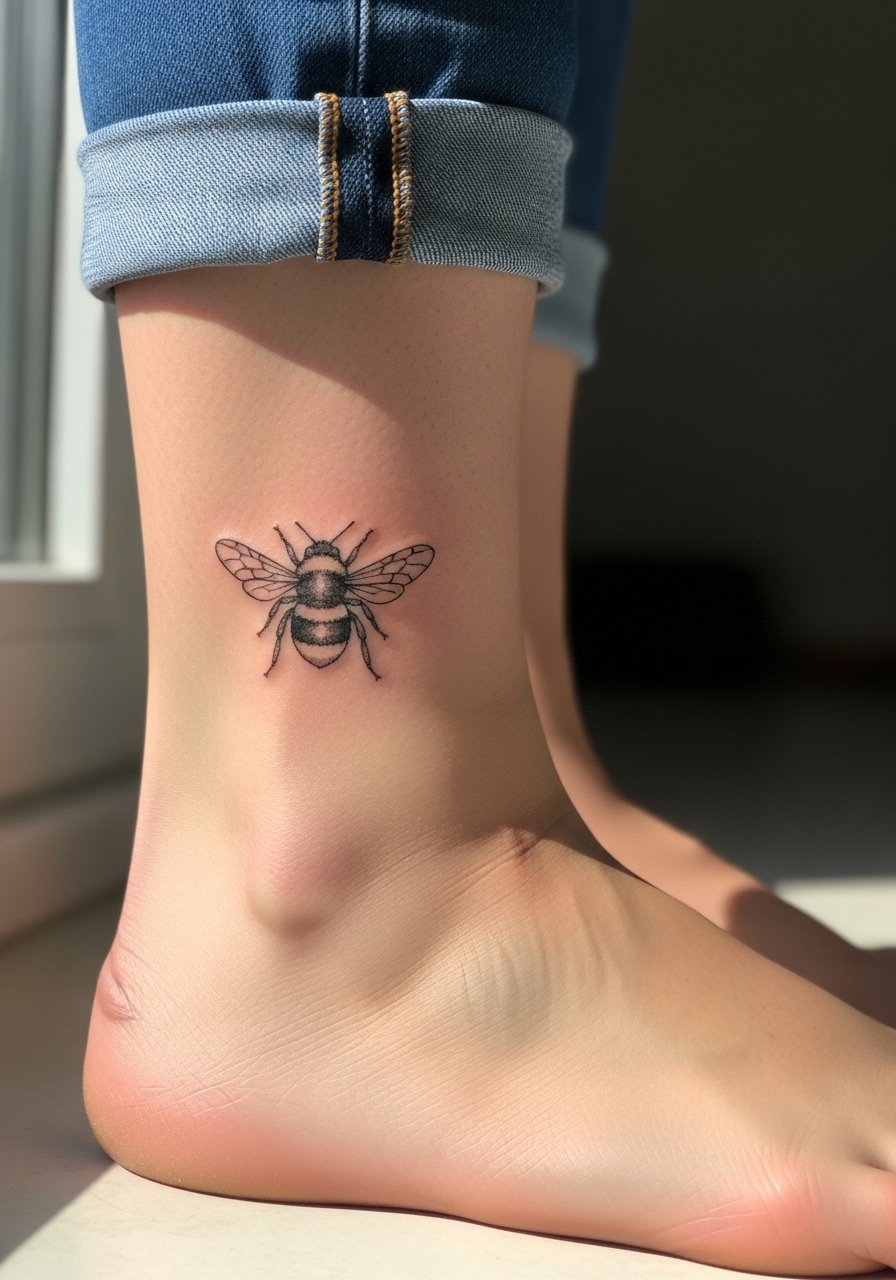
Small ankle accents are discreet and seasonal focal points. Because ankles rub against footwear and socks, ask for a slightly more saturated primary contour than you might want on paper. A short session can do a micro piece, but count on a touch-up as the first year finishes if you wear tight shoes often. Show this design with strappy flat sandals or cropped pants in warmer months. The most frequent error is underestimating friction and expecting no maintenance.
21. Bee and Moon Motif on the Upper Forearm
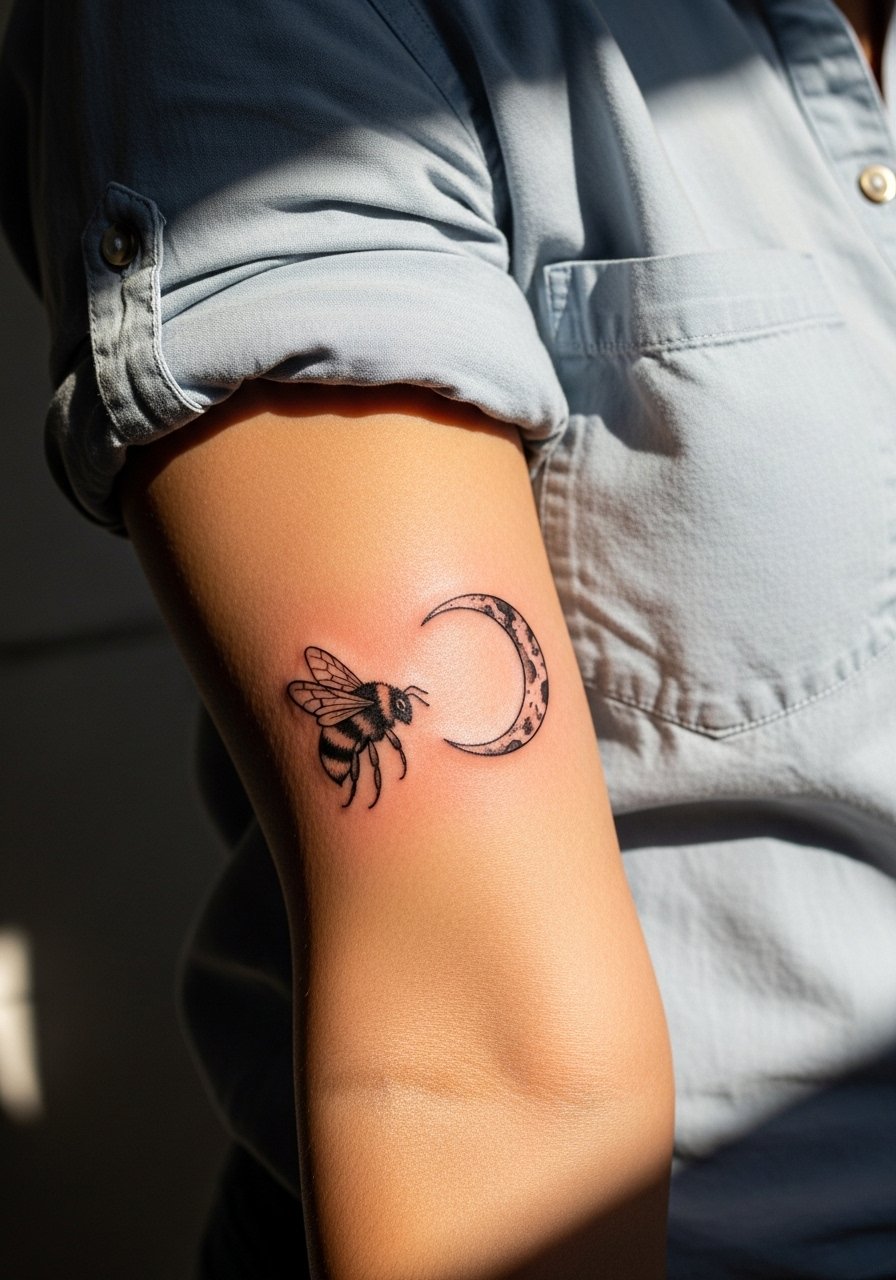
Pairing astronomical symbols with the bee adds symbolic weight. Forearm placement gives visibility and a broad canvas for interplay between the moon and insect. Ask for clear separation between moon crescent and bee body through negative space so the composition reads at a glance. Sessions vary with size, but one sitting often suffices. Avoid requesting tiny moons that crowd the bee, because overlapping elements tend to blur as the piece ages.
22. Geometric Bee with Honeycomb Backdrop on the Outer Forearm
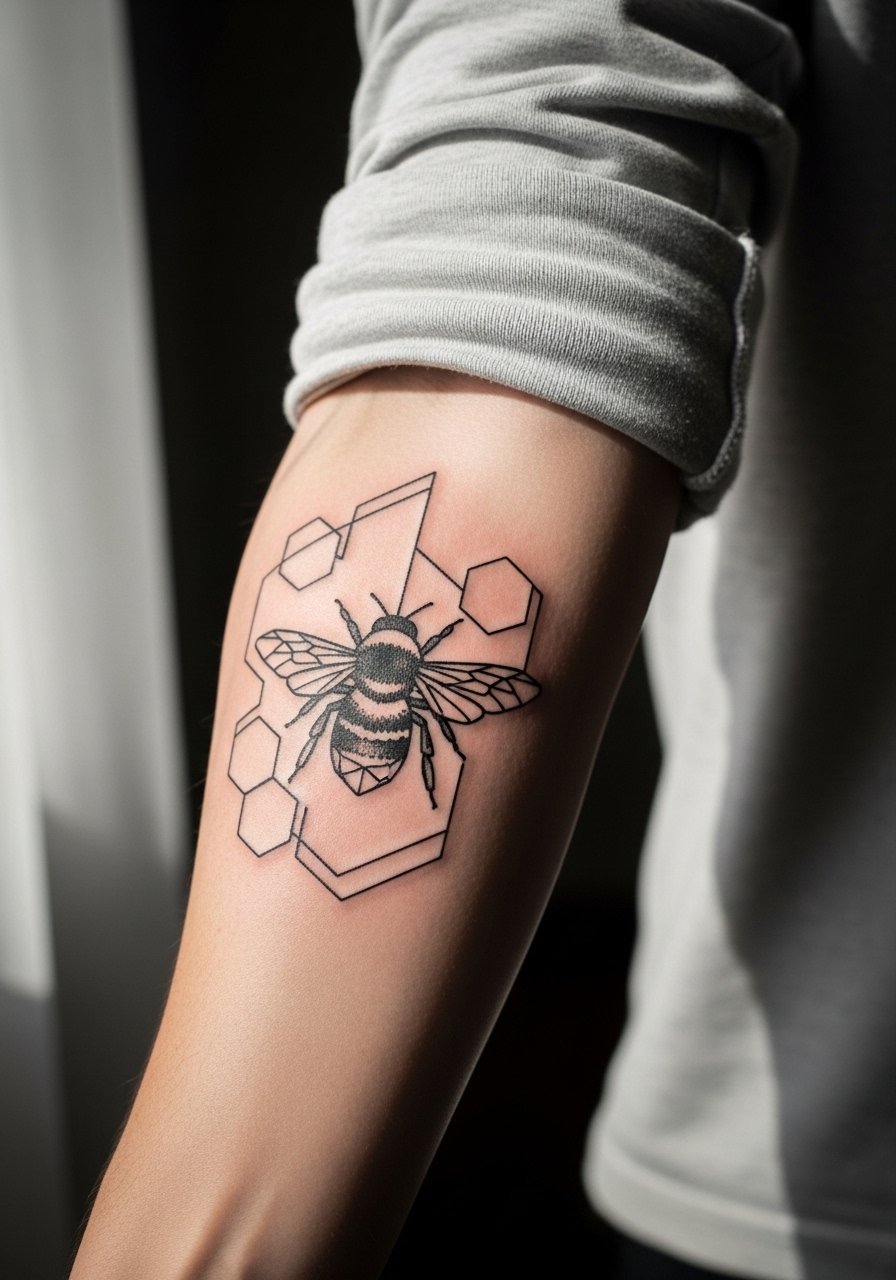
Combining geometry and natural forms needs disciplined spacing. For outer forearm work ask for honeycomb cells slightly larger than you think, because small cells can merge into a textured shadow after two years. The forearm tolerates bold experiments, but insist on preliminary stencils to check scale. Pair the finished piece with a rolled cuff chambray shirt when you want to show it. A typical mistake is shrinking the honeycomb too small for readable negative space.
23. Bee with Floral Wreath on the Shoulder Cap

A wreath frames the bee and gives symmetry. Shoulder cap skin handles color well, and motion does not distort round compositions as much as on ribs. Ask for slightly heavier outlines on outer petals and stipple shading in the center so the wreath keeps form as it settles. Sessions are usually straightforward. Avoid over-detailing every petal, which can blend. For session wear, a strapless top makes access easier.
24. Tiny Linework Bee Near the Collarbone with a Dainty Necklace Pairing
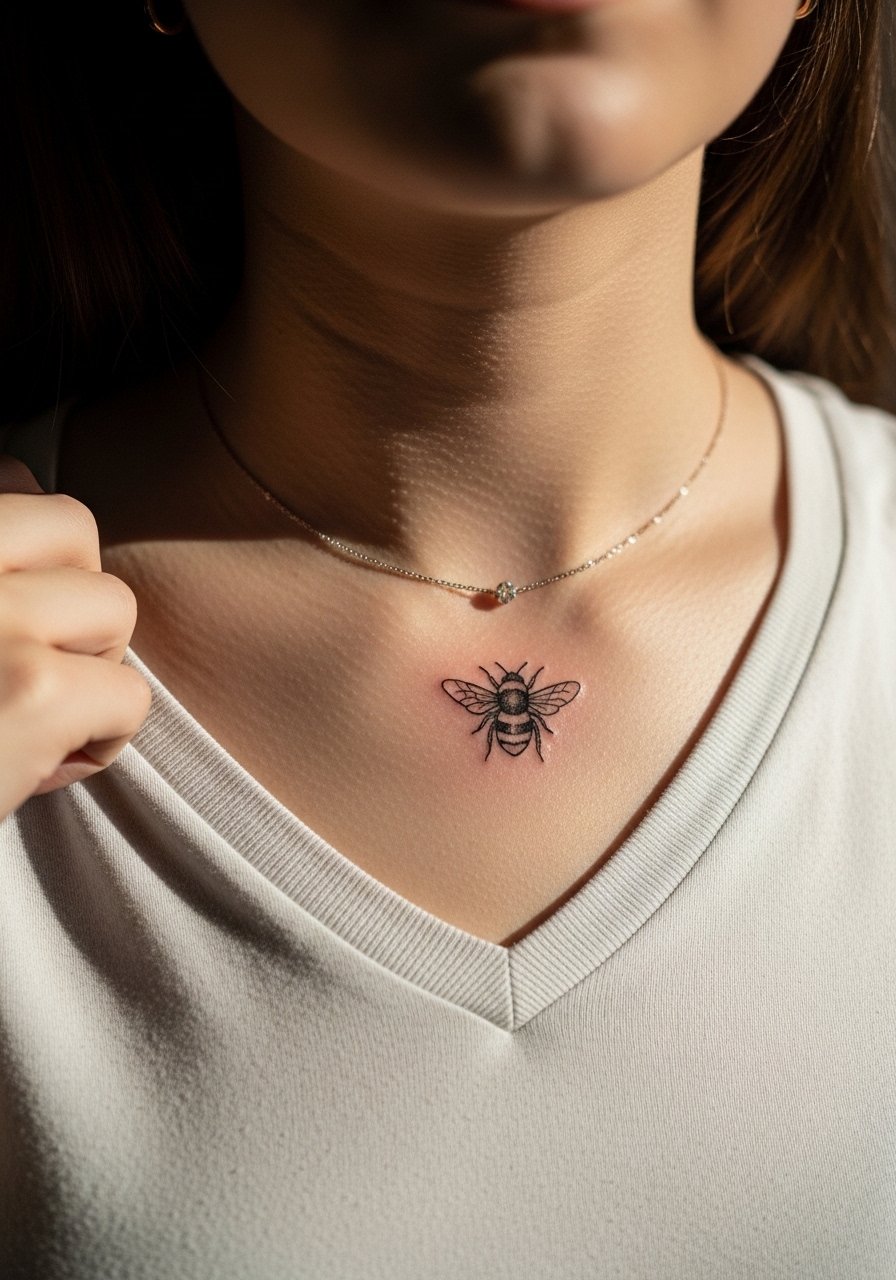
A petite collarbone bee reads like a punctuation mark. Because the collarbone area can be bony, ask the artist to keep slightly more open spacing in the wings so lines do not compress on the bone edge. A small session will do this, and a touch-up in a couple of years is normal. For finished look wear a dainty gold necklace to frame the piece. The frequent mistake is requesting ultra-fine wing veins that disappear as the skin moves.
25. Bumble Bee Tattoo as a Scar Cover-Up

Using bees to mask healed scars works well when you plan placement and scale carefully. Scar tissue takes ink differently, so consult a practitioner experienced with cover-ups and ask for a small test patch or discussion about scar depth. The artist might recommend heavier black fills and tight stipple shading. Expect the session time to vary based on scar density and plan for touch-ups. This is a niche solution that can be very effective when executed with realistic expectations.
26. Sci-Fi Honeycomb with Quantum Pattern Bee for Science Fans
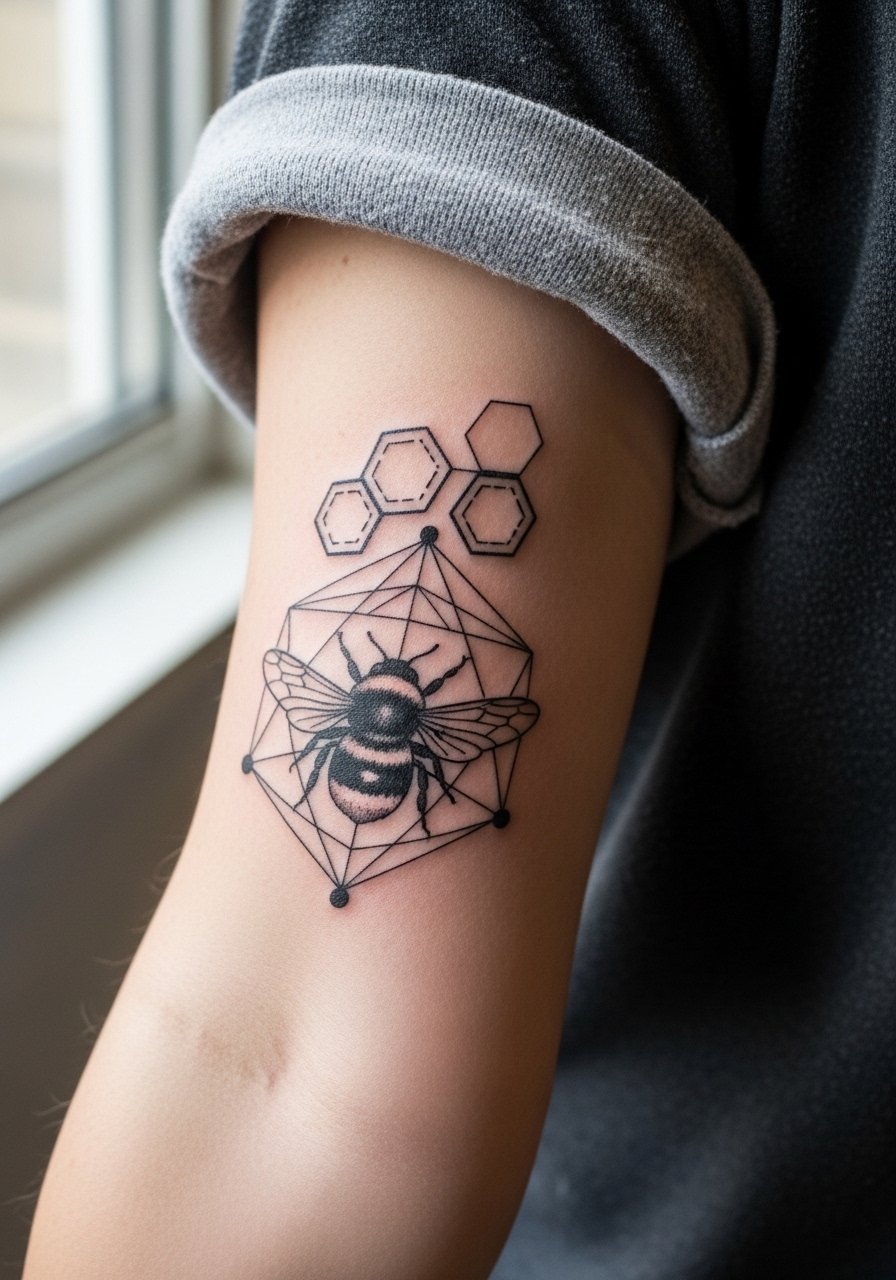
For a niche science aesthetic, integrate angular honeycomb geometry with subtle circuitry lines. This contemporary twist asks for crisp spacing so the linear motifs do not blur into one another. Forearm placement gives good real estate, and sessions vary with complexity. Ask your artist to map the negative channels clearly, because overly dense tech lines are a frequent error. This design plays well with neutral rolled sleeves to emphasize the geometric wings.
27. Tiny Bee on the Back of the Neck
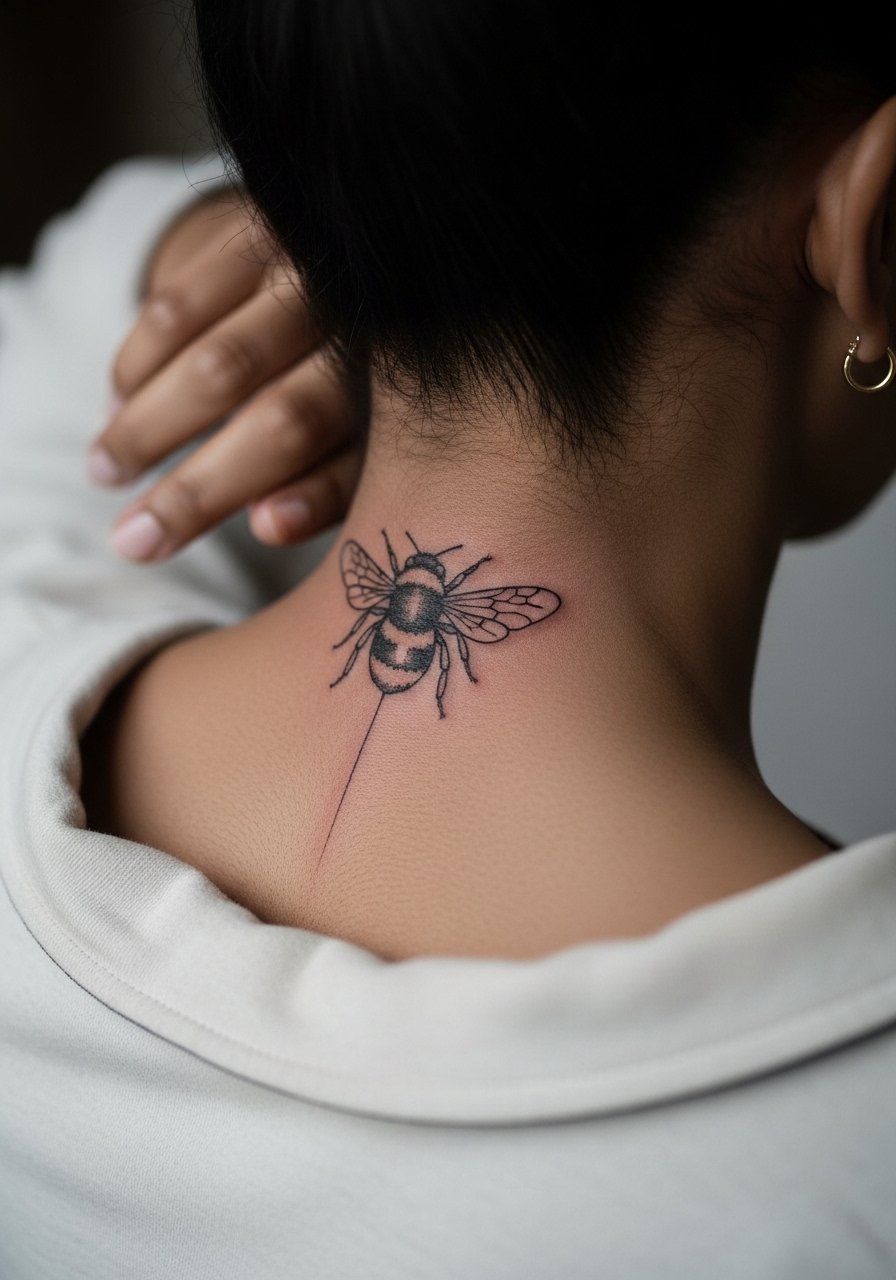
Neck placements are visible when your hair is up and discreet when down. The skin here is thin and mobile, so ask the artist about long-term visibility and recommended line weight. A short session will place a small piece, but touch-ups may be needed earlier than on thicker-skinned areas. Consider workplace visibility and grooming habits before committing. A common misstep is underestimating how often the piece will be seen when hair is pulled back.
Frequently Asked Questions
Q: Will fine line bumble bee tattoos on the wrist blur faster than bold traditional bees on the forearm?
A: Fine line on the wrist is more vulnerable because of frequent washing and friction. Bold traditional pieces on forearms tend to keep their silhouette longer because heavier saturation resists early fading. Expect a possible touch-up for wrist lines within two to three years, and plan placement based on how much maintenance you want.
Q: Are watercolor-style bee tattoos harder to keep vibrant than blackwork designs?
A: Watercolor looks fantastic at first, but color fades faster with UV exposure and light skin tones show yellow differently. Blackwork maintains contrast longer. If you love watercolor, ask your artist to anchor the composition with black outlines or stronger saturation in key areas so the form remains readable as pigments soften.
Q: How should I dress for a thigh neo-traditional session and for aftercare visibility?
A: For the session wear loose shorts or a skirt you can adjust so the artist has clear access without fabric bunching. After healing, high-waisted shorts or slit skirts work well to reveal the thigh art when you want. A practical option for the appointment is high waisted denim shorts that you can shift without discomfort.
Q: Does getting a micro-realism bee on a finger require special aftercare compared with a forearm piece?
A: Fingers need more early protection because of hand washing and repeated friction. Use protective film and gentle cleansing in the first week, and expect a higher chance of a touch-up within months. Fine line forearm pieces see less mechanical wear and usually need less frequent touch-ups.
Q: When an artist mentions they prefer Saniderm versus dry healing for a small bee, what should I ask them?
A: Ask why they recommend their preferred method and what their observation has been for similar small pieces. One camp favors protective film for less scabbing, and another prefers dry healing to encourage natural flaking. The right choice depends on your lifestyle and the artist's technique, so get a clear explanation before you book.
