
Fine line behind-ear tattoos are everywhere on saved boards, but the reality is more complicated than the pretty photos. They age differently depending on hairline coverage, sun exposure, and how much friction from collars or phone straps the spot endures, and they can surprise you in pain and touch-up needs. Read on for clear ideas, what to ask your artist, and how each tiny design lives, heals, and plays with your wardrobe.
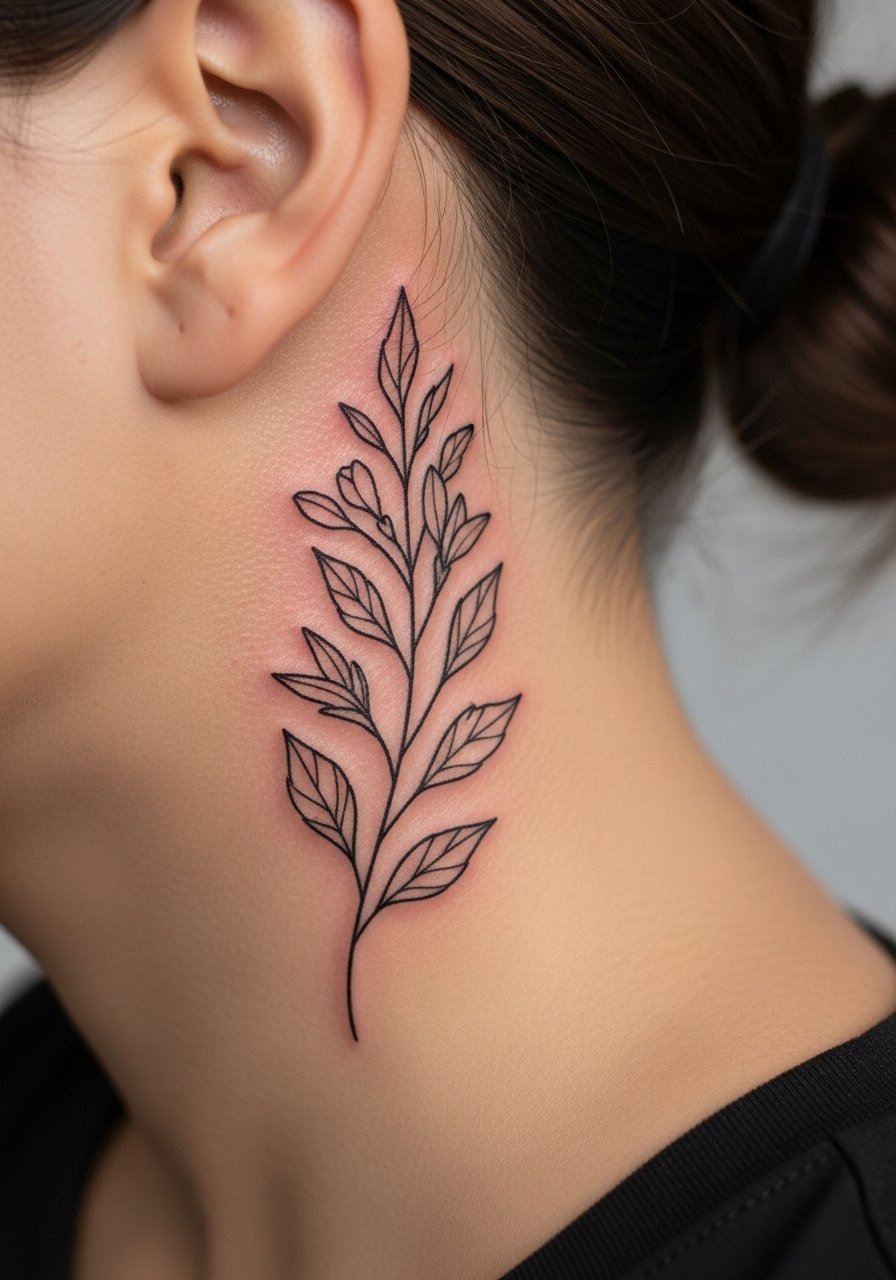
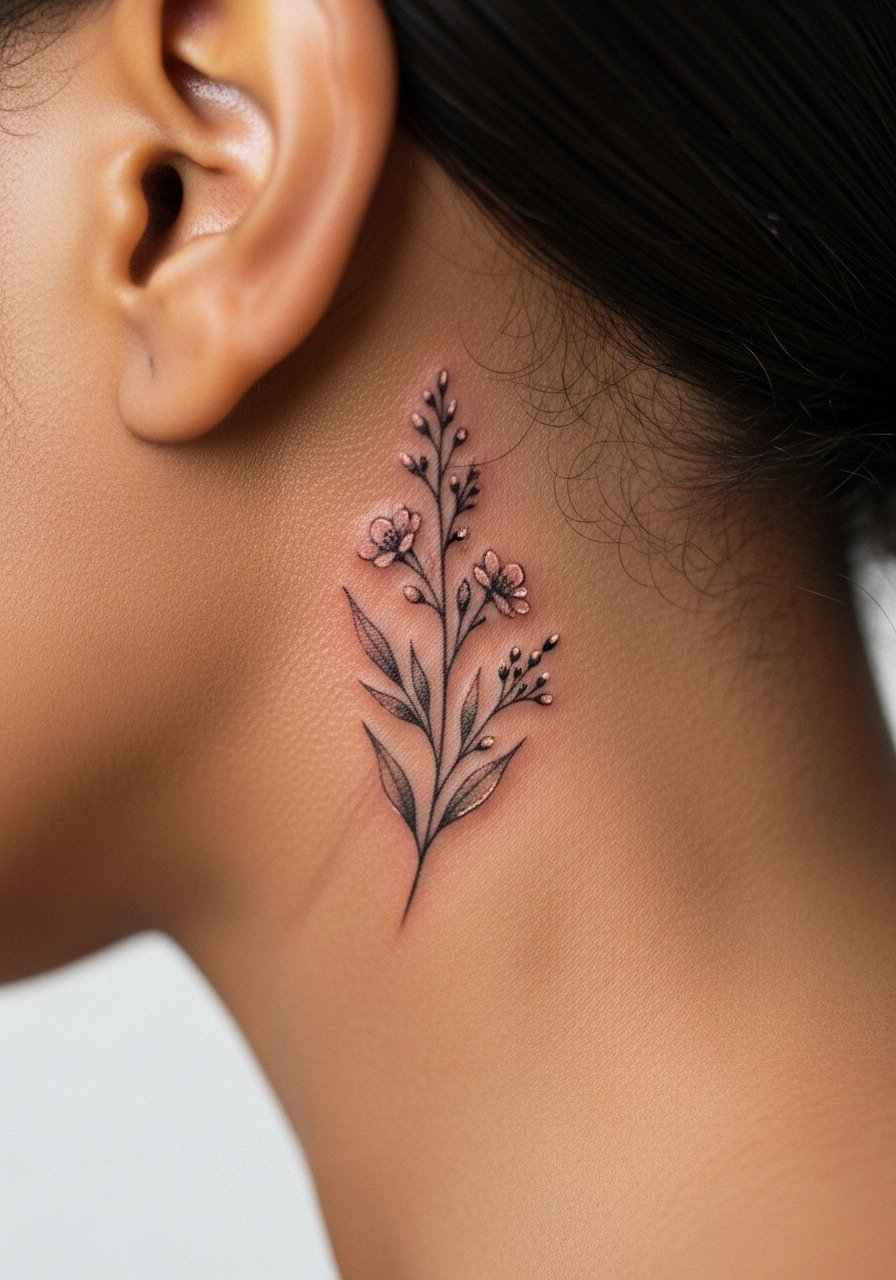
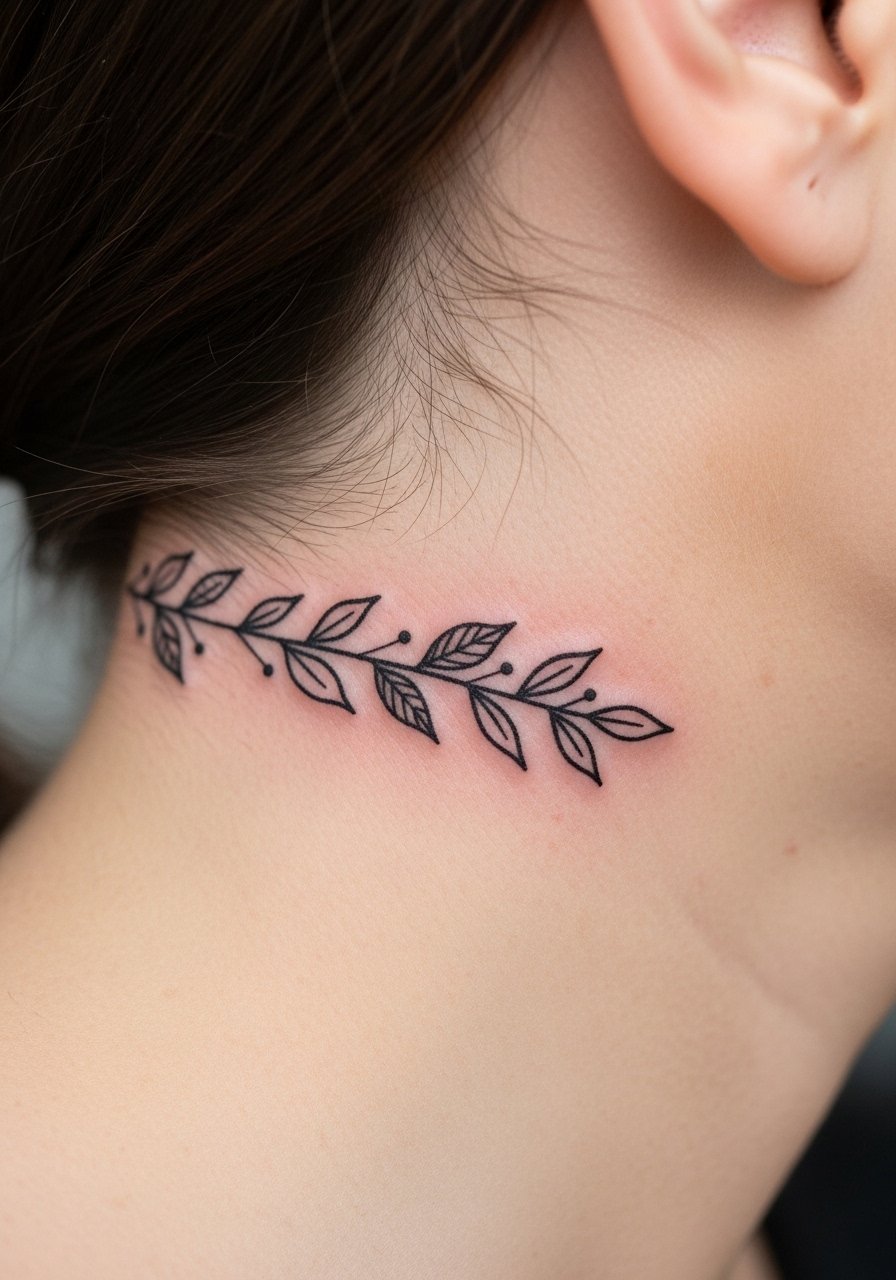
1. Delicate Botanical Sprig on the Skin Just Behind the Ear, Below the Hairline on the Neck
A tiny sprig of leaves works when you want organic shape without crowding the small canvas. I recommend asking for single-needle linework with slightly increased spacing between leaves so the detail survives a few years. The common mistake is packing too many leaves into a postage-stamp area, which leads to softening and merging by year two. Expect a quick 15 to 30 minute session and mild stinging as the needle hits the thin, often bony area. Blowout risk is moderate because the skin is thin, so request shallow, precise placement from the artist. For showing it off, a thin chain pendant necklace sits just below the design without competing, and for the appointment pull hair up with a silk scrunchie so the artist has clear access.
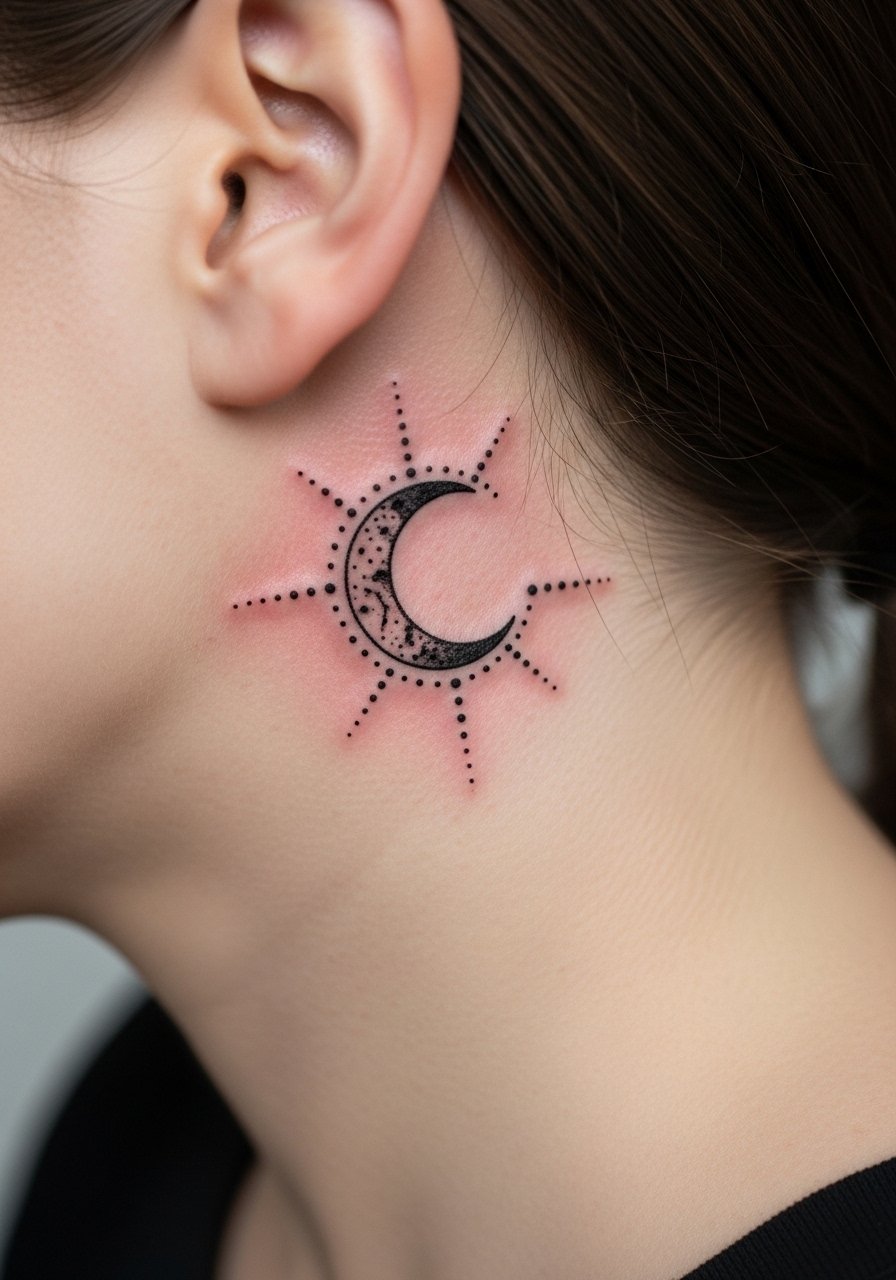
2. Tiny Crescent Moon with Dot Work on the Skin Just Behind the Ear, Below the Hairline on the Neck
A crescent moon with a halo of dots reads classic but quiet. Ask during consultation for staggered dot sizes and light stipple shading behind the crescent to create depth without heavy saturation. Many people make it too small and dense which can blur into a gray smudge at year three. Pain is usually mild to moderate since the area hugs bone and cartilage. Expect 20 to 40 minutes in the chair. If you sleep on the side with the tattoo, shift position for the first week to avoid extra pressure. For session comfort, wear your hair up and a looser top so the artist can tuck strands away, and bring a hair claw clip to keep everything out of the way.
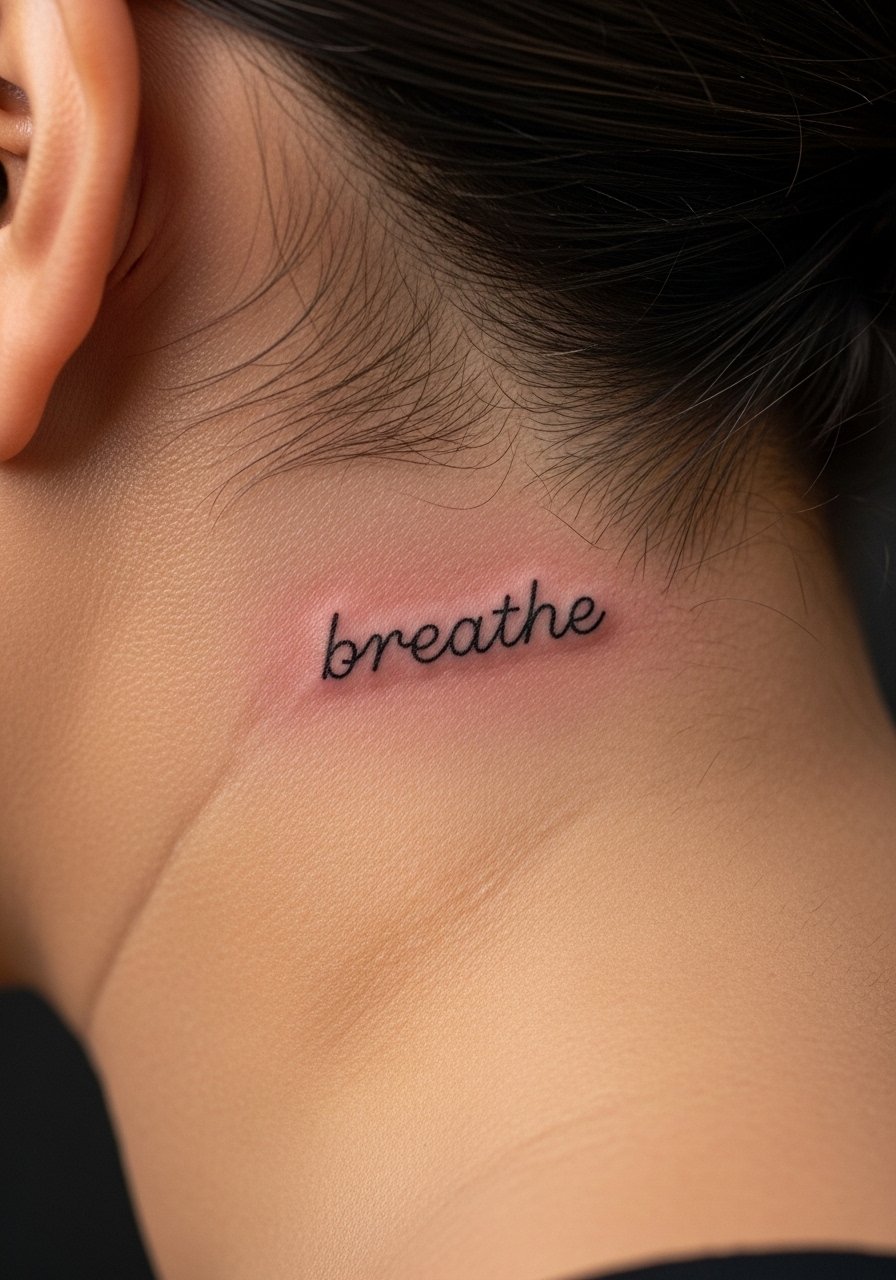
3. Micro Script Word on the Skin Just Behind the Ear, Below the Hairline on the Neck
Micro script is intimate and reads as a private detail when hidden by hair. Tell your artist the exact font weight you want and show examples with the same stroke width. The biggest mistake is choosing a flowing script with hairline strokes that vanish into the skin after one or two years. A slightly bolder single-needle script with modest spacing holds up better. This piece usually takes 10 to 25 minutes and feels sharp near the skull. If you plan to wear your hair back often, consider asking for the lettering to sit a little lower where it catches light. For showcasing the word with outfits, a wide-neck shirt frames the area without revealing everything.
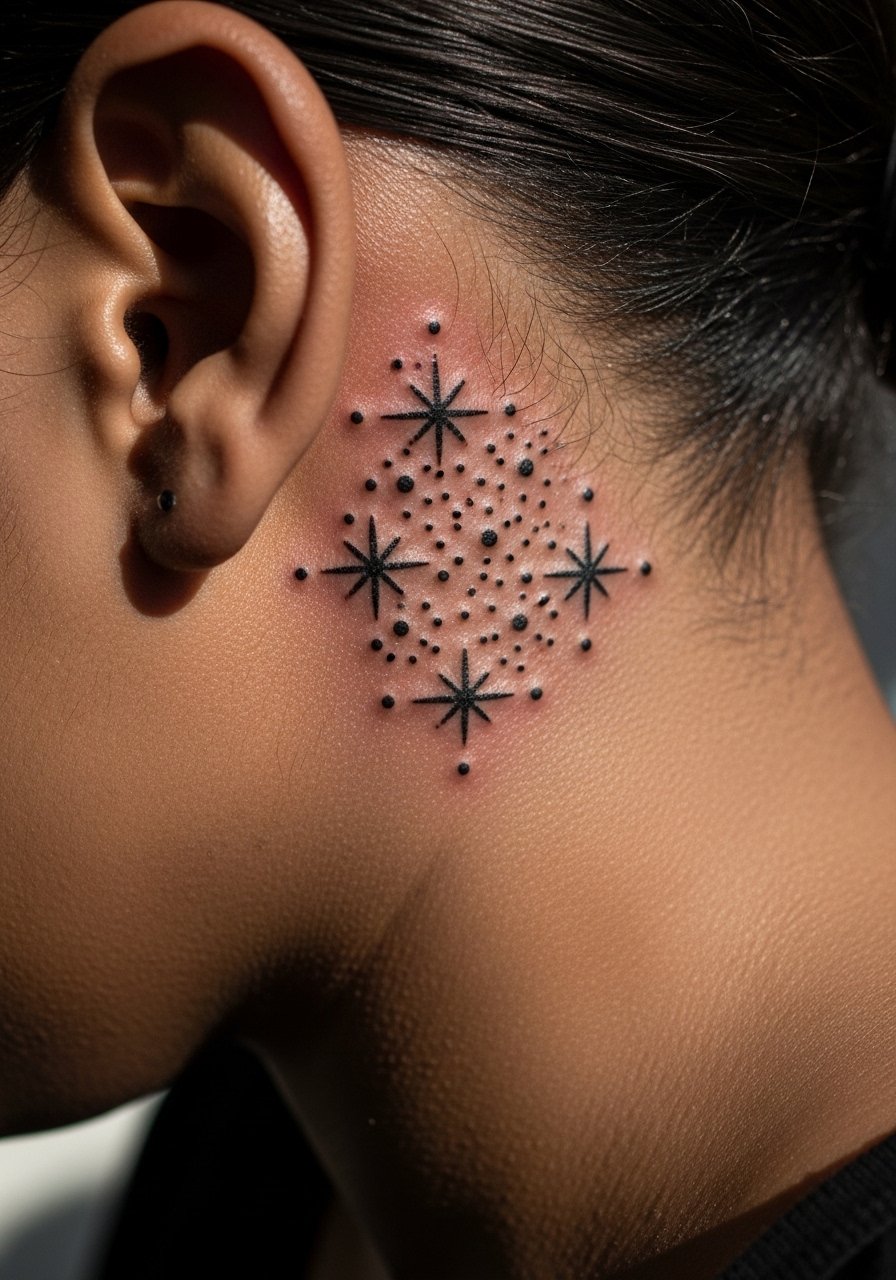
4. Little Star Cluster with Minimal Blackwork on the Skin Just Behind the Ear, Below the Hairline on the Neck
A cluster of tiny stars looks playful when spaced properly. I usually recommend mixing dot sizes and adding one slightly bolder star to anchor the cluster, which prevents the whole grouping from blending over time. If an artist packs five identical micro stars too close together, the negative space disappears as the skin settles. Pain is brief and sharp. Expect 15 to 30 minutes. One professional split is whether to use bold black anchors in small placements. One camp favors a single heavier dot to stabilize the cluster. The other camp insists pure micro line is cleaner. Ask your artist which approach they prefer and why. Pair the look with simple ear hoops like minimalist hoop earrings when you want the design to pop.
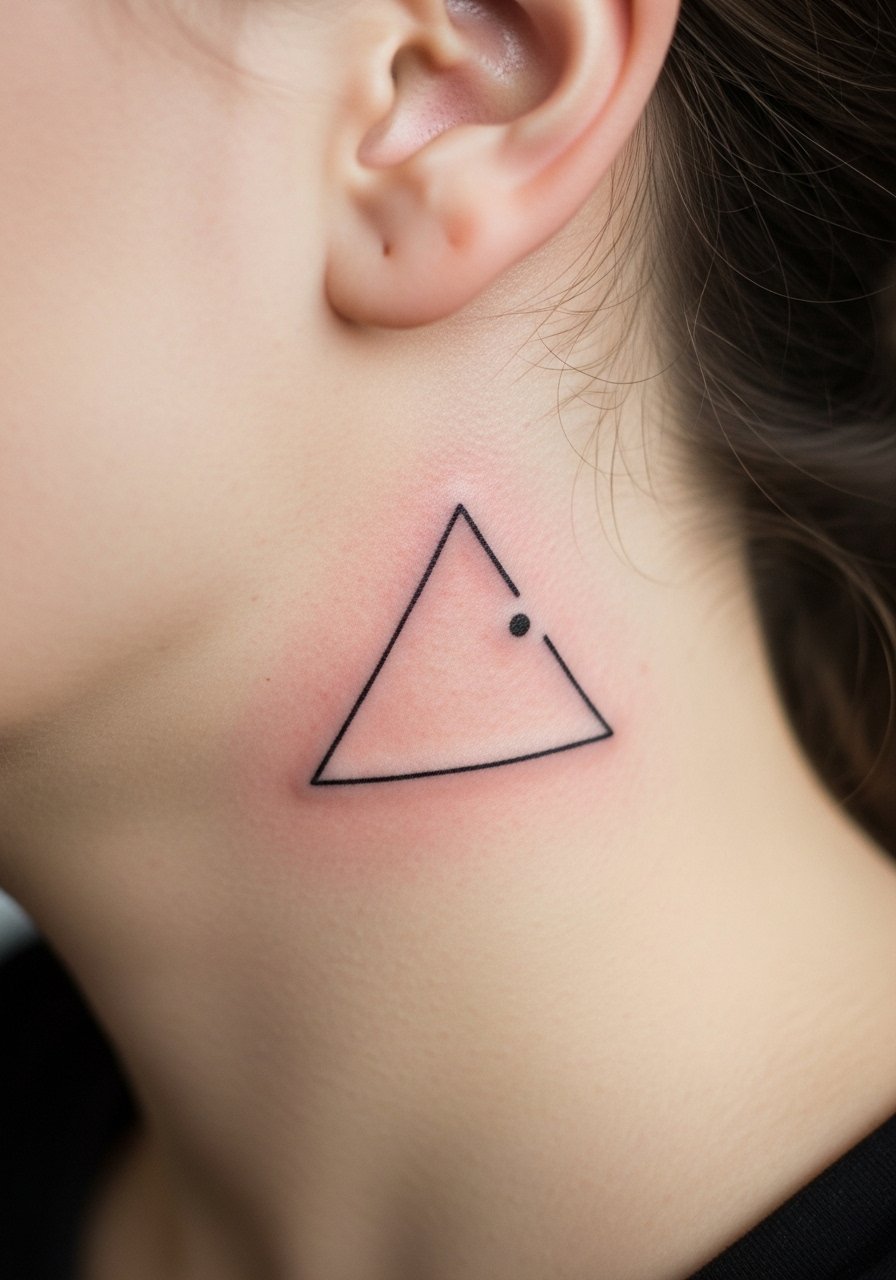
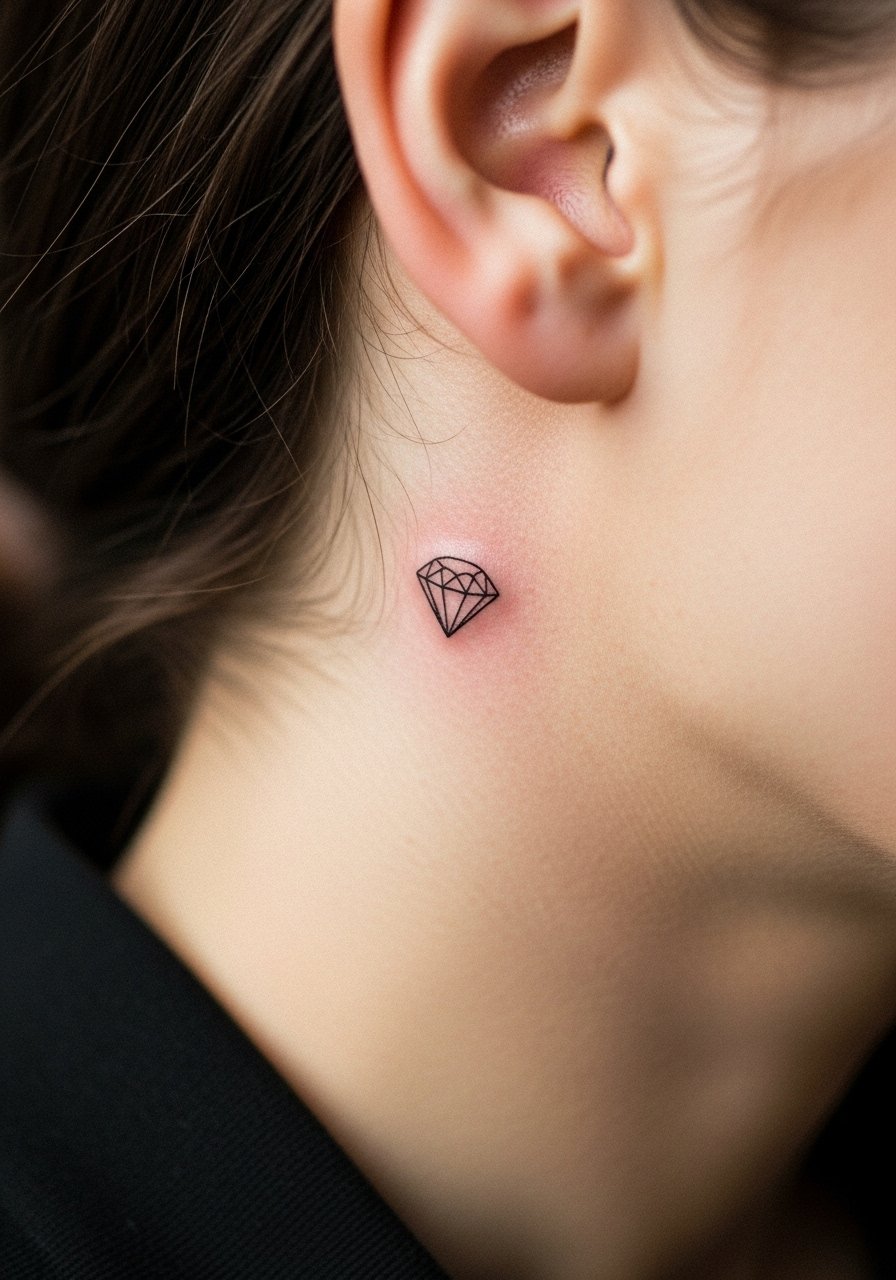
5. Geometric Triangle with Single Dot on the Skin Just Behind the Ear, Below the Hairline on the Neck
Geometric shapes feel modern and hold a clear visual language in tiny placements. For a triangle, insist on crisp linework with slightly thicker outer strokes and lighter interior lines so the silhouette stays strong as the piece ages. The common error is razor-thin outlines that vanish or feather. Session time is short, often under 20 minutes, and pain is a quick sharp burn. Blowout risk rises if the needle goes too deep, so tell the artist you want surface placement with controlled depth. For the session wear and easy revealing afterward, keep a racerback tank on hand so you can roll hair up and adjust necklines without fuss.
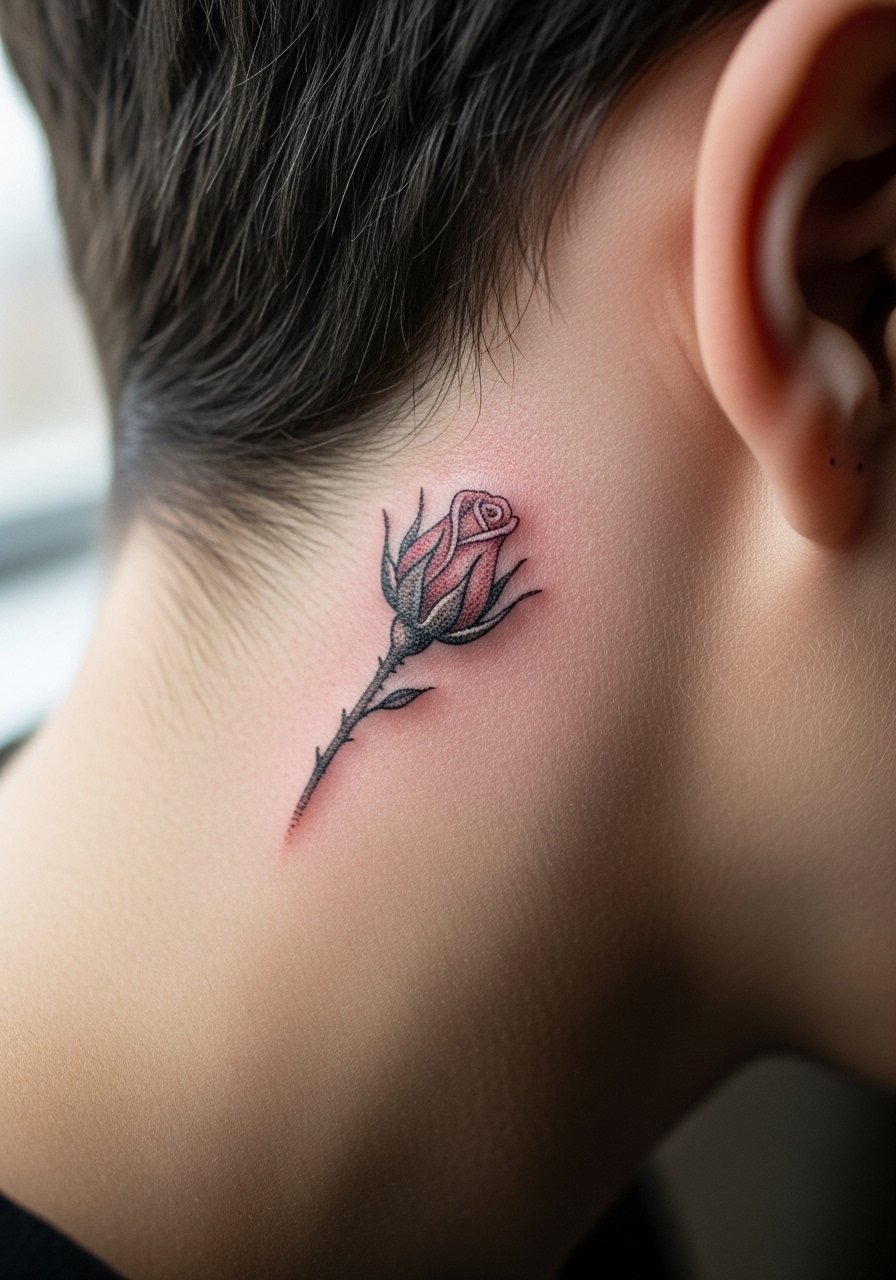
6. Micro-Realism Rosebud on the Skin Just Behind the Ear, Below the Hairline on the Neck
A tiny micro-realism rosebud can be surprisingly expressive if the artist uses soft stipple shading rather than heavy saturation. Tell your artist you want delicate petal shading and a tiny stem with negative space. A frequent mistake is pushing color or heavy graywash into a space too small, which turns petals into a single dark blob after a couple of years. Expect 30 to 45 minutes with some feathering sensations as the needle works shading. Touch-ups are more likely for micro-realism than for single-line designs because the tiny shaded areas lose contrast faster. For the appointment, pin your hair with a silk scrunchie and wear a loose top so the artist can access the area easily.
Studio Day Picks
Those behind-ear mini pieces above need small but specific prep and supplies to stay comfortable during the session and healthy in the first week.
- Stencil transfer paper kit. Lets you try placement on the skin behind the ear without the commitment, which is crucial for such a visible small area.
- Topical numbing cream. Applied as directed before the session it can reduce sharp discomfort when the needle hits near bone.
- Thin protective film roll. Useful for covering tiny behind-ear tattoos during the first day if hair or collars would otherwise rub the spot.
- Fragrance-free gentle body wash. Cleans the area without stripping residual ink or irritating fresh linework.
- Aquaphor healing ointment. A thin layer in the first 48 hours locks in moisture for fine line work without creating a film that traps bacteria.
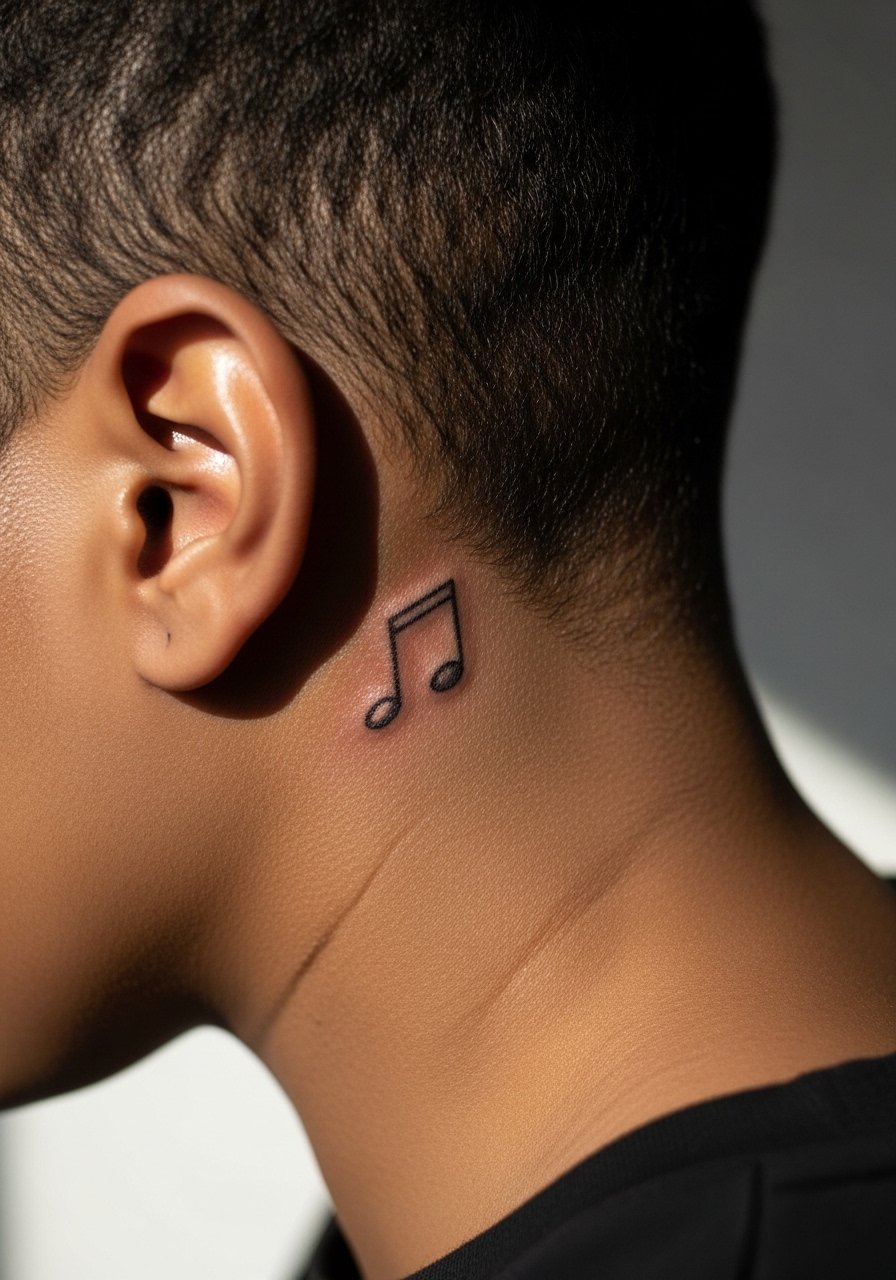
7. Tiny Music Note with Minimal Shading on the Skin Just Behind the Ear, Below the Hairline on the Neck
A musical note is a compact symbol that works if you want meaning without a loud visual. Ask your artist for a slightly bolder stem and a hollow counter so the note reads at a glance, and avoid filling it with heavy graywash. The common version that fades fastest is one with faint, identical strokes which disappear into the skin. This session is brief and the sting is localized. If you wear glasses or earbuds, be mindful of friction when the piece is fresh. For showing it off at concerts or when hair is pulled back, a small pair of studs or a plain chain looks right. Consider a thin chain choker to keep the eye moving down the neckline.
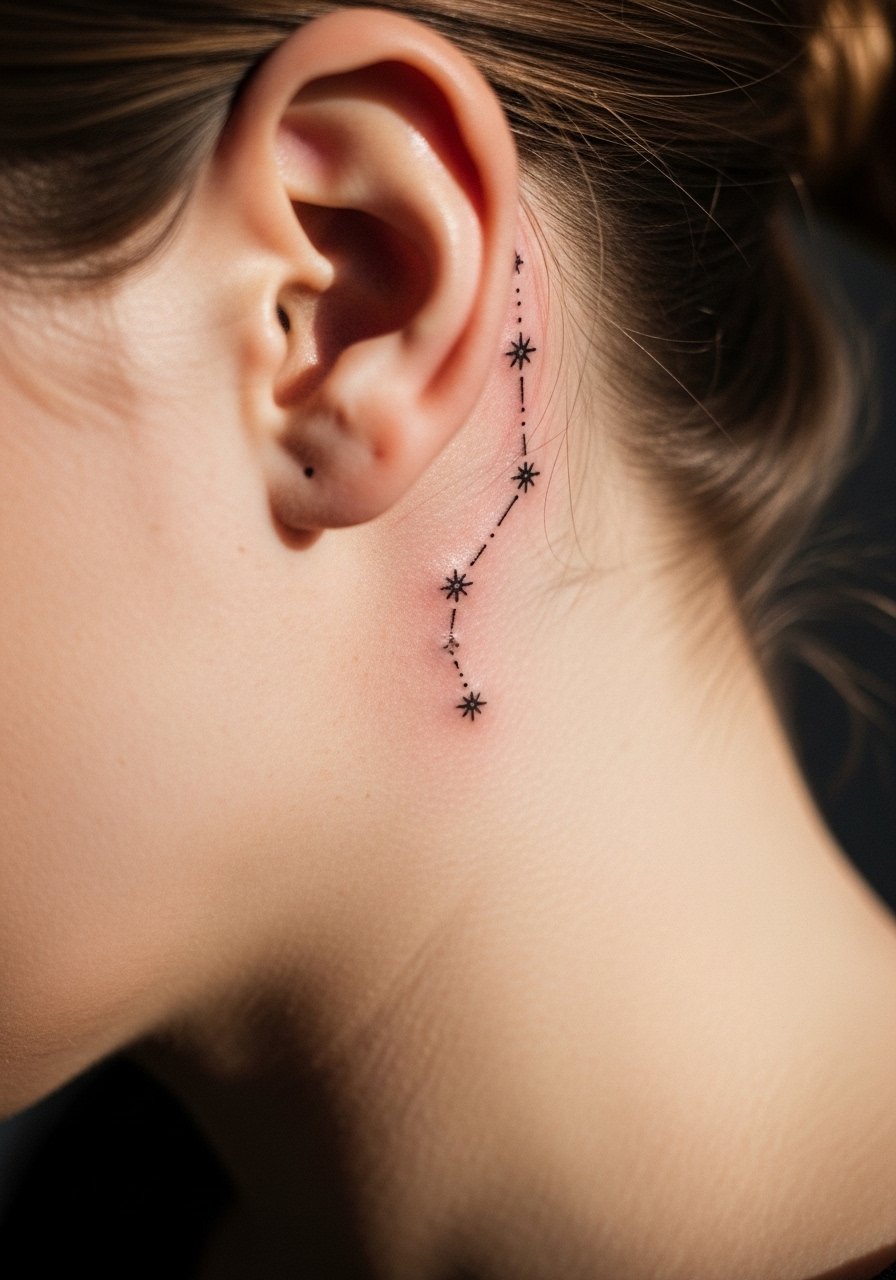
8. Constellation Line with Tiny Stars on the Skin Just Behind the Ear, Below the Hairline on the Neck
Constellations let you map a small story across a narrow area. Tell your artist the spacing you want between stars and which star to make slightly larger so the pattern does not blur into a single shape. A mistake is compressing multiple tiny stars into a tight band which becomes an indistinct smudge at year two. Expect a 20 to 40 minute session with light prickling. For people who wear turtlenecks often, mention that to your artist since fabric friction affects healing. A lightweight turtleneck in the weeks after the session can protect the area while you heal, but avoid rough knits.
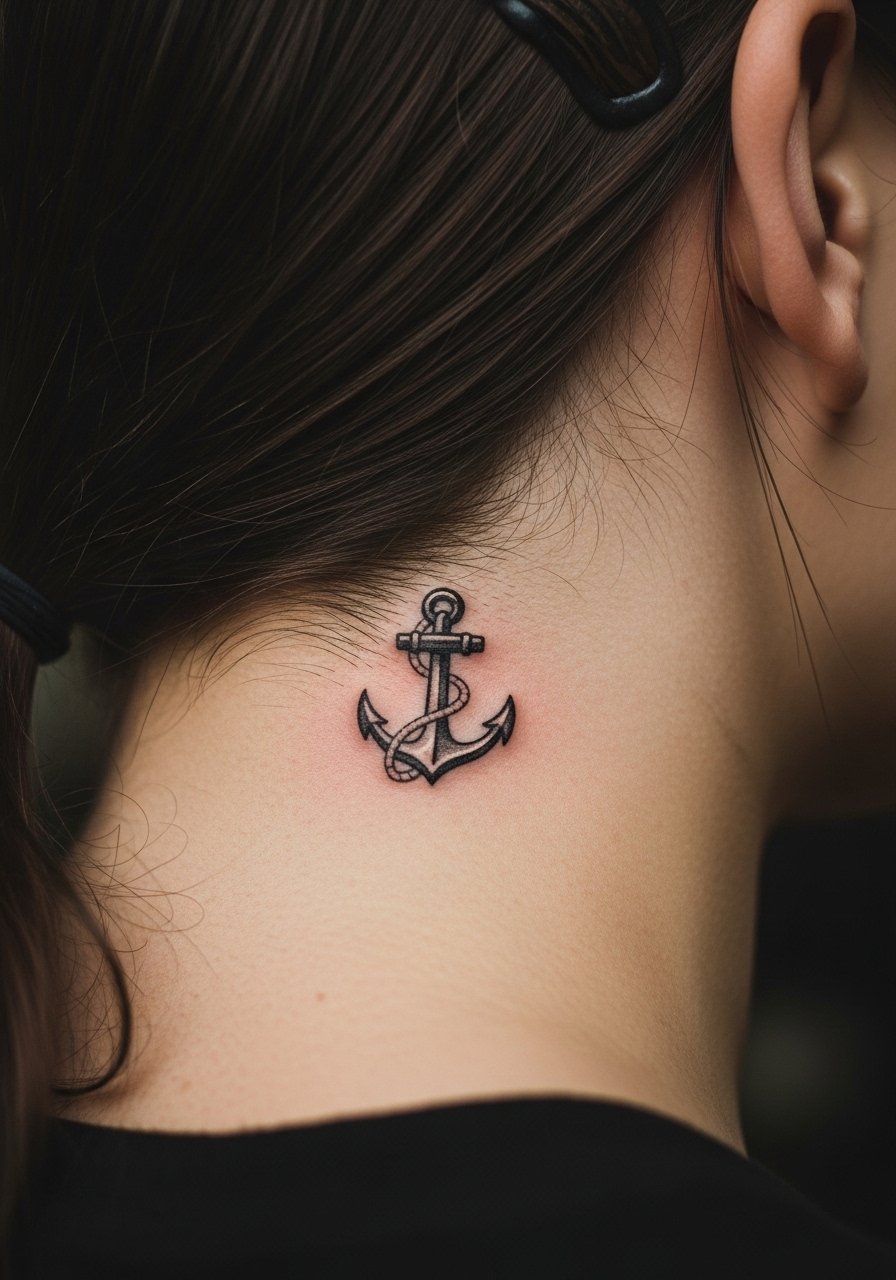
9. Tiny Anchor or Nautical Glyph on the Skin Just Behind the Ear, Below the Hairline on the Neck
A tiny anchor reads like a secret symbol and tends to age well if hit with bold single strokes for the anchor frame and lighter interior lines. The most common error is over-detailing with tiny crosshatching that softens into gray. Sessions are fast and slightly stingy. Talk to your artist about how visible you want the piece when hair is down; shifting it a few millimeters can change how often it shows. For outfits that make the anchor peek out without being loud, a boatneck top plays nicely with the theme and keeps attention balanced.
10. Single Tiny Gem or Minimal Dot Cluster on the Skin Just Behind the Ear, Below the Hairline on the Neck
A single dot or a tiny gem shape is the quietest option. If you choose this, ask for a slightly larger dot than you think you need so it survives natural skin settling. The classic mistake is asking for a microscopic pinprick dot which disappears by year one. This is one of the lowest pain placements but still sensitive. Session time is short. For nighttime comfort, you may want a silk pillowcase the first week to reduce friction while you sleep. A silk pillowcase helps keep hair and fabric from tugging at the new ink.
11. Tiny Floral Sprig with Subtle Color Wash on the Skin Just Behind the Ear, Below the Hairline on the Neck
A hint of diluted color can warm a tiny floral sprig, but color in a compact area fades faster than black linework. One camp of artists argues that micro color is a delicate aesthetic worth the maintenance. The other camp avoids any color in tiny behind-ear work because touch-ups become frequent. If you want color, ask for muted tones and minimal fill so the linework still reads when the pigment fades. Expect 30 to 45 minutes and more sensitivity during colored shading. When styling for evenings, an open-back midi dress paired with hair up highlights the color without making it look like a statement.
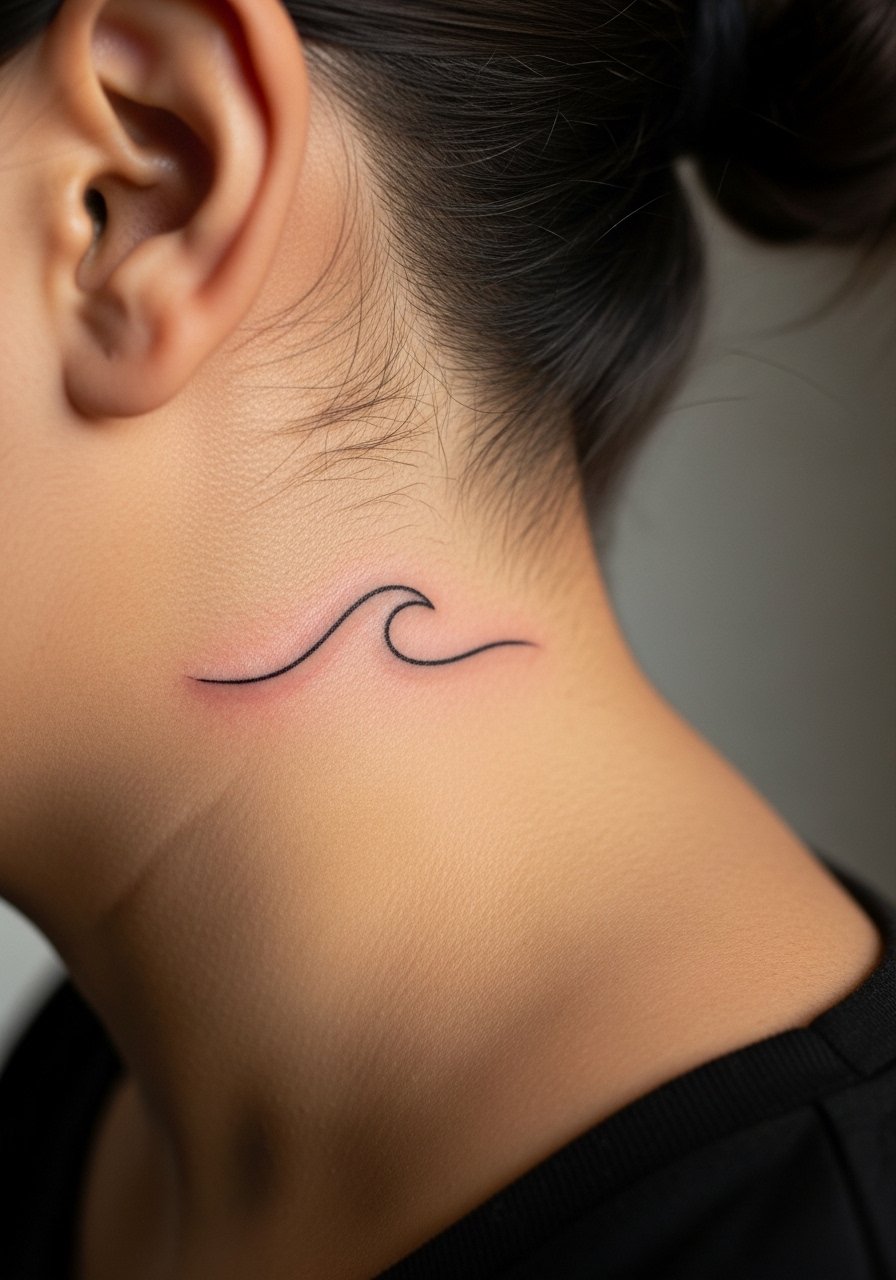
12. Tiny Wave Line with Negative Space on the Skin Just Behind the Ear, Below the Hairline on the Neck
Minimalist wave lines read modern and are forgiving if spaced with negative space. Tell your artist you want the crest lines slightly separated so the shape holds as skin settles. A common mistake is a single continuous thin stroke which can feather into unclear shape after a couple of years. Pain is brief. This piece is great if you like seasonal visibility depending on hair length. For casual days and sessions, a loose button-down shirt you can pull aside keeps you comfortable and gives the artist full access.
13. Tiny Leaf Outline Row on the Skin Just Behind the Ear, Below the Hairline on the Neck
A row of micro leaf outlines creates motion across a tiny strip. Ask your artist to stagger the loop sizes for readability. The aging problem shows when artists replicate identical small leaves in a tight row because the negative space between them disappears. Sessions are brief but the area can feel raw for a couple of days. For job-sensitive environments where you sometimes want to conceal the piece, grow it into a slightly larger motif near the nape over time. Carry a lightweight scarf for quick concealment on days you need to hide the area.
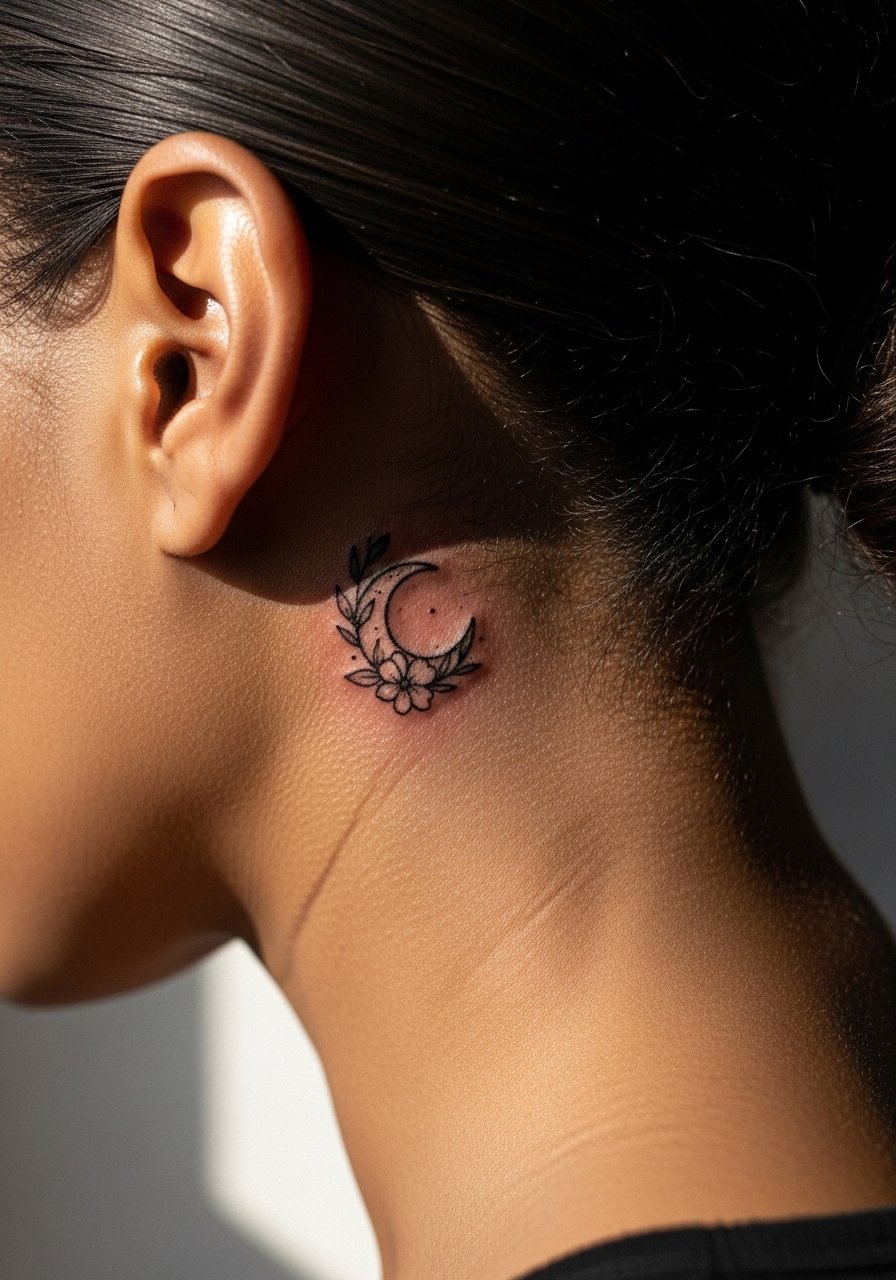
14. Tiny Crescent with Floral Accent on the Skin Just Behind the Ear, Below the Hairline on the Neck
Combining a small crescent with a single petal accent gives visual interest without crowding the area. Ask for one accent petal instead of a bouquet so the piece avoids density. The common error is treating the behind-ear canvas like a mini forearm and stuffing it with detail. Expect 20 to 40 minutes and a sharp sensation close to bone. For sessions, keep breathing steady and plan to shift positions if needed. Pair the tiny motif with simple studs or a minimalist stud earring set to create a balanced look when your hair is up.
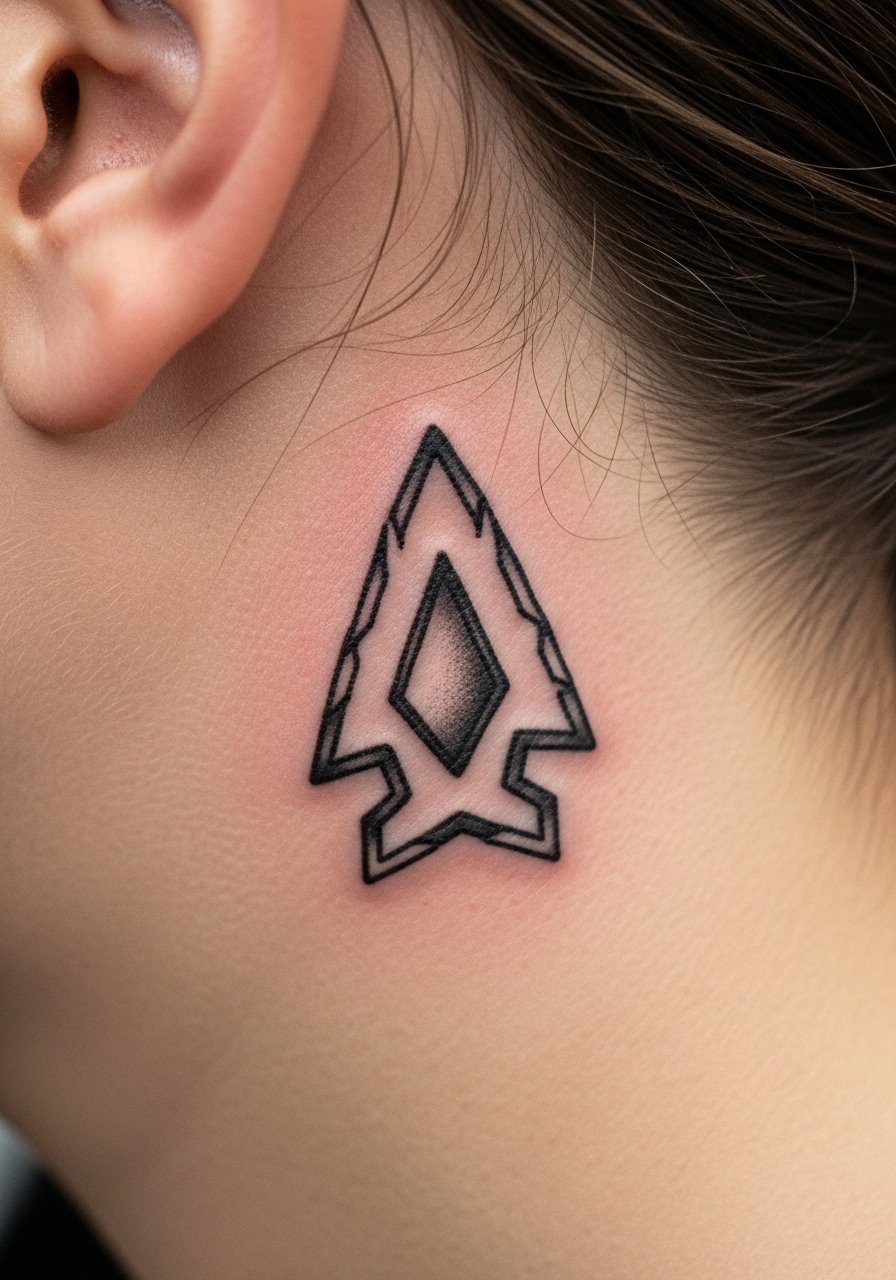
15. Single Tiny Arrowhead on the Skin Just Behind the Ear, Below the Hairline on the Neck
An arrowhead reads crisp and directional. Request a slightly thicker outline on the outer edge and a hollow center so the form keeps contrast over time. The mistake is fine, equal-weight lines that blend as skin texture changes. Expect a quick session and localized sting. If you have very short hair or are thinking of shaving around the area, mention that at booking because hair regrowth can rub the tattoo during the first days. For showing it off casually, a crew neck tee with hair tucked behind the ear makes the design peek out cleanly.
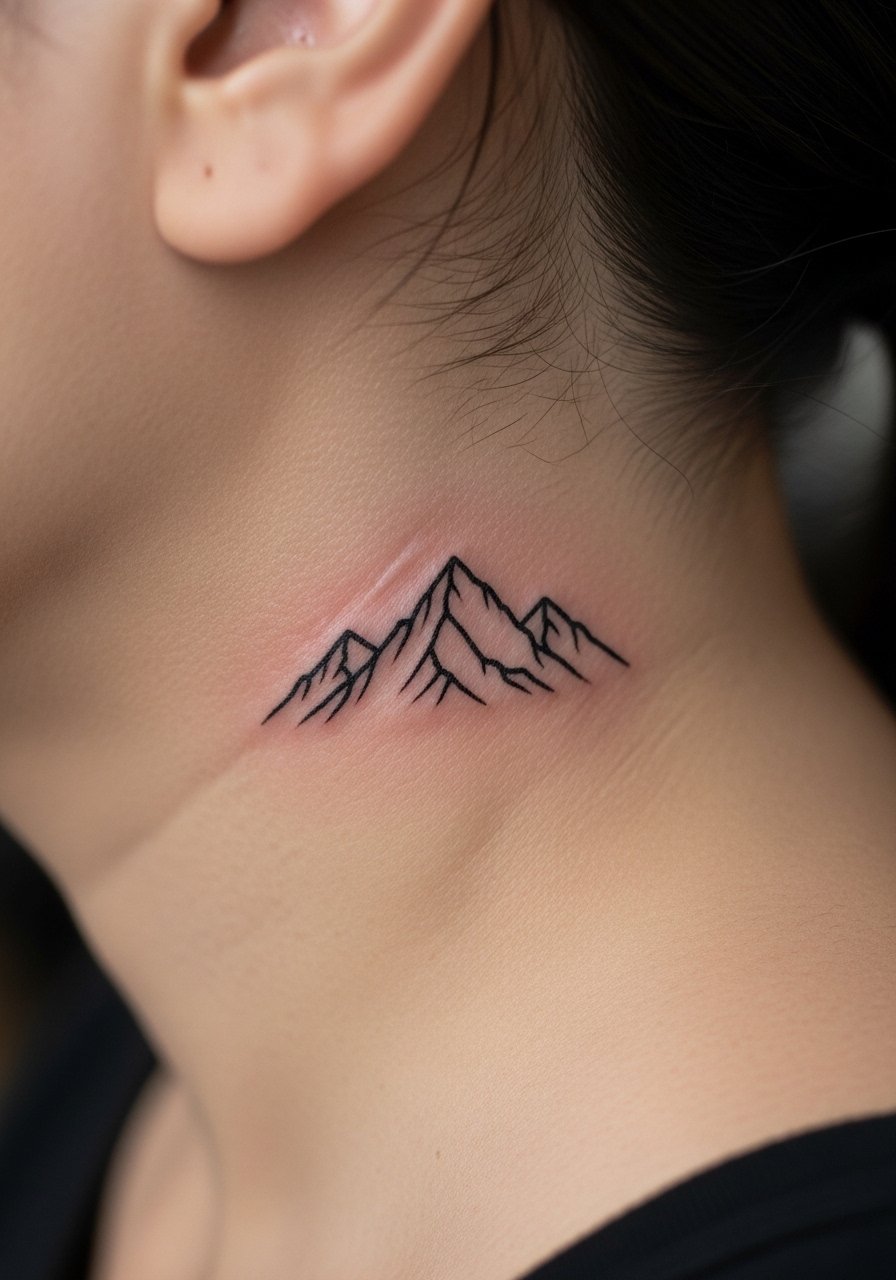
16. Micro Cresting Mountain Line on the Skin Just Behind the Ear, Below the Hairline on the Neck
A miniature mountain line gives an outdoorsy vibe and scales well in tiny spaces. Ask for slightly spaced peaks and a trimmed baseline so erosion does not fill the negative space. The typical error is compressing too many peaks which leads to a single gray band after a few years. Sessions are short but expect twinges near the mastoid. If you travel often, mention climate exposure to the artist since sun and cold affect healing. For weekend show-off outfits, pair the design with a low ponytail and a v-neck sweater to maintain an organic aesthetic.
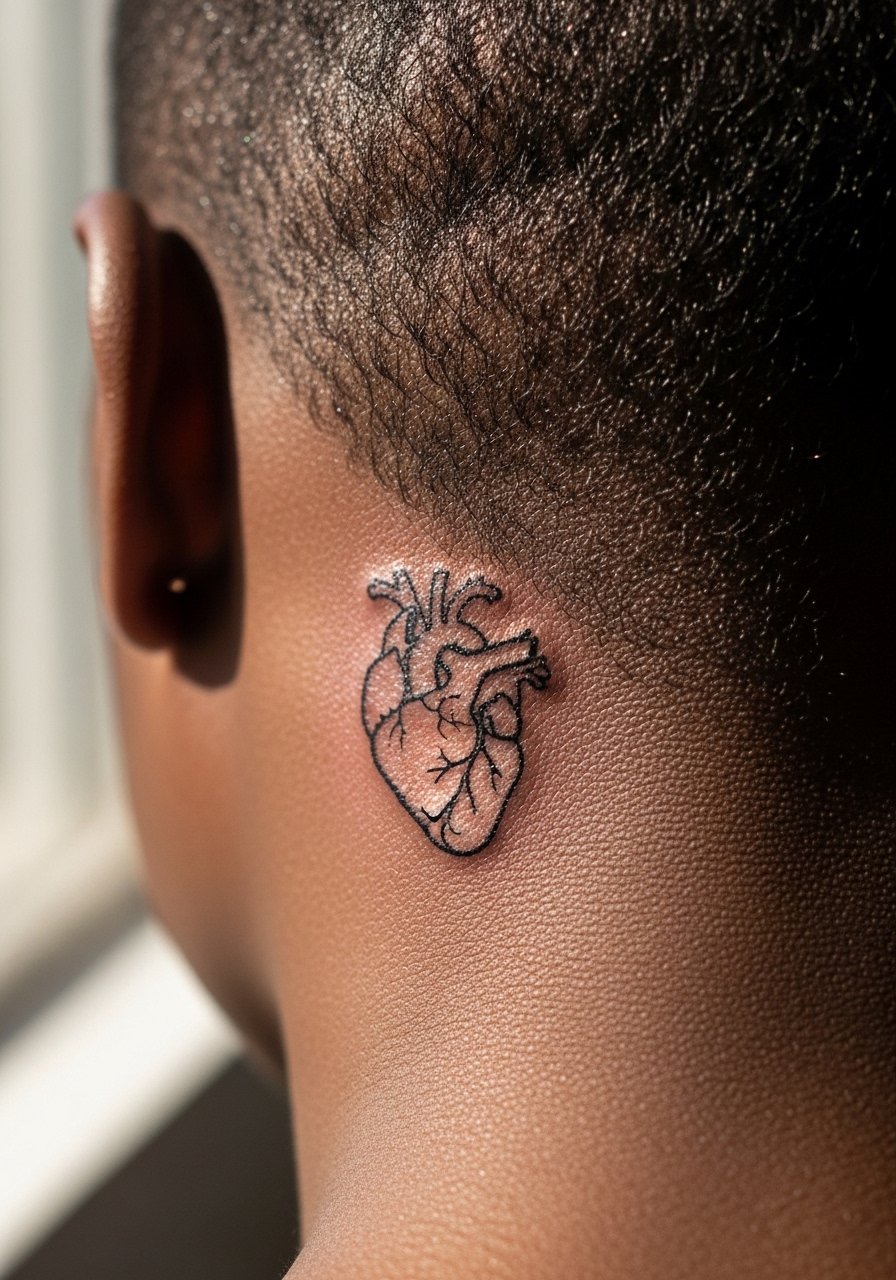
17. Tiny Anatomical Heart Outline on the Skin Just Behind the Ear, Below the Hairline on the Neck
A small heart outline reads classic and personal. Tell your artist whether you want a perfectly symmetrical heart or a slightly imperfect hand-drawn look. The common issue is asking for microscopic symmetry which can look mechanical when healed. This placement feels sharp but brief, and touch-ups for crisp outer lines are common around year two. For sessions, skip jewelry on the side being tattooed and wear a loose tank top so you do not catch necklaces during healing.
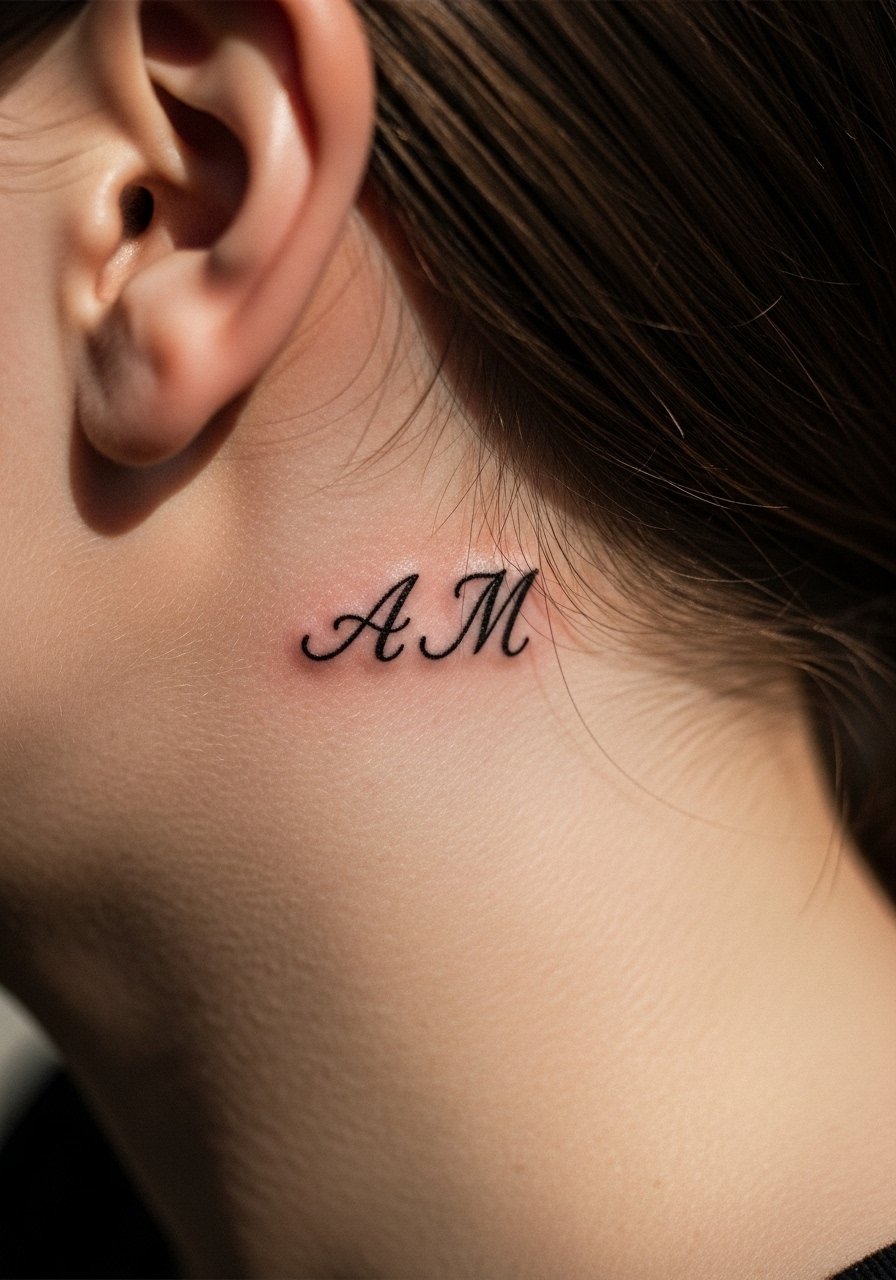
18. Tiny Script Initials Behind the Ear on the Skin Just Behind the Ear, Below the Hairline on the Neck
Initials are intimate but durable when kept bold and simple. Specify exact letter spacing and insist on test transfers in different sizes to see how readable the letters remain from a few feet away. The misstep is choosing a flourish-heavy font that melts with time. This tattoo is quick and can feel raw if the letters sit close to bone. If you have a scalp pierce or other neck jewelry, plan the session around that so piercings do not pull at the fresh ink. For showing initials subtly, a thin chain pendant necklace below the area complements the placement without crowding it.
19. Tiny Botanical Crescent Frame on the Skin Just Behind the Ear, Below the Hairline on the Neck
Instead of a full floral, a crescent framed by two tiny leaves keeps the silhouette clean while giving organic detail. Tell your artist you want the crescent slightly thicker than the leaves so the frame does not overpower the delicate foliage. Over-detailing is the usual mistake here and leads to a muddy patch after a few years. Expect 25 to 40 minutes of work and a sharp sensation along the curve. If you are hair-coloring regularly, avoid dyeing near the fresh tattoo. For nights out, tuck hair with a decorative hairpin to keep the area visible without full reveal.

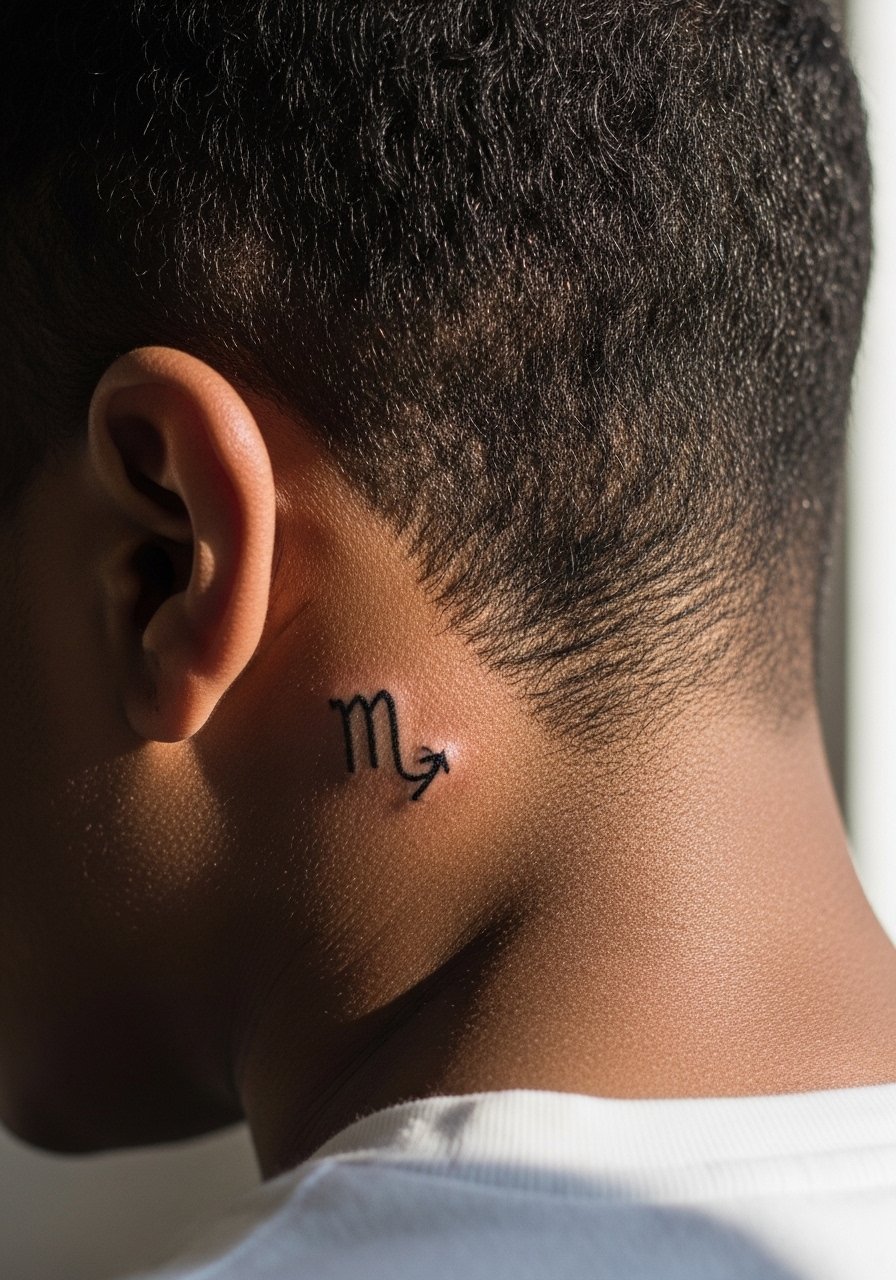
20. Micro Zodiac Glyph on the Skin Just Behind the Ear, Below the Hairline on the Neck
A zodiac glyph is symbolic and compact. Specify the exact glyph and its orientation so the image generator and stencil match your intention. One pitfall is choosing oversized decoration around the glyph which dilutes the sign over time. This is a fast appointment and feels like a pinprick. If you work in a conservative environment and worry about visibility, shift the glyph slightly lower into the hairline so it only shows when hair is up. A light scarf can be a discreet way to hide the area when needed.
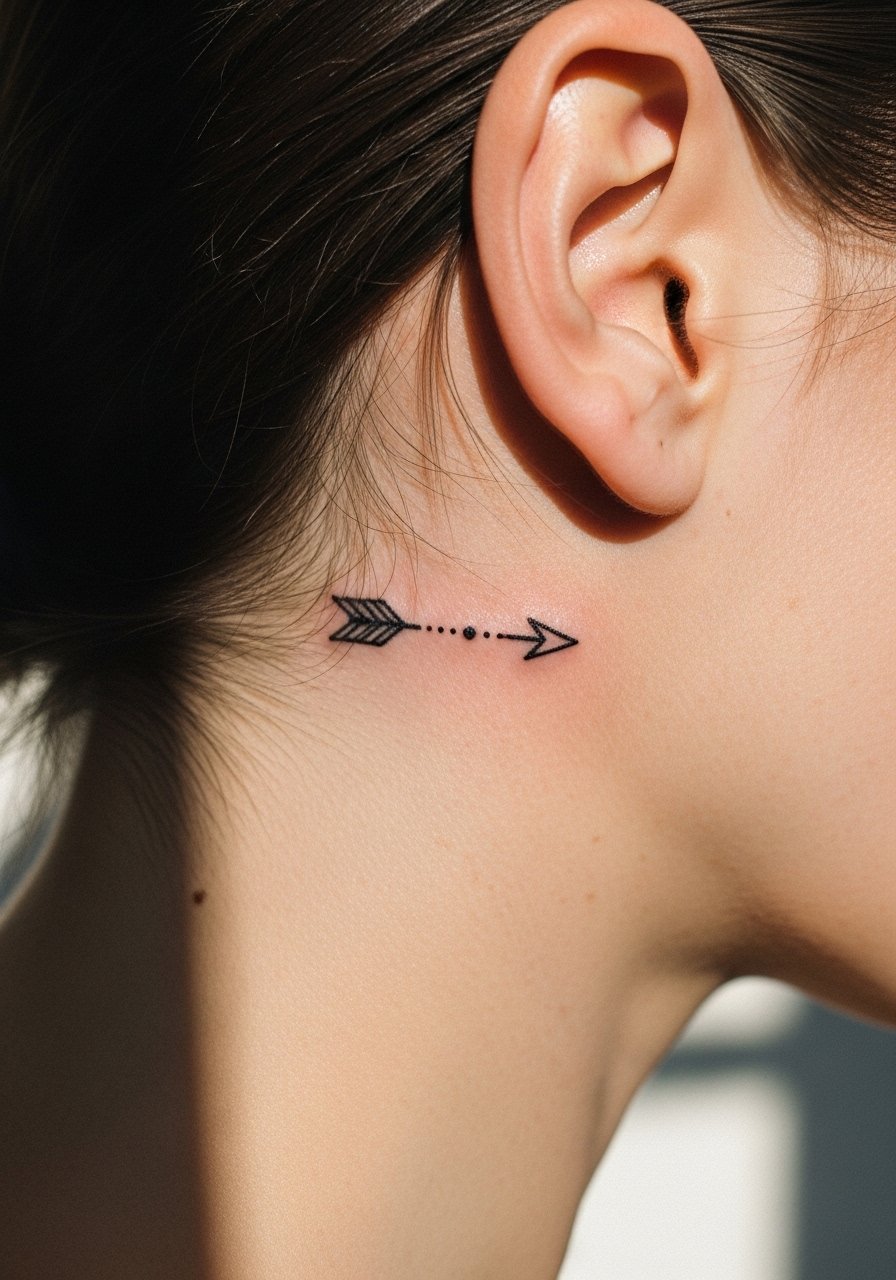
21. Tiny Arrow with Dot Trail on the Skin Just Behind the Ear, Below the Hairline on the Neck
A mini arrow with a trailing dot line creates movement in a tiny spot. Tell your artist the precise trajectory you want and whether the dots should taper in size. The common mistake is drawing the trail too dense which becomes a gray smudge later. Expect a short session and sharp localized needle feeling. For booking, ask about touch-up policies for small work because artists vary on whether they include one free touch-up. For styling, a low bun clip keeps the area visible and tidy when you want to show it.
Frequently Asked Questions
Q: How much does a behind-ear micro tattoo hurt compared with a forearm piece?
A: Pain is usually sharper near the behind-ear spot because the skin is thin and close to bone, but sessions are short so the overall discomfort is often less than a long forearm sitting. Everyone's threshold is different, and things like topical numbing and breathing techniques help. Plan for a quick sting and mild soreness the first two days.
Q: Will tiny fine-line pieces behind the ear need touch-ups often?
A: Many fine-line micro pieces need a touch-up sooner than bold blackwork, especially if they sit where hair, collars, or phone straps rub them. Expect touch-ups around year two to three depending on placement and sun exposure. Ask your artist for their maintenance timeline and whether touch-ups are included in the price.
Q: Can I show a behind-ear tattoo easily with outfits, and what helps it stand out?
A: Yes, simple styling choices highlight these tiny pieces. Pulling hair into a bun or using decorative pins makes the area visible, and delicate necklaces or studs frame the space without stealing focus. A thin chain pendant necklace or small ear studs pair well when you want the tattoo to read as part of an outfit.
Q: Should I avoid dyeing my hair or getting piercings near a fresh behind-ear tattoo?
A: It is wise to avoid chemical hair treatments and new piercings near a healing tattoo. Dye can irritate and piercings can introduce bacteria or rub the area. Wait until the tattoo is fully healed and any scabs are gone before exposing it to dye or additional trauma.
Q: How do I find an artist good with micro work without naming people?
A: Use shop directories, local convention lineups, community hashtags for close-up healed shots, and Reddit threads focused on micro tattoos to find portfolios that show consistent healed results. Look specifically for healed photos of micro work on thin skin and ask the artist about their preferred needle spacing and touch-up policy before booking.
