
Fine line How To Train Your Dragon pieces read delicate on skin and loud on mood, but their longevity depends on placement, spacing, and the depth of each stroke. Trends push ever-smaller silhouettes, and the sites where people choose to place them often decide whether they look crisp at year one or mushy at year five. Read these 21 minimal line ideas with practical notes on consultation, aging, and what to wear when you book the session.
1. Toothless Silhouette on Inner Forearm

I recommend this when you want a recognizable icon without heavy detail. Tell your artist you want a single continuous contour line for the head and wing separation, and ask for slightly wider spacing between curves so the silhouette does not fill in with time. The inner forearm is forgiving on pain, and a 30 to 45 minute session usually does it. Common mistakes include compressing too much detail into a tiny area, which raises blowout risk and forces early touch-ups. For showing this off, rolled sleeves and a loose button-down shirt frame the forearm without stealing focus.
2. Tiny Night Fury Finger Icon
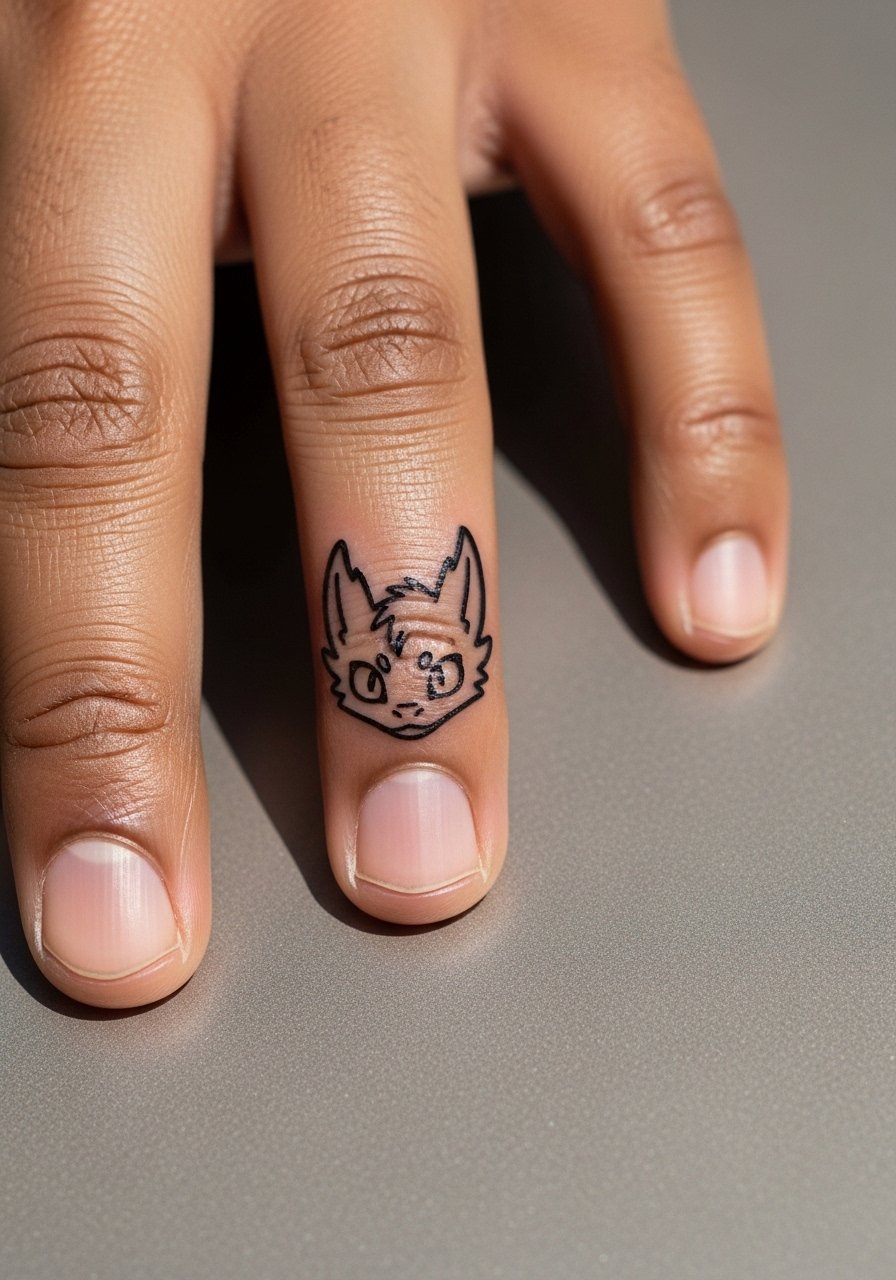
Fair warning: fingers age tattoos differently because of constant washing and friction. A minimal Night Fury glyph on the finger needs extra negative space and a plan for a thin protective film in the first week. The linework must sit shallow enough to avoid heavy saturation but deep enough to avoid early fading. Sessions are under 20 minutes, but expect touch-ups at year one or two. The biggest mistake is requesting high detail on a nail-side placement. For the appointment, wear a thin chain bracelet instead of heavy cuffs so the wrist area does not rub the fresh ink.
3. Hiccup Profile on Upper Arm
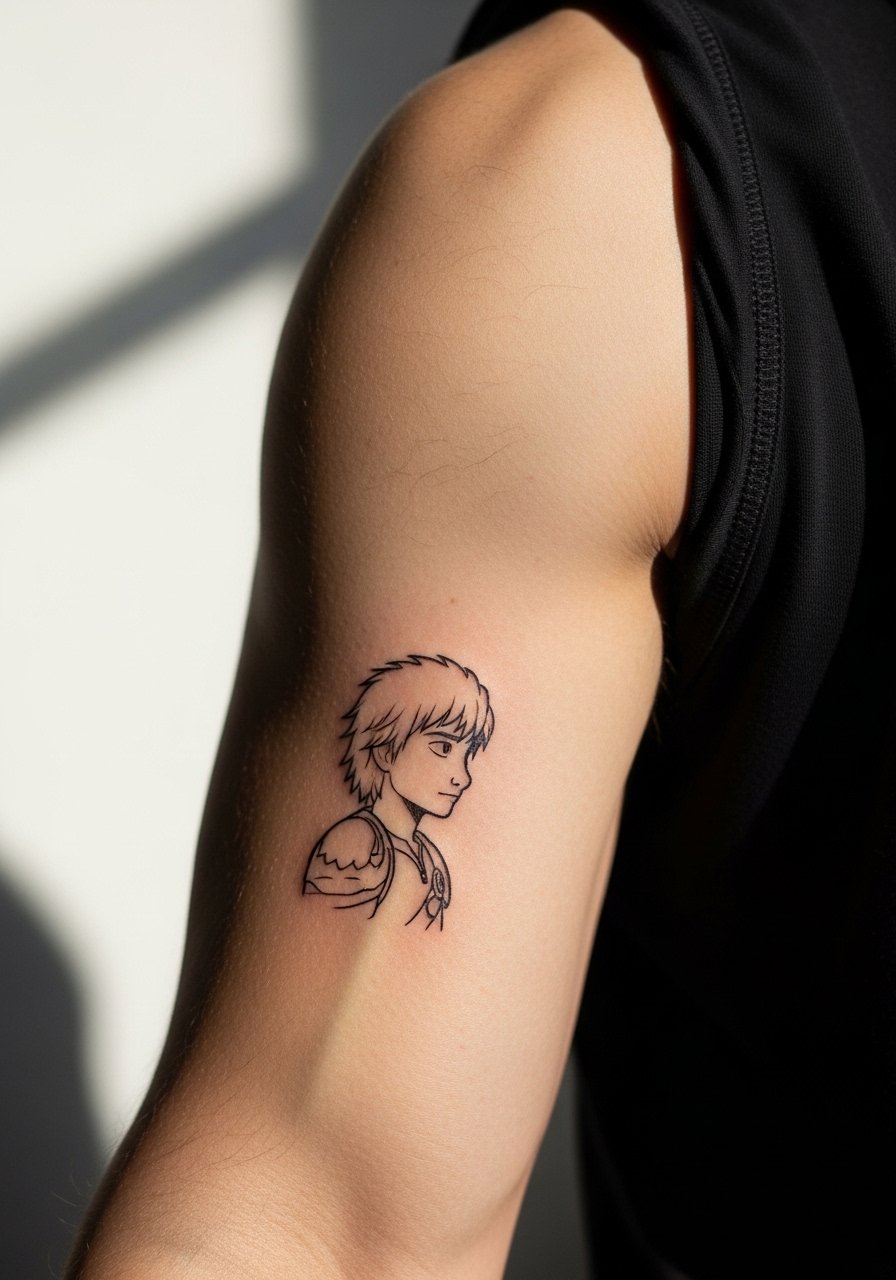
Most people pick the outer arm for visibility and easier touch-ups. Ask your artist to keep the face shape simple and the jawline clear so shading does not merge into the hairline over time. Outer arm pain is low and a 40-minute session will usually cover a medium-sized silhouette. Aging looks like slight softening at six months and gentle blur at five years unless spacing is generous from the start. Common mistake: adding tiny facial details that read muddy after healing. Pair this with rolled-sleeve tees and a minimalist watch to balance the arm without covering the piece.
4. Dragon Wing Collarbone Linework
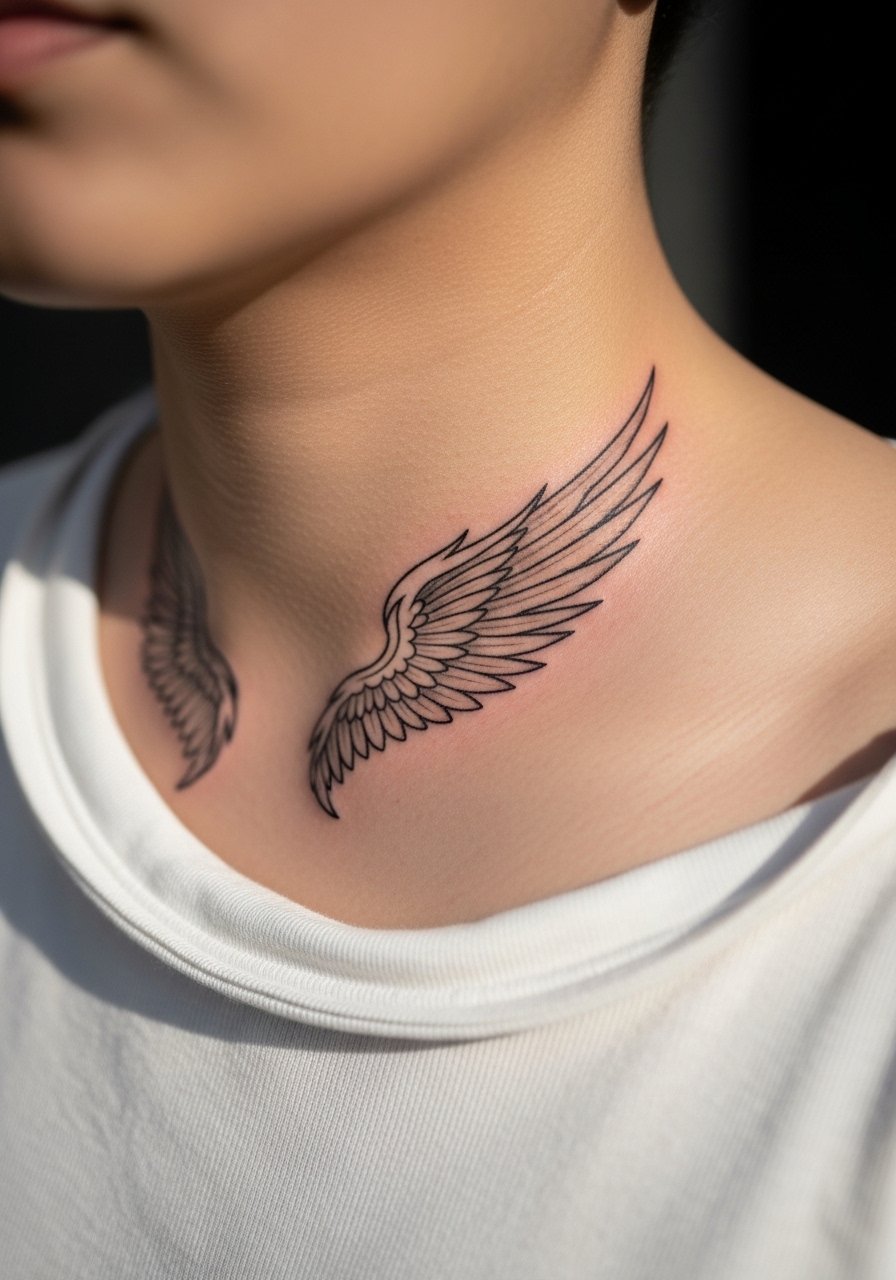
This placement looks elegant and shows quickly with open necklines, but it is thinner skin so touch-ups are more common. In consultation, specify that you want the wing tips to taper gradually so the linework ages without clumping near the bone. The session is often under an hour, with moderate discomfort near the bone. One camp of artists warns that collarbone pieces blur faster because of movement and sun exposure. The other camp says careful depth and spacing keep lines crisp. Ask where your artist stands before booking. For evenings, an open-back midi dress frames the collarbone without crowding the linework.
5. Minimal Dragon Egg on Ankle
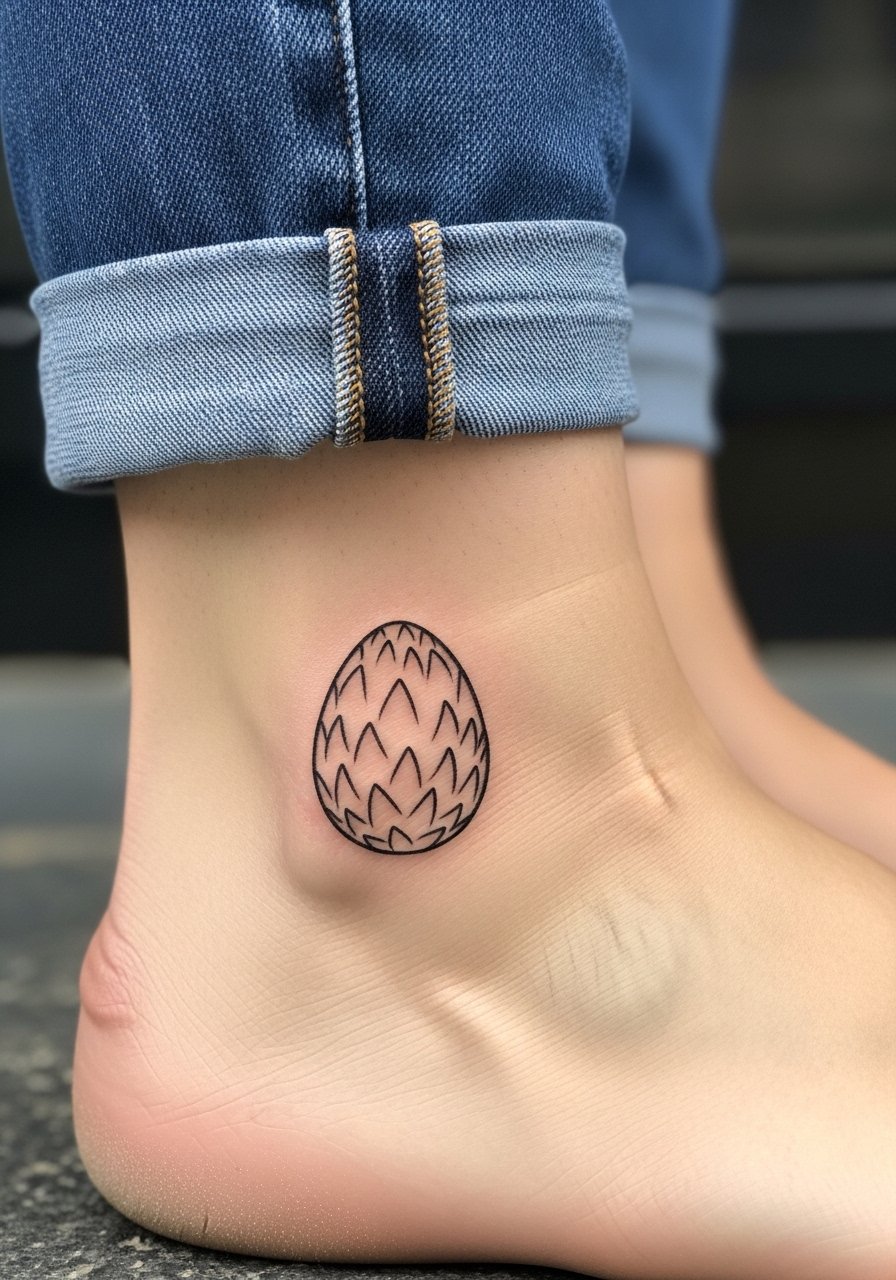
The ankle tolerates small designs well but suffers from friction with shoes and socks. Tell your artist to leave a thin gap between concentric egg lines so the pattern keeps its crispness after healing. Session time is short under 30 minutes but expect heavier fading from shoe straps and long walks. A common mistake is placing too much interior detail that disappears by year two. For the appointment wear jeans you can roll and a pair of slip-on sandals so the ankle is accessible without rubbing.
6. Minimal Toothless Flight Across Ribcage
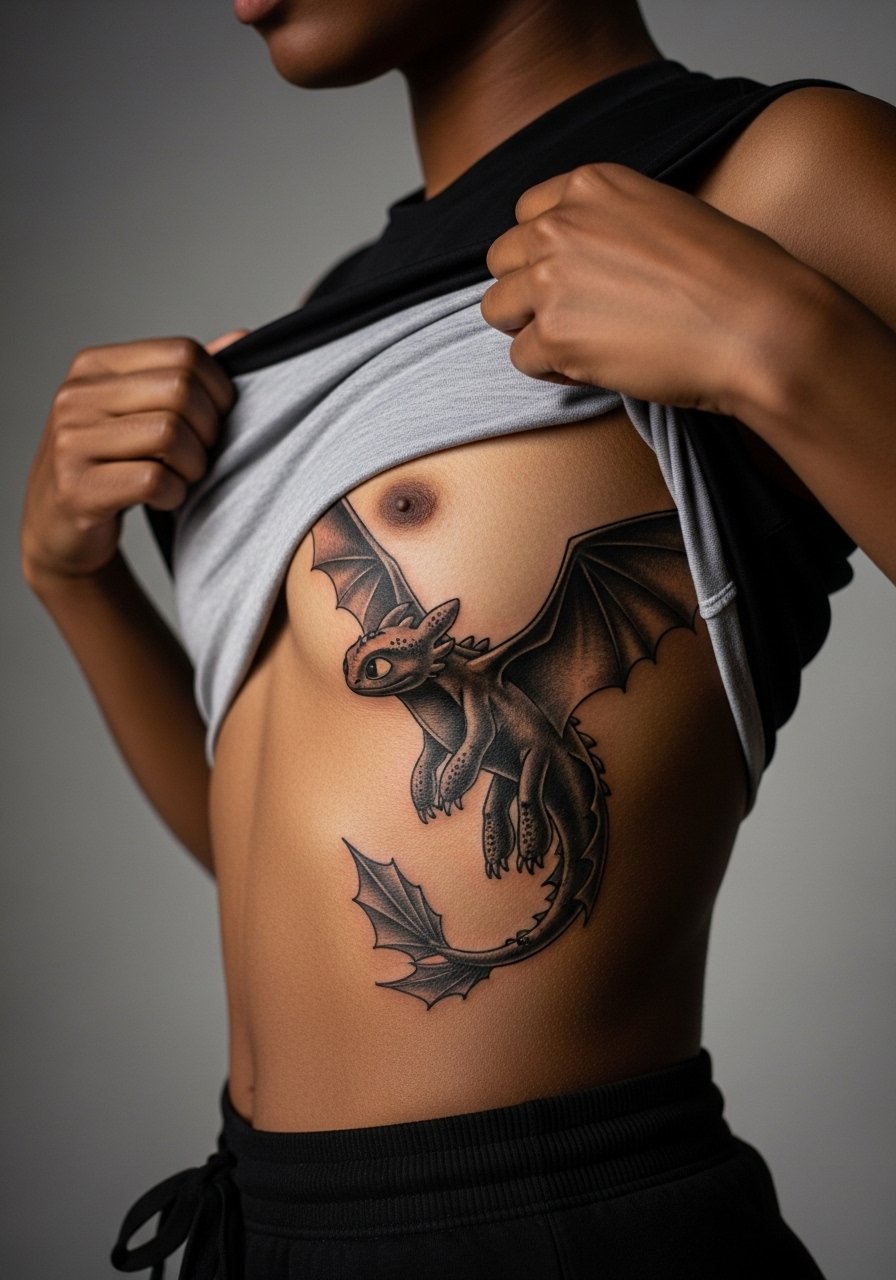
Fair warning: the ribcage is high on most pain scales but it offers a long canvas for motion. For a flight piece, ask for elongated wings with wider spacing between feather lines. Aging shows some softening at two years if the lines are too tight. The big mistake is shrinking a sweeping pose to fit a small rib area. Touch-ups are common at year two to maintain crisp wing tips. Because this is an intimate area, schedule a longer session slot and wear a sports bra or fitted top to make access easier for the artist.
Studio Day Picks
The inner forearm, ankle, and ribcage pieces above ask for different prep and first-week care, so a few targeted items make the session and the first healing window easier.
- Stencil transfer paper kit. Lets you and your artist preview placement on skin, especially useful for the forearm and collarbone layouts above.
- Topical numbing cream. Applied as your artist recommends it eases ribcage and collarbone sensitivity before the session.
- Thin protective film roll. Keeps ankle and finger tattoos cleaner during the busiest first week of washing and movement.
- Fragrance-free gentle body wash. Cleanses healing lines without irritating delicate fine line work on the forearm or chest.
- Aquaphor healing ointment. Thin layers for the first few days help protect narrow needle channels, especially on areas that flex a lot.
7. Tiny Dragon Scale Wrist Band
This works for anyone who wants a repeating motif without full sleeve commitment. When you consult, show a reference for scale spacing and ask for negative space between scales so the band does not become a solid line over time. Wrist tattoos face heavy friction from watches and bracelets so expect more frequent touch-ups. Session time is typically 20 to 30 minutes and pain is low to moderate. Avoid the mistake of shrinking the scale pattern below finger-width. For showing it off, stack with a minimal leather watch strap instead of wide metal bracelets.
8. Light Fury Minimal Head at Nape
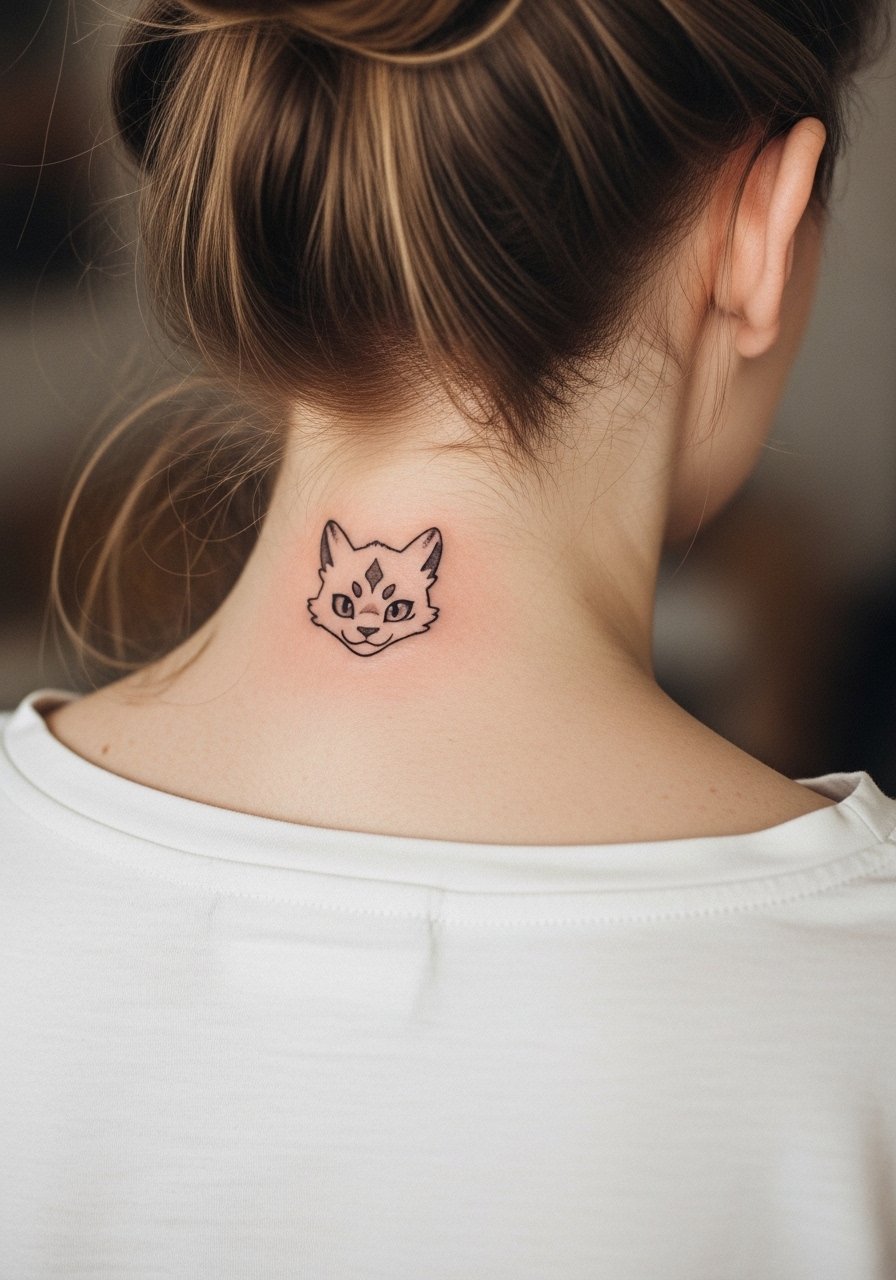
A nape placement can be discreet or visible with hair up. Pain is moderate and sessions run 20 to 35 minutes. Tell your artist you want the ear and eye suggested by just a few strokes, not full facial detail, to avoid early blurring. A point of controversy here is neck work in visible jobs. One camp says small nape pieces are fine and easy to conceal with hair. The other camp warns employers may react. Think about your career context before committing. For the session, wear a wide-neck shirt you can pull aside easily.
9. Minimal Dragon Footprint on Calf
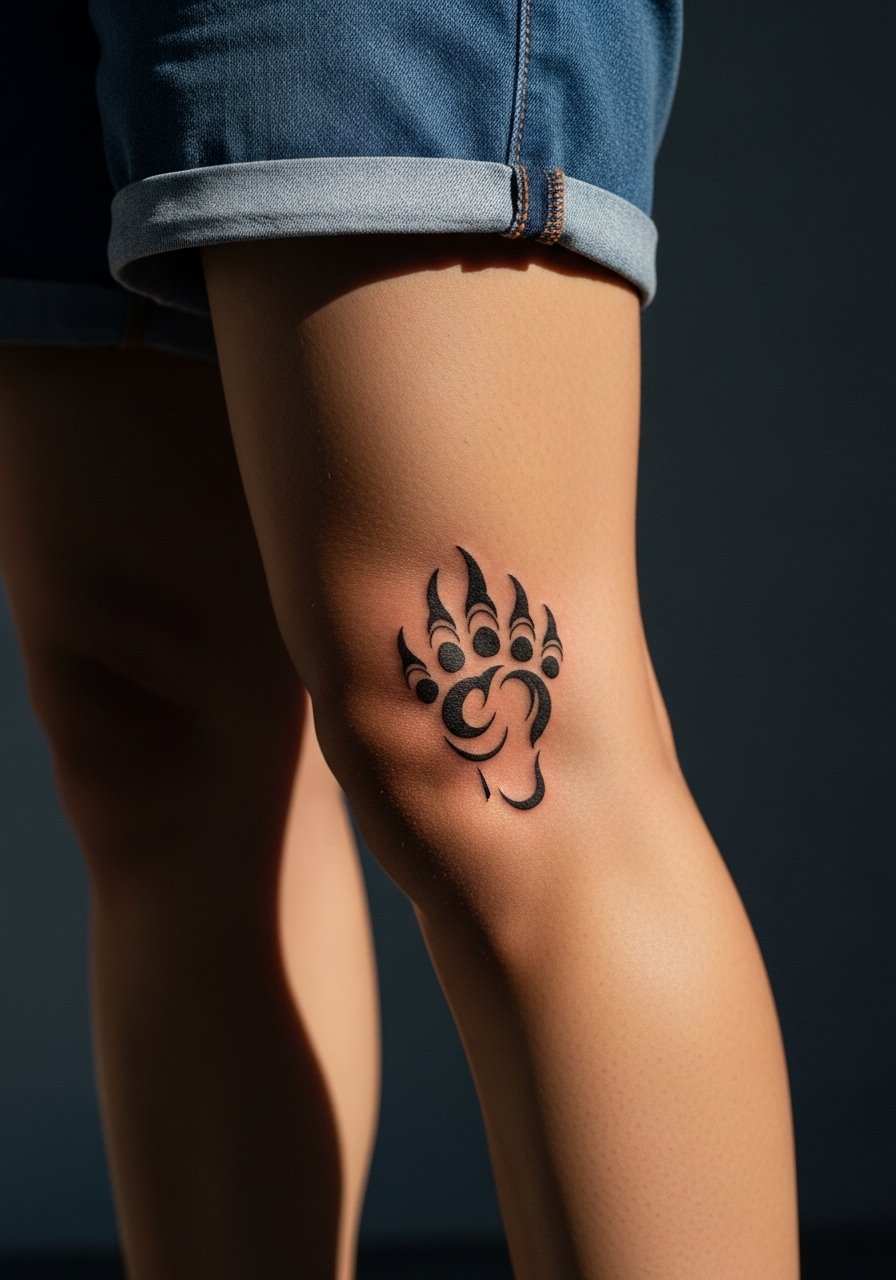
There is room to scale the footprint larger than on the ankle, which helps longevity. The calf is low pain area and a 30 to 45 minute slot often covers it. Ask for thicker primary strokes and lighter inner lines so the footprint keeps shape over time. A common mistake is cramming extra claw marks into a tiny version, which erases detail within a couple of years. Pair with cropped pants or a loose drawstring linen pant for summer show-off looks.
10. Spine-Aligned Minimal Flying Dragons
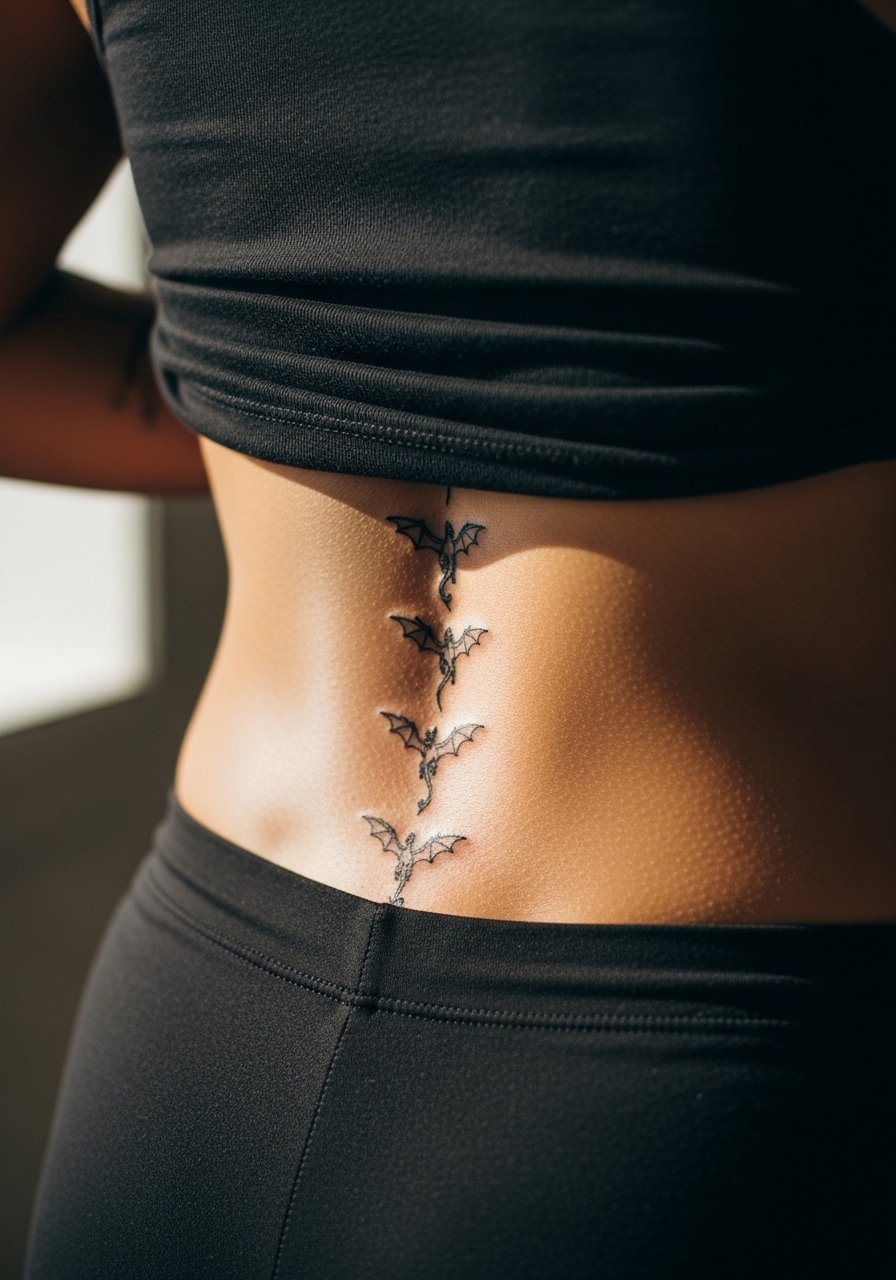
This placement reads well with vertical motion and mimics natural movement. Pain varies from moderate to high along the spine, and sessions usually split into shorter sittings. In consultation, agree on spacing and orientation so the designs do not merge when you bend. Expect slight softening at the highest and lowest points by year five if lines are too close. A mistake is mapping too many creatures too tightly. For evening wear, open-back tops accent the vertical line.
11. Minimal Dragon Head Behind Ear
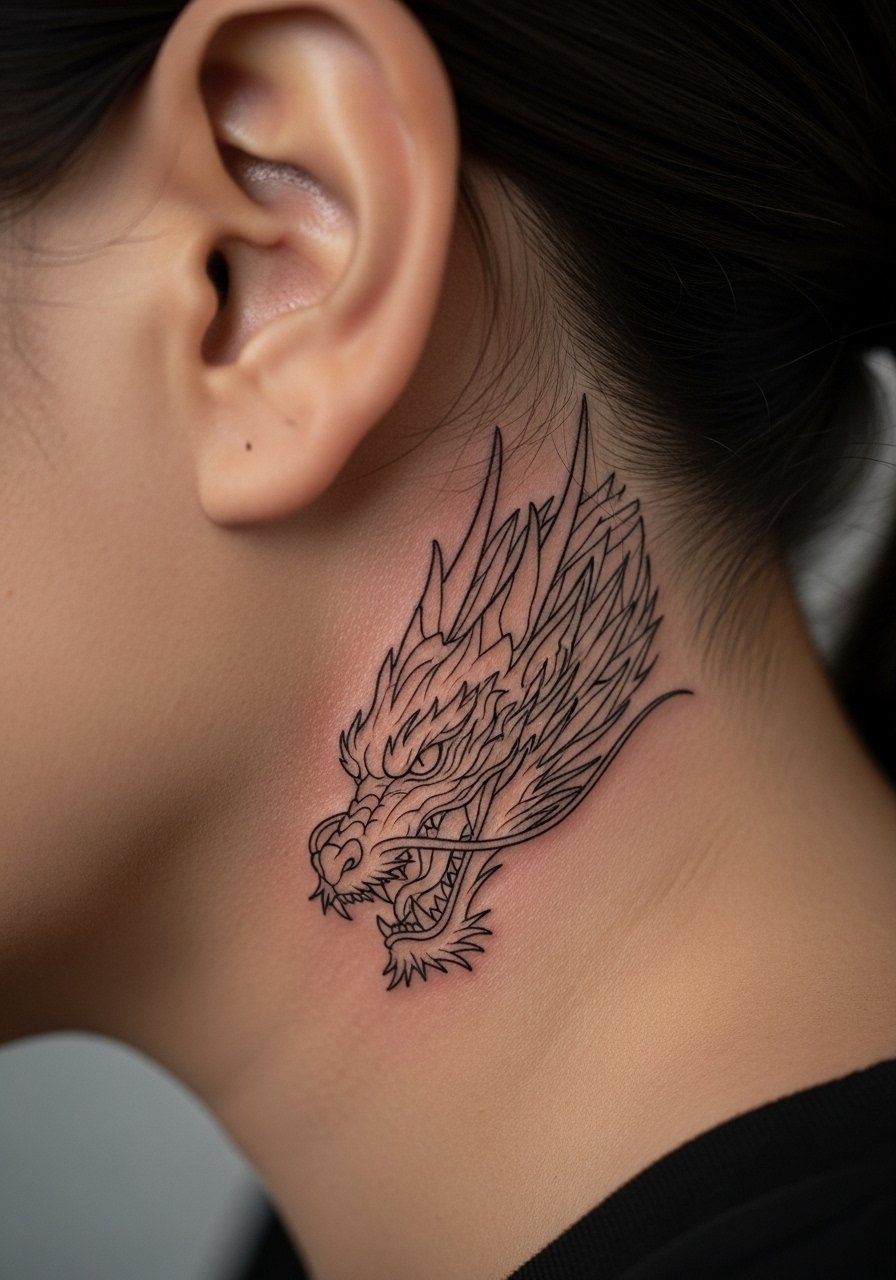
Behind-the-ear placements require precise stenciling and a sure hand. The skin there is thin and the artist must control needle depth, otherwise lines may fade or blur quickly. Sessions are short and discomfort is moderate. Ask your artist for a compact arrangement with no tiny text or flourishes. For the session, wear your hair up so the artist has clear access and you can see placement in a mirror later.
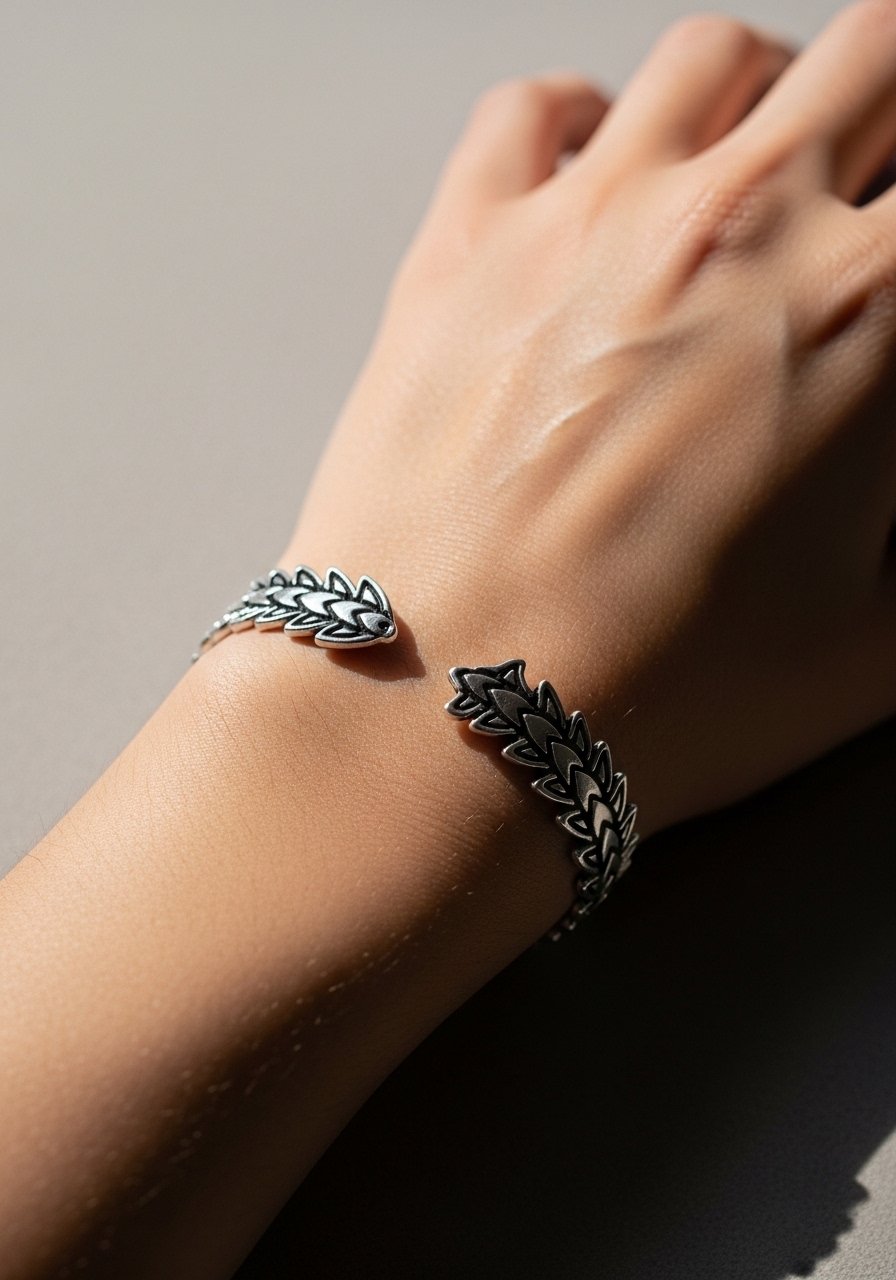
12. Minimal Dragon Tail Wrist Wrap
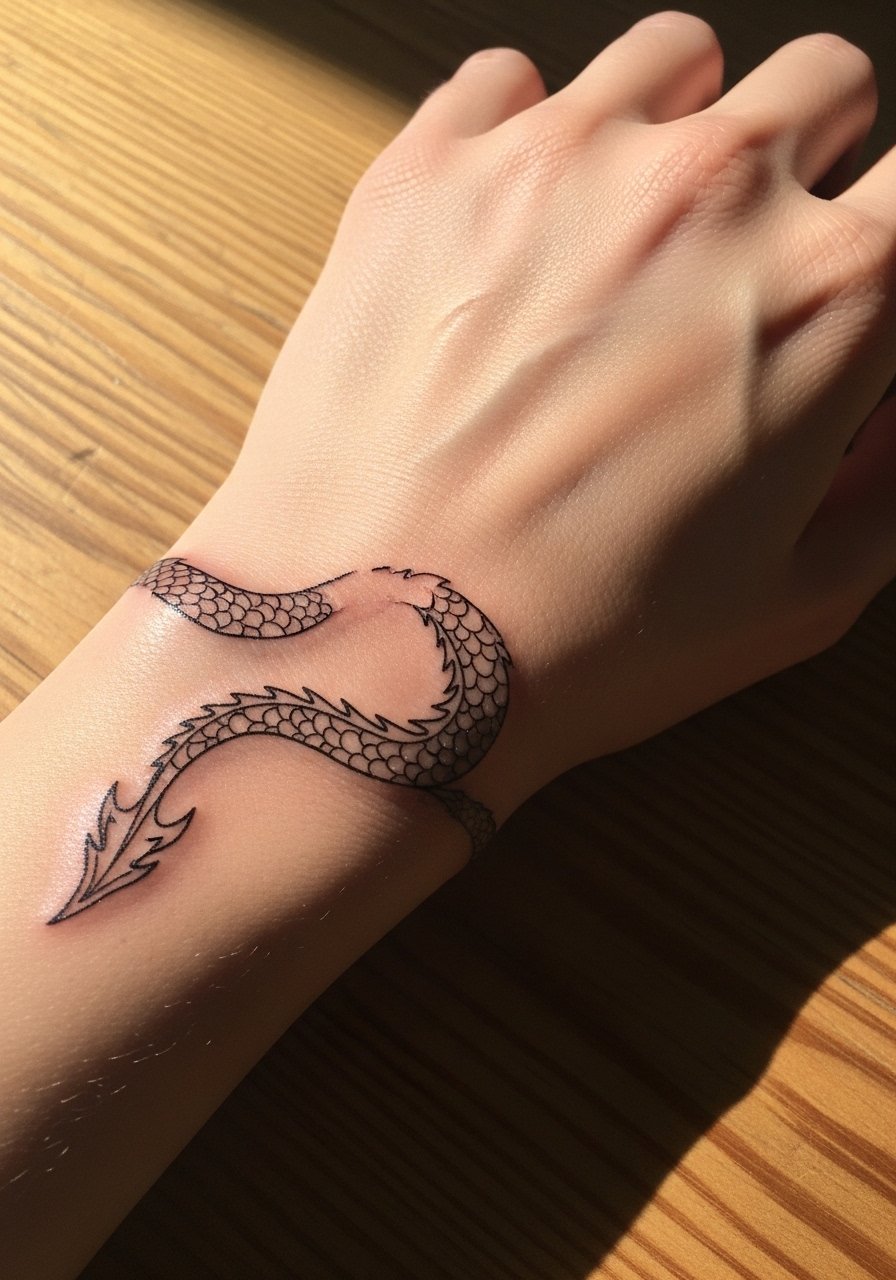
Visual impact comes from the wrap motion rather than detail. Tell your artist you want the tail to break at the underside of the wrist so it does not look like a continuous ring that can migrate over time. Wrist skin moves constantly, so expect touch-ups around year one. The common mistake is making the band too tight which causes the lines to blur into a thicker band. For showing the piece, pair with a thin chain pendant necklace to draw the eye up from the wrist without competing.
13. Minimal Dragon Constellation on Shoulder Blade
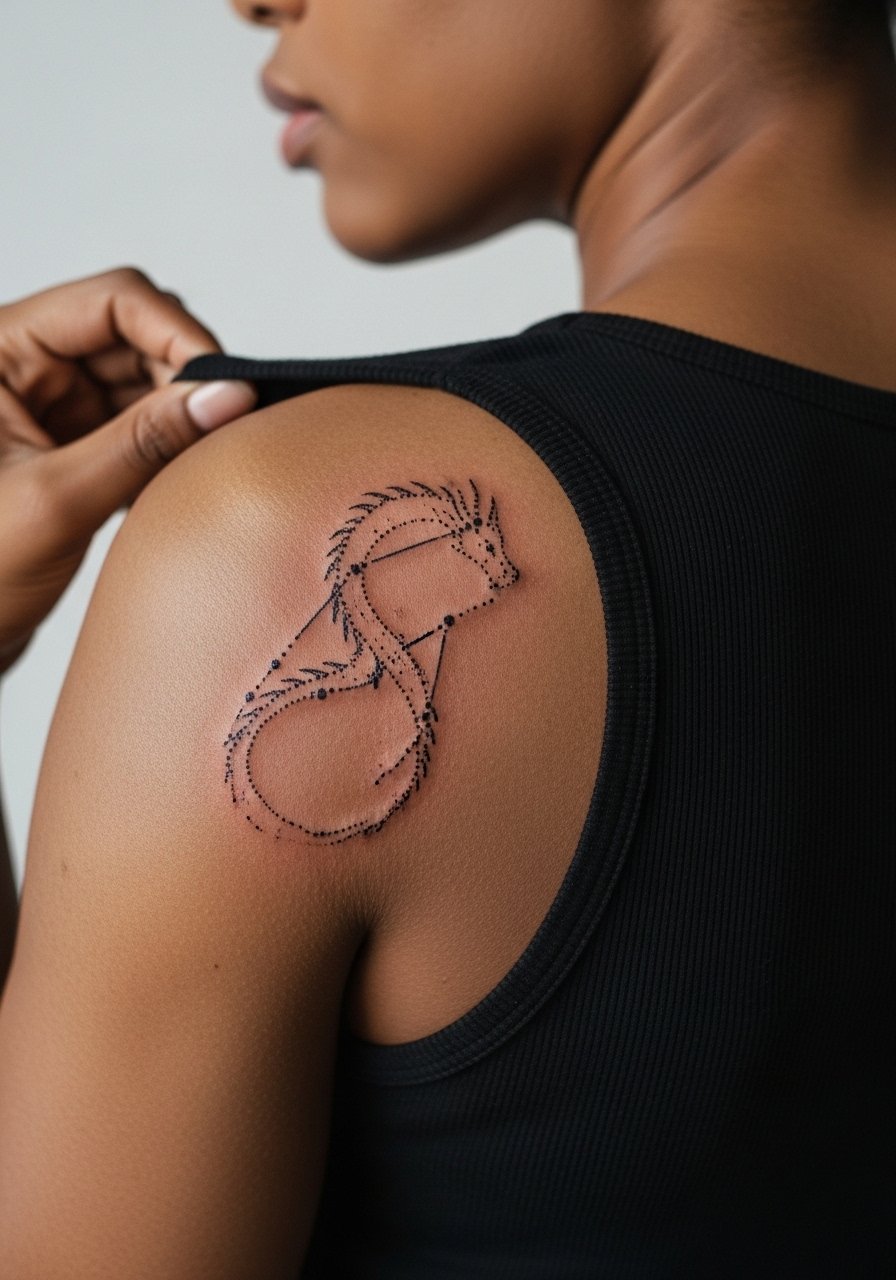
Shoulder blades are a forgiving canvas with low day-to-day friction. For a constellation style, ask for slightly larger dots in the joints and thin connector lines so stipple shading does not merge. Session time ranges from 30 to 60 minutes depending on scale and dot work density. A mistake is using tiny dots too close together, which can look like a patch after healing. Show it off with a racerback or racerback tank for clear visibility.
14. Minimal Dragon Eye on Sternum
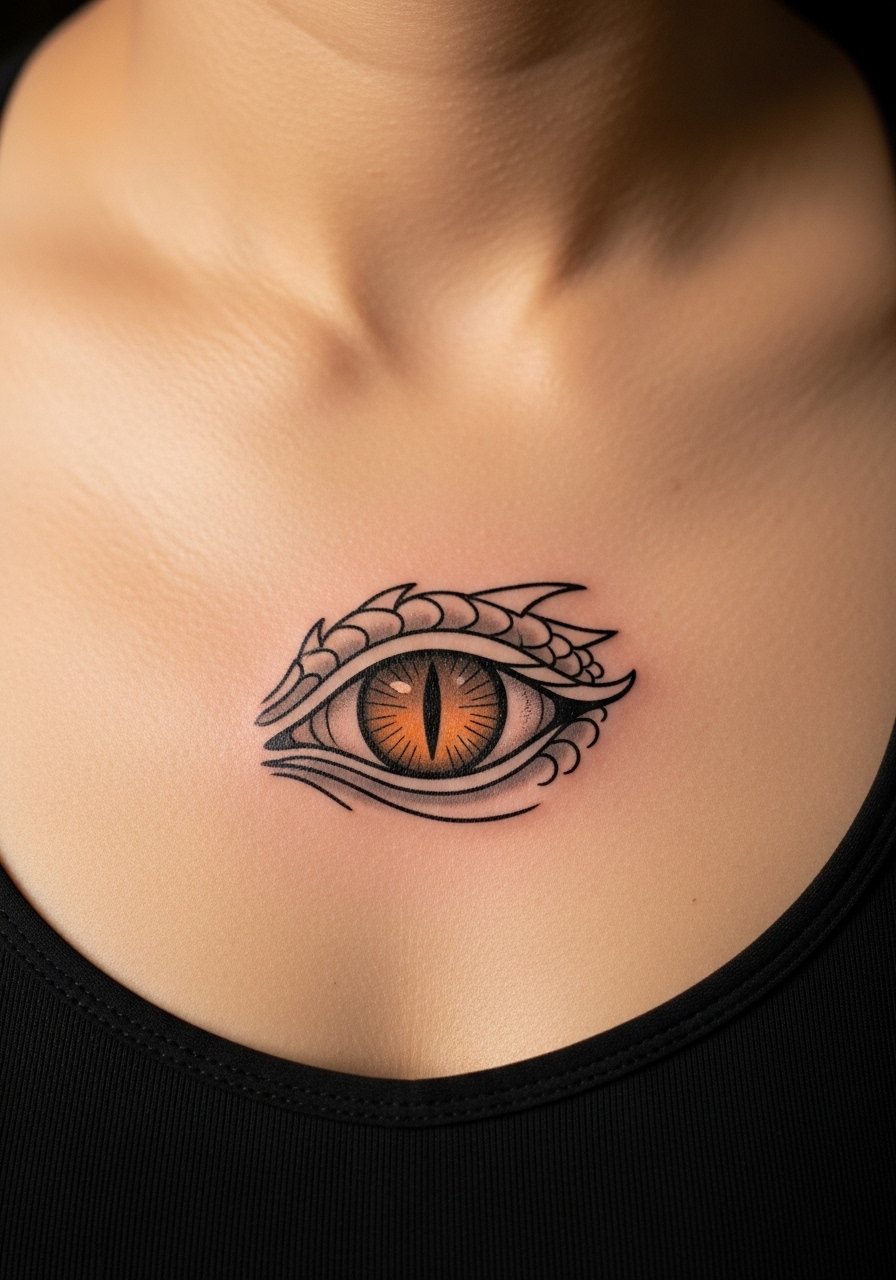
Sternum pieces require a careful approach because of movement and shallow skin. Sessions can be painful and may need pauses. In consultation, ask for a clean single-stroke contour with a small highlight gap so the center does not fill in with time. One camp says sternum fine line rarely holds due to motion. Another argues careful placement above or below the bra line mitigates that. Plan for a touch-up at year two if you want the eye to stay sharp. Wear a sports bra to the session so the artist can easily access the area.
15. Minimal Dragon Script on Ribcage
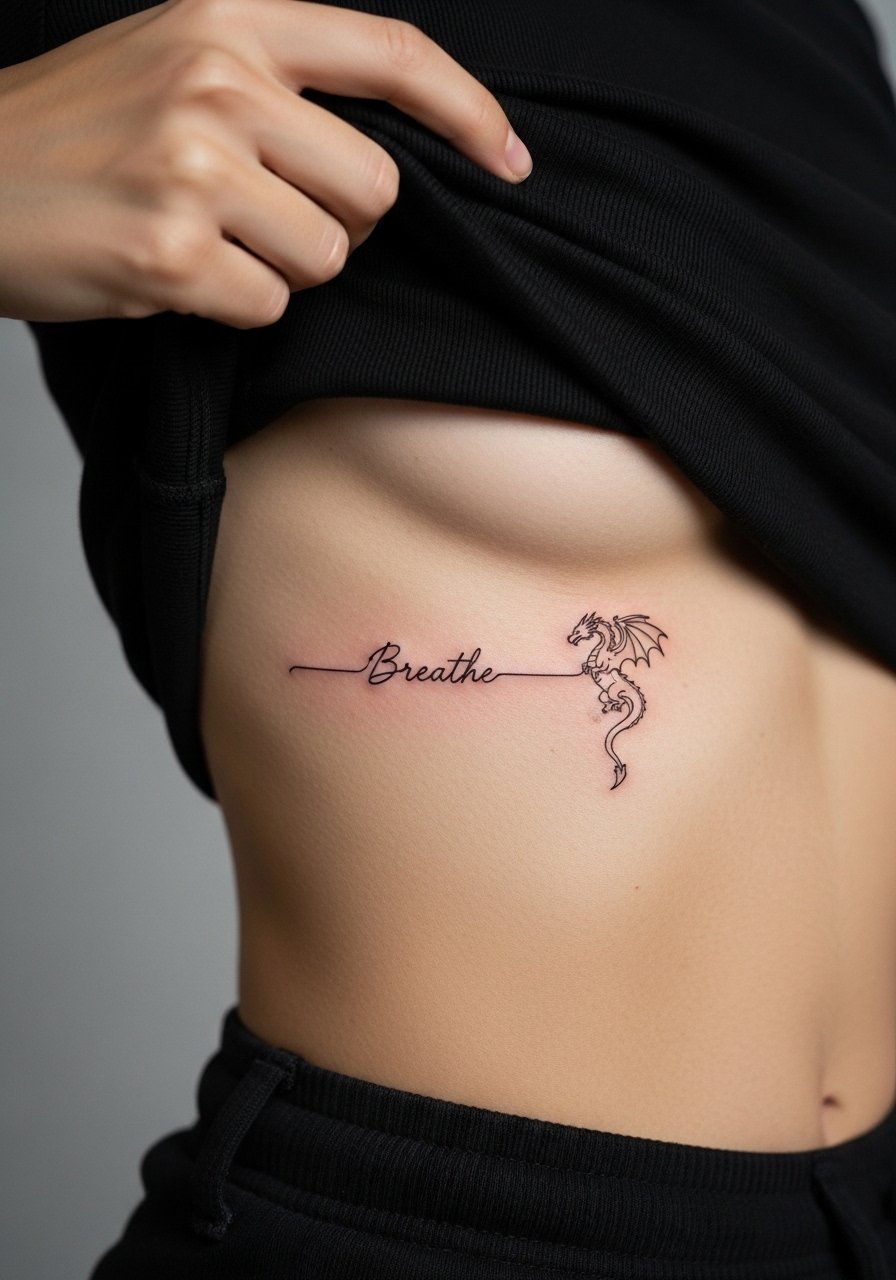
Ribcage text needs room and a confident hand to prevent letters from merging. When you bring text, specify the exact word and the script style so the artist can create a stencil that reads clearly after healing. Pain can be high and sessions may be broken. A common mistake is choosing overly ornate lettering at a small size. For the session, wear a cropped tee or zip-up hoodie you can pull aside for clean access.
16. Minimal Dragon Skull on Upper Thigh
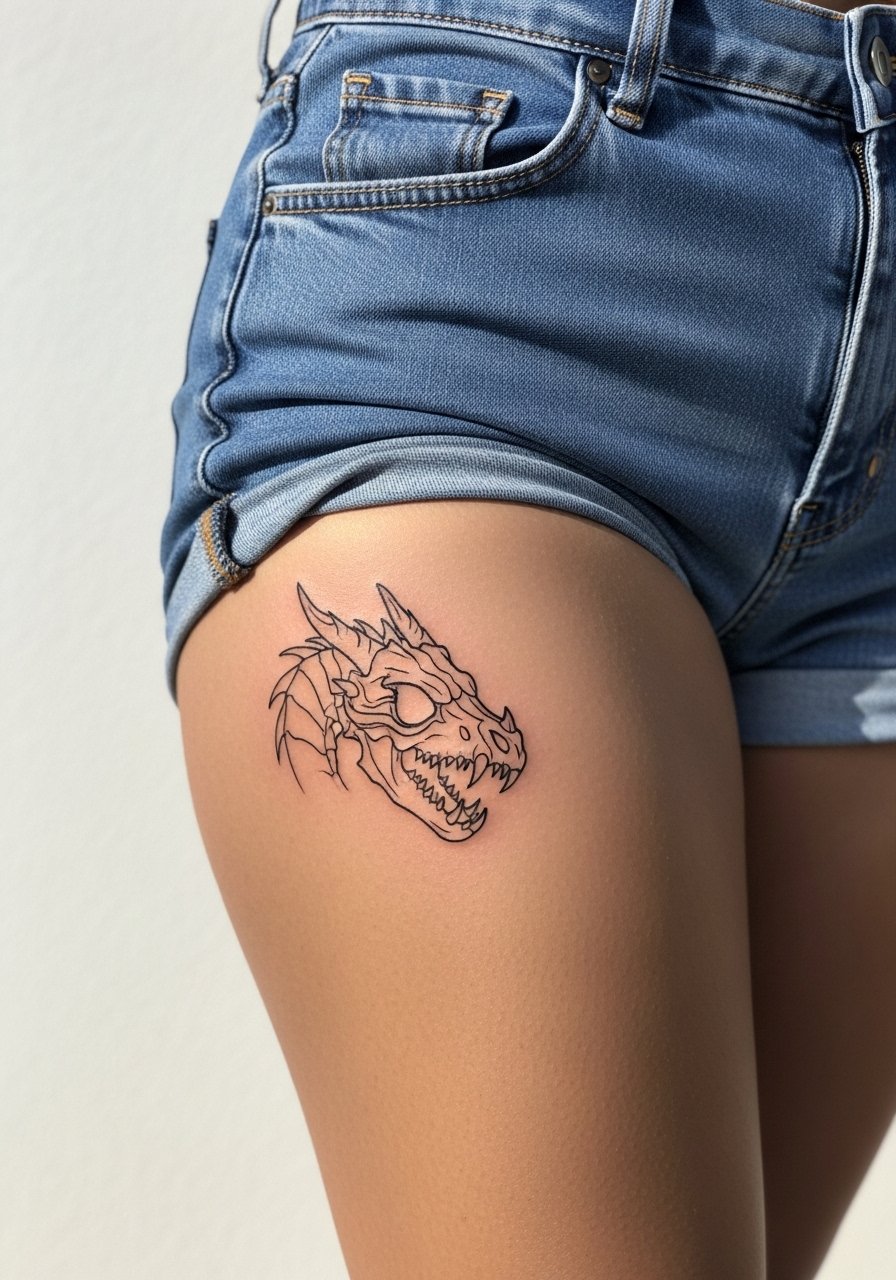
Upper thigh skin is thick and holds linework well, which suits slightly larger minimal motifs. Tell your artist you want the skull simplified to main planes rather than teeth detail to avoid muddying. Sessions are comfortable for most people and can run 45 to 90 minutes if you want shading. A common mistake is packing fine dots into jaw lines, which blur over time. For the appointment, shorts you can shift easily are the best option.
17. Tiny Baby Dragon on Collarbone Corner
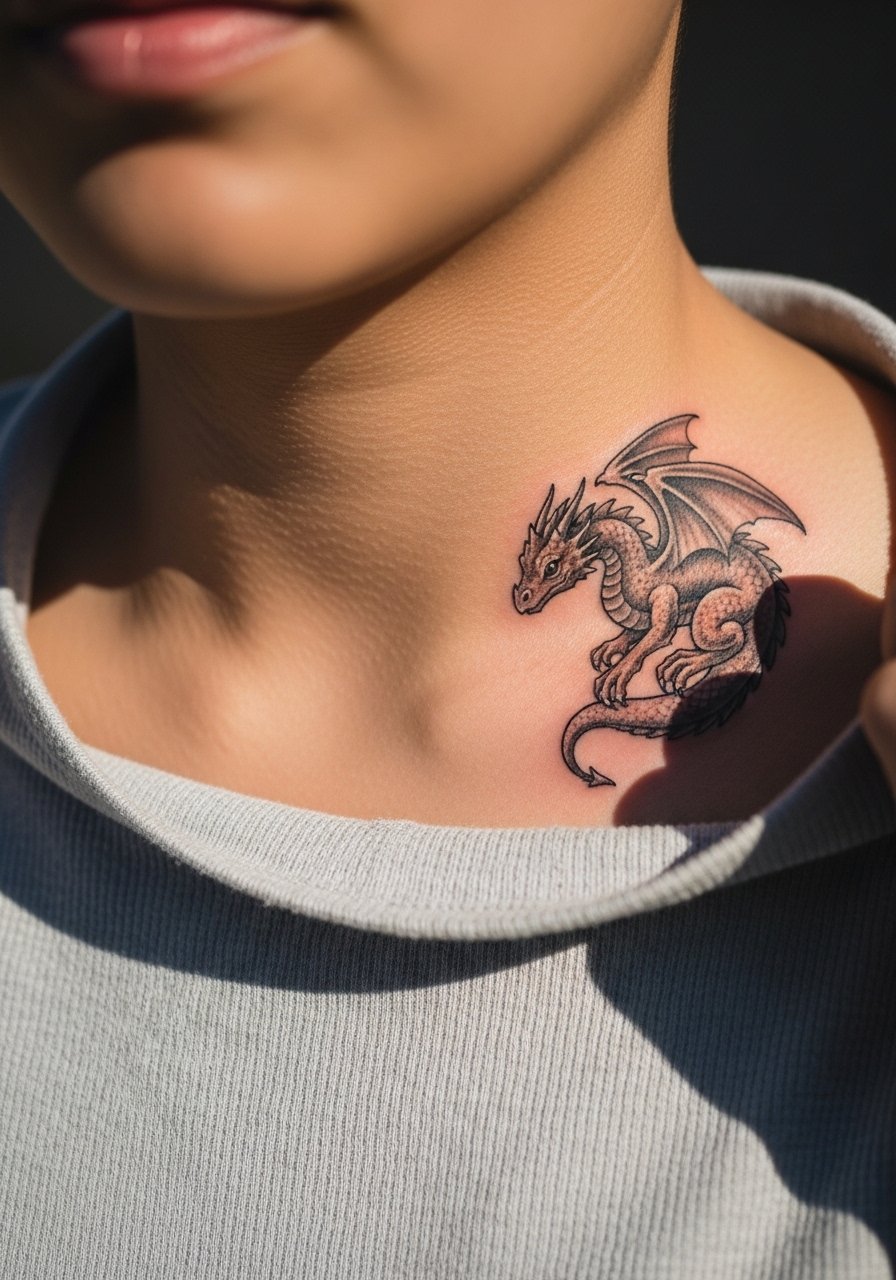
This placement reads delicate and frames necklaces. Specify that the dragon should be offset toward the shoulder to prevent layering with clothing seams. Collarbone skin sits close to bone so expect more sensitivity and occasional touch-ups where clothing rubs. A mistake is centering too close to the sternum where movement distorts the shape. For showing it off, a thin chain pendant necklace sits above without competing with the tiny figure.
18. Minimal Dragon Head on Upper Wrist
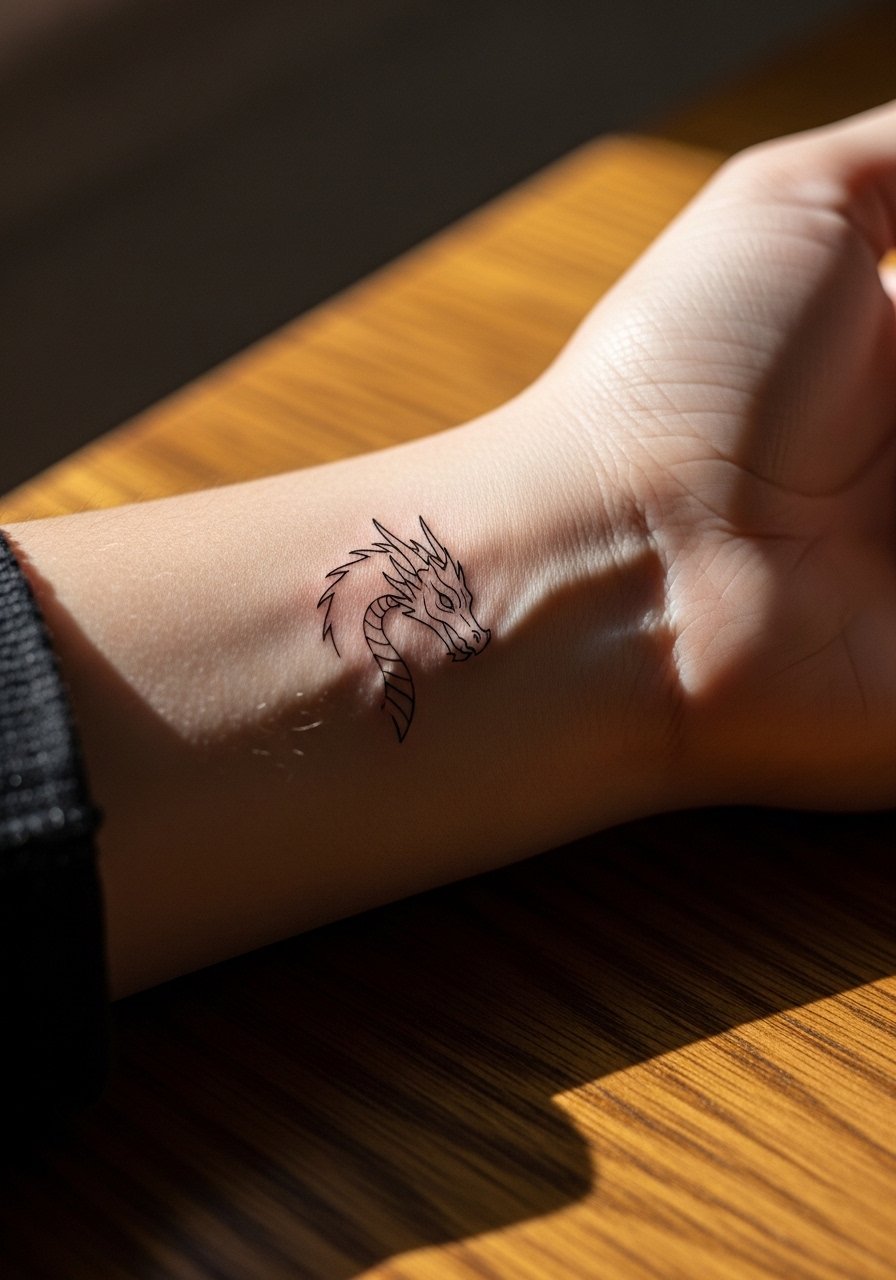
Upper wrist pieces heal with moderate durability but face daily washing. Ask for slightly bolder primary strokes and minimal internal detail to keep the head readable after six months. Sessions run about 20 to 35 minutes depending on line density. The common mistake is requesting shaded eyes or tiny teeth that vanish quickly. For the session wear short sleeves and bring a thin sleeve cuff or roll your sleeves so the artist has clear access.
19. Minimal Dragon Flight Line Along Foot Arch
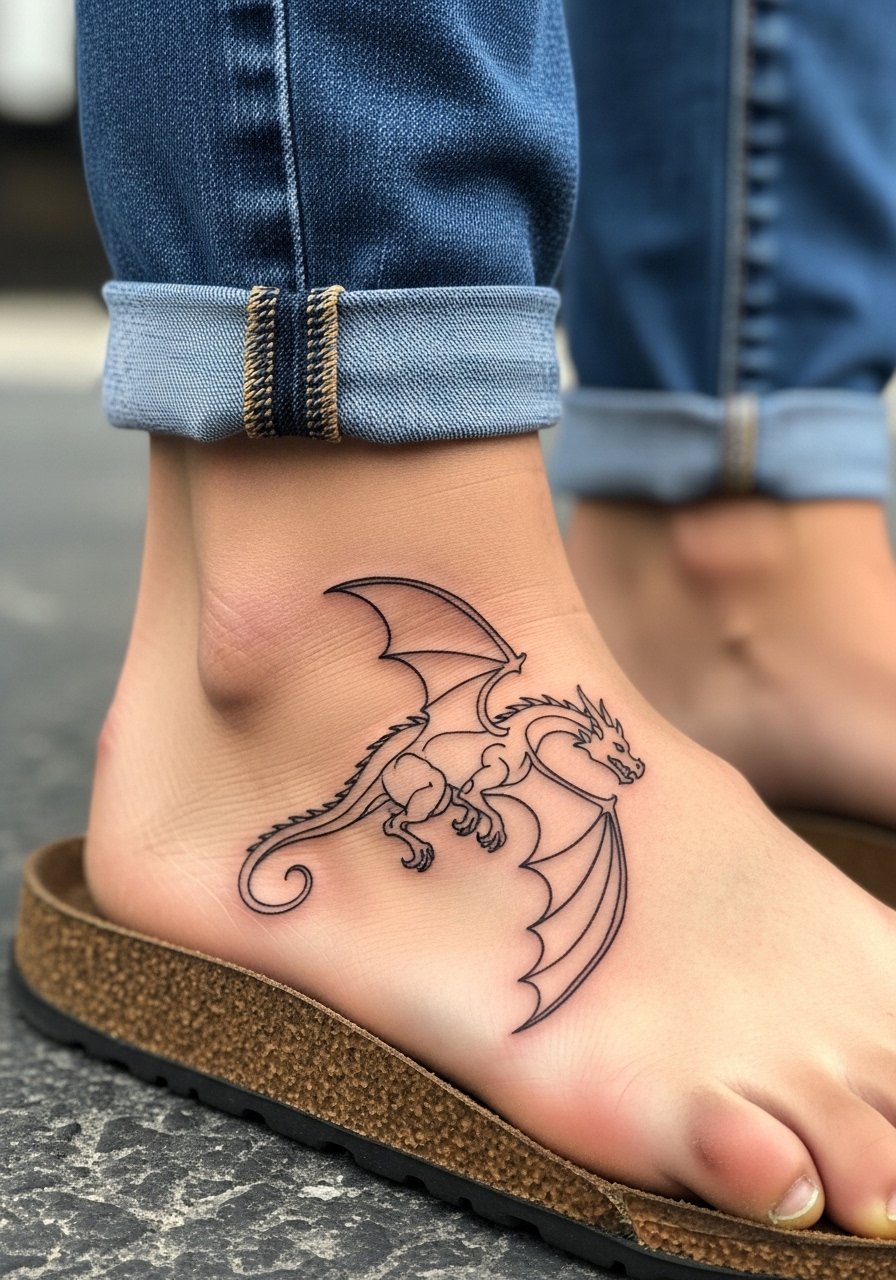
Foot tattoos face high friction and swelling so they need generous spacing between strokes. The arch breathes but shoe contact shortens clarity, and touch-ups are common at year one. Sessions are short but sometimes sensitive. Avoid tiny loops or interior flourishes that will break apart from daily wear. For showing it off, strappy sandals work and a pair of slip-on sandals minimizes rubbing during early healing.
20. Minimal Dragon Tail Behind Knee
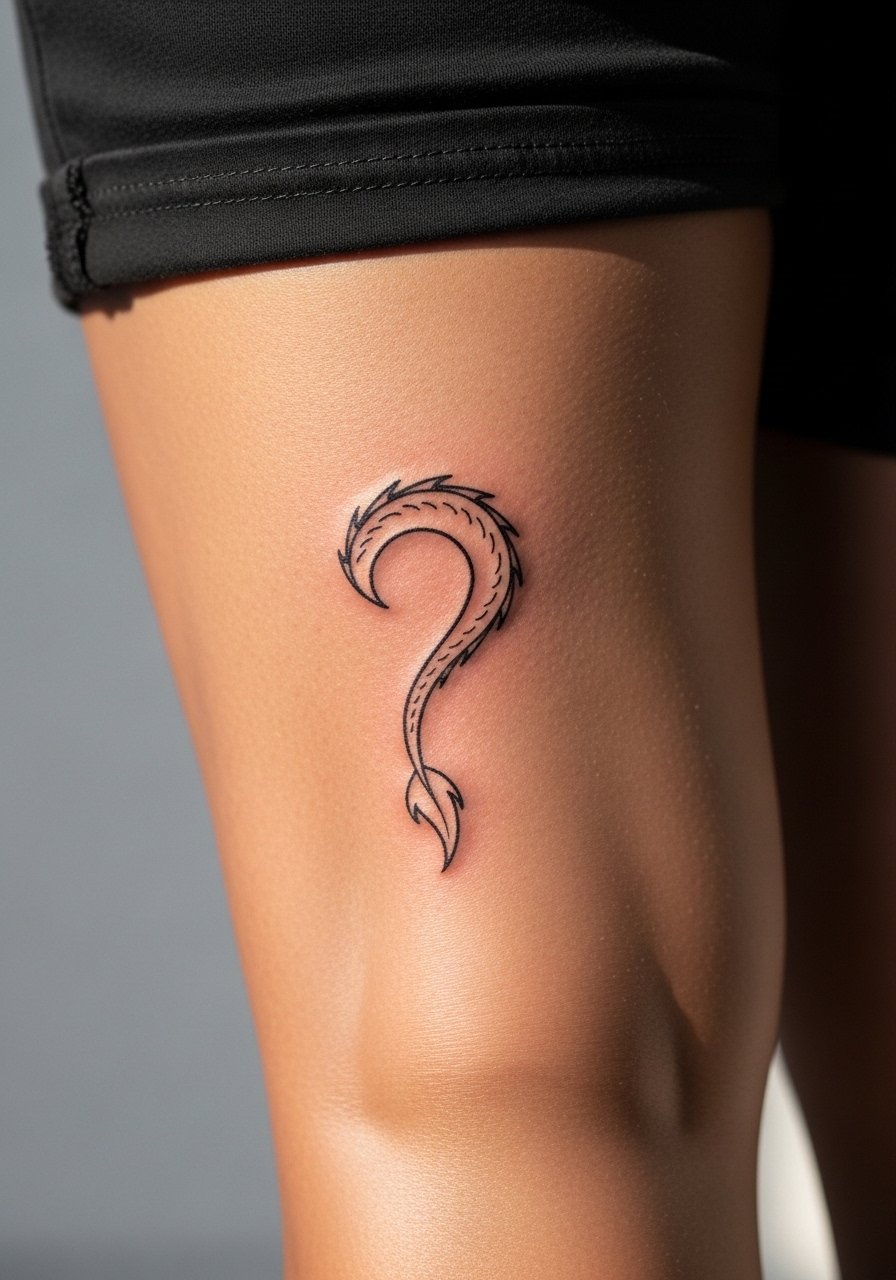
Behind-knee placements move a lot and can cause lines to spread if too thin. During consultation, request slightly heavier linework at pivot points and wider gaps at curves. Pain is moderate and sessions might be short but require careful aftercare to avoid scabbing in crease areas. Mistake to avoid is placing hairline strokes directly in the crease. Wear loose shorts for the appointment so the artist can work without the fabric constraining the area.
21. Minimal Two-Line Dragon Over Foot Instep
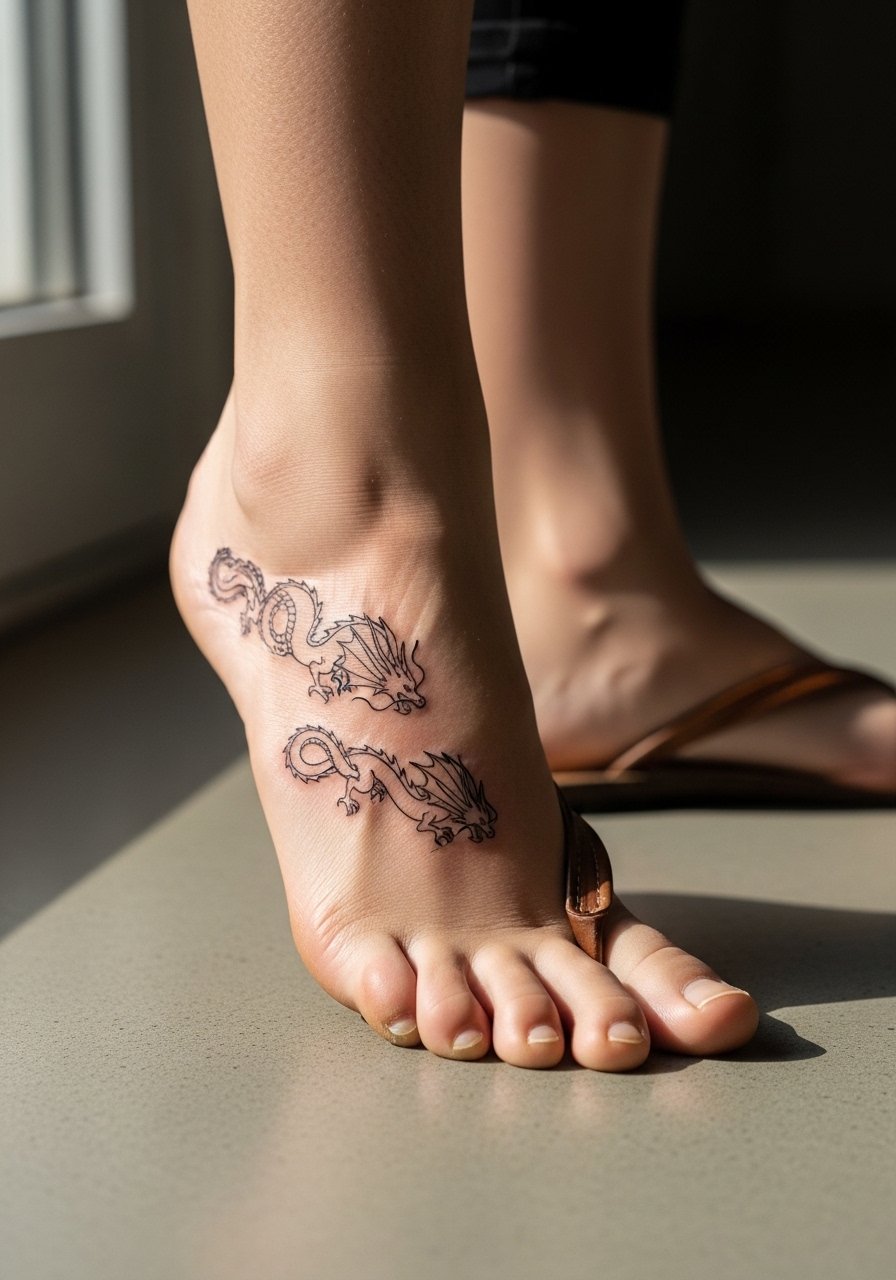
The instep lets you use two parallel strokes to suggest movement while keeping each line simple. Tell your artist you want the lines spaced enough so they age independently. Expect similar friction concerns as other foot placements and plan for a touch-up in the first year. Sessions are brief and discomfort is moderate. Avoid compressing both lines into too narrow a band which makes the motif look like a single thick stroke over time. Strappy sandals keep the area visible while minimizing rubbing in the first week.
Frequently Asked Questions
Q: Will fine line dragon tattoos blur faster than bolder blackwork on forearms and wrists?
A: In my experience fine line does soften faster because there is less pigment and thinner channels to withstand sun and friction. On forearms and wrists you can slow the blur by asking for slightly heavier primary strokes and more negative space between elements so the design has room to age.
Q: Are ribcage and sternum placements worth the pain for minimal designs?
A: They are worth it if you want a piece that moves with the body and can be hidden for work. Expect higher discomfort and a higher chance of touch-ups, and ask your artist about depth and spacing so lines do not merge with breathing and motion.
Q: How often should I plan touch-ups for finger, ankle, and foot placements?
A: From what I have seen, fingers and feet often need a touch-up within the first year, ankles sometimes at year two, and forearms less frequently. The schedule depends on your lifestyle, sun exposure, and how much friction the area gets.
Q: What should I ask an artist during the consultation for a minimal dragon script or text?
A: Ask to see healed examples of the same script size on similar skin tones and placements, and request a stencil test on your skin so you can check legibility. Also confirm the exact wording and spelling for the stencil stage to avoid surprises.
Q: How do I find artists who specialize in fine line minimal work without naming one?
A: Search local shop portfolios on community directories, look through recent convention guest lists, and follow hashtags that combine your city with fine line tags. Also check community forums and recent healed photo threads to see how specific artists' linework settles over time.
Q: Will a minimal dragon tattoo affect job prospects or professional settings?
A: It depends on placement and industry. Hidden or easily covered placements like thighs, ribs, and upper arms tend to be low risk. Visible placements like hands and neck can still affect hiring in some fields, so weigh how public you want the piece to be before booking.
