
Fine line plague doctor portraits look beautiful fresh, but they age like a secret if you pick the wrong placement or needle spacing. Trends online push tiny beaks and dense stipple, then people end up booking touch-ups when lines soften. Pick designs and placements that match how you live, and the first idea below shows a reliable starting point for most people.
1. Fine Line Plague Doctor on Inner Forearm

I see this placement a lot because it reads like a control piece for detail. Ask your artist for slightly heavier primary contours and stipple shading in shadows so the beak and mask keep definition as the skin ages. Common mistake is demanding ultra-thin lines across the whole design, which can blur within two to three years on active forearms. Expect a moderate pain level, a single two- to three-hour session for a mid-sized piece, and a touch-up at year two for most light skin types. For showing it off, pair with a rolled-sleeve linen shirt to frame the forearm without hiding the work.
2. Micro-Realism Plague Doctor Portrait on Upper Arm
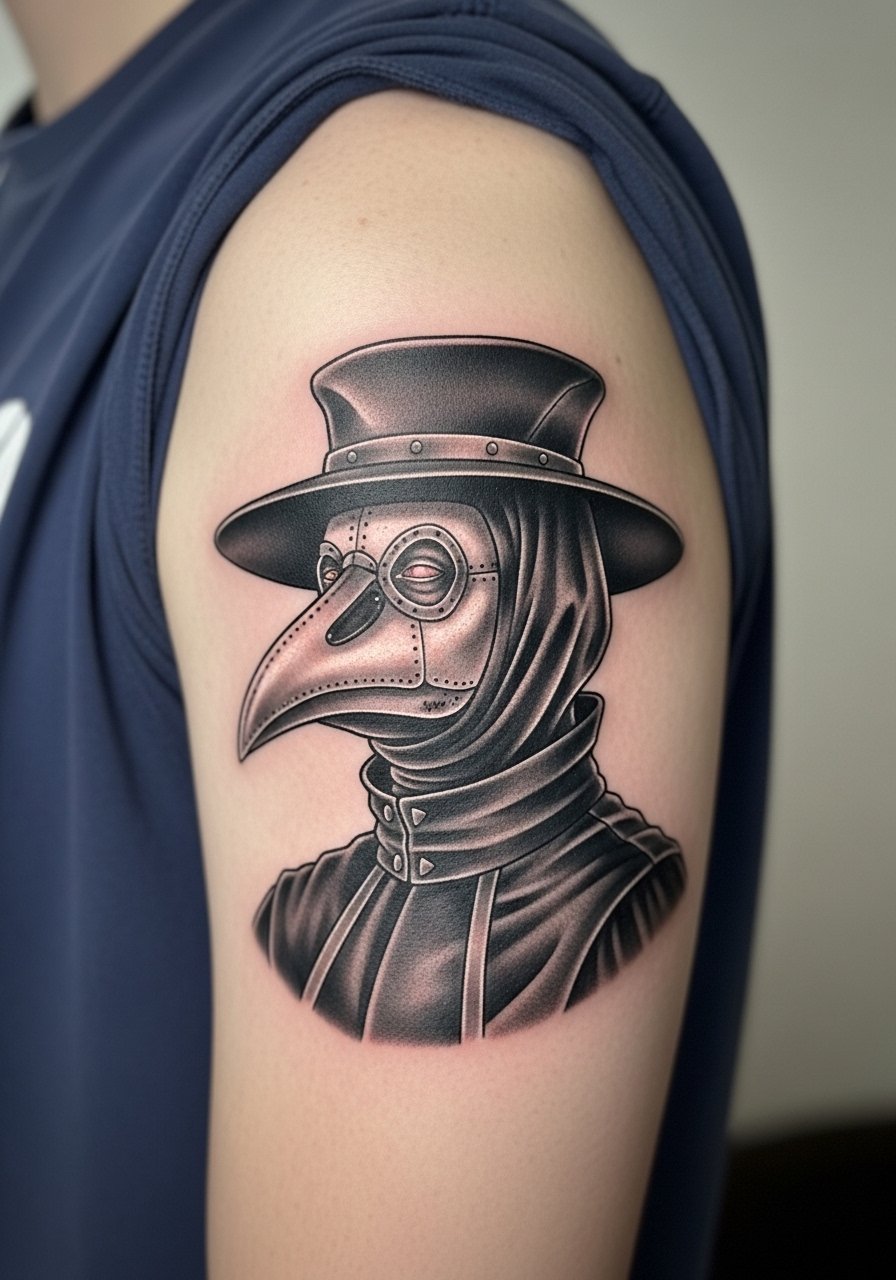
Personal observation: micro-realism brings haunting texture but it depends on saturation and contrast more than tiny detail. Tell your artist you want howling shadow under the beak and punched-in darks in the eyeholes, not an evenly grey wash. The pain is forgiving on the outer arm, sessions usually run two to four hours depending on size, and the piece holds longer if saturation is prioritized over infinitely small strokes. Mistakes happen when clients request maximum tiny detail at small scale. Wear a loose short-sleeve tee to the appointment so the artist has clean access without fabric tugging.
3. Blackwork Plague Doctor Sleeve Accent
Visual impact lead: dense black fills around the plague doctor silhouette make the mask read from across a room. In consultations, say you want bold silhouettes and negative-space highlights rather than thousands of tiny hairlines. The session feels longer because of saturation work, expect multiple sessions that total six to ten hours for a cohesive half-sleeve. Blowout risk increases if lines are packed too tightly near joints. A common aging issue is patchy saturation when artists rush shading. Plan for one substantial touch-up within the first year to even out any early fading.
4. Sternum Plague Doctor with Ornamental Frame
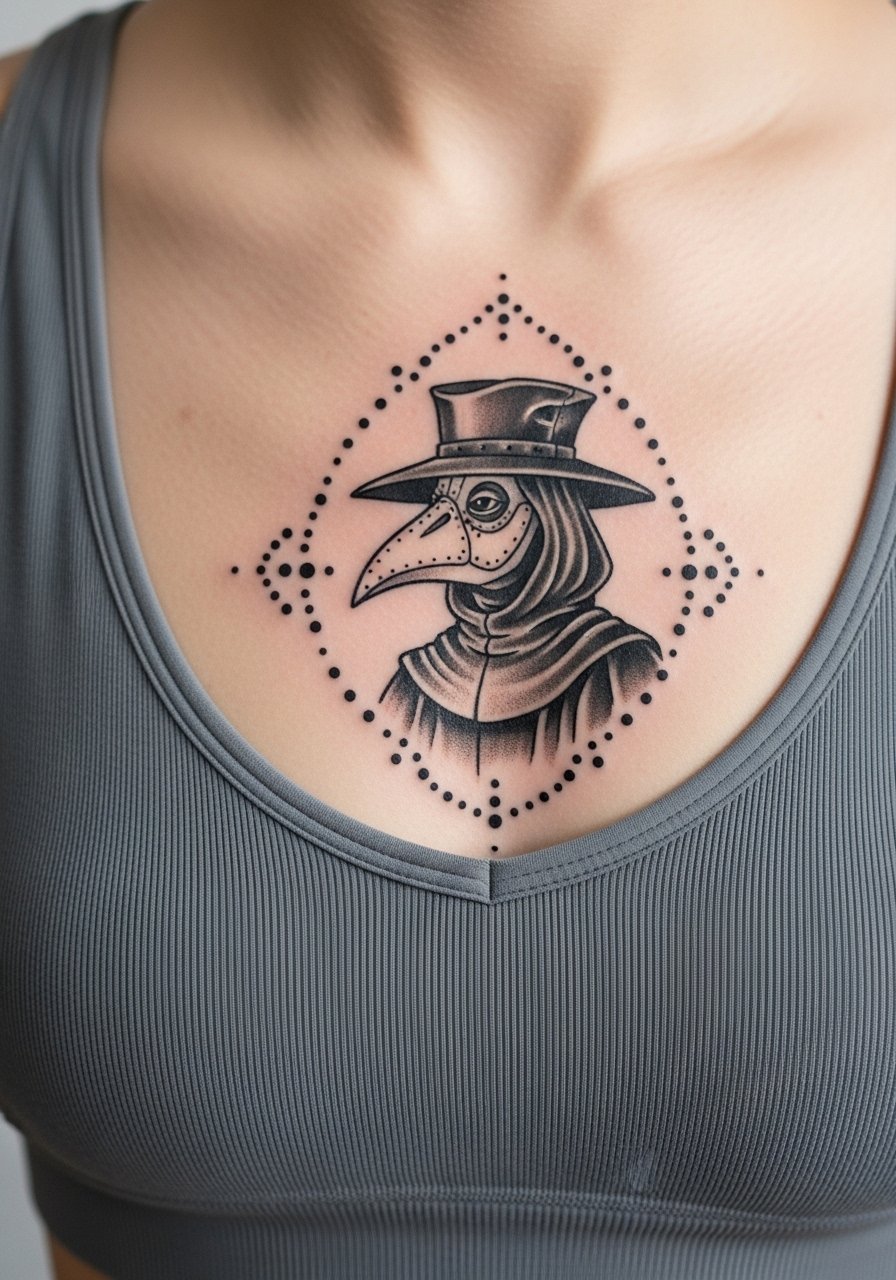
Fair warning: sternum work can be painful and the skin there moves with breathing, which changes how tiny details settle. Tell the artist to prioritize spacing and stipple shading instead of ultra-fine contour in the center. The session often splits into shorter sittings because the area is sensitive, and healing needs careful clothing choices to avoid rubbing. A mistake I see is trying to cram a highly detailed mask into a narrow sternum band. For the appointment, wear a fitted sports bra so the artist can expose the zone easily without full torso exposure.
5. Ankle Micro Plague Doctor Charm
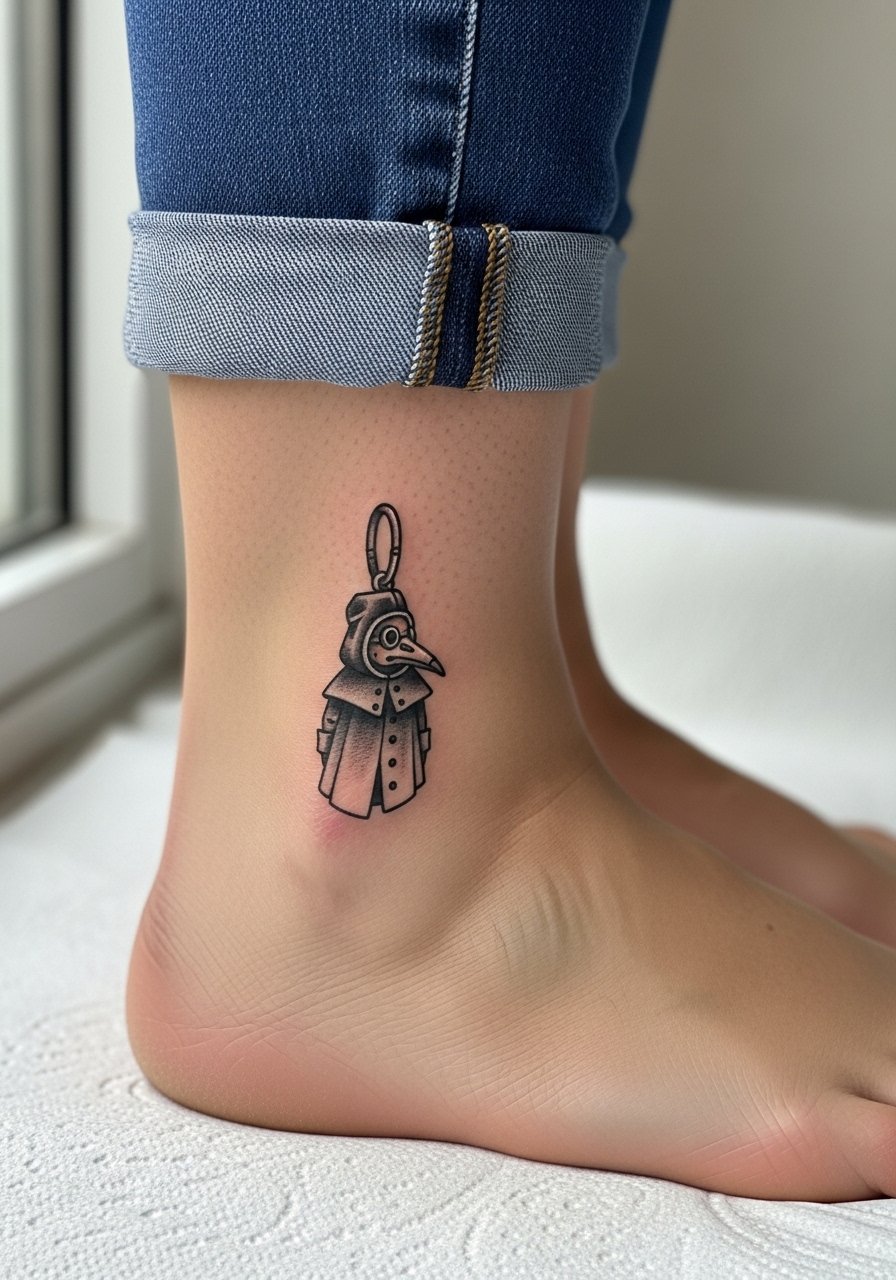
Mistake lead: the ankle is unforgiving for tiny details because skin movement and friction from shoes erode crispness. For a charm-sized plague doctor, ask for simplified silhouette, raised linework for longevity, and minimal stipple. Sessions are short and usually under an hour, but the area faces constant friction so expect earlier touch-ups, possibly at year one to two. If you want to show it off, try pairing it with sandals or thin-strapped shoes when weather allows so the artwork has breathing room and avoids boot friction.
6. Ribcage Plague Doctor in Stipple Shading
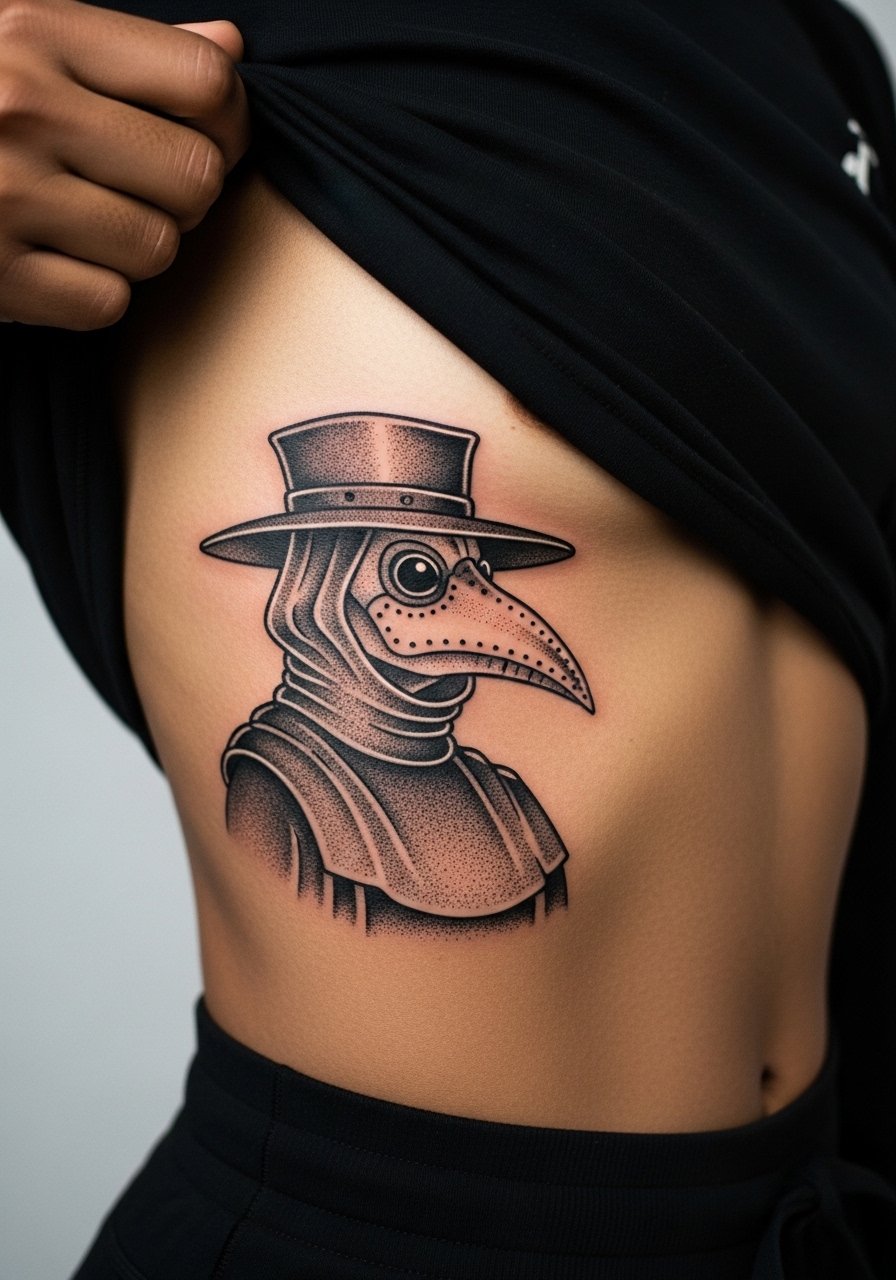
Controversy lead: fine line and stipple on ribs split artists into two camps. One camp says the stretch and thin skin blur filigree within two years. The other camp says proper needle depth and spacing keep stipple intact. The realistic position is that both are partly right; technique, session pacing, and your body healing all determine outcome. For this placement, expect a higher pain rating, multiple short sessions, and a careful consultation where you and the artist map spacing. A common error is insisting on ultra-dense stipple in a small rib area. For the appointment wear a cropped athletic top you can lift so the artist has clean access without exposing more than necessary.
Studio Day Picks
The upper-arm, sternum, and ribcage pieces above need different prep from small wrist and ankle charms, so a few targeted items smooth the session and early healing.
-
Stencil transfer paper kit. Lets you preview exact placement so a long rib or sternum piece sits where you want it relative to clothes.
-
Topical numbing cream. Useful for ankle and sternum sessions to take off the edge without interfering with shading.
-
Thin protective film roll. Helps guard ankle and finger tattoos from shoe or ring friction during the most vulnerable days.
-
Fragrance-free body wash. Gentle cleansing matters for pieces that sit near clothing lines like the sternum and ribs.
-
Aquaphor healing ointment. Thin layers in the first 48 hours help keep fine line and stipple work on forearms and ribs from drying into hard flakes.
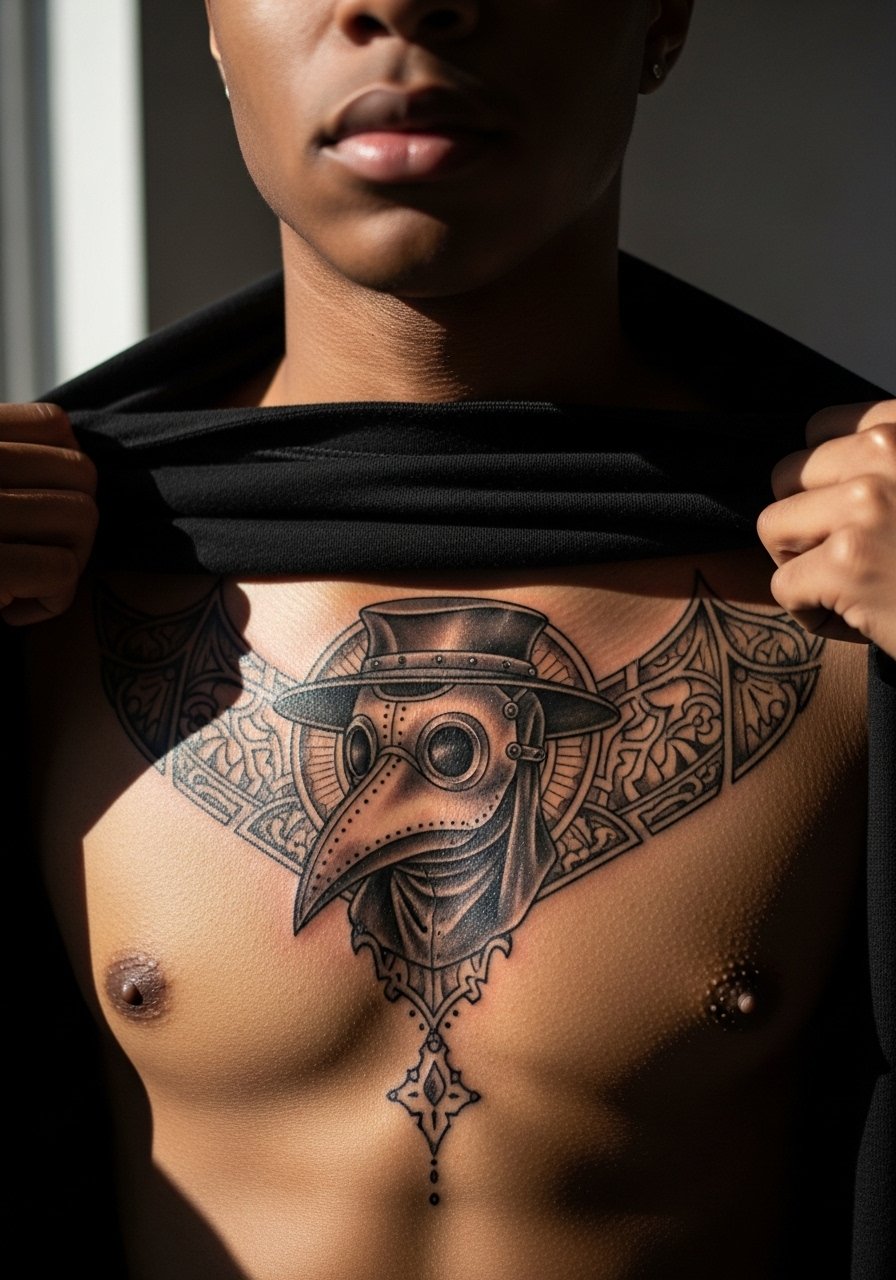
7. Chest Plate Plague Doctor with Heraldic Elements
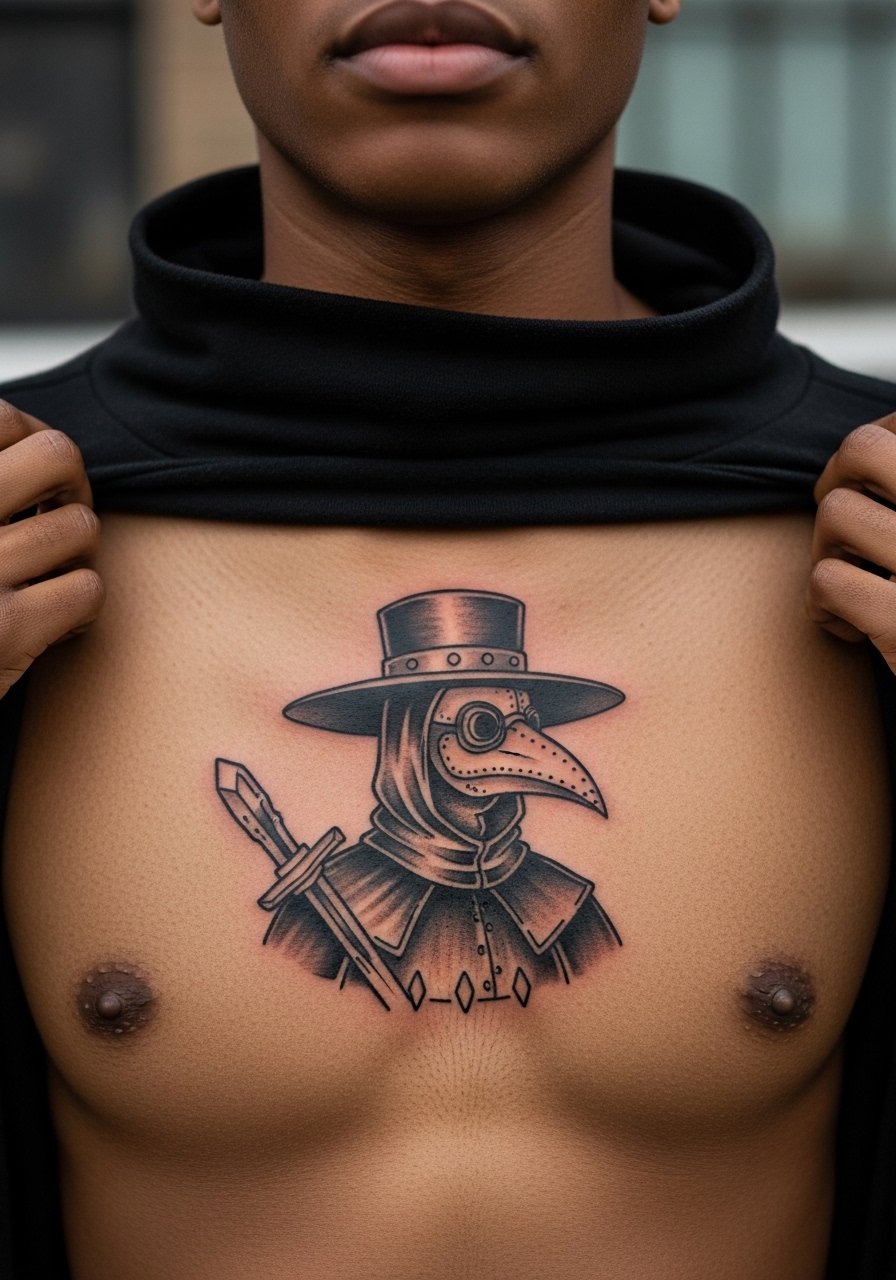
Consultation lead: large chest work needs composition that reads in motion with the pectoral and collarbone lines. Tell your artist you want the mask to sit centered with heraldic flourishes flowing toward the shoulders, not competing for the same visual space. Sessions tend to be long and may require two visits depending on how much fill and dot work you want. A common aging issue is the top edge softening where the collarbone moves against fabric. This placement can show in professional settings depending on wardrobe, so plan accordingly.
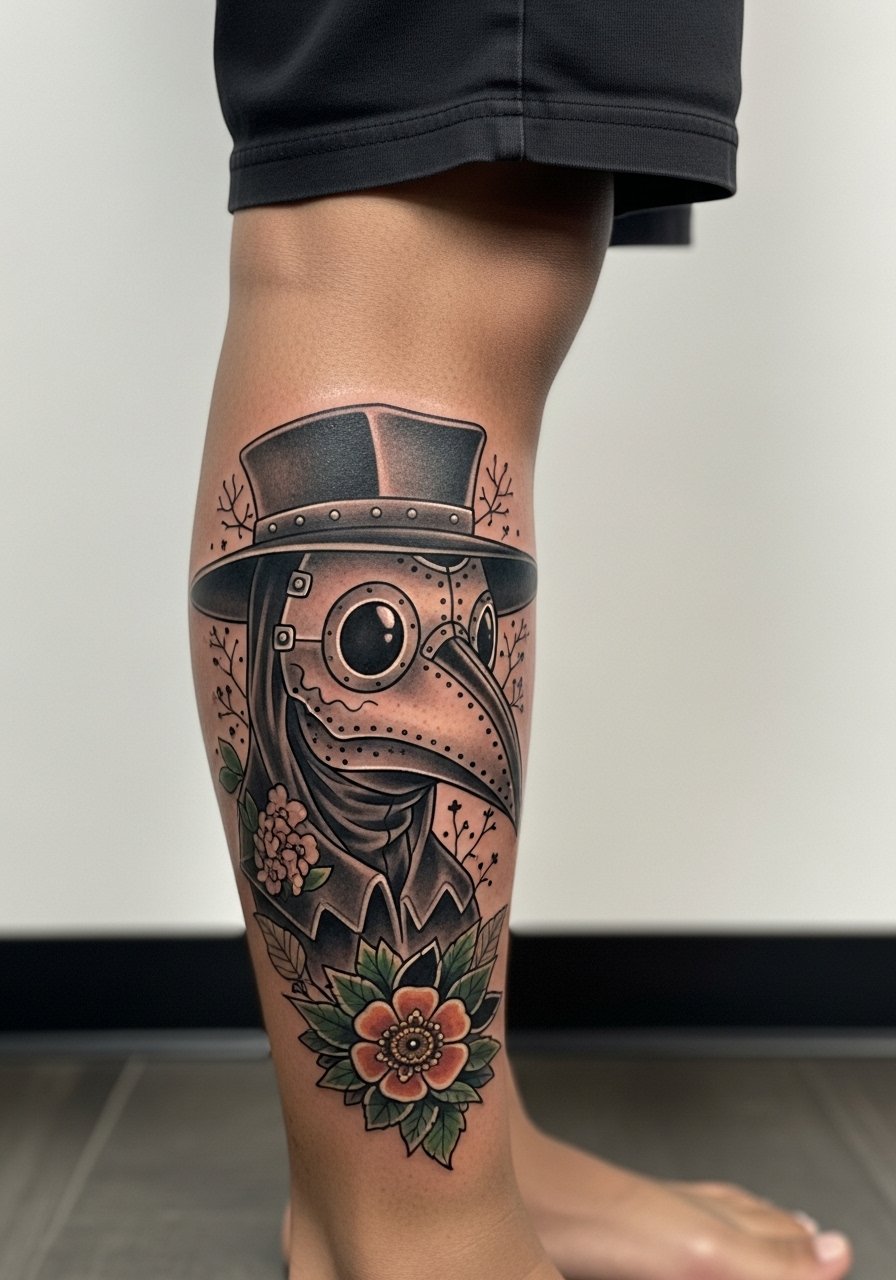
8. Calf Plague Doctor in Blackwork Silhouette

Visual impact lead: the calf is a great canvas for dramatic silhouettes and negative-space highlights that age well. Sessions feel moderate because the calf tolerates long stretches, and saturation holds without the same friction risks as ankle or hands. Tell the artist you want strong black fills with a few controlled negative-space lines to keep the beak readable from a distance. Avoid tiny internal detail that will get lost once the leg muscles settle and the skin stretches. Pair with linen shorts for warm-weather showings that keep attention on the artwork.
9. Back-of-Hand Mini Plague Doctor Emblem
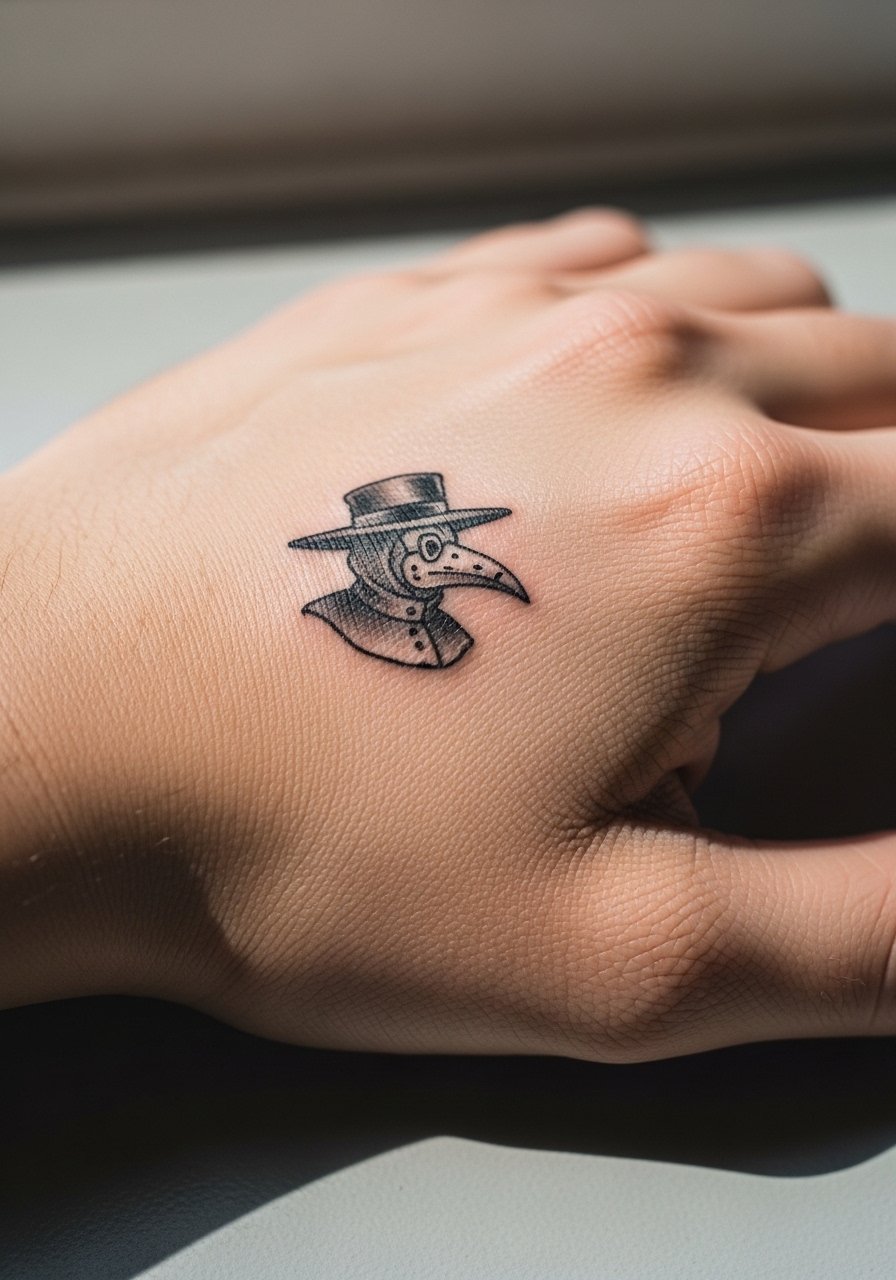
Mistake lead: hand tattoos face higher risk of early break-up because of frequent washing and use. For a hand emblem, simplify shapes and request bolder outer contours so the beak and mask still read after months of use. Sessions are short but painful and touch-ups are common within a year. Keep in mind some workplaces still have restrictions on visible hand tattoos. For show-off looks, thin ring stacks work better than wide bands because they do not compete with the tiny mask.
10. Collarbone Plague Doctor with Script Banner
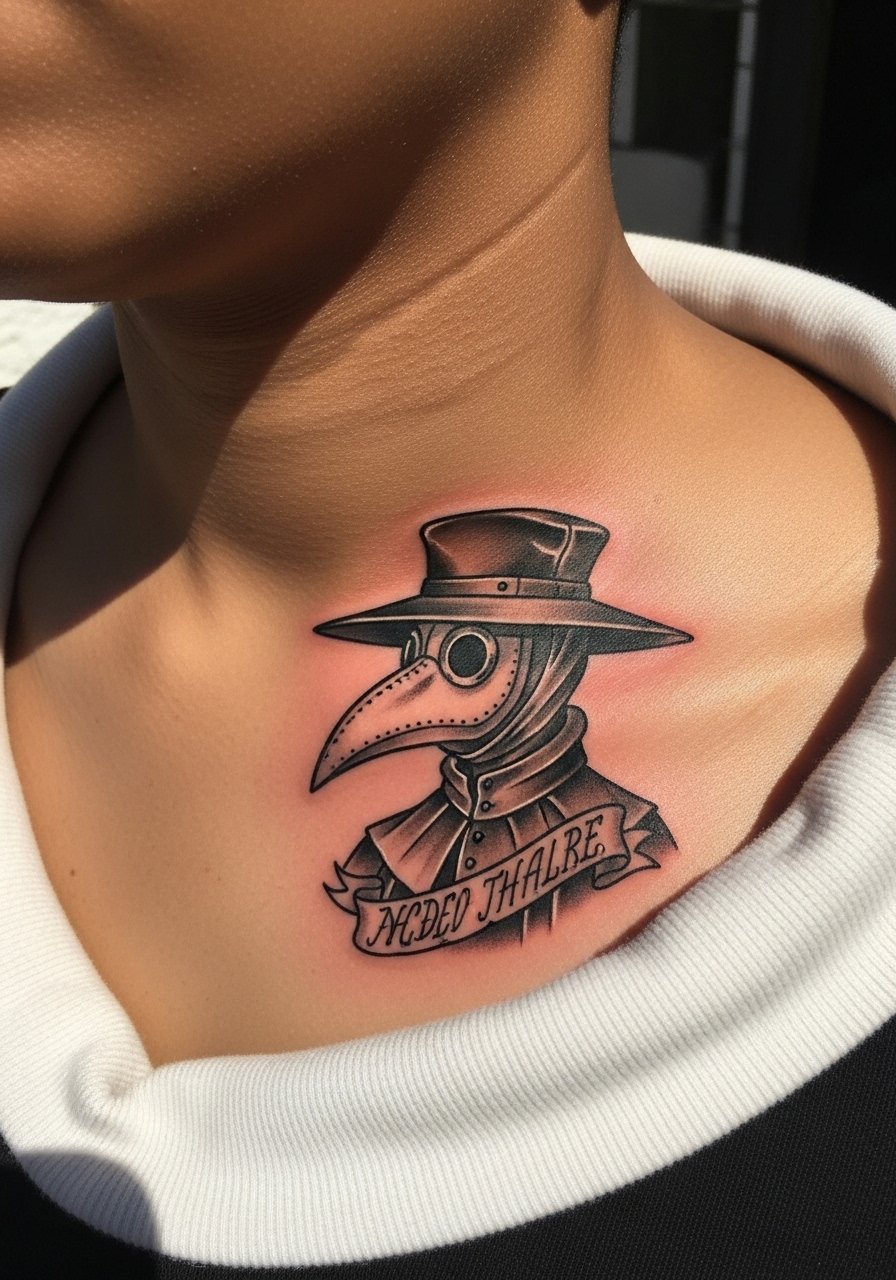
Pain warning lead: collarbone placement is thin and contours sharply, so tell your artist you want slightly bolder spacing around the script to prevent early blur. Lettering must be sized to the skin plane, so request a test stencil and insist on seeing the exact letter width on skin before work starts. Sessions are short but can feel sharp along the bone. A frequent mistake is requesting overly tight script that becomes unreadable after a year. For the session, a wide-neck tee makes access easy without full exposure.
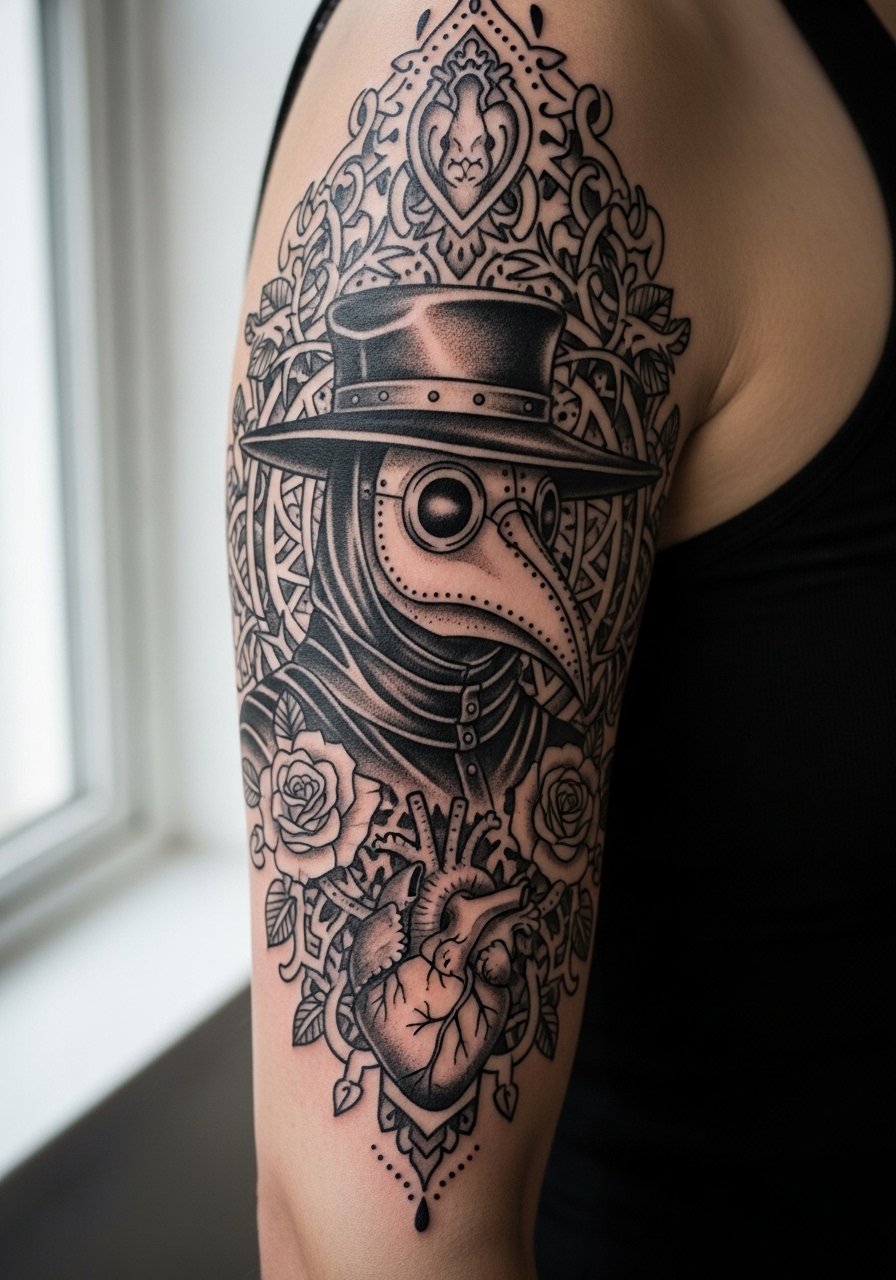
11. Thigh Plague Doctor in Ornamental Frame
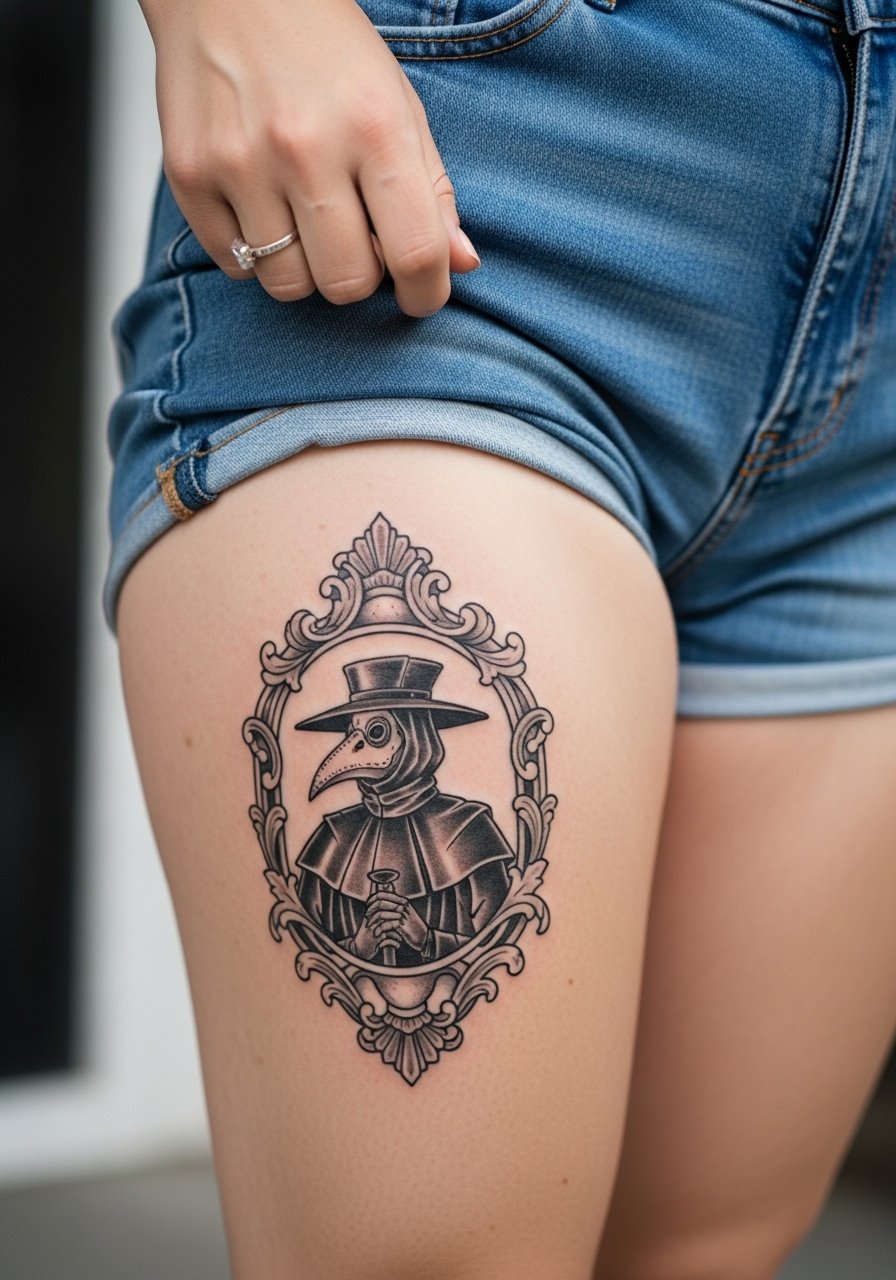
Personal observation: the thigh gives room to breathe, so you can include ornamental borders and small scenes around the mask without cramming. Tell the artist you want room between motifs so stipple and dot work keep their identity as the skin settles. Pain is lower here, sessions can be longer, and the piece often needs only one multi-hour visit. A common error is overfilling the space with tiny icons that compete with the central portrait. For the appointment, wear high-waisted shorts so the artist can reach the area without uncomfortable tugging.
12. Finger-Side Plague Doctor Sigil
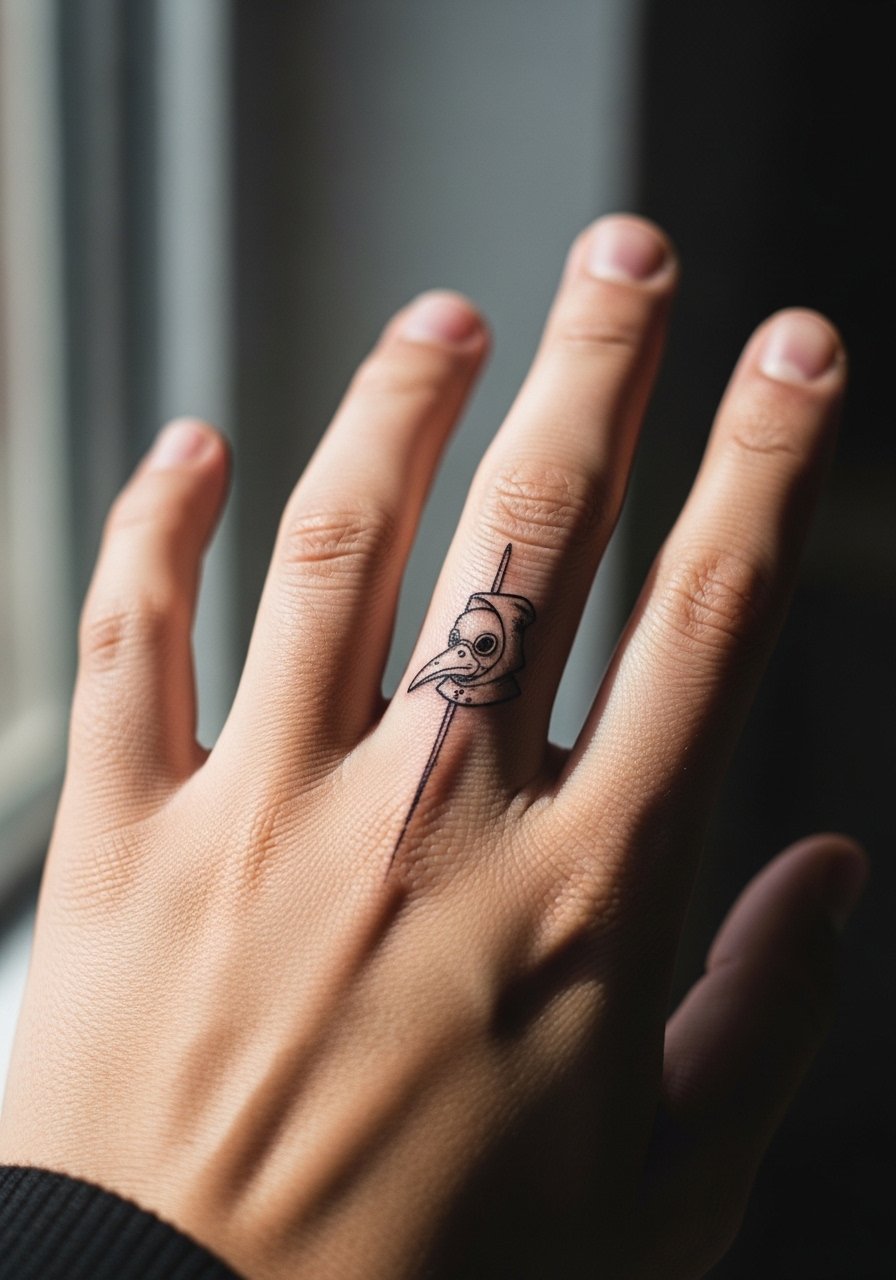
Mistake lead: finger placements need simplified geometry because skin on fingers blurs and sheds more with washing. Ask for slightly thicker linework and fewer interior details to keep the sigil readable. Sessions are quick and painful, and touch-ups at six to twelve months are common. A real-life mistake is matching size to a reference that was photographed much larger; scale down consciously during consultation. Rings and stacked bands can obscure tiny work, so keep jewelry minimal when showing this piece.
13. Religious Icon Mashup with Plague Doctor Mask
Controversy lead: merging plague doctor imagery with religious iconography splits reactions. One camp sees it as a provocative artistic commentary on mortality and faith. The other camp finds it disrespectful to sacred symbols. Name both views when you discuss the idea with an artist and decide whether you want an abstract nod or a literal combination. Expect moderate pain on the upper chest and plan for careful spacing so neither element competes visually. If you want to avoid offense, consider altering motifs rather than direct replicas.
14. Throat-Side Plague Doctor Accent
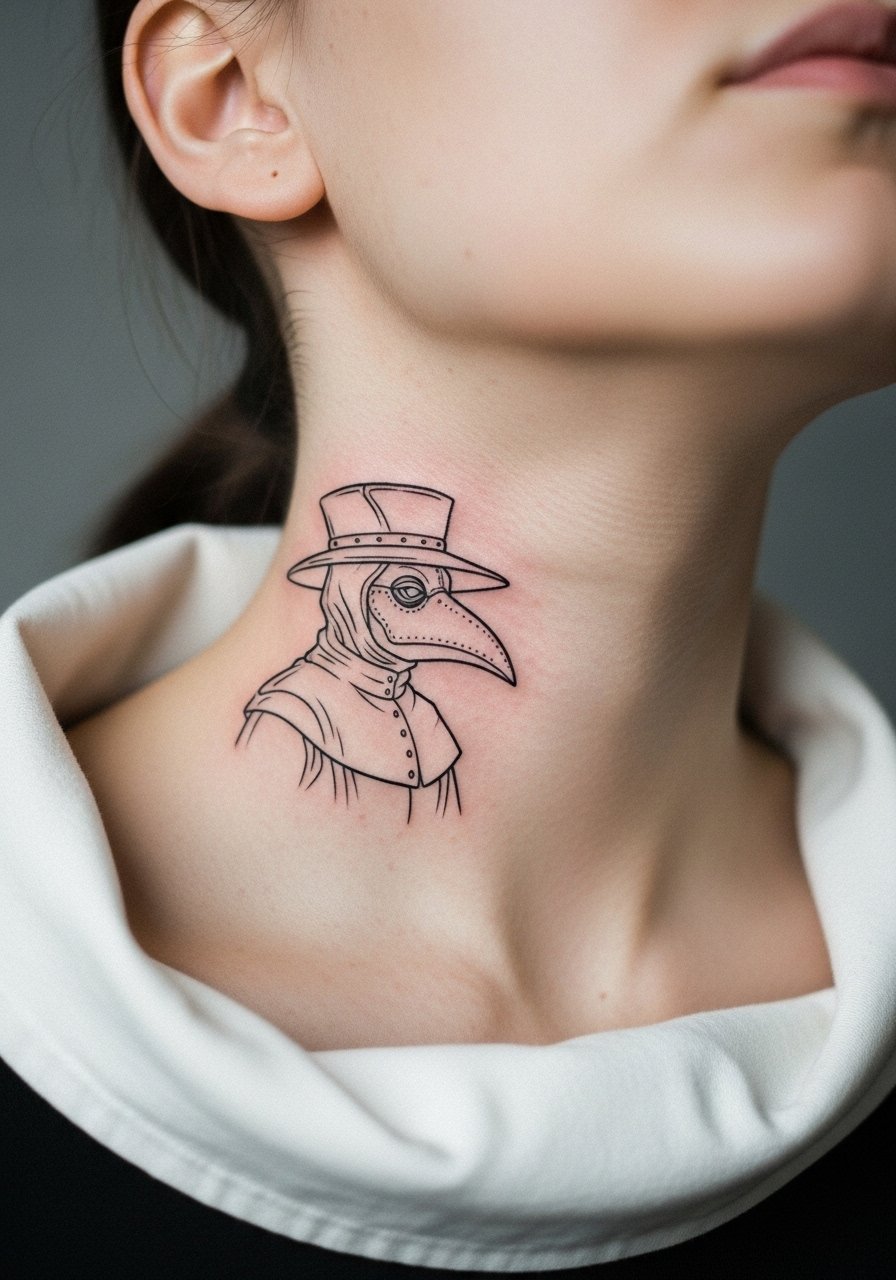
Consultation lead: neck placements age differently because the skin there stretches and is often exposed. Tell your artist you want fewer tiny strokes and a focus on confident contour. Session pain can be significant and healing needs care to avoid clothing rubbing. A common mistake is expecting dense detail to last long on the neck. For showing this piece off, pair with open collars that let the design breathe rather than hiding it under scarves.
15. Upper Back Plague Doctor with Winged Cloak
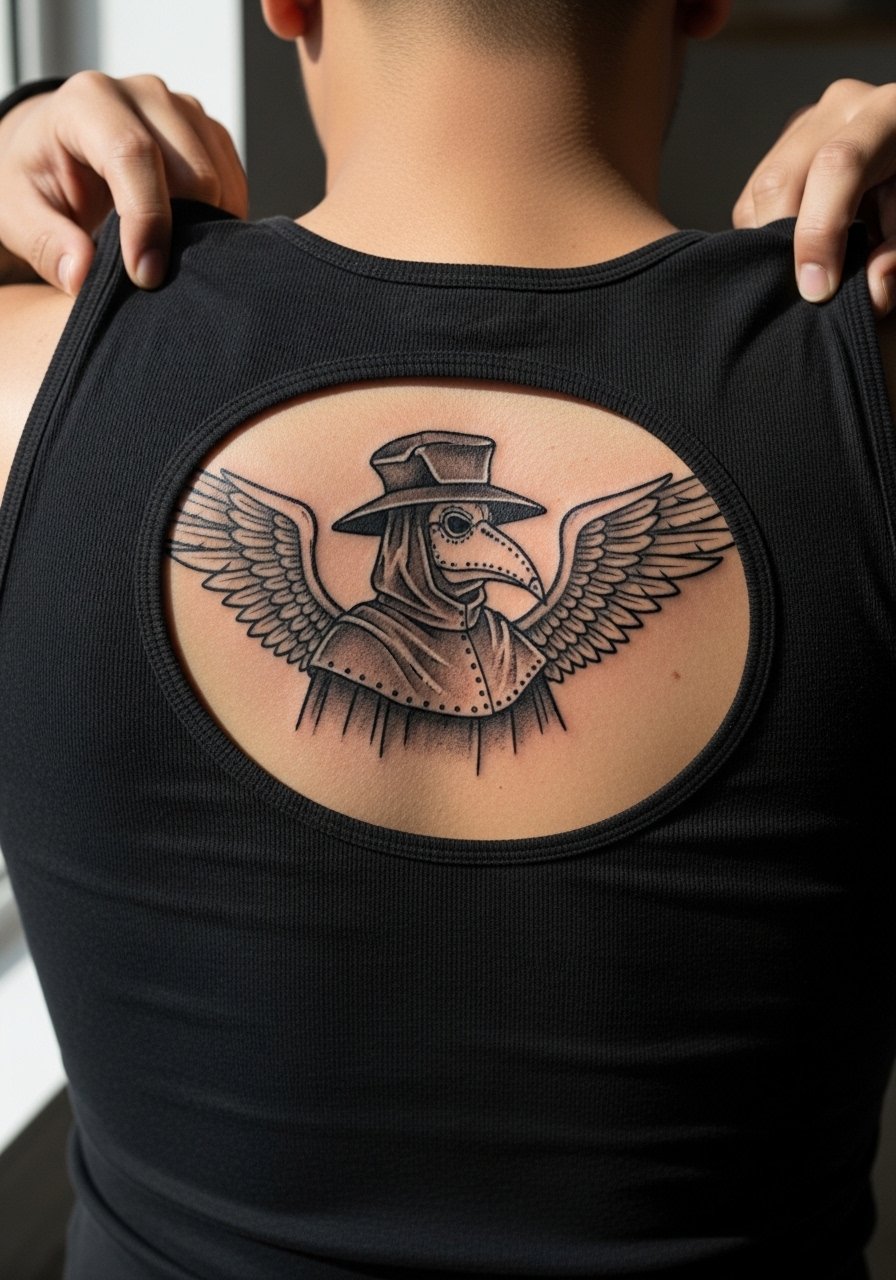
Visual impact lead: the upper back is ideal for compositions that move across shoulder blades. Tell the artist you want the cloak to flow with muscle movement so the beak remains central even as posture shifts. Sessions are medium-length and often split across two visits for comfort. Blowout risk is lower here than on hands or ribs, but tight lines near the spine can soften if compressed by backpacks. For the appointment, a tank top you can pull aside keeps things practical while preserving modesty.
16. Calavera-Style Plague Doctor Mask on Calf Wrap
Mistake lead: combining skull motifs and plague masks can become visually busy if placed too small. Ask for clear negative space around the mask and confident black fills for the calavera elements to ensure the wrap reads at a glance. Calf sessions tolerate long shading passes and often finish in a single three- to five-hour slot. A common oversight is not accounting for muscle flex when designing a wrap, which can distort symmetry when standing versus seated.
17. Minimalist Beak Outline Behind the Ear
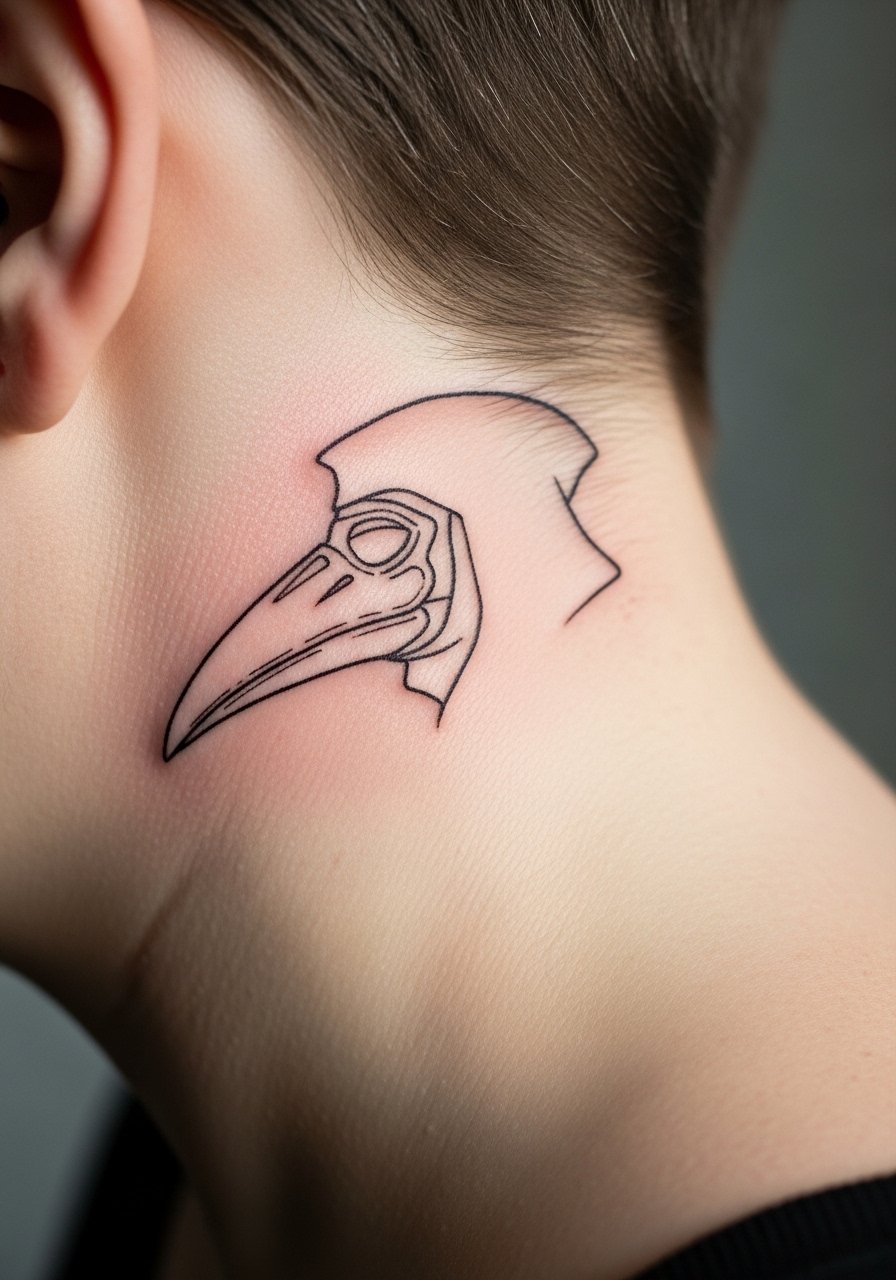
Styling lead: behind-the-ear accents are subtle and suit those who want a personal nod without broad display. Because the area is small, keep the design as a clean outline and request a test stencil so you can check placement beneath hair. Healing is quick but the spot can be sensitive during sleep. For the session, tuck hair behind the ear and wear a wide-neck tee so the artist can work without full ear exposure. Note that this placement requires precision and an artist comfortable with small-scale linework.
Frequently Asked Questions
Q: Will a fine line illustrative plague doctor on the ribs hold up, or should I pick blackwork instead?
A: It depends on your priorities. Fine line can look delicate and haunting, but ribs stretch and move, so stipple and slightly heavier primary lines help longevity. Blackwork holds up better under friction and stretching, but it gives a different feel. Discuss spacing and expected touch-up timelines with the artist so you pick the version that fits your patience for maintenance.
Q: How soon after a collarbone or sternum session can I wear necklaces again?
A: Wait until the initial scabbing has flattened and the skin is no longer tender, usually at least two weeks in my experience. Lightweight chains that sit above the tattoo are less likely to rub, and a small thin chain pendant can be safe once the area feels comfortable. If in doubt, keep jewelry off for another week to avoid irritation.
Q: Are hand and finger plague doctor tattoos worth it if I want them to last?
A: They are worth it if you accept they will need maintenance. Hands and fingers fade faster because of washing, friction, and thin skin. Simplified shapes and bolder contours will last better, and plan on touch-ups at twelve months or sooner. If you need lower maintenance, consider moving the same motif to the wrist or outer hand.
Q: What should I bring to my first consult for a custom plague doctor piece?
A: Bring visual references that show composition and the amount of negative space you like, and share where you want the piece to sit on your body so the artist can size it. Mention any skin sensitivities and your typical clothing choices so the artist can plan for friction zones. From what I see, a clear conversation about spacing prevents the most common regrets.
Q: How often do illustrative plague doctor pieces need touch-ups?
A: Expect small touch-ups between one and three years depending on placement, contrast, and how much sun exposure the area gets. Visible spots like hands, fingers, and ankles tend toward annual touch-ups, while upper back and calf work often go longer between sessions. Trust your artist's post-healing assessment and schedule a touch-up once you notice softening in primary contours.
