
Bold fine detail can look fragile as it ages, and bold saturation can feel blunt the week after. The surprising part is which illustrative eagle choices hold up. Some designs read strong on day one and softer at year three, while others gain presence as the skin settles. Below are 21 eagle ideas that balance that initial punch with long-term clarity, plus practical notes for consultation, session wear, and how each placement behaves over time.
1. Neo-Traditional Eagle on Outer Forearm
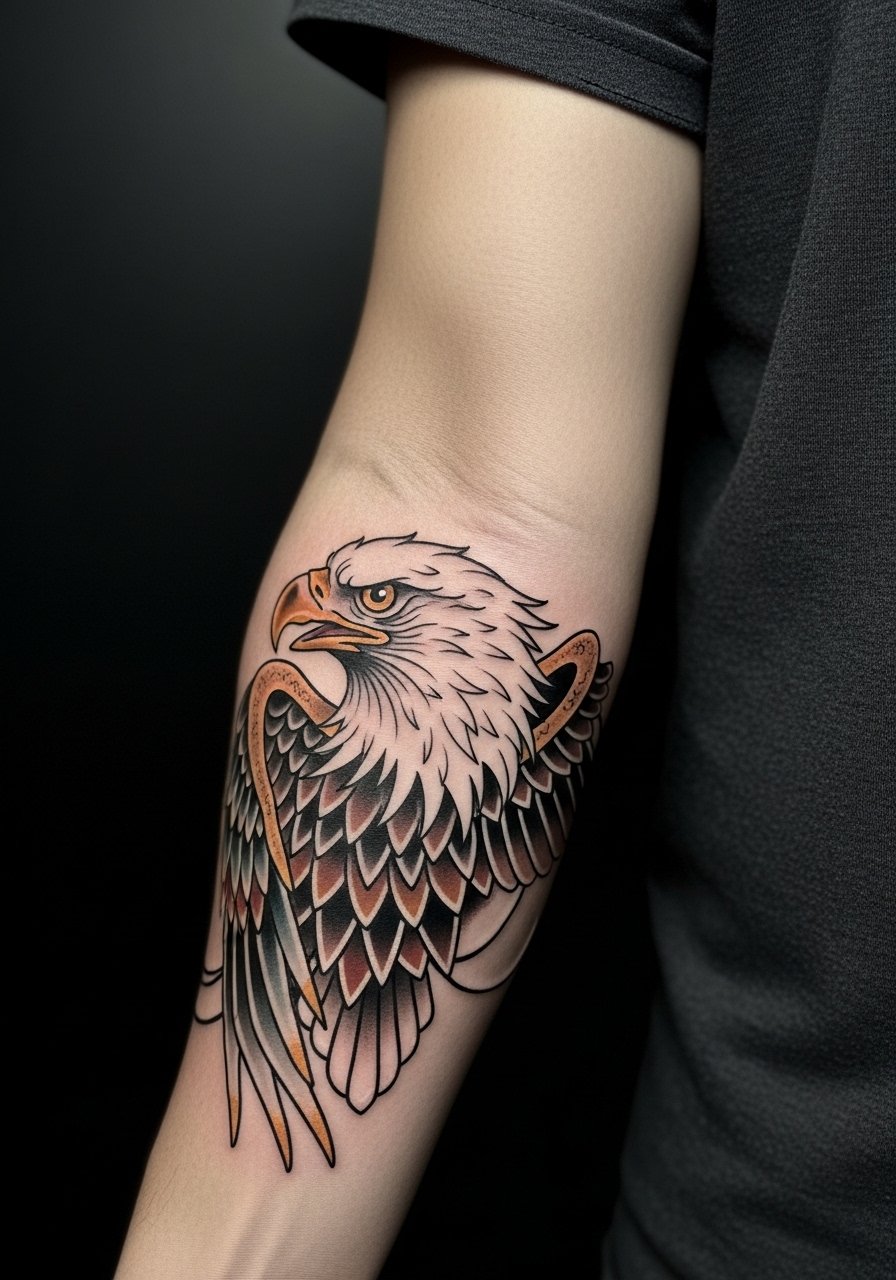
This placement reads like a headline piece when done in neo-traditional illustrative work. I recommend asking the artist for slightly heavier outer outlines and softer internal linework so the wing detail keeps shape as it heals. Pain is moderate and a single two- to three-hour session will cover medium-sized pieces. Common mistakes are packing too many tiny feathers into a constrained band, which blurs at year two. For showing it off, roll sleeves up and wear a short-sleeve linen shirt that keeps the forearm visible without looking like you planned it. Expect a touch-up at year three for feather edges if you want razor clarity.
2. Fine Line Flying Eagle on Inner Forearm
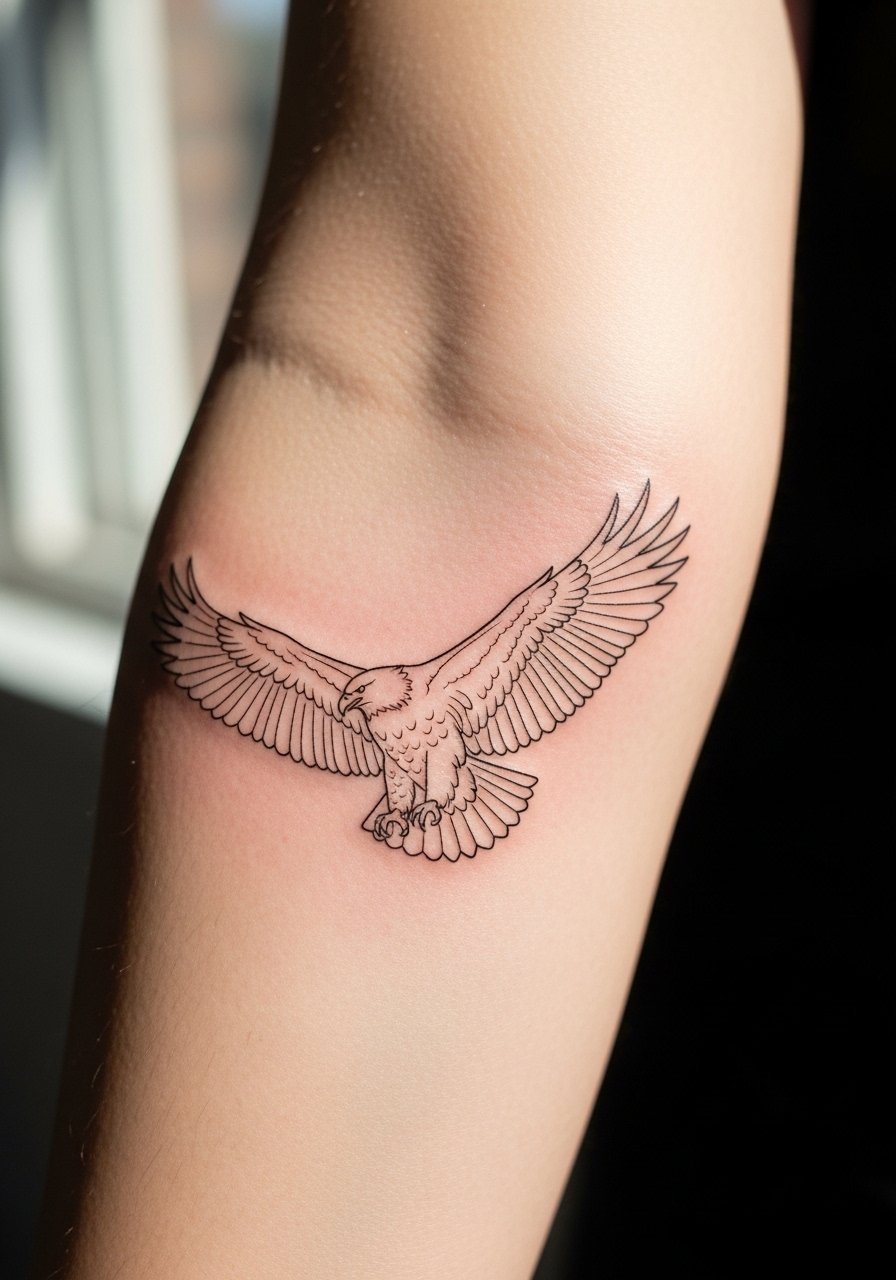
Fine line illustrative eagles can feel elegant on the inner forearm but they demand spacing. Tell your artist you want slightly increased spacing between feather lines and one-pass linework with medium depth so the ink sits and does not blow out. Pain is lower here than ribs, session time one to two hours for a compact composition. The usual mistake is shrinking the details to fit an aesthetic image from social media. At six months the wings look crisp, by year two the thinnest lines may soften. Pair the piece with a minimalist leather cuff bracelet when you want to draw the eye to the forearm.
3. Chest-Spanning Illustrative Eagle with Banner
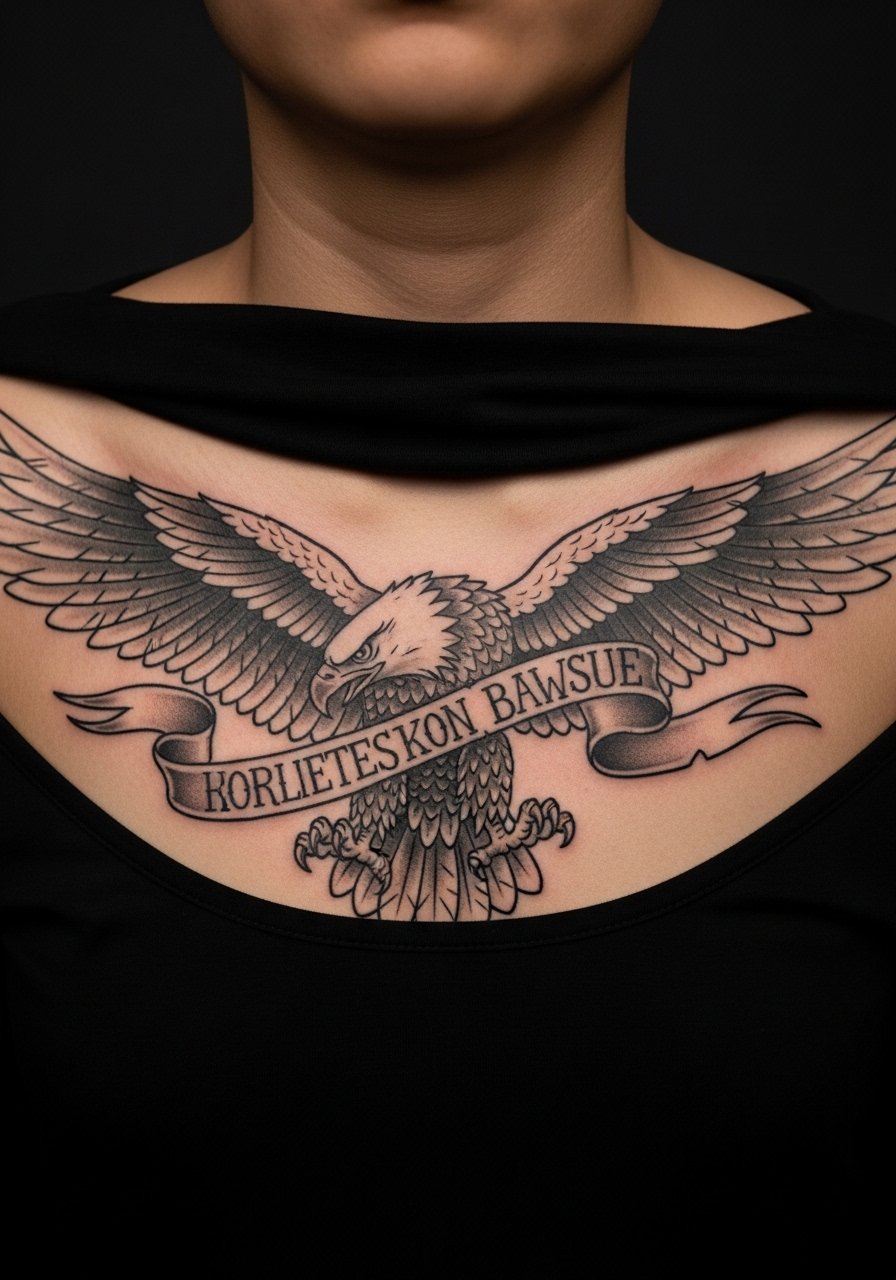
A chest panel lets an eagle command space and incorporate script or a banner without crowding. This area is sensitive but it rewards scale. In consultation, bring a range of references for banner placement so the letter spacing sits naturally across sternum curvature. Sessions are usually split across two appointments because of the breathing and movement here. The common error is tiny script across a curved chest, which warps as you breathe. Expect touch-ups at year two for saturated fills near the center where friction from collars is higher. For the session wear, a wide-neck tee you can pull aside makes life easier for both of you.
4. Shoulder Cap Eagle in Blackwork
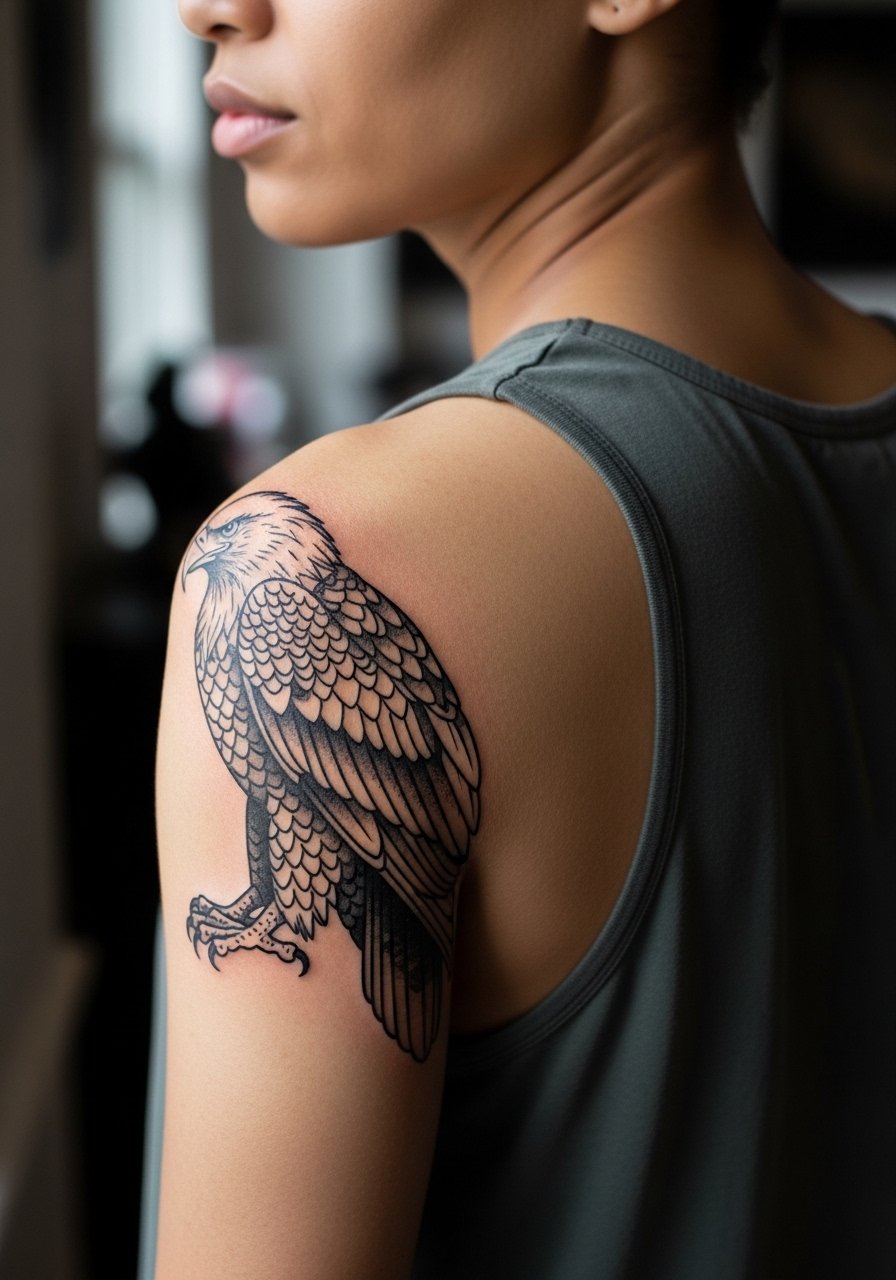
A shoulder cap island reads bold and masculine in dense blackwork. Ask for strong saturation in the primary blacks and deliberate negative space for feather definition. Pain is low to moderate. Session time is typically two to four hours depending on shading. A frequent misstep is over-detailing the shoulder edge which can merge into the deltoid curve over time. Blackwork gains presence as it settles but needs solid initial saturation to avoid patchy fading. For showing it off, a loose tank top frames the cap without competing with the silhouette.
5. Ribcage Rising Eagle in Fine Line
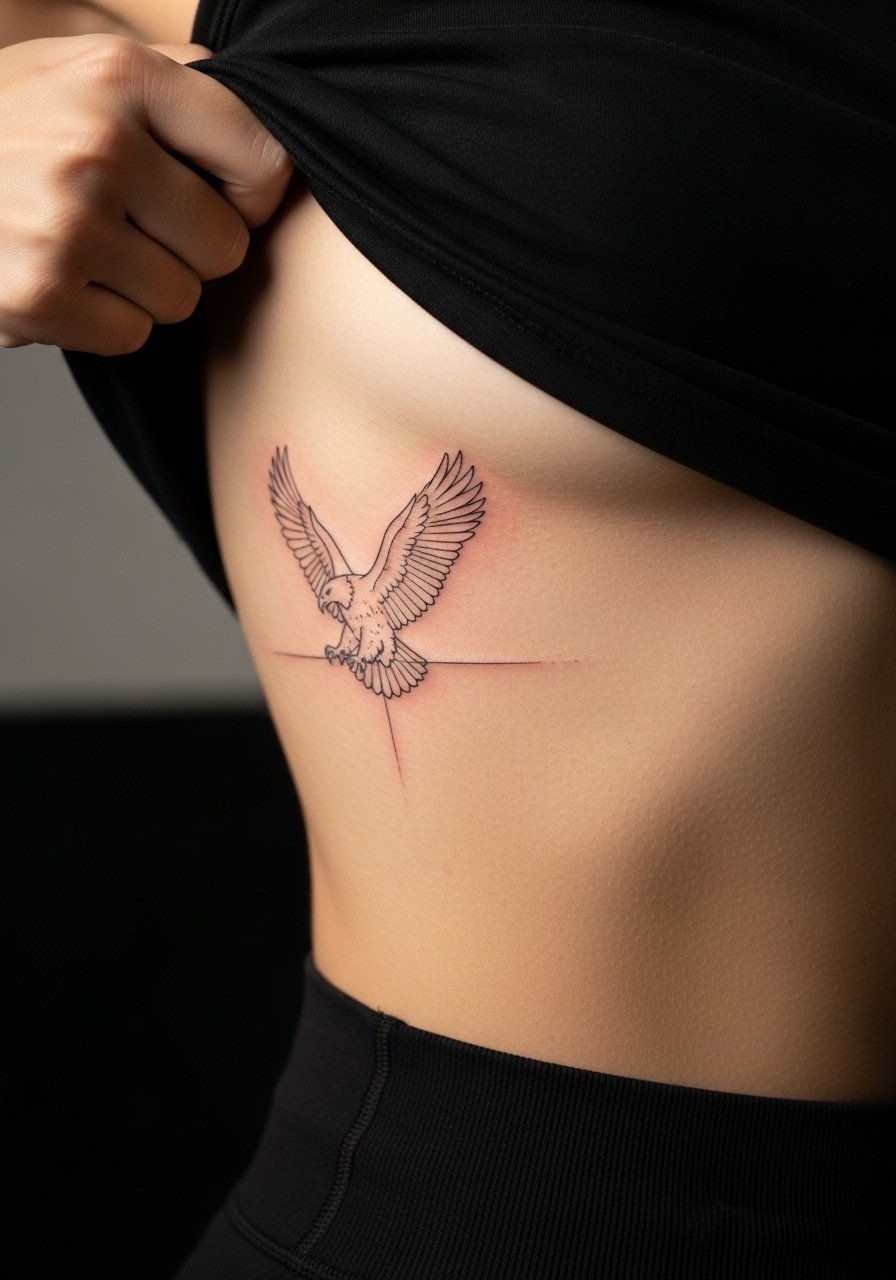
Fair warning: ribs are contentious for fine line work. One camp argues the skin stretch and movement blur the lines within two years. The other camp says with correct needle depth and spacing it can settle well. In my experience the outcome depends on both technique and how big you allow the lines to be. Pain is high and sessions may be uncomfortable, so wear a loose top and be ready for breaks. Common mistakes include asking for tiny intricate details in a narrow vertical space. Expect a touch-up window at year two to reinforce the feather tips. For the appointment, wear a cropped athletic top so the artist can lift fabric without you feeling exposed.
6. Sleeve Anchor: Eagle with Waves and Compass
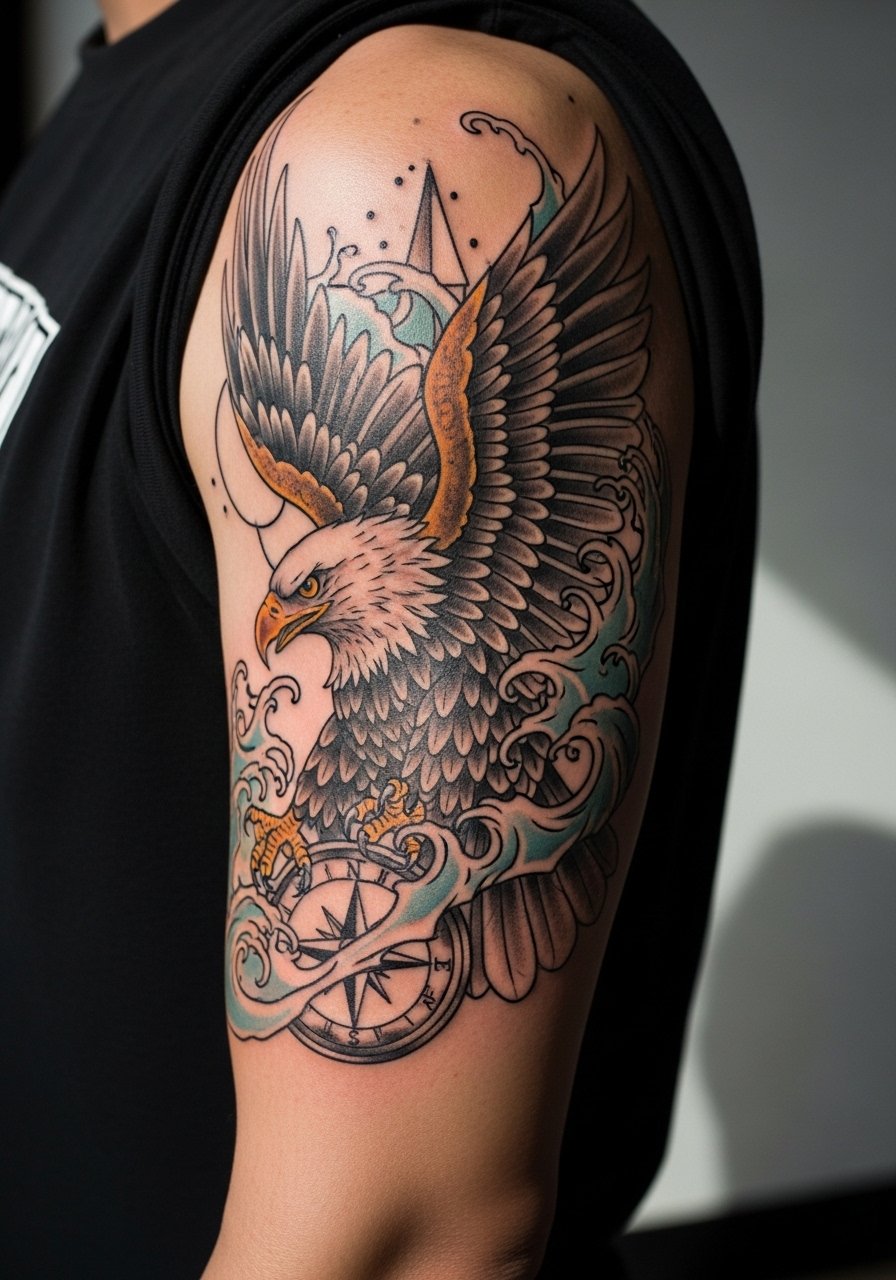
This composition anchors a sleeve and gives a narrative element to the eagle with water and navigation motifs. Tell the artist you want the compass to read clear at arm bend and the wing edges to follow muscle flow so the design moves with you. Expect multiple sessions adding up to six to eight hours depending on color saturation and background fill. The typical mistake is crowding tiny iconography into tight bands, which flattens under healed skin. For showing it off between sessions, a short-sleeve button-down keeps the sleeve visible without constantly exposing fresh work. Plan for a touch-up after the sleeve has fully settled, often around year two.
Studio Day Picks
The forearm, chest, and shoulder sessions above benefit from a few specific prep and session items that make the chair time smoother.
-
Stencil transfer paper kit. Lets you test placement on curving areas like the ribcage and chest before the needle touches skin.
-
Topical numbing cream. Applied per directions before rib or sternum sessions to help manage the higher pain around bones and tight skin.
-
Thin protective film roll. Useful for finger and wrist work that gets rubbed by daily activities during the first week.
-
Fragrance-free gentle body wash. Cleanses healing skin without irritating the fine line work on forearms and chests.
-
Aquaphor healing ointment. Thin layers early on help prevent excessive scabbing on saturated areas like the shoulder cap and sleeve anchor.
7. Upper Arm Micro-Realism Eagle Head
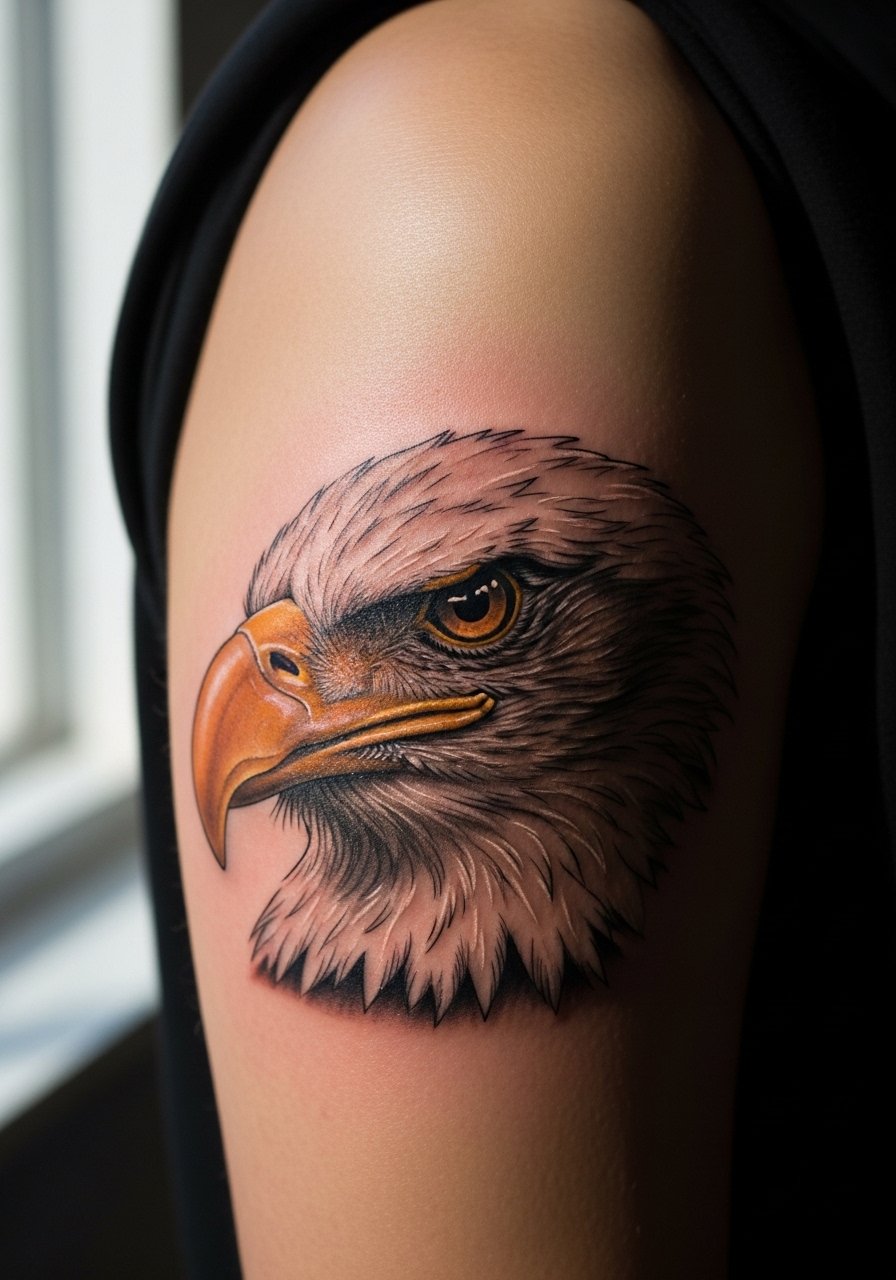
Micro-realism on the upper arm can read intense and photo-like when scaled properly. Tell the artist during consultation you prefer contrast between beak highlights and deep eye saturation rather than packing tiny feather stipples everywhere. Pain is moderate and sessions can run two to four hours. A real mistake is asking for micro details smaller than three millimeters across, which often dissolve into soft texture. At six months the contrast holds best, by year three you may want touch-ups in the darkest tones. Pair this with a classic short-sleeve tee when you want a casual look that keeps the upper arm visible.
8. Sternum Minimalist Eagle Emblem
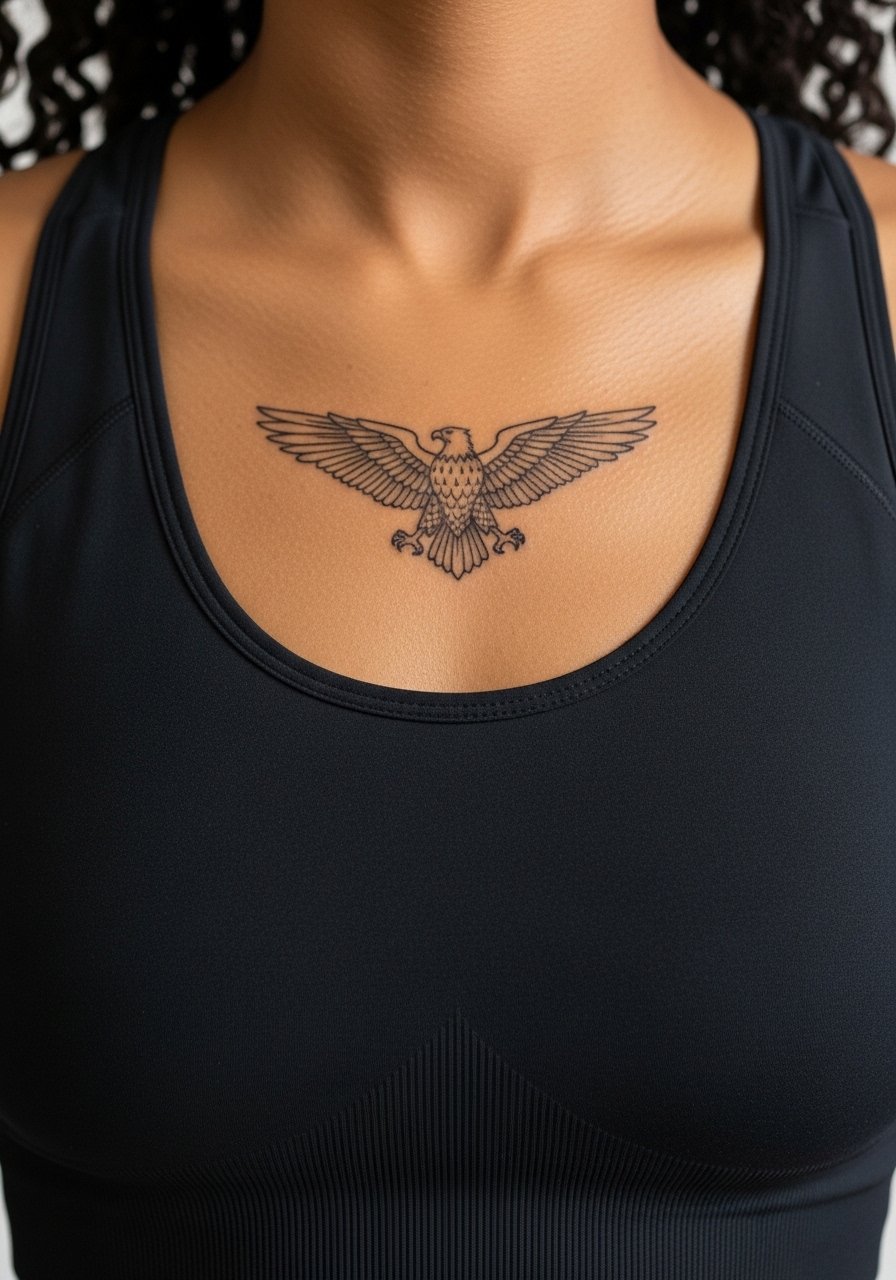
Sternum placements require sensitivity in both design and session pacing. Keep the emblem simple and bold so the curved area does not distort ornate details. Pain is high and many artists split sternum pieces into short sessions. A common error is cramming tiny script or filigree across the sternum where breathing causes constant movement. Expect the emblem to settle with slightly softened edges at year two. For the appointment, a fitted sports bra or bandeau is ideal since it gives clear access without exposing unnecessary skin. Consider asking the artist about touch-up timing as the centerline often needs reinforcement.
9. Back Panel Soaring Eagle with Mountainscape
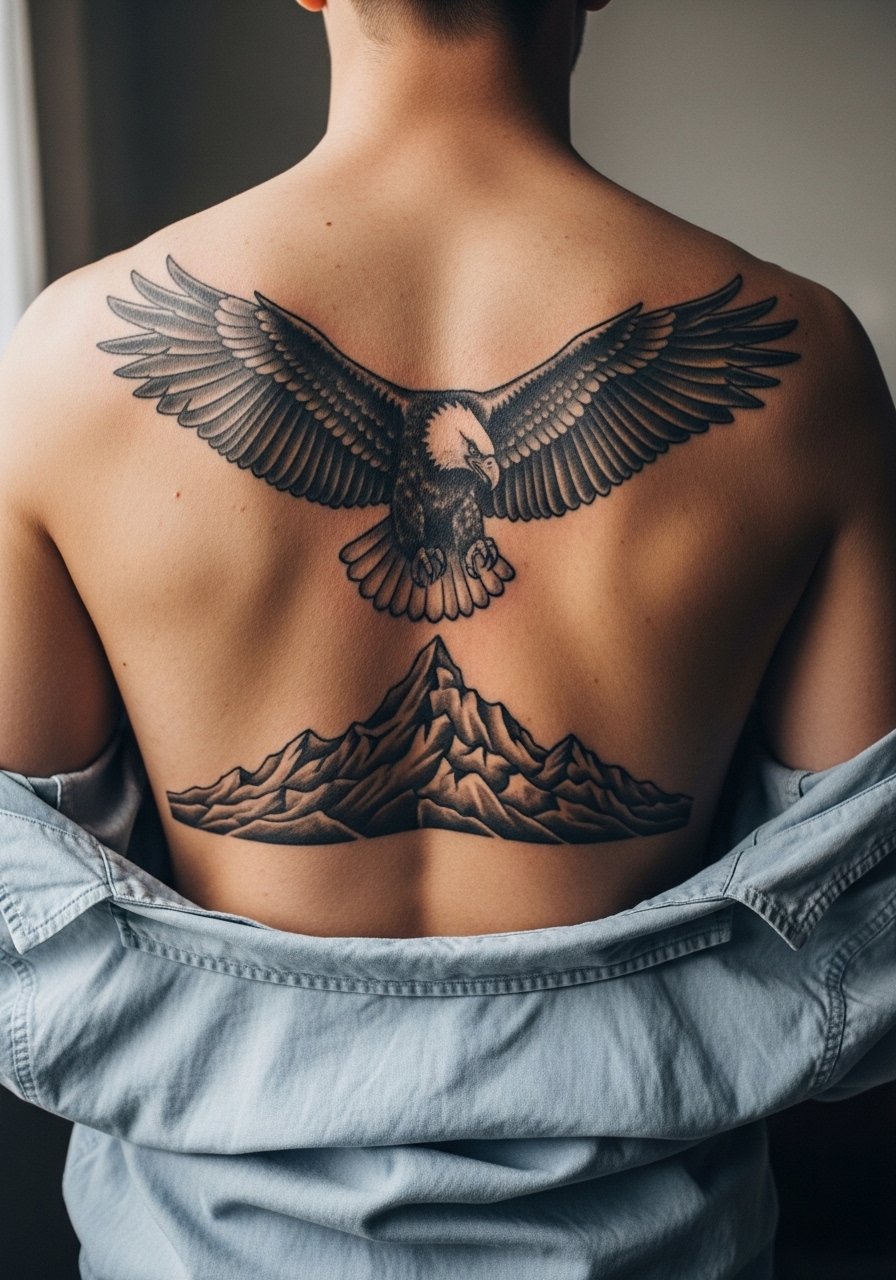
Large back panels are forgiving of scale and can incorporate scenic elements for narrative weight. I recommend mapping out negative space so the eagle reads from a distance and the mountains provide depth without crowding. Sessions for a full panel usually happen over multiple long sittings. Common mistakes are trying to force too much tiny texture into shadow fields; those tend to flatten. Expect the piece to look cohesive at six months and increasingly integrated at year three as ink settles. For showing the panel, an open-back shirt or a loose button-down frames the design elegantly for evenings out.
10. Calf-Placement Eagle in Stipple Shading
Stipple shading suits the calf because the rounded canvas absorbs dot gradients gracefully. Tell the artist you want denser dots for shadow and lighter dots for feather texture so the gradient reads clean from a few feet away. Pain here is moderate and session time is one to three hours. A common mistake is trying to convert heavy brush-stroke shading into dot work without enough dots per square inch. Expect stipple to age well when artist spacing is correct, though the darkest densities may need reinforcement at year three. For session comfort, wear loose drawstring linen pants so you can roll the leg up without pressure.
11. Ankle Tiny Eagle Silhouette
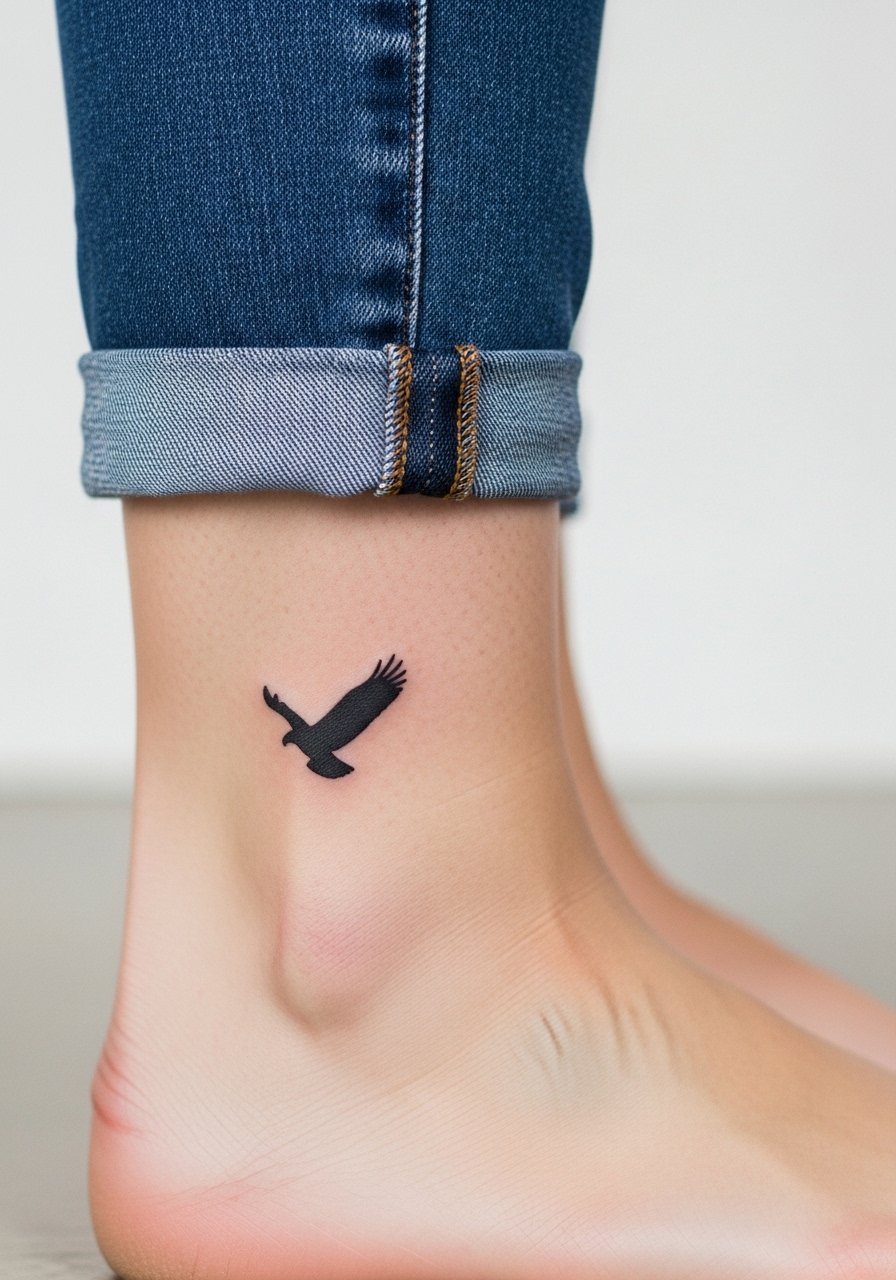
Small ankle silhouettes are subtle but subject to friction from socks and shoes. Ask the artist to place the silhouette where your shoe line will not constantly rub it. Session time is short, under an hour for a tiny silhouette, but healing needs attention because the area scabs readily. A common oversight is placing the design too close to seams where blowout risk increases. Healed at six months the silhouette still reads crisp if initial linework was slightly thicker. Pair this with a low-profile shoe or a canvas slip-on when you want to show it without drawing too much attention.
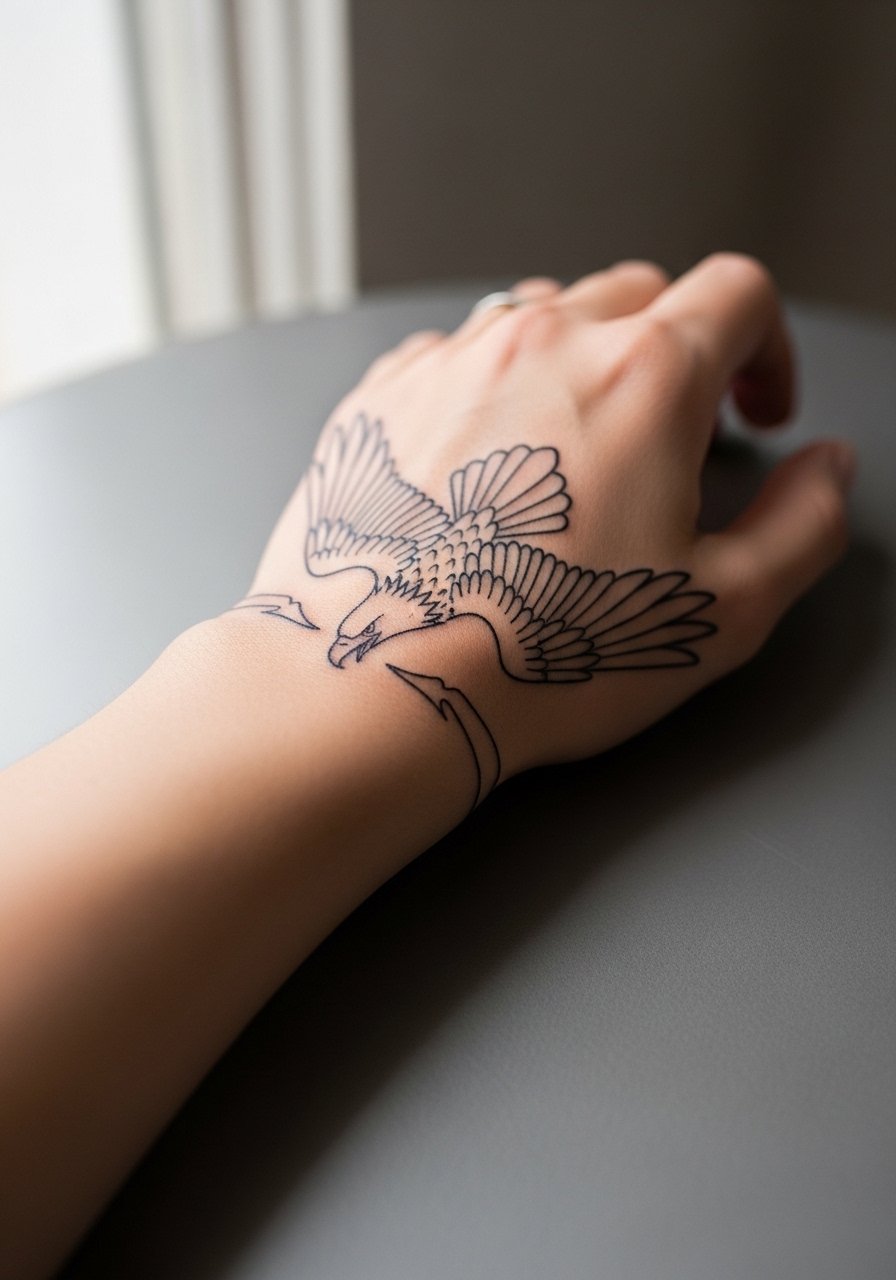
12. Hand and Finger Eagle Set
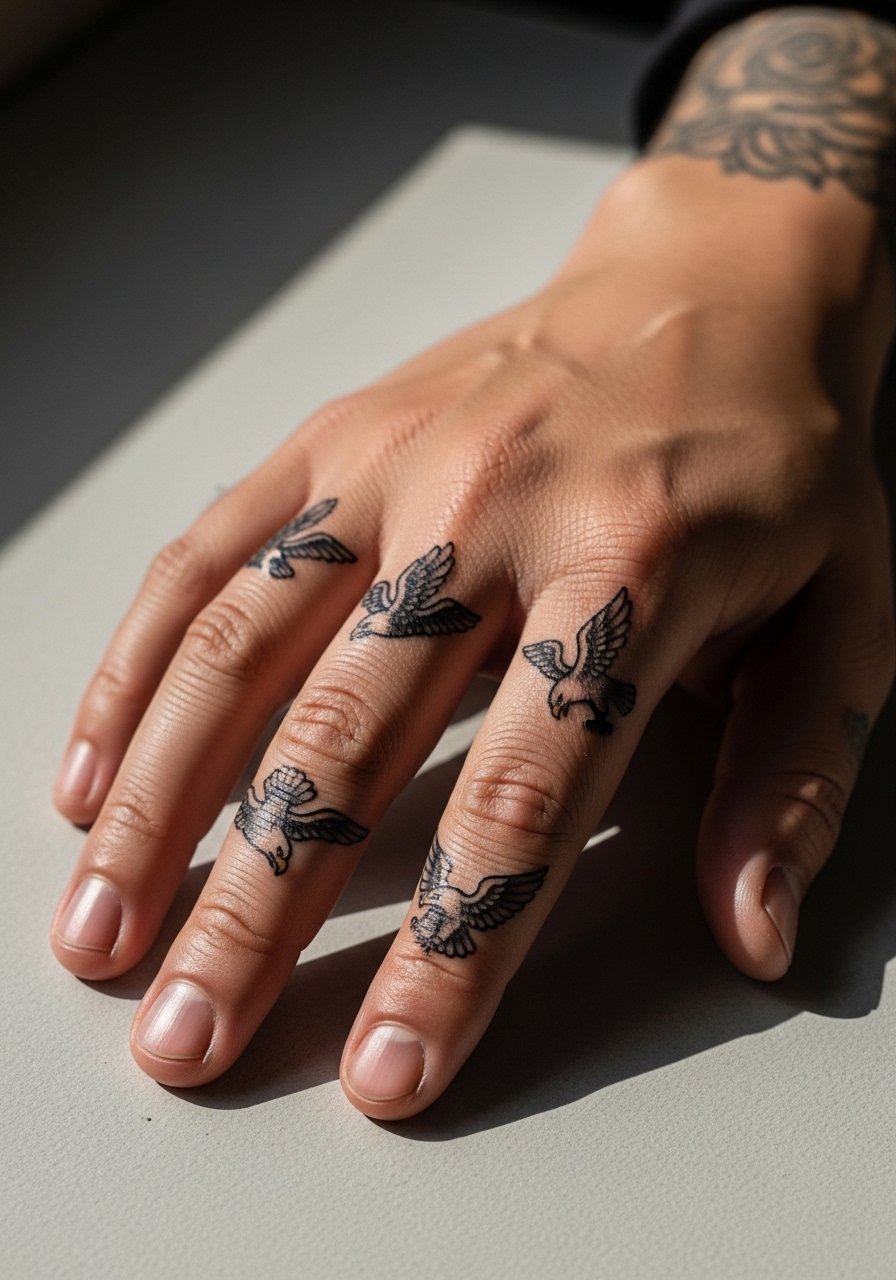
Hand and finger tattoos are visible and can affect work opportunities, so consider that reality before committing. They also fade faster due to constant washing and abrasion. For this set, request a slightly bolder line weight and compact shapes that survive routine wear. Pain is sharp and healing includes frequent touch points. The frequent mistake is picking very fine script or ultra-delicate feather work for fingers. Expect touch-ups within the first year. If you need to be discreet for a time, a ring or bracelet can soften the visual. Hand work should be discussed with your artist in detail because experience with hands varies by studio.
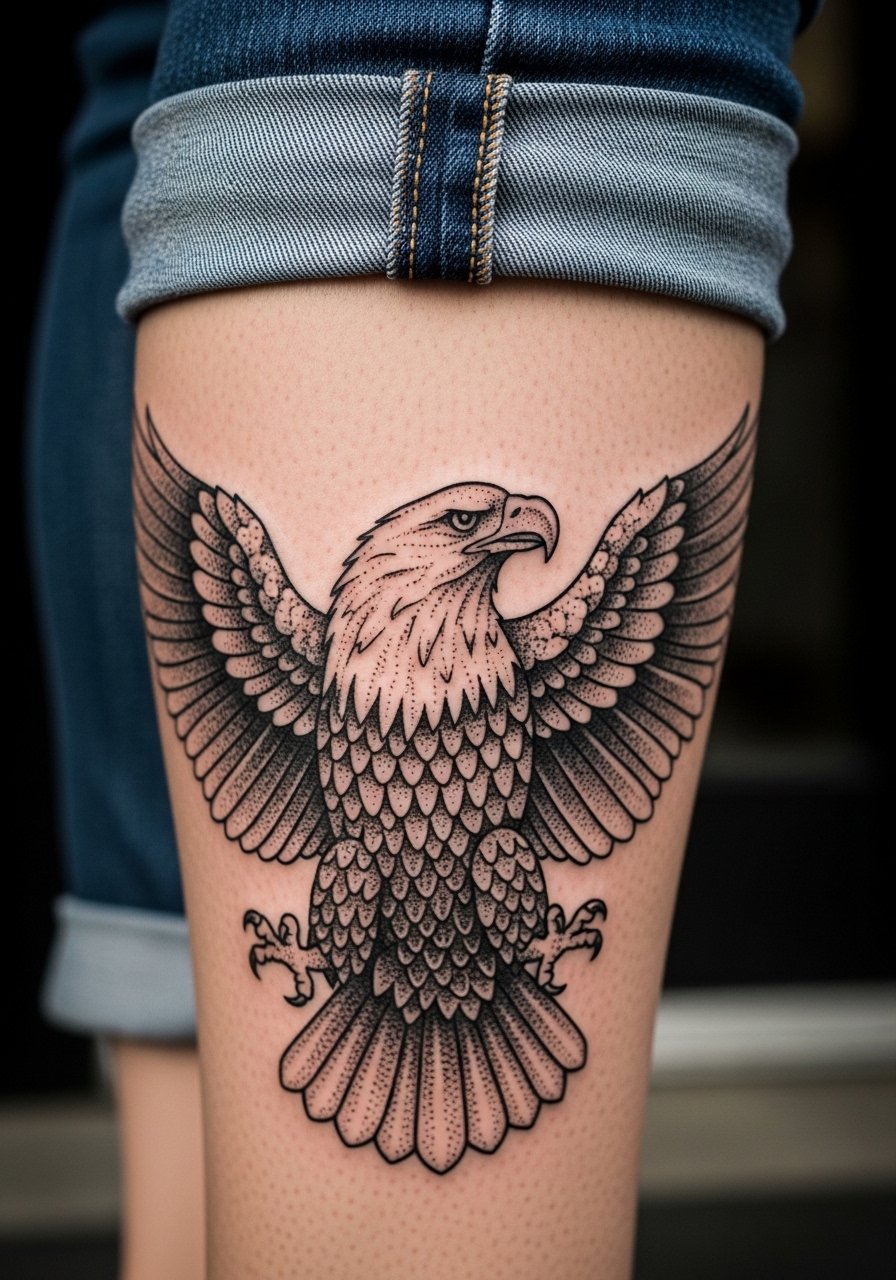
13. Thigh Bold Illustrative Eagle with Rope
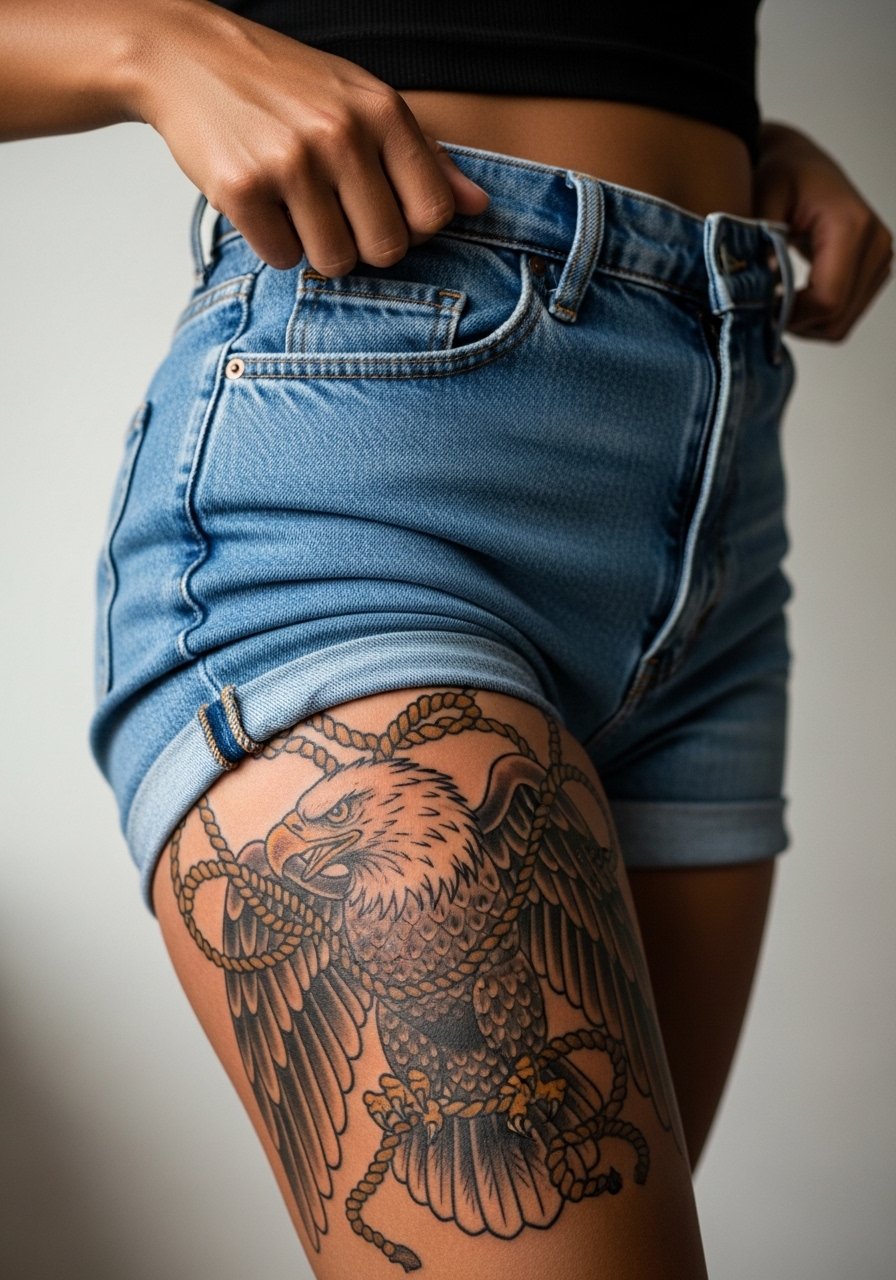
Thighs handle scale and saturation well, which makes them ideal for bolder illustrative eagles. Tell the artist you want the rope to fade into negative space rather than crowding the wing edge. Pain is lower than ribs but can be sensitive near the inner thigh. Sessions range from two to five hours based on size. A common error is too many tiny directional lines in the rope that look busy after healing. For the appointment, wear high-waisted denim or shorts that you can shift for access without full exposure. Thigh pieces often hold color longer than extremities.
14. Side Neck Feathered Eagle Accent
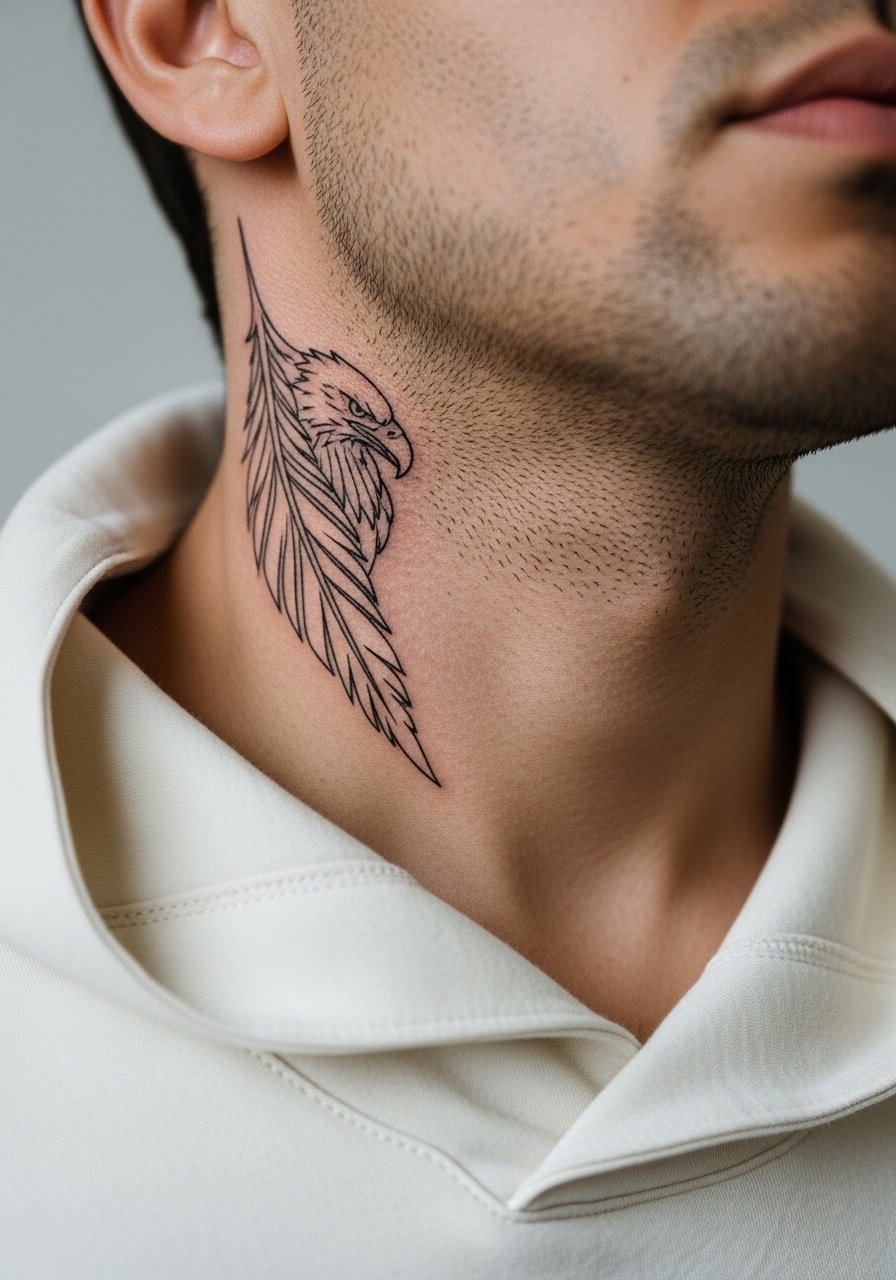
Neck placements are visible and can impact job situations in some fields. Design-wise, keep feathers aligned with jawline flow so the piece reads intentional rather than accidental. Pain is moderate to high and sessions are short but focused. A frequent mistake is overcomplicating the neck with tiny details that do not survive constant movement. Expect some softening at year two and be ready to discuss touch-up cadence. For subtle coverage on days you need it, collared shirts work well when you want to conceal the piece.
15. Collarbone Perched Eagle

Collarbones make an elegant ledge for perched motifs but the bone sits close to skin which affects needle depth choices. Ask for strong outline contrast and clean negative space around the wings so the image floats. Pain spikes over bone and sessions are usually short single appointments. The common error is requesting very fine cross-hatching right over the bone, which can heal patchily. For showing it off, a thin chain pendant necklace sits nicely above the banner or beak without competing.
16. Full Chest Eagle with Strong American Lines
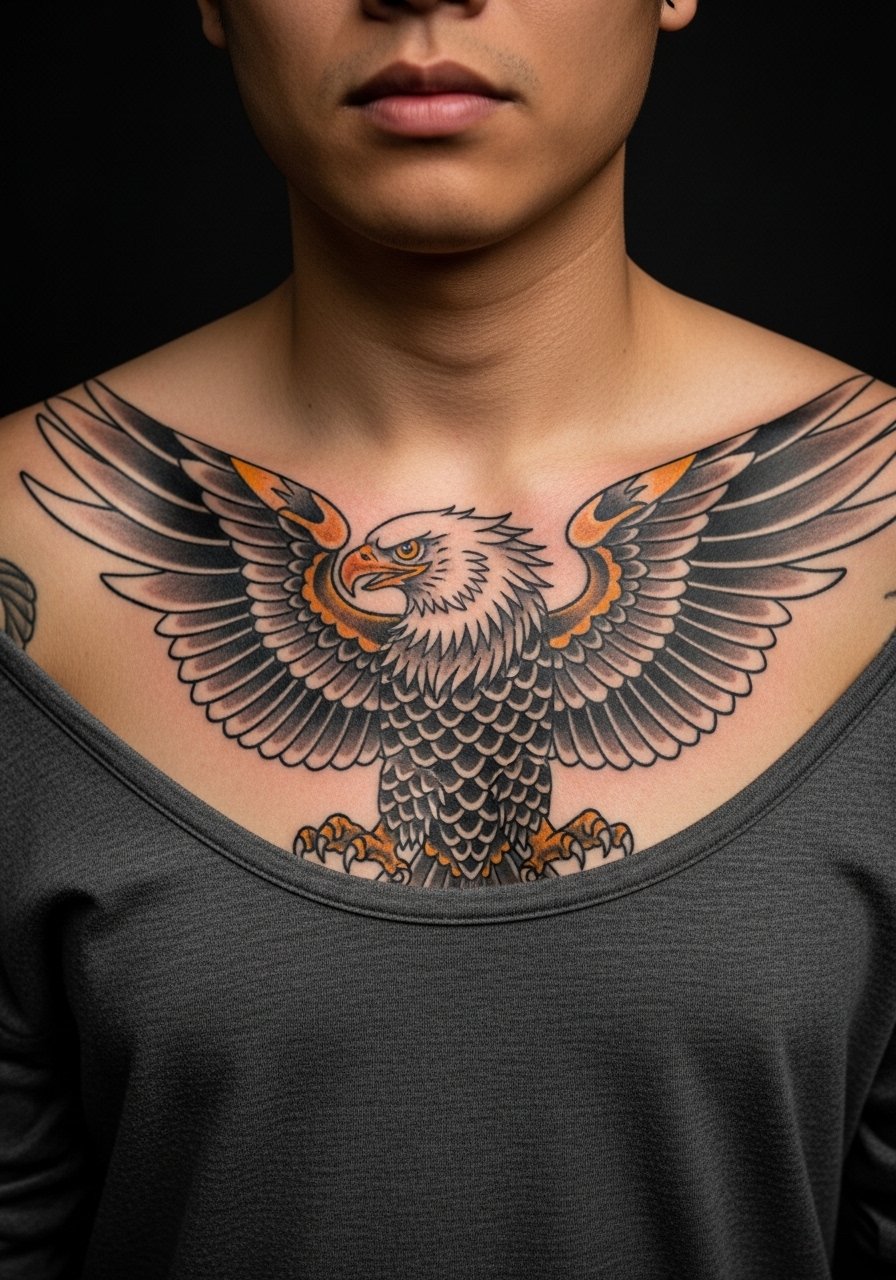
A full chest piece demands a design that reads in bold shapes and respects chest curvature. Ask for heavy primary outlines with moderated internal detail so the main silhouette remains legible years down the line. Sessions are lengthy and often split. The mistake is trying to cram micro details into chest folds where breathing and movement fight line clarity. Expect the saturated blacks to hold while the smallest internal elements may need reinforcement. For colder days, open-button shirts layer well and showcase the chest without exposing too much.
17. Inner Bicep Detailed Eagle Portrait
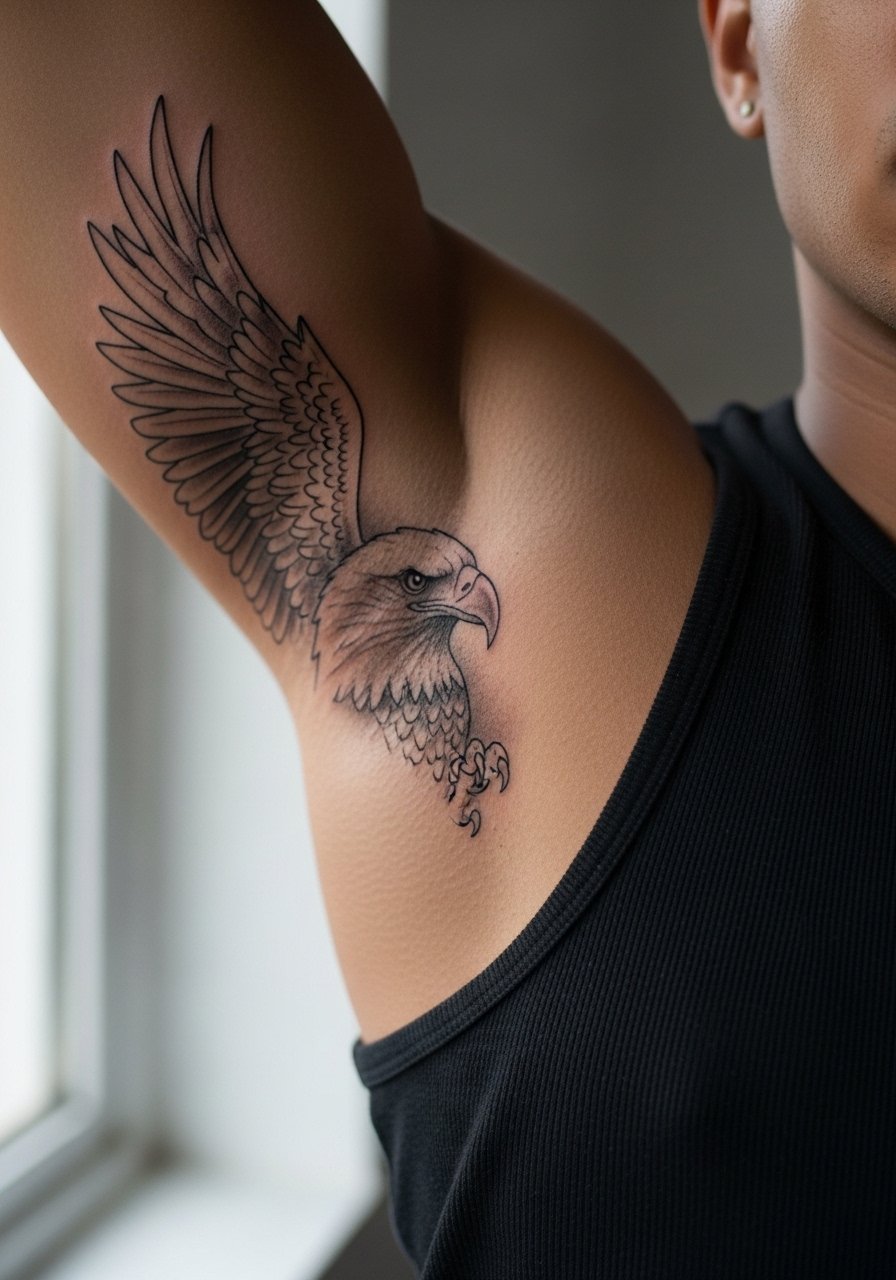
Inner bicep portrait work can be intimate and surprising when executed cleanly. Tell the artist you want depth in the eye area and simpler feather marks around the edge for contrast. Pain is moderate and can feel sharp when the arm is manipulated. The usual mistake is trying to push a full photoreal portrait into a small inner bicep area. That dilutes impact. Expect the portrait to look best after six months and to need targeted touch-ups in the darkest points after year two. For session comfort wear a tank top that allows the arm to be raised easily.
18. Lower Back Midline Eagle Crest
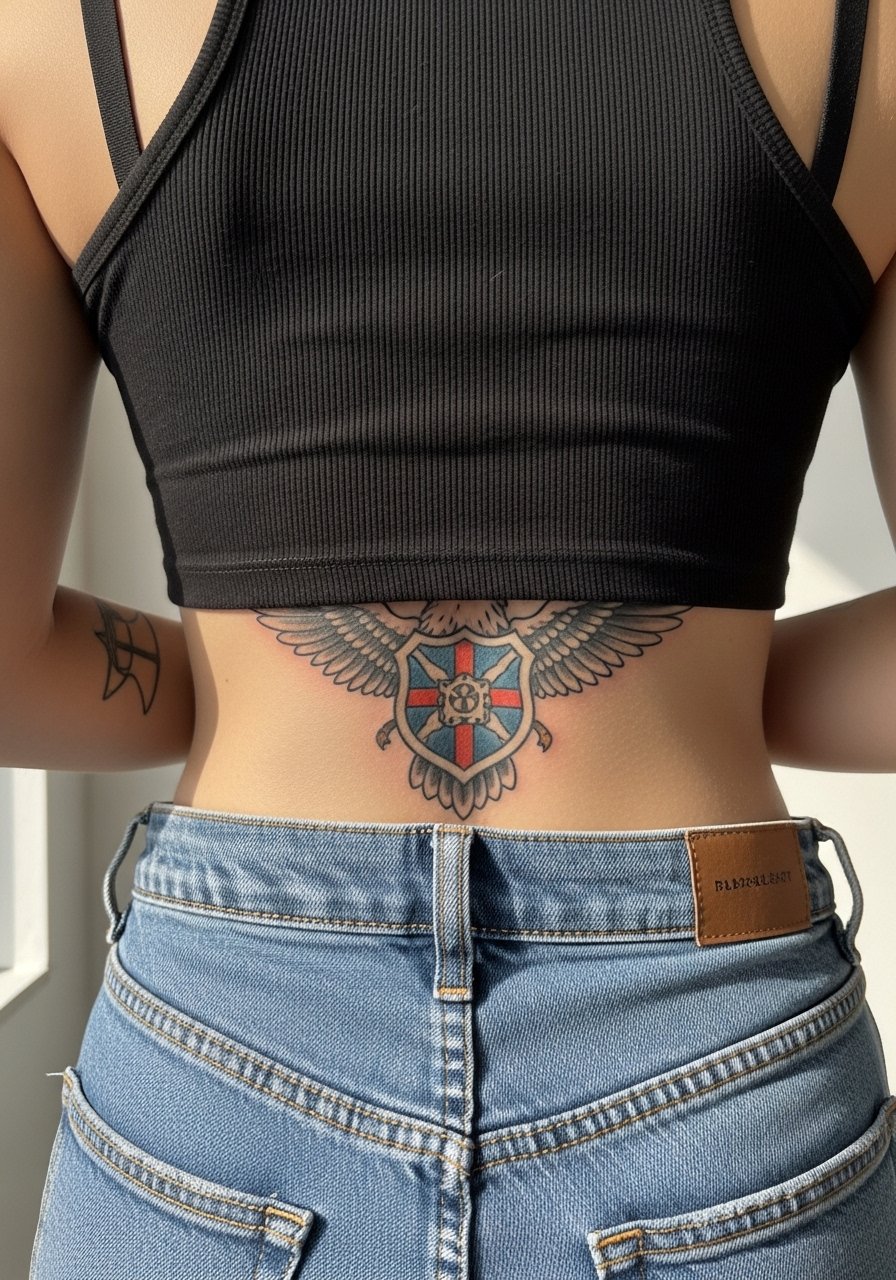
Lower back pieces can be bold without demanding daily visibility. Center the crest so it follows the spine midline and avoid extreme horizontal filigree that sits over lumbar movement. Pain is moderate and sessions are usually short. A common misstep is putting very fine lace details that suffer as the skin stretches. Expect this area to hold pigmentation relatively well but discuss seam lines for low-rise clothing. For the session, a tank top and high-waisted jeans makes access simple while keeping you comfortable.
19. Wrist Wrap Eagle Band
Wrist bands are great for repeating feather motifs and short banners. Ask the artist to keep linework a bit bolder than you might prefer so the wrap survives constant washing and clothing contact. Pain is low but the area scabs easily. A common error is placing too many tiny strokes around the wrist where abrasion is constant. Expect to revisit the piece for touch-ups within the first year. For daily wear, a minimalist watch pairs well and frames the band without covering it completely.
20. Fan-Style Back Shoulder Eagle with Geometric Halo
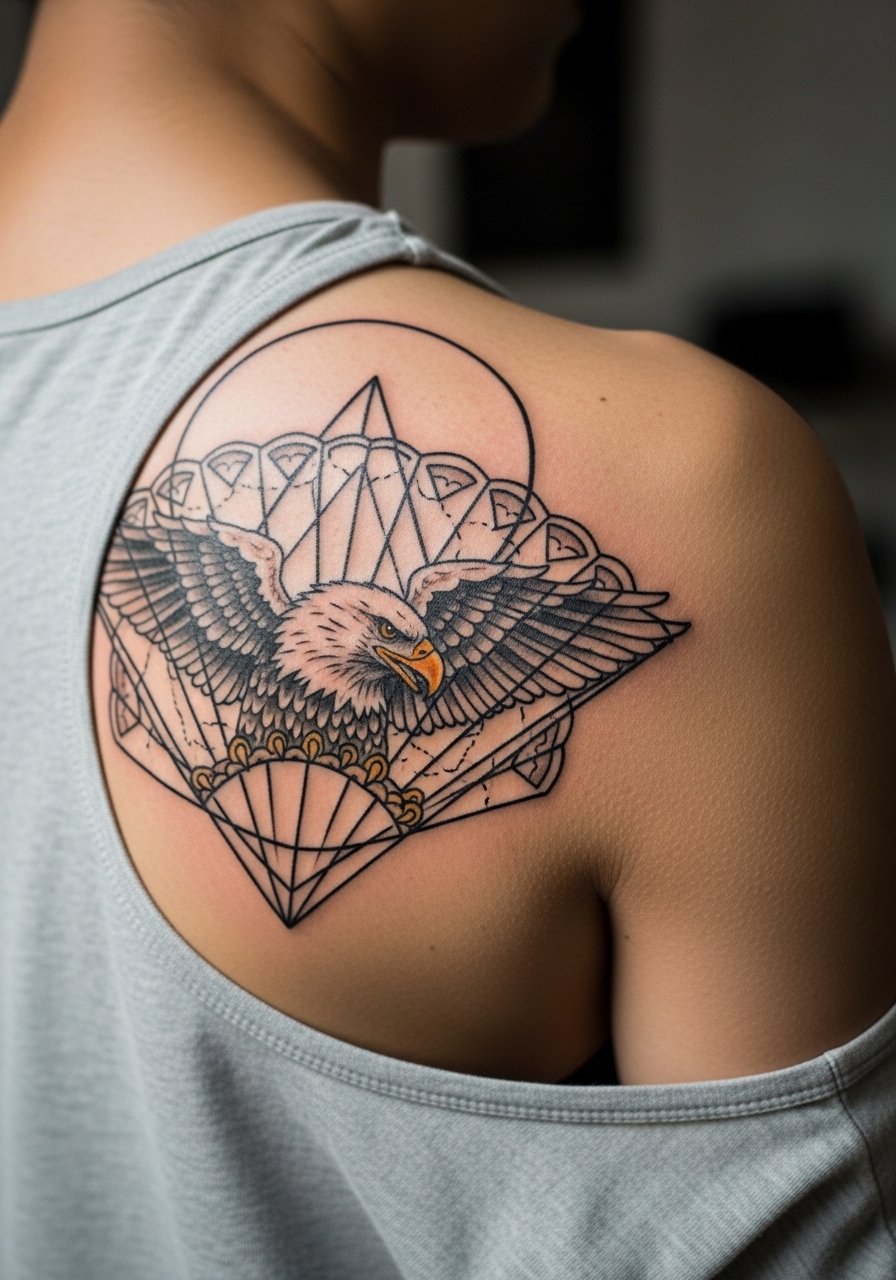
This hybrid design combines illustrative feathers with a structured geometric halo for contrast. During consultation, specify that the halo remains unfilled and acts as negative space so the eagle stays dominant. Sessions are split between background fills and primary linework. A common mistake is overcrowding the halo with micro-ornament, which competes with the eagle. Expect the geometric elements to hold their crispness if initial lines are slightly bolder. For showing the piece, an open-back tank or halter frames the shoulder elegantly.
21. Leg Sleeve Eagle and Floral Mix

A leg sleeve gives room to alternate bold eagles with softer flora so the composition breathes. Ask for transitional negative space between the eagle and florals so each element has separation when the leg moves. Sessions accumulate over many sittings and often require different positions for access. The mistake is stacking too many large elements without flow, which reads chaotic once healed. Expect strong longevity in leg work because abrasion is lower than hands and feet, though high-saturation areas may still need reinforcement at year three. For comfort during the session, wear loose drawstring shorts so your artist can access the thigh and calf without tugging.
Frequently Asked Questions
Q: Will fine line eagles on the ribs blur faster than on forearms?
A: Ribs move with breathing and the skin is tighter, so fine line ribs do carry higher blur risk unless the lines are spaced and stroked thicker than what you see on a wrist. I advise larger feather spacing and scheduling a touch-up in the two-year window if you want crisp edges.
Q: How should I prep clothing-wise for a sternum or chest eagle session?
A: Wear a wide-neck shirt or a fitted sports bra you can pull aside without exposing extra skin. That lets the artist check placement and start quickly. A loose button-down also works for shoulder and upper chest pieces.
Q: Are illustrative eagles adaptable for darker skin tones without losing detail?
A: Yes. The trick is contrast and line weight. Artists who work across skin tones will push slightly bolder outlines and rely on negative space for highlights so the eagle reads well from a distance. Bring photos of healed work on similar skin tones during consultation.
Q: How often will a hand or finger eagle need a touch-up?
A: Plan on at least one touch-up within the first year because hands and fingers see constant abrasion and washing. The frequency after that depends on your exposure to friction and sun.
Q: Can I combine neo-traditional eagle elements with micro-realism in a single piece?
A: You can, and it creates interesting contrast when done thoughtfully. Ask the artist to assign clear zones where each technique lives so the eye reads them separately. Mixing styles raises session complexity, so expect the piece to be broken into multiple appointments.
Q: Is it worth asking about numbing cream for a rib or sternum session?
A: Many people find topical numbing cream helps with high-pain areas, but check with your artist first because application timing matters. If they approve, follow their instructions closely so numbing does not interfere with the ink lay.
