
Fine line black and grey "she is art" pieces look delicate online, but the reality is that pain sensitivity, skin type, and placement determine how they age and how many touch-ups you will need. Some designs that read fragile on day one keep detail for years, and others soften into smudge faster than people expect. Keep those trade-offs in mind and start with a placement that suits your lifestyle. First up is a micro-realism portrait for the inner forearm.
1. Micro-Realism Portrait on Inner Forearm
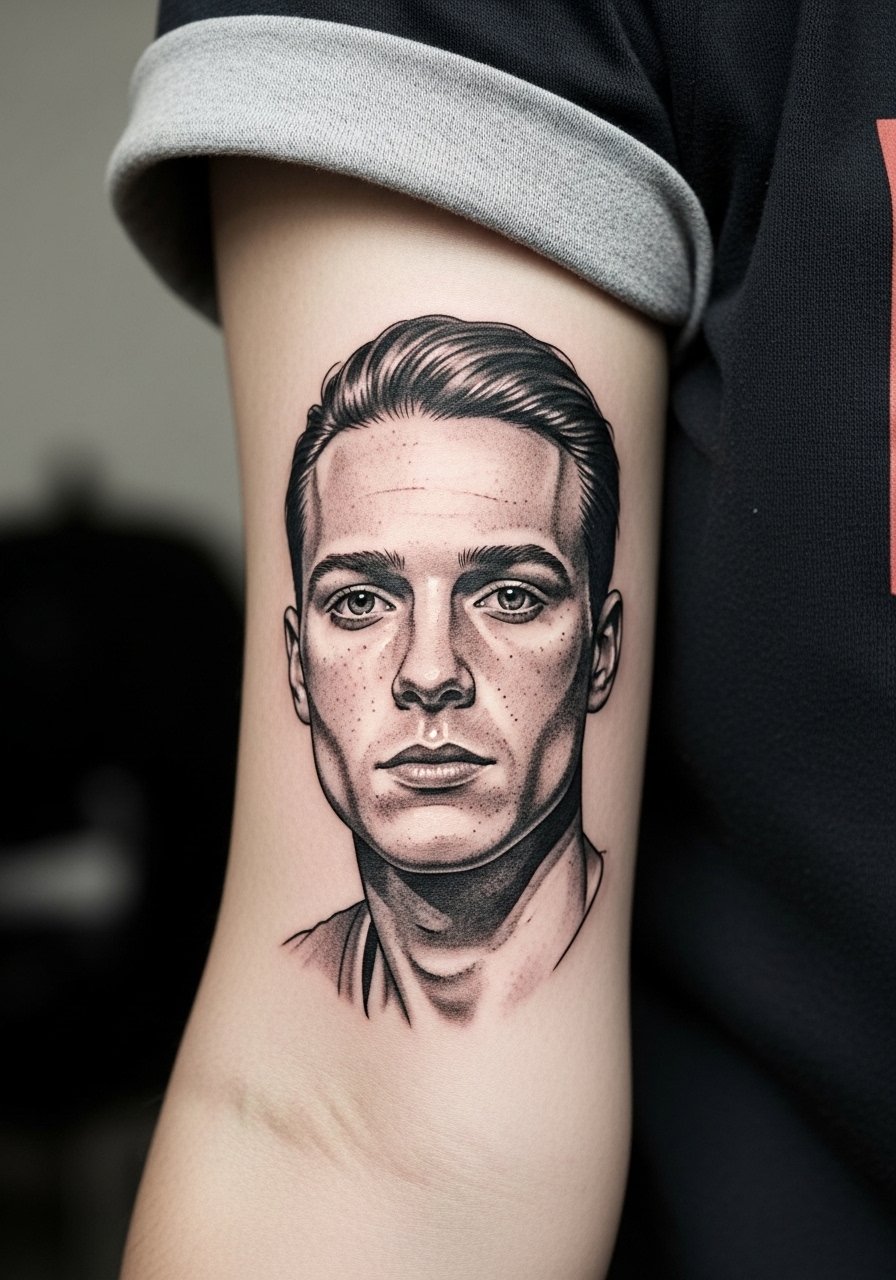
I've seen small portrait pieces on inner forearms keep facial detail for four to six years when the artist left breathing room around features. Expect moderate pain and a session that runs one to three hours depending on size. Ask your artist to favor slightly bolder linework around eyes and mouth so the tiny strokes do not merge with skin movement. A common mistake is asking for ultra-tiny eyes that look perfect fresh and blur into a gray patch later. For show-off outfits, roll up a linen sleeve and pair this with a minimalist gold bracelet to frame the piece.
2. Tiny Arrow Cluster on Inner Wrist
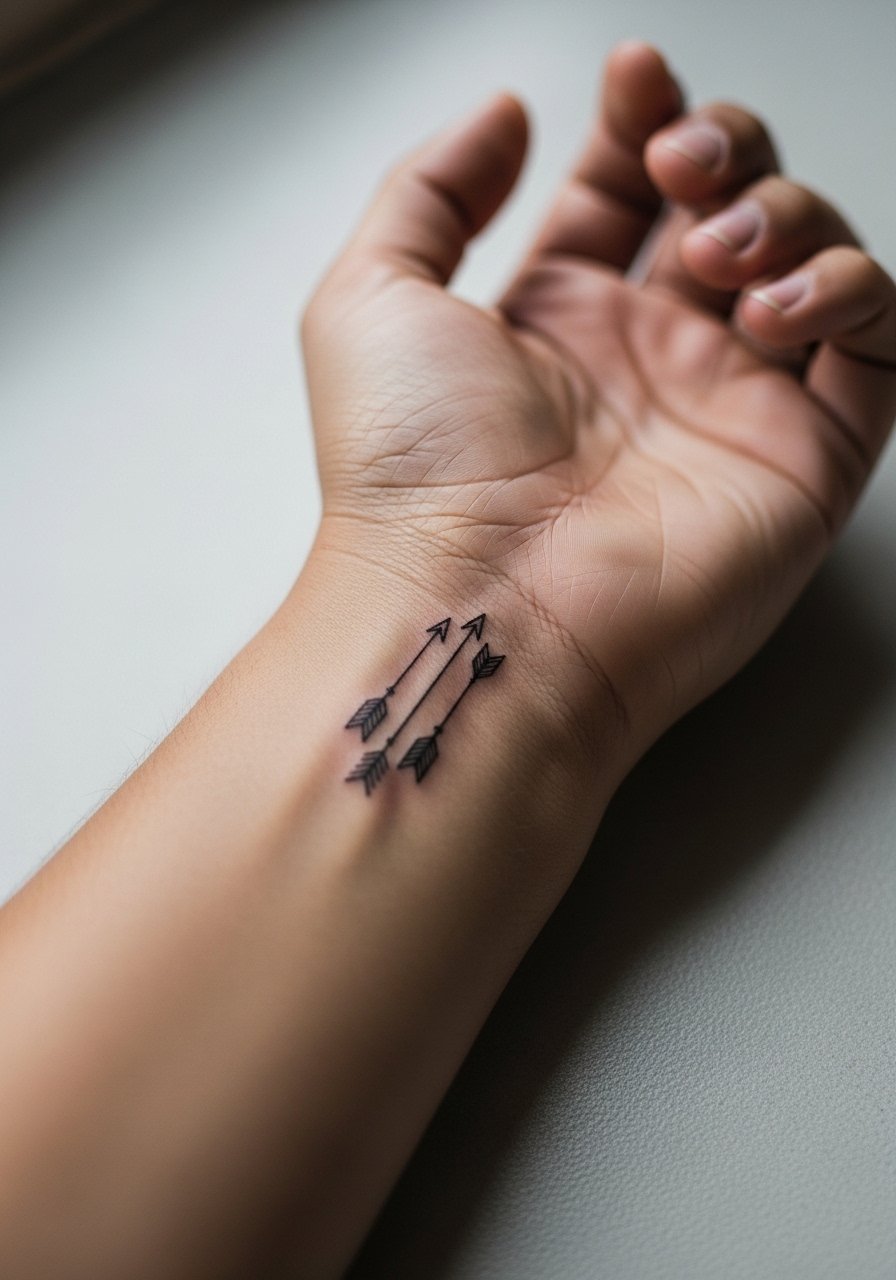
Fair warning about wrist work. The skin there sees constant friction and the thinner dermis makes blowout more likely. These small arrow clusters usually take under an hour but need precise spacing so points do not merge over time. Tell your artist you want slightly open gaps between arrows and to avoid needle parking right at the edge of the tendon. For the session, wear a loose button-down shirt you can pull aside so the artist has unobstructed access and you stay comfortable while the needle passes.
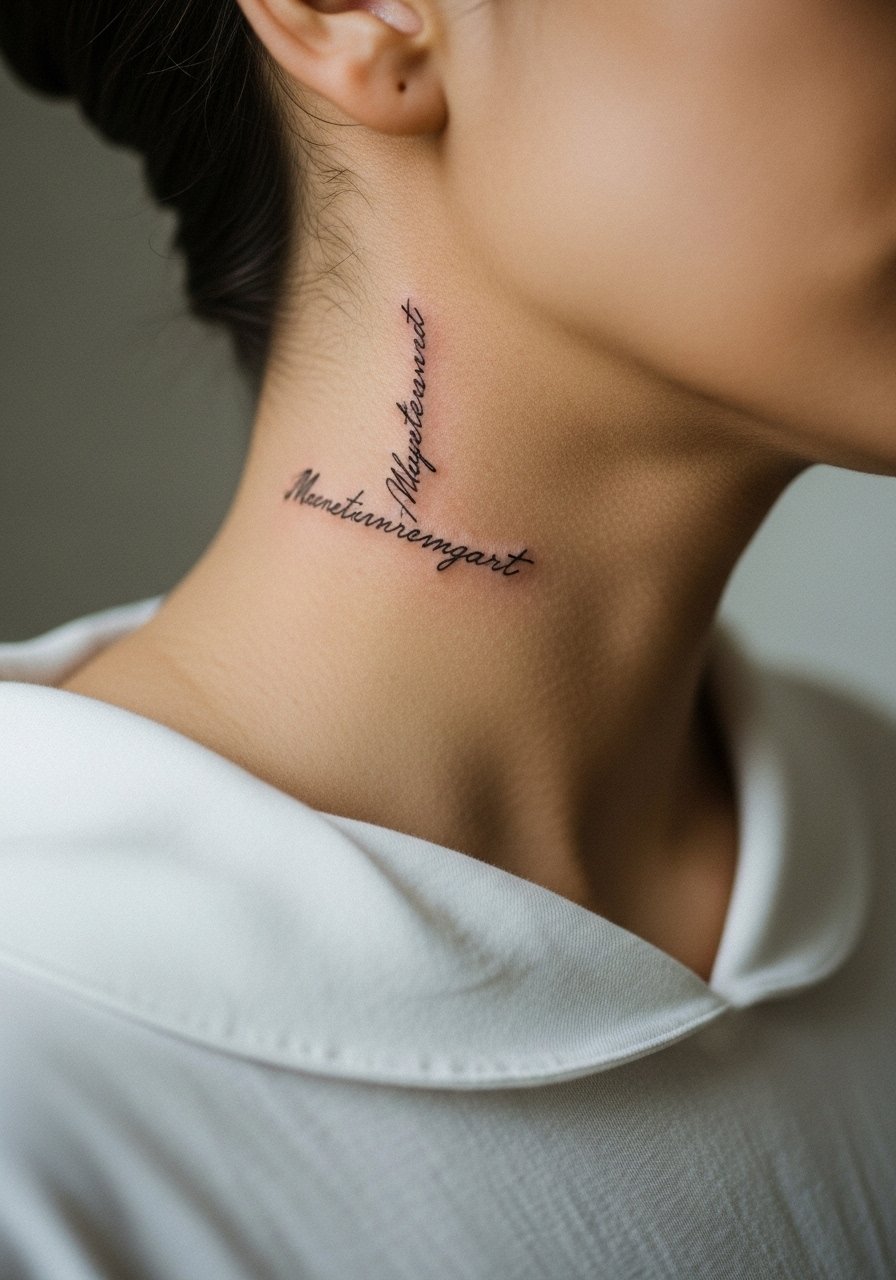
3. Script Along the Collarbone in Soft Grey
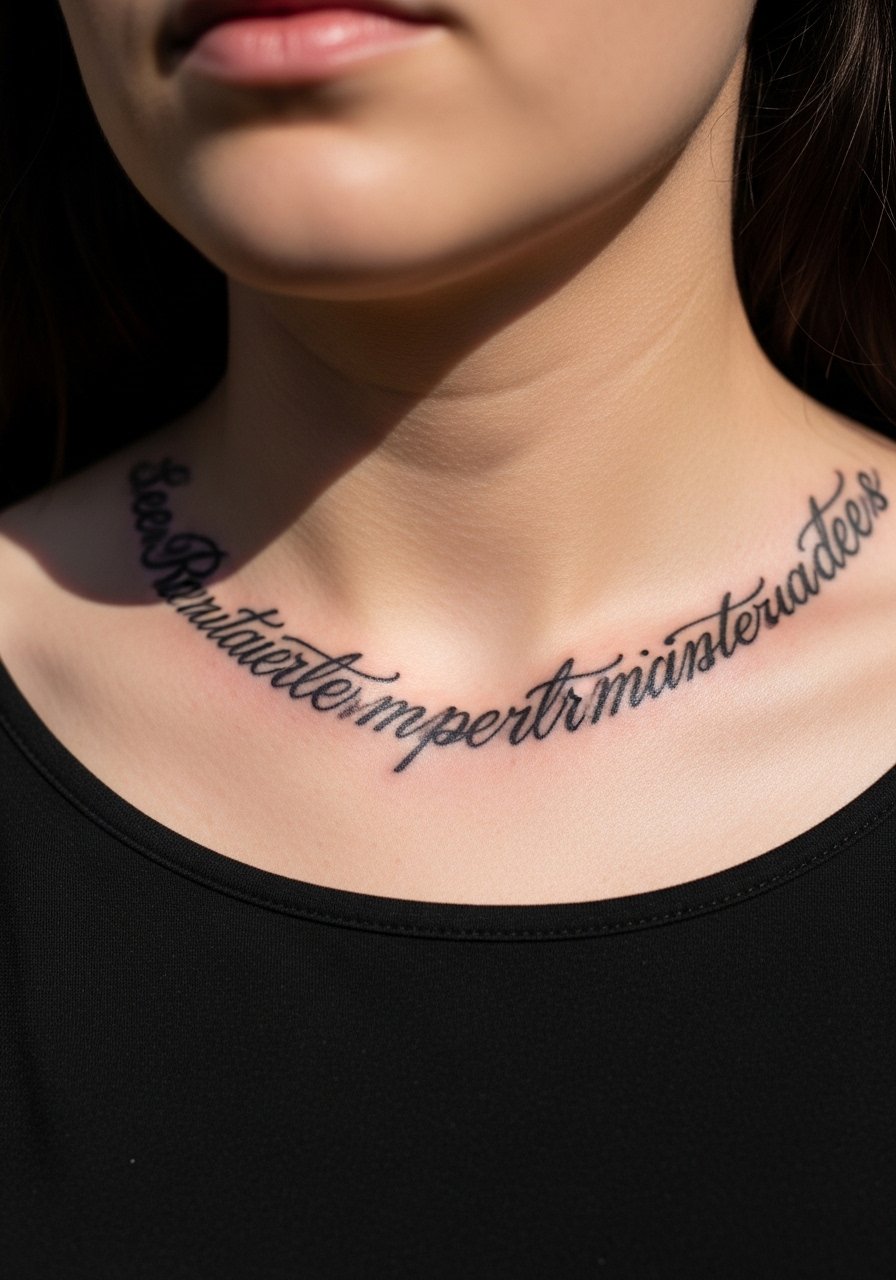
A collarbone script reads delicate but is vulnerable to stretching from movement and clothing friction. Pain is often moderate to high because the bone sits close under the skin. Ask for a slightly thicker stroke than you think you want so letters remain legible at two and five years healed. The common mistake is requesting ultra-thin hairline strokes that look beautiful fresh and vanish later. For evenings out, pair this with an open-back midi dress or a thin chain pendant to keep attention on the script without covering it.
4. Mandala Detail on the Ribcage
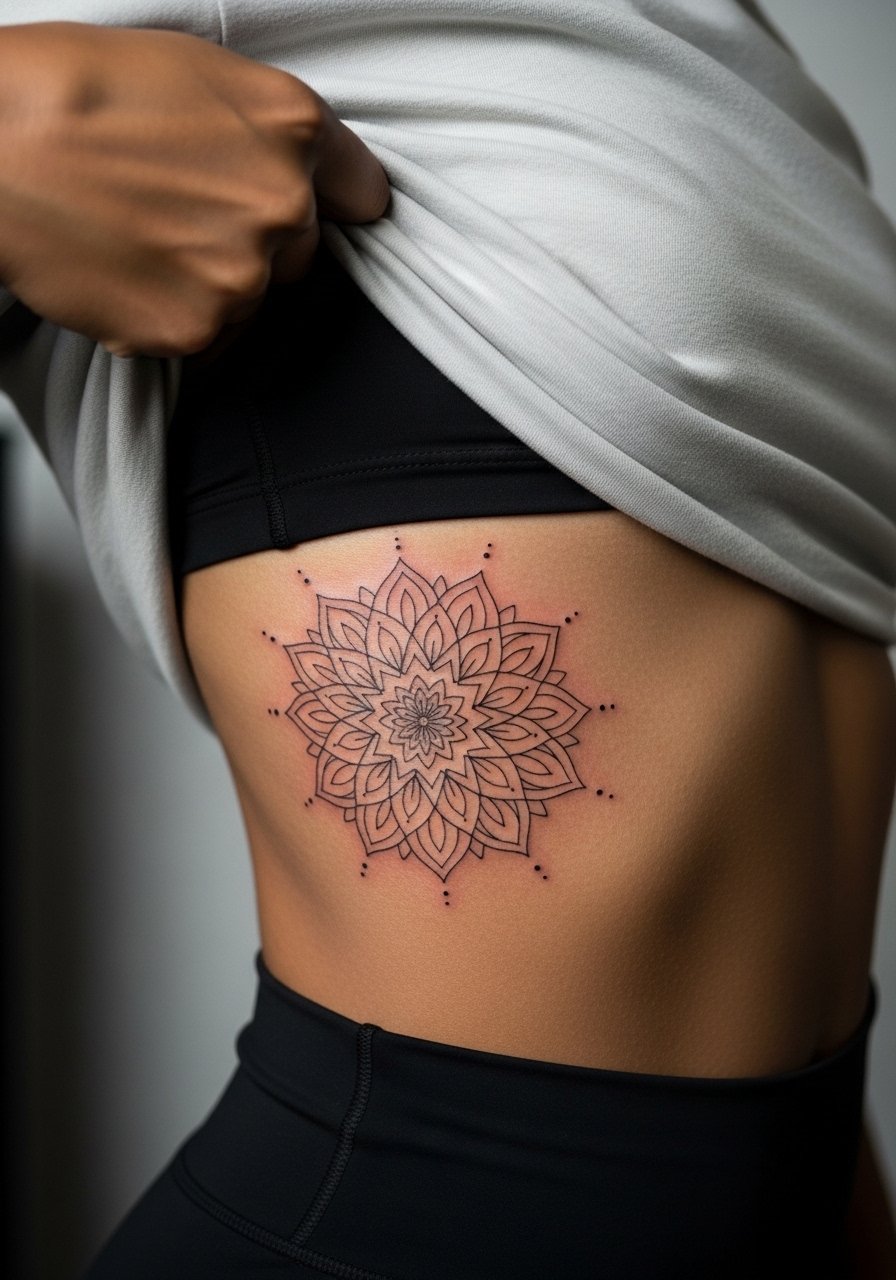
Fine line mandalas on ribs spark a real debate. One camp says the skin stretch and movement will blur dense mandala work within two to three years. The other camp argues that with the right depth and spacing, mandalas settle and keep their geometry. Expect a high pain session that can run multiple hours with breaks. Tell your artist to space the concentric rings and to use stipple shading rather than packed grey fill in the densest areas. For booking, wear a cropped top you can lift and a zip-up hoodie to stay warm between passes.
5. Minimal Symbols on the Side of the Hand
Hand tattoos still affect hiring in some industries and the skin there shifts a lot. Pain is sharp and sessions are short, but these pieces demand frequent touch-ups because of washing and daily abrasion. Ask for slightly bolder outlines and consider placement on the fleshy side rather than the knuckle tips. A common mistake is choosing ultra-minimal negative space that disappears under calluses and constant movement. For showing this off, a thin stack of delicate rings can complement without crowding the motif.
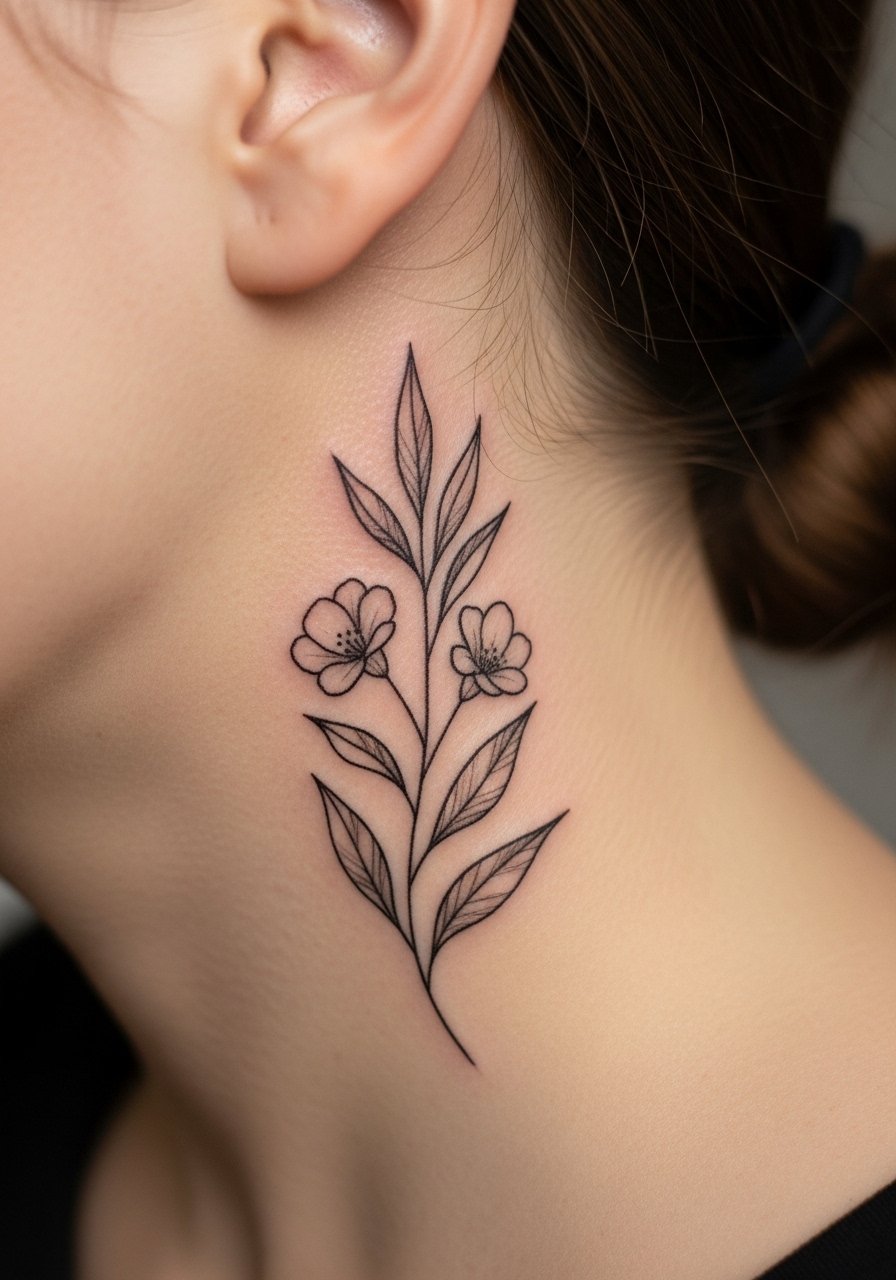
6. Shoulder Blade Botanical in Gradient Grey

This placement heals well and shows beautifully with shoulder-baring tops. Pain is low to moderate and sessions usually last one to two hours for a medium piece. For longevity, favor whip shading and stipple rather than dense grey blocks so the leaves retain texture after a few years. A mistake I see is asking for too much tiny detail that blurs when the shoulder moves. For outfits, pair the design with an open-back dress or a cutaway tank to let the negative space read.
Studio Day Picks
The forearm, wrist, collarbone, ribcage, hand, and shoulder blade pieces above each have unique prep and healing needs, so a small kit smooths the studio day and the first week.
- Stencil transfer paper kit. Lets you preview placement on the skin, which is handy for the forearm portrait and collarbone script in ideas 1 and 3.
- Topical numbing cream. Applied 45 minutes before can take the edge off rib and hand sensitivity without obscuring linework.
- Thin protective film roll. Keeps wrist and hand tattoos cleaner during the first week of frequent washing and friction.
- Fragrance-free gentle body wash. Cleanses the ribcage and shoulder blade areas without stripping fragile grey shading.
- Aquaphor healing ointment. Thin layers for the first few days help lock in moisture while fine lines settle.
7. Micro-Realism Eye on the Bicep
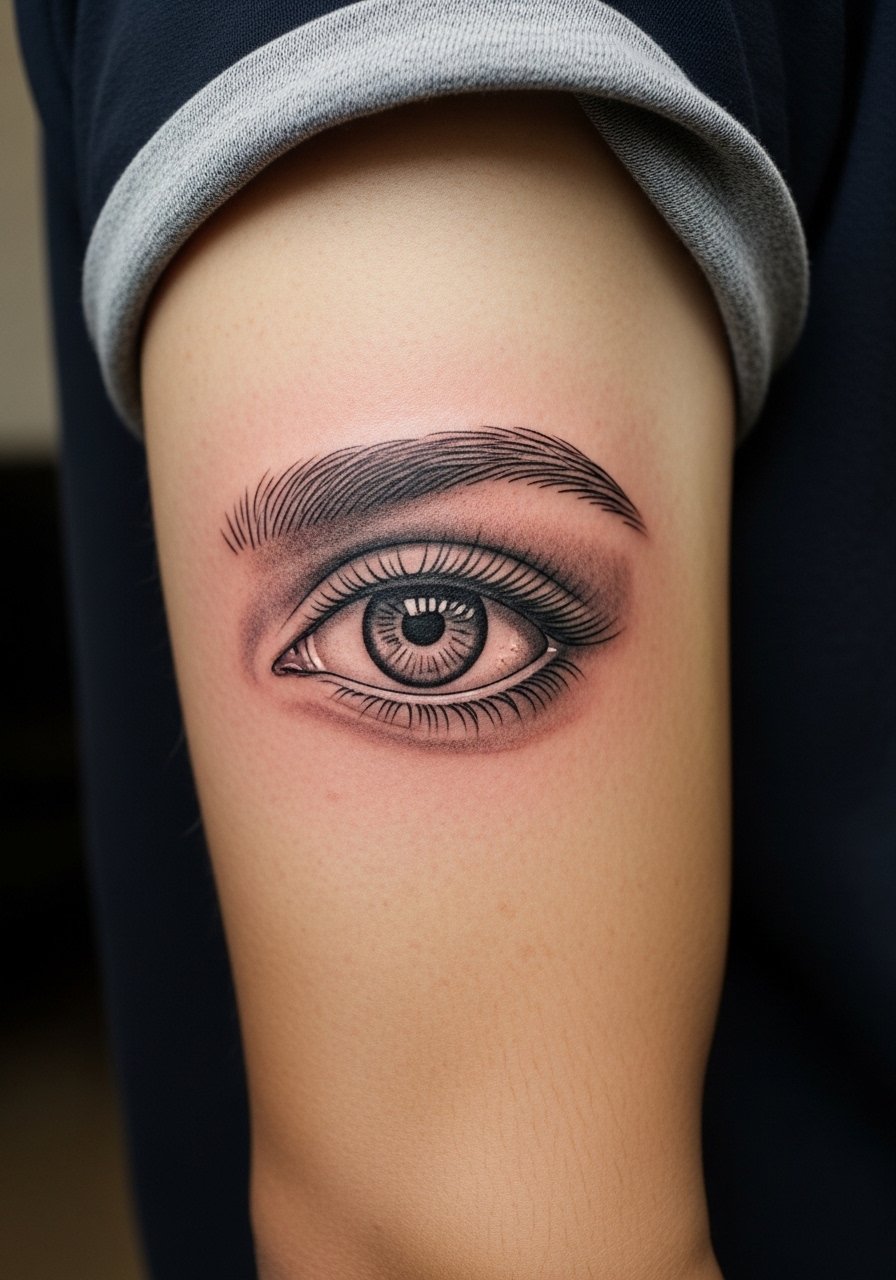
There's something about a finely inked eye that reads like a statement without screaming. Pain on the bicep is mild to moderate and a single session can finish in under two hours for a palm-sized piece. For consultation, bring photos that show the exact pupil detail you want and ask for slightly stronger contrast around the iris. People often make the mistake of requesting too much micro detail without allowance for skin texture, which softens tiny strokes over time. For casual showing, a rolled-up sleeve and a classic leather cuff sit well with this placement.
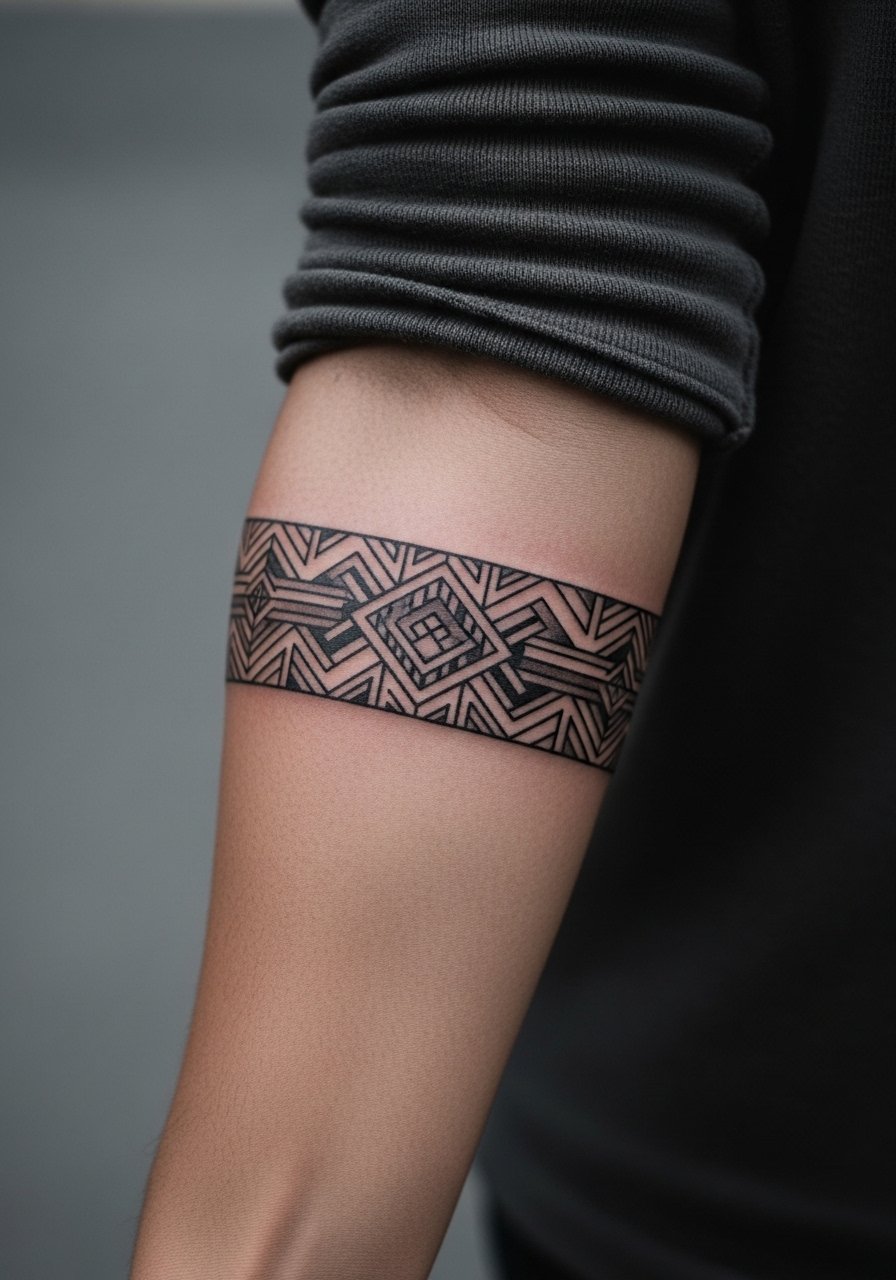
8. Geometric Mandala on Upper Arm
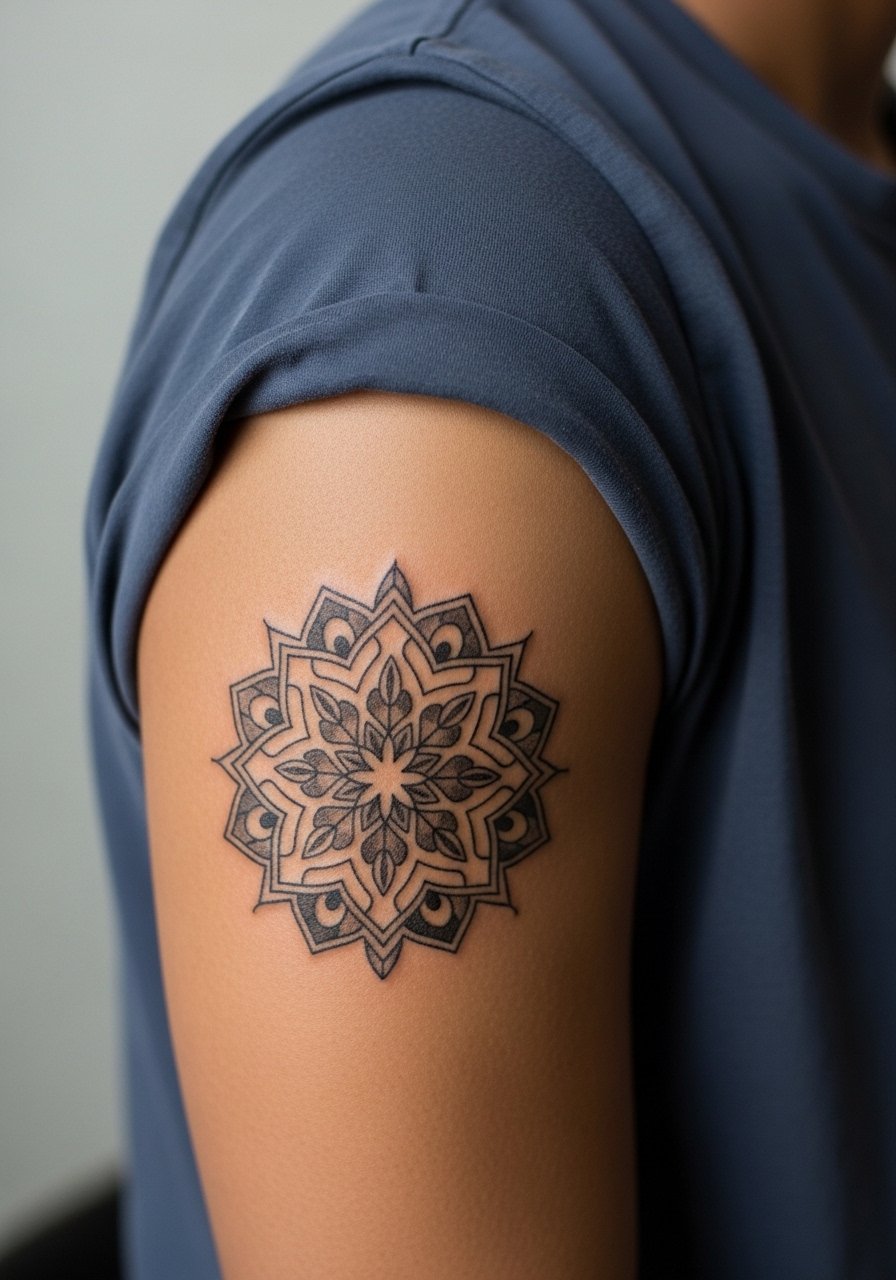
Most geometric sleeves begin with a primary mandala anchor on the upper arm. This spot tolerates denser work and heals predictably. Pain is mild and sessions are modular so you can plan staged appointments. Ask your artist for wider negative space between concentric rings to avoid merging as the piece ages. The common error is packing too many thin concentric lines that blur into a flat grey disc at year three. For outfit pairing, short sleeve tees in solid neutral tones help the geometry read clean.
9. Hip Floral Curve
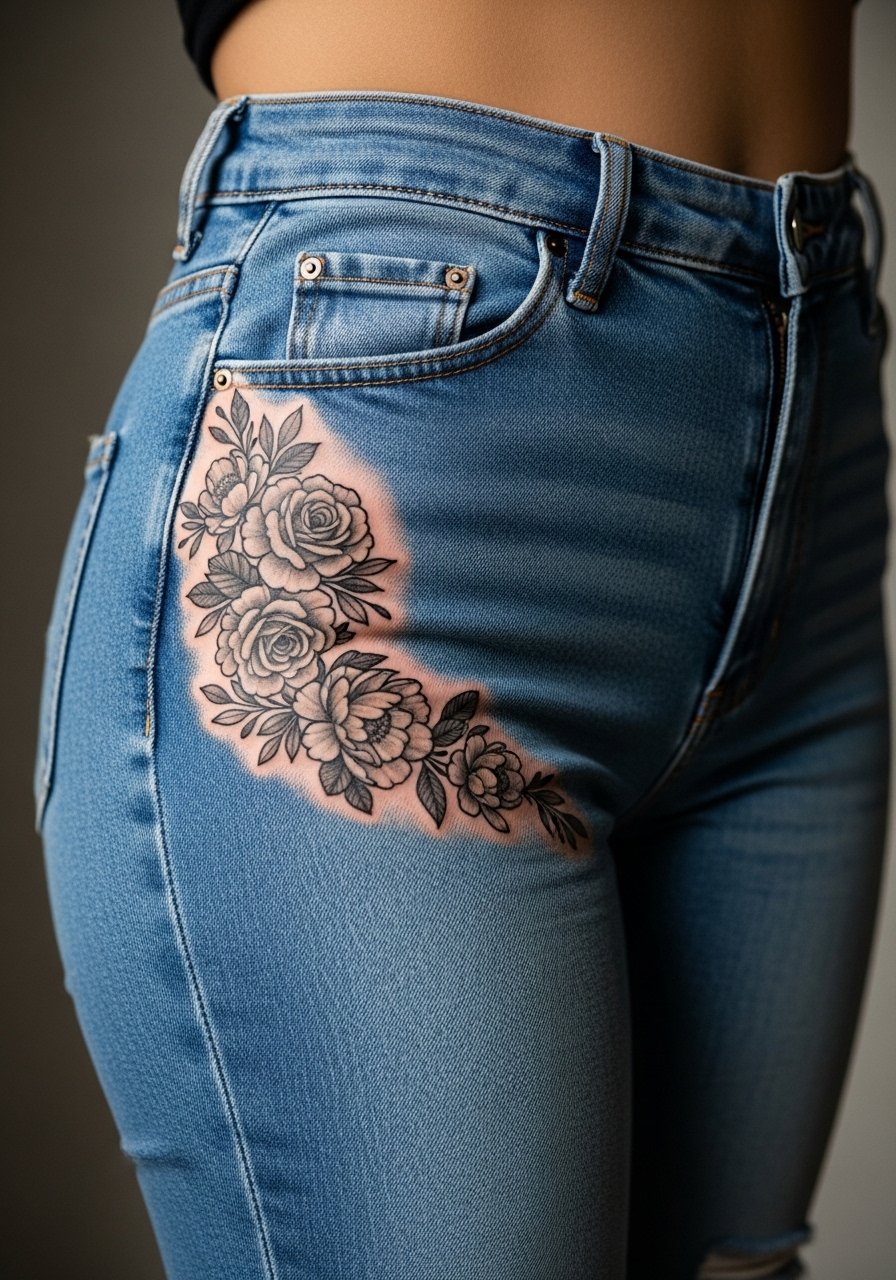
Hip tattoos curve with the body so they look intimate and organic. Sessions are usually broken into shorter blocks because the spot can be tender and awkward to sit through. Tell your artist you want lines that follow the hip's natural flow and to avoid tiny clustered dots near the fabric line. A mistake is placing detailed elements where clothing rubs constantly. For the appointment, wear high-waisted jeans you can pull down just enough to expose the area without slipping everything off.
10. Calf Portrait of a Animal Motif
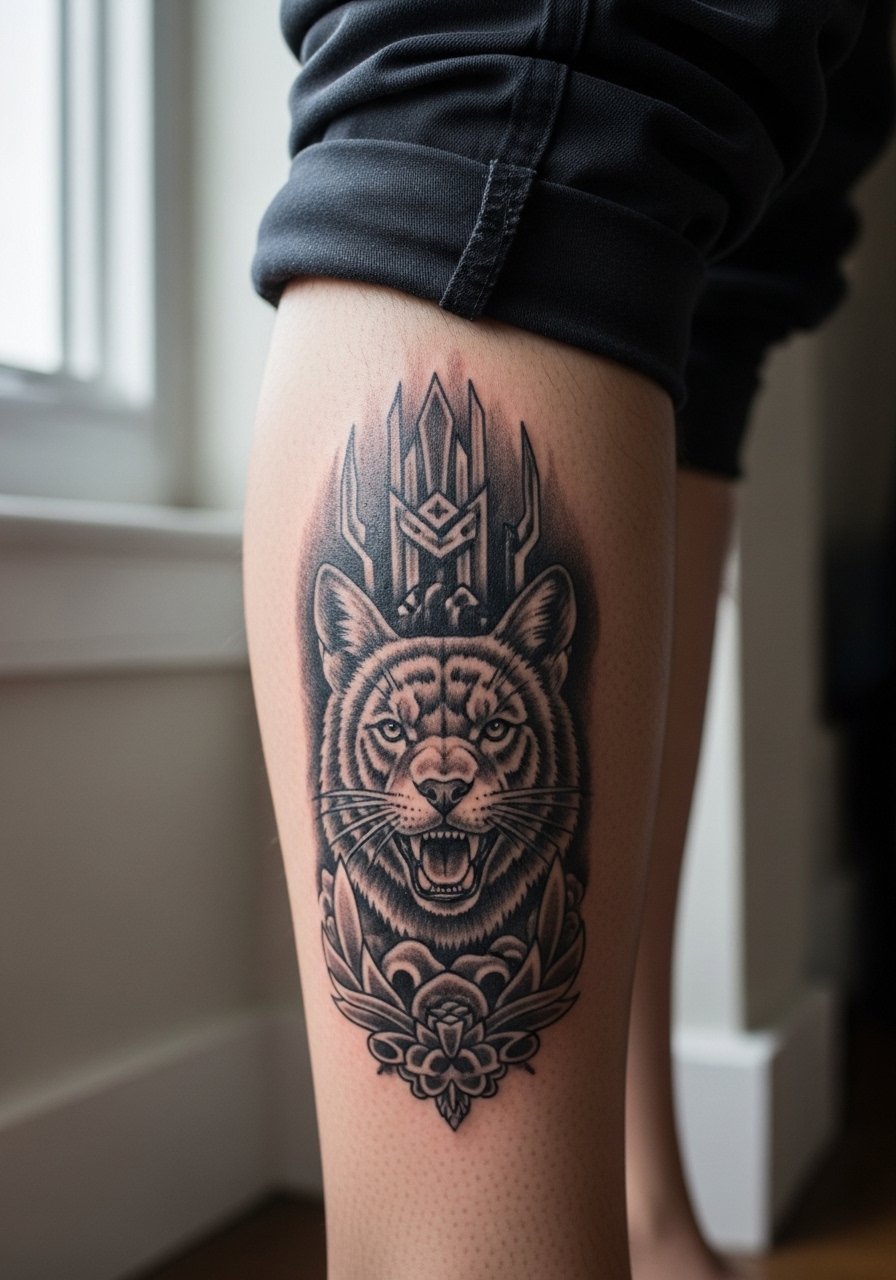
Calf pieces are forgiving for larger micro-realism work because the skin is thick and movement is moderate. Pain is low and sessions can be longer, which suits detailed animal portraits. Ask for strategic areas of heavier saturation to preserve facial features and contrast as the piece ages. Common mistakes include placing key facial detail over tendons or knots where skin movement is highest. For shows and photos, roll up your pant leg and pair with a mid-calf boot or cropped trousers.
11. Small Constellation Around the Ankle
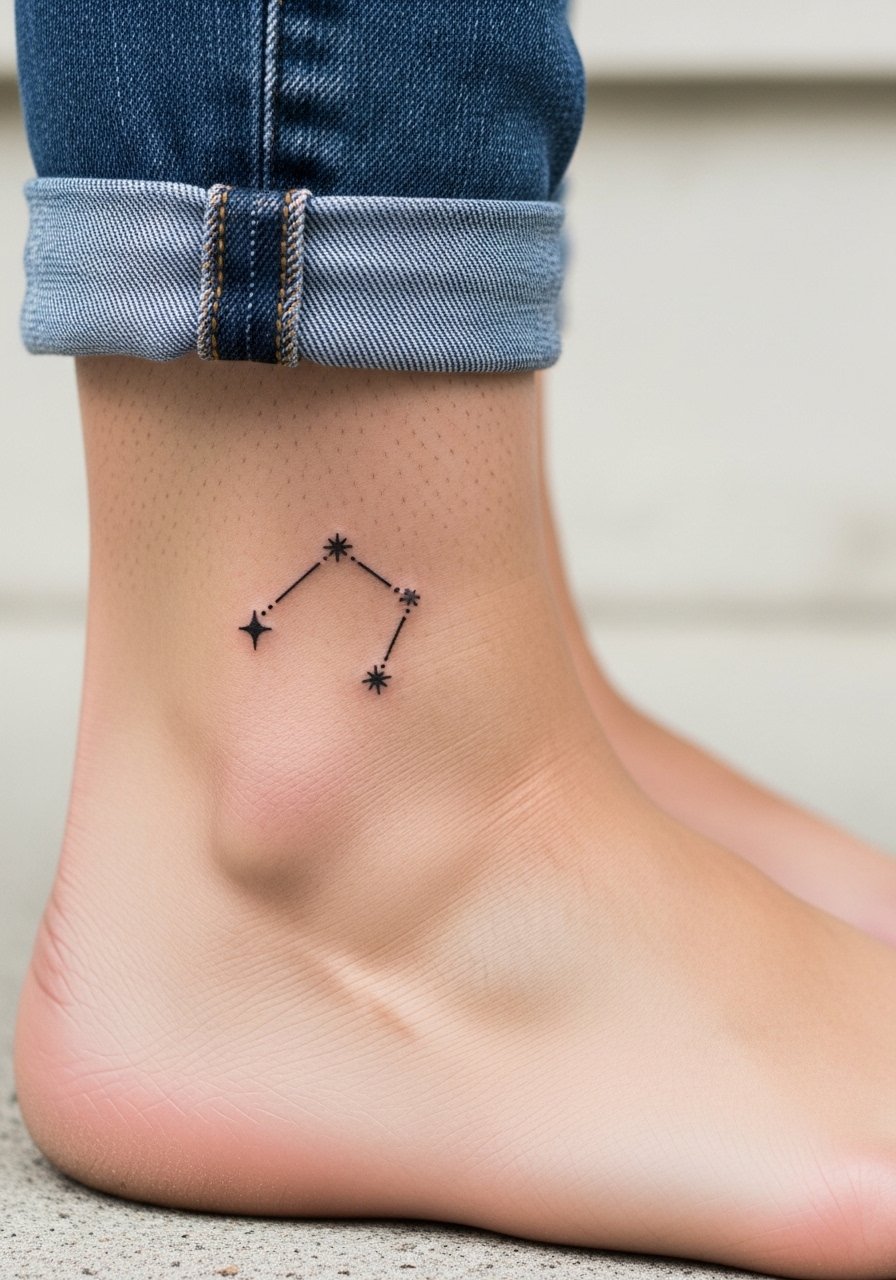
Ankle tattoos deal with constant rubbing from socks and shoes which accelerates fading. Pain at the ankle is sharp but quick for small motifs. Ask your artist to place the main nodes on slightly flatter parts of the ankle and to use a small amount of saturation under the dots. A mistake is requesting single thin lines that vanish against footwear. For footwear choices after healing, loafers or sandals show this off best and a pair of low-profile sandals keeps the ankle visible without irritation.
12. Spine Script Running Down the Back
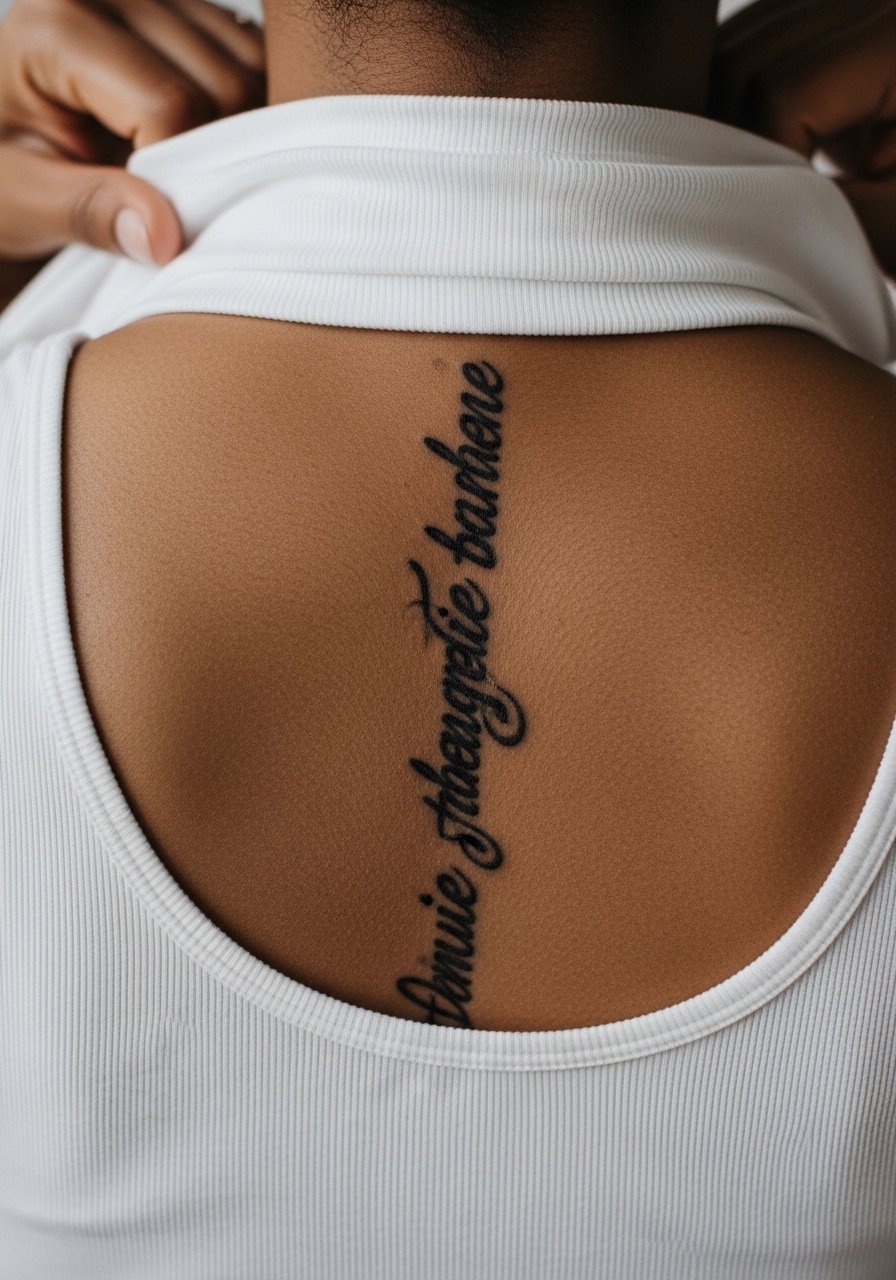
Spine scripts look dramatic but the location is high on the sensitivity scale. Expect prolonged sessions with breaks and moderate to high pain. For longevity, choose bold but airy lettering and ask for spacing that prevents letters from merging as the skin shifts. A common error is demanding tiny cursive where letters touch each other; that blurs first. If you have an event, wear a backless top to show the vertical line without excessive stretch.
13. Thigh Botanical with Negative Space
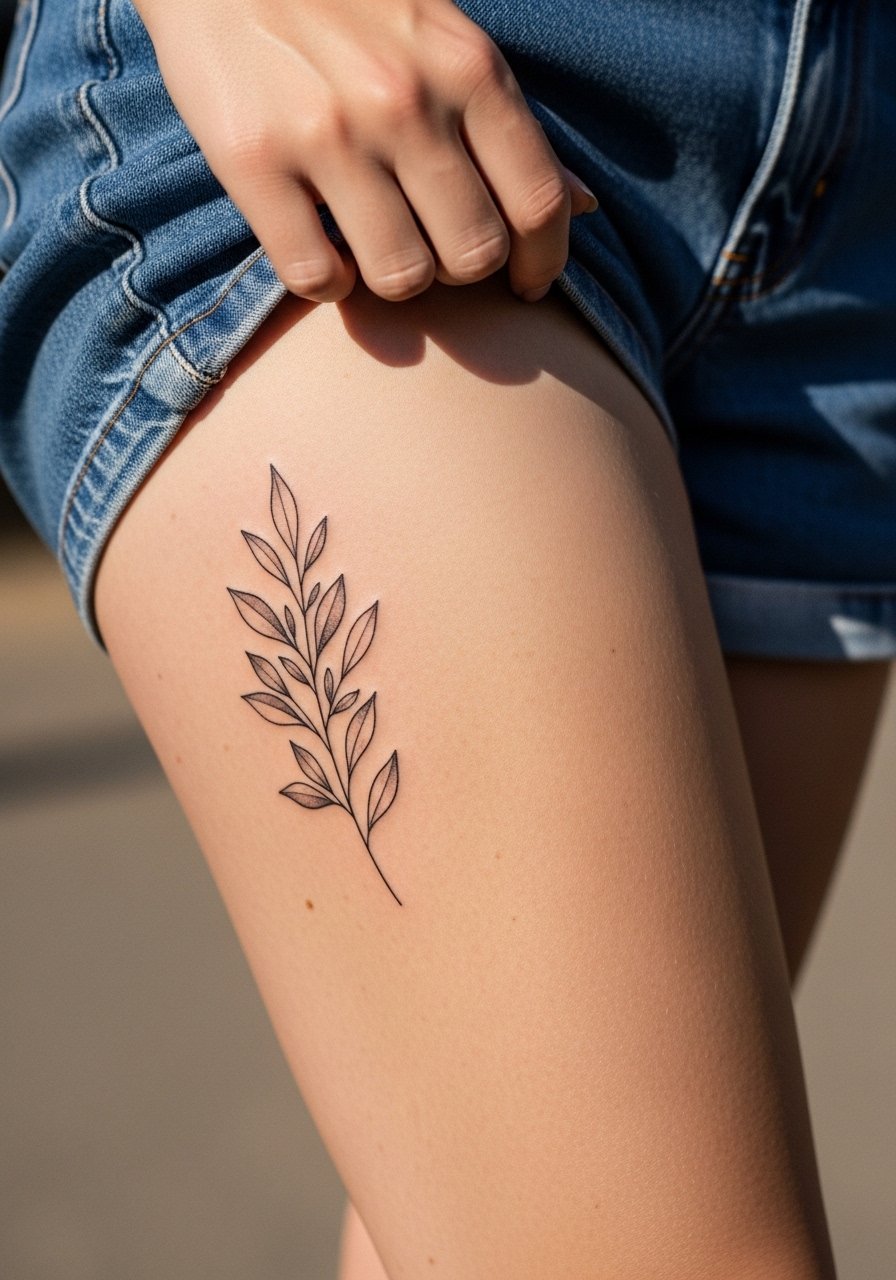
Outer thigh pieces are forgiving and age well when shaded using stipple work. Pain is moderate and sessions can be long, which suits larger botanicals. Tell your artist to build in negative space so leaves and stems do not merge after a few years. A typical mistake is overfilling the center with grey wash that blends into one tone with time. For the session, wear loose drawstring shorts so the artist can roll fabric away without pressure on the area.
14. Simple Linework on the Side of the Neck
Neck tattoos are visible and can still affect first impressions in some professions. Pain is high and ink sits where exposure to sun and hats is frequent. One camp prioritizes bold strokes here to last, the other crafts delicate work and accepts touch-ups. Ask your artist where they stand and plan maintenance accordingly. A common mistake is placing ultra-fine detail that dissolves under regular sun exposure. For discreet showing, pair with a scarf or wide-neck top to protect the area.
15. Stipple Shaded Moon on the Rib Side
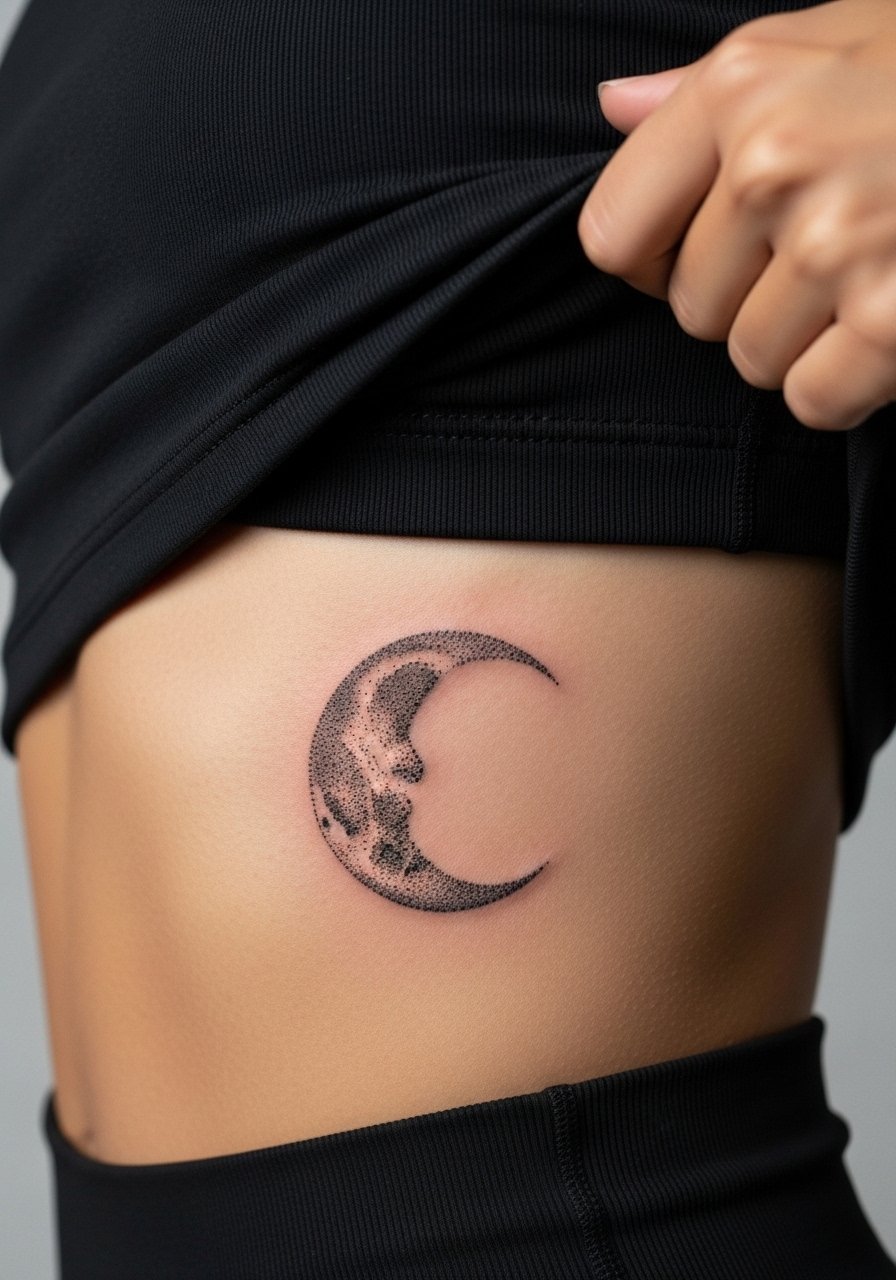
Stipple shading reads beautifully on curving rib surfaces but the site is notoriously painful. Sessions are often split into short passes. Ask for dot work that leaves breathing room between clusters so the pattern keeps texture as it heals. The big mistake is packing dots too tightly which creates a solid grey block later. Wear a fitted sports bra to your appointment so the artist can access the ribcage and you remain supported between passes.
16. Back-of-Arm Script Around Triceps

The back of the arm moves with muscle and sun exposure is frequent. Pain is moderate and sessions are usually under two hours for short script. Ask for slightly thicker downstrokes to preserve letterform integrity and avoid connecting strokes that touch at the curvature. People often underestimate how much the arm bends and request scripts that grow unreadable. For daytime wear, rolled sleeves and a thin chain pendant keep focus off constant sun exposure.
17. Calf-to-Ankle Chain of Small Shapes
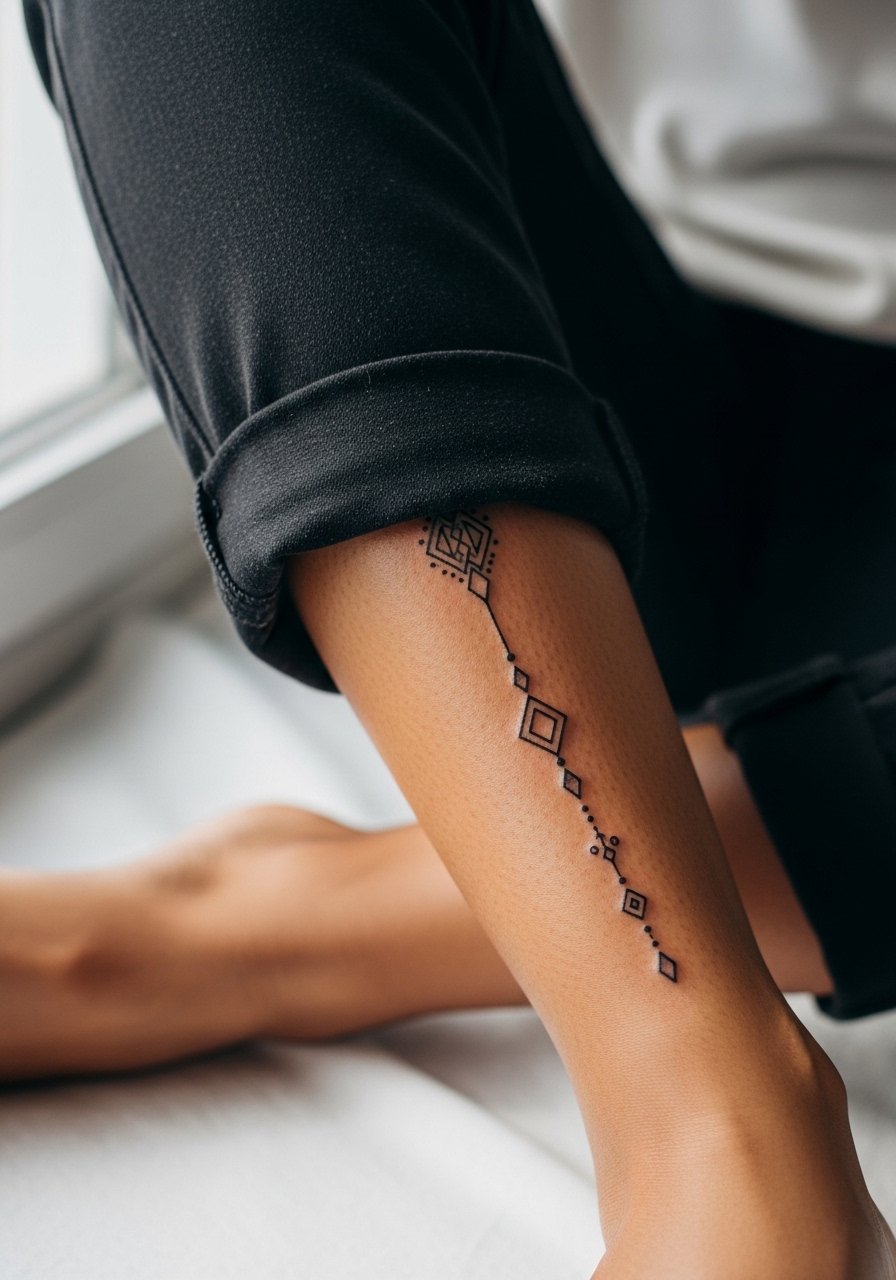
Linear chains like this show movement well but they endure frequent friction from socks. Pain is low to moderate and the session can be longer depending on number of nodes. Ask your artist to plan negative spacing at the ankle where skin bunches. A frequent mistake is making the chain too tight so links blur with motion. For shoes that complement the chain, low-top sneakers or sandals keep the flow visible and you can break out a pair of low-profile sandals.
18. Tiny Line Portrait Behind the Ear
Behind-the-ear pieces are discreet and intimate. Pain is sharp because the area is thin and close to cartilage. Sessions are short, but the area sees hair oils and sweat which affects longevity. Tell your artist you want a design that tolerates slight blur and avoid ultra-tiny dot clusters. One common mistake is expecting day-one clarity to last without touch-ups. Because of the location, book with an artist experienced in small neck placements and plan for a quick touch-up in year two if needed.
19. Chest Anchor Portrait Near Sternum
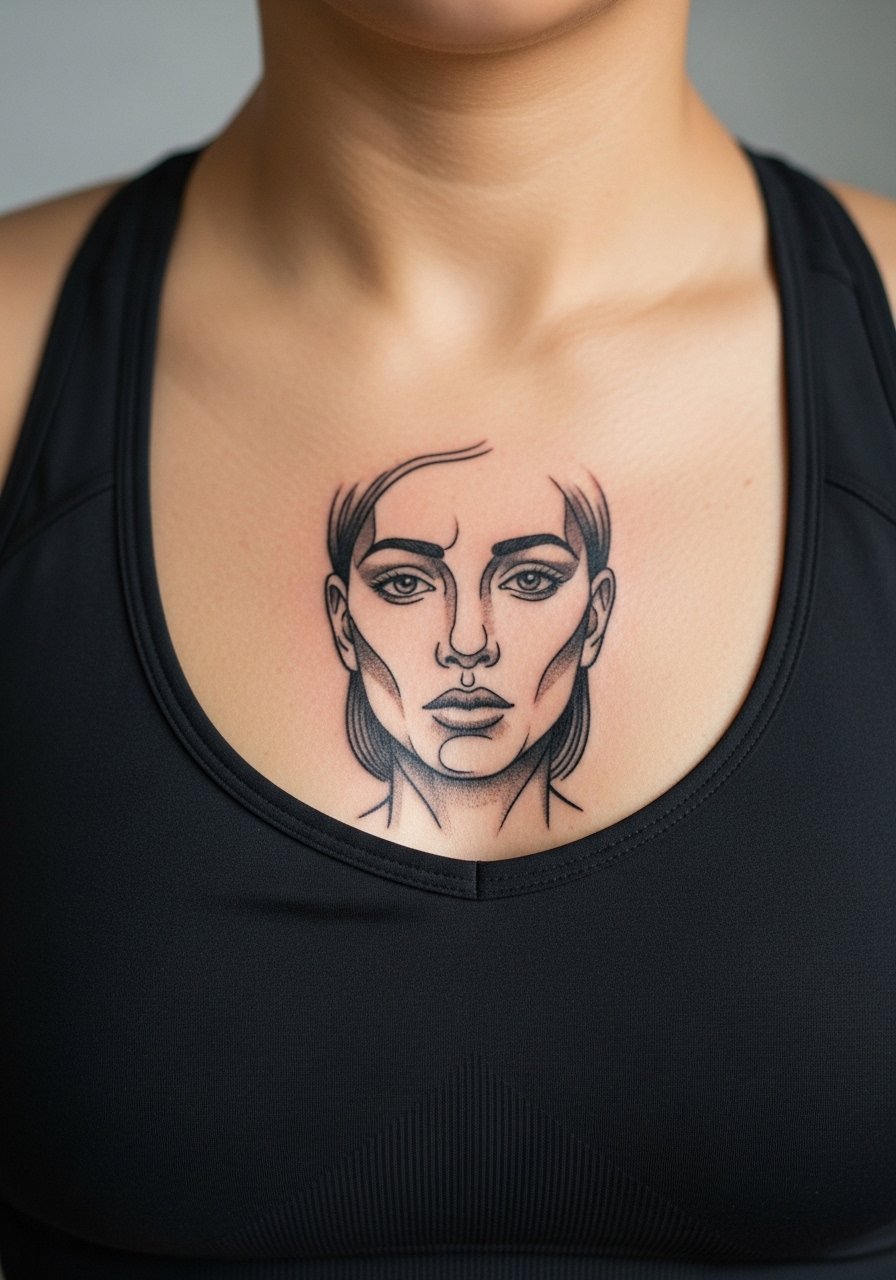
Sternum and upper chest pieces sit on sensitive, mobile skin. Pain ranges high and sessions are typically split. Artists divide these into careful passes to keep saturation even. Ask for contrast emphasis around key facial features and avoid asking for ultra-delicate hairlines across the sternum where movement blurs them. A mistake is expecting the same longevity as upper arm work. For post-session comfort, a strapless or fitted sports bra makes dressing simpler and keeps fabric off the fresh ink.
20. Geometric Half-Sleeve on the Outer Forearm
Outer forearm half-sleeves balance visibility with less daily abrasion than hand pieces. Pain is moderate and multi-session builds let you stage complexity. Ask for bigger negative shapes in the densest areas so the geometry keeps its crispness over time. A common error is stacking many micro-lines without spacing, which ages into blobby grey. To wear this, roll sleeves and pair with a minimalist watch that highlights the forearm without covering the art.
21. Small Anchor Near the Ankle Bone
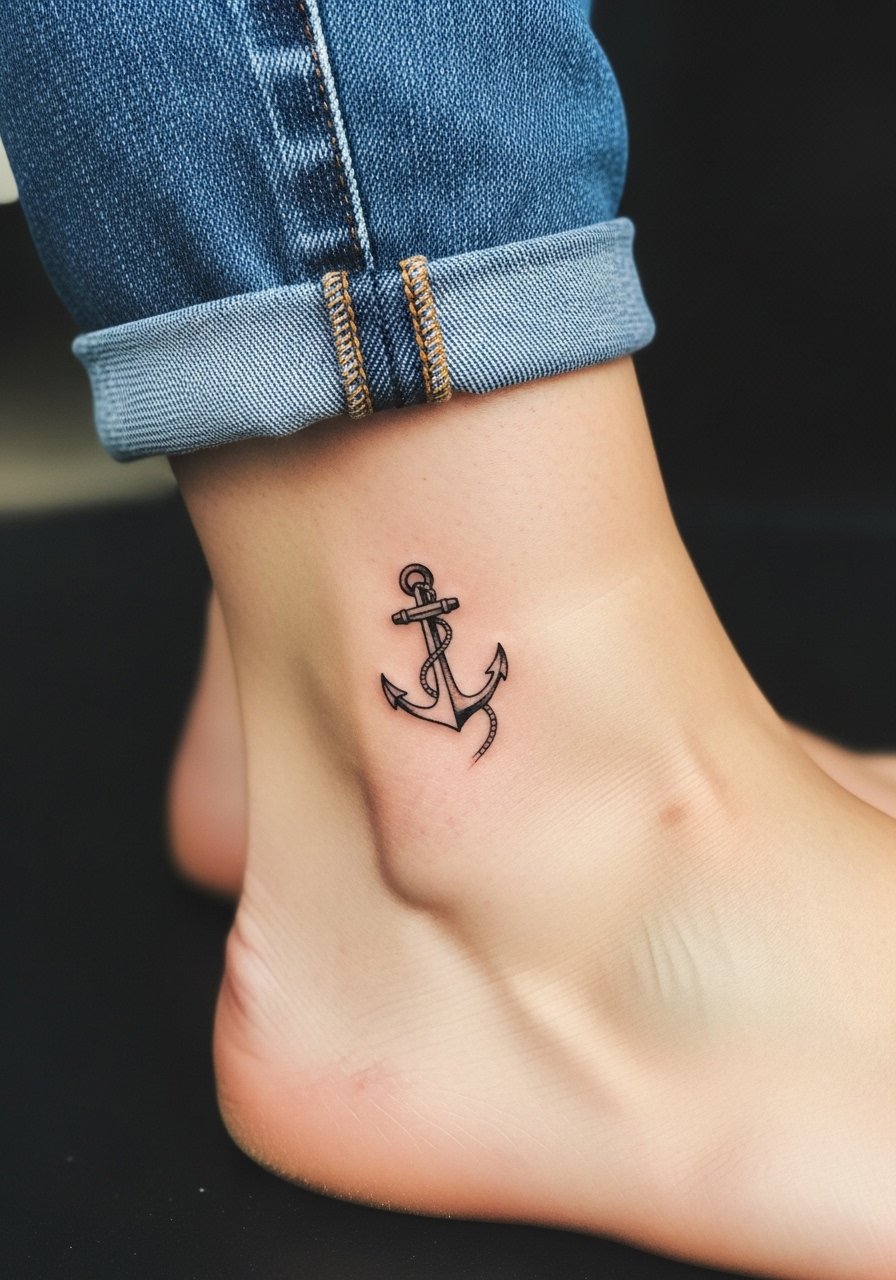
Anchors near the ankle are small and symbolic. Expect quick sessions and sharp but brief pain. The main risk is friction from shoes and socks which causes early fading. Ask for slight saturation under the outline and placement on the flatter surface just above the bone. A mistake I see is placing the motif where shoes rub directly. For visibility after healing, choose low-cut shoes or a pair of sandals that avoid constant fabric contact.
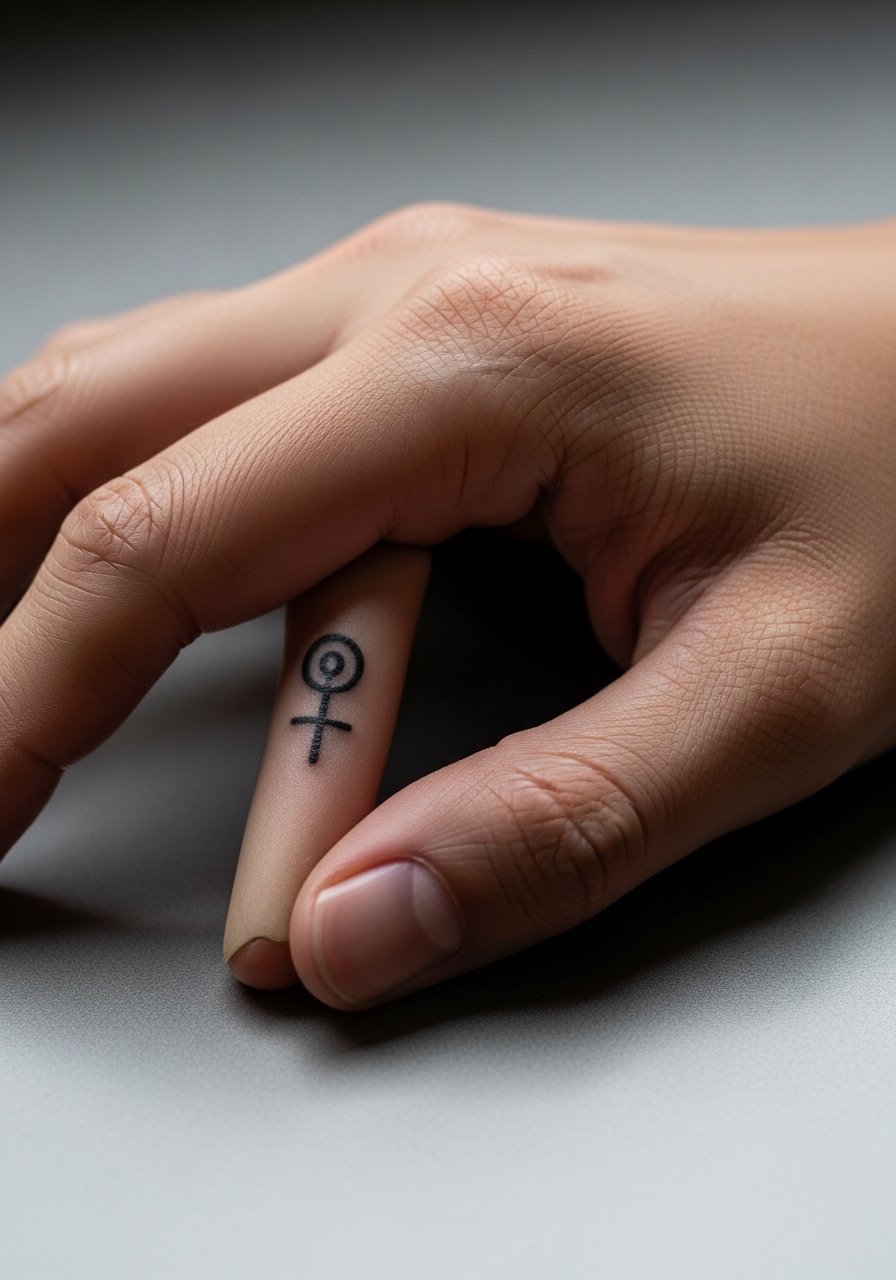
22. Minimalist Script on the Inside of the Finger
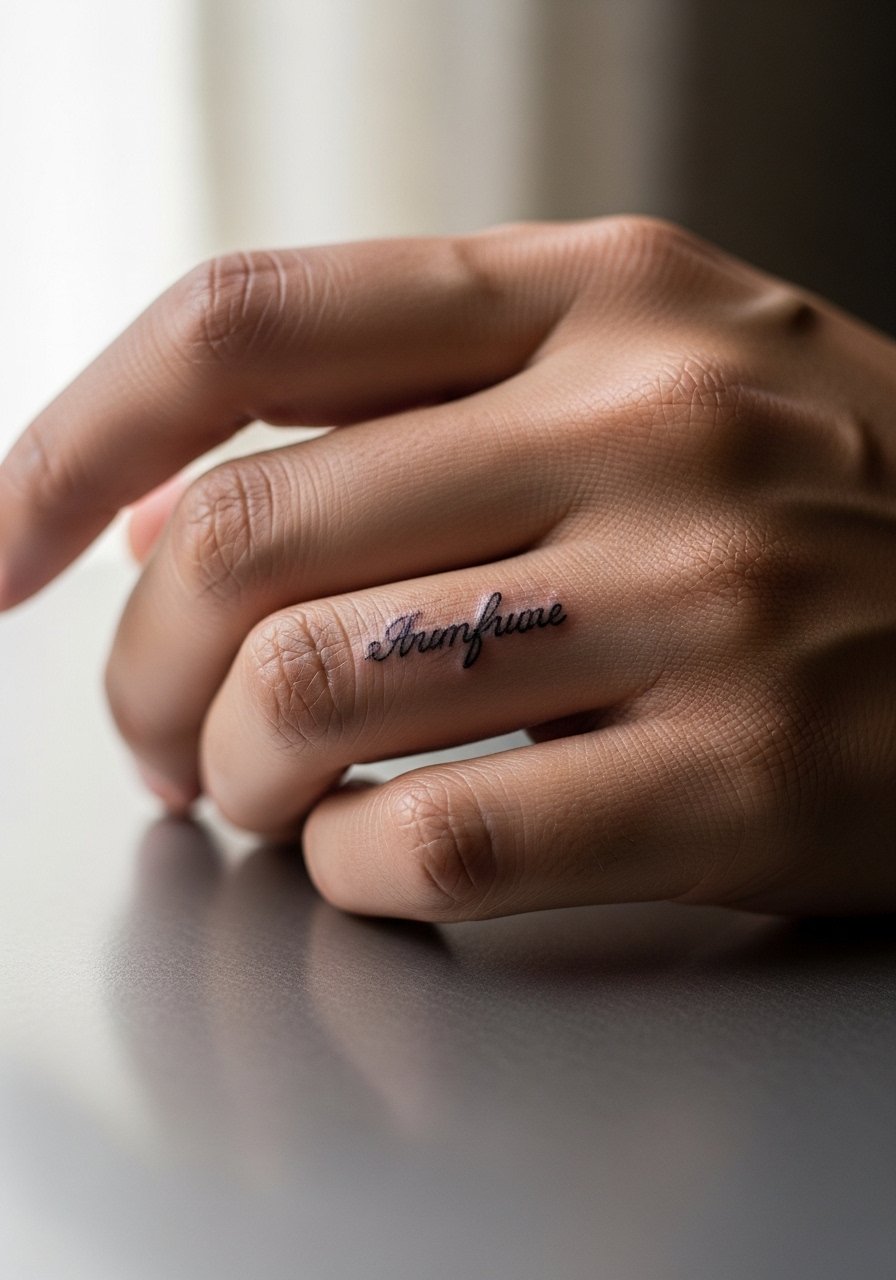
Inside finger placements fade quickly and require more frequent touch-ups. Pain is intense for a tiny area and sessions are flash quick. If you want this, ask for bolder letterforms rather than hairline script so the words remain legible through hand use. The common mistake is expecting permanence similar to forearm work. Consider placement on the side of the finger where wear is less, and be ready to plan for a refresh in the next couple of years.
23. Abstract Blackwork on the Lower Back
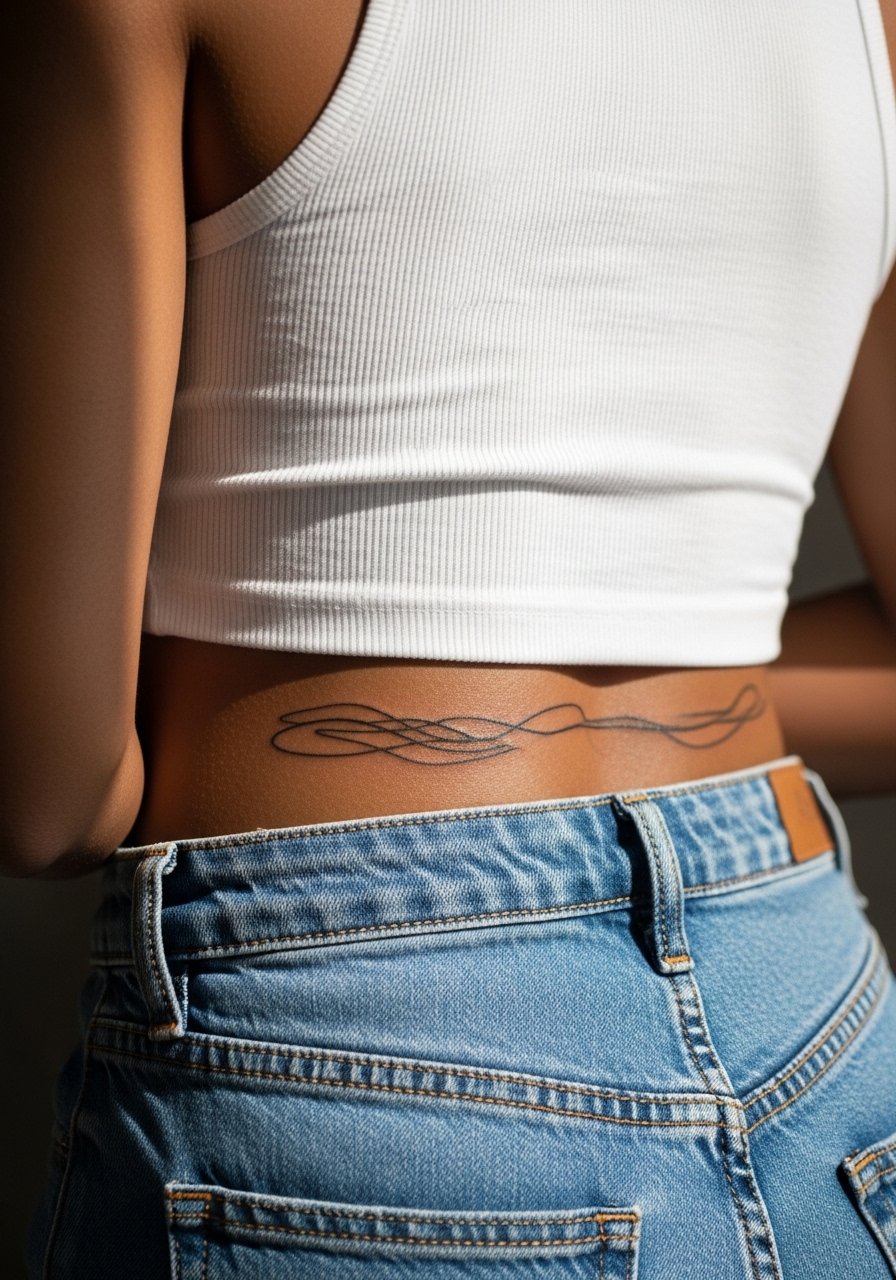
Lower back pieces are comfortable to hide or show and they heal well when spared tight waistbands. Pain is mild to moderate and sessions can run long for larger blackwork. Ask your artist to avoid heavy saturation right at the waistband to reduce friction-based fading. A mistake is placing the heaviest blocks where belts and waistbands will rub daily. For showing off this zone, low-rise jeans and a cropped top keep the silhouette clean.
24. Dotwork Moon Phase on the Inner Wrist
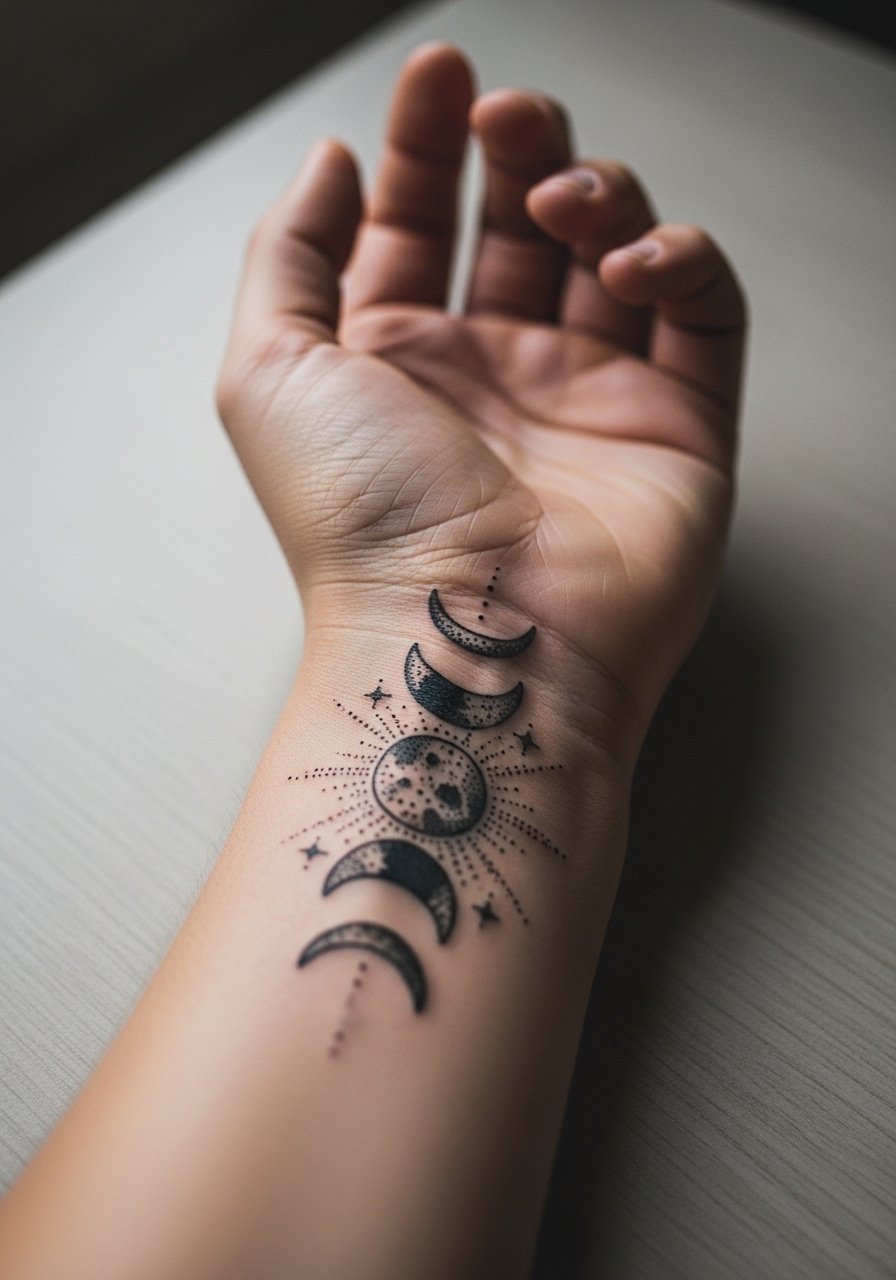
Inner wrist dotwork is delicate but exposed. Expect sharp pain and quick sessions. Ask your artist to use slightly larger dots in the darkest crescents so they do not smooth together after a year. A frequent mistake is packing too many tiny dots in a narrow area which turns into a single grey tone. For everyday styling, a slim cuff or folded sleeve pairs well but avoid constant bracelets that rub the rising crescent.
25. Botanical Sleeve Start on the Upper Arm
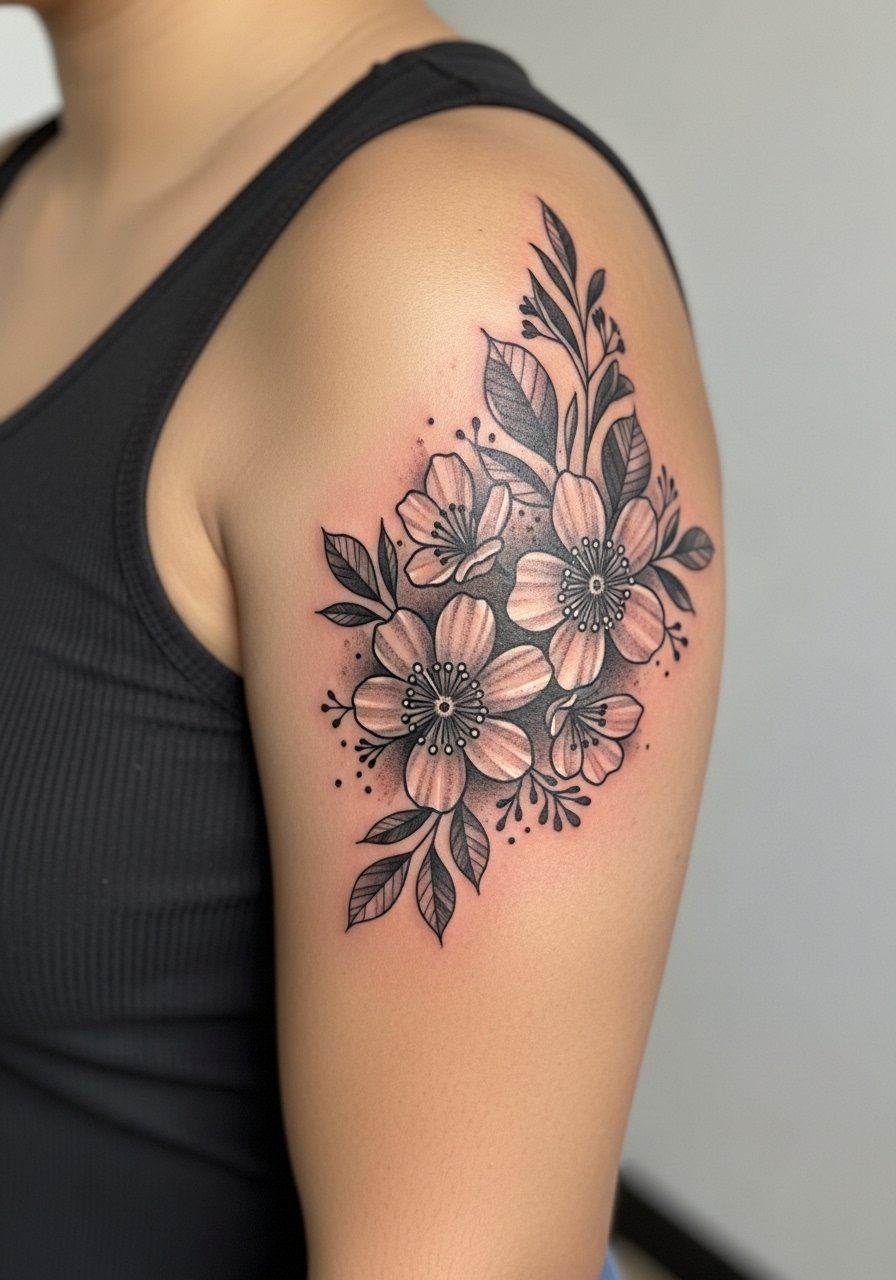
Starting a botanical sleeve on the upper arm lets you build outward with minimal early regret. Pain is moderate and sessions can be staged across months. During consultation, say you want a mix of stipple and soft grey wash to keep texture without dense blocks. The mistake is asking to fit too many species into the first session which crowds the composition. For styling, rolled sleeves and a loose linen shirt complement the natural theme.
26. Tiny Geometric Calf Spot Near Achilles
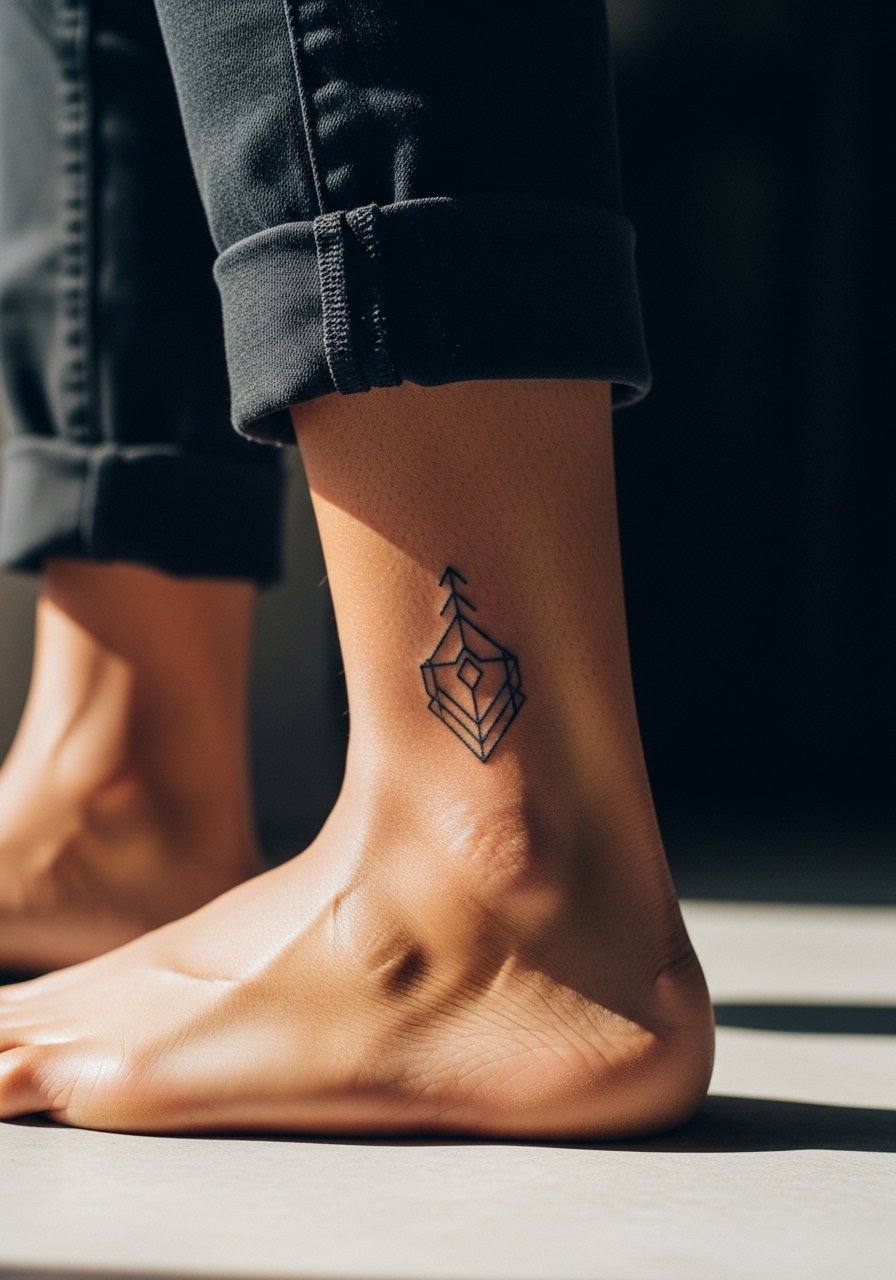
Tiny pieces near the Achilles bear constant motion which affects longevity. Pain is moderate and careful placement avoids detachment zones. Tell your artist to place the motif just off the tendon and to avoid ultra-thin lines that vanish with ankle flex. People often choose the tendon itself which leads to distortion as the foot moves. For comfort after the session, slip into a pair of soft slip-on shoes that reduce pressure on the area.
27. Crescent Moon Behind the Shoulder Cap
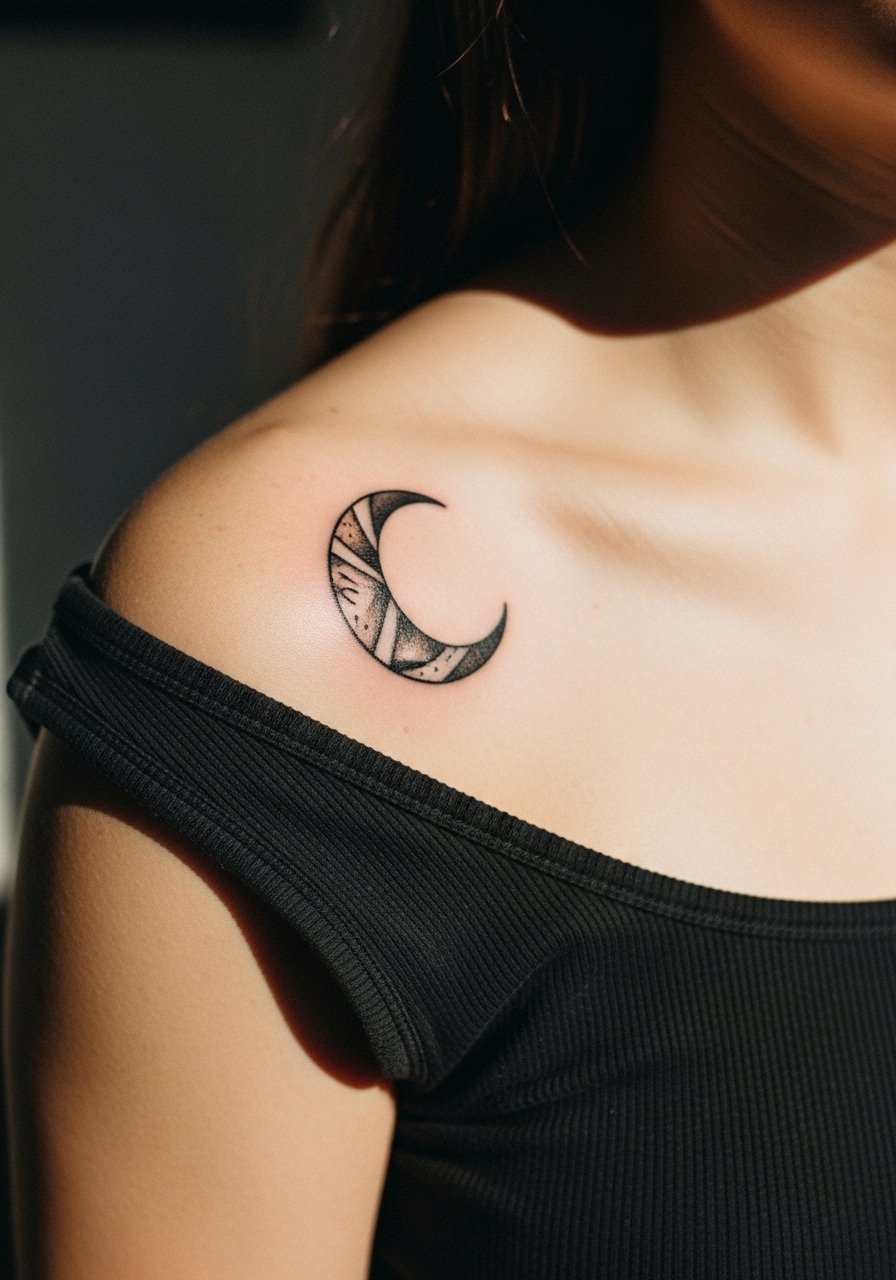
This placement ages well and shows nicely with sleeveless styles. Pain is low to moderate and quick sessions can complete the motif. Ask your artist to orient the crescent with the shoulder curve and to keep negative space at the horn tips so the moon reads clean as muscles move. A common mistake is making the crescent too thin which causes the tips to disappear. For outfits, an open-back or tank top highlights the curve without hiding it.
Frequently Asked Questions
Q: Will fine line portraits on the forearm need touch-ups more often than bold blackwork?
A: In my experience, yes, the thinner strokes of fine line portraits can mellow faster because skin texture and sun exposure soften the micro detail. Bold blackwork tends to read cleaner longer. Planning a touch-up around year three is realistic for detailed forearm portraits depending on your sun habits.
Q: Are ribcage mandalas worth the pain given the controversy about long-term clarity?
A: Artists are split. One camp says ribs are too mobile and dense mandalas blur within a few years. The other camp says good spacing and depth solve most issues. If you choose ribs, ask your artist to space the rings and prefer stipple shading. Also bring a zip-up hoodie for studio comfort between passes.
Q: How should I dress for a sternum or chest session to make the process easier?
A: Wear a fitted sports bra or a wide-neck top that you can lift or pull aside without fully undressing. That keeps the artist's access clean and reduces movement during the session. A fitted option also helps avoid fabric rubbing the fresh ink afterward.
Q: Do hand and finger tattoos affect job prospects long term?
A: They still can in more conservative fields. Hands are highly visible and fade faster due to washing, so both longevity and appearance are considerations. If your work requires discretion, choose less visible placements or plan for cover options like rings or gloves when necessary.
Q: What is the realistic pain and session plan for a half-sleeve on the outer forearm?
A: Pain is typically moderate and manageable. Most outer forearm half-sleeves are built over two to four sessions depending on complexity. Staging the work lets you assess how shading settles before booking the next block and keeps healing predictable.
