
Fine line trends look flawless on a phone screen. The reality is different when a design wraps around an arm, moves with the muscle, and meets daily friction from sleeves and watches. That tension changes what holds up and what needs touch-ups. Read the first idea for a forearm wrap that balances crisp geometry with real-world wear, and learn what to ask your artist before the stencil goes down.
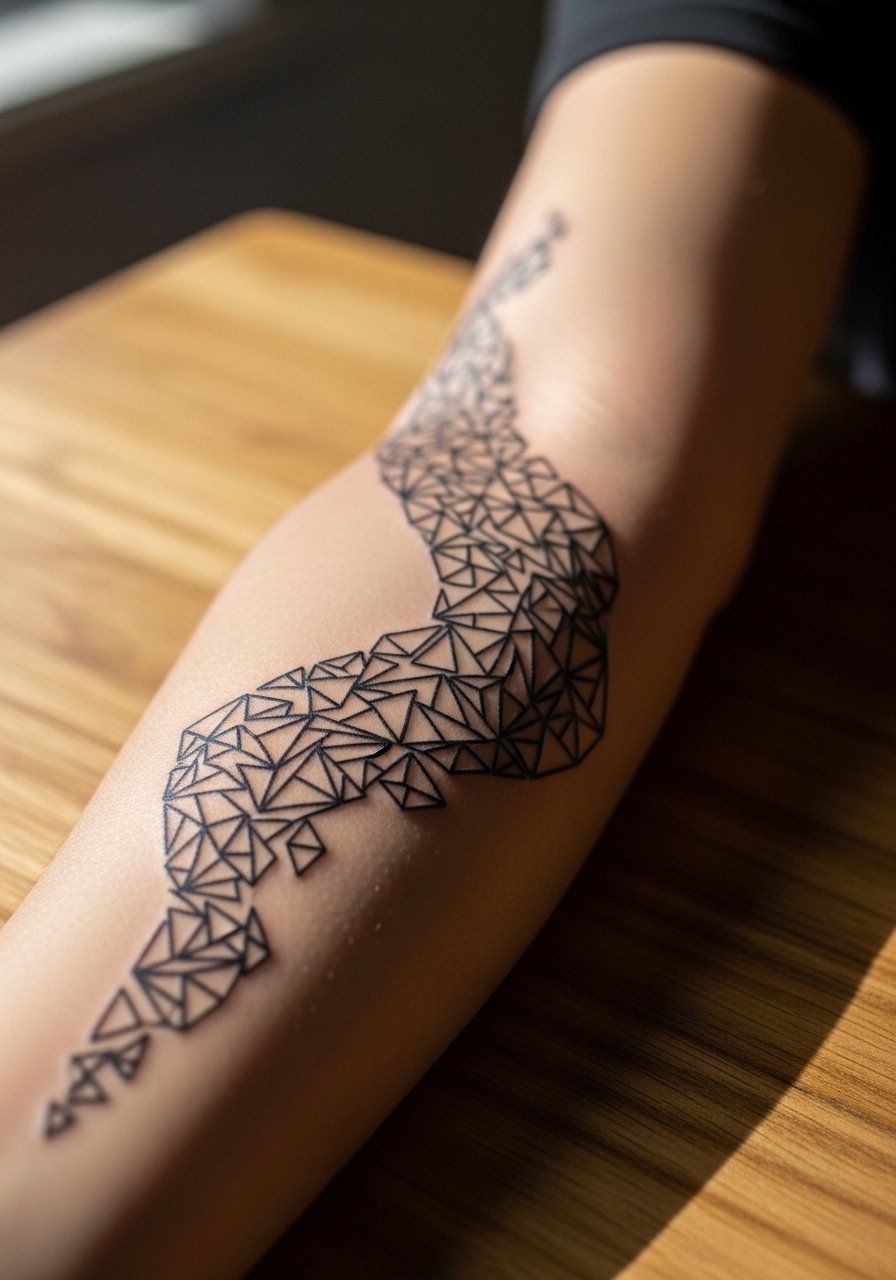
1. Narrow Geometric Wrap on Inner Forearm
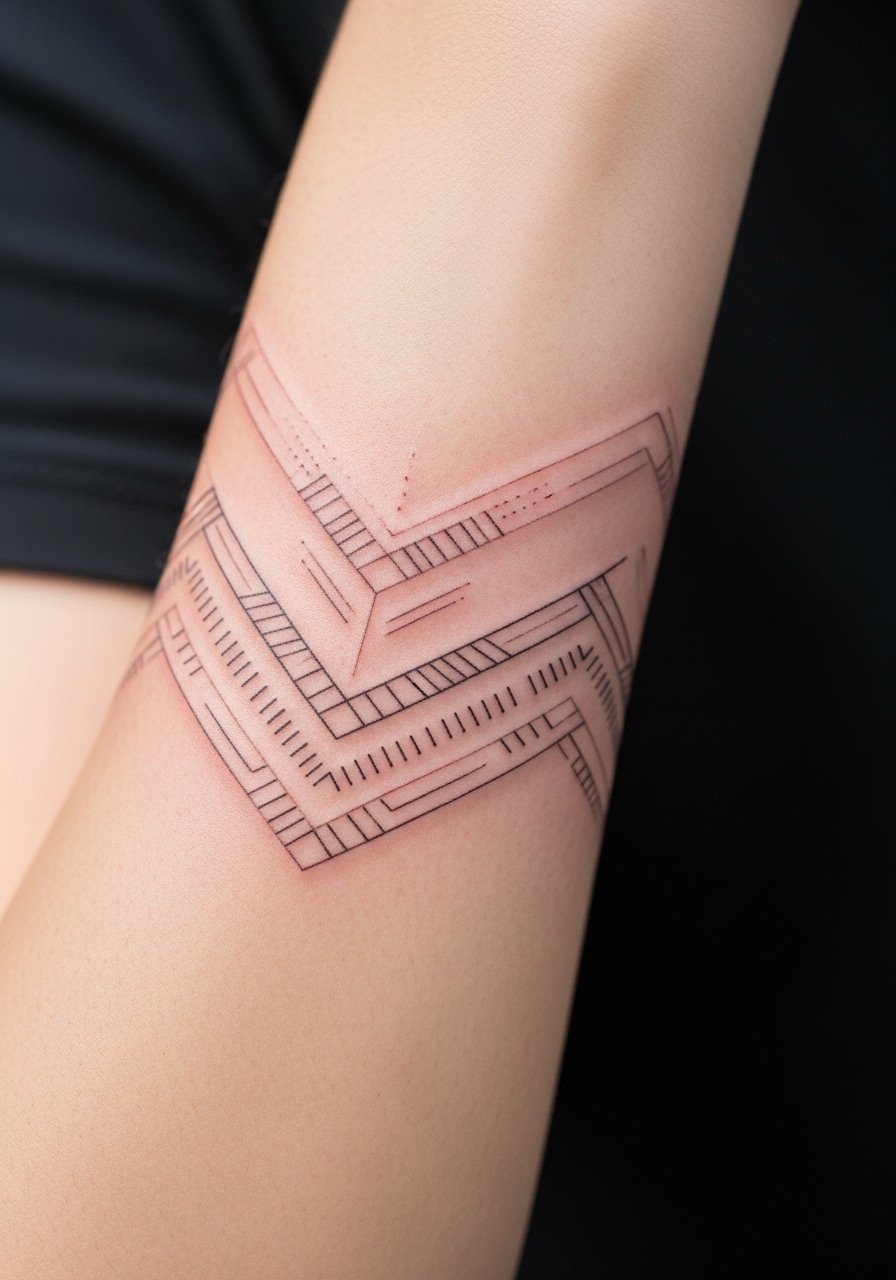
A slim wrap on the inner forearm reads like jewelry when executed with careful spacing. I recommend this over dense mandalas if you want longevity because the open negative space slows line merging. Tell your artist to keep linework slightly heavier than micro hairline so it settles without smudging. Expect moderate pain, about a two to three out of ten, and a single session under two hours for a narrow band. Common mistakes are going too small and packing lines too close. At six months the band looks crisp, at two years the lines soften, and at five years a gentle touch-up often brings the contrast back. For showing it off, roll sleeves up or wear linen short-sleeve shirts in light neutrals, they frame the band without crowding the linework.
2. Angular Full-Sleeve Suggestion on Upper Arm
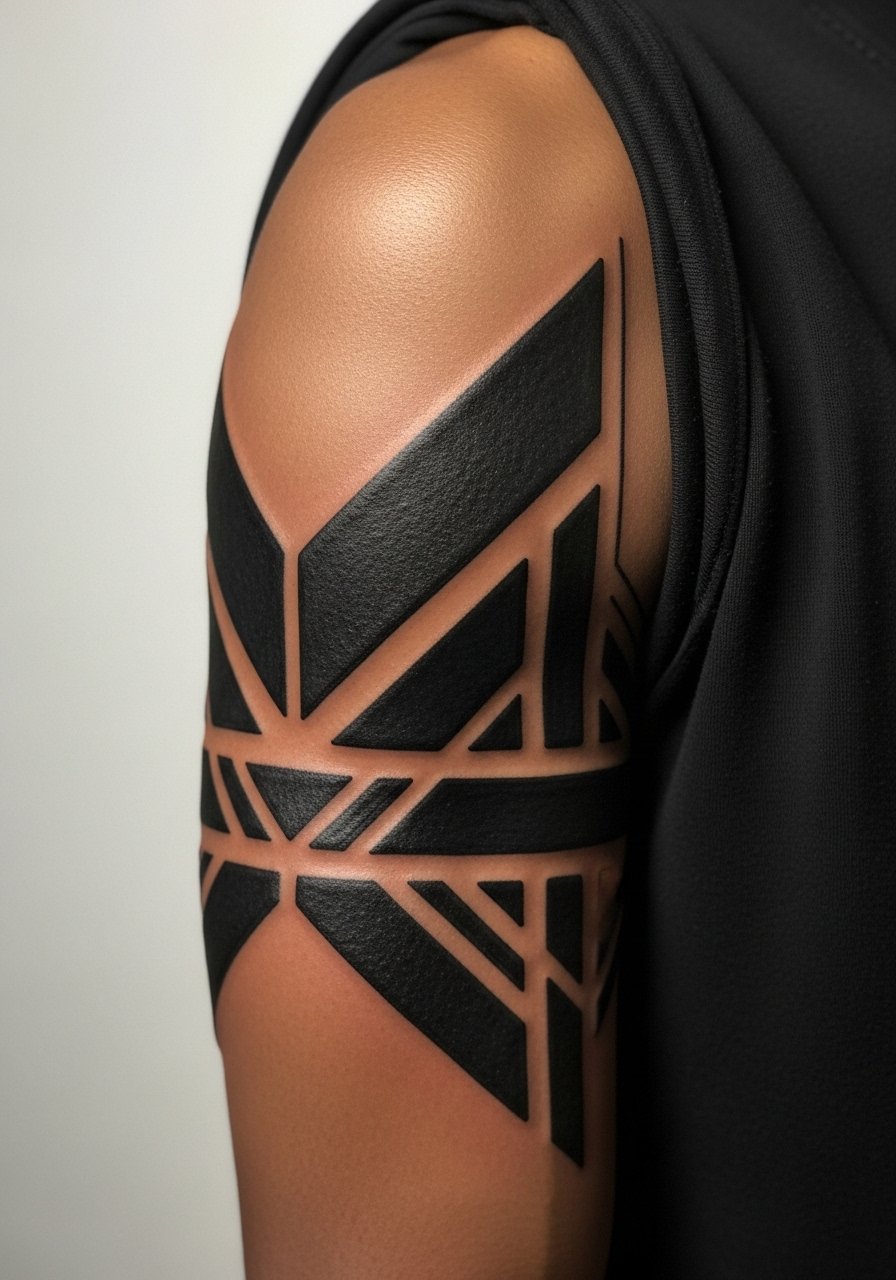
This design uses repeating polygons that wrap from bicep to tricep for a structured look. Choose this over a floral sleeve if you want crisp edges that read from a distance. Expect higher saturation work and longer sessions split across two appointments for comfort. Pain is moderate on the outer arm and session time can be three to five hours per pass. Tell the artist you want clear breathing room between shapes to reduce blowout risk near the inner elbow. At six months saturated panels look steady, at two years edges soften a bit in high-movement zones, and dense fills may need touch-ups around year three. During the appointment wear a loose button-down shirt you can easily slide off without rubbing the new ink.
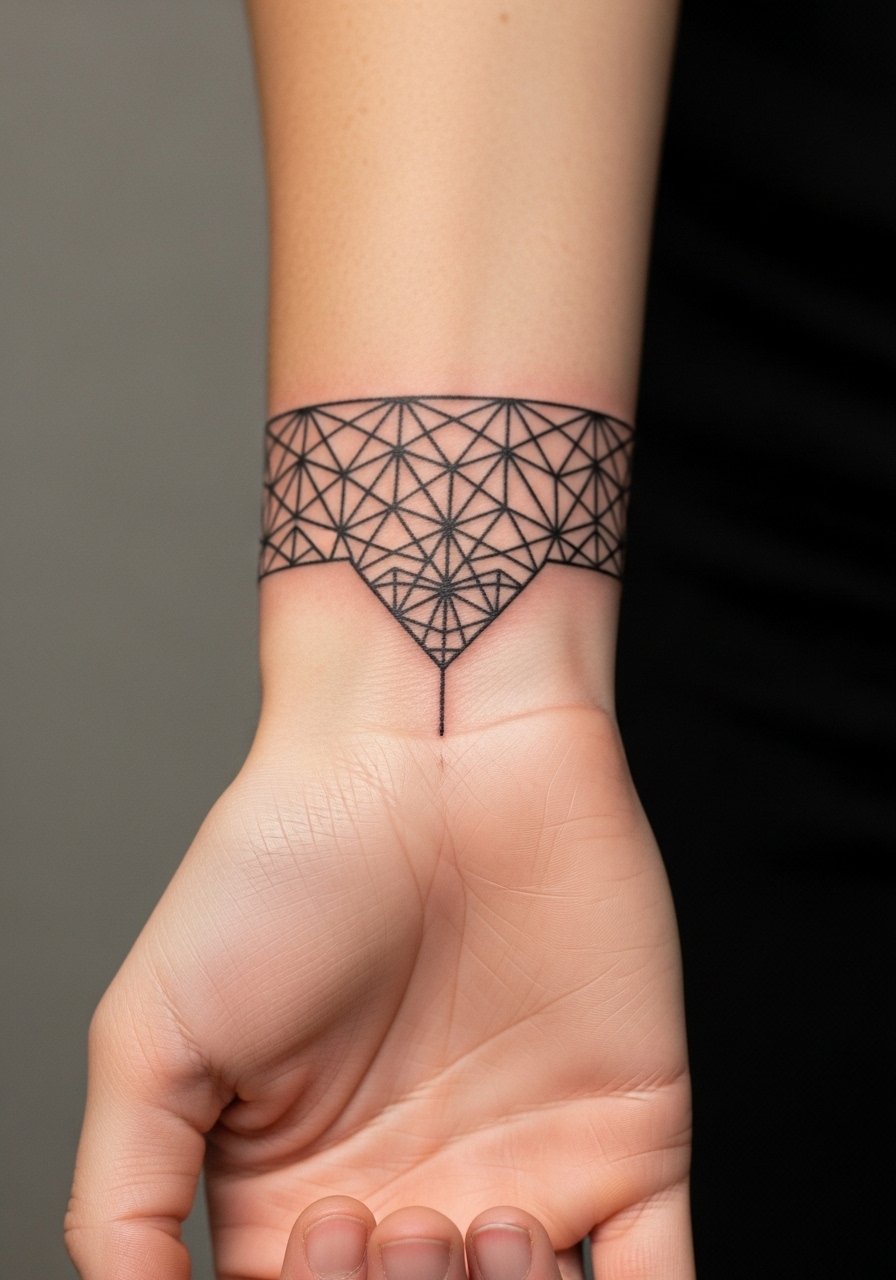
3. Minimal Chain-Link Wrap at Wrist
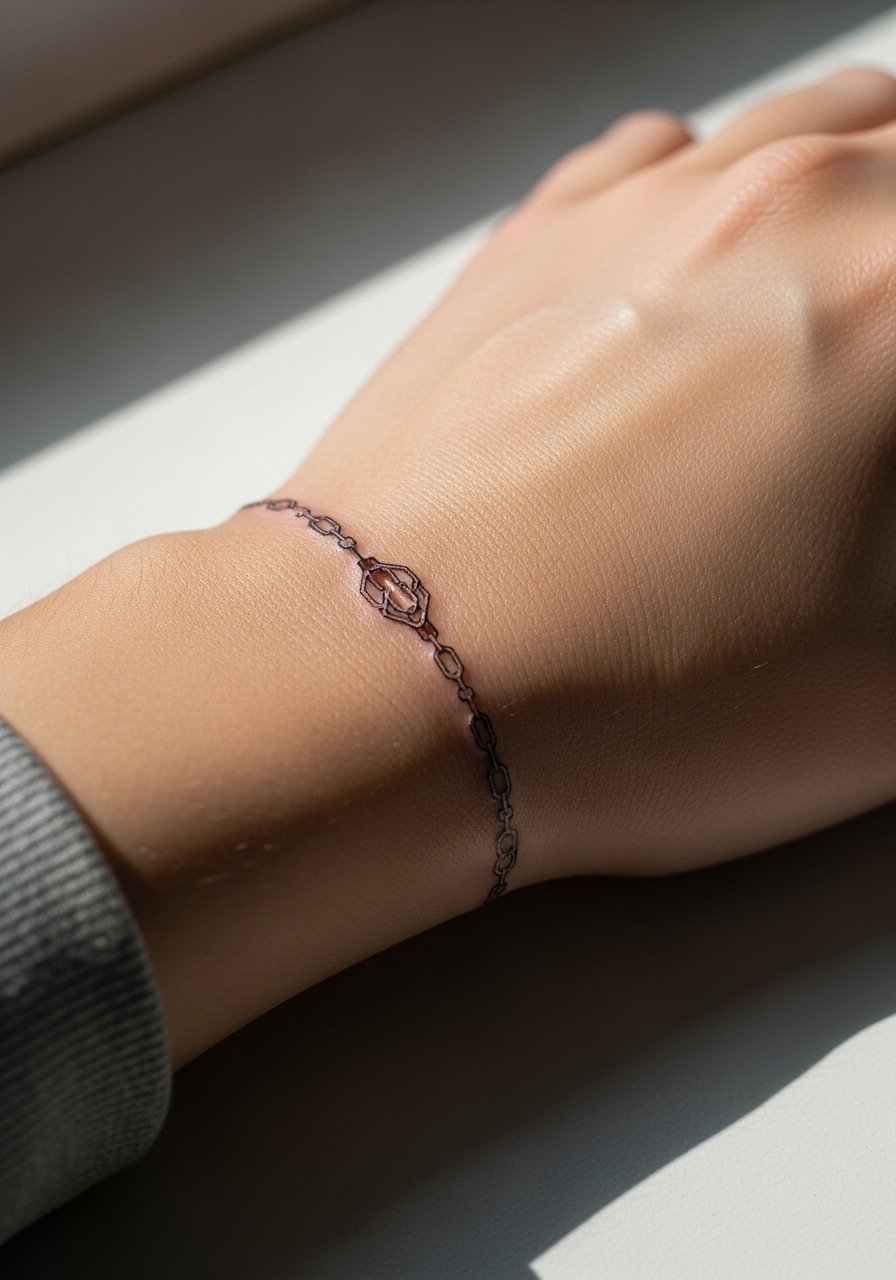
A chain-link wrap is a subtle way to get geometric repetition without a full sleeve. I suggest this for people who want visible placement but low risk of aging issues because the pattern uses small negative spaces. On the wrist the pain is higher, around four to five out of ten, and sessions are short, usually under an hour. A frequent mistake is requesting hairline lines that are too delicate. Ask the artist to use slightly bolder linework and to space links by a hair width. At six months the links sit clean, at two years the nodes may blur if they were too fine, and a touch-up at year two or three keeps it crisp. Pair this with a minimalist watch or thin stacking bracelets so the tattoo reads like intentional jewelry.
4. Interlocking Triangles Around the Elbow

Elbow wraps need special planning because the joint folds and stretches. This interlocking-triangle approach uses negative space to keep movement from collapsing shapes. Expect sharp stinging around the bone and an appointment split into shorter passes. Tell your artist to map the triangles so key points fall on the flatter parts of the arm, not directly over the crease. One common error is lining dense geometry across the fold, which ages into a blur. At six months the triangles hold shape, at two years the creased areas show the most softening, and you should budget for a touch-up around year three. For the session wear a sleeveless tank that gives the artist clear access without tugging at the elbow.
5. Thin Negative-Space Band at Mid-Bicep
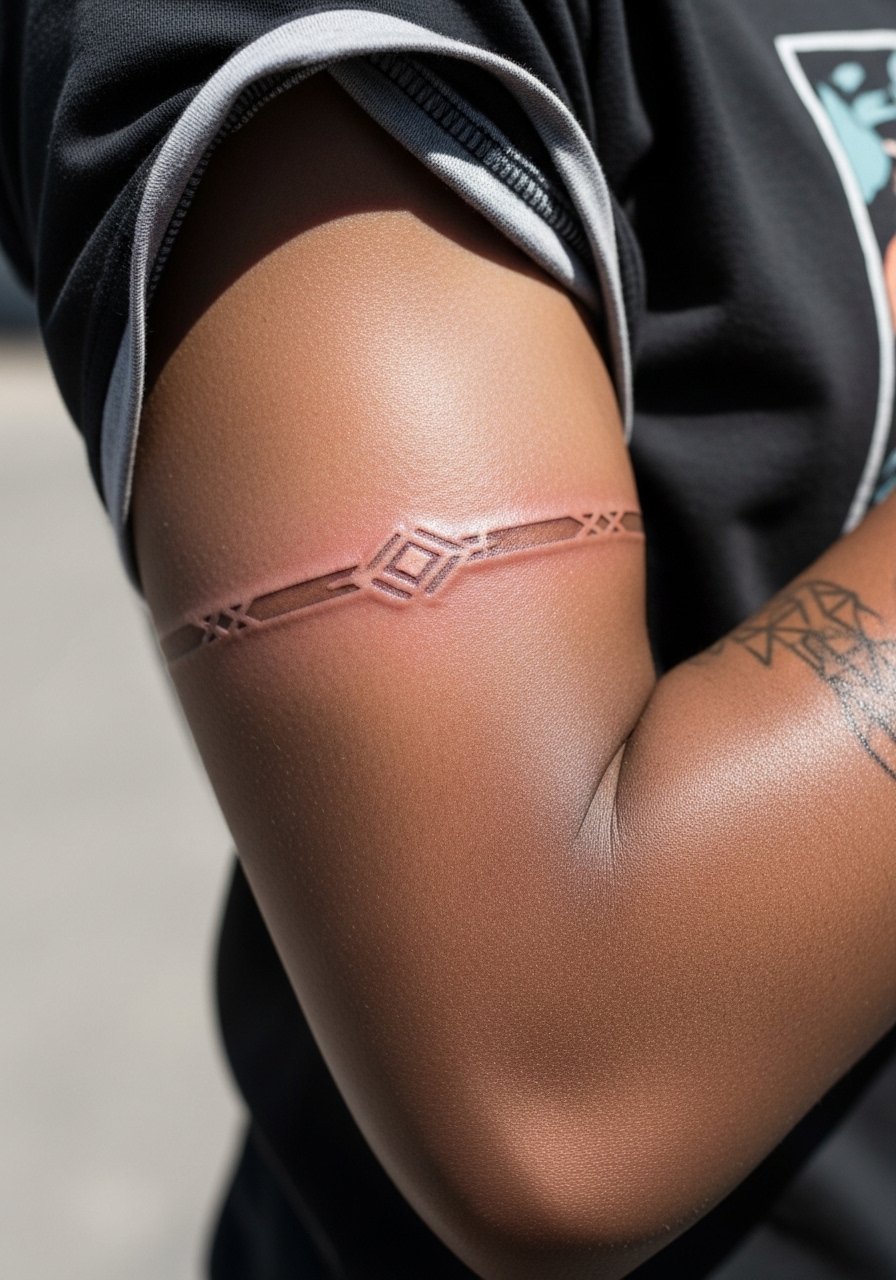
A mid-bicep wrap sits on soft tissue and usually tolerates finer work. I prefer a negative-space band here over fully filled blackwork because the flesh moves and breathes, preserving separation between shapes. Pain is low to moderate, and a single one- to two-hour session often does the job. Avoid the mistake of asking for ultra-thin hairlines without spacing. Ask your artist to test a draft stencil and check it in motion so the diamonds keep their proportions when your arm flexes. At six months the band should read clean, at two years it will soften slightly, and touch-ups every few years keep the pattern lively. Session-day tip, wear a loose drawstring tee so the artist can work without fabric rubbing the fresh ink.
6. Wrap That Crosses Inner Bicep and Outer Forearm

Crossing the inner bicep increases visibility but also risk. The inner arm skin is softer and some artists say fine line there blurs quickly. One camp argues the stretch causes lines to merge within two years. The other camp says correct needle depth and spacing keep fine work stable. Ask your artist where they stand before booking. Pain ranges from moderate to higher on the inner bicep and the session often runs two to three hours. Common mistakes include packing too many intersecting points where blowout is more likely. At six months the crossover looks striking, at two years expect some softening in the inner portion, and a touch-up timeline at year two to three is realistic. For the session wear a tank top so the artist can easily access both outer and inner arm without shifting clothing.
Pre-Session Essentials
The first six ideas above include wrist, inner arm, elbow, and bicep wraps. A few targeted items smooth the appointment and the first week of healing for those zones.
- Stencil transfer paper kit. Lets you preview the placement and pattern on your skin before the needle touches any of it, which is especially helpful for wraps that cross joints.
- Cooling gel pads. Apply briefly before the session to calm surface sensitivity on the wrist and inner bicep.
- Thin protective film roll. Keeps forearm and wrist wraps clean during the first few days when friction from clothing and watches is highest.
- Fragrance-free body wash. Use during showers to gently cleanse fine line work without irritating fresh lines near the elbow and wrist.
- Saniderm transparent film. A single layer of protective film can reduce scabbing and protect delicate wraps from rubbing in the first 48 hours.
7. Geometric Mandala Wrap at the Shoulder Cap
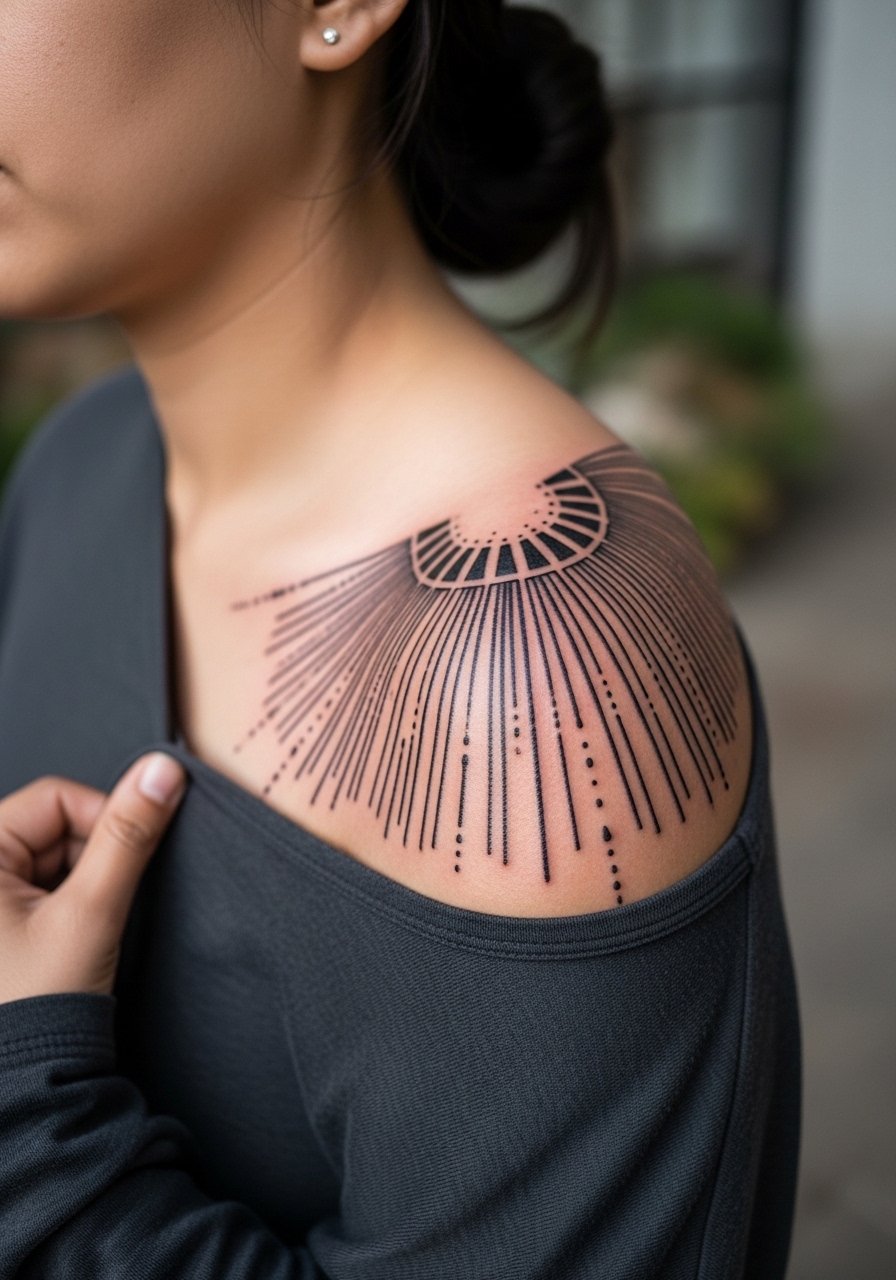
A shoulder-cap wrap reads like a statement when the mandala arcs around the arm. I recommend this over a tight circular mandala on the upper chest if you want movement that does not compress. The shoulder tolerates saturation well, and pain is typically low to moderate. Ask your artist to place the densest points where muscle motion is minimal so the central geometry keeps its shape. A common mistake is crowding too much dot work into a small radius. At six months the mandala settles softly, at two years shading may blur slightly, and dense stipple often benefits from a touch-up after two to four years. For showing it off pick off-the-shoulder tops that let the arc sit cleanly against bare skin.
8. Chevron Wrap with Stipple Shading Around the Wrist
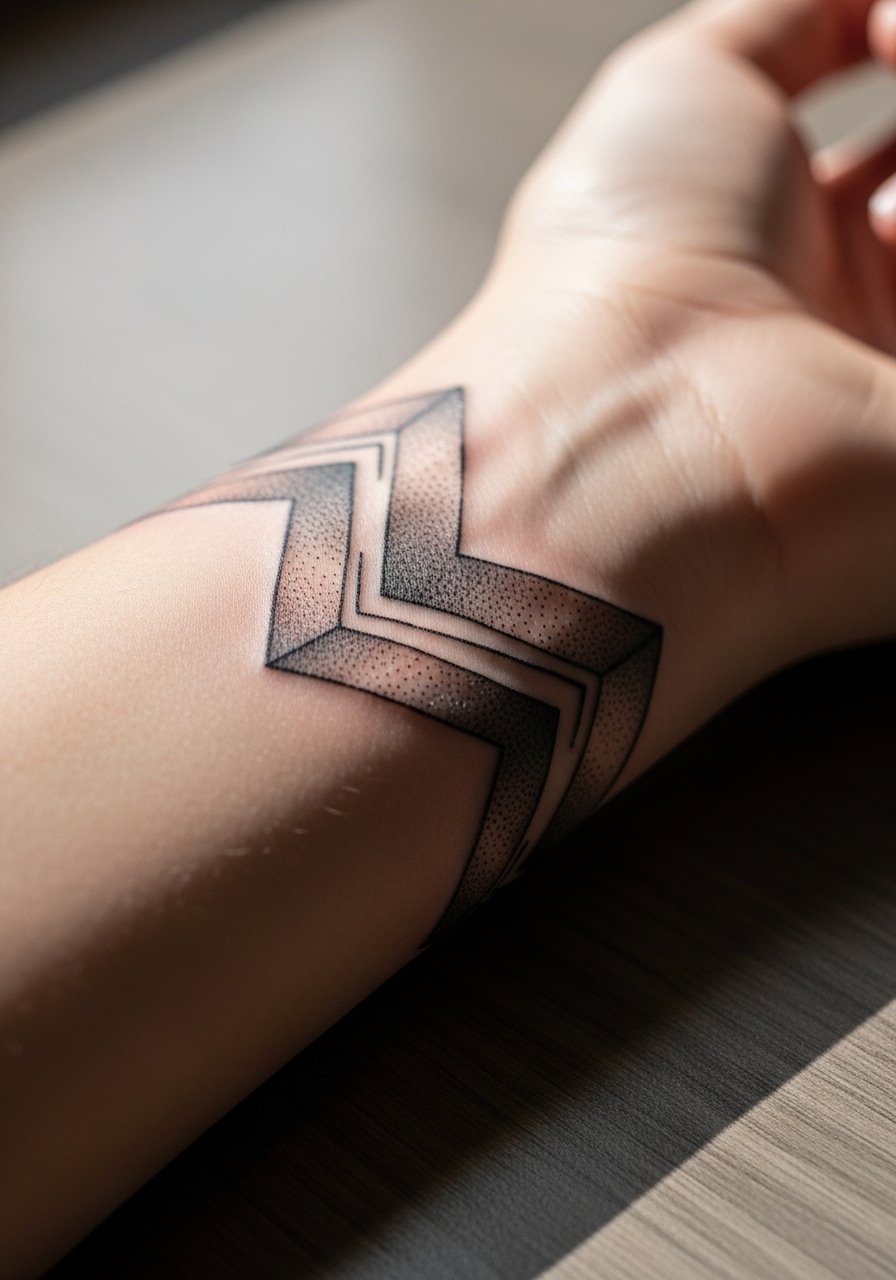
Chevrons with stipple shading add texture without heavy fills. On the wrist this balance keeps the piece readable longer than solid blocks. Pain on the wrist is noticeable and sessions are brief, often under an hour. Tell your artist you prefer stippling over solid saturation near the bone to avoid dense patches wearing off unevenly. A common mistake is overlapping dense dots too close to the wrist crease which accelerates blur. At six months the dots look crisp, at two years the densest dots may soften, and a light touch-up restores definition. Pair this design with thin stacking bracelets and a minimal cuff bracelet to echo the geometry without covering the ink.
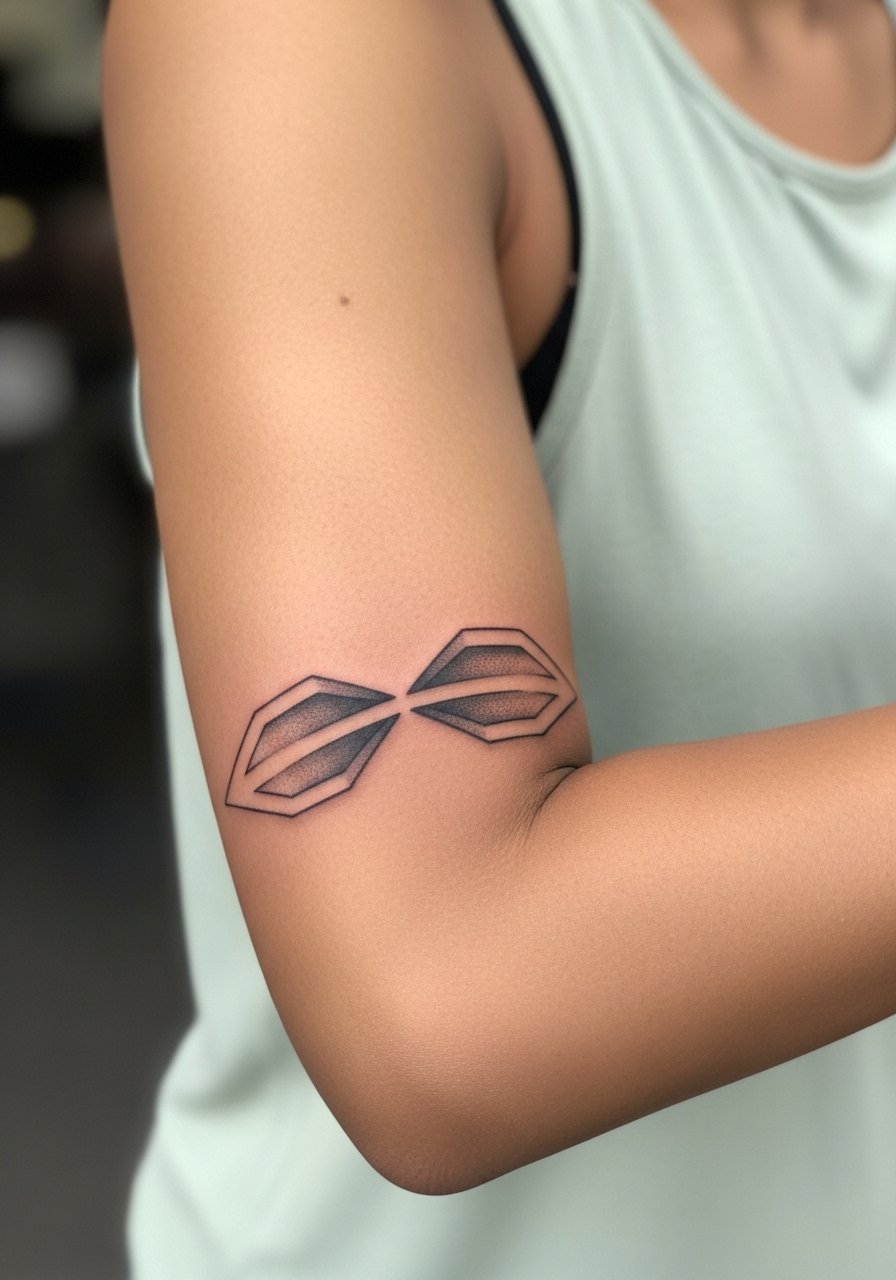
9. Asymmetric Polygon Wrap for the Upper Arm
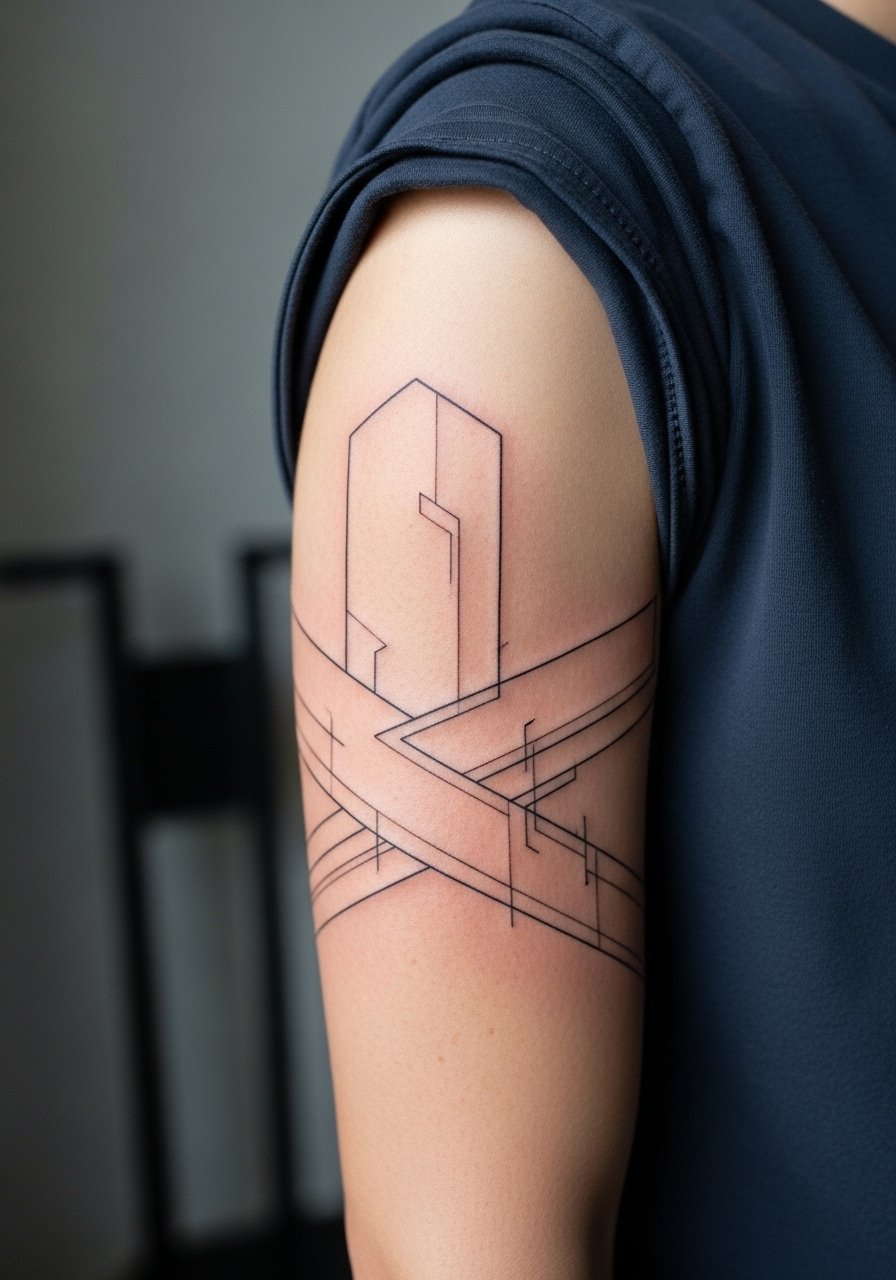
Asymmetric polygons feel modern because they avoid mirrored repetition. I prefer them for upper arm wraps that should read dynamic with muscle movement. The outer arm is forgiving, pain is low, and a single session up to three hours can cover a moderate wrap. During consultation, bring references that show exact edge weight so the artist understands whether you want crisp borders or softened joins. Mistakes include asking for too many tiny facets which age into a muddle. At six months edges look clean, at two years small facets may blur slightly, and larger shapes retain more legibility over time. For casual wear try sleeve rolls or short-sleeve shirts that let the pattern peek out from under fabric.
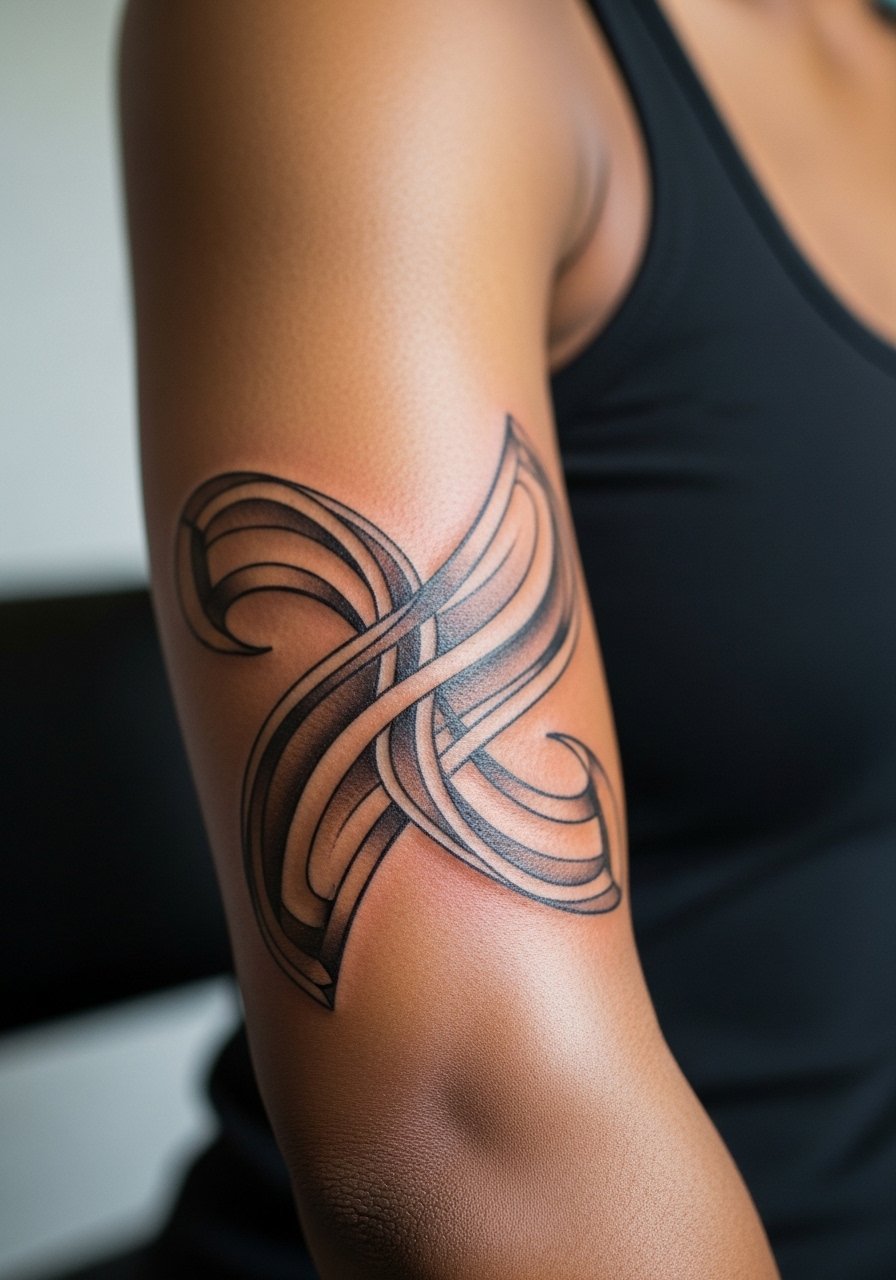
10. Fine-Line Spiral That Wraps From Wrist to Forearm
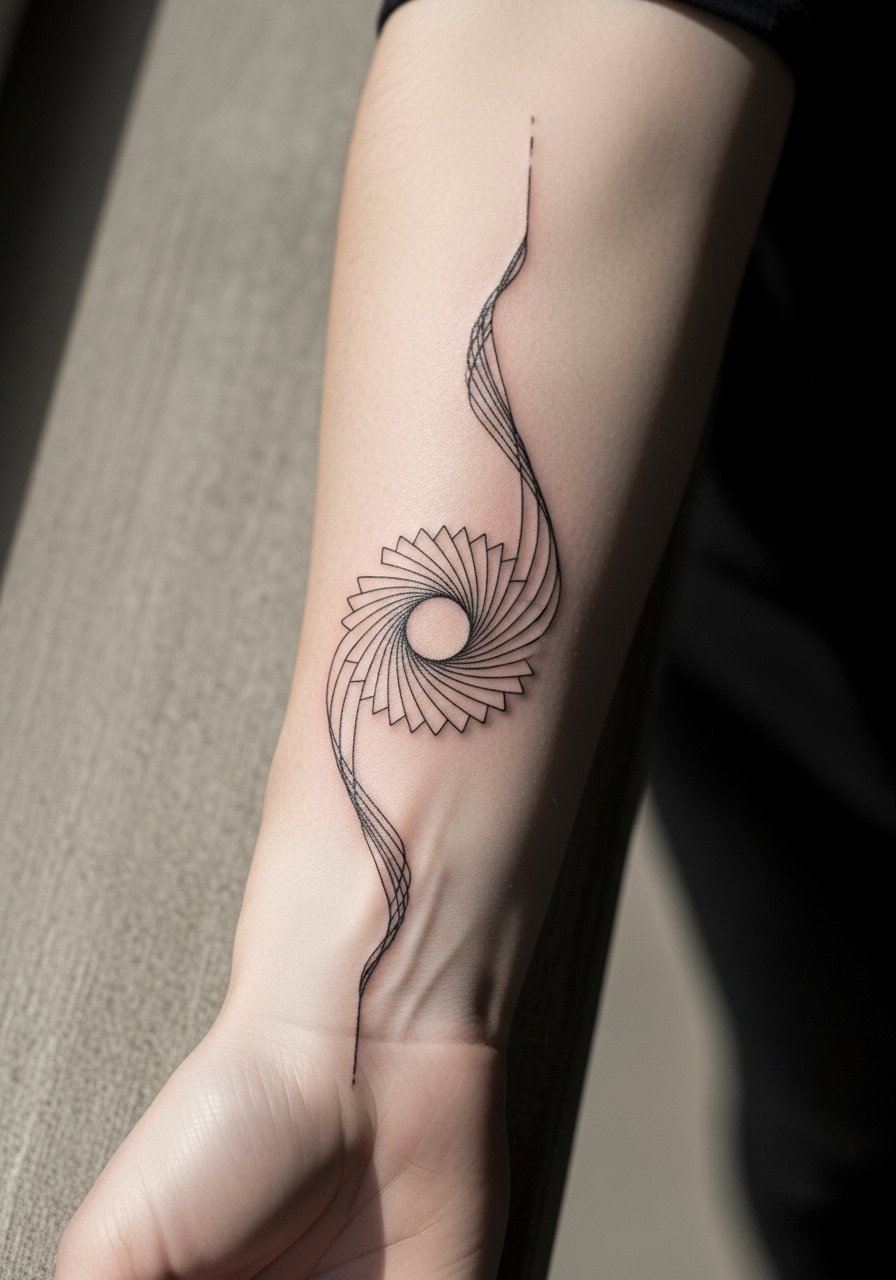
A spiral wrap feels continuous and hypnotic, but fine-line spirals are sensitive to scale. I recommend slightly increasing line weight compared with a single hairline so the spiral keeps its rhythm over time. The wrist start raises pain briefly, and a full forearm spiral can take two sessions for comfort. Tell your artist to map the spiral on your arm and check it under normal movement so the flow does not warp. Common mistakes are letting the spiral tighten too close to the wrist crease where lines merge. At six months the spiral looks elegant, at two years inner coils may soften, and an occasional touch-up retains the crisp center. Wear rolled cuffs or a racerback tank when you want the spiral visible without obstruction.
11. Hexagonal Honeycomb Wrap Across the Outer Forearm
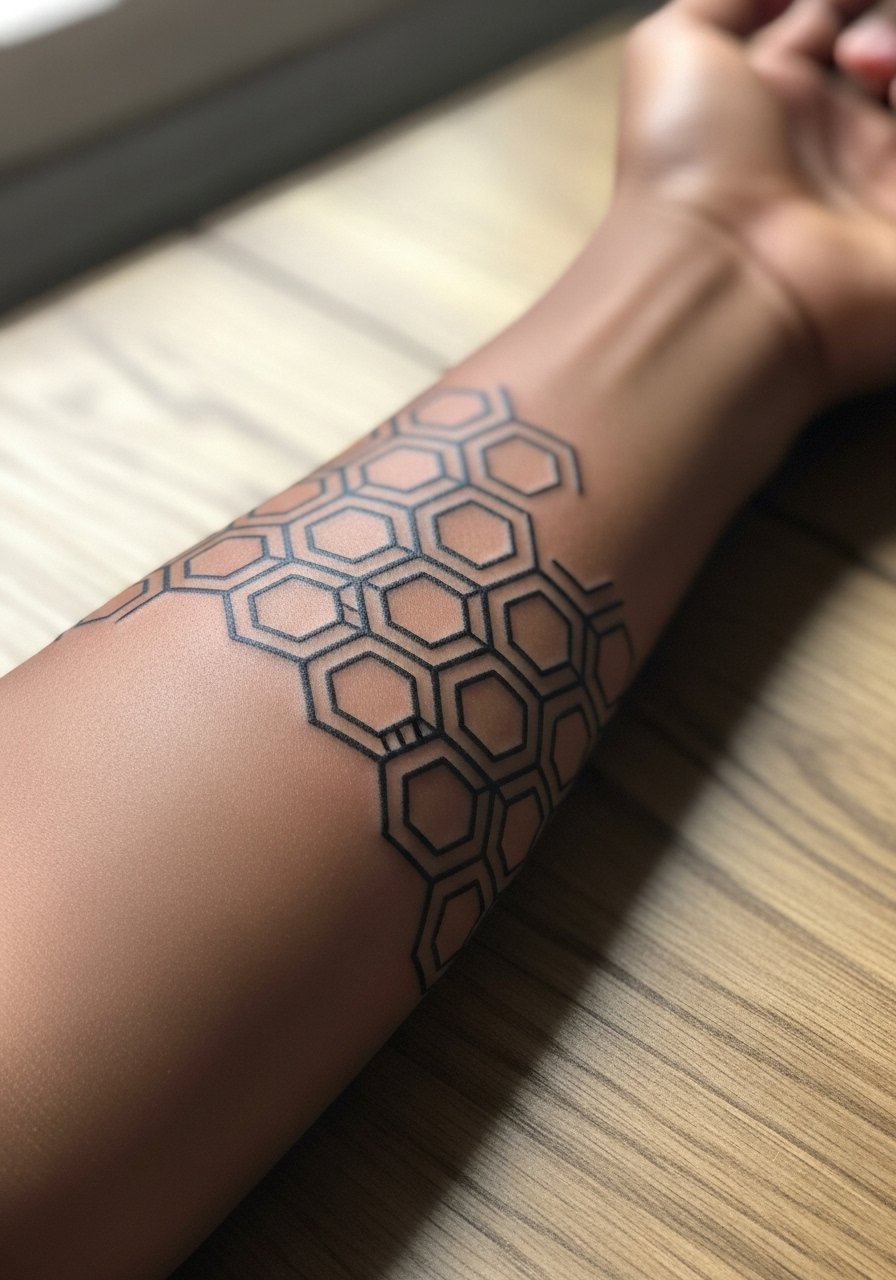
Honeycomb grids work on the outer forearm where the skin is flat and movement is predictable. I recommend this if you want a modular look that can be extended into a larger sleeve later. Pain is low and a single two-hour session often covers a bold band. Ask the artist to space hexes slightly wider than you think to prevent edges from fusing as the ink settles. A common mistake is trying to pack micro-hexes that end up muddy. At six months the grid reads sharp, at two years the closest edges may soften, and a touch-up after a few years maintains the crispness. If you are building toward a sleeve, keep a notebook of placement photos to bring to future sessions.
12. Geometric Script Band That Wraps the Wrist
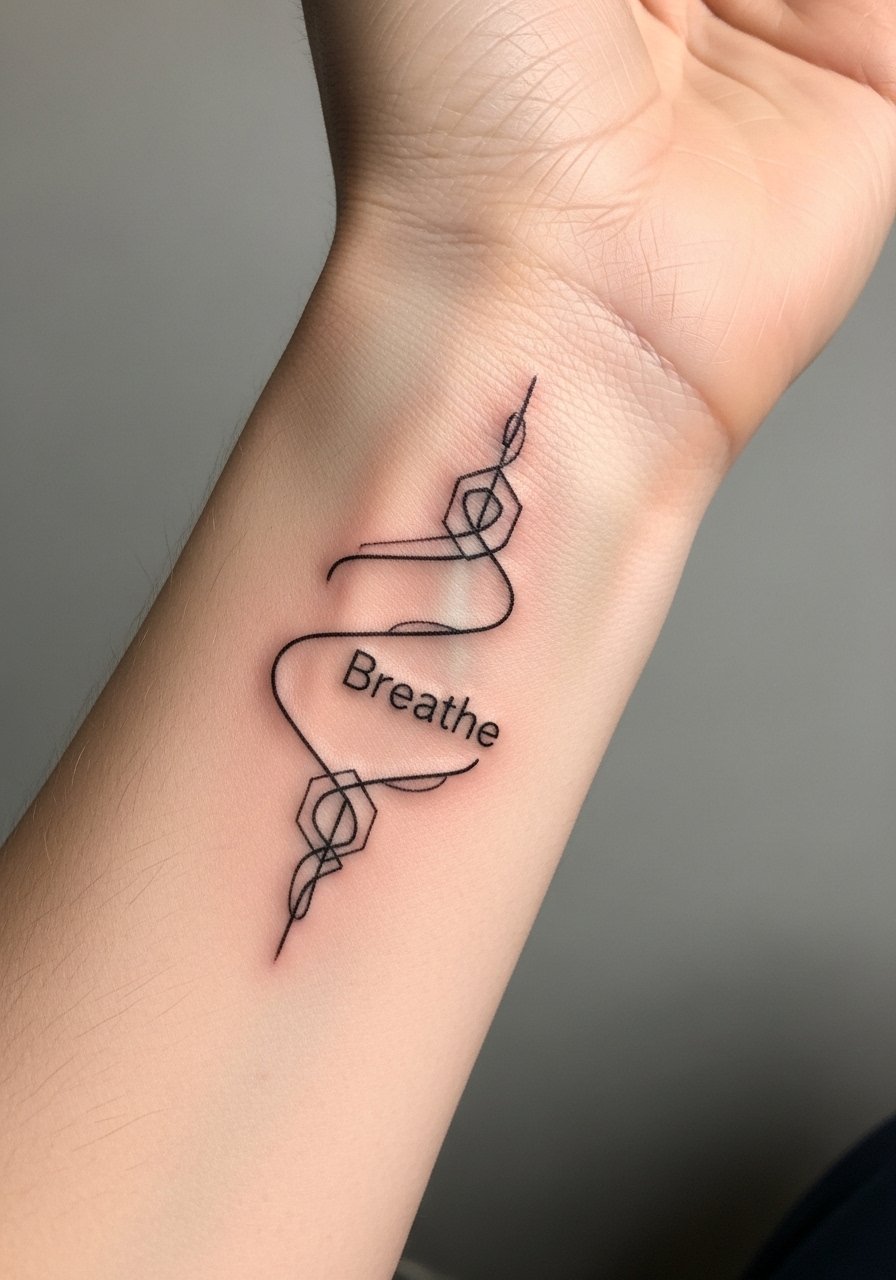
Integrating script into a geometric wrap adds a personal layer to an otherwise abstract band. Pick a single short word and have the artist map exact letter spacing within the angles to avoid distortion. The wrist sting is real and sessions are quick. Avoid tiny script that forces the artist to compress letters, which blurs faster than simple shapes. At six months the word remains legible, at two years thin strokes may soften, and a touch-up restores the fine counters. For the appointment wear a short-sleeve top you can move without rubbing the fresh ink.
13. Split-Plane Wrap That Meets at the Elbow
When geometry meets at the elbow you must plan symmetry with movement in mind. A split-plane wrap uses mirrored negative spaces so one side echoes the other without forcing exact line overlap at the crease. Pain is higher at the elbow and sessions are often split. Communicate to your artist that you want mapping when the arm is both straight and flexed to avoid misaligned joins. One mistake is assuming a static stencil will translate across motion. At six months the meeting point looks cohesive, at two years the crease area will show more softening than the outer planes, and you may want a touch-up focused on that junction. For comfort bring a soft hoodie you can remove easily to give the artist access while staying warm before and after.
14. Micro-Geom Wrap Near the Collarbone
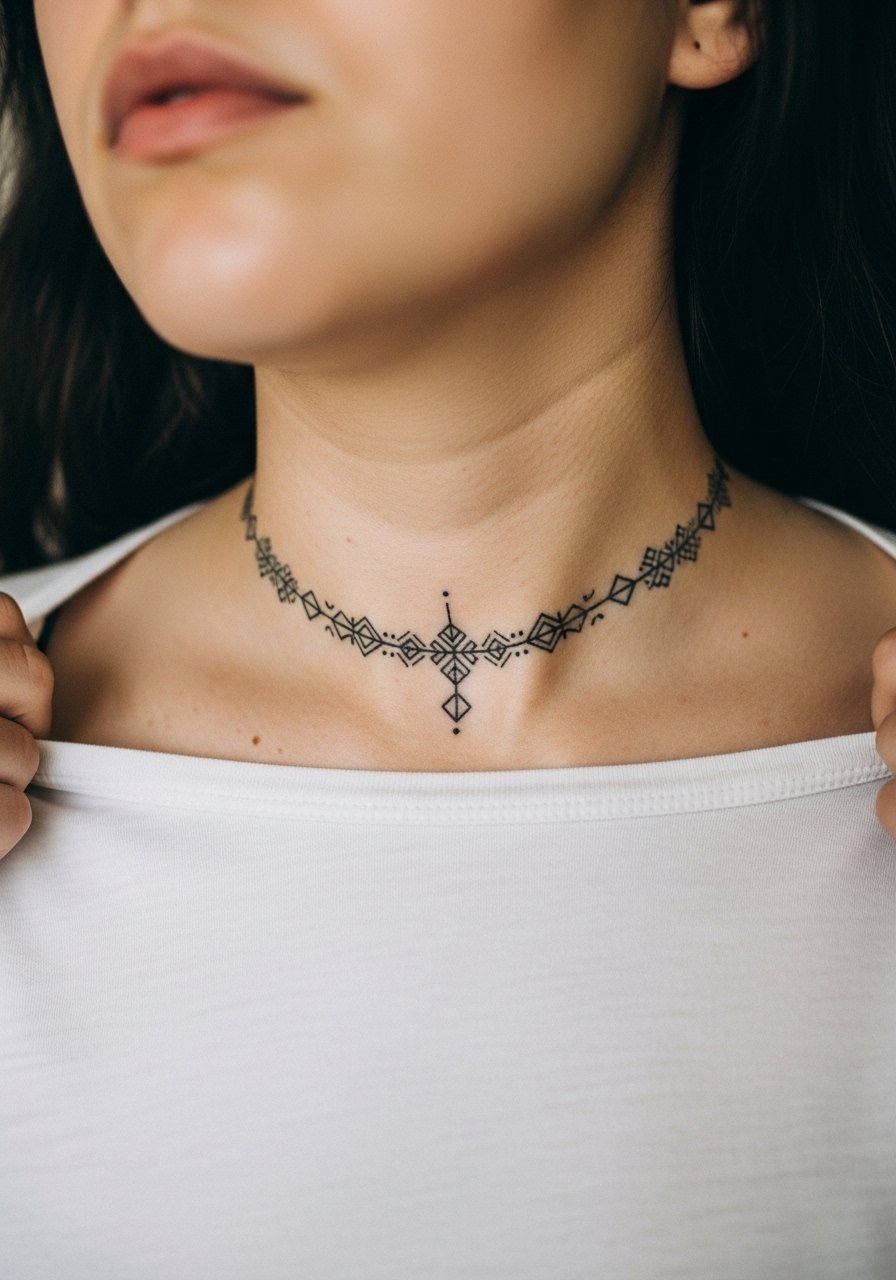
Collarbone wraps read delicate but need careful scale because the bone sits close to the skin. I suggest slightly bolder linework than you might assume to prevent the shapes from disappearing as the skin ages. Pain can spike over the bone and sessions are short. During consultation ask the artist to angle motifs to follow collarbone lines for a more natural flow. A common error is placing too much dense detail over the bone where touch-ups become tricky. At six months the shapes sit crisp, at two years thin elements may fade faster due to sun exposure, and topical sun protection helps maintain contrast.
15. Optical Illusion Wrap That Circles the Forearm
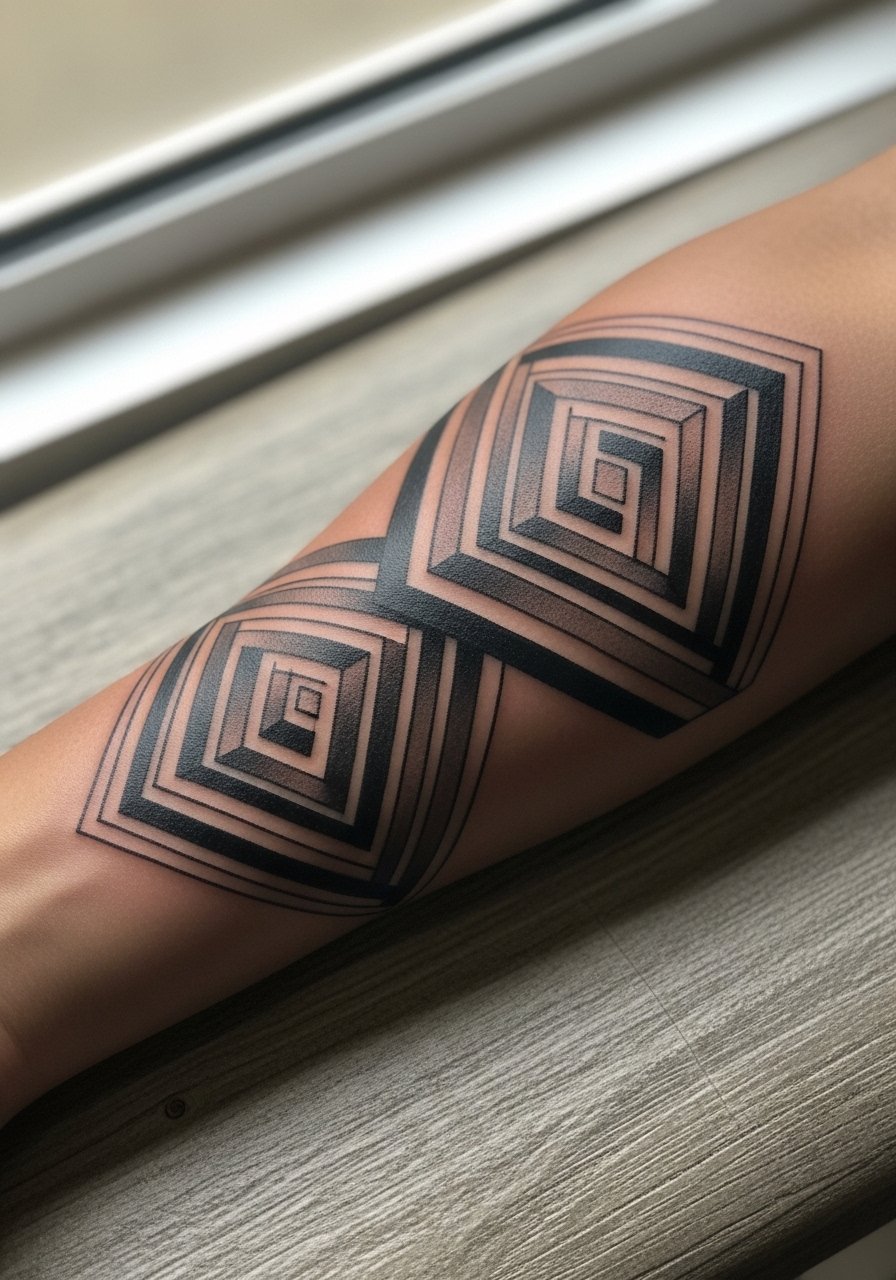
Optical illusion wraps play with depth and rely on precise line spacing to create a three-dimensional feel. I recommend this for forearm placements because the flat plane allows the effect to read well. Pain is moderate and an appointment may be split for fine detail. Tell the artist you want test stencils to check the 3D read from different angles before inking. Mistakes include compressing lines too tightly which flattens the illusion as it heals. At six months the 3D effect is readable, at two years inner contrasts soften, and a targeted touch-up of key lines revives the pop. Style it with rolled sleeves or a cotton button-up so the pattern is visible when desired.
16. Lattice Wrap That Tapers Toward the Wrist
A tapering lattice reads elegant because it guides the eye along the arm. Choose this format over a uniform band if you like graduated intensity that works with bracelets and watches. Pain is higher near the wrist and sessions can be completed in a single two-hour pass for small tapers. During consultation mention that taper points should avoid the heel of the hand where skin friction is highest. One mistake is abrupt tapering that looks unbalanced once healed. At six months the taper flows, at two years thin tapered strands will be the first to lose crispness, and a light touch-up evens the transition. For showing it off wear rolled cuffs or a delicate chain bracelet.
17. Bold Polygon Cuff Around the Bicep

A bold cuff uses thicker outlines and open centers to create a durable statement that ages predictably. I recommend this for people who want a low-maintenance wrap because heavy outlines hold up better than fragile hairlines. Pain is low on the bicep and sessions are often a single appointment under three hours. Ask the artist to balance line weight with negative space so the cuff does not feel heavy on the arm. Common mistakes are overfilling the centers which can look flat as it heals. At six months the cuff looks strong, at two years the thick lines retain form well, and touch-ups are less frequent than with fine-line pieces.
18. Ribboned Geometric Wrap That Crosses the Inner Elbow
Crossing the inner elbow adds complexity because of constant flexion. This ribboned approach keeps spaces between ribbons so folding does not merge the shapes. One side of the community says inner-elbow fine line is a losing battle for longevity. The opposing view maintains that proper placement and depth keep it intact. I recommend demanding a mapping trial so you can see the ribbons during movement. Expect higher pain and a likely split session. At six months the ribbons look cohesive, at two years the crease is most at risk, and a touch-up focused on the inner fold typically restores crispness. For the appointment pick a sleeveless top you can slightly raise so the artist has room to work without fabric interference.
19. Fragmented Geometric Wrap That Leaves Negative Windowing
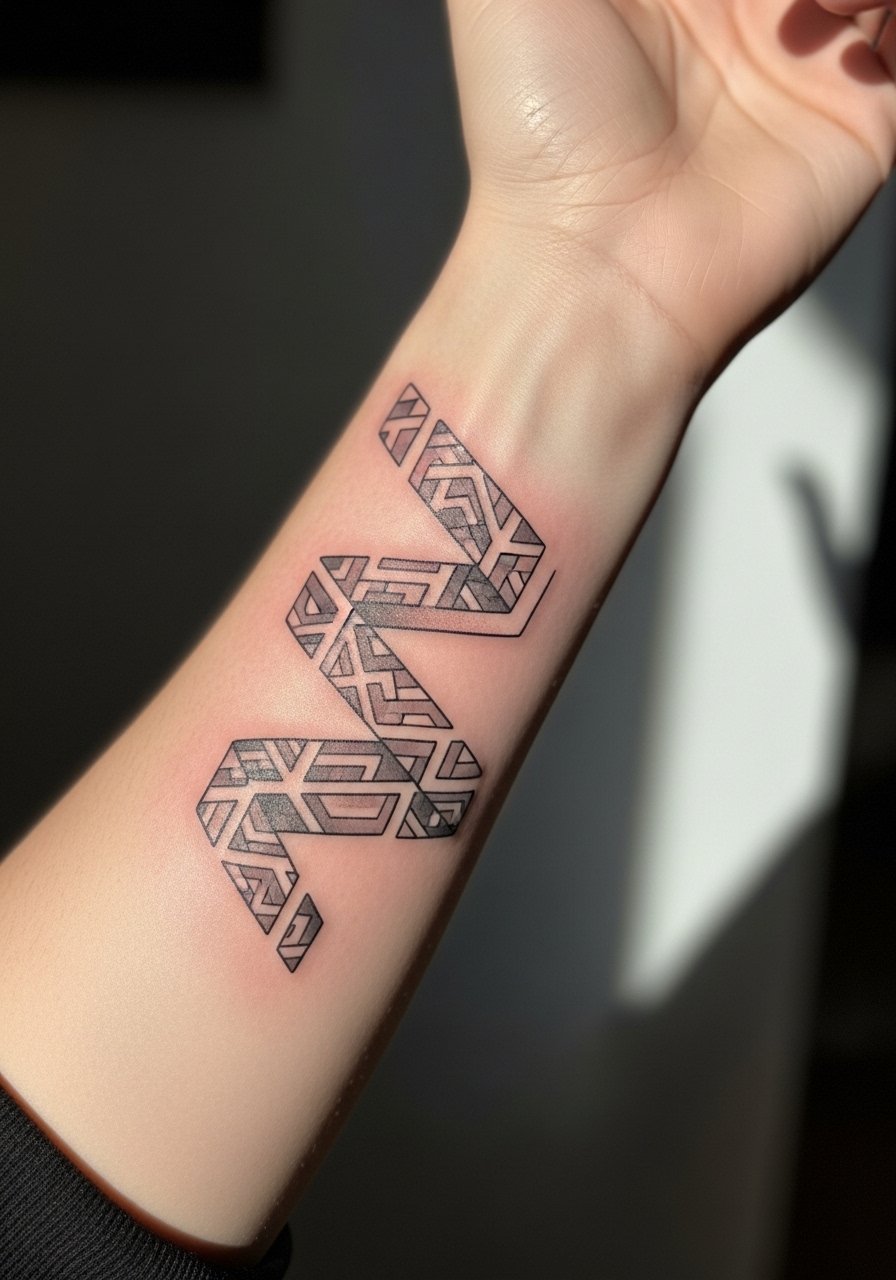
Fragmented wraps give a modern, airy feel because sections float around the arm rather than forming a solid band. I suggest this if you want visual interest with less risk of heavy areas blurring. Pain is moderate on the forearm and a single session can handle moderate fragmentation. Tell the artist to maintain consistent spacing rules so negative windows read as a deliberate pattern, not gaps from poor stenciling. A common mistake is uneven gaps that make the pattern look accidental. At six months the windows read clean, at two years the smallest fragments blur first, and yearly photos help you decide when to touch up select fragments.
20. Cascading Triangles That Follow Muscle Lines
Designs that follow muscle lines look more integrated and age more gracefully because they move with the body. Cascading triangles work well on the forearm where the planes are predictable. Expect moderate pain and session times around two hours. During consultation, have the artist mark the flow while you flex and relax so triangles align with muscle contours. Mistakes include ignoring motion which makes shapes distort as you use your arm. At six months the cascade reads fluid, at two years inner triangles may soften, and targeted touch-ups on the most-used zones keep the overall rhythm intact. For a day out wear rolled sleeves or a short-sleeve tee that shows the cascade cleanly.
21. Full Wrap Sleeve with Geometric Panels and Dot Work
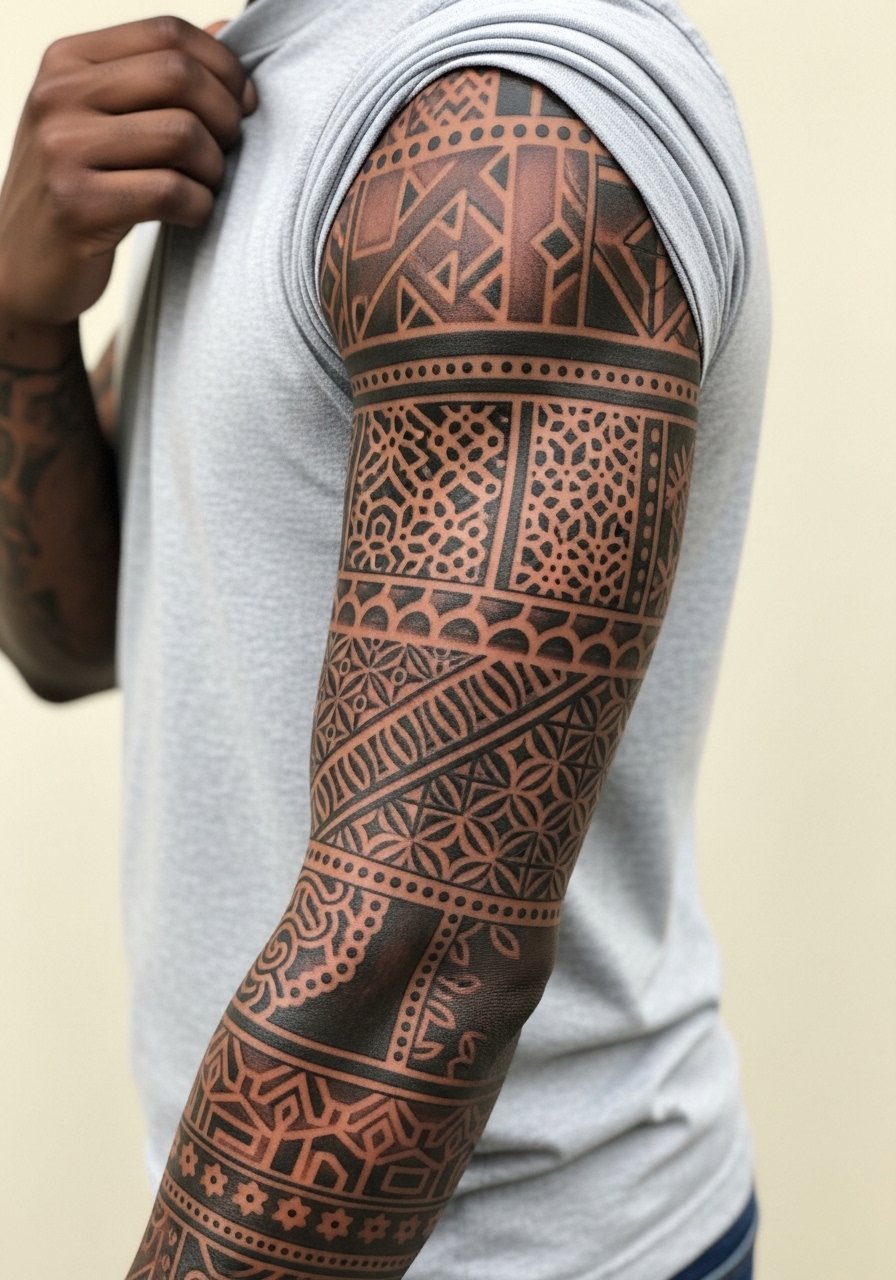
A full wrap sleeve combines several geometric languages into a cohesive whole. This is for people ready to invest in multiple sessions and in a plan that allows breathing space between panels. Pain varies across the arm and sessions are staged, often over many months. In consultation, discuss a long-term plan, how panels will age, and which edges you want bold versus stippled. The biggest mistake is trying to cram too many small panels into one pass which leaves no room for aging. At six months the sleeve has strong contrast, at two years panel joins can show softening in high-motion areas, and maintenance touch-ups every few years are normal for sleeves. When building a sleeve, document each session with consistent photos so future artists match the original rhythm.
Frequently Asked Questions
Q: Will a geometric wrap on the wrist blur faster than one on the upper arm?
A: In my experience wrist wraps blur sooner because the wrist has thinner skin and constant friction from clothing and watches. Upper arm wraps usually last longer because the skin is thicker and moves less. Ask your artist to increase line weight slightly for wrist work and plan for a possible touch-up around year two.
Q: How should I prepare clothing-wise for a session that crosses the inner bicep and forearm?
A: Bring a sleeveless tank or a button-down you can slide off without rubbing the fresh ink. A loose button-down shirt that you can remove easily is ideal so the artist can access both inner and outer arm without fabric friction.
Q: Are there specific geometric styles that need more frequent touch-ups?
A: Fine-detail geometry and micro-hex grids tend to need more frequent touch-ups than bold polygon cuffs because thin strokes lose contrast faster. Designs that sit over joints or creases also usually need targeted touch-ups sooner.
Q: How do I find an artist who understands geometric wrap mapping without naming names?
A: Search local shop directories, look for portfolios tagged with geometric or linework on gallery platforms, and check discussion threads in the tattoo community for first-hand reports. Bring several reference photos and ask the artist to sketch a stencil on you in motion before booking.
Q: If I want a wrap that reads like jewelry, what placement and scale do you recommend?
A: Inner forearm and narrow wrist bands read most like jewelry when scaled with measured negative space. Keep line weight slightly bolder than a hairline and ask for a stencil check in natural light so the piece reads as an accessory rather than faint ink.
Q: What should I ask about longevity during my consultation for a rib-adjacent geometric wrap?
A: Ask whether they prefer bolder outlines or fine lines for that placement, and how they map motifs around stretches in the skin. Two camps disagree on fine lines near ribs. One says the stretch causes quick blurring. The other says correct placement and depth keep it stable. Hearing their position helps you set realistic expectations.
