
Fine line under-breast work looks fragile in photos, but the reality in the chair is messier. Pain, under-bra friction, and unexpected fading are the three things people mention most when they regret a rush decision. Pick a technique that suits your skin, plan for touch-ups, and choose clothing that helps healing. The first idea shows how a delicate illustrative floral can read bold without losing its detail over time.
1. Fine Line Botanical Underbust
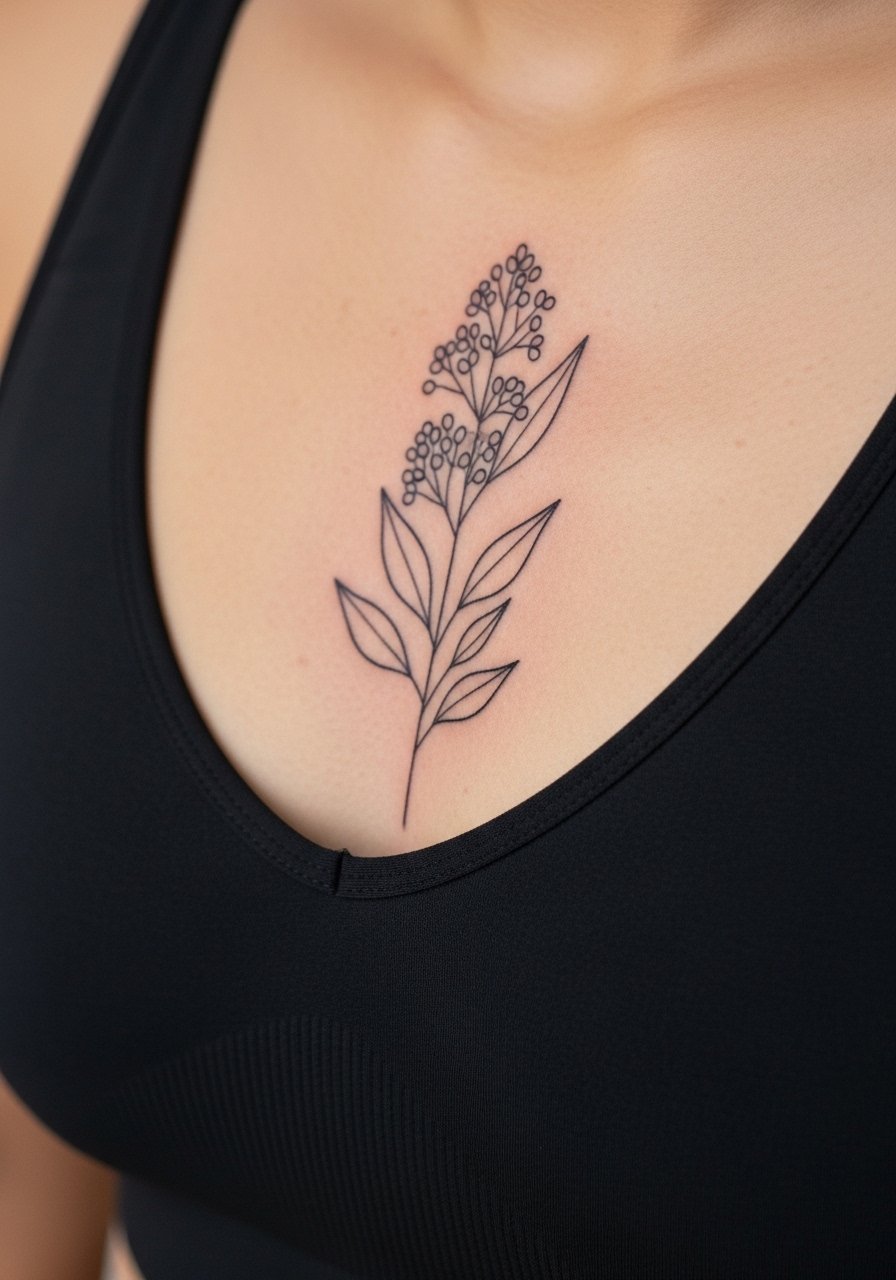
Most people choose a botanical underbust when they want something personal but not loud. Fair warning, the skin here flexes with breathing, so ask your artist for slightly heavier linework than you would on a forearm to prevent early blurring. Expect a moderate pain level and a session that runs one to two hours depending on coverage. The most common mistake is asking for ultra-fine hairlines that disappear after healing. For the appointment, wear a fitted sports bra you can pull down slightly so the artist has clean access without full exposure. Hand this exact phrase to your artist: "deepen the outer contour but keep inner veins delicate," to get the illustrative look that lasts.
2. Micro-Realism Moth Below the Rib
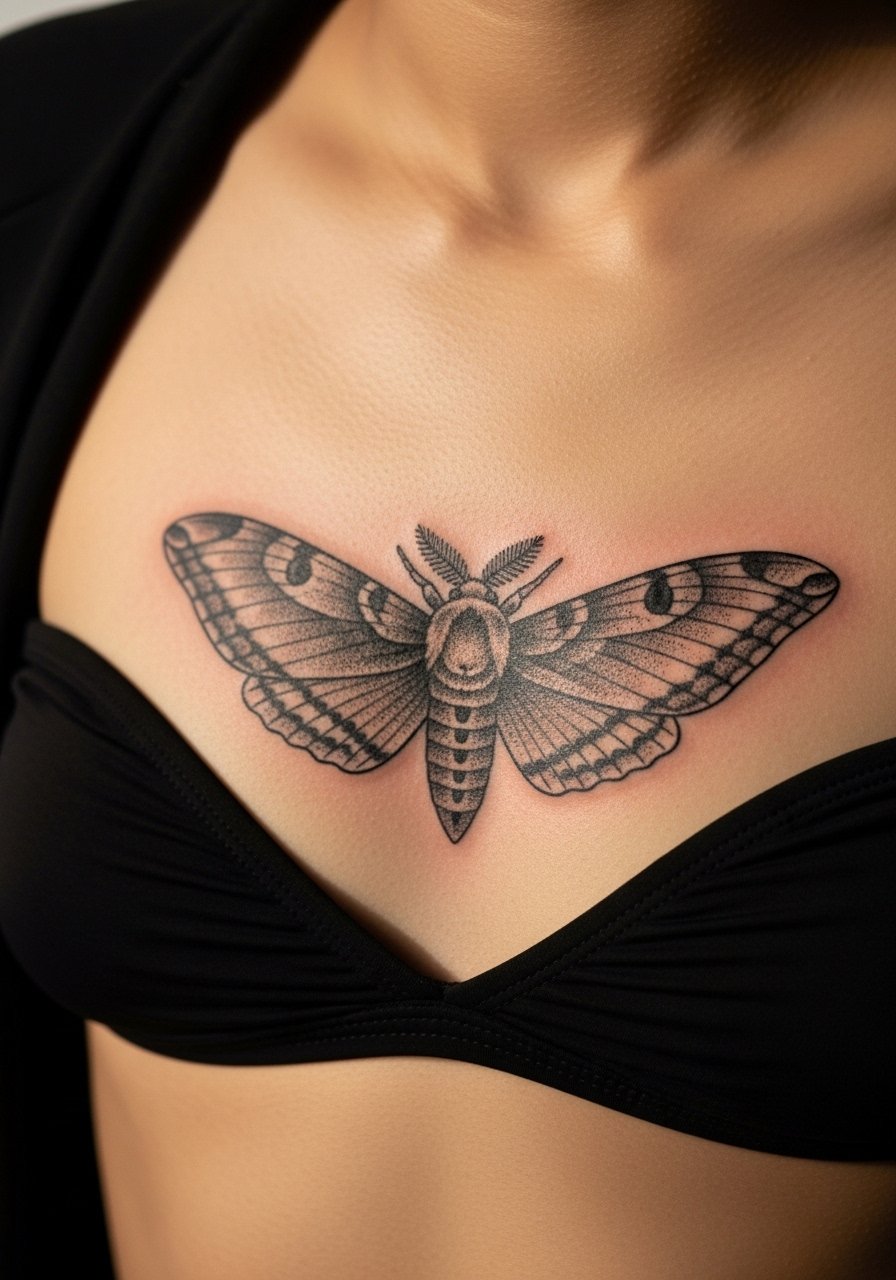
I've seen micro-realism here read beautifully when the scale is right and the shading is soft. This placement is sensitive and session time can stretch to two hours, with more breaks needed. A typical error is packing too much tiny texture into a small area, which causes merging as it heals. Tell your artist you want soft stipple shading and visible highlights so the wings read at arm's length. Career considerations matter less for this concealed spot, but find an artist who has healed micro-realism photos in similar placements before booking.
3. Blackwork Mandala Underbust Band
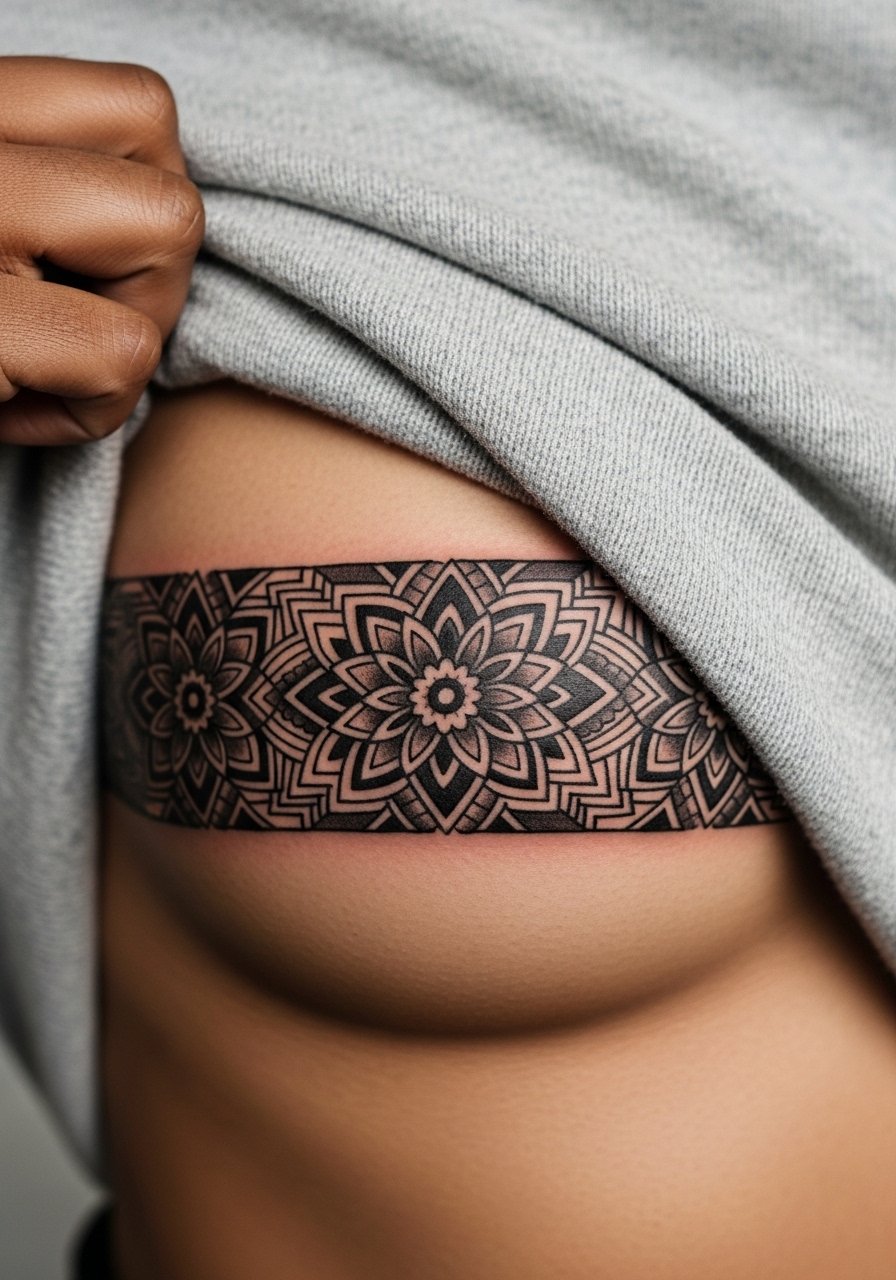
There are two camps on heavy blackwork near the sternum. One camp says saturated black will age into a bold graphic that holds. The other camp worries about dense fills near softer skin causing patchy healing. I recommend spacing the motifs and leaving small negative spaces so the fills settle evenly. Expect a firmer pain and a session that could be split into two visits for full saturation. Pair this with low-cut or open-back eveningwear to show the band when you want it visible.
4. Ornamental Filigree with Dot Work
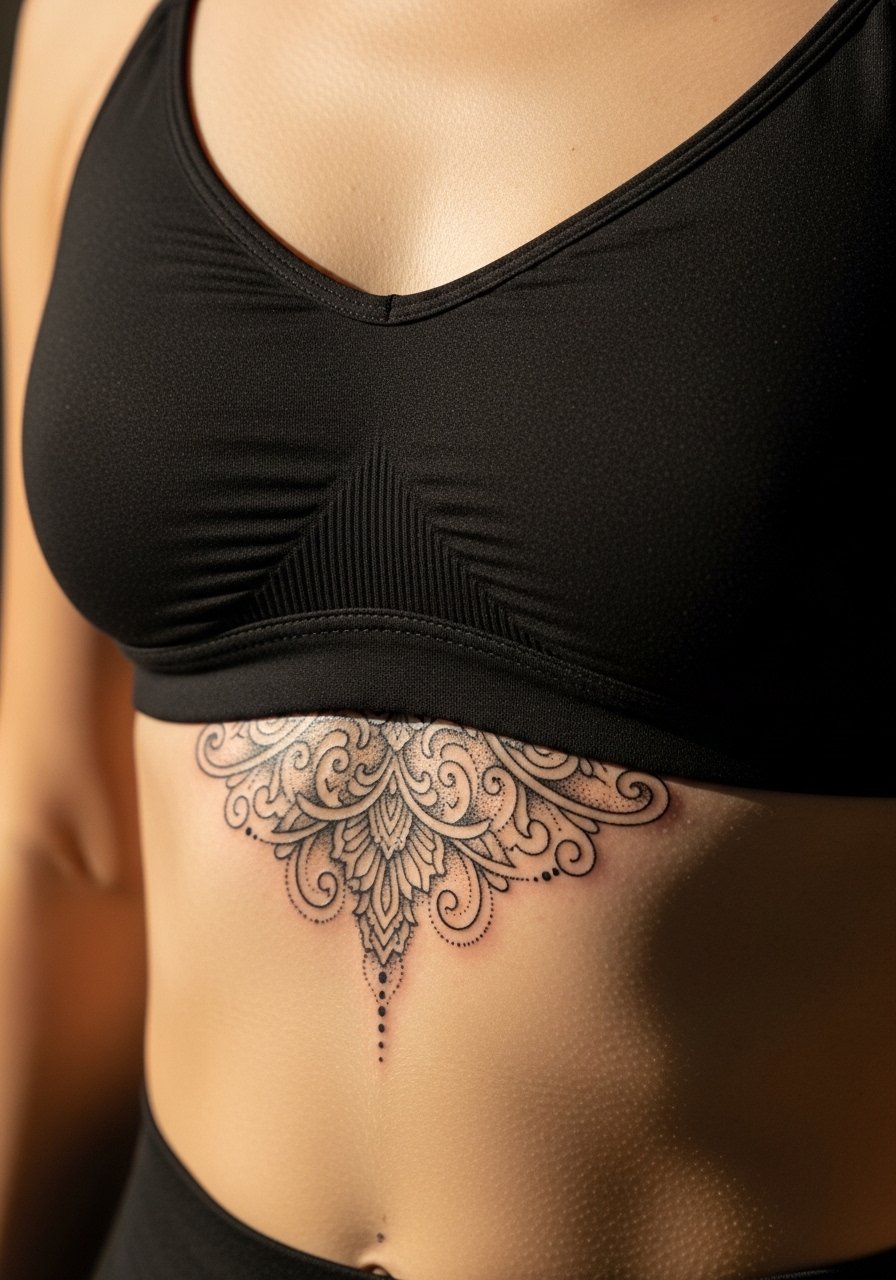
This style reads ornate without being large. Most mistakes happen when clients ask for too many tiny curls in too small a space. Tell your artist to prioritize negative space and to scale filigree elements out slightly from the center. Expect dot work to soften after two years, so plan a touch-up at that point if you want crisp stipple. For the session, a bandeau or strapless top makes access clean and keeps bra straps from rubbing the fresh ink.
5. Script Curve Under the Breast
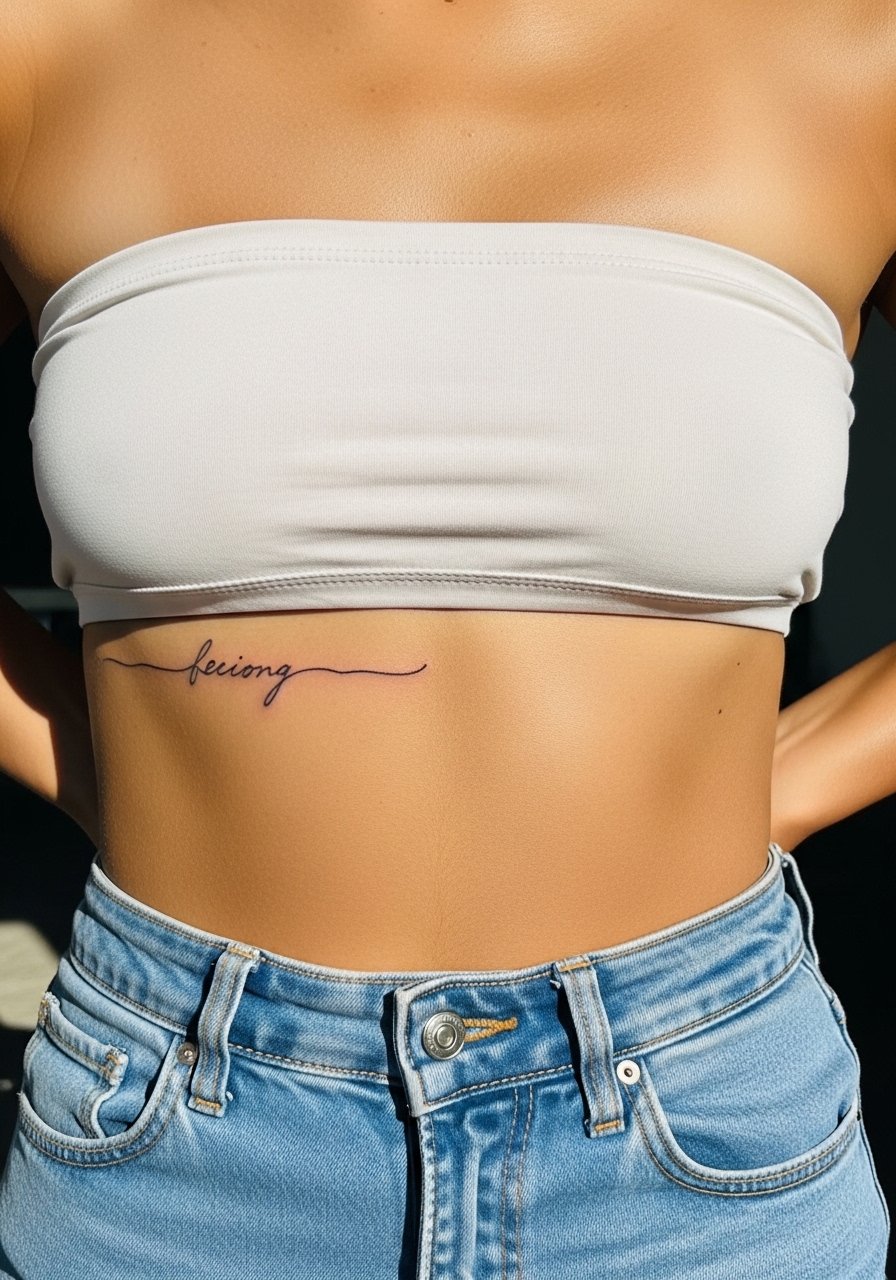
Smaller script that hugs the underbust can read elegant but it is vulnerable to blowout if the letters are too thin. The common mistake is requesting tiny lowercase loops. Ask for slightly heavier lineweight in the downstrokes and clear spacing between letters. Session time is short, often under an hour, but expect a touch-up at year two if your skin is prone to spreading. Think about wearing a bandeau for the session and during the first week to avoid underwire friction.
6. Crescent Moon and Stars Composition
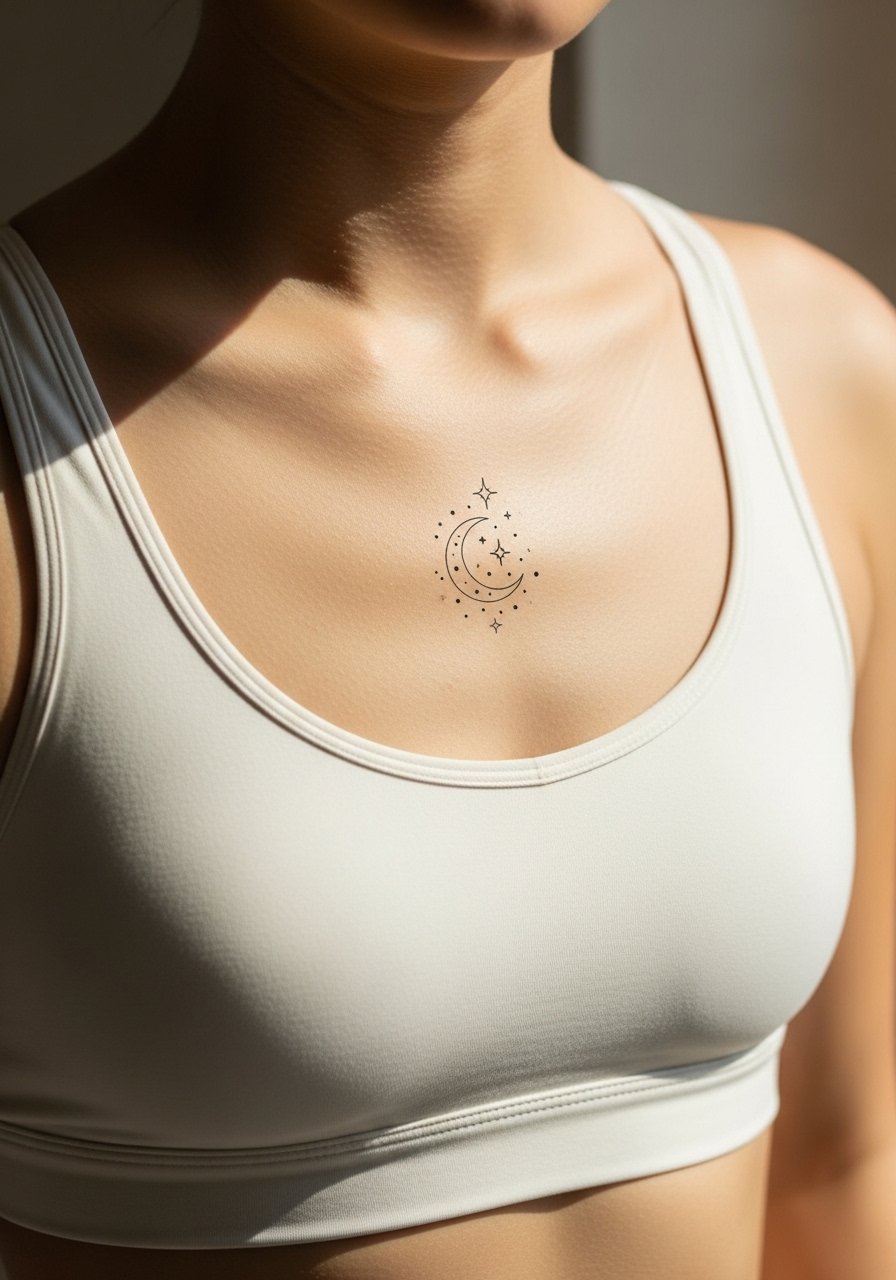
Visual impact is the reason many pick this motif. The underbust curve frames a crescent naturally, but the tiny star dots are a frequent aging trap. Dots placed too tightly will merge after a year. Tell your artist to space stars and to use stipple shading around the crescent for depth rather than more dots. The session usually takes under ninety minutes. Wear a strapless bra you can adjust to give the artist access without full exposure.
Studio Day Picks
The first six ideas above share issues with friction from bras, fine detail that can blur, and variable sensitivity across the sternum and ribs.
-
Stencil transfer paper kit. Lets you and the artist preview placement on the curved underbust area so scale and curve read correctly before the needle touches skin.
-
Topical numbing cream. Applied before a sensitive underbust session eases the first pass on the sternum without making the skin too swollen for linework.
-
Thin protective film roll. Wraps cleanly around under-bra zones to protect the area from friction during the first day of healing.
-
Fragrance-free body wash. Gentle cleansers remove shower residue from the healed band without stripping oils that help fine line longevity.
-
Aquaphor healing ointment. A thin layer in the first 48 hours helps keep the delicate underbust linework from drying into flaky scabs that pull pigment.
7. Art Nouveau Flowing Vines
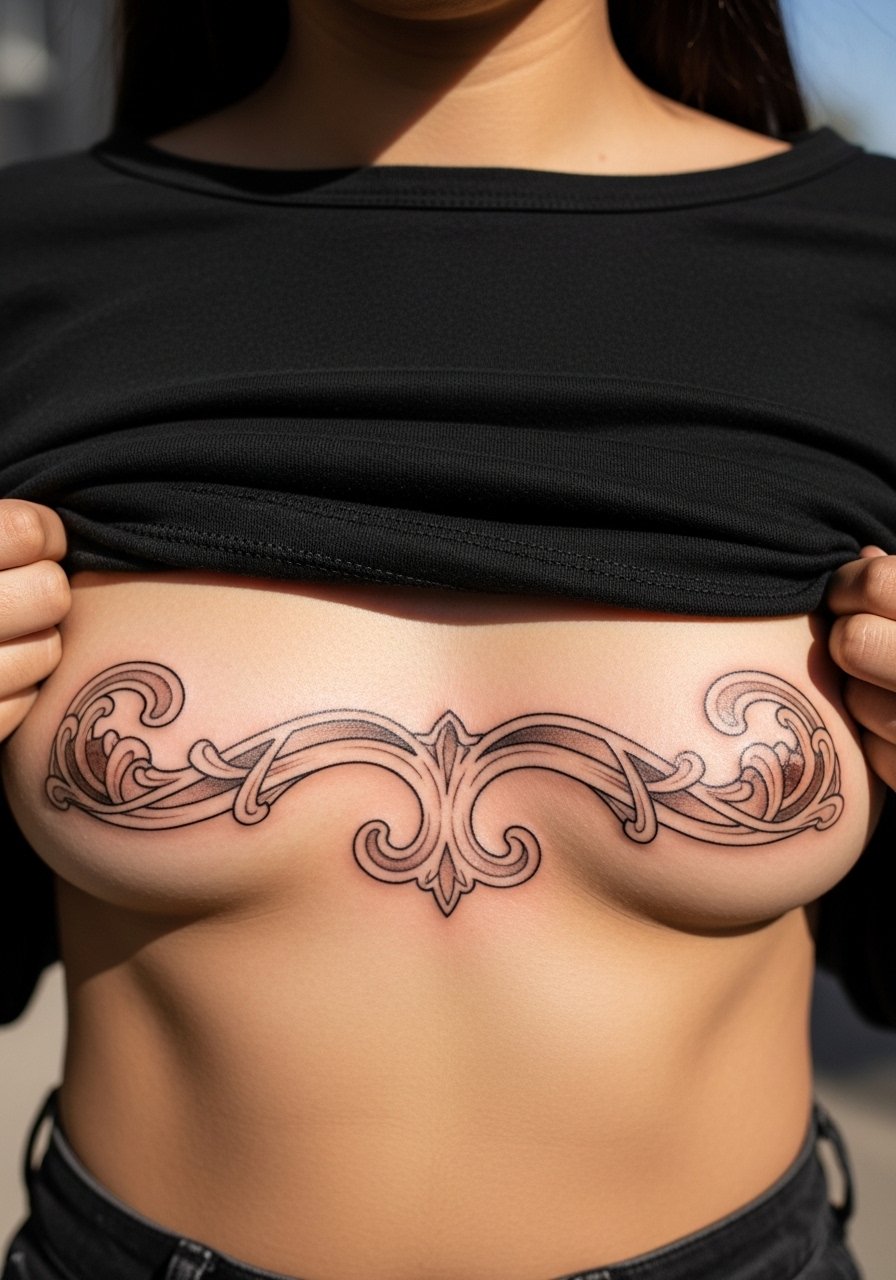
The flowing vines read like movement when done with sweeping linework. The aging issue is small inner curls that collapse into blur. Ask the artist to scale the swirls outward and use visible negative space between tendrils. Sessions can be one to two hours depending on coverage and demand intermittent breaks because of the placement sensitivity. For showing it off, an open-back midi dress or a low-cut top frames the vines without crowding them.
8. Minimalist Crescent Lace Band
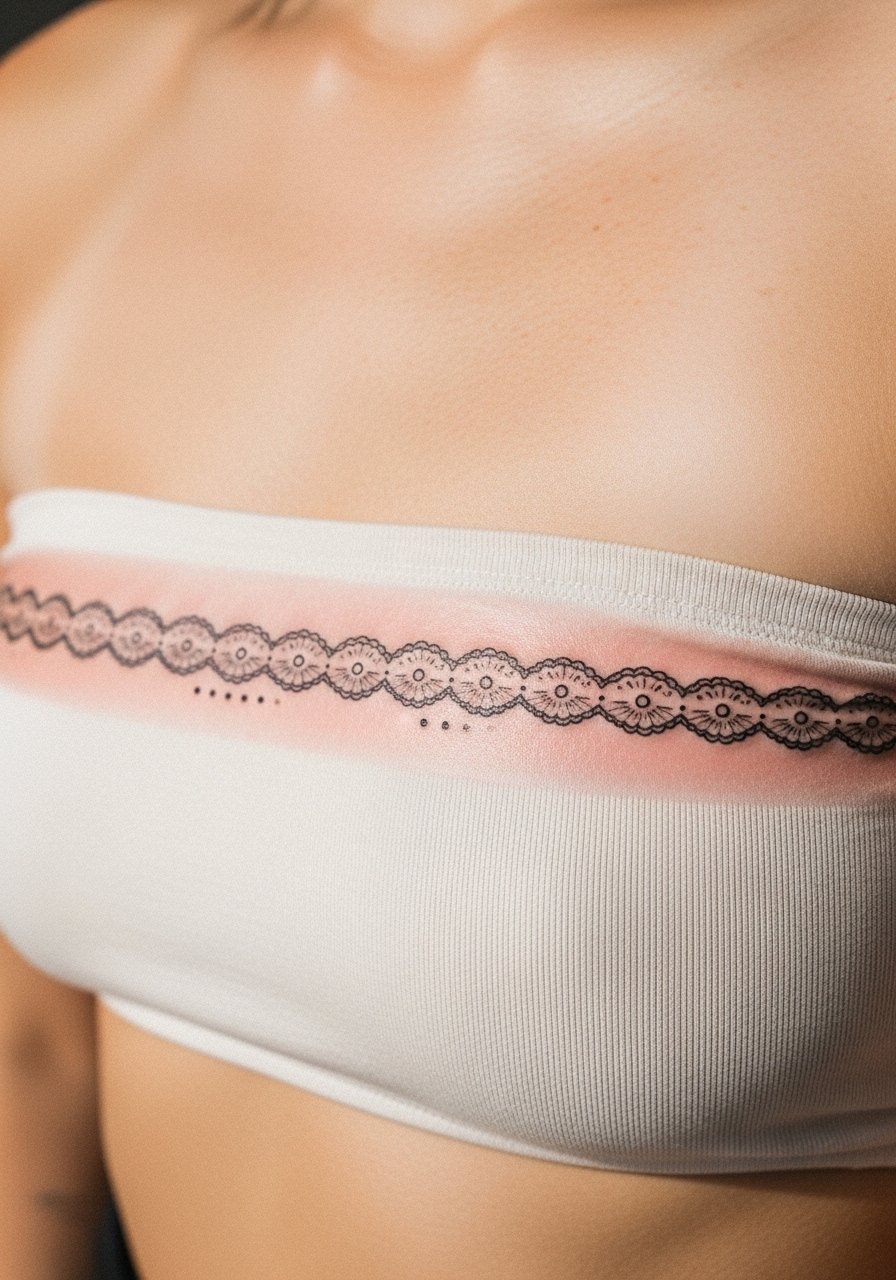
A minimalist lace band works well for people who want the look of lingerie without the fabric. The common mistake is too-fine loops that need touching up after a year. Ask for slightly heavier outer lines and thin inner filigree only where space allows. The pain is tolerable but expect the artist to pause regularly because the sternum area can be sensitive. A strapless or bandeau top keeps straps away from the fresh ink while healing.
9. Stippled Crescent with Tiny Flowers
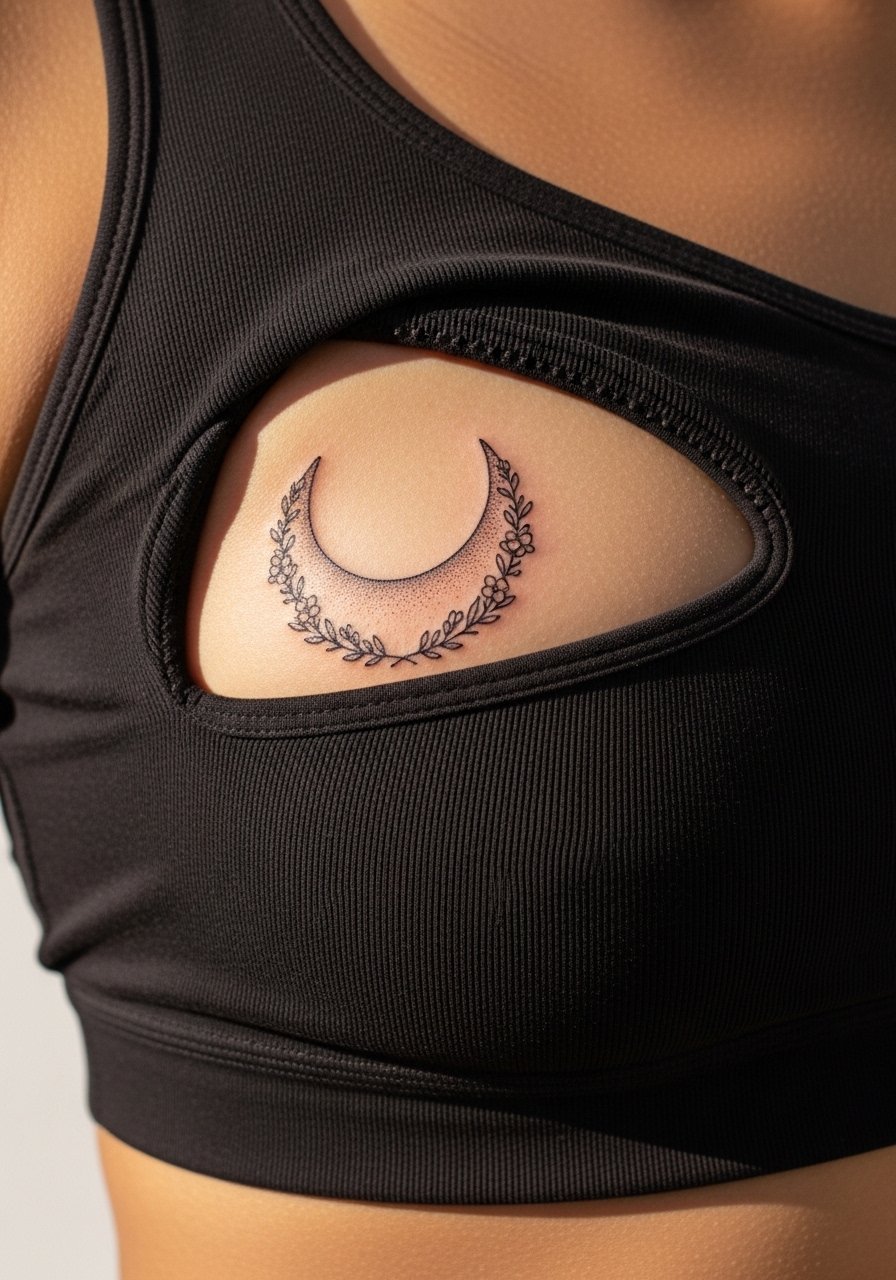
Dot work creates texture, but dense stippling can lose its definition if placed too close to heavy motion zones. Tell the artist to use gradated stipple that fades into negative space rather than filling every area. Sessions are detail-focused and may take longer than expected. The sternum is more porous, so touch-ups at two to three years are common for crisp stipple. For the session, wear a strapless sports bra you can slightly shift without rubbing the area.
10. Geometric Linework Mirror Piece
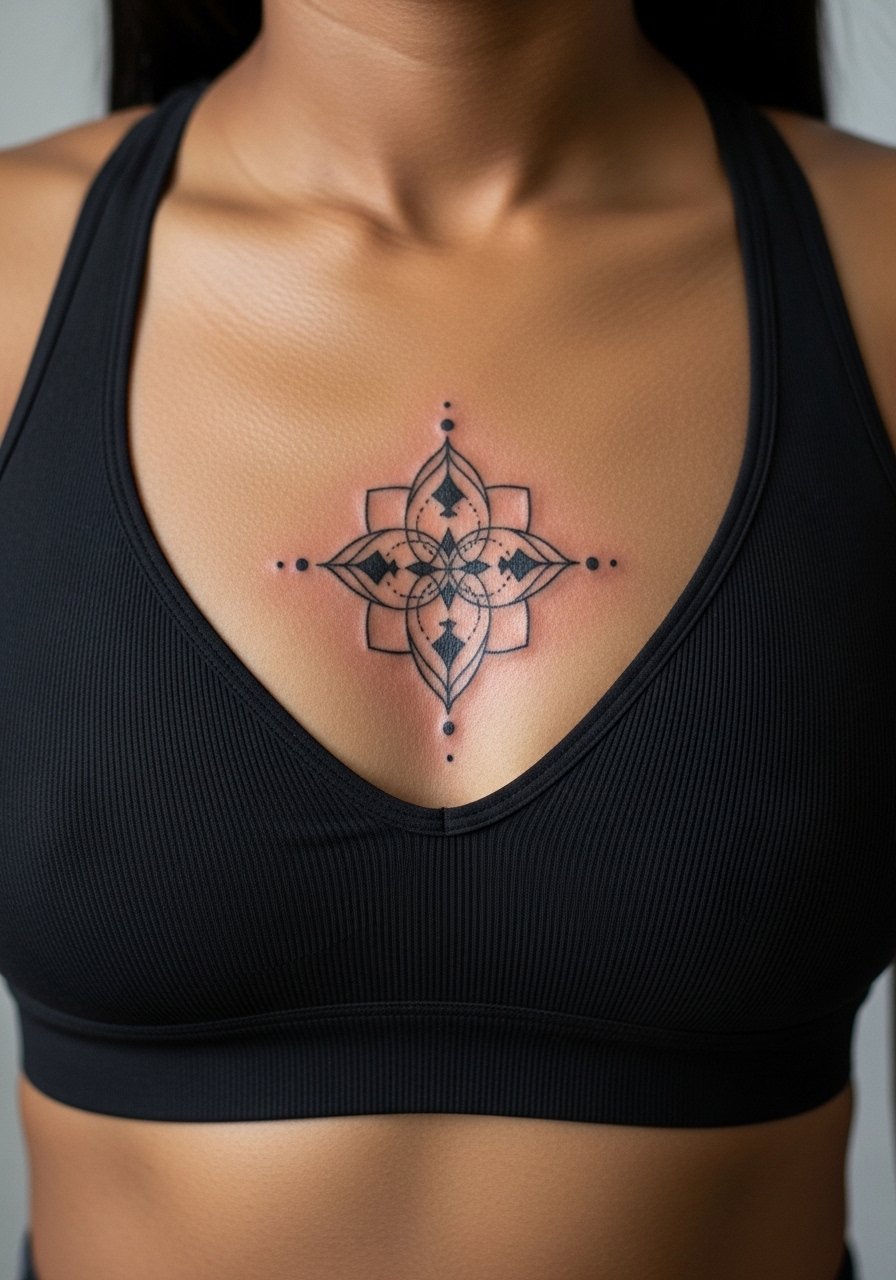
Geometric work reads best when the lines are given breathing room. The mistake is cramming tight angles too close to the breast curve so symmetry looks off on the body. Insist on a pre-session mockup taped to the skin for visual confirmation. Expect a medium pain level and a steady hand session that takes around two hours. This placement benefits from open-neck or wide-neck tops when you want to reveal the symmetry.
11. Tiny Constellation Cluster
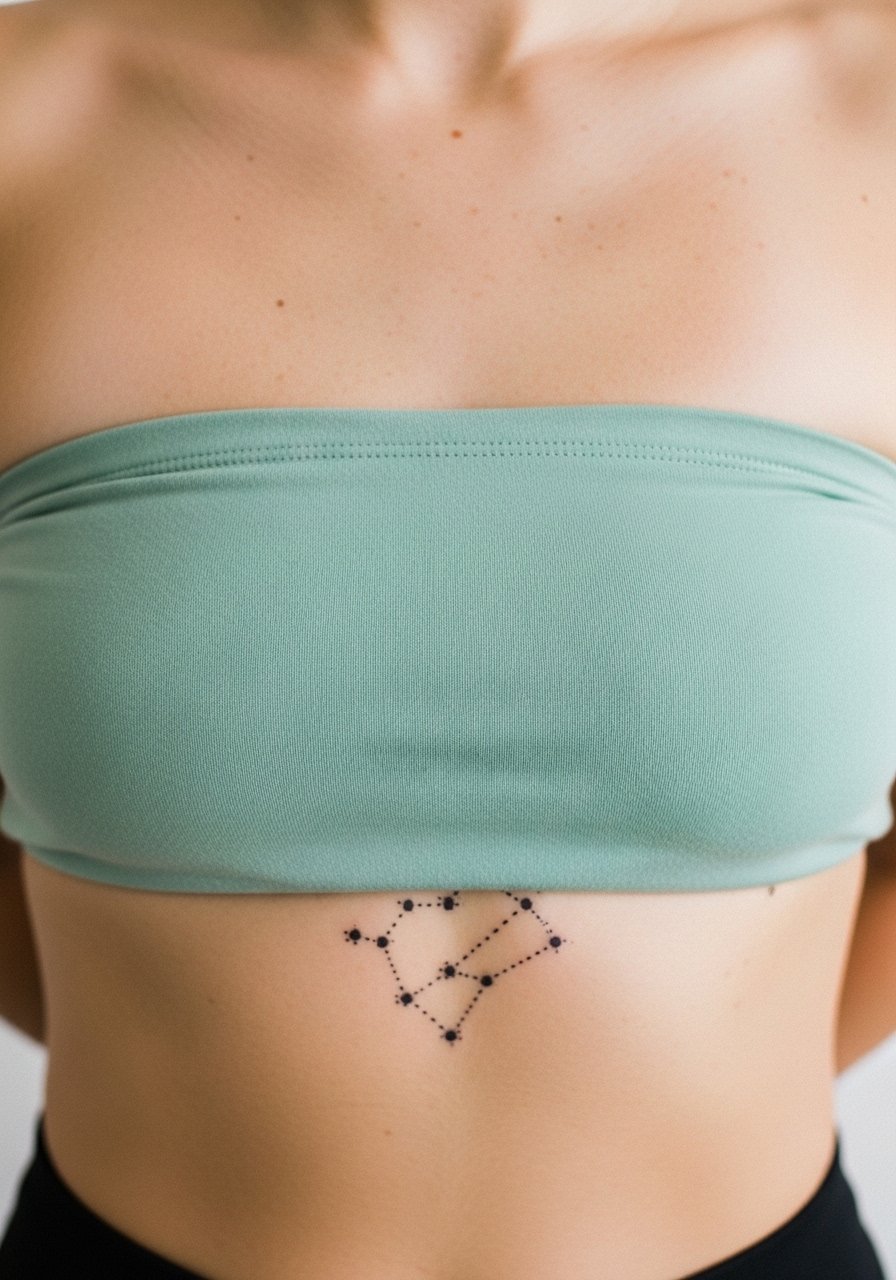
Constellations are deceptively tricky on curving skin. The tiny connecting lines can stretch out or blur if they cross too many movement planes. Ask for slightly thicker connectors and larger star dots so the pattern reads from a distance. Sessions are short, but the touch-up timeline is sooner than people expect. For showing it off, a racerback tank leaves the neckline visible without exposing too much.
12. Illustrative Wave Crest
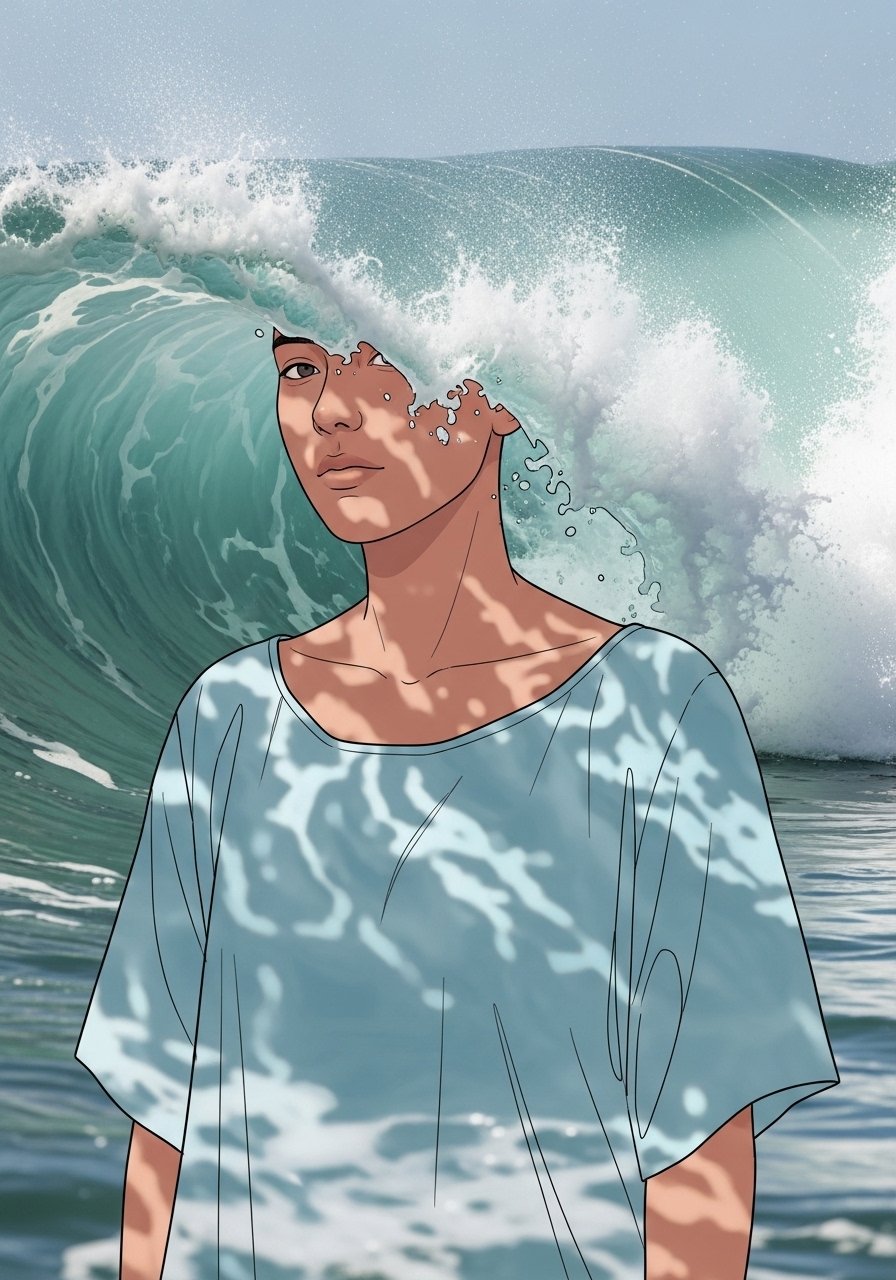
There is a visual impact to motion-based pieces here that few placements can match. The common error is over-detailing the foam which blurs into a gray patch as it heals. Tell your artist to suggest implied motion with fewer, stronger strokes and stipple for texture. Sessions take one to two hours and can sting near the sternum. Low-cut blouses or bandeau tops frame ocean-inspired pieces nicely for evenings out.
13. Scripted Coordinates Underbust
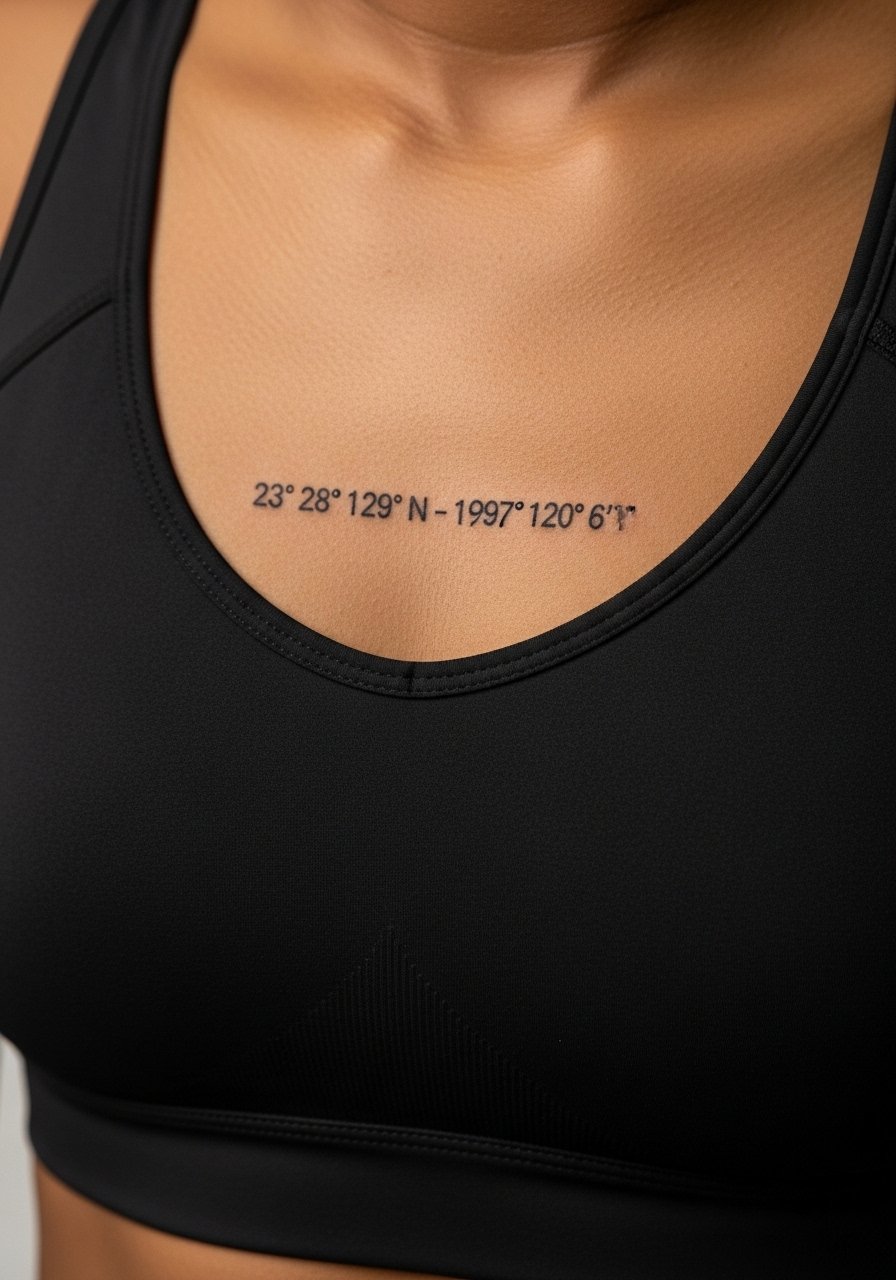
Text with coordinates reads crisp when size and spacing are right. A frequent mistake is choosing very small numerals that merge after a year. Request the exact font size and a mockup taped to the skin so you can judge legibility. The session runs quickly but expect a touch-up window earlier if your skin is prone to spreading. For the session wear a loose button-down shirt you can pull to one side.
14. Lace Chandelier Motif
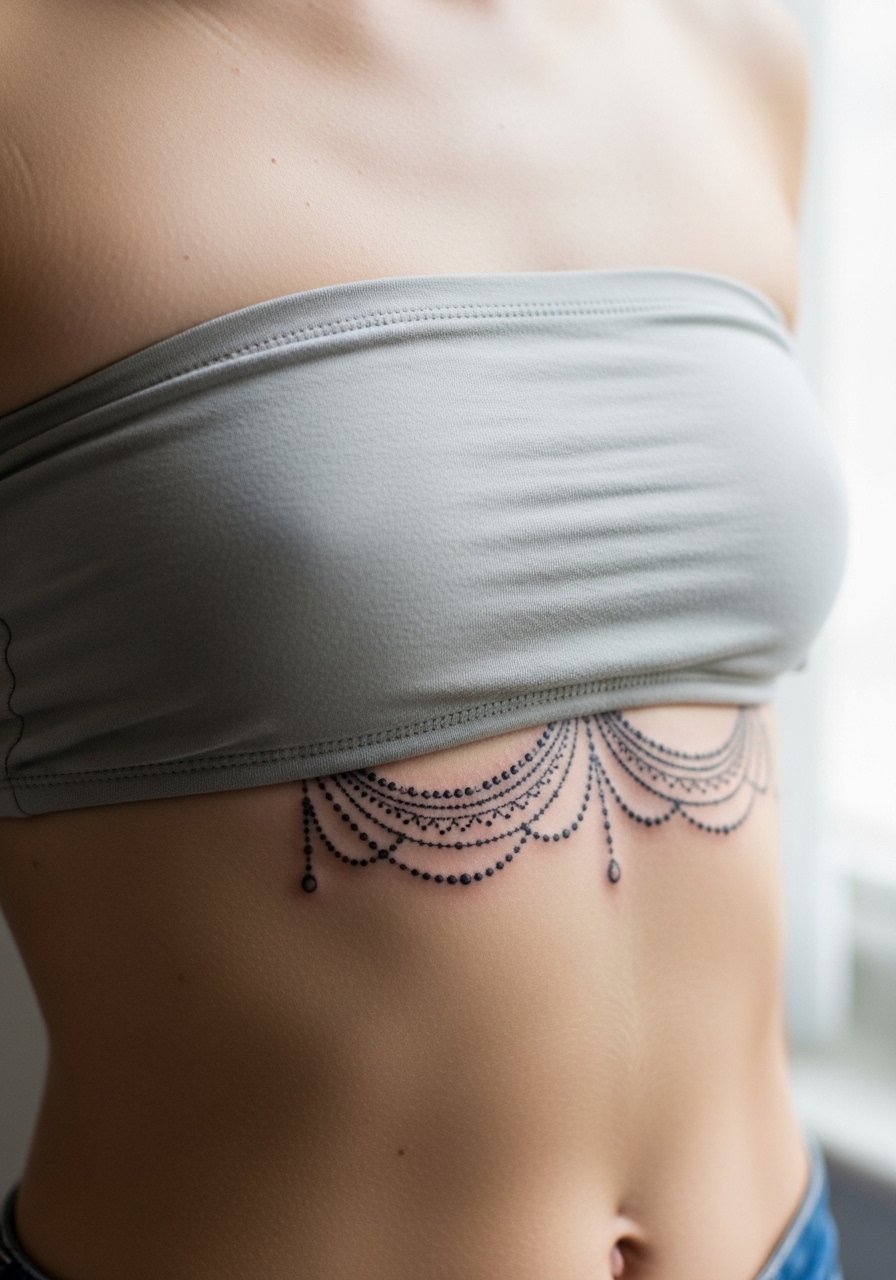
This motif plays with negative space to mimic jewelry. The mistake is packing too many beading details into a narrow band that fades into a blur. Ask for larger beads and spaced chains so the chandelier reads clearly after healing. Expect a one to two hour session with careful positioning. If you want to show it off, pair it with a low-back dress or a strapless top to mimic the dangling effect.
15. Botanical Wreath Framing Sternum
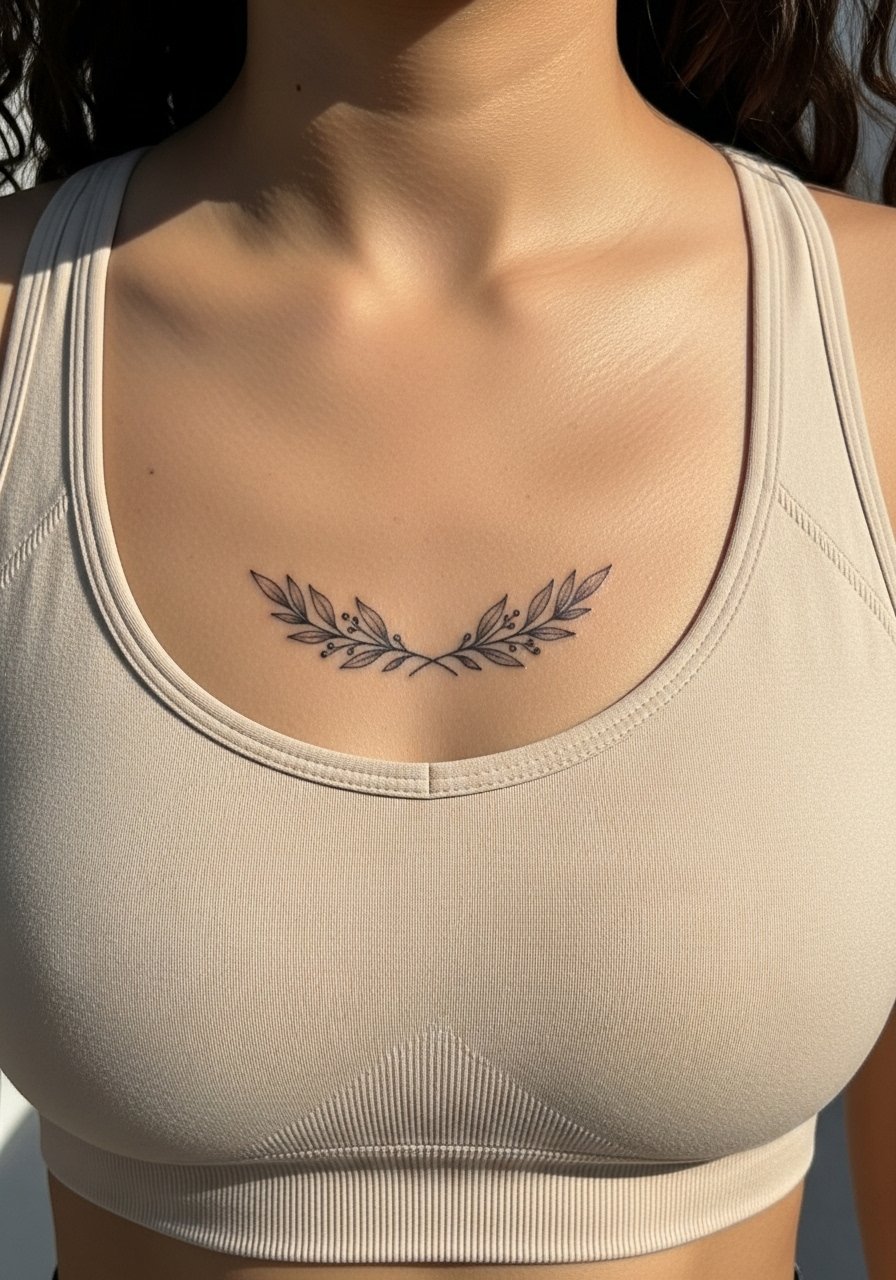
A wreath that encircles the sternum can feel intimate and wearable. The common mistake is a wreath that sits too tight and becomes unreadable when the skin settles. Ask for airy spacing and slightly thicker outer strokes. Sessions are moderate in length and ache more on the center rib line. For daytime wear a thin chain pendant necklace sits just above the wreath without competing visually.
16. Single Bold Anchor Underbust
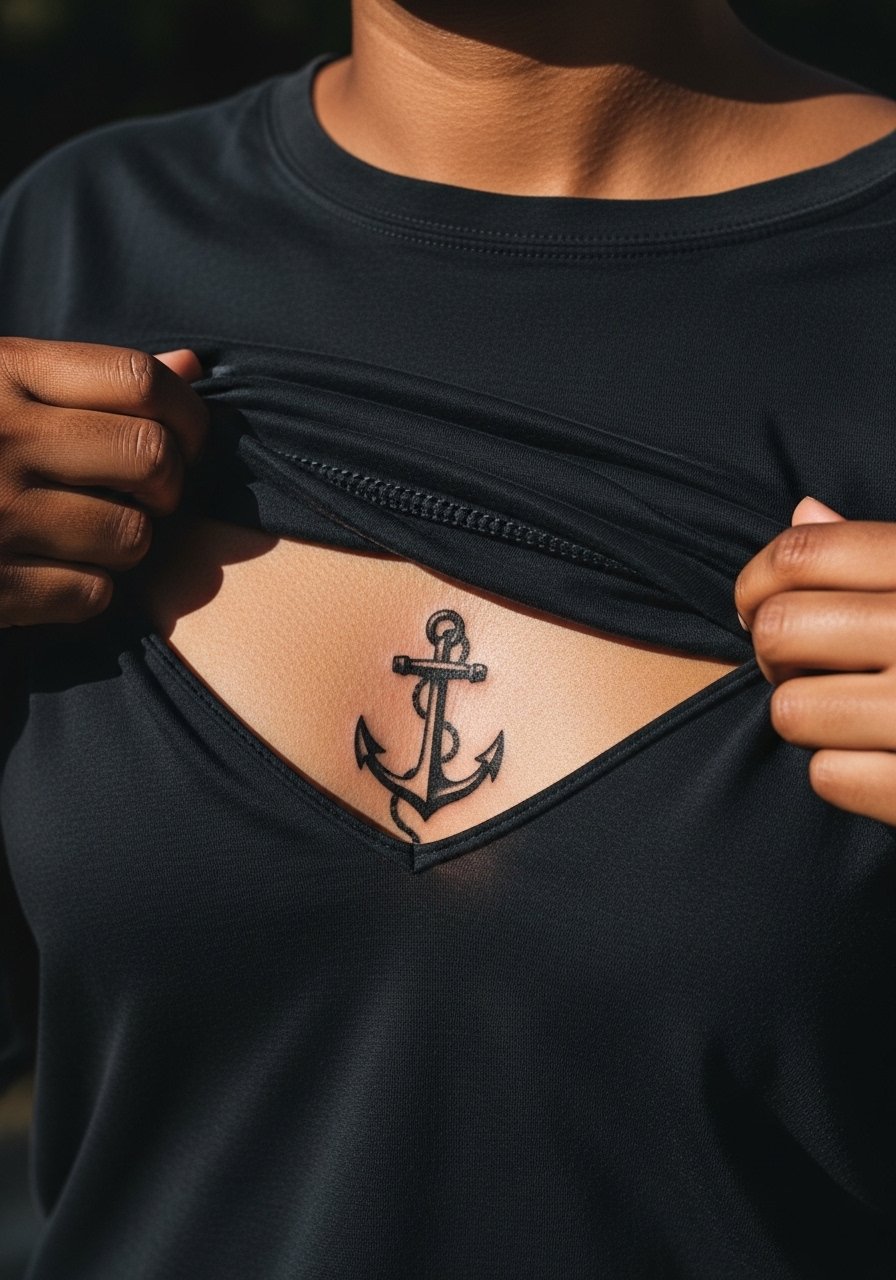
Bold single motifs can age more predictably than complex micro-detail. The trade-off is more pain during saturation passes, and the sternum can sting. If you want longevity, ask for clean outlines and solid fills rather than tiny internal shading. Sessions are shorter but intense. This style pairs with simple tops that let the single icon read clearly.
17. Abstract Brushstroke Sweep
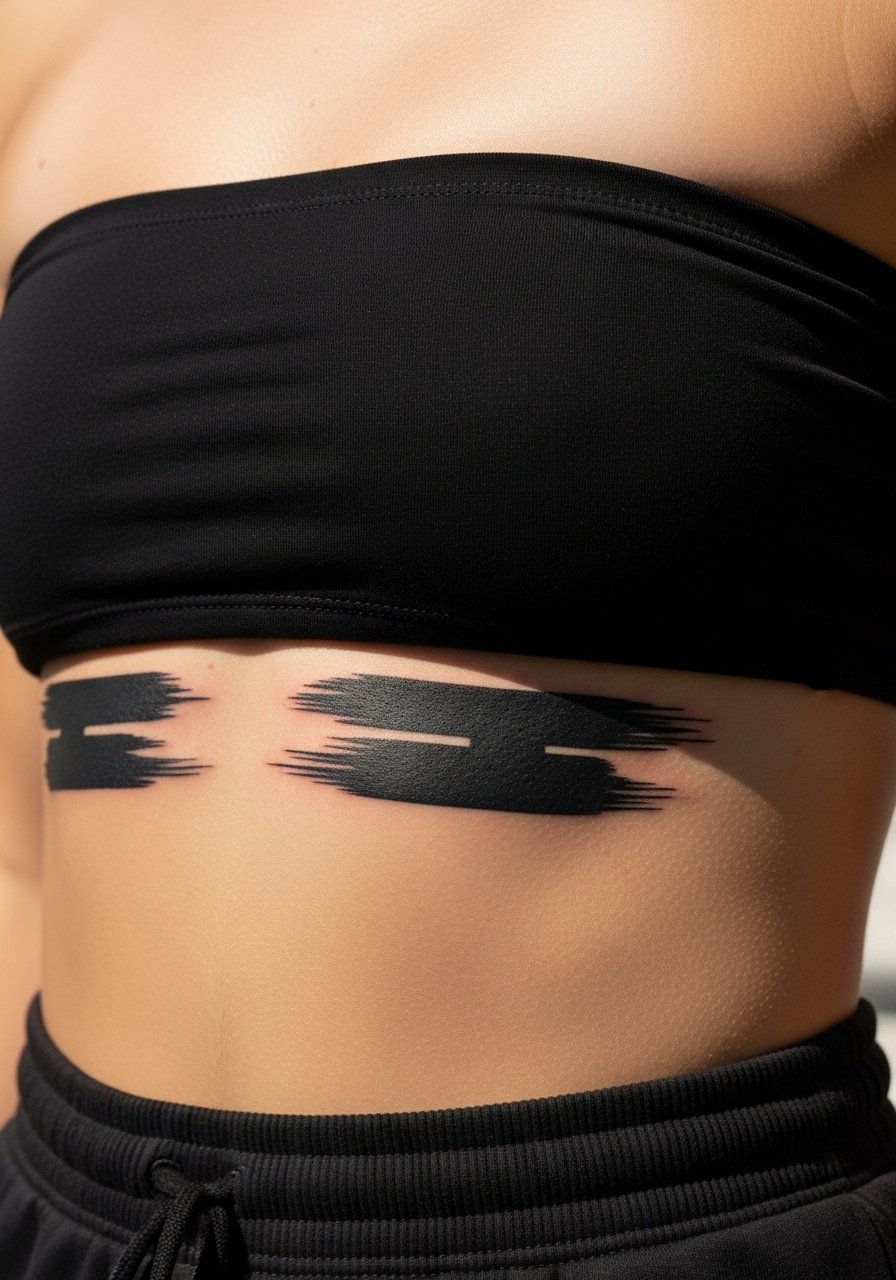
Abstract brushstrokes can look fresh as they age because they rely on form rather than micro detail. The risk is asking for watercolor-like feathering in an area prone to friction, which can bloom unpredictably. Tell the artist you want hard edges in the main stroke and feathered tails only where space allows. Expect variable session length based on coverage. For showing off, low-cut tops highlight the sweep without distraction.
18. Tiny Anchor Chain with Beads
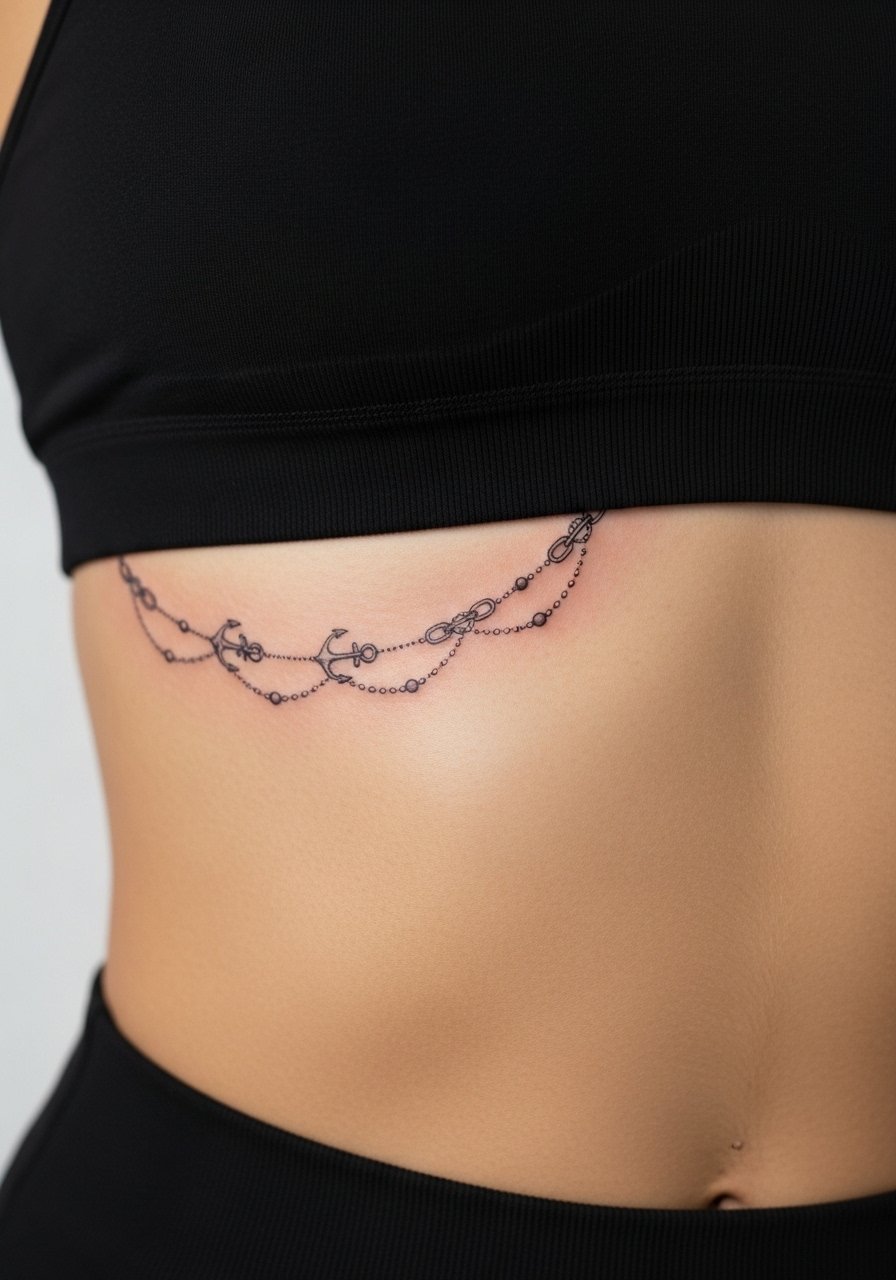
Chains and beading read delicate but are vulnerable to blowout if links are too thin. The common mistake is micro-linkwork that cannot hold under the skin. Ask for slightly stronger link contours and spaced beads so the chain remains legible. Sessions are detail-focused and may require brief pauses. Choose bras without seams or underwire for the first two weeks to reduce rubbing.
19. Japanese Wave Accent Under the Sternum
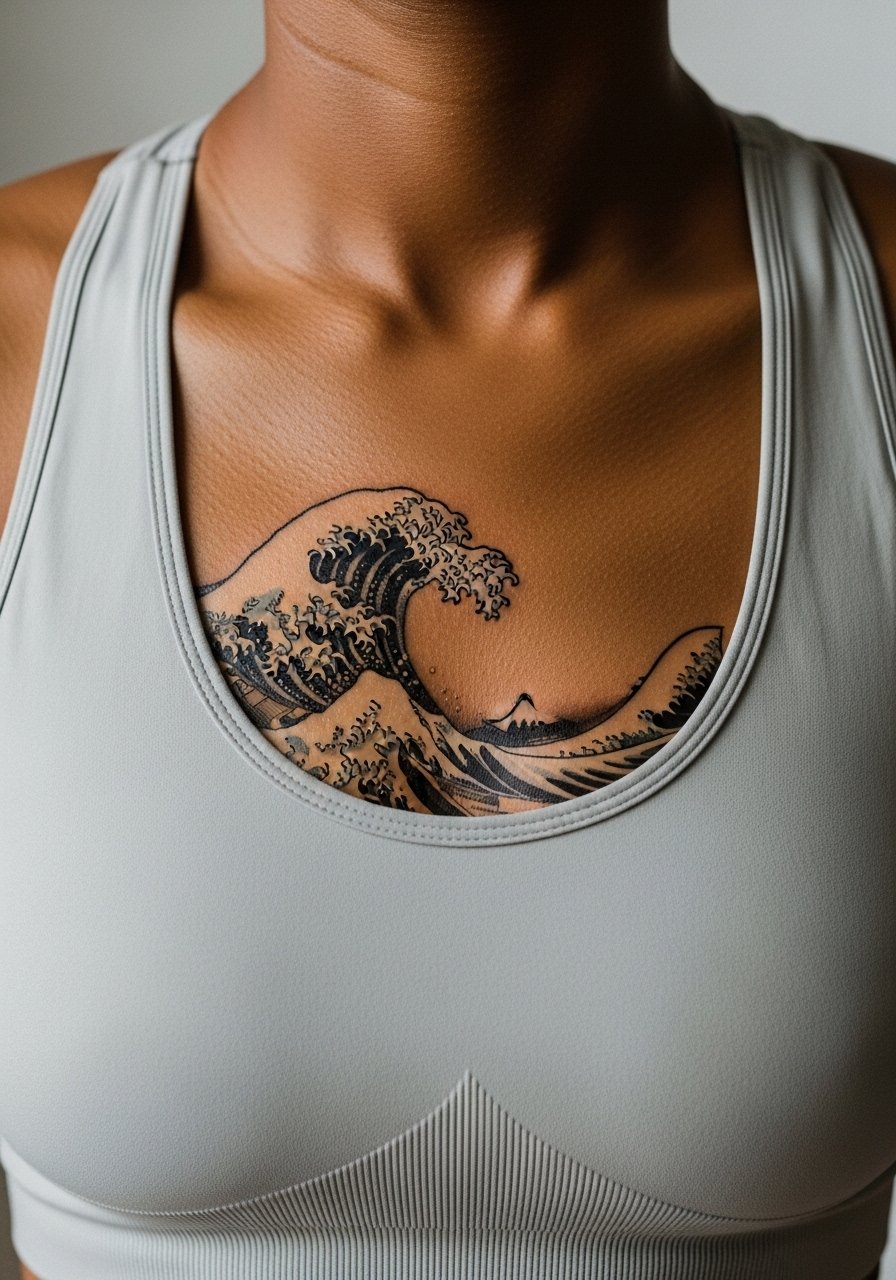
Traditional Japanese-inspired motifs translate well to the underbust when simplified. Problems arise when clients ask for full-scale mats to be miniaturized without adjusting line weight. Tell your artist to simplify elements and preserve contrast. The session can be short for an accent piece, but dense black may require a second pass. For evenings, pair this with a simple slip dress to echo the motif.
20. Stylized Heart Lattice
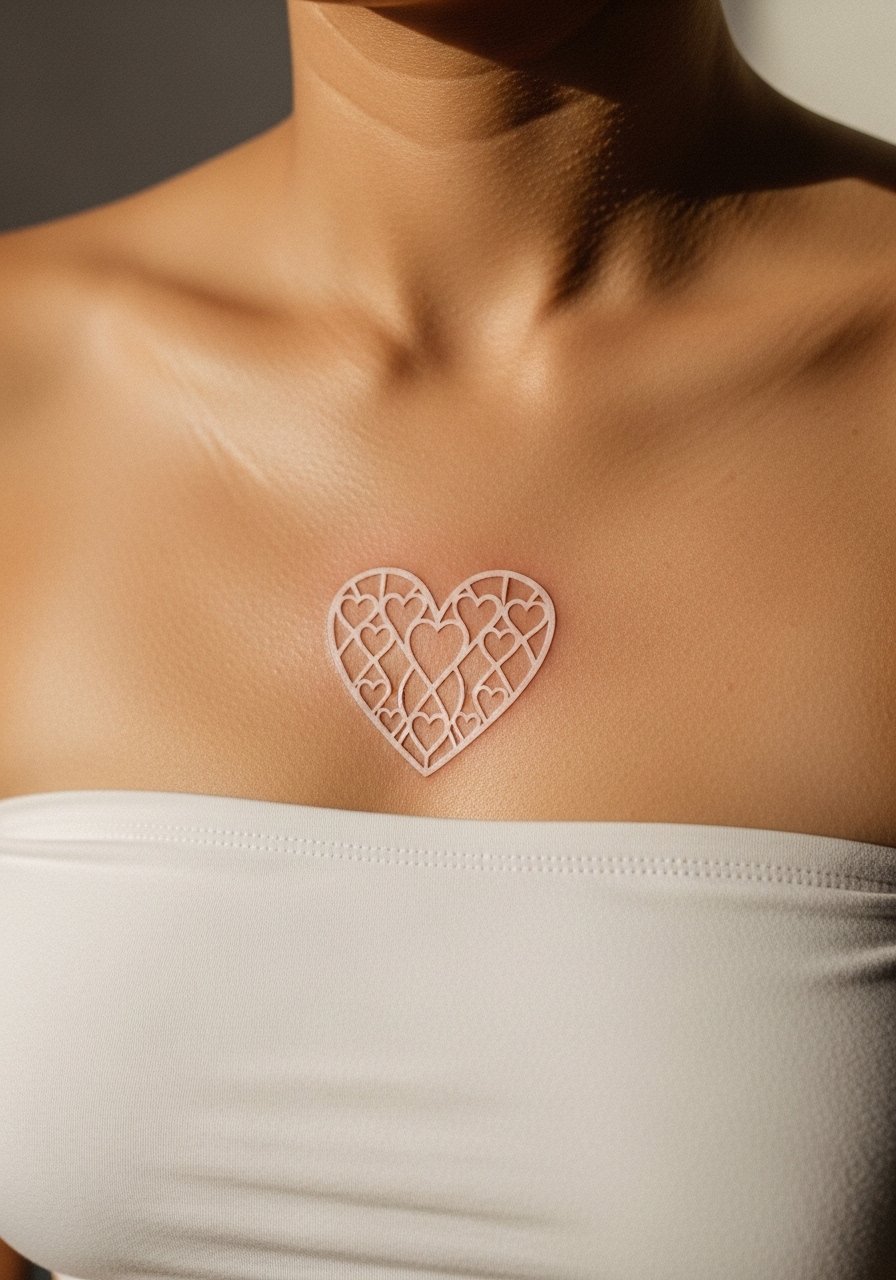
Pattern repeats need room to stay crisp. The mistake is creating too many small hearts that blur into a gray band. Ask for fewer repeats with clear negative space and a solid anchor line. Sessions vary by scale but usually remain under two hours. Consider low-cut tops that let the lattice peek through for special occasions.
21. Botanical Crescents Mirrored
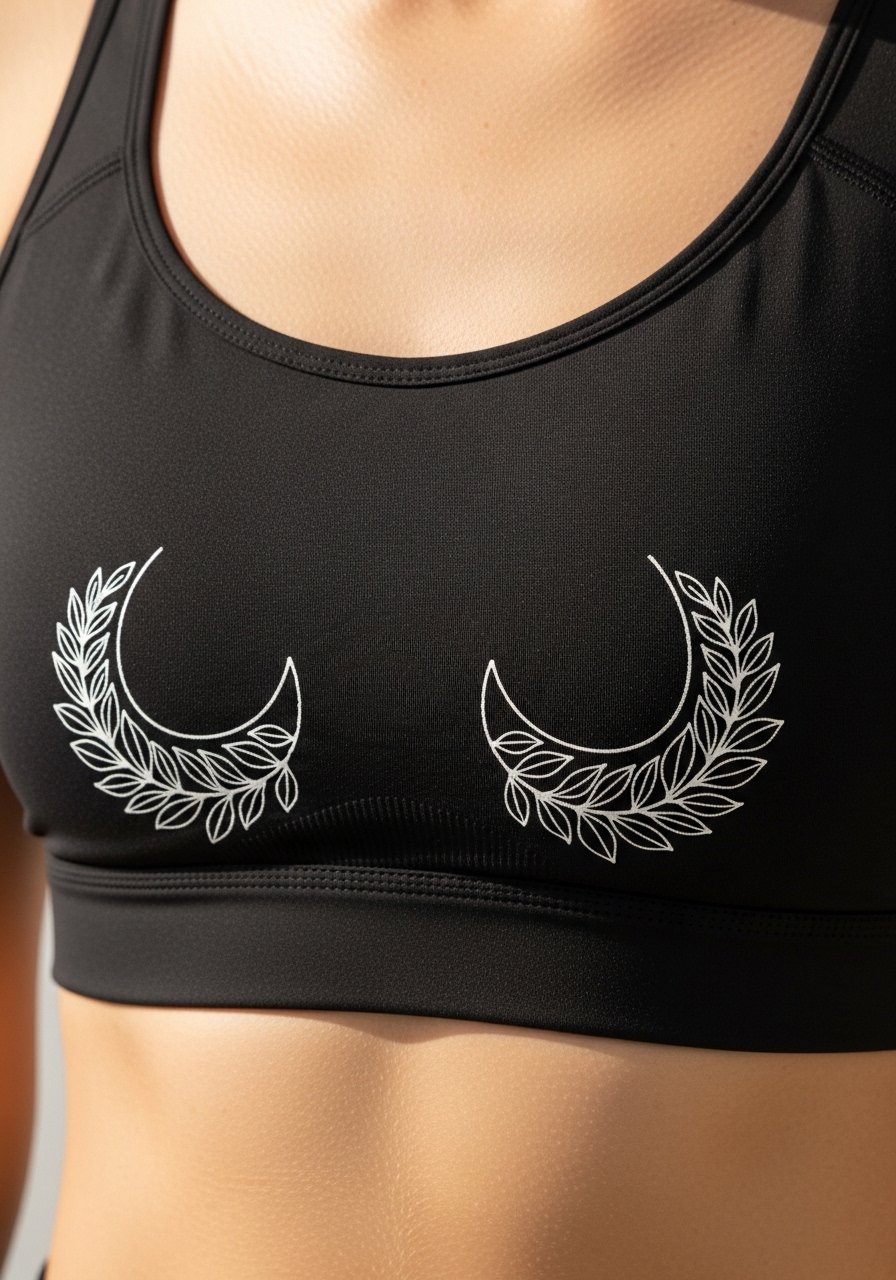
Mirrored designs force alignment issues that often get noticed after swelling. The consultation tip is to have the artist photograph the stencil from multiple angles before starting. Expect moderate pain near the center and slightly lower along the ribs. Planning for a touch-up is wise because symmetry adjustments sometimes need small corrections after healing.
22. Tiny Gemstone Cluster
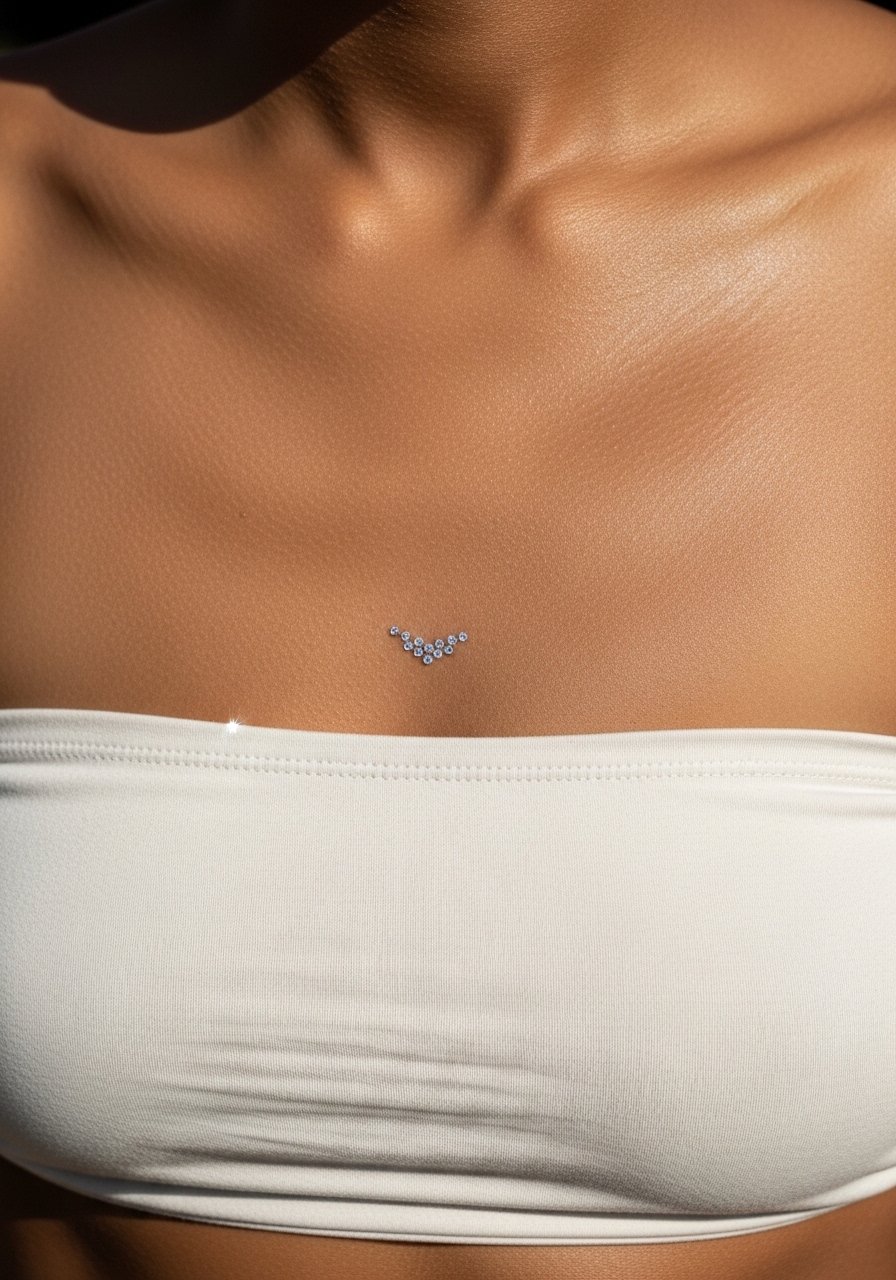
Gem clusters look precious but facets can be lost if done too small. Ask for slightly larger facets and for the artist to use contrast rather than micro-shading for the sparkle effect. Sessions are brief but precise. If your job requires discretion, this hidden placement keeps the piece personal.
23. Stylized Animal Silhouette
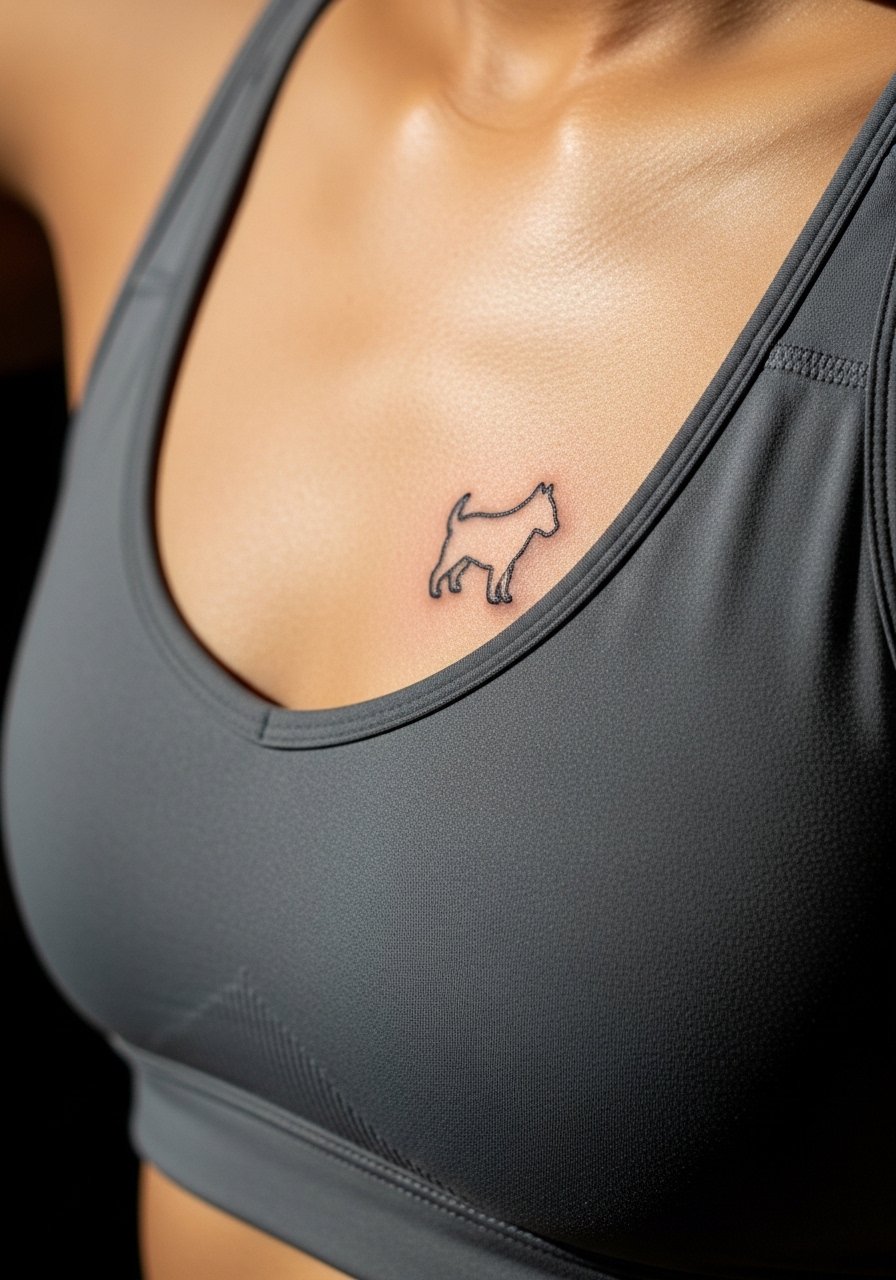
Silhouettes translate well because they rely on shape, not tiny line detail. The most common misstep is adding internal texture that muddies the silhouette as it heals. Ask for a bold outline and then discuss any internal marks sparingly. Sessions are usually quick and healing tends to be predictable. Consider breathable bras during healing to minimize friction.
24. Decorative Anchor with Rope Curve
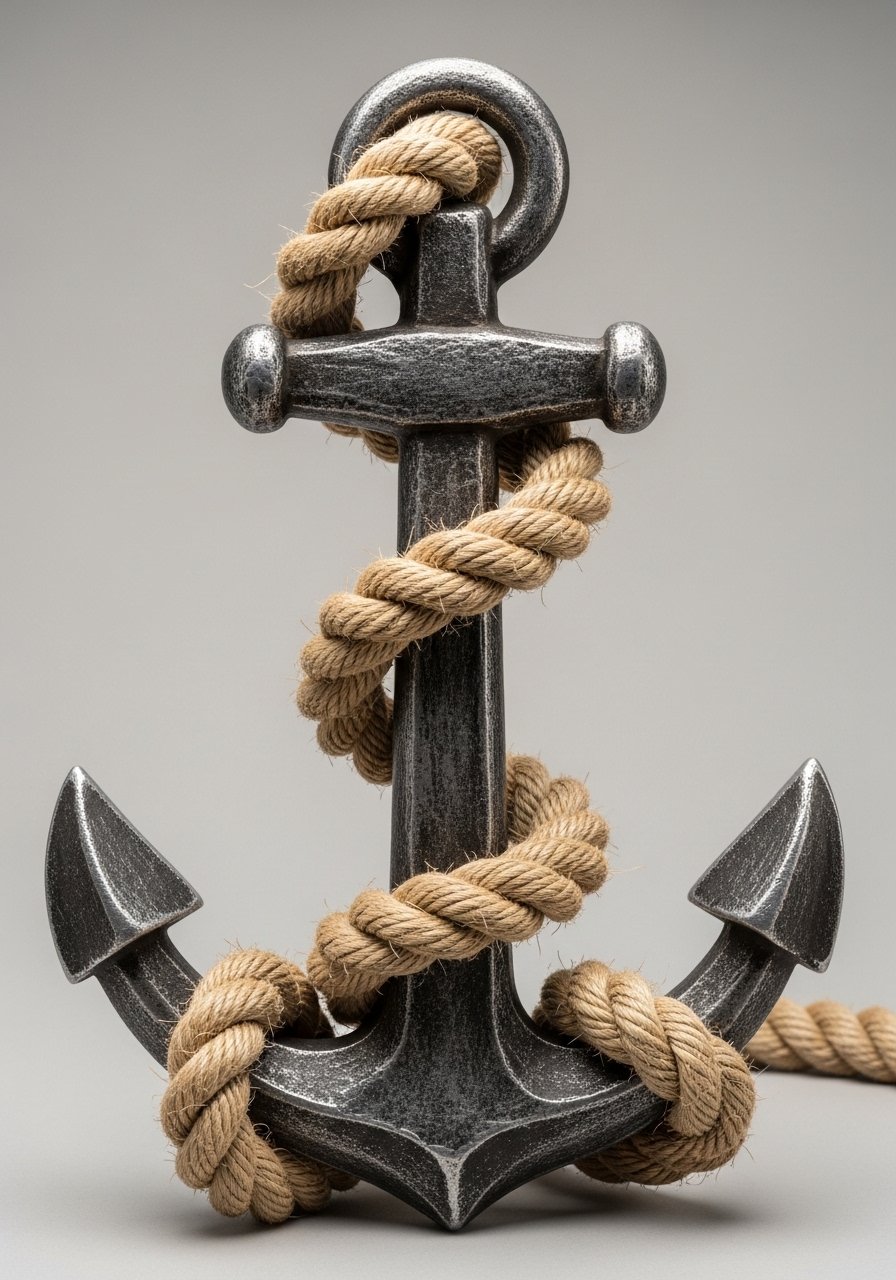
Rope texture needs scale to remain legible. The error is asking for tiny twists that merge. Tell your artist to suggest rope with alternating light and dark strokes rather than repeated tiny loops. The sternum sting is real, so plan for breaks. This motif pairs well with nautical-themed dresses for nights out.
25. Tiny Botanical Crescent Pair
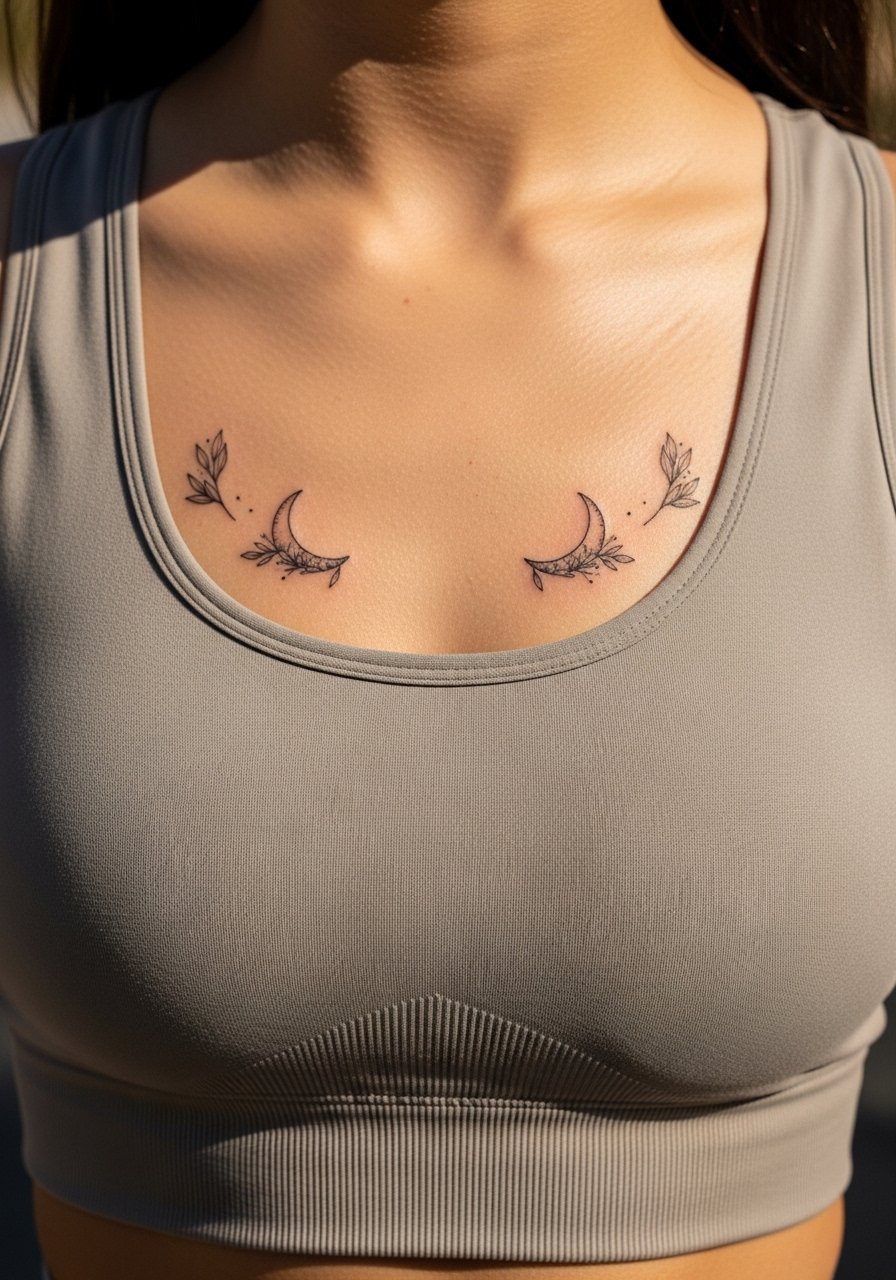
Paired crescents give a balanced look without covering much skin. A typical mistake is placing them too medially so they read as one shape. Discuss spacing with the artist and request mirrored stencils before starting. Sessions are brief and aftercare focuses on avoiding bra friction in the first week.
26. Wave-Filled Half-Moon Band
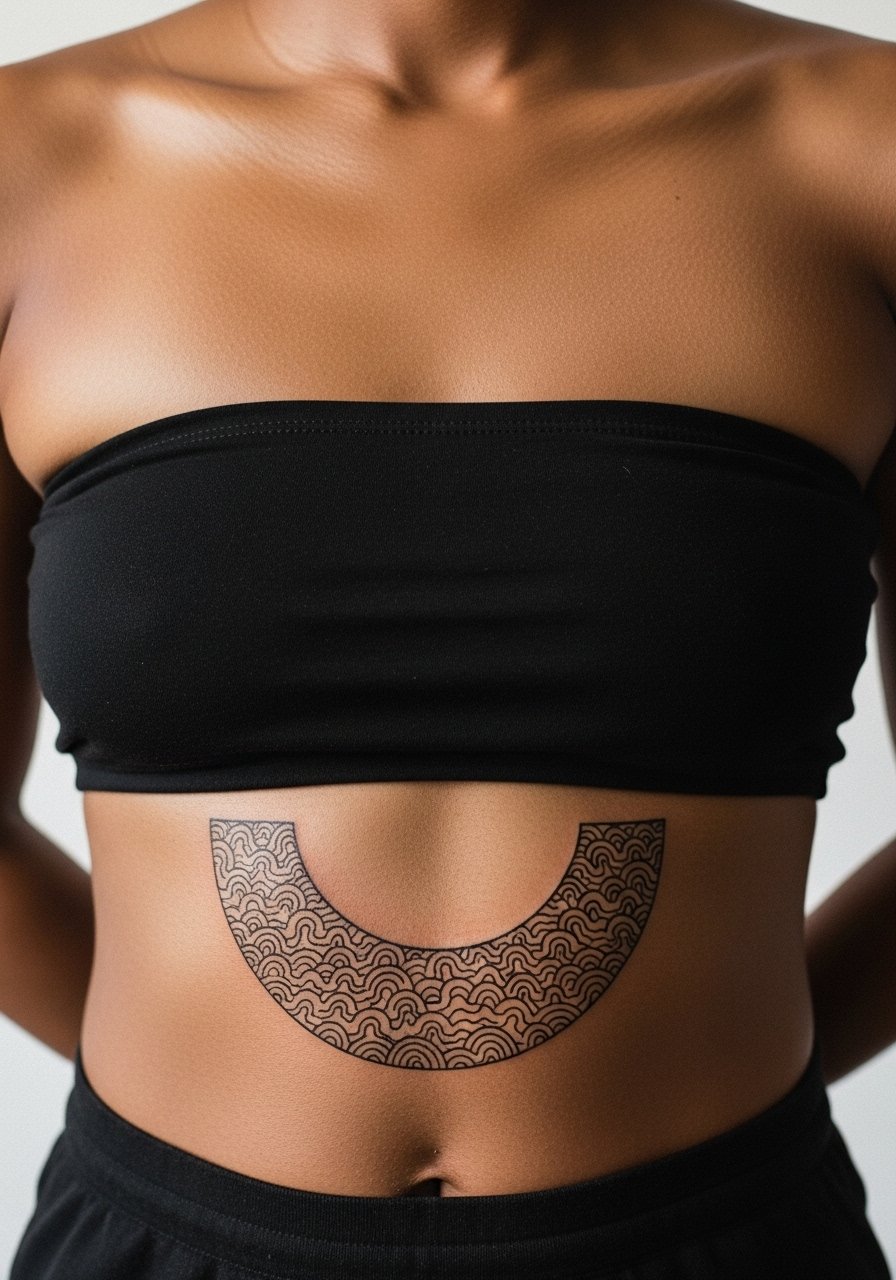
Filling a band with repeated wave lines risks merging if the waves are too small. Ask for bolder wave outlines and fewer internal strokes. Expect moderate pain across the sternum and plan for a touch-up as lines settle. Pair with low-rise skirts or dresses that let the band peek out for styling.
27. Lace-Inspired Vertical Pendant
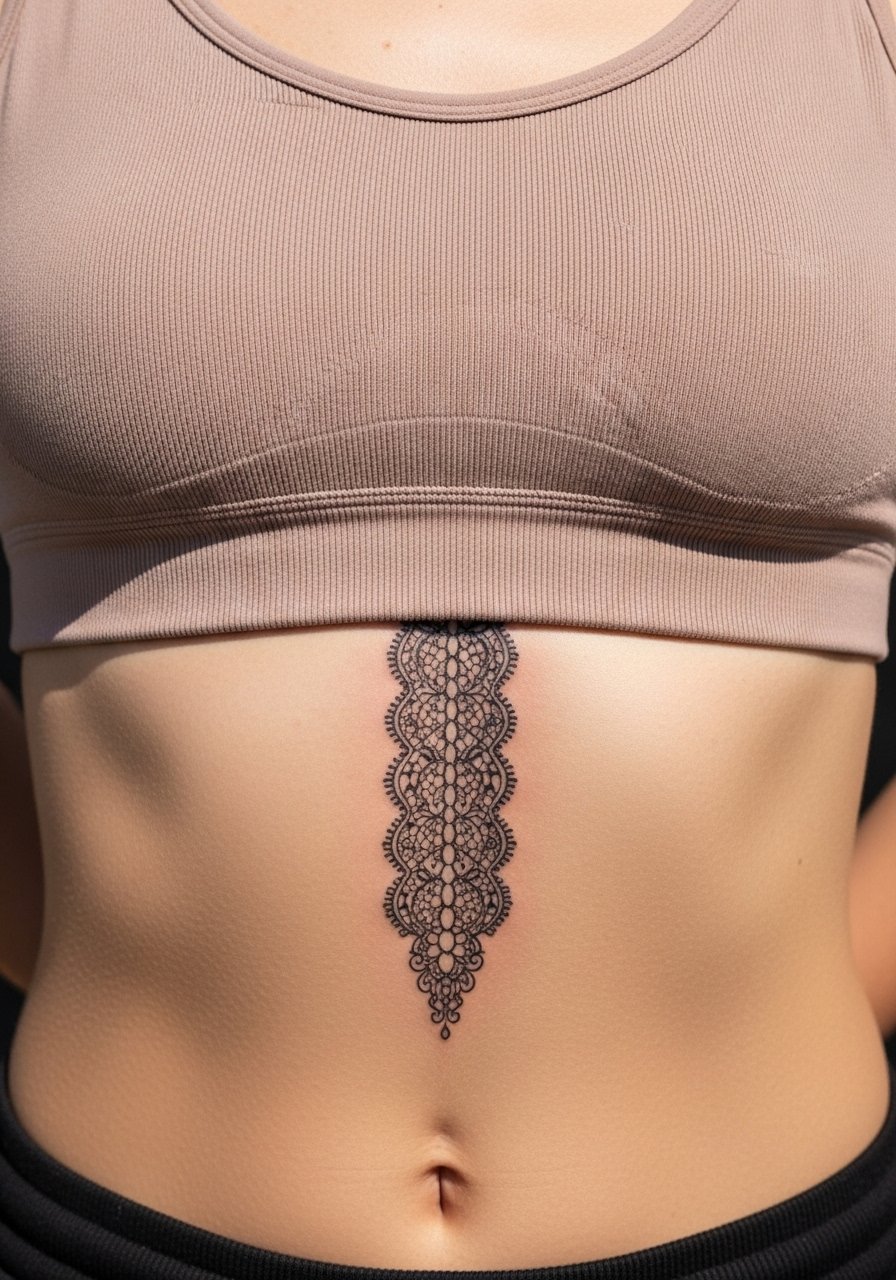
A vertical pendant plays with length and draws the eye down the sternum. The pitfall is asking for tiny lace details that cannot heal sharply in this zone. Tell your artist to emphasize vertical anchors and keep tiny filigree minimal. Sessions may be longer because of the vertical span. If you're considering career visibility, this placement remains easy to conceal beneath standard tops.
Frequently Asked Questions
Q: Will fine line under-breast tattoos blur faster than bolder designs?
A: In my experience, fine line work faces a higher risk of blur in high-movement or high-friction zones. The two camps are clear. One camp argues that ultra-fine lines should be avoided near the sternum because the skin moves and spreads. The other camp says that with slightly heavier line weight and proper spacing, fine line can settle well. Ask your artist which approach they use and why, then look at healed photos on similar skin and placement.
Q: How painful is an under-breast or sternum session and what can I do for comfort?
A: Pain varies by person but most describe sternum and under-breast work as more uncomfortable than an outer arm piece. Numbing cream and pacing breaks help. Bring a loose button-down or a loose button-down shirt so you can expose only the area being worked on and stay comfortable between passes.
Q: How long before I should expect to need a touch-up for detailed dot work or micro-realism here?
A: From what I have seen, dot work and micro-realism in this zone often need a touch-up between two and three years, depending on skin type and daily friction. If you prioritize longevity, plan for a light touch-up and space the details a bit more during the initial session.
Q: Does wearing a bra during the first week ruin an under-breast tattoo?
A: Friction is the main concern. A soft, non-underwire band that does not rub directly on the ink reduces problems. Many artists recommend a bandeau or soft sports bra you can adjust so the fresh skin is not constantly irritated. Change garments cautiously and keep the area clean.
Q: How do I find an artist experienced with under-breast illustrative work without relying on Instagram handles?
A: Use discovery pathways like dedicated shop directories, local convention lineups, and community forums where people share healed photos and experiences. Search for shops that list healed photos by placement on their websites and ask to see healed portfolios during consultation. A short conversation about healed results often reveals more than a single fresh photo.
Q: Are there cultural or symbolic concerns to consider with ornamental or mandala under-breast pieces?
A: Yes. Some ornamental and mandala patterns have cultural roots. Two reasonable approaches are to commission a custom piece that references the aesthetic while avoiding direct sacred motifs, or to discuss respectful adaptation with your artist. Many people choose slight variations rather than direct replicas to keep the intent clear.
