
Fine line and saturated traditional pieces both look great on the shoulder, but they do not behave the same over time. Trends push tiny detail and micro shading, yet the shoulder handles bold outlines and dense color with less risk of blowout. Below are 27 traditional-flash shoulder ideas with practical notes on aging, consultation talking points, session comfort, and wardrobe tips that actually help you show the work off.
1. Classic Anchor on the Outer Shoulder
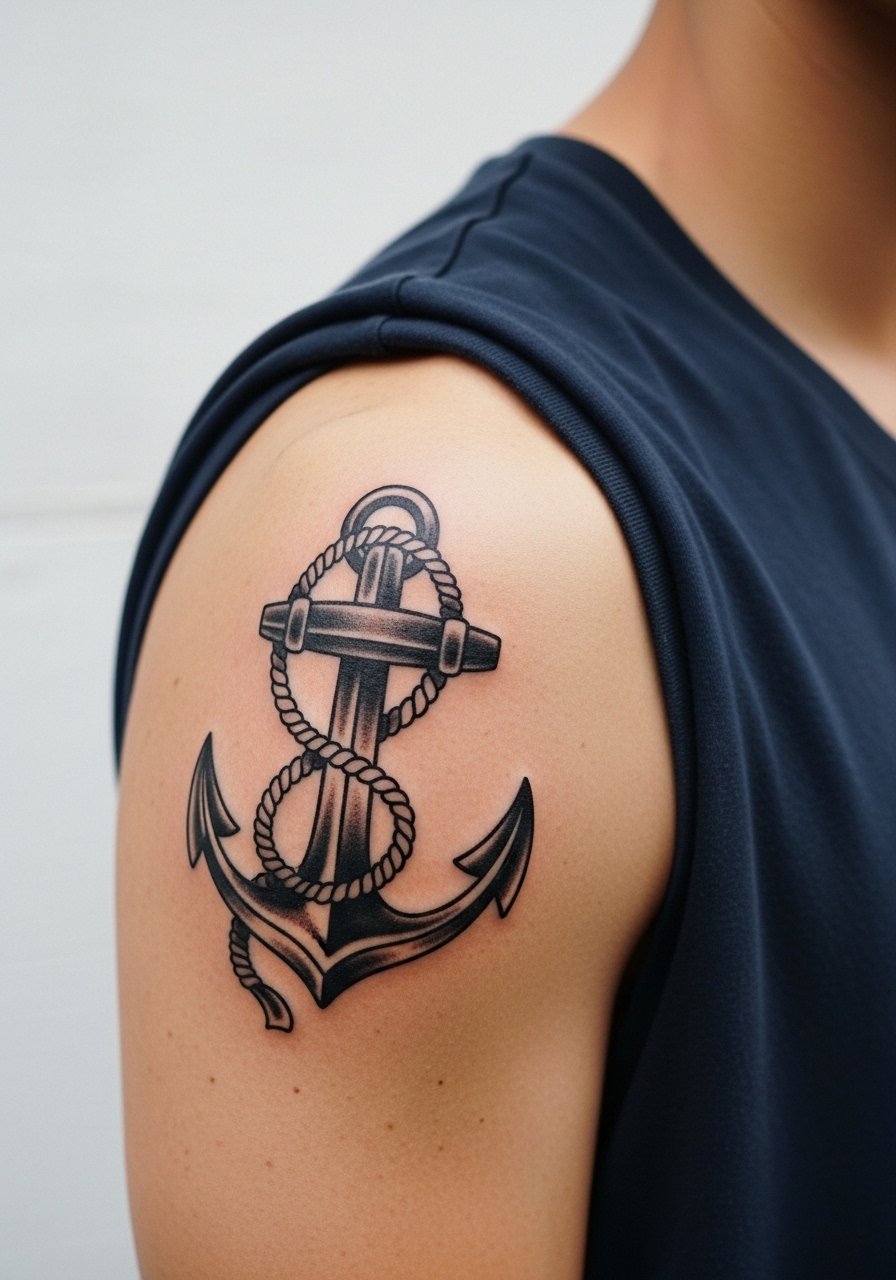
A classic anchor reads well on the rounded plane of the outer shoulder because the curve gives the design presence without distortion. Tell your artist you want bold linework and dense black saturation for longevity, not micro details that will blur. Pain on the shoulder is low to moderate, and a single session usually covers a medium anchor. Expect sharp contrast at six months and steady softening by year three, with touch-ups helpful at year five if you want crisp lines. For the appointment, bring a loose button-down shirt you can pull aside so the artist has clear access.
2. Sparrow with Banner on the Cap of the Shoulder
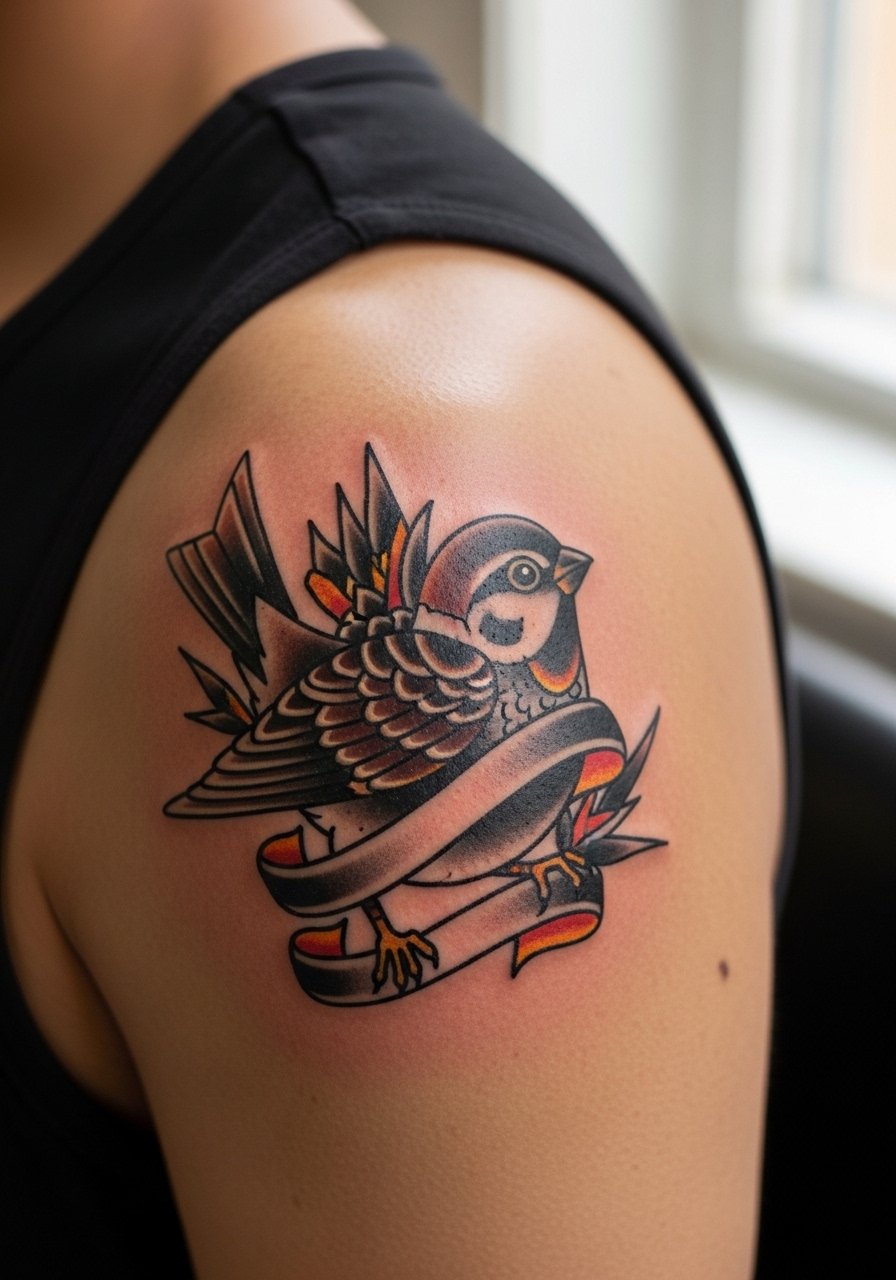
This flash piece uses bold outlines and flat color blocks that age into strong shapes. Ask for slightly exaggerated spacing inside the banner so lettering holds up instead of blurring into the bird. The shoulder cap is forgiving for saturation, so a fuller color pack reduces the need for early touch-ups. Sessions feel brisk since the area is easy for the artist to access. Pair this with rolled-up sleeves or a racerback tank to show the silhouette when you want people to notice the banner text.
3. Rose and Dagger Anchored Near the Deltoid
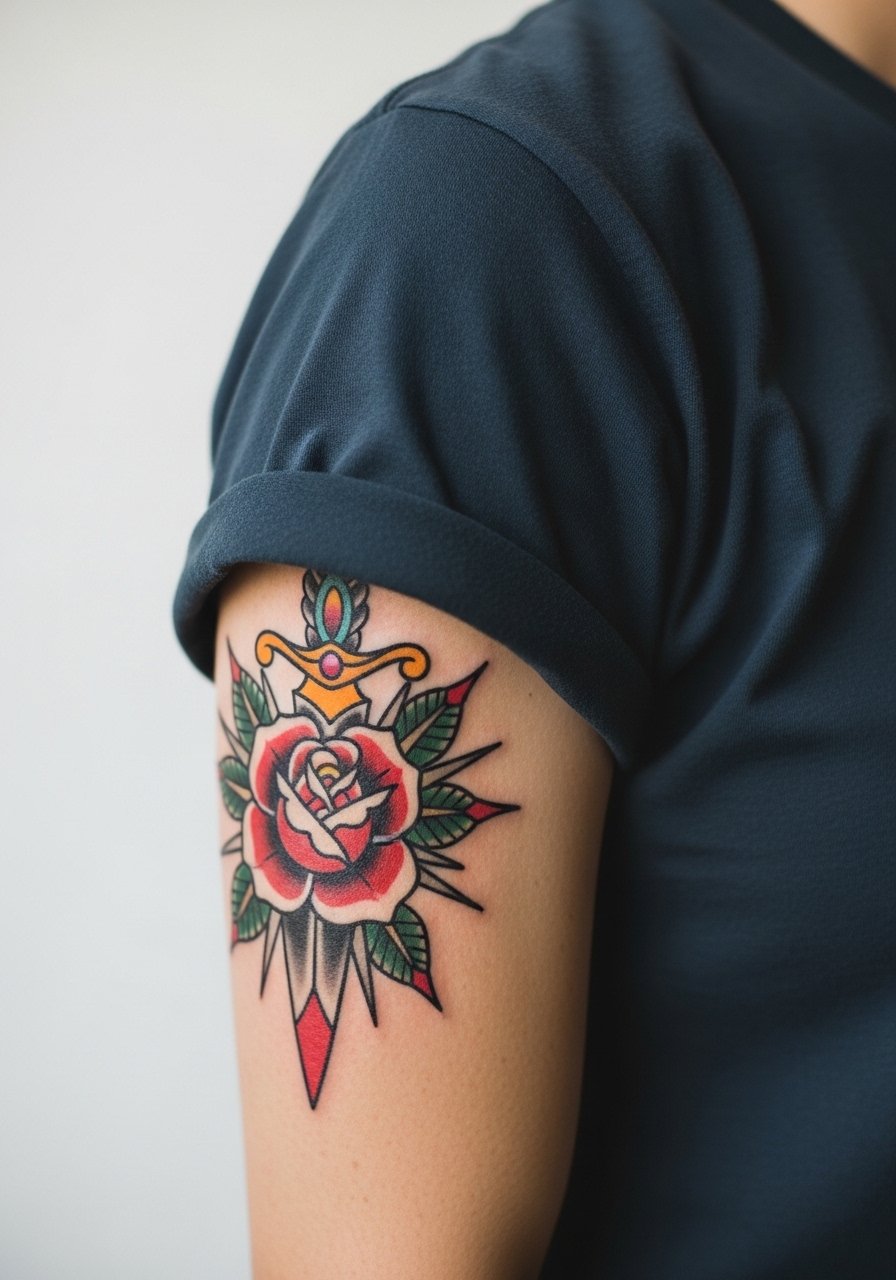
Visually this is a shoulder-friendly classic because the petal shapes follow the muscle. During consult, specify solid black outlines and dense red saturation instead of layered shading. The deltoid handles saturation well, so the piece ages with bold silhouettes rather than smudged detail. Watch for a common mistake, which is asking for tiny stipple shading inside petals. That detail looks good fresh and tends to lose crispness by year four. Show this design off with a short-sleeve tee that you can cuff to frame the art.
4. Nautical Wheel on the Upper Back Shoulder Blade
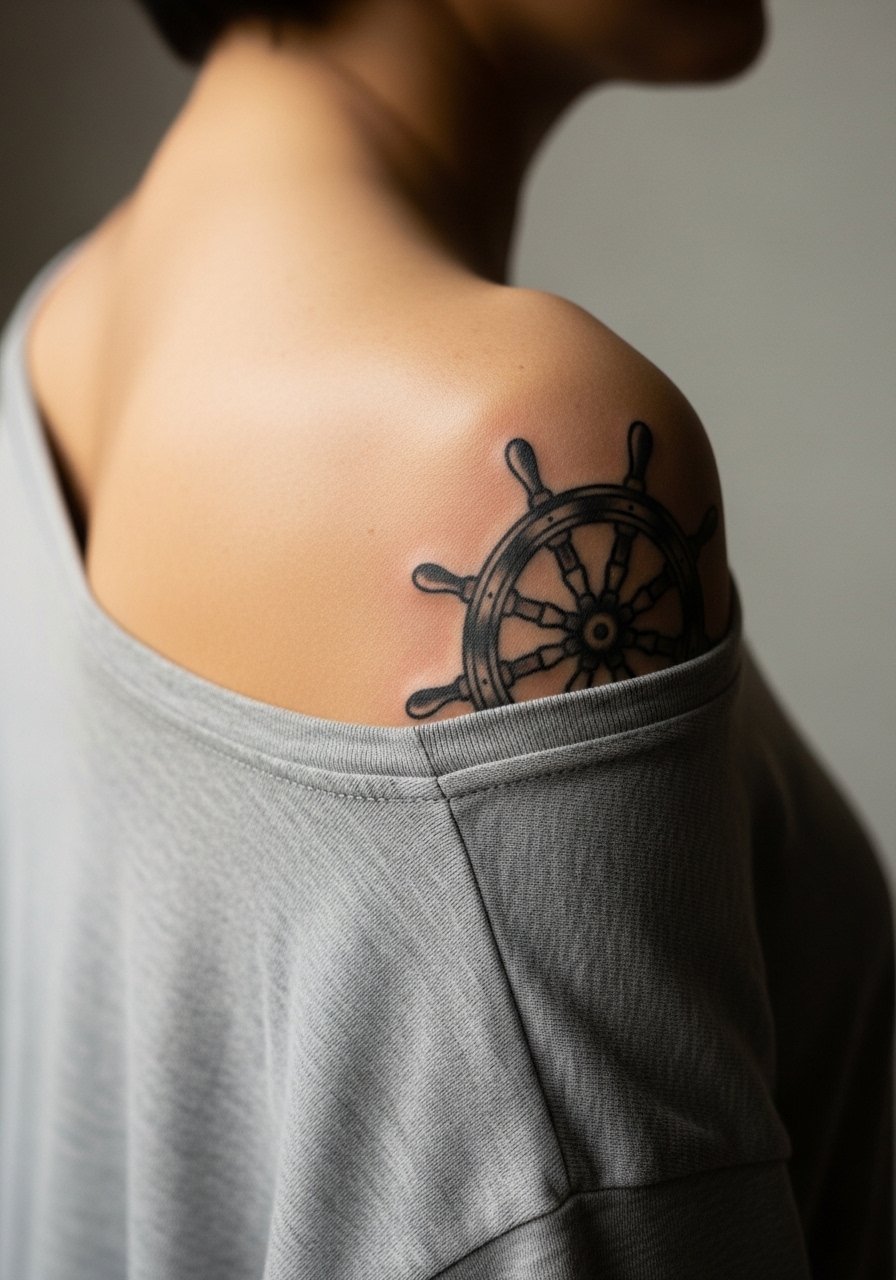
The shoulder blade adds a slightly flatter canvas, which helps the spokes of a wheel stay true. Ask for thicker spoke outlines and avoid micro hatching between spokes to prevent patchy aging. A one to two hour session usually covers the wheel depending on size. Pain is moderate near the bone but manageable with breaks. For evenings out, an open-back blouse or a wide-neck top frames the wheel without competing with the design.
5. Pin-Up Silhouette Facing the Shoulder Curve
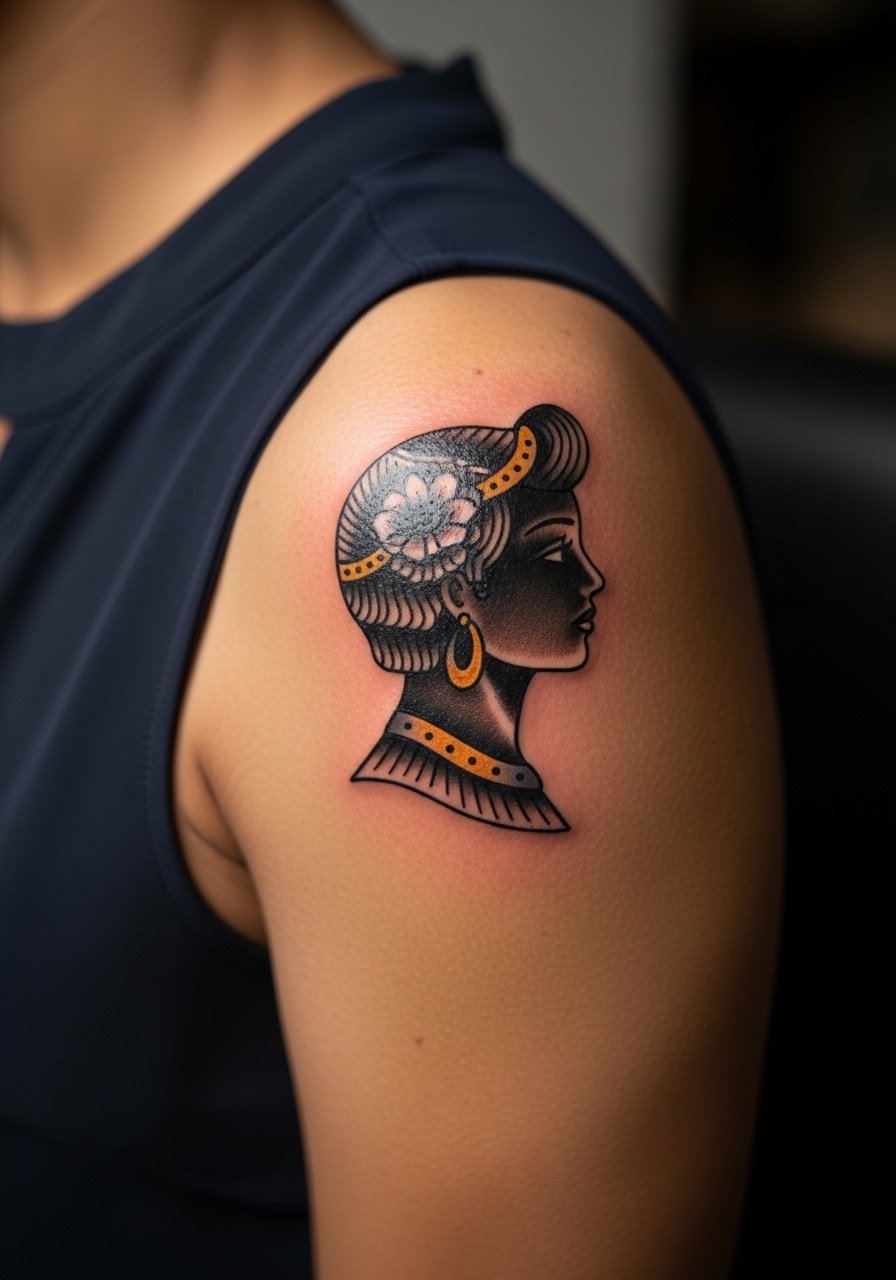
Pin-up silhouettes that follow the shoulder curve read better than ones placed flat across the chest. Tell your artist you want clear, uninterrupted linework on the outline and minimal interior detail so the silhouette stays readable as the skin moves. This placement is slightly more sensitive toward the back of the shoulder but still within a low to moderate pain band. Wearing a sleeveless blouse will let you show the silhouette without pulling focus from the clean contour.
6. Traditional Sailor Star Cluster Near the Collar
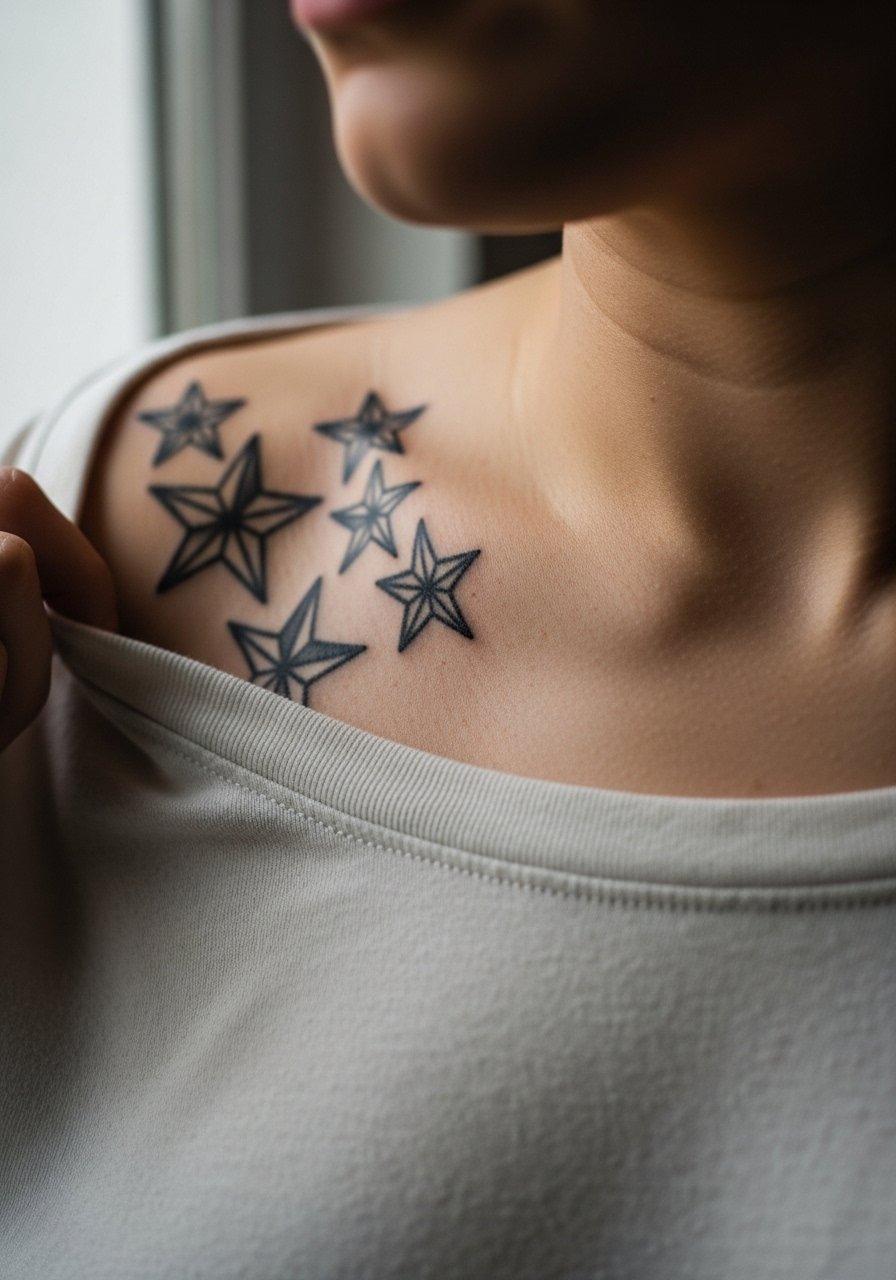
Small star clusters rely on well-spaced outlines to avoid merging over time. The collar area has slightly thinner skin, so ask for moderate line weight rather than needle-fine strokes. Expect the session to be short and stinging in spots where the bone is close. For showing off the cluster, a wide-neck shirt pulled to the side frames the stars elegantly.
Studio Day Picks
The compact shoulder and collar pieces above benefit from a few practical items that ease the session and protect fine line edges in the first week.
-
Stencil transfer paper kit. Lets you preview placement on the curved shoulder before the needle touches skin, which is essential for designs that need exact symmetry.
-
Topical numbing cream. Apply per instructions about 45 minutes before the session to soften discomfort during collar and shoulder spots where the skin thins.
-
Thin protective film roll. Useful for small shoulder pieces that might rub against straps in the first 48 hours.
-
Fragrance-free body wash. Gentle cleansing helps preserve the saturation of bold traditional fills while the surface scabs.
-
Aquaphor healing ointment. A thin layer in the first two days keeps the skin hydrated around tight linework without suffocating the ink channels.
7. Bold Swallow Pairing Across the Shoulder Cap
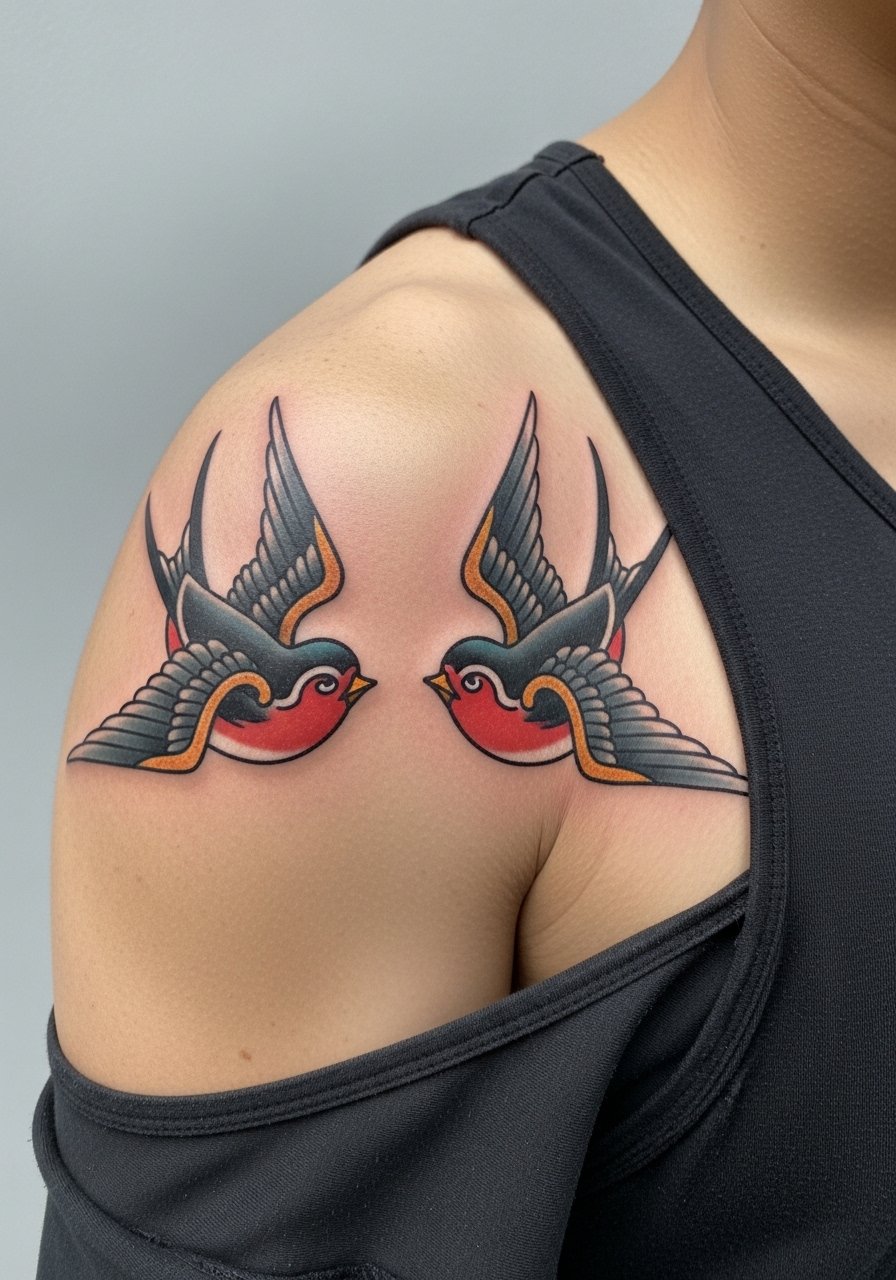
Twin swallows look classic placed symmetrically on either side of the shoulder cap because the negative space between them reads balanced. Ask for even outlines and flat color fills rather than gradients, which hold up better against UV exposure. The session is moderate in length and comfort. Avoid tiny decorative dots around the birds. Those elements tend to wash out within a couple of years. For casual show-off looks, try a racerback tank that keeps straps clear and the birds visible.
8. Bold Traditional Compass on the Outer Shoulder
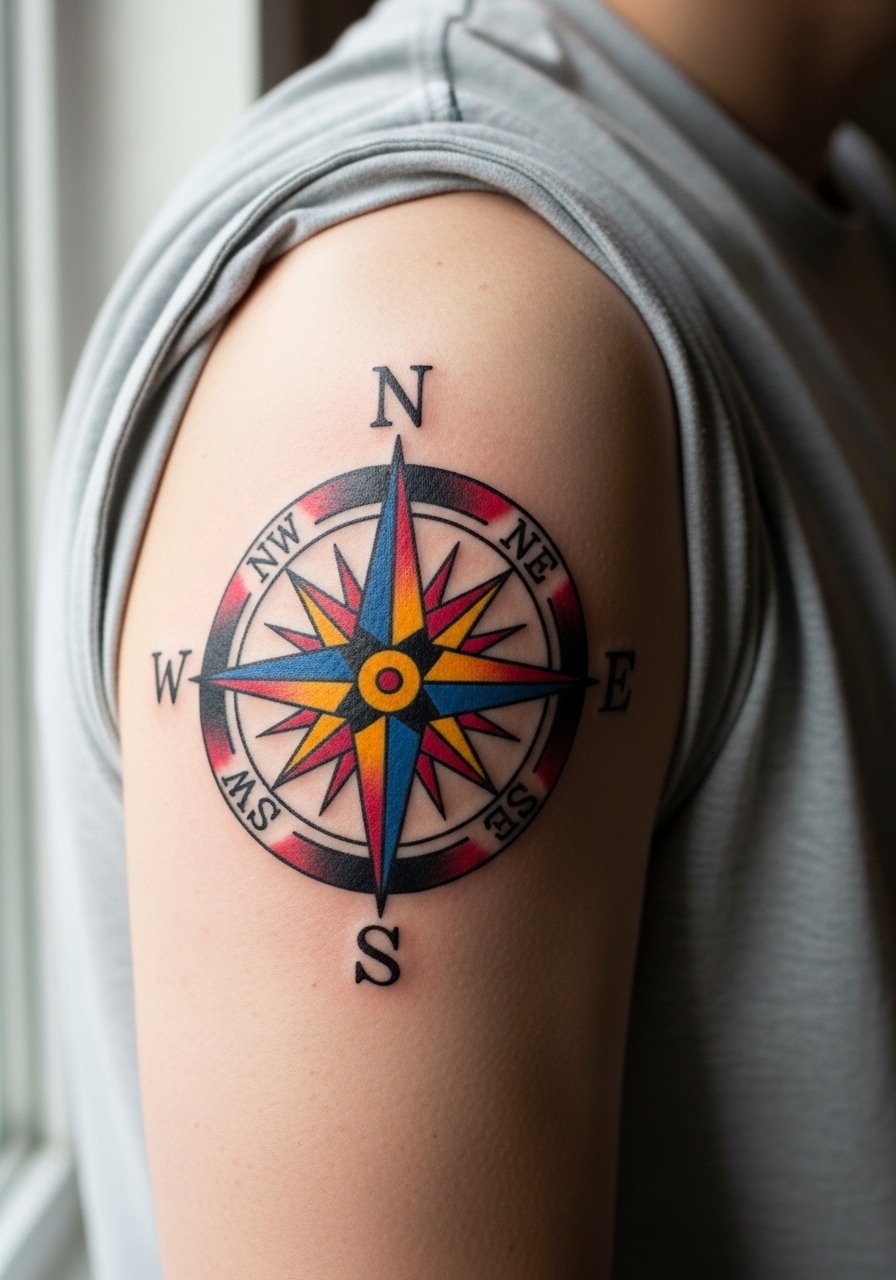
A compass benefits from bold cardinal points and open negative spaces so the design still reads when minor spreading occurs. In consultation, specify reduced micro shading in the center to keep the focal point crisp. The outer shoulder's low risk of blowout makes it a safe seat for this flash. For travel-season outfits, a short-sleeve linen shirt rolled at the cuff pairs well and keeps the compass visible without constraining the shoulder.
9. Traditional Floral Cluster Over the Deltoid
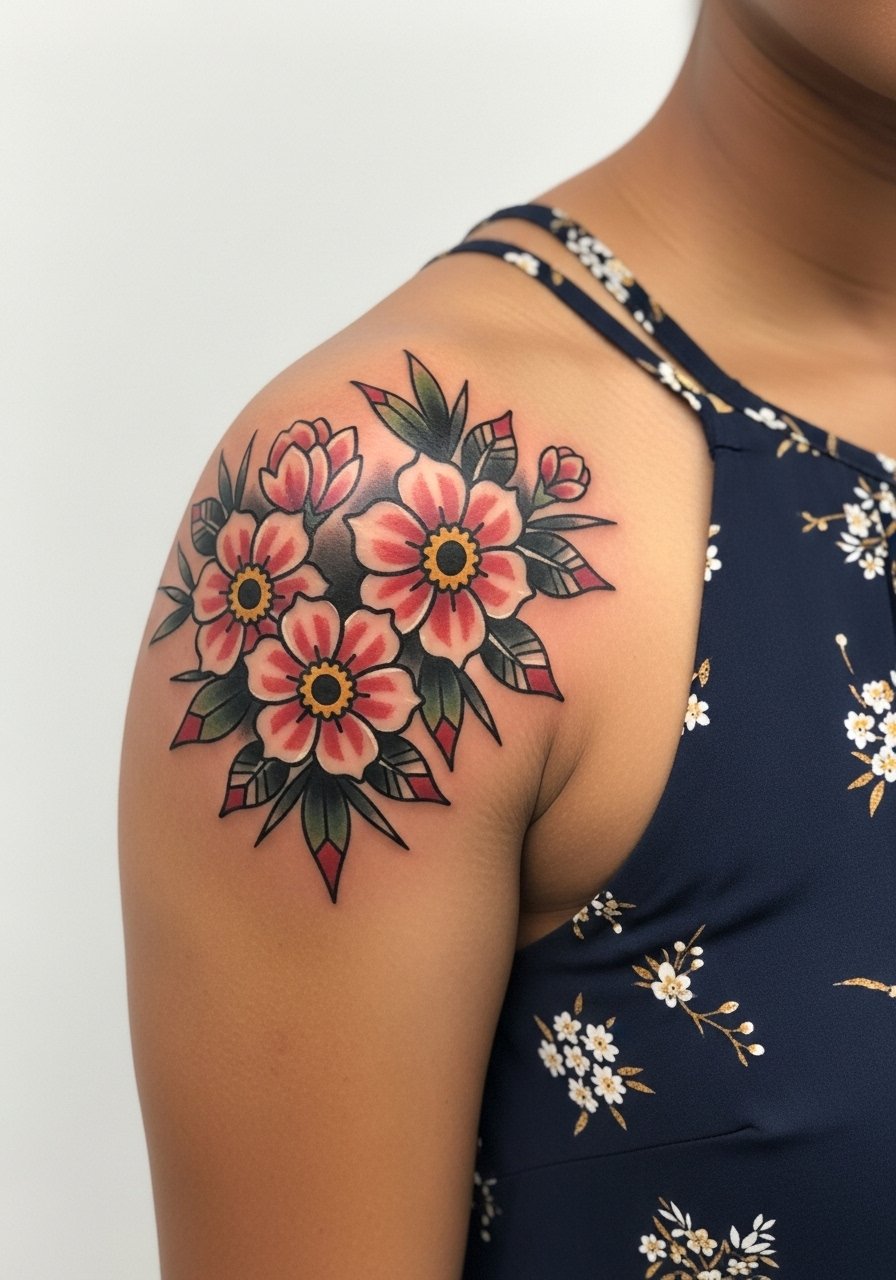
Clusters of roses and leaves take advantage of the deltoid curve to create natural flow. Tell your artist to use clear negative space between blooms so petals do not merge later. This placement is forgiving for saturation and tends to need fewer touch-ups than dense, tiny work. Watch for requests for excessive fine shading in petal centers. That technique looks great fresh and often bleeds into the outlines by year three. Pair this with a sleeveless dress that shows the curve without competing with the florals.
10. Anchor and Rope Wrapping the Shoulder Blade
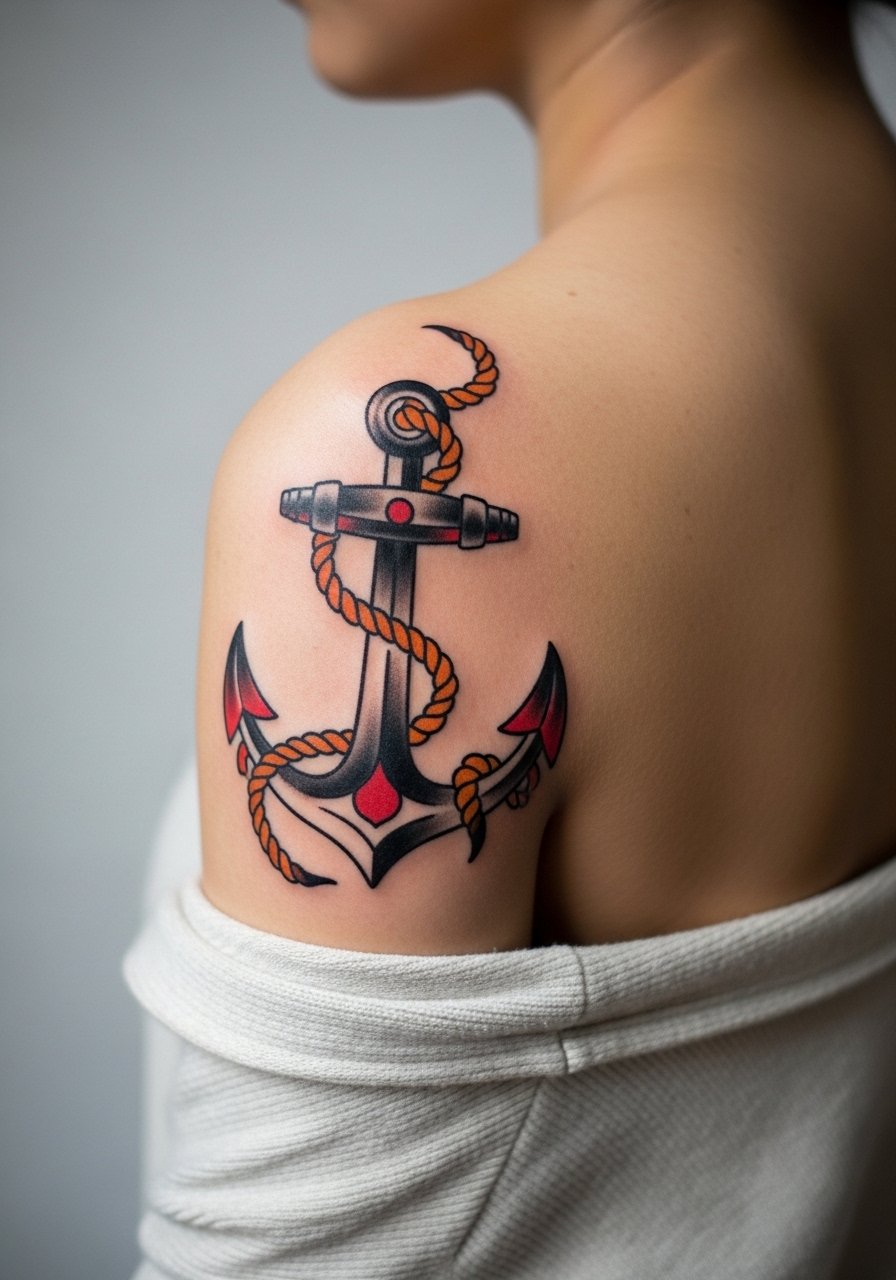
A rope wrapping design benefits from deliberate spacing between turns so the strands do not blur into one another as the skin ages. Request slightly thicker rope outlines and simplified cross lines inside the coils. The shoulder blade gives a flatter surface so the pattern holds true. During the session you will feel some scraping near the bone, but it is short-lived. For evening wear, an open-back top or a wide-neck blouse frames the rope without shadowing the anchor.
11. Nautical Script on the Upper Shoulder
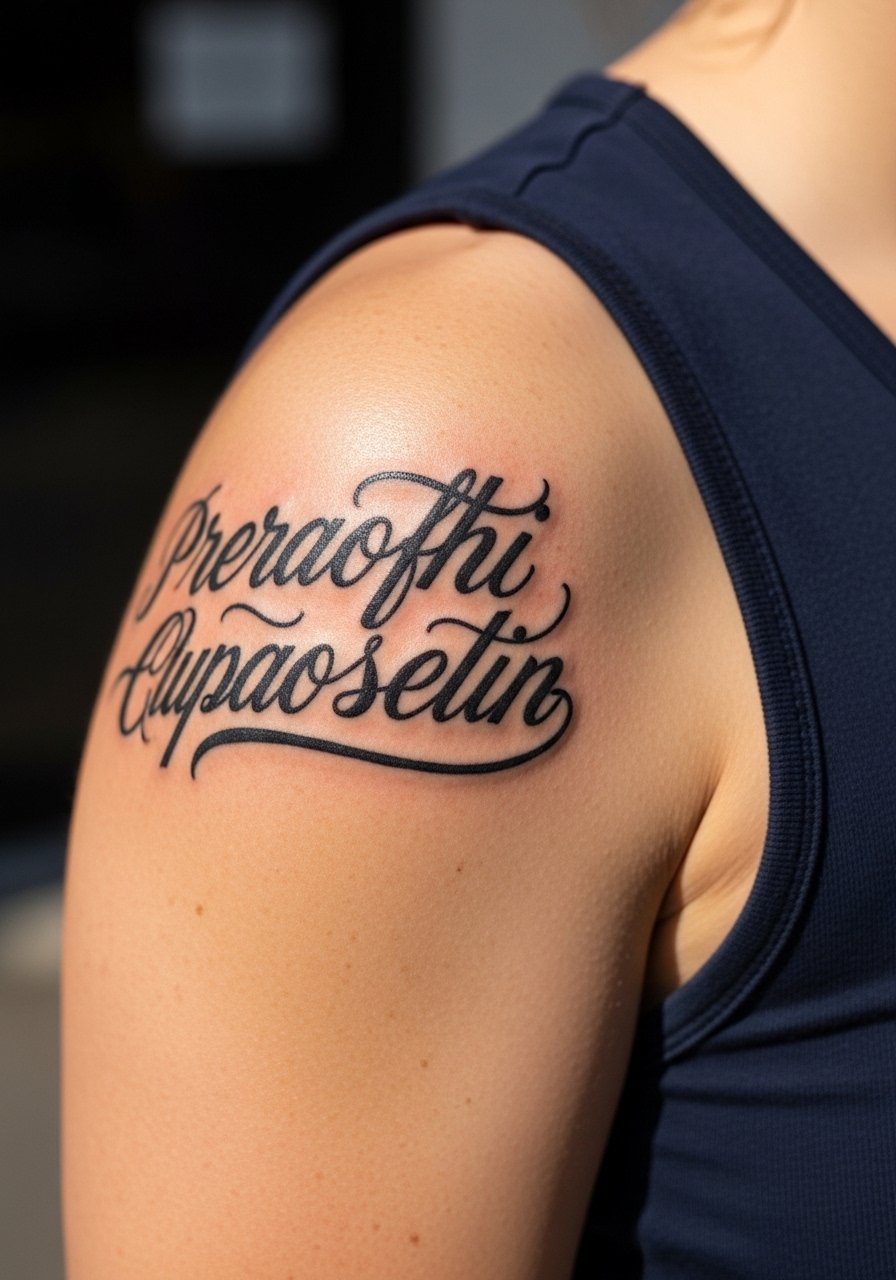
Script near the shoulder needs spacing larger than many clients expect. The truth is that small cursive letters merge over time if placed too tight. Ask for open kerning and moderate line weight so the phrase stays legible at two and five years. This is a short session with sharp lines and minimal shading. Pair the script with a loose tank top that keeps the neckline clear and lets the text sit above the sleeve line.
12. Eagle Head Facing Out from the Shoulder Peak
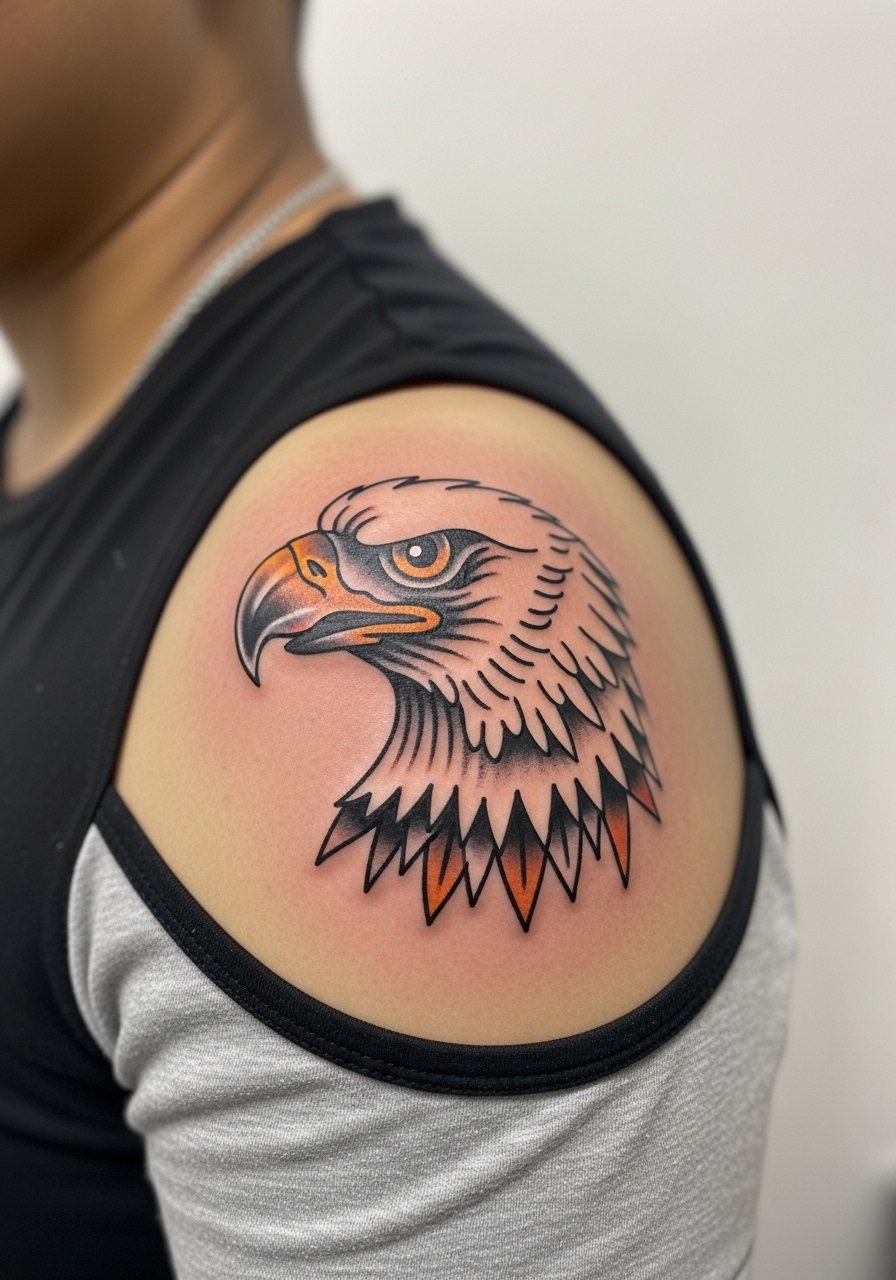
An eagle head uses strong contrast to convey motion, which works with the shoulder's natural slope. During consult, request heavy black outlines around the beak and eye to maintain focal clarity as minor loss of saturation occurs. The session has moments of pressure near the bone but is otherwise steady. Avoid asking for ultra-fine feather detail. That fades fastest. For a look that highlights the motif, wear a short-sleeve tee that leaves the cap exposed.
13. Compass Rose Centered on the Shoulder Blade Outboard
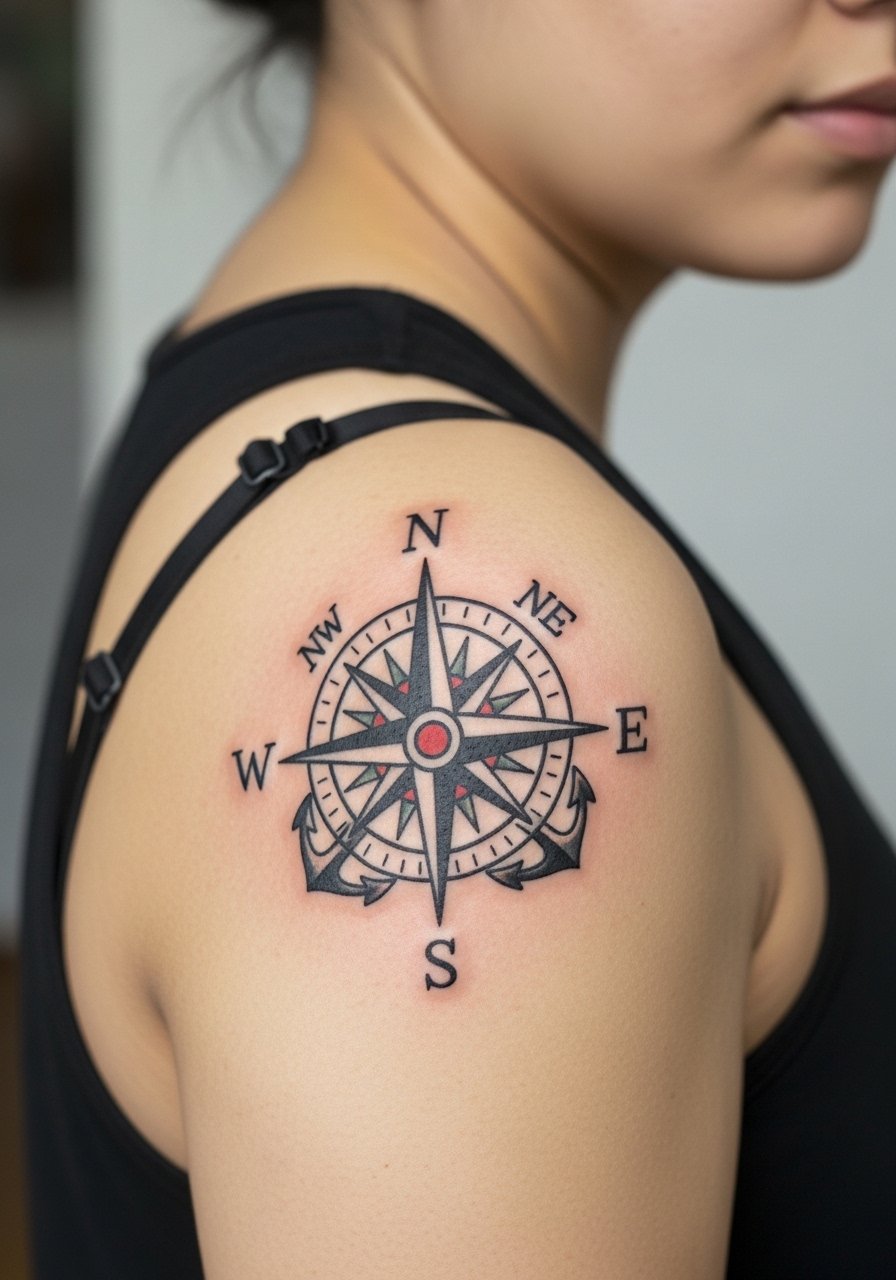
A compass rose with an open center and clear cardinal points reads well even as edges soften. Tell the artist to space the outer points wider than a print reference implies. The shoulder blade tolerates saturation and gives a flatter plane for accuracy. Expect a session of moderate length and steady buzzing. To wear this piece without hiding it, choose an open-back top that leaves the blade visible.
14. Traditional Panther Prowling Across the Deltoid
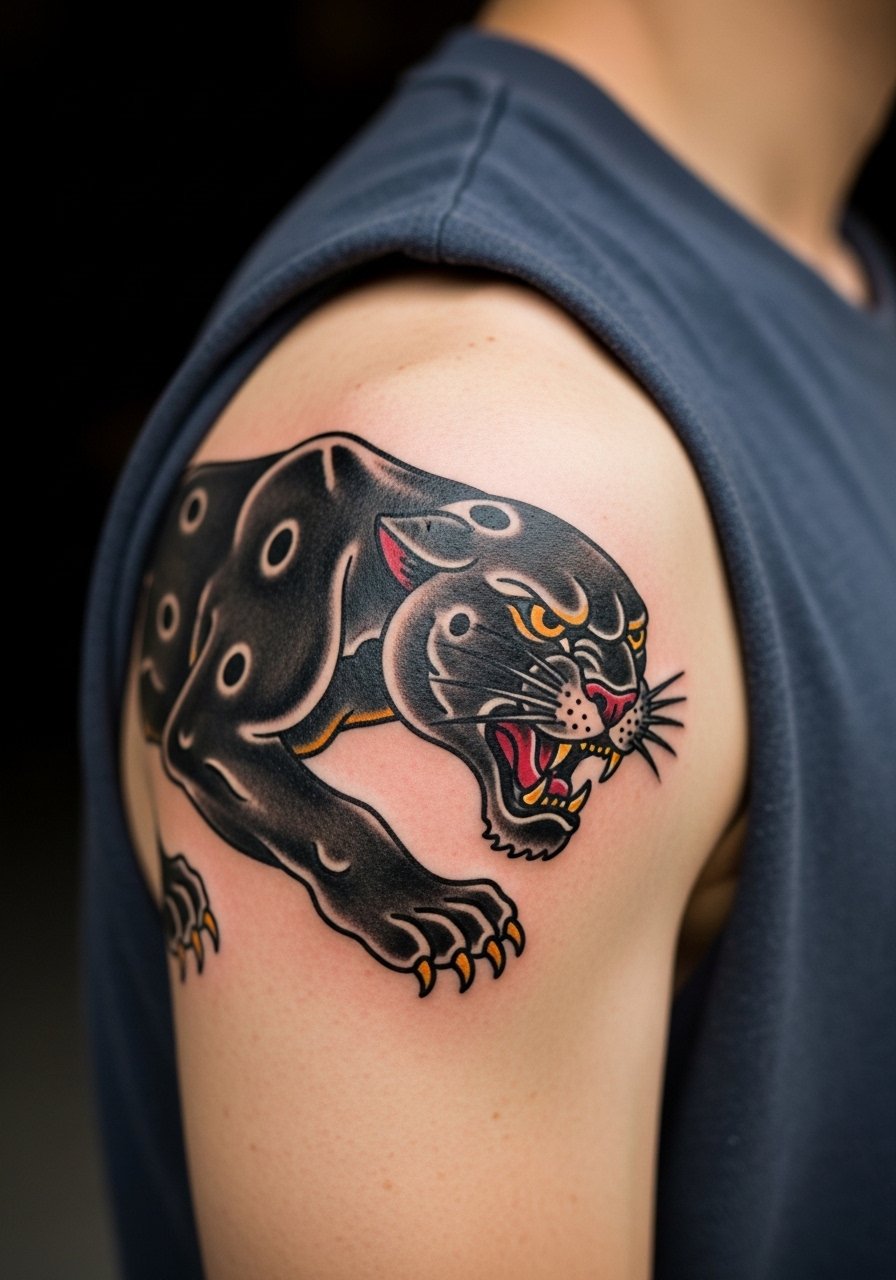
Panthers look dramatic when their limbs wrap slightly around the deltoid because motion complements the muscle. Specify simplified facial detail and strong negative space between limbs so the figure keeps definition. This placement is good for saturated blackwork and has a mid-range pain level. Avoid requests for tiny whiskers and micro texture. Those elements tend to soften into the main shadow quickly. For showcasing, a sleeveless top keeps the silhouette in view.
15. Ship in Bottle Sitting on the Shoulder Cap
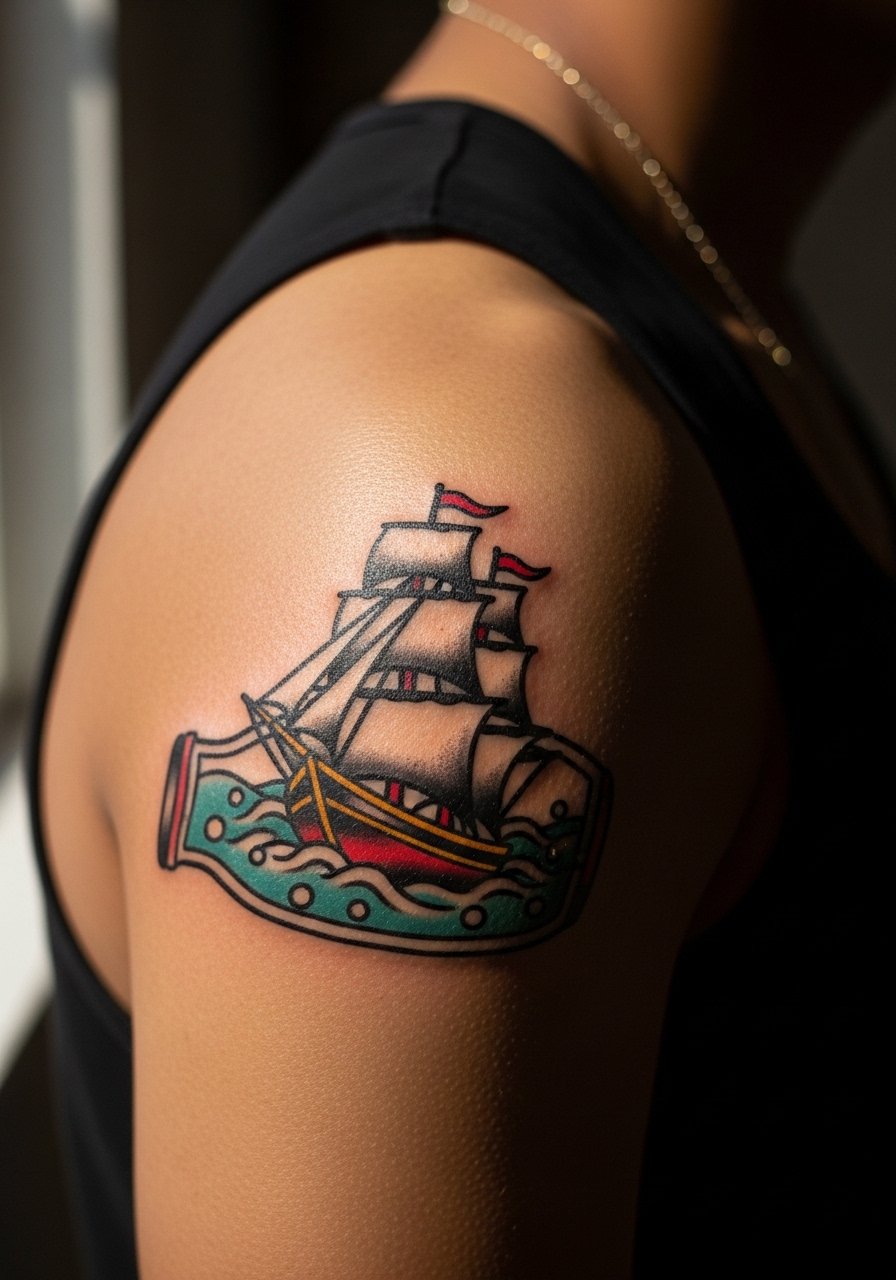
A ship-in-bottle works best with simplified hull lines and clear mast spacing. The bottle shape should be slightly enlarged compared to a print to keep details readable as the skin shifts. Sessions for this piece are moderate because of the capsule detail, but the shoulder cap is forgiving for saturation. One common mistake is asking for tiny rope rigging. That disappears first, so opt for solid mast lines. Wear a racerback tank to show the cap without strap interference.
16. Anchor and Rose Half-Sleeve Transitioning from Shoulder to Upper Arm
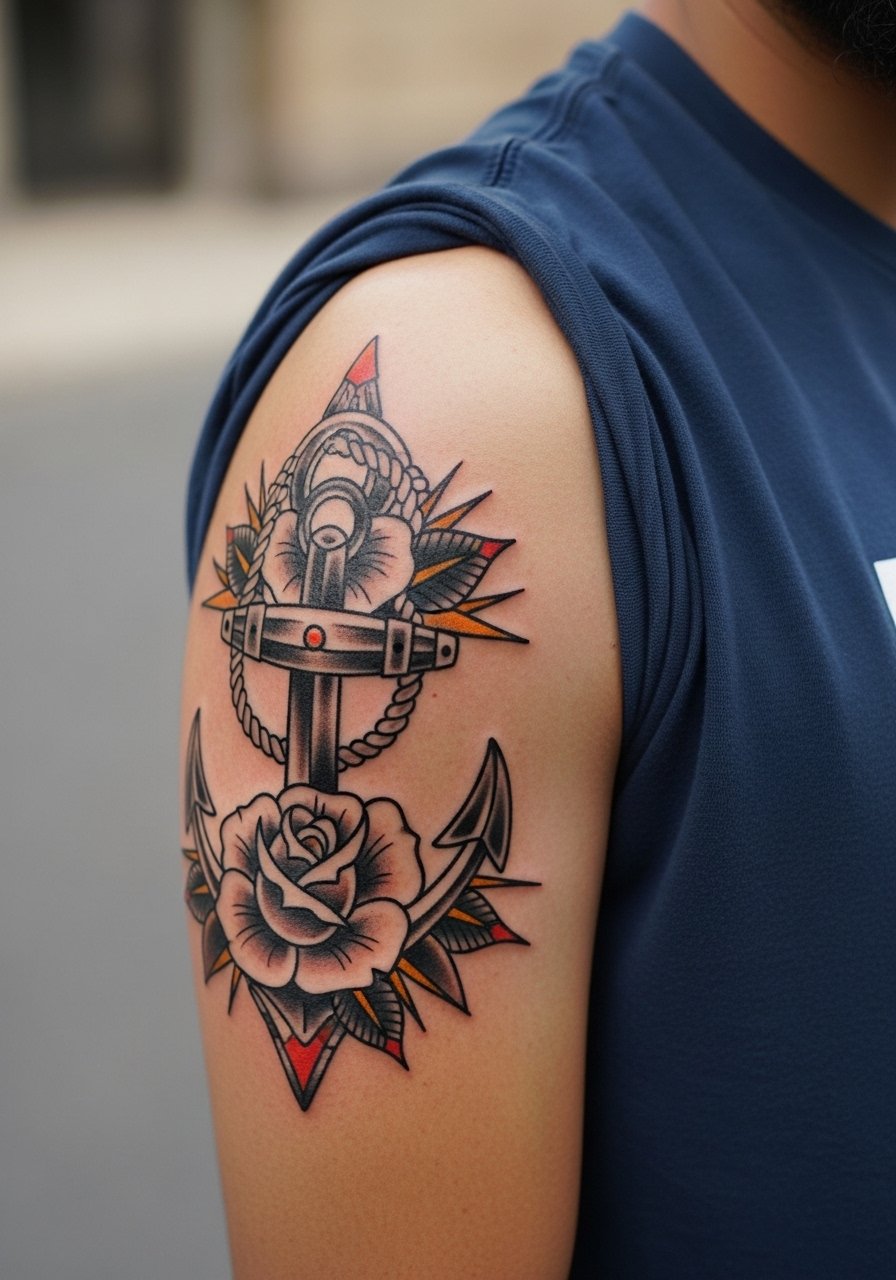
Half-sleeves that begin at the shoulder need clear composition to avoid crowding when the arm moves. During consultation, map negative spaces so the anchor and roses breathe as the limb rotates. The session is longer and may require two sittings. Expect good longevity if the outlines are bold and color is saturated. For visibility, roll sleeves or choose a short-sleeve linen shirt to show the transition without compressing the area.
17. Simple Pinwheel Flash Near the Shoulder Joint
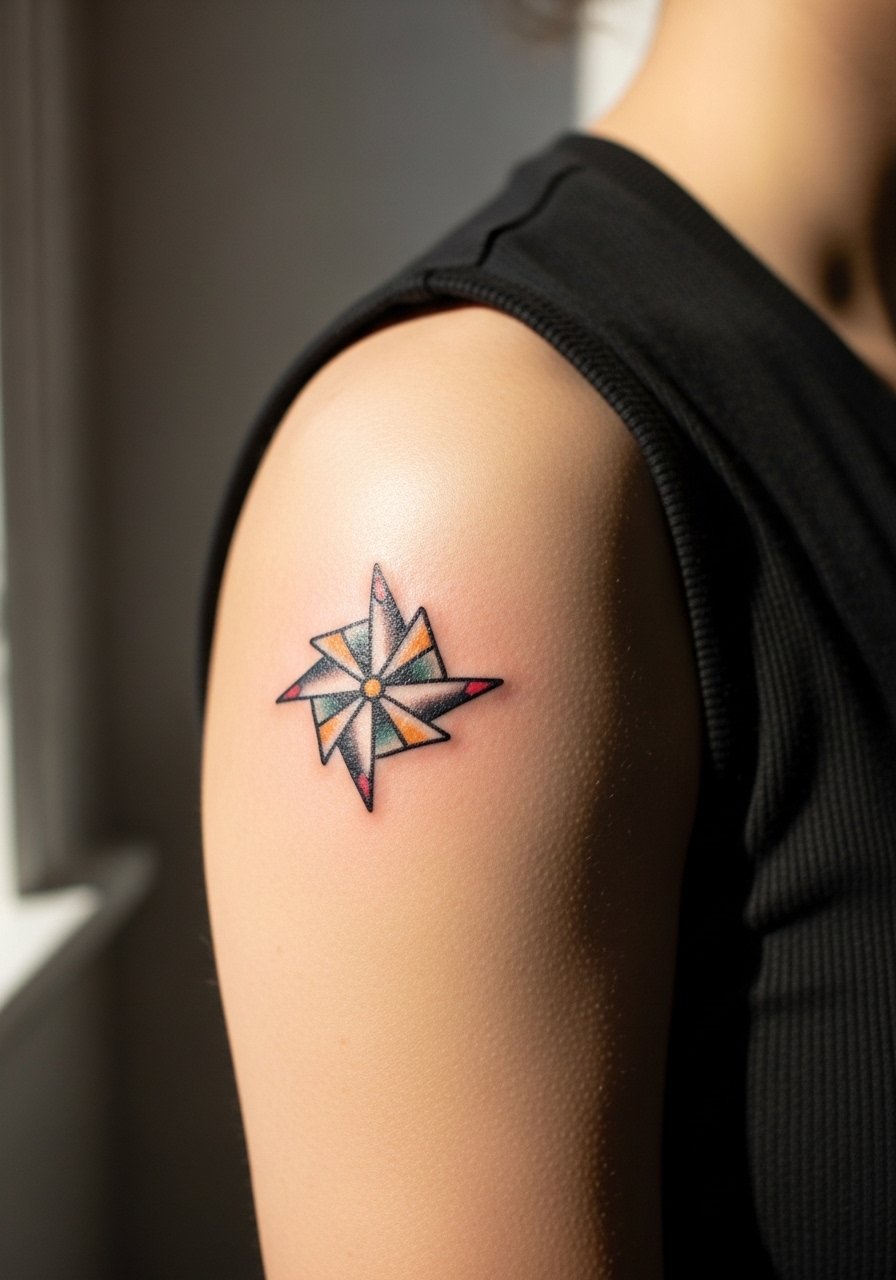
Small flash pieces near the joint move with the arm, so design margins should be wider than you expect. Tiny spokes and dots look fine fresh and tend to blur where the skin stretches. This is a quick session with a sharp sting during needle passes. For both the appointment and showing off, a loose tank top is practical and flattering.
18. Heart and Banner Balanced on the Shoulder Cap
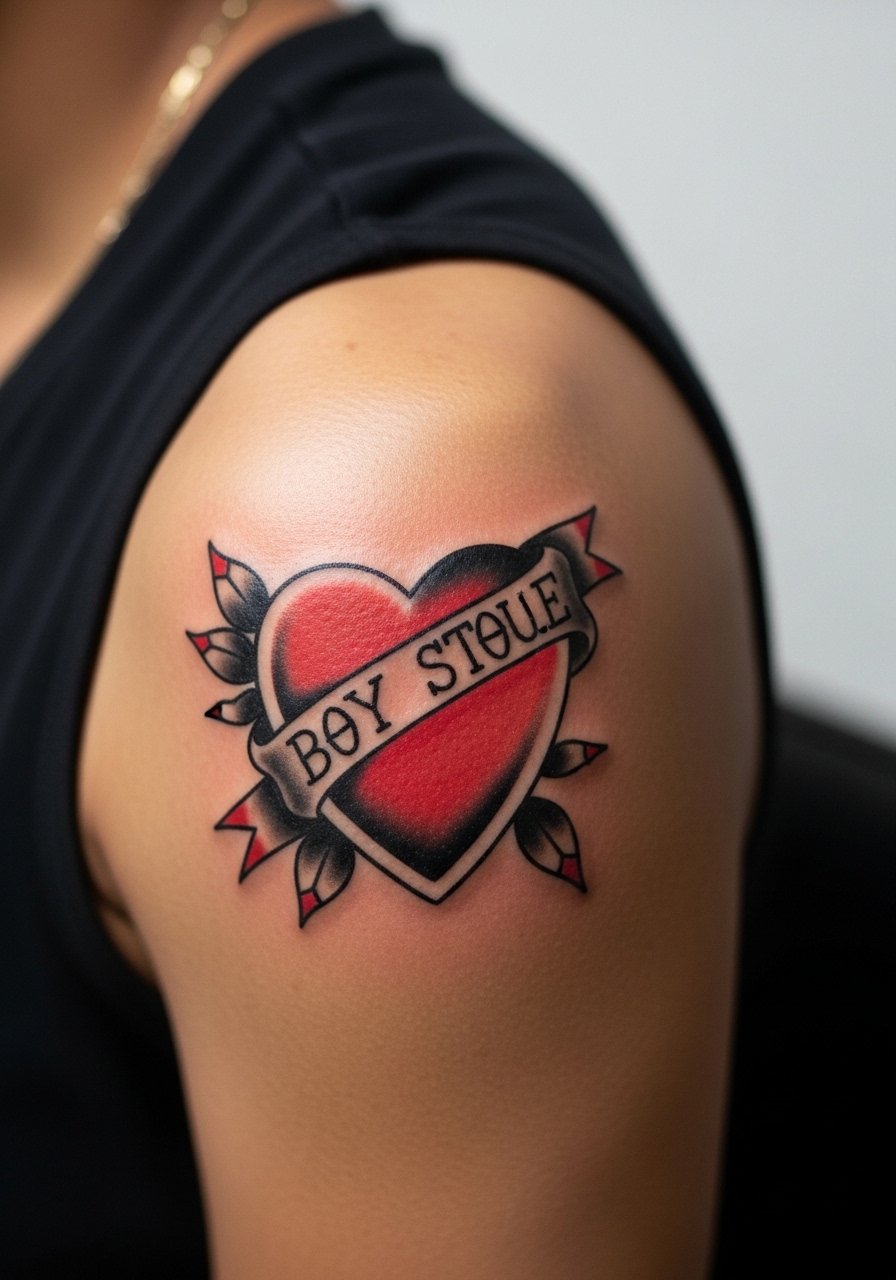
A heart and banner should be sized so the banner's lettering can use thicker strokes. Fine script inside a narrow banner will soften faster than bolder typography. The shoulder cap sits well for this because the curve adds dimensionality. Expect a short session and minor discomfort. For date and name pieces, be explicit about spacing in consultation. Show it off with a sleeveless blouse that frames the cap.
19. Old-School Lighthouse Placed Near the Shoulder Edge
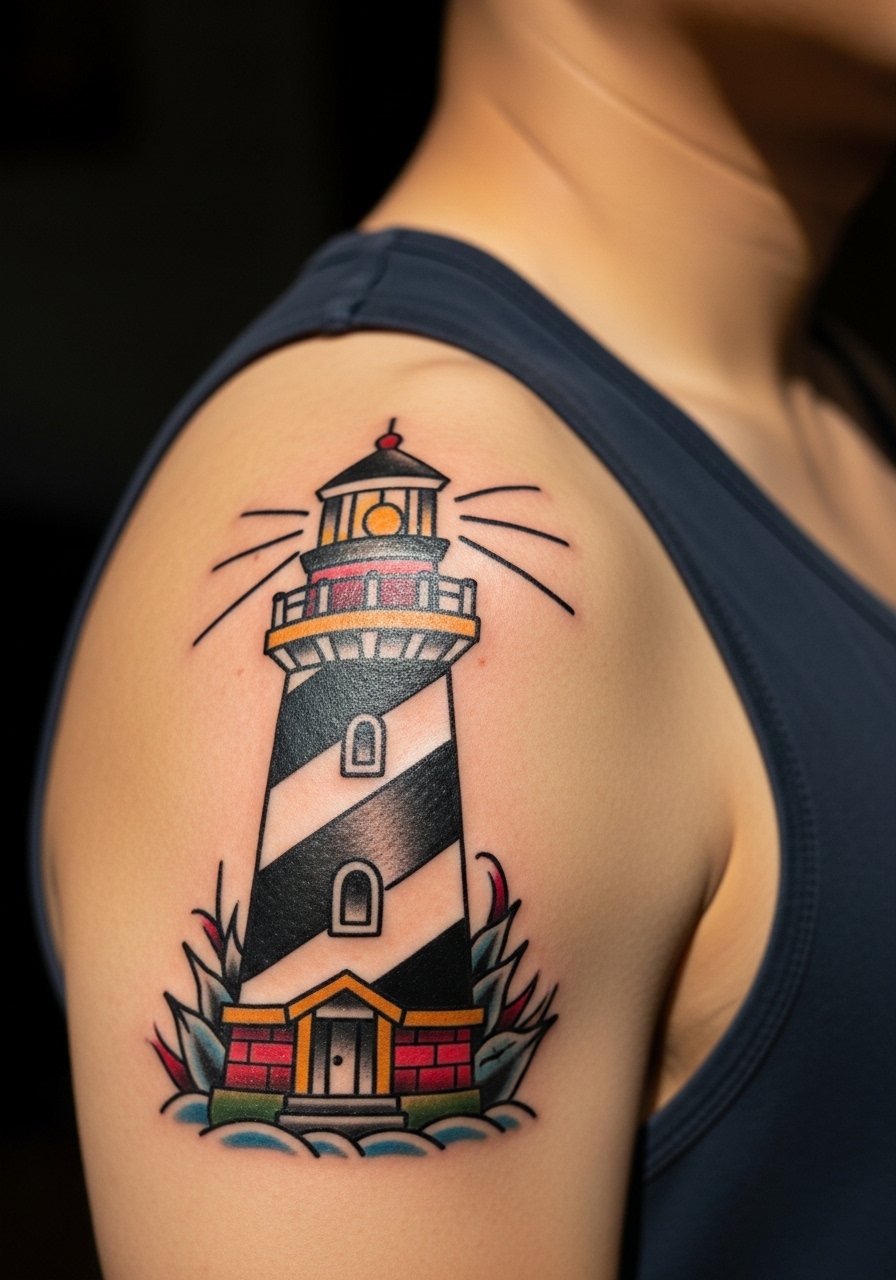
A lighthouse benefits from tall, clear bands of color and a simplified horizon so the silhouette remains legible. Tell your artist to favor broad fills over tight cross-hatching inside the tower. The shoulder edge is a durable spot for saturated vertical imagery. Sessions are moderate depending on size. Dress for the reveal with a wide-neck shirt that keeps the piece unobstructed.
20. Bold Rose with Banner That Wraps Slightly onto the Chest
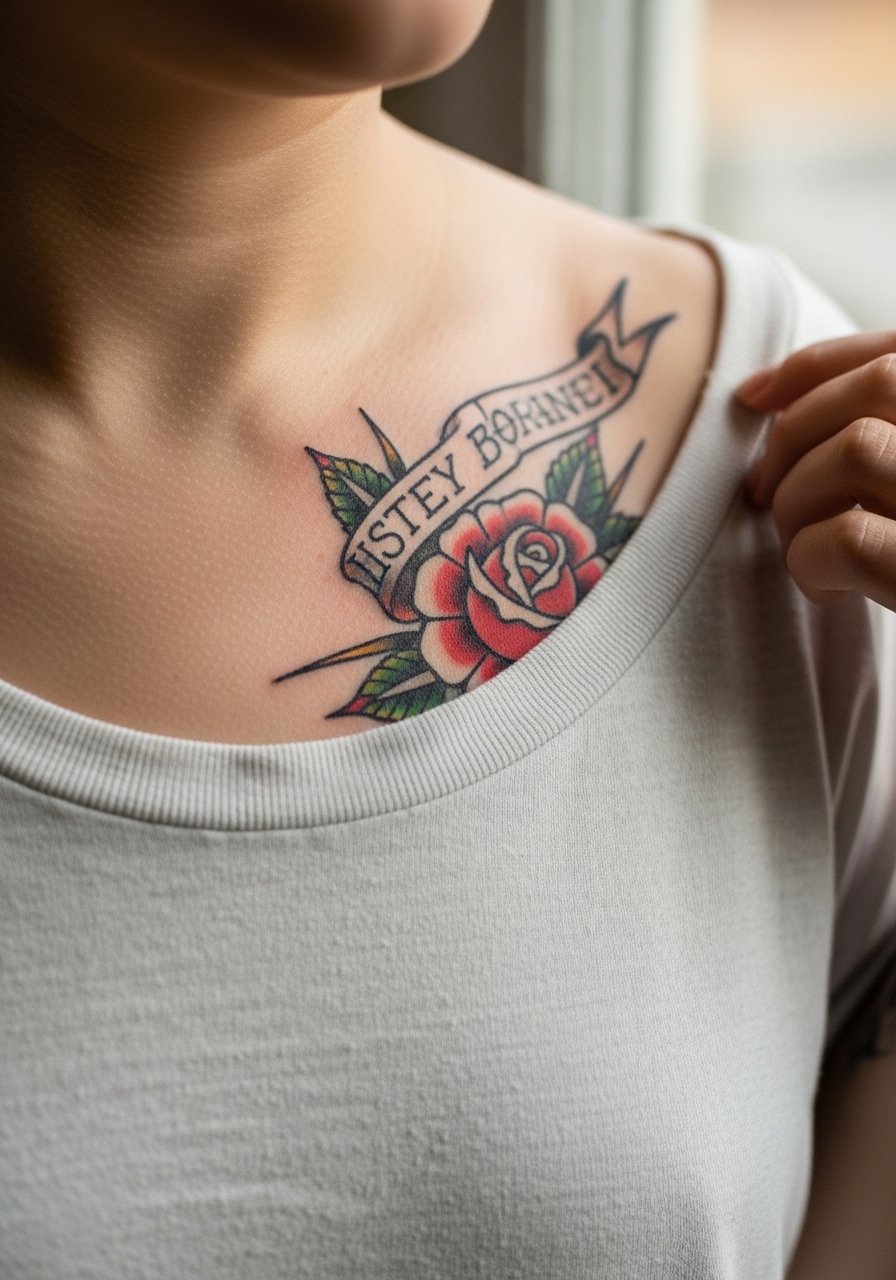
When a shoulder design bleeds onto the upper chest, the sternum and collar area change skin tension. Use thicker banner lines at the chest edge so the text survives skin movement. This placement requires a modest clothing descriptor in images, and a wide-neck shirt pulled aside is best for sessions. Expect a bit more sting where the chest approaches the shoulder. For evenings, an open-neck blouse frames the wrap elegantly.
21. Bold Blackwork Sunburst at the Shoulder Peak
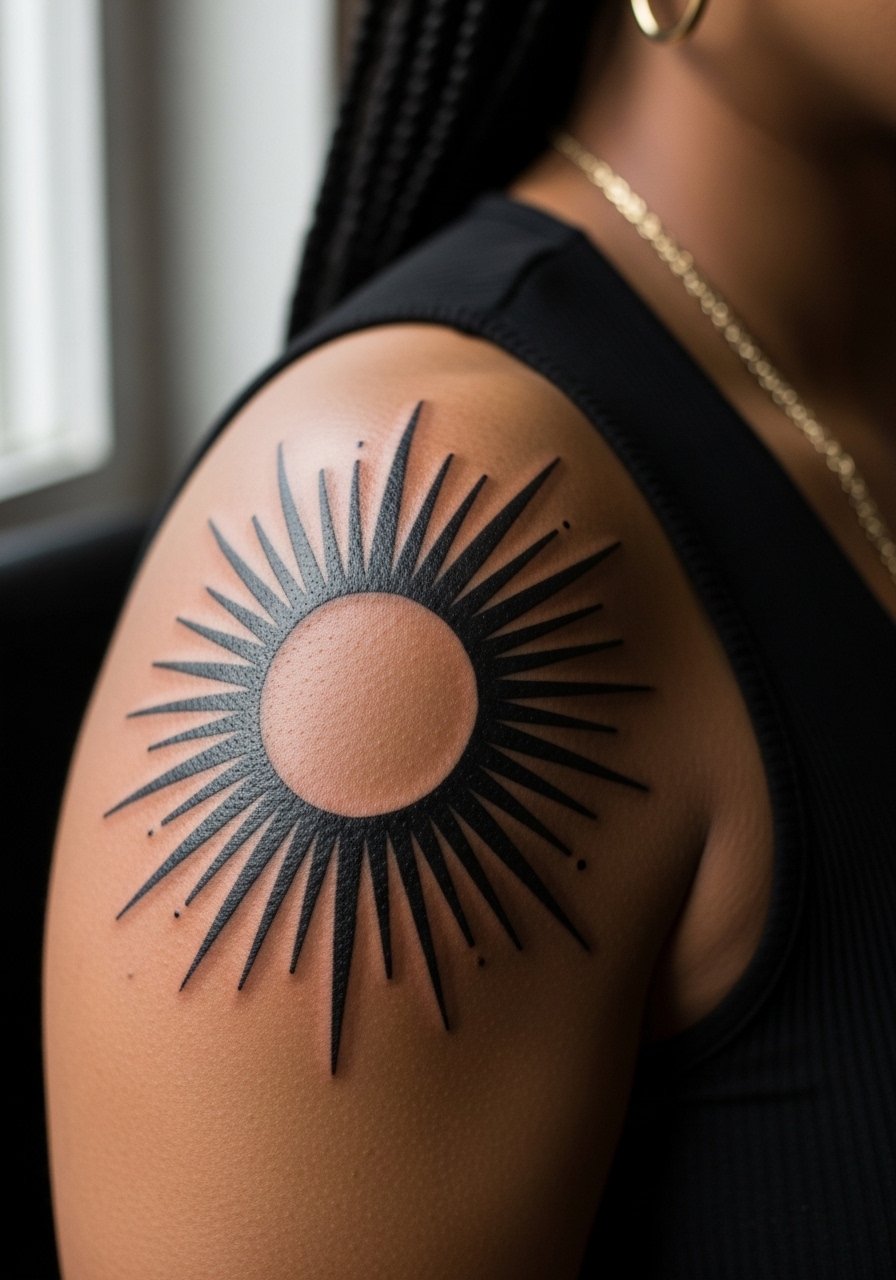
Blackwork sunbursts thrive on strong contrast and negative ring spacing. Ask for clear separation between rays rather than feathered edges that will blur. The peak of the shoulder is forgiving for heavy black fills. Sessions can be intense for short bursts of dense packing. For outfits, a sleeveless top provides an unobstructed view and minimal friction on healing.
22. Traditional Skull and Flowers Grounded on the Shoulder
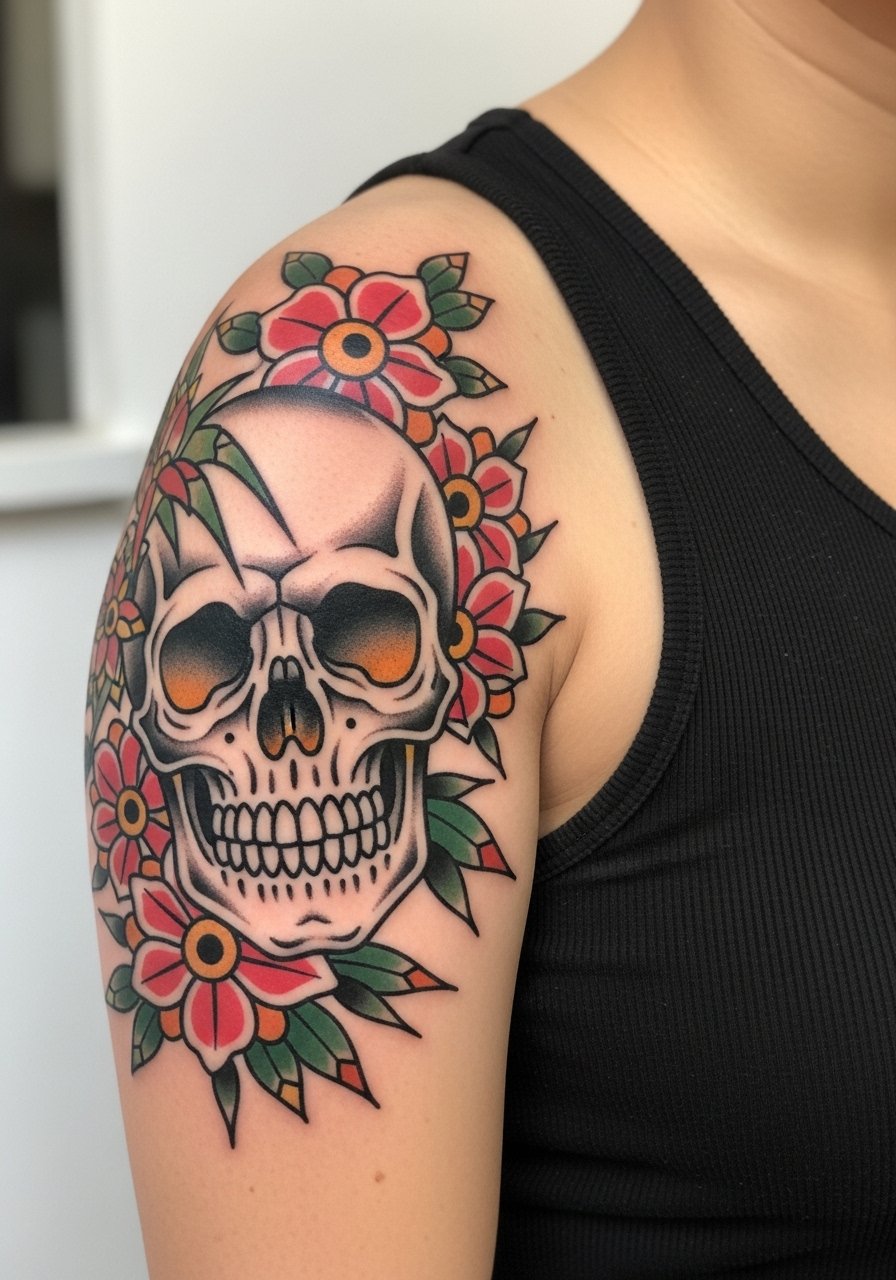
Skull motifs need strong black anchors around eye sockets and jaw to hold shape as minor fading occurs. Have your artist simplify small tooth detail into solid block shapes for longevity. The shoulder's curvature accentuates the skull without compressing details. This is a mid-length session with steady pressure near the bone. Pair with a loose button-down shirt you can slide to show the shoulder.
23. Classic Rose and Pin-Up Pairing Across the Shoulder Cap
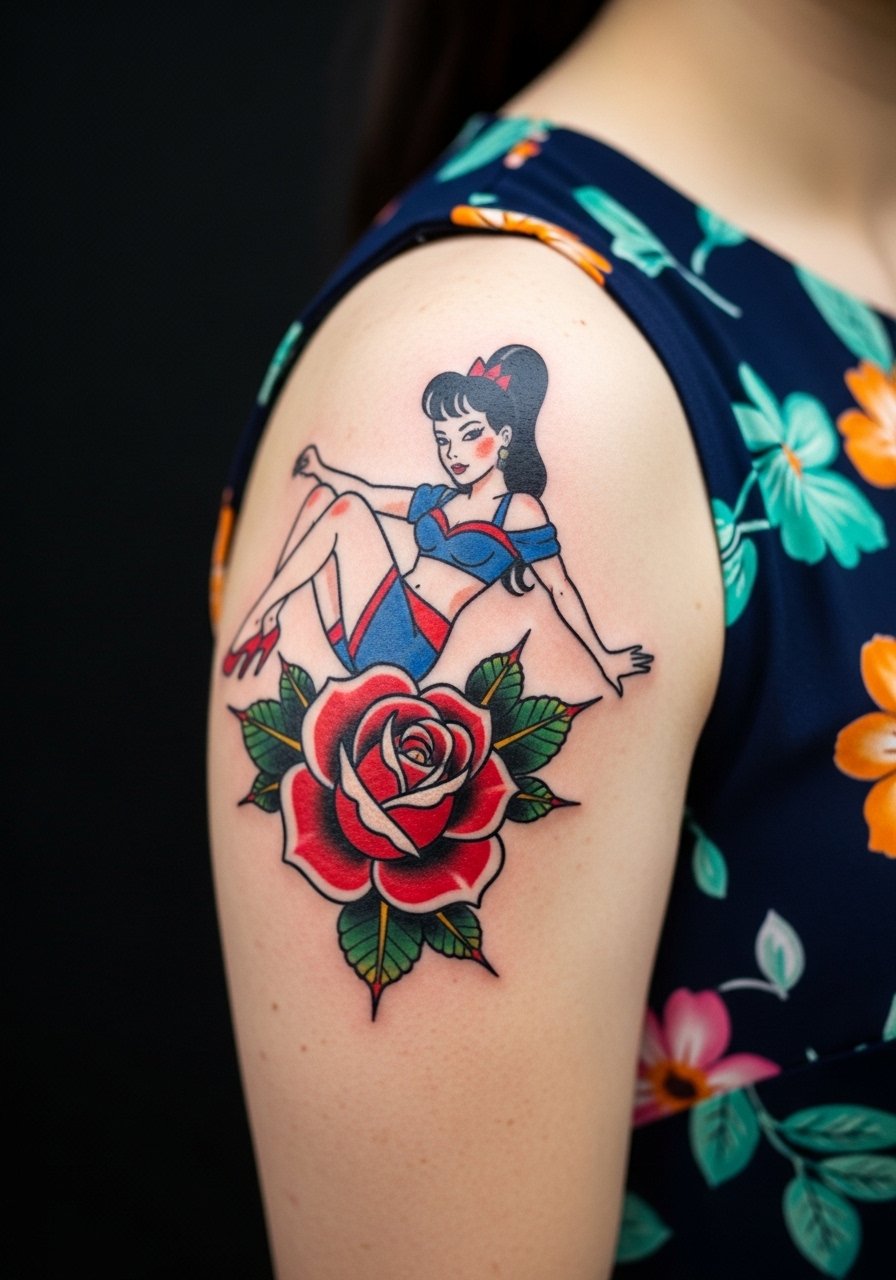
Combining a rose and a pin-up requires composition that keeps the two subjects from competing. Ask for negative space buffers and avoid micro shadings between elements. The shoulder cap supports this duo well and the result needs fewer touch-ups when the outlines are decisive. Sessions are longer for composition and pose adjustments. Show the pairing with a sleeveless dress that keeps the cap exposed.
24. Anchor and Compass Combo Near the Shoulder Ridge
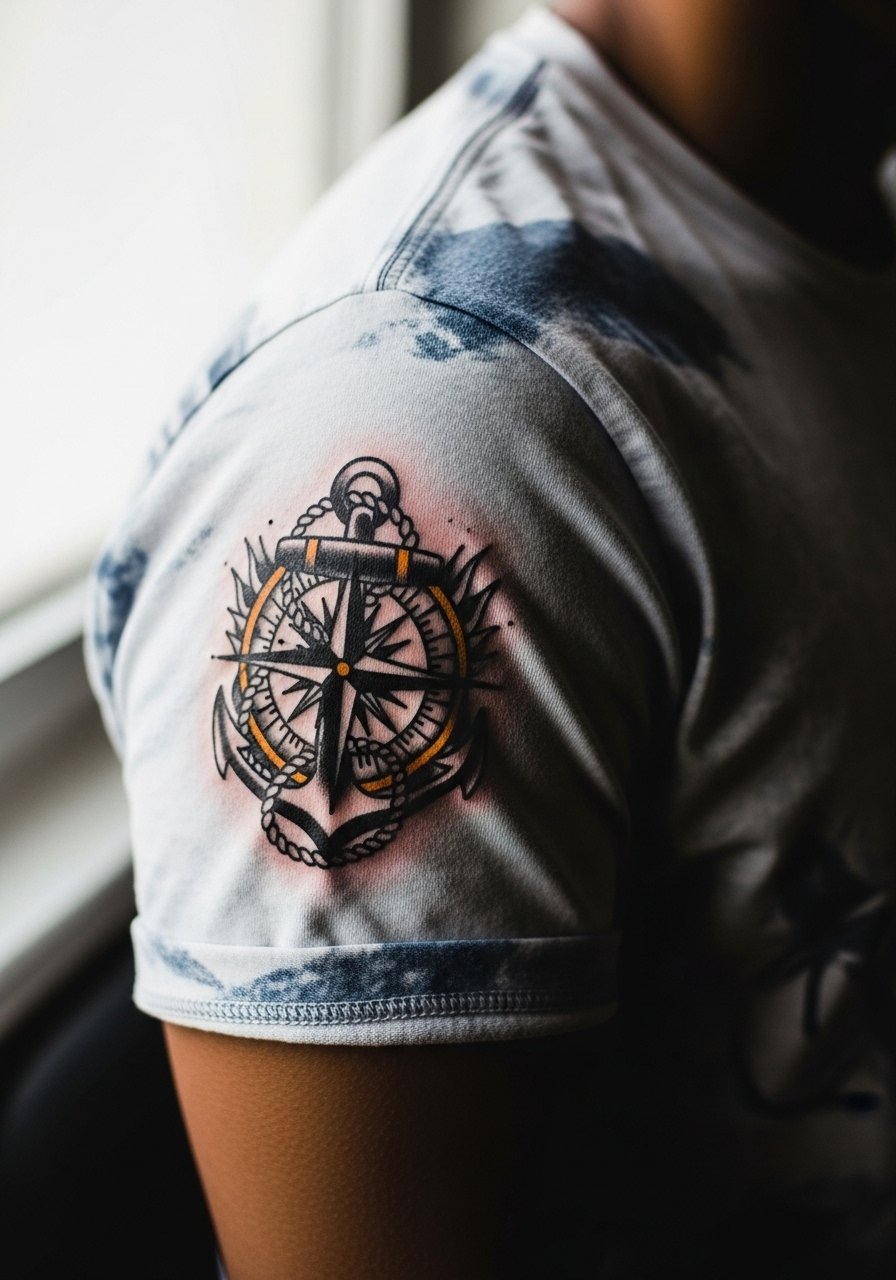
When pairing two nautical motifs, keep scale proportional so the anchor does not crowd the compass. Request simplified inner compass details to avoid busy centers that age poorly. The shoulder ridge provides good structure for both pieces to sit side by side. Expect moderate session time and manageable pain. For casual looks, a short-sleeve tee cuffed at the sleeve makes a clean frame.
25. Traditional Bannered Script That Curves with the Shoulder Line
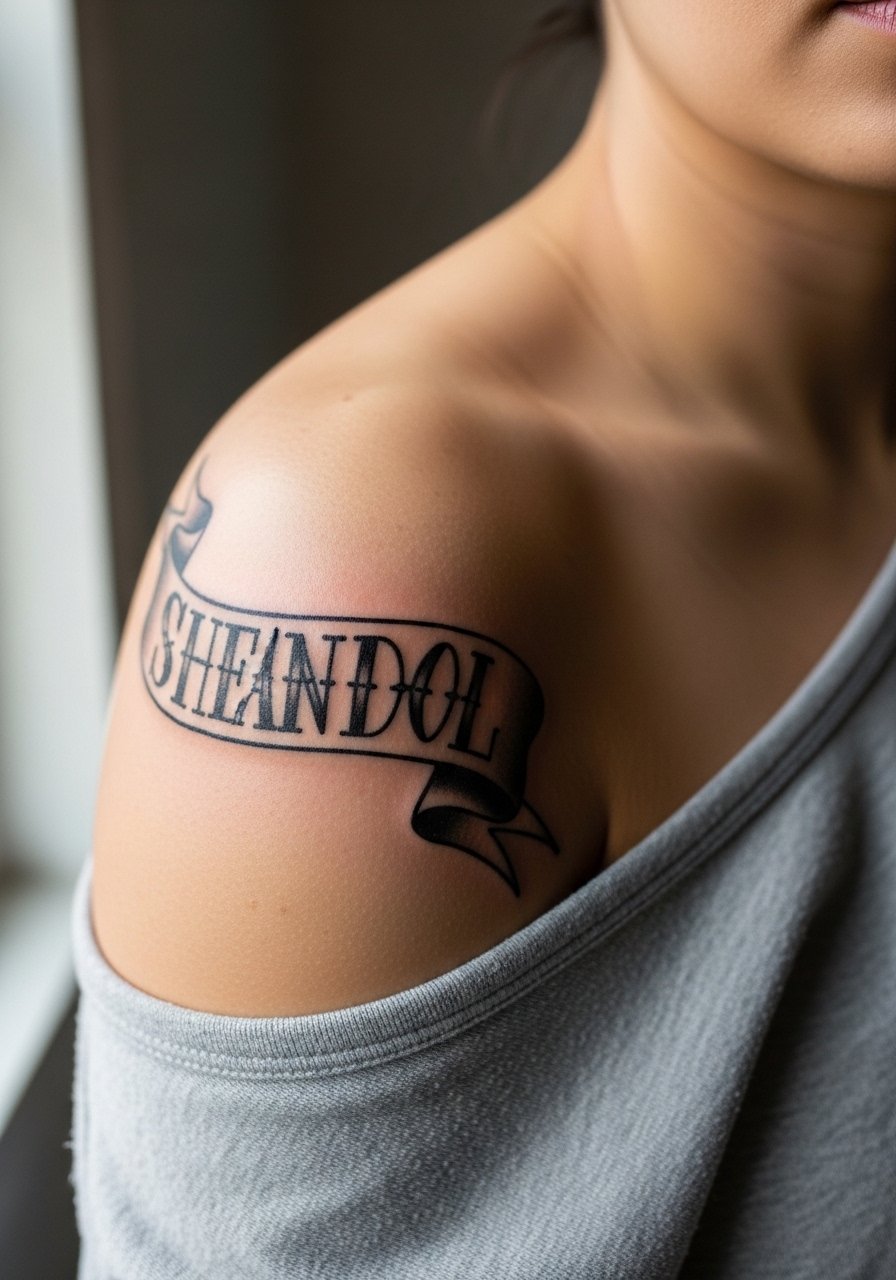
Script that follows the shoulder curve needs kerning widened and stroke weight increased for future legibility. Ask the artist to print a curved stencil on skin and test how the letters look when you move your arm. This small test prevents letters compressing later. Sessions are short but precise. For reveal, choose a wide-neck top that keeps the banner visible without pulling.
26. Small Traditional Ship Motif Tucked Near the Shoulder Joint
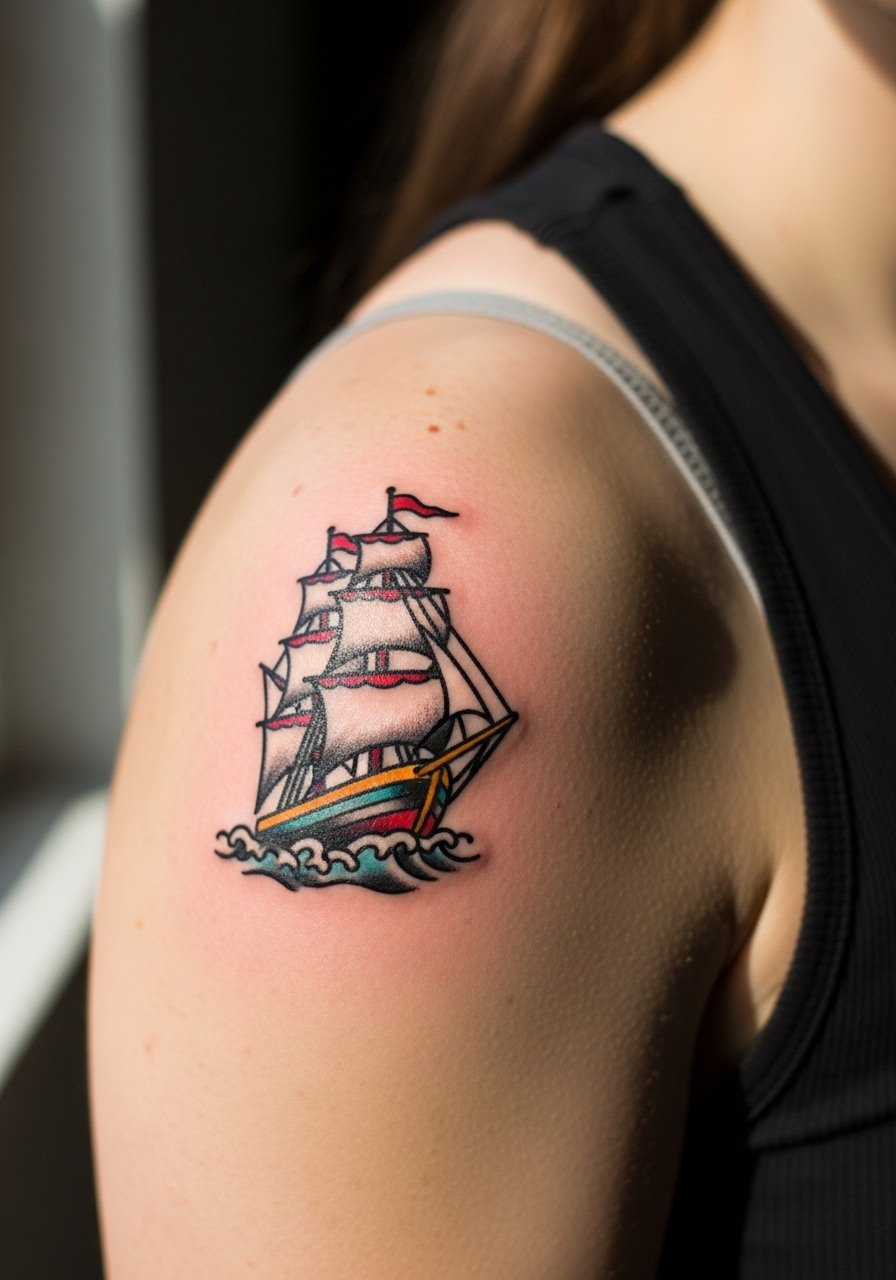
Tiny ships need exaggerated mast spacing and simplified rigging to last beyond a couple of years. The shoulder joint moves a lot, so allow extra margin around the hull to avoid merging. This is a quick session and can be paired with other small flash later. For showing it off, a loose tank top will keep the joint visible and reduce friction during healing.
27. Traditional Sun and Moon Duo Sitting on the Shoulder Cap Edge
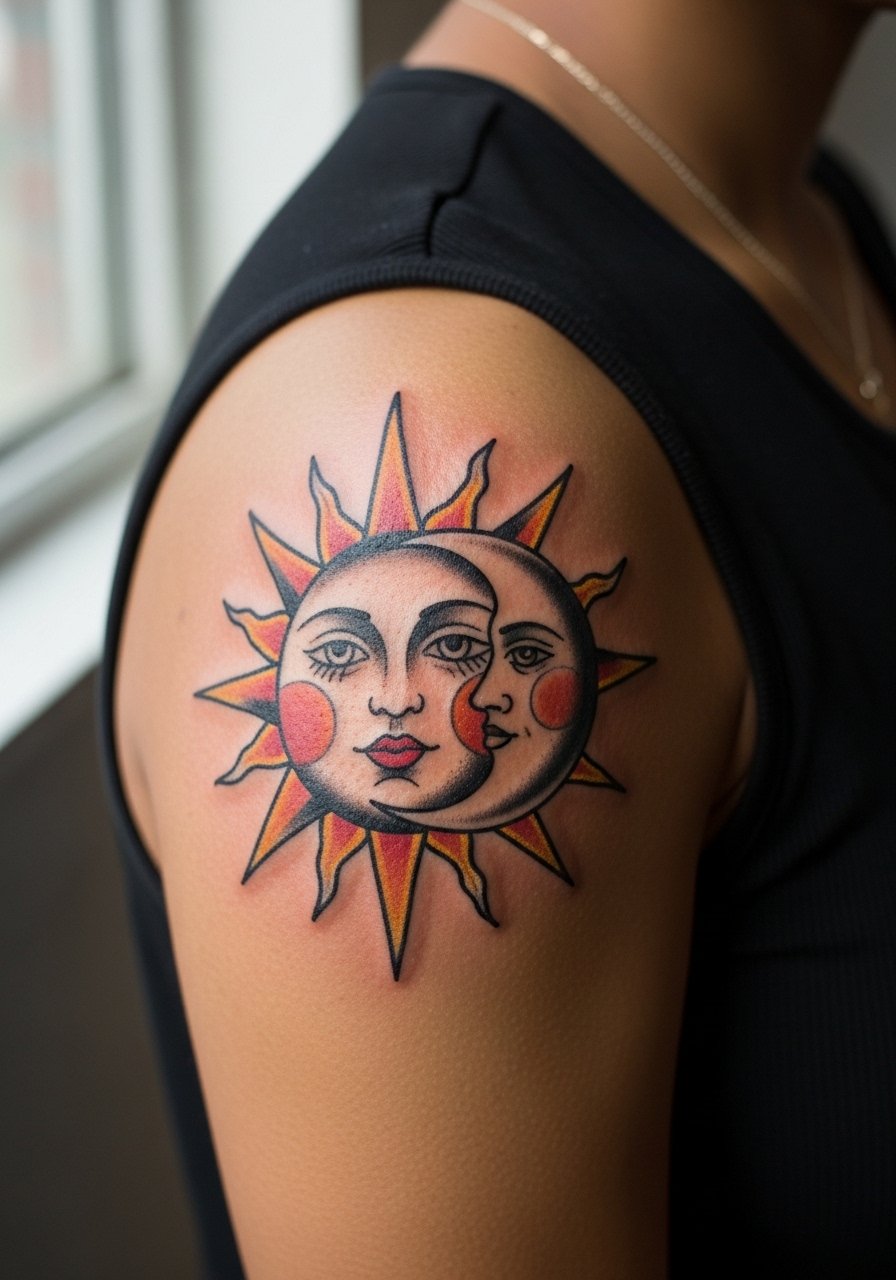
Sun and moon pairs play with contrast, so ensure the moon uses negative space rather than fine dot shading that fades. The cap edge gives both icons room to breathe and keeps their silhouettes distinct. This design is moderate in session length and sensation. A common debate among artists is whether smaller celestial icons belong on rounded anatomy. One camp argues they blur too fast. The other camp says with bold outlines and open spacing they stay clear. Ask the artist which approach they prefer during consultation.
Frequently Asked Questions
Q: Will traditional bold outlines on the shoulder reduce the need for touch-ups compared with fine line work?
A: Yes, in my experience bold outlines and saturated fills tend to hold better on shoulder skin than ultra-fine details. The thicker linework resists minor spreading and UV-related fading, so touch-ups are usually needed later and less often.
Q: How does a shoulder placement affect pain and session length compared with ribs or sternum?
A: The shoulder is generally lower on the pain scale and easier to access, so sessions are shorter and more comfortable than ribs or sternum. Ribs and sternum are more sensitive and may require breaks, so plan for separate sittings if moving from shoulder into chest territory.
Q: If I want to show a shoulder tattoo but keep it private sometimes, what clothing choices work best during the healing window?
A: Loose tops with adjustable straps are the most practical. A loose button-down shirt or a wide-neck blouse lets you expose the area for showing off and keep it covered when you need privacy. During healing, avoid tight straps that rub.
Q: Are there design choices to avoid if I plan to get a shoulder piece that later extends into a sleeve?
A: Avoid highly detailed micro elements at the join between shoulder and upper arm. Leave negative space in the transition zone so future work can flow. Discuss a compositional roadmap with the artist so the shoulder can expand into consistent shapes later.
Q: Do dark skin tones need different considerations for traditional color saturation on the shoulder?
A: Darker skin tones can carry saturated color beautifully, but contrast and lineweight matter more. Ask for strong black anchors and slightly increased line weight so color pops and shapes remain legible as the piece heals and ages.
Q: How long should I wait before swimming or strenuous shoulder work after getting a traditional shoulder tattoo?
A: Most artists I know advise avoiding submersion and heavy friction for at least two weeks. Light movement and normal showers are okay if you follow your artist's cleaning instructions. If something feels overly irritated, check in with your artist because the timeline can vary with size and placement.
