
Fine line realism is everywhere online, but what looks great on a swipe through an app does not always hold up on skin. Trends push tiny, ultra-detailed pieces that demand perfect placement and aftercare. This list collects realistic tattoo style drawings that read clearly in photos and keep working years later, with practical notes on aging, consult tips, and a little wardrobe help to show them off.
1. Fine Line Arrow on Inner Forearm
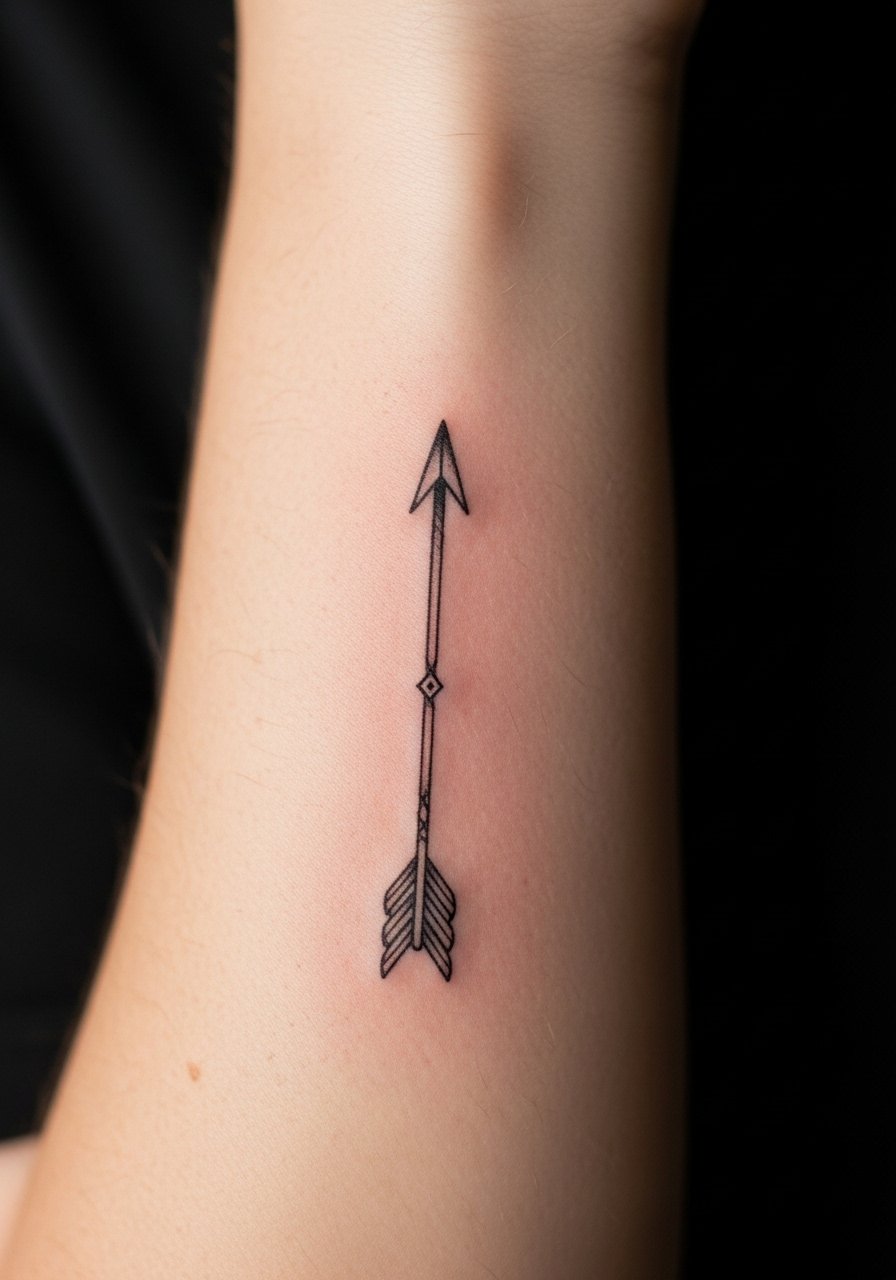
This tiny arrow reads sharp when done with deliberate spacing between strokes. I tell people to ask for slightly heavier line weight than the lightest photo reference so the linework survives daily sun exposure. Common mistake is requesting micro hairline details that blur into a gray thread by year three. Pain on the inner forearm is mild, sessions are short, and touch-up at year two is realistic. For the session wear, bring a loose button-down shirt you can pull aside so the artist has clean access without stretching the skin.
2. Micro-Realism Wolf Head on the Bicep
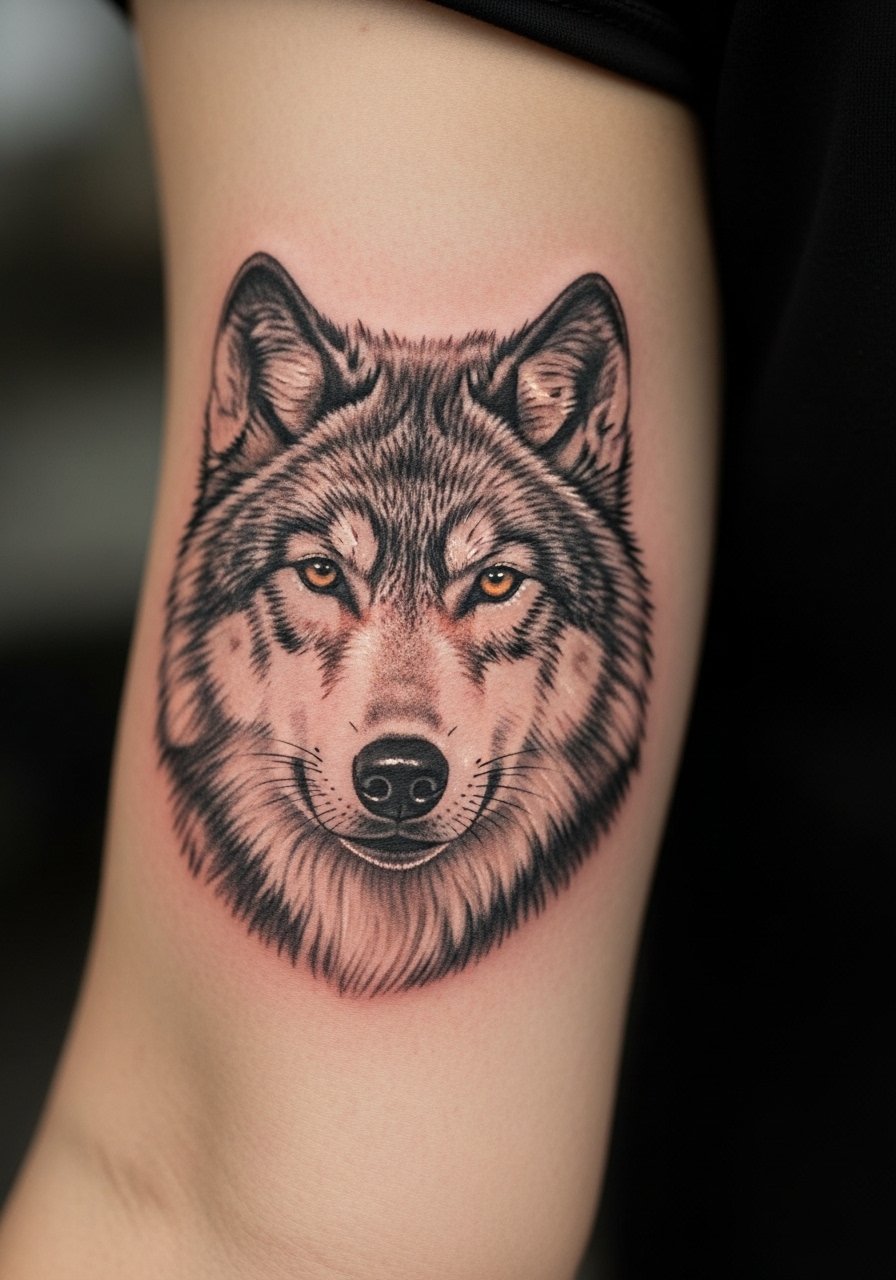
A wolf in micro-realism focuses on eyes and fur texture rather than full-body detail. I recommend bringing portrait references of animal fur, not stylized cartoons, and telling your artist which part of the face to emphasize. Mistakes include asking for the entire animal in a tiny space, which flattens into indistinct shading. Expect moderate pain on the bicep and a two-hour session for a medium-sized head. For evenings out, this placement pairs well with rolled-up sleeves and a classic leather jacket that frames the shoulder and forearm.
3. Black and Gray Portrait on Upper Arm
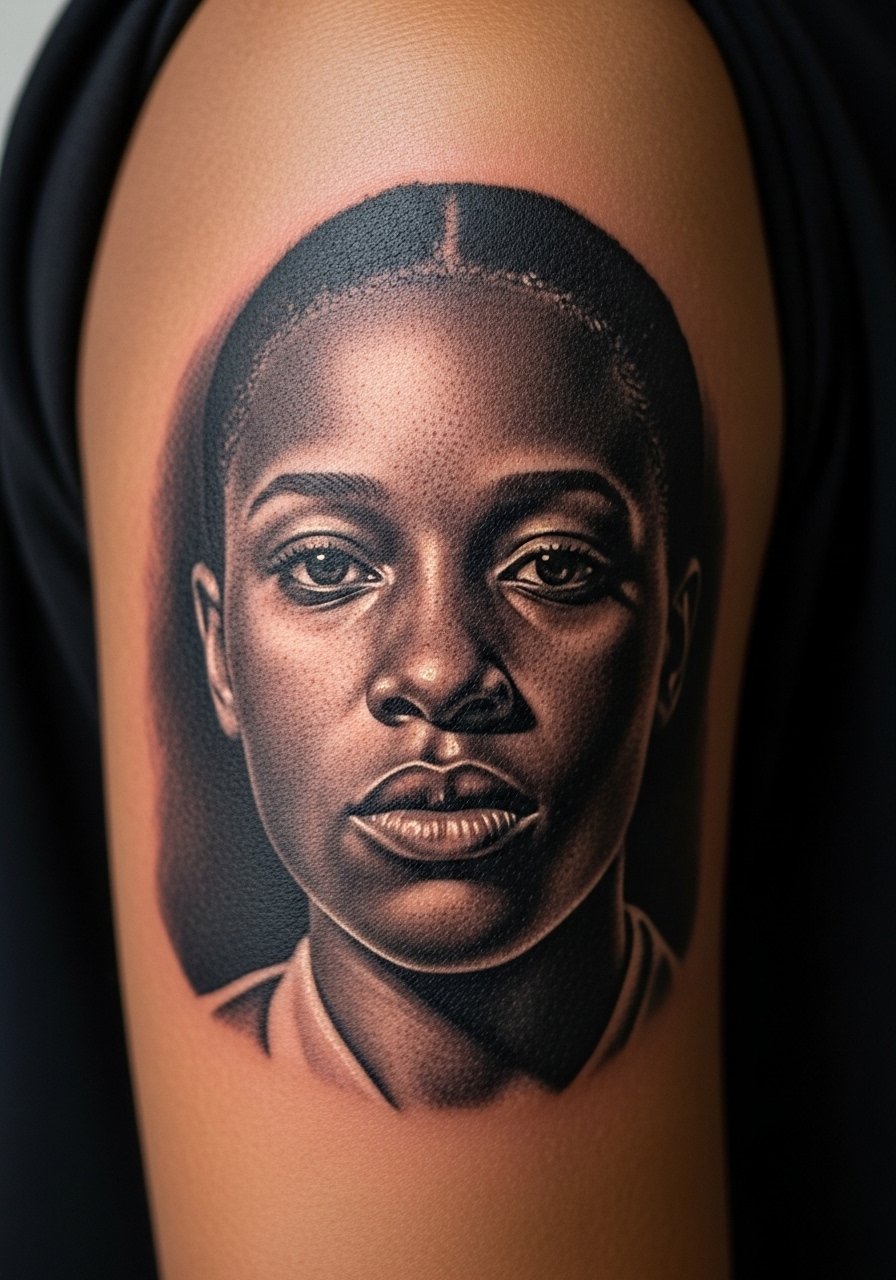
Portrait realism is unforgiving. Tell your artist you want emphasis on tonal range and clear highlights, not just dense black saturation. The main mistake is relying on low-resolution photos or heavily filtered images. This placement is forgiving for aging, because the upper arm sees less UV than the wrist. Sessions can last multiple hours and often require a second appointment for refinement. For the session, wear a loose tank top so the artist can work around the shoulder without tugging at fabric.
4. Color Realism Rose on the Shoulder Blade
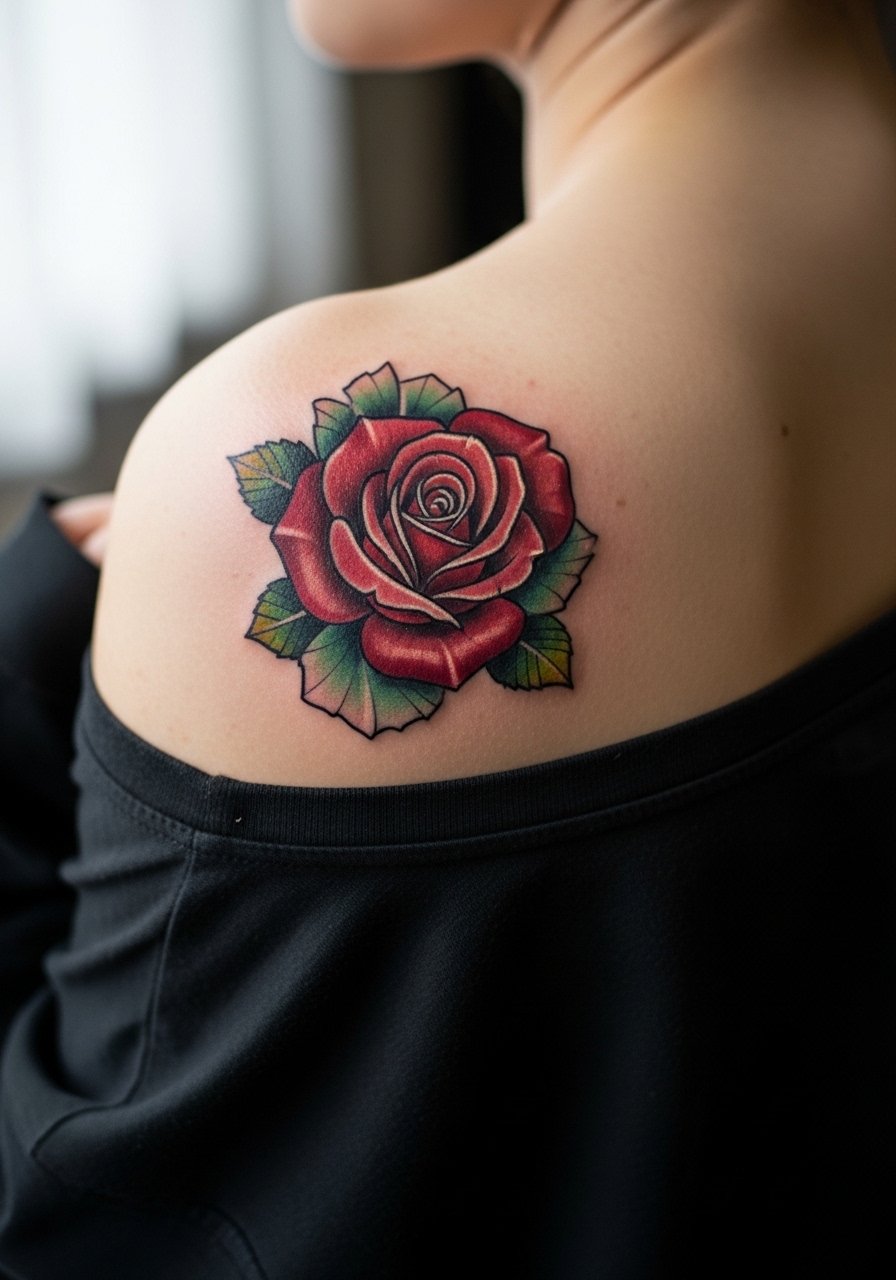
Color realism roses rely on layered saturation and subtle highlights to suggest petals. In consultation, specify whether you want true color fidelity or a muted palette that fades gracefully. Common aging issue is heavy saturation with no midtones, which becomes muddy over time. Pain is moderate on the shoulder blade and sessions are often spread out. For showing off, open-back tops or a wide-neck sweater let the rose peek through without overexposing the area.
5. Micro-Realism Insect on the Wrist
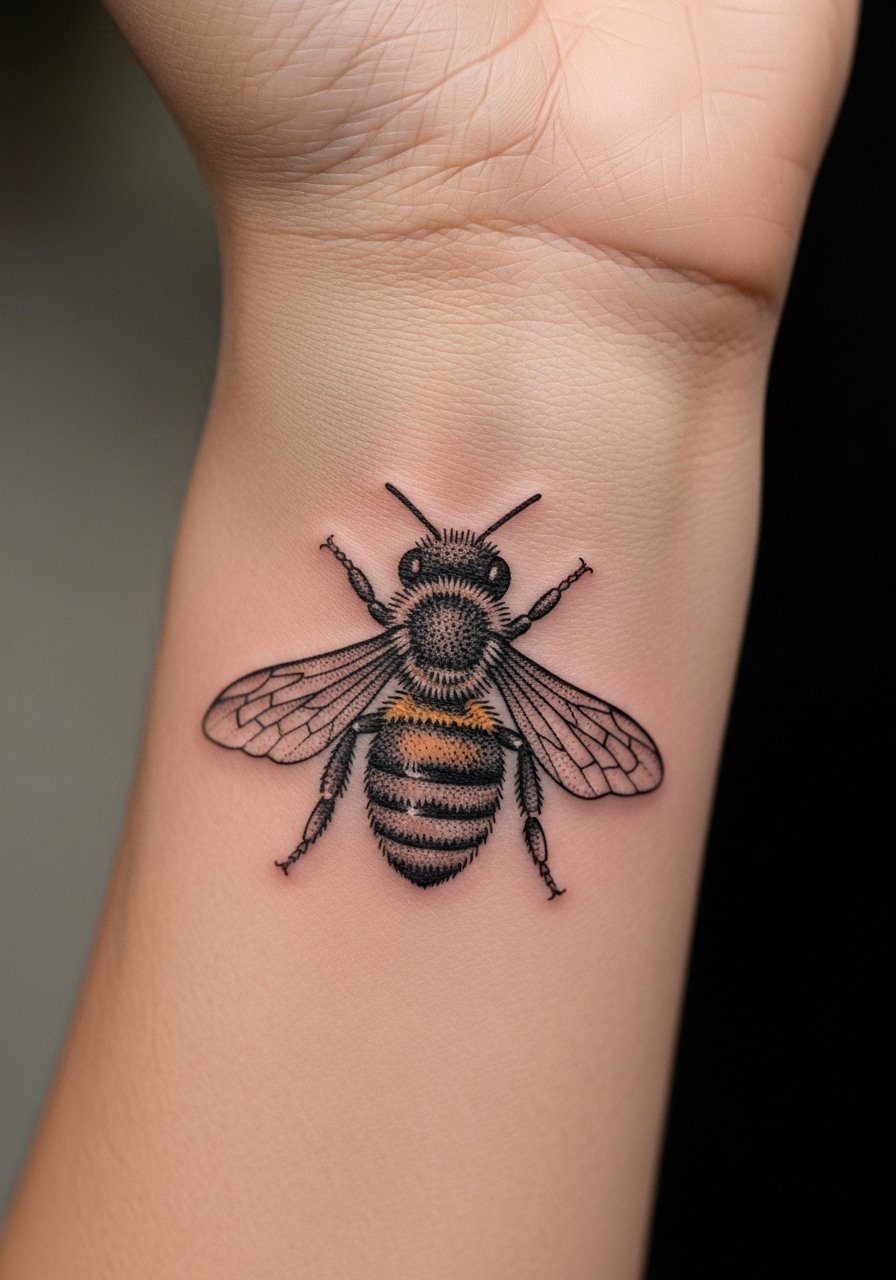
Tiny insects can read as crisp micro-realism if the negative space is planned. Tell the artist to leave breathing room around legs and wings so stipple shading does not merge. A common mistake is requesting ultra-small antennae that disappear into blur. Wrist skin takes a beating from washing and bracelets, so expect touch-up sooner than on the upper arm. For session comfort and access, wear a short-sleeve linen shirt you can roll up without constricting circulation.
6. Realistic Eye with Tear Drop Near Collarbone
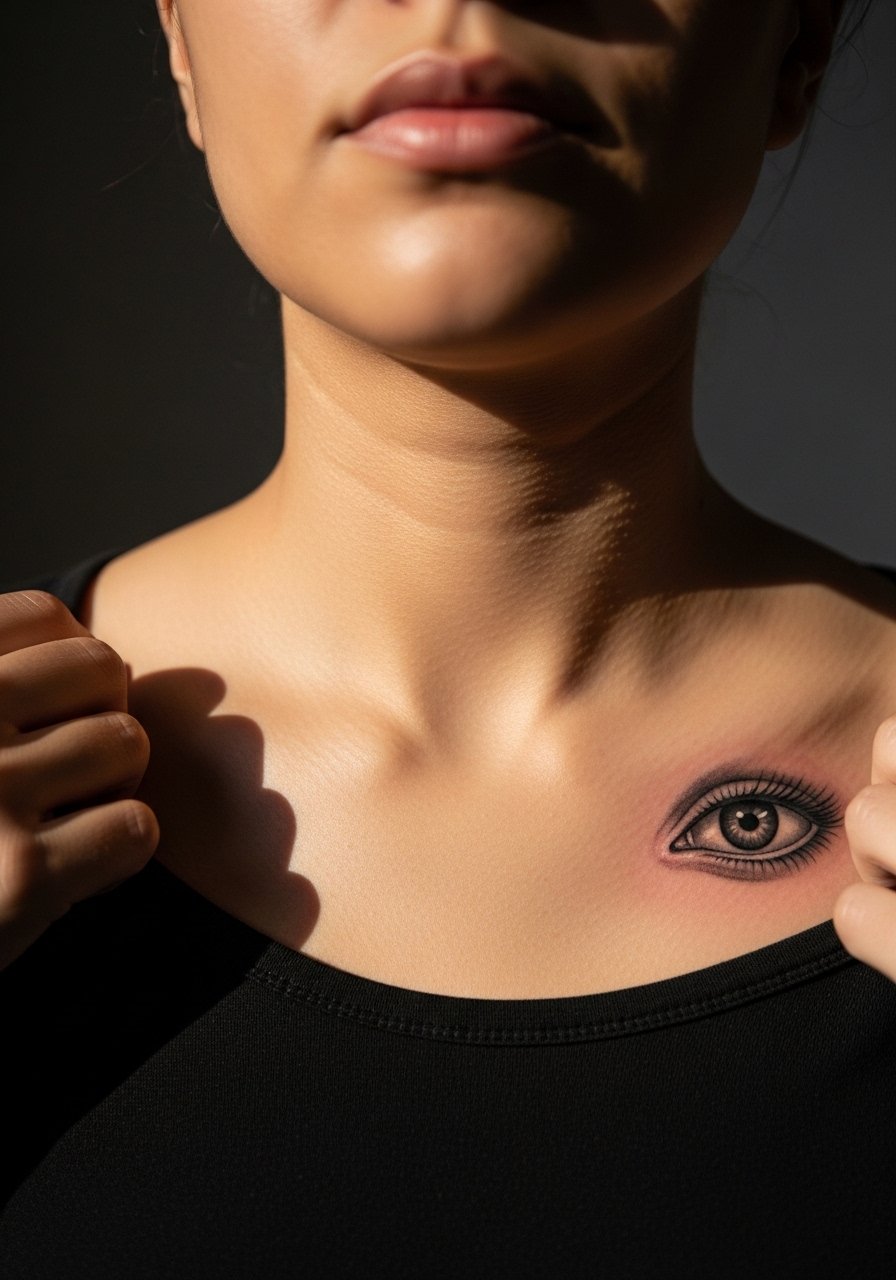
An eye near the collarbone reads intimate and requires careful spacing to avoid distortion when clothing shifts. I suggest asking your artist how the design sits with the curve of the clavicle and request a pre-stencil check in standing and sitting positions. Mistakes include centering the pupil without accounting for shoulder slope, which skews the gaze. Sternum and collarbone zones are more sensitive, and sessions are often shorter with breaks. Pair this placement with a thin chain pendant necklace that sits above the design to frame, not compete.
Studio Day Picks
Those inner forearm, wrist, and collarbone pieces above need different prep than larger arm and back work, and a few small items smooth out the session and the first week.
- Stencil transfer paper kit. Lets you preview how a fine line or micro-realism stencil sits on skin before the needle, especially useful for the wrist and collarbone placements above.
- Topical numbing cream. Applied about 45 minutes before can take the edge off for sensitive collarbone and wrist sessions without changing saturation.
- Thin protective film roll. Keeps small wrist and finger tattoos cleaner during the first week of friction from typing and bracelets.
- Fragrance-free body wash. Gentle cleansing matters for delicate linework on forearms and the inner wrist where soap residue can cause irritation.
- Aquaphor healing ointment. A thin layer for the initial days helps lock in moisture for fine line work without clogging the channels needed for neat healing.
7. Hyper-Realistic Fruit Slice on the Calf
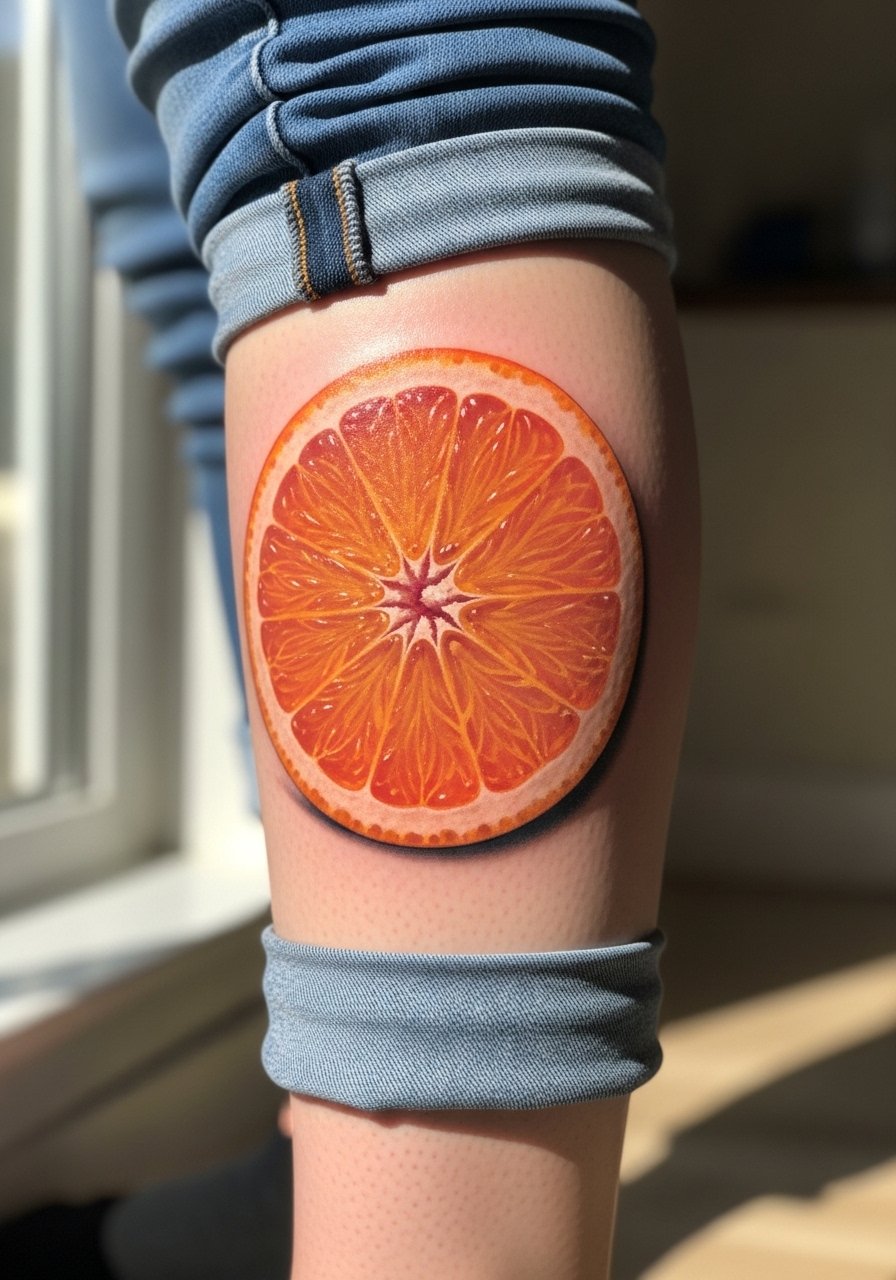
Food realism can be playful and is forgiving when placed on the calf, which sees less sun. Tell the artist you want crisp highlights and subtle rind texture, not heavy outlines. A mistake is compressing too many tiny seeds into a small slice, which looks cluttered when healed. Calf sessions are moderate on pain and allow longer single sittings. For show-off outfits, roll jeans or wear a linen midi skirt so the tattoo sits mid-boot season without hiding.
8. Realistic Skull with Floral Overlay on the Thigh
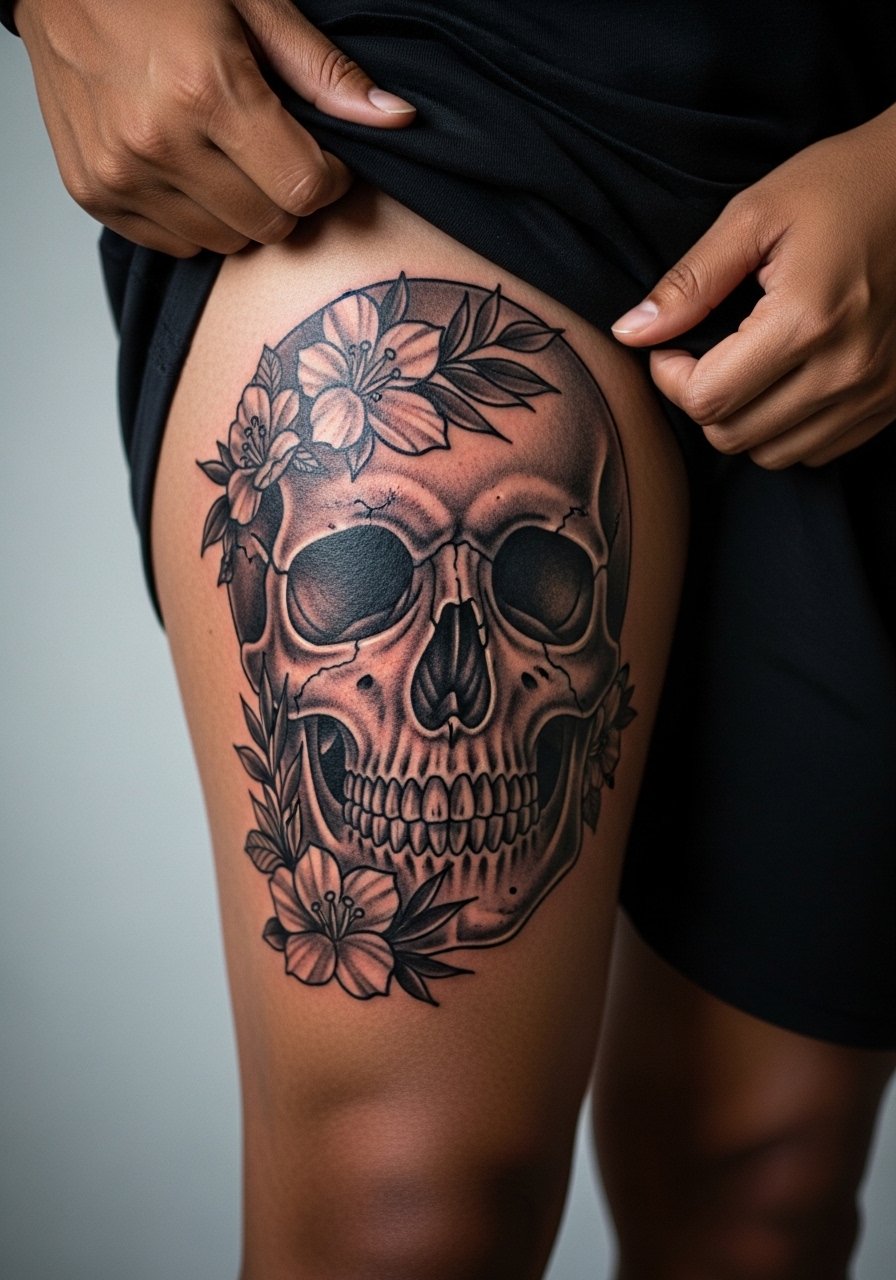
Thigh placements let artists render larger realism with softer gradation and less UV exposure. In consultation, clarify whether flowers should sit over the skull or weave through the eye sockets for depth. Common error is asking for too much tiny texture in a space that moves with clothing, which can stretch details. Pain varies on inner versus outer thigh and sessions may be spread across days. For comfort during the appointment, wear loose drawstring shorts or a wrap skirt so the artist can access without cold or pressure.
9. Tiny Realistic Script on a Finger
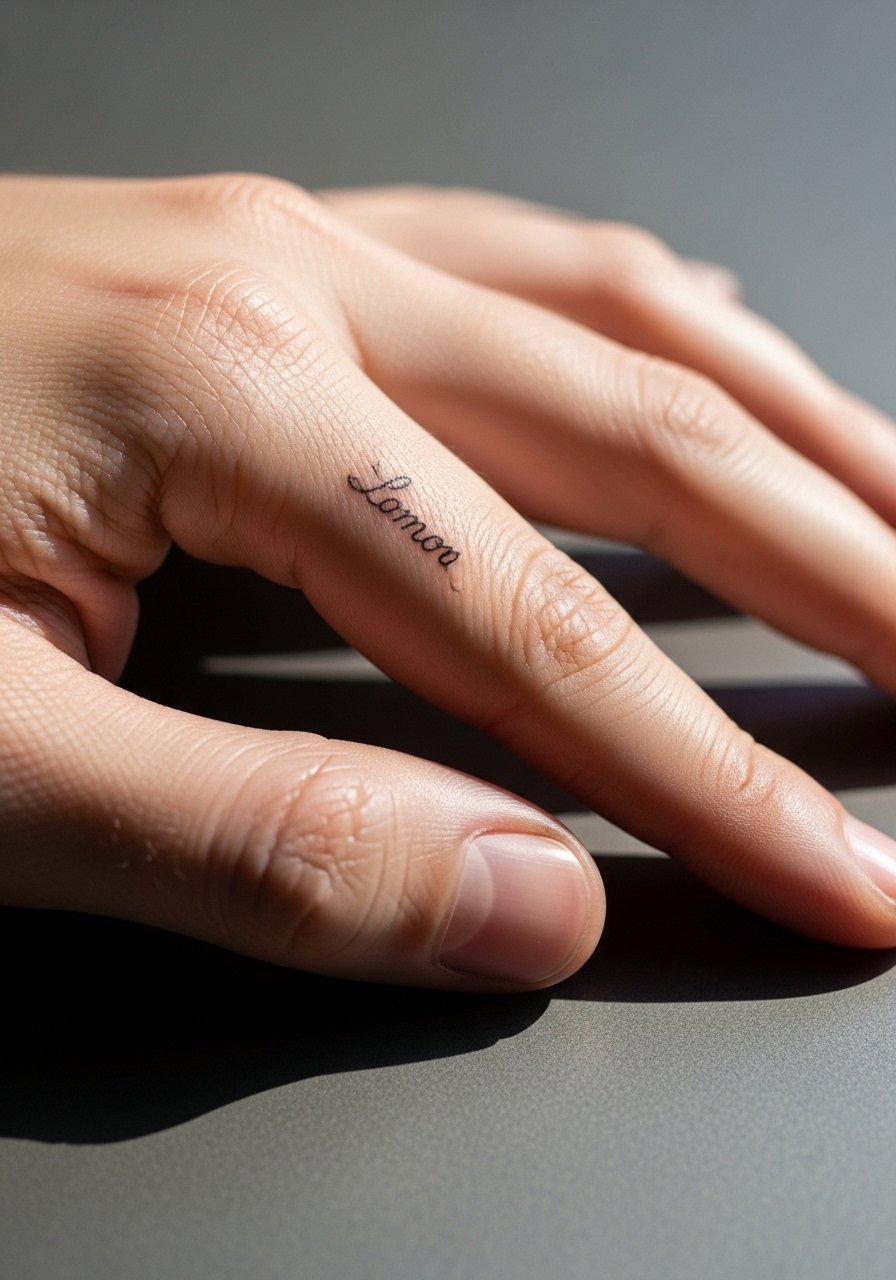
Finger scripts are high maintenance. I advise requesting slightly bolder letterforms than the thinnest photo reference to avoid early blur. The common mistake is choosing very dense script that traffics across knuckles, which opens and fades quickly. Expect faster fading and likely touch-ups within two years. Hand and finger tattoos still affect hiring in some industries, so think about visible work and career path before committing. During the session, keep hands warm and bring a thin knit glove to slip on between passes if you need a break.
10. Photorealistic Pet Portrait on the Ribcage
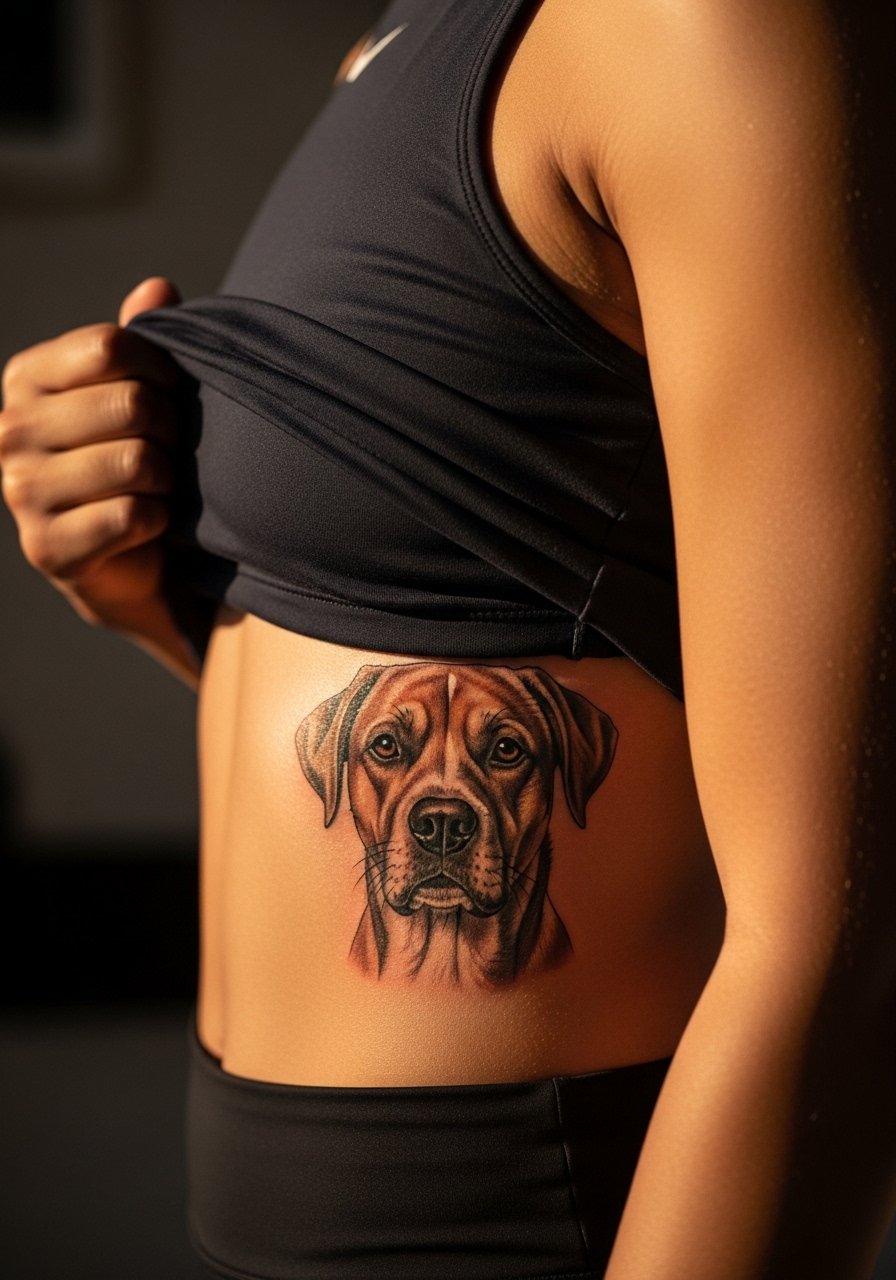
Ribcage portraits are emotional but technically demanding. Artists split on fine line on ribs. One camp says the skin stretch blurs lines within two years. The other camp argues that with proper depth and spacing, fine line settles fine on ribs. Ask your artist where they stand and whether they recommend denser shading or a slightly larger scale. Pain on the ribs is higher, sessions are often broken into shorter appointments, and touch-up planning should be part of the timeline. For the appointment, wear a cropped top so the artist can access the side without full torso exposure.
11. Realistic Jewelry Tattoo on the Sternum
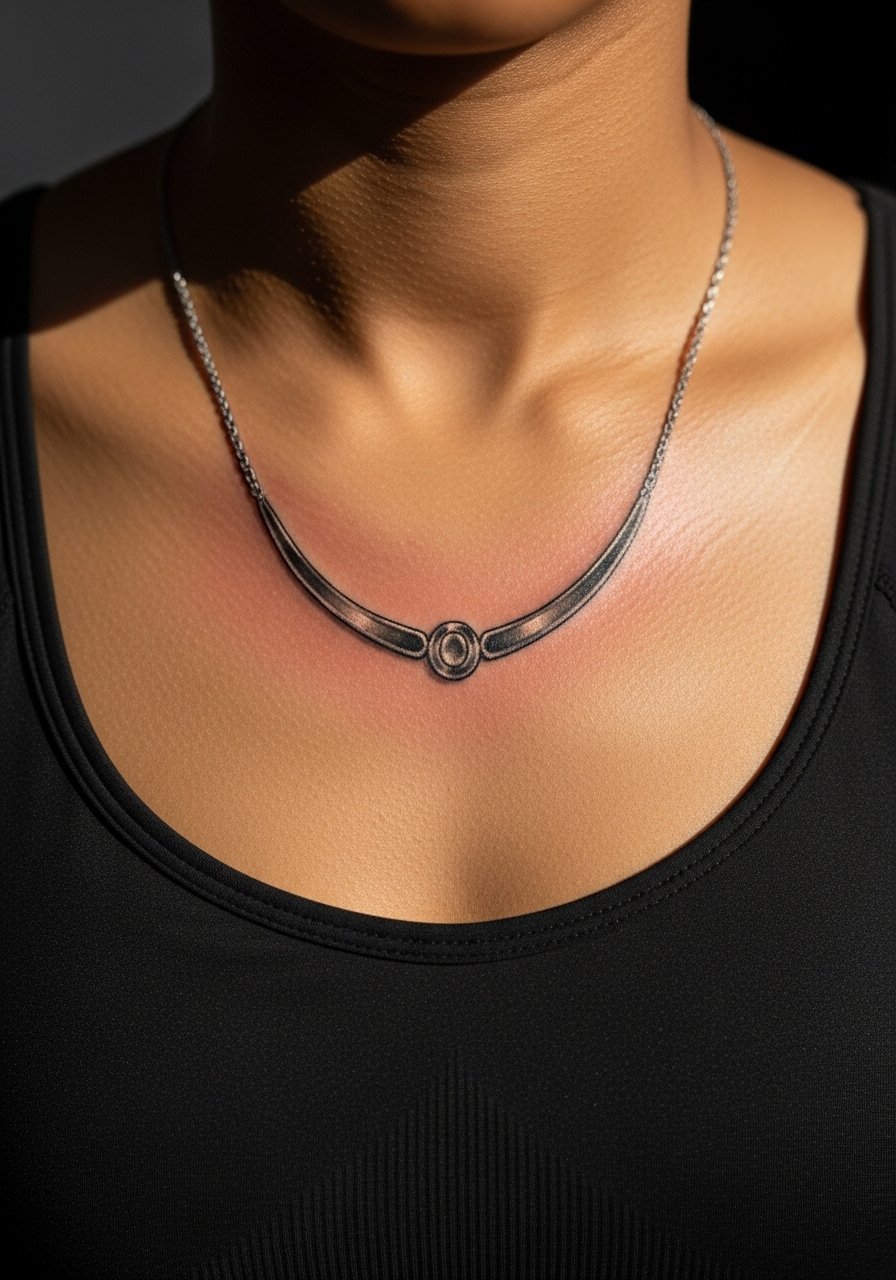
Sternum jewelry pieces read like real metal when highlights are placed correctly. I recommend discussing how the design sits with clothing lines to avoid awkward overlap. A key mistake is insisting on ultra-thin chains that disappear into skin texture over time. Sternum sessions are sensitive and usually shorter with breaks. For showing the piece, wear low-v-neck tops or a bandeau dress so the tattoo is framed but not exposed excessively.
12. Realistic Pocket Watch on the Inner Forearm
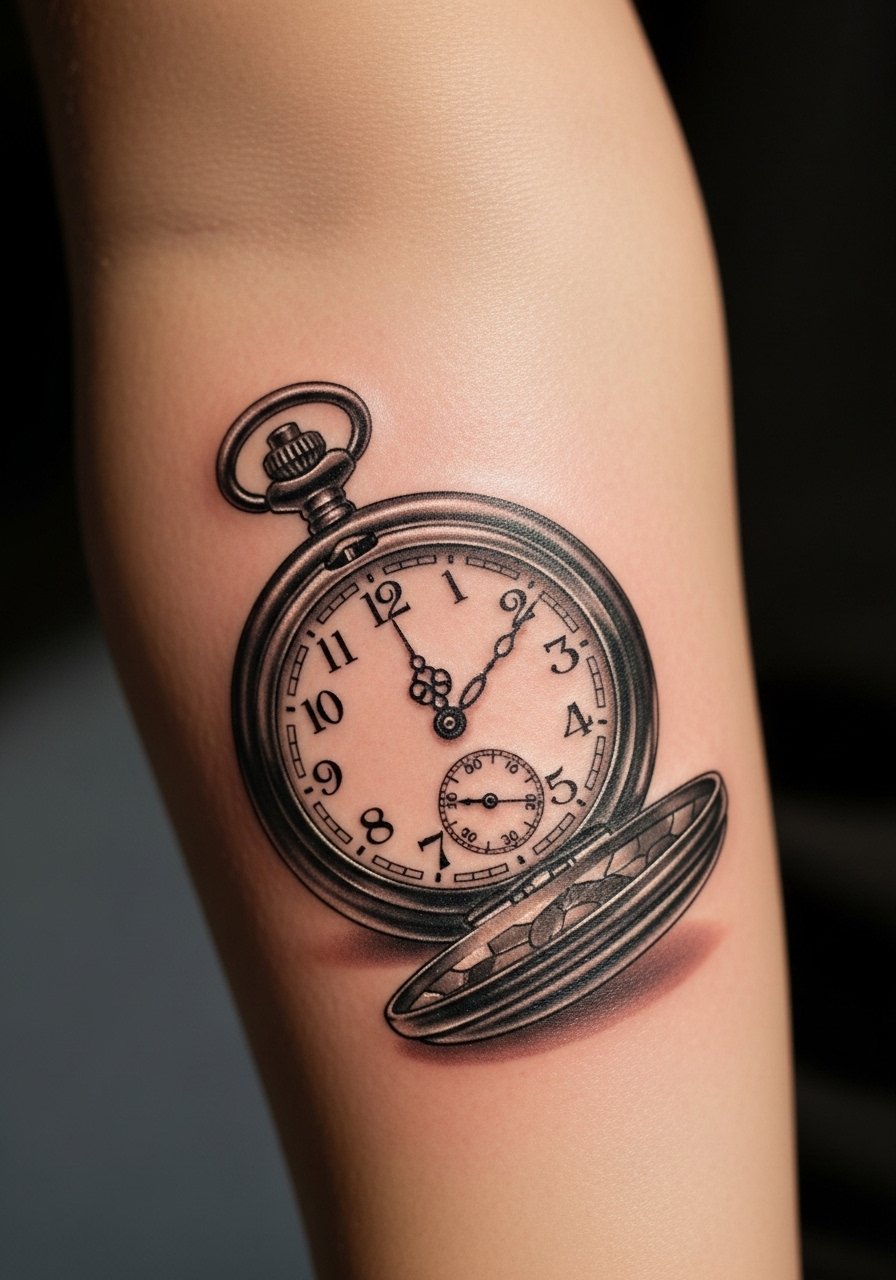
Fine numerals and gear detail work best at a medium size on the forearm. Tell your artist which time to show and whether numerals should be Roman or Arabic. The biggest mistake is scaling the face too small so the numbers become a blur at year three. Inner forearm heals reasonably well, but frequent sun exposure can soften contrast. Sessions are moderate length and a light touch-up may be needed in a couple of years. For daily wear, a minimalist leather watch sits beside the tattoo without competing.
13. Hyper-Realistic Feather Along the Collarbone
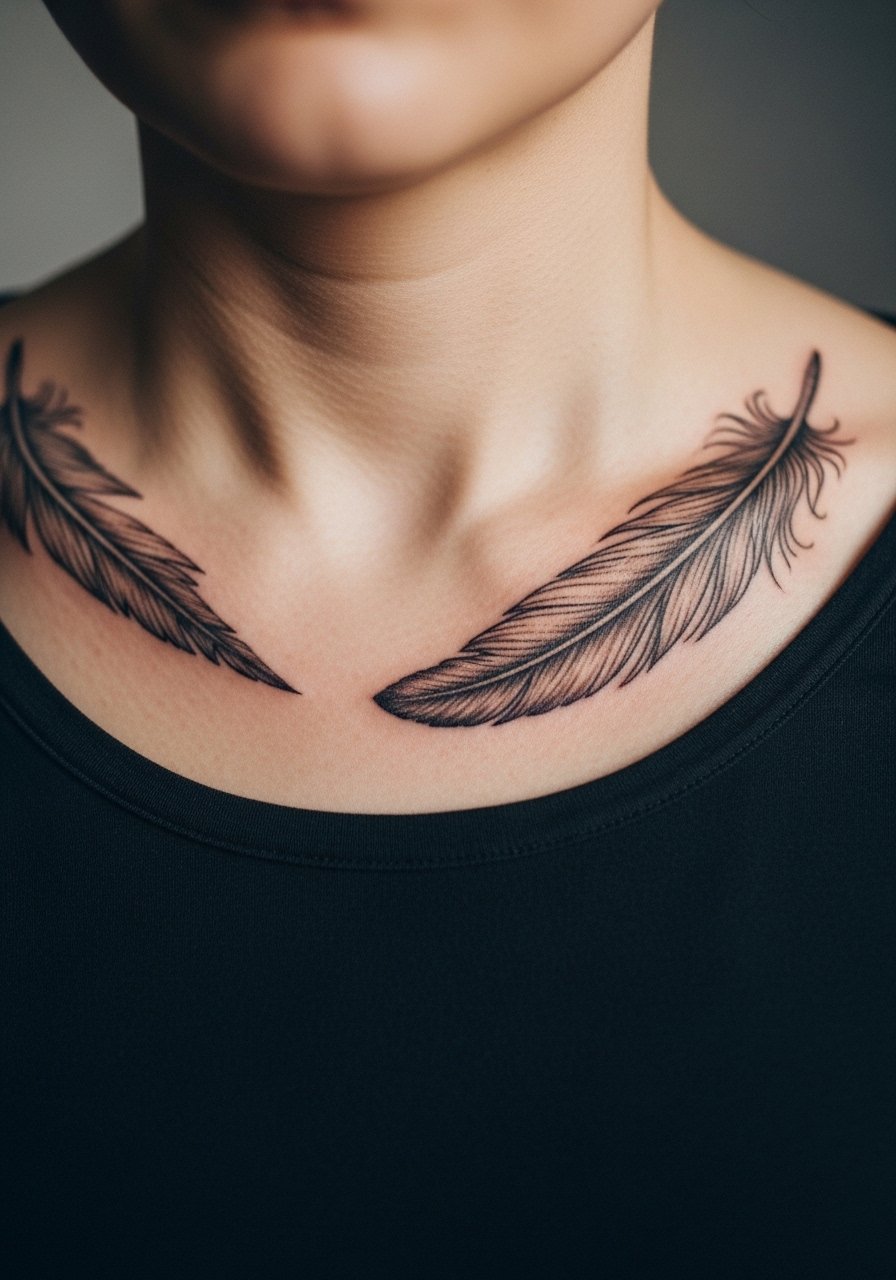
A feather along the collarbone is elegant if the barbs keep negative space. Ask for a midline spine of the feather with airy barbs, not a solid block. A common error is dense fill that turns into a dark streak after a few years. Collarbone work can be tender and sessions benefit from short breaks. For showing it off, pair the piece with a v-neck blouse or a delicate pendant that sits just above.
14. Realistic Eye and Hand Composition on the Back
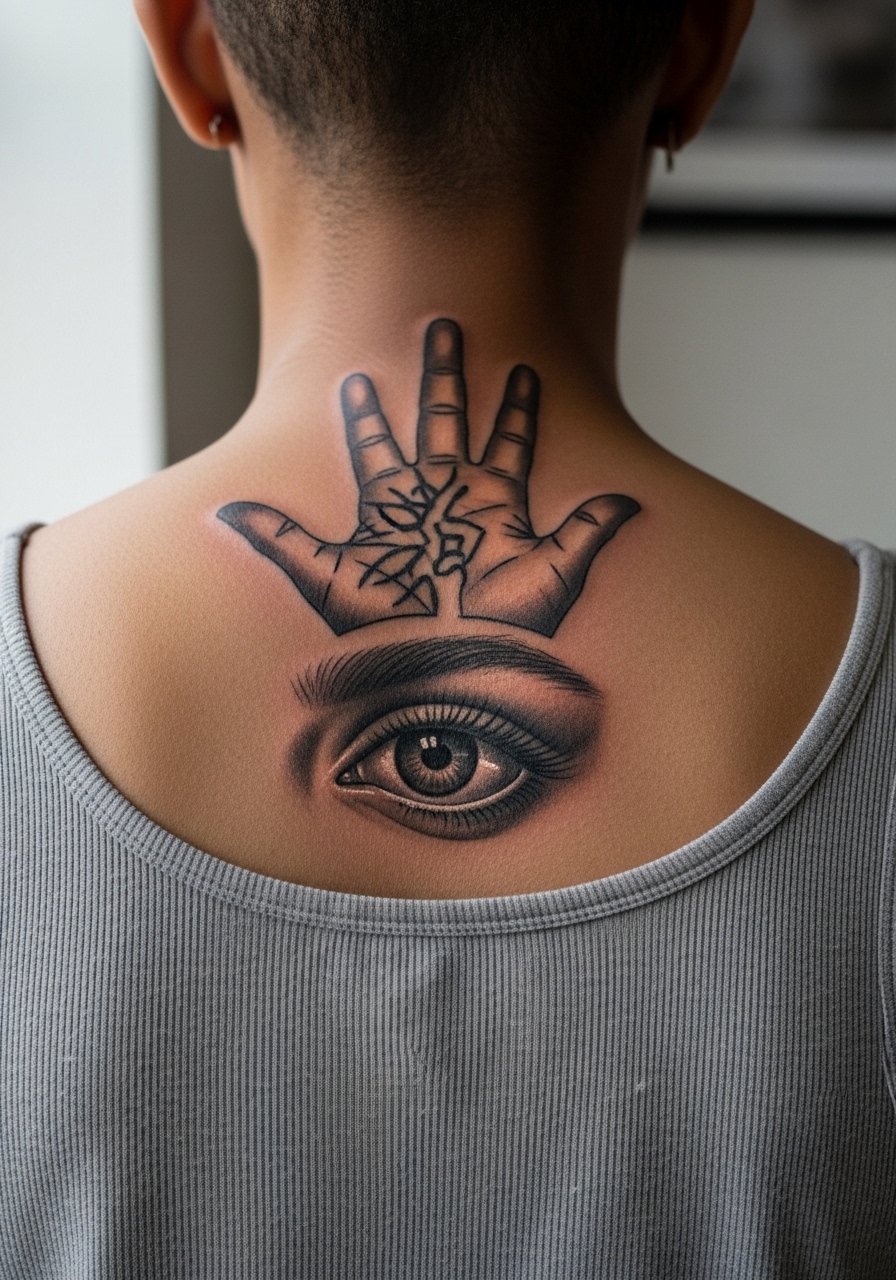
Back compositions let realism breathe across a larger canvas. I suggest deciding if the hand is supporting or reaching toward the eye in the reference, and bring clear photos showing the intended interaction. A mistake is crowding elements without negative space, which looks dense when healed. Upper back is less sun exposed and ages well, but sessions may be long and require multiple sittings. For the appointment, wear a tank top you can pull down slightly to give the artist access while keeping you comfortable.
15. Mini-Realism Camera on the Ankle
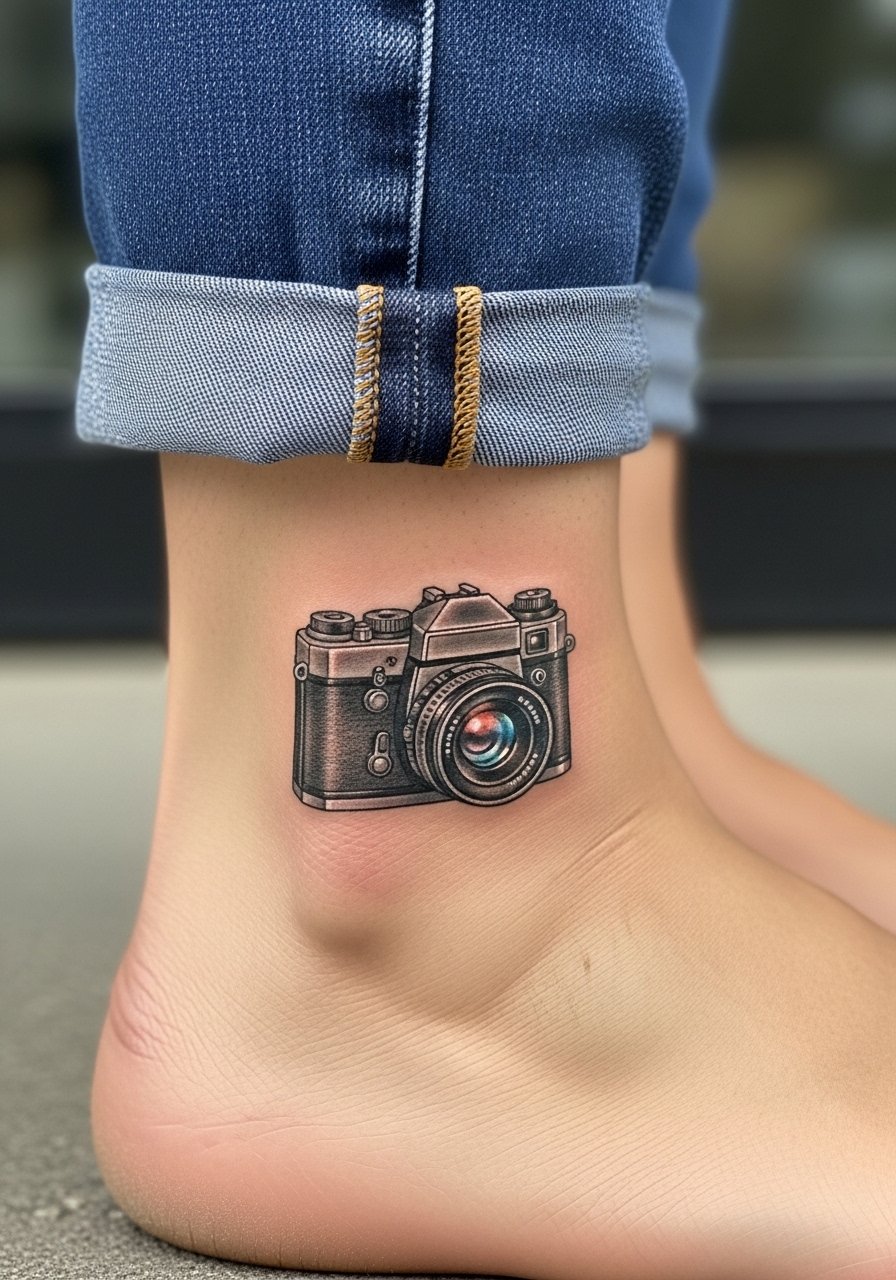
Ankle mini-realism must keep bold anchor points so lenses and knobs remain readable. Ask for a slightly larger aperture detail than the smallest reference to avoid blur from footwear friction. The common aging issue is loss of contrast from rubbing inside shoes and socks. Ankle sessions are moderately painful and touch-ups are common. For showing it off, roll trousers or wear low-profile sandals, and consider pairing with a delicate ankle chain that highlights the area.
16. Realistic Botanical Sprig on the Inner Bicep
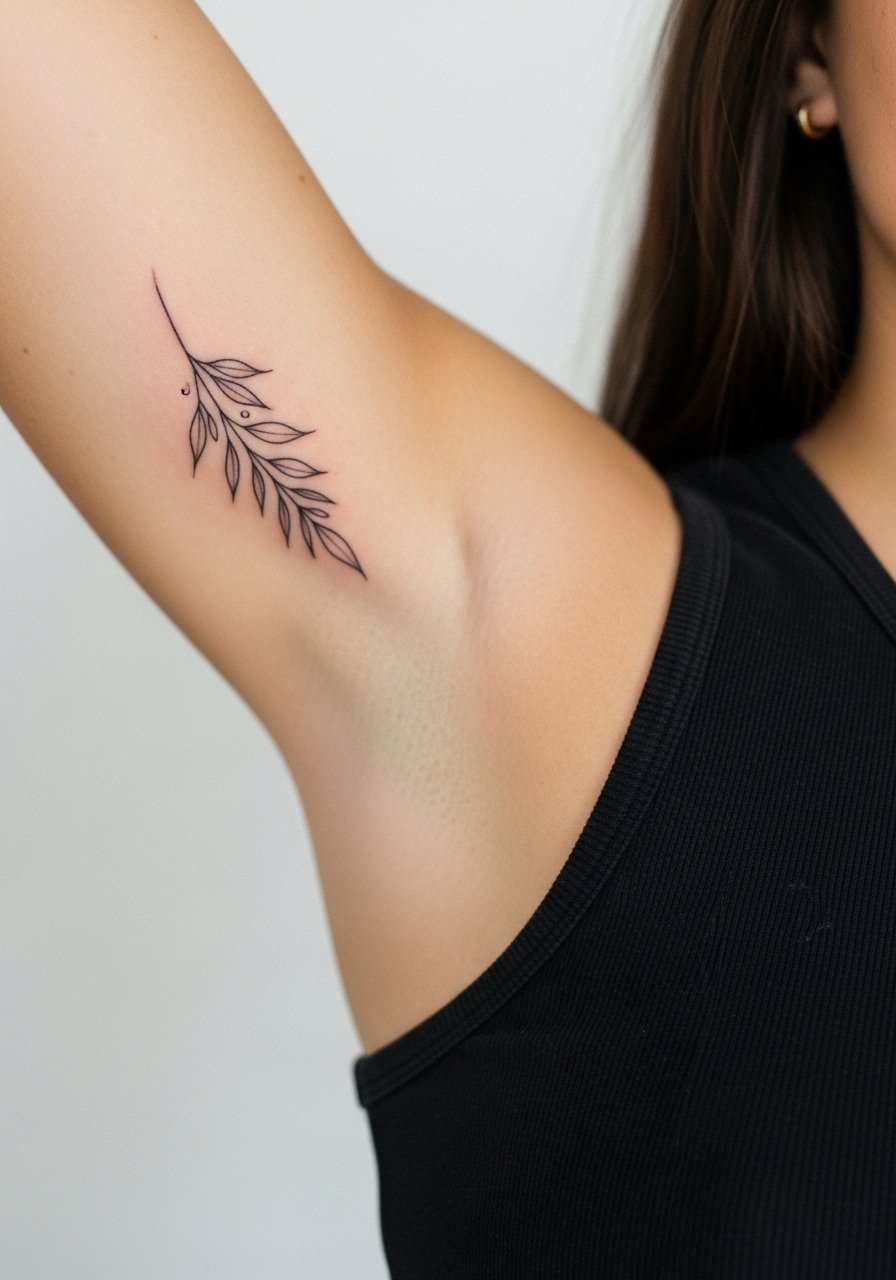
Inner bicep pieces can keep crisp linework when needles land at proper depth. One mistake is packing too many tiny veins and leaves without breathing room. The inner bicep sees muscle movement that can blur very fine lines, so ask for spaced elements. Pain can spike because of sensitivity and sessions are often shorter. For comfort during the session, wear a loose tank top you can adjust without tugging skin.
17. Photorealistic Eye on the Hand
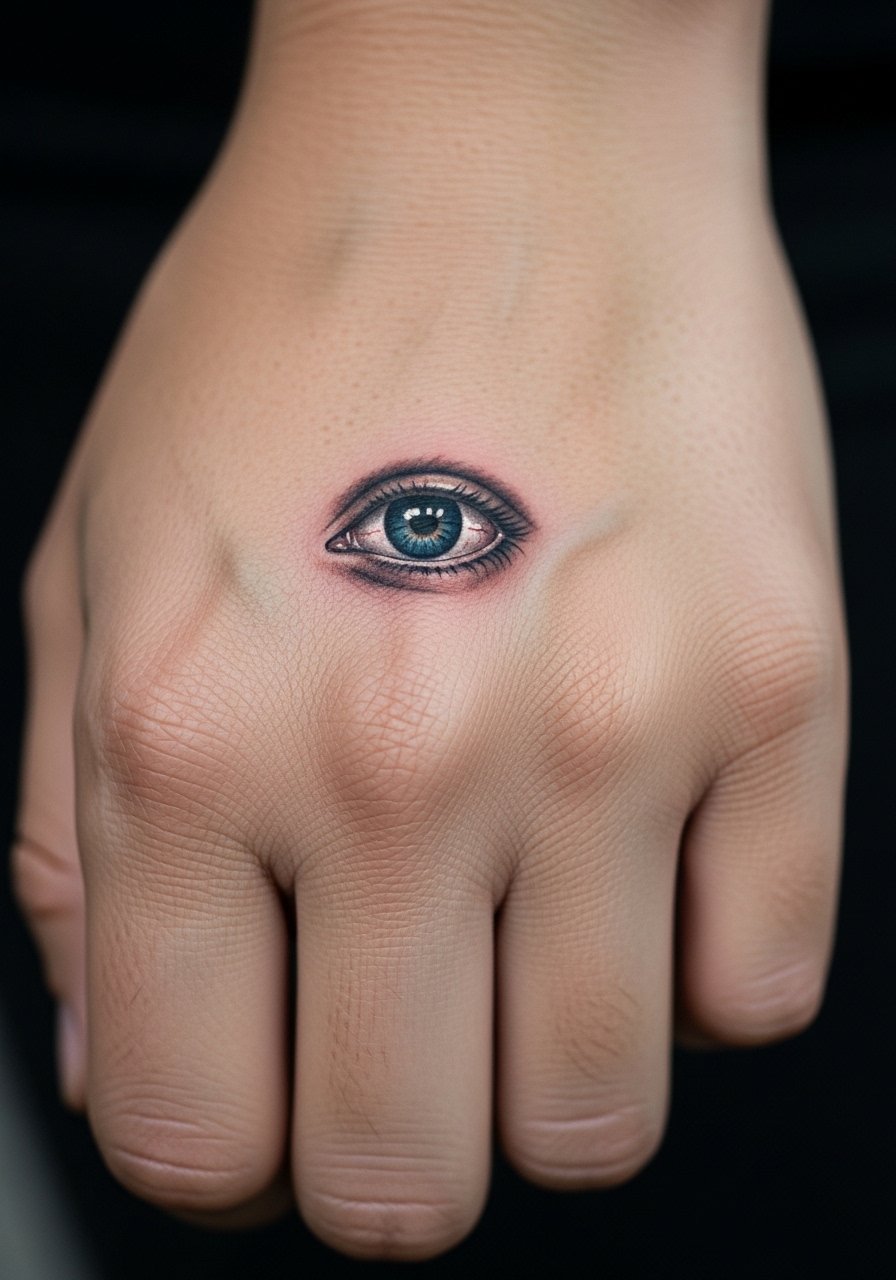
Hand realism remains controversial for long-term readability. One camp argues hands blur quickly due to friction and sun. The other camp says bold shading and careful placement on the back of the hand can last if you accept a shorter touch-up cycle. If you choose hand work, plan for maintenance and be explicit about touch-up timing. Sessions sting more on the hand and healing requires vigilance. For casual looks that still show the piece, pair with a slim ring set rather than full knuckle bands.
18. Realistic Folded Fabric Tattoo Along the Side Torso
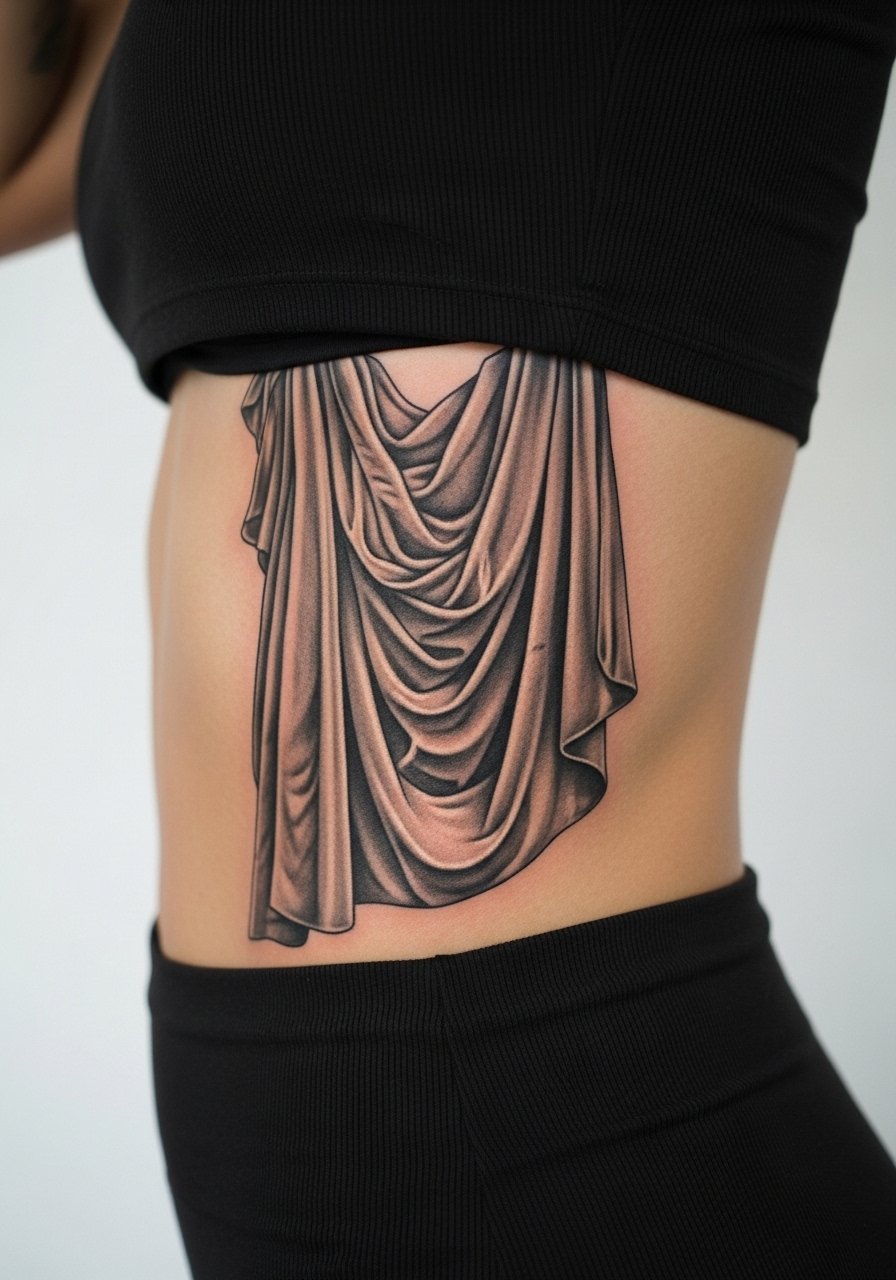
Rendered fabric shows dimensional realism when highlights and shadows match body curves. Tell the artist how you want the drape to fall when standing and sitting. The main mistake is ignoring how clothing and movement will crease the area, which can distort subtle shading. Side torso sessions are higher on the pain scale and usually split across visits. For the appointment, wear high-waisted bottoms and a cropped tee so only a narrow strip is exposed.
19. Small Realistic Book Page on the Inner Wrist
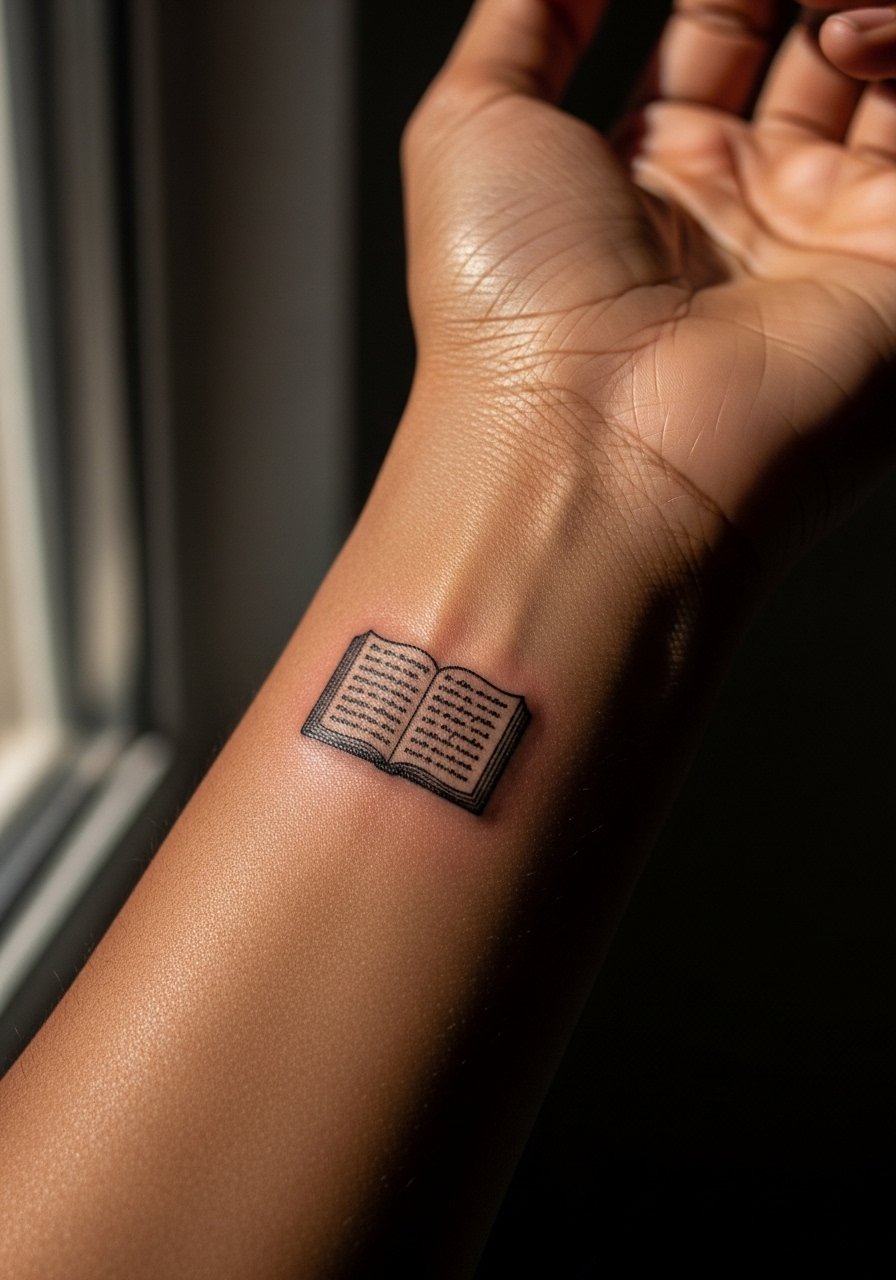
Tiny book pages need clear line separation between page edge and text field. Ask your artist to keep text minimal and bold enough to read at arm's length. A mistake is cramming full paragraphs into a microscopic rectangle that heals into a gray square. Inner wrist heals quickly but is exposed to sun and washing, so expect earlier softening. For the session, keep your sleeve rolled and wear a loose long-sleeve shirt you can push without pressing on fresh ink.
20. Realistic Lion Head on the Chest
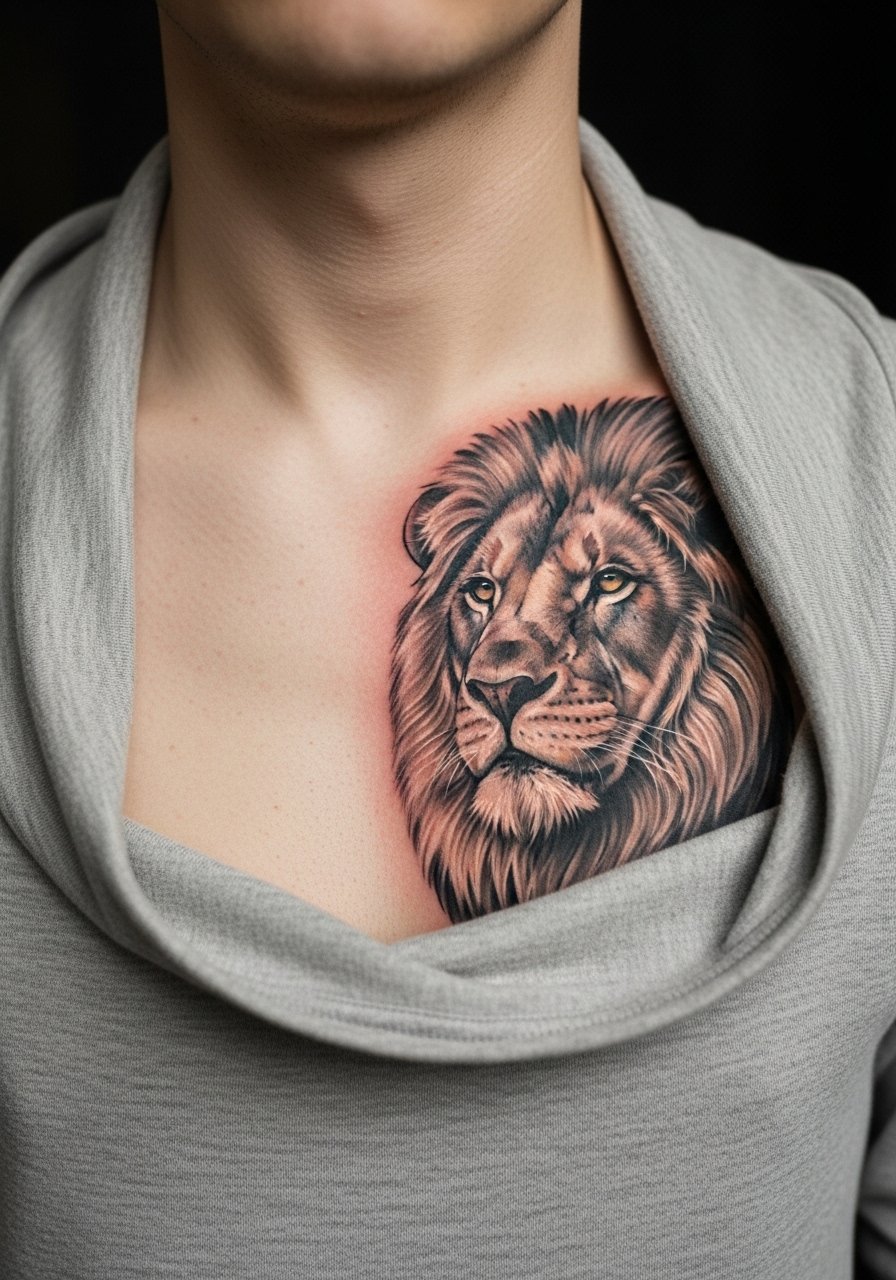
Chest realism needs scale to carry mane detail without losing form. In consultations, decide if the mane blends into background shading or stays separate to preserve contrast. A mistake is insisting on extreme micro-texture across the mane that will soften. Chest sessions can be intense and benefit from breaks. For framing on nights out, a wide-neck blouse can show the piece while keeping it tasteful.
21. Realistic Moon Phase Line on the Spine
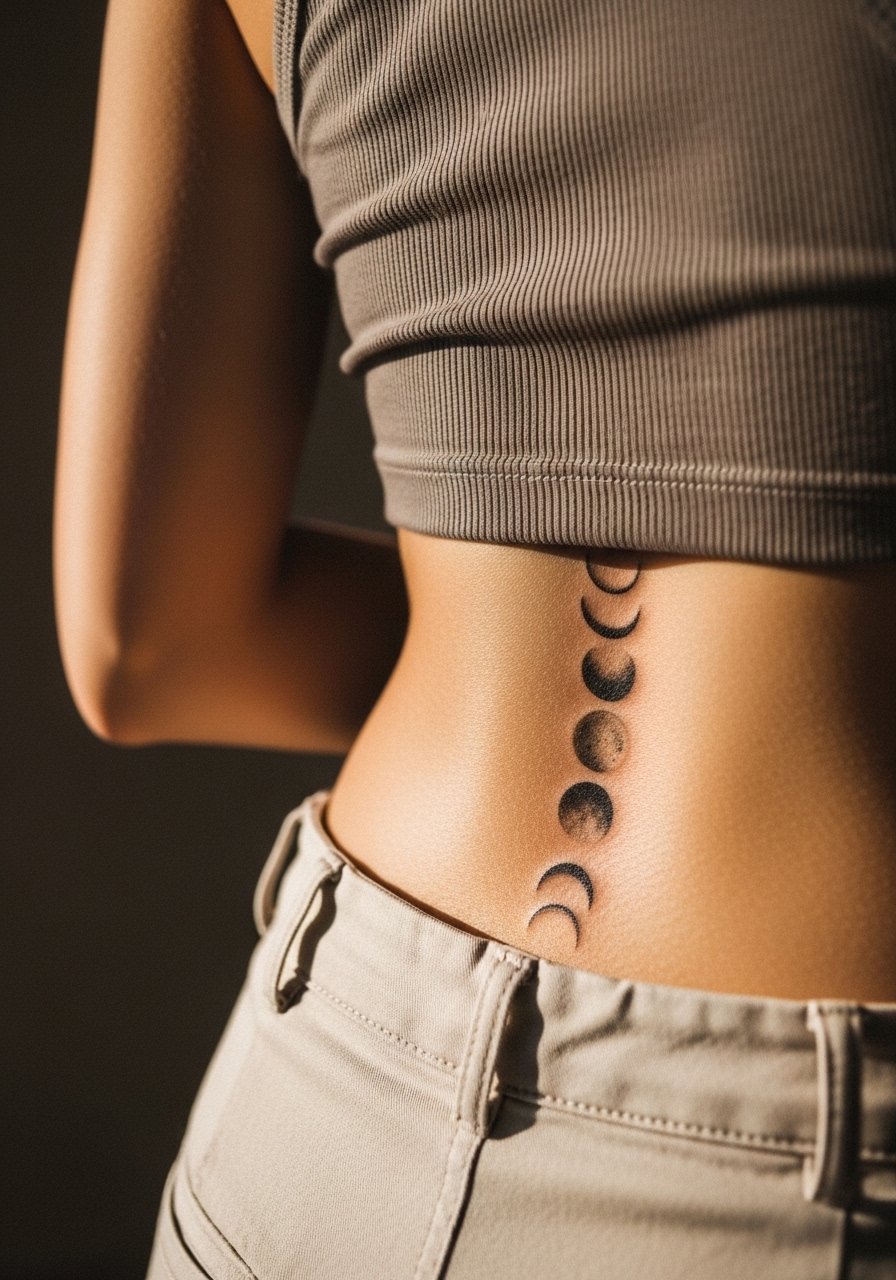
Spine placements read dramatic when moon shapes keep consistent spacing and contrast. Tell your artist whether you want waxing or waning emphasized and request a standing stencil check. Common mistake is compressing phases too close so adjacent crescents merge with normal movement. Spine pain varies by vertebra and sessions are often short. For after sessions and showing discreetly, open-back tops or a halter dress frame the vertical line.
22. Tiny Realistic Pearl on the Ear Lobe Area
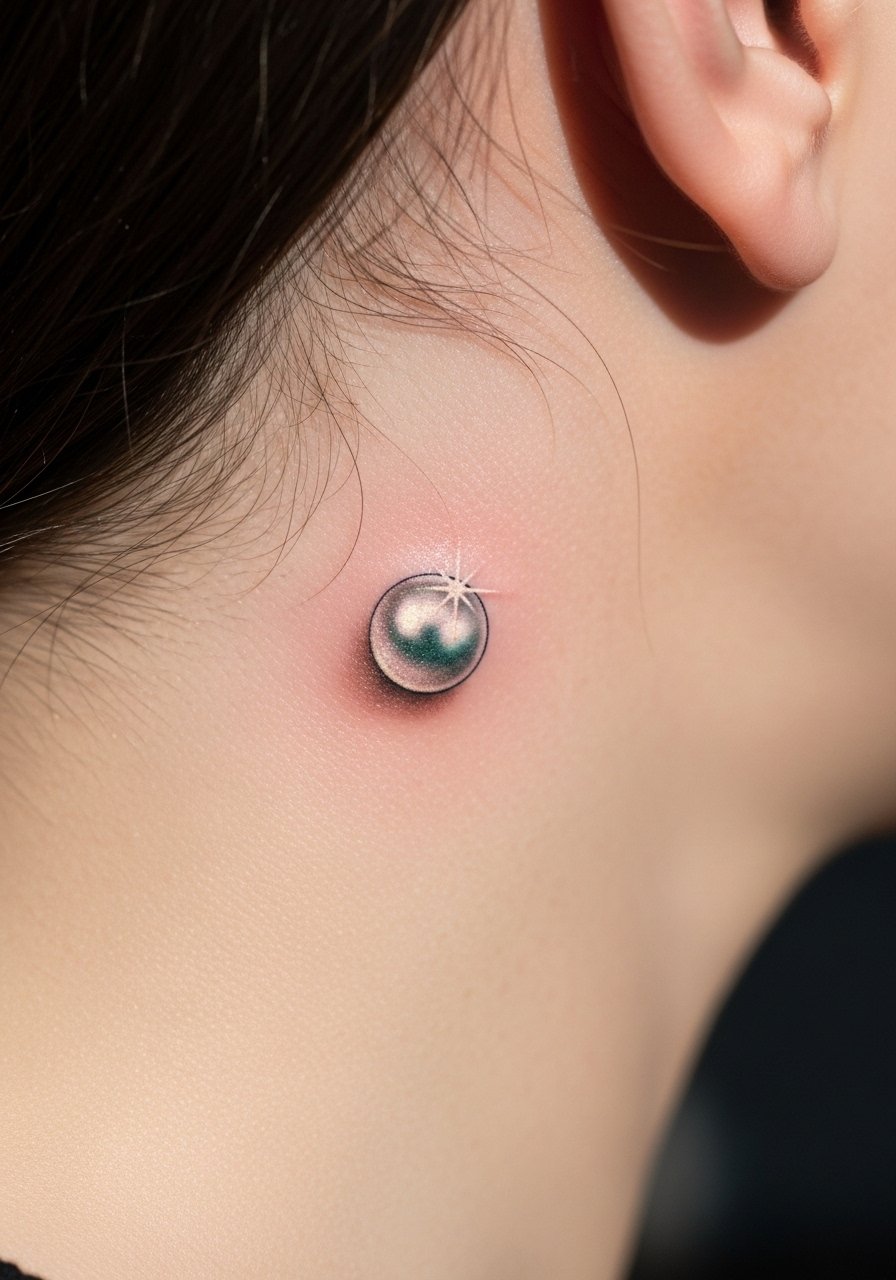
Behind-ear and lobe-adjacent realism must respect curvature and hairline. Describe exactly where relative to the lobe you want ink placed and request a standing and seated stencil check. A mistake is asking for a micro highlight that looks like a white speck when healed. This area is discreet and low on UV exposure, but healing needs gentle care. For appointments, keep hair tied back and wear a wide-neck shirt to let the artist access the area without fully exposing hair or neck.
23. Realistic Koi Fish on the Calf
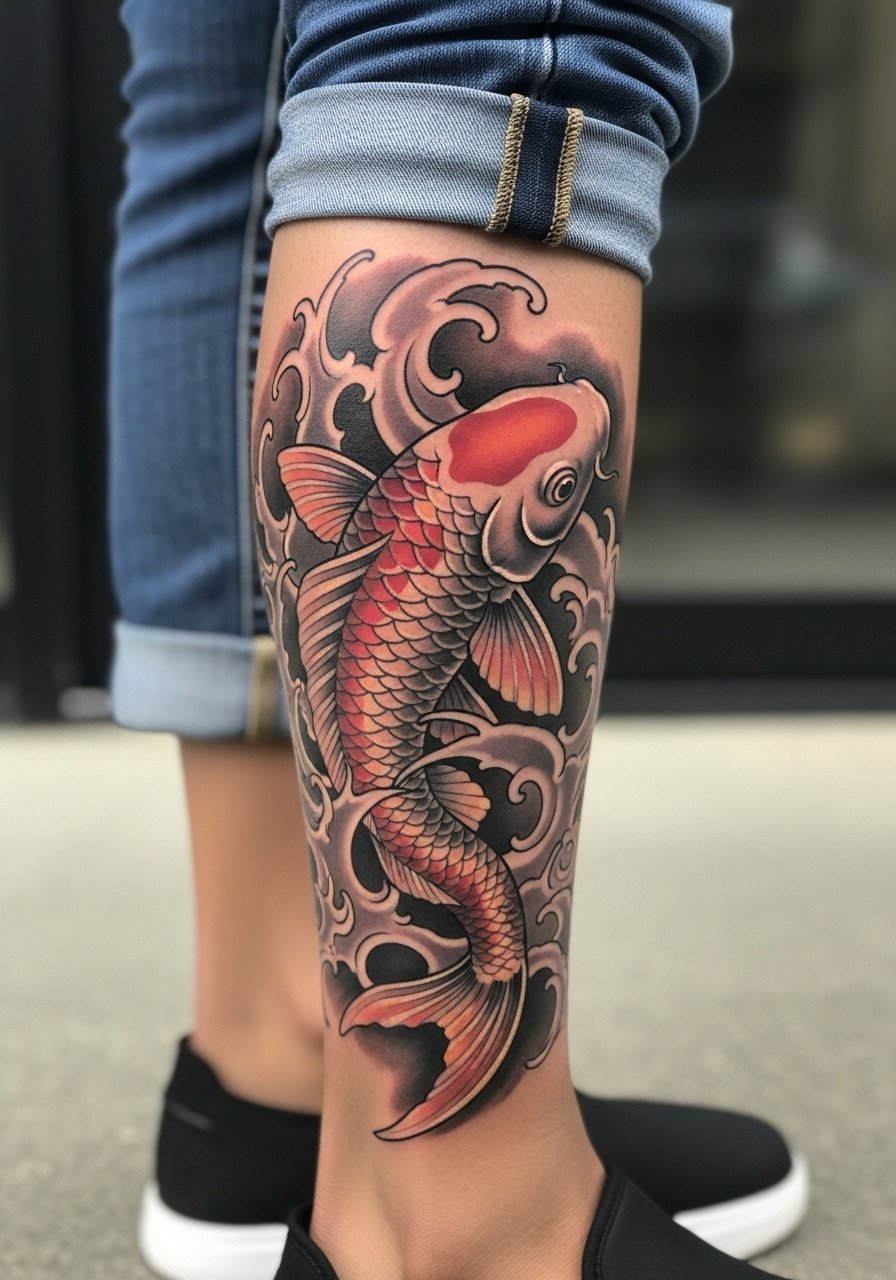
Koi realism benefits from flowing composition that matches calf curvature. Ask your artist to plan scale so scales retain texture and highlights read as reflective. Mistake is trying to compress multiple koi into a narrow area which loses individual detail. Calf is forgiving, sessions are moderate in length, and color holds well if sun is avoided. For seasonal showing, pair with a kaftan or rolled jeans to balance cover and reveal.
24. Micro-Realism Leaf Cluster Near the Ankle
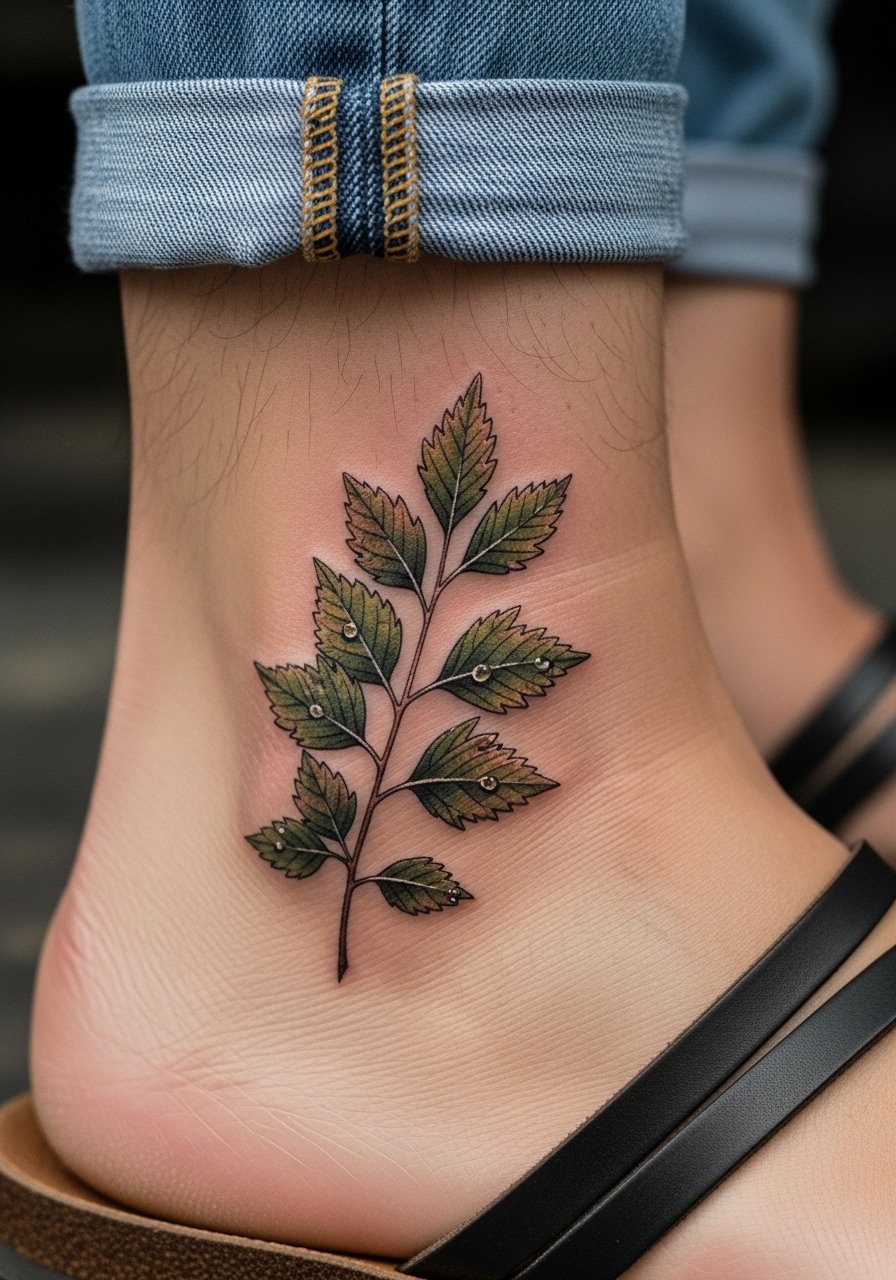
Ankle clusters must avoid too many intersecting veins and stems. Request defined stems and selective stippling instead of full-blended filler. Common issue is over-detail in a spot that rubs against socks and shoes. Ankle pain is low to moderate, but expect more touch-ups. For footwear choices, minimal sandals or low sneakers keep friction minimal, and an ankle sock pack helps during the first week.
25. Realistic Candle Flame on the Wrist
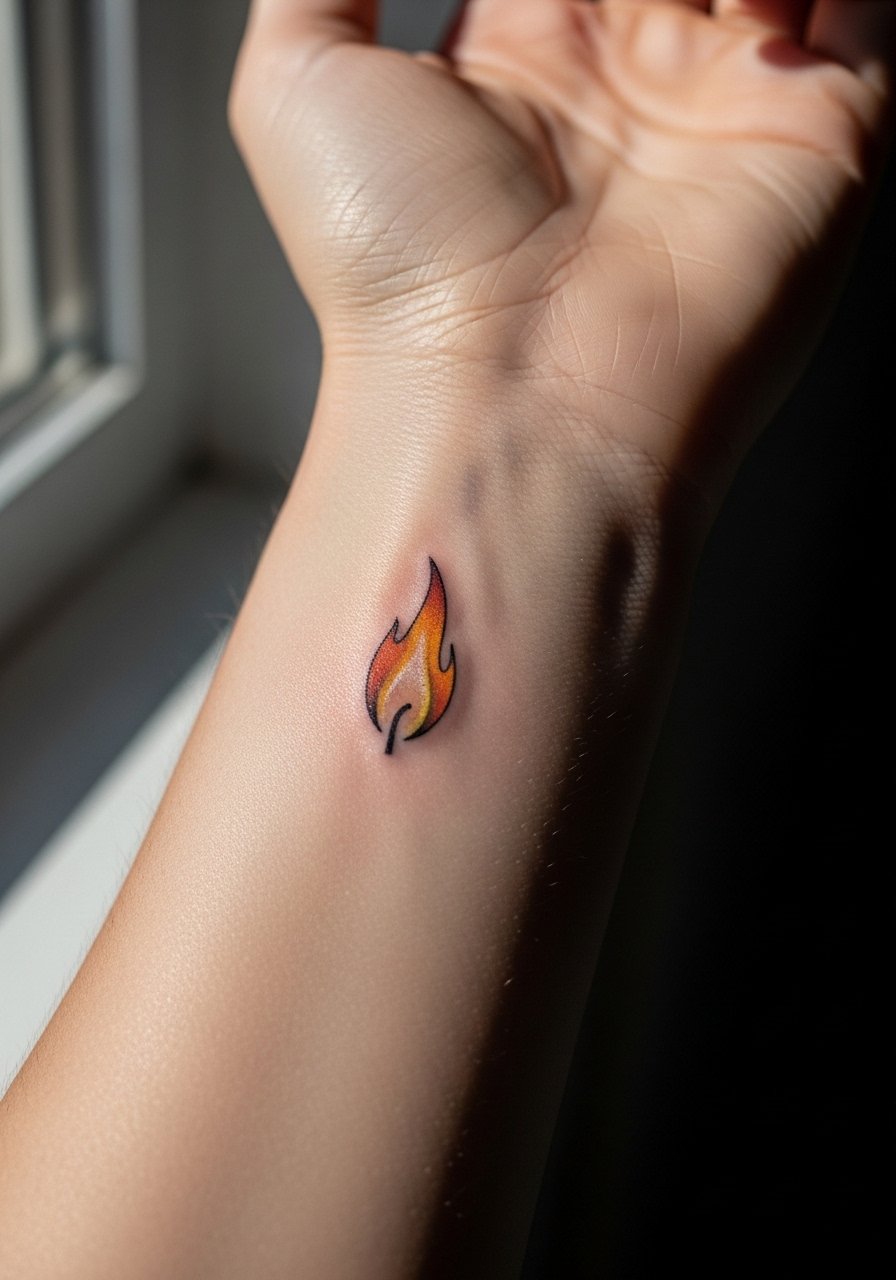
A candle flame relies on crisp highlight and soft feathered edges to read as glowing. Tell your artist if you want a trailing smoke line or a clean flame, because each ages differently. Mistake is adding too much surrounding soot shading that muddies the glow. Wrist exposure accelerates fading, so plan for touch-ups. For showing subtle warmth, wear a delicate bracelet that sits just below the flame without obscuring it.
26. Realistic Glass Shard Fragment on the Side of the Hand
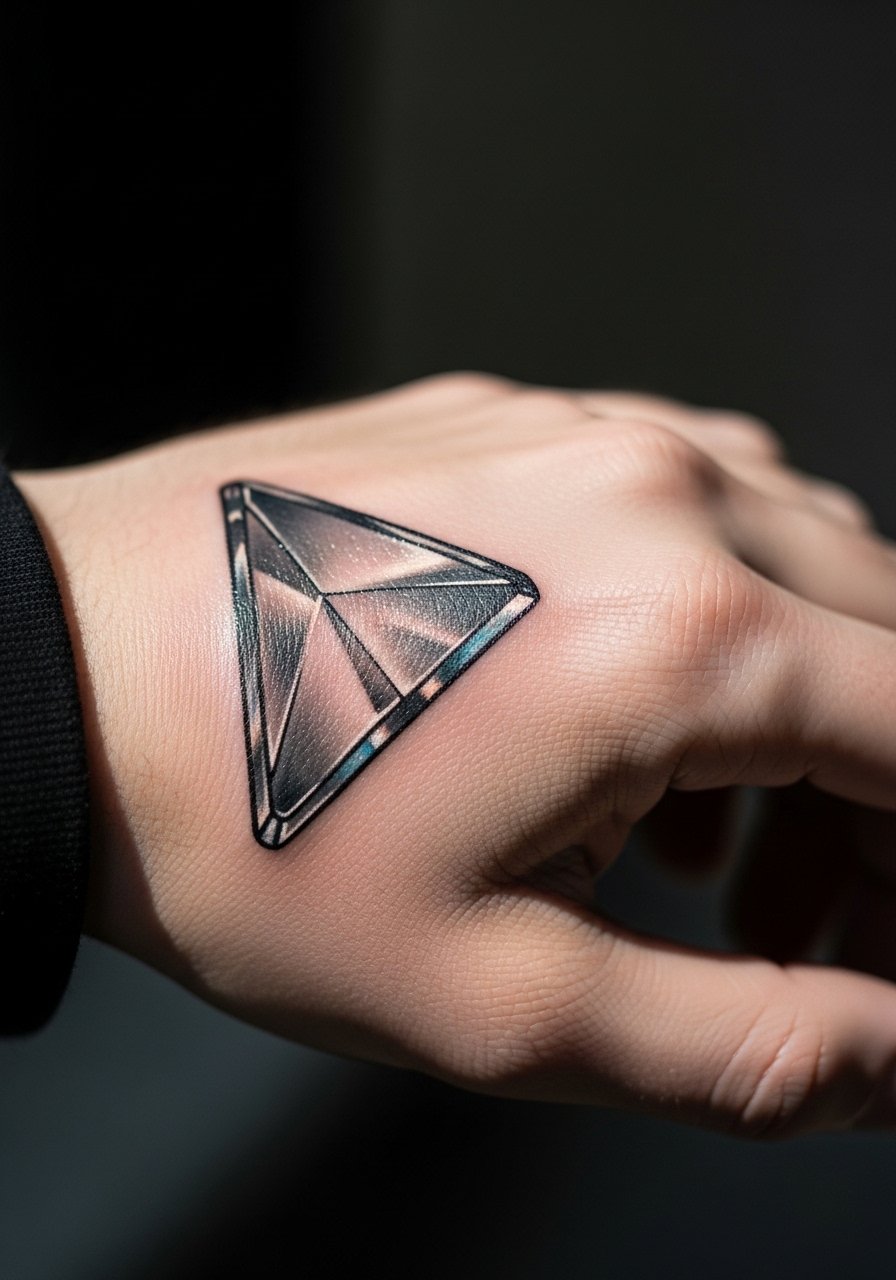
Edge realism for glass needs decisive highlights and negative space to appear reflective. Ask your artist to maintain hard edges and minimal internal texture so the shard still reads after some softening. Hands blur faster than arms and require a maintenance plan. Expect sharper initial contrast and a likely touch-up timeline. For styling, pair with a minimal leather cuff when you want a slightly edgier look without covering the piece.
27. Mini-Realism Vintage Key Behind the Ear Area
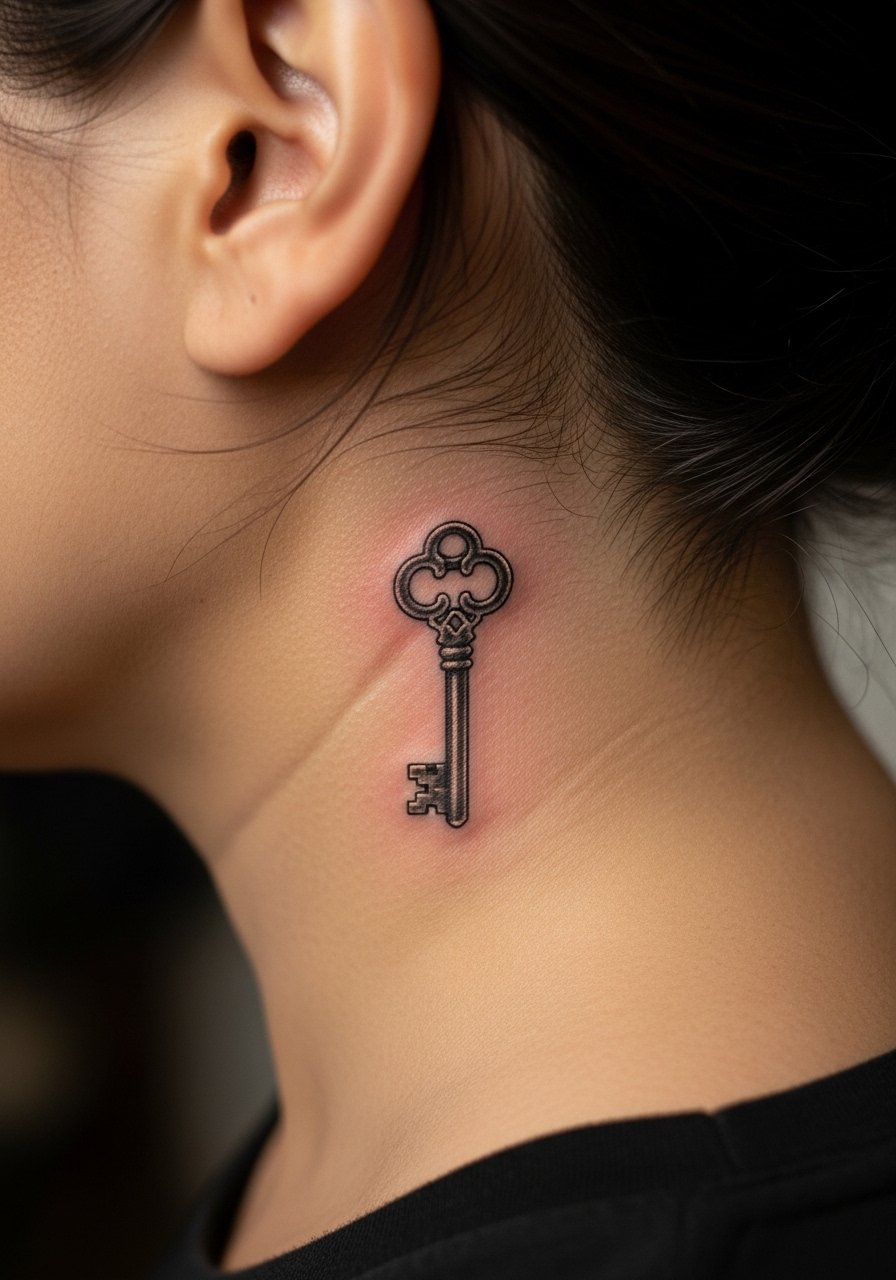
Behind-ear mini pieces are intimate and require the artist to map the curve carefully. Bring exact placement preferences and be ready for a small stencil adjustment. A common mistake is picking a key with too many teeth and ridges that blur into a smudge. Healing is discreet and lower UV exposure helps retention. For appointments and discreet showing, keep hair up and wear a wide-neck shirt to allow the artist access while keeping the area modest.
Frequently Asked Questions
Q: Will fine line realistic tattoos on the ribs blur faster than on the arm?
A: It depends on how small the lines are and how much the skin moves. Ribs stretch and flex with breathing and weight change more than the outer arm, so many artists avoid the thinnest hairlines there. If you want ribs, ask for slightly bolder spacing and a touch-up plan.
Q: How often should I expect touch-ups for micro-realism on hands and fingers?
A: Hands and fingers experience more friction and sun, so touch-ups are commonly needed sooner than other placements. Plan for a maintenance check around year two and accept that a yearly refresher keeps crisp edges.
Q: Are color realism pieces harder to match on darker skin tones?
A: Colors interact with undertones differently, so discuss palette adjustments with an artist experienced in your skin tone. Many choose richer midtones and strategic highlights to read clearly without relying on pastels that disappear.
Q: Can I wear jewelry over a new chest or collarbone tattoo during the first week?
A: Avoid anything that rubs directly on fresh ink for the first few days, and choose lightweight pieces that do not press into the area. If you need a necklace, pick a thin chain pendant that sits above the tattoo line rather than over it.
Q: What should I bring to a long portrait realism session?
A: Bring flexible clothing that allows the artist access without stretching the design area, snacks, and water. Sessions can be multiple hours and short comfort breaks matter. A loose zip hoodie or button shirt that you can layer is helpful.
Q: How do I find an artist who specializes in realistic work without naming individuals?
A: Use portfolio filters on local directories, search hashtags tied to realism in your city, and visit conventions where realism is showcased. Ask to see healed images from past clients, and request a consult to discuss touch-up policy before booking.
