
Bold trends often look great on a feed and fall apart on skin, and neo traditional Medusa designs are a perfect example. Fresh saturation, heavy outlines, and snake detail can read fierce at the session and blur or soften if size and placement are wrong. Below are 21 neo traditional Medusa tattoo design ideas with what to ask for in consults, how they age, wardrobe pairings for showing them off, and images you can use for reference.
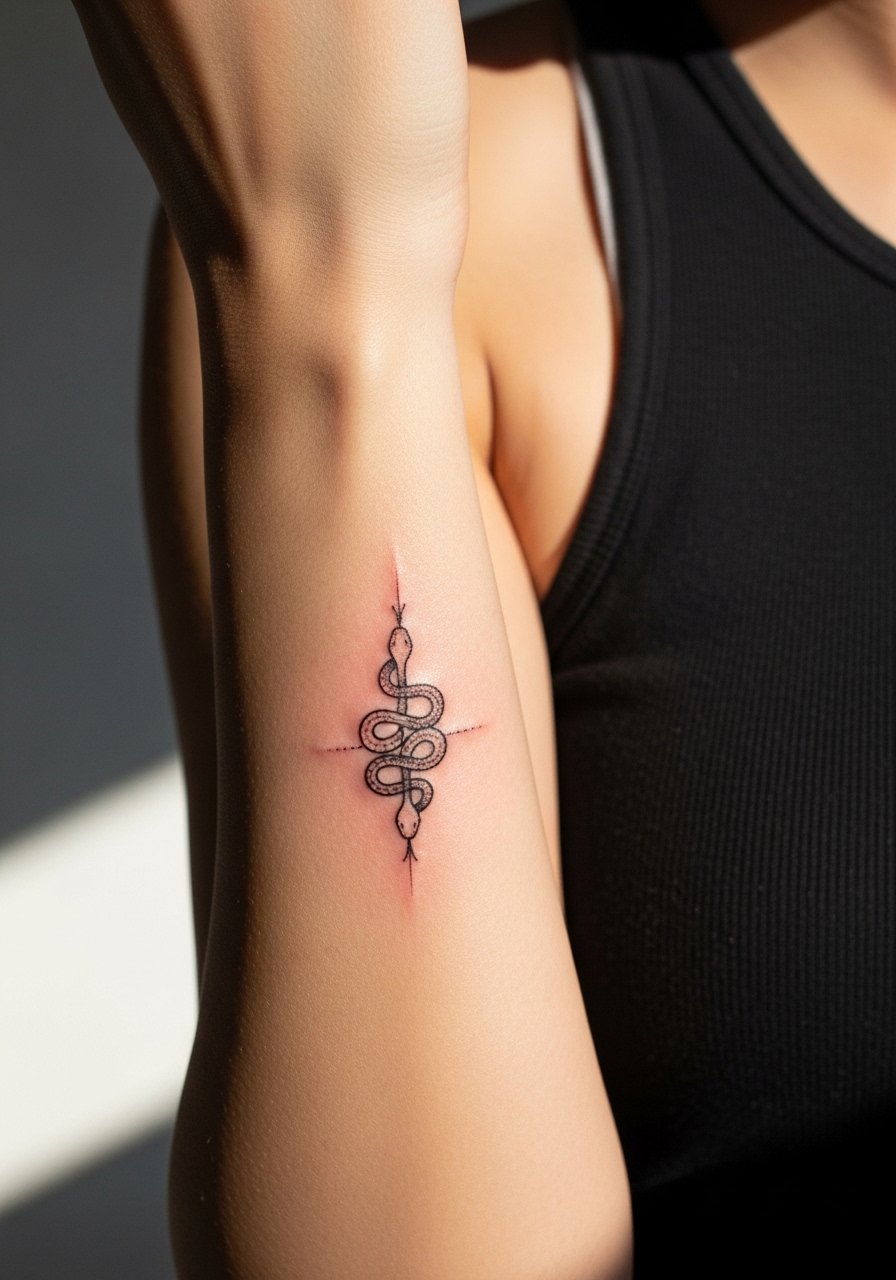
1. Medusa Head with Snake Halo on Outer Forearm
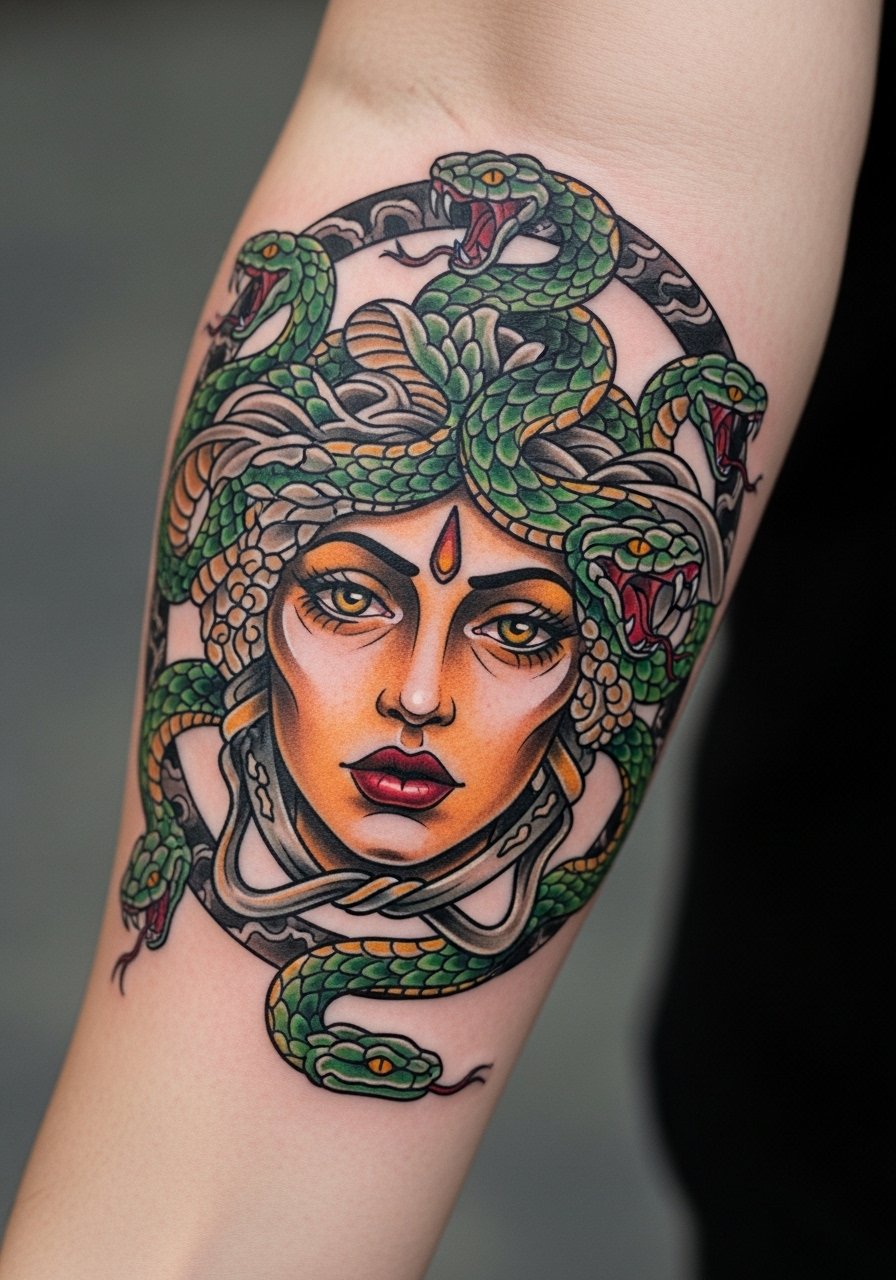
I recommend this when you want a design that reads sideways and follows arm movement. Tell your artist to scale the snake halo so each snake head is legible at four to six inches. Common mistakes are trying to cram too many small snakes into a narrow forearm. That version blurs into a single dark mass at year three. Expect moderate discomfort during the session and a touch-up at year two if you use bright reds. For showing this off, pair with a fitted black short sleeve tee and a leather cuff bracelet that sits opposite the tattoo so the forearm stays visible.
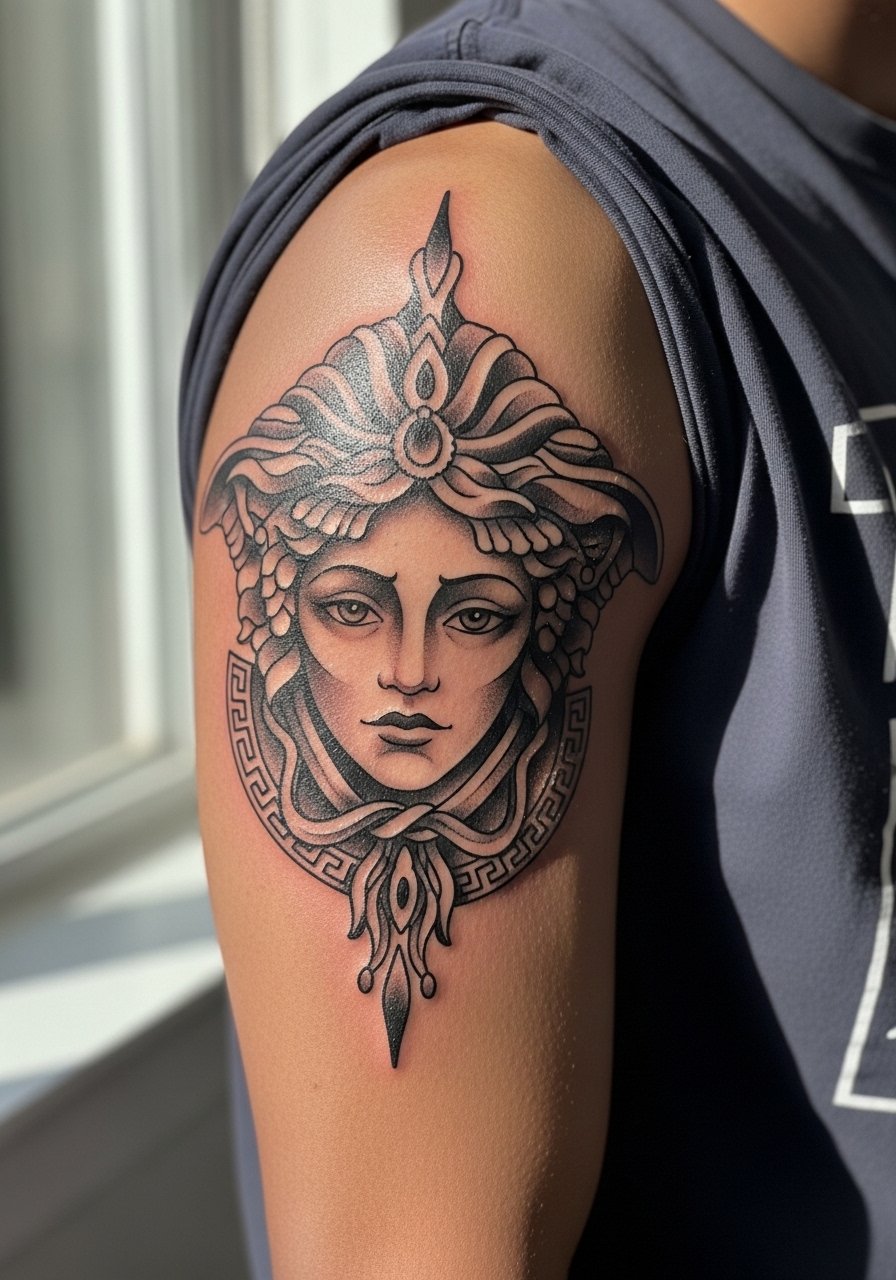
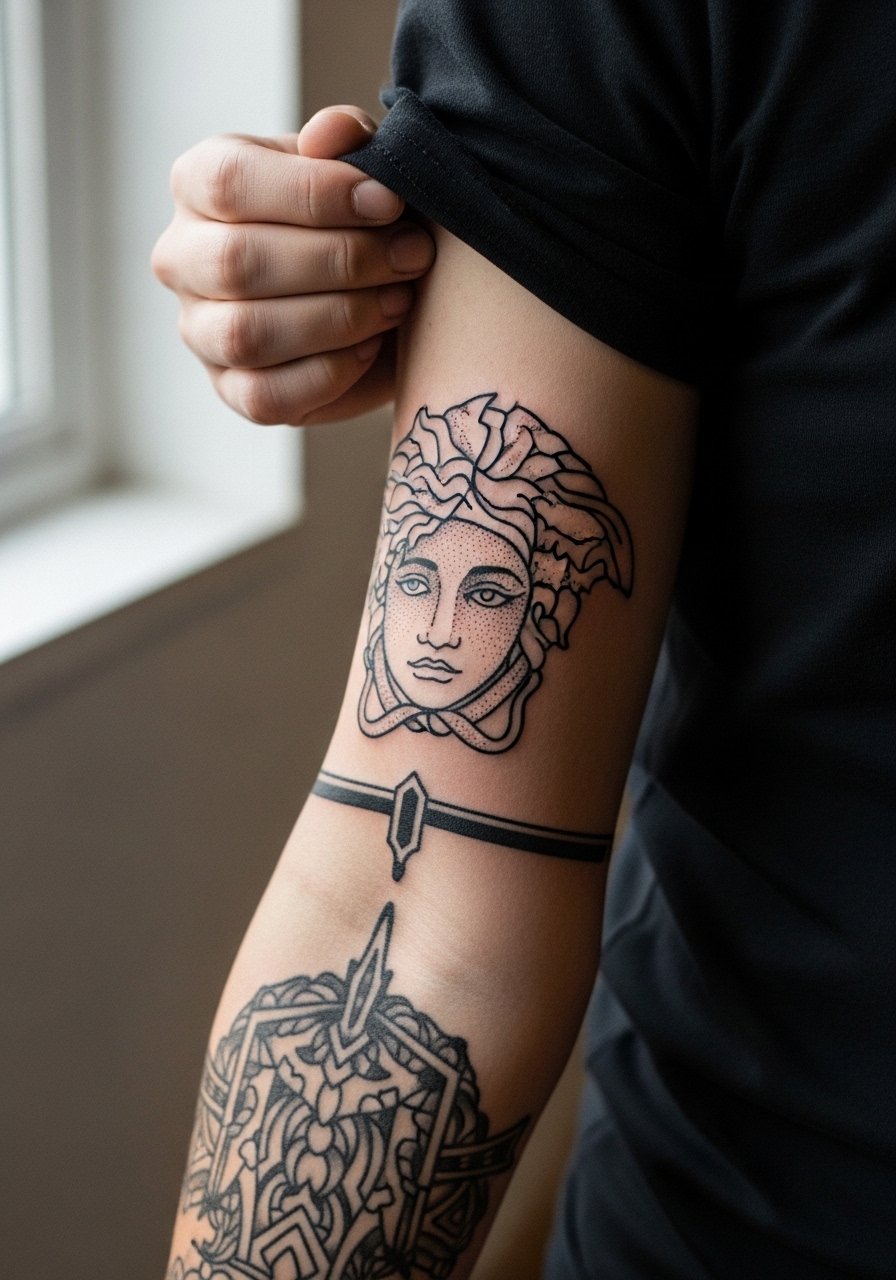
2. Black-and-Gray Medusa Portrait on Upper Arm
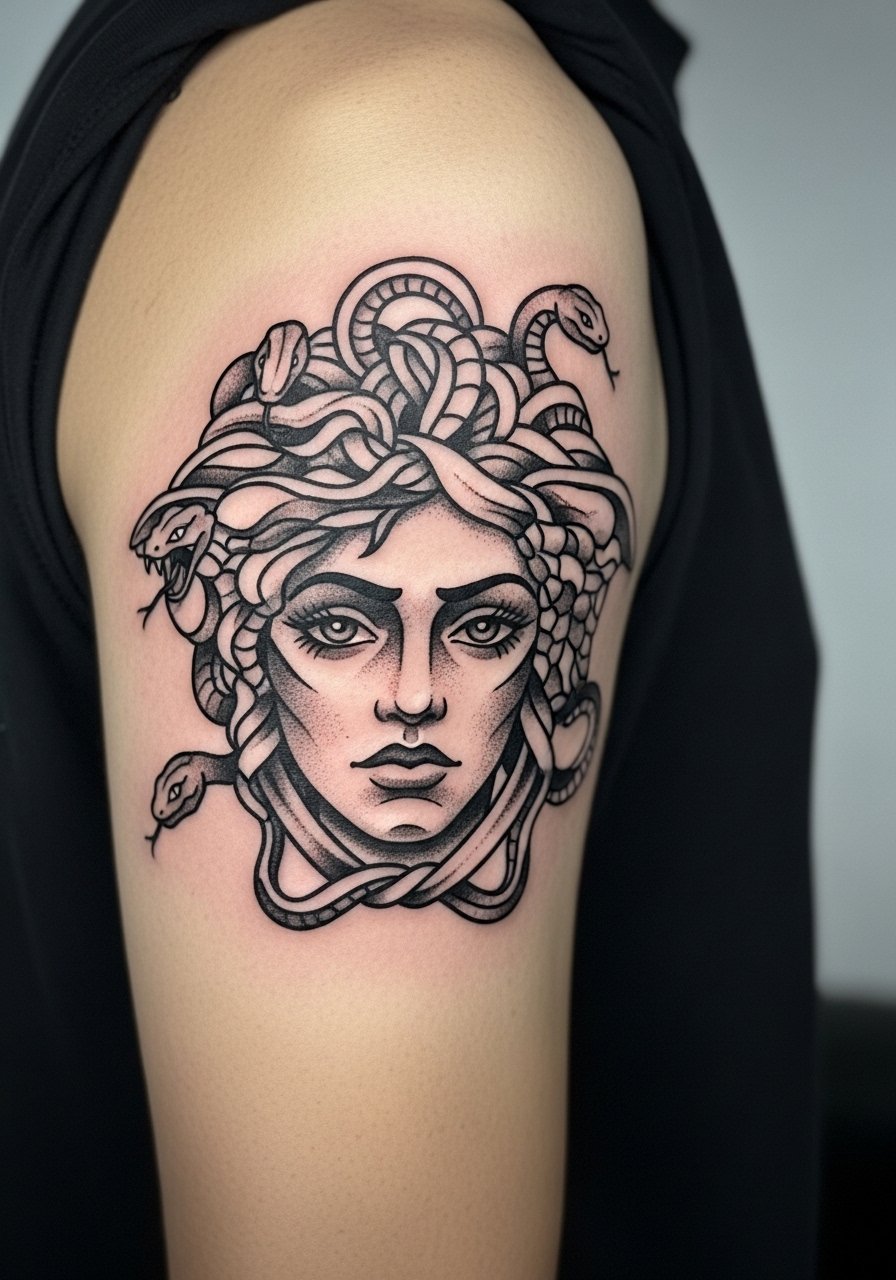
This is the go-to if you worry about color fade. Ask for clean black outlines and layered stipple shading to keep contrast as the piece heals. The common version that ages poorly is overly delicate shading with nearly invisible outlines. That fades into gray smudges over time. Upper arm sessions feel manageable and you can often finish in one sitting. This placement has low blowout risk when the linework is bold. If you want to show it off, an off shoulder crop top in neutral gray frames the portrait, and a layered gold chain necklace on the opposite side balances the look.
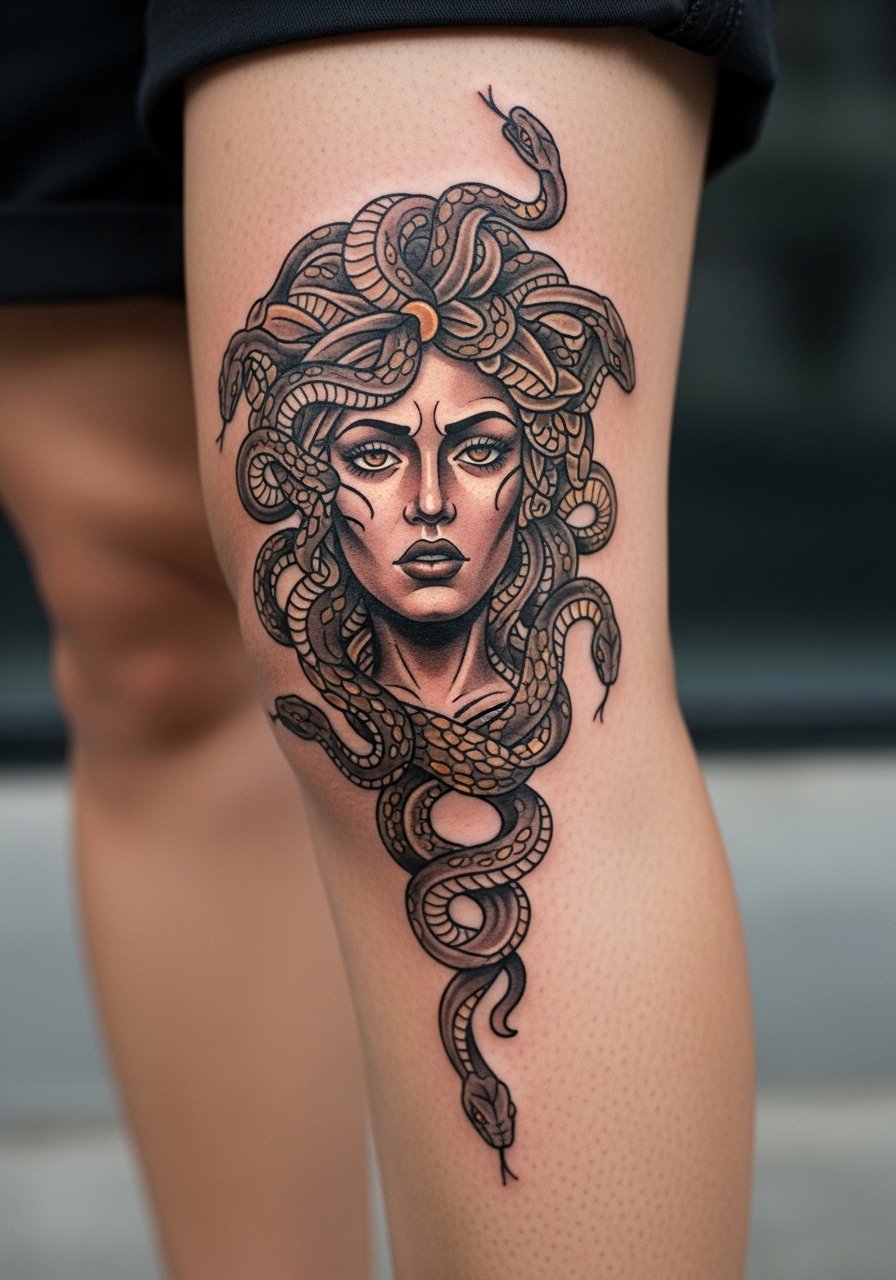
3. Serpentine Hair Focused Thigh Piece with Bold Scales
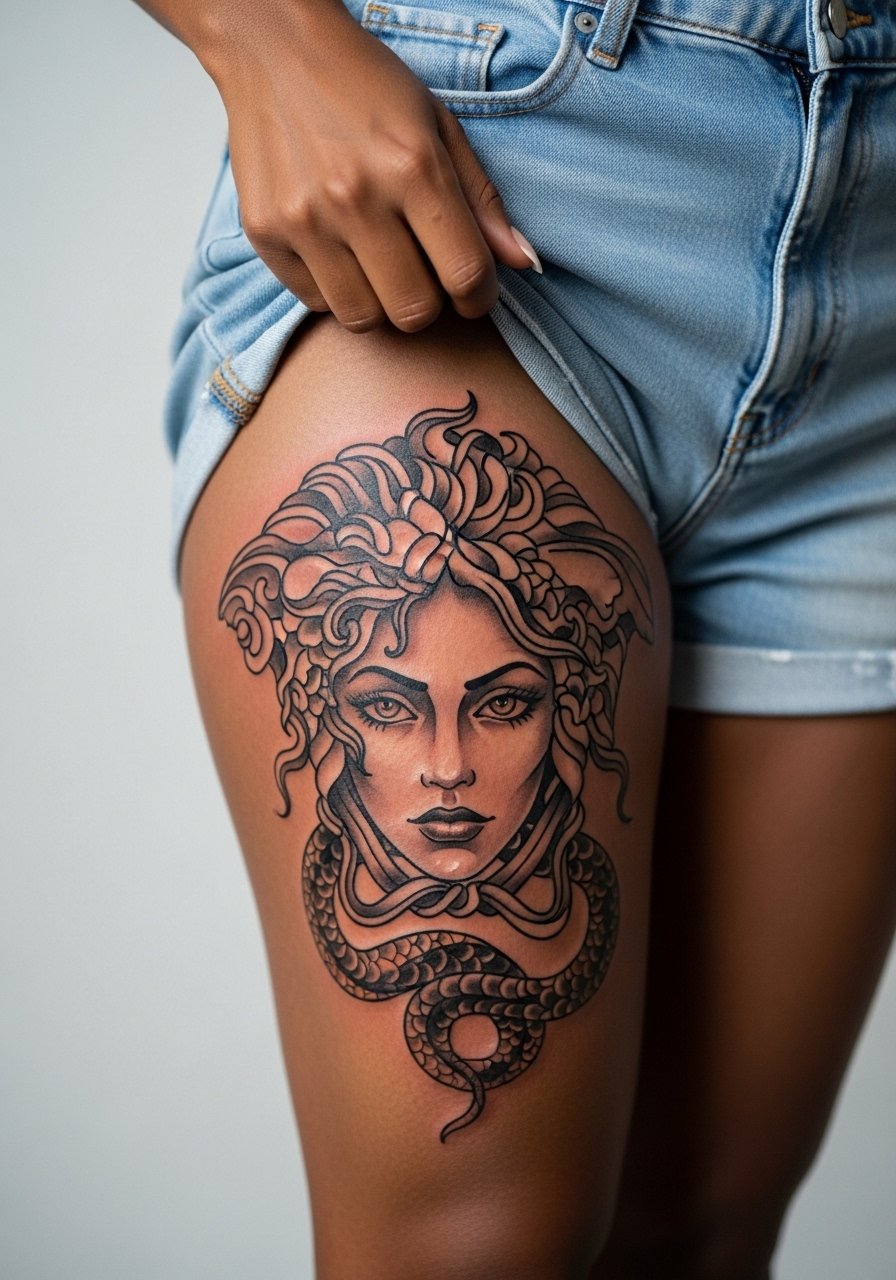
The thigh allows detail. I urge larger scale so each scale and fang reads after a year. A mistake I see is trying to make a thigh piece tiny so it hides under shorts. Tiny scales collapse and need touch-ups. Expect two sessions for heavy saturation and realistic scale texture. For session comfort, wear high waisted denim shorts you can shift easily and bring a loose skirt for the ride home. For nights out, fishnet textures like fishnet thigh high stockings echo snake patterns without overpowering the piece.
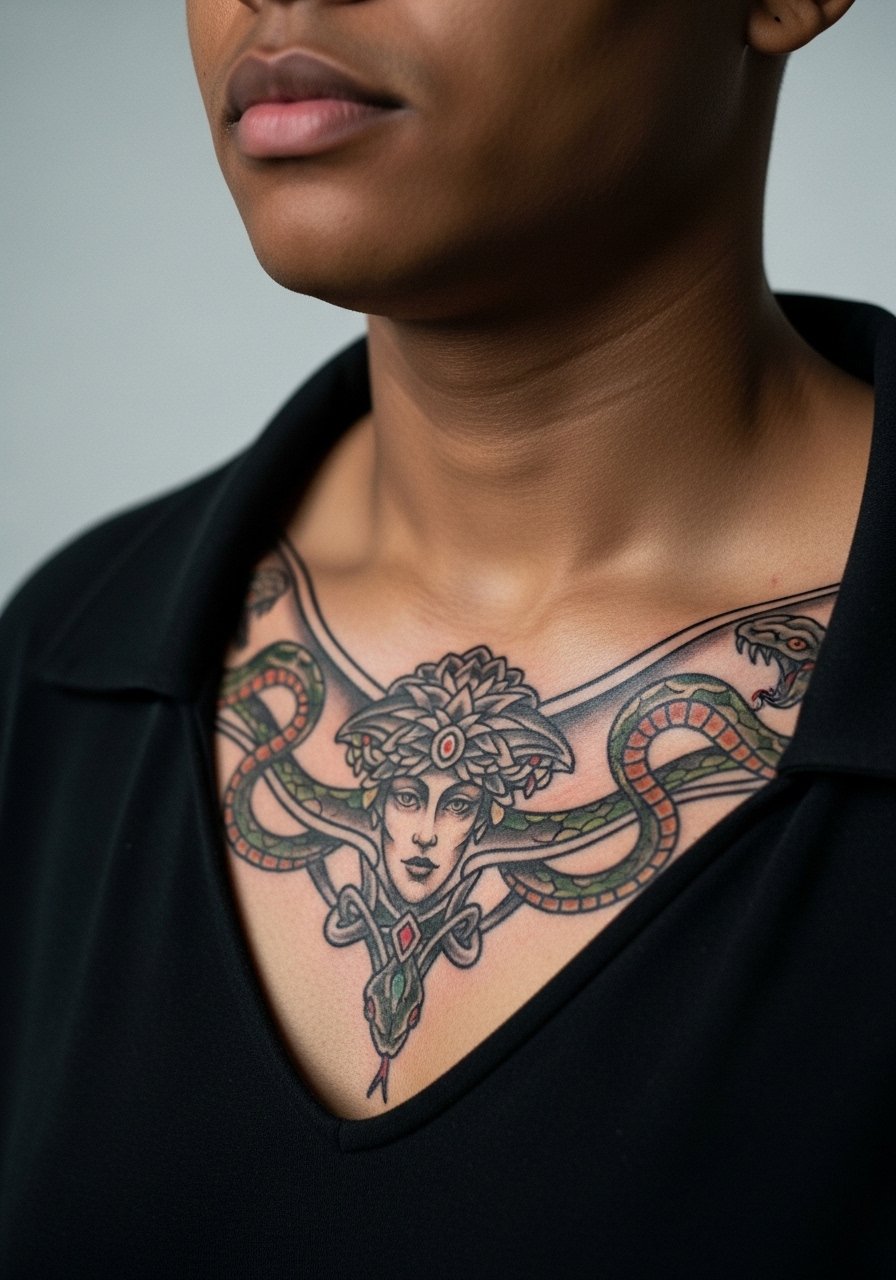
4. Realistic Gaze Collarbone Medusa with Subtle Color Accents

This placement is dramatic and personal. Ask for slightly deeper linework around the pupils so the gaze remains readable at six months. The risky version uses too many tiny facial details pushed into a small collarbone piece. That blurs with movement. Collarbone sessions are bony and can be a 6 to 7 on most pain scales, but a medium-sized piece settles beautifully. Pair with a strapless crop top and a dainty choker necklace that sits just below the tattoo so the art stays the focal point.
5. Snake-Halo Thigh Wrap with Bold Reds and Greens
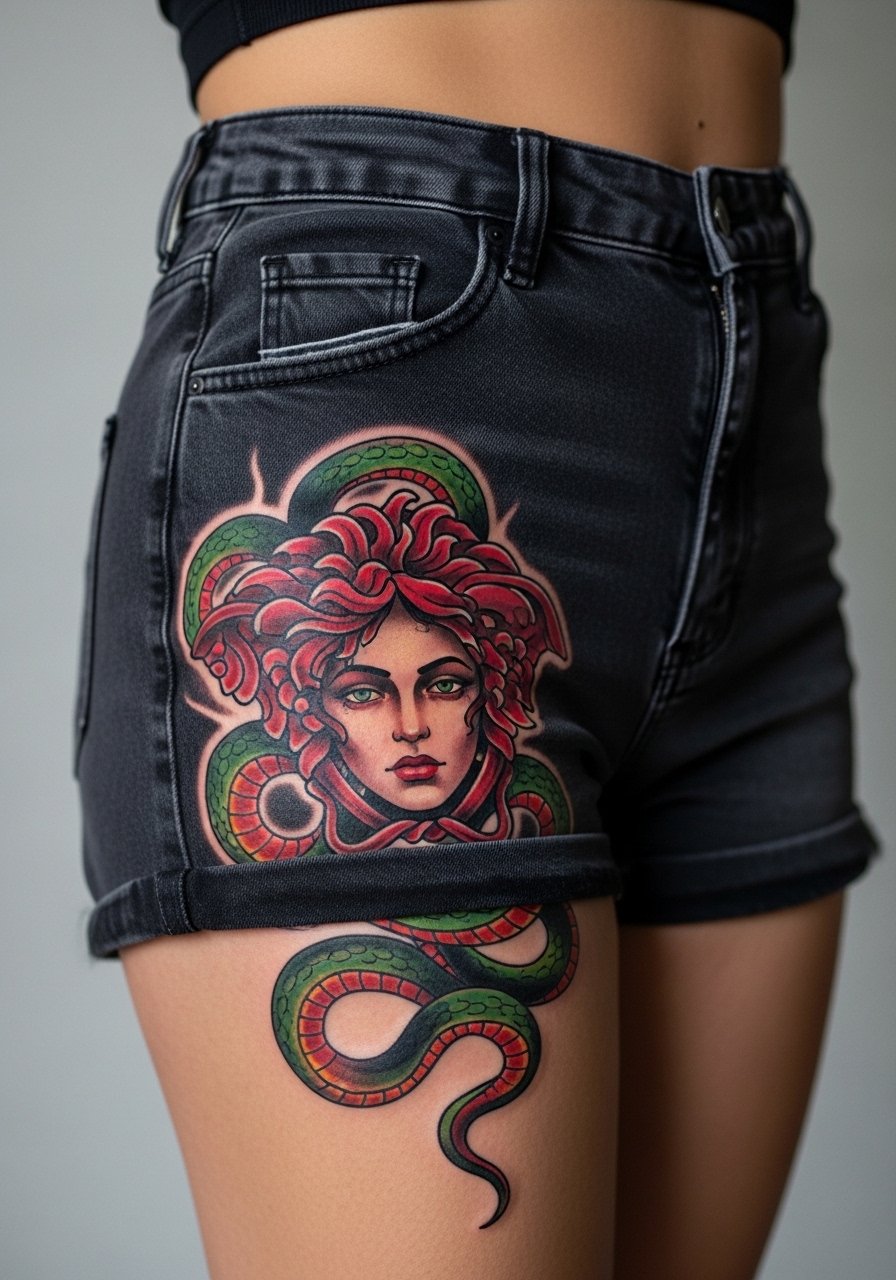
Go for this when you want theatrical color that works with movement. The common failing is uneven saturation where the inner wraps are left light. That results in patchy aging and more touch-ups. Thigh sessions can be long and bruising happens for heavy color blocks. Two sessions spaced six to eight weeks apart is standard. For show-off dressing, try high-waisted shorts and a simple black skirt. A practical session tip is to wear loose joggers you can pull up, so bring loose jogger pants women to the appointment.
6. Stylized Medusa with Geometric Frame on the Shoulder
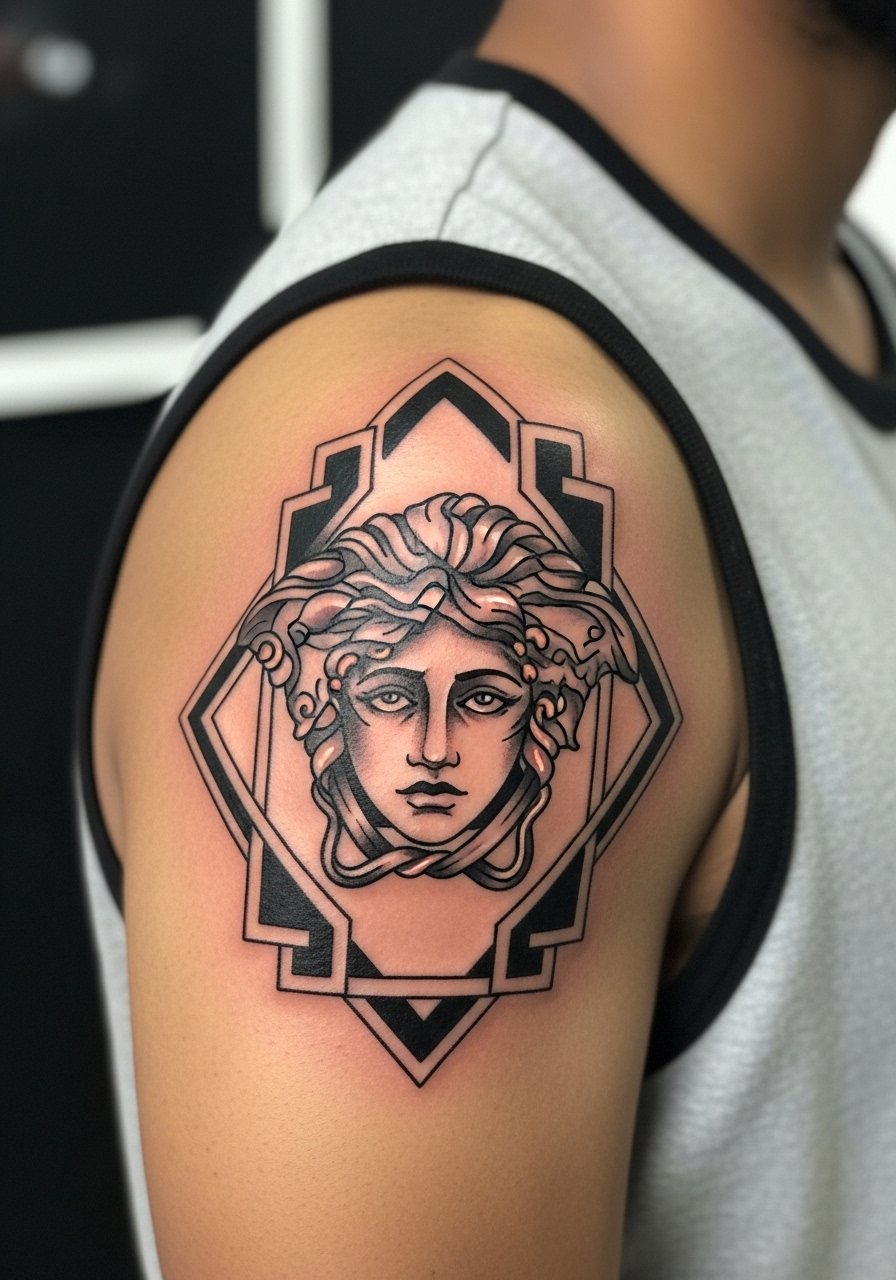
Shoulder pieces age predictably because they avoid constant friction. Tell your artist to keep the frame lines slightly thicker than you think they need to be. The mistake is ultra-fine frames that break into ghost lines over time. Sessions are comfortable and often finished in one to two sittings. For showing this one off, an off shoulder crop top or a layered gold chain necklace on the opposite side emphasizes the shoulder without covering the art.
Studio Day Picks
These items help with the forearm, upper arm, thigh, collarbone, and shoulder pieces above so your session and first week go smoother.
- Stencil transfer paper kit. Lets you preview placement on curved areas like the shoulder and thigh so you can tweak scale before the needle hits skin.
- Topical numbing cream. Useful for collarbone sessions that run long and for the inner-thigh area if you are nervous about pain.
- Thin protective film roll. Keeps forearm and shoulder pieces protected from friction while you sleep and during the first few showers.
- Fragrance-free gentle body wash. A mild cleanser for the first week, especially important for saturated thigh and shoulder color blocks.
- Aquaphor healing ointment. Thin layers in the first days help locked-in saturation on pieces with tight color like the snake halo.
7. Blackwork Medusa Back Piece with Bold Silhouette
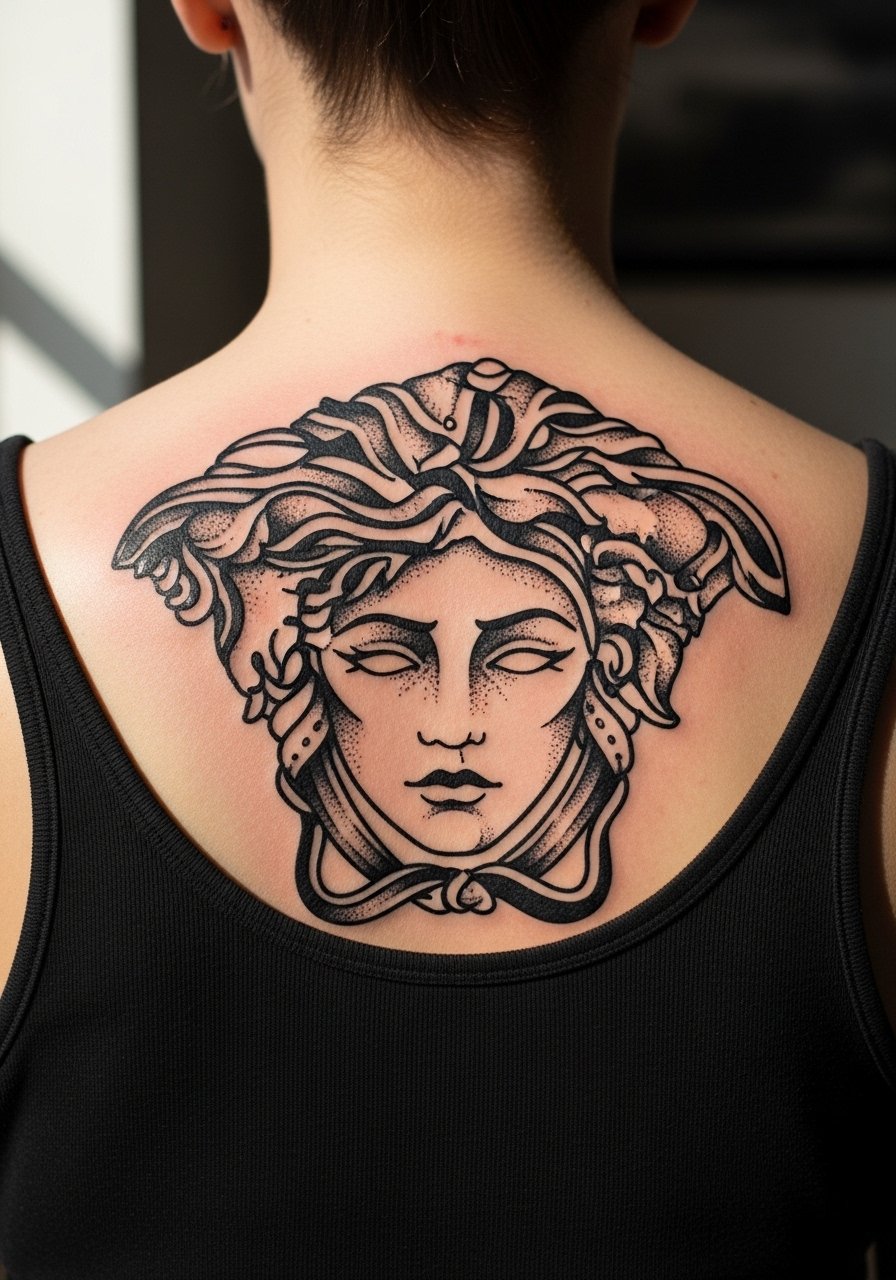
Back pieces let you go large and graphic. I recommend solid black silhouettes around the hair to make the face read even from a distance. A common mistake is trying to stuff portrait-level detail into a busy back composition. Small details disappear as the skin moves. Sessions are long and you will need breaks, but the payoff is a piece that holds well. For wardrobe, an open-back dress or open-back midi dresses highlights the silhouette in warm weather.
8. Tiny Medusa Finger or Hand Accent with Subtle Snake Motif

Hand and finger placements are trendy and risky. Hands are high friction and often need touch-ups earlier than arm pieces. The biggest mistake is asking for tiny facial detail on a finger. Faces need a minimum area to keep features legible. Sessions hurt more and heal slower because of thin skin. For showing this off with ease, add stacked dainty bracelets or a simple watch. Consider a thin chain pendant necklace on days when you want jewelry but still want the hand to stand out.
9. Ankle Medusa with Curved Snake Tail Accent

Ankle work is charming but gets exposed to shoe friction and socks. A common error is placing the lowest part of the design too near the shoe line. That spot fades faster. Small snake accents help maintain shape as color softens. Session pain is low to moderate and healing requires mindful sock choices. Roll jeans or wear sandals to show it off and consider an asymmetrical skirt or high waisted denim shorts for beach season.
10. Medusa Half-Sleeve with Mixed Stipple and Whip Shading
Half-sleeves let you mix techniques to separate hair, skin, and snakes. Ask the artist to define areas that will use stipple vs whip shading so the piece retains texture as it ages. A mistake is blending too many techniques without clear separations. That muddies the sleeve at year two. Sessions span multiple visits and pain is moderate through the bicep. For midday sessions wear a loose button-down shirt you can slide to the side for access.
11. Sternum Medusa with Symmetrical Snake Wings
Sternum work is intimate and often more painful because of bone proximity and breathing. Artists split on whether to do highly detailed faces there. One camp says the slight movement from breathing distorts tiny features. The other camp says with correct needle depth it holds up. Ask the artist where they stand. The common mistake is under-scaling a detailed portrait for the sternum. If you want to show it, strapless tops or a bandeau work well. For appointment comfort wear a fitted sports bra that provides modesty while giving clear access.
12. Inner Bicep Miniature Medusa with Fine Line Highlights
Inner biceps are sensitive and require careful line depth. I advise asking for slightly bolder primary contours with fine line highlights inside the snakes. A mistake is pure fine line without anchor outlines. That style can blur in two to three years in this spot. Sessions are uncomfortable enough that short breaks help. For session wear a loose tank you can move and consider pairing the piece with rolled sleeves later. Bring a racerback tank top womens so the artist has clear access.
13. Hip Medusa with Decorative Scale Border

Hip placements are sensual and private. I suggest a scale border that follows body curves so healing and movement preserve readability. A common error is placing heavy black at the very edge where it rubs against waistbands. That area fades faster. Sessions can be awkward for chair positioning so plan for comfort. When you want to show the piece, high-waisted shorts or an asymmetrical skirt work well. Try high waisted denim shorts that you can lower slightly for the appointment.
14. Lower Back Medusa with Flowing Snake Tail
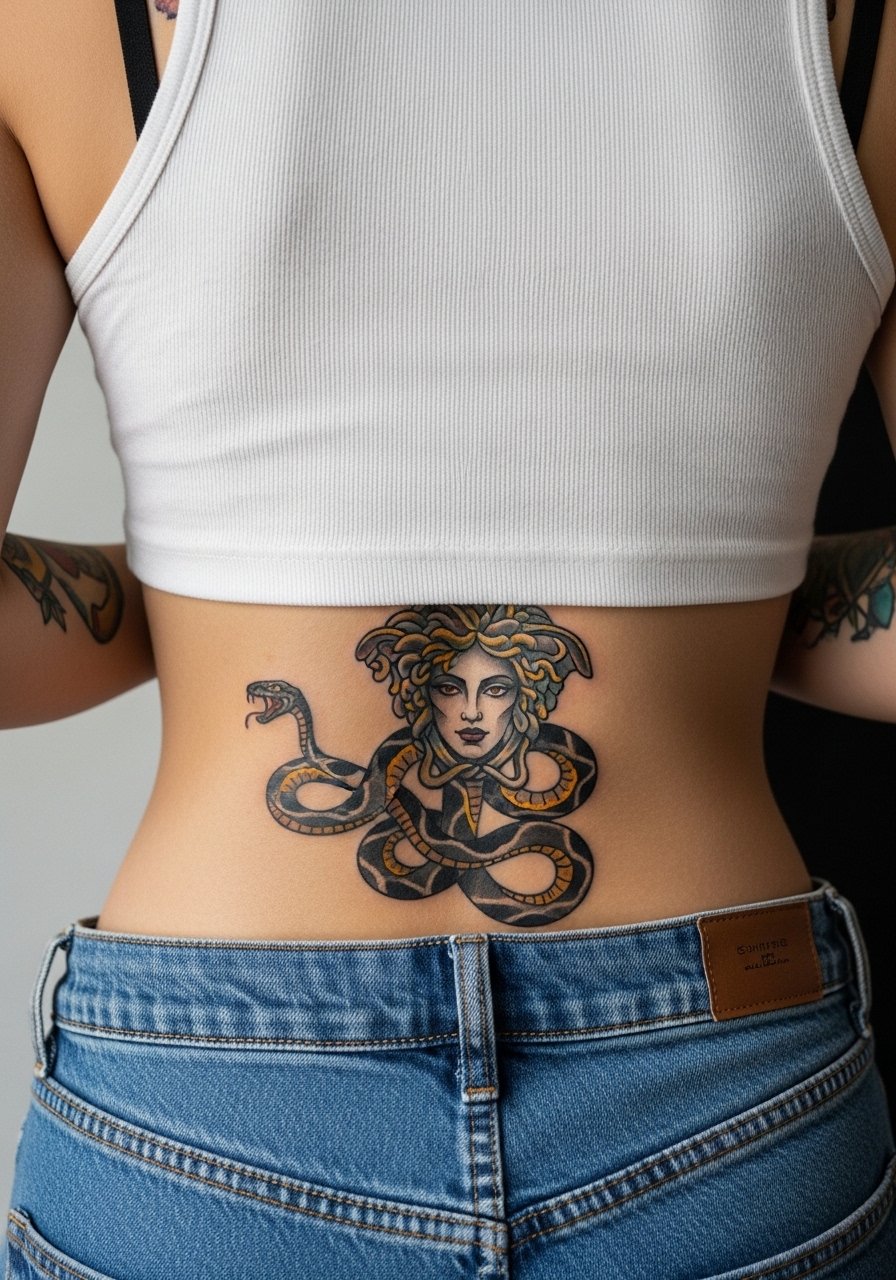
Lower back placements breathe with the body and suit sweeping tails. Avoid very dense lower edges that sit under waistbands. That spot sees friction and often needs more touch-ups. Sessions are moderate in pain but can be convenient since you can lie comfortably. Open-back dresses or a tank with low-rise bottoms show this well. Consider a tank top with high-waisted jeans combo for casual reveals.
15. Stomach Medusa with Central Portrait and Subtle Shading

Abdomen work needs careful placement because skin stretches. I recommend centering heavier outlines around the portrait so movement does not erase facial contrast. The mistake is relying on tiny gradients across the belly where the skin moves a lot. Those gradients break up as weight shifts. Sessions can be uncomfortable for long stretches. For session wear a cropped tee and high-waisted bottoms you can adjust easily. Plan for realistic touch-up expectations in two to four years.
16. Side Neck Medusa Accent with Minimalist Hair Snakes
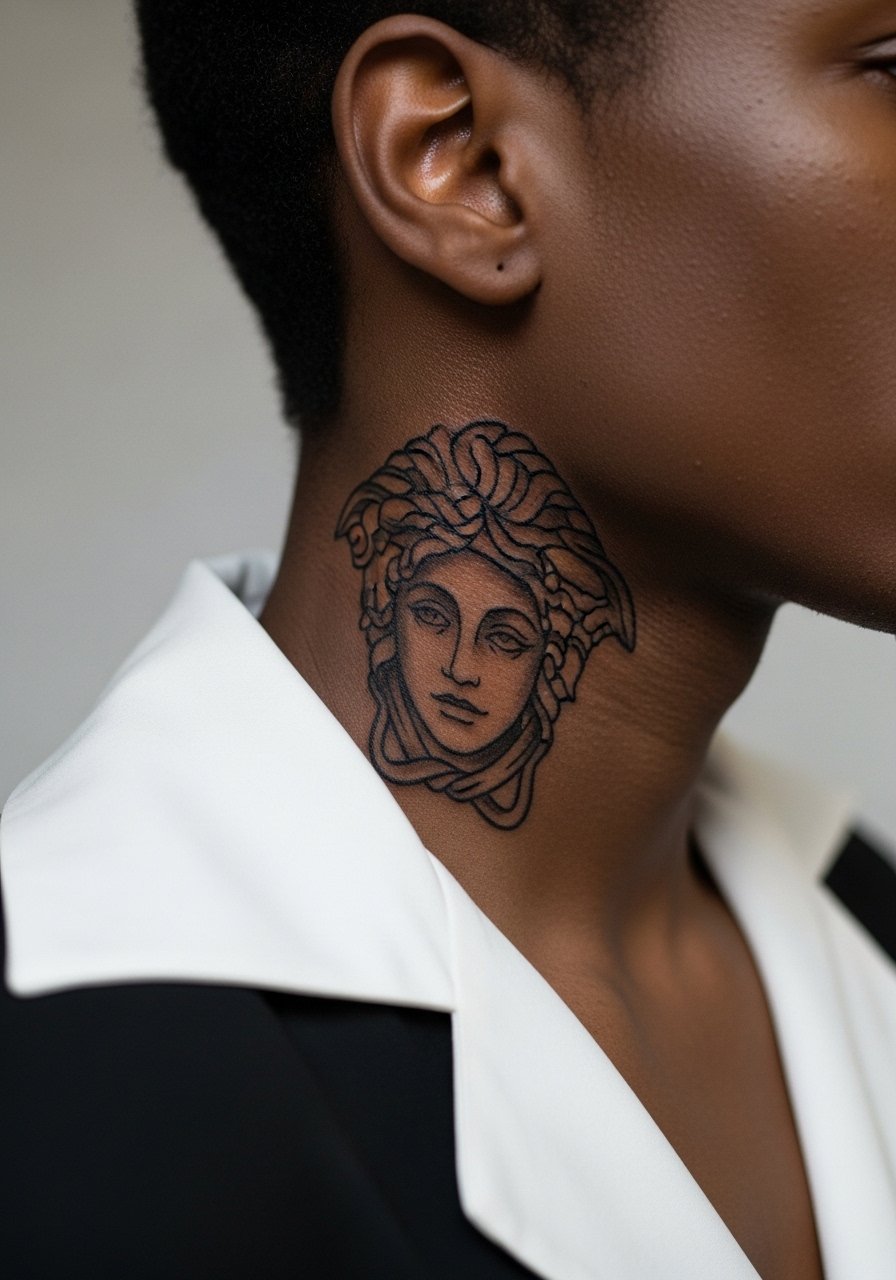
Neck placements are bold and visible. I advise minimal snake hair and defined outlines so the design reads without tiny faces. Jobs and client preferences matter here. The error is overcomplicating a small neck area with facial detail meant for larger canvases. Session pain is moderate and touch-ups are common. For showing this placement without overexposing, pair with a wide-neck shirt you can style down on days you want visibility.
17. Behind-the-Ear Micro Medusa with Single Snake Curl

Behind-the-ear tattoos need tiny, strong marks. Never try to compress a portrait there. The two camps debate micro-detail: one side argues it fades too fast, the other says bold micro-lines last if the artist is experienced. Ask the artist about their track record for this spot. The session is short but healing runs into hair and shampooing challenges. Keep cuts short at the hairline and consider a haircut that frames the area if you want it visible.
18. Calf Medusa Portrait with Vertical Snake Flow
Calf placements take scale well and avoid constant friction. I recommend vertical composition because the calf elongates imagery. A mistake is crowding the portrait with horizontal elements that compress features. Sessions are often easy to sit through and heal well. For showing this off, wear shorts or skirts and consider pairing with ankle boots. For session wear, loose shorts or a skirt you can adjust works best.
19. Chestplate Medusa with Ornamental Snake Armor
Chestplate compositions read large and regal. I advise clear separations between armor elements and the face so aging preserves the portrait. An over-ornamented chestpiece collapses into texture patches at year three if the elements are too small. Sessions are painful near the sternum and collarbone edges. For showing this piece, wide-neck shirts and V-neck blouses work well. A v neck blouse women frames the art without covering it.
20. Neo Traditional Medusa Sleeve Fragment with Dot Work Fill
For sleeves, use dot work as texture and keep line anchors bold. The error is relying solely on dot work to define shapes. Dots soften into gray washes and lose separation. Fragment pieces let you test the style before committing to a full sleeve. Sessions vary by size but expect multiple visits. For casual display, rolled linen shirts in cream or olive make the pattern pop and help the linework stay visible.
21. Feature Medusa Head with Fanged Snakes and Scale Accents on Upper Thigh

This final thigh idea emphasizes teeth and scale detail. Ask for distinct negative space between fangs and scales so each element keeps definition as the piece settles. A common mistake is packing the area with small fangs and tiny scales. Those details merge after a year. Two sessions are common for heavy contrast pieces here. For showing off, high-waisted shorts or asymmetrical skirts work best. For the appointment wear, loose joggers or a skirt you can shift make the session more comfortable.
Frequently Asked Questions
Q: Will fine line details in Medusa hair blur faster on the ribs or the thigh?
A: Fine line on the ribs tends to blur faster for many people because of skin stretch and breathing movement, while the thigh is more stable and keeps detail longer. That said, a skilled artist who uses slightly bolder anchor lines can make ribs hold up better. Ask the artist how they adjust depth and spacing for each placement.
Q: How often should I expect touch-ups for a colorful neo traditional Medusa on the forearm?
A: For saturated color on the forearm, plan on a realistic touch-up window around three to five years depending on sun exposure and friction. Lighter colors like yellow often need more attention. Keep the forearm protected from direct sun to extend saturation.
Q: Are there visibility or job considerations for visible neck or hand Medusa tattoos?
A: Yes, neck and hand placements remain highly visible and can affect first impressions in some workplaces. If career flexibility matters to you, consider slightly less visible spots or designs that can be covered by clothing. A side-neck piece can be hidden with a high collar on formal days.
Q: What should I wear the day of a collarbone or sternum Medusa session?
A: Wear clothing that exposes only the tattoo zone and stays modest. For collarbone pieces bring a strapless crop top or a loose wide-neck shirt you can slide aside. For sternum sessions a fitted sports bra or bandeau is easiest for both access and comfort.
Q: Does black-and-gray neo traditional Medusa need different aftercare than a vibrant color piece?
A: Aftercare basics are the same, but black-and-gray tends to show scabbing differently and can look patchy if you over-moisturize while scabs form. Clean gently with a fragrance-free wash and follow your artist's timeline for ointment and moisturizing.
